


立ち絵や合成素材に使える背景透過PNG画像を簡単に生成できる画像生成AI「Layer Diffusion」をローカルにインストールして使ってみた
ControlNetの開発者として知られるLvmin Zhang氏が、背景透過画像を生成できる「Layer Diffusion」を開発しました。すでにLayer Diffusionを簡単に使えるツールが公開されていたので、実際にPC上にインストールして透過画像を生成してみました。
[2402.17113] Transparent Image Layer Diffusion using Latent Transparency
https://arxiv.org/abs/2402.17113
GitHub - layerdiffusion/LayerDiffuse: Transparent Image Layer Diffusion using Latent Transparency
https://github.com/layerdiffusion/LayerDiffuse
GitHub - layerdiffusion/sd-forge-layerdiffuse: [WIP] Layer Diffusion for WebUI (via Forge)
https://github.com/layerdiffusion/sd-forge-layerdiffuse
・目次
◆1:Layer Diffusionのインストール手順
◆2:背景透過画像を作る方法
◆3:構図を指定して背景透過画像を作る方法
◆1:Layer Diffusionのインストール手順
Layer Diffusionの開発者であるZhang氏はStable Diffusionの高速実行ユーザーインターフェース「Stable Diffusion WebUI Forge」も開発しており、Stable Diffusion WebUI ForgeでLayer Diffusionを使えるようにする拡張機能「sd-forge-layerdiffuse」も公開しています。今回はStable Diffusion WebUI Forgeにsd-forge-layerdiffuseをインストールすることでLayer Diffusionを使ってみます。Stable Diffusion WebUI Forgeのインストール手順やモデルデータの追加手順は以下の記事で詳しく解説しています。
グラボを買い替えずとも画像生成AIの実行速度を高速化できる「Stable Diffusion WebUI Forge」を実際にインストールして生成速度を比較してみた - GIGAZINE
Stable Diffusion WebUI Forgeのインストールが完了したら、sd-forge-layerdiffuseのインストール作業を進めます。まず、Stable Diffusion WebUI Forgeの「Extensions」タブ内の「Install from URL」タブを開き、最上部の入力欄にsd-forge-layerdiffuseの配布ページのURL「https://github.com/layerdiffusion/sd-forge-layerdiffuse」を入力してから「Install」をクリックします。
しばらく待つと、画面下部にインストール完了通知が表示されます。
インストール完了通知が表示されたら「Installed」タブ内の「Apply and restart UI」をクリック。
UIが再読み込みされてシード値入力欄の下部に「LayerDiffuse」というメニューが追加されたらsd-forge-layerdiffuseのインストールは完了です。
◆2:背景透過画像を作る方法
Stable Diffusion WebUI Forgeにsd-forge-layerdiffuseをインストールできたので、実際に背景透過画像を作ってみます。まず、「LayerDiffuse」メニューを展開して「Enable」にチェックを入れ、Method欄で「Only Generate Transparent Image (Attention Injection)」を選択します。
後は、通常の画像生成と同様にモデルを選択したりプロンプトを入力して画像を生成すればOK。今回はモデルデータは「Juggernaut XL V6」を使い、プロンプトなどは以下の設定で画像を生成してみます。
an apple, high quality
Negative prompt: bad, ugly
Steps: 20, Sampler: DPM++ 2M SDE Karras, CFG scale: 5, Seed: 12345, Size: 1024x1024, Model hash: 1fe6c7ec54, Model: juggernautXL_version6Rundiffusion, layerdiffusion_enabled: True, layerdiffusion_method: Only Generate Transparent Image (Attention Injection), layerdiffusion_weight: 1, layerdiffusion_ending_step: 1, layerdiffusion_fg_image: False, layerdiffusion_bg_image: False, layerdiffusion_blend_image: False, layerdiffusion_resize_mode: Crop and Resize, Version: f0.0.17v1.8.0rc-latest-269-gef35383b
設定を一発で適用したい場合は、上記の引用内のテキストをすべてコピーしてプロンプト入力エリアにペーストし、プロンプト入力エリアの右隣にある赤枠で囲ったボタンをクリックすればOK。
すると、プロンプトやサンプラー、ステップ数、解像度などの設定が自動的に調整されます。後は「Generate」をクリックすれば画像の生成が始まります。
画像の生成結果はこんな感じ。リンゴの周りが切り抜かれた透過画像が生成されました。なお、sd-forge-layerdiffuseやモデルデータのバージョンが異なる場合は、上記の設定を丸ごとコピーしても異なる画像が生成されます。
sd-forge-layerdiffuseを使って画像を生成すると、1度の生成で画像が2枚出力されます。2枚の画像のうち、背景が市松模様の画像は「透過部分を示すイメージ画像」で、透過画像ではありません。この市松模様付き画像を保存しても透過画像としては使えないので注意。
もう一方の背景に何も描画されていない画像が透過画像です。
透過画像を生成したら、後は保存してPhotoshopやGIMPなどの画像編集ソフトで合成写真を作ったり、動画の立ち絵に使ったりできます。
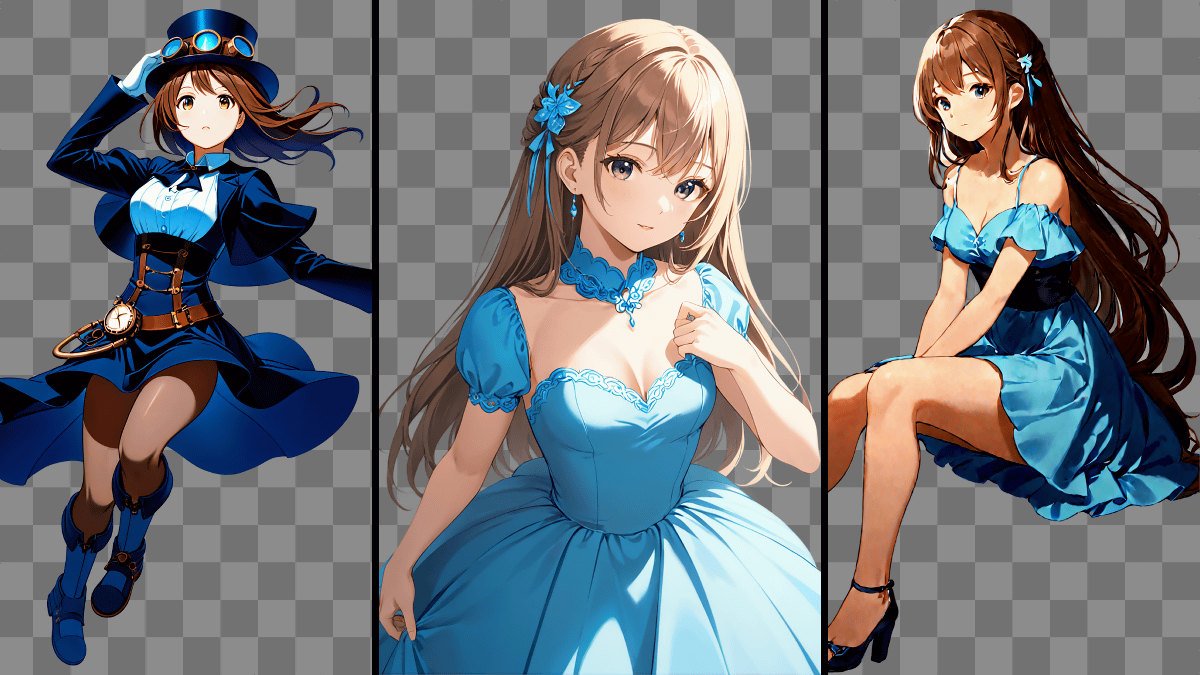
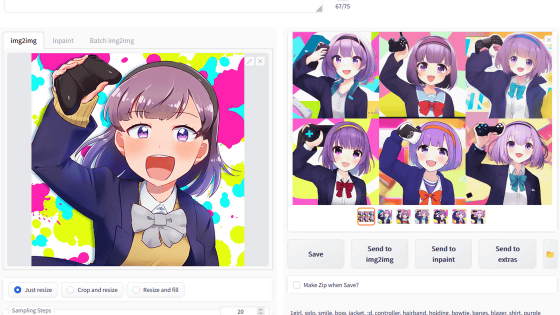
続いて、アニメイラスト風画像の生成が得意なモデルデータ「anima_pencil-XL 1.0.0」を使って以下の設定でアニメキャラクター風の透過画像を生成してみます。
girl in dress, high quality
Negative prompt: nsfw, bad, ugly, text, watermark
Steps: 20, Sampler: DPM++ 2M SDE Karras, CFG scale: 7, Seed: 12345, Size: 896x1152, Model hash: 7ed8da12d9, Model: animaPencilXL_v100, layerdiffusion_enabled: True, layerdiffusion_method: Only Generate Transparent Image (Attention Injection), layerdiffusion_weight: 1, layerdiffusion_ending_step: 1, layerdiffusion_fg_image: False, layerdiffusion_bg_image: False, layerdiffusion_blend_image: False, layerdiffusion_resize_mode: Crop and Resize, Version: f0.0.17v1.8.0rc-latest-269-gef35383b
生成結果はこんな感じ。
こんな感じに使えます。特に透過処理などを実行せずとも「画像を生成してそのまま作品に使用」というワークフローを構築できるのが魅力的。
Layer Diffusionでは、「背景が完全に透明な画像」だけではなく「異なる透明度が共存する画像」も作成できます。例として、モデルデータに「Juggernaut XL V6」を使い、以下の設定で透明なグラスの画像を生成してみます。
a cup made of glass, high quality
Negative prompt: bad, ugly
Steps: 20, Sampler: DPM++ 2M SDE Karras, CFG scale: 5, Seed: 12345, Size: 1024x1024, Model hash: 1fe6c7ec54, Model: juggernautXL_version6Rundiffusion, layerdiffusion_enabled: True, layerdiffusion_method: Only Generate Transparent Image (Attention Injection), layerdiffusion_weight: 1, layerdiffusion_ending_step: 1, layerdiffusion_fg_image: False, layerdiffusion_bg_image: False, layerdiffusion_blend_image: False, layerdiffusion_resize_mode: Crop and Resize, Version: f0.0.17v1.8.0rc-latest-269-gef35383b
生成結果はこんな感じ。
生成したグラスの画像で合成写真を作るとこんな感じ。透明度の違いによってガラスの透明感を表現できていることが分かります。
◆3:構図を指定して背景透過画像を作る方法
Layer Diffusionでは通常の画像生成と同様に「座ったポーズの人物」「寝転がった犬」などポーズを指定して透過画像を生成できます。この時、「背景になる画像」を指定することで、背景に沿ったポーズを取らせた上で背景を透過することが可能。例えば、以下の例ではイスが写った写真を背景として入力し、「座る女の子」を生成することでイスに座らせ、その上で背景をイスごと削除しています。
背景に沿ったポーズの画像を生成する手順は次の通り。まず、「LayerDiffuse」メニュー内の「Enable」にチェックを入れ、Method欄で「From Background to Blending」を選択します。
続いて、イスなどの被写体を含む背景画像を画像エリアにドラッグ&ドロップします。
こんな感じに背景画像が登録されればOK。
続いて、通常の画像生成と同様にモデルデータを選択したりプロンプトを入力したりしてから画像を生成します。今回はアニメイラスト風の描写でイスに座る女の子の透過画像を生成したいので、モデルデータは「anima_pencil-XL 1.0.0」を使い、その他の設定は以下で画像を生成しました。
sitting girl in dress, high quality
Negative prompt: nsfw, bad, ugly, text, watermark
Steps: 20, Sampler: DPM++ 2M SDE Karras, CFG scale: 7, Seed: 123456, Size: 896x1152, Model hash: 7ed8da12d9, Model: animaPencilXL_v100, layerdiffusion_enabled: True, layerdiffusion_method: Only Generate Transparent Image (Attention Injection), layerdiffusion_weight: 1, layerdiffusion_ending_step: 1, layerdiffusion_fg_image: False, layerdiffusion_bg_image: False, layerdiffusion_blend_image: False, layerdiffusion_resize_mode: Crop and Resize, Version: f0.0.17v1.8.0rc-latest-269-gef35383b
生成結果はこんな感じ。背景として設定した画像のイスに女の子が座っています。
続いて、背景を削除する作業を進めます。まず、「LayerDiffuse」のメニュー内のMethod欄で「From Background and Blending to Foreground」を選択。
次に、生成した画像を画像入力エリアにドラッグ&ドロップします。
「LayerDiffuse」メニューの中に背景画像と生成画像が表示されればOK。
後は、何も設定を変更せずに「Generate」をクリック。
これで背景を削除できました。この手順で透過画像を生成すれば、被写体のポーズや構図をある程度コントロールできます。
・関連記事
グラボを買い替えずとも画像生成AIの実行速度を高速化できる「Stable Diffusion WebUI Forge」を実際にインストールして生成速度を比較してみた - GIGAZINE
画像生成AIをノートPCでどれくらいの速度で動かせるのか、「Razer Blade 16」のVRAM容量16GB「GeForce RTX 4090 Laptop」で実際に試してみたよレビュー - GIGAZINE
VRAM容量12GBの「GeForce RTX 4070 SUPER」は画像生成AIでどれだけの性能を発揮するのか?旧世代グラボと徹底比較してみたよレビュー - GIGAZINE
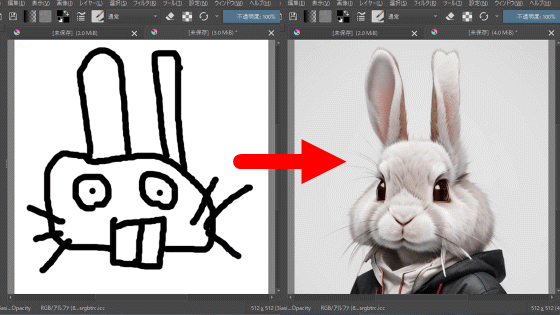
無料お絵描きアプリ「Krita」に画像生成AIを組み込んで落書きから美麗イラストを作成する方法まとめ、Stable DiffusionとControlNetをコマンドなしでサクッと導入可能 - GIGAZINE
画像生成AI「Stable Diffusion」に「悪い例を集めたLoRA」を組み合わせて高品質な画像を生成する手法が登場、簡単に試せるデモも公開されたので試してみた - GIGAZINE
「描いたイラストをリアルタイムでAIに手直ししてもらえる環境」を「Stable Diffusion」と「Redream」の組み合わせで実現する方法まとめ、ControlNetも使って高品質な画像を生成可能 - GIGAZINE
・関連コンテンツ
in ソフトウェア, レビュー, 創作, Posted by log1o_hf
You can read the machine translated English article I locally installed and used the image g….