I locally installed and used the image generation AI ``Layer Diffusion'' that can easily generate background transparent PNG images that can be used for standing pictures and composite materials.
[2402.17113] Transparent Image Layer Diffusion using Latent Transparency
https://arxiv.org/abs/2402.17113
GitHub - layerdiffusion/LayerDiffuse: Transparent Image Layer Diffusion using Latent Transparency
https://github.com/layerdiffusion/LayerDiffuse
GitHub - layerdiffusion/sd-forge-layerdiffuse: [WIP] Layer Diffusion for WebUI (via Forge)
https://github.com/layerdiffusion/sd-forge-layerdiffuse
·table of contents
◆1: Layer Diffusion installation procedure
◆2: How to create a transparent background image
◆3: How to create a transparent background image by specifying the composition
◆1: Layer Diffusion installation procedure
Mr. Zhang, the developer of Layer Diffusion, has also developed Stable Diffusion's high-speed execution user interface 'Stable Diffusion WebUI Forge', and has an extension 'sd-forge-layerdiffuse' that allows you to use Layer Diffusion with Stable Diffusion WebUI Forge. is also published. This time, I will try using Layer Diffusion by installing sd-forge-layerdiffuse on Stable Diffusion WebUI Forge. The steps to install Stable Diffusion WebUI Forge and add model data are explained in detail in the article below.
I actually installed ``Stable Diffusion WebUI Forge'' that can speed up the execution speed of image generation AI without replacing the graphics card and compared the generation speed - GIGAZINE
After completing the installation of Stable Diffusion WebUI Forge, proceed with the installation of sd-forge-layerdiffuse. First, open the 'Install from URL' tab in the 'Extensions' tab of Stable Diffusion WebUI Forge, and enter the URL of the sd-forge-layerdiffuse distribution page in the input field at the top, ' https://github.com/layerdiffusion/sd -forge-layerdiffuse '' and click Install.
After waiting for a while, an installation completion notification will be displayed at the bottom of the screen.
When the installation completion notification is displayed, click 'Apply and restart UI' in the 'Installed' tab.
When the UI is reloaded and a menu called 'LayerDiffuse' is added at the bottom of the seed value input field, the installation of sd-forge-layerdiffuse is complete.
![]()
◆2: How to create a background transparent image
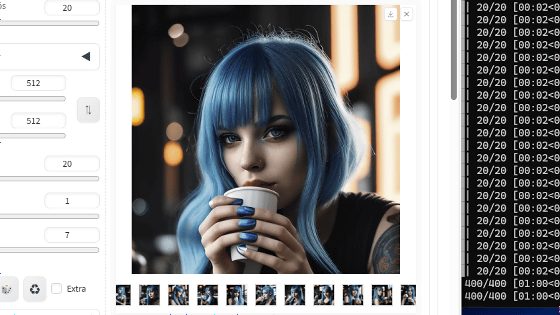
Stable Diffusion WebUI Now that I have installed sd-forge-layerdiffuse on Forge, I will actually create a transparent background image. First, expand the 'LayerDiffuse' menu, check 'Enable', and select 'Only Generate Transparent Image (Attention Injection)' in the Method field.
After that, just select the model and enter the prompt to generate the image, just like normal image generation. This time, we will use '
an apple, high quality
Negative prompt: bad, ugly
Steps: 20, Sampler: DPM++ 2M SDE Karras, CFG scale: 5, Seed: 12345, Size: 1024x1024, Model hash: 1fe6c7ec54, Model: juggernautXL_version6Rundiffusion, layerdiffusion_enabled: True, layerdiffusion_method: Only Generate Transparent Image (Attention Injection), layerdiffusion_weight: 1, layerdiffusion_ending_step: 1, layerdiffusion_fg_image: False, layerdiffusion_bg_image: False, layerdiffusion_blend_image: False, layerdiffusion_resize_mode: Crop and Resize, Version: f0.0.17v1.8.0rc-latest-269-gef35383b
If you want to apply the settings in one go, copy all the text in the quote above, paste it into the prompt input area, and click the button surrounded by a red frame to the right of the prompt input area.
![]()
It will then automatically adjust settings such as prompts, sampler, number of steps, and resolution. After that, click 'Generate' to start generating the image.
The image generation result looks like this. A transparent image with the area around the apple cropped out has been generated. Note that if the versions of sd-forge-layerdiffuse or model data are different, different images will be generated even if you copy the entire settings above.
When you generate an image using sd-forge-layerdiffuse, two images will be output in one generation. Of the two images, the image with a checkered pattern in the background is an 'image showing transparent parts' and is not a transparent image. Please note that even if you save this checkered image, it cannot be used as a transparent image.
The other image with nothing drawn on the background is a transparent image.
Once you have generated a transparent image, you can save it and create a composite photo using image editing software such as Photoshop or GIMP, or use it as a portrait for a video.
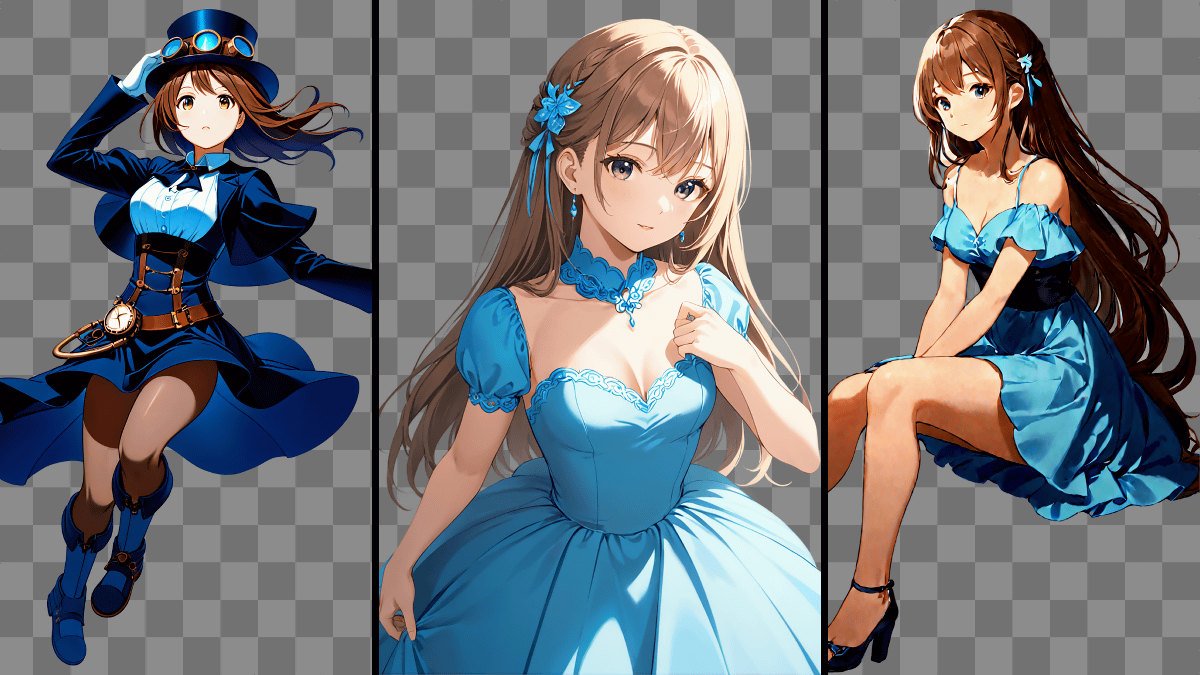
Next, we will use the model data '
girl in dress, high quality
Negative prompt: nsfw, bad, ugly, text, watermark
Steps: 20, Sampler: DPM++ 2M SDE Karras, CFG scale: 7, Seed: 12345, Size: 896x1152, Model hash: 7ed8da12d9, Model: animaPencilXL_v100, layerdiffusion_enabled: True, layerdiffusion_method: Only Generate Transparent Image (Attention Injection), layerdiffusion_weight: 1, layerdiffusion_ending_step: 1, layerdiffusion_fg_image: False, layerdiffusion_bg_image: False, layerdiffusion_blend_image: False, layerdiffusion_resize_mode: Crop and Resize, Version: f0.0.17v1.8.0rc-latest-269-gef35383b
The generated result looks like this.
![]()
You can use it like this. It is especially attractive that it allows you to create a workflow where you can ``generate images and use them in your work as is'' without having to perform transparency processing.
Layer Diffusion allows you to create not only images with completely transparent backgrounds, but also images with different levels of transparency. As an example, let's use 'Juggernaut XL V6' as the model data and generate an image of a transparent glass with the following settings.
a cup made of glass, high quality
Negative prompt: bad, ugly
Steps: 20, Sampler: DPM++ 2M SDE Karras, CFG scale: 5, Seed: 12345, Size: 1024x1024, Model hash: 1fe6c7ec54, Model: juggernautXL_version6Rundiffusion, layerdiffusion_enabled: True, layerdiffusion_method: Only Generate Transparent Image (Attention Injection), layerdiffusion_weight: 1, layerdiffusion_ending_step: 1, layerdiffusion_fg_image: False, layerdiffusion_bg_image: False, layerdiffusion_blend_image: False, layerdiffusion_resize_mode: Crop and Resize, Version: f0.0.17v1.8.0rc-latest-269-gef35383b
The generated result looks like this.
When you create a composite photo with the generated glass image, it looks like this. You can see that the transparency of glass can be expressed by the difference in transparency.
◆3: How to create a transparent background image by specifying the composition
With Layer Diffusion, you can generate transparent images by specifying poses such as ``person in a sitting pose'' or ``dog lying down'', just like normal image generation. At this time, by specifying the ``background image'', it is possible to make the pose match the background and make the background transparent. For example, in the example below, a photo with a chair is input as the background, a 'sitting girl' is generated, the girl is made to sit on the chair, and then the background is deleted along with the chair.
The steps to generate an image with a pose that matches the background are as follows. First, check 'Enable' in the 'LayerDiffuse' menu and select 'From Background to Blending' in the Method field.
Next, drag and drop a background image containing a subject such as a chair into the image area.
It is OK if the background image is registered like this.
Next, select model data and enter prompts as you would for normal image generation, and then generate the image. This time, I want to generate a transparent image of a girl sitting on a chair with an anime illustration style depiction, so I used 'anima_pencil-XL 1.0.0' as the model data and generated the image using the following settings.
sitting girl in dress, high quality
Negative prompt: nsfw, bad, ugly, text, watermark
Steps: 20, Sampler: DPM++ 2M SDE Karras, CFG scale: 7, Seed: 123456, Size: 896x1152, Model hash: 7ed8da12d9, Model: animaPencilXL_v100, layerdiffusion_enabled: True, layerdiffusion_method: Only Generate Transparent Image (Attention Injection), layerdiffusion_weight: 1, layerdiffusion_ending_step: 1, layerdiffusion_fg_image: False, layerdiffusion_bg_image: False, layerdiffusion_blend_image: False, layerdiffusion_resize_mode: Crop and Resize, Version: f0.0.17v1.8.0rc-latest-269-gef35383b
The generated result looks like this. A girl is sitting on the chair in the image set as the background.
Next, proceed to remove the background. First, select 'From Background and Blending to Foreground' in the Method field in the 'LayerDiffuse' menu.
Next, drag and drop the generated image into the image input area.
It is OK if the background image and generated image are displayed in the 'LayerDiffuse' menu.
After that, click 'Generate' without changing any settings.
Now you can remove the background. By using this procedure to generate a transparent image, you can control the subject's pose and composition to some extent.
Related Posts: