


無料でマインドマップ形式のタスクを複数人で共有・管理できる「Subtask」
マインドマップ形式でタスクを共有管理することが可能であり、コメント機能やファイル添付機能、タスクの割り振り・締め切りなども設定できるフリーのウェブサービスが「Subtask」。ウェブサービスなのでもちろんアプリのインストールは不要です。
Subtask
https://www.subtask.com/
これがSubtaskのトップページ。

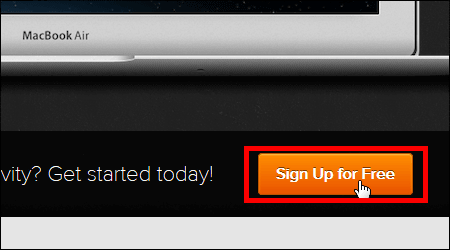
まずは「Sign Up Free」をクリック。
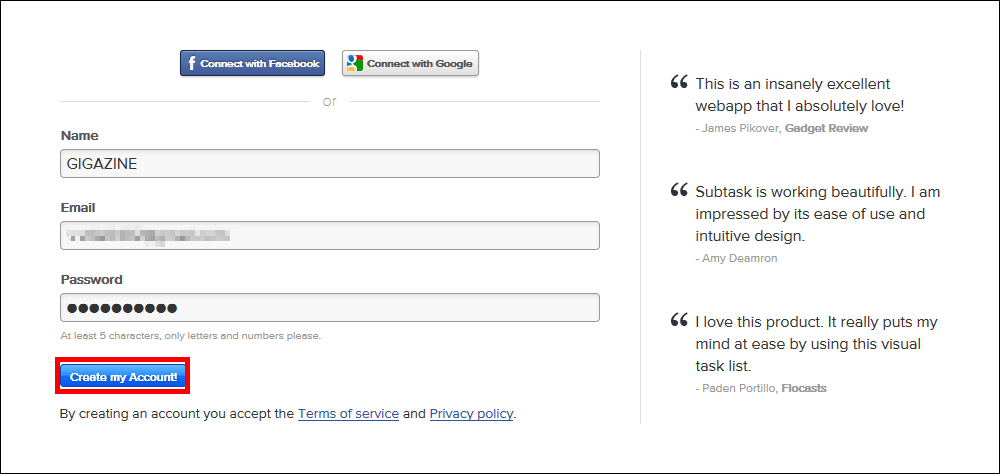
上から順にアカウント名、メールアドレス、パスワードを入力して「Create my Account!」をクリックします。
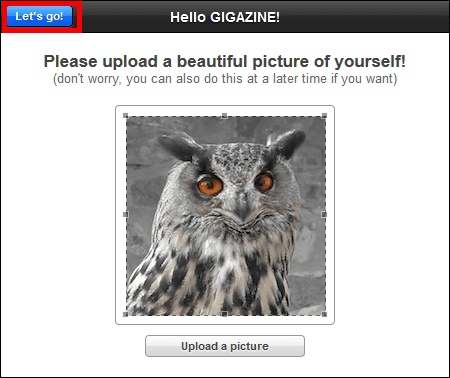
「Let's go!」をクリック。
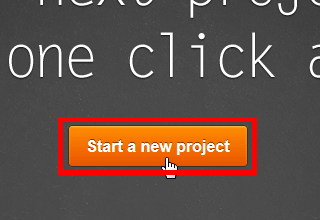
「Start a new project」をクリックで登録完了です。
Subtaskで新しいプロジェクトを作成するとこんな感じでほとんど真っ白の画面が表示されます。
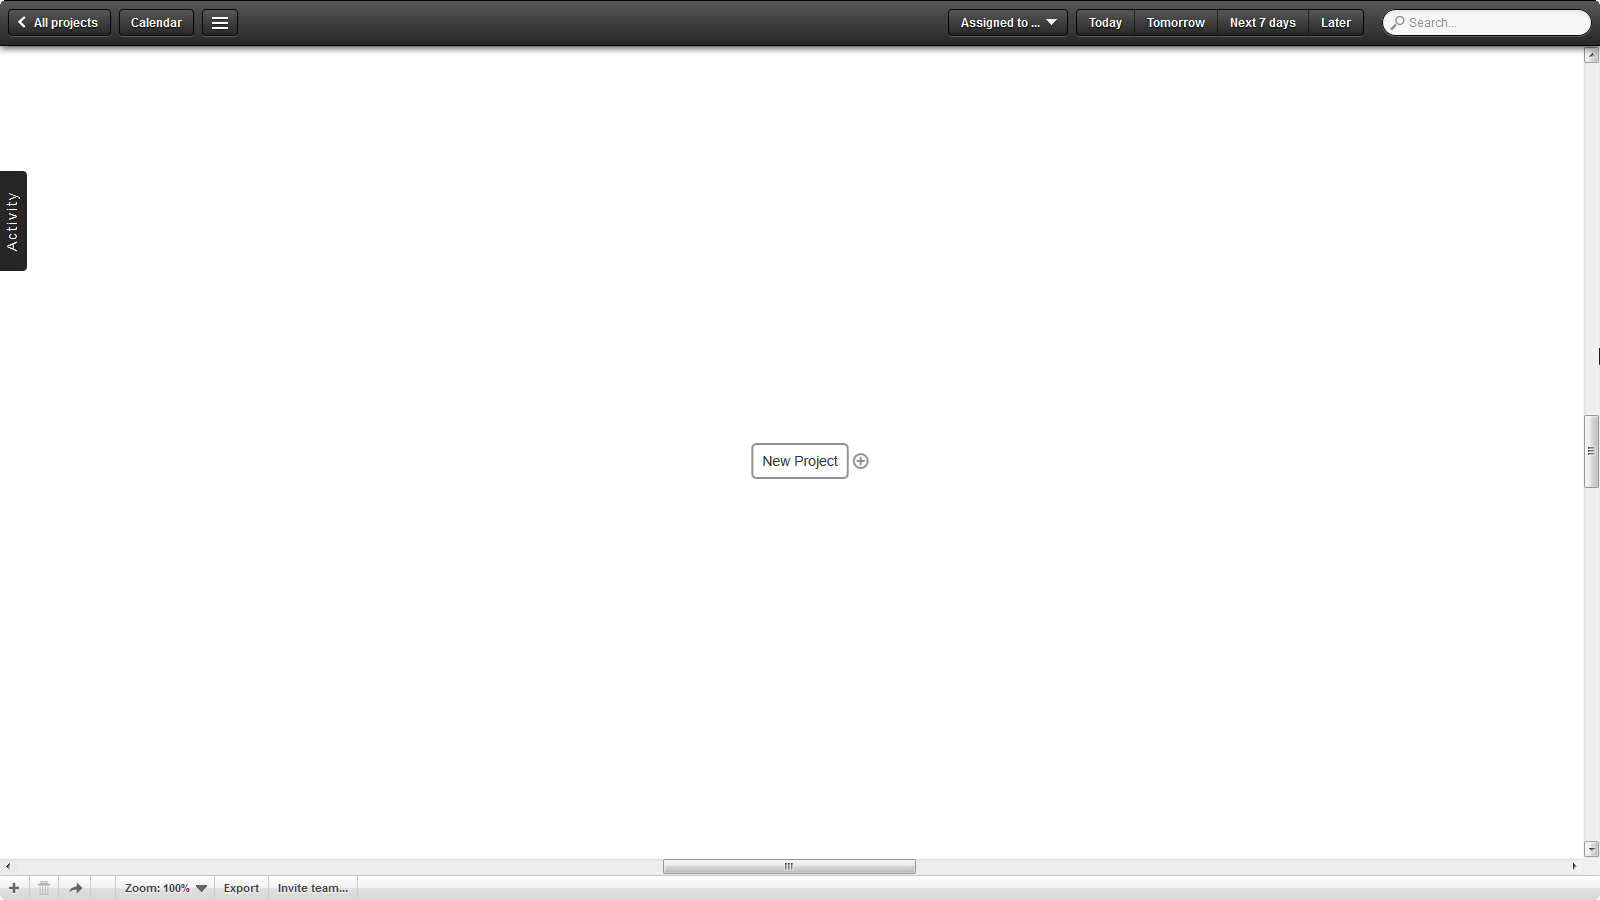
真ん中には「New Project」と表示されており、クリックすると文字の変更が可能なのでプロジェクトの名前を入力しましょう。最初は「Subtask」というプロジェクト名にしてみました。
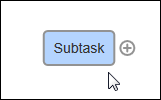
まずはSubtaskの主な機能を確認します。プロジェクト名の横にあるプラスマークをクリック……

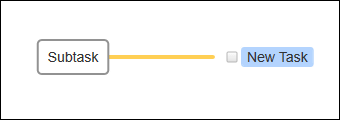
すると横に新しいタスクができます。
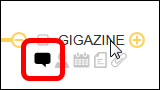
次はタスク下の5つのアイコン
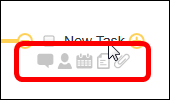
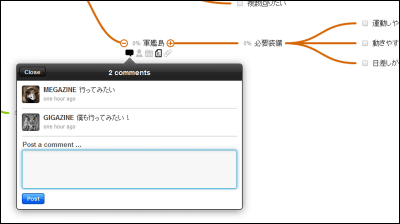
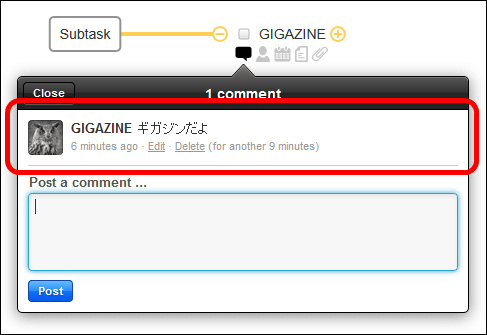
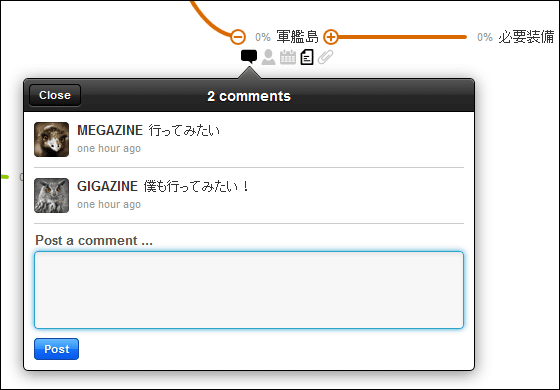
左端のアイコンをクリックするとタスクにコメントを残せます。コメントを書き込んで「Post」をクリック。
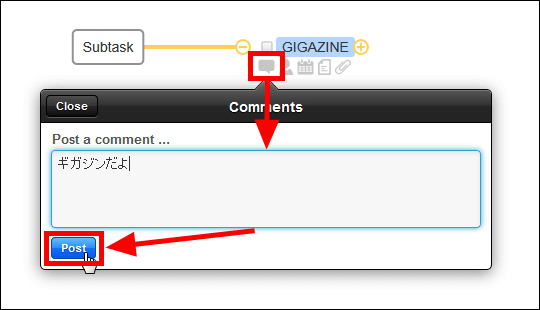
コメントが追加されるとこんな感じにアイコンの色が変化。
追加したコメントはこんな感じで見ることができます。
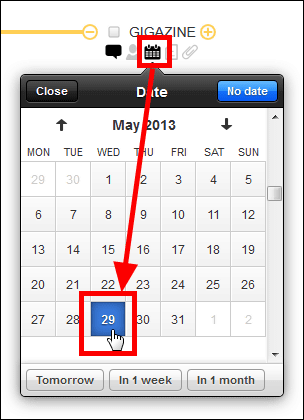
5つあるアイコンの真ん中にあるのはカレンダーアイコンで、タスクに日程を割り当てることが可能。
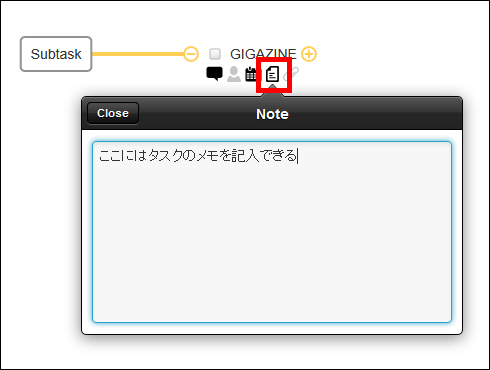
右から2番目のアイコンをクリックすれば、タスクごとにメモを残しておけます。
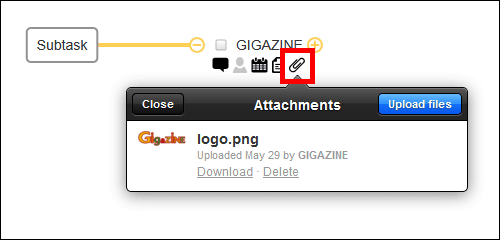
右端のクリップアイコンではファイル管理が可能。ファイルの添付はファイルをドラッグして添付したいタスク上でドロップするか、「Upload files」をクリックすればOK。
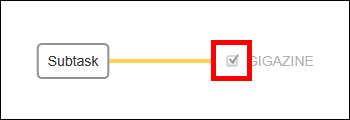
各タスクの左にはチェックボックスが付いており、チェックを入れるとタスク完了となりタスクが半透明で表示されます。
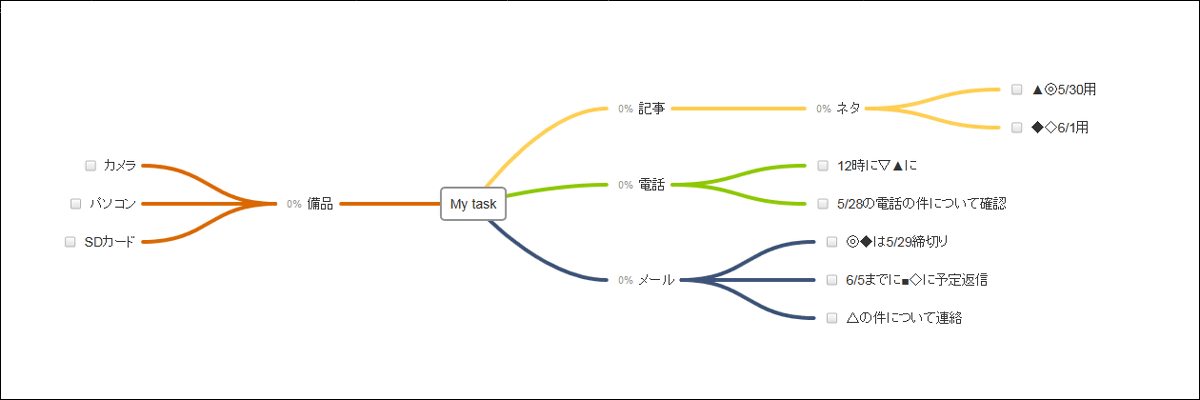
一通りの使い方が分かったところで、簡単にマインドマップを作成してみました。
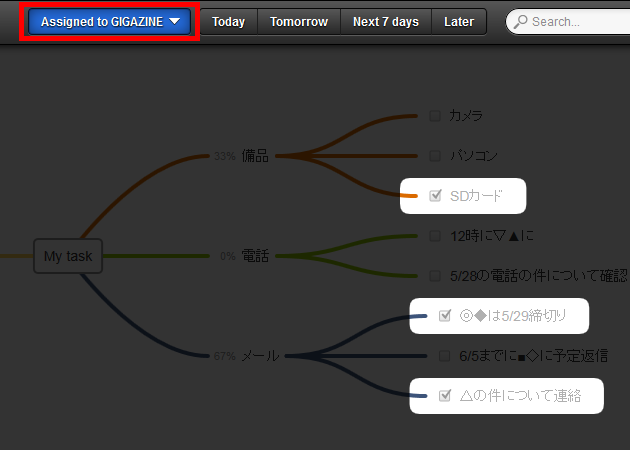
画面右上メニューの中には日程アイコンがあり、この中の「Today」をクリックすると今日すべきタスクだけが見えやすくなって表示されます。
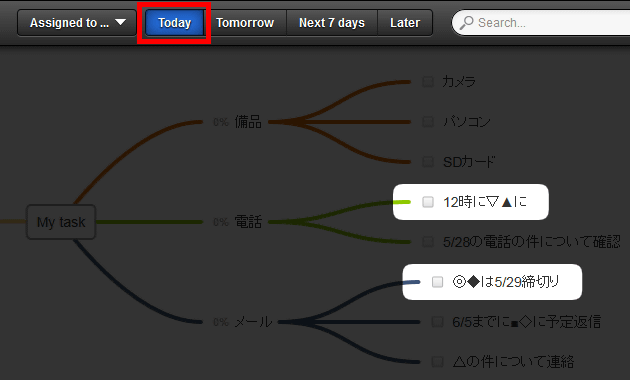
同じように「Next 7 days」をクリックすれば1週間後までにするべきタスクがこんな感じで表示されるので、いつまでにどのタスクをこなさなければならないのかがとても分かりやすく表示できます。
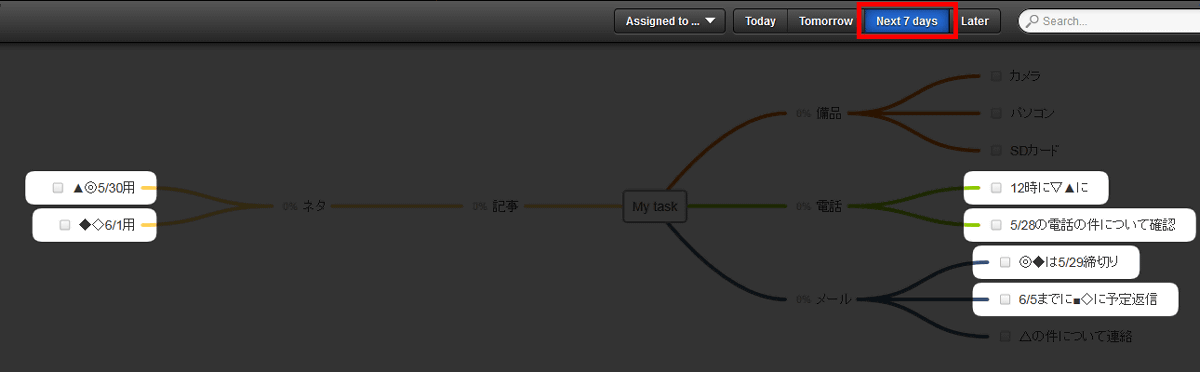
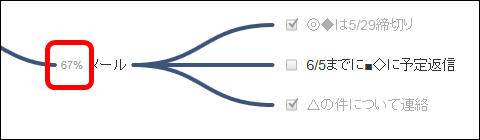
各タスクの下にさらにタスクがある場合はタスク左側に進捗度が表示されます。
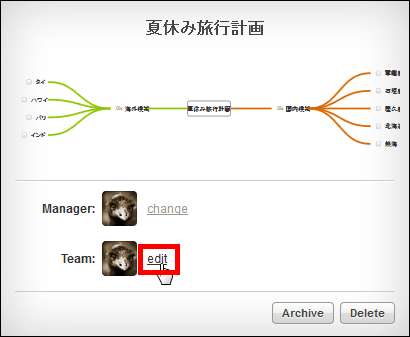
次はプロジェクトを他の人と共有します。画面左上にある「All projects」をクリック。
すると、作成中のプロジェクトがこのように表示されます。
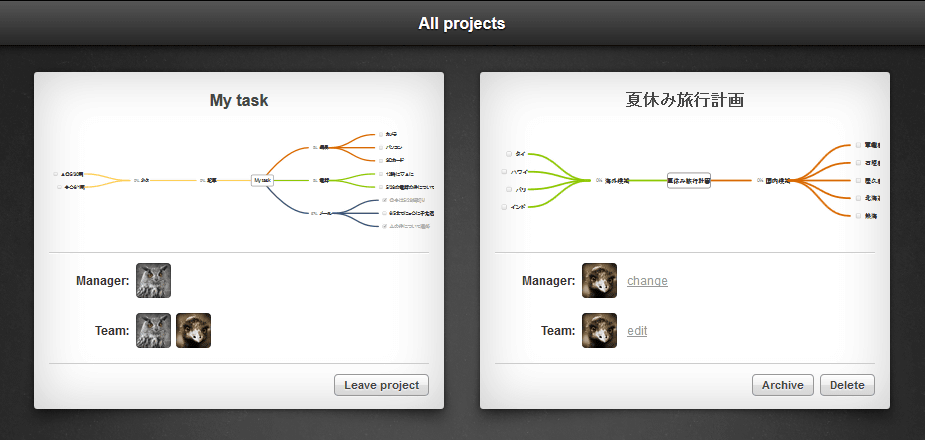
「edit」をクリック。
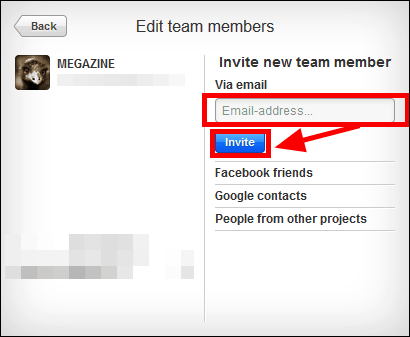
プロジェクトを共有したい人のアドレスを入力して「Invite」をクリック。
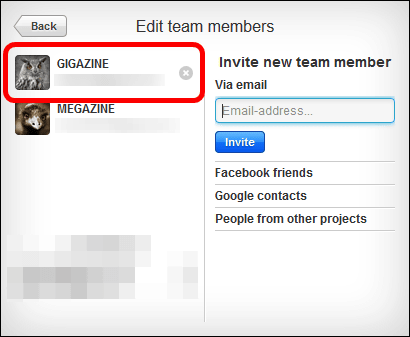
「team」にメンバーが追加され、プロジェクトの共有が可能になりました。
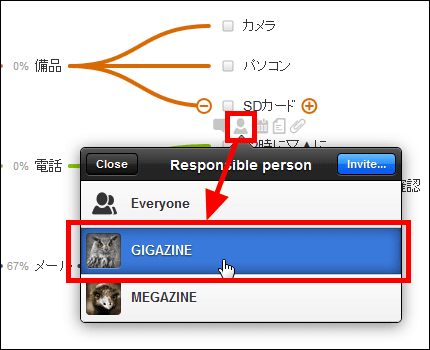
メイン画面で、タスク下の人型アイコンをクリックしアカウントを選択すれば、タスクを各アカウントごとに割り振る事が可能です。
画面右上の「Assidned to…」から「GIGAZINE's tasks」選択。
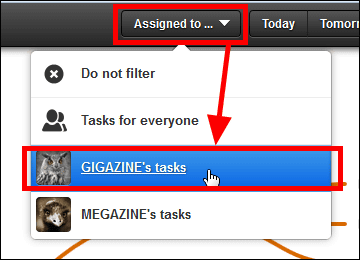
こうすれば各アカウントごとに割り振られたタスクを確認することもできます。
こんな感じにコミュニケーションを取りながらタスクを共有したり、タスクに締め切りや担当を割り振ることができるので、複数人でのタスク管理にはかなり役立ちそうなサービスです。
・関連記事
マインドマップを作成してWord/Excel/PowerPointなどと連携可能なフリーソフト「Edraw MindMap」 - GIGAZINE
頭の中のアイデアや考えをマインドマップ発想で簡単に見てわかるように整理する「マインドマネージャー」 - GIGAZINE
マインドマネージャーをウェブ上で作成・編集・共有できる「MindManager WEB」を試してみた - GIGAZINE
高橋メソッドのプレゼンを自動で作ってくれる「高橋メソッドジェネレータ」 - GIGAZINE
アイデアはどこからやって来るのか?という20項目 - GIGAZINE
・関連コンテンツ

in ネットサービス, レビュー, Posted by logu_ii
You can read the machine translated English article "Subtask" that can share and manage task….