I tried programming-free automatic operation with Microsoft's official free automation tool 'Power Automate Desktop for Windows 10'

On March 2, 2021, Microsoft introduced the
Download Power Automate Desktop for Windows 10 to automate tasks and processes at no additional cost | Windows Experience Blog
https://blogs.windows.com/windowsexperience/2021/03/02/download-power-automate-desktop-for-windows-10-to-automate-tasks-and-processes-at-no-additional-cost/
To install 'Power Automate Desktop for Windows 10' on your PC, go to the Microsoft distribution page and click 'download'.

Double-click the downloaded 'Setup.Microsoft.PowerAutomateDesktop.exe' to start the installer.

When the installer starts, click 'Next'.
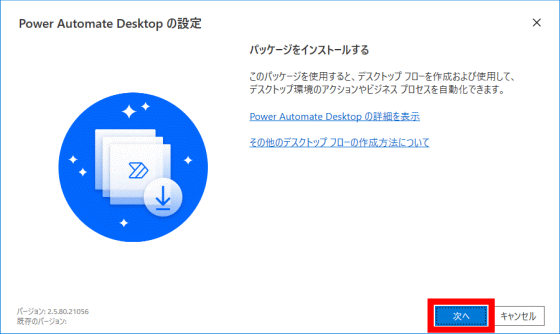
After checking the 'Terms of Use' and 'Privacy Statement', check the checkbox and click 'Install'.

When the installation is complete, you will see a screen like this. By installing the extension in the browser, automatic operation using a web browser will be possible. This time I will try using Firefox, so click 'Mozilla Firefox'.

When the

Click 'Add' displayed in the pop-up at the top right of the screen to complete the extension installation.

Go back to the installer and click 'Launch Power Automate Desktop'.

Then, you will be asked to sign in with your Microsoft account, so enter your email address and click 'Sign in'.

When the 'Sign in to account' screen is displayed, click the account used to sign in.

Enter the password and click 'Sign in' to launch 'Power Automate Desktop for Windows 10'.

When 'Power Automate Desktop for Windows 10' starts, select Japan in 'Select Country / Region' and click 'Start'.

The screen of 'Power Automate Desktop for Windows 10' looks like this. Click 'New Flow' to register the automatic operation.

After naming the flow, click 'Create'.

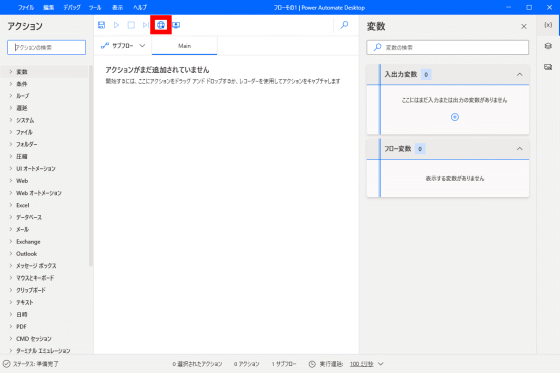
The flow creation screen looks like this. A list of actions is displayed on the left side of the screen, and detailed settings such as variables can be set on the right side of the screen. This time, click the globe icon at the top of the screen to automate web browsing.
When the browser selection screen for web browsing is displayed, select 'Firefox' and click 'Next'.

Then, 'Web Recorder' and Firefox will start.

After opening the page that is the starting point of automatic operation in Firefox, click 'Start Recording' displayed in the upper left of the Web Recorder, and click the link you want to access in Firefox.

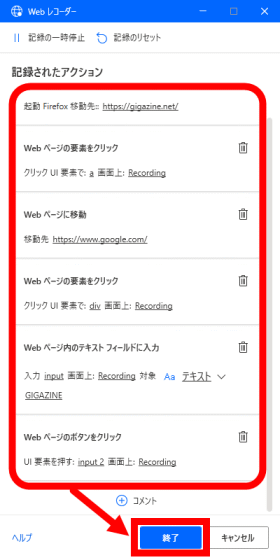
Then, the action 'Click the element of the web page' was automatically added to the web recorder. 'Power Automate Desktop for Windows 10' automatically recognizes the operation performed on the PC as an action like this.

It is also possible to recognize text input. When I entered 'GIGAZINE' in the search keyword input field of Google search, the action 'Enter in the text feed of the web page' was added to the web recorder.

When you have recognized all the actions you want to operate automatically, click 'Finish' to close the web recorder.
Then, the action recognized by the Web recorder is reflected on the flow creation screen like this. To save the contents of the automatic operation, click the save icon at the top left of the screen.

Click 'OK' when the save completion popup is displayed.

To perform an automatic operation, click the mark like the play button located to the right of the save icon.

In the following movie, you can see how the automatic operation is actually executed.
Browsing automatically using Microsoft's official RPA tool 'Power Automate Desktop for Windows 10' --YouTube
In addition, 'Power Automate Desktop for Windows 10' will be installed as standard in Windows 10, and will be delivered for Windows Insider Preview within a few weeks from the time of article creation.
Related Posts:


