


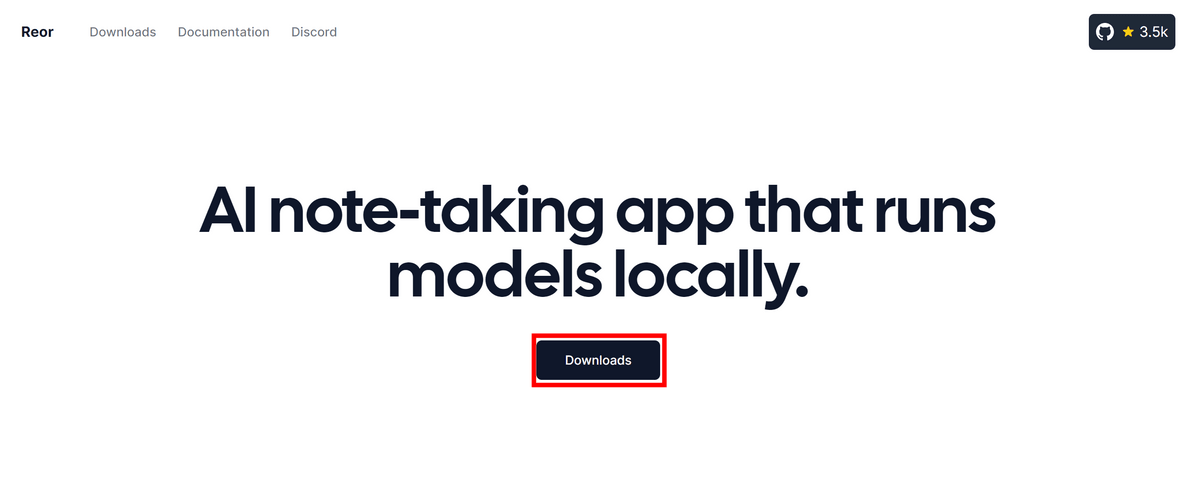
ローカルやOpenAIのモデルを使ってAIの力を借りながらメモを作成できるアプリ「Reor」を使ってみた

「Reor」はメモを書いている時に過去のメモの関連する部分が表示されたり、AIにメモの内容について質問したりできるメモ作成アプリです。AIモデルとしてOpenAIのモデルのほか、ローカルのモデルも利用可能とのことだったので、実際に使ってみました。
Reor
https://www.reorproject.org/
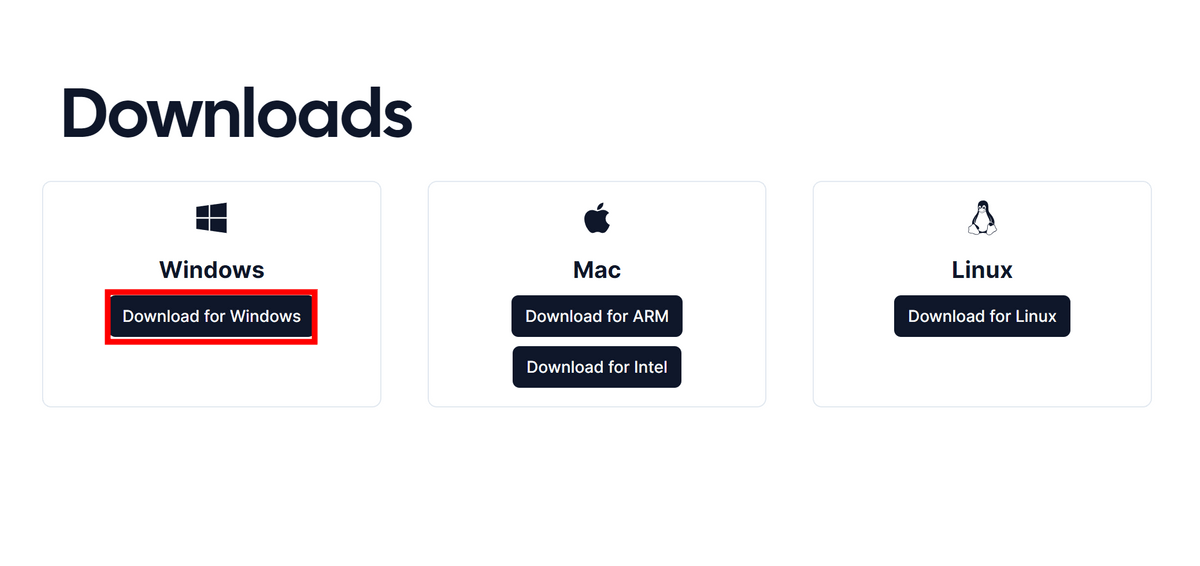
Reorの公式サイトにアクセスし、「Downloads」をクリック。
「Download for Windows」をクリックします。
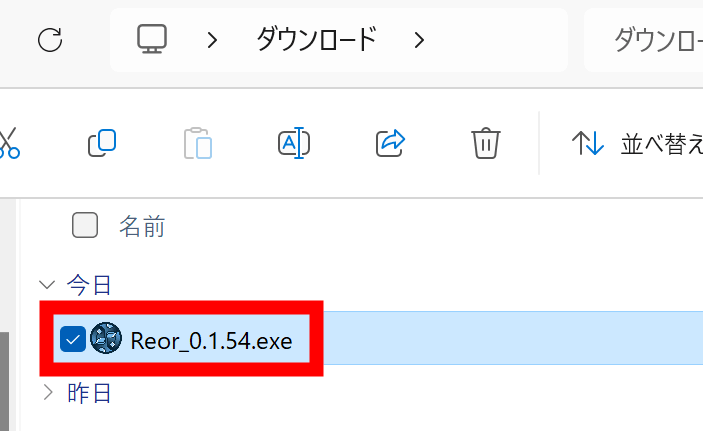
ダウンロードした実行ファイルをダブルクリック。
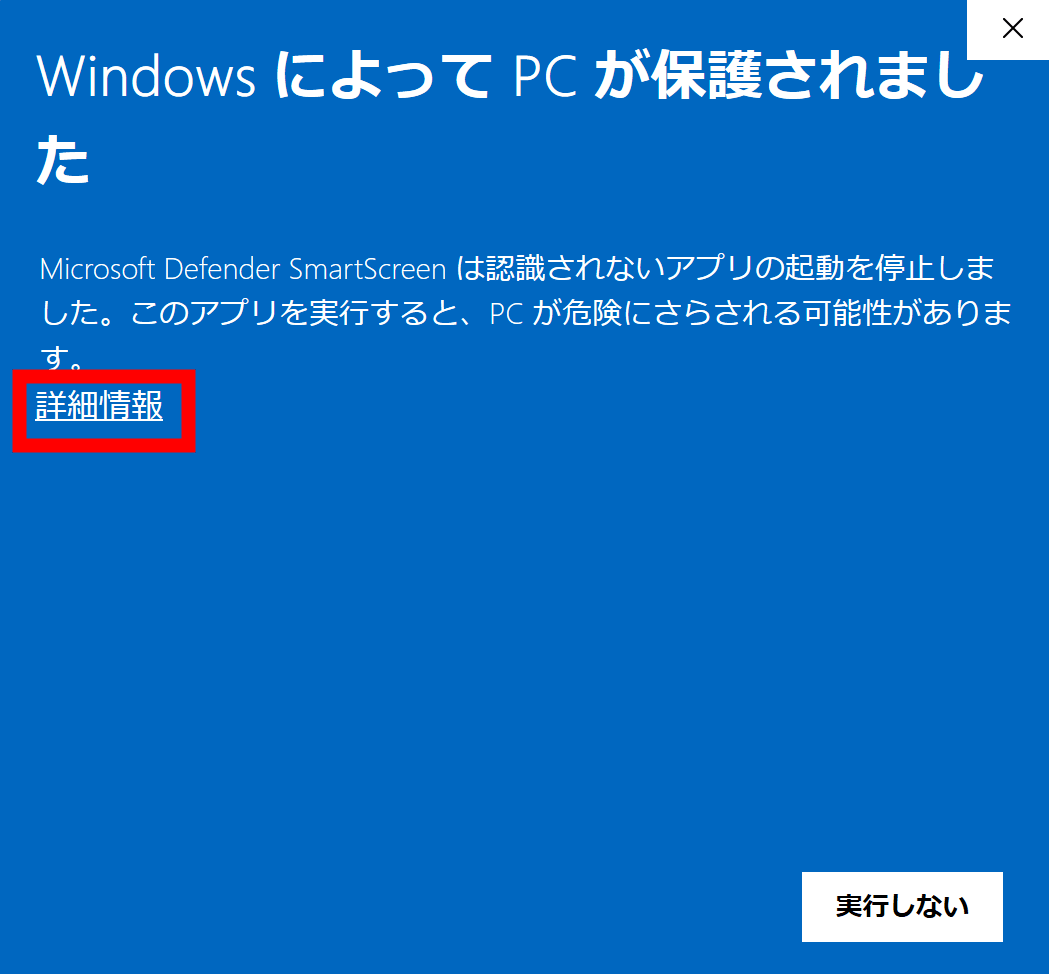
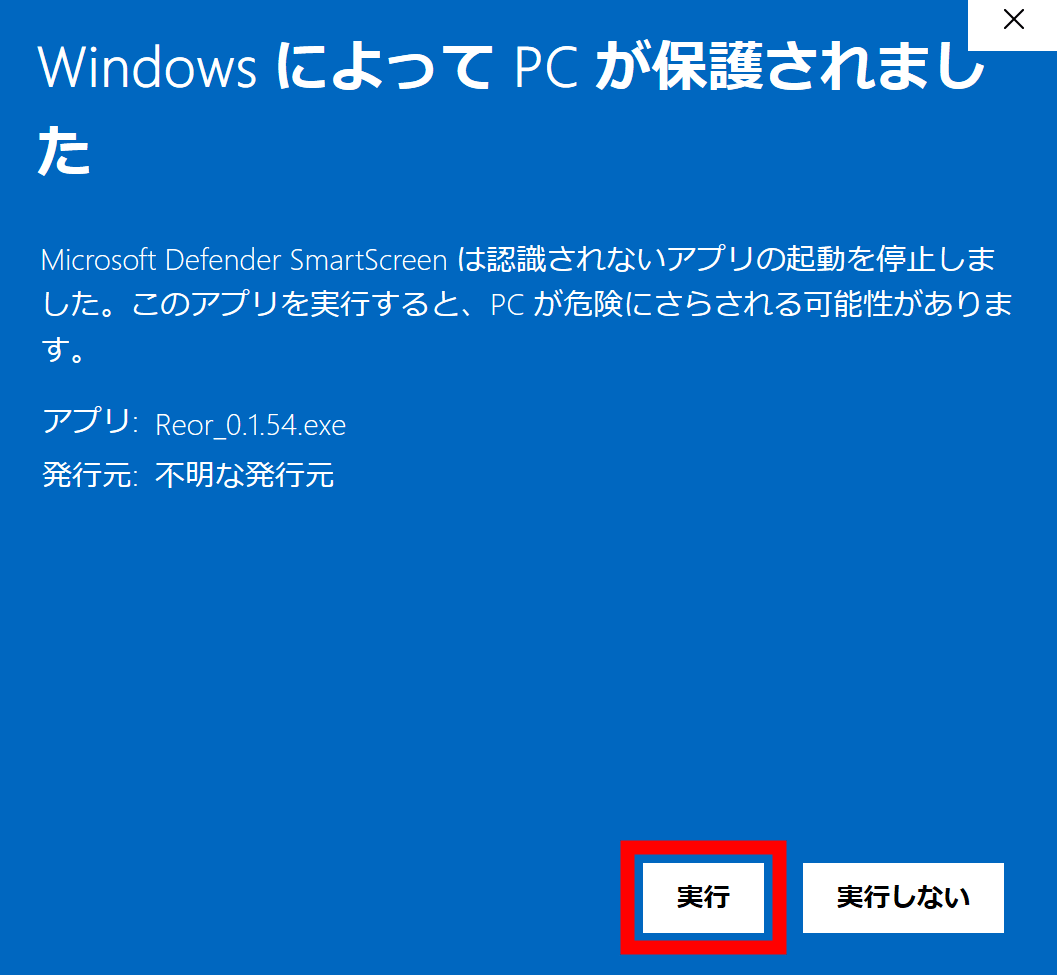
「詳細情報」をクリックします。
「実行」をクリック。
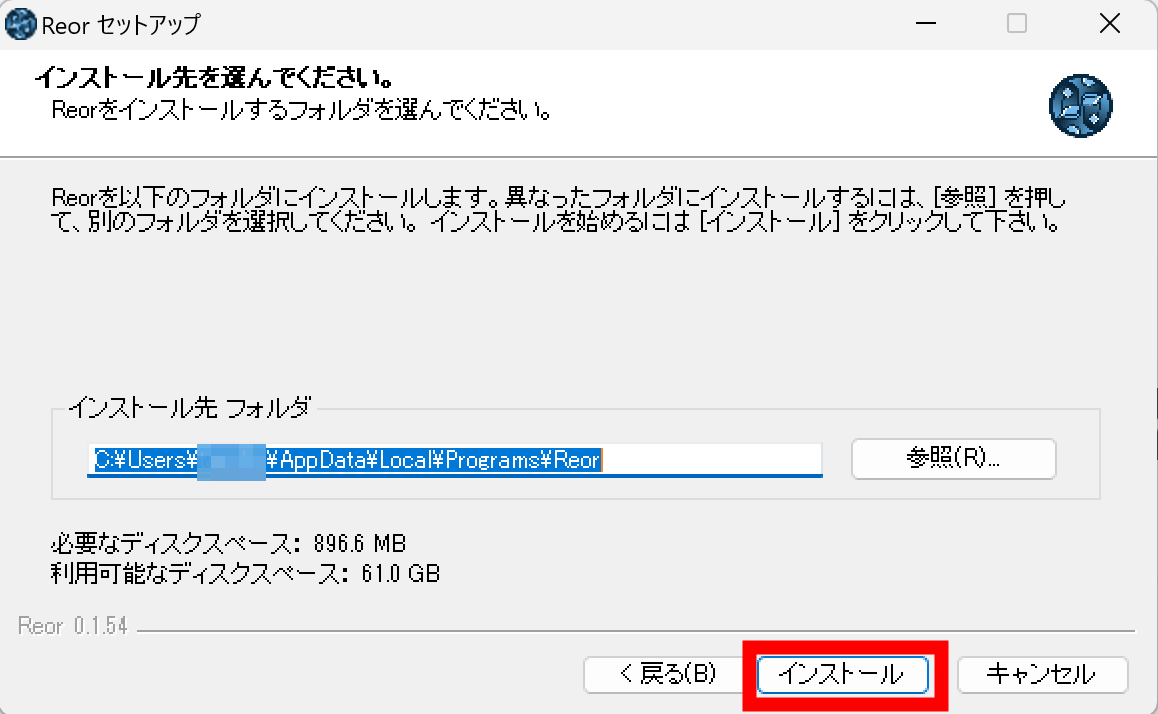
インストーラーが起動するので「次へ」をクリックします。

今回は特にインストール先を変更せず、そのまま「インストール」をクリックしました。
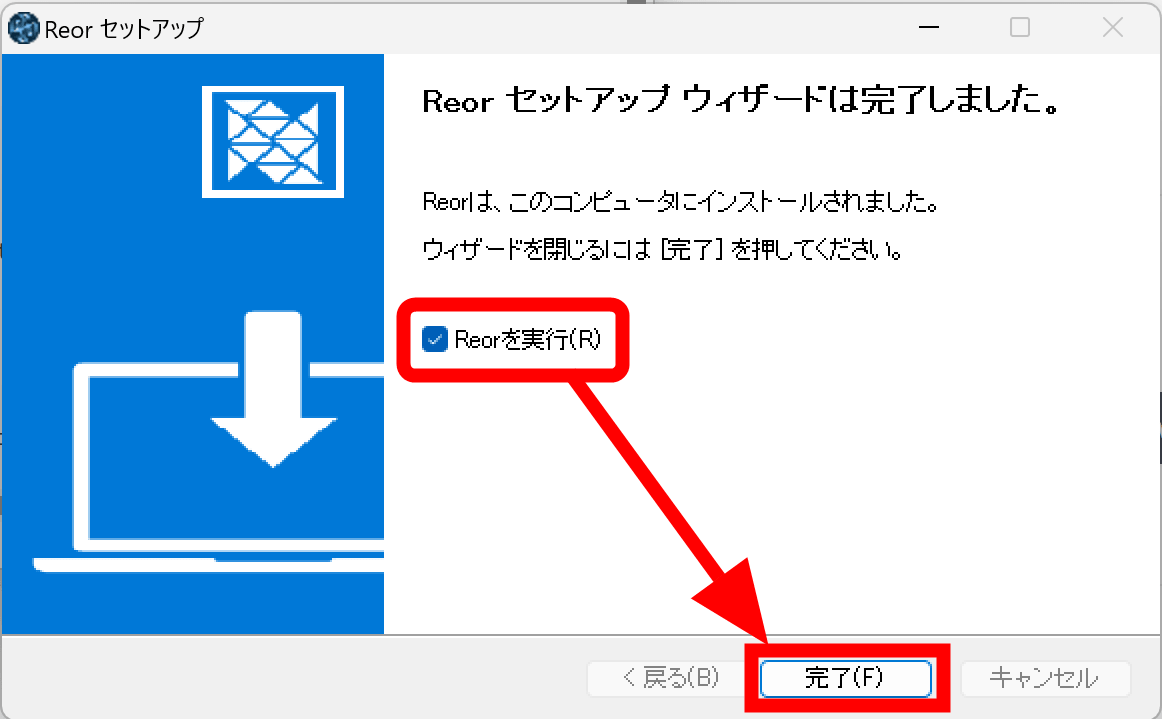
「Reorを実行」にチェックマークが入っているのを確認し、「完了」をクリック。
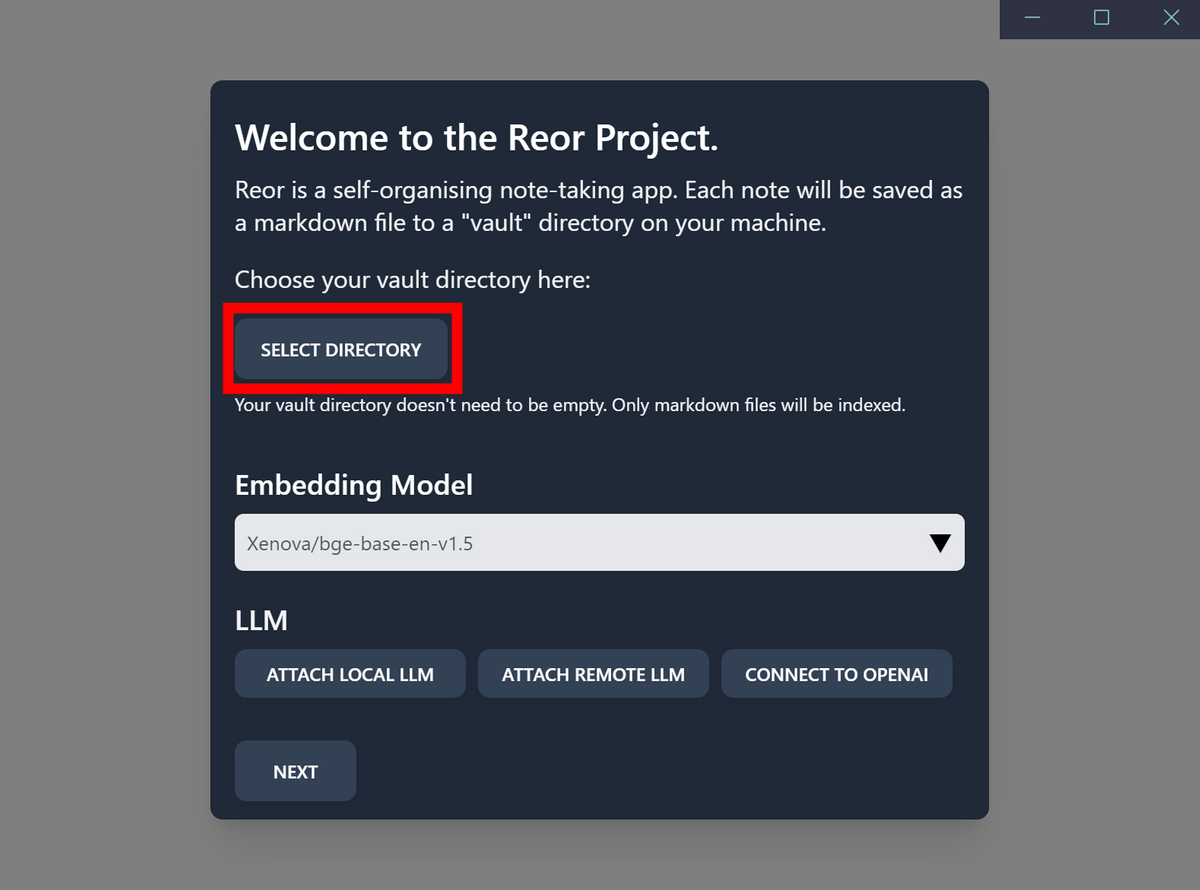
無事Reorが起動しました。初回の起動時にはメモを保存するフォルダを選択するよう指示されます。「SELECT DIRECTORY」をクリック。
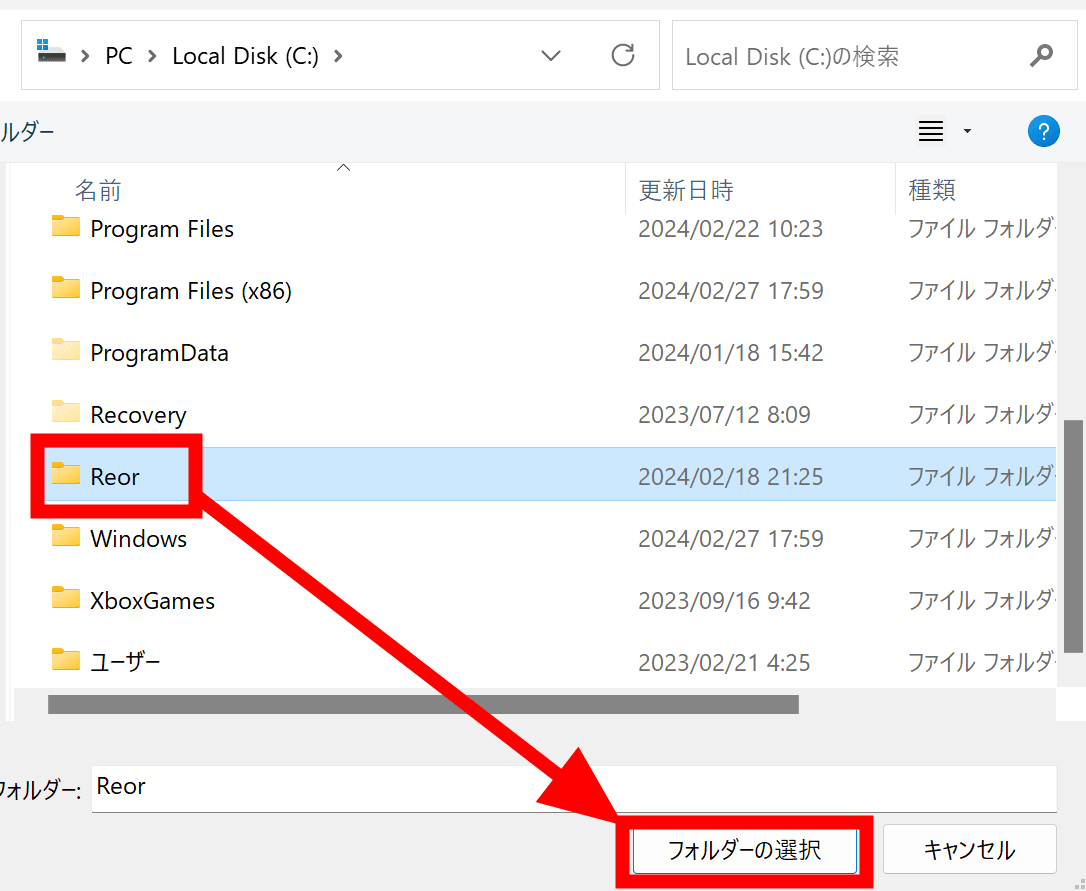
フォルダを選択し、「フォルダーの選択」をクリックします。
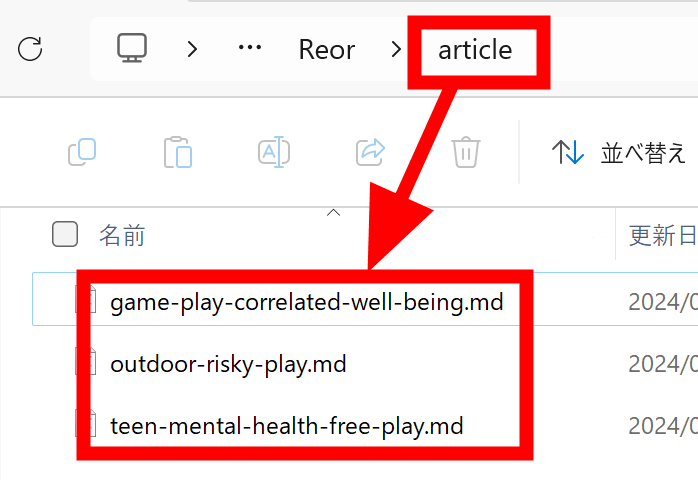
ここで選択したフォルダの「article」フォルダの中にいくつかの「子どもの成長」に関する記事をマークダウン形式で保存しました。このように保存フォルダの中にマークダウン形式のファイルを保存するとReorに自動で読み込まれるとのこと。
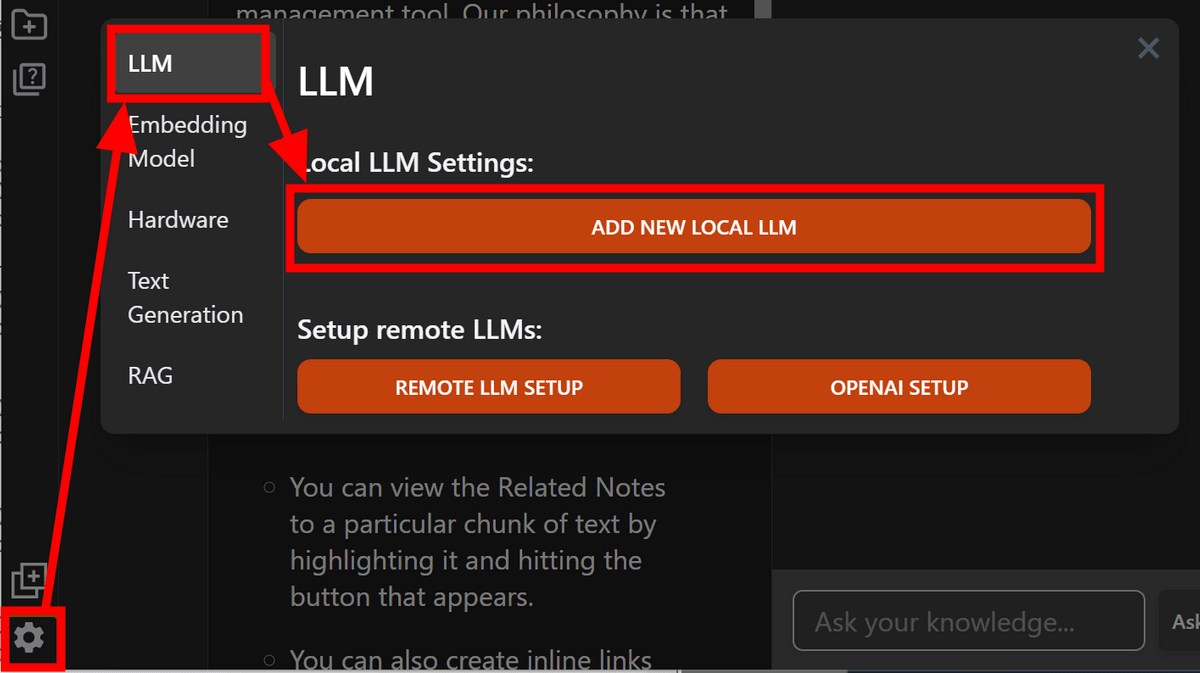
続いてローカルで使用するモデルを選択します。左下の歯車アイコンから設定画面を開き、「LLM」の「ADD NEW LOCAL LLM」をクリック。
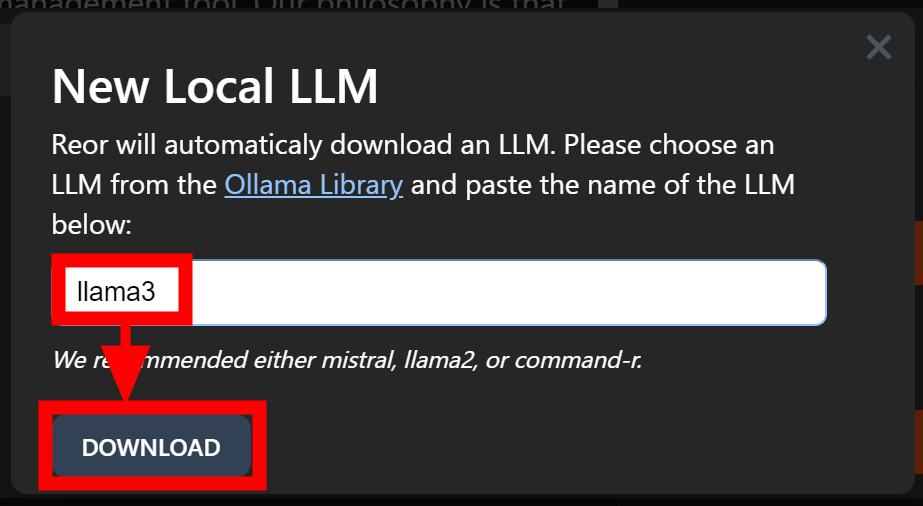
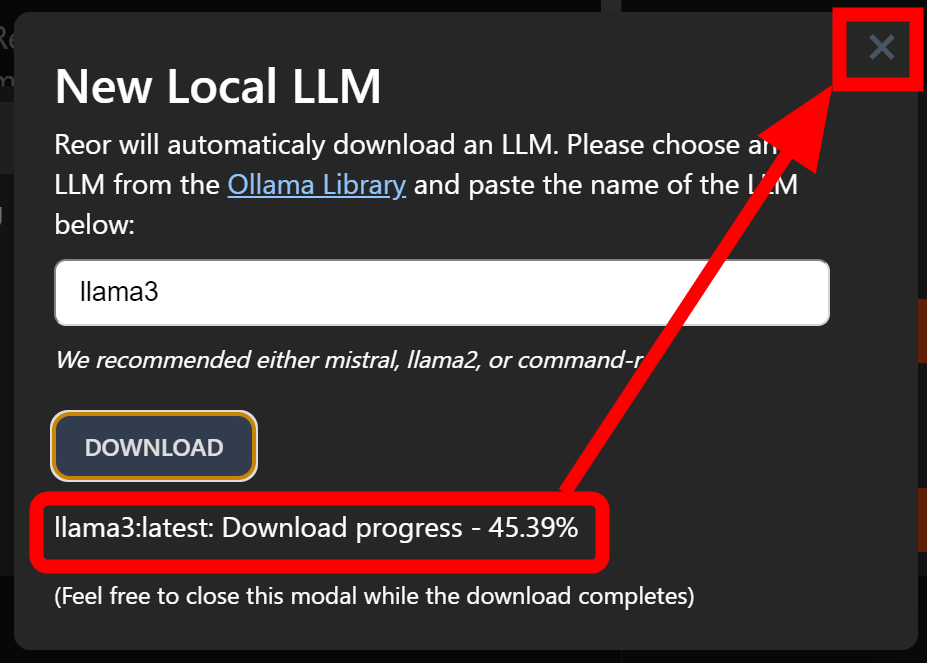
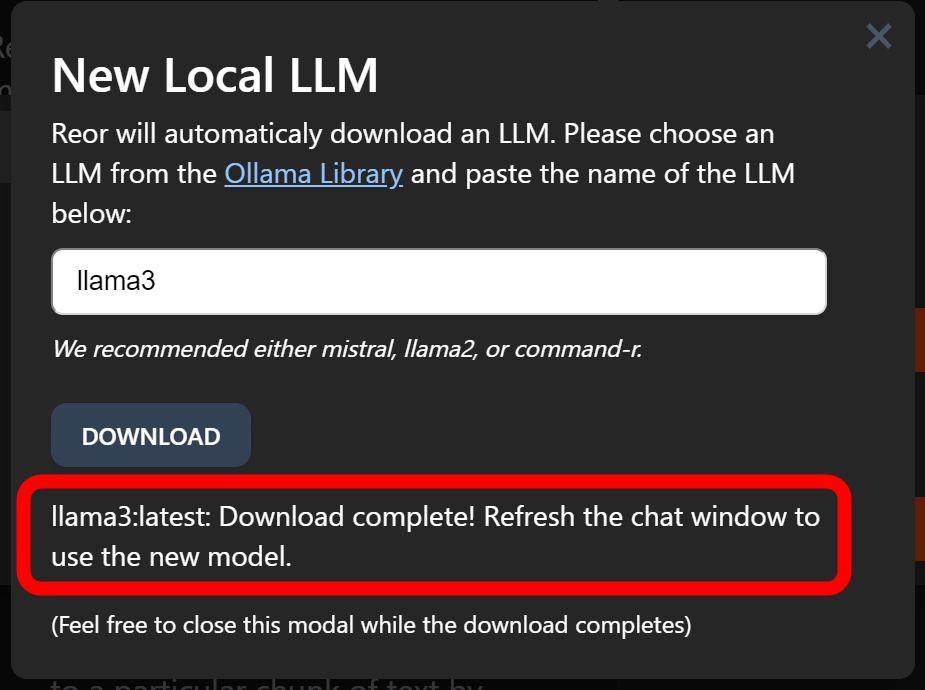
ReorはOllamaで利用可能なモデルを全て利用できるとのこと。今回はLlama 3を使用するため、「llama3」と入力して「DOWNLOAD」をクリックしました。
しばらく0%のまま進みませんでしたが、待っているといつの間にかダウンロードが始まっていました。こうして画面を開いて待機する必要はないとのことなので一度右上の「×」ボタンをクリックして画面を閉じ、先にチャット以外の部分を確認していきます。
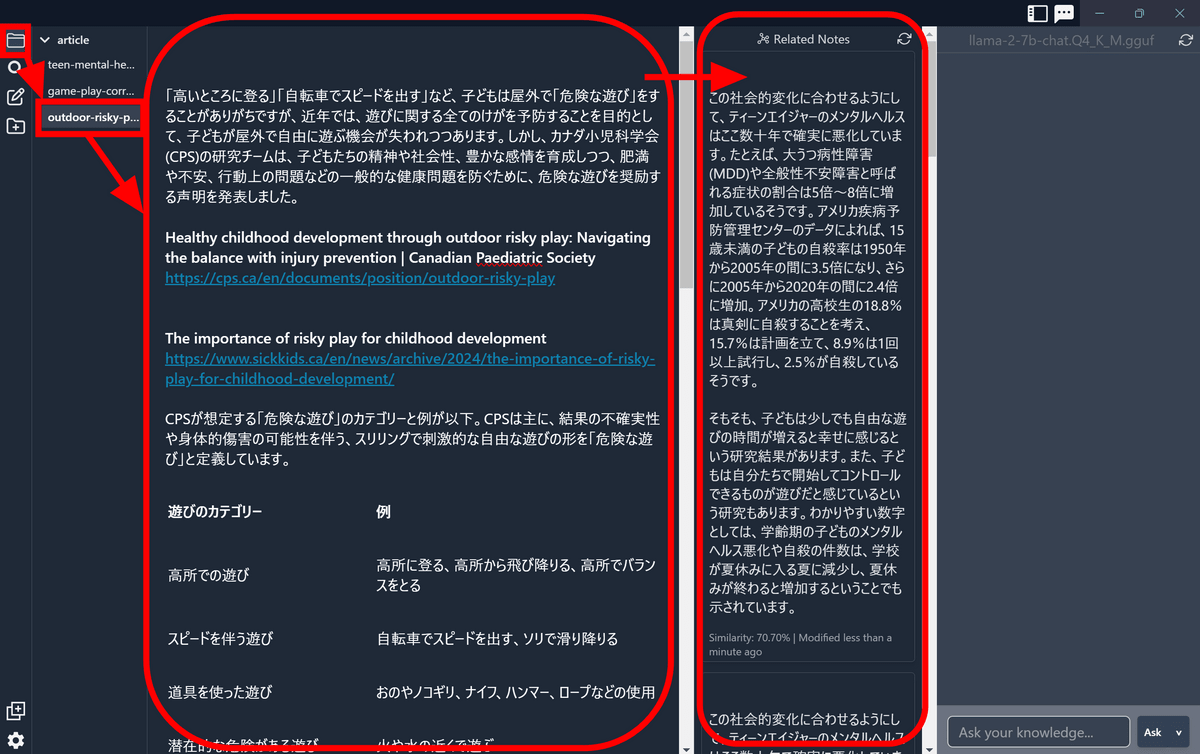
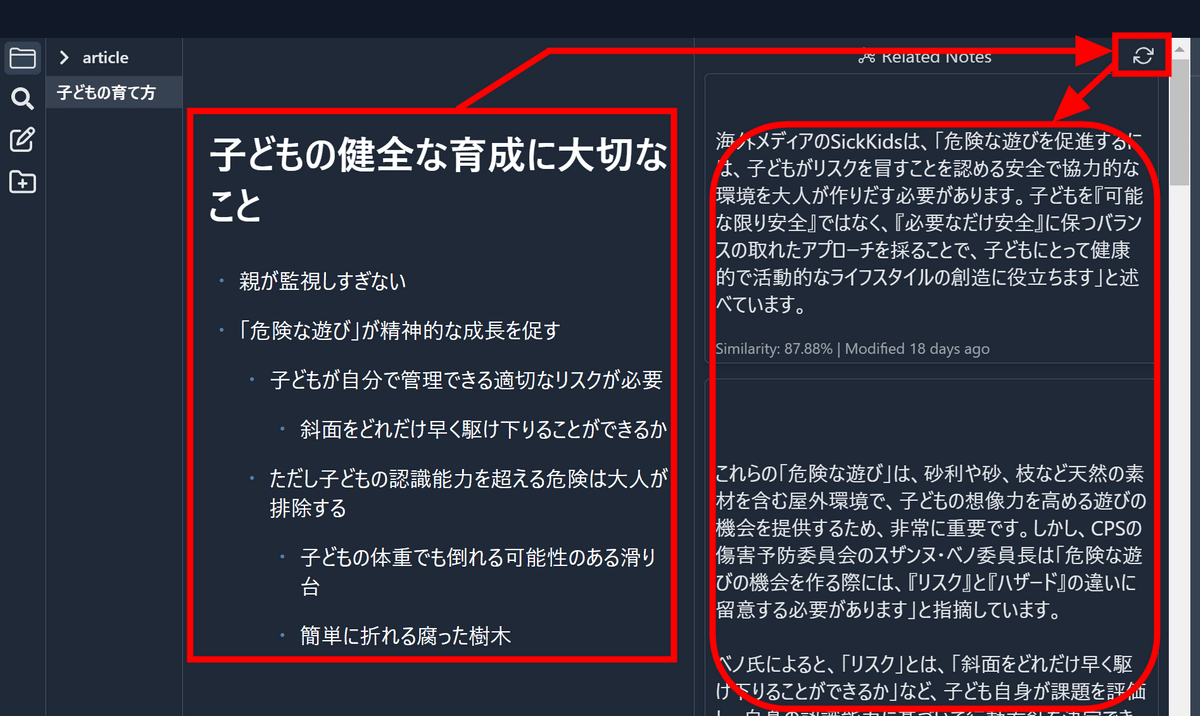
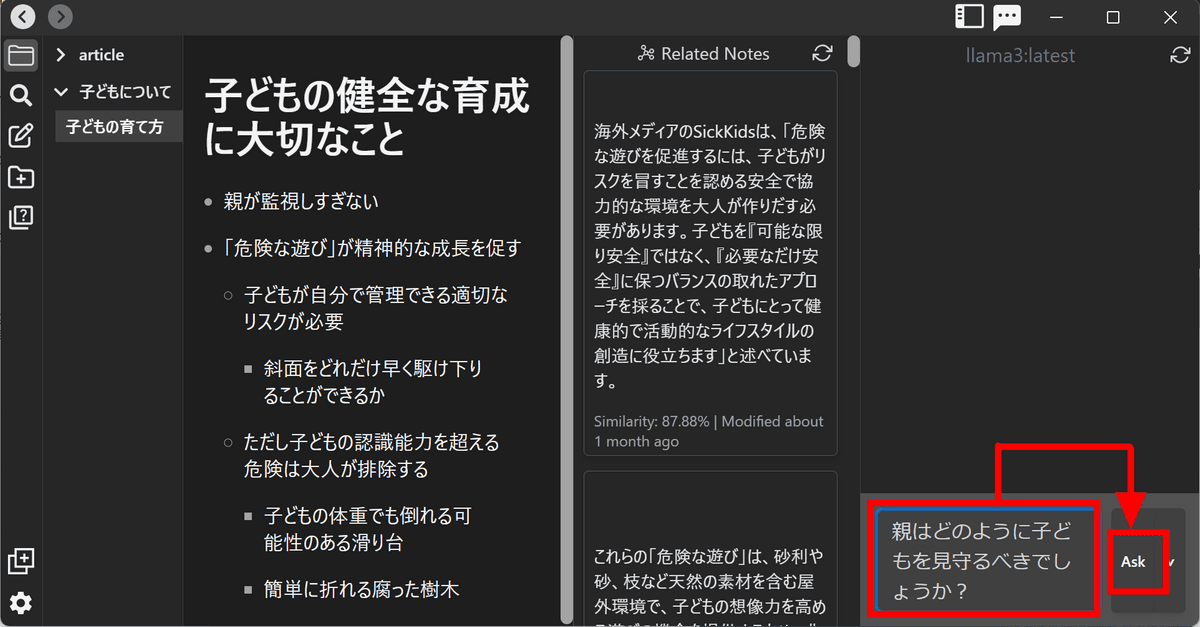
左端のフォルダのマークをクリックすると先ほど保存しておいた記事のデータが出現しました。そのうちの1つをクリックすると中身が表示されると同時に、そのメモに関連する他のメモの部分が右側に表示されます。
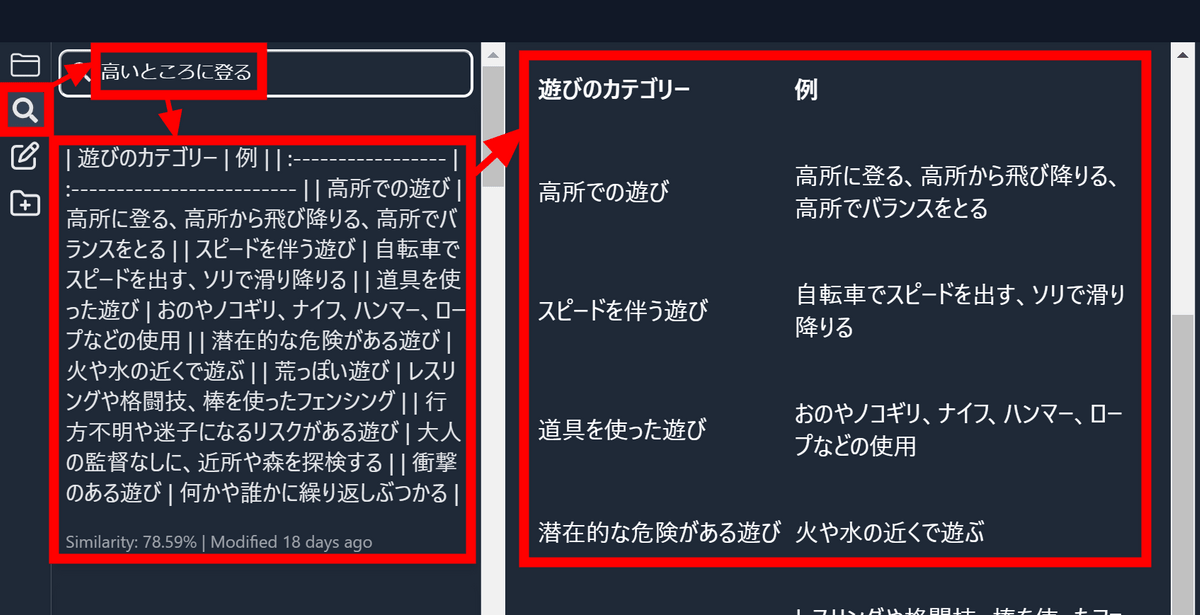
また、検索マークのボタンをクリックするとメモを直接検索することが可能です。検索結果をクリックするとそのメモが開きます。
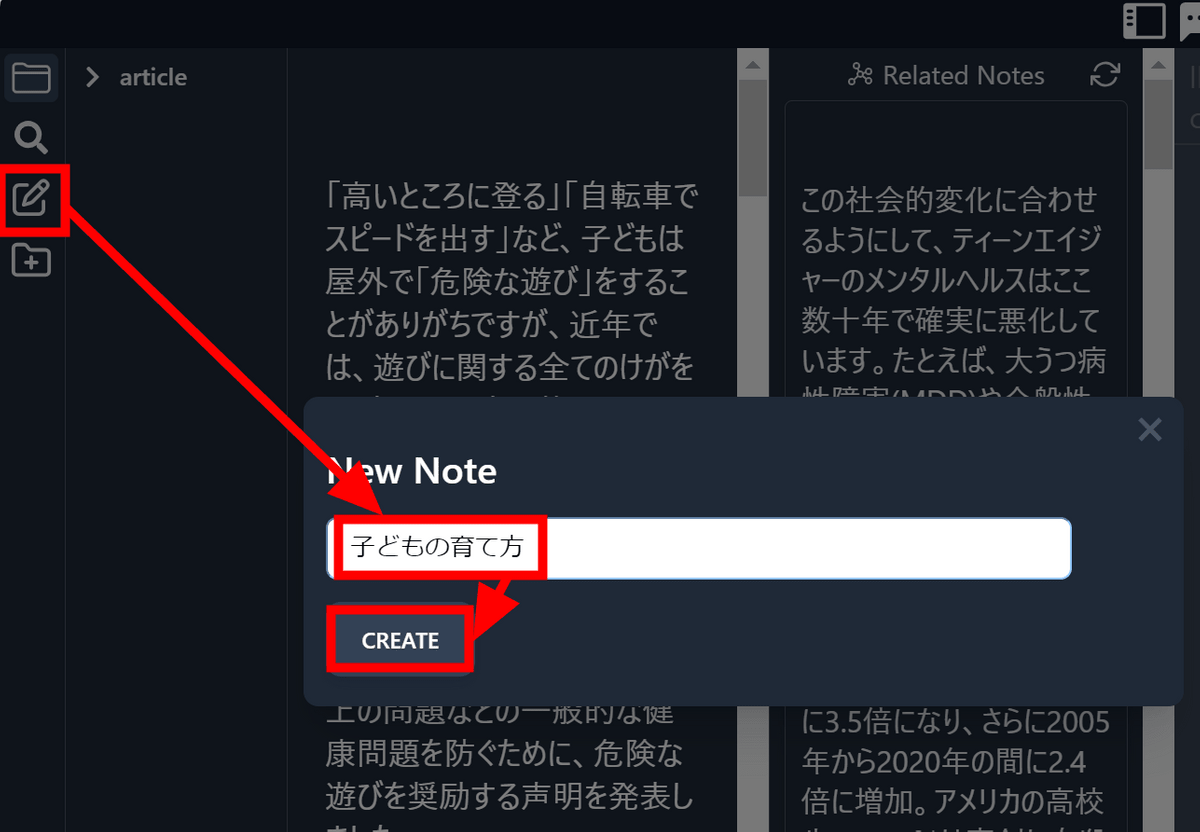
新しいメモを作成するには「紙とペン」のアイコンをクリックし、タイトルを入力して「CREATE」をクリック。
メモを作成して右側の「RELATED NOTES」にある更新ボタンをクリックすると、作成中のメモの内容に関連する過去のメモの内容が表示されます。
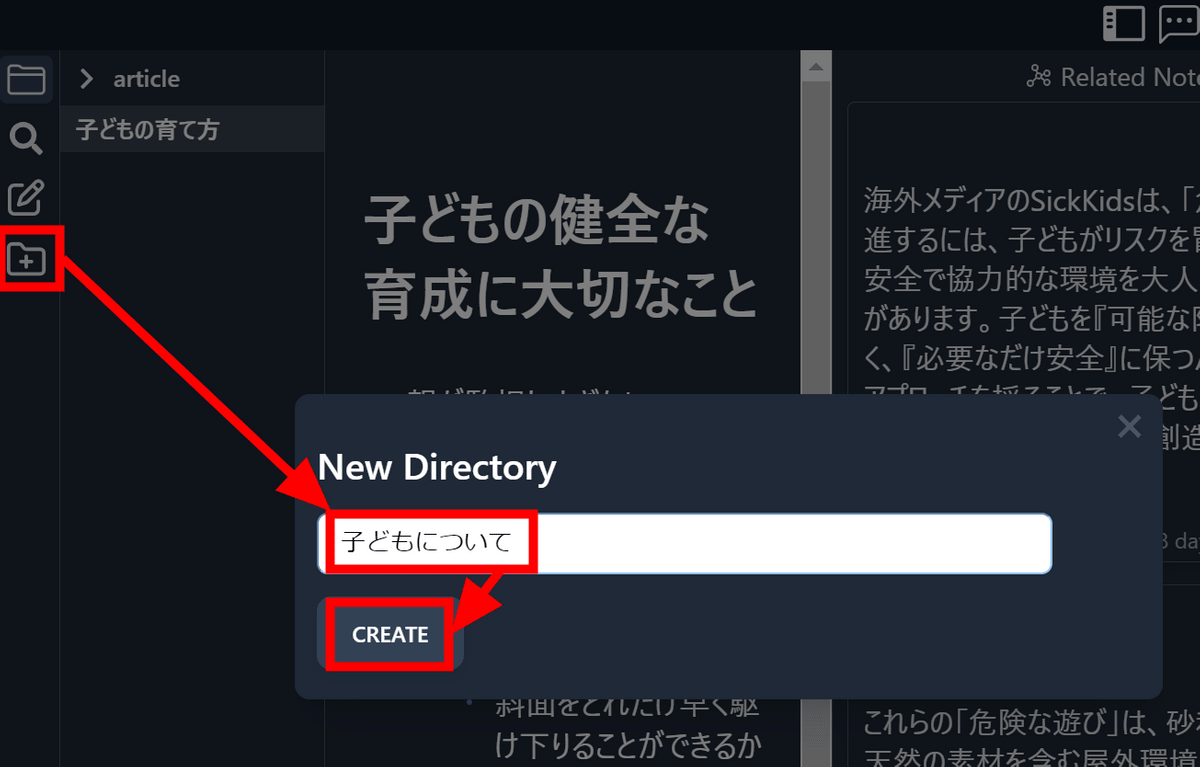
「フォルダ」のアイコンをクリックし、フォルダ名を入力して「CREATE」をクリックすると新しくフォルダを作成可能。
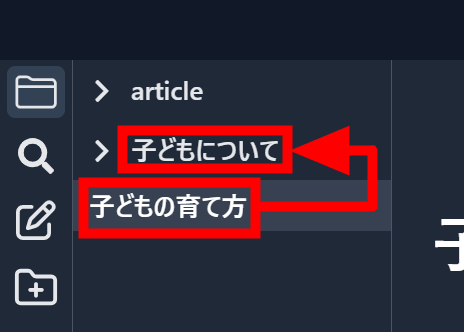
作成済みのメモをドラッグ&ドロップすることでフォルダへ整理することができます。
一通り確認できたところで、再び設定画面を開くとLlama 3のダウンロードが完了していました。
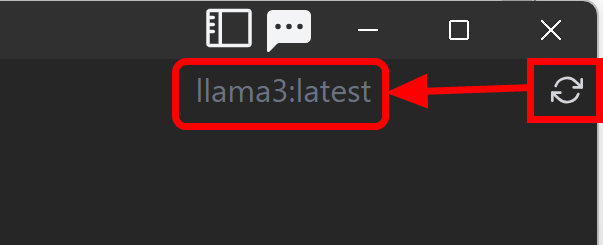
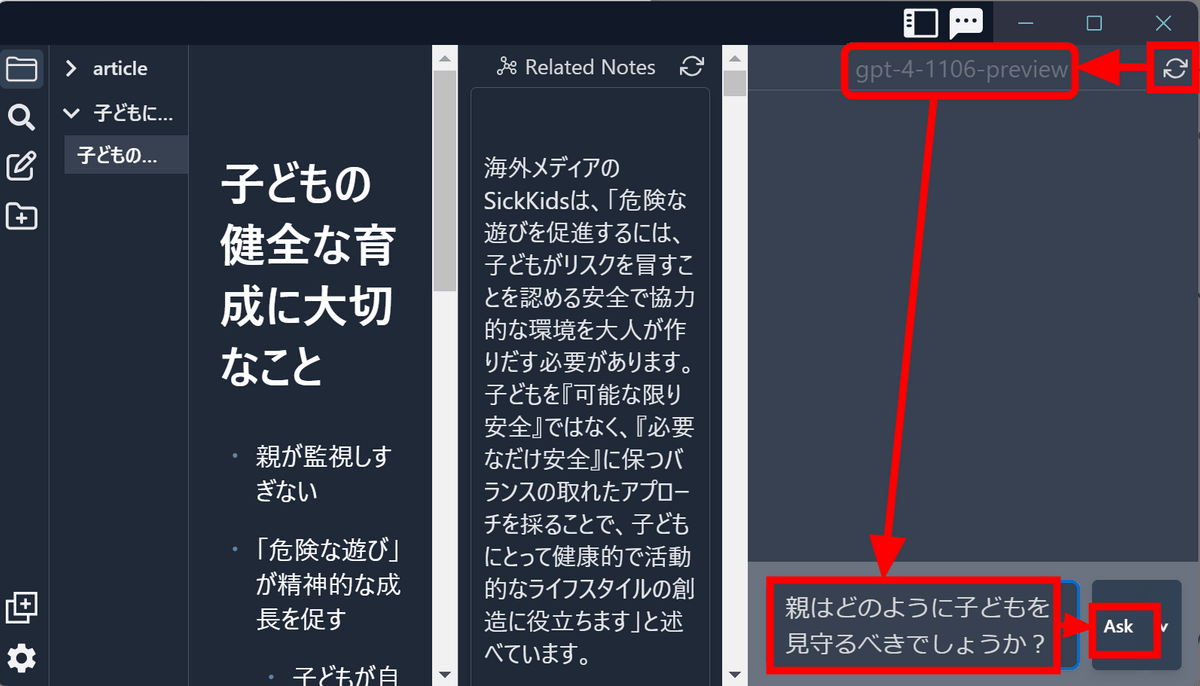
チャット欄の右上にある更新マークをクリックし、Llama 3を呼び出します。
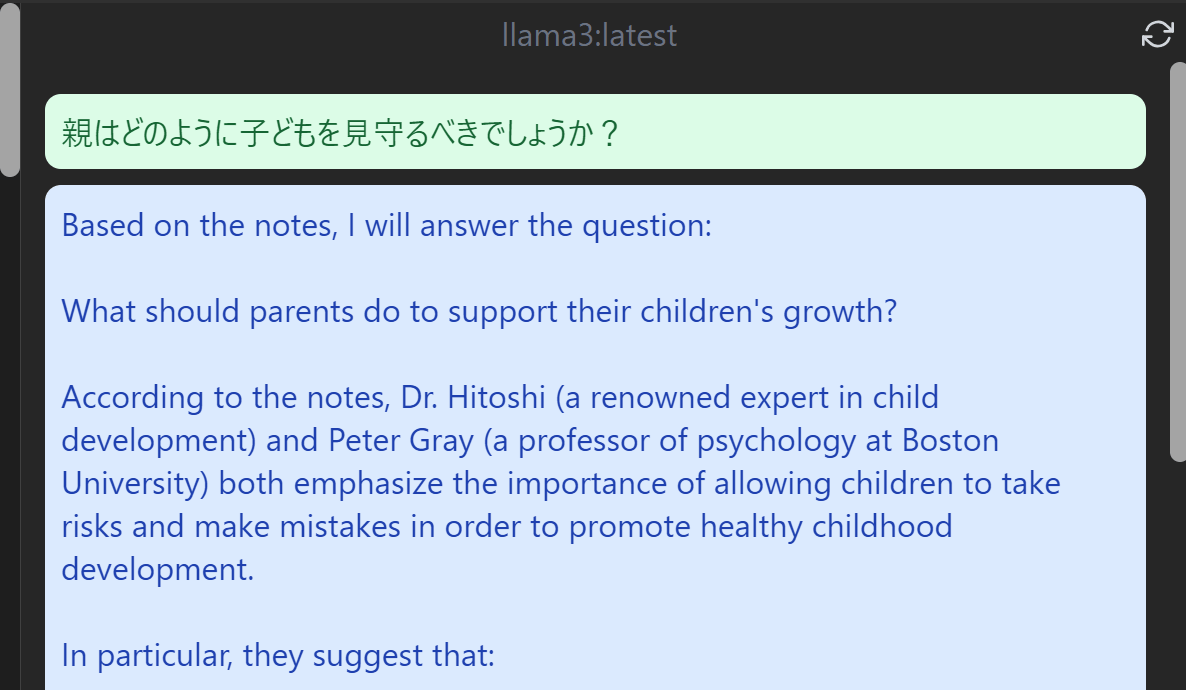
このチャット欄では作成済みのメモの内容について右端の欄でAIに質問することが可能です。「親はどのように子どもを見守るべきでしょうか?」と入力し、「Ask」ボタンをクリックしてみました。
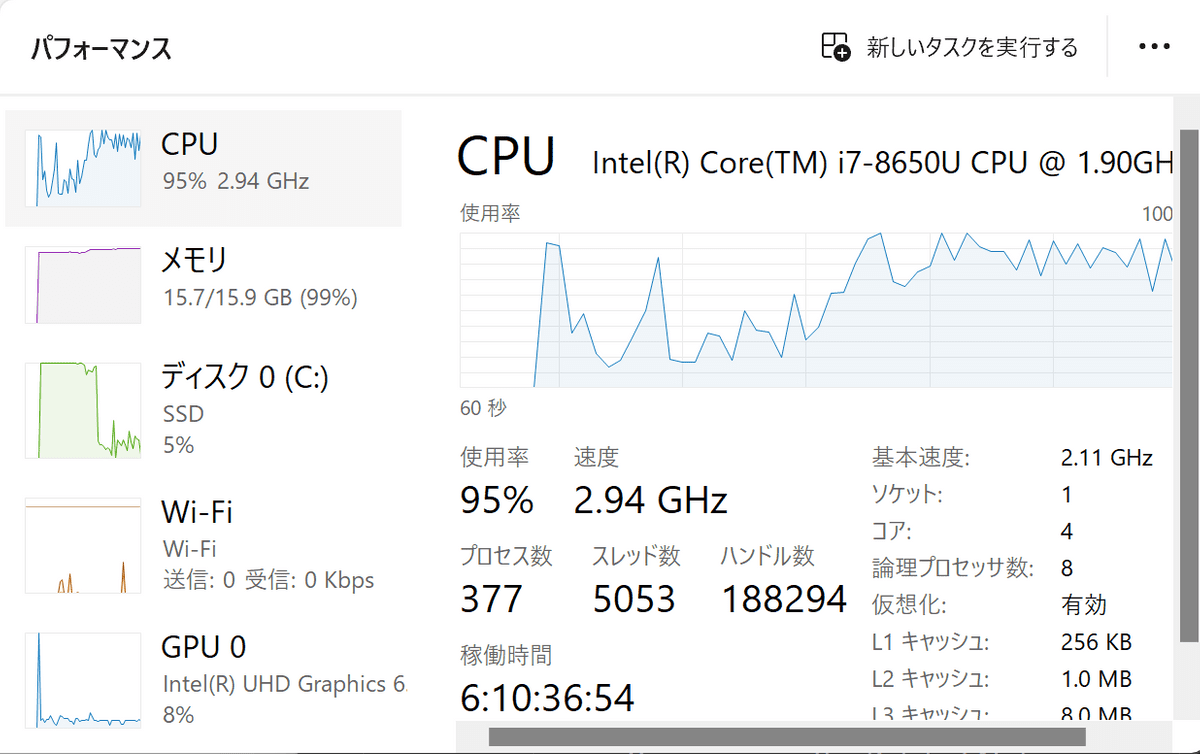
CPU使用率とメモリの消費量が跳ね上がり推論が始まります。
かなり待つ上に日本語での回答は得られませんでしたが、少なくともメモの内容に基づいた回答にはなっていました。
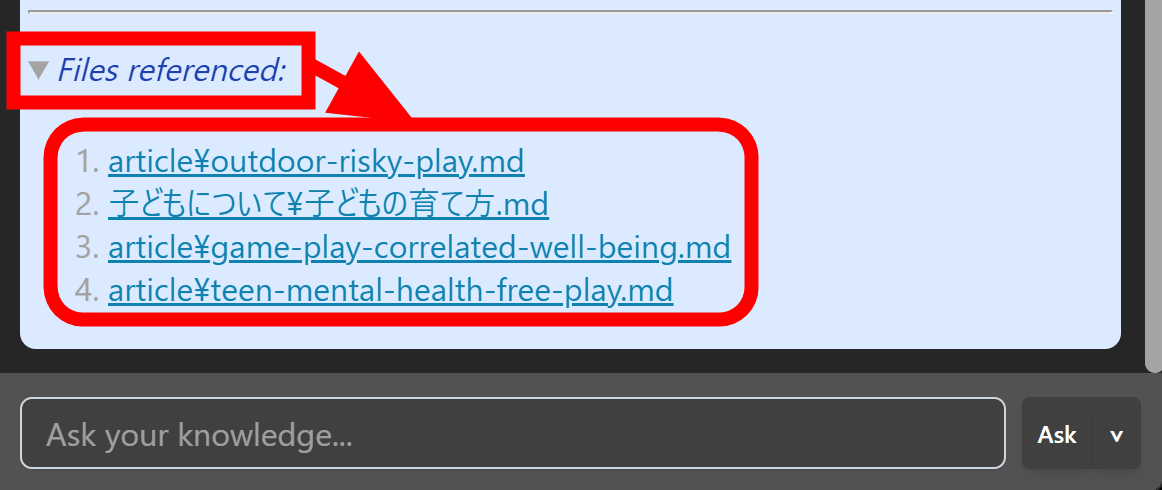
一番下に「Files referenced:」としてどのメモを使用したのかについての情報がまとまっています。
なお、NvidiaかAMDのGPUを搭載している場合、Ollamaをインストールして実行しておけばGPUを使用して推論を高速化してくれるとのこと。残念ながら今回レビューに使用しているPCにはいずれも搭載されていません。

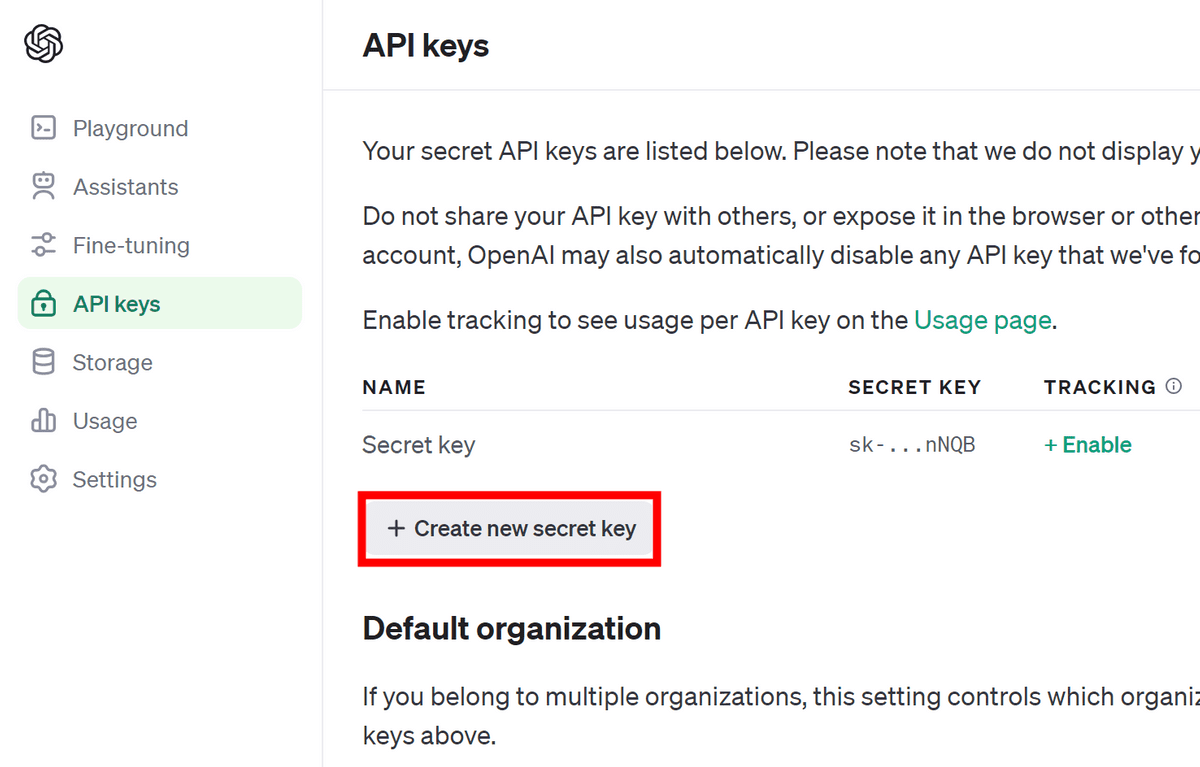
ローカルモデルの代わりにOpenAIに接続してみます。OpenAIのAPI keysのページを開き、「Create new secret key」をクリック。
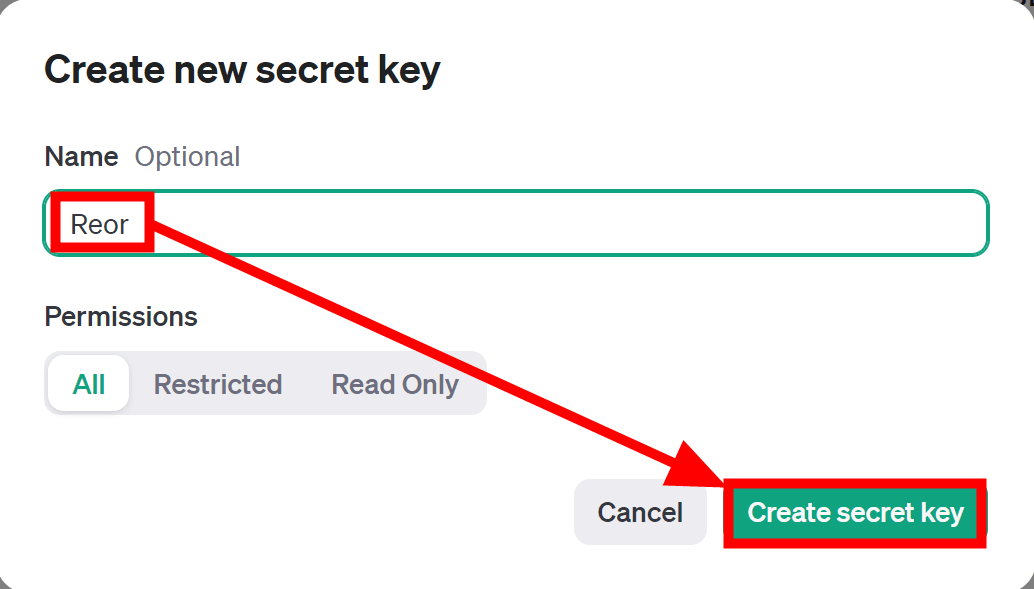
名前を入力して「Create secret key」をクリックします。
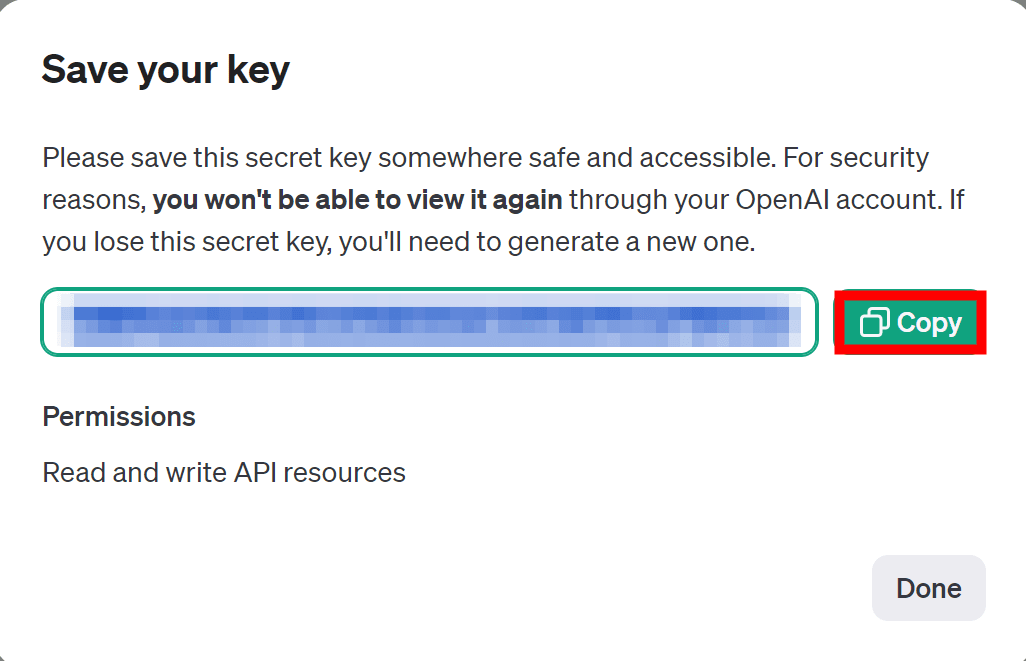
「Copy」ボタンをクリック。
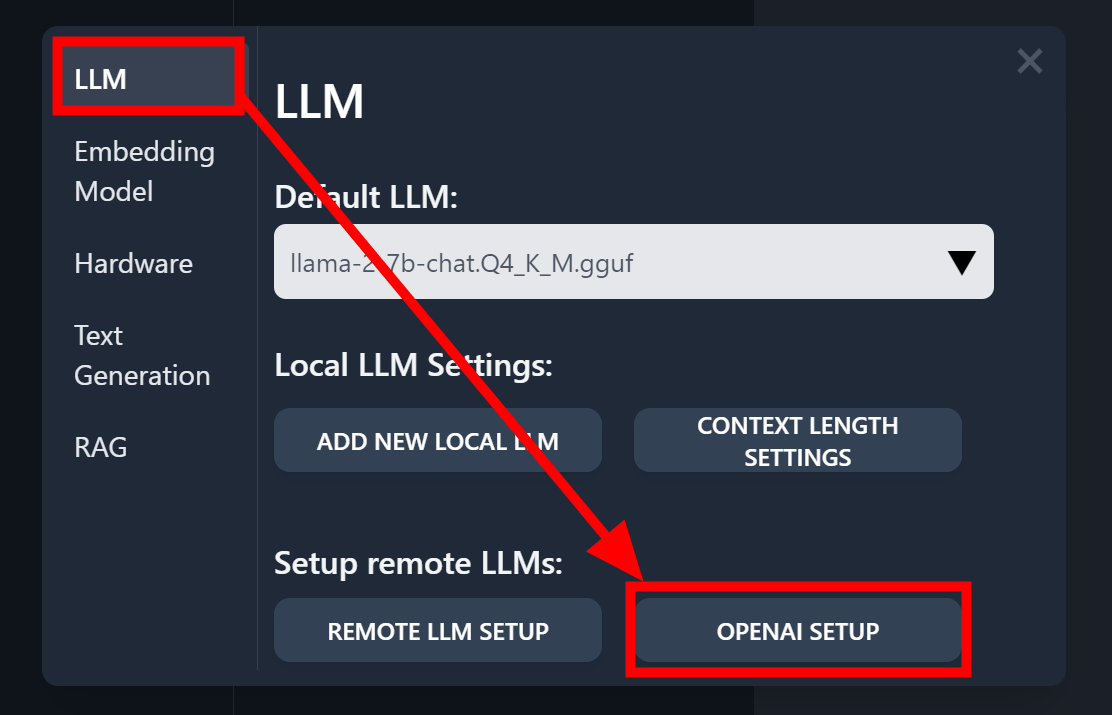
Reorの画面に戻り、設定の「LLM」を開いて「OPENAI SETUP」をクリックします。
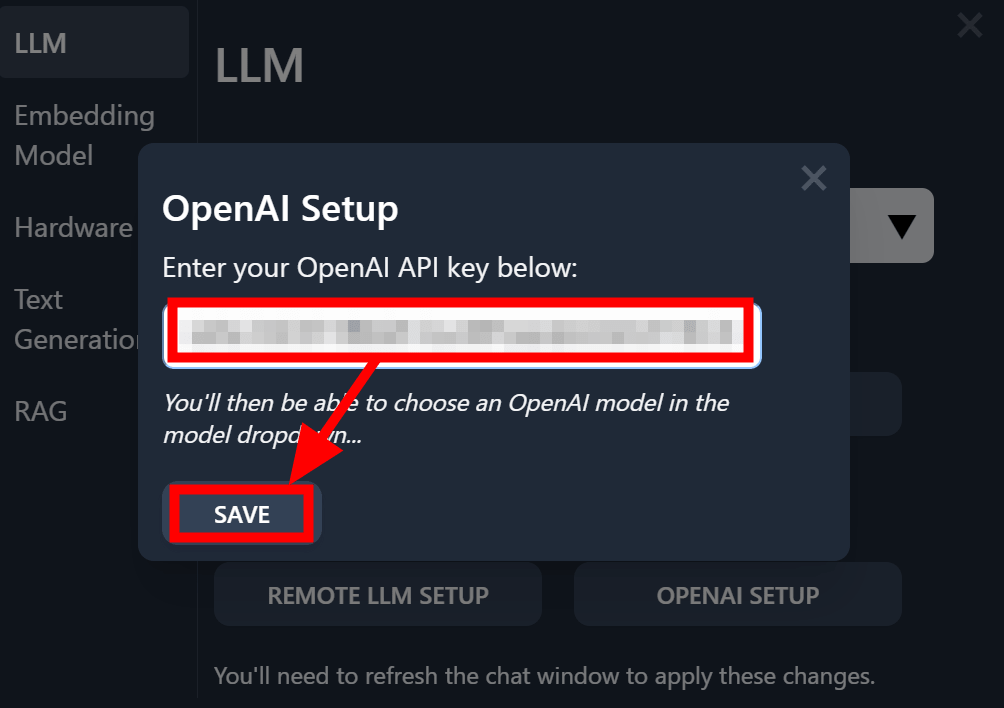
先ほどコピーしたOpenAIのAPI keyをペーストし、「SAVE」をクリック。
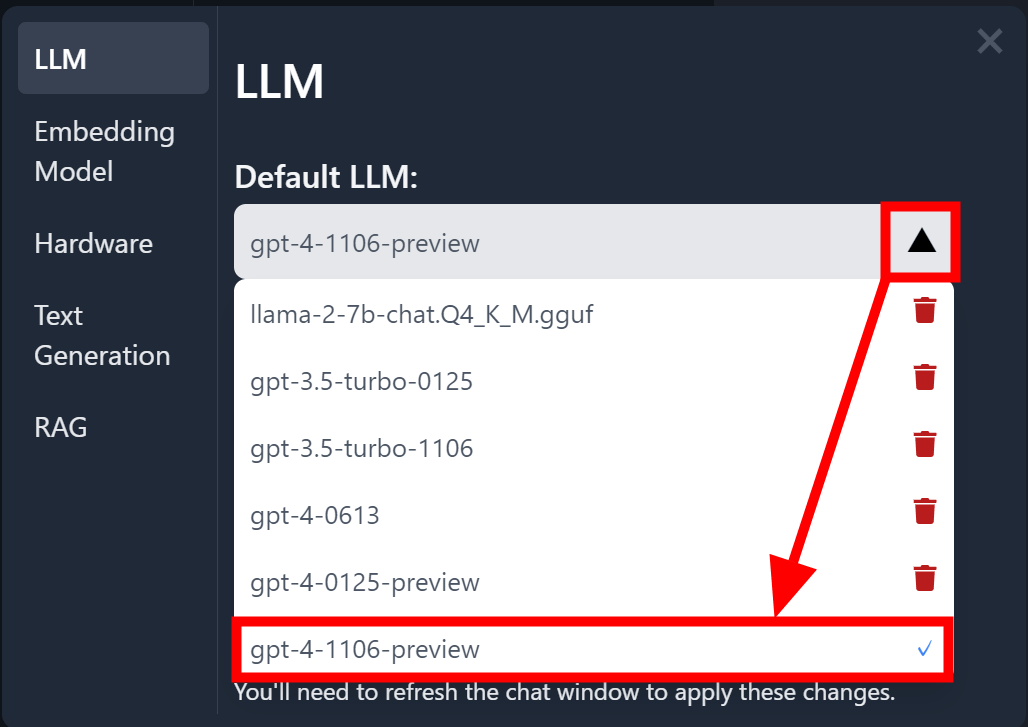
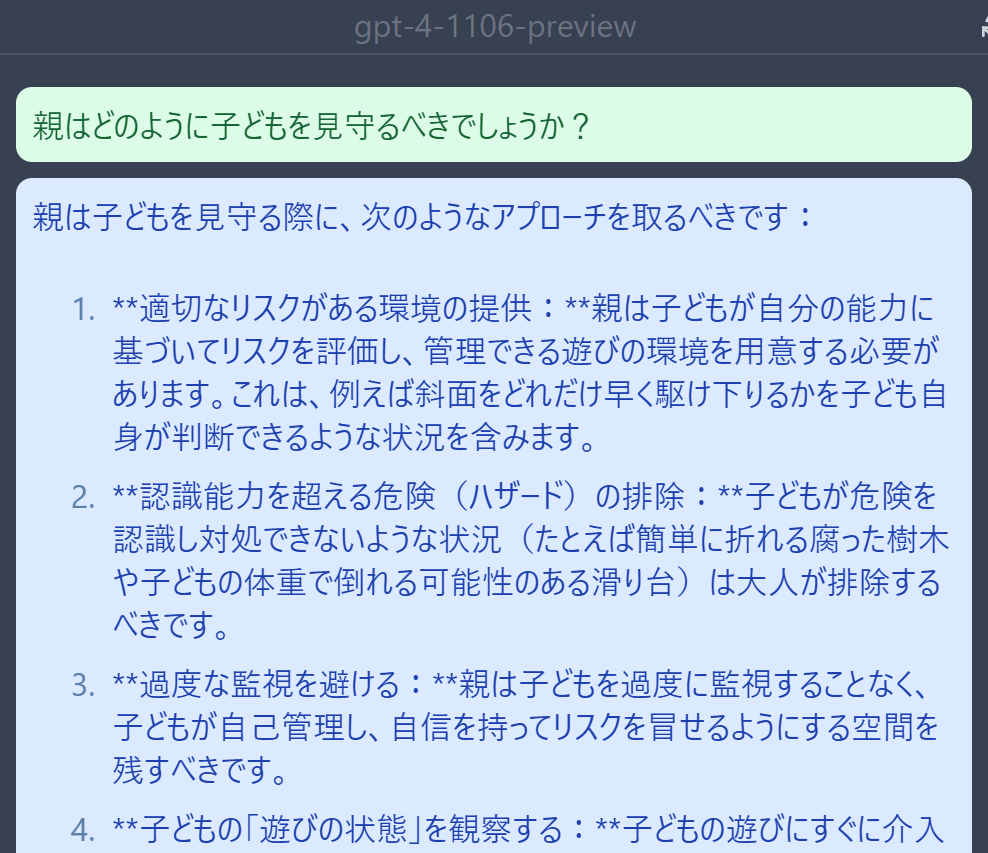
LLMの選択肢にOpenAIのさまざまなモデルが追加されました。「gpt-4-1106-preview」をクリックします。
チャット欄の更新アイコンをクリックするとチャットのAIモデルが「gpt-4-1106-preview」へと更新されました。先ほどと同じ質問を入力し、「Ask」をクリック。
メモの内容に基づいた答えが返ってきました。
・関連記事
GoogleがGemini ProとPaLM 2を搭載したメモ作成アプリ「NotebookLM」を実験的にリリース - GIGAZINE
文字起こしAI「Whisper」を誰でも簡単に使えるようにした超高精度文字起こしアプリ「writeout.ai」使い方まとめ、オープンソースでローカルでも動作OK - GIGAZINE
AIが執筆した「クリエイティブシンキングを使って思考力をアップさせる方法」とは? - GIGAZINE
Googleがニュース記事執筆用のAIツールをテスト中、一部メディア向けにデモを実施 - GIGAZINE
「AIと協力して創作をするべき」と作家が語る理由とは? - GIGAZINE
・関連コンテンツ
in AI, ソフトウェア, レビュー, Posted by log1d_ts
You can read the machine translated English article I tried using the app 'Reor' that allows….