


「Raspberry Pi Pico 2」のRISC-VコアでLチカを実行&デバッグしてみた
2024年8月9日に登場した「Raspberry Pi Pico 2」には、ArmコアとRISC-Vコアを搭載した独自開発マイコン「RP2350」が搭載されています。RISC-Vコアを簡単に使えて面白そうだったので、実際にRP2350のRISC-Vコアを使ってLチカを実行してデバッグも試してみました。
Raspberry Pi Pico 2 – Raspberry Pi
https://www.raspberrypi.com/products/raspberry-pi-pico-2/
GitHub - raspberrypi/pico-examples
https://github.com/raspberrypi/pico-examples?tab=readme-ov-file
・目次
◆1:用意する物
◆2:LチカのコードをRISC-Vコア向けにビルドする
◆3:デバッグ環境を構築
◆4:Lチカを実行してデバッグしてみる
◆1:用意する物
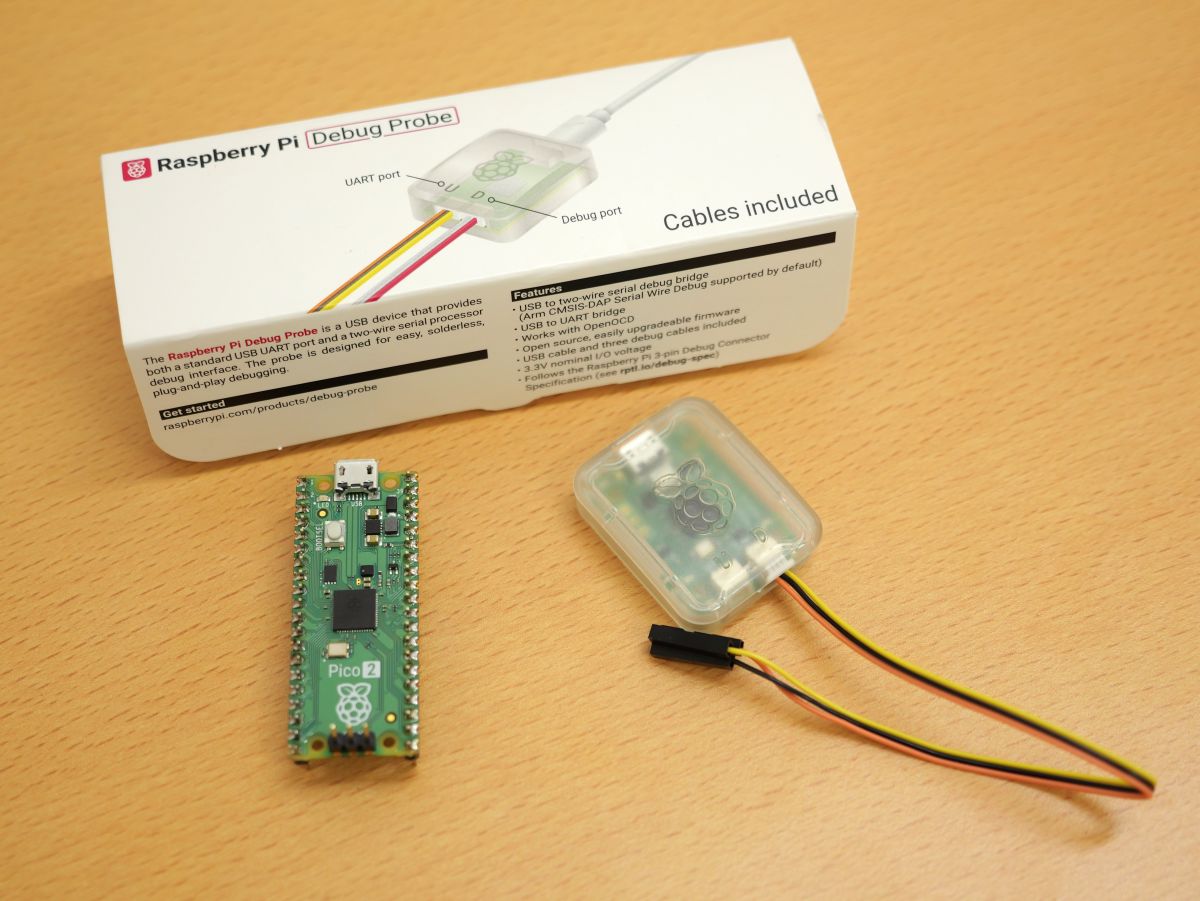
今回は、Raspberry Pi開発チームがくれたRaspberry Pi Pico 2とRaspberry Pi Debug Probeを使ってLチカを実行およびデバッグしてみます。なお、ビルドやデバッグにはUbuntuを使います。
◆2:LチカのコードをRISC-Vコア向けにビルドする
まず、公式サンプルコードリポジトリに含まれるLチカ(LEDを点滅させるプログラム)のソースコードをRISC-V向けにビルドします。ビルド環境の構築方法は以下の記事で解説しています。
「Raspberry Pi Pico 2」の開発環境を構築してLチカするまでの手順まとめ - GIGAZINE
ビルド環境を構築したら、RISC-V用のコンパイラをダウンロードして展開します。今回はホームディレクトリにダウンロードして展開しました。
cd

wget https://buildbot.embecosm.com/job/corev-gcc-ubuntu2204/47/artifact/corev-openhw-gcc-ubuntu2204-20240530.tar.gz

tar -zxvf corev-openhw-gcc-ubuntu2204-20240530.tar.gz
続いて、サンプルコードリポジトリのクローン先に移動して、デバッグ用のディレクトリを作成し、Lチカのコードが含まれる「blink」をビルドします。RISC-V向けにビルドするには、「cmake」にコンパイラ指定オプション「-DPICO_TOOLCHAIN_PATH=ホームディレクトリ/corev-openhw-gcc-ubuntu2204-20240530」とアーキテクチャ指定オプション「-DPICO_PLATFORM=rp2350-riscv」を付ければOK。今回はデバッグもしたいので「-DCMAKE_BUILD_TYPE=Debug」というオプションも付けて実行しました。
cd pico-examples

mkdir debug

cd debug

cmake -DPICO_TOOLCHAIN_PATH=ホームディレクトリ/corev-openhw-gcc-ubuntu2204-20240530 -DPICO_PLATFORM=rp2350-riscv -DCMAKE_BUILD_TYPE=Debug ..

cd blink

make
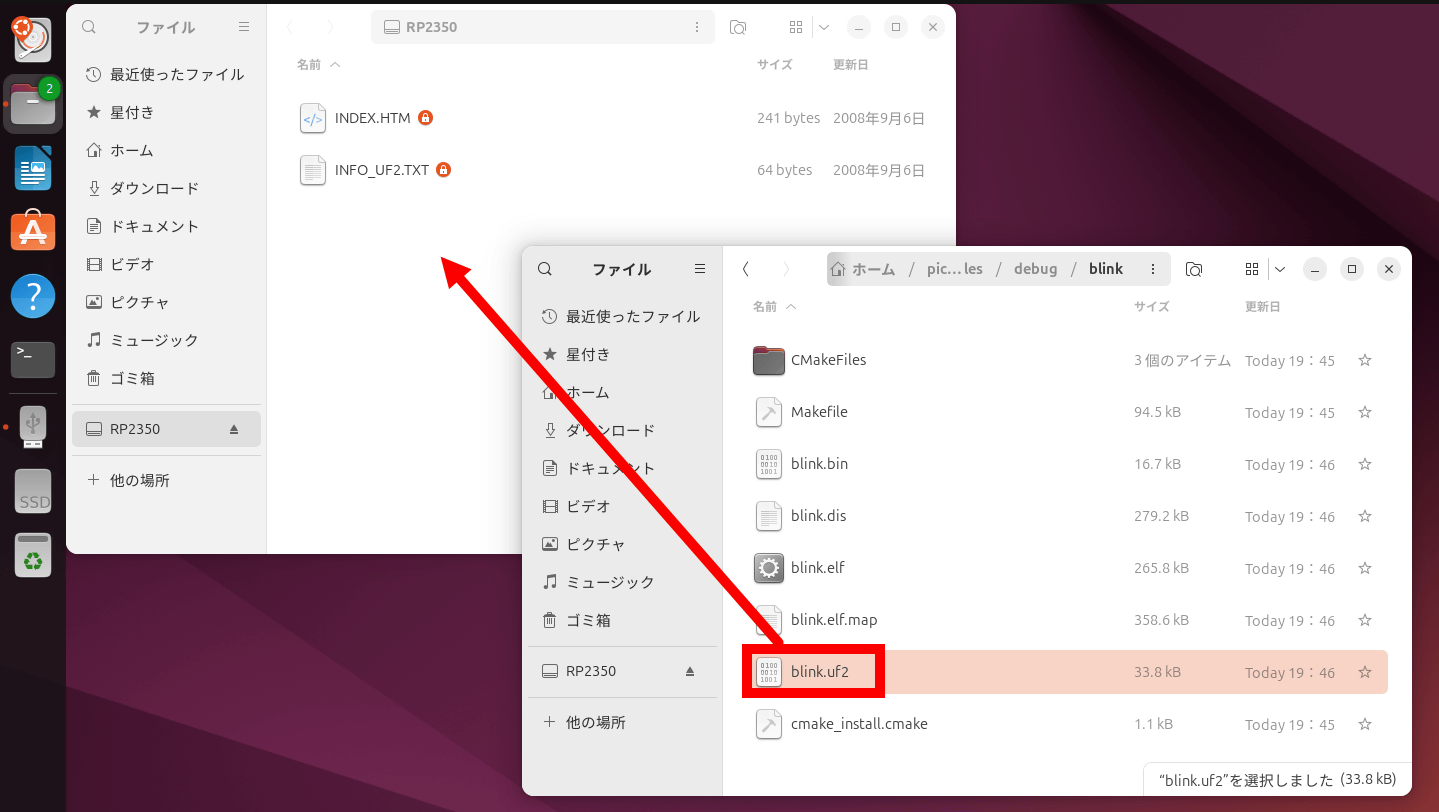
正しくコマンドを実行すると、「ホームディレクトリ/pico-examples/debug/blink」に「blink.elf」や「blink.uf2」といったファイルが出力されます。RISC-V向けにビルドできているか確認するために、以下のコマンドを実行。
file blink.elf
以下のような結果が出力されればRISC-V向けのビルドは成功です。
blink.elf: ELF 32-bit LSB executable, UCB RISC-V, RVC, soft-float ABI, version 1 (SYSV), statically linked, with debug_info, not stripped
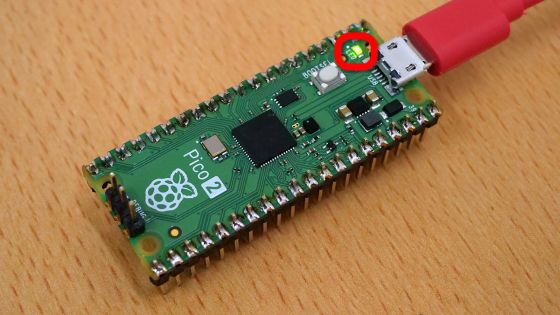
後は、Raspberry Pi Pico 2をPCに接続して「blink.uf2」をドラッグ&ドロップでコピーすればRISC-VコアでLチカを実行できるようになります。
◆3:デバッグ環境を構築
続いて、「Raspberry Pi用のOpenOCDをビルドする」「デバッガをインストール」「Raspberry Pi Pico 2にRaspberry Pi Debug Probeを装着」という操作を実行してデバッグ環境を構築します。
・Raspberry Pi用のOpenOCDをビルドする
まず、以下のコマンドを実行して必要なパッケージをインストールします。
sudo apt install -y git gcc g++ autoconf automake libtool pkg-config make libusb-1.0-0-dev libhidapi-dev libgpiod-dev libftdi1-dev openocd
続いて、Raspberry Pi用のOpenOCDのリポジトリをクローンしてビルドします。
cd

git clone https://github.com/raspberrypi/openocd.git

cd openocd

./bootstrap

./configure

make
これで、「ホームディレクトリ/openocd/src」の中にopenocdのバイナリが出力されます。
・デバッガ「gdb-multiarch」をインストール
デバッガはGDBを使います。今回はRISC-Vのデバッグに対応した「gdb-multiarch」をインストールします。
sudo apt install gdb-multiarch
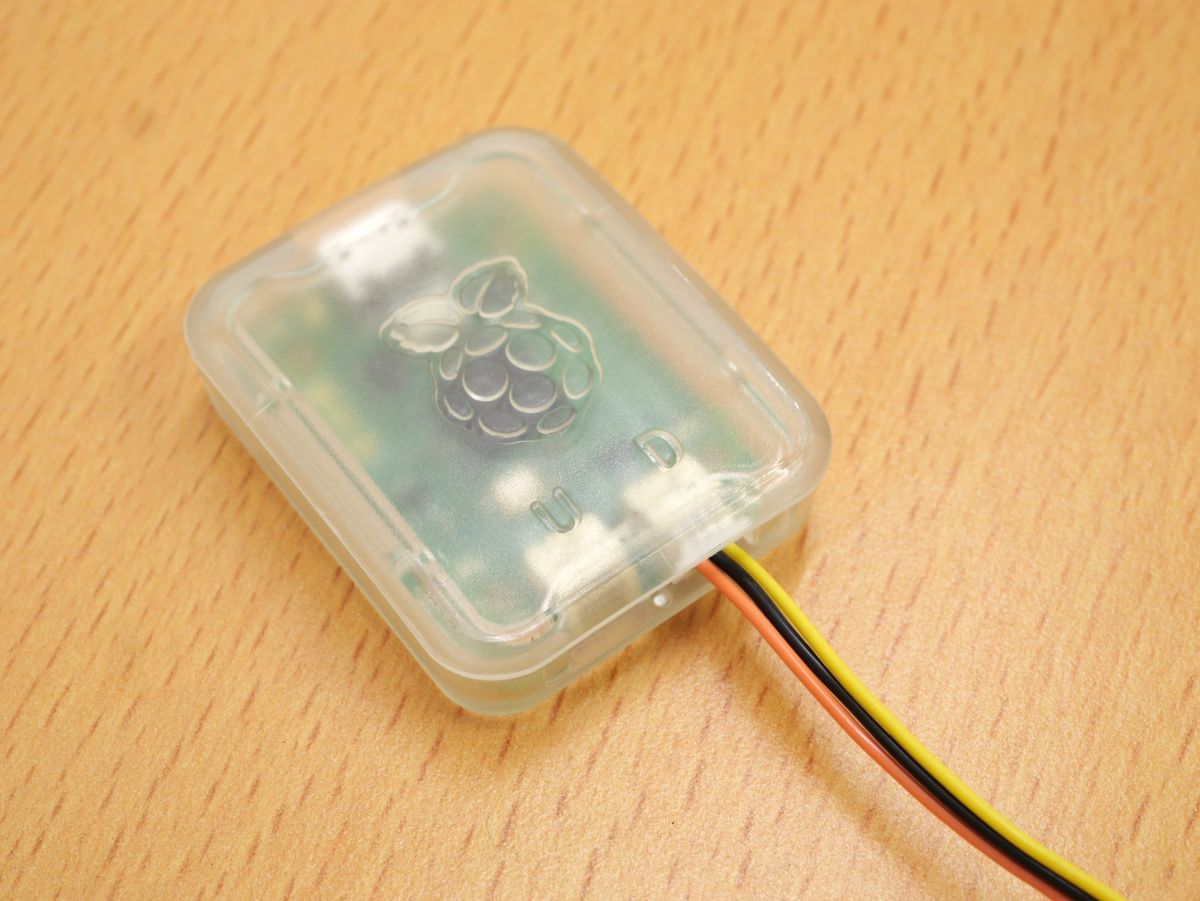
・Raspberry Pi Pico 2にRaspberry Pi Debug Probeを装着
まず、Raspberry Pi Debug ProbeのDポートに3-pin JST-SHコネクタを接続します。
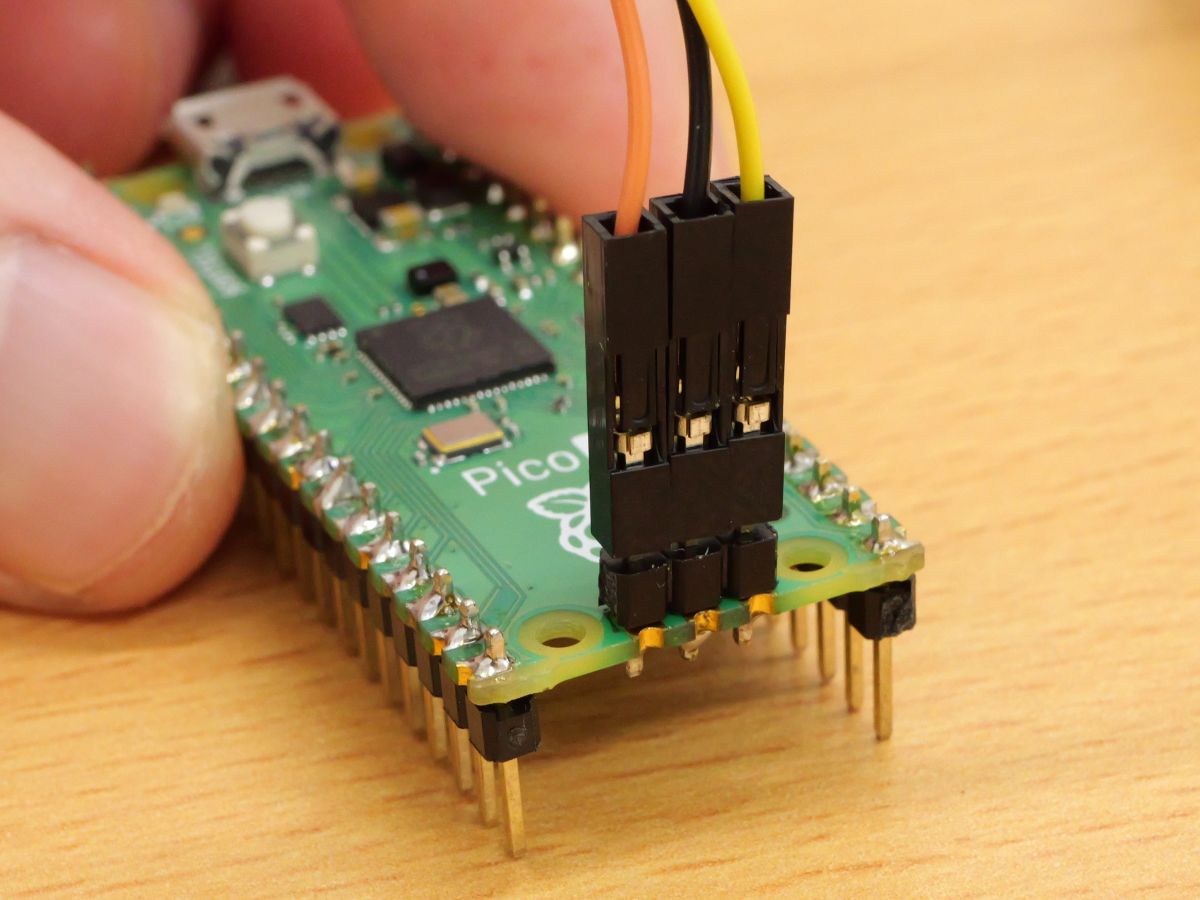
続いて、Raspberry Pi Debug ProbeをRaspberry Pi Pico 2のデバッグ用端子と接続します。オレンジ色の線を左側の「SWCLK」、黒色の線を中央の「GND」、黄色の線を右側の「SWDIO」に接続すればOK。
これでデバッグの下準備は完了です。
◆4:Lチカを実行してデバッグしてみる
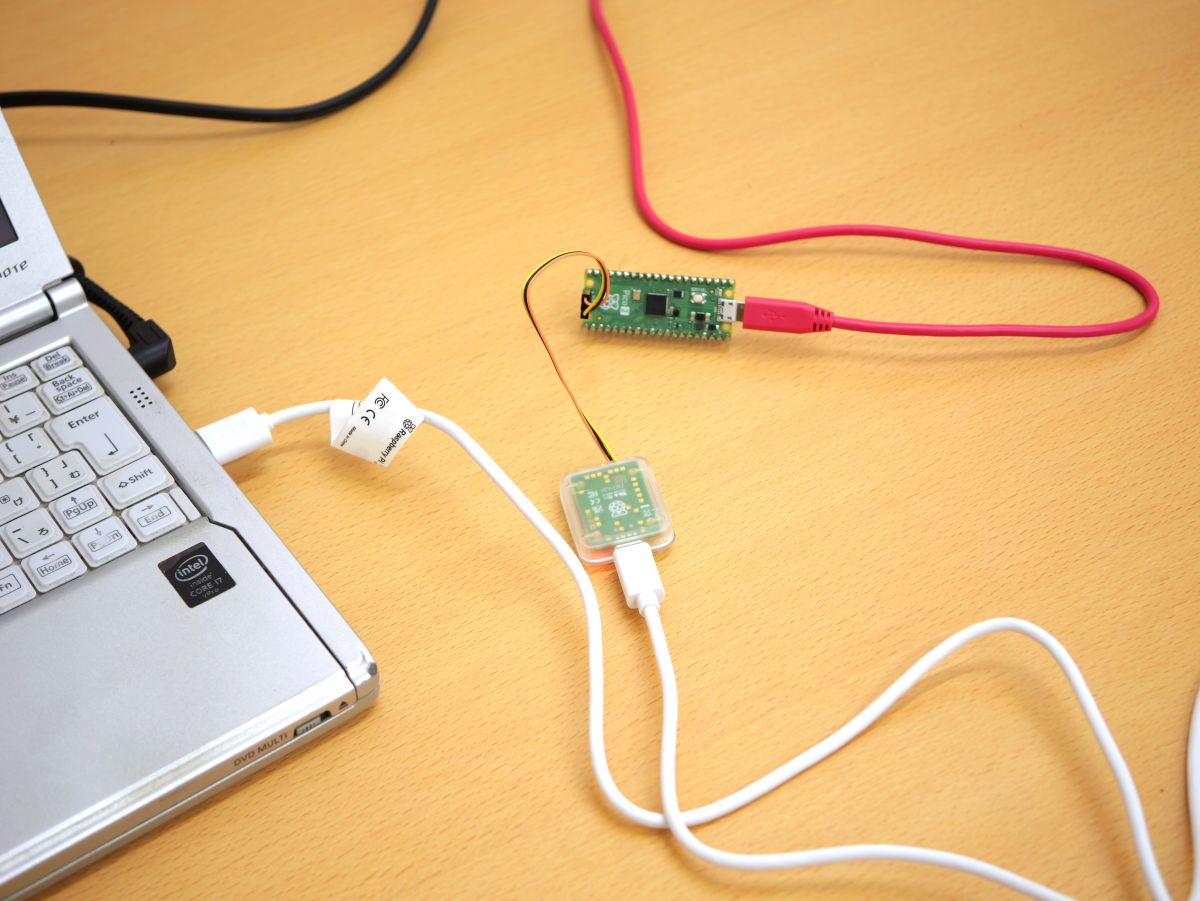
準備完了したので、実際にデバッグしてみます。まず、Raspberry Pi Pico 2を電源に接続し、Raspberry Pi Debug ProbeをPCに接続します。
続いて、OpenOCDを起動します。
cd ホームディレクトリ/openocd/src

./openocd -s ホームディレクトリ/openocd/tcl/ -f ホームディレクトリ/openocd/tcl/interface/cmsis-dap.cfg -f ホームディレクトリ/openocd/tcl/target/rp2350-riscv.cfg -c "adapter speed 5000"
以下のようなログが出力されたらOpenOCDの起動は成功です。
Open On-Chip Debugger 0.12.0+dev-gebec9504d (2024-10-03-20:49)
Licensed under GNU GPL v2
For bug reports, read
http://openocd.org/doc/doxygen/bugs.html
Info : Hardware thread awareness created
Info : Hardware thread awareness created
adapter speed: 5000 kHz
Info : Listening on port 6666 for tcl connections
Info : Listening on port 4444 for telnet connections
Info : Using CMSIS-DAPv2 interface with VID:PID=0x2e8a:0x000c, serial=E6633861A32C5038
Info : CMSIS-DAP: SWD supported
Info : CMSIS-DAP: Atomic commands supported
Info : CMSIS-DAP: Test domain timer supported
Info : CMSIS-DAP: FW Version = 2.0.0
Info : CMSIS-DAP: Interface Initialised (SWD)
Info : SWCLK/TCK = 0 SWDIO/TMS = 0 TDI = 0 TDO = 0 nTRST = 0 nRESET = 0
Info : CMSIS-DAP: Interface ready
Info : clock speed 5000 kHz
Info : SWD DPIDR 0x4c013477
Info : [rp2350.dap.core0] datacount=1 progbufsize=2
Info : [rp2350.dap.core0] Disabling abstract command reads from CSRs.
Info : [rp2350.dap.core0] Disabling abstract command writes to CSRs.
Info : [rp2350.dap.core0] Core 0 could not be made part of halt group 1.
Info : [rp2350.dap.core0] Examined RISC-V core
Info : [rp2350.dap.core0] XLEN=32, misa=0x40901105
Info : [rp2350.dap.core0] Examination succeed
Info : [rp2350.dap.core1] datacount=1 progbufsize=2
Info : [rp2350.dap.core1] Disabling abstract command reads from CSRs.
Info : [rp2350.dap.core1] Disabling abstract command writes to CSRs.
Info : [rp2350.dap.core1] Core 1 could not be made part of halt group 1.
Info : [rp2350.dap.core1] Examined RISC-V core
Info : [rp2350.dap.core1] XLEN=32, misa=0x40901105
Info : [rp2350.dap.core1] Examination succeed
Info : starting gdb server for rp2350.dap.core0 on 3333
Info : Listening on port 3333 for gdb connections
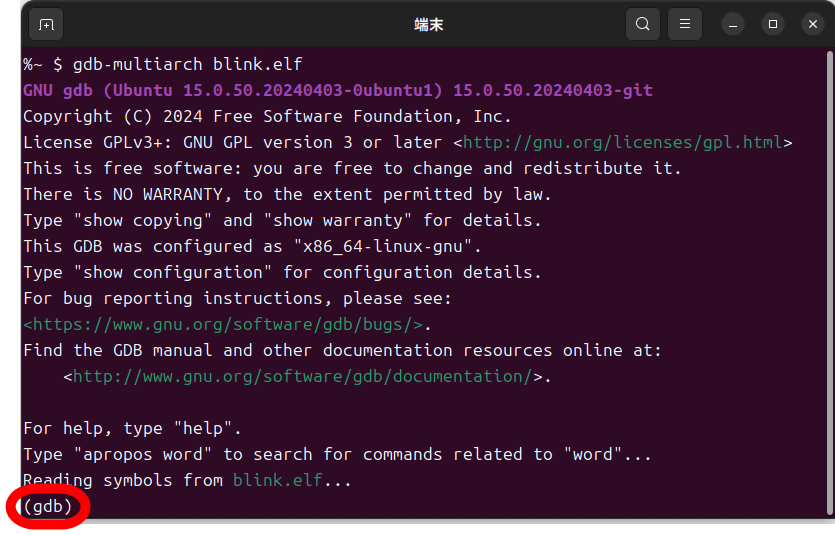
次に、ターミナルをもう1つ起動し、「ホームディレクトリ/pico-examples/debug/blink」に移動してGDBを起動します。
cd ホームディレクトリ/pico-examples/debug/blink

gdb-multiarch blink.elf
起動に成功するとGDBのコンソールが表示されます。
GDBのコンソールで以下のコマンドを順番に実行。
target remote :3333
monitor reset init
break main
continue
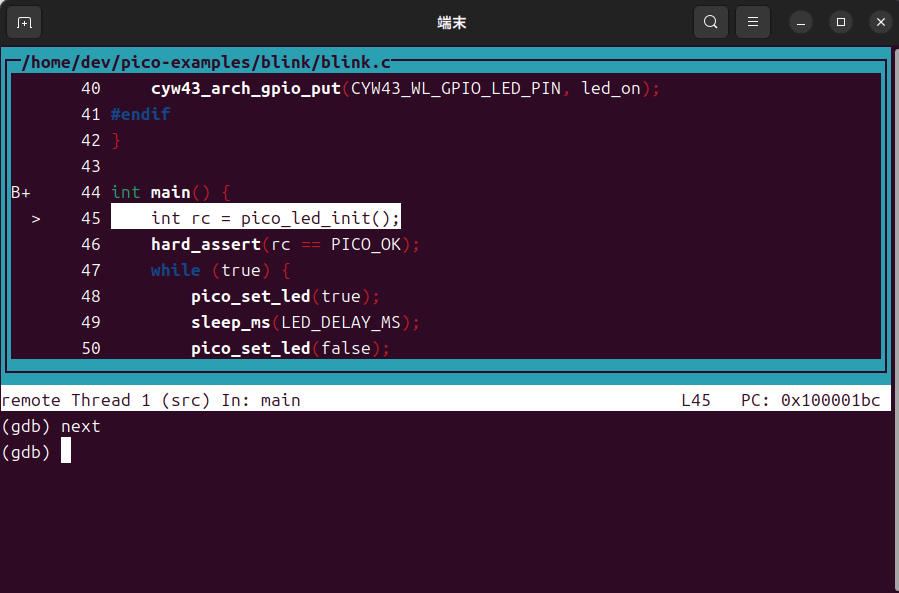
layout src
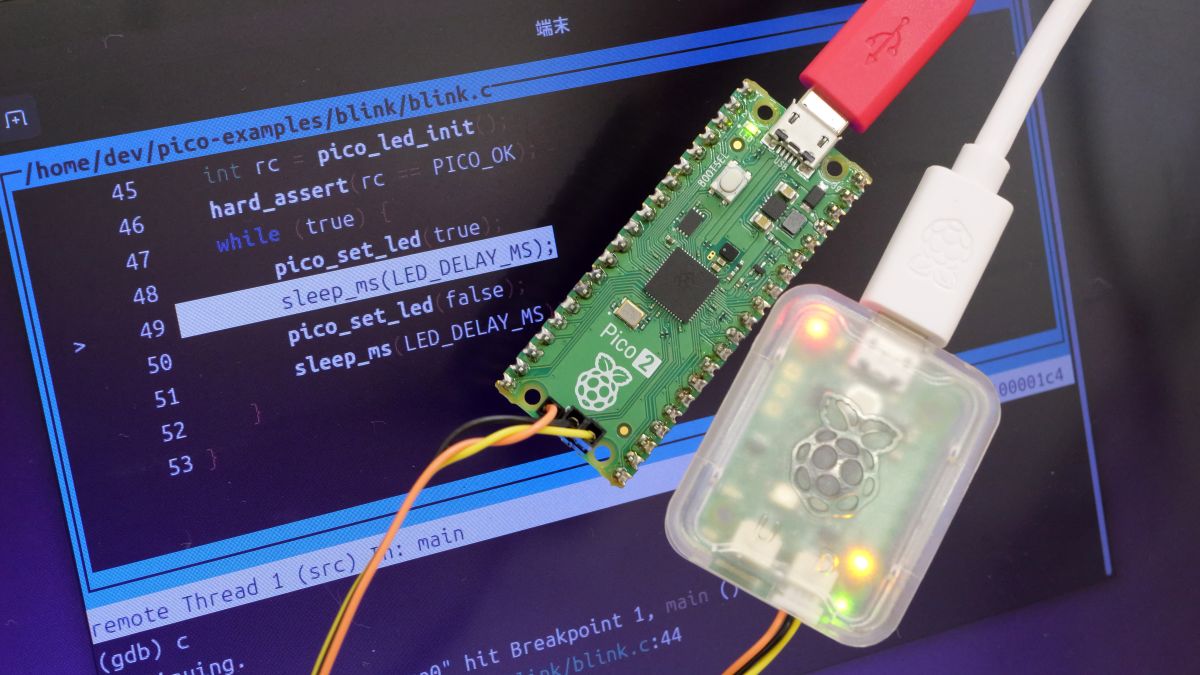
正しくコマンドを実行すると、以下のようなデバッグ画面が表示されます。後は、「next」と入力してからEnterキーを押せば、Enterキーを押すたびにプログラムが1行ずつ実行されます。
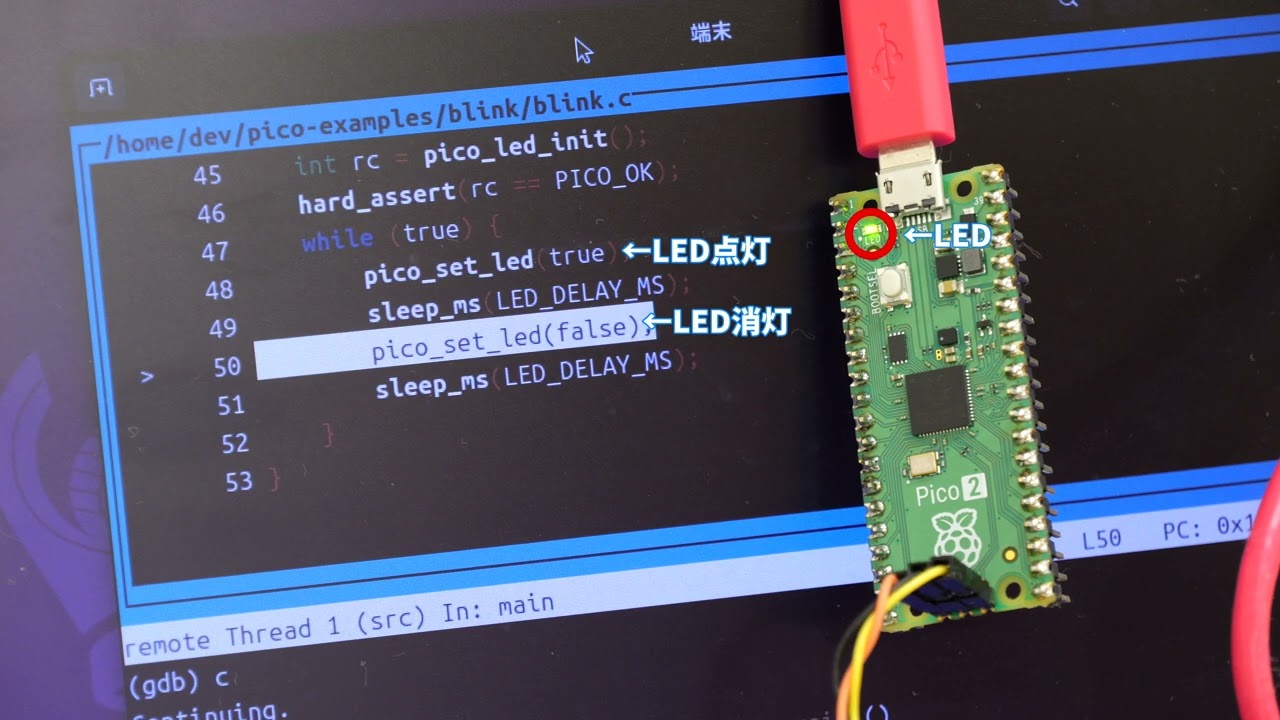
Raspberry Pi Pico 2のRISC-VコアでLチカを1行ずつ実行する動画が以下。
「Raspberry Pi Pico 2」のRISC-VコアでLチカ実行&デバッグしてみた - YouTube
なお、GDBは「quit」と入力すれば終了できます。また、OpenOCDは「Ctrl+C」で終了できます。
・関連記事
ArmコアとRISC-Vコアどっちも搭載した小型マイコンボード「Raspberry Pi Pico 2」が届いたのでフォトレビュー - GIGAZINE
「Raspberry Pi Pico 2」の開発環境を構築してLチカするまでの手順まとめ - GIGAZINE
Raspberry Pi Pico 2の省電力モードを有効にして待機電力を3V・0.05mA以下に下げてみた - GIGAZINE
Raspberry Pi 5のGIGAZINEレビュー総まとめ「必要な電源」「クーラーは必須なのか」「OSインストール手順」「M.2 SSDを接続する方法」「RTC機能の詳細」などの疑問を解決できるレビューが盛りだくさん - GIGAZINE
・関連コンテンツ


in 動画, ハードウェア, ソフトウェア, レビュー, Posted by log1o_hf
You can read the machine translated English article I tried running and debugging an LED bli….