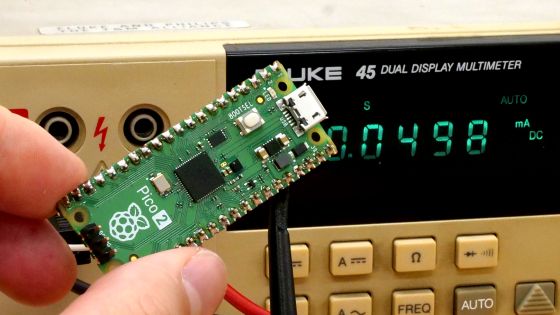
I tried running and debugging an LED blinking circuit on the RISC-V core of the 'Raspberry Pi Pico 2'
The '
Raspberry Pi Pico 2 – Raspberry Pi
https://www.raspberrypi.com/products/raspberry-pi-pico-2/
GitHub - raspberrypi/pico-examples
https://github.com/raspberrypi/pico-examples?tab=readme-ov-file
·table of contents
◆1: What to prepare
◆2: Build the LED blinking code for the RISC-V core
◆3: Build a debugging environment
◆4: Try blinking the LED and debugging
◆1: What to prepare
This time, I will try to run and debug the LED blinking using the Raspberry Pi Pico 2 and Raspberry Pi Debug Probe provided by the Raspberry Pi development team. I will use Ubuntu for building and debugging.
◆2: Build the LED blinking code for the RISC-V core
First, build the source code for the LED blinking program included in
Summary of steps to build a development environment for 'Raspberry Pi Pico 2' and blink LED - GIGAZINE
Once you have created the build environment, download and extract the RISC-V compiler. In this example, I downloaded and extracted it to my home directory.
[code]cd
wget https://buildbot.embecosm.com/job/corev-gcc-ubuntu2204/47/artifact/corev-openhw-gcc-ubuntu2204-20240530.tar.gz
tar -zxvf corev-openhw-gcc-ubuntu2204-20240530.tar.gz[/code]
Next, go to the cloned destination of the sample code repository, create a directory for debugging, and build 'blink', which contains the code for blinking the LED. To build for RISC-V, simply add the compiler specification option ' -DPICO_TOOLCHAIN_PATH=home directory/corev-openhw-gcc-ubuntu2204-20240530 ' and architecture specification option ' -DPICO_PLATFORM=rp2350-riscv ' to 'cmake'. Since I also wanted to debug this time, I also added the option ' -DCMAKE_BUILD_TYPE=Debug '.
[code]cd pico-examples
mkdir debug
cd debug
cmake -DPICO_TOOLCHAIN_PATH=HOME_DIRECTORY/corev-openhw-gcc-ubuntu2204-20240530 -DPICO_PLATFORM=rp2350-riscv -DCMAKE_BUILD_TYPE=Debug ..
cd blink
make[/code]
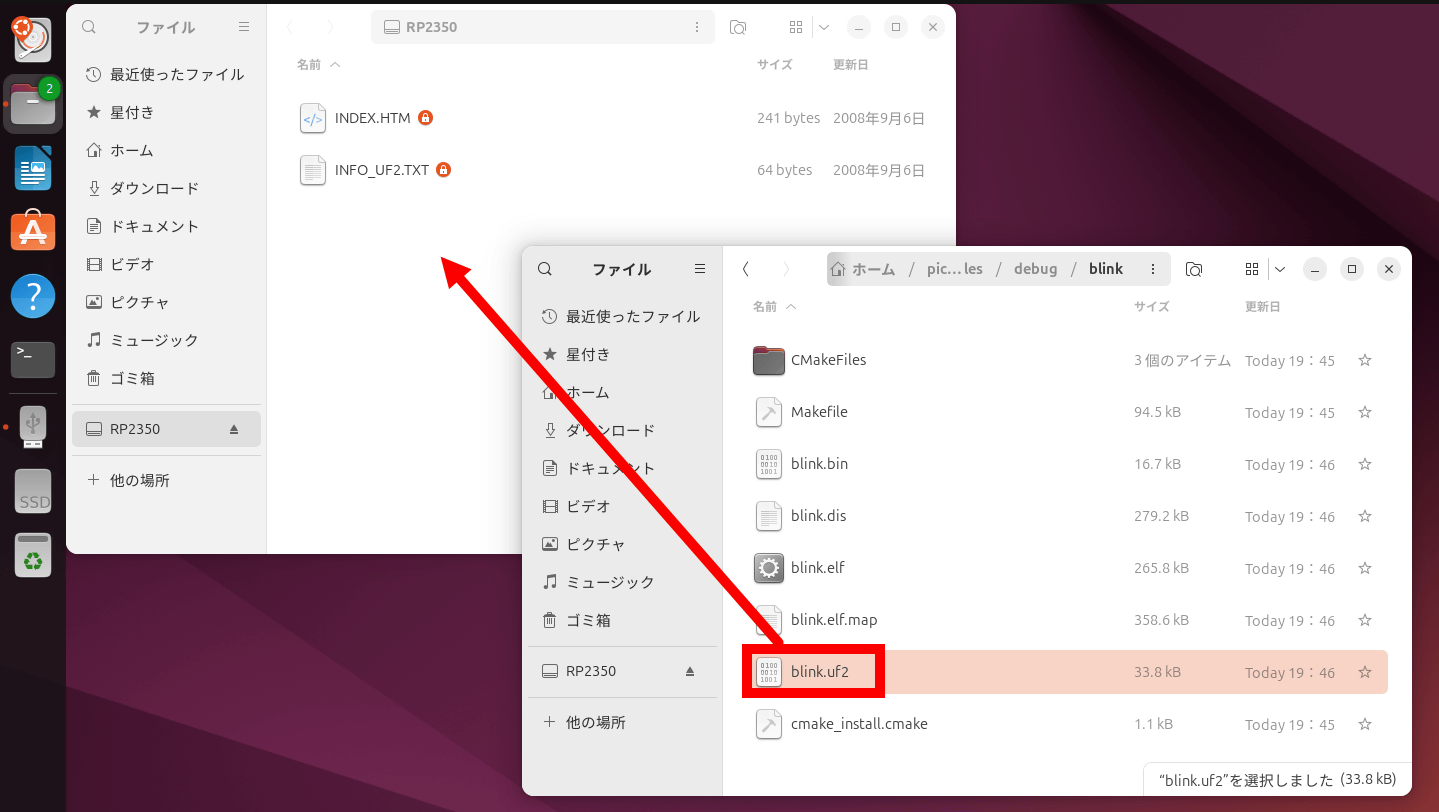
If you run the command correctly, files such as ' blink.elf ' and ' blink.uf2 ' will be output to 'home directory/pico-examples/debug/blink'. To check if it has been built for RISC-V, run the following command.
[code]file blink.elf[/code]
If the following output is displayed, the build for RISC-V is successful.
blink.elf: ELF 32-bit LSB executable, UCB RISC-V , RVC, soft-float ABI, version 1 (SYSV), statically linked, with debug_info, not stripped
After that, connect the Raspberry Pi Pico 2 to your PC and copy “ blink.uf2 ” by dragging and dropping it, and you will be able to blink the LED on the RISC-V core.
◆3: Build a debugging environment
Next, build the debugging environment by performing the following operations: 'Build
・Build OpenOCD for Raspberry Pi
First, install the required packages by running the following commands:
[code]sudo apt install -y git gcc g++ autoconf automake libtool pkg-config make libusb-1.0-0-dev libhidapi-dev libgpiod-dev libftdi1-dev openocd[/code]
Next, clone the OpenOCD repository for Raspberry Pi and build it.
[code]cd
git clone https://github.com/raspberrypi/openocd.git
cd openocd
./bootstrap
./configure
make[/code]
This will output the openocd binary to 'home directory/openocd/src'.
・Install the debugger 'gdb-multiarch'
We will use GDB as the debugger. This time, we will install 'gdb-multiarch' which supports RISC-V debugging.
[code]sudo apt install gdb-multiarch[/code]
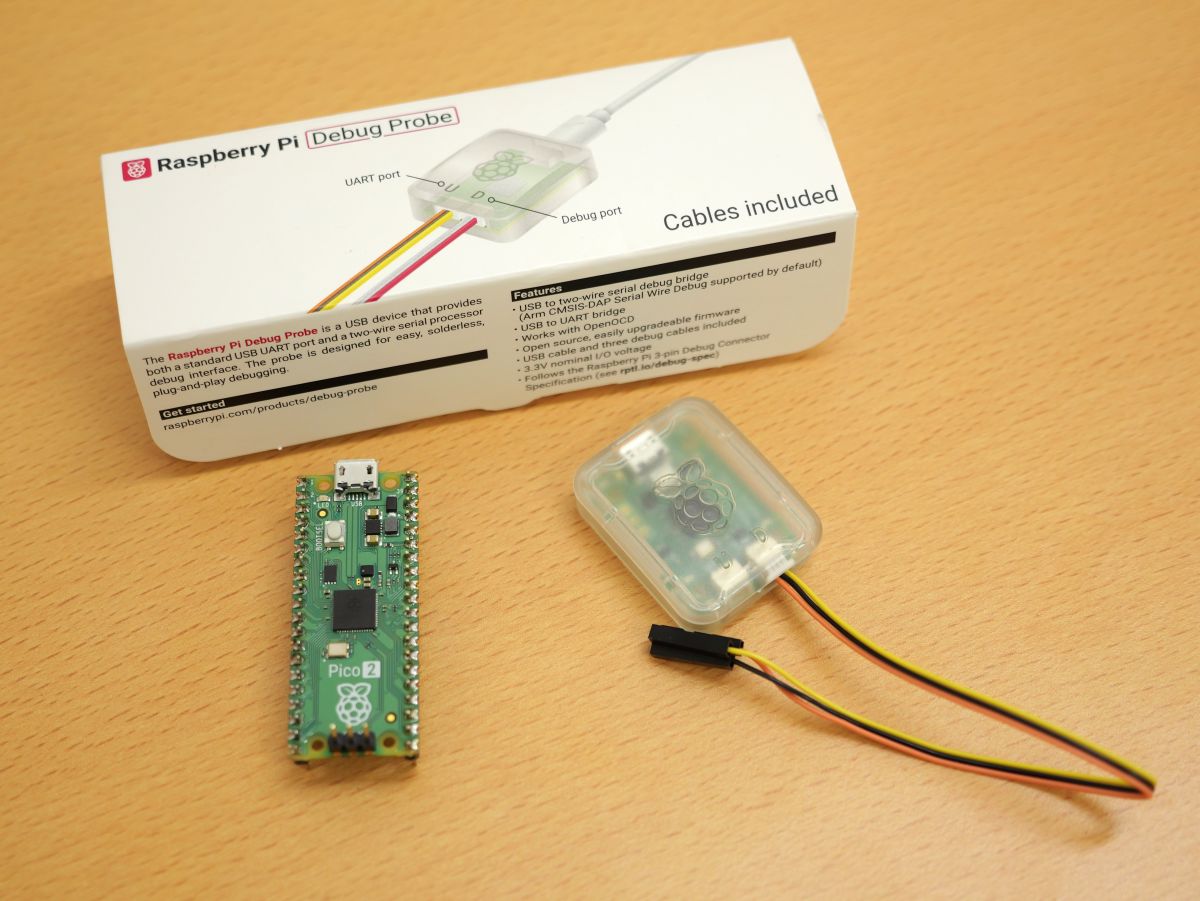
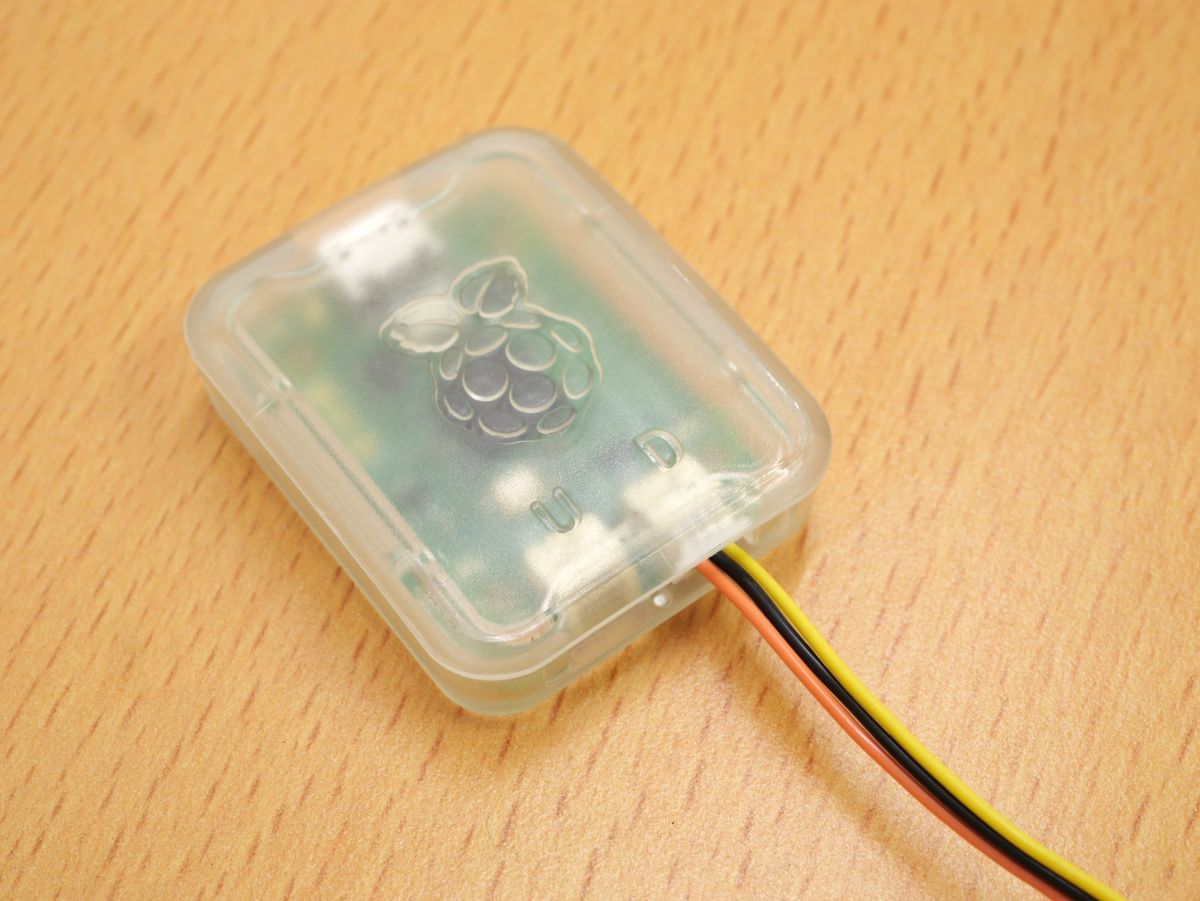
・Attach the Raspberry Pi Debug Probe to the Raspberry Pi Pico 2
First, connect the 3-pin JST-SH connector to the D port of the Raspberry Pi Debug Probe.
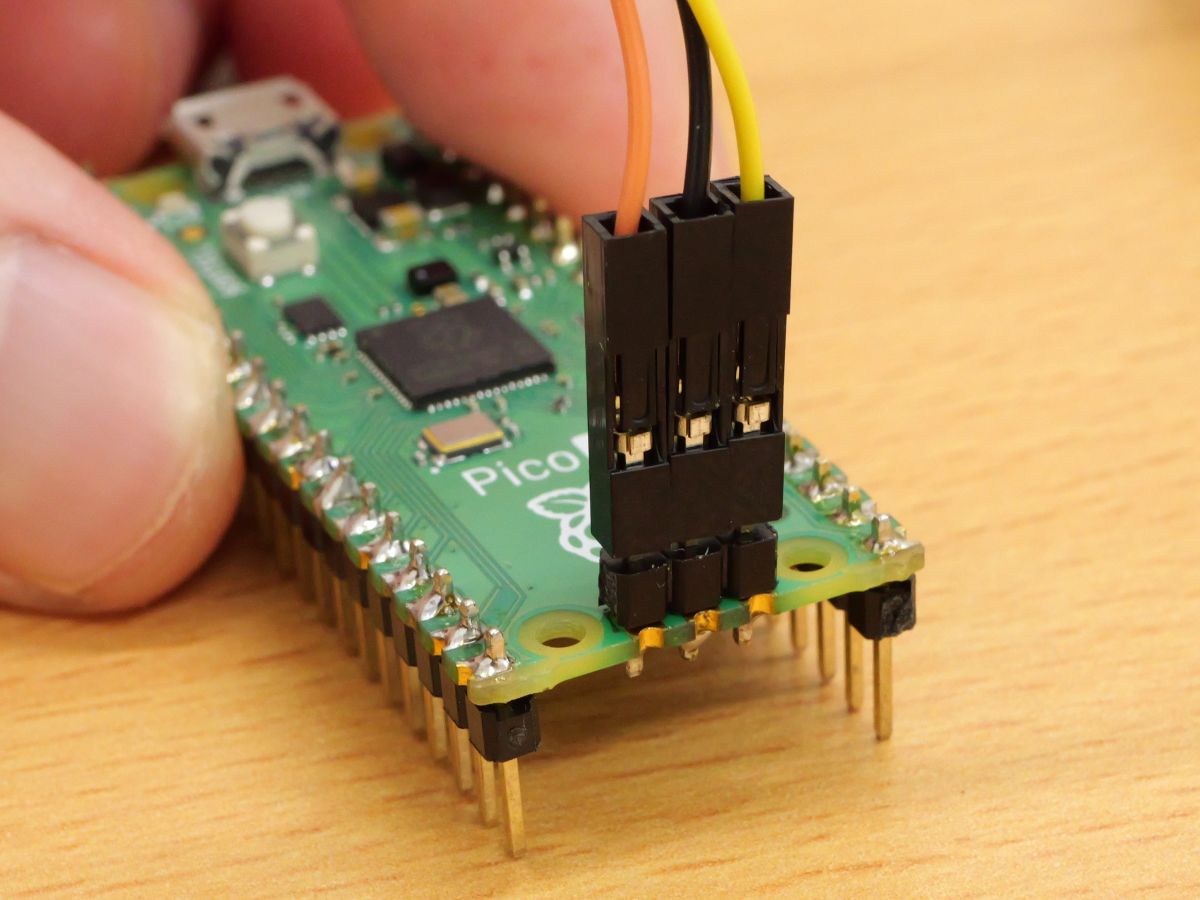
Next, connect the Raspberry Pi Debug Probe to the debug terminal of the Raspberry Pi Pico 2. Connect the orange wire to 'SWCLK' on the left, the black wire to 'GND' in the center, and the yellow wire to 'SWDIO' on the right.
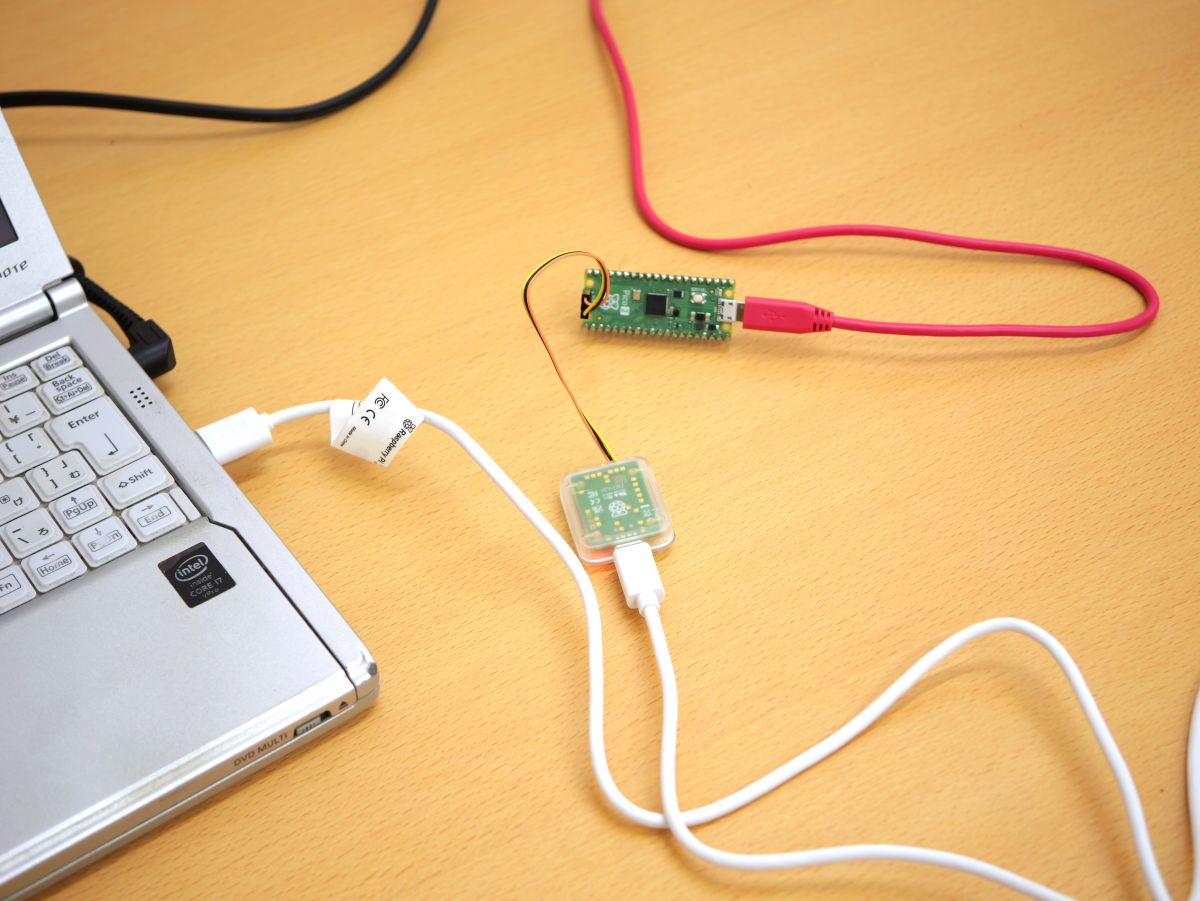
This completes the preparation for debugging.
◆4: Try blinking the LED and debugging
Now that we're ready, let's actually debug it. First, connect the Raspberry Pi Pico 2 to a power source and connect the Raspberry Pi Debug Probe to your PC.
Next, start OpenOCD.
[code]cd home directory/openocd/src
./openocd -s HOME_DIRECTORY/openocd/tcl/ -f HOME_DIRECTORY/openocd/tcl/interface/cmsis-dap.cfg -f HOME_DIRECTORY/openocd/tcl/target/rp2350-riscv.cfg -c 'adapter speed 5000'[/code]
If the following log is output, OpenOCD has started successfully.
Open On-Chip Debugger 0.12.0+dev-gebec9504d (2024-10-03-20:49)
Licensed under GNU GPL v2
For bug reports, read
http://openocd.org/doc/doxygen/bugs.html
Info : Hardware thread awareness created
Info : Hardware thread awareness created
Adapter speed: 5000 kHz
Info : Listening on port 6666 for tcl connections
Info : Listening on port 4444 for telnet connections
Info : Using CMSIS-DAPv2 interface with VID:PID=0x2e8a:0x000c, serial=E6633861A32C5038
Info: CMSIS-DAP: SWD supported
Info: CMSIS-DAP: Atomic commands supported
Info: CMSIS-DAP: Test domain timer supported
Info: CMSIS-DAP: FW Version = 2.0.0
Info : CMSIS-DAP: Interface Initialised (SWD)
Info: SWCLK/TCK = 0 SWDIO/TMS = 0 TDI = 0 TDO = 0 nTRST = 0 nRESET = 0
Info: CMSIS-DAP: Interface ready
Info: clock speed 5000kHz
Info : SWD DPIDR 0x4c013477
Info: [rp2350.dap.core0] datacount=1 progbufsize=2
Info : [rp2350.dap.core0] Disabling abstract command reads from CSRs.
Info : [rp2350.dap.core0] Disabling abstract command writes to CSRs.
Info : [rp2350.dap.core0] Core 0 could not be made part of halt group 1.
Info: [rp2350.dap.core0] Examined RISC-V core
Info : [rp2350.dap.core0] XLEN=32, misa=0x40901105
Info : [rp2350.dap.core0] Examination succeed
Info: [rp2350.dap.core1] datacount=1 progbufsize=2
Info : [rp2350.dap.core1] Disabling abstract command reads from CSRs.
Info : [rp2350.dap.core1] Disabling abstract command writes to CSRs.
Info : [rp2350.dap.core1] Core 1 could not be made part of halt group 1.
Info: [rp2350.dap.core1] Examined RISC-V core
Info : [rp2350.dap.core1] XLEN=32, misa=0x40901105
Info : [rp2350.dap.core1] Examination succeed
Info : starting gdb server for rp2350.dap.core0 on 3333
Info : Listening on port 3333 for gdb connections
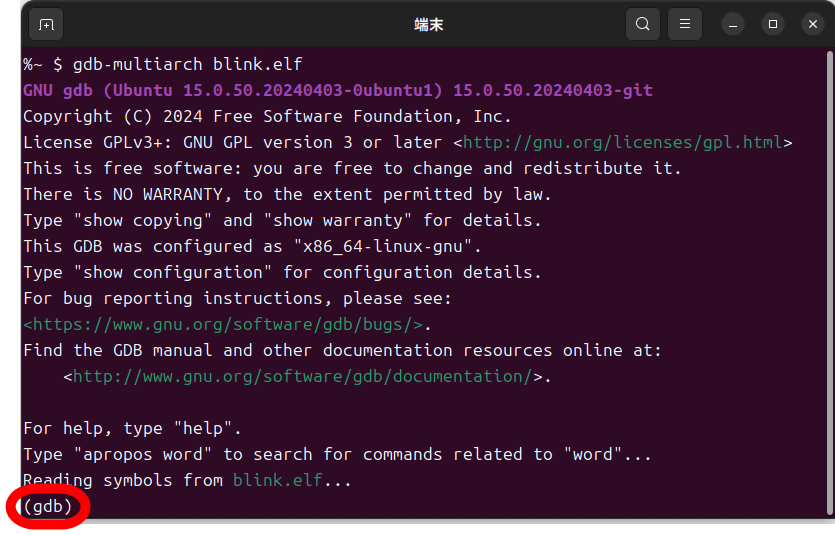
Next, start another terminal, navigate to 'home directory/pico-examples/debug/blink' and start GDB.
[code]cd home directory/pico-examples/debug/blink
gdb-multiarch blink.elf[/code]
If the startup is successful, the GDB console will be displayed.
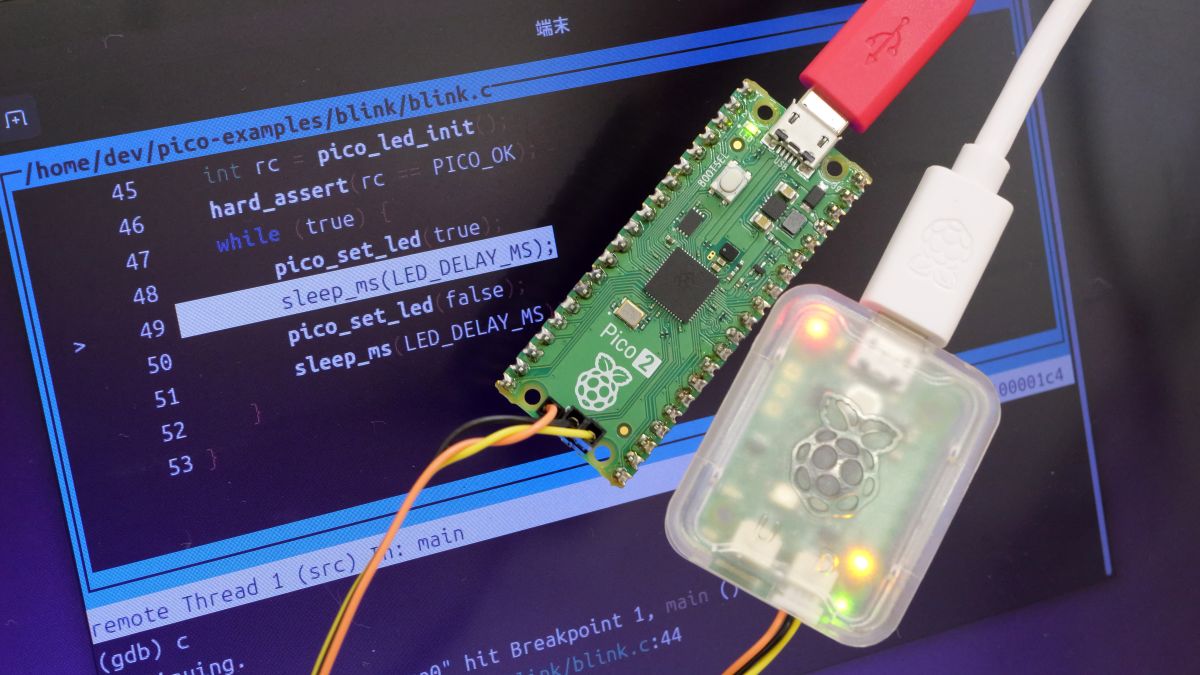
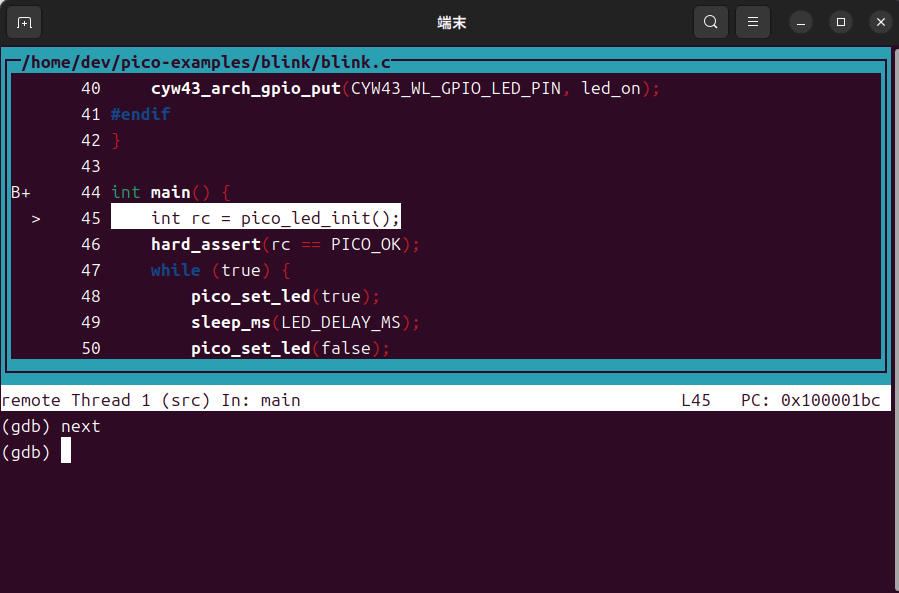
Execute the following commands in the GDB console in order:
[code]target remote :3333
monitor reset init
break main
continue
layout src[/code]
If you execute the command correctly, the following debug screen will be displayed. Then, enter ' next ' and press the Enter key. Each time you press the Enter key, the program will be executed one line at a time.
Below is a video showing the LED blinking line by line on the Raspberry Pi Pico 2's RISC-V core.
I tried running and debugging an LED blinking on the RISC-V core of 'Raspberry Pi Pico 2' - YouTube
You can exit GDB by typing 'quit' and OpenOCD by pressing 'Ctrl + C'.
Related Posts: