I made a device to solve the problem of delays in Bluetooth audio output on the Nintendo Switch [Raspberry Pi Pico 2 W]
The Nintendo Switch
GitHub - wasdwasd0105/PicoW-usb2bt-audio: Transform your Raspberry Pi Pico W into a USB to Bluetooth Audio Adapter.
https://github.com/wasdwasd0105/PicoW-usb2bt-audio
Connecting to the Internet with Raspberry Pi Pico W-series.: Getting online with C/C++ or MicroPython on W-series devices. - connecting-to-the-internet-with-pico-w.pdf
(PDF file) https://datasheets.raspberrypi.com/picow/connecting-to-the-internet-with-pico-w.pdf
·table of contents
◆1: Examples of audio delay on Nintendo Switch and how to solve it
◆2: Creating a build environment for Raspberry Pi Pico 2 W
◆3: Build the Pico W USB Audio to Bluetooth Adapter
◆4: Write to Raspberry Pi Pico 2 W
◆5: Resolves audio delay on Nintendo Switch
Bonus: Can also run on RISC-V cores
◆1: Examples of audio delay on Nintendo Switch and how to solve them
The Nintendo Switch's Bluetooth audio output can have a large delay depending on the type of audio device. When tested by the GIGAZINE editorial department, a large delay occurred when outputting audio from the Bluetooth speaker ' Anker PowerConf '.
Below is a video comparing 'audio output from the Nintendo Switch console' and 'audio output from a Bluetooth speaker.' You can see that the audio from the Bluetooth speaker is output one beat later than the button operation.
While searching for a solution to the audio delay, I discovered someone who had built a system that 'has the Nintendo Switch recognize the Raspberry Pi Pico W as a USB audio device and outputs the audio of the Nintendo Switch to a Bluetooth speaker via the Raspberry Pi Pico W.' With this method, Bluetooth processing can be performed on the Raspberry Pi Pico W instead of the Nintendo Switch, so audio delay can be reduced.
Raspberry Pi Pico W USB Audio to Bluetooth Adapter: Testing on Switch and Windows - YouTube
The above video was made possible by writing software called ' Pico W USB Audio to Bluetooth Adapter ' to the Raspberry Pi Pico W.

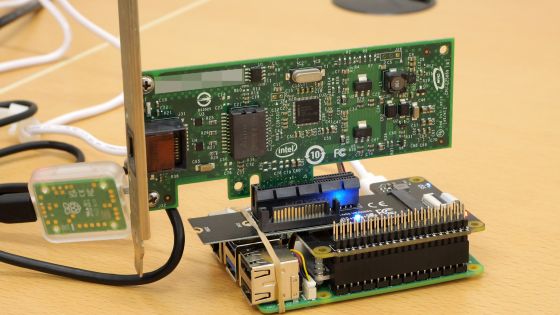
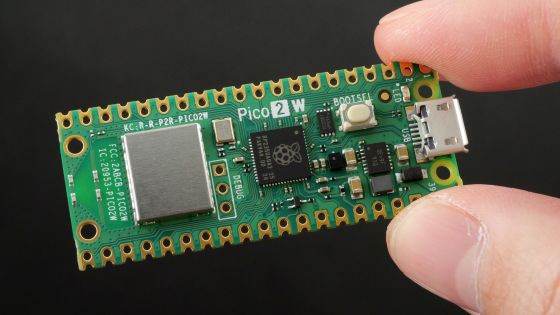
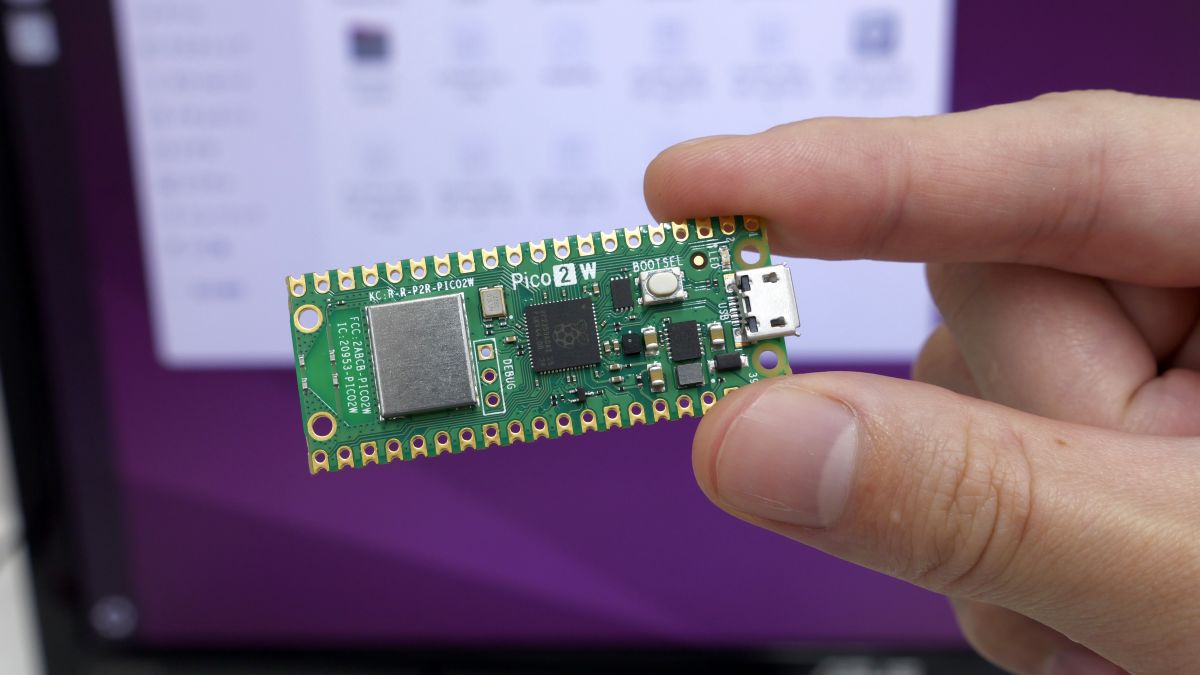
So I decided to actually build the Pico W USB Audio to Bluetooth Adapter and write it to the Raspberry Pi Pico 2 W to use it. You can check what kind of device the Raspberry Pi Pico 2 W is in the following article. At the time of writing this article, the Raspberry Pi Pico 2 W has not obtained technical certification, so I used it after submitting a notification of the '
A microcomputer 'Raspberry Pi Pico 2 W' that can use Wi-Fi and Bluetooth has arrived, so a quick photo review - GIGAZINE
◆2: Creating a build environment for Raspberry Pi Pico 2 W
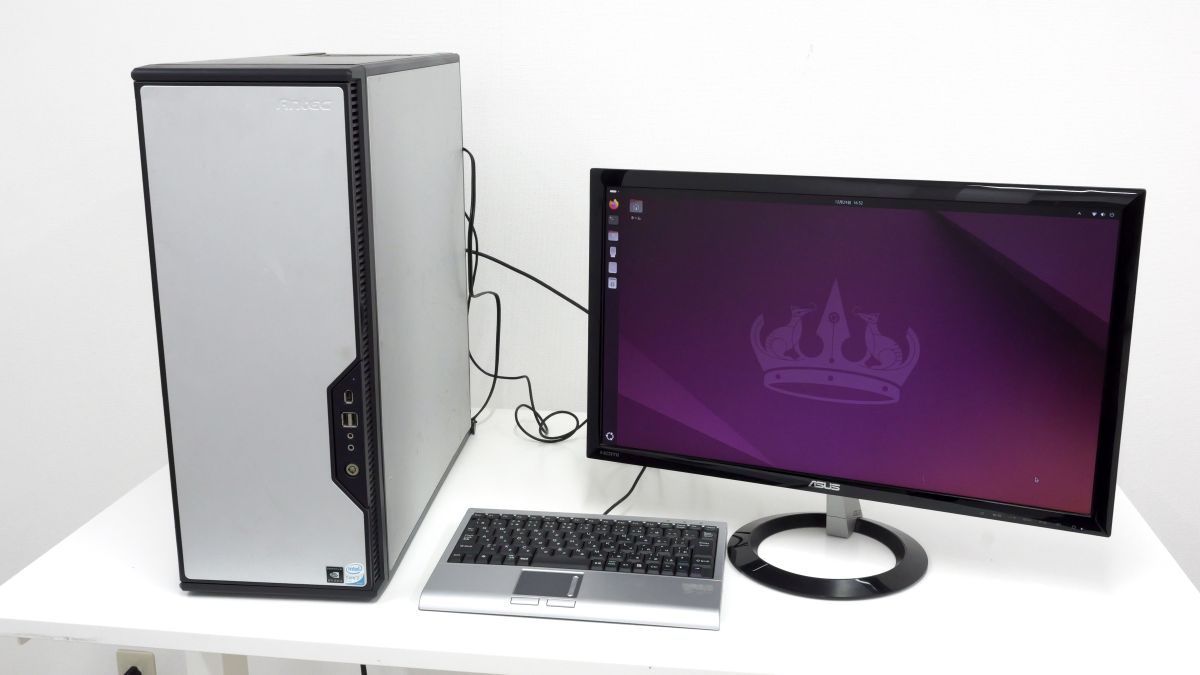
The build environment for Raspberry Pi Pico 2 W can be built on either Windows or Linux. This time, we will build the build environment on an Ubuntu machine.
First, install the necessary packages, including CMake, by running the following commands:
[code]sudo apt install cmake gcc-arm-none-eabi libnewlib-arm-none-eabi libstdc++-arm-none-eabi-newlib[/code]
Next, clone the ' Raspberry Pi Pico SDK ' repository managed on GitHub. In this example, we cloned it directly into the home directory.
[code]git clone https://github.com/raspberrypi/pico-sdk.git[/code]
Once the repository has been cloned, set the environment variables. Open '.bashrc' in any editor and add the following lines:
[code]export PICO_SDK_PATH=$HOME/pico-sdk[/code]
Go to 'home directory/pico-sdk' and update the submodule to complete the environment setup.
[code]cd pico-sdk
git submodule update --init[/code]
Next, let's build the official Raspberry Pi sample software to check if the environment has been set up correctly. First, clone the official sample repository directly into your home directory.
[code]cd
git clone https://github.com/raspberrypi/pico-examples.git[/code]
Execute the following command to build the sample for the Raspberry Pi Pico W series. Replace ○○○○ with the SSID of your Wi-Fi router, and △△△△ with your Wi-Fi password.
[code]cd pico-examples
mkdir build-2w
cd build-2w
cmake -DPICO_BOARD=pico2_w -DWIFI_SSID=○○○○ -DWIFI_PASSWORD=△△△△ ..
cd pico_w
make[/code]
If the build completes without errors, the environment setup is successful.
◆3: Build Pico W USB Audio to Bluetooth Adapter
Clone the Pico W USB Audio to Bluetooth Adapter repository and the repository containing the additional libraries required for building directly into your home directory.
[code]cd
git clone https://github.com/raspberrypi/pico-extras.git
git clone https://github.com/wasdwasd0105/PicoW-usb2bt-audio.git[/code]
Move inside 'PicoW-usb2bt-audio'.
[code]cd PicoW-usb2bt-audio[/code]
The 'CMakeLists.txt' required for building is saved in the 'PicoW-usb2bt-audio' directory, but at the time of writing this article, there is a problem in that 'the part specifying the SDK save location is hard-coded with the author's environment values.' Therefore, open 'CMakeLists.txt' in any editor and overwrite it with the values of your environment.
The part that says ' set(PICO_SDK_PATH '/Users/wasdwasd0105/pico/pico-sdk') ' is the problematic part.
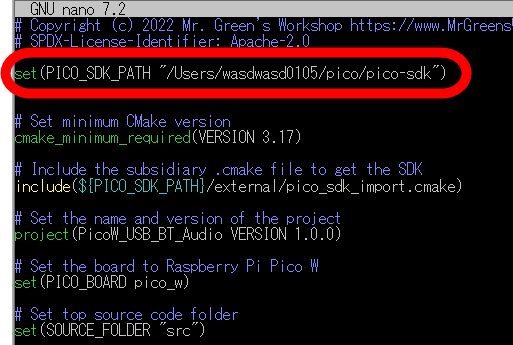
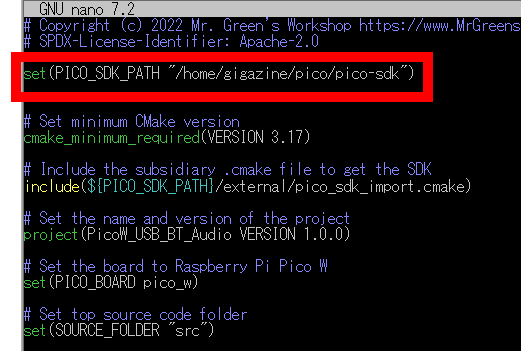
Change it to ' set(PICO_SDK_PATH 'Home directory/pico/pico-sdk') ' and save it overwriting.
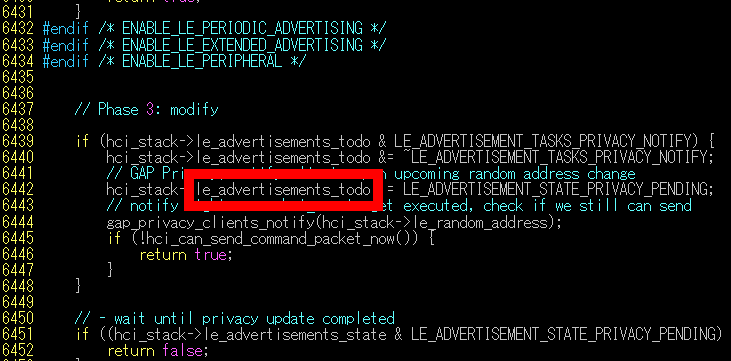
In addition, there is a problem where the build will fail unless you change ' le_advertisements_state ' to ' le_advertisements_todo ' on lines 6442, 6451, and 10,769 of 'home_directory/pico/pico-sdk/lib/btstack/src/hci.c', so you can fix this using an editor of your choice.
The part that needs to be rewritten is ' le_advertisements_state ' on line 6442.
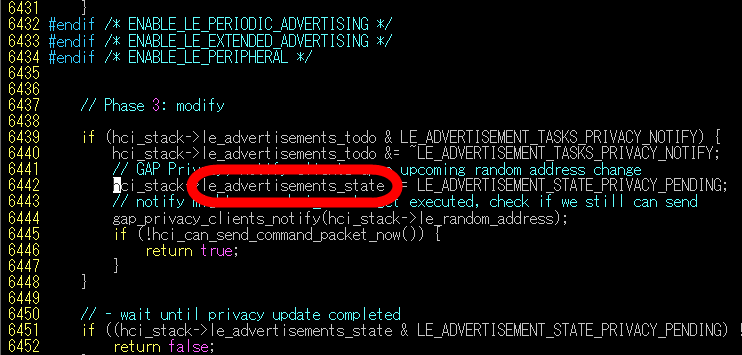
Just change it to ' le_advertisements_todo ' and save it. Similarly, replace ' le_advertisements_state ' on lines 6451 and 10,769 with ' le_advertisements_todo '.
Once you have finished modifying the code, create a working directory and build it. In this example, we built it in a directory called 'build-2w'.
[code]mkdir build-2w
cd build-2w
cmake -DPICO_EXTRAS_PATH=HOME_DIRECTORY/pico-extras -DPICO_BOARD=pico2_w ..
make[/code]
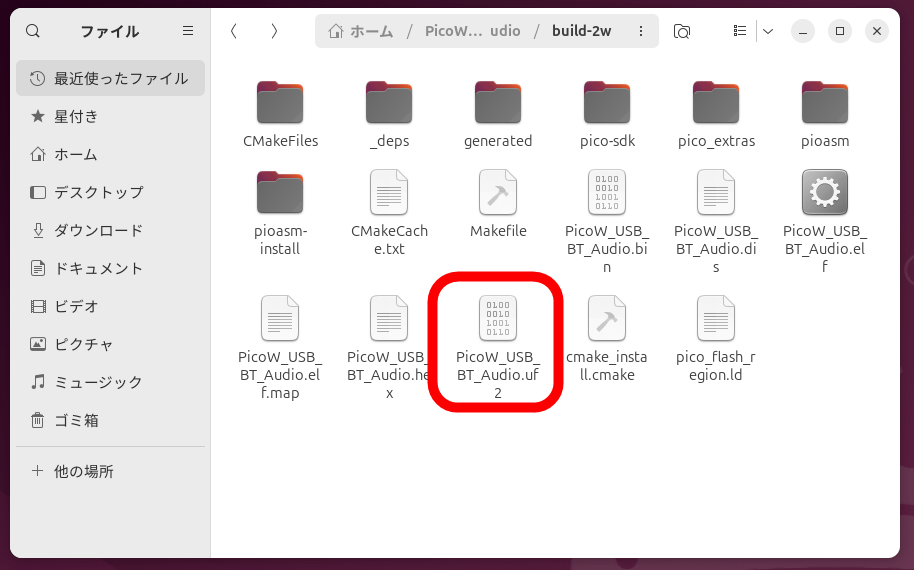
If the file ' PicoW_USB_BT_Audio.uf2 ' is output to 'Home directory/PicoW-usb2bt-audio/build-2w', the build is successful.
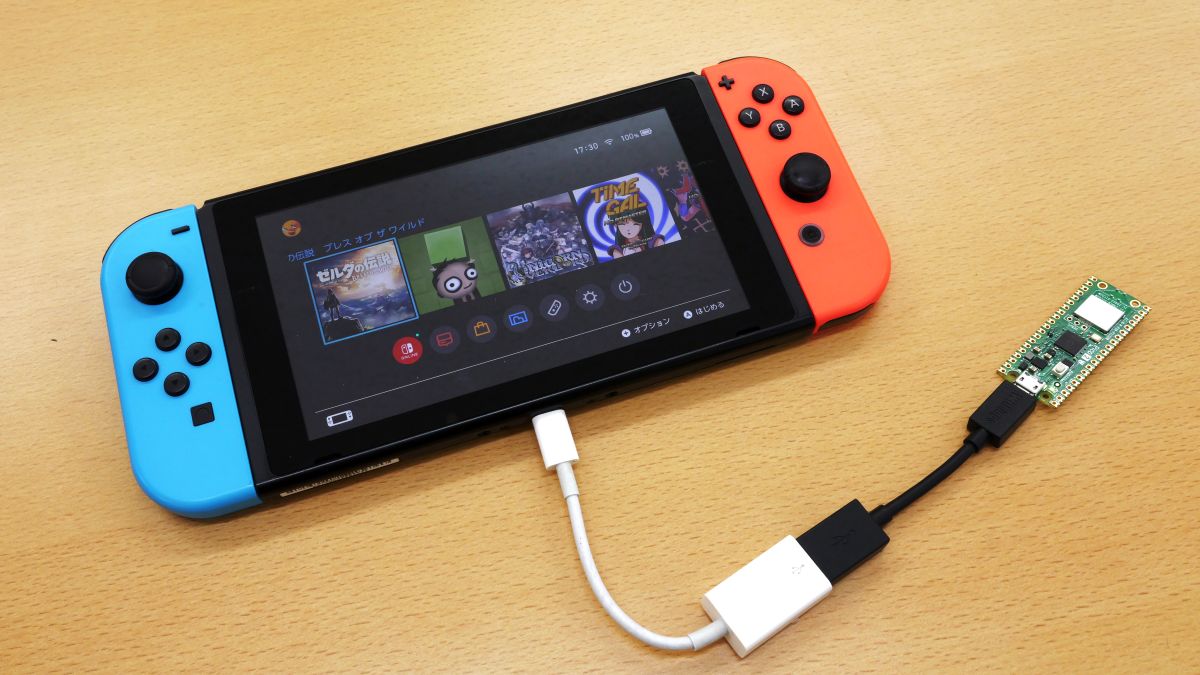
◆4: Write to Raspberry Pi Pico 2 W
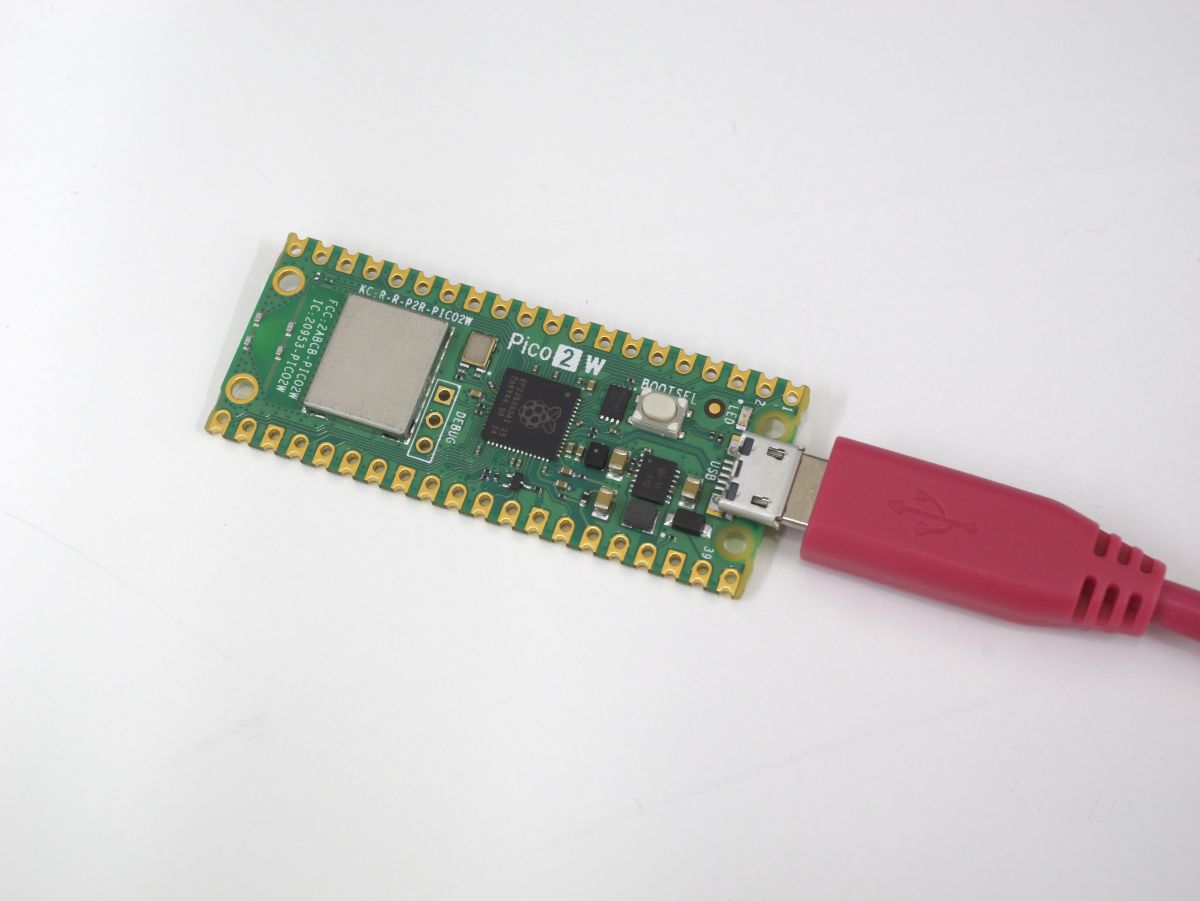
Write the output PicoW_USB_BT_Audio.uf2 to the Raspberry Pi Pico 2 W. First, prepare the Raspberry Pi Pico 2 W and a USB cable.
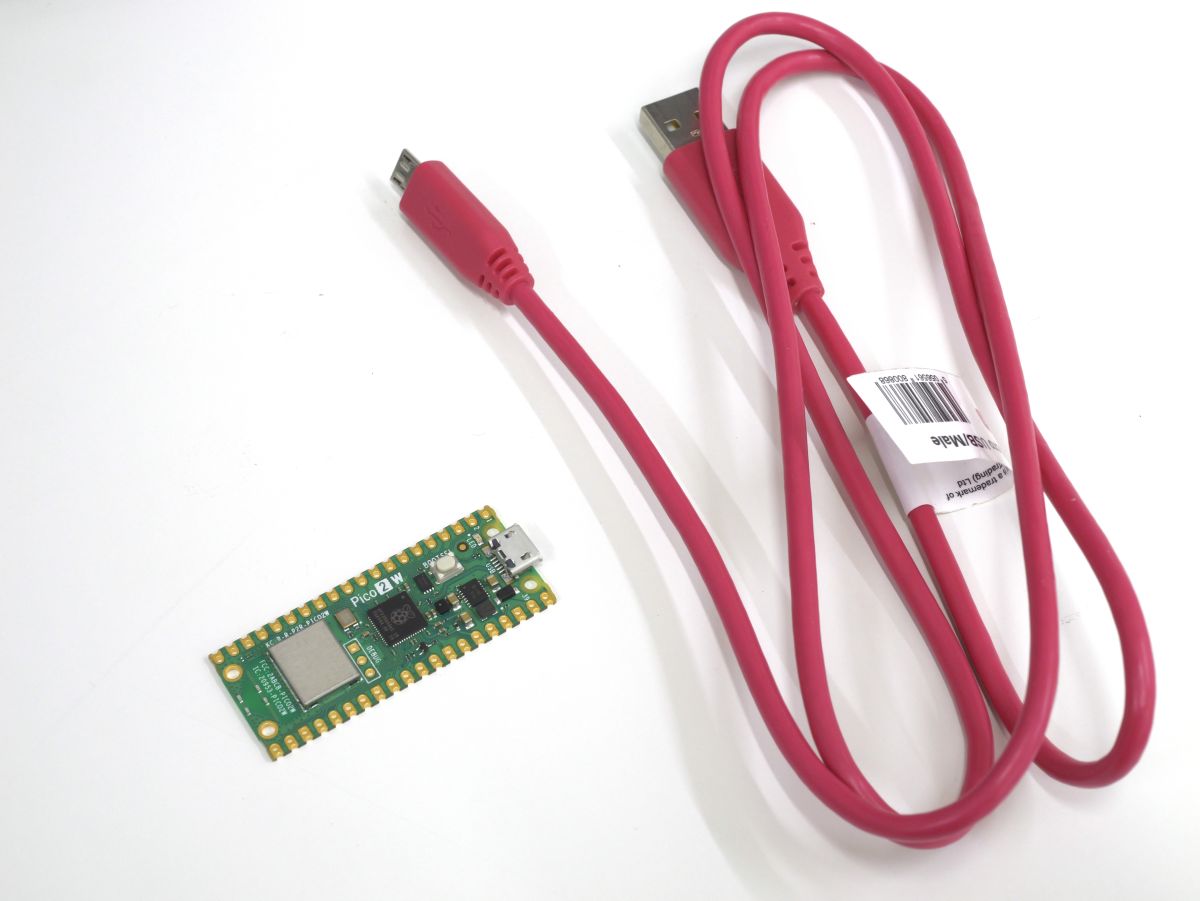
Insert the USB cable into the Raspberry Pi Pico 2 W.
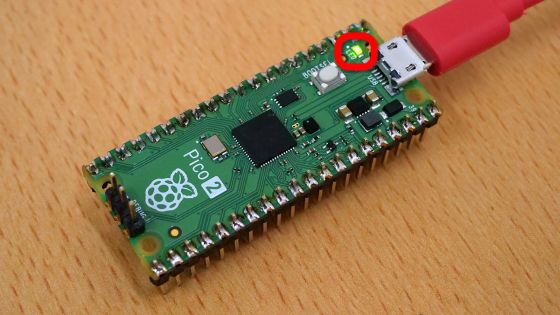
Next, press the BOOTSEL button on the Raspberry Pi Pico 2 W.
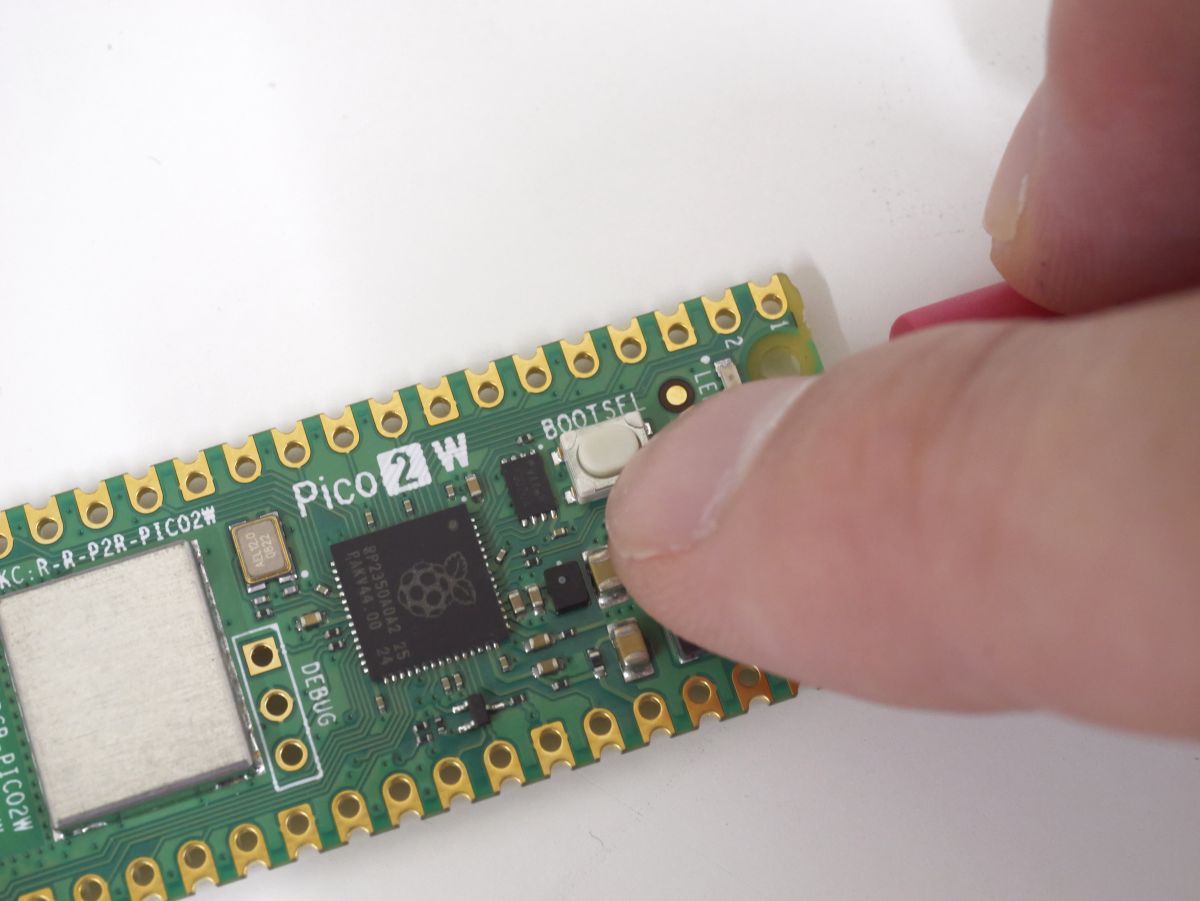
While holding down the BOOTSEL button, connect the Raspberry Pi Pico 2 W to your PC with a USB cable.
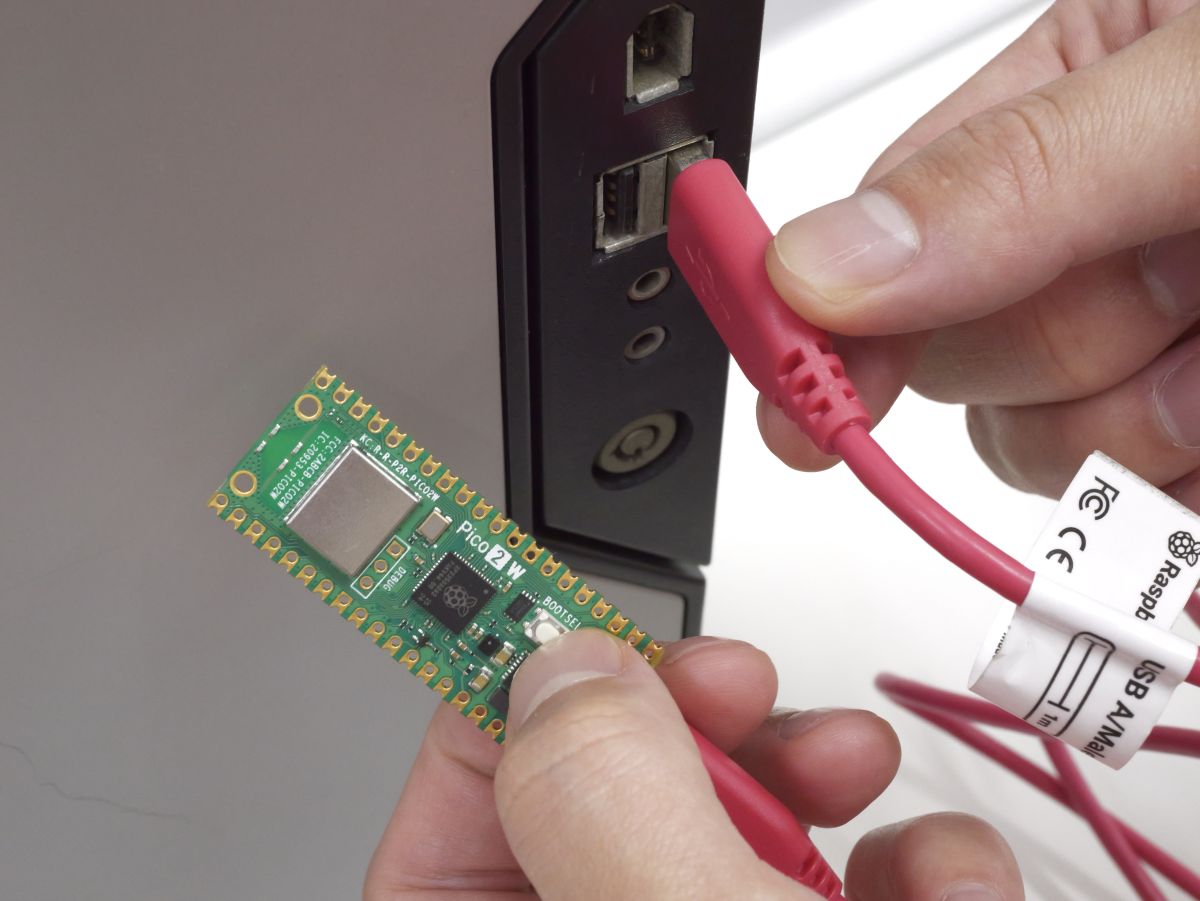
When you release the BOOTSEL button, the Raspberry Pi Pico 2 W will be mounted as a storage named “RP2350”.
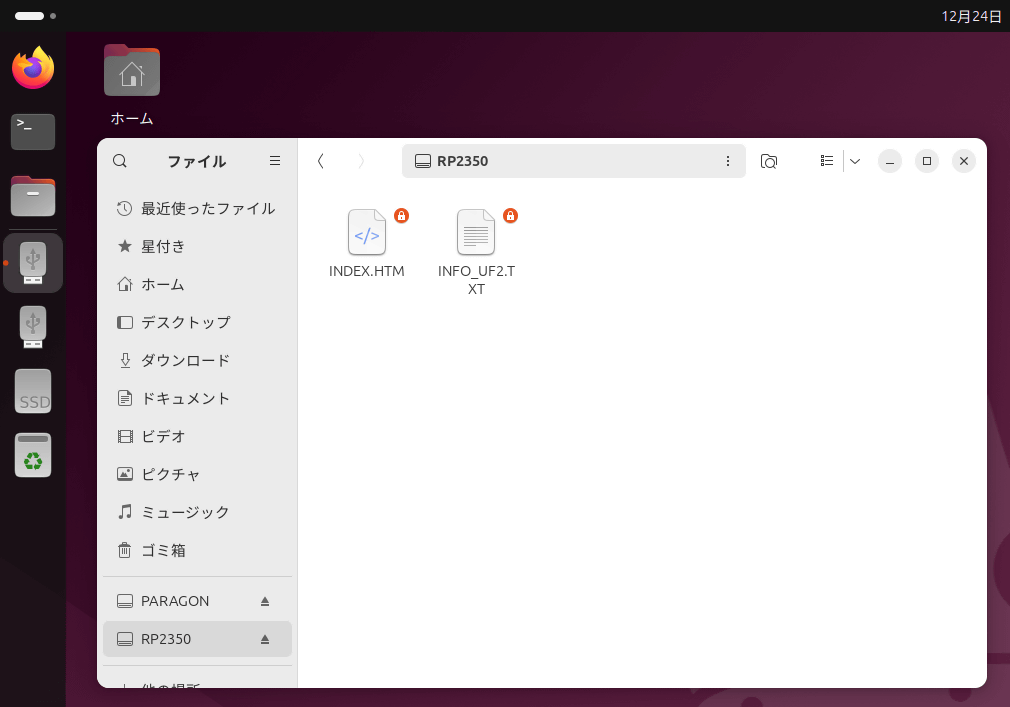
Open 'Home Directory/PicoW-usb2bt-audio/build-2w' in a file manager and drag and drop 'PicoW_USB_BT_Audio.uf2' into 'RP2350' to copy it, and the writing will be complete.
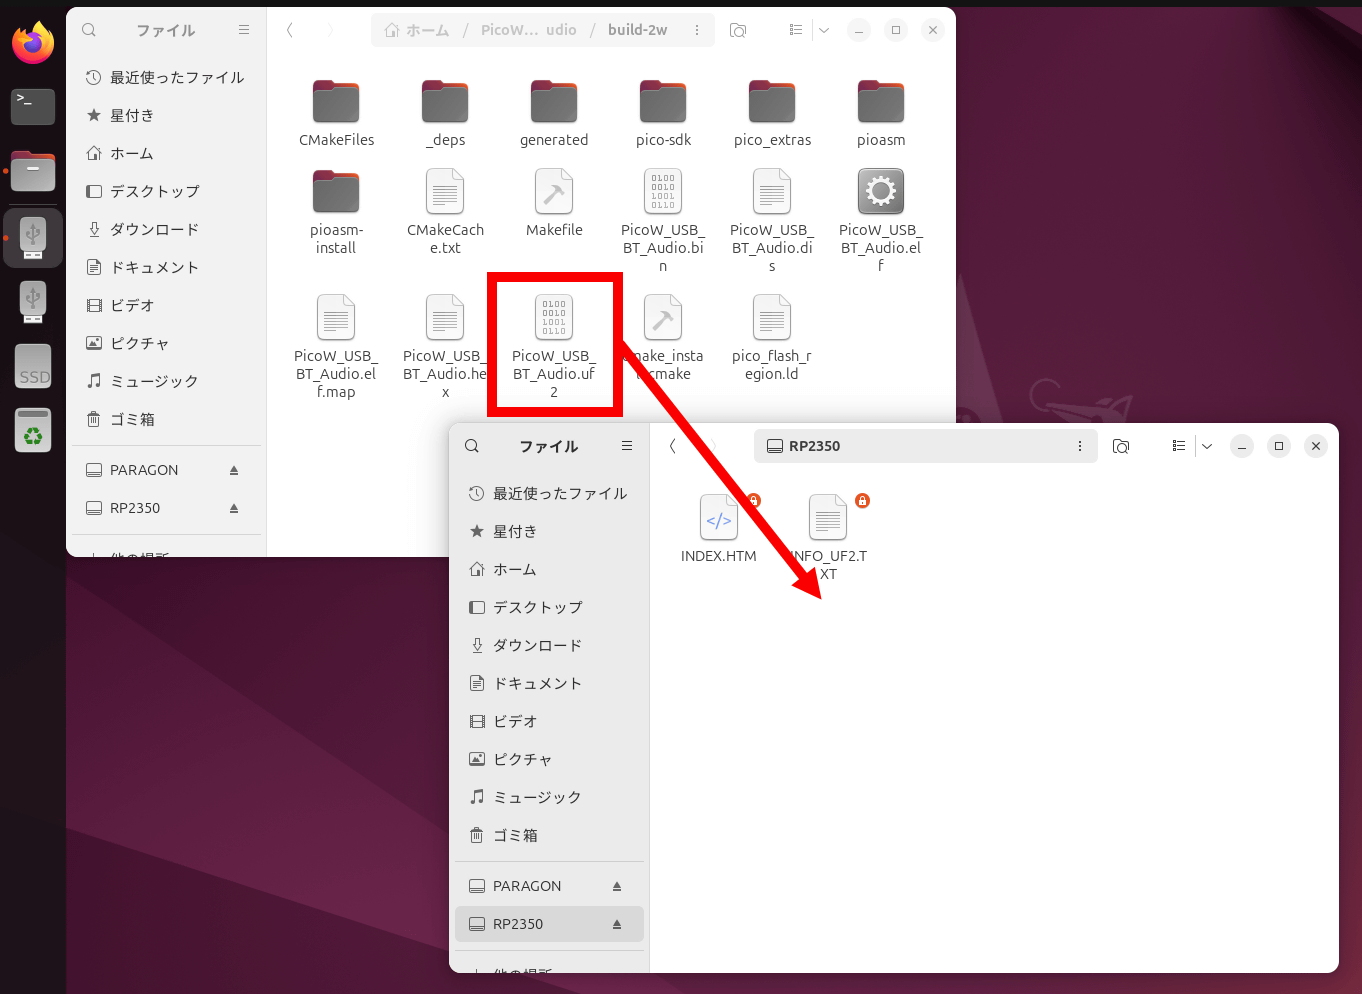
Once writing is complete, disconnect the Raspberry Pi Pico 2 W from the PC.
◆5: Resolves audio delay on Nintendo Switch
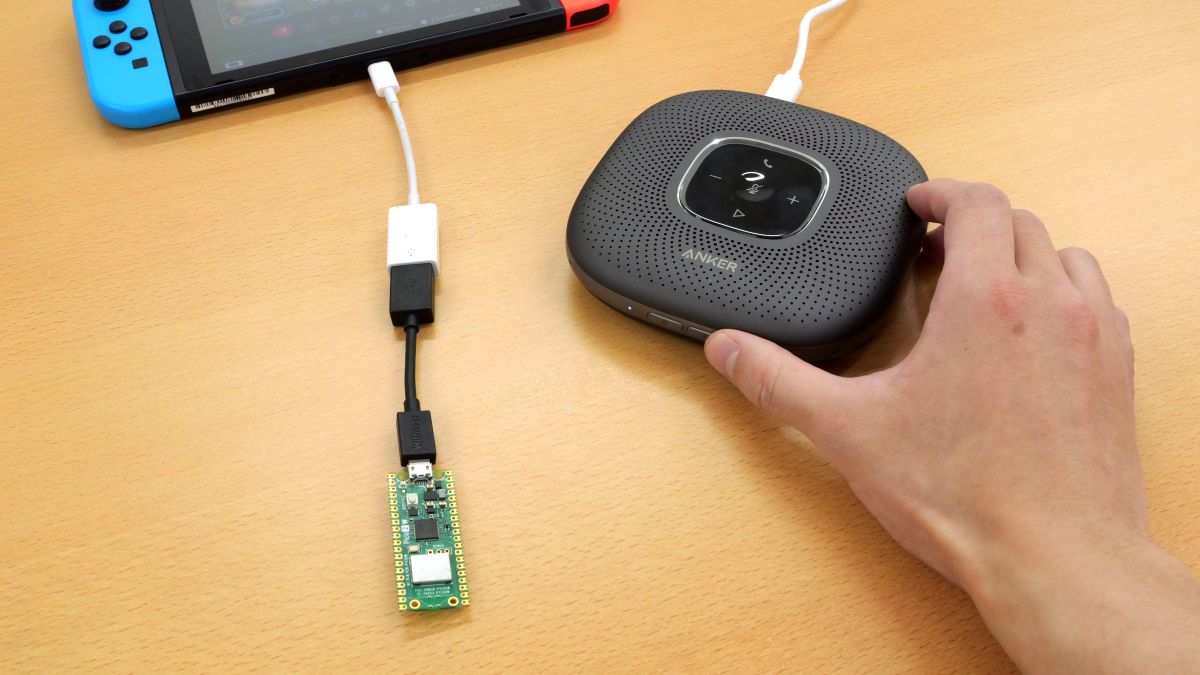
Let's see if we can solve the audio delay problem on the Nintendo Switch using a Raspberry Pi Pico 2 W with the Pico W USB Audio to Bluetooth Adapter. First, prepare the Nintendo Switch, Bluetooth speaker (Anker PowerConf), Raspberry Pi Pico 2 W, and a USB cable to connect the Nintendo Switch and Raspberry Pi Pico 2 W. If you have a cable with USB Micro-B on one end and USB Type-C on the other, you will only need one, but since I didn't have one this time, I prepared a cable with USB Micro-B on one end and USB Type-A on the other and a USB Type-A to USB Type-C conversion cable.
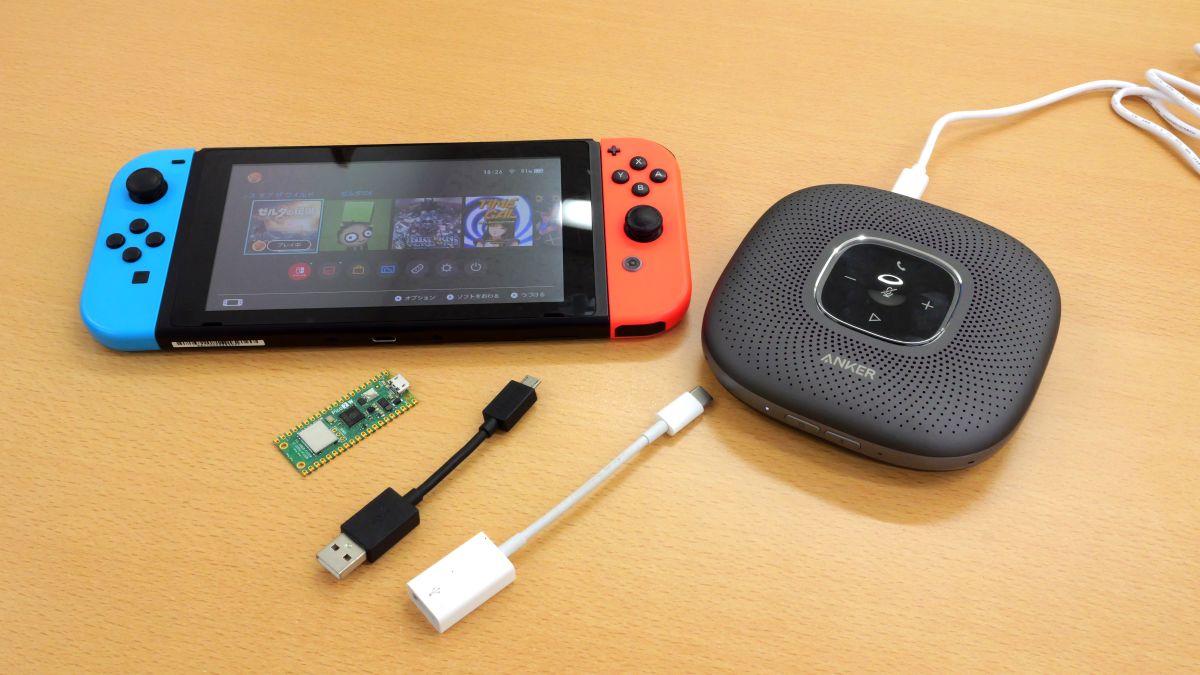
Connect the Nintendo Switch and Raspberry Pi Pico 2 W with a cable.
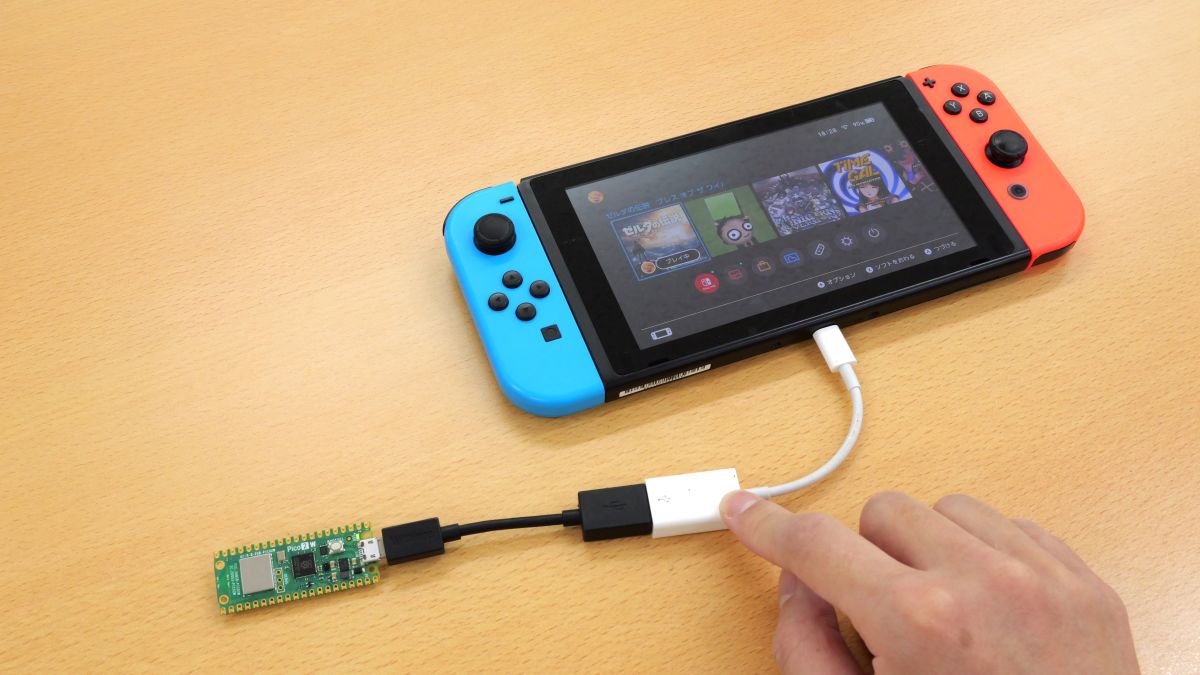
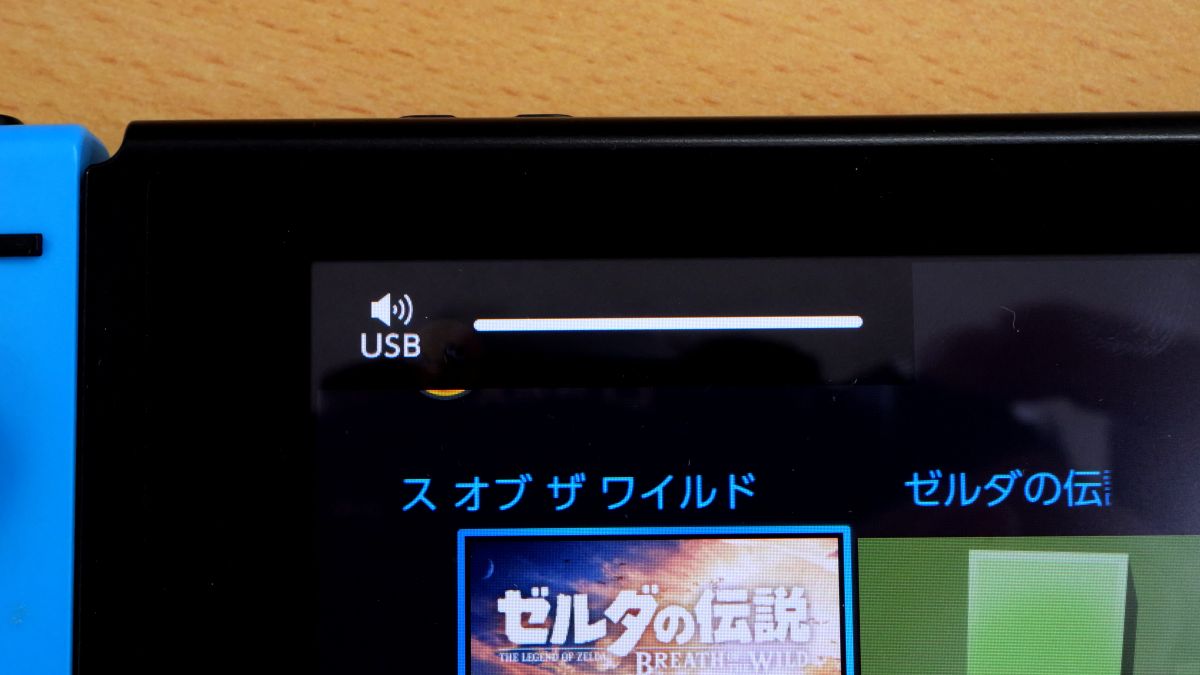
It was then recognised as a USB audio device.
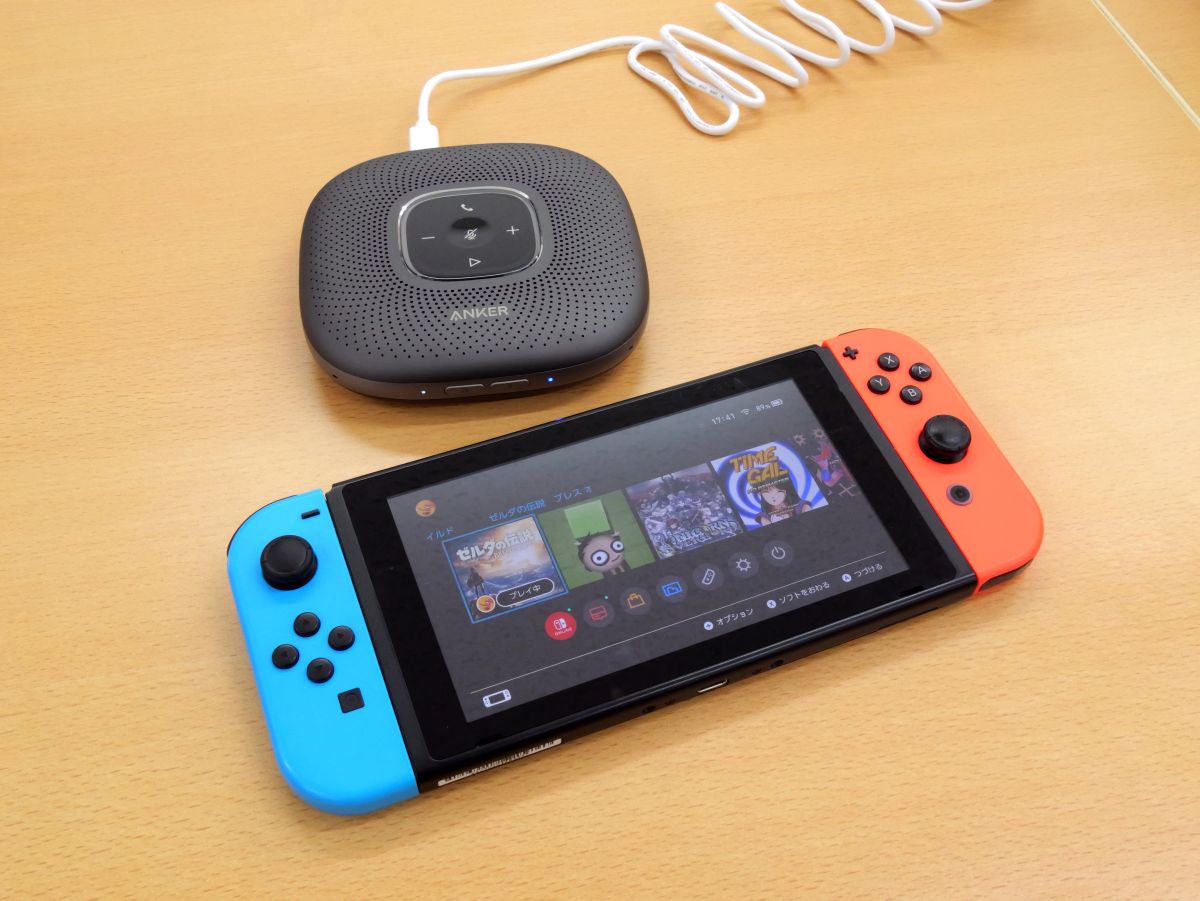
Next, start the Bluetooth speaker. The Raspberry Pi Pico 2 W is in a waiting state for pairing by default, so pairing will be completed if you put the Bluetooth speaker into pairing mode.
Below is a video that summarizes the steps to connect the Raspberry Pi Pico 2 W to the Nintendo Switch and play sound from a Bluetooth speaker.
We compared the latency between 'audio output from a Bluetooth speaker' and 'audio output from a Bluetooth speaker via Raspberry Pi Pico 2 W.' We can see that the latency is reduced by the Pico W USB Audio to Bluetooth Adapter.
I tried to solve the Nintendo Switch Bluetooth audio delay problem - YouTube
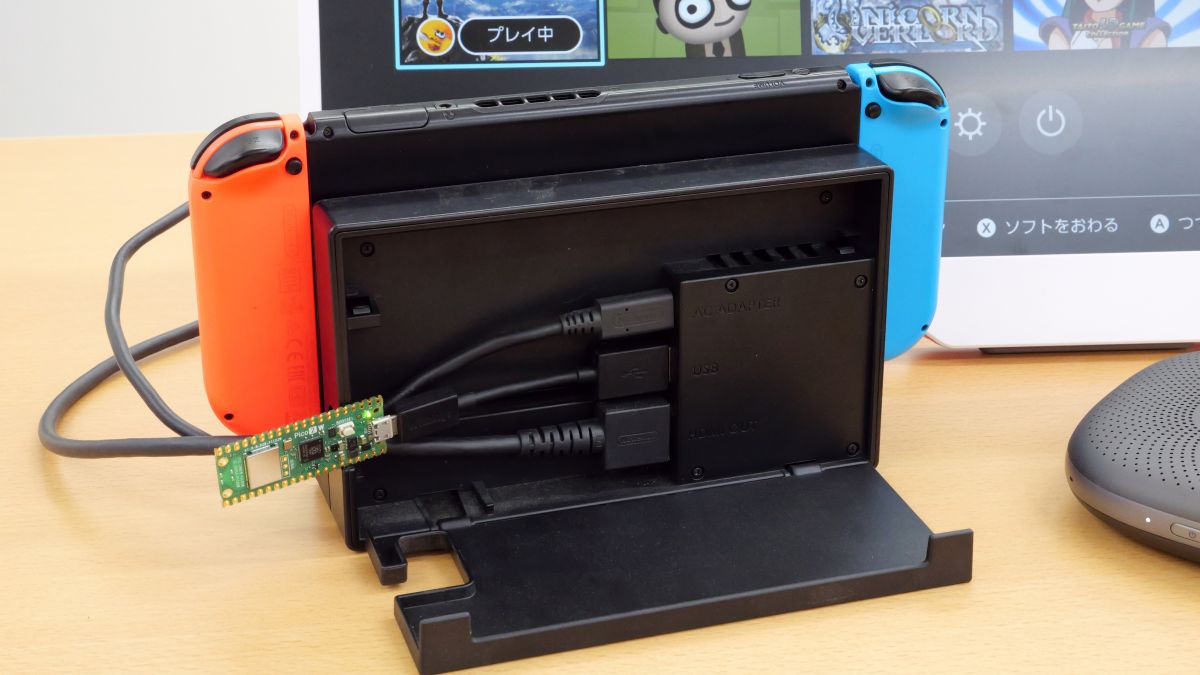
The Raspberry Pi Pico 2 W can also be connected to the Nintendo Switch dock, allowing you to enjoy low-latency Bluetooth audio output even in TV mode.
The video below shows Bluetooth audio output via Raspberry Pi Pico 2 W in TV mode.
I tried to solve the Bluetooth audio delay problem on the Nintendo Switch [TV mode] - YouTube
Bonus: Can also run on RISC-V cores
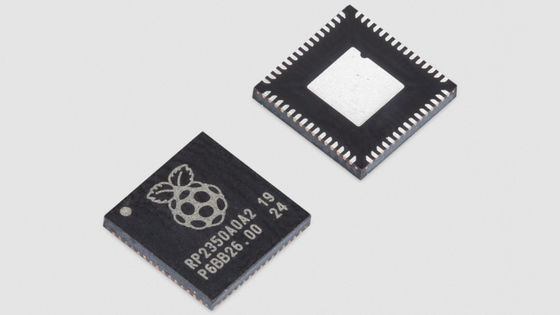
The Raspberry Pi Pico 2 W is equipped with the Raspberry Pi proprietary microcontroller ' RP2350 ', which has a built-in RISC-V core. The USB audio device we created this time can also be run on the RISC-V core by changing the CMake options as follows and building it.
[code]cmake -DPICO_EXTRAS_PATH=HOME_DIRECTORY/pico-extras -DPICO_TOOLCHAIN_PATH=HOME_DIRECTORY/corev-openhw-gcc-ubuntu2204-20240530 -DPICO_BOARD=pico2_w -DPICO_PLATFORM=rp2350-riscv ..[/code]
However, to build for the RISC-V core, you will need to prepare a dedicated compiler, etc. For details on how to build for the RISC-V core, please see the following article.
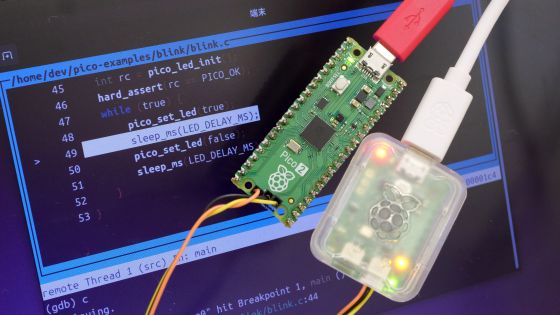
I tried running and debugging an LED blinker on the RISC-V core of 'Raspberry Pi Pico 2' - GIGAZINE
Related Posts: