Summary of steps to build a development environment for 'Raspberry Pi Pico 2' and make the LED blink

The small microcomputer board '
GitHub - raspberrypi/pico-sdk
https://github.com/raspberrypi/pico-sdk
GitHub - raspberrypi/pico-examples
https://github.com/raspberrypi/pico-examples
Setting up Raspberry Pi Pico - getting-started-with-pico-JP.pdf
(PDF file) https://datasheets.raspberrypi.com/pico/getting-started-with-pico-JP.pdf
◆Build a development environment for Raspberry Pi Pico 2
It is possible to build a development environment for Raspberry Pi Pico 2 on Windows, but the procedure is cumbersome so this time we will build the development environment on Ubuntu.
First, run the following command to install the compiler and other required packages.
[code]sudo apt install cmake gcc-arm-none-eabi libnewlib-arm-none-eabi libstdc++-arm-none-eabi-newlib[/code]
Next, clone
[code]git clone https://github.com/raspberrypi/pico-sdk.git[/code]
Once the Git repository has been cloned, set the environment variables. Open ' .bashrc ' in any editor and add the following lines:
[code]export PICO_SDK_PATH=$HOME/pico-sdk[/code]
Go to ' home directory/pico-sdk ' and update the submodule to complete the environment setup.
[code]cd pico-sdk
git submodule update --init[/code]
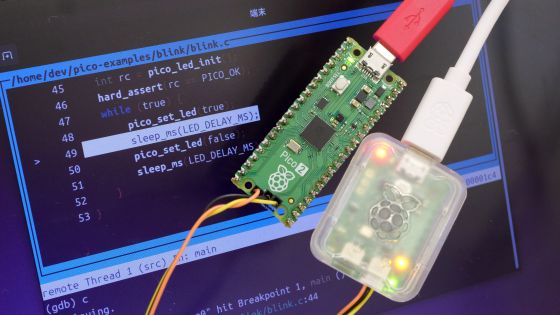
◆ Blinking LEDs with Raspberry Pi Pico 2
The Raspberry Pi Pico 2 is equipped with an LED that can be controlled by a program, so we will actually write an LED blinking program to the Raspberry Pi Pico 2 and make it blink. By the way, the program to blink the LED is not limited to the Raspberry Pi Pico 2, but is often executed as the first step in electronic work, and is also called 'L Chika', an abbreviation of 'LED Chika Chika'.
You can create the program yourself, but this time we will build and use a program called “
First, go back to your home directory and clone the repository:
[code]cd
git clone https://github.com/raspberrypi/pico-examples.git[/code]
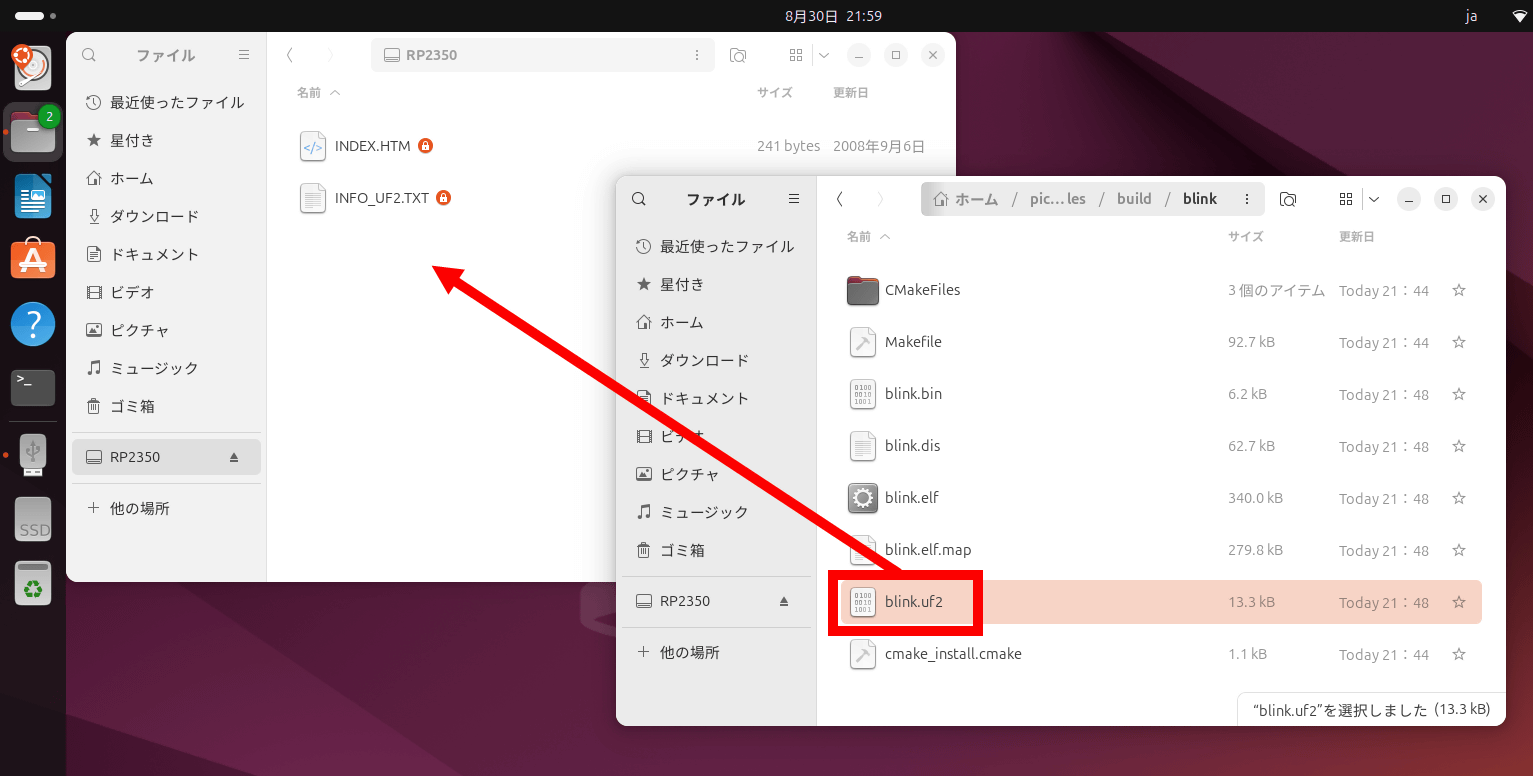
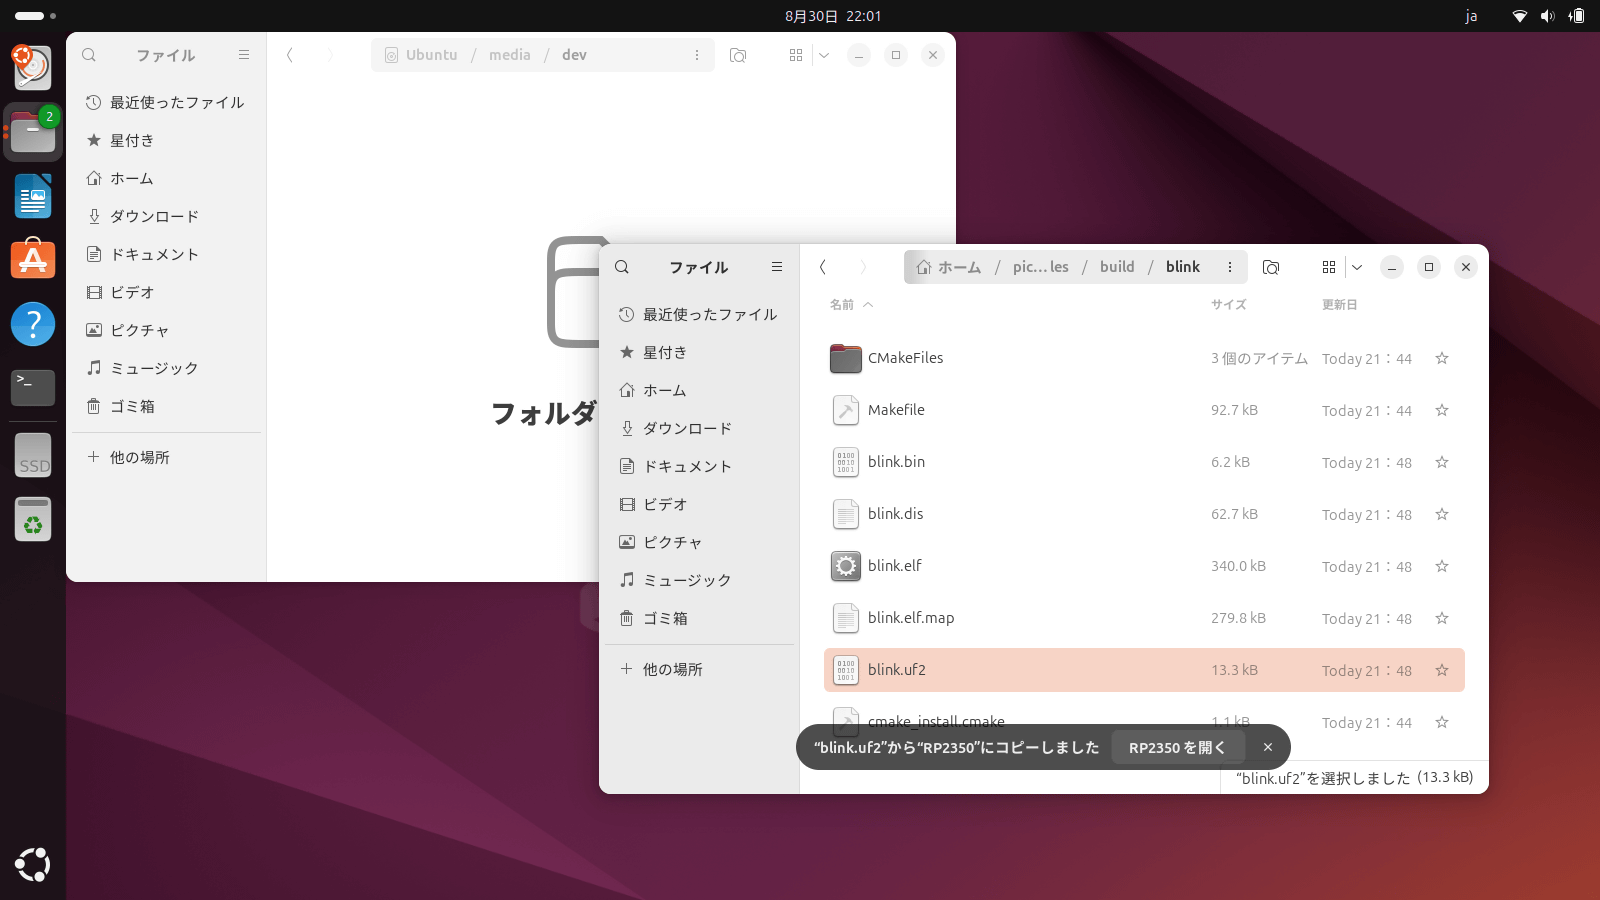
Next, move to ' Home Directory/pico-examples ' which contains the code and build the program. Since we want to build a program for the RP2350 Arm core this time, we need to specify ' -DPICO_PLATFORM=rp2350 ' as a Cmake option. If the build is successful, a file called ' blink.uf2 ' will be output to ' Home Directory/pico-examples/build/blink '.
[code]cd pico-examples
mkdir build
cd build
cmake -DPICO_PLATFORM=rp2350 ..
cd blink
make[/code]
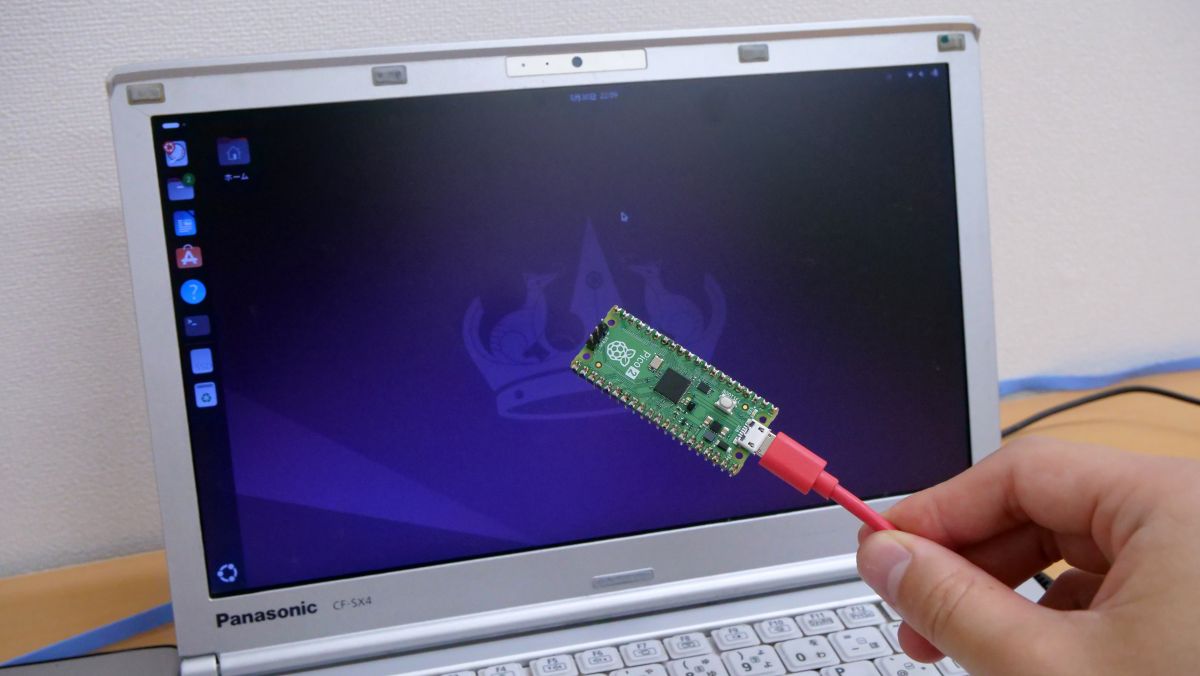
Next, write the program file to the Raspberry Pi Pico 2. First, while pressing the BOOTSEL button on the Raspberry Pi Pico 2, connect it to your PC with a USB cable.
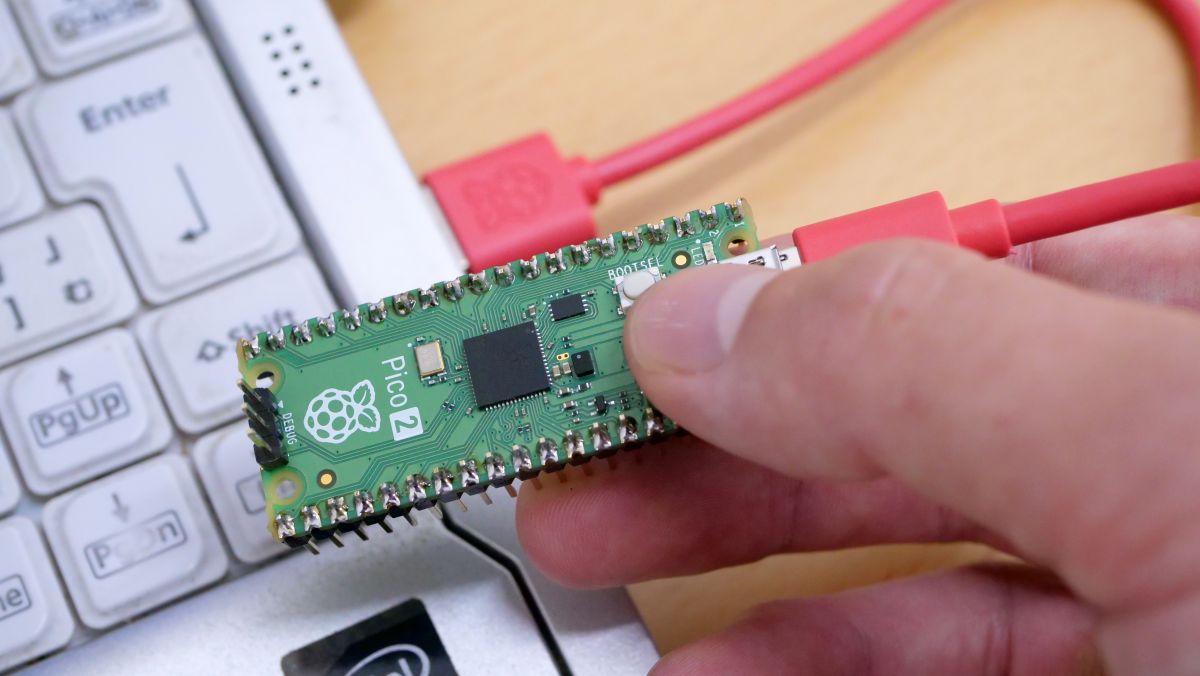
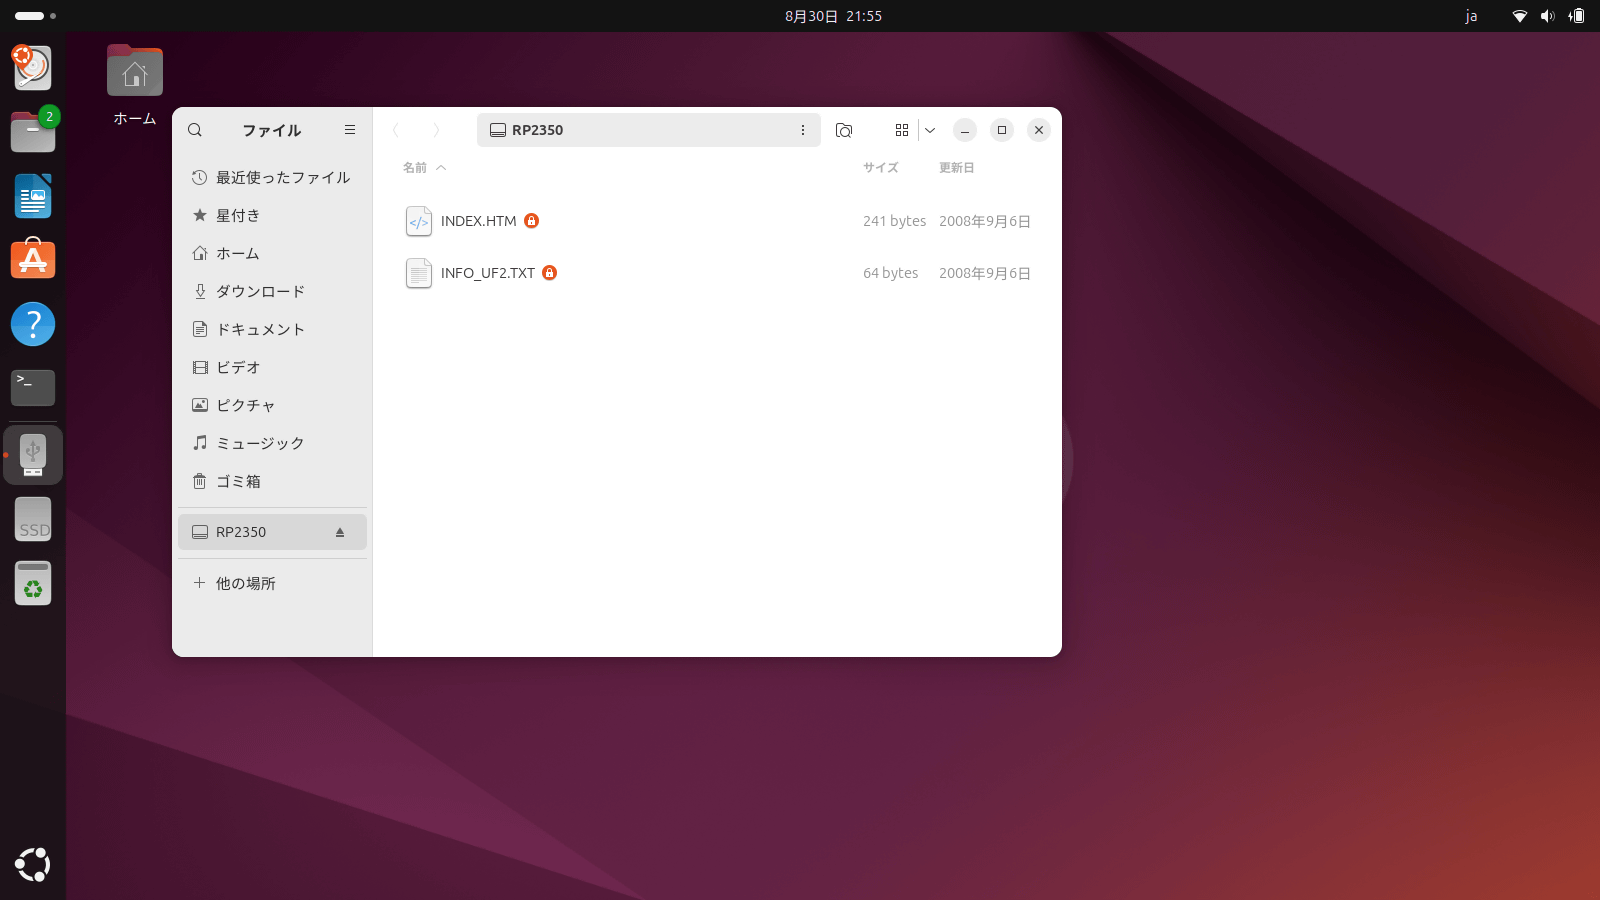
When you connect Raspberry Pi Pico 2 to your PC, it will automatically be recognized as storage, so open it in the file manager.
Next, open “ Home directory/pico-examples/build/blink ” in the file manager and drag and drop “ blink.uf2 ” to copy it to the Raspberry Pi Pico 2 that is recognized as storage.
Once copying is complete, the Raspberry Pi Pico 2 will automatically unmount and reboot.
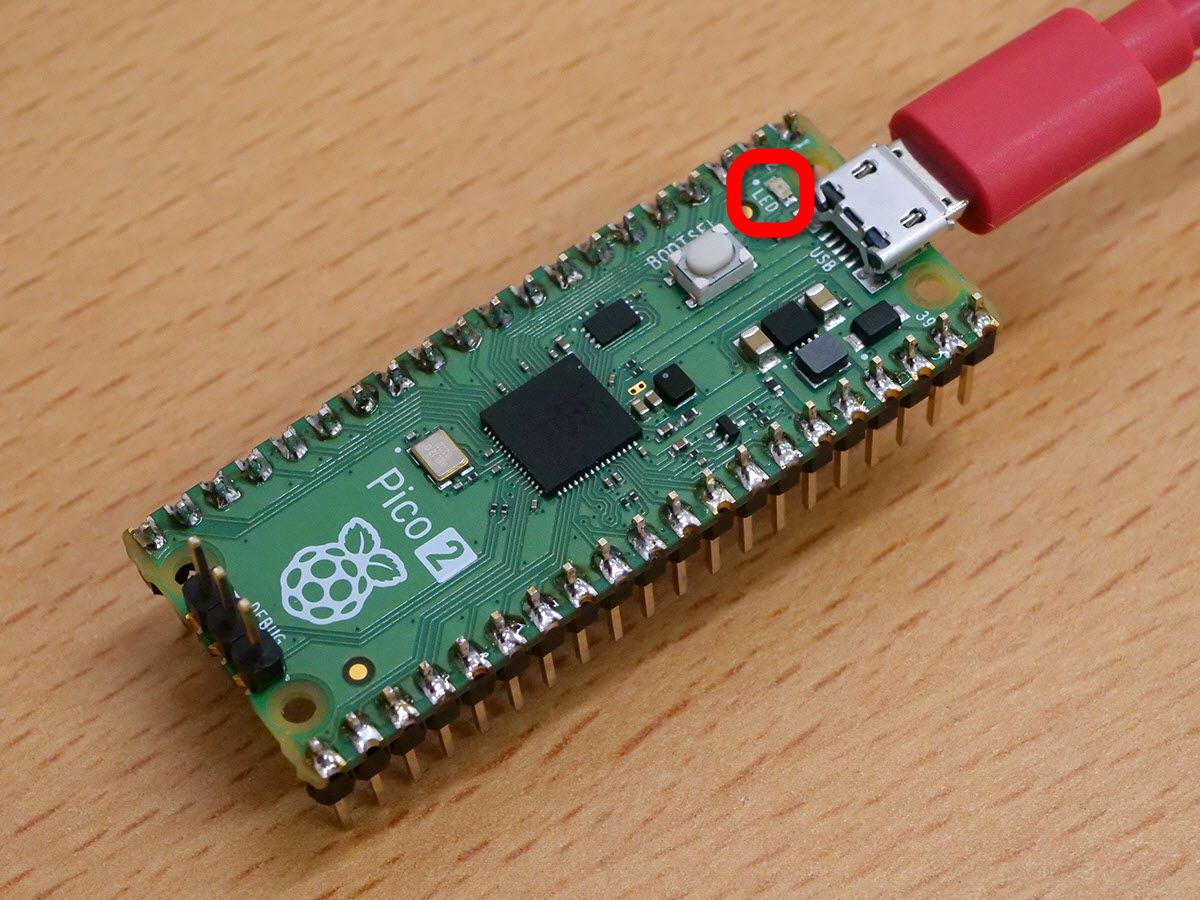
The Raspberry Pi Pico 2 LED will now start blinking. The LED blinking was successful.
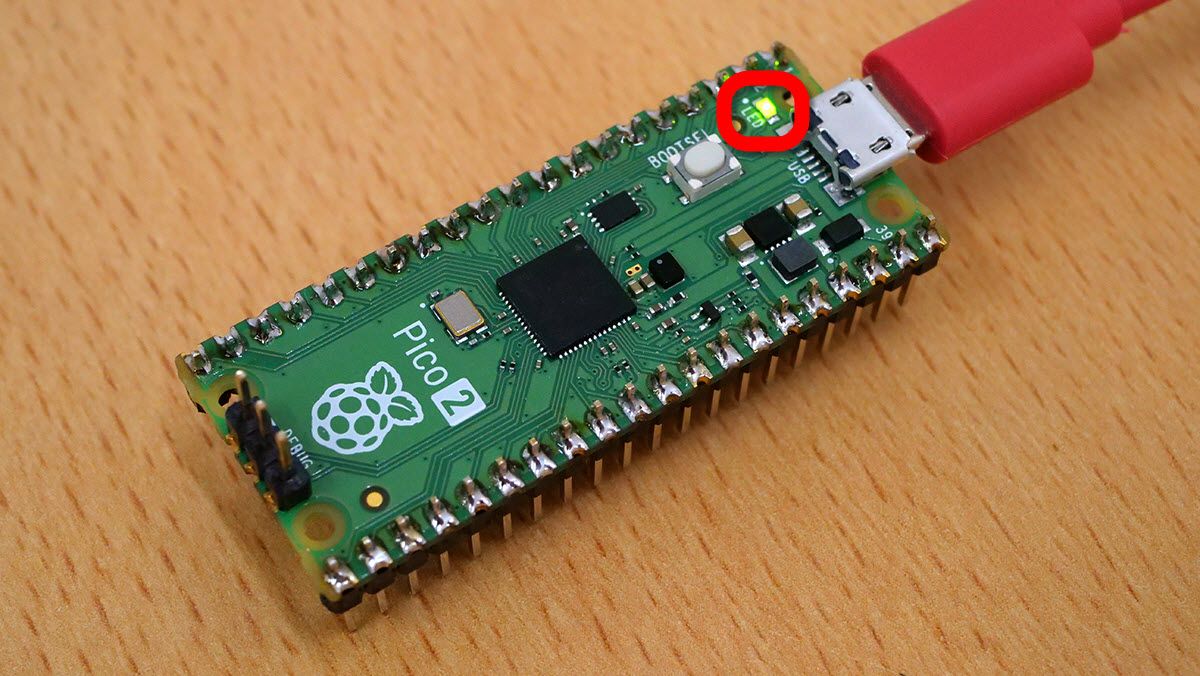
Below is a movie that captures the blinking LED of Raspberry Pi Pico 2. Since the program is stored in the RP2350, the LED will blink in the same way even if it is connected to a USB power adapter or the like, not just a PC.
'Raspberry Pi Pico 2' LED blinking - YouTube
Related Posts: