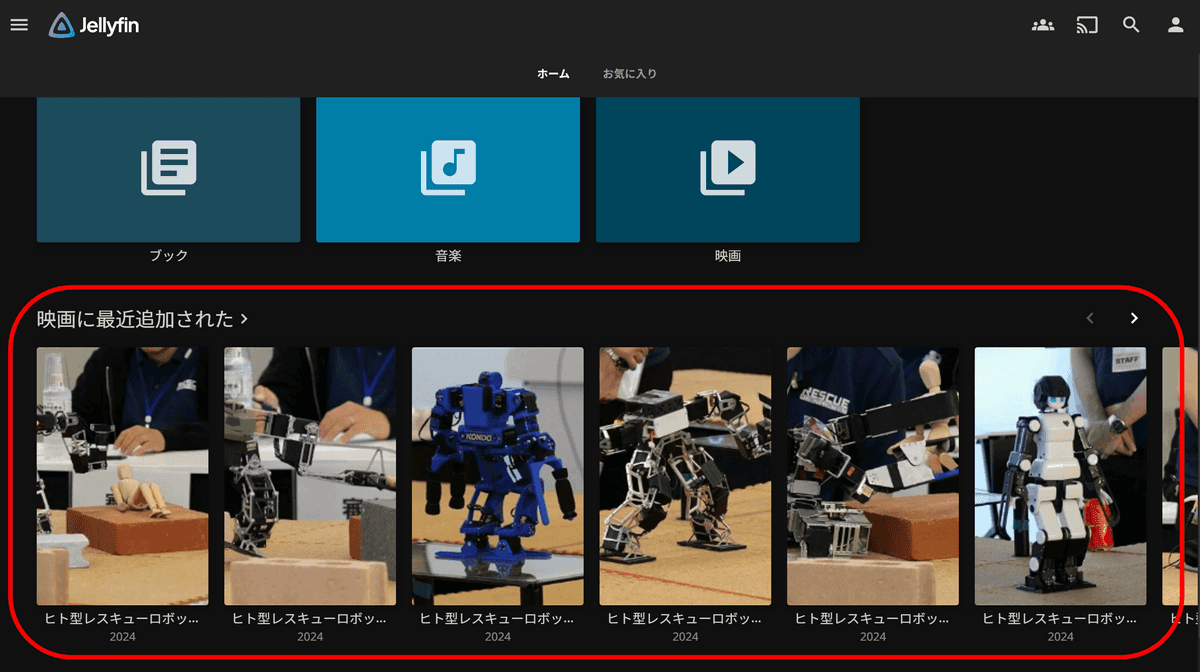
I tried using 'ChannelTube' in conjunction with Jellyfin, which allows you to regularly sync, download, save, and back up YouTube channels for free.

ChannelTube is an open source tool that periodically checks subscribed YouTube channels and automatically downloads videos. It is also possible to link it to Jellyfin, which allows you to stream saved content, so I actually tried linking it to Jellyfin and using it.
GitHub - TheWicklowWolf/ChannelTube: Download Video or Audio from YouTube channels on a schedule via yt-dlp.
https://github.com/TheWicklowWolf/ChannelTube
The setup of Jellyfin has been explained in the following article. In this article, we will assume that the setup of Jellyfin has been completed according to the procedure in the following article. Note that if you only want to download videos to a local folder, you do not need to set up Jellyfin.
Summary of how to install and set up 'Jellyfin' on Windows, which allows you to stream videos, music, e-books, etc. for free at home or on the go - GIGAZINE

ChannelTube requires Docker, so install Docker. Open the start menu, search for 'powershell', and click 'Run as administrator' under 'Windows PowerShell'.
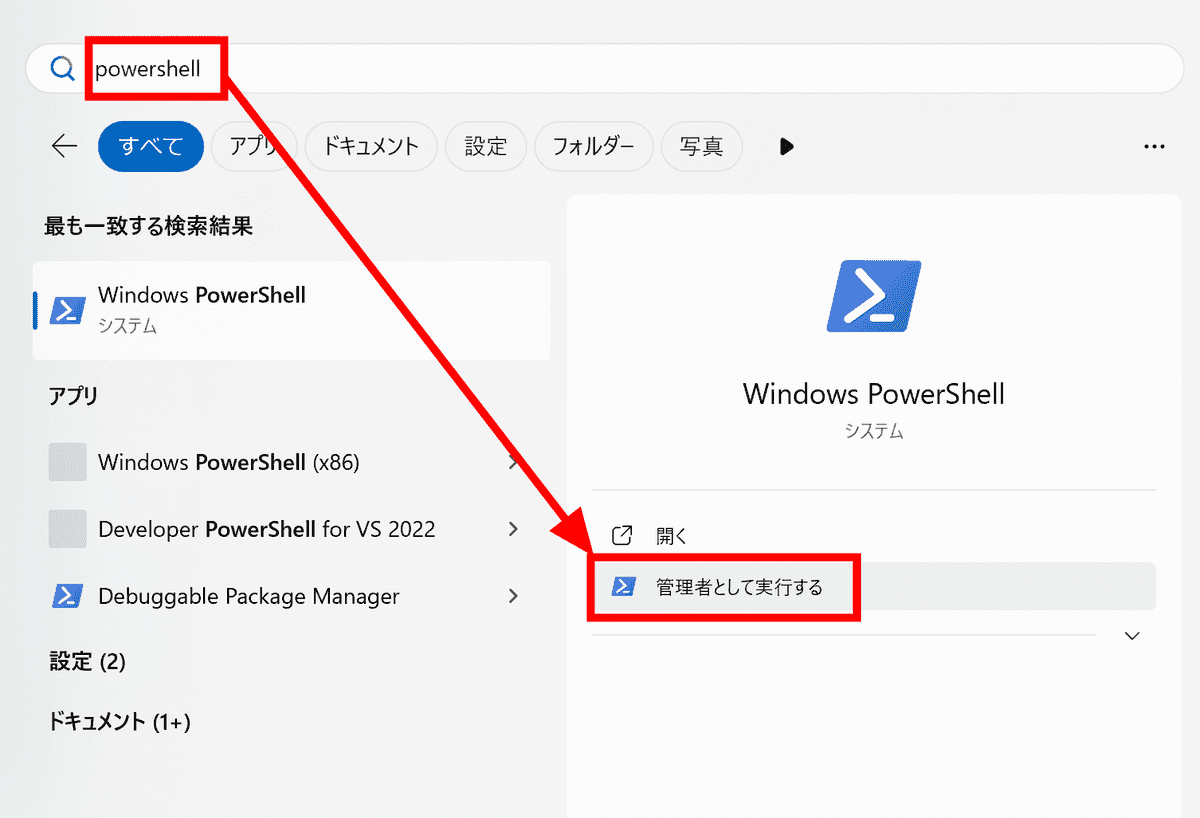
Once PowerShell is running, copy and paste the following command and press Enter to run it.
[code]winget install Docker.DockerDesktop[/code]
The installation display looks like this. When the installation is complete, restart your PC.

Create a folder named 'config' and a file named 'compose.yaml' in the Jellyfin data folder.
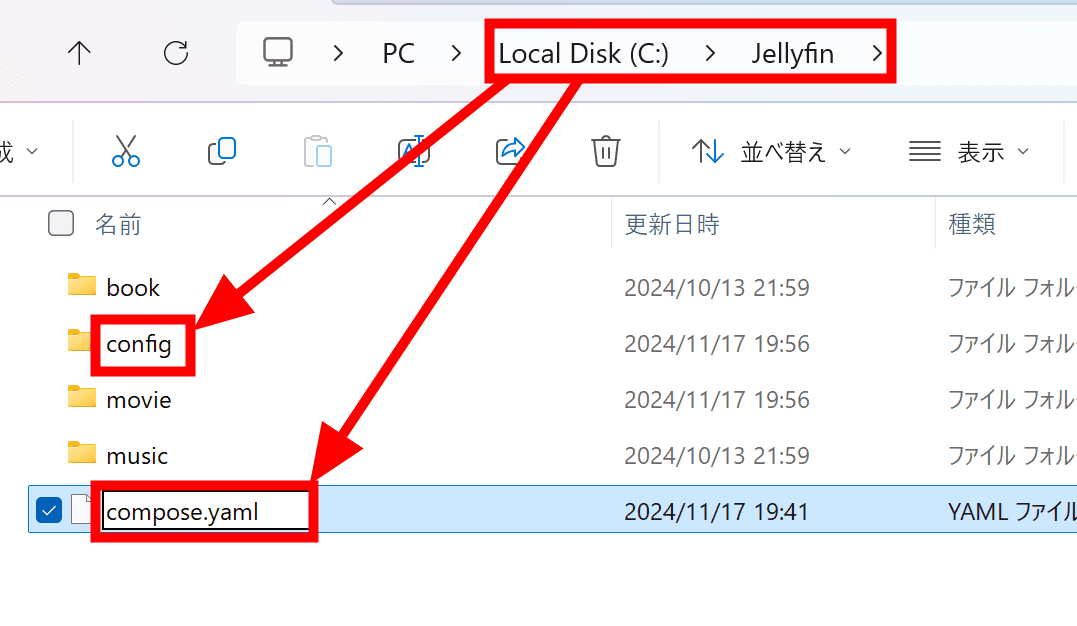
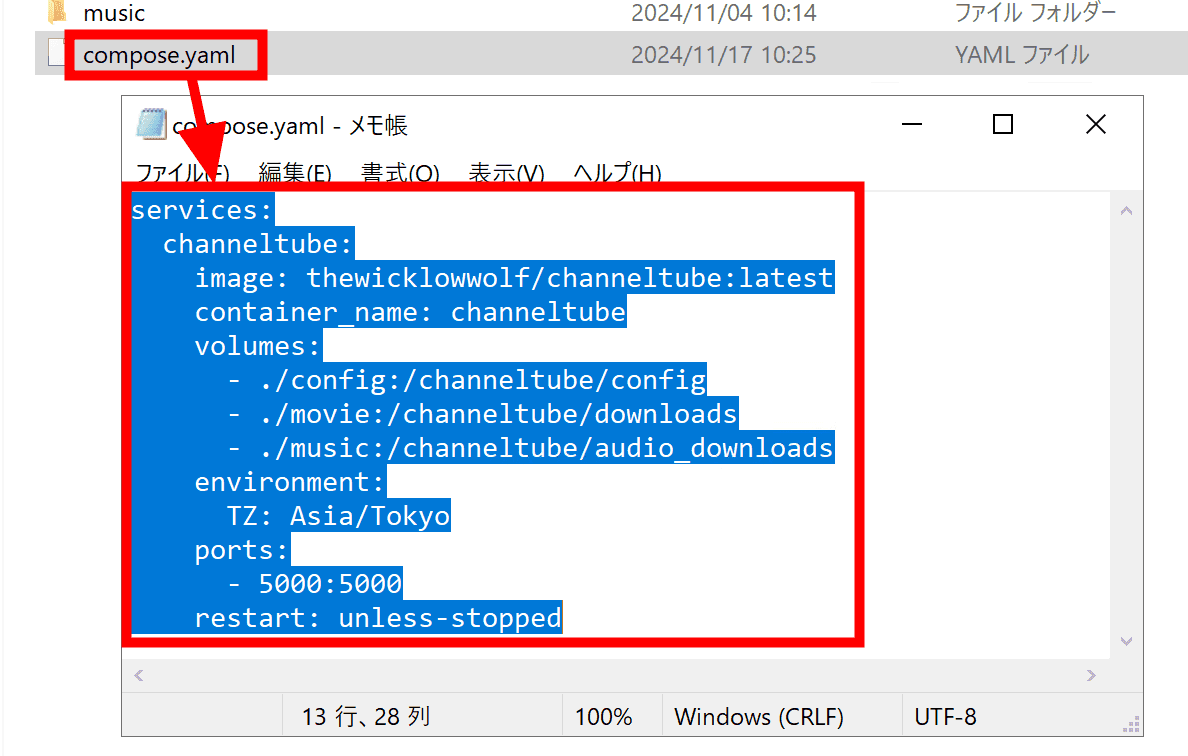
Open 'compose.yaml' in a text editor such as Notepad, copy and paste the following content, and save it. The 'movie' folder will be the destination for the downloaded video, so change it as necessary.
[code]services:
channeltube:
image: thewicklowwolf/channeltube:latest
container_name: channeltube
volumes:
- ./config:/channeltube/config
- ./movie:/channeltube/downloads
- ./music:/channeltube/audio_downloads
environment:
TZ: Asia/Tokyo
Ports:
- 5000:5000
restart: unless-stopped[/code]
This is what it looks like in the image.
Start PowerShell again, navigate to the Jellyfin data folder and enter the command '
docker compose up '. This time, the Jellyfin data folder was ' C:\jellyfin ', so enter the command as follows:
[code]cd C:\jellyfin
docker compose up[/code]
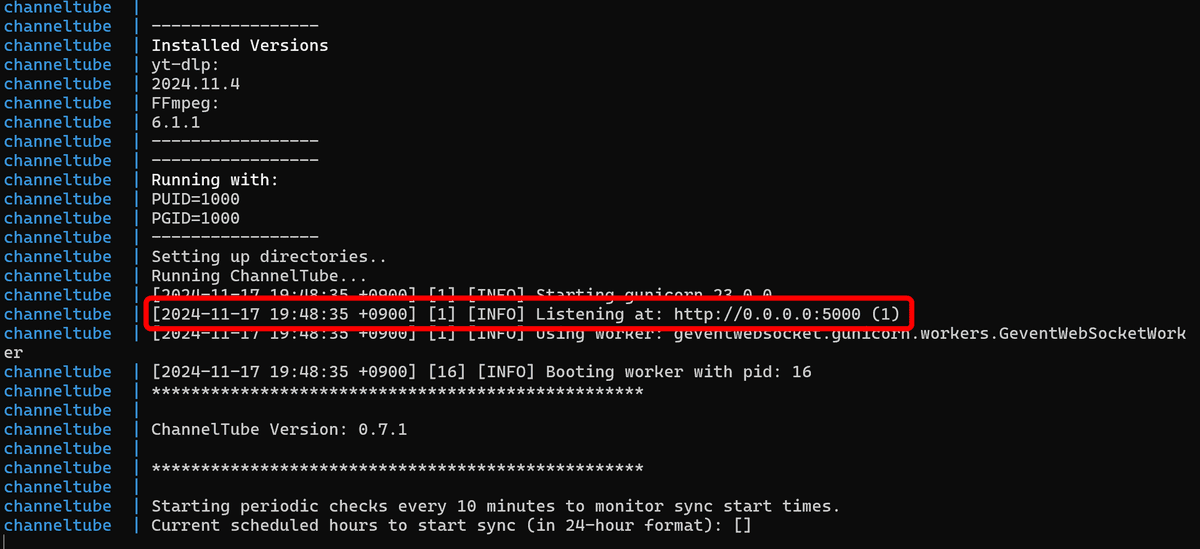
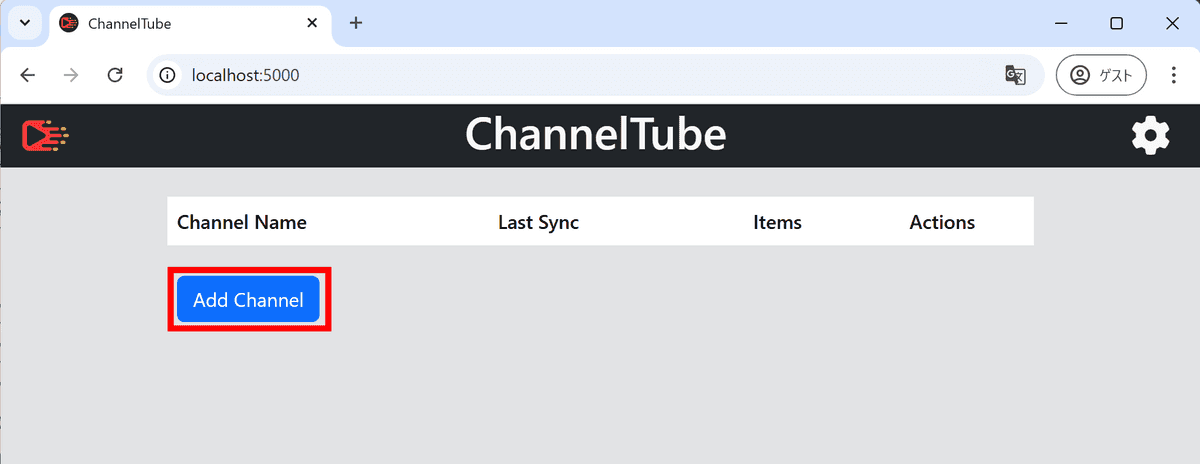
If the following message appears, ChannelTube has been launched. Open your browser, enter 'http://localhost:5000' in the address bar and press Enter.
Click “Add Channel”.
Click Edit.

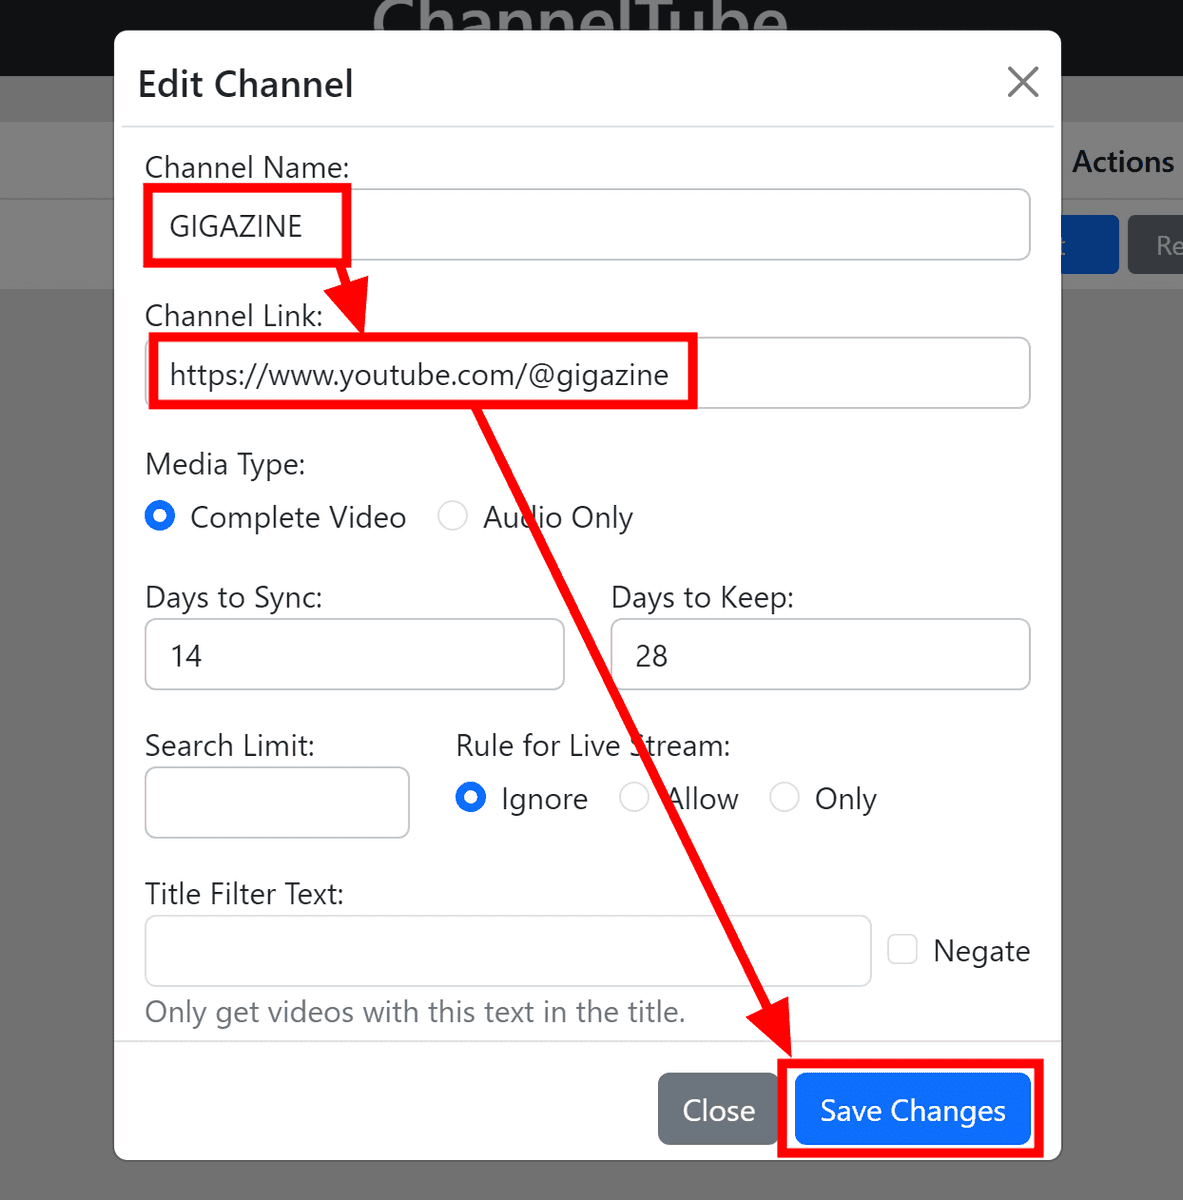
Enter the channel name and channel URL and click 'Save Changes'. Recent videos of the channel you set here will be automatically downloaded. By default, videos uploaded within the last 14 days will be downloaded.
Click the gear icon in the upper right corner to open the settings screen.

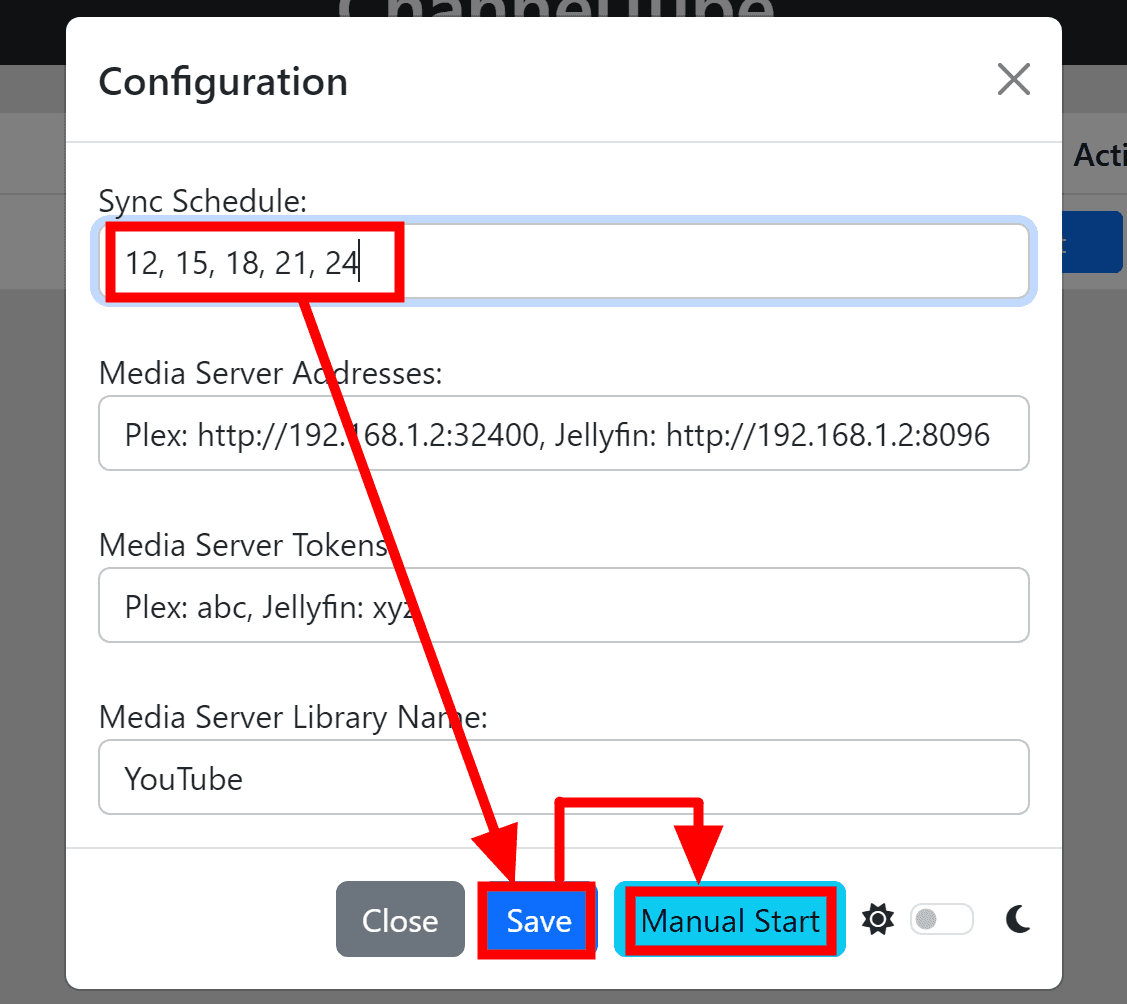
In the 'Sync Schedule' field at the top, enter 'What time to check for updates.' If you want to check for updates multiple times a day, just separate them with commas. For example, if you enter '12, 15, 18, 21, 24', it means that updates will be checked five times every day at 12:00, 15:00, 18:00, 21:00, and 24:00. Once you have entered the information, click 'Save,' and click 'Manual Start' since you want to update immediately this time.
The last check date and time column will display 'In Progress.'

After waiting for a while, the following screen will appear. When the update is complete, the date and time of the update will be displayed.

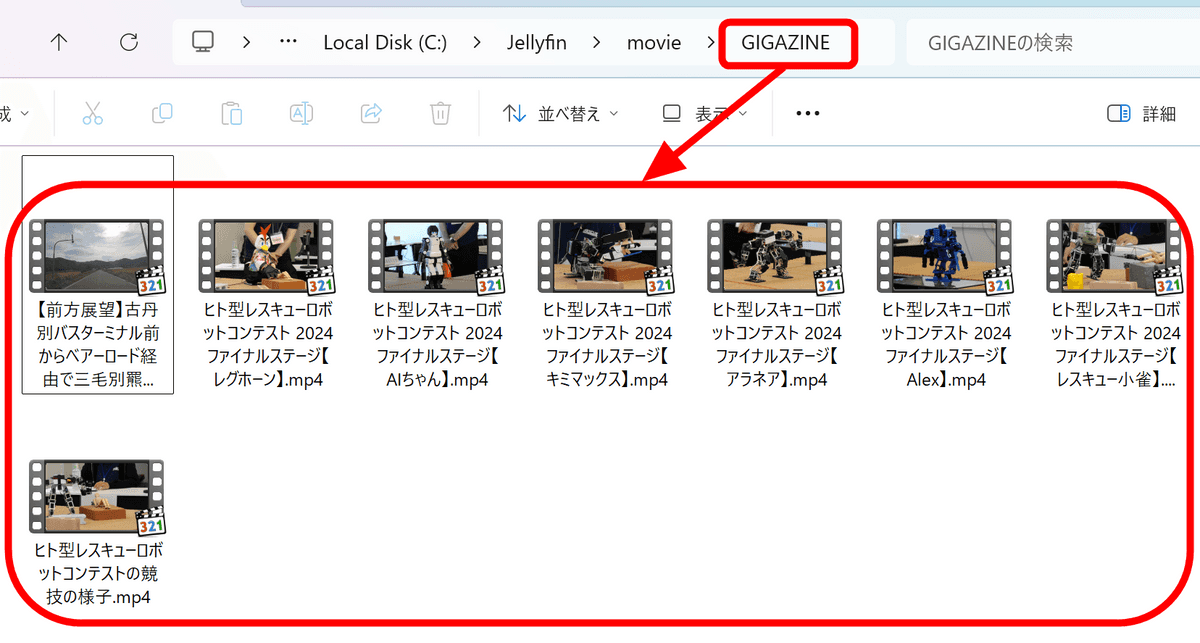
When I checked the 'movie' folder, I found that a folder with the channel name had been created and the videos had been downloaded and saved there.
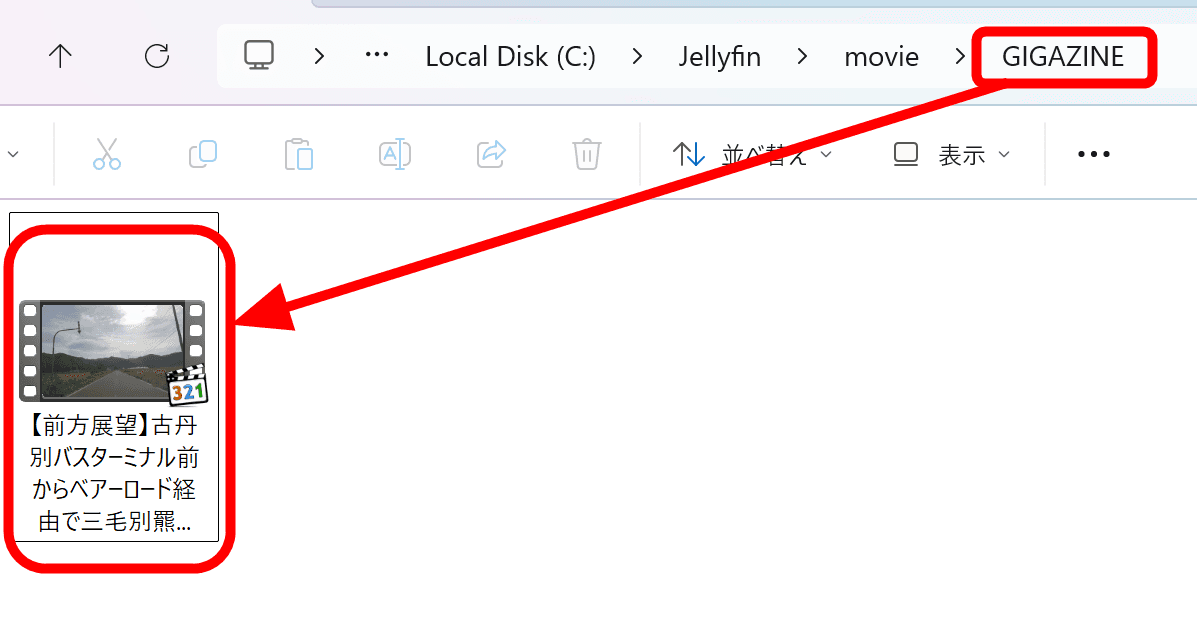
The 'movie' folder is the Jellyfin media library, but you need to scan the library to reflect the addition of videos. So, from here, we will set it up so that it will automatically scan when ChannelTube finishes updating.
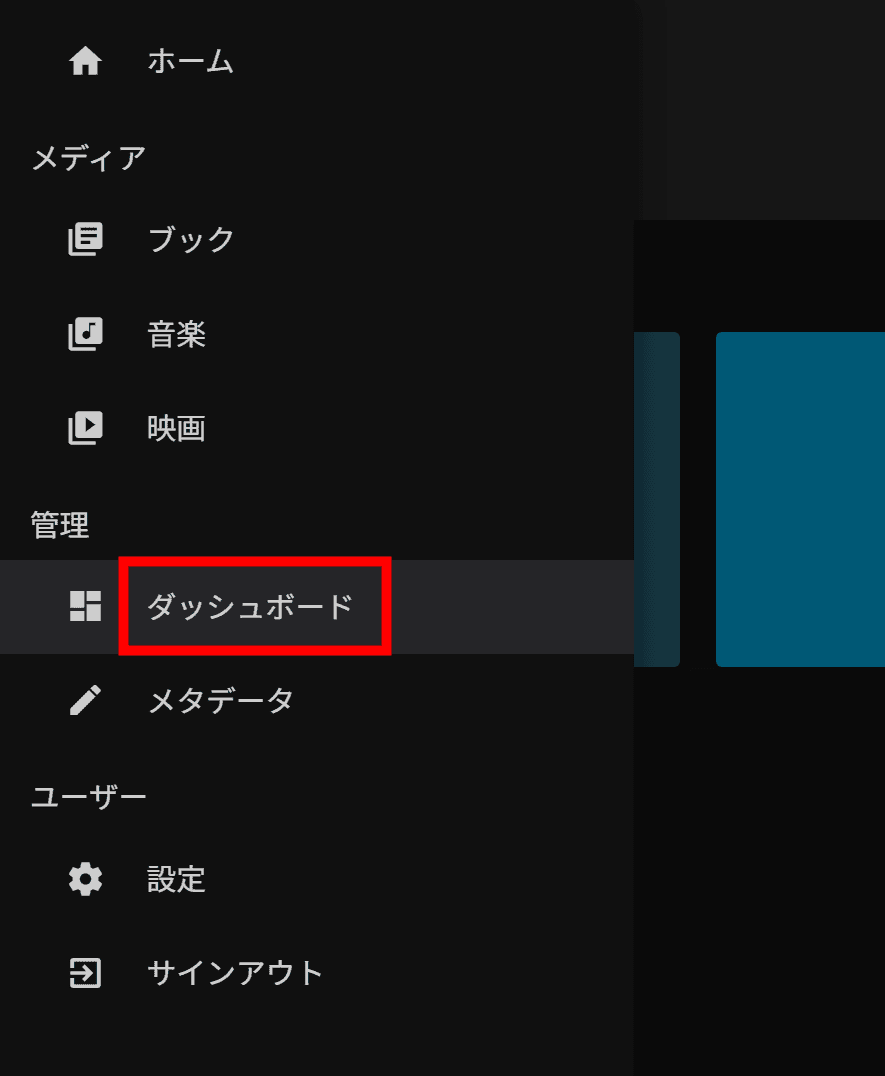
Click 'Dashboard' from the left menu of Jellyfin.
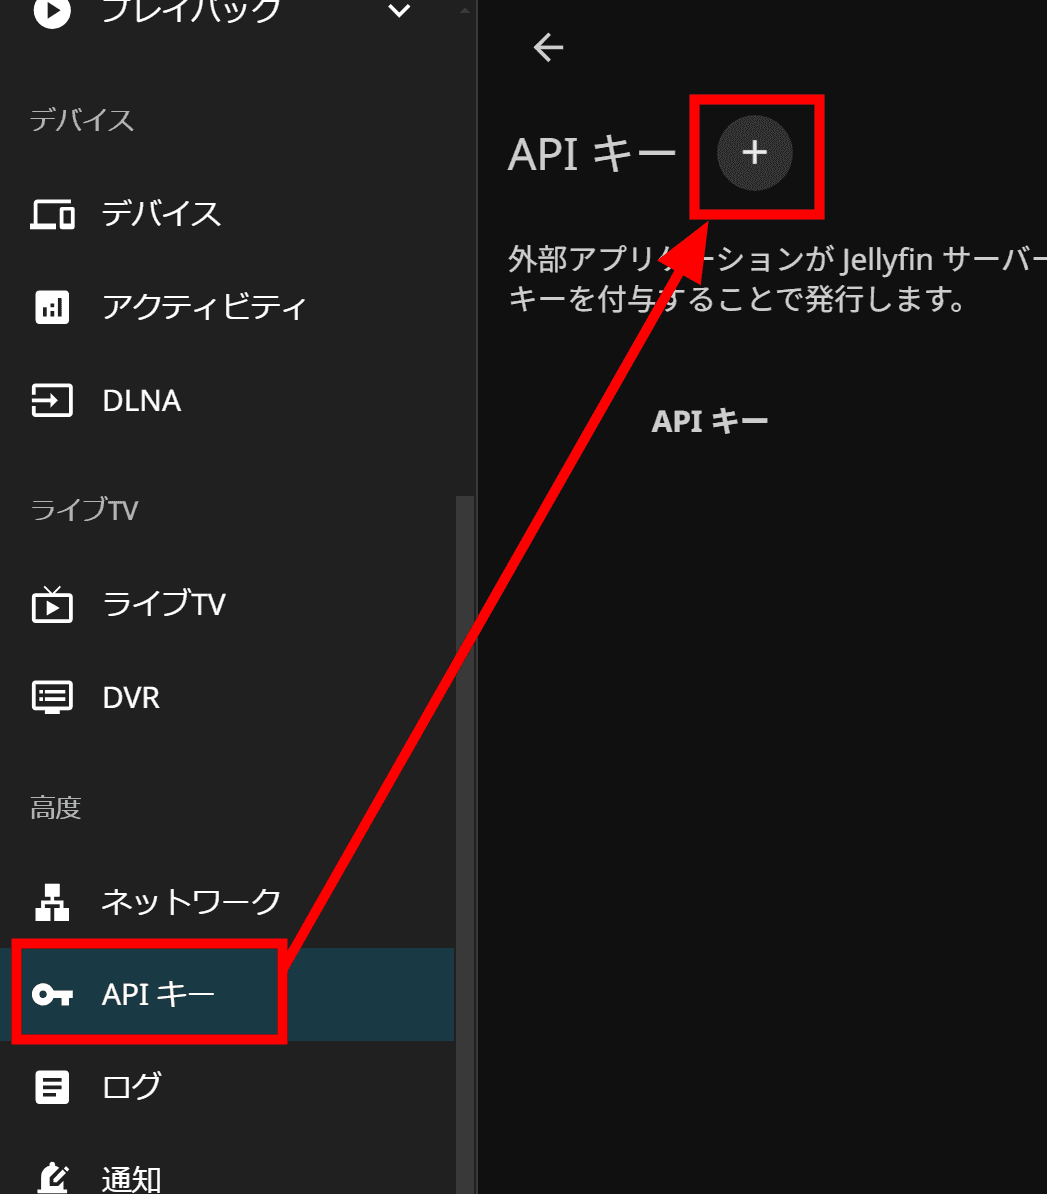
Click on 'API Key' and then on the '+' button.
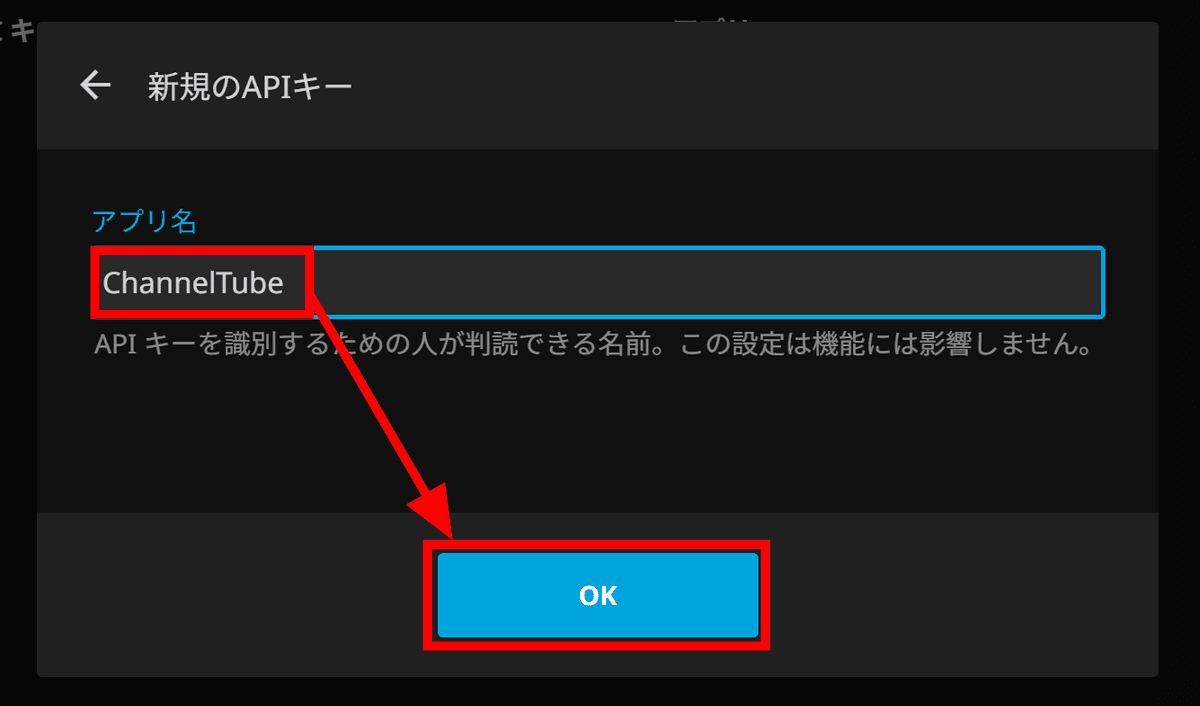
Enter 'ChannelTube' as the app name and click 'OK'.
The API key will be displayed, so copy it.

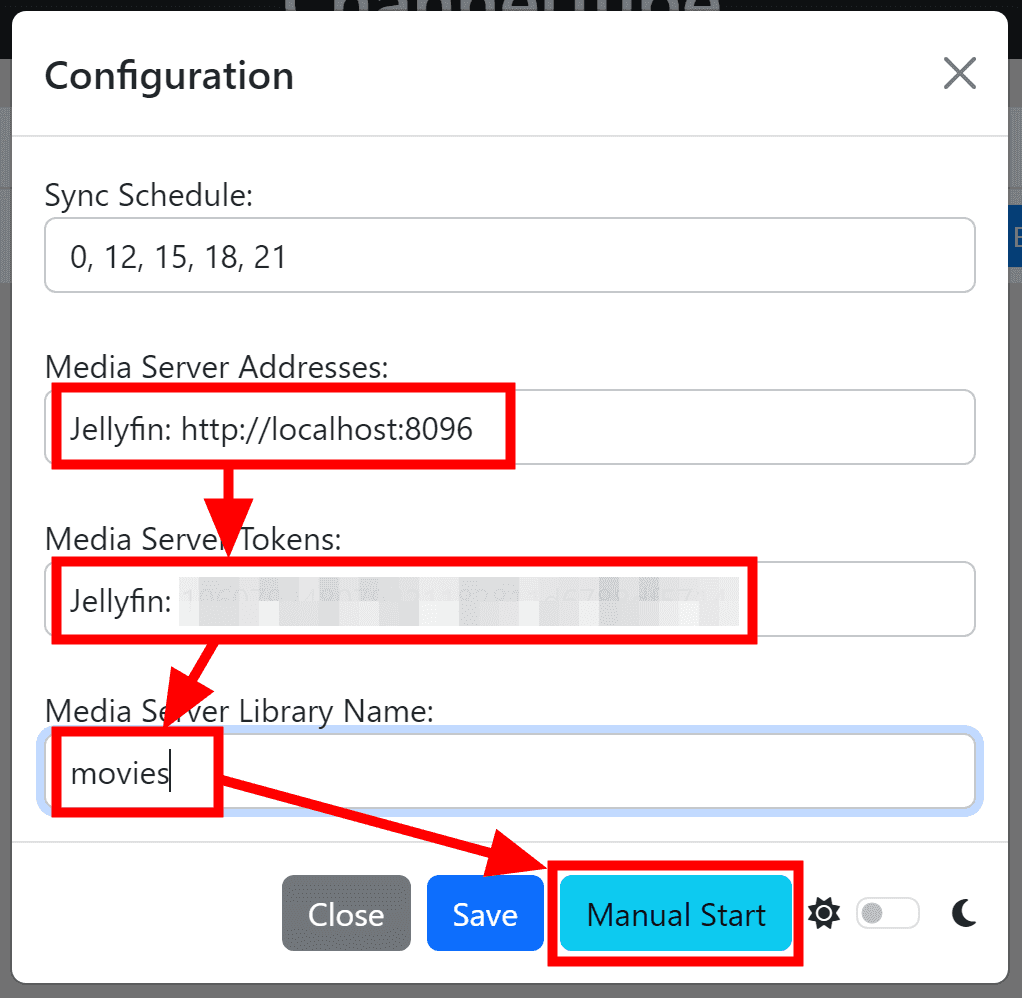
Open the ChannelTube settings screen and enter 'Jellyfin: http://localhost:8096' in the 'Media Server Addresses' field. In the 'Media Server Tokens' field, set the API key in the format 'Jellyfin: [API key]', enter the library name, and click 'Manual Start'.
I waited until the update check was finished and when I checked the media folder, the newly uploaded video had been downloaded.
When I opened Jellyfin, the video I had just downloaded was displayed in the 'Recently Added' section, confirming that the connection had been successful.
Related Posts:
in Review, Software, Web Application, Posted by log1d_ts
