How to correct 'movie that has become dark' with 'HDR' of Google Photos in one shot, both Android smartphone and iPhone are OK

There are many people who have experienced that when shooting a movie with a smartphone or camera, ``A part of the scene has become dark in a scene with a large difference in brightness''. Google Photos has a tool '
Edit videos - Android - Google Photos Help
https://support.google.com/photos/answer/10729480
To use 'HDR', first open the movie you want to edit in Google Photos and then tap 'Edit'.

Next, tap 'Adjustment' and then tap 'HDR'.

Then, a slide bar for adjusting the effectiveness of the HDR effect is displayed at the bottom of the screen.
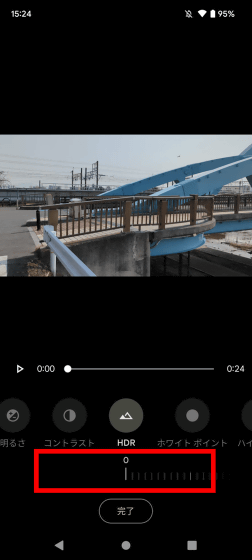
After adjusting the effect, tap 'Done'.

Editing is complete when 'Saved' is displayed.
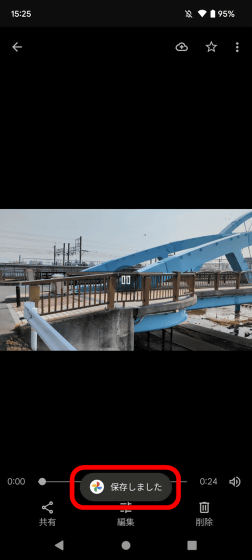
By playing the following movie, you can check the original movie before editing and the movie after applying HDR in order.
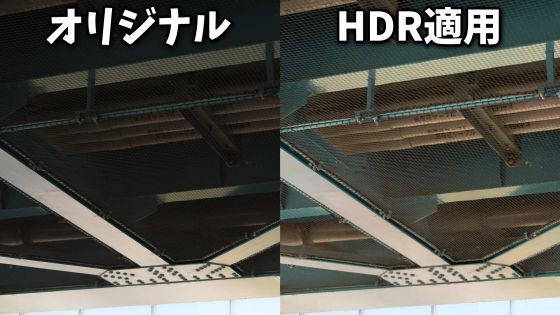
Below is a part of the above movie cut out. After applying HDR (right), you can see that the shadowed part of the bridge is brighter.
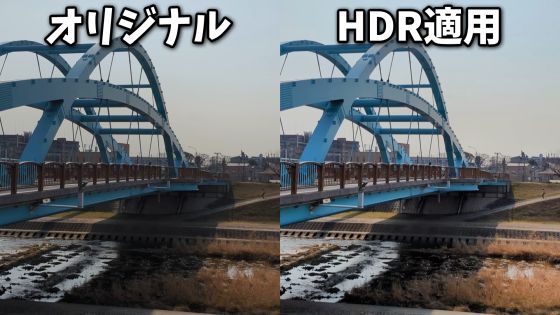
As another example, I tried applying the HDR effect to a movie with a large difference in brightness, ``Looking up at the bridge passing over the riverbed''.
Comparing the original before editing (left) and after applying HDR (right), you can see that the dark areas behind the bridge are much brighter.
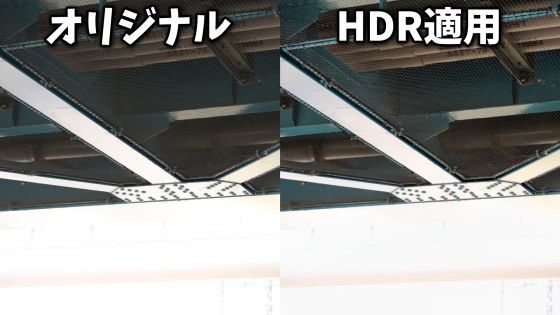
On the other hand, it was not possible to correct the 'too bright part' like the lower half of the scene below. Google Photos' 'HDR' is good at correcting darkened areas, but it seems that it is not good at correcting overly bright areas.
In addition, 'HDR' was a function that can be used only in the Google smartphone 'Pixel' series, but from February 2023, if you are a ' Google One ' subscriber, you can use it on Android smartphones and iPhones other than Pixel.
Related Posts:


