'Mark when' that allows you to create a project timeline for free by simply editing the text and share it with a URL
When planning a long-term project or life, it's helpful to have an easy-to-read timeline with individual events for later review. ' Markwhen ' is a free tool that reflects the entered / edited text in an easy-to-read timeline, and can be output as PDF or shared by URL, so try how to actually create a timeline. I tried it.
Project planning example --Markwhen
Accessing Markwhen opens a page with a text editing tab on the left and a timeline on the right, as shown below.
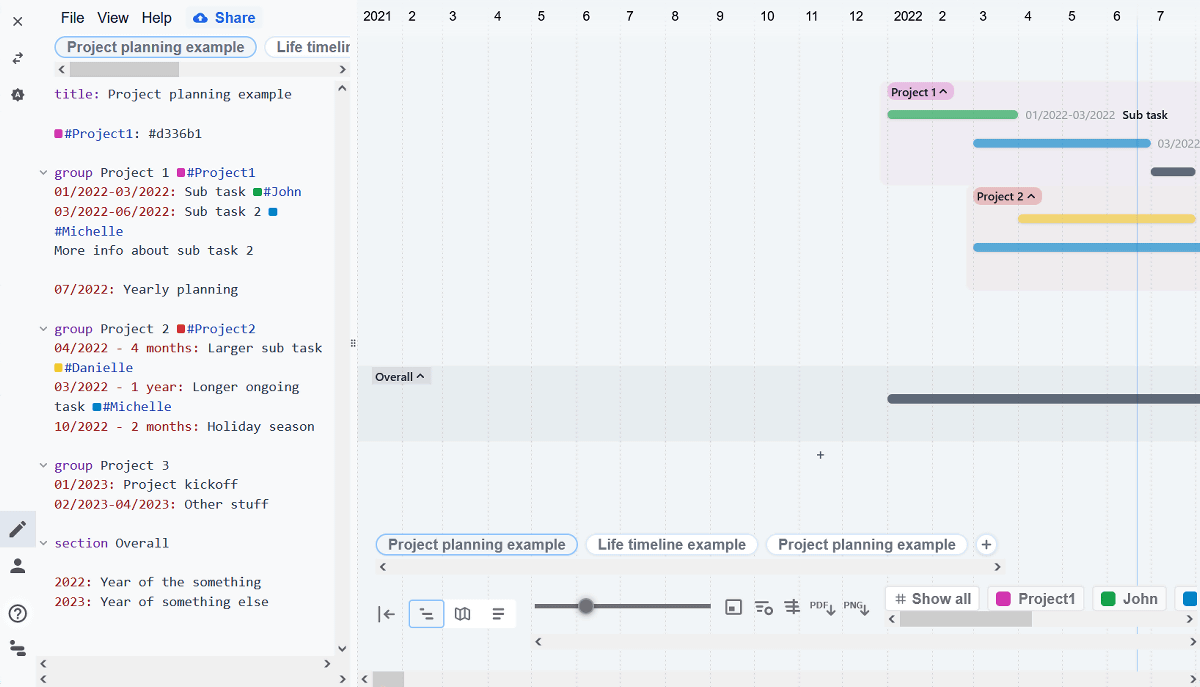
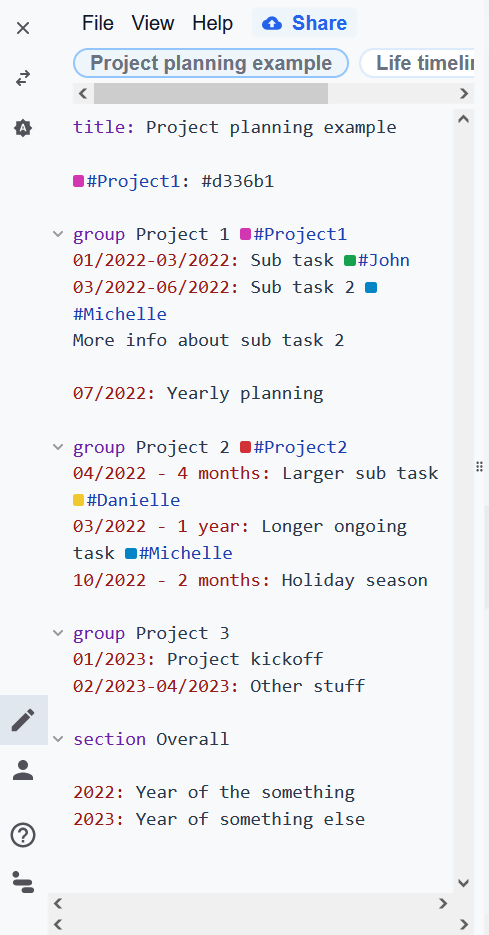
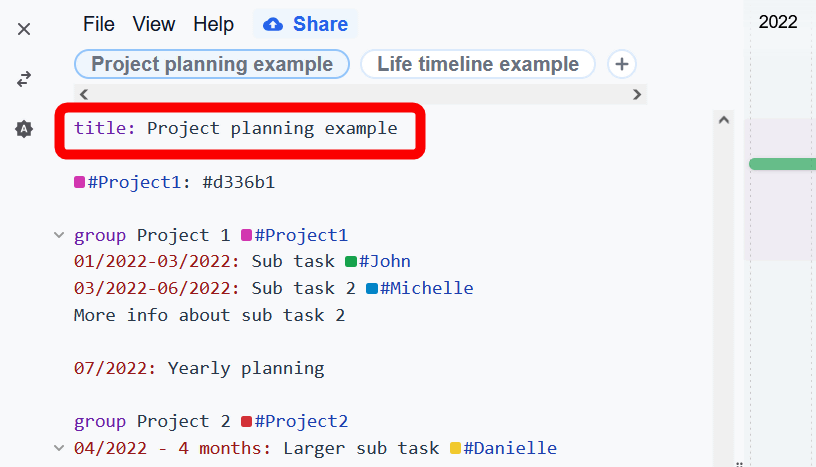
The text input field of 'Project planning example' registered as an example looks like this.
The timeline on the right is generated by reflecting the contents of the text input field.
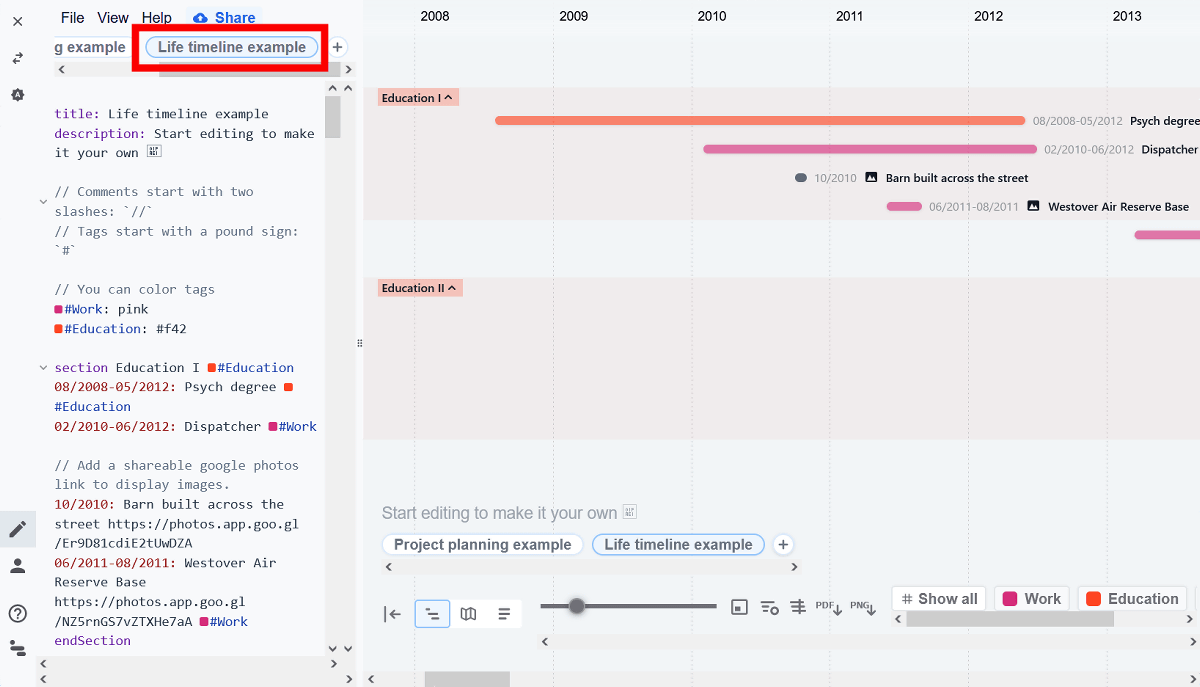
In addition to 'Project planning example', 'Life timeline example' registered as an example looks like this. It is possible to change the appearance and color of the timeline depending on the description method.
Detailed instructions on how to create a timeline with Markwhen are explained in the official documentation.
Markwhen editor
https://markwhen.com/docs
First, let's look at the structure of the timeline based on the input text of 'Project planning example'. The timeline consists of a title, 'Header,' and 'Events,' which indicate individual events. The header must be written above the event in the text entry field, and in the case of 'Project planning example', 'title: Project planning example' is the header.
Below that are the 'events' that are reflected in the timeline.

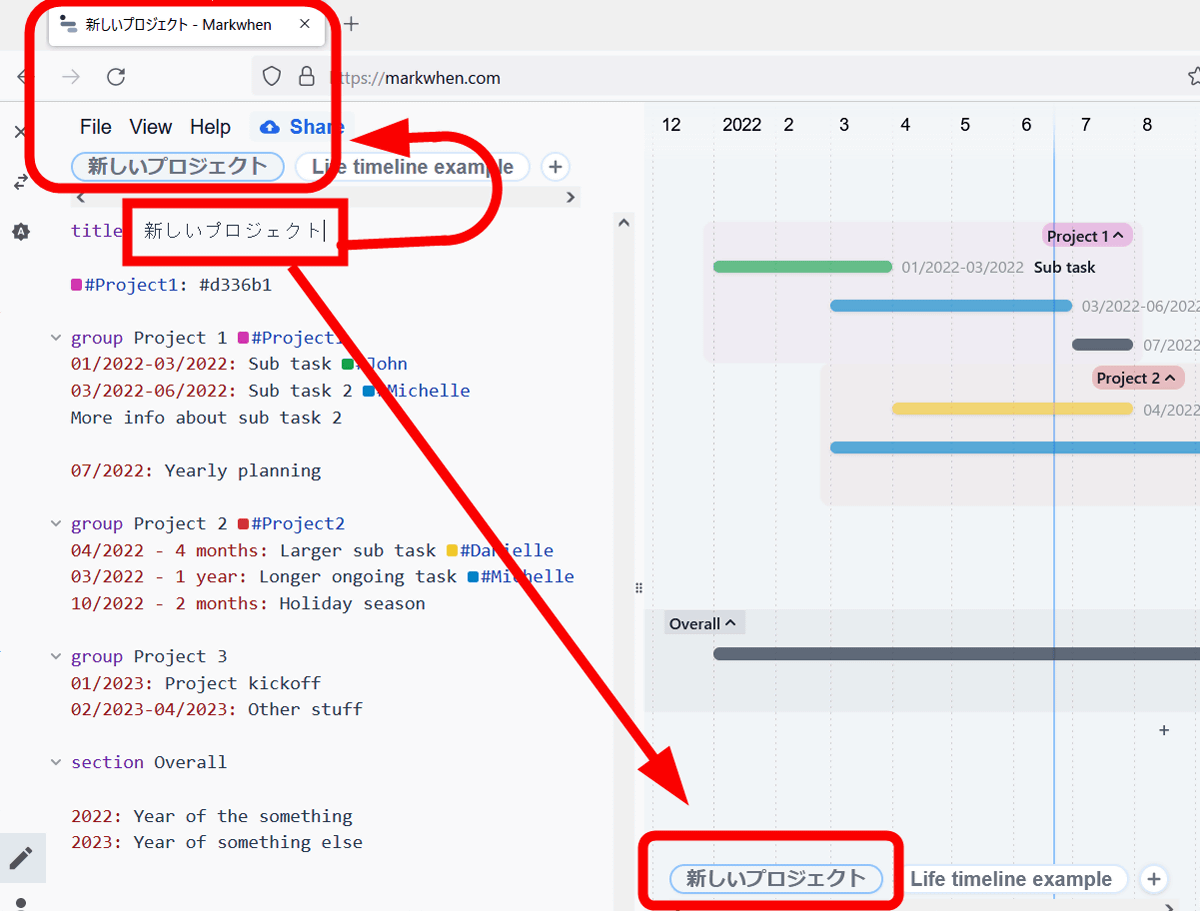
To specify a title, enter the title you want to specify after 'title:', and this title will also be displayed as the title of the browser tab. For example, if you put 'new project' after 'title:', it will be reflected in the title of the timeline and the title of the browser tab as shown below.
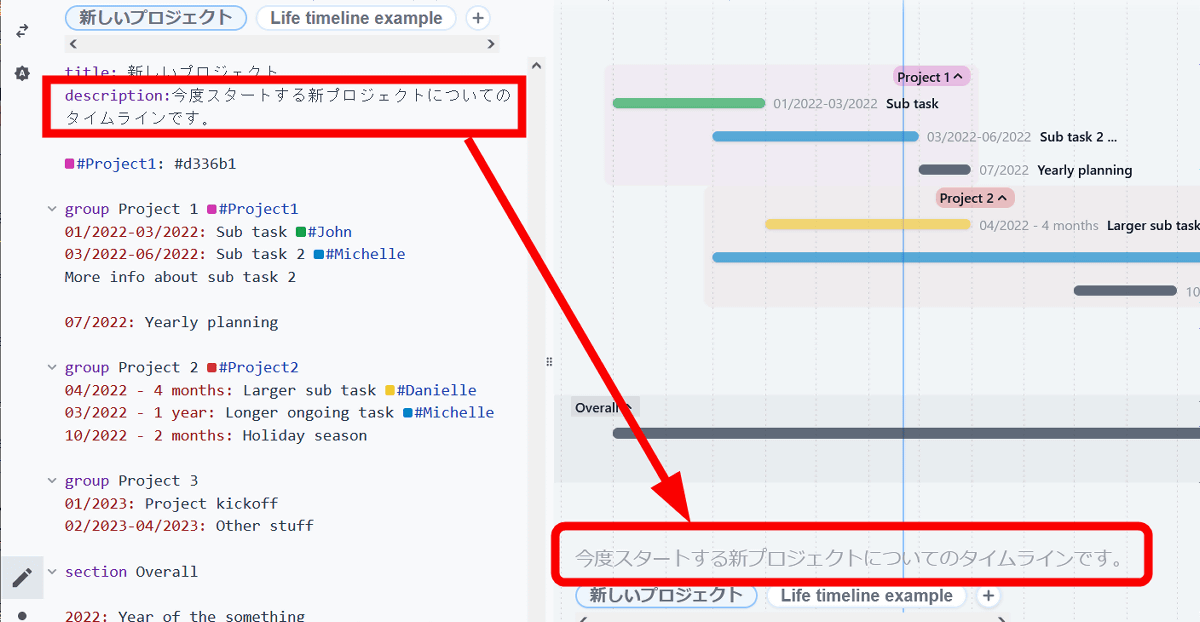
Also, if you want to add a description of the title, you can also add a description to the timeline by entering the description after 'description:' above the event.
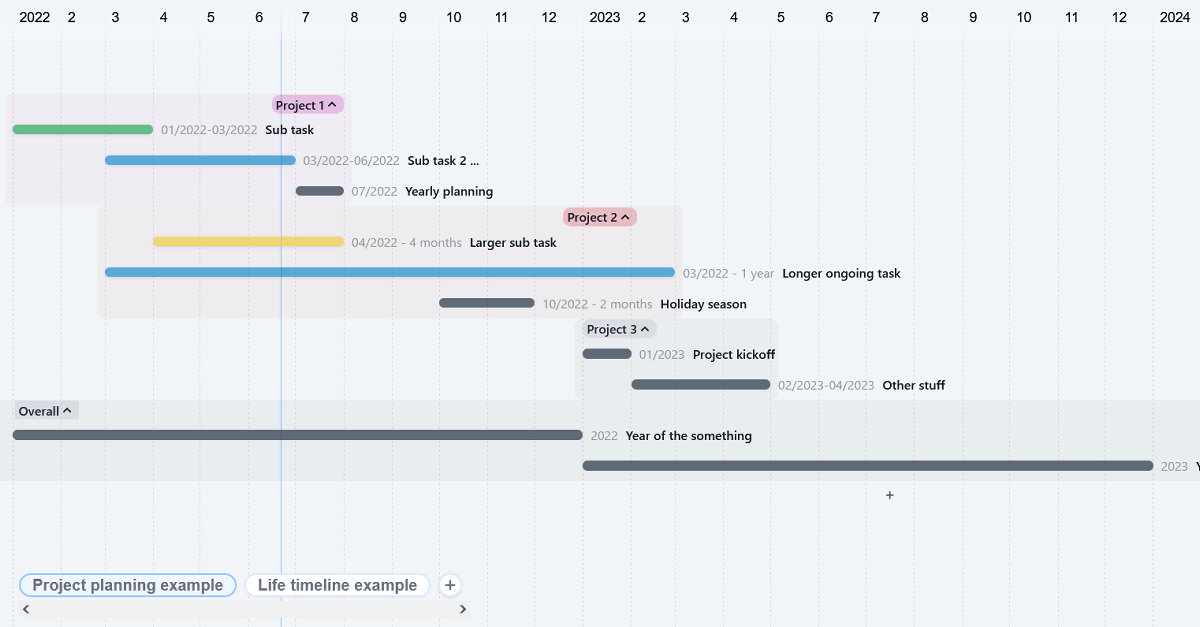
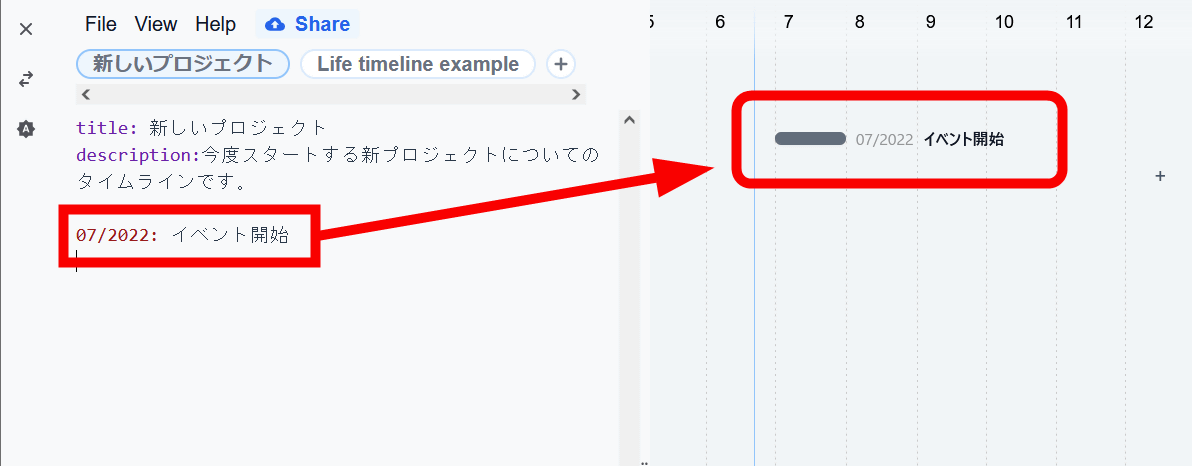
Next, delete the event that has already been entered and add a new event to the timeline. To add an event, enter a ': (colon)' after specifying a specific period, and then enter a description of the event. For example, if you enter '07/2022: Event start', the event was added to the item of July 2022 on the timeline.
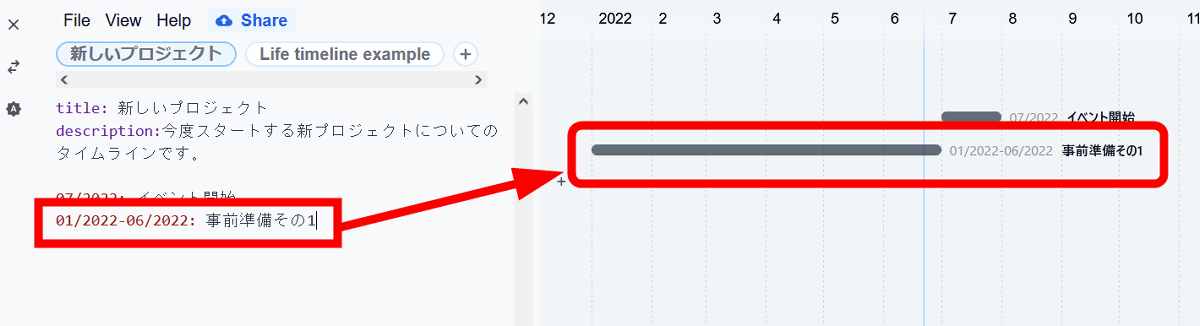
Event dates can also be specified by connecting them with '-'. For example, if you enter '01/2022-06/2022: Preparation Part 1', the event according to the specified period from January to the end of June 2022 will be reflected in the timeline.
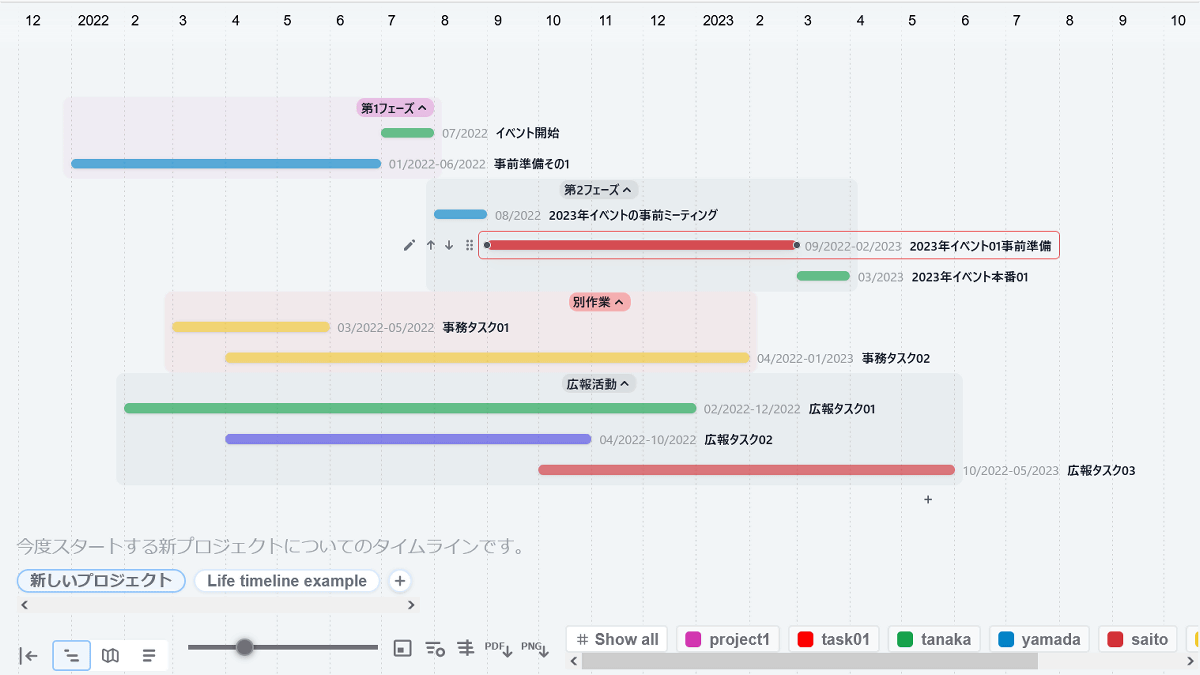
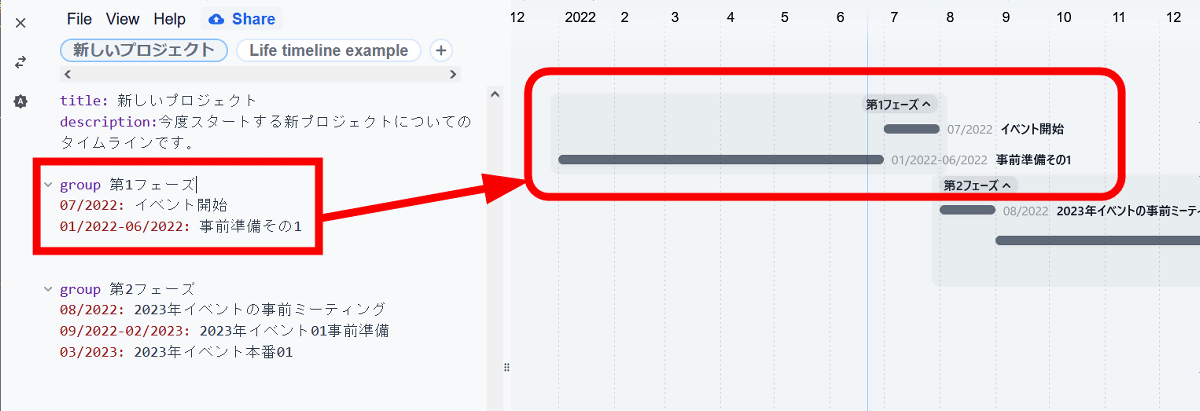
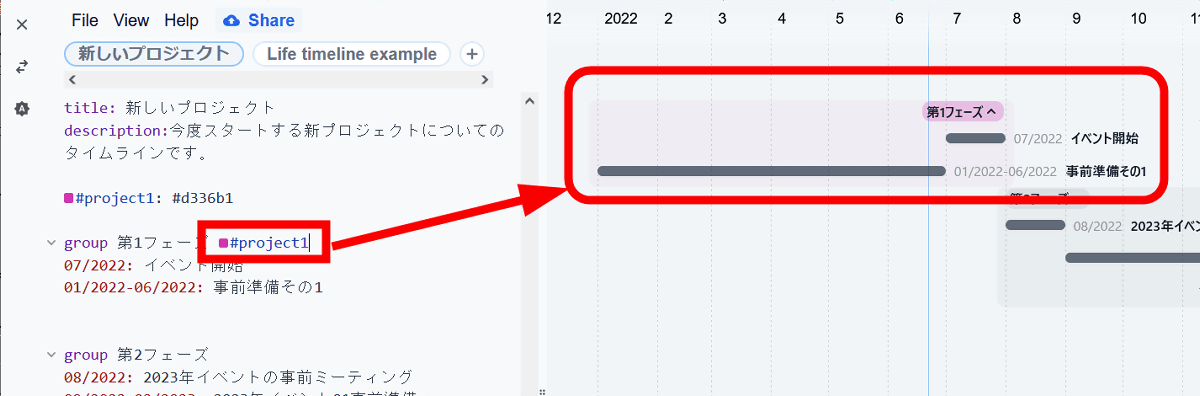
You can also group events by entering 'group (group name)' at the top of multiple events. When I try to enter 'group 1st phase', it looks like this. When multiple projects are in parallel, it is easier to organize them by grouping them in this way.
It is also possible to color-code each group. It is OK if you specify the tag color with the
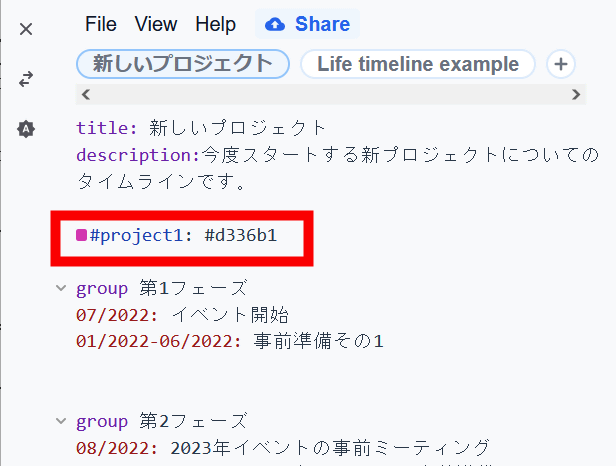
If you insert the tag '# project1' after the event group, the specified color will be reflected on the timeline.
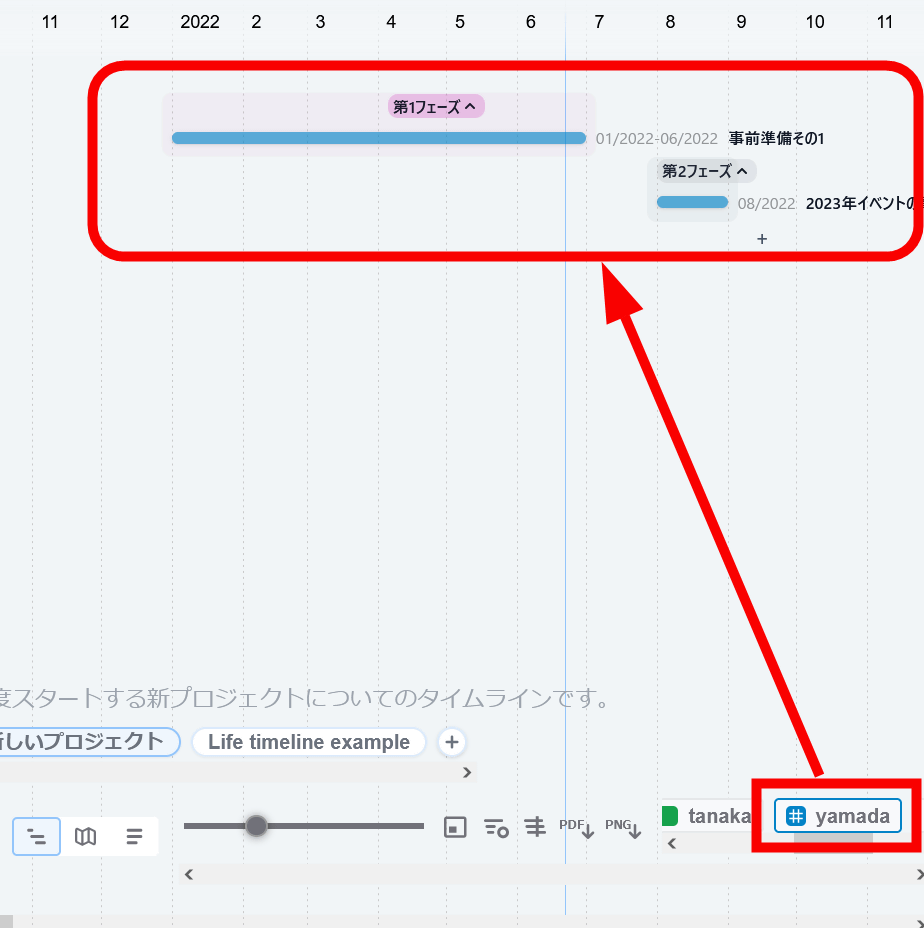
Also, if you insert tags such as '#tanaka' and '#yamada' in each event, they will be tagged even if you have not specified the color in advance, and you can set the color later.
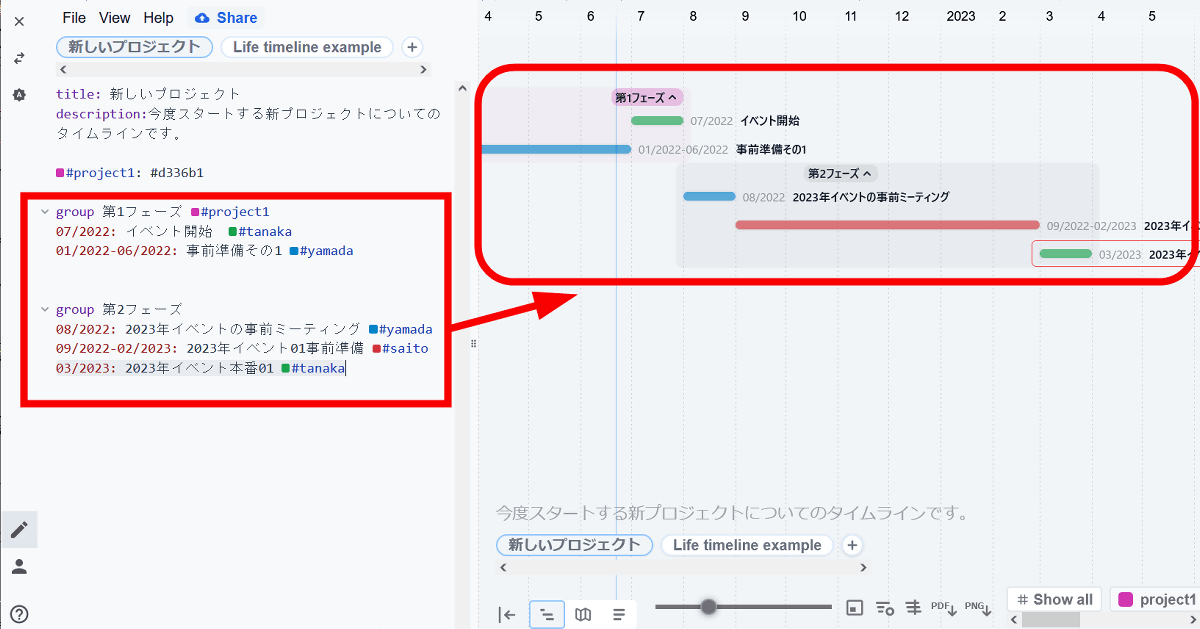
Since the set tags are lined up at the bottom of the timeline, you can also click the tags to display only the related timeline.
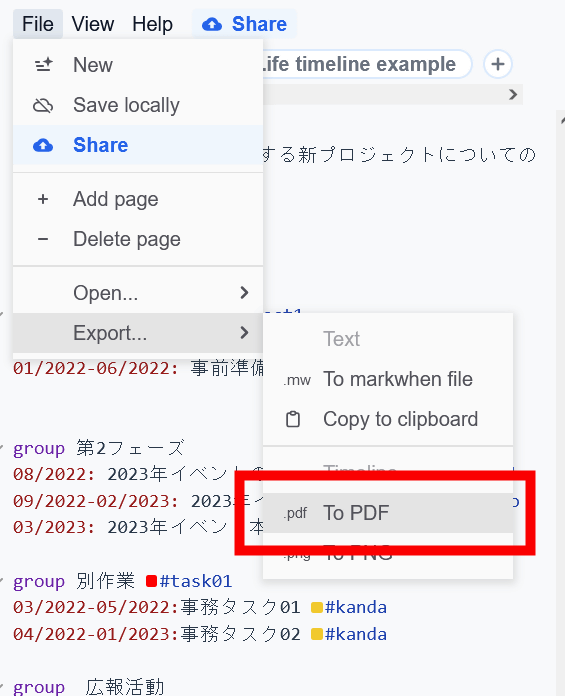
The created timeline can be output in text format and saved to the clipboard by clicking 'File', 'Export', and 'Copy to clipboard' at the top left of the screen.
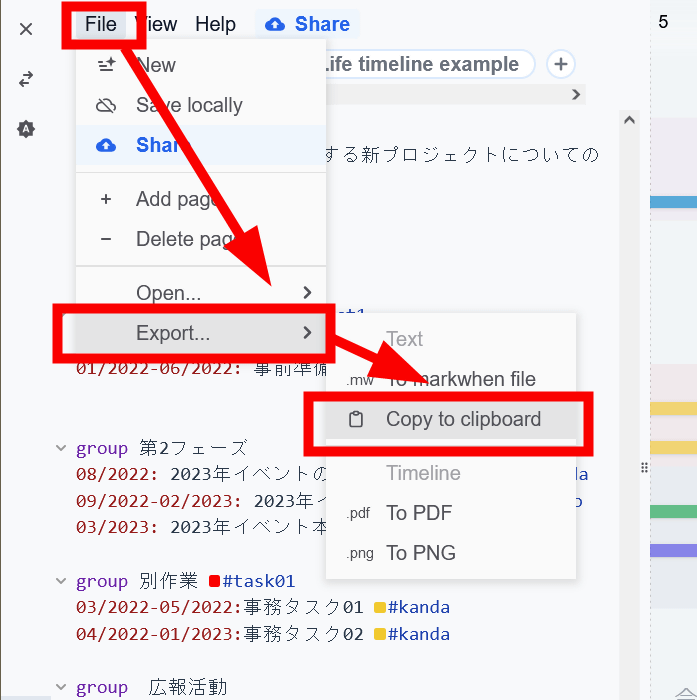
Also, if you click 'To PDF' ...
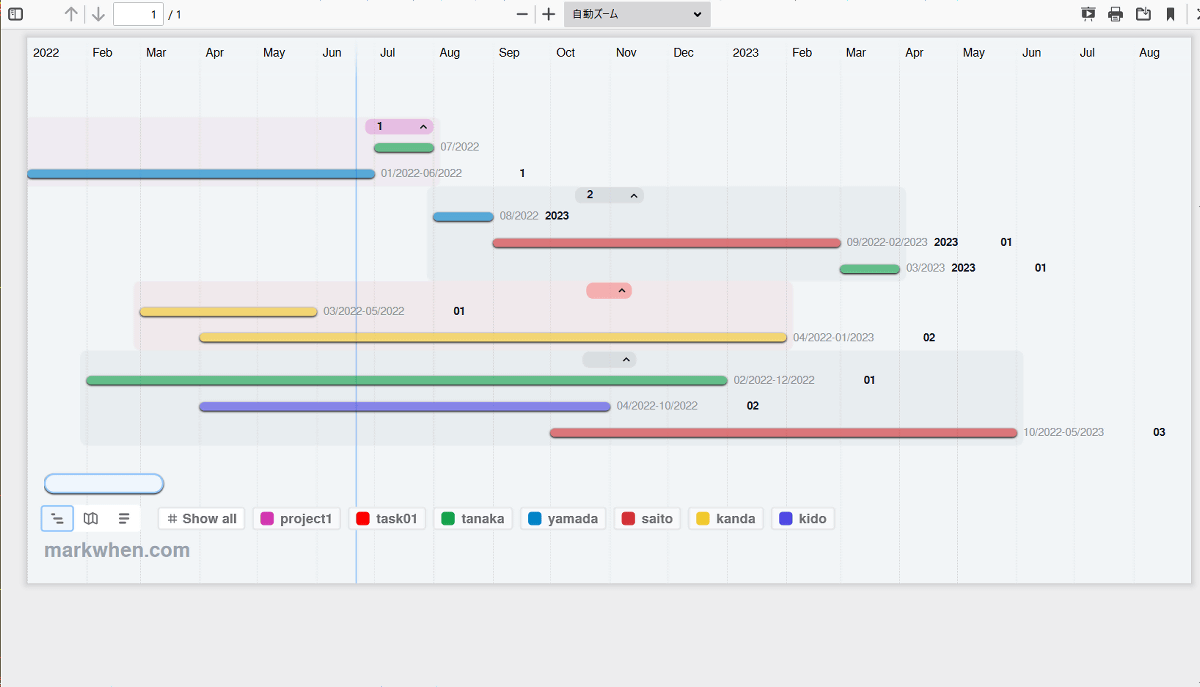
A PDF file of the timeline opens, and you can save or print out this PDF. Note that Japanese does not seem to be converted to PDF, so be careful when outputting.
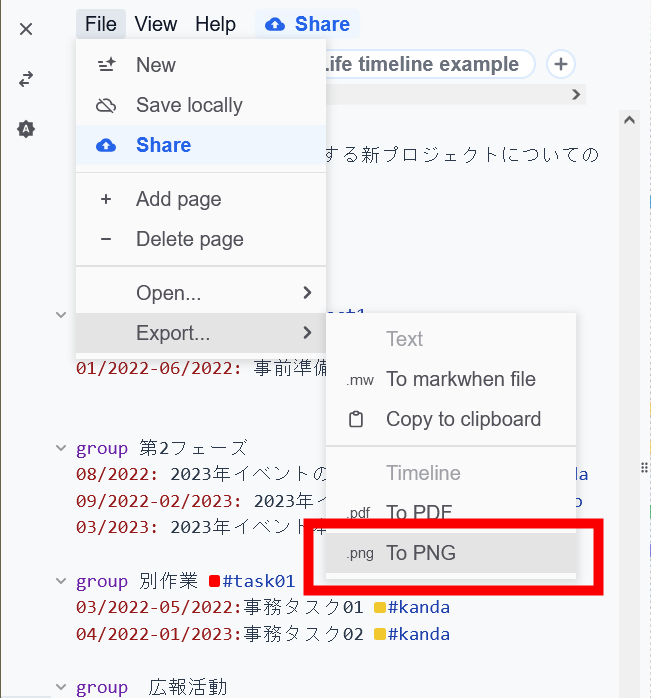
Click 'To PNG' to download the timeline as a PNG file. In this case as well, Japanese is not reflected.
Click 'Share' at the top ...
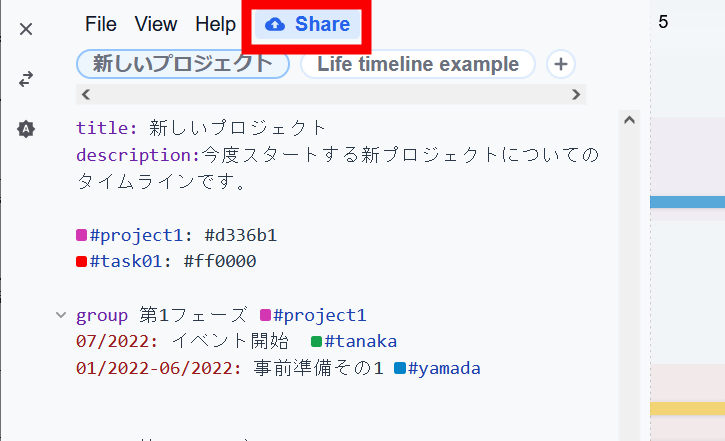
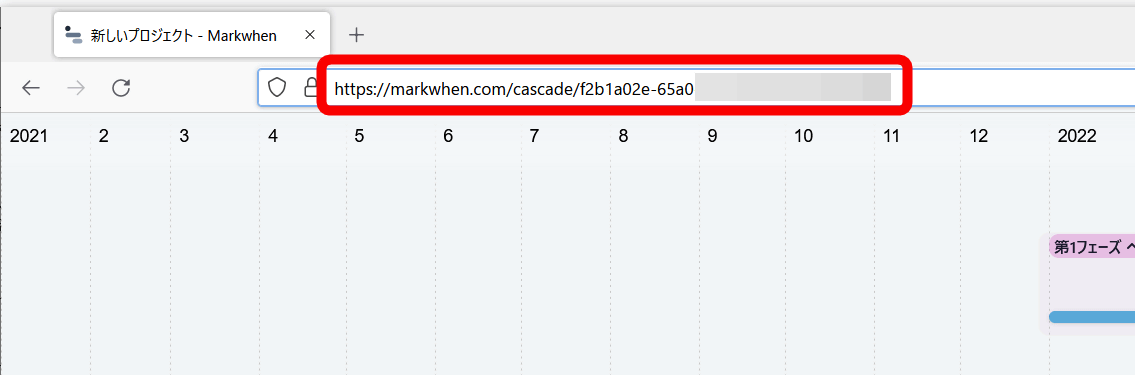
The URL for the timeline has been generated. By sharing this URL, you can share the timeline with other team members.
Related Posts:


in Web Service, Review, Posted by log1h_ik