I tried using the free Slack-like open source chat tool 'Zulip'
In recent years, due to the wave of remote work, more and more companies are introducing chat tools such as Slack for internal communication. ' Zulip ' is an open source chat tool like Slack, and it is said that basic functions can be used for free, so I actually tried using what kind of tool it is.
Zulip
Zulip is a chat tool acquired by Dropbox in 2014 and was released as open source in 2015. Many engineers have committed to the official GitHub repository, and improvements are still being made at the time of writing the article. How to use Zulip is as follows.
◆ Installation & setup
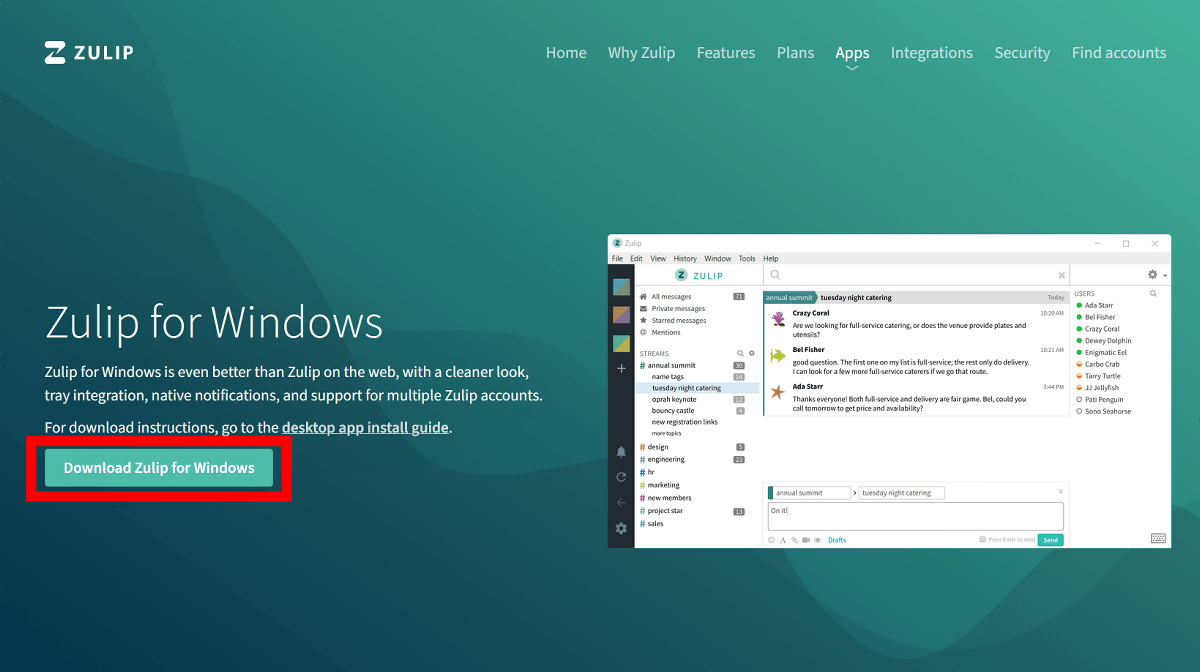
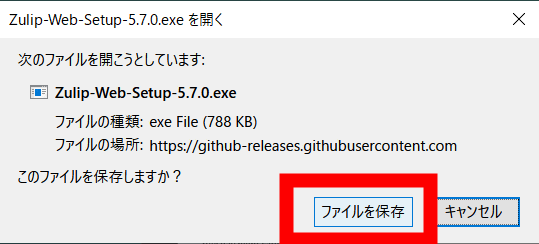
When you visit the official download page , you will be directed to download the best app for each environment you visit. This time, click 'Download Zulip for Windows' ...
Click Save File.
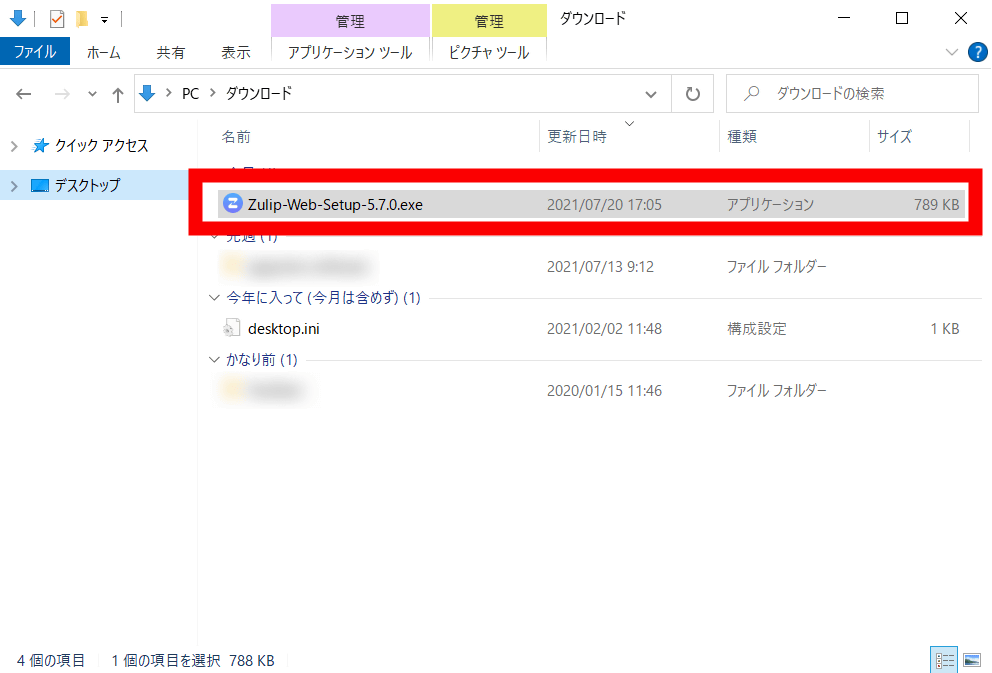
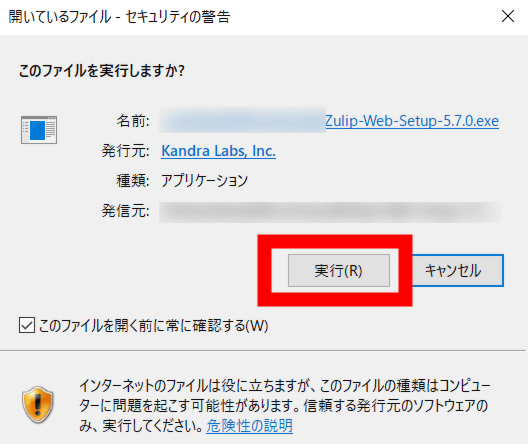
Open the downloaded executable file ...
Click 'Run'.
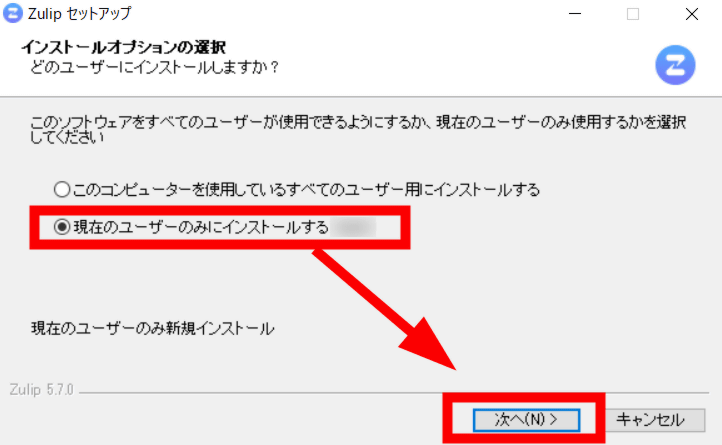
Select the range of users who will use the software and click 'Next'.
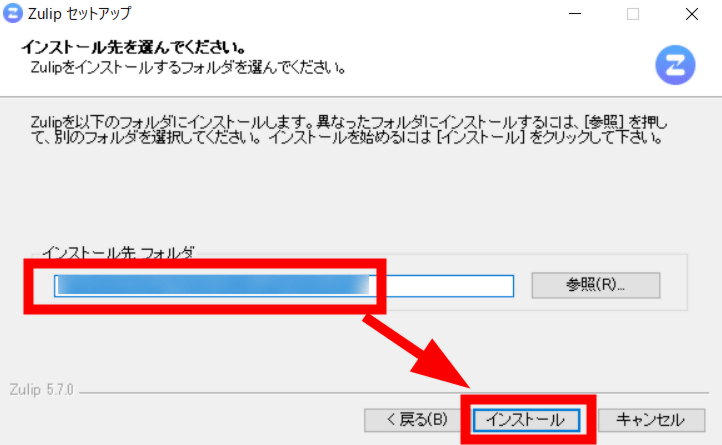
Select the installation folder and click 'Install'.
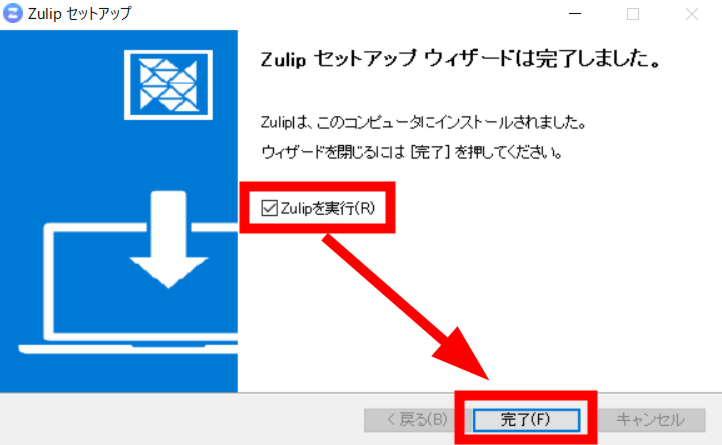
After the installation is complete, if you click 'Finish' with 'Run Zulip' checked ...
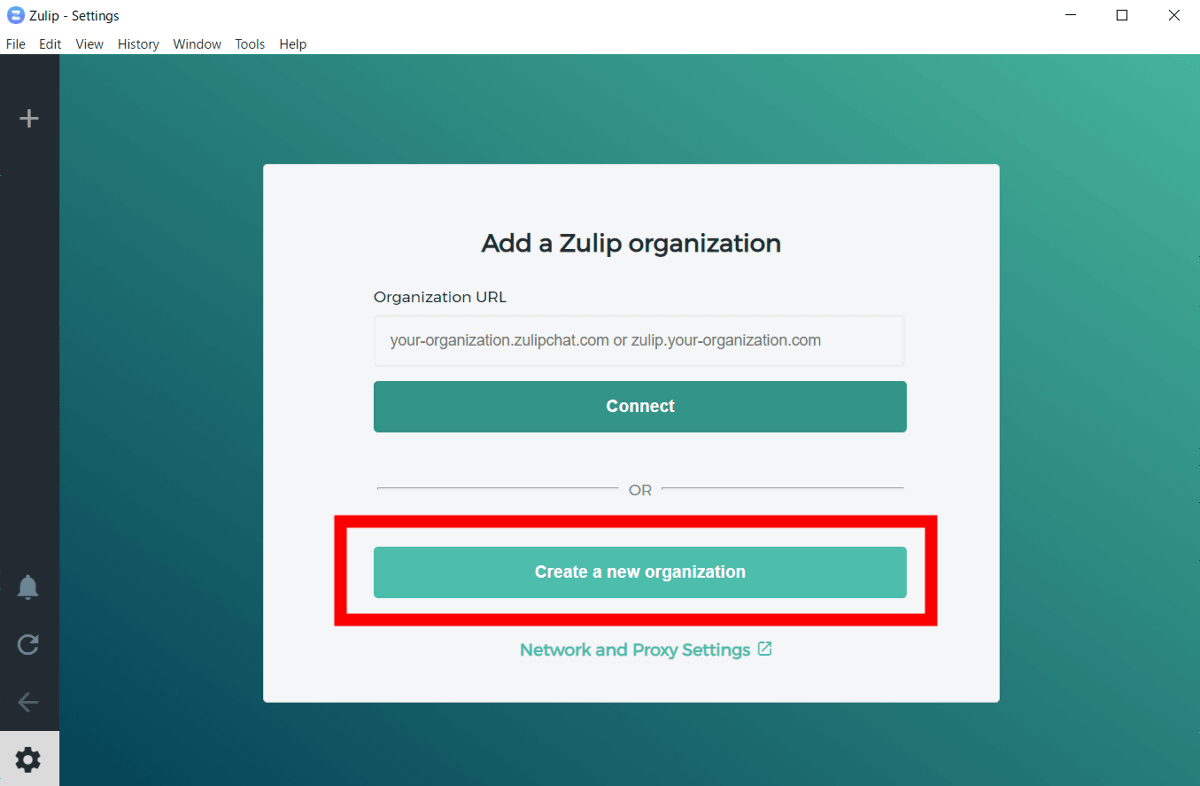
The client app will start. If you want to start a new organization instead of joining an existing Zulip organization, click 'Create a new organization'.
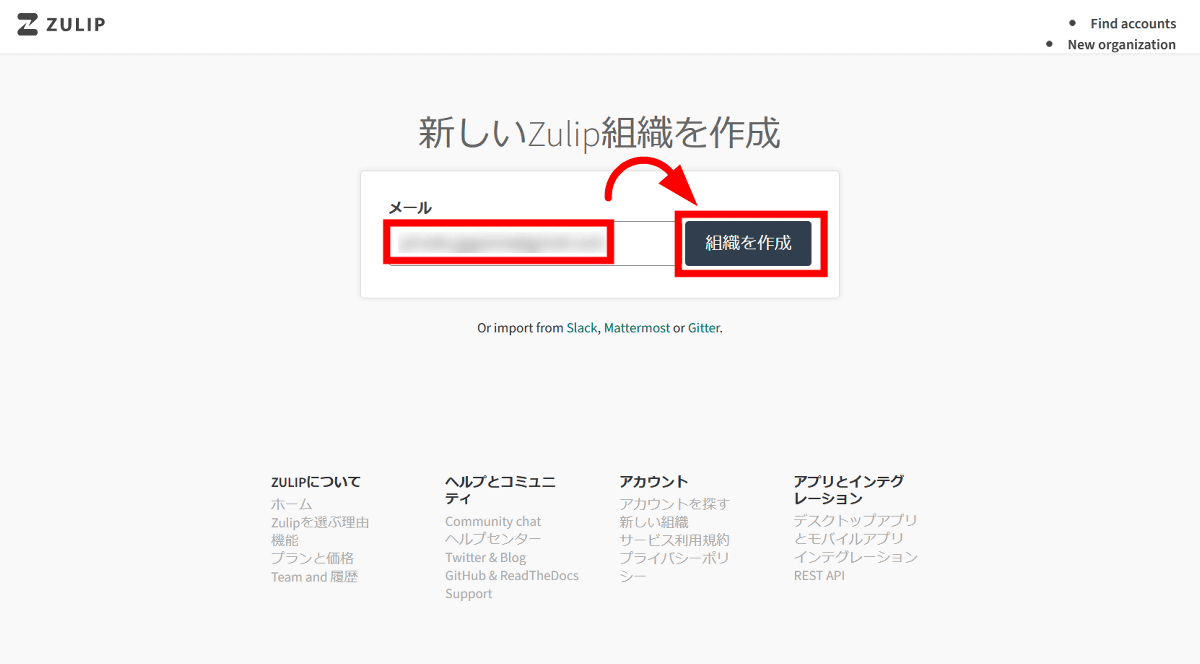
This will open the browser registration page. Enter the administrator's email address and click 'Create Organization'.
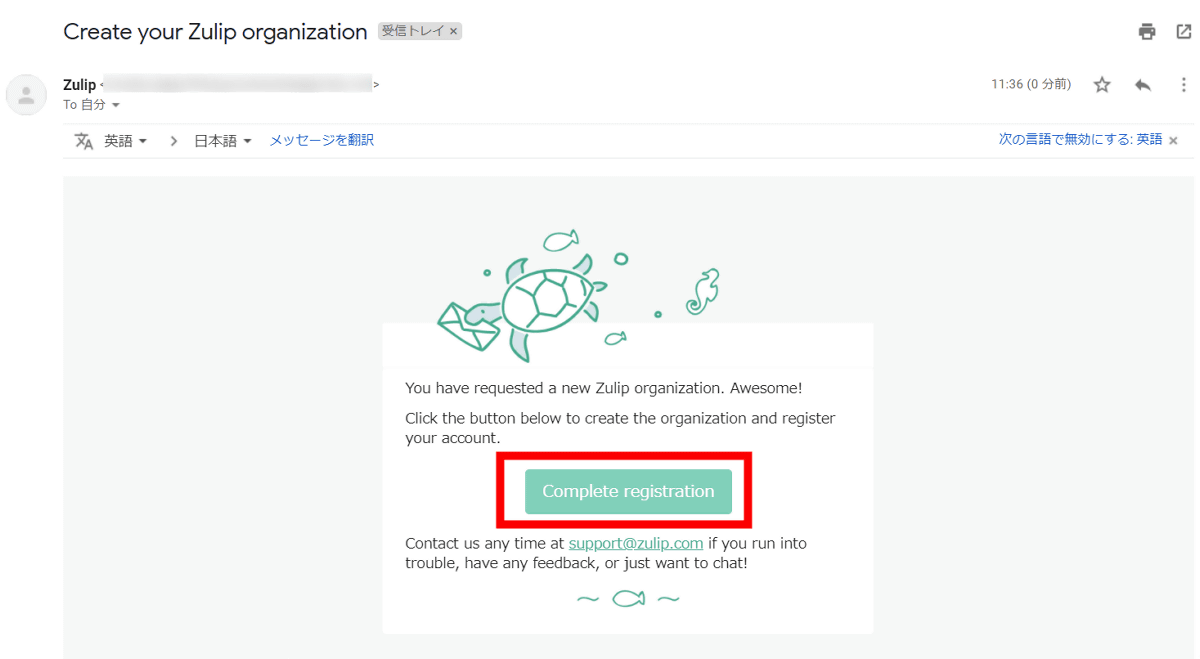
A verification email from Zulip will be sent to the registered email address, so click 'Complete registration'.
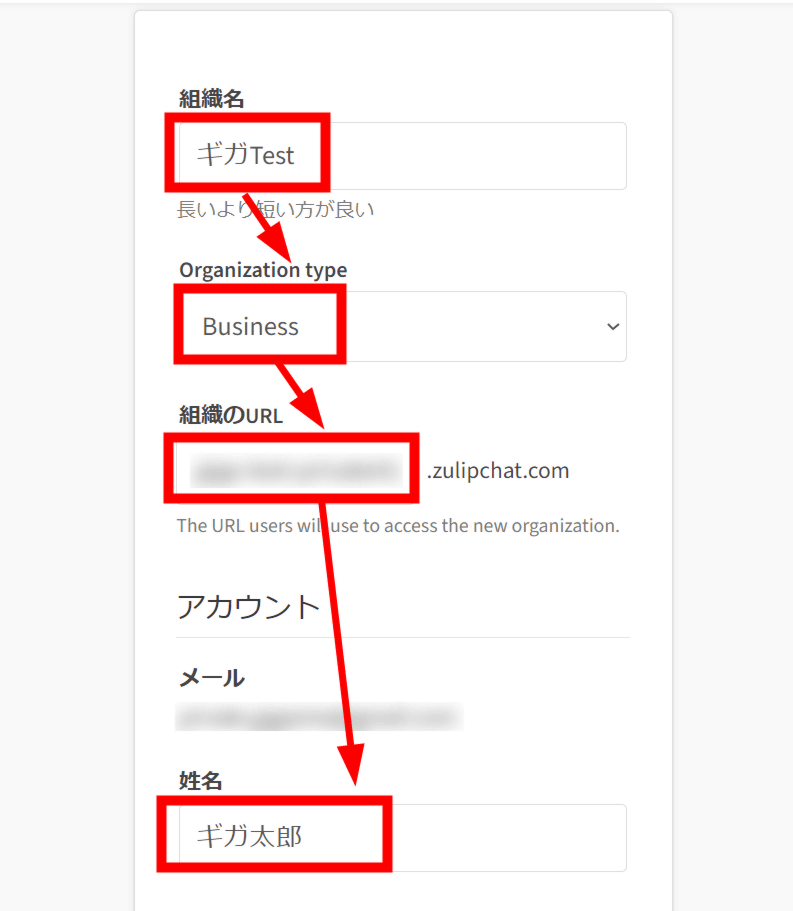
Then, the browser setup page opens, so enter the organization name, Organization type, organization URL, and user name.
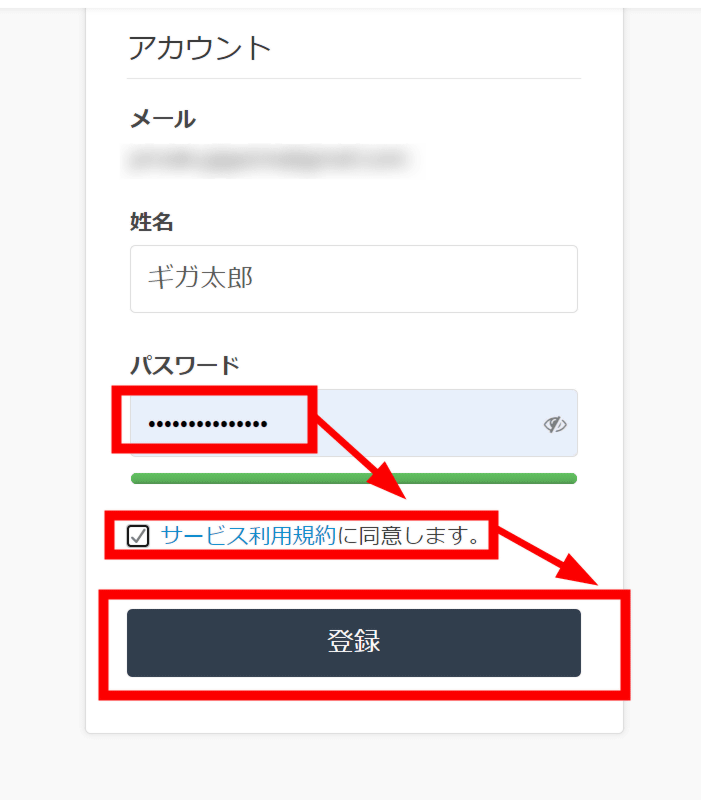
Enter the password, check 'I accept the terms of service', and click 'Register'.
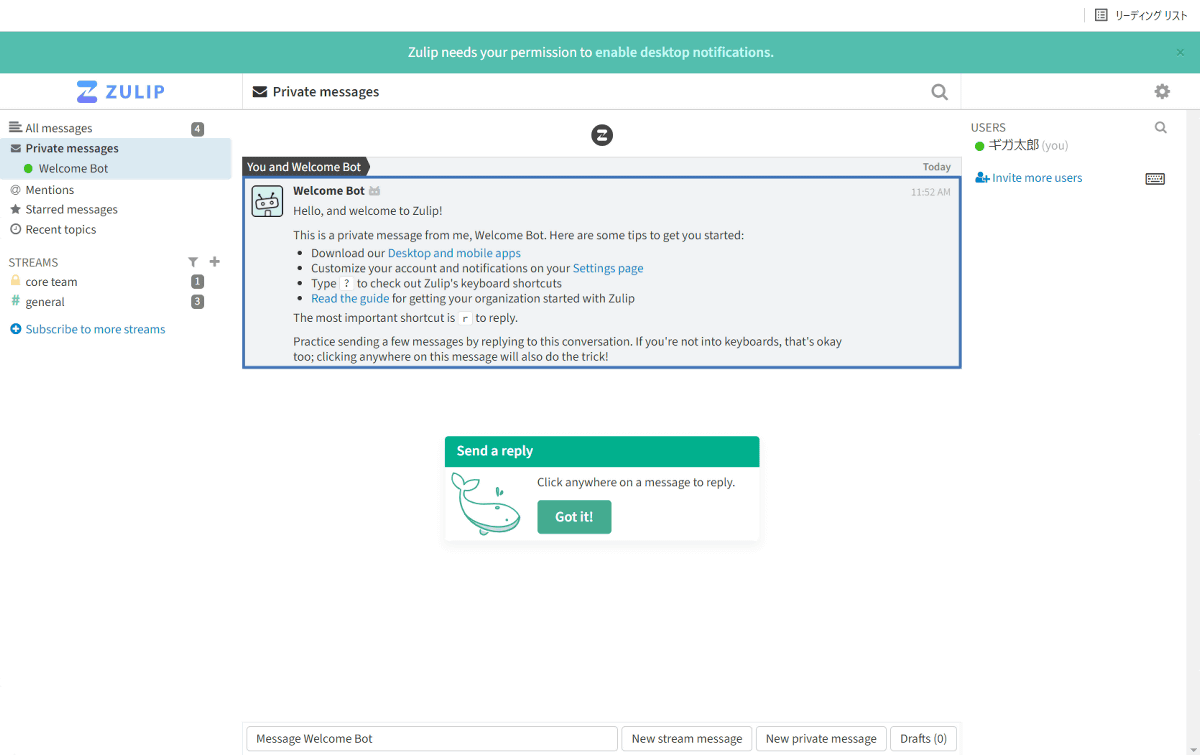
This completes the start-up of the organization.
◆ Log in to Zulip with the desktop version of the client app
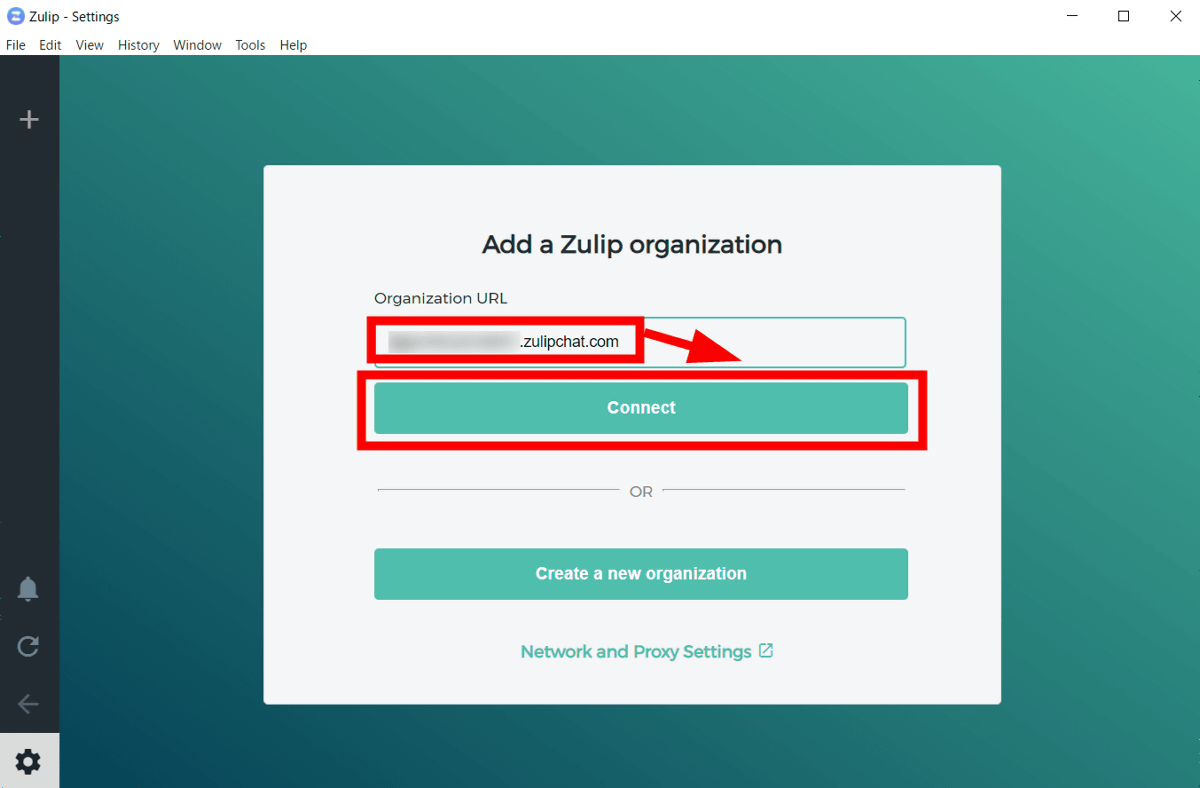
Once the browser setup is complete, it's time to log in to your Zulip organization from the desktop version of the client app. Enter the URL of your organization on the top screen of the app and click 'Connect'.
Enter your email address and password and click 'Login' ...
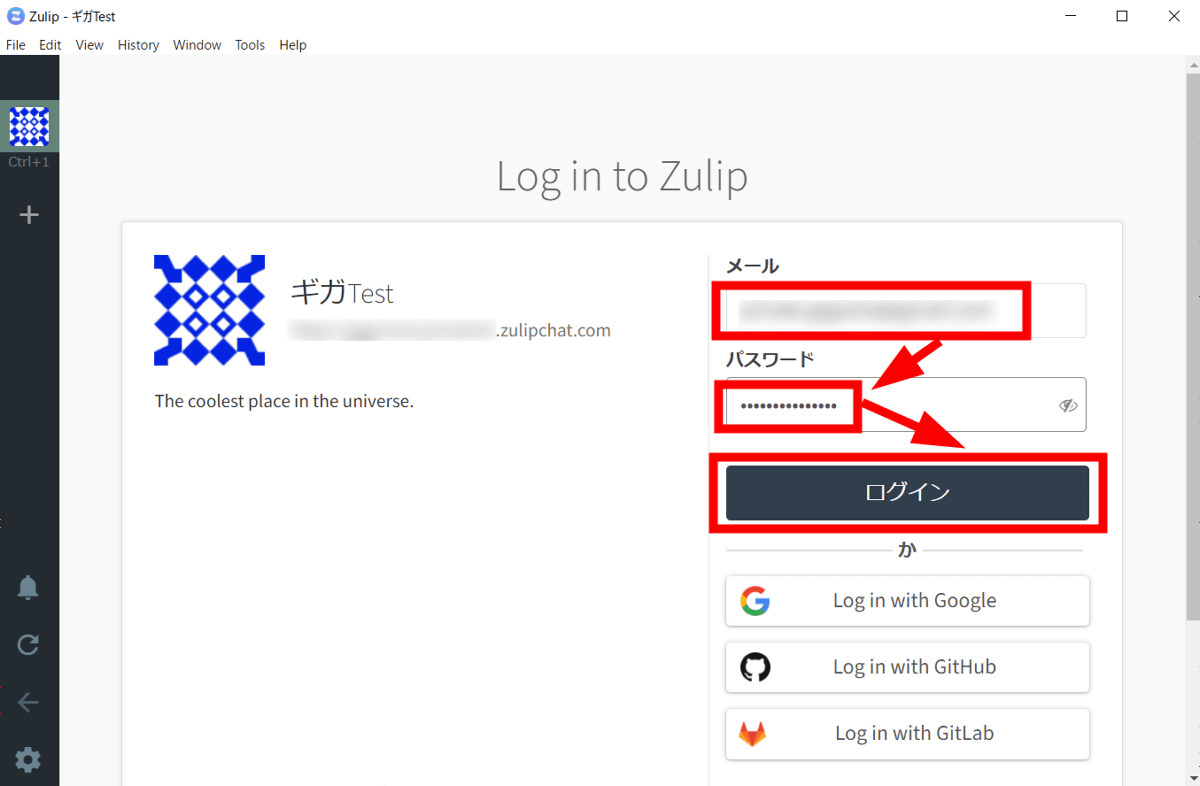
I was able to access the organization from the app. If you want to invite other users, just install Zulip's client app and enter the URL of your organization from the top screen.

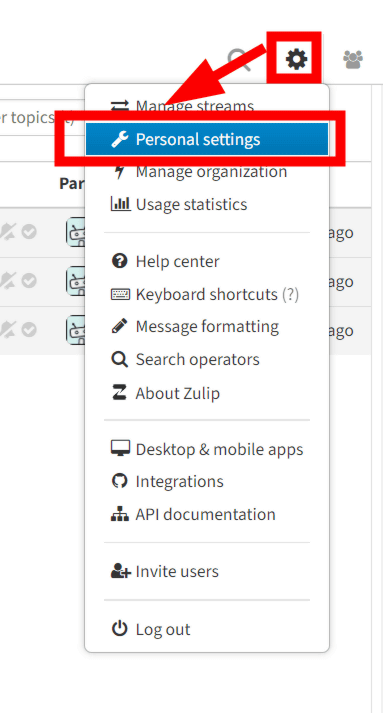
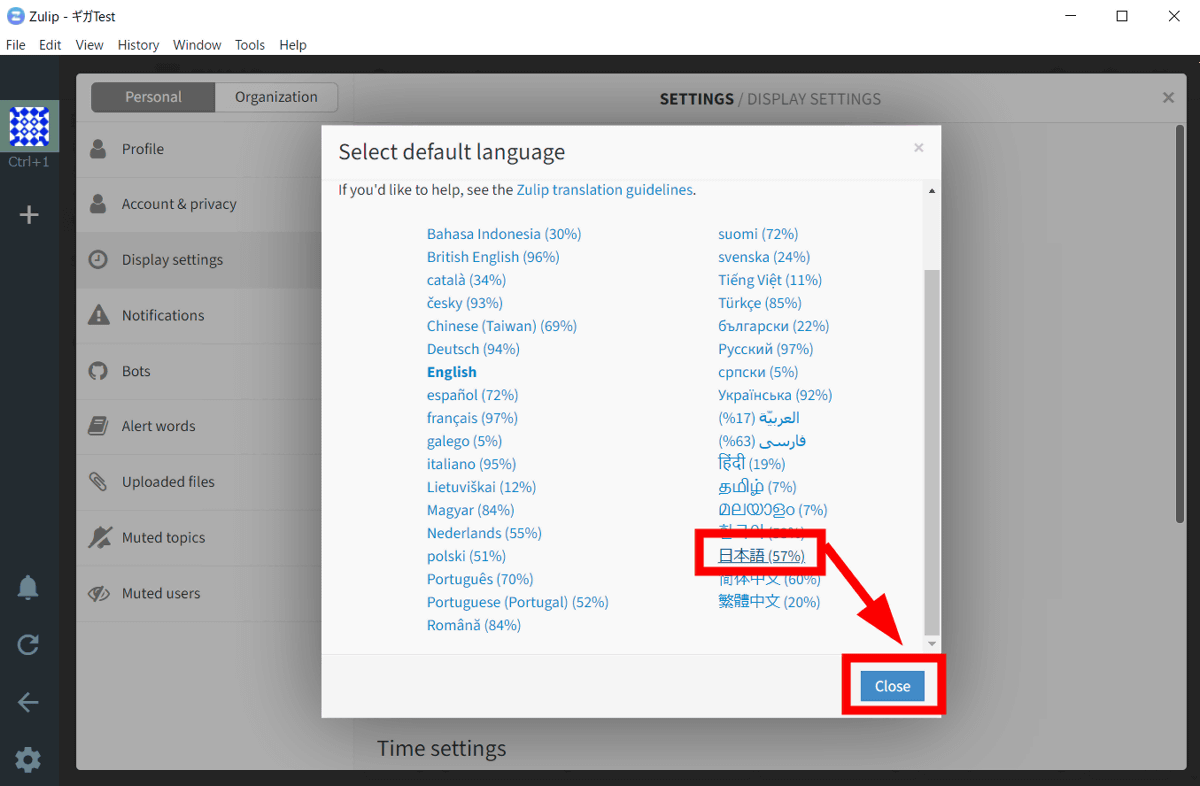
To use Zulip in Japanese, click 'Personal settings' from the gear icon in the upper right.
Select 'Display settings' and click the 'Default language' item.
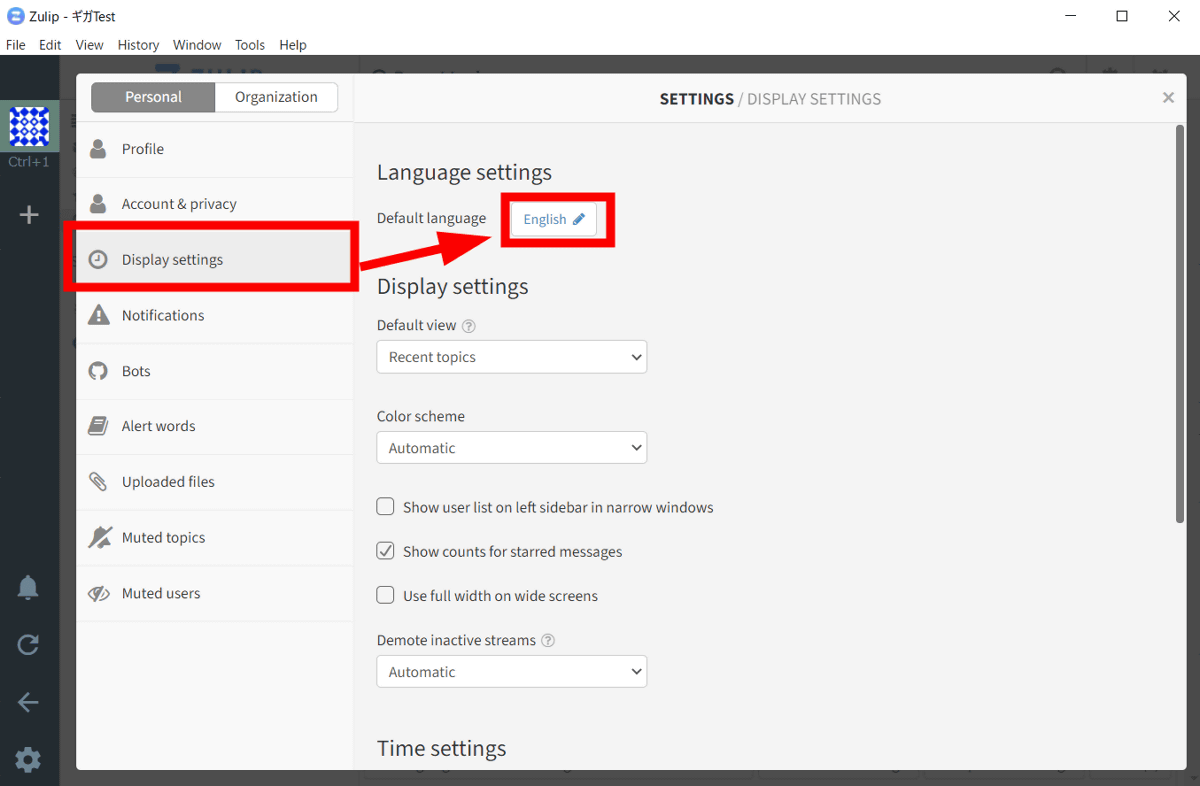
Select 'Japanese' and click 'Close'. In addition, what is displayed on the right side of the language is the ratio that translation supports, and Japanese support is '57%'.
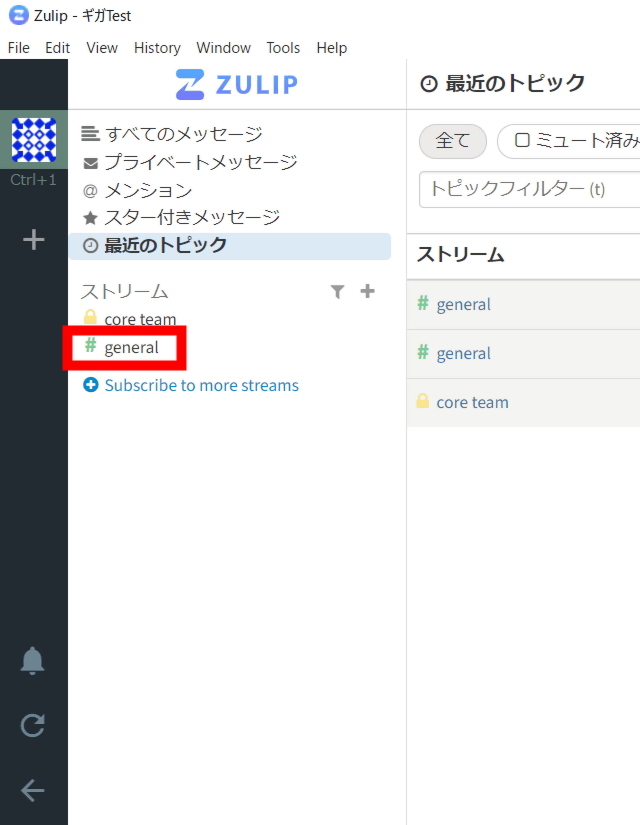
When I returned to the top screen and reloaded, the main part was translated into Japanese.

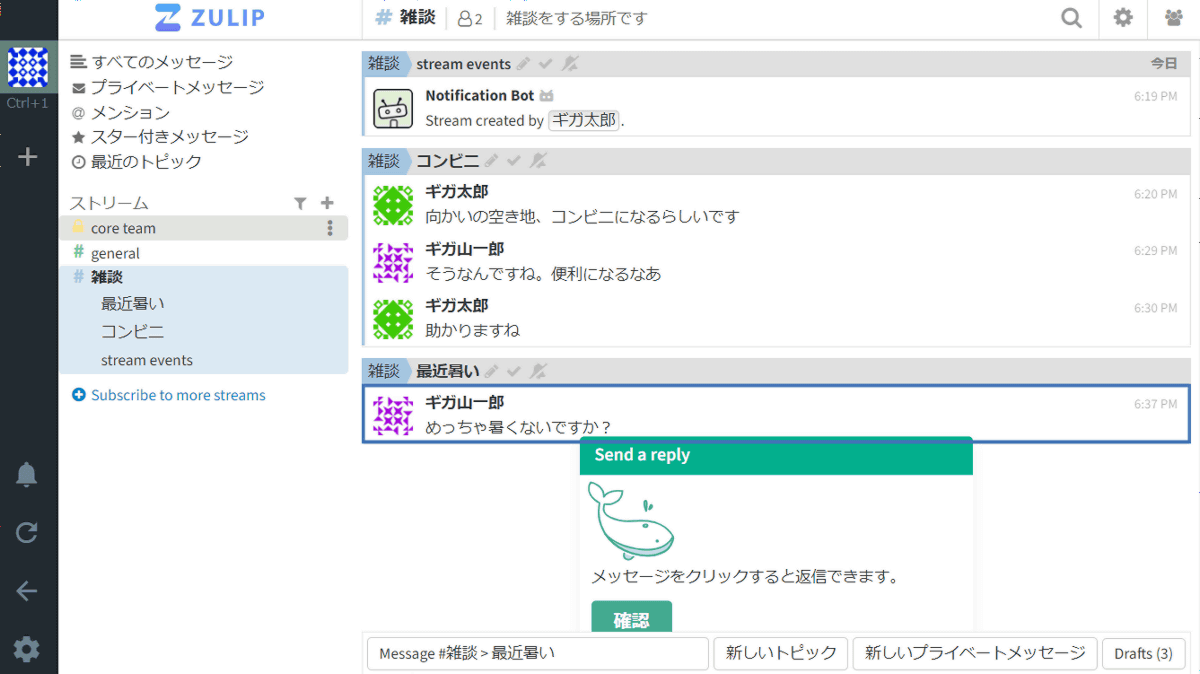
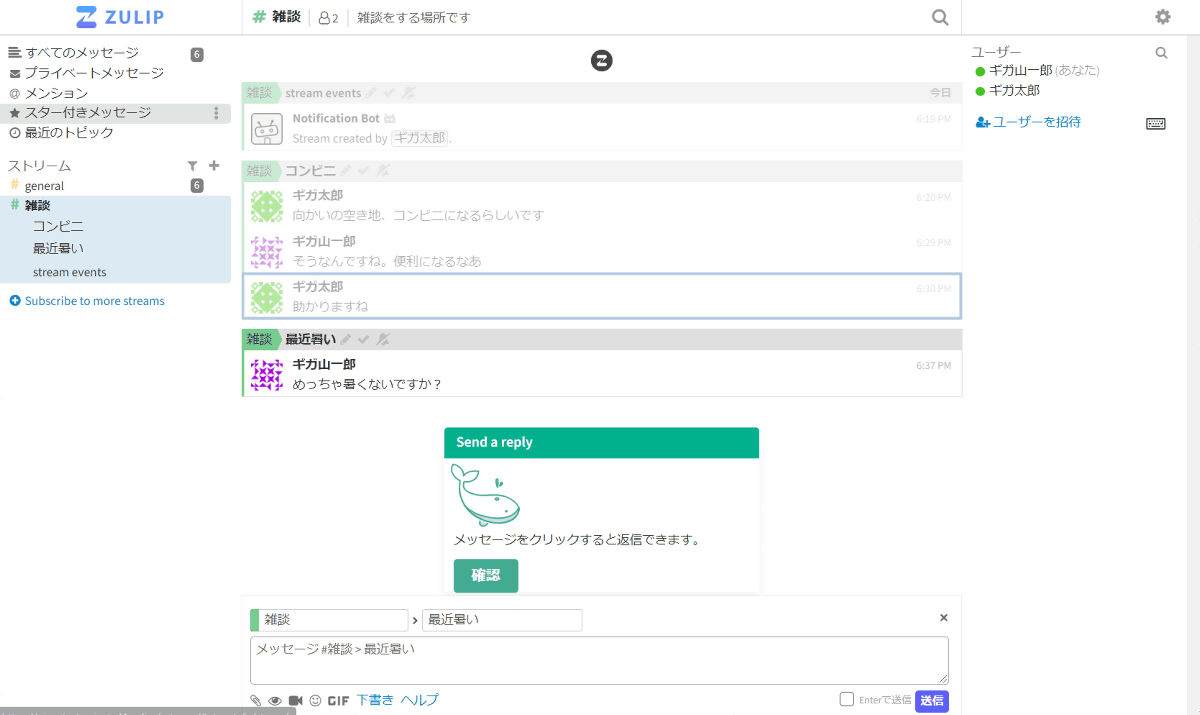
◆ Send message & 'stream' and 'topic'
In Zulip, users join a kind of channel called 'stream' and exchange messages in it. At the time of creating the Zulip organization, there are two streams, 'core team' for users with administrator privileges and 'general' for general users. If you try clicking 'general' ...
You can see the message sent by the Zulip bot.
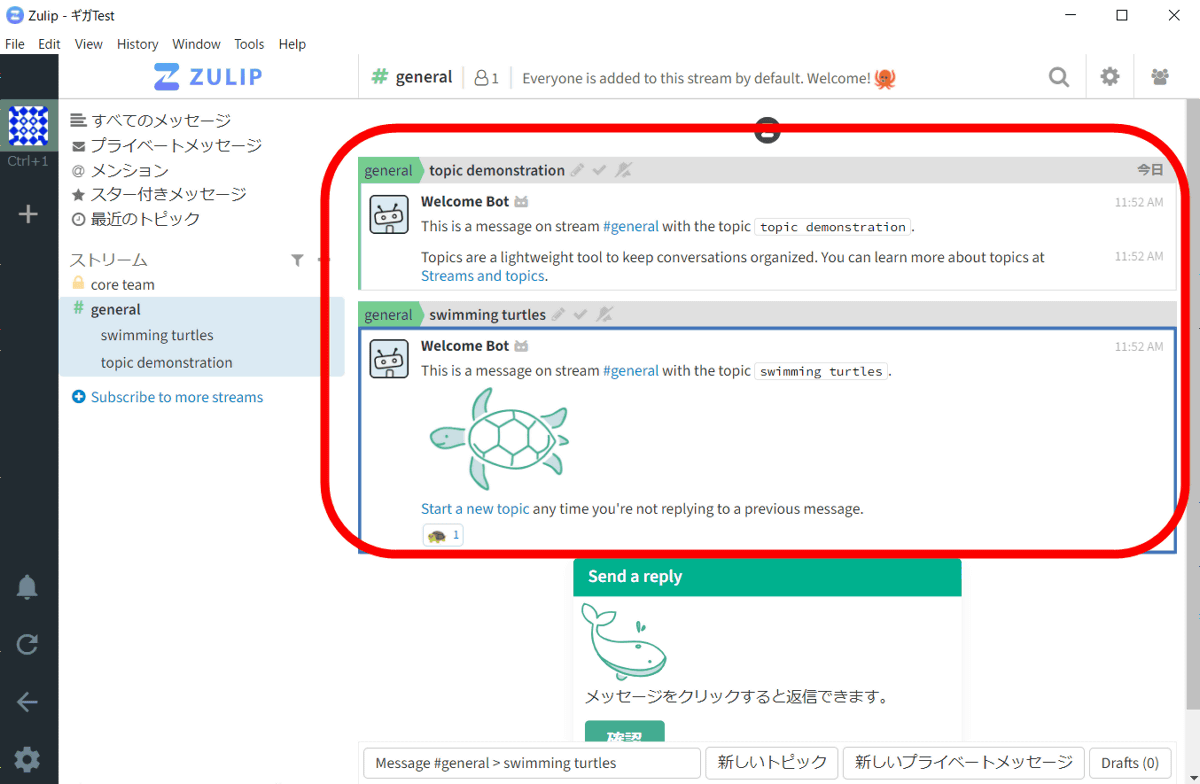
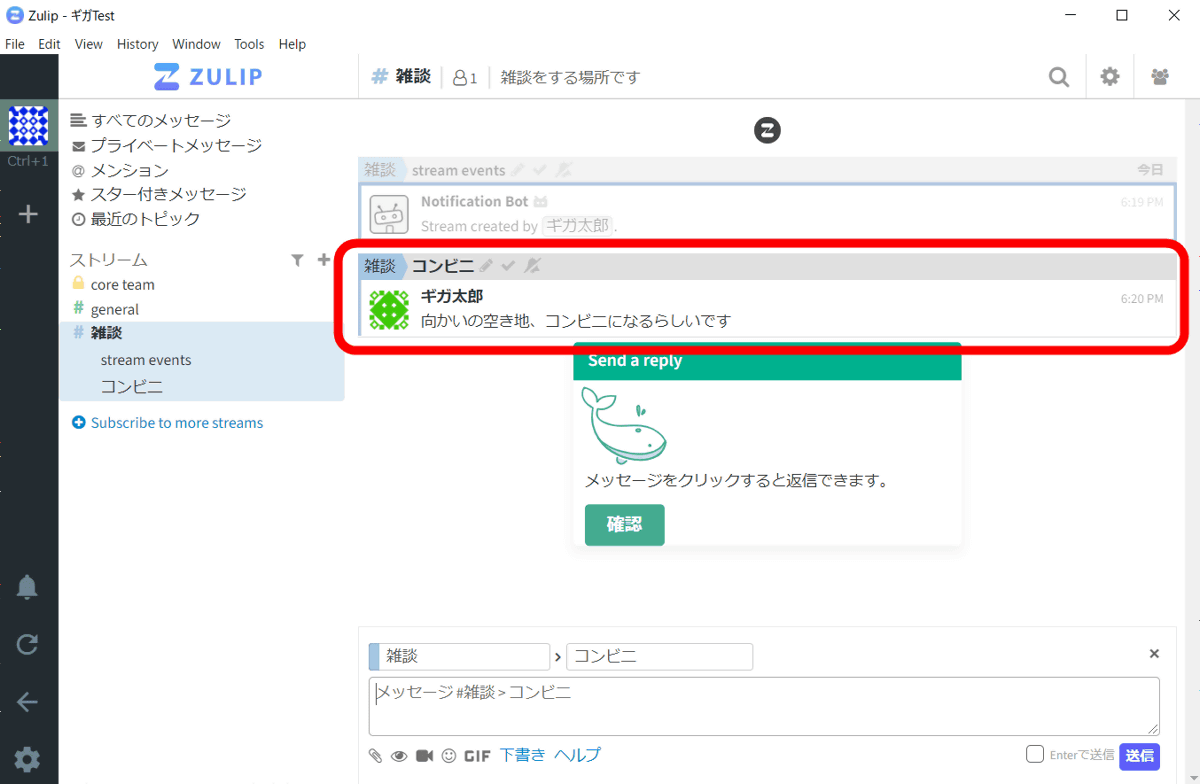
The inside of the stream is further subdivided into items called 'topics'. In the case of email, the stream is an internal or departmental mailing list, and the topic is an image like the subject of an email (thread name). Participants in the stream can view the messages exchanged within it and select topics that are relevant to them to join the conversation.

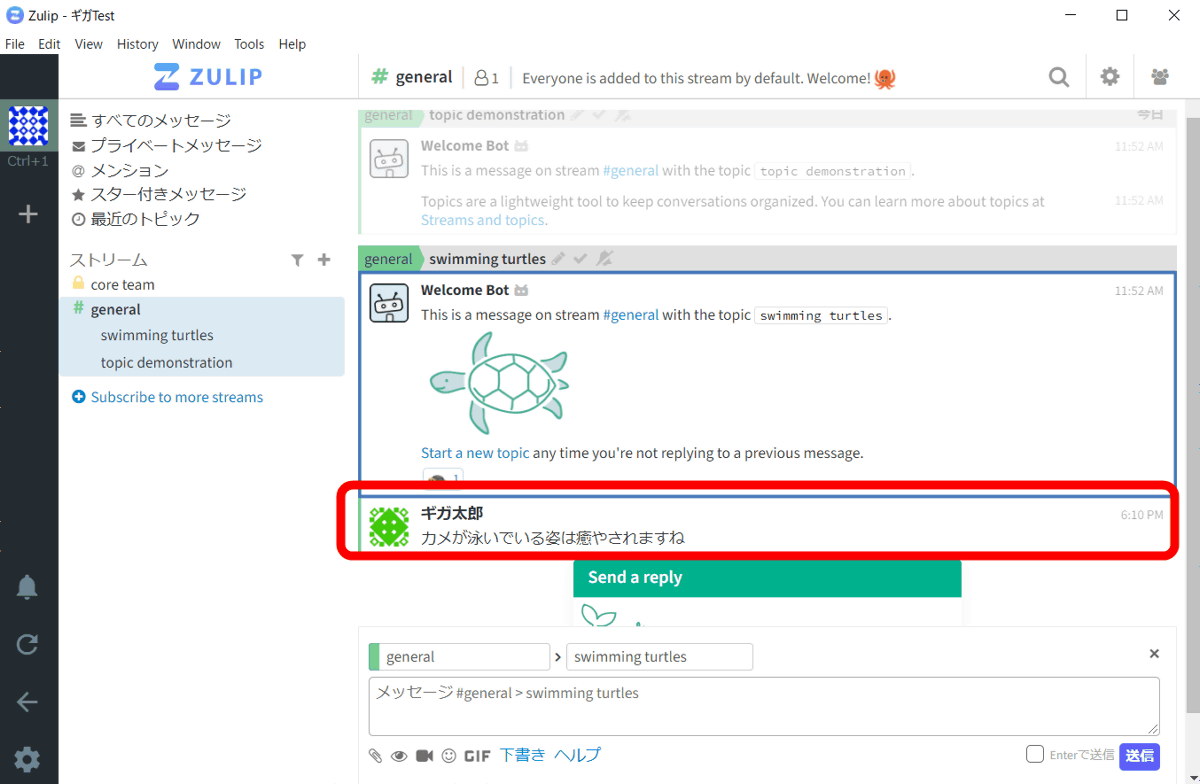
If you want to reply to a topic message, click on the message or press 'r' with the message selected. Then a form for creating text will open, so enter a message and click 'Send' ...
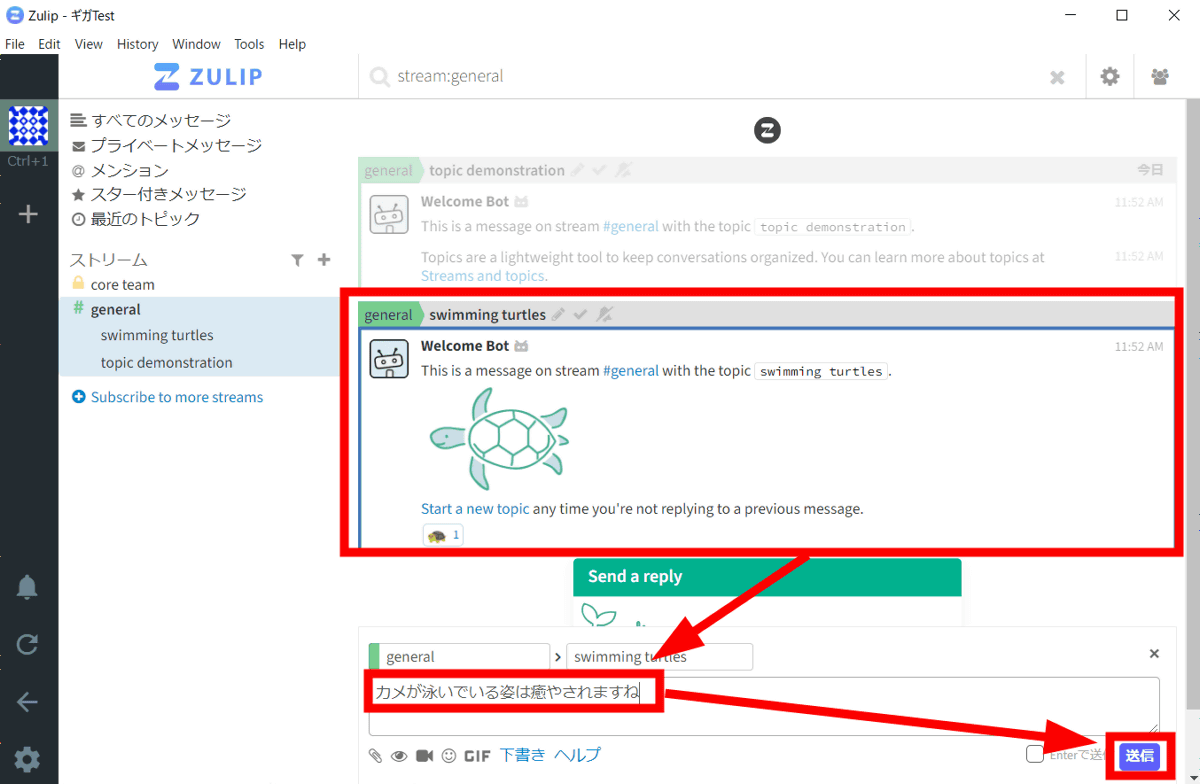
A message has been sent to the topic.
If you select a topic at the bottom of the stream, you can only view the messages on that topic. You can easily switch between the entire stream and topics that are relevant to you.

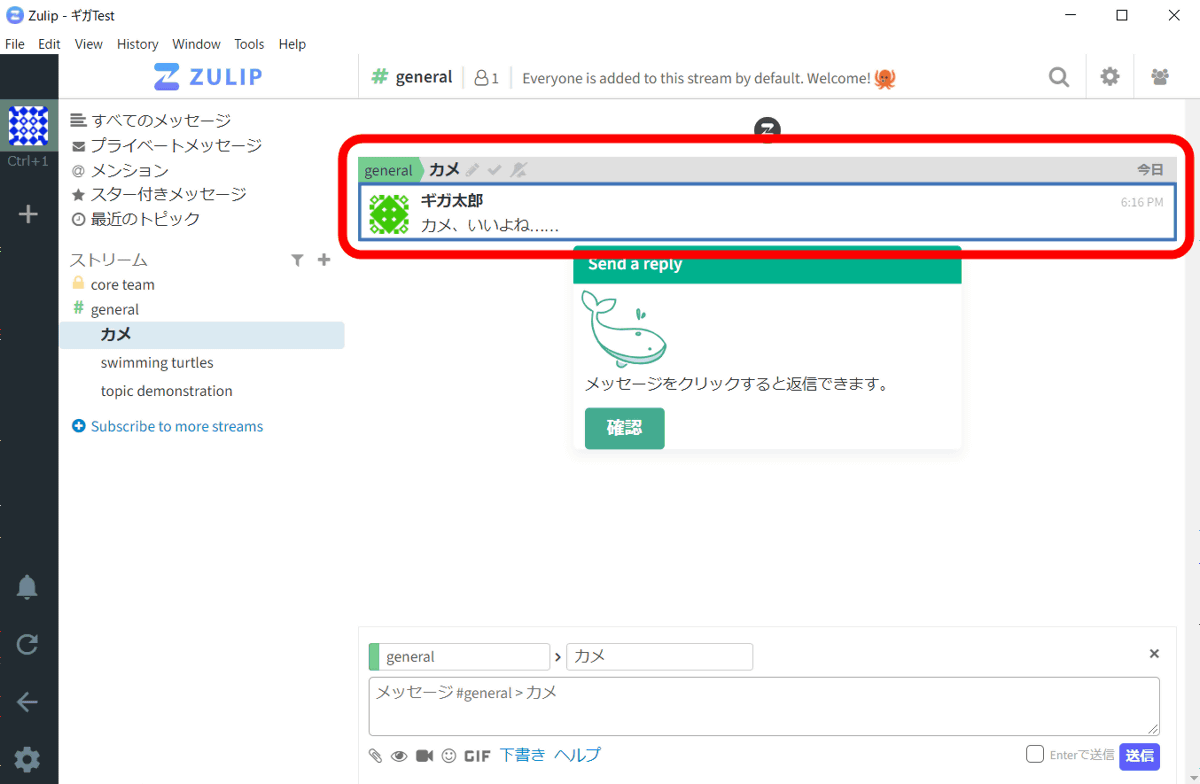
If you want to create a new topic, click 'New Topic' at the bottom of the screen.

Enter the topic name and body and click 'Send' ...

A new topic has been created in the stream.
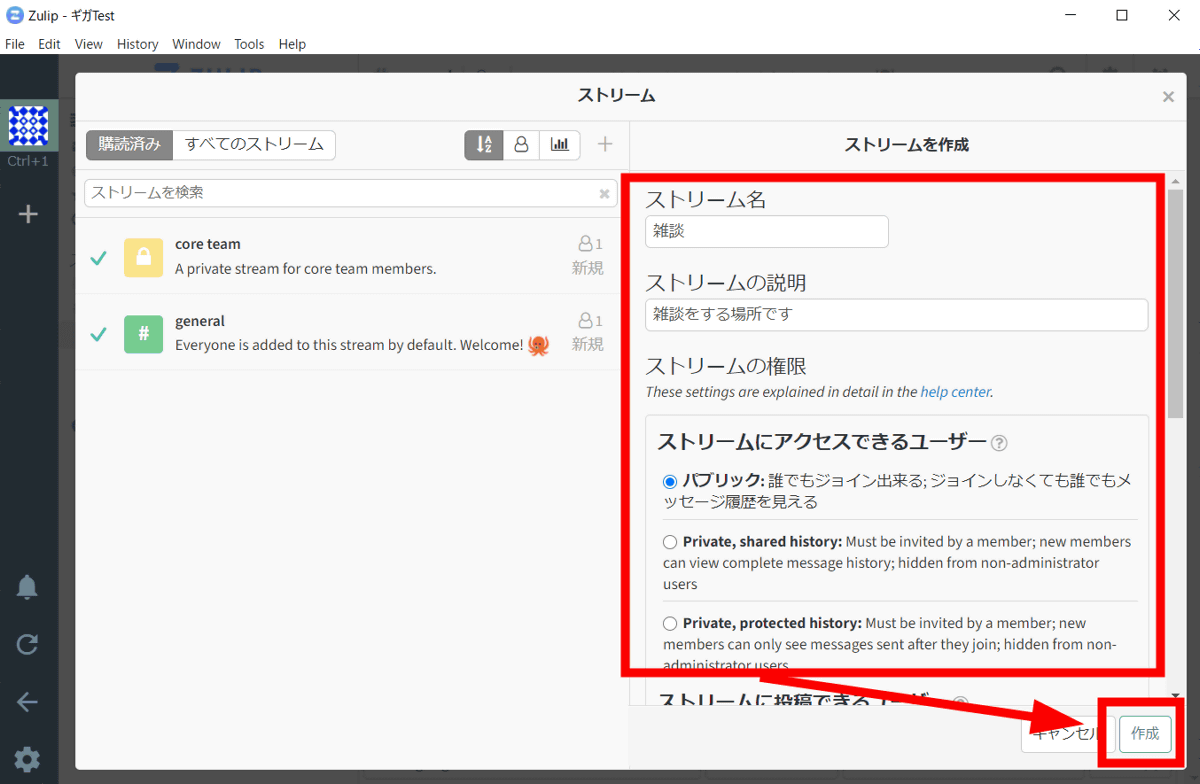
You can also create the stream yourself. Click the cross icon next to 'Stream' and click 'Create a stream'.

If you set the stream name, description, and users who can join the stream and click 'Create' ...
You have created a new stream.
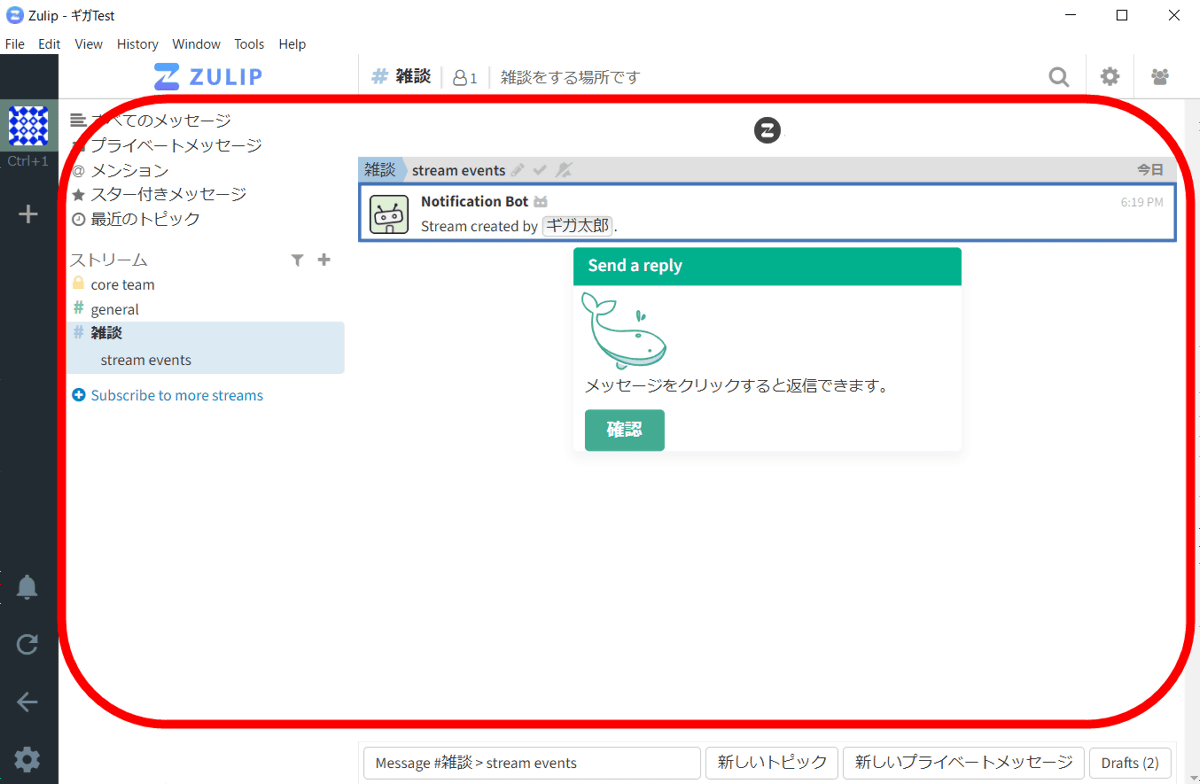
After that, you can create a topic according to the purpose of the stream and have a conversation.
◆ User invitation
To invite other users, click the member icon at the top right of the app and click 'Invite User'.
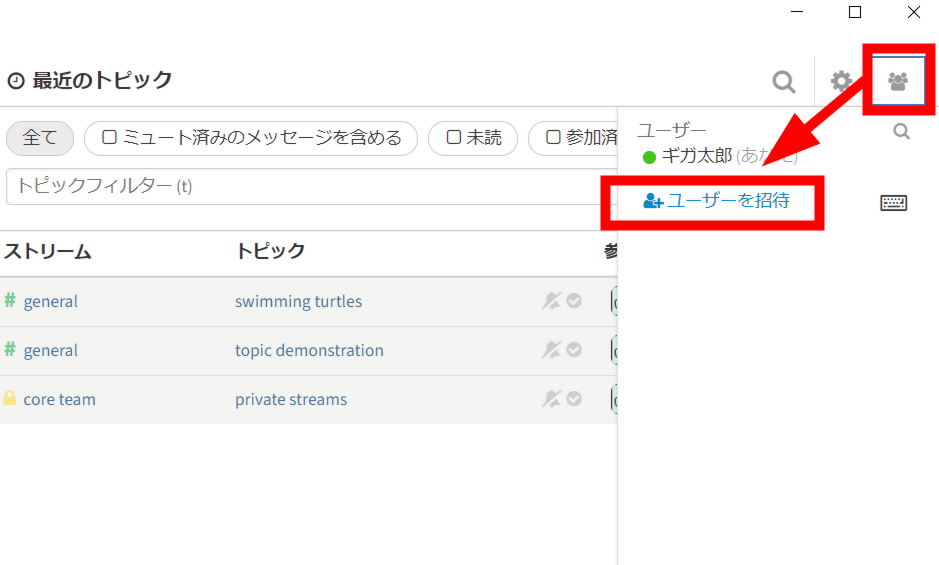
Enter the email address of the user you want to invite, select your permissions, set the stream you can view, and then click Invite.

Then, an invitation email will be sent to the email address you entered ...
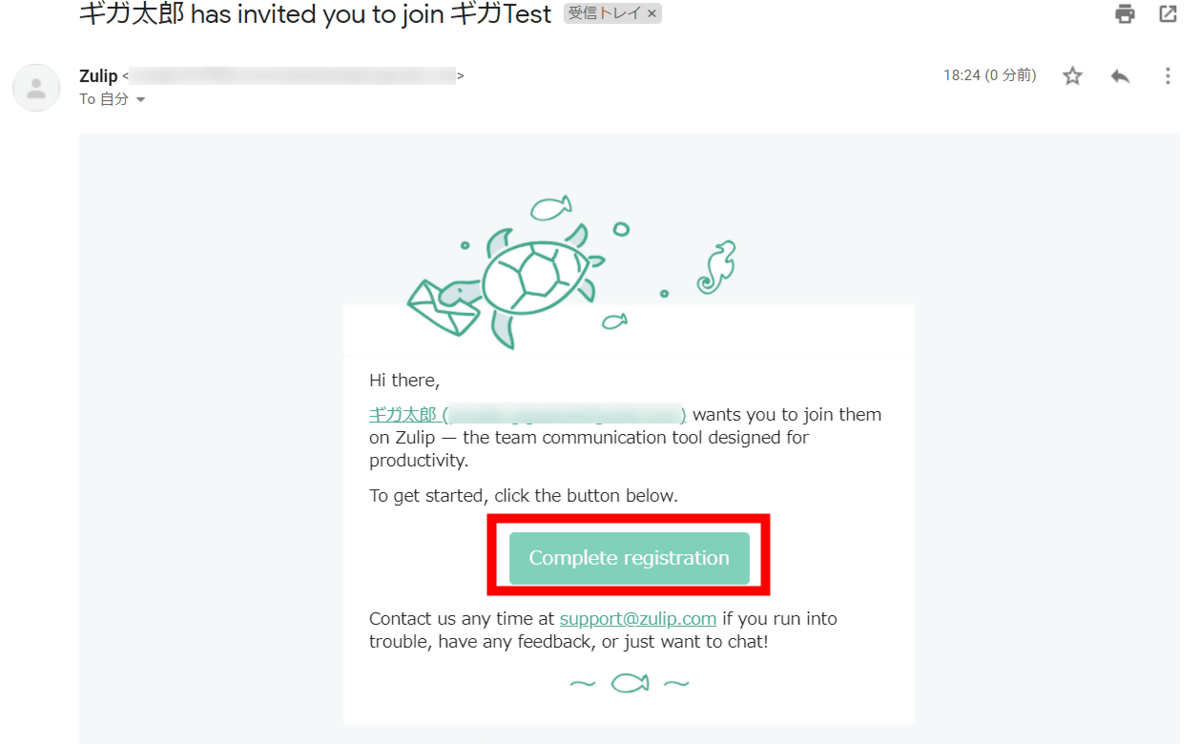
You can join the organization by setting a name and password.

Also, if you check 'Create Invitation Link' and click 'Create Invitation Link', the URL for the invitation will be generated. You can also share this URL via SNS or email to get your organization involved.
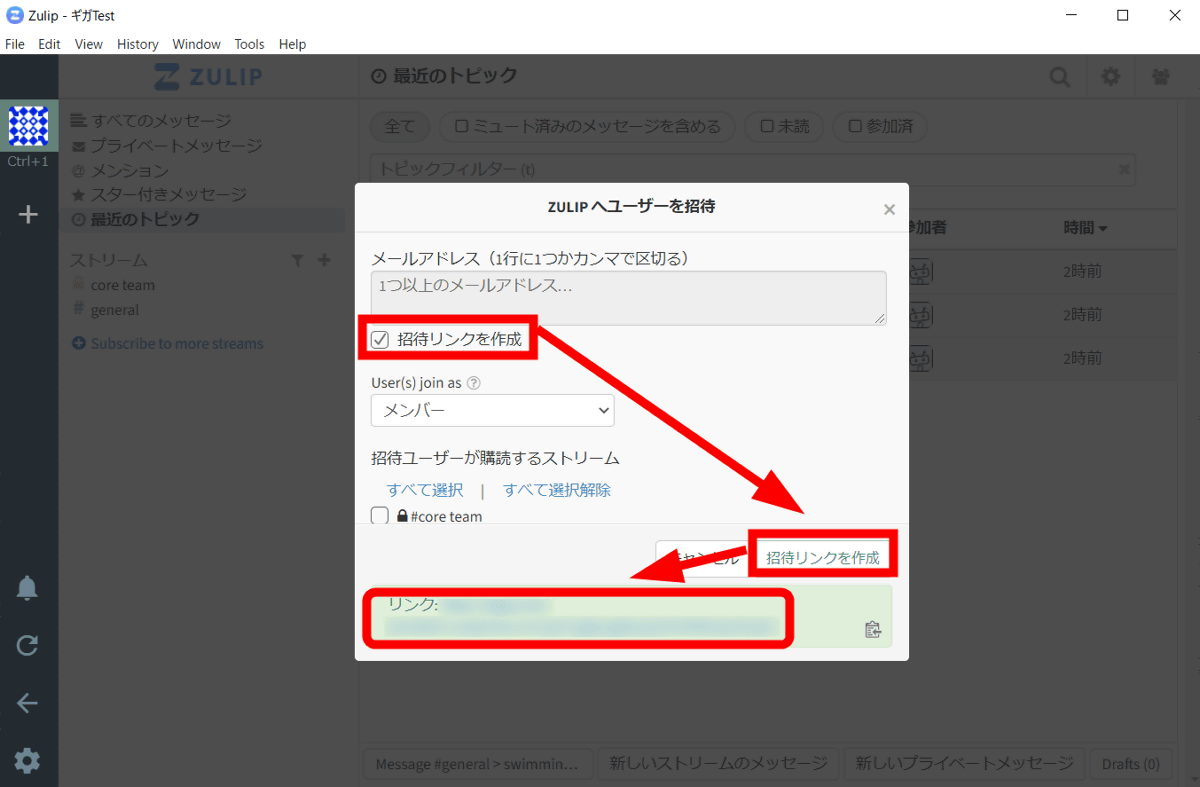
Users who join the organization can write to streams and create topics.
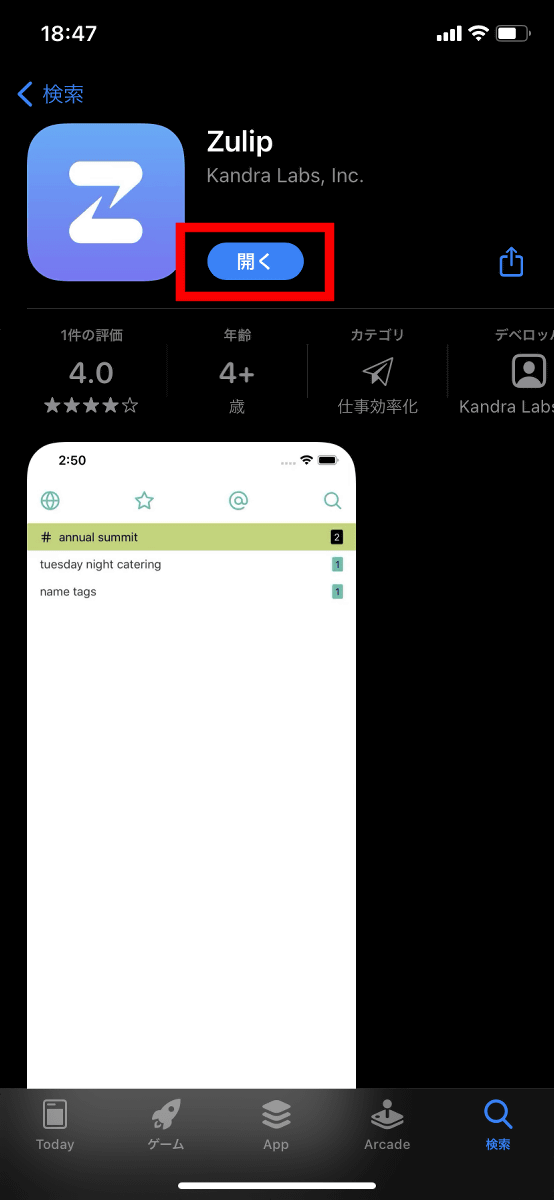
◆ Mobile version
Zulip has a mobile app version, so you can access it from your smartphone. Install the Zulip app from the app store and tap 'Open'.
Enter the URL of your organization and tap 'Enter'.

Enter your email address and password and tap 'Log in'.

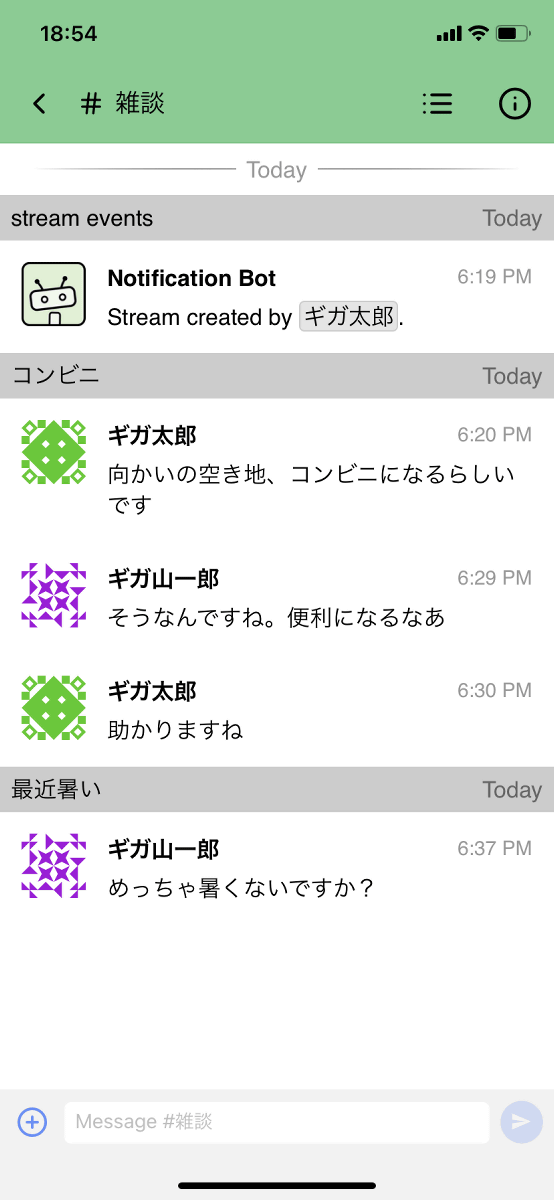
You can now view and write streams and topics from your smartphone.
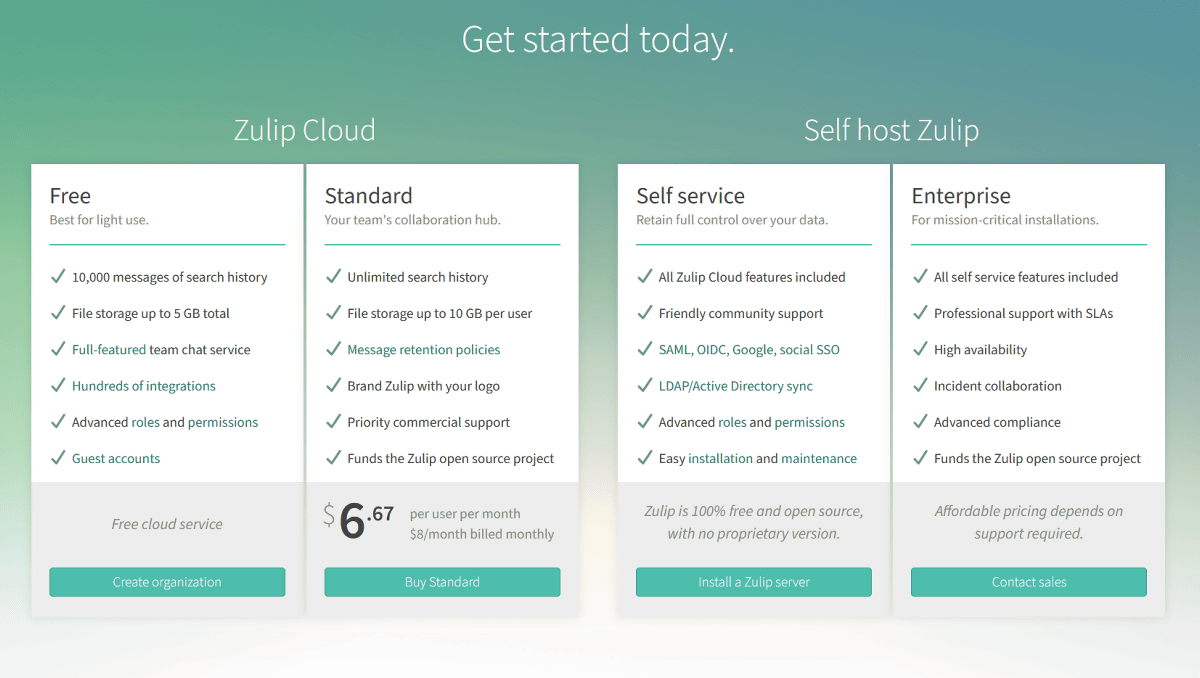
◆ Paid version
Zulip is also available for free, but if you upgrade to the paid version for $ 6.67 per month, you'll have unlimited message search history, and the free version will free up a total of 5GB of file storage to 10GB per user. .. However, if you operate it on your own server, you can of course use it without any restrictions.
Related Posts: