`` Emergency Website Kit '' review that made it easy to create an emergency site that can handle a large amount of access by combining free services
In emergencies, various organizations need a way to quickly deliver important information, but in such situations there is often a great deal of access to websites for delivering information, such as
Emergency Website Kit | Max Böck-Frontend Web Developer
https://mxb.dev/blog/emergency-website-kit/
According to Bock, the most resilient is static sites that simply place HTML files. So, they seemed to adopt the policy of generating the necessary files using a static site generation generator called Eleventy and placing them on a hosting / CDN service called Netlify to enable mass access.
Also, to minimize browsing even when the network is slow, decorations were minimized and CSS was inlined to reduce the number of files. By preparing service workers, it seems that once browsing, it was possible to continue to see the site even if the terminal goes offline. In addition, by using a service called Netlify CMS , people who are not familiar with IT can easily add and edit information.
◆ I actually used it
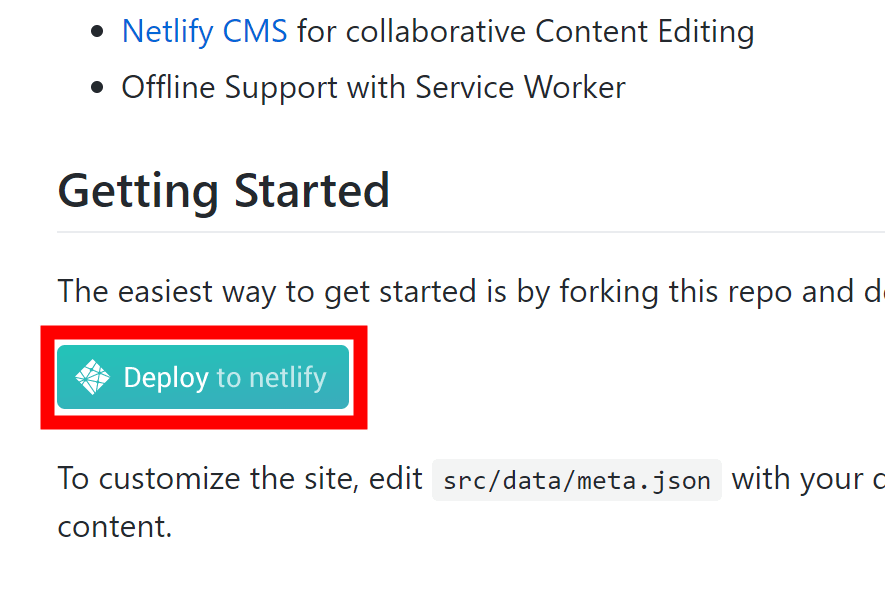
The boiler plate prepared by Bock is published on Github. By accessing the repository prepared by Bock and clicking 'Deploy to netlify' in the Getting Started item, you can prepare the above emergency site in one shot.
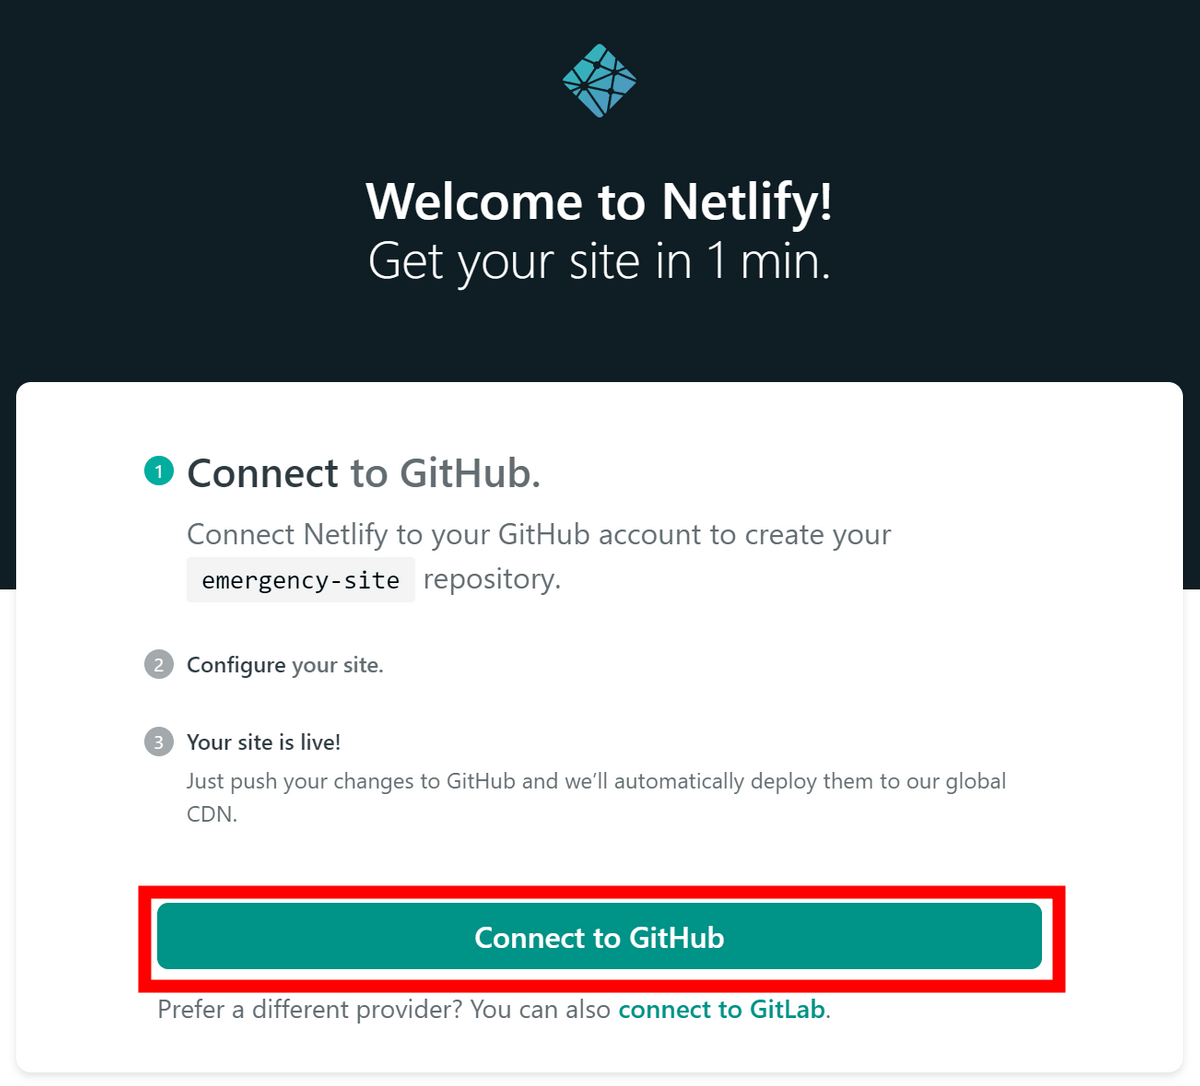
Since the Netlify page opens, click 'Connect to GitHub'. In order to host a website based on the GitHub repository, you need a GitHub account.
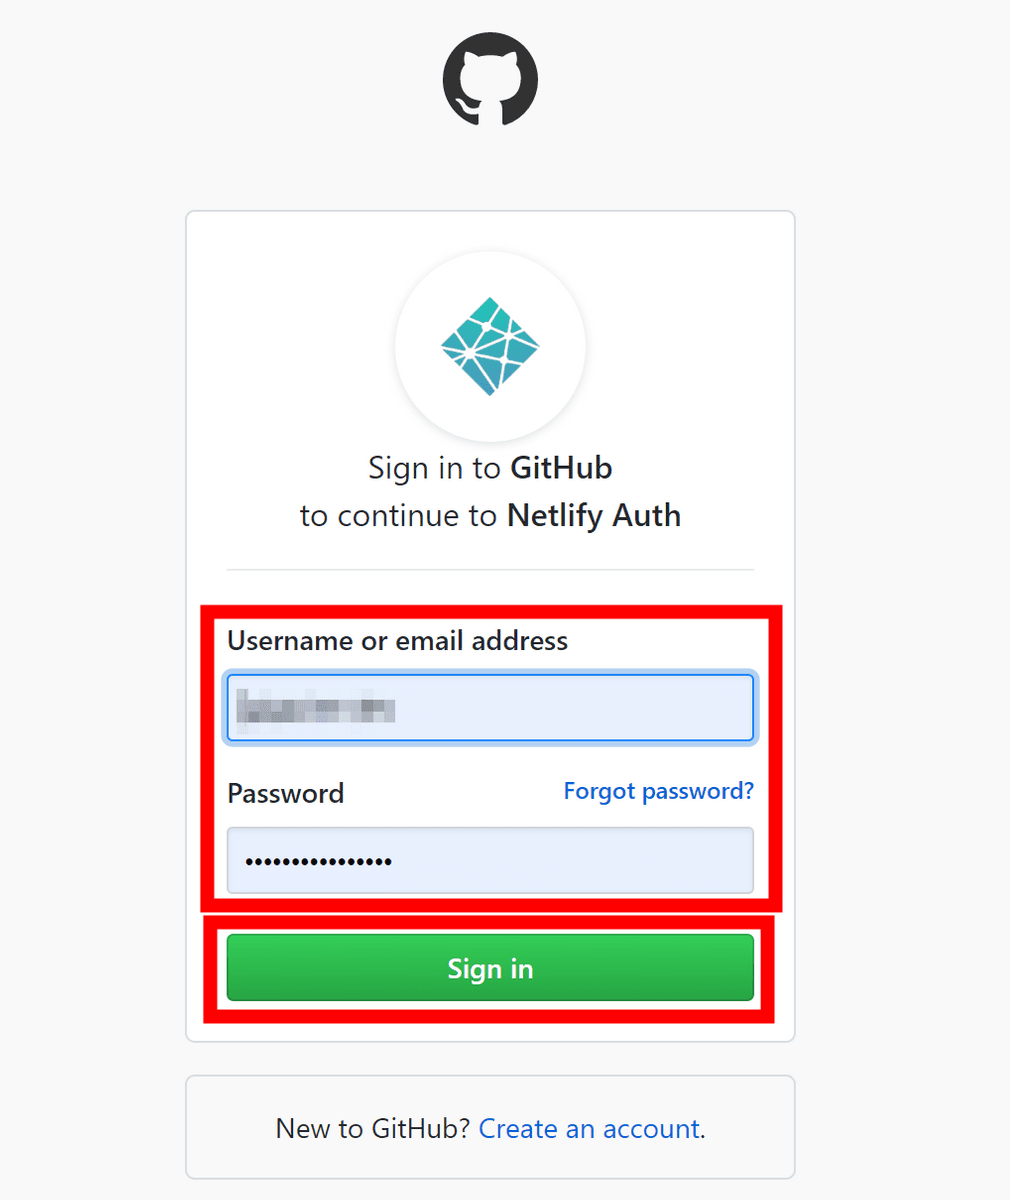
Enter your GitHub user information and click 'Sign in'.
Click 'Authorize netlify' because the authority is required.

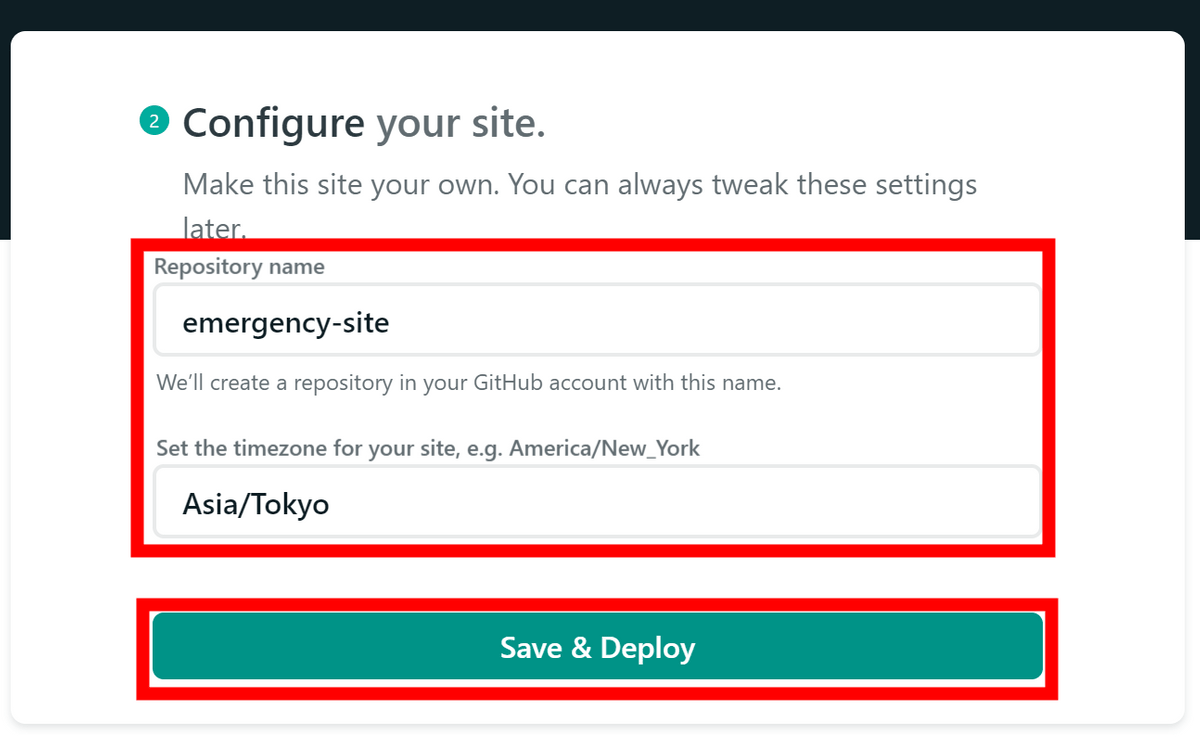
Set the repository name to be created in GitHub to 'emergency-website-kit', set the time zone to 'Asia / Tokyo', and click 'Save & Deploy'.
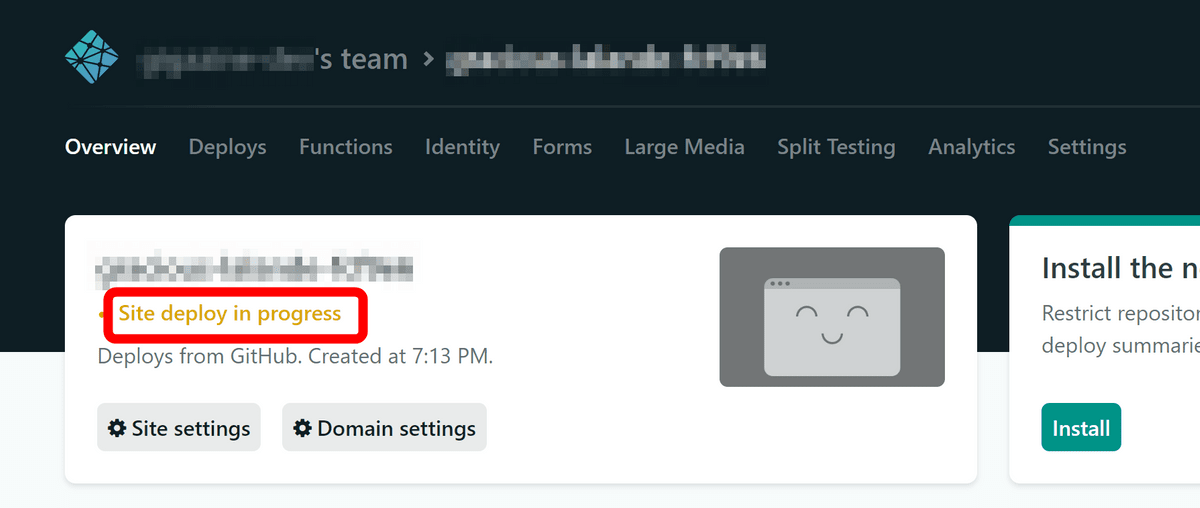
Then, 'Site deploy in progress' and the work is displayed.
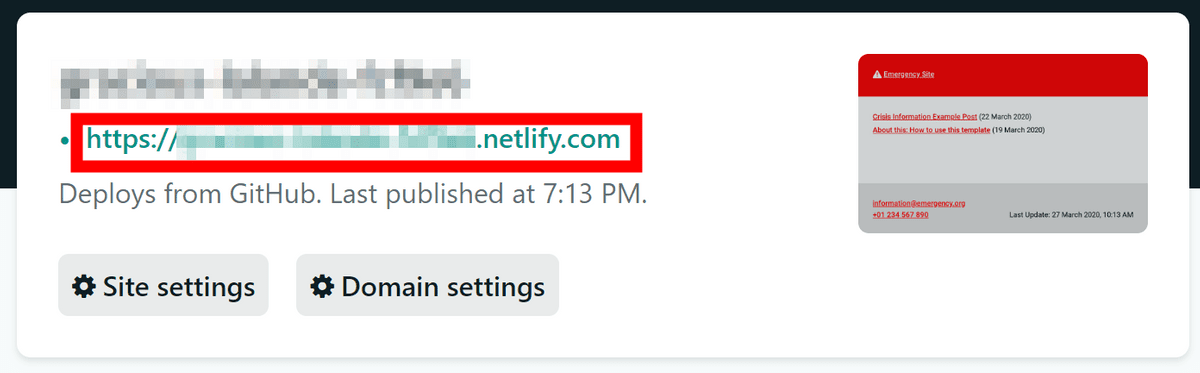
After a minute or so, the deployment was completed and the site address was displayed. Click on the site address ...
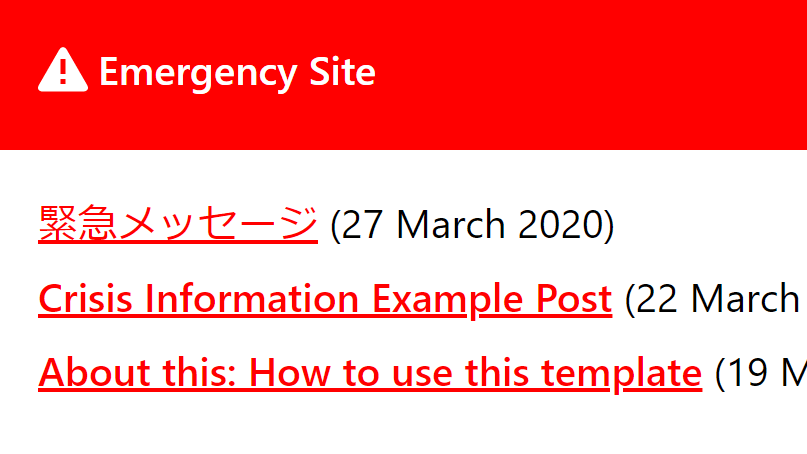
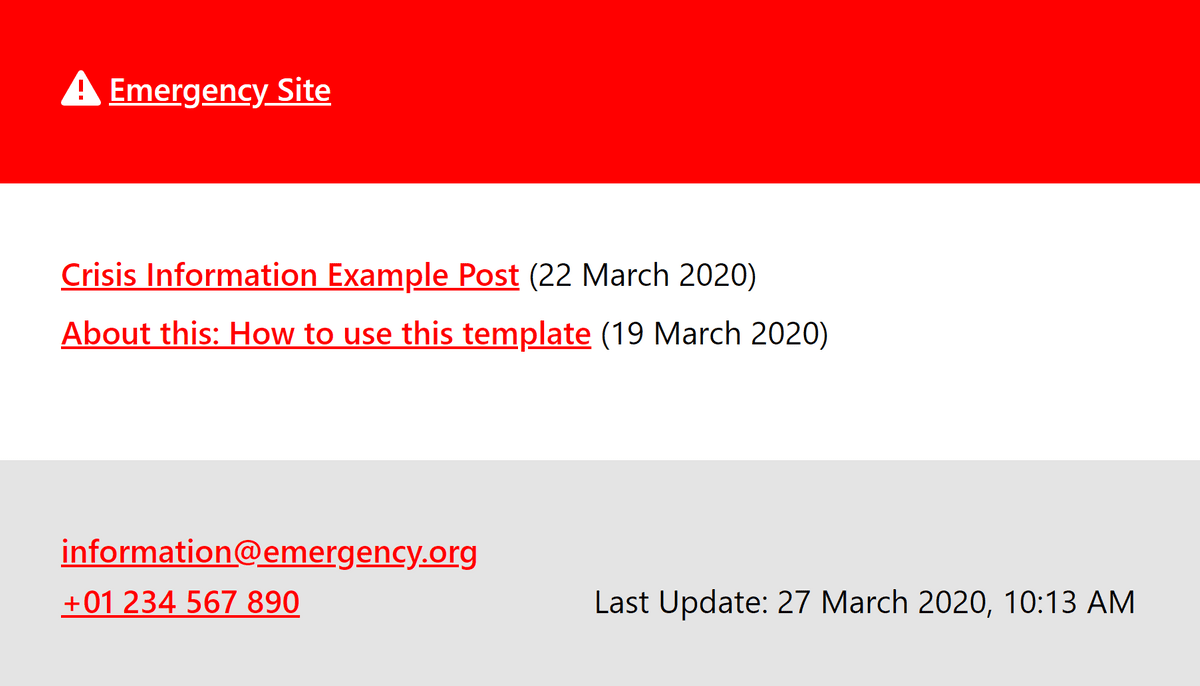
A simple site is displayed as set by Bock.
◆ Netlify CMS settings
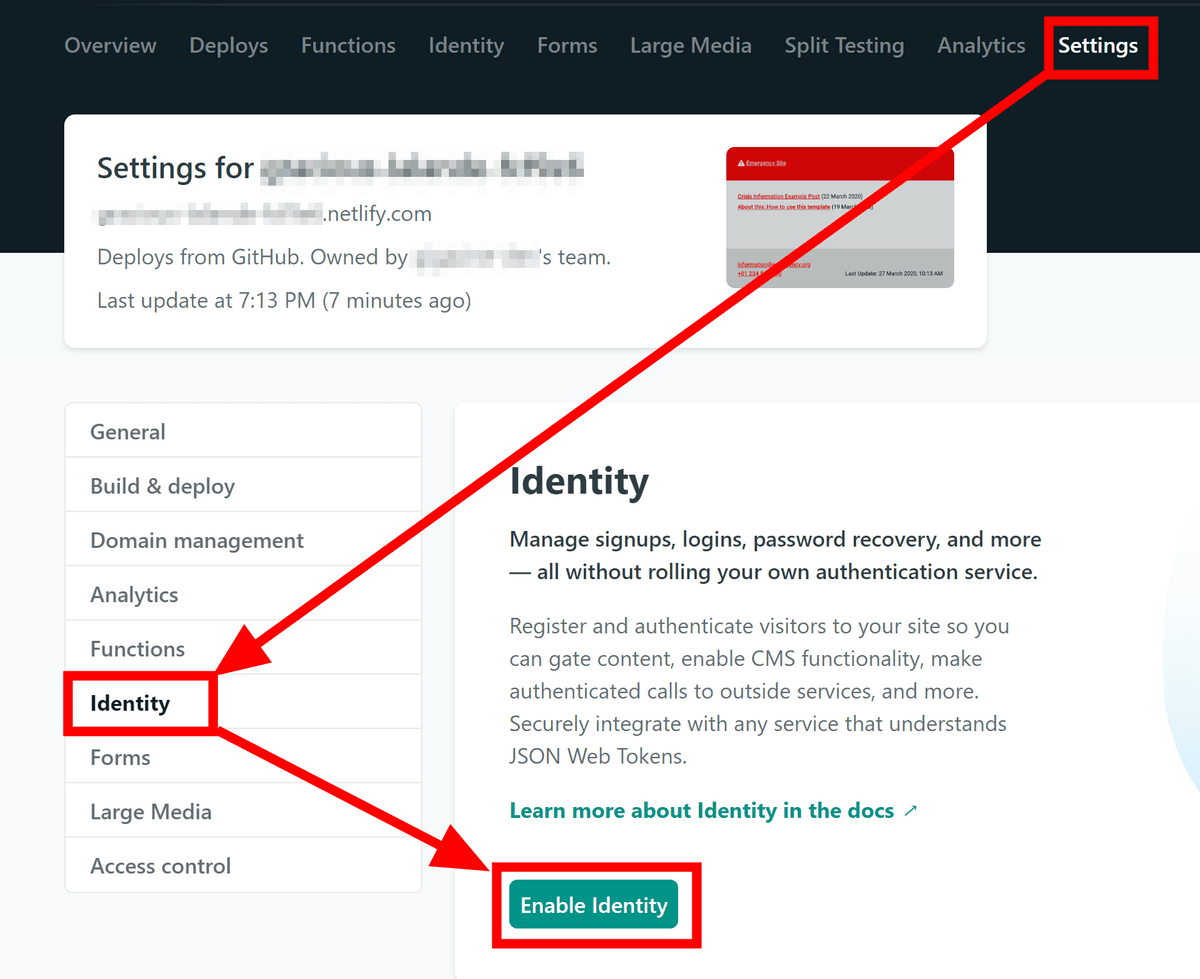
Next, I will post on the site using Netlify CMS. Return to the Netlify page and click “Enable Identity” from “Identity” on the “Settings” tab.
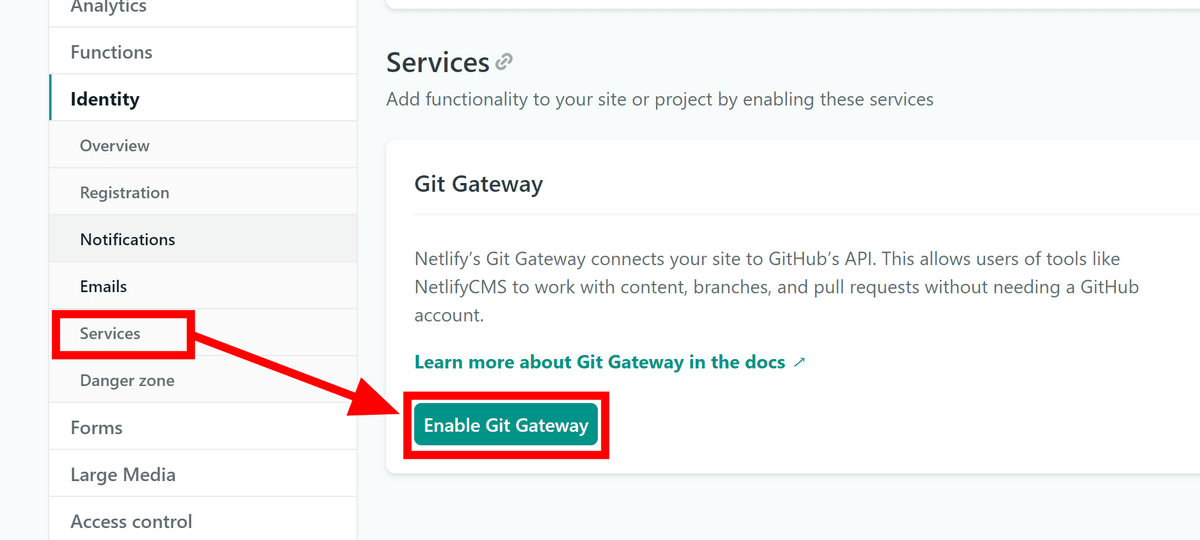
Turn on 'Enable Git Gateway' in 'Services' because you can configure Identity related settings.
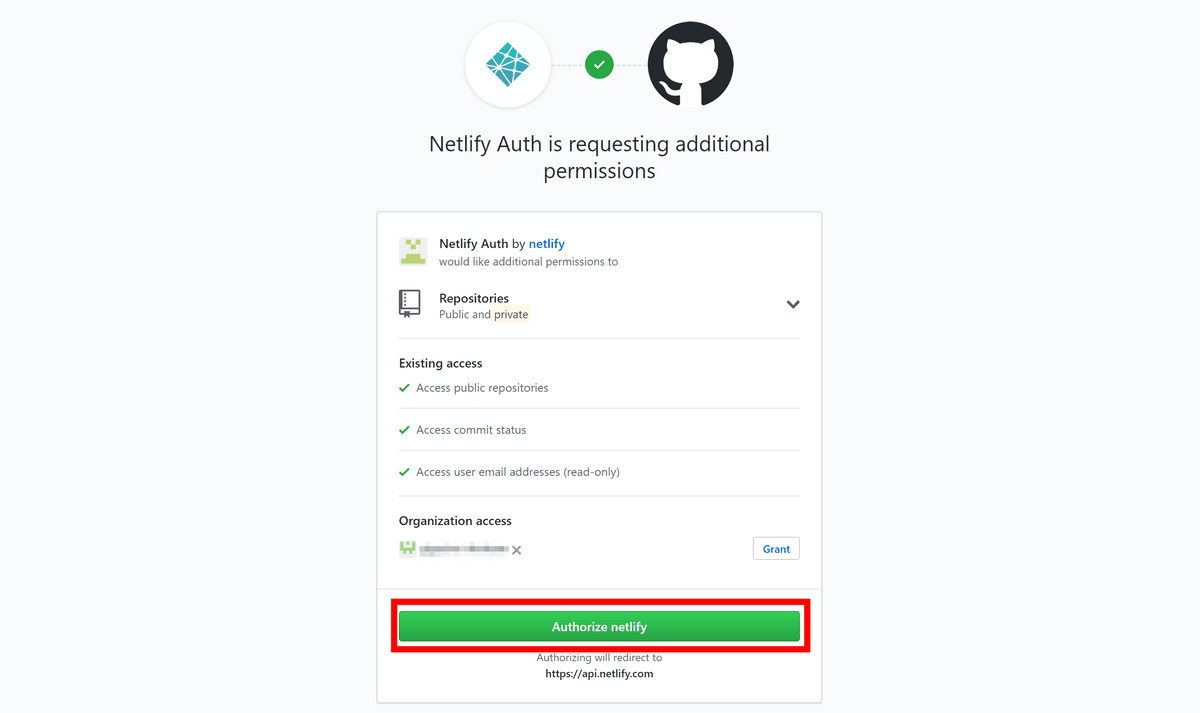
You will be asked for permission again, so click 'Authorize netlify'.
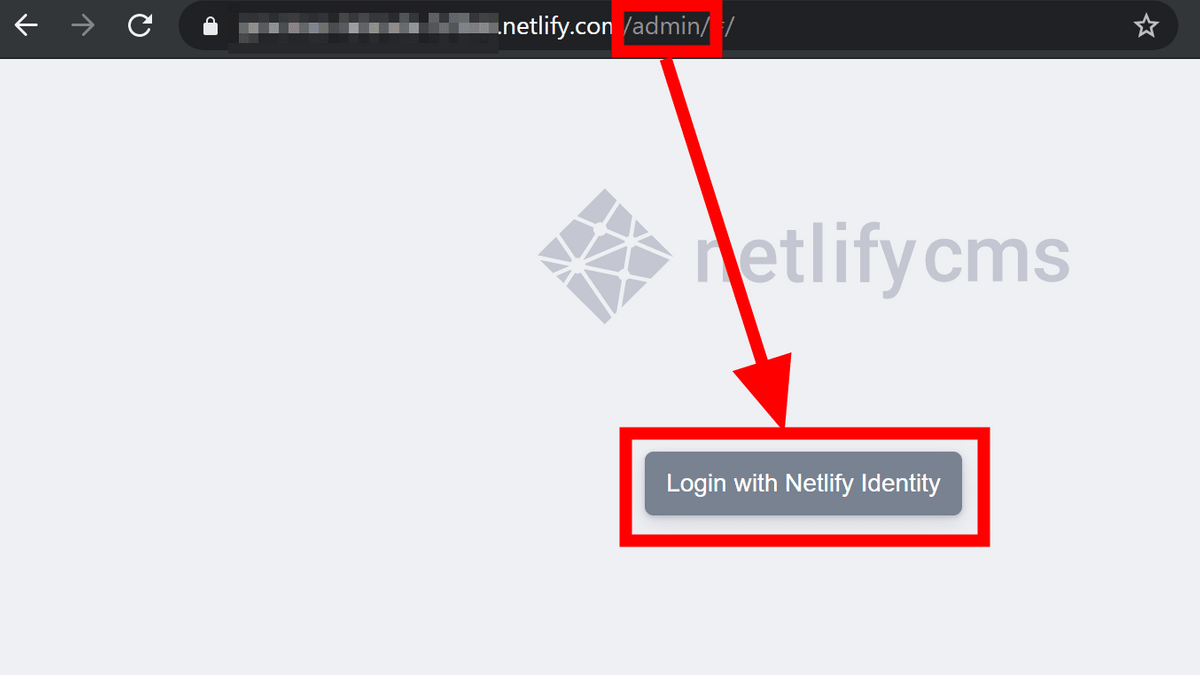
This completes the netlify configuration. If you add 'admin' to the end of the address bar of the site you created earlier, it will be a setting screen, so click 'Login with Netlify Identity'.
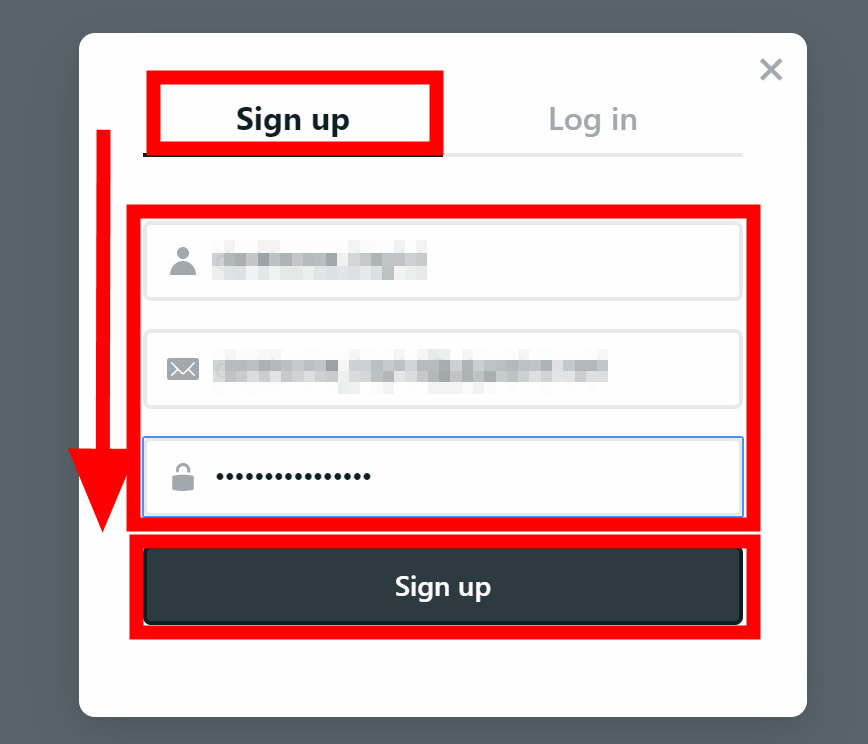
First, create an account. Select the 'Sign up' tab, set your ID, e-mail address and password, and click 'Sign up'.
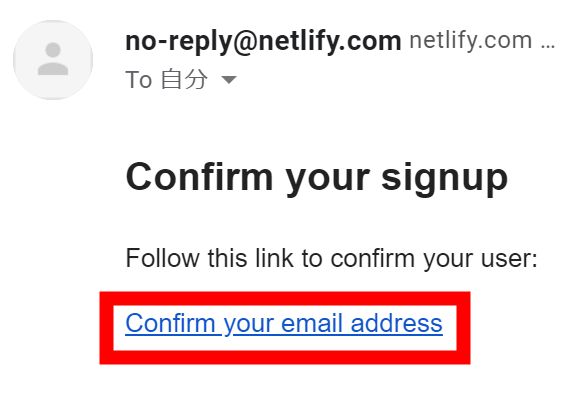
A confirmation e-mail will be sent to the entered e-mail address. Click 'Confirm your email address' described in the e-mail.
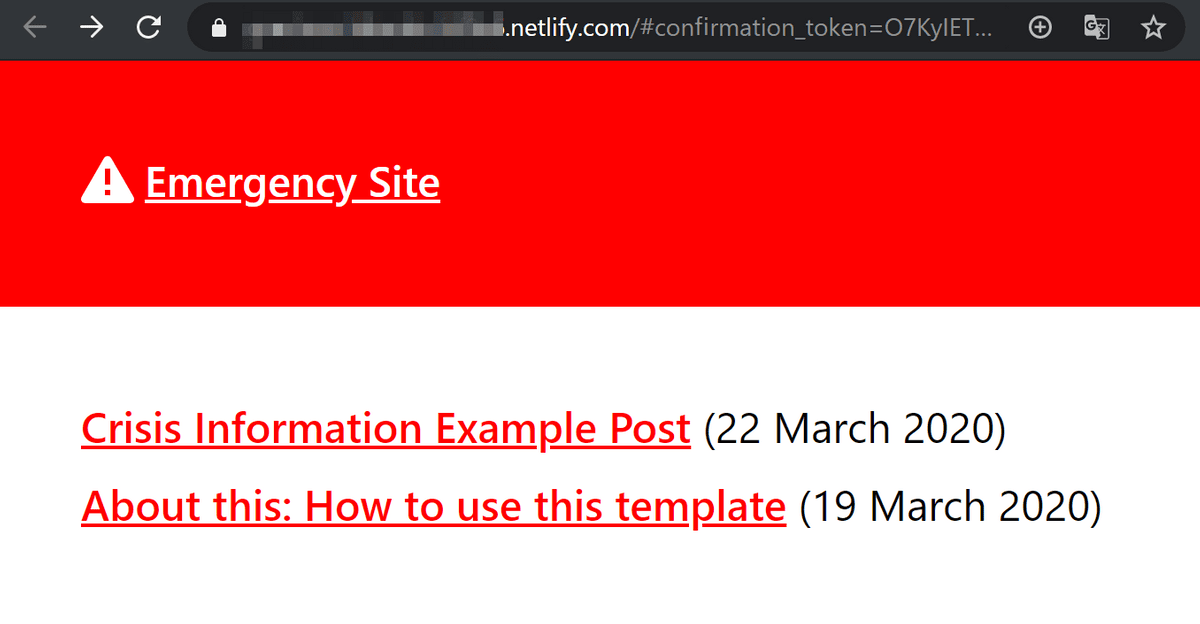
When you access, '# confirmation_token = ~' is added to the URL.
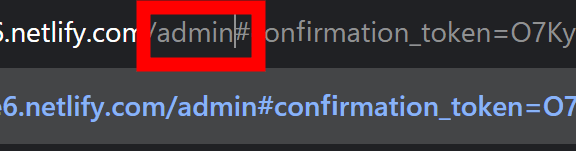
Here, enter “admin” before “# confirmation_token = ~” to proceed to the management screen.
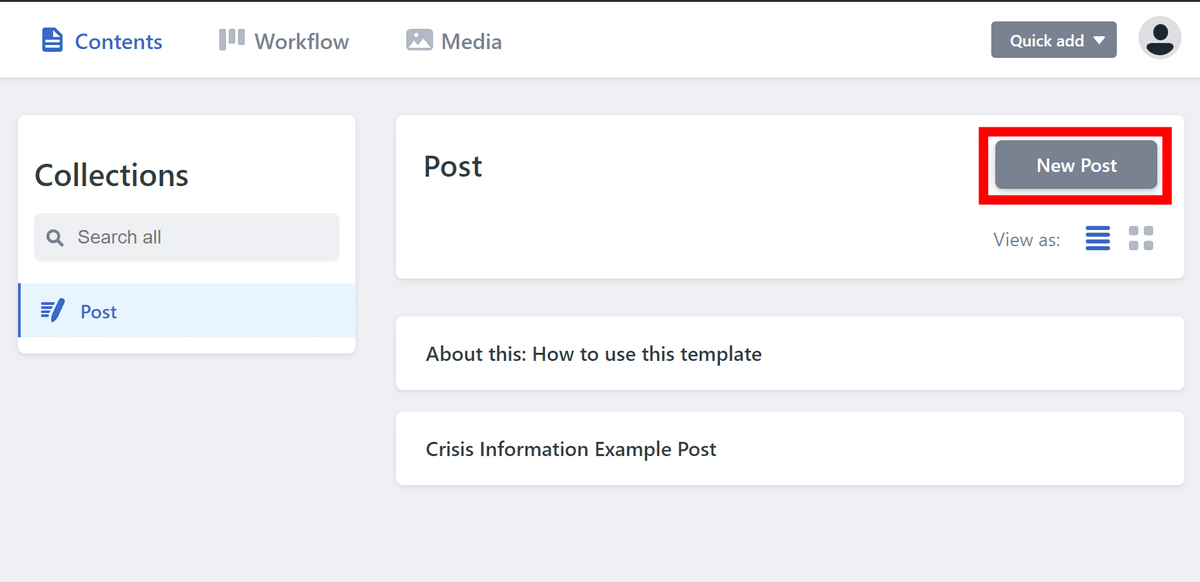
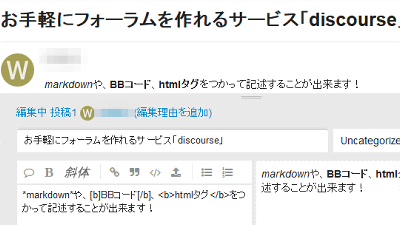
Then, I moved to the screen where I can manage blog posts. This time I will try to post a new post, so click 'New Post'.
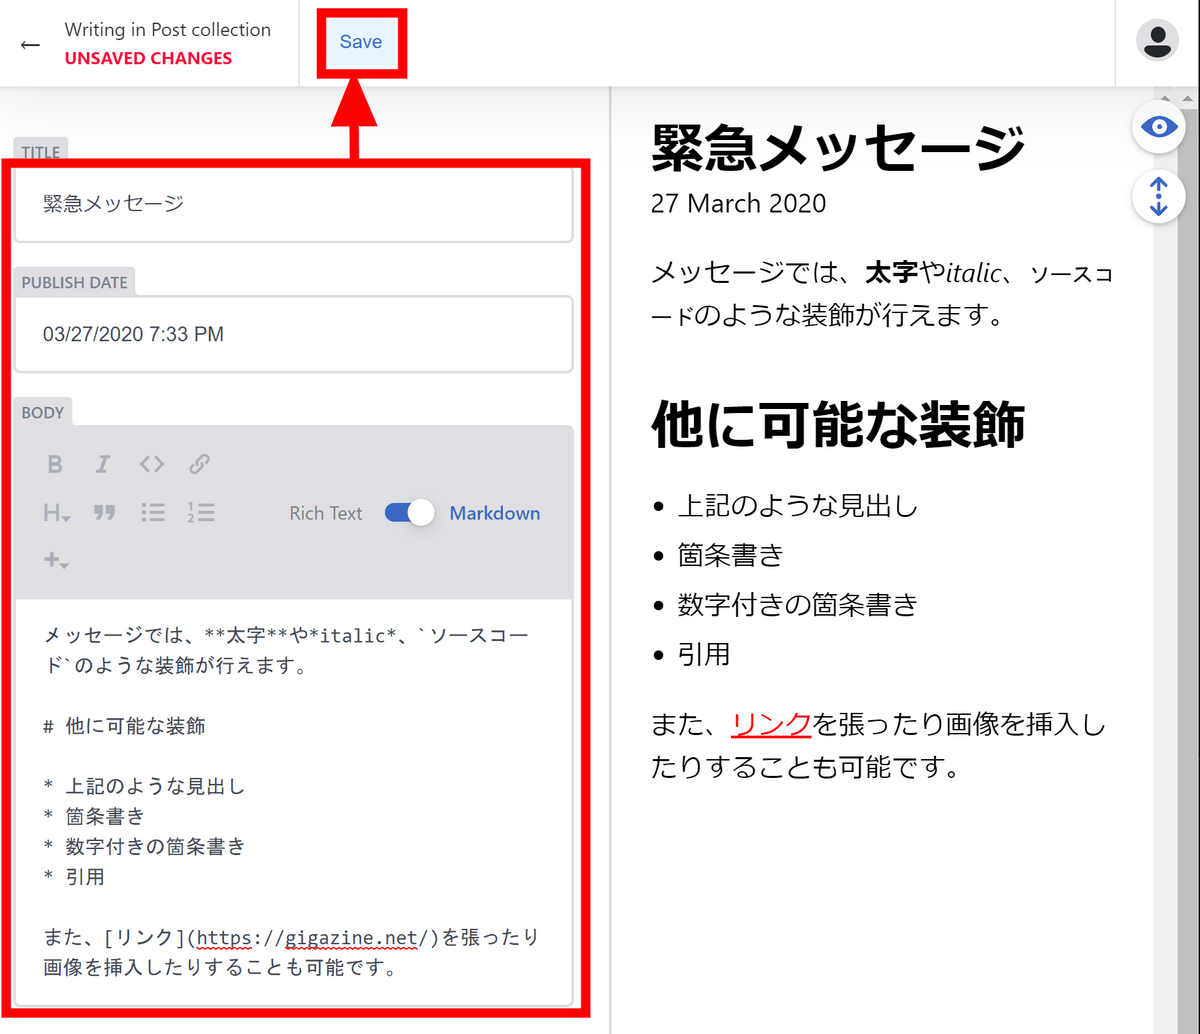
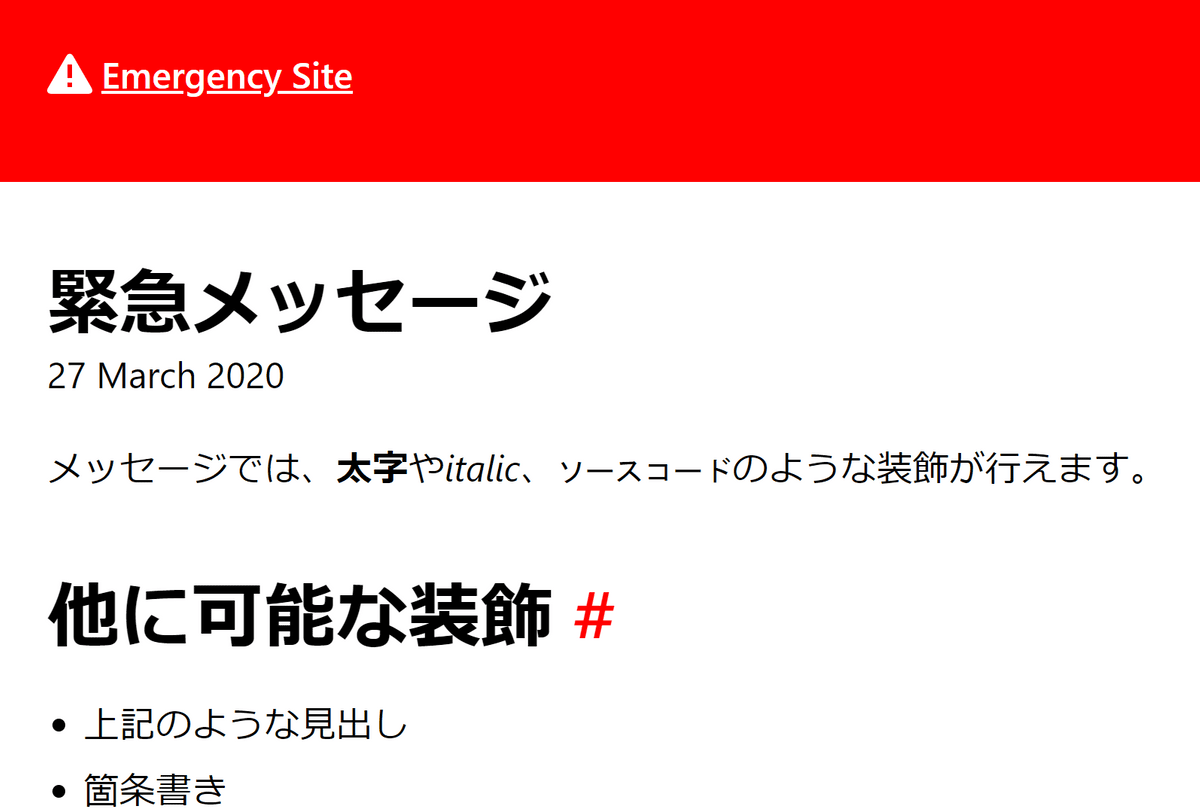
Write the title, date and time, and content, and click 'Save'. Decorations such as bold, heading, and bullet points are possible, and content can be edited in rich text format or markdown format.
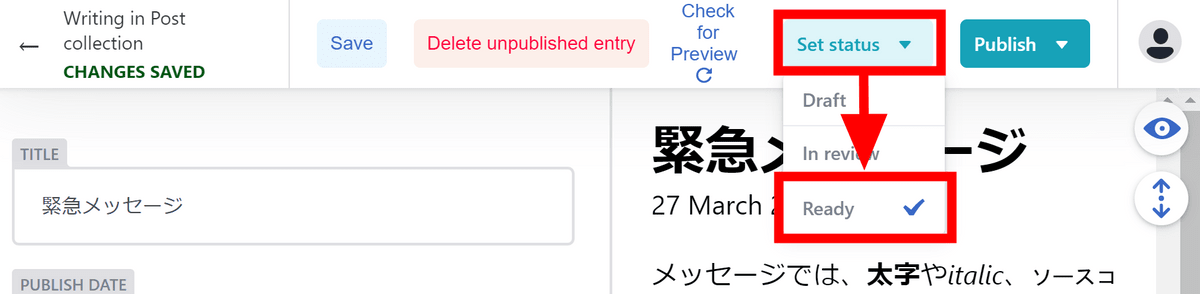
It is possible to have someone review the saved post, but this time it will be posted as it is, so click 'Set Status' and change the status to 'Ready'.
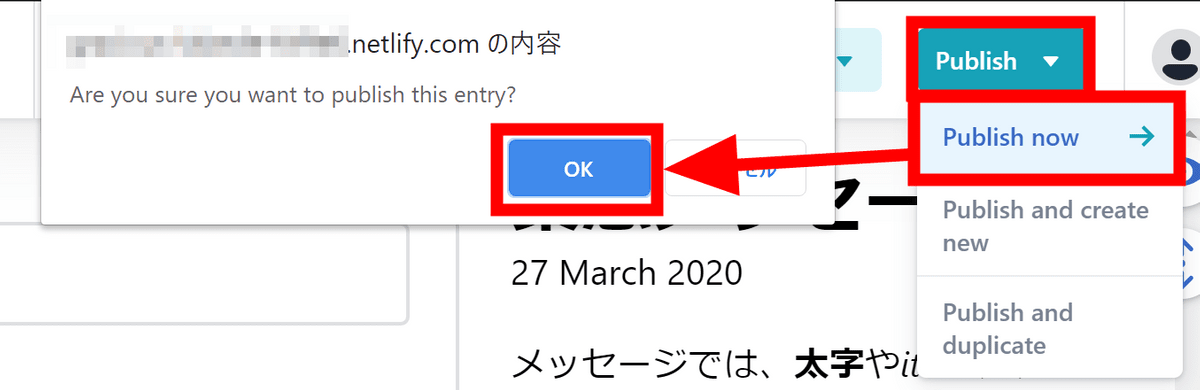
Then click 'Publish now' from 'Publish'. A confirmation dialog will appear. Click “OK”.
When I reopened the original site, I saw the previous post at the top. Click here ...
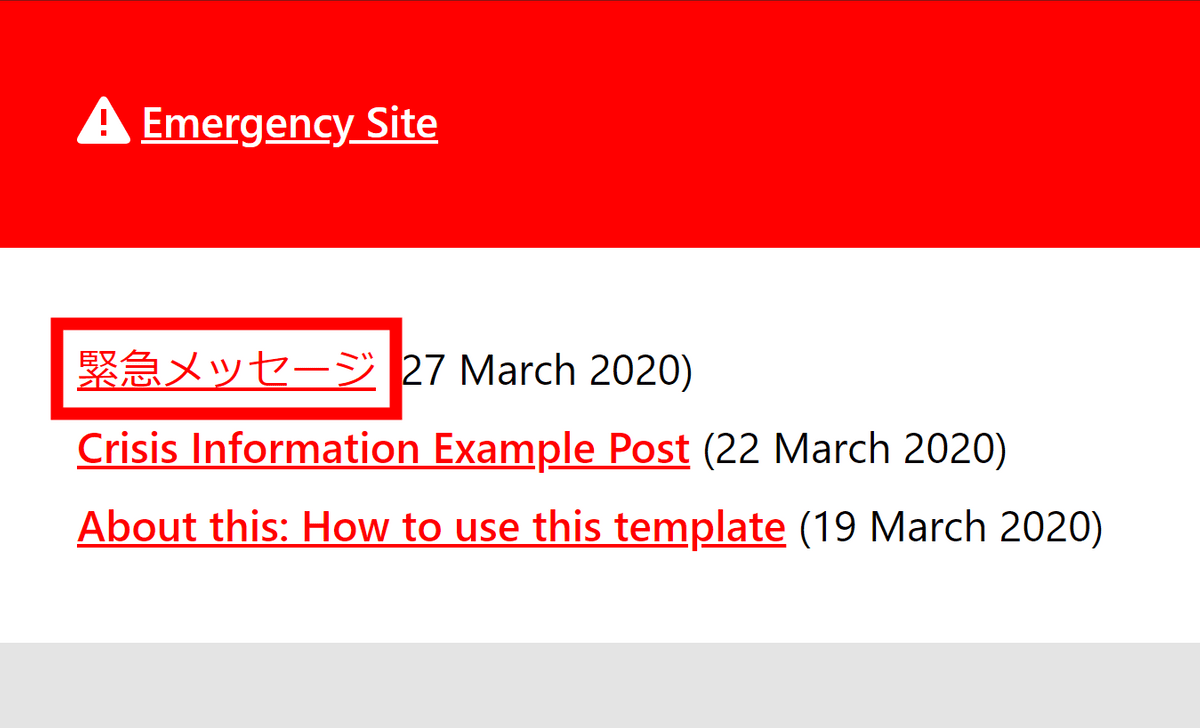
The contents of the above are reflected.
Since the site can be set up easily, editing is also easy, and a site that can handle a large amount of access can be set up for free, the 'Emergency Website Kit' prepared by Bock is a very useful tool in case of emergency.
Related Posts:

in Web Service, Review, Web Application, Posted by log1d_ts