'Microfeed' review that allows you to self-host blogs that can post audio and movies up to 10GB for free, no server required using Cloudflare

There are many services that can be used to set up a blog, but one of them is a system called 'microfeed' that can be used if you want to 'self-host without preparing a server.' It runs on Cloudflare and can post audio, images, movies, etc., so I tried using it right away to check its capabilities.
GitHub - microfeed/microfeed: a lightweight cms self-hosted on cloudflare, for podcasts, blogs, photos, videos, documents, and curated urls.
To use microfeed, you need a Github account and a Cloudflare account.
Join GitHub · GitHub
https://github.com/signup
Cloudflare | Web Performance & Security
https://dash.cloudflare.com/sign-up
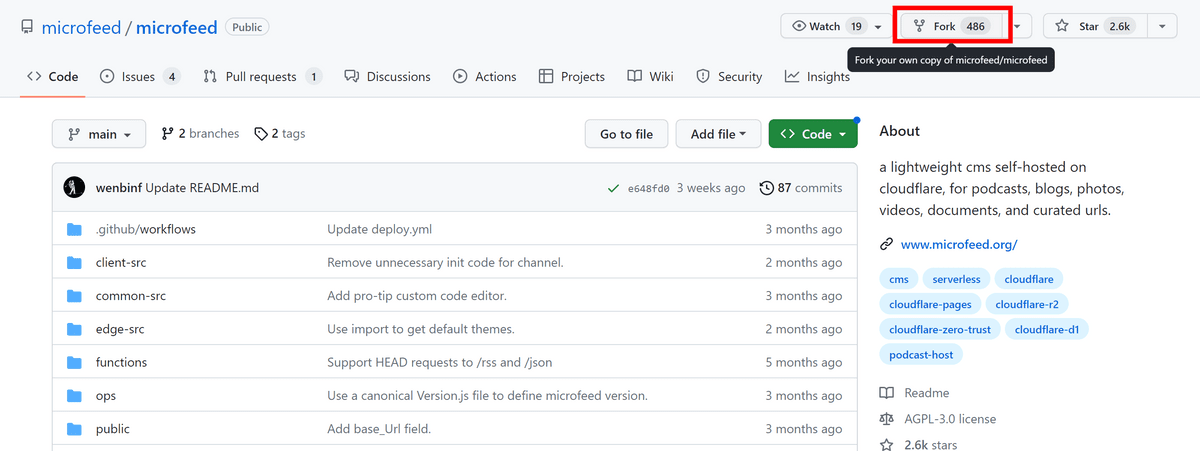
Open the microfeed page on Github and click 'Fork'.
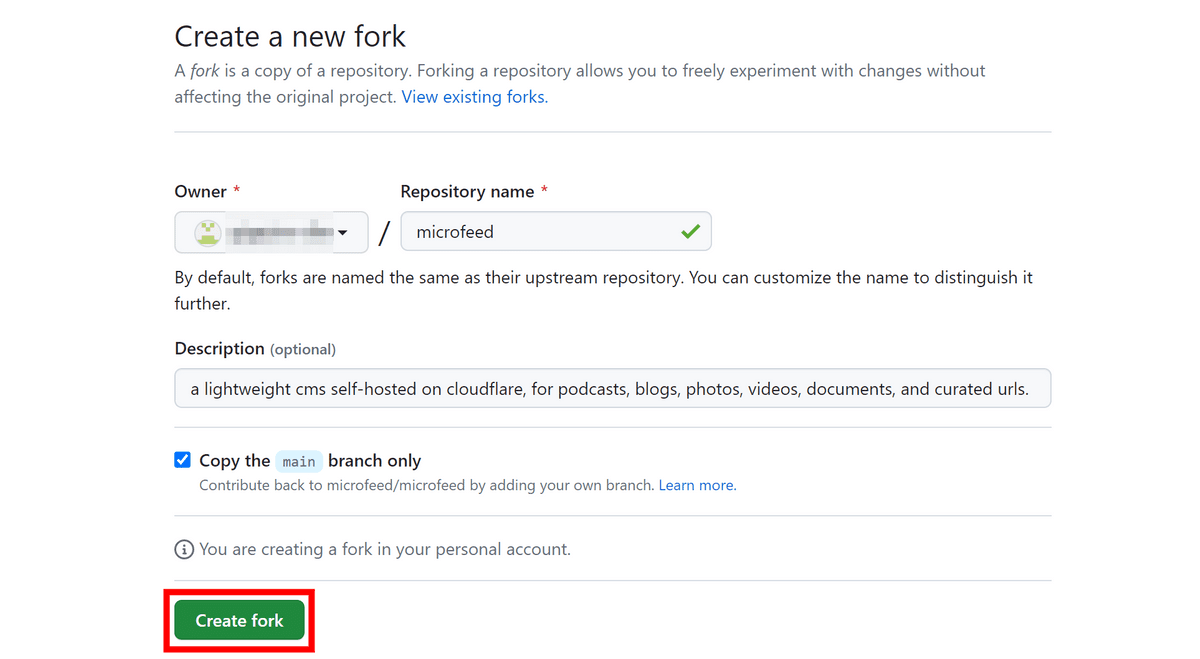
Leave the settings as they are and click 'Create fork'.
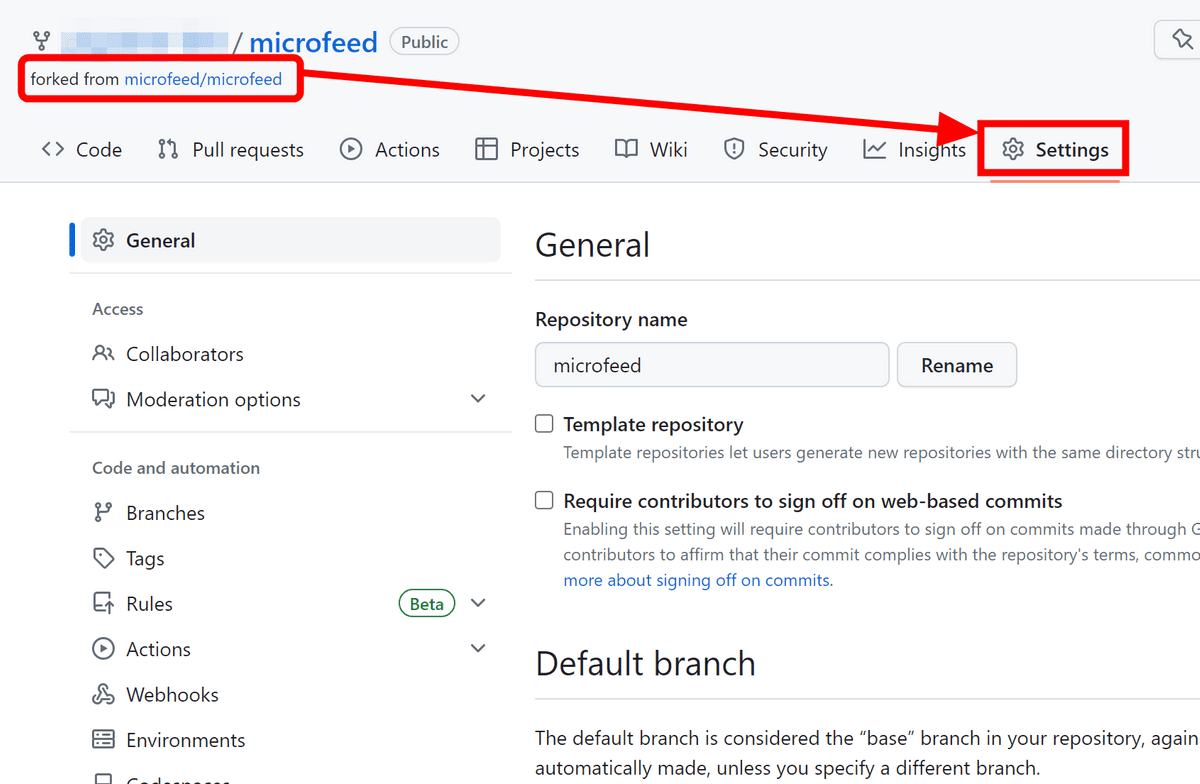
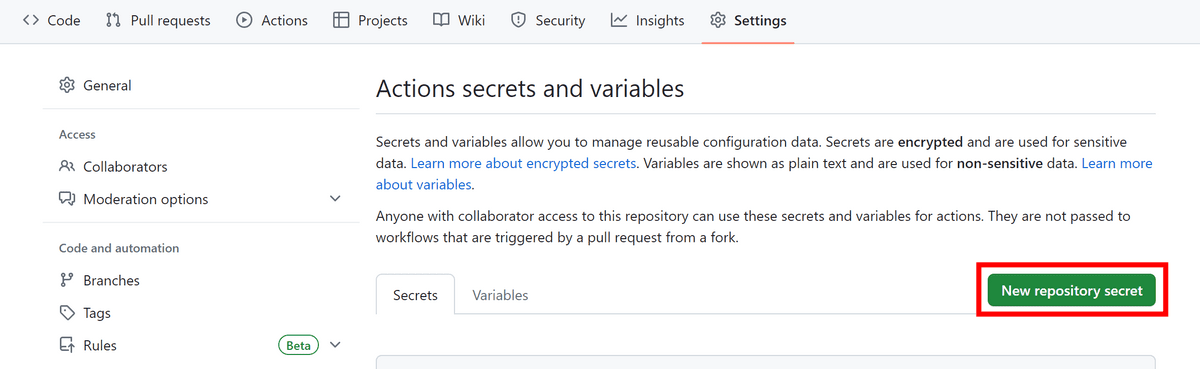
A forked repository will be created on your account, so make sure you have the forked version open and click 'Settings'.
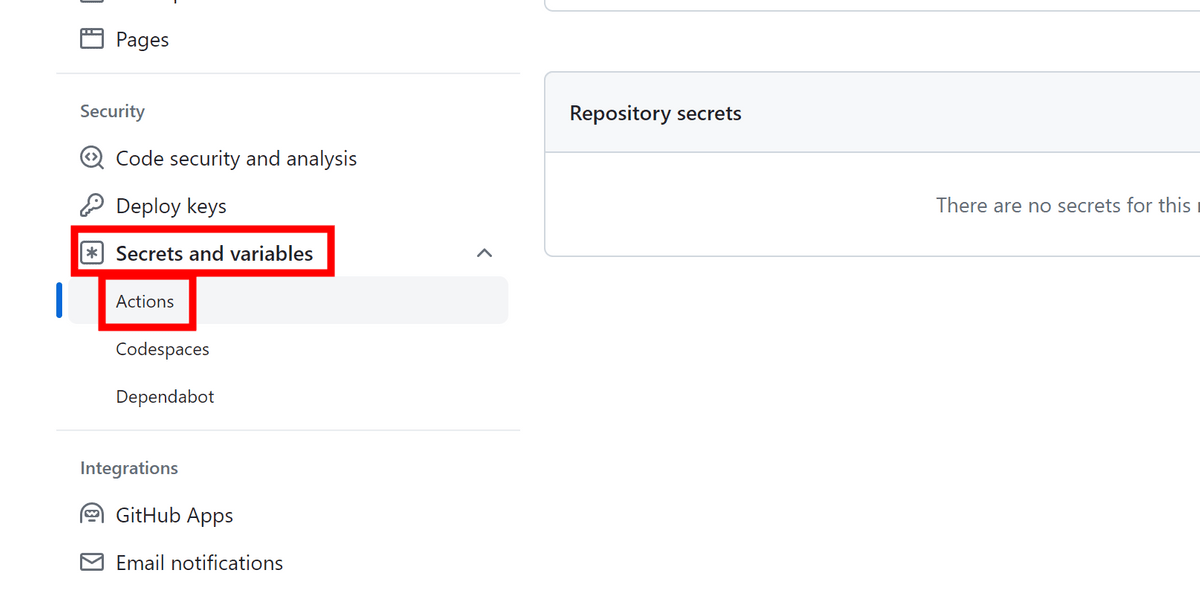
Expand 'Secrets and variables' in the left menu and click 'Actions'.
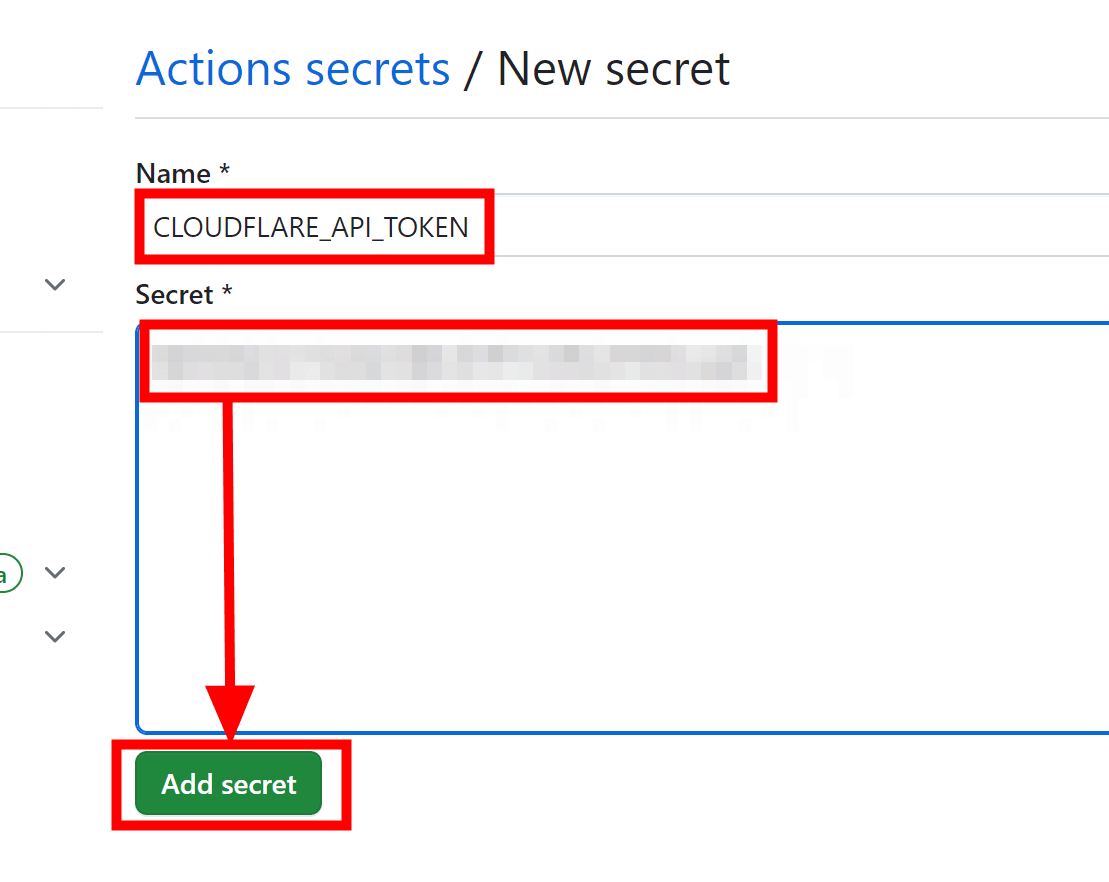
We will set five secrets, so hold down the Ctrl key and click 'New repository secret' five times to open it in another tab. From here, we will collect the necessary API data.
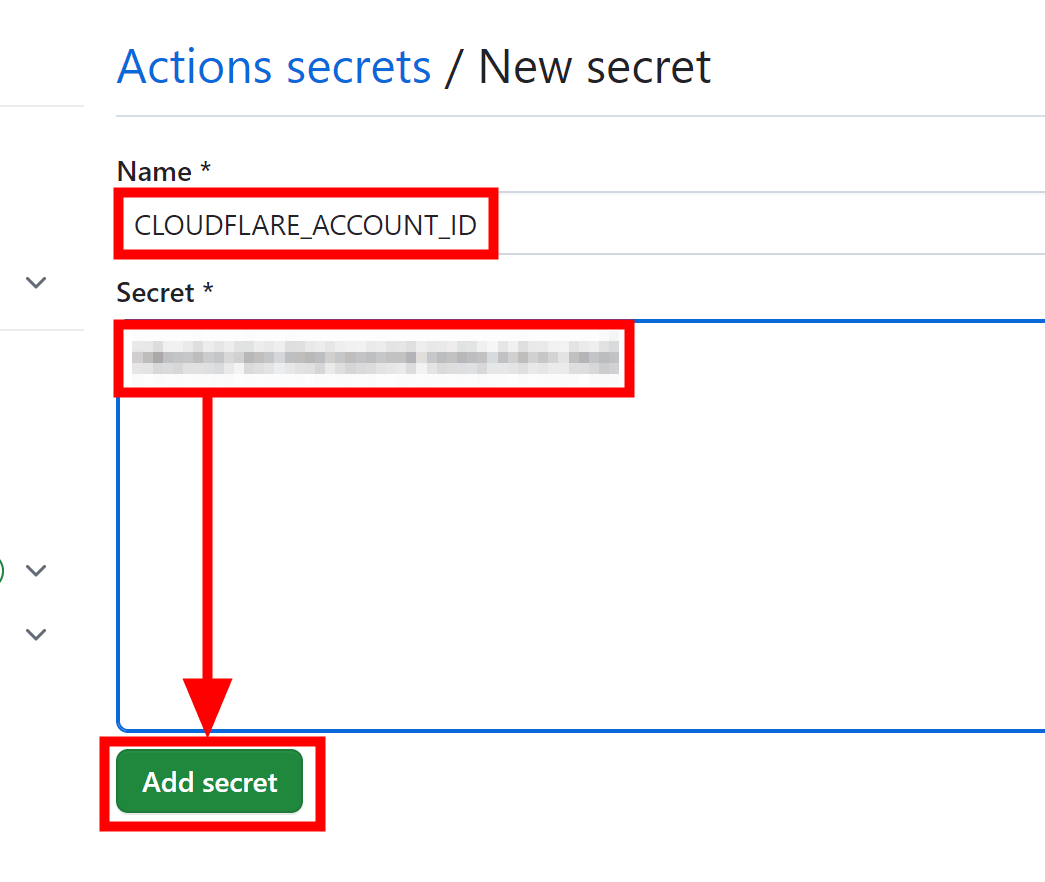
Open another window, log in to Cloudflare, and copy the part of the dashboard below 'dash.cloudflare.com/'.

Return to the secret entry screen and enter 'CLOUDFLARE_ACCOUNT_ID' in the Name field. Paste the ID you copied into Secret and click 'Add secret.'
Next, prepare an API token. Open
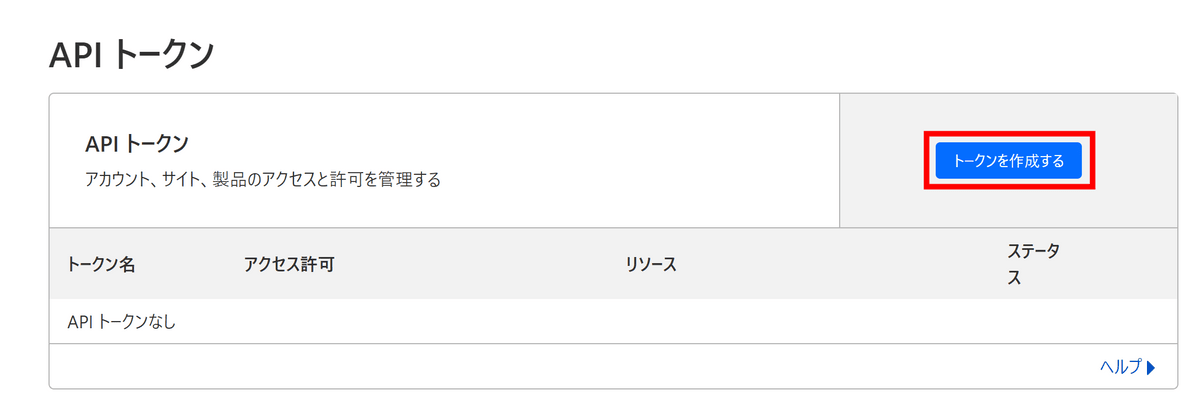
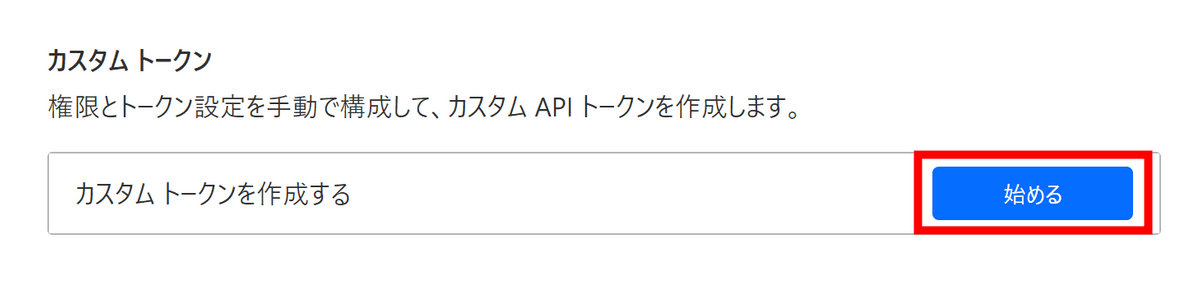
Click 'Get Started' in the 'Create a Custom Token' section.
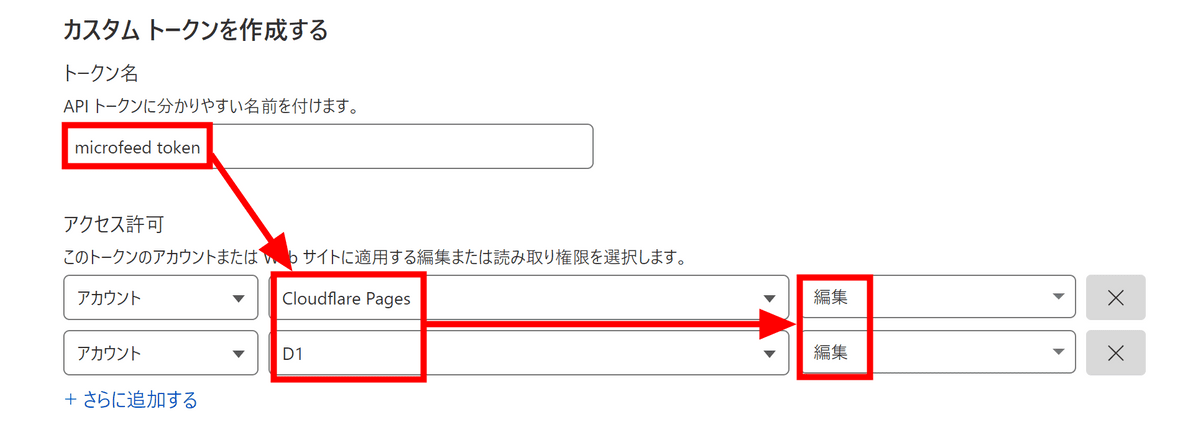
You can name the token anything. I named it 'microfeed token' this time. Select 'Cloudflare Pages' and 'D1' in the Access Permissions section, and select 'Edit' for both in the right column.
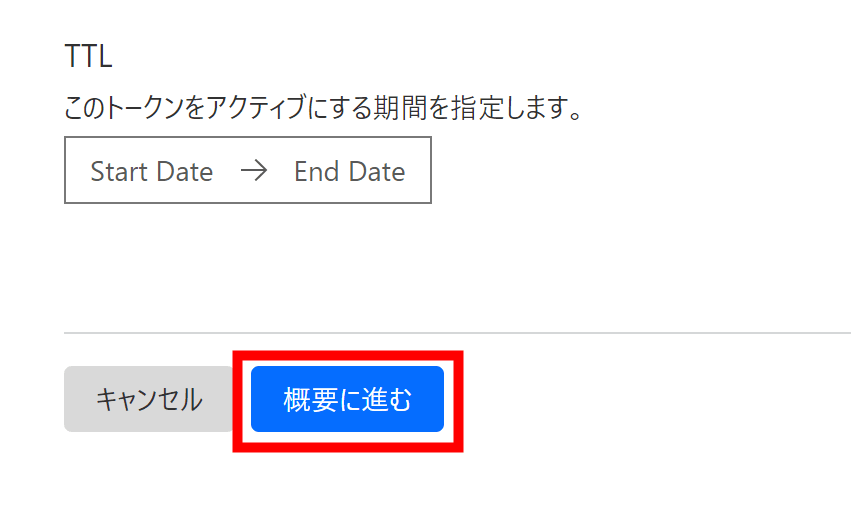
Leave other settings unchanged and click 'Proceed to Summary'.
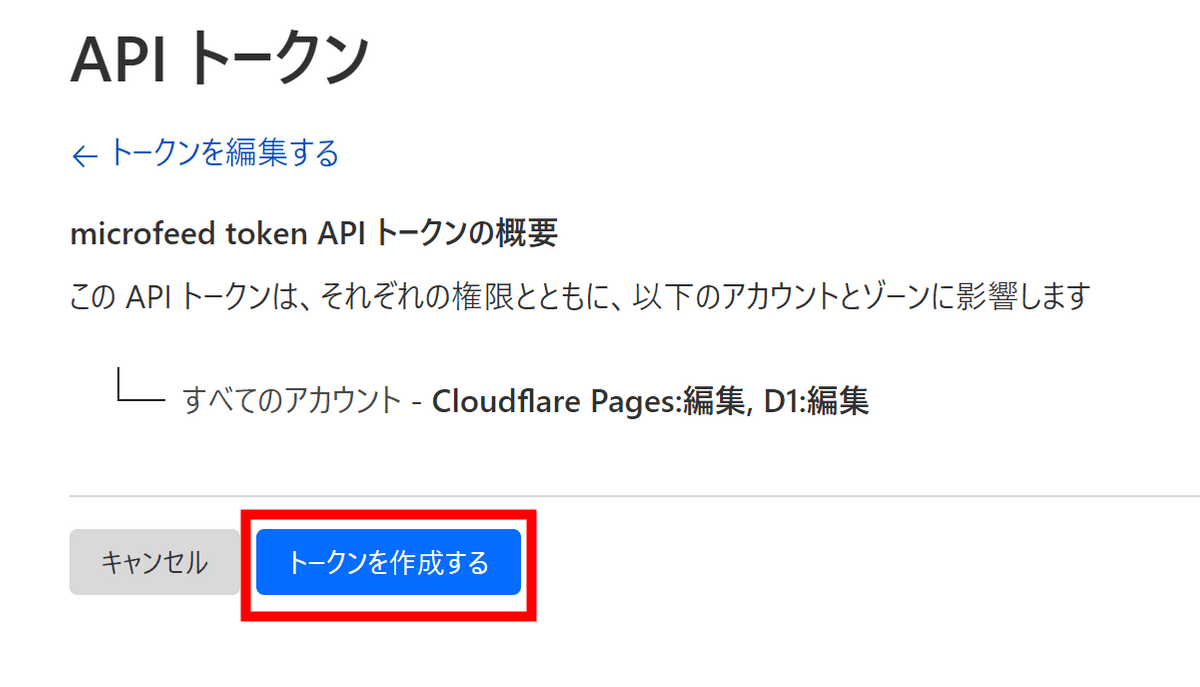
Click Create Token.
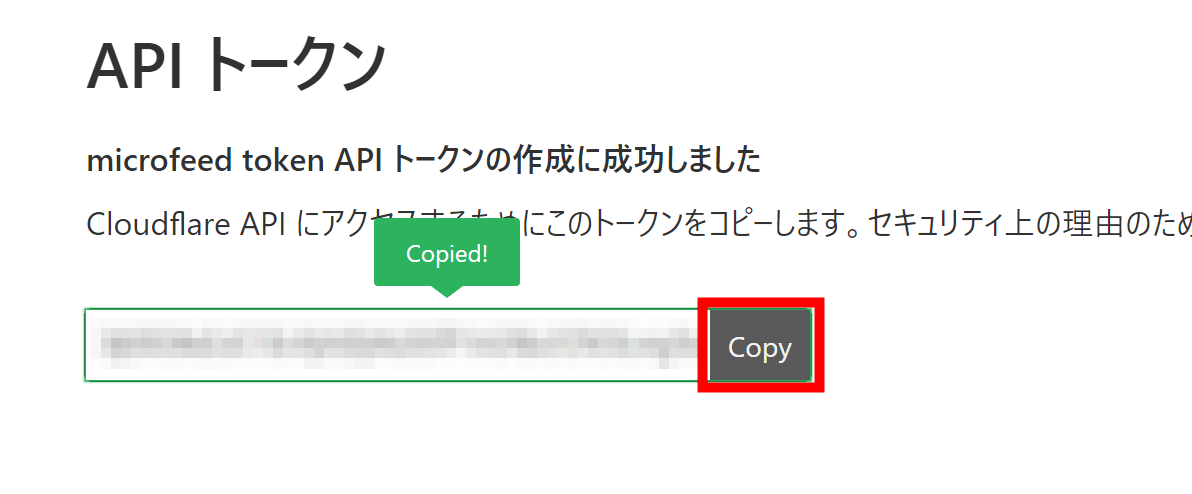
Copy the API token.
Enter the copied API token into the second secret field in Github. Enter 'CLOUDFLARE_API_TOKEN' in the Name field and click 'Add secret'.
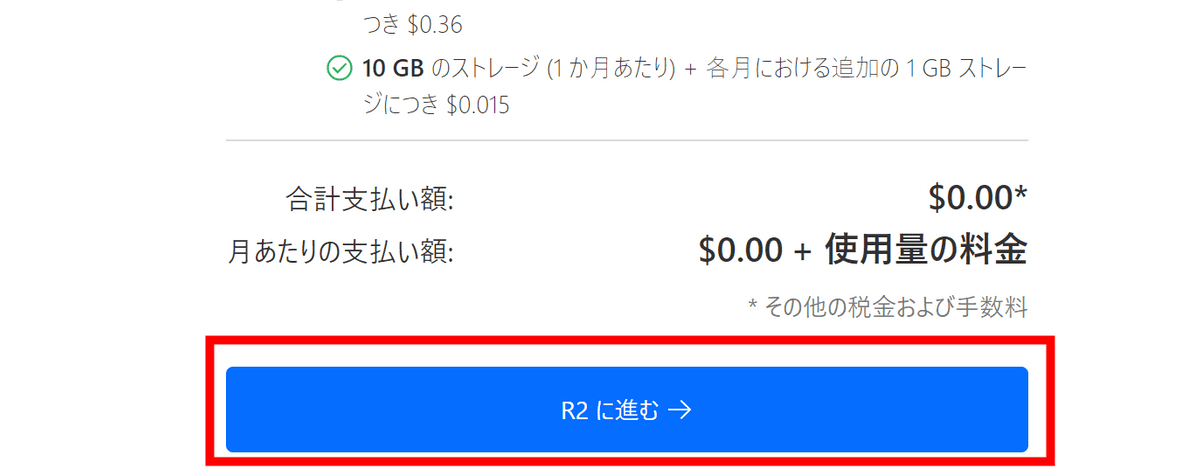
Next, we will set up R2. Open
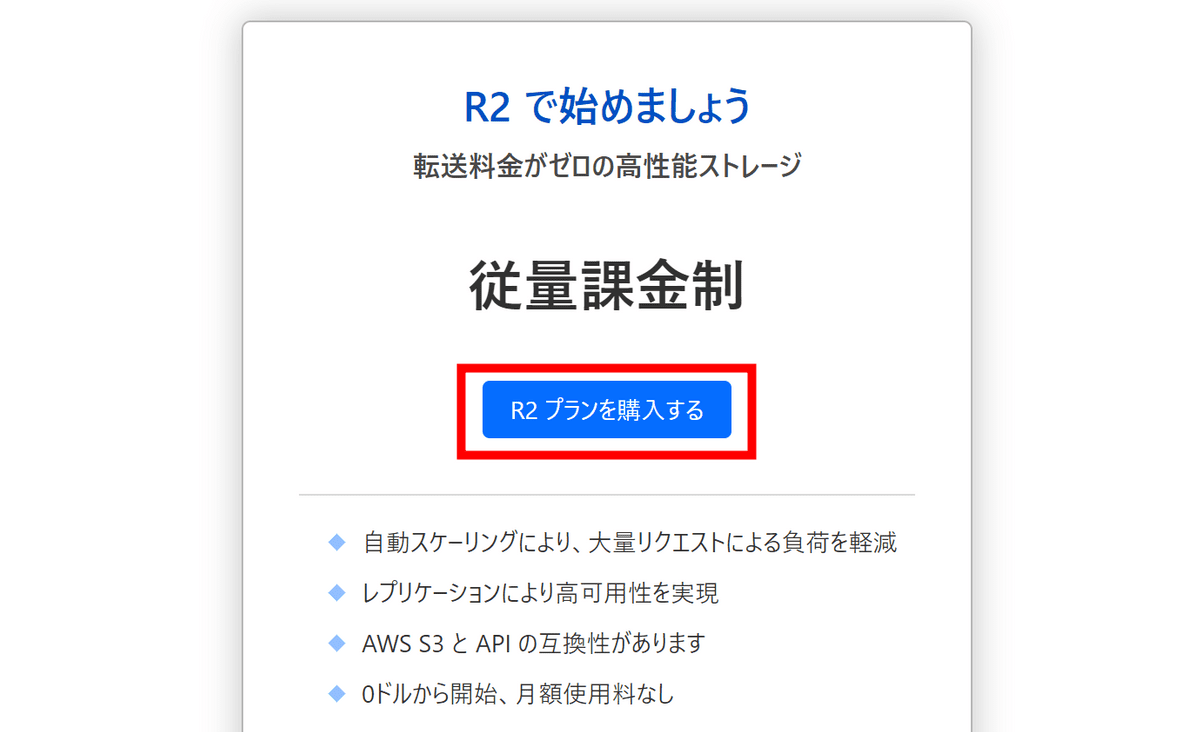
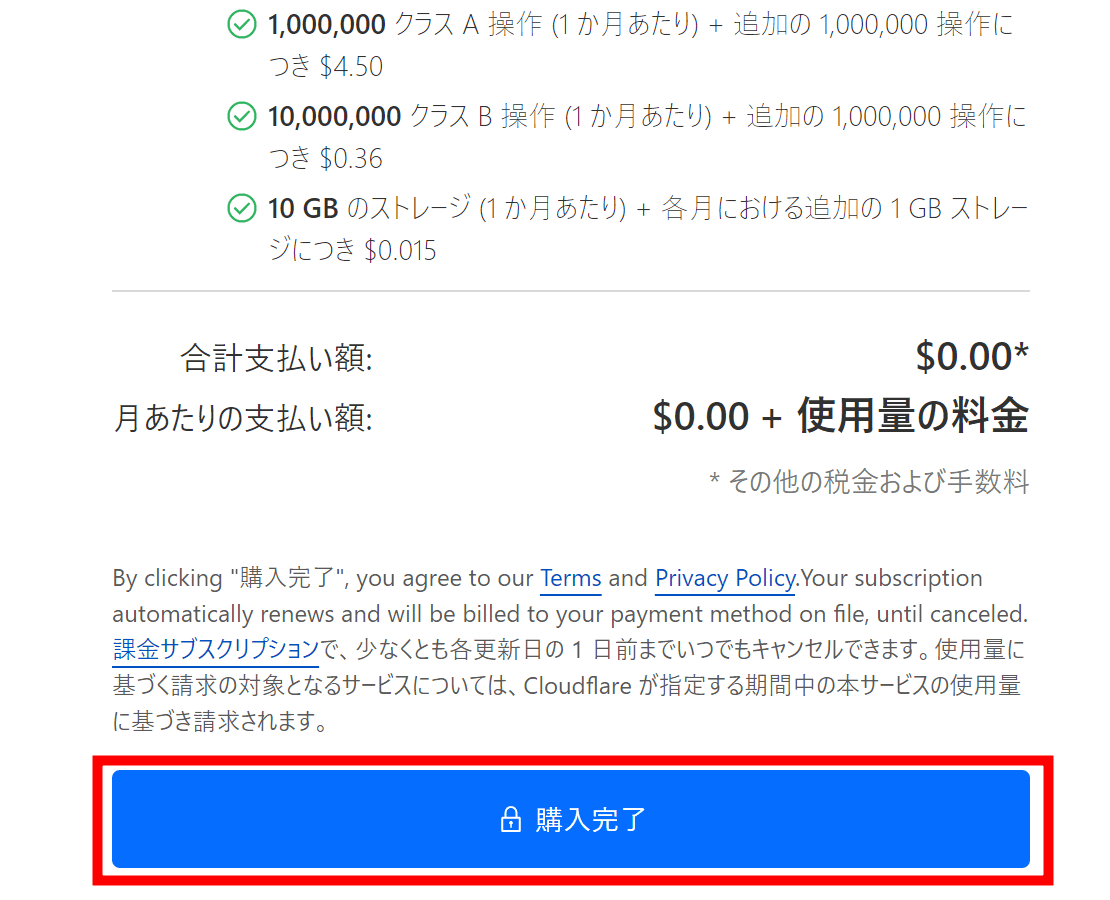
Check the fee and click 'Proceed to payment summary'. At the time of writing, it is free for up to 1 million writes, 10 million reads, and 10 GB of capacity.
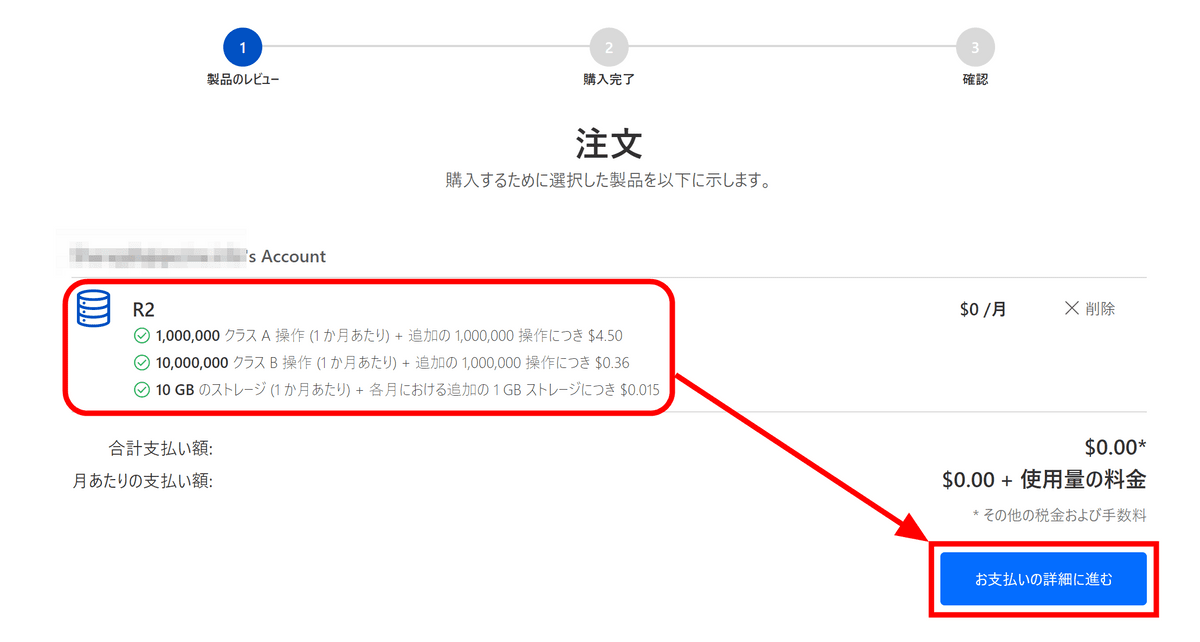
A confirmation screen will appear, so click 'Complete Purchase'.
Click 'Proceed to R2'.
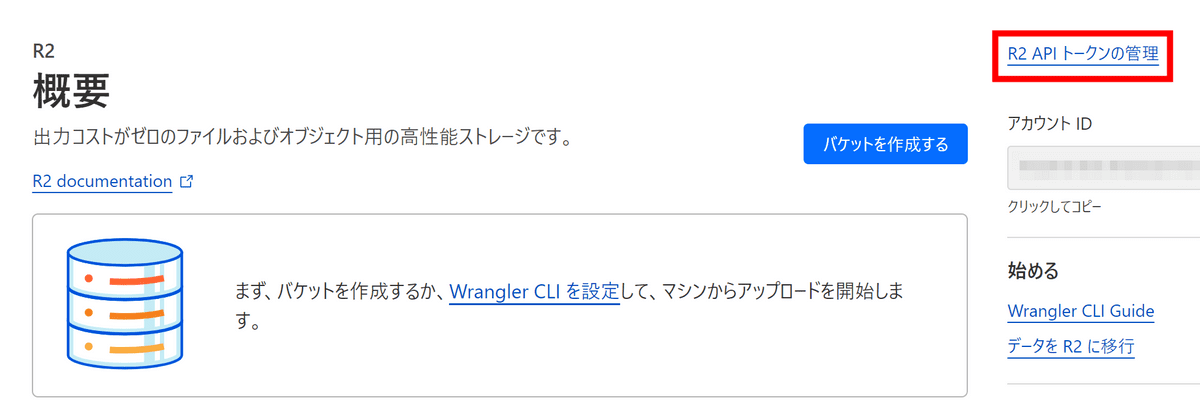
Click 'Manage R2 API Tokens' in the upper right.
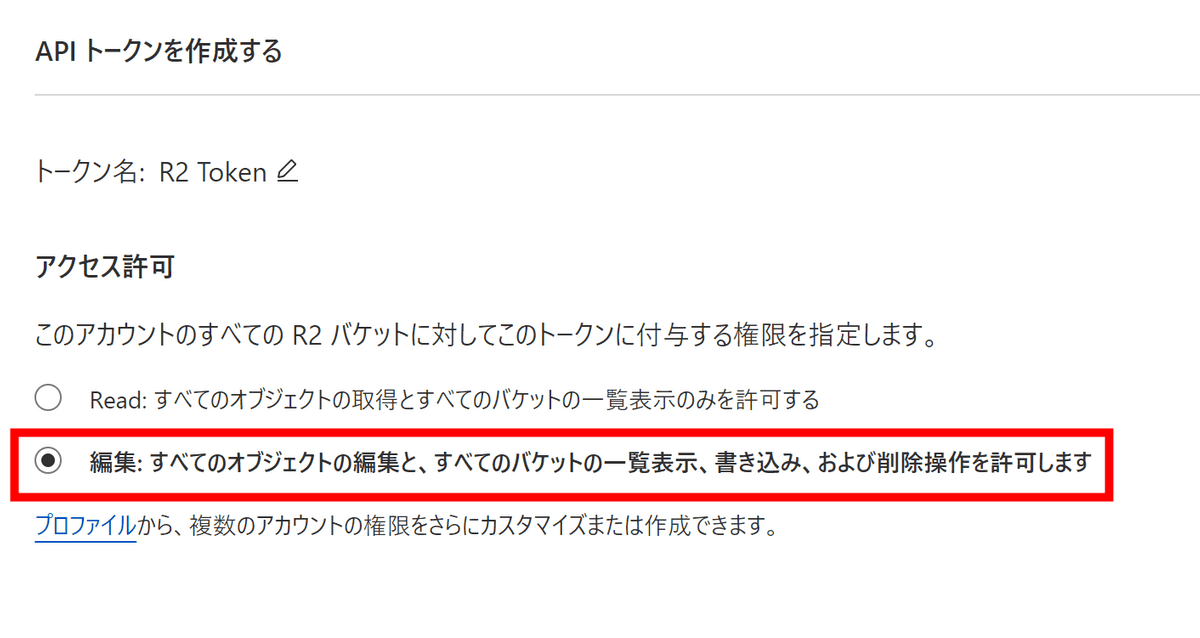
Click 'Create API token'.

Set the Access Permissions field to 'Edit'.
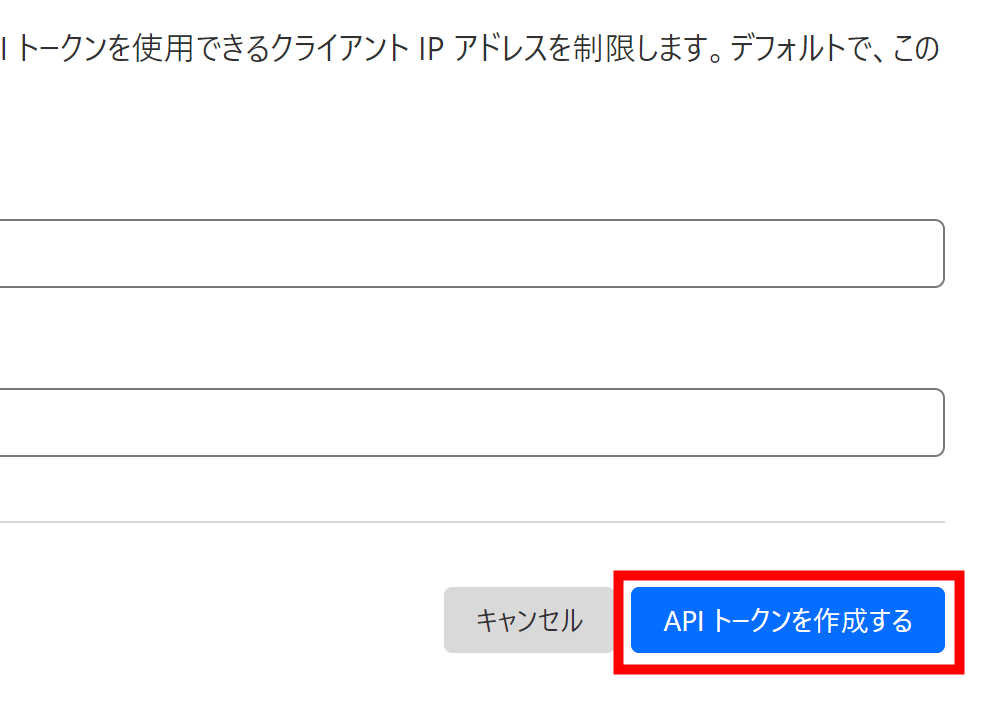
Leave other settings unchanged and click 'Create API token'.
Copy the access key ID...
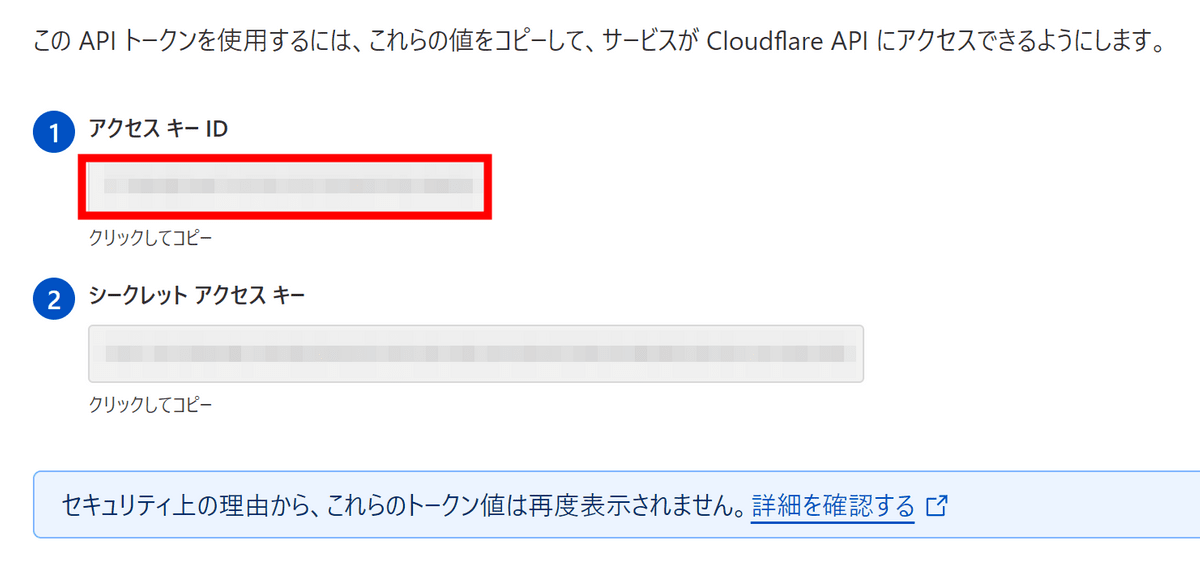
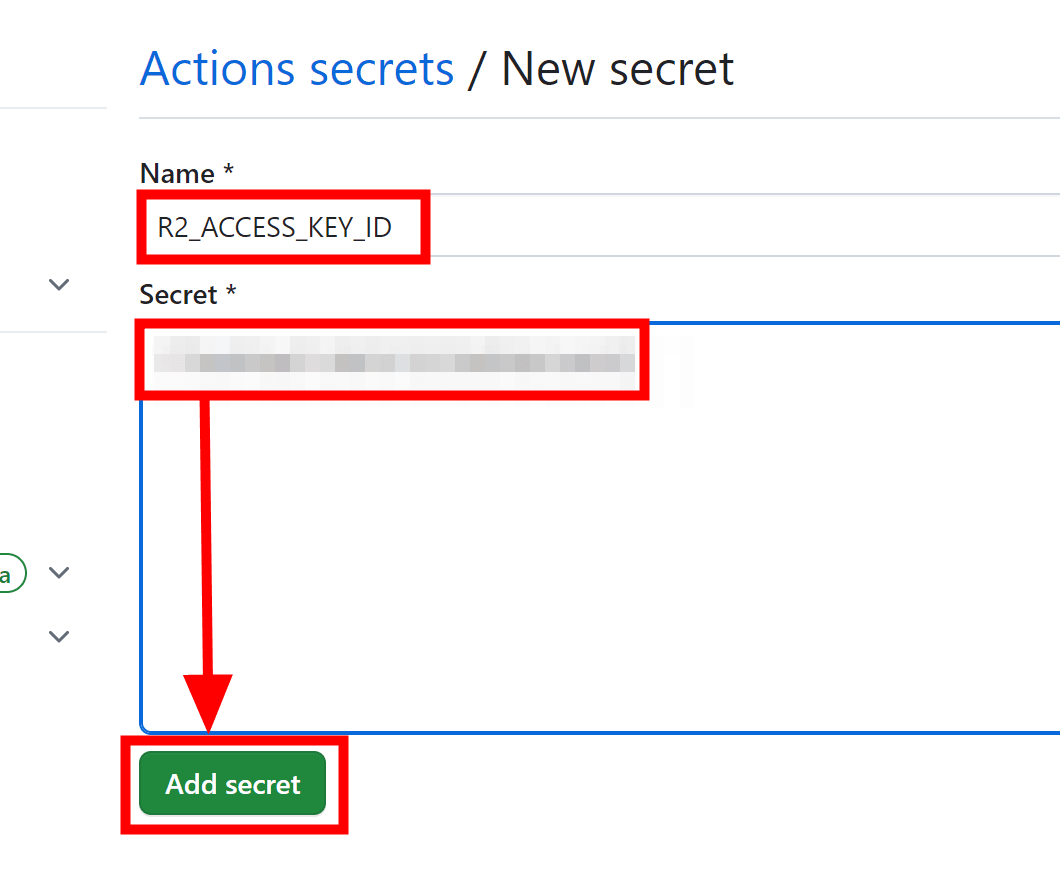
Paste it into the Github secret input field, enter 'R2_ACCESS_KEY_ID' in the Name field, and click 'Add secret.'
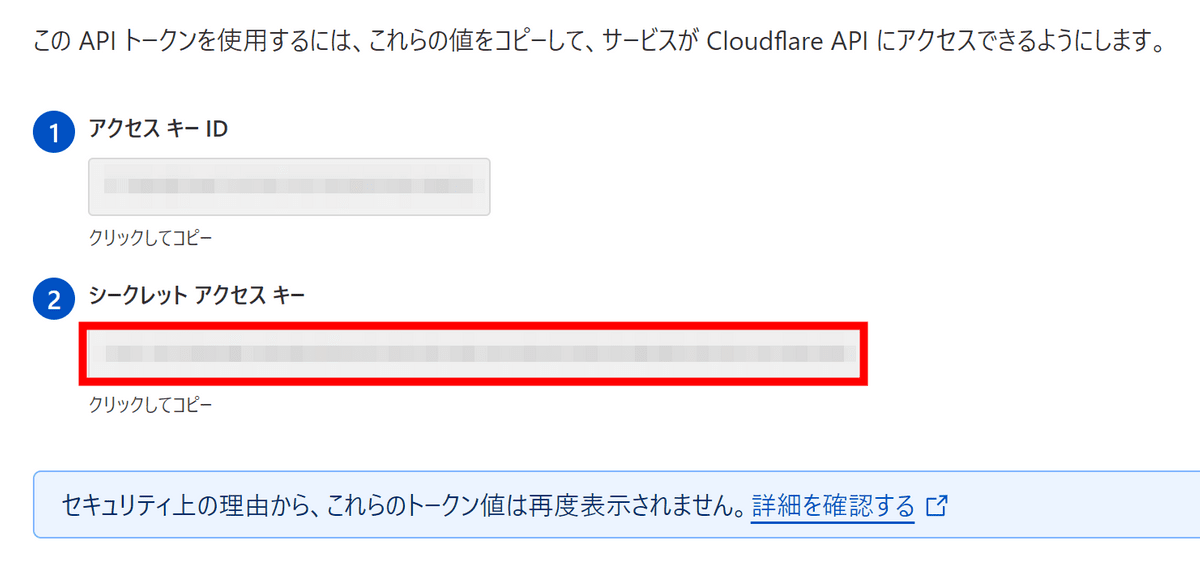
Copy the secret access key in the same way.
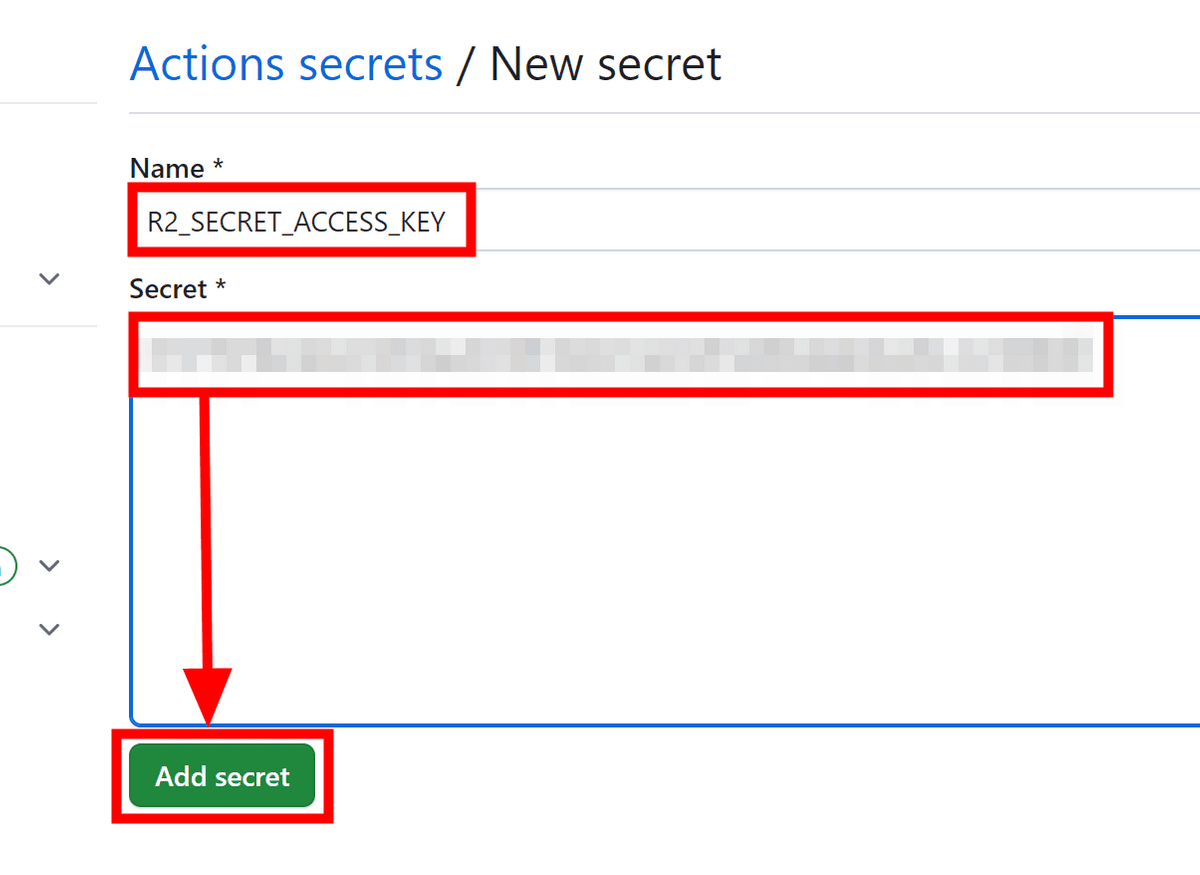
This time, enter 'R2_SECRET_ACCESS_KEY' in the Name field, paste your secret access key into the Secret field, and click 'Add secret'.
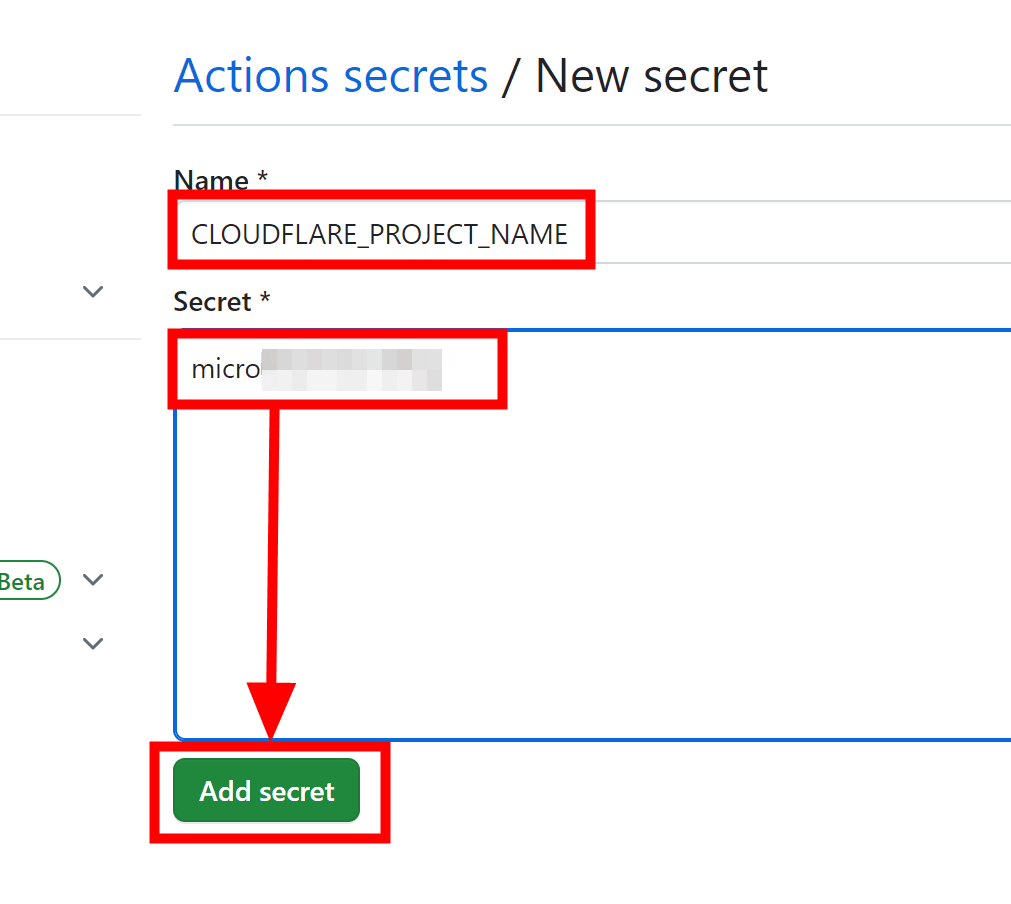
For the fifth secret setting, enter 'CLOUDFLARE_PROJECT_NAME' in the Name field and enter an appropriate name in the Secret field. If you are not using a custom domain, the name you enter here will be used in the URL.
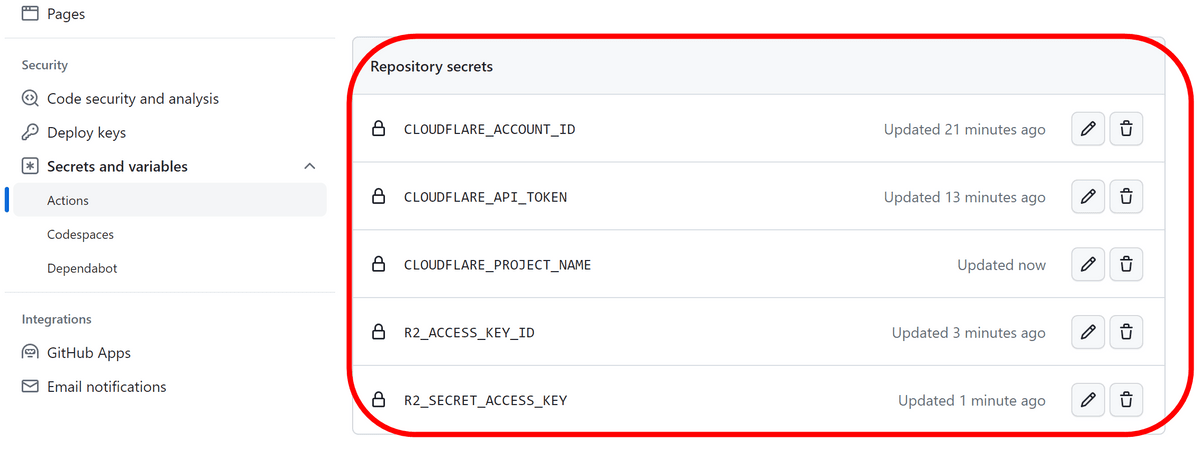
It's OK if the Secrets field in Github looks like this.
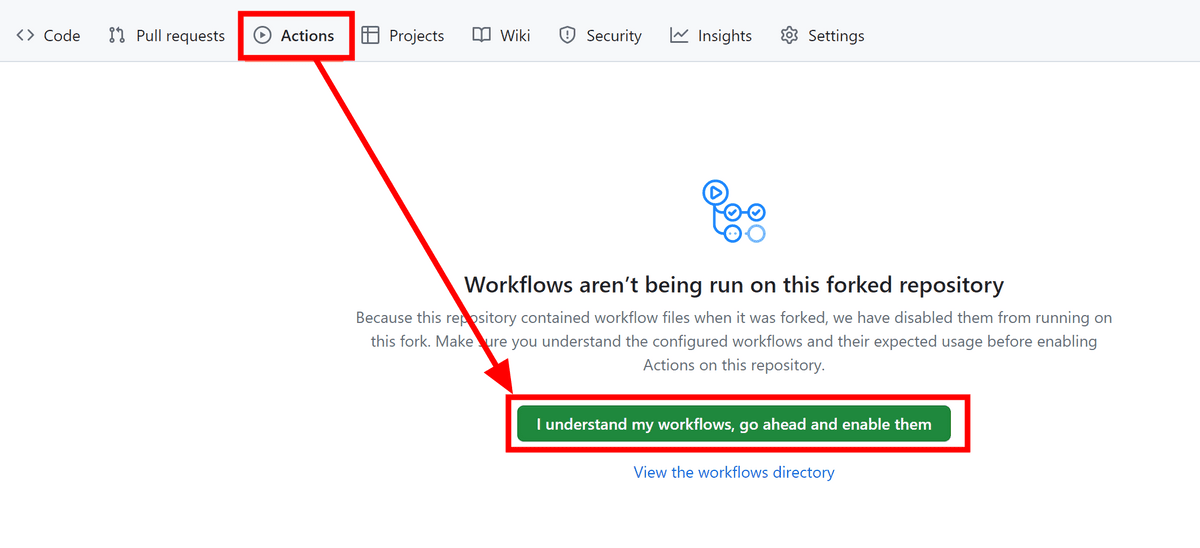
Go to 'Actions' in your repository and click 'I understand my workflows, go ahead and enable them.'
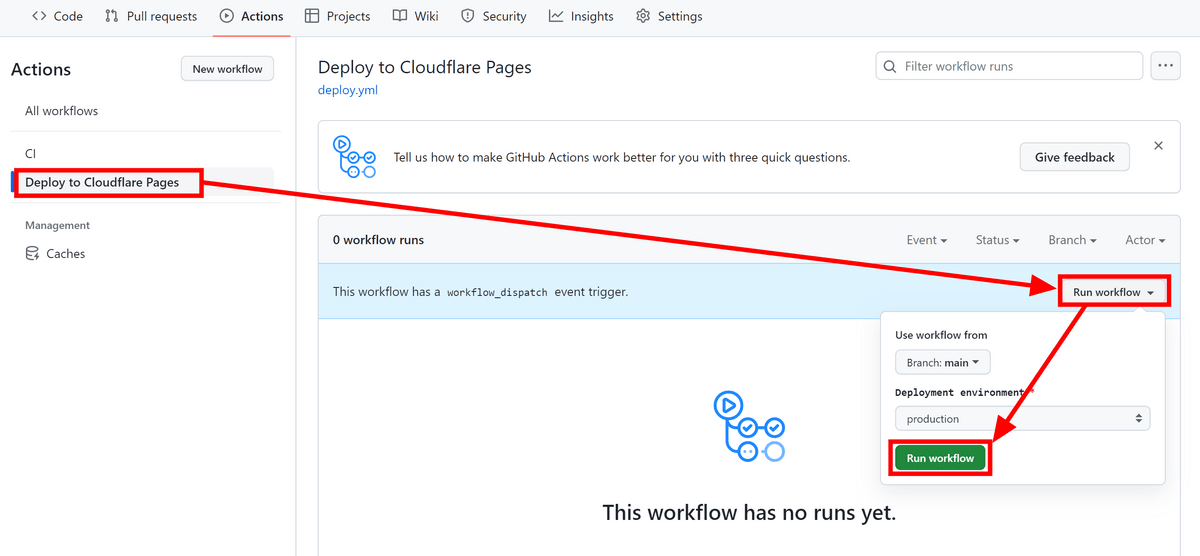
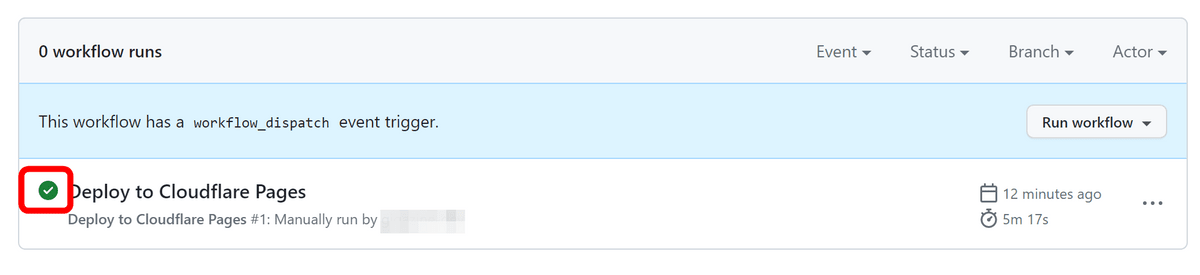
Click 'Deploy to Cloudflare Pages', open 'Run workflow', and click the green 'Run workflow'.
The deployment will start automatically.

After waiting about 5 minutes, the completion mark was displayed.
When you open
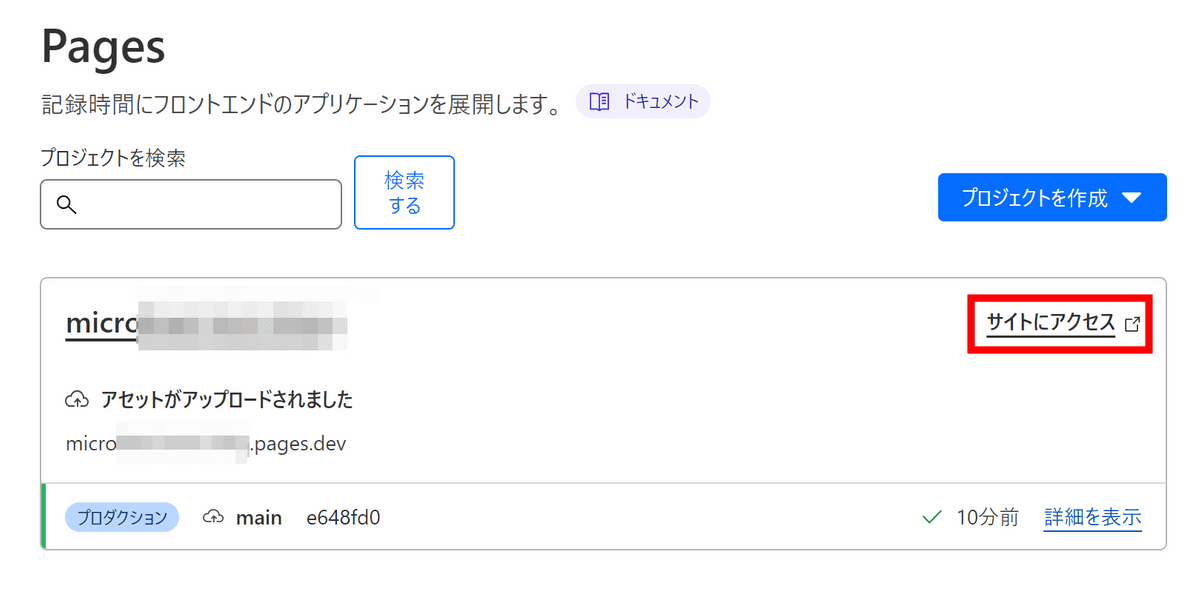
You will be automatically redirected to the admin page.
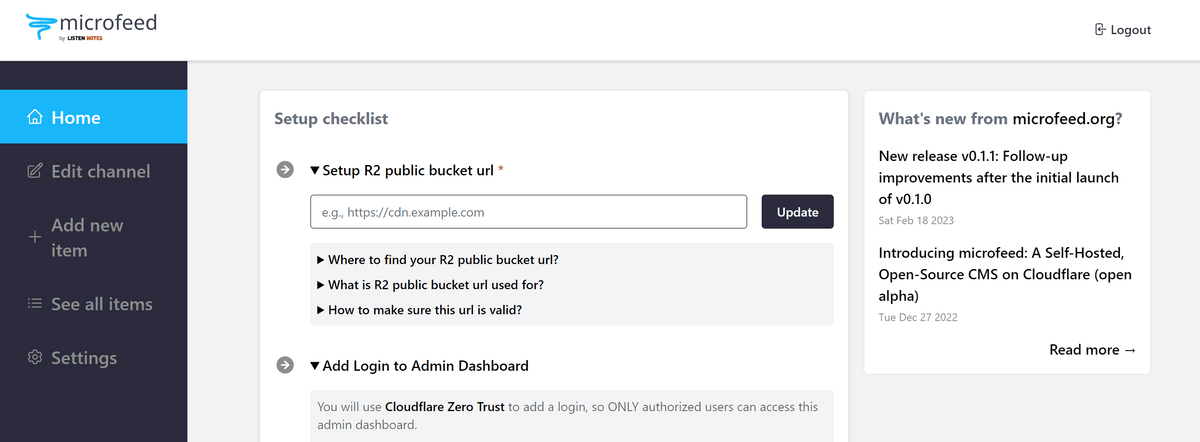
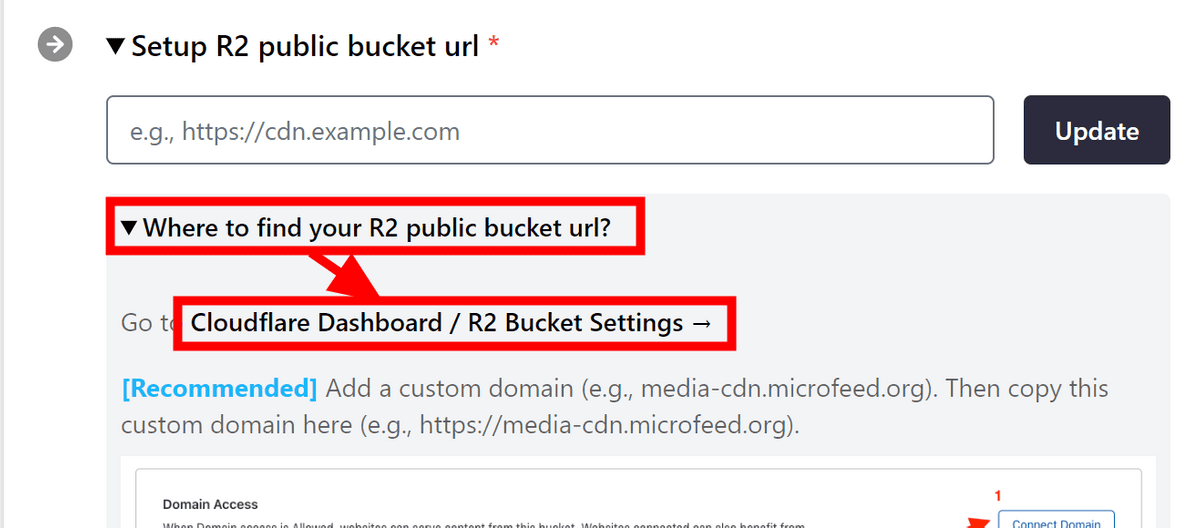
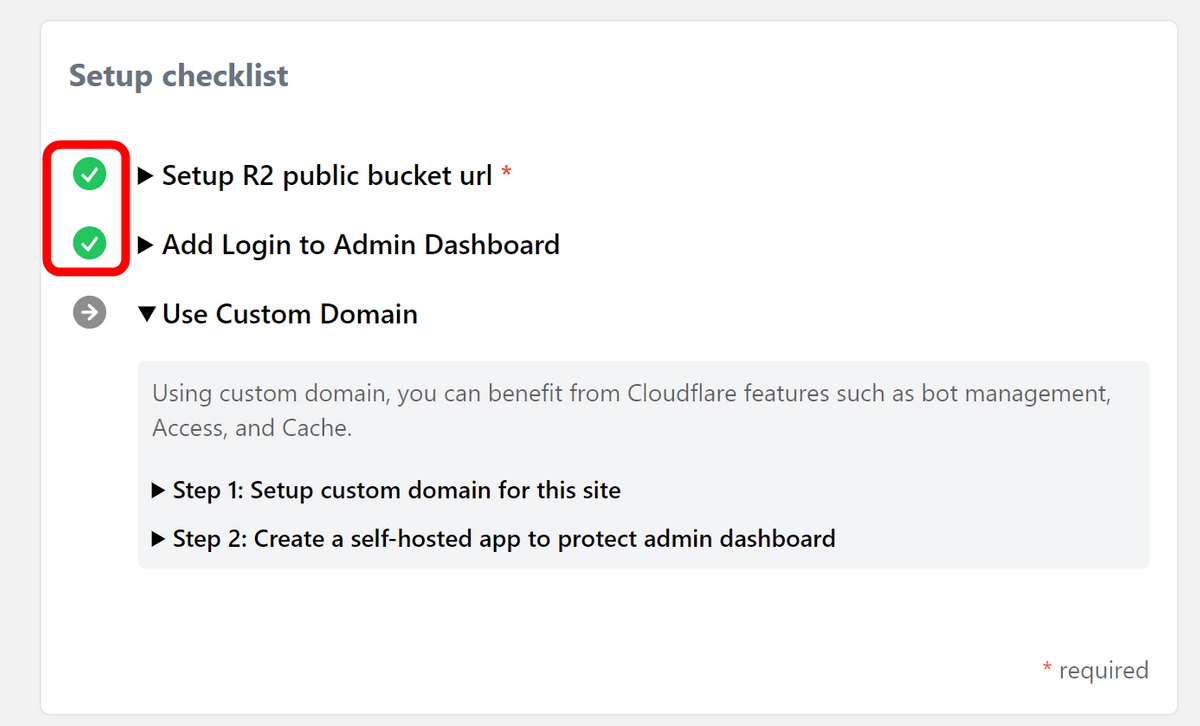
First, you need to configure R2. Open 'Where to find your R2 public bucket url?' and click 'Cloudflare Dashboard / R2 Bucket Settings →'.
The R2 settings screen will open, so click 'Allow access' for the 'r2.dev subdomain'.

The r2.dev subdomain is rate limited, and a notice appears stating that you should use a custom domain in production. Since we are not going to use a domain that will be subject to rate limits this time, just enter 'allow' and click 'Allow'.
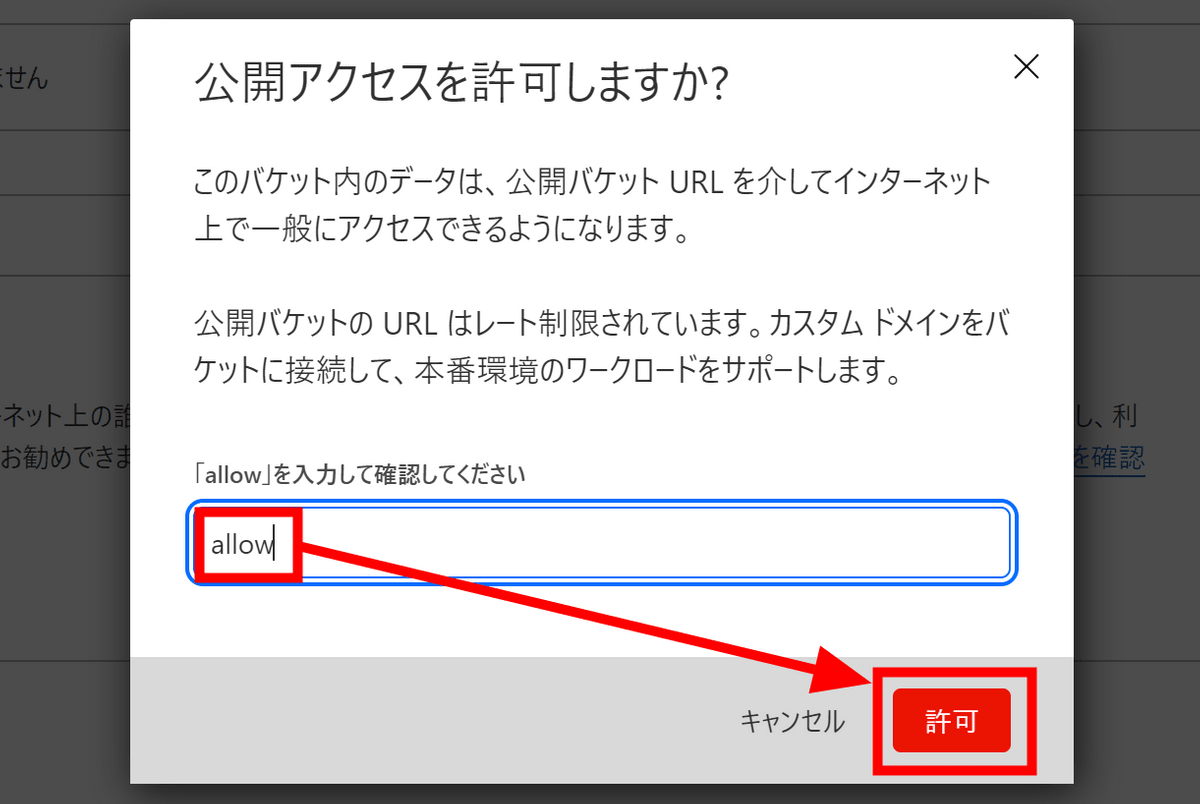
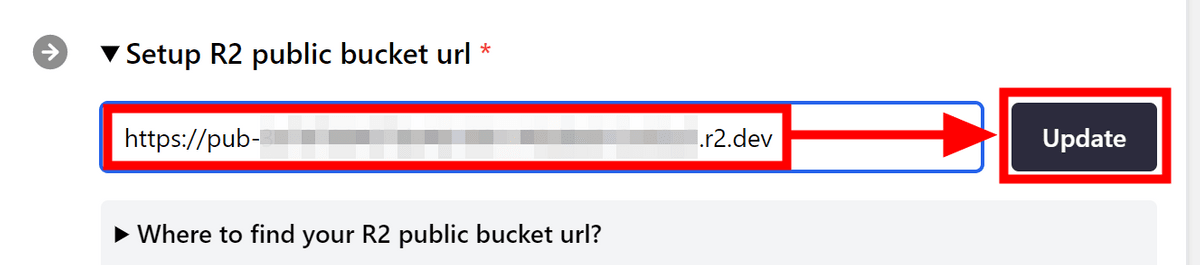
The word 'Allow' appears next to the item name and a public URL appears. Copy the public URL ...

Paste it into the microfeed settings screen and click 'Update'.
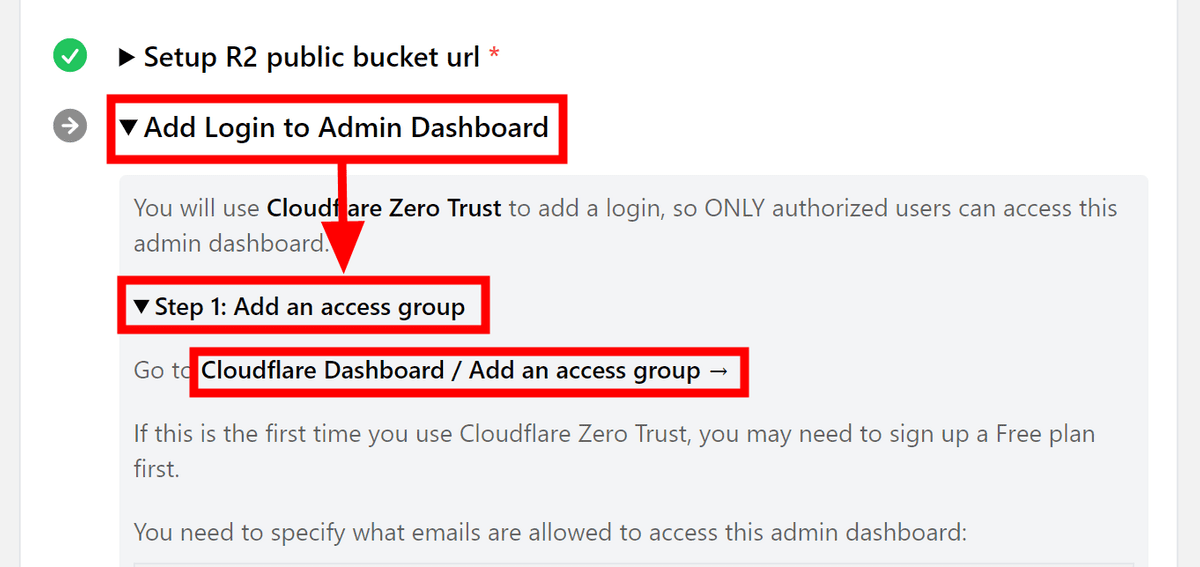
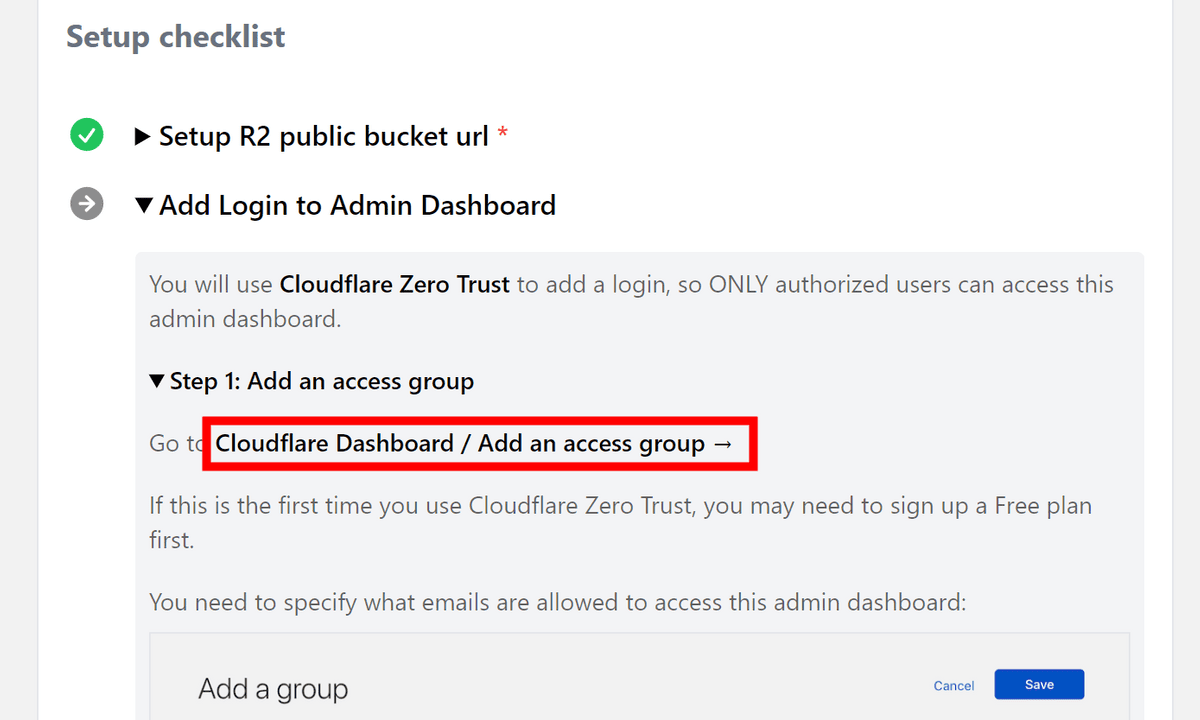
Next, set up authentication in the admin screen. Open 'Add Login to Admin Dashboard' and click 'Cloudflare Dashboard / Add an access group →' in the 'Step 1: Add an access group' section.
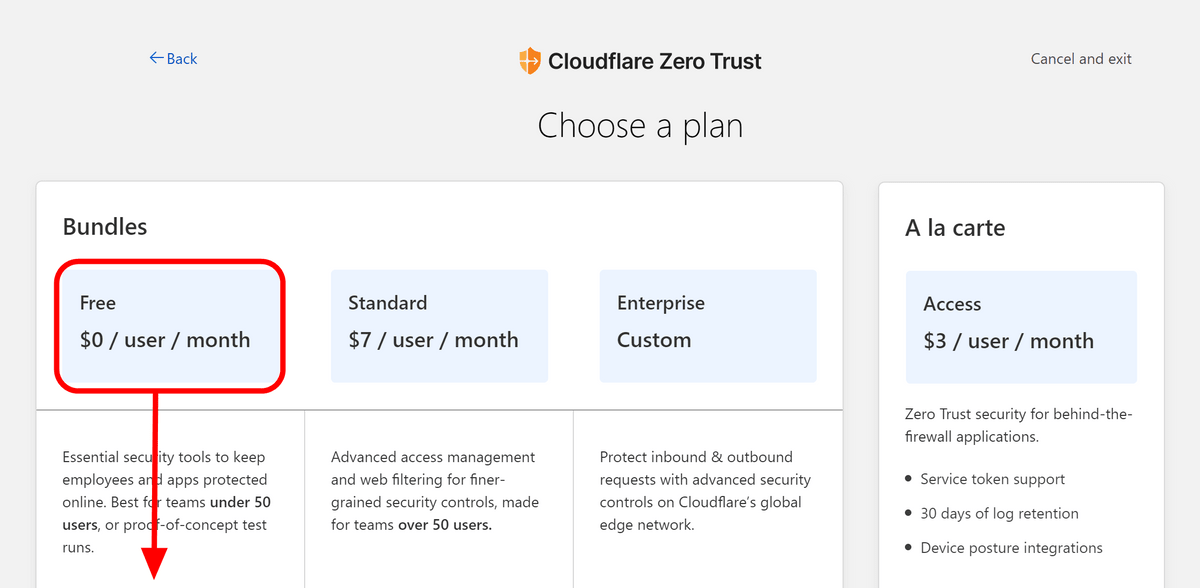
The Cloudflare Access settings screen will open, so choose a team name and click 'Next'.

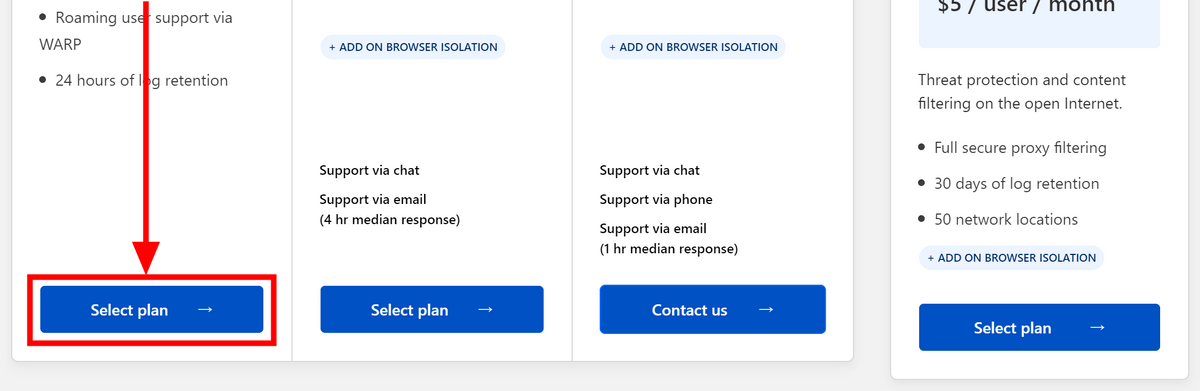
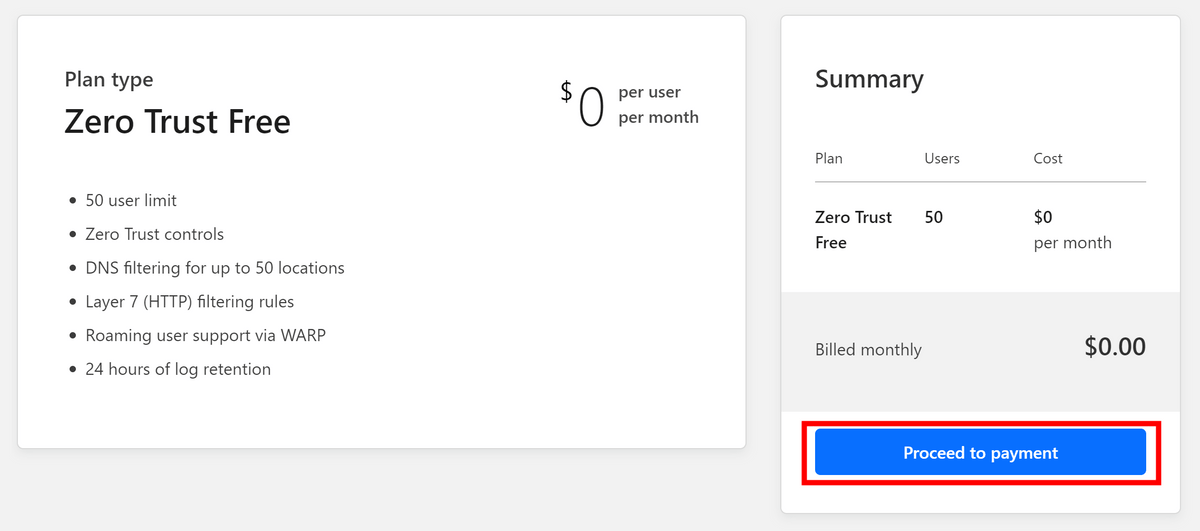
You will be asked to select a plan, but the Free plan is fine for this usage. Scroll down...
Click “Select plan”.
Click 'Proceed to payment'.
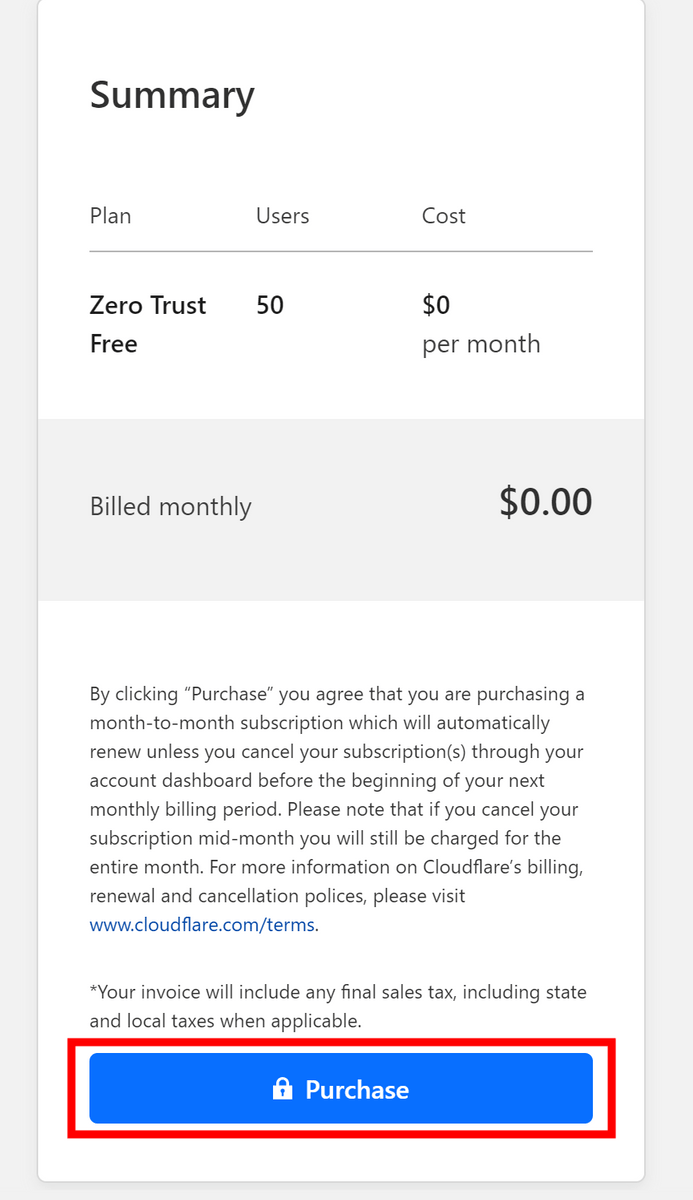
You will be redirected to a confirmation screen, so click 'Purchase'.
You will be returned to the Cloudflare Access homepage, so click 'Cloudflare Dashboard / Add an access group →' again from the microfeed settings screen.
Enter 'Admin group' in the Group name field and check 'Set as default group'.
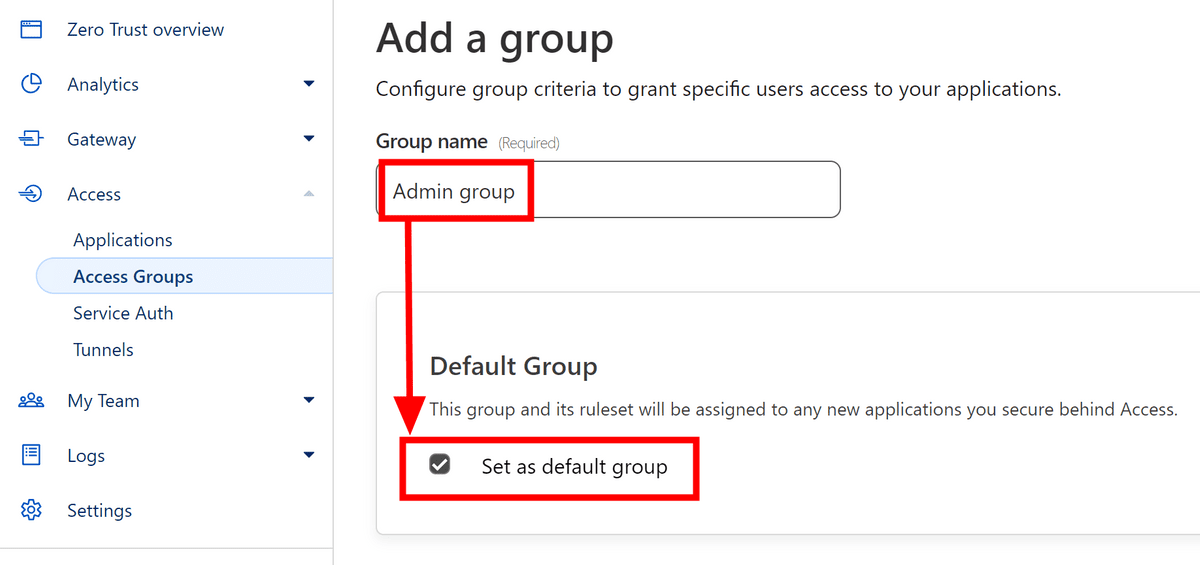
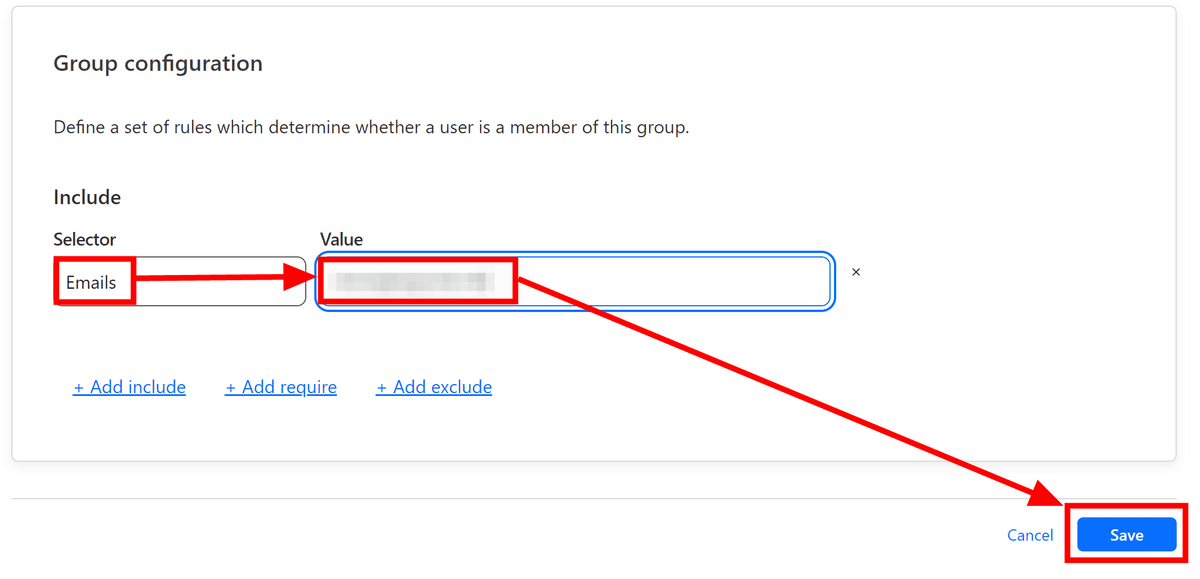
Furthermore, in the 'Group configuration' section, set 'Selector' to 'Emails', enter your email address, and click 'Save'.
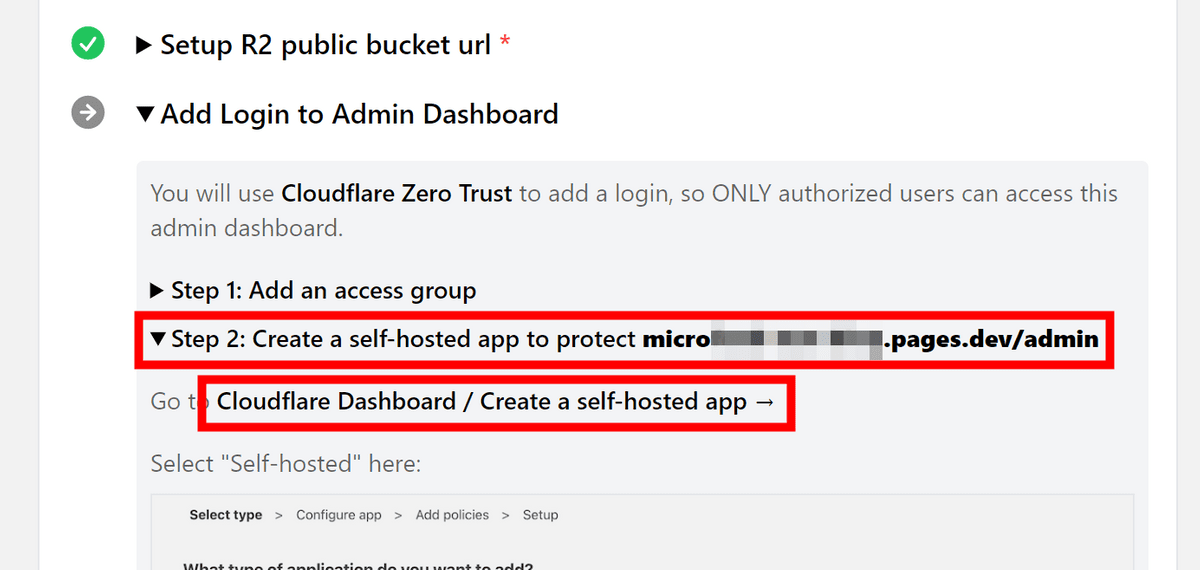
Return to the microfeed screen, open 'Step 2: Create a self-hosted app to protect...', and click 'Cloudflare Dashboard / Create a self-hosted app →' directly below.
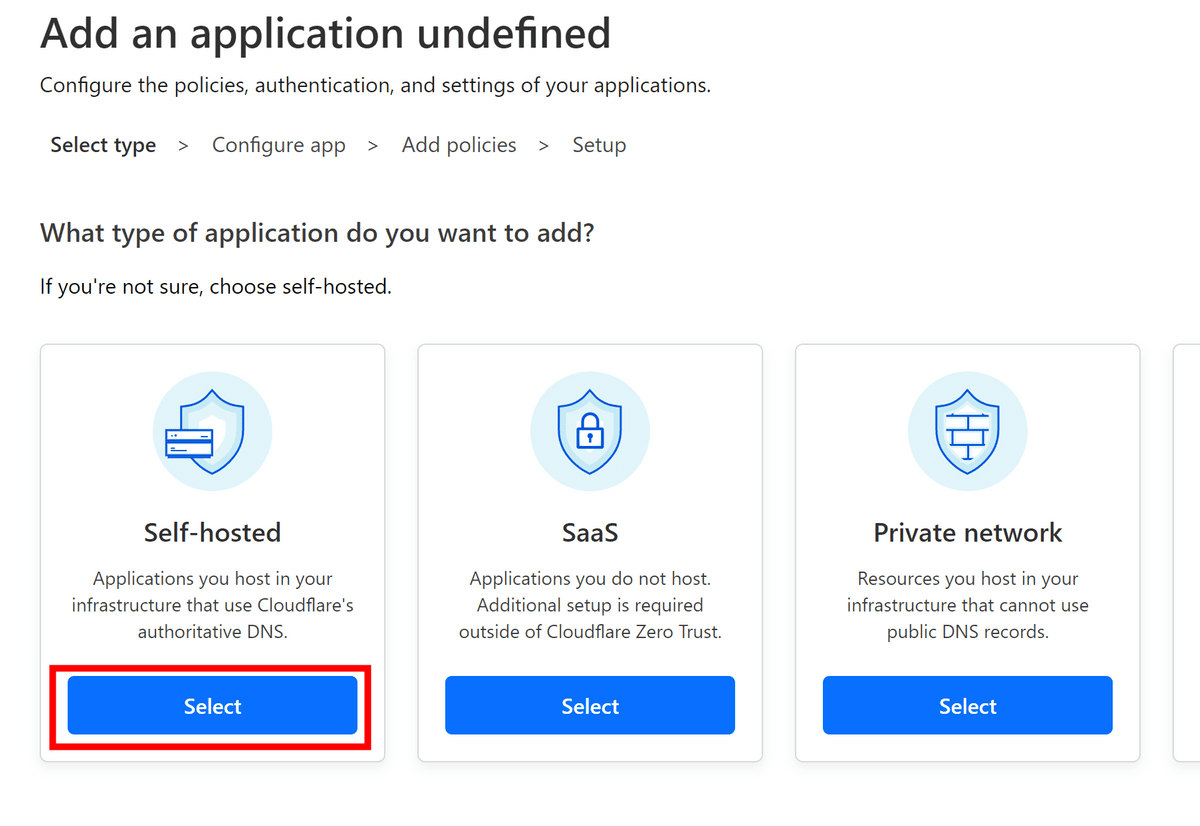
Click “Select” for “Self-hosted”.
Enter an appropriate name in the Application name field. In this example, I used the URL to be protected. Enter 'admin' in the Path field and select the microfeed address in the Domain field.
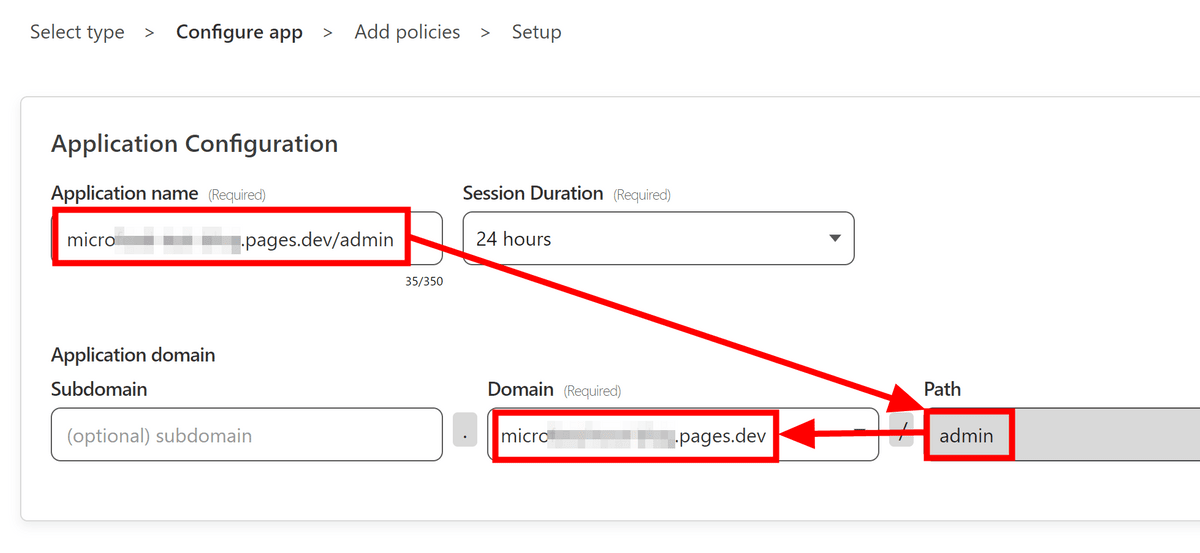
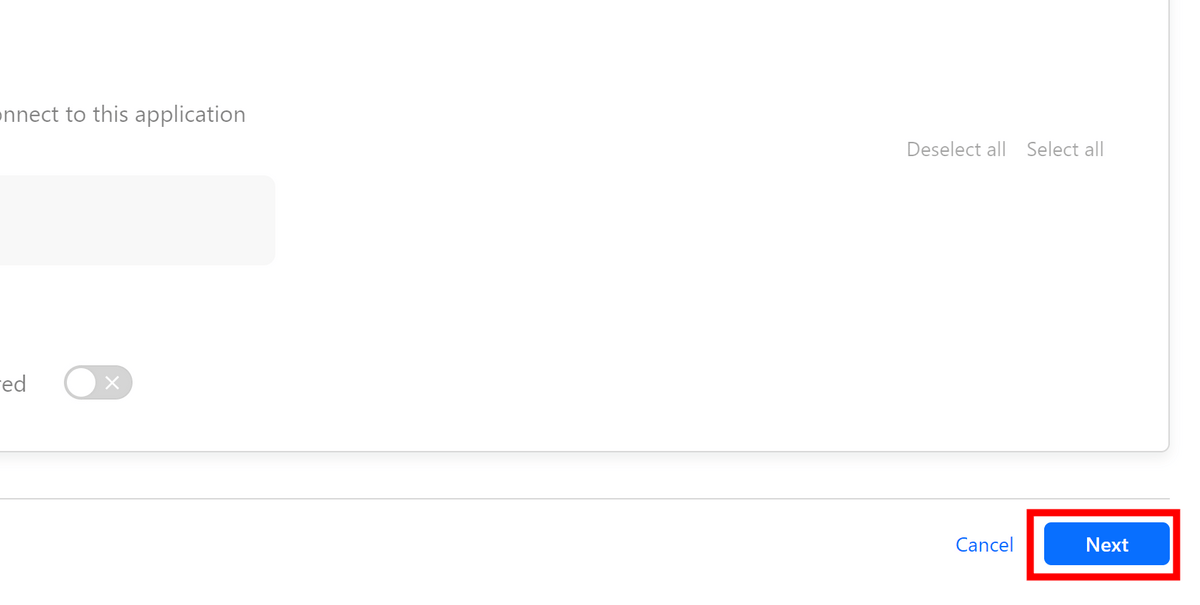
Leave other settings unchanged and click 'Next'.
Enter 'Admin only' in Policy name...
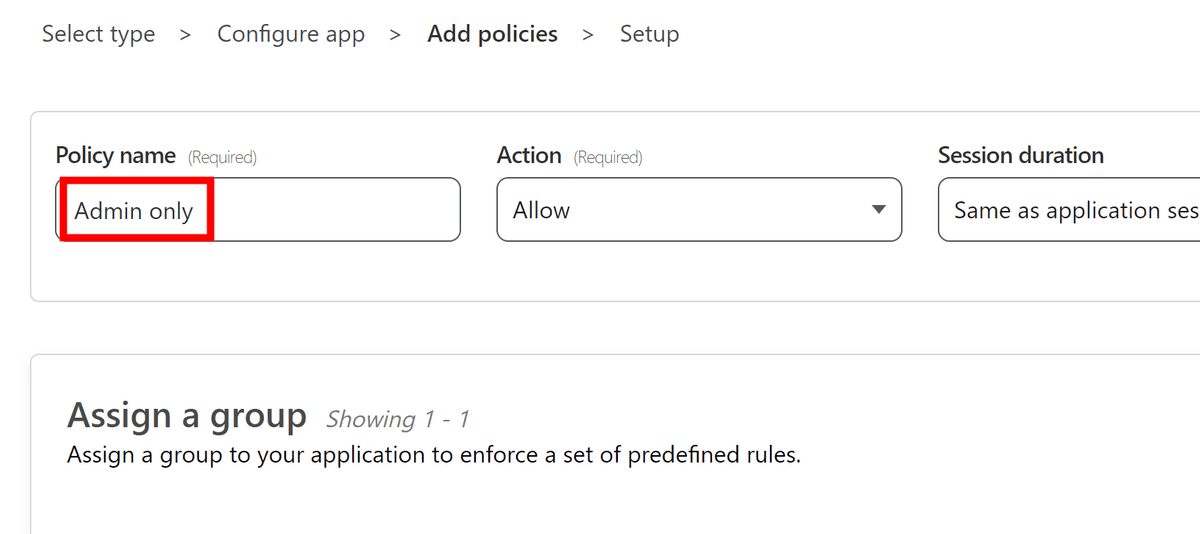
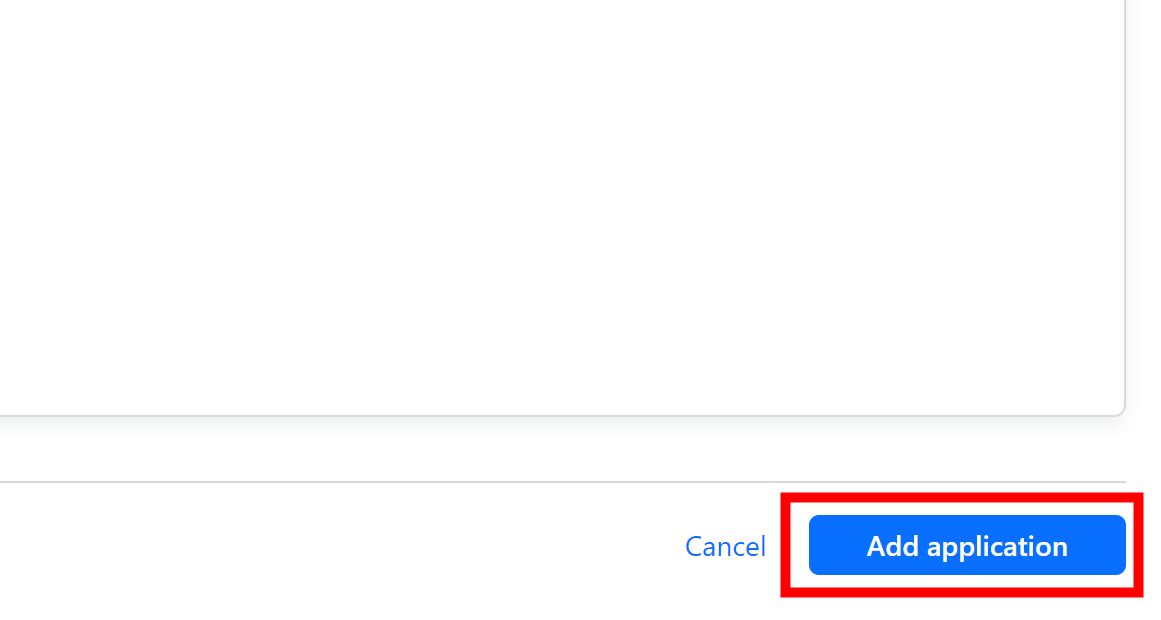
Click “Next”.
Click Add application.
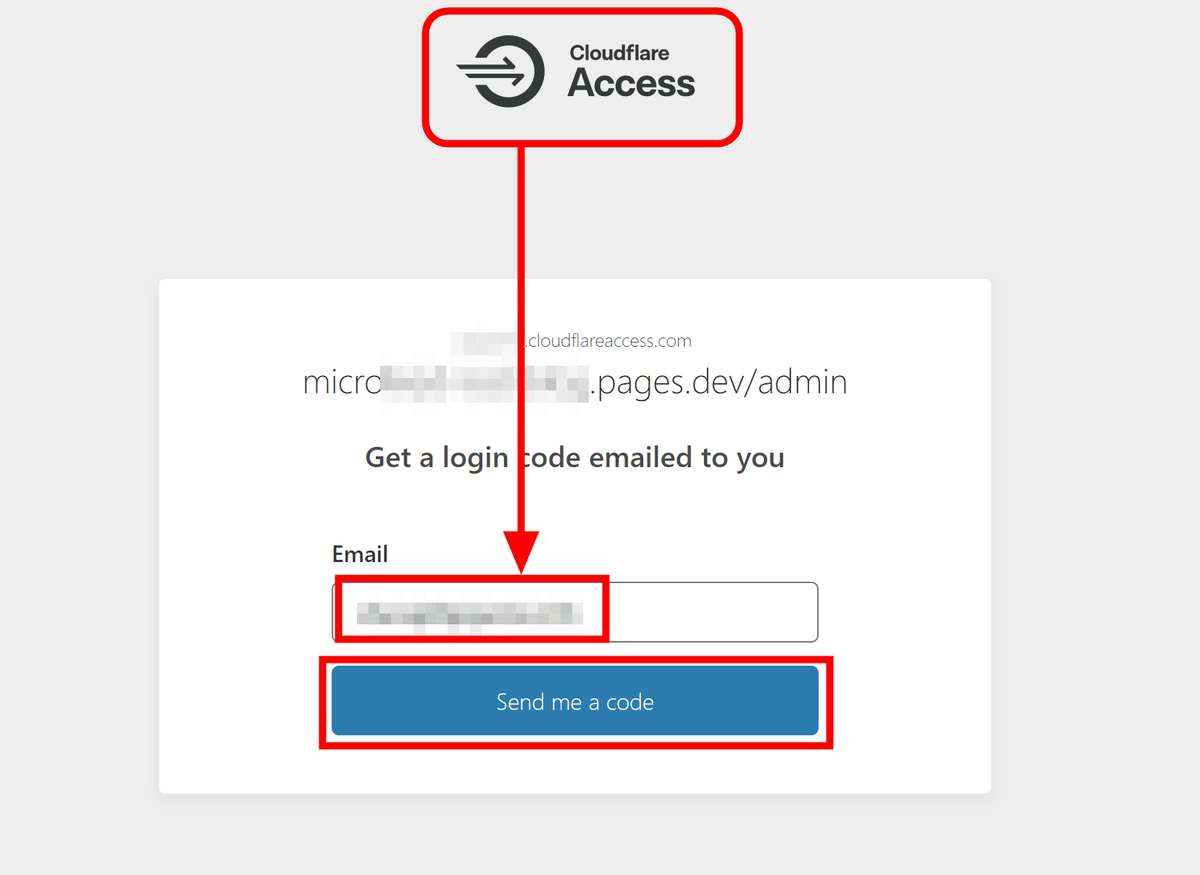
When I reloaded the microfeed screen, I was taken to the Cloudflare Access authentication screen. Enter your email address and click 'Send me a code.'
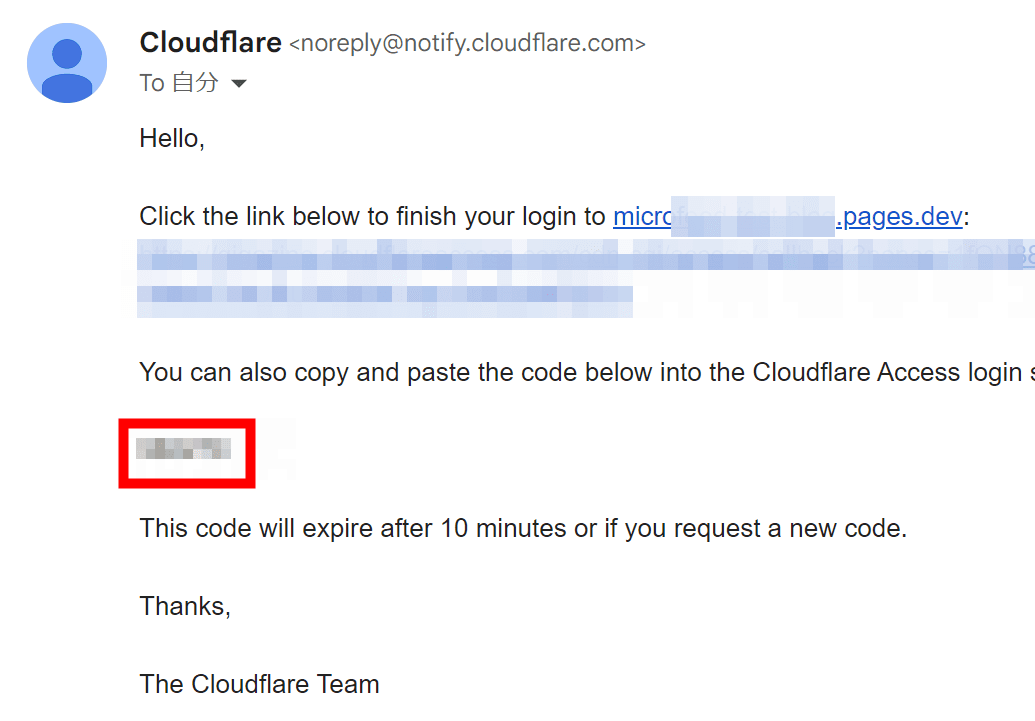
The code will be sent to the email address you entered, so copy it...
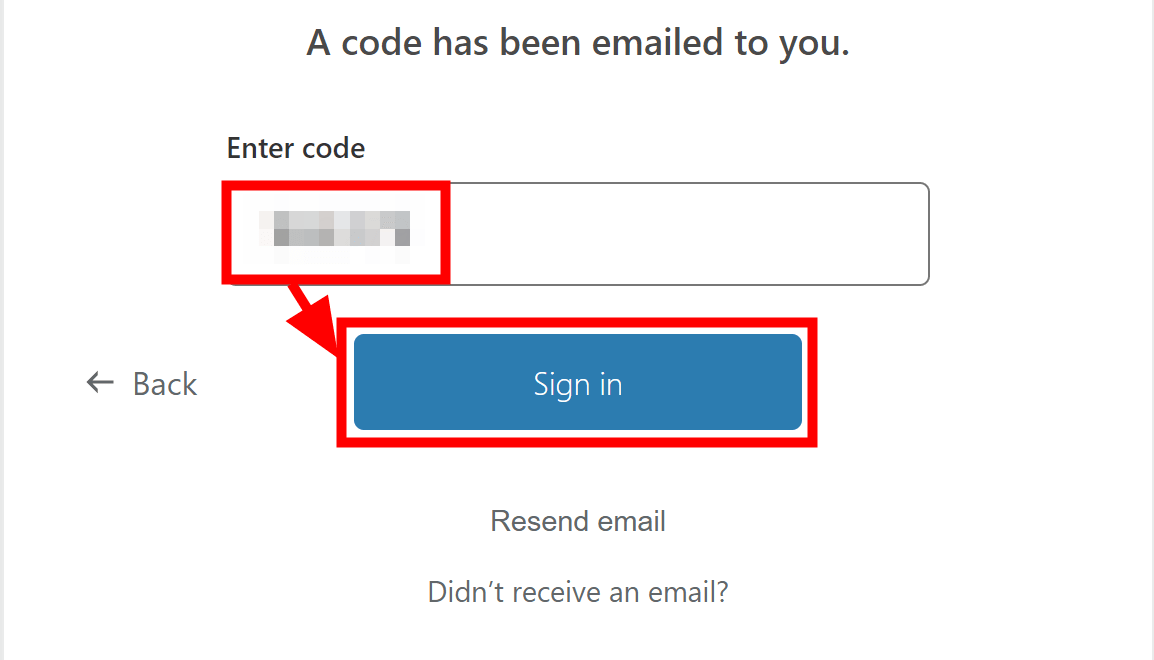
Paste it into Cloudflare Access and click 'Sign in'.
The microfeed admin screen also explains how to set up a custom domain, but since we won't be using a custom domain this time, the microfeed setup is complete.
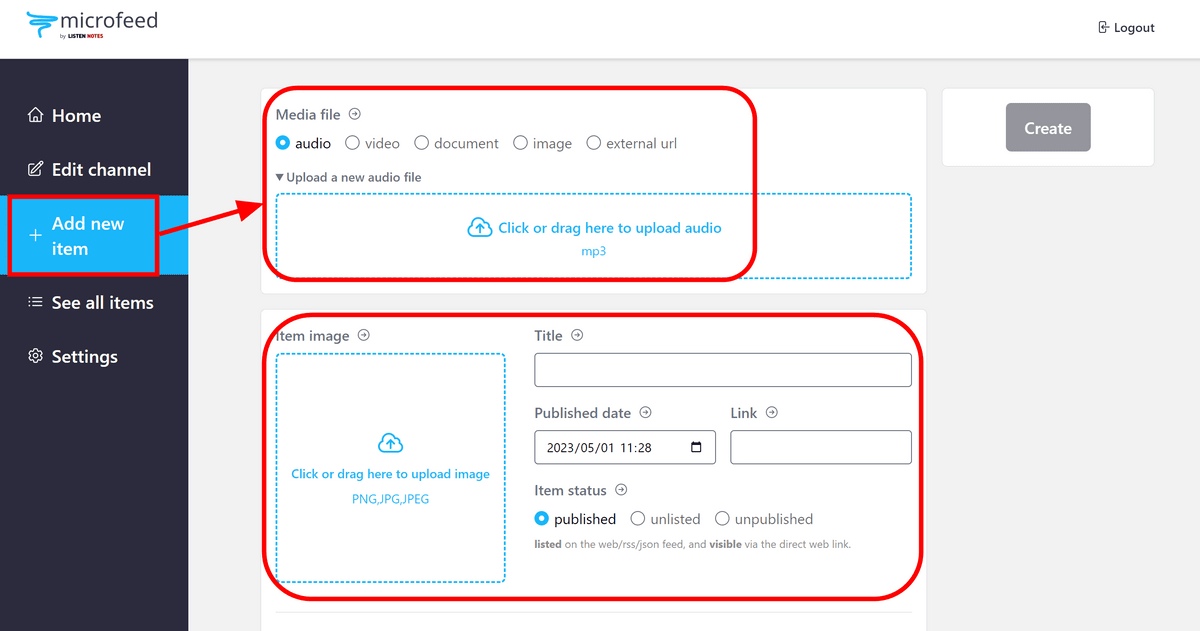
Let's try using microfeed. It seems that you can post new content by clicking 'Add new item'. Select the file you want to upload above and write a description below.
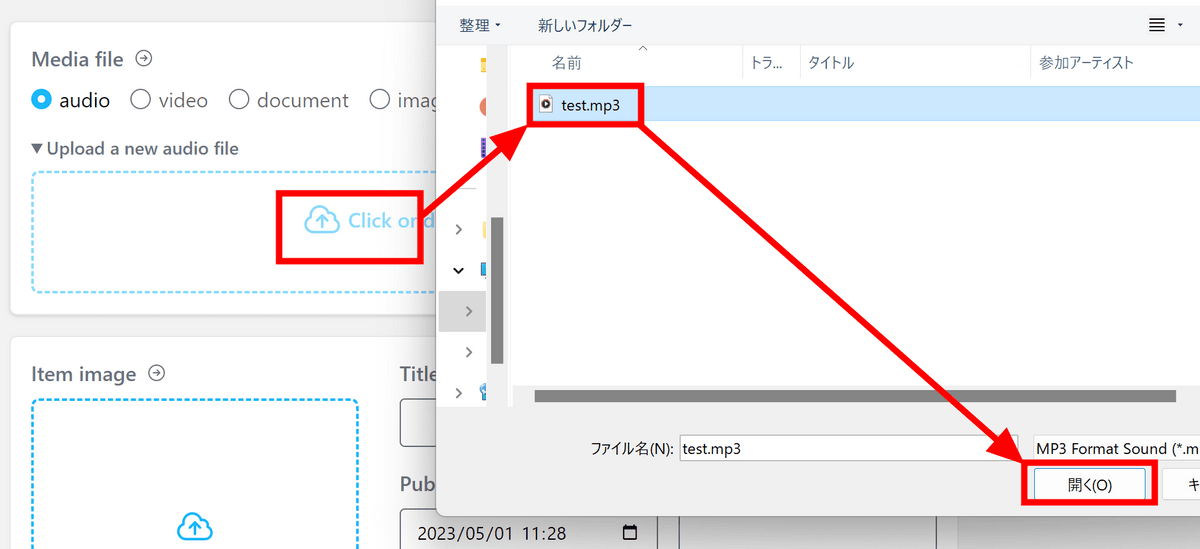
I tried uploading an mp3 audio file.
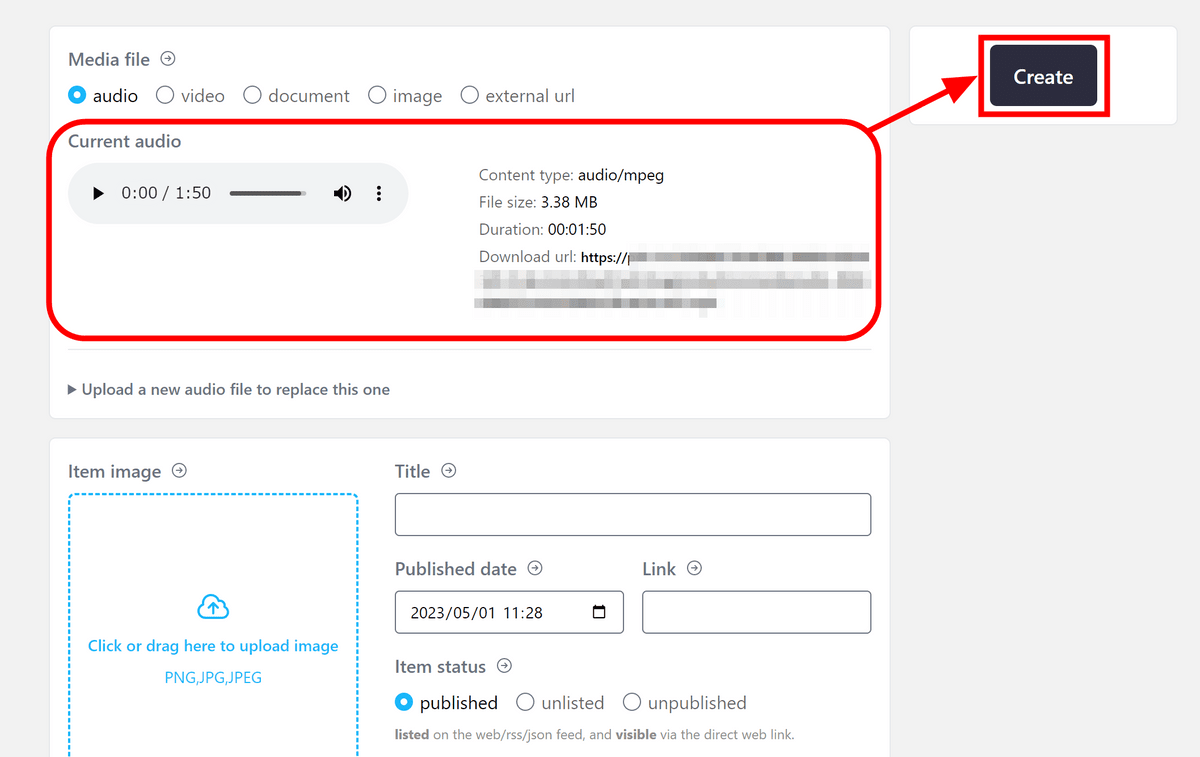
A preview will be displayed so you can check whether the audio you uploaded is correct. Click 'Create' to complete the submission.
You can view the posted content in the 'See all items' tab.
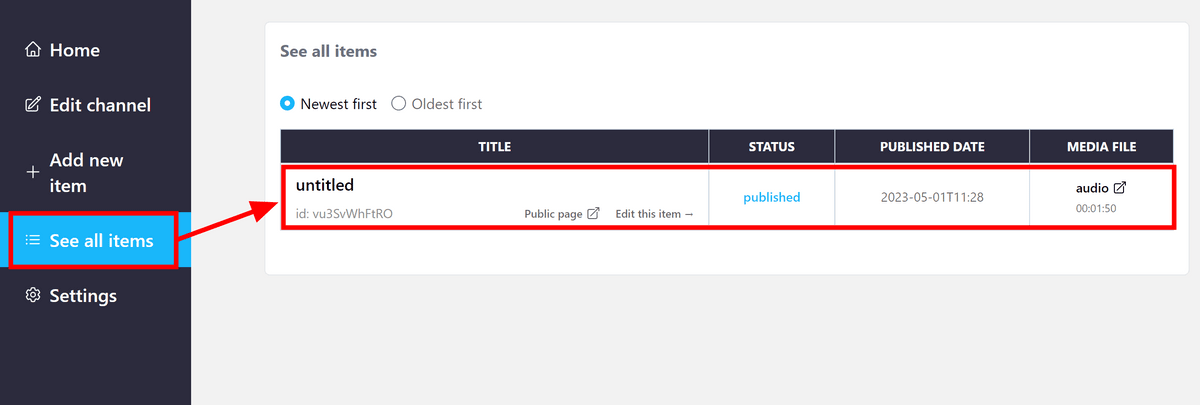
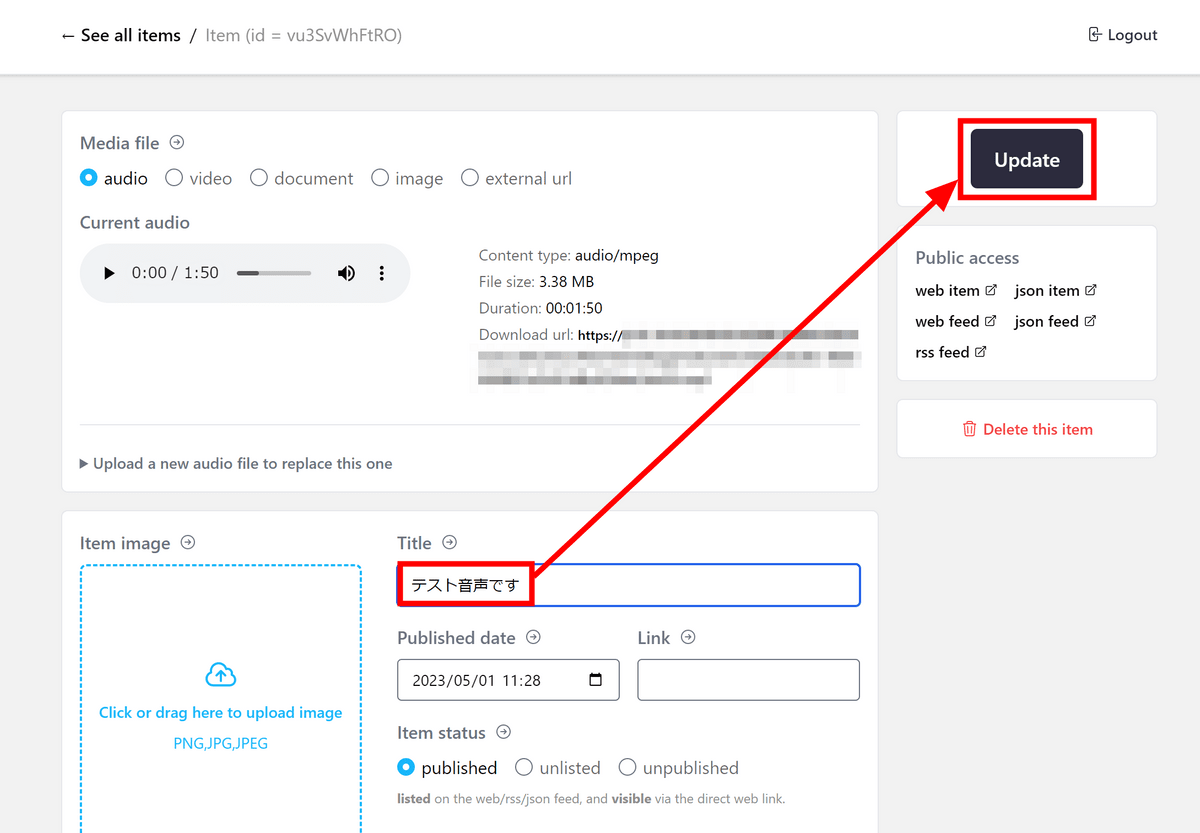
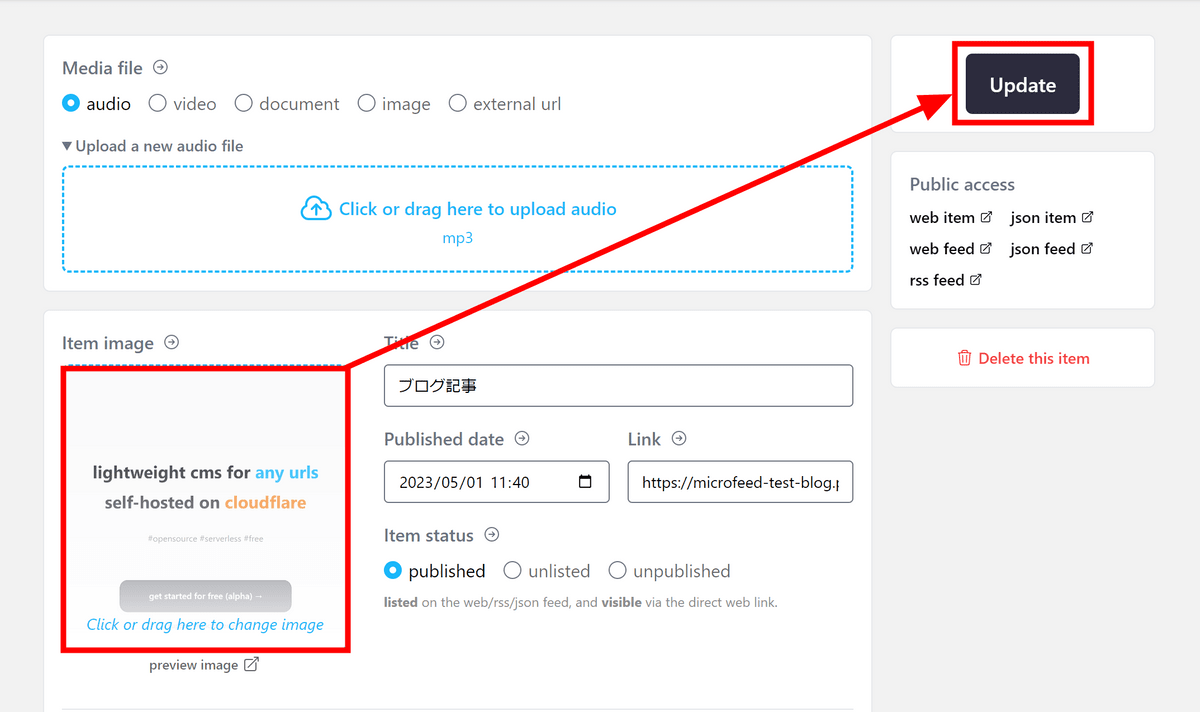
You can edit the content you posted later. In addition to replacing the title and thumbnail, you can also replace the audio file itself. Just rewrite the part you want to change and click 'Update'.
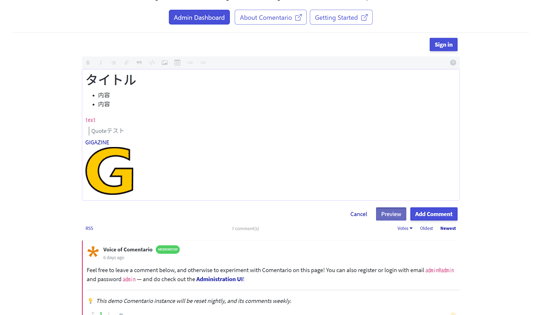
Also, when posting a blog article, after entering the title, it seems like it would be a good idea to use the visual editor below.

The URL for the posted content can be obtained in the 'Public access' column under 'Update' on the editing screen. Click on 'web item' ...
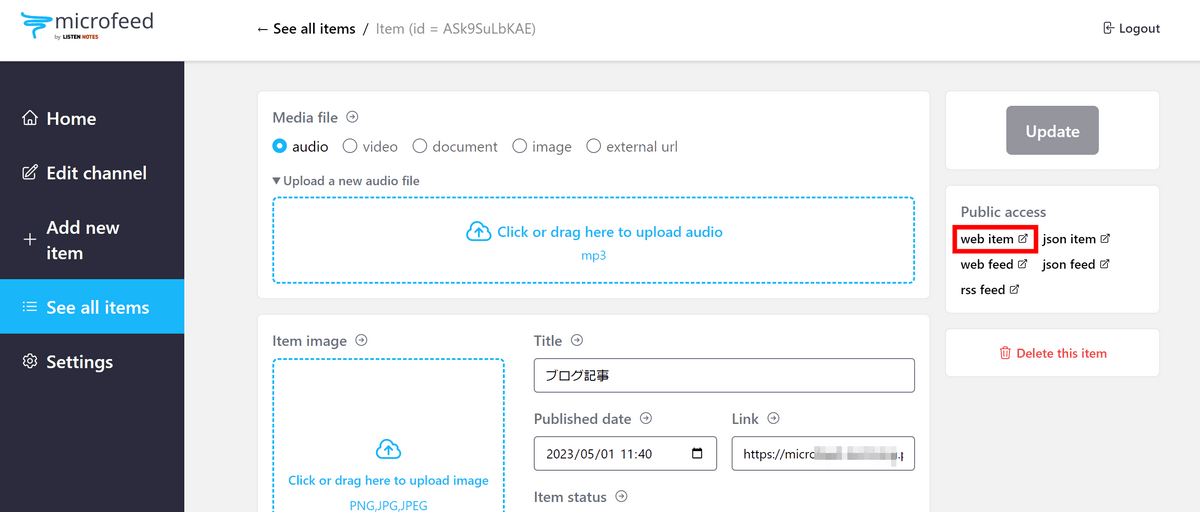
It was displayed like this.
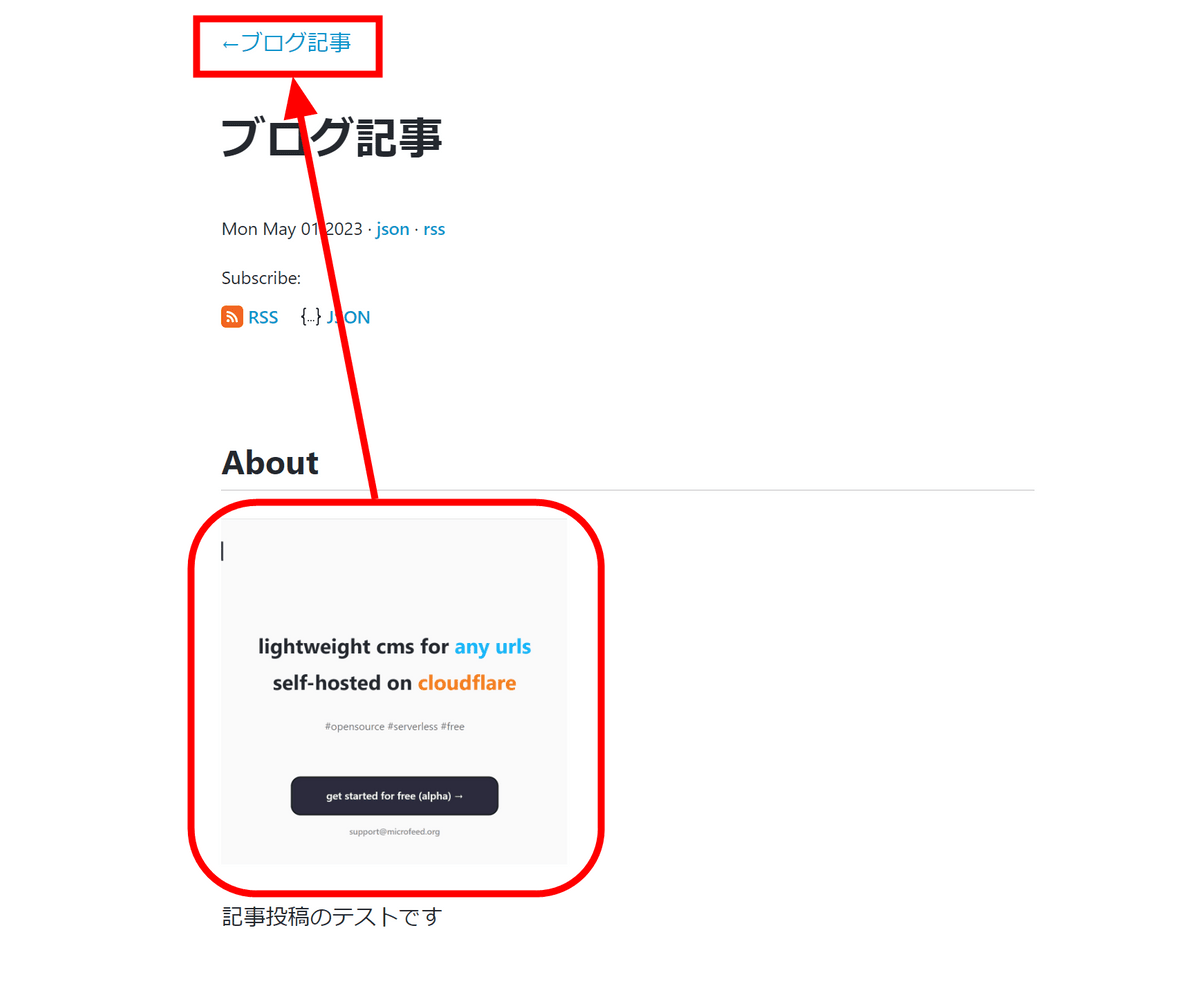
Next, let’s set the thumbnail.
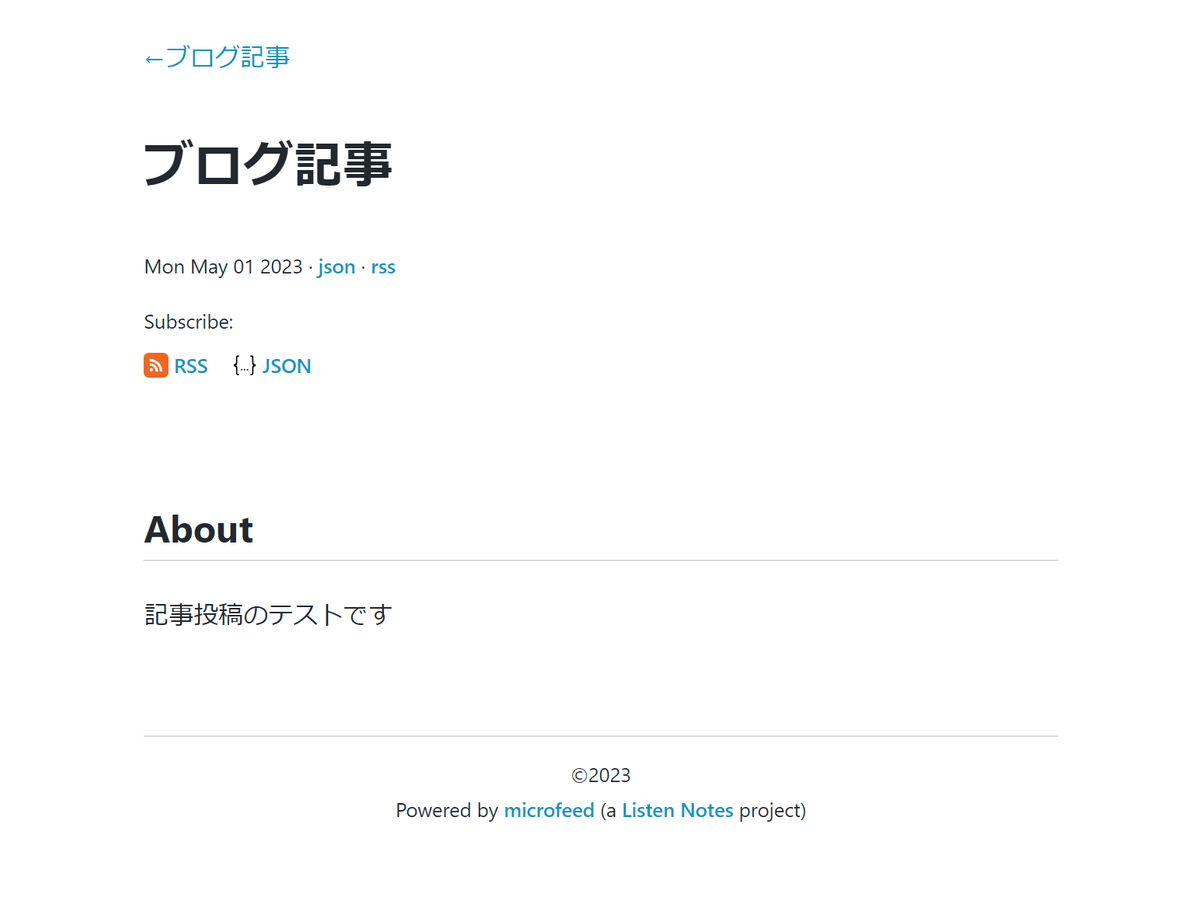
The thumbnail appears under About. Click on the link '←Blog Post' to see what the top page looks like...
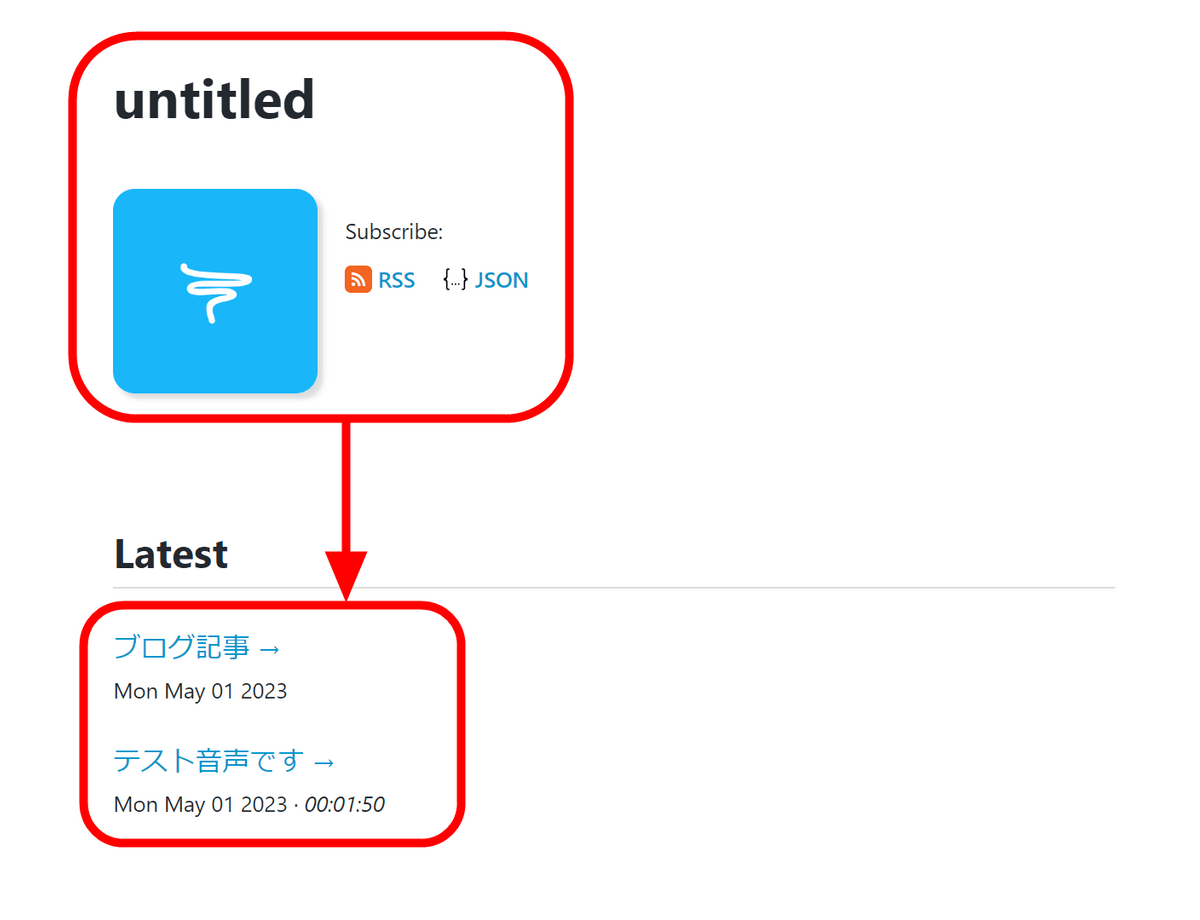
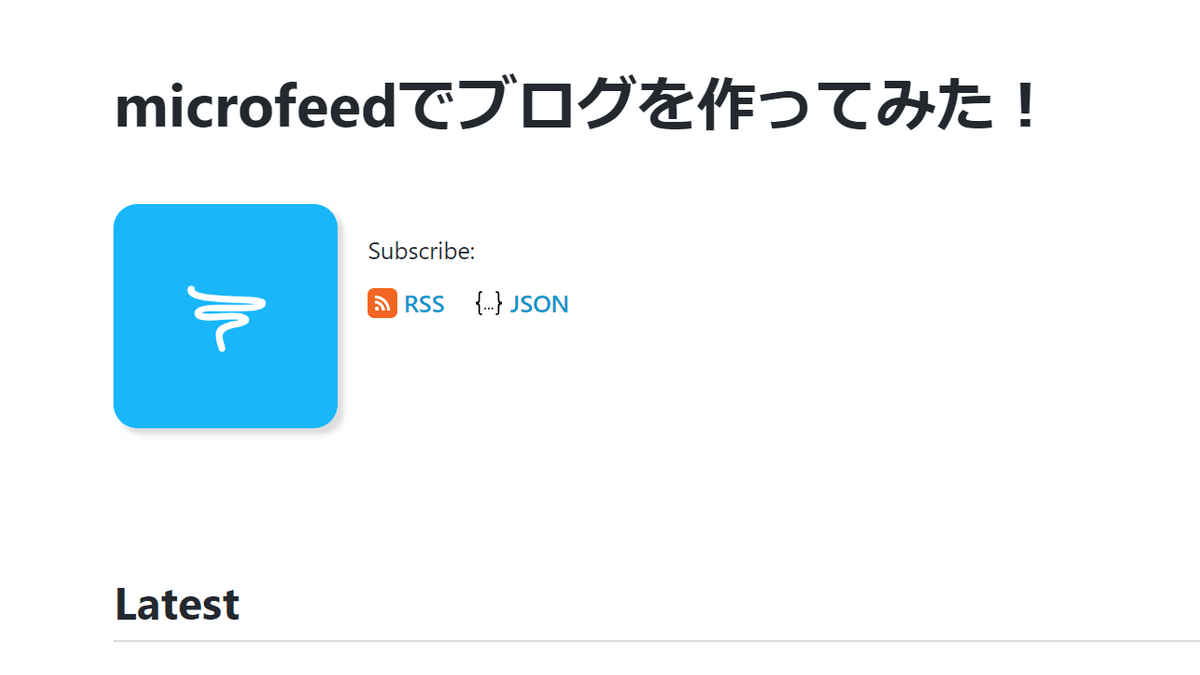
Since the blog title was not set, it was 'untitled'. RSS and JSON are automatically generated, so readers can easily subscribe. There is a list of articles at the bottom, but it seems that thumbnail images are not displayed here.
You can set the blog title and image on the 'Edit channel' page. Enter 'I made a blog with microfeed!' in the title field and click 'Update' ...
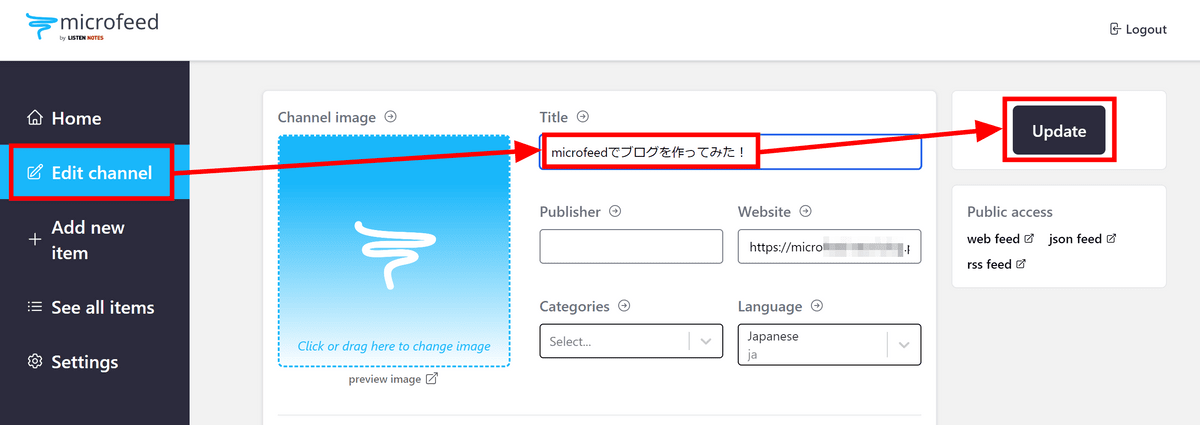
The title was successfully changed.
Related Posts:


in Free Member, Software, Review, Web Application, Posted by log1d_ts