I tried self-hosting the open source ``Mixpost'' that allows you to post and schedule posts to X (formerly Twitter), Facebook, and Mastodon for free.
Mixpost is a tool that allows you to manage multiple accounts of various SNS such as X, Facebook, Mastodon, etc. at once. In addition to simultaneous posting, it is also possible to post at a specified time, so I self-hosted it and tried using it.
Self-hosted, Open Source Social Media Management - Mixpost
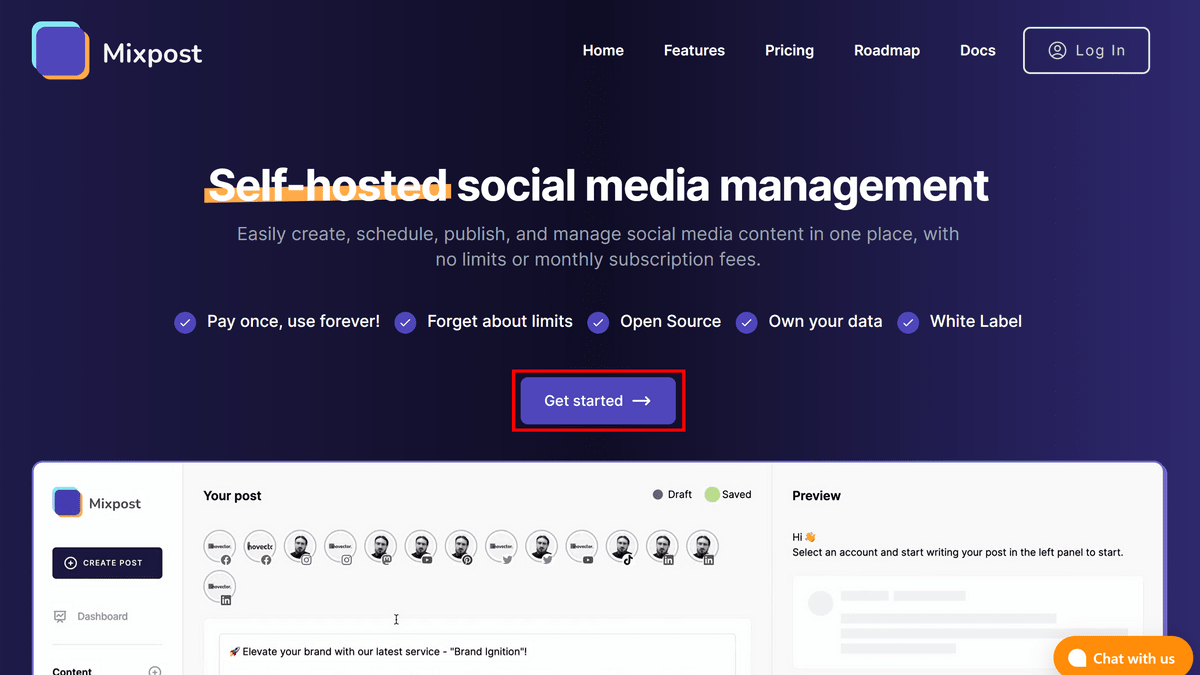
Access the official website and click 'Get started'.
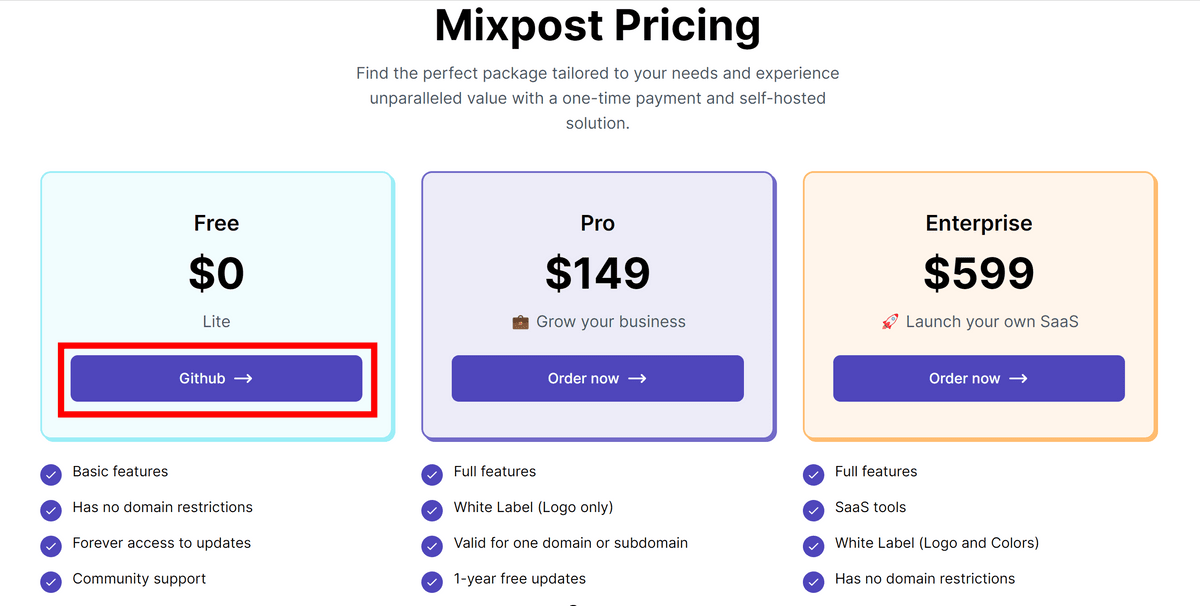
Click 'Github' displayed in the 'Free' column.
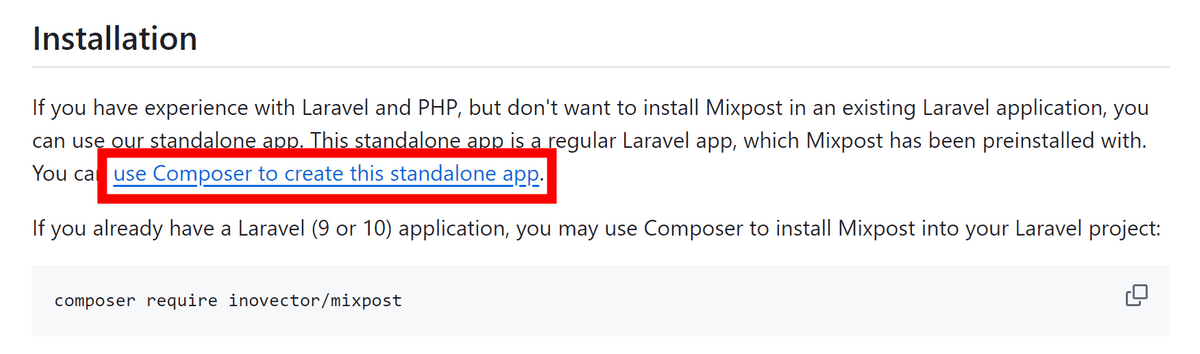
It is possible to add it to the Laravel application, but since we will be using the standalone app version this time, click 'use Composer to create this standalone app'.
Furthermore, this time we will use the Docker version. You can check the details of the Docker version by clicking the '
Also, if Docker is not installed on the server, install it in advance by referring to the document below.
Install Docker Engine | Docker Documentation
https://docs.docker.com/engine/install/
This time, to use Debian, I entered the following command.
[code]sudo apt-get update
sudo apt-get install ca-certificates curl gnupg
sudo install -m 0755 -d /etc/apt/keyrings
curl -fsSL https://download.docker.com/linux/debian/gpg | sudo gpg --dearmor -o /etc/apt/keyrings/docker.gpg
sudo chmod a+r /etc/apt/keyrings/docker.gpg
echo \
'deb [arch='$(dpkg --print-architecture)' signed-by=/etc/apt/keyrings/docker.gpg] https://download.docker.com/linux/debian \
'$(. /etc/os-release && echo '$VERSION_CODENAME')' stable' | \
sudo tee /etc/apt/sources.list.d/docker.list > /dev/null
sudo apt-get update
sudo apt-get install docker-ce docker-ce-cli containerd.io docker-buildx-plugin docker-compose-plugin[/code]
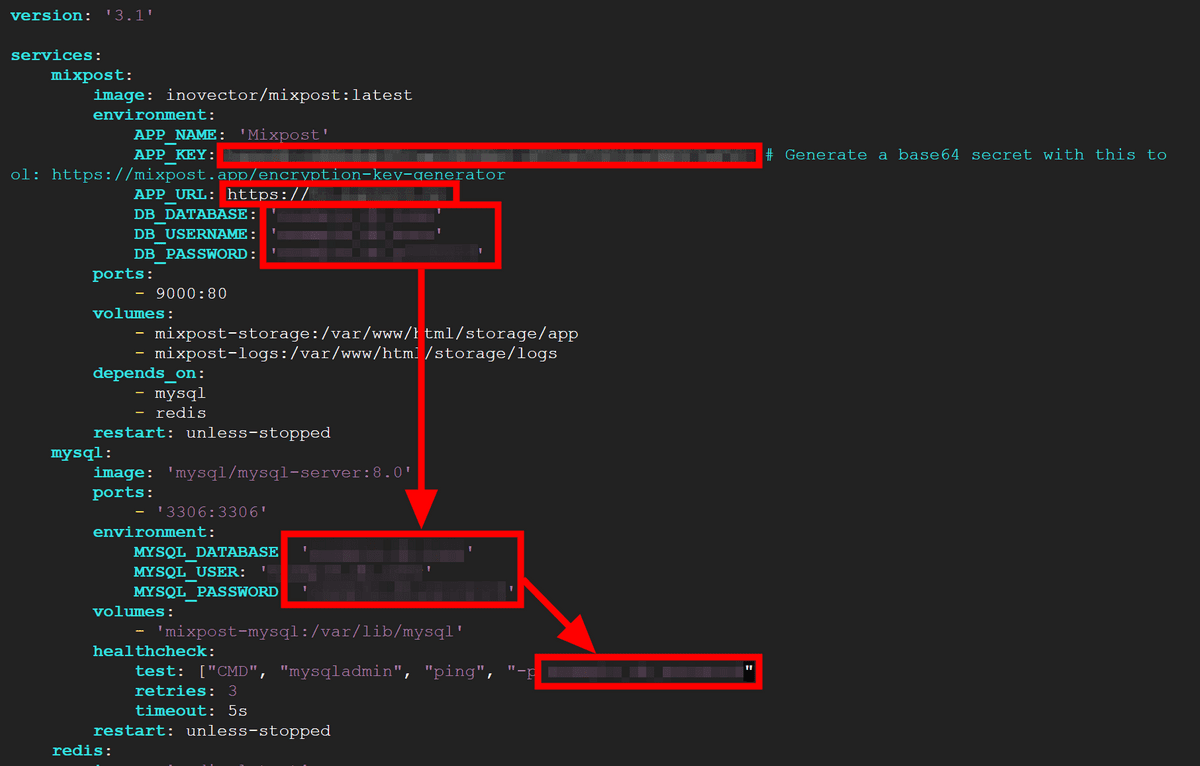
Also, use the official tool to generate APP_KEY, which is required during setup, and copy it.

Copy the example provided in

Open docker-compose.yml in a text editor and paste the APP_KEY you generated earlier in the APP_KEY field. Enter the URL to host in APP_URL, and create and enter the DB name, user name, and password in the DB_DATABASE, DB_USERNAME, and DB_PASSWORD fields. After entering the same DB name, user name, and password for MYSQL, set the same password in the healthcheck field.
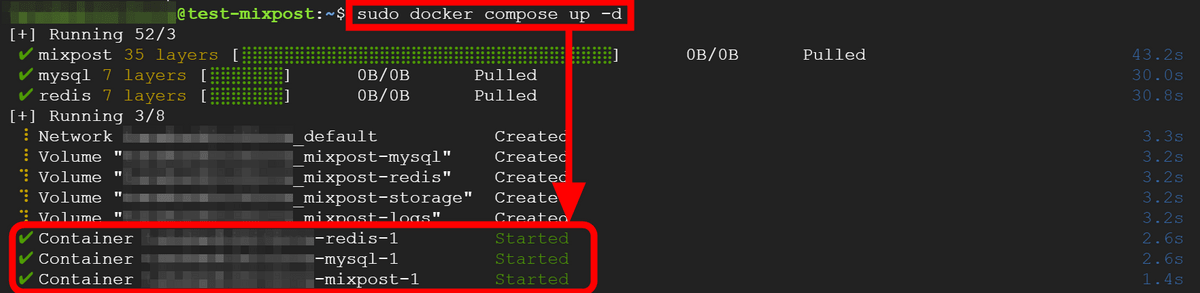
Enter the command below to start Mixpost.
[code]sudo docker compose up -d[/code]
As shown in the diagram below, preparation is complete when the three containers 'redis', 'mysql', and 'mixpost' start.
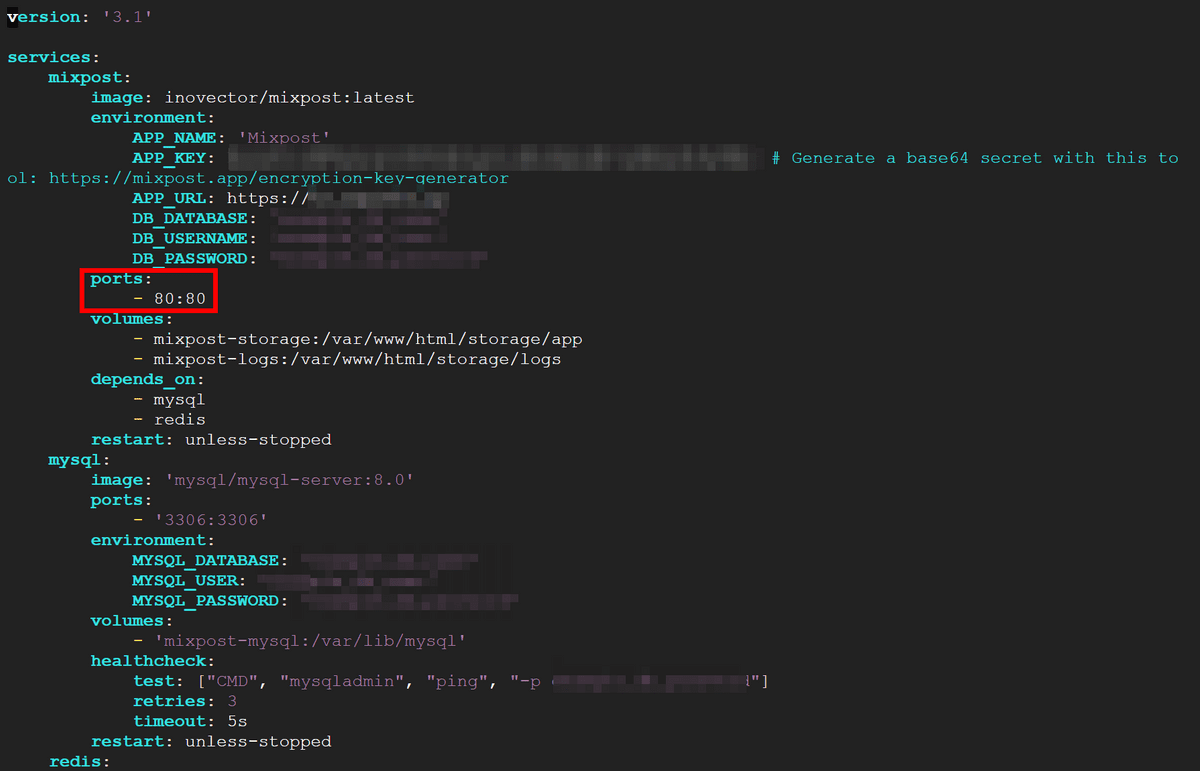
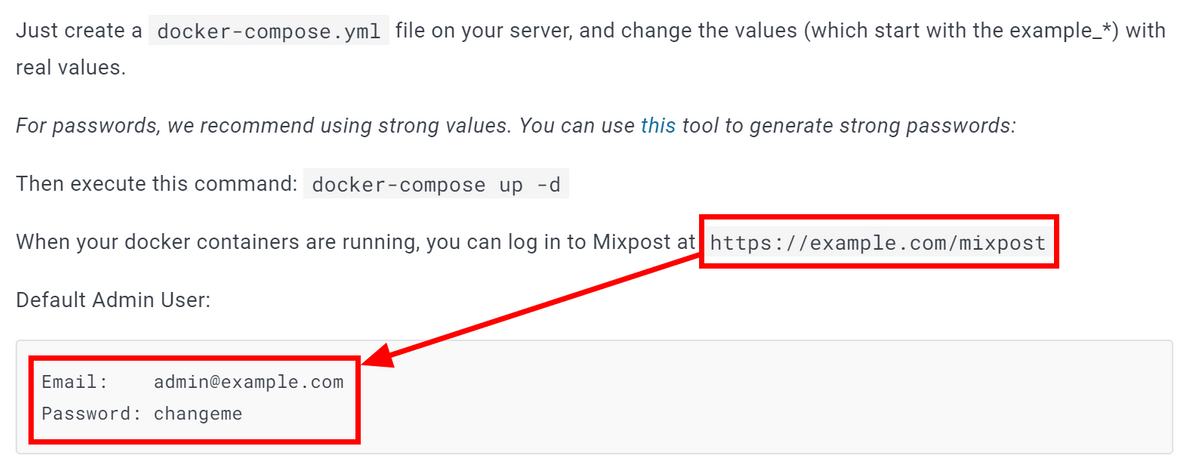
However, when I tried to access the server, the connection failed. If you look at the configuration file again, the port setting is now 9000. You can modify the URL, but this time I changed the port number to 80.
If you check the documentation, you can access mixpost by accessing '[server URL]/mixpost' after starting the server. It also states that the admin user's email address is '[email protected]' and the password is set to 'changeme.'
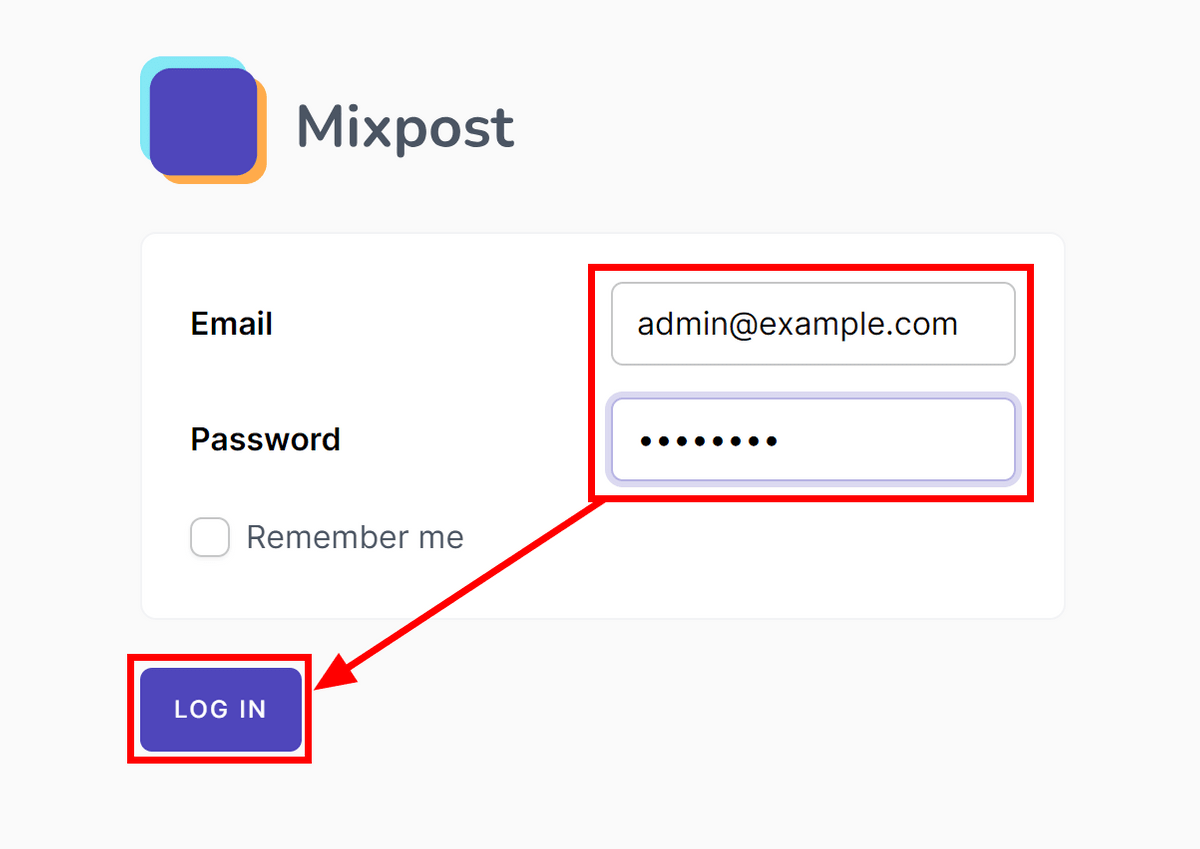
Access as instructed, enter the administrative user's email address and password, and click 'LOG IN'.
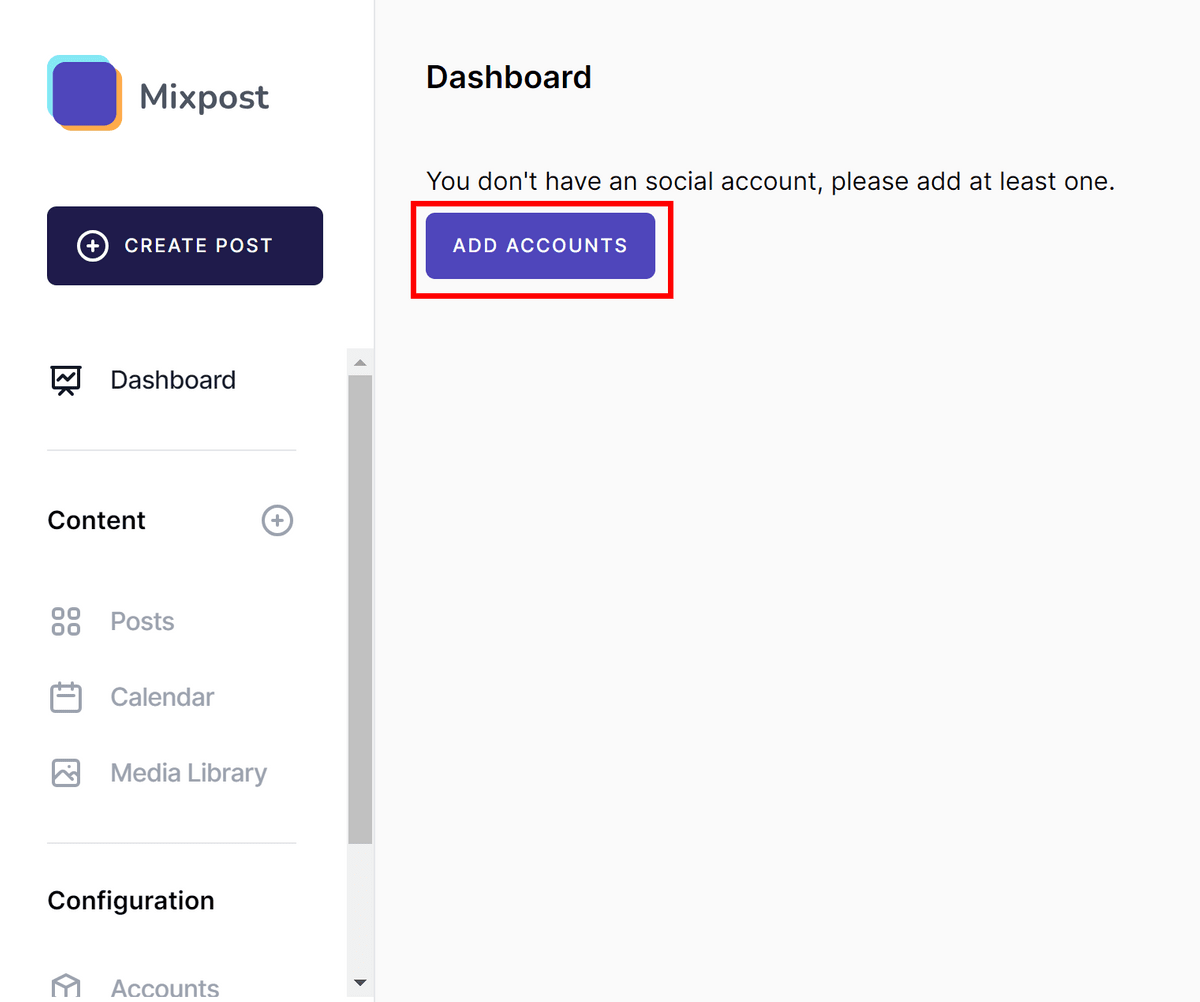
First you need to register an SNS account. Click 'ADD ACCOUNTS'.
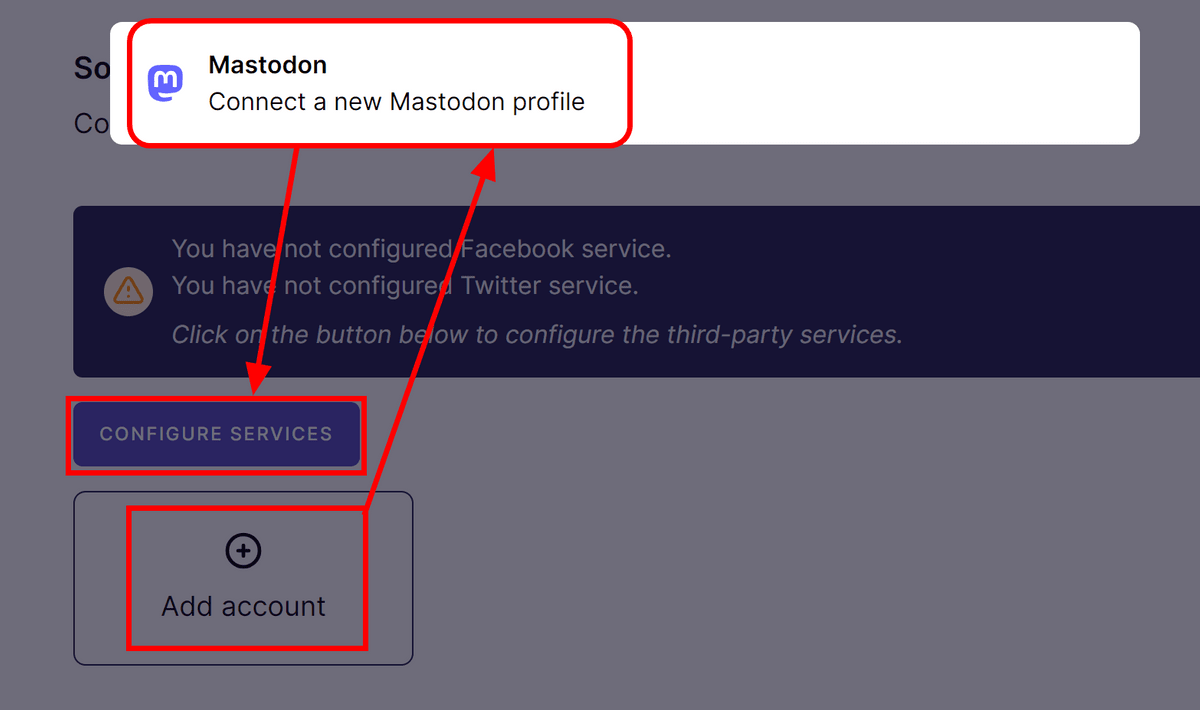
It was displayed that additional settings are required to add Facebook and Twitter (currently X) accounts.

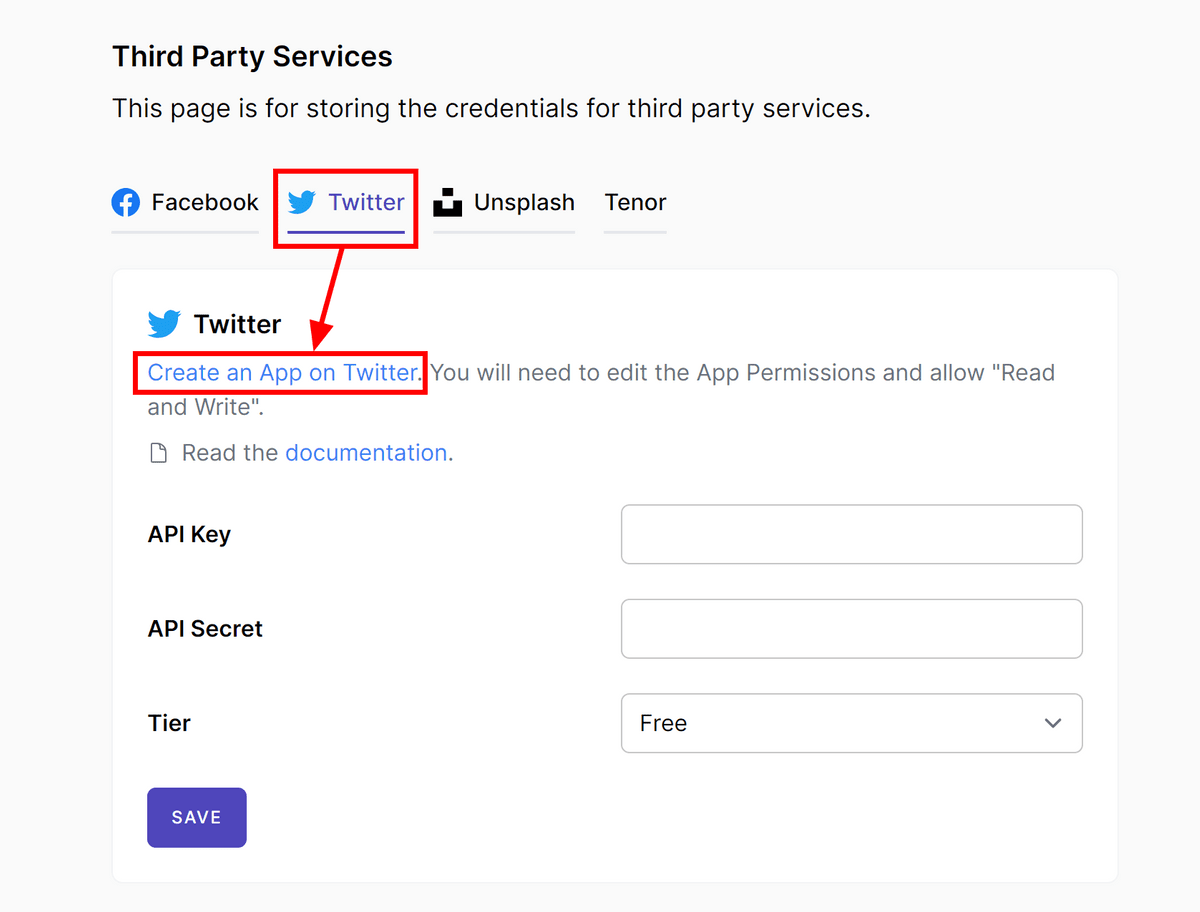
If you click 'Add account' in this state, you will be able to add Mastodon. This time, to add an X (formerly Twitter) account, click 'CONFIGURE SERVICES'.
Click 'Twitter' and then 'Create an App on Twitter'.
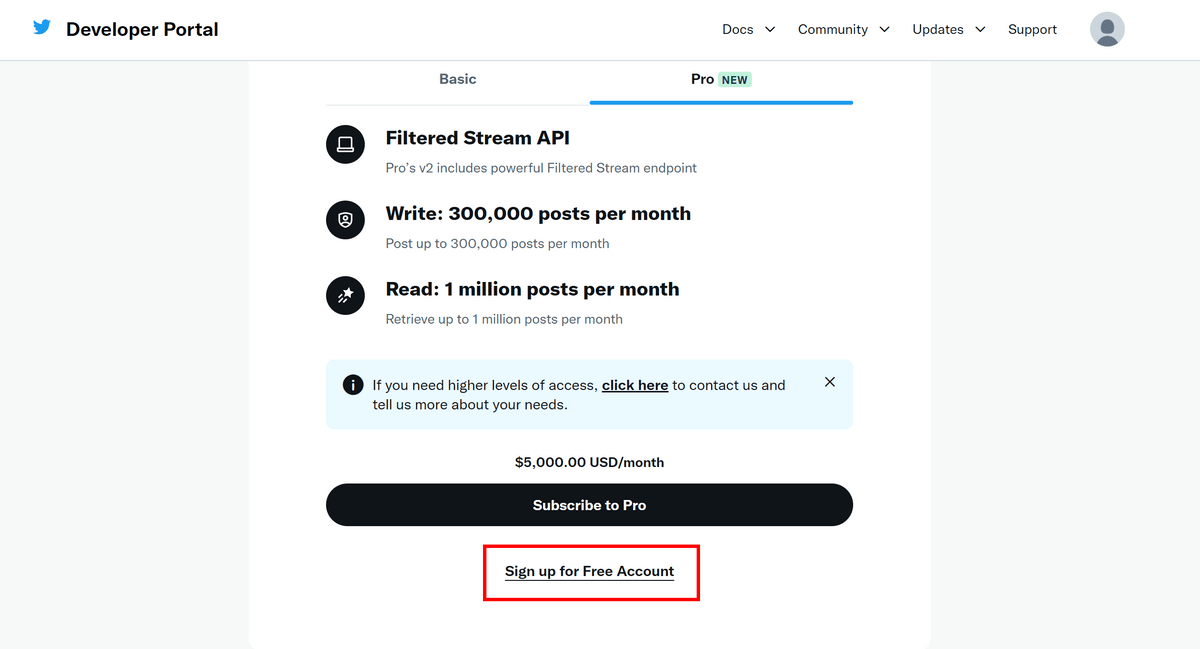
Click 'Sign up for Free Account'.
A field appears where you can enter how you plan to use Twitter's data and API.
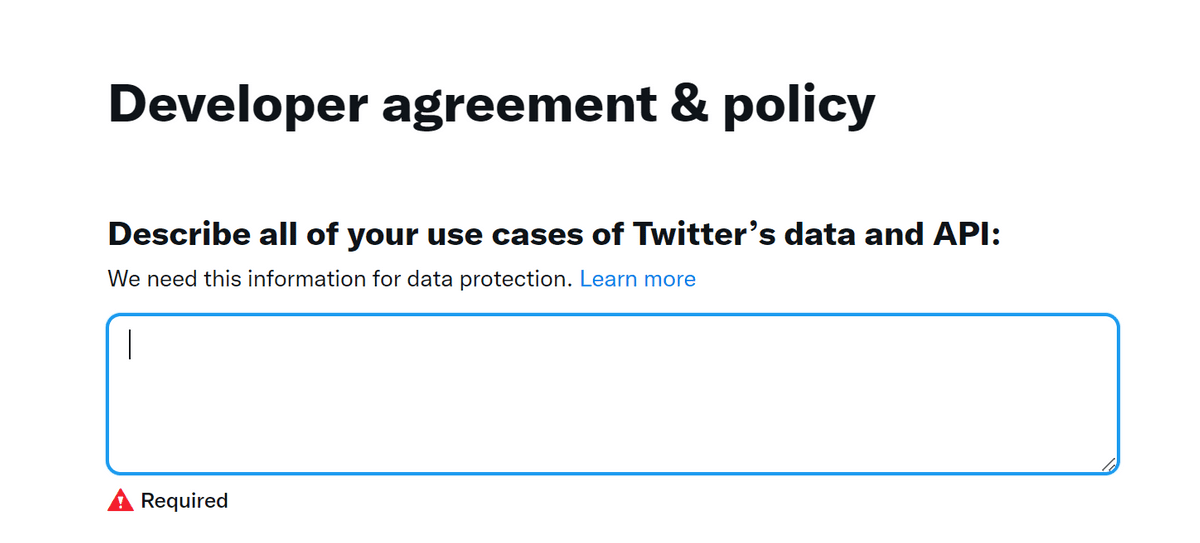
There are example sentences in

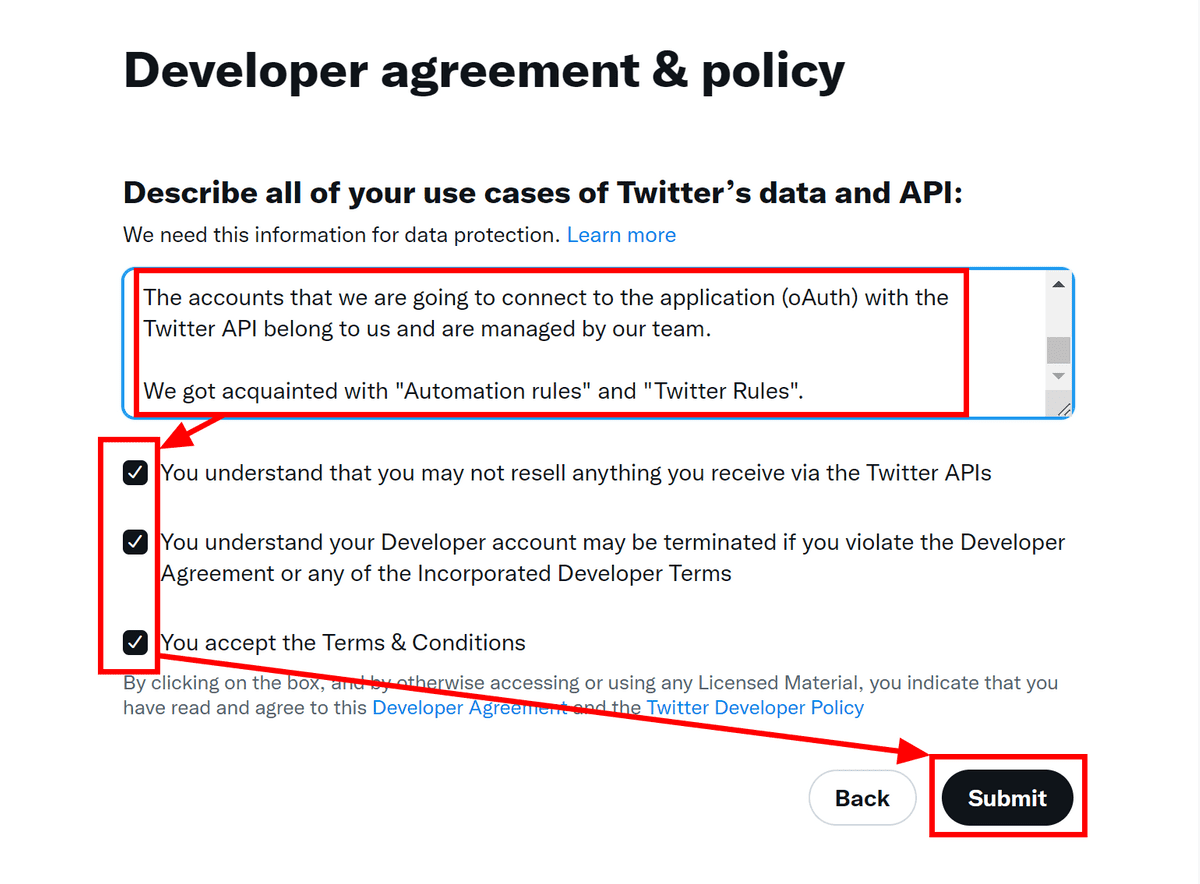
Paste it into the previous input field, check all checkboxes and click 'Submit'.
You will be automatically redirected to the project screen, so click on the gear mark.
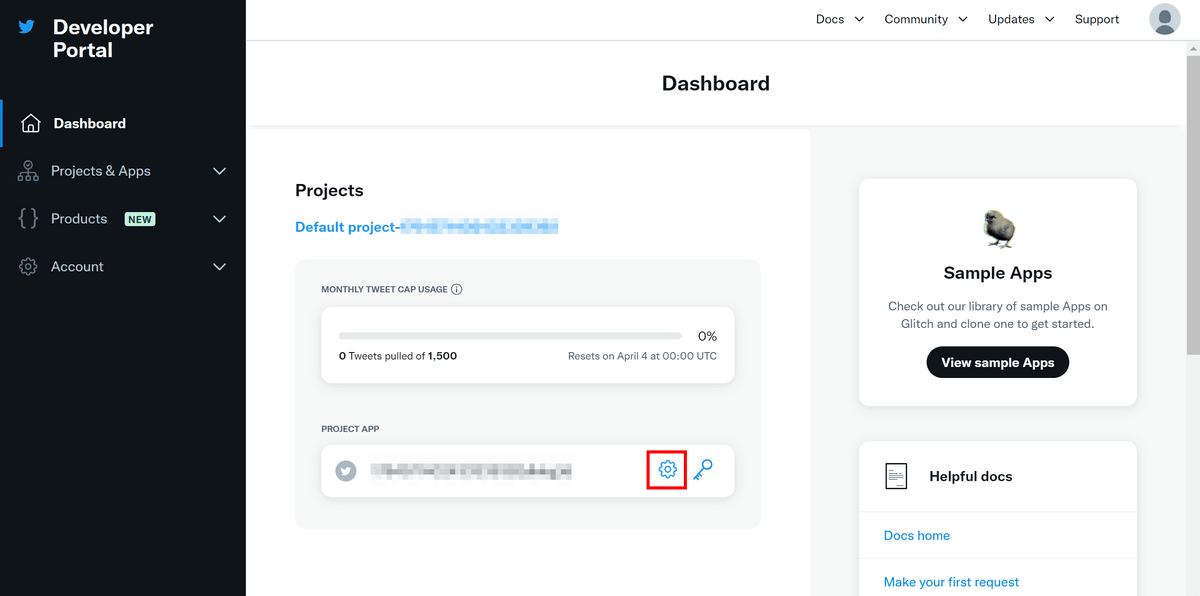
Click 'Set up' in the 'User authentication settings' column.

Change the app permissions to 'Read and write' and change the Type of App to 'Web App, Automated App or Bot'.
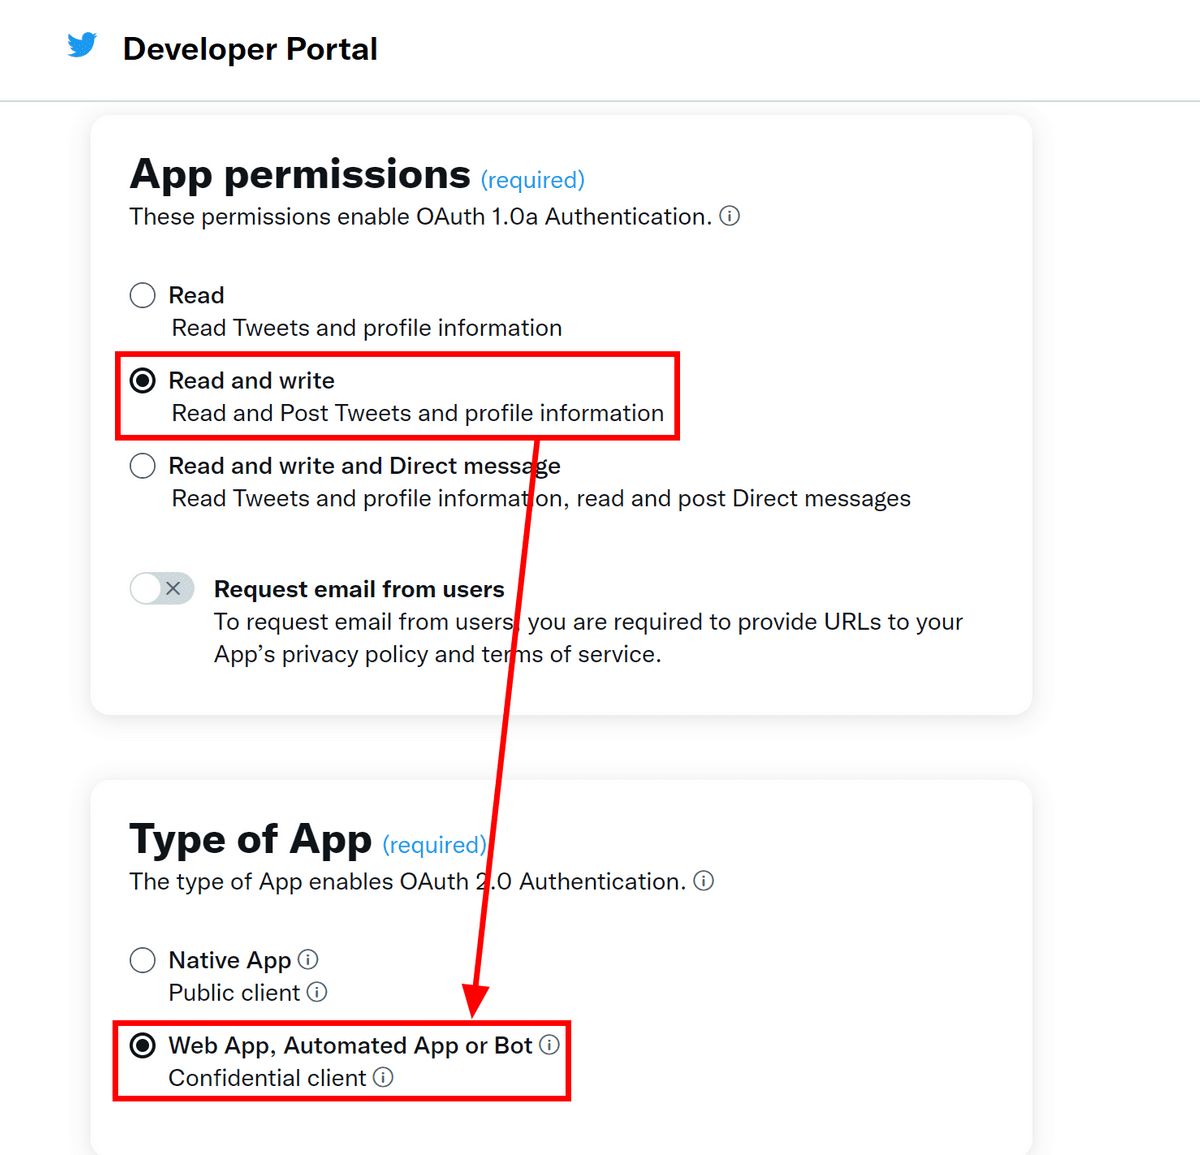
Scroll down and enter '[server URL]/mixpost/callback/twitter' in the 'Callback URI / Redirect URL' field of App info. Also, enter the server URL in Website URL.

Go through all the remaining settings and click 'Save' at the bottom.

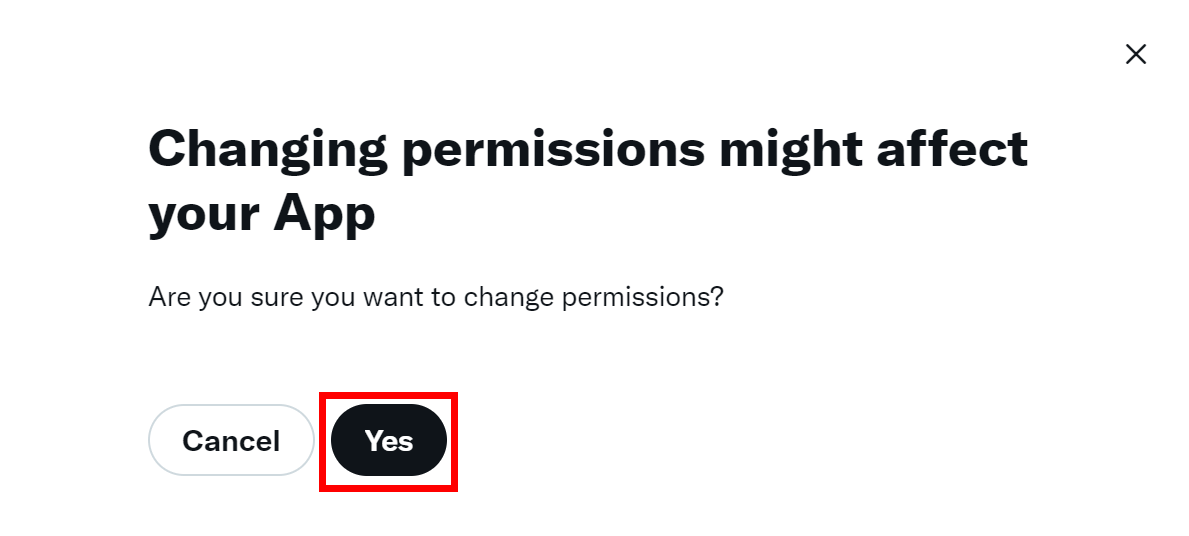
Click “Yes” to confirm.
The OAuth 2.0 Client ID and Client Secret are displayed. If you only use it for mixpost, there is no need to save it. Click 'Done'.
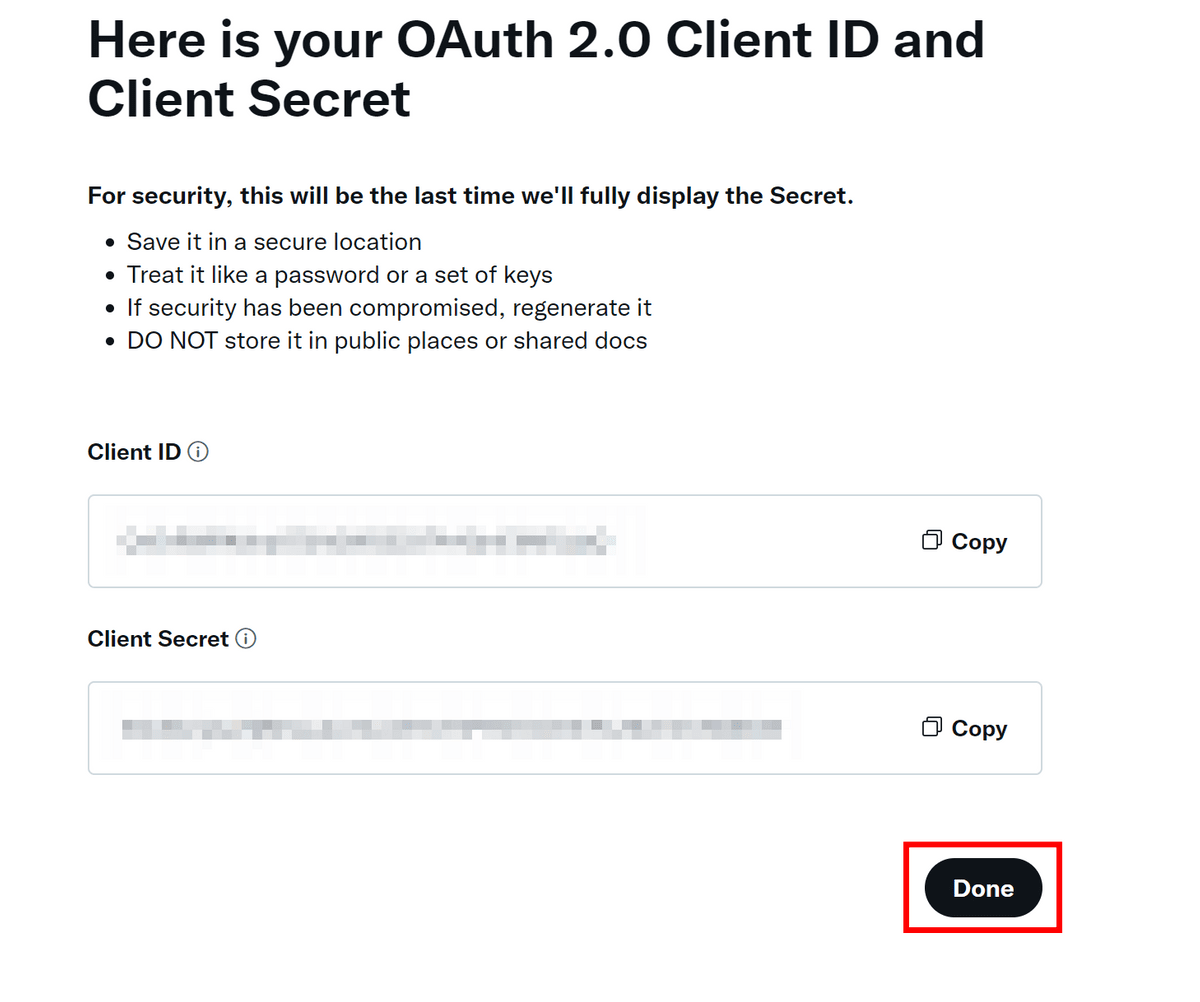
Click Yes, I saved it.

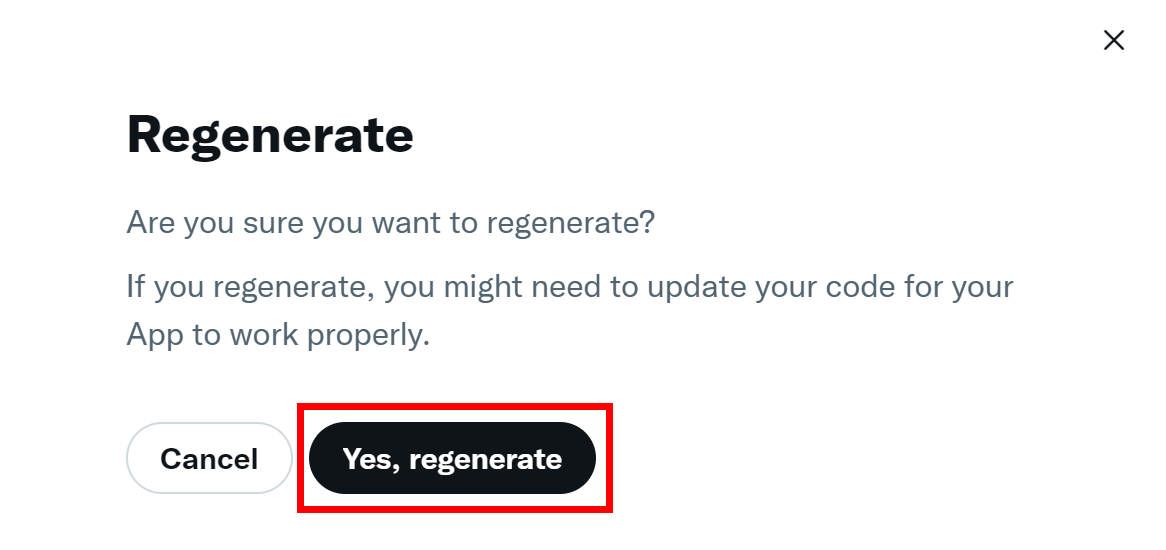
Return to the project page, click 'Keys and tokens' and click 'Regenerate'.

Click 'Yes, regenerate'.
The API Key and API Key Secret will be displayed, so copy them both.
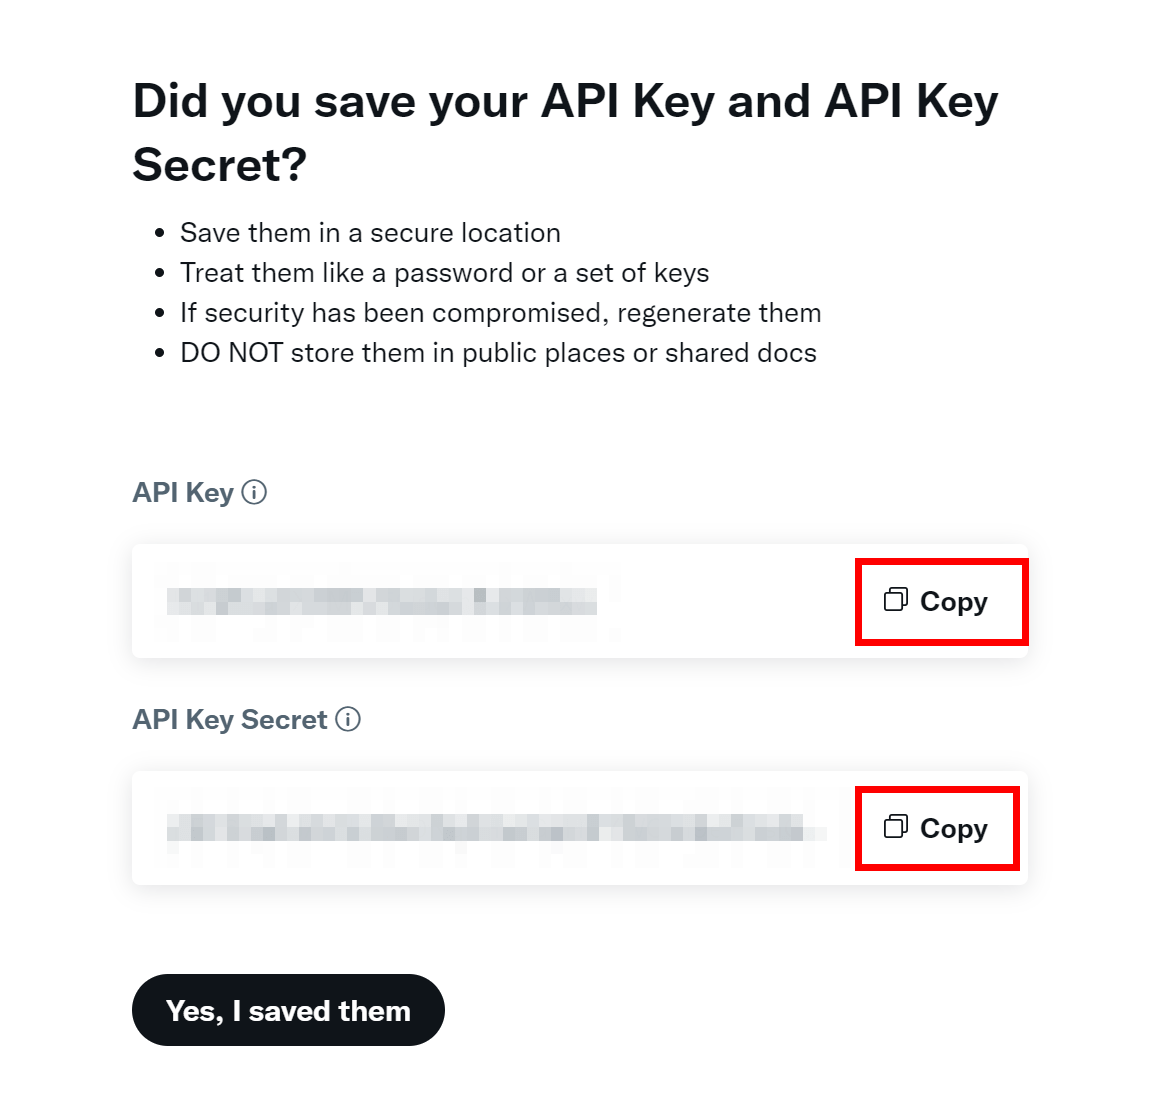
Return to the Mixpost screen, paste each in the API Key and API Secret fields, and click 'SAVE'.

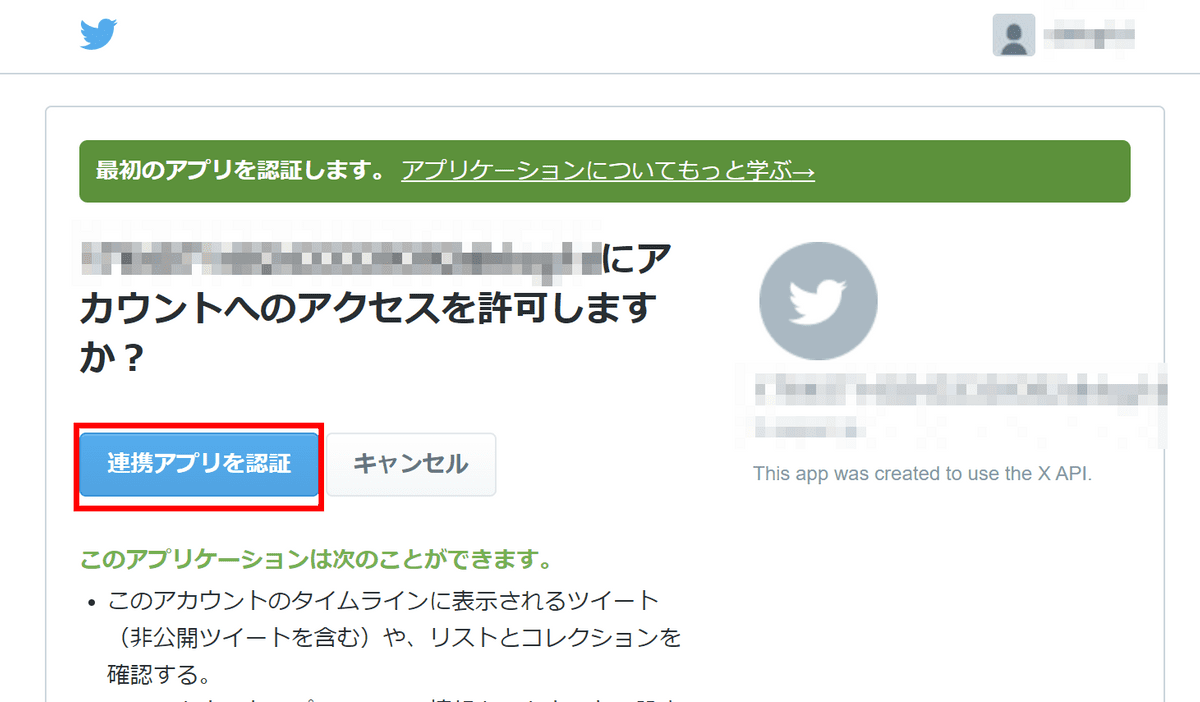
First, log in to the X (formerly Twitter) account you want to link from your browser. Next, click 'Add account' from 'Accounts' and 'Twitter' will be added to the options, so click it.

Click 'Authenticate linked app'.
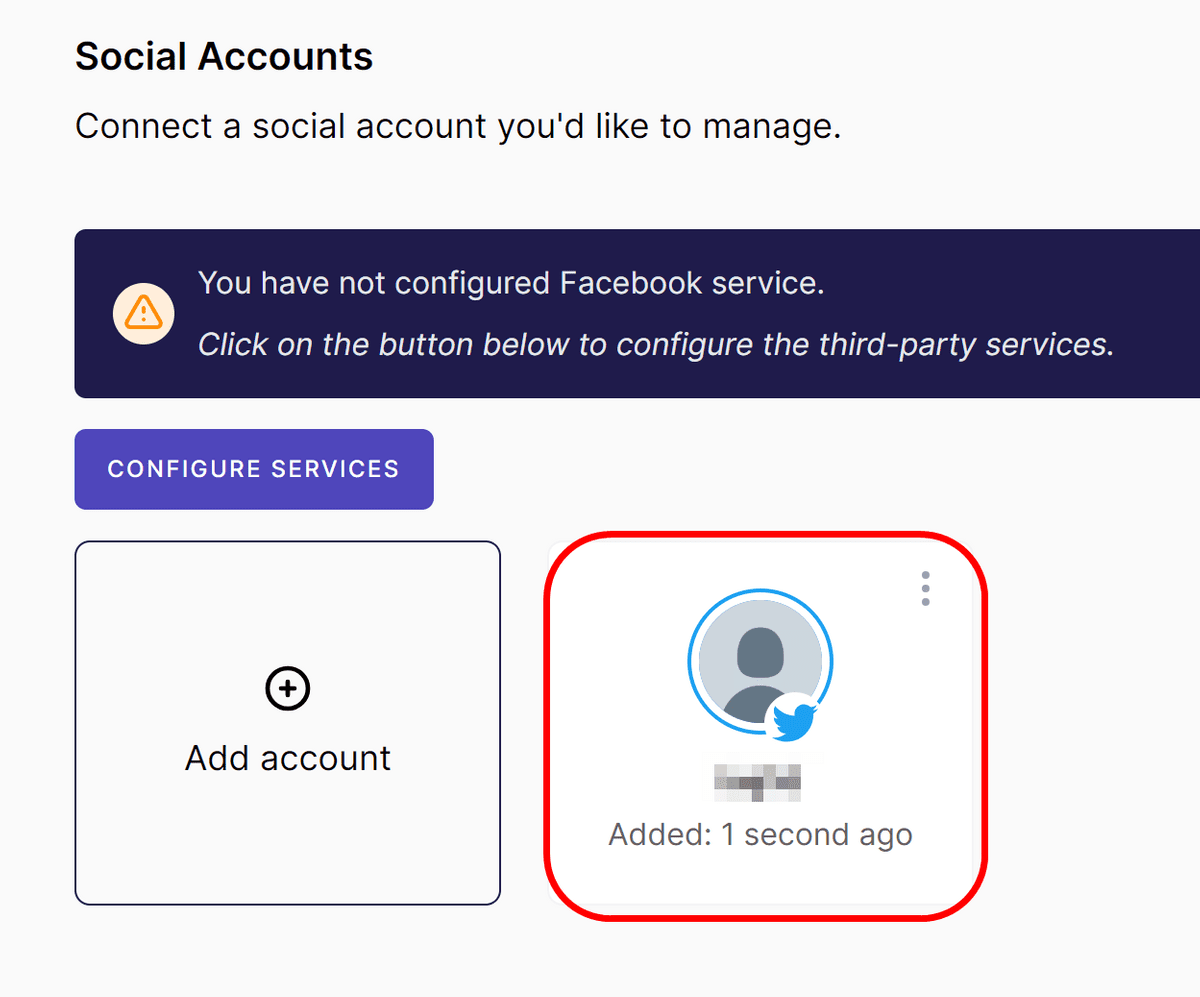
Account added.
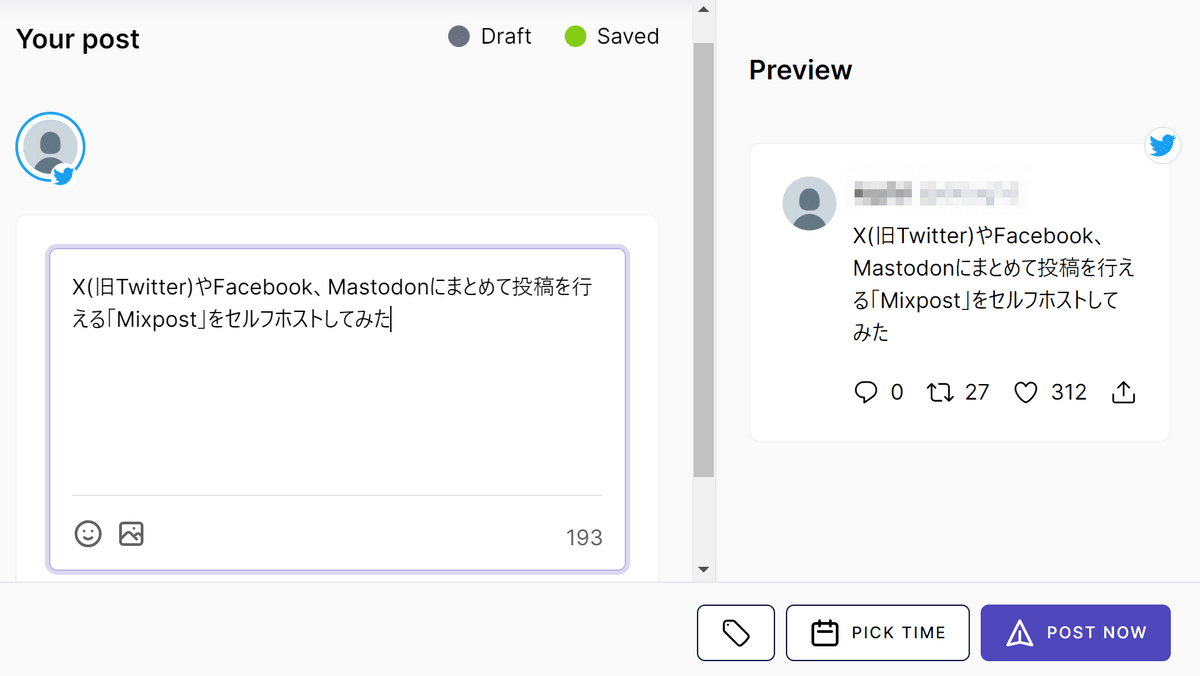
I will try posting from Mixpost right away. Click 'CREATE POST' and select the account you want to use for posting. As you enter the post content, a preview will be displayed on the right, so if there is no problem, click 'POST NOW'.

A confirmation screen will appear, so click 'POST NOW'.

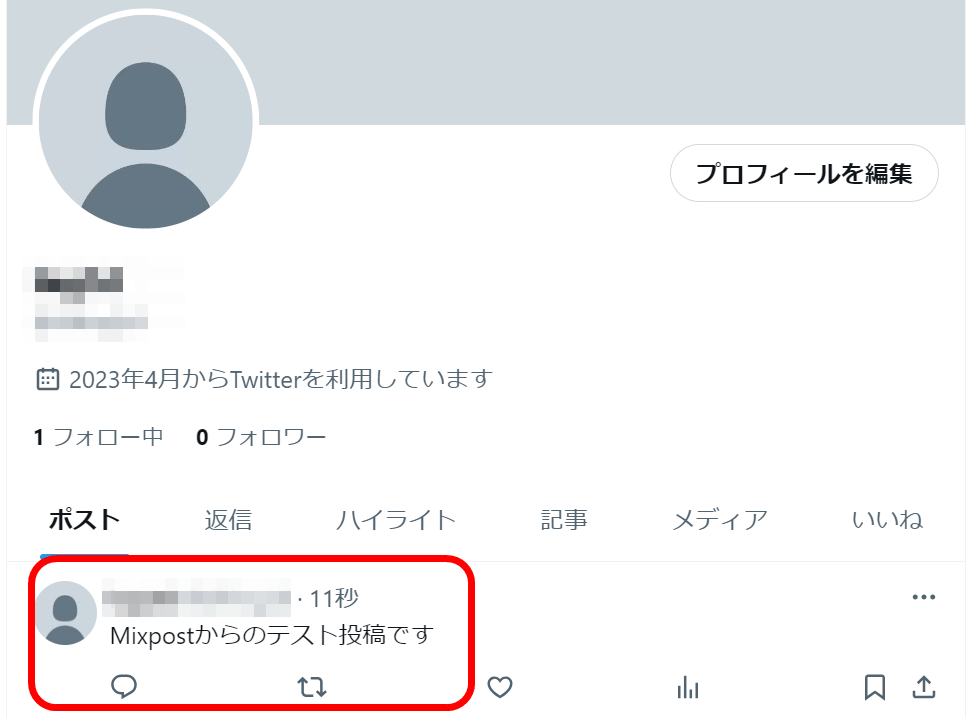
When I looked at the X (old Twitter) screen, I saw that the post had been successfully posted.
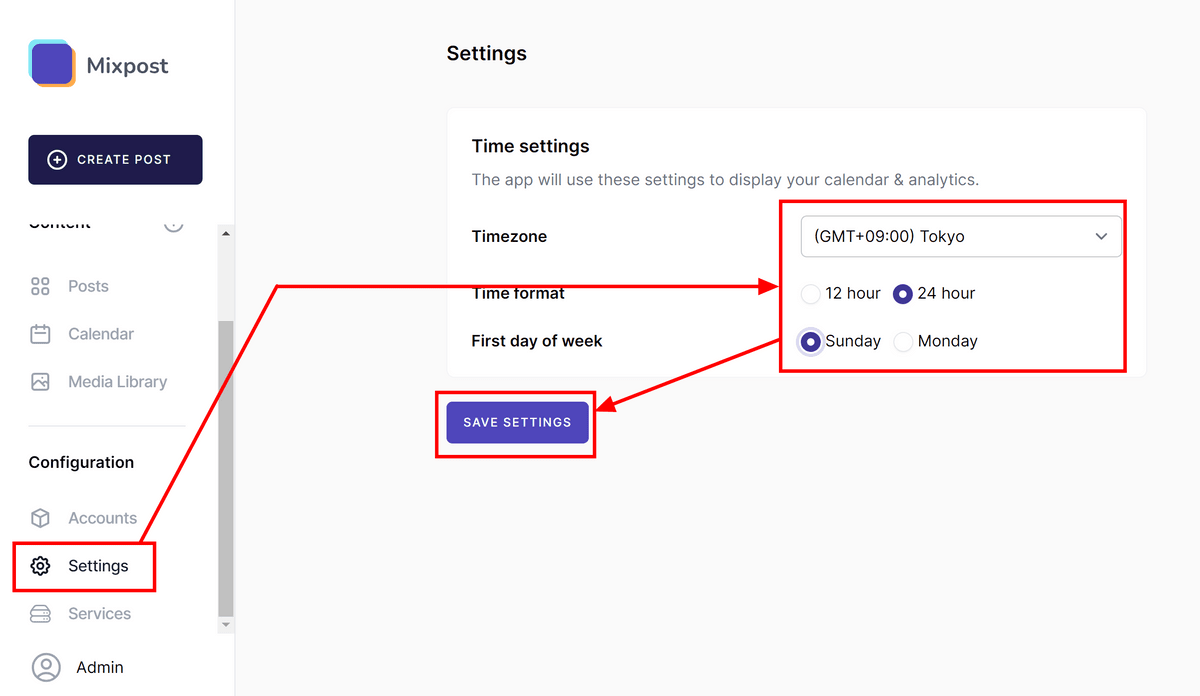
You can set the time by opening 'Settings'. This time, I set the settings as 'Tokyo time', '24 hour notation', and '1 week starts from Sunday', and clicked 'SAVE SETTINGS'.
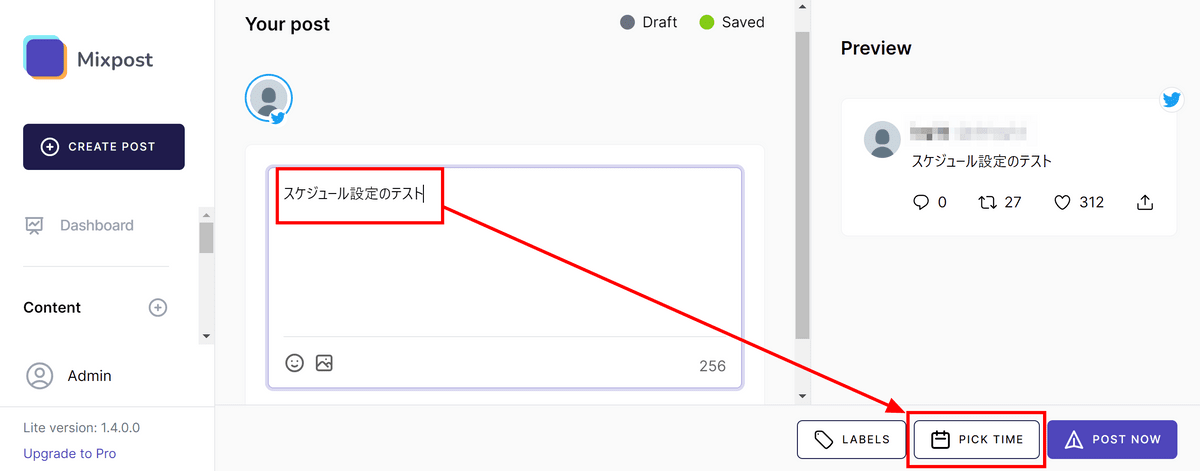
Now that you have set the time, let's try scheduled posting. After entering the post content like a normal post, click 'PICK TIME' this time.
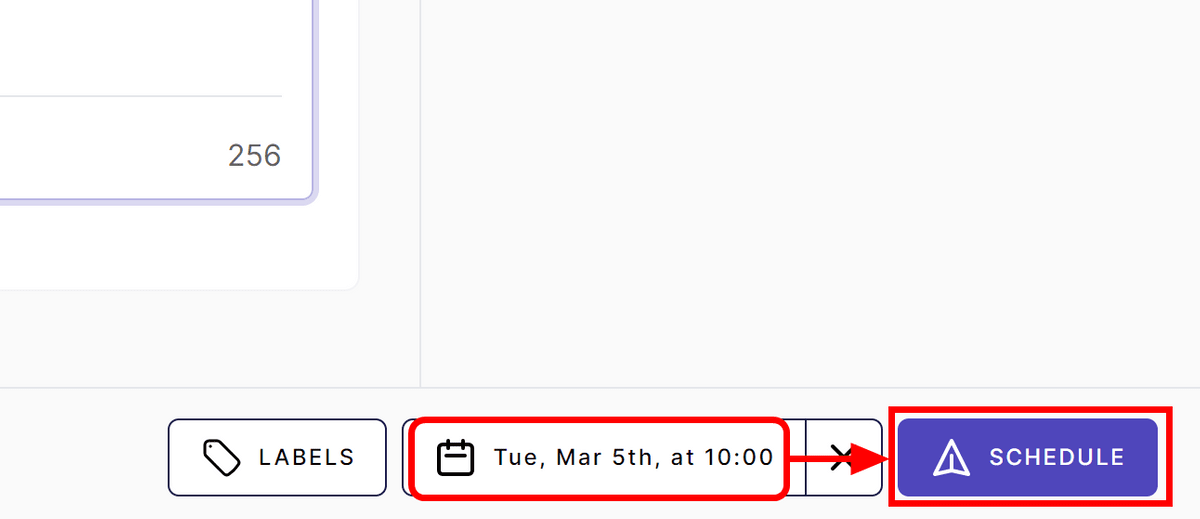
Select date and time and click PICK TIME.
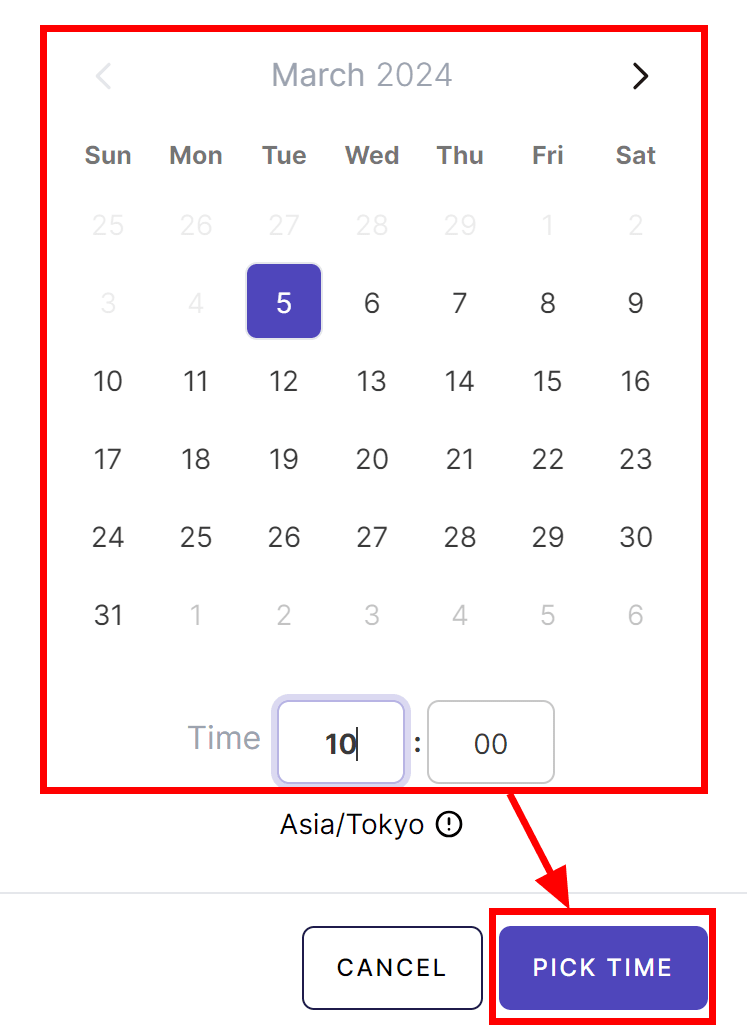
Check the time and click 'SCHEDULE'.
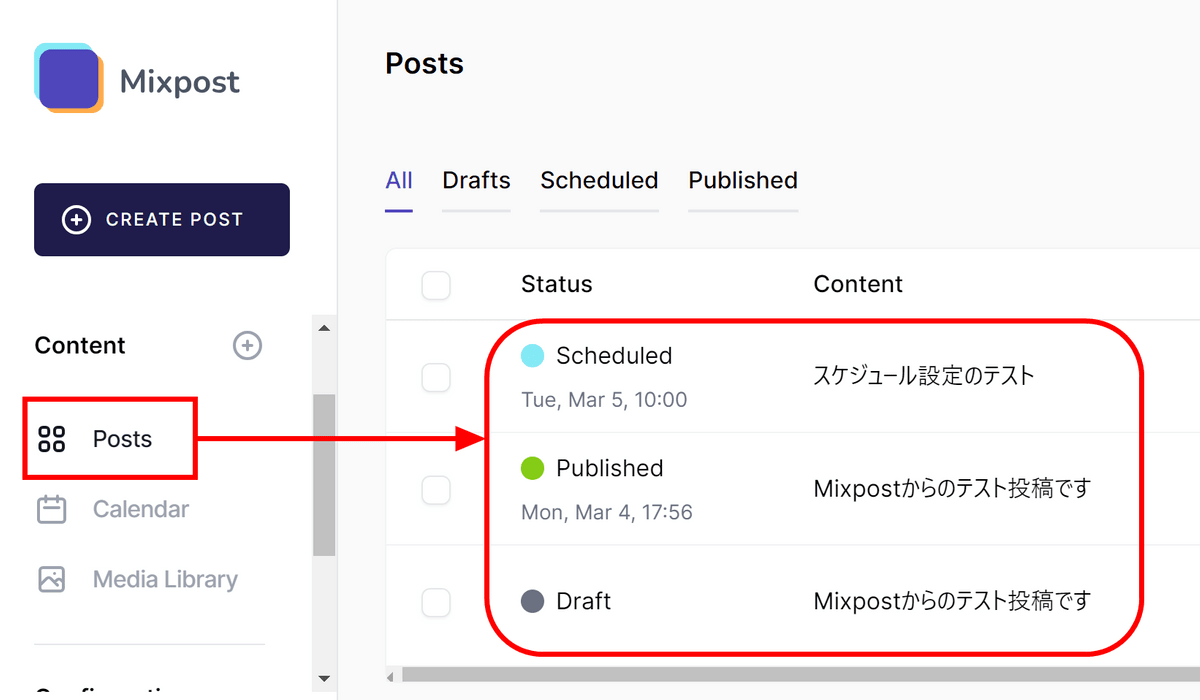
Click 'Posts' to display a list of reserved, posted, and draft contents.
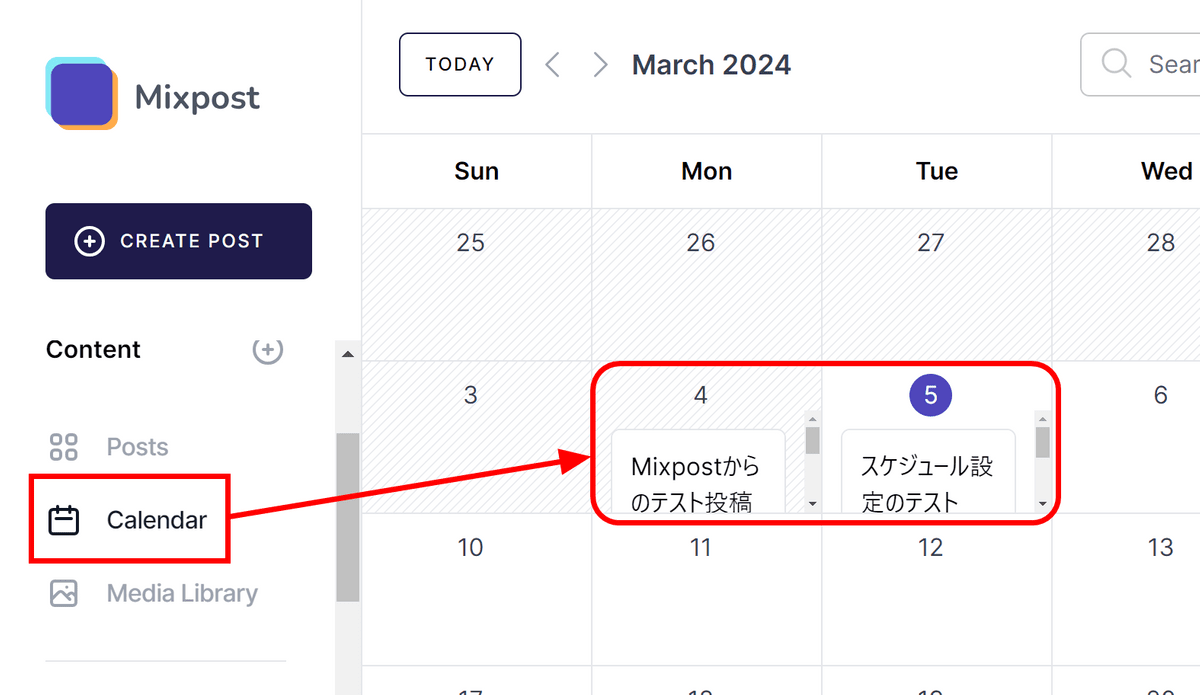
When you look at 'Calendar', you can check the daily posting contents in calendar format.
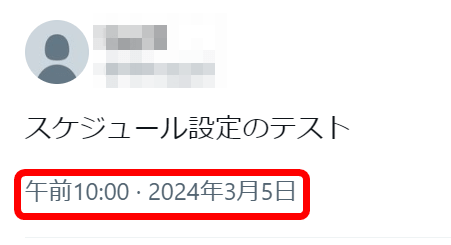
Posting will be done automatically at the scheduled time.
In addition, it is possible to ``delete'' a post by checking the left on the Posts list screen and clicking the trash can mark, but this means ``delete the post from the Mixpost DB.''
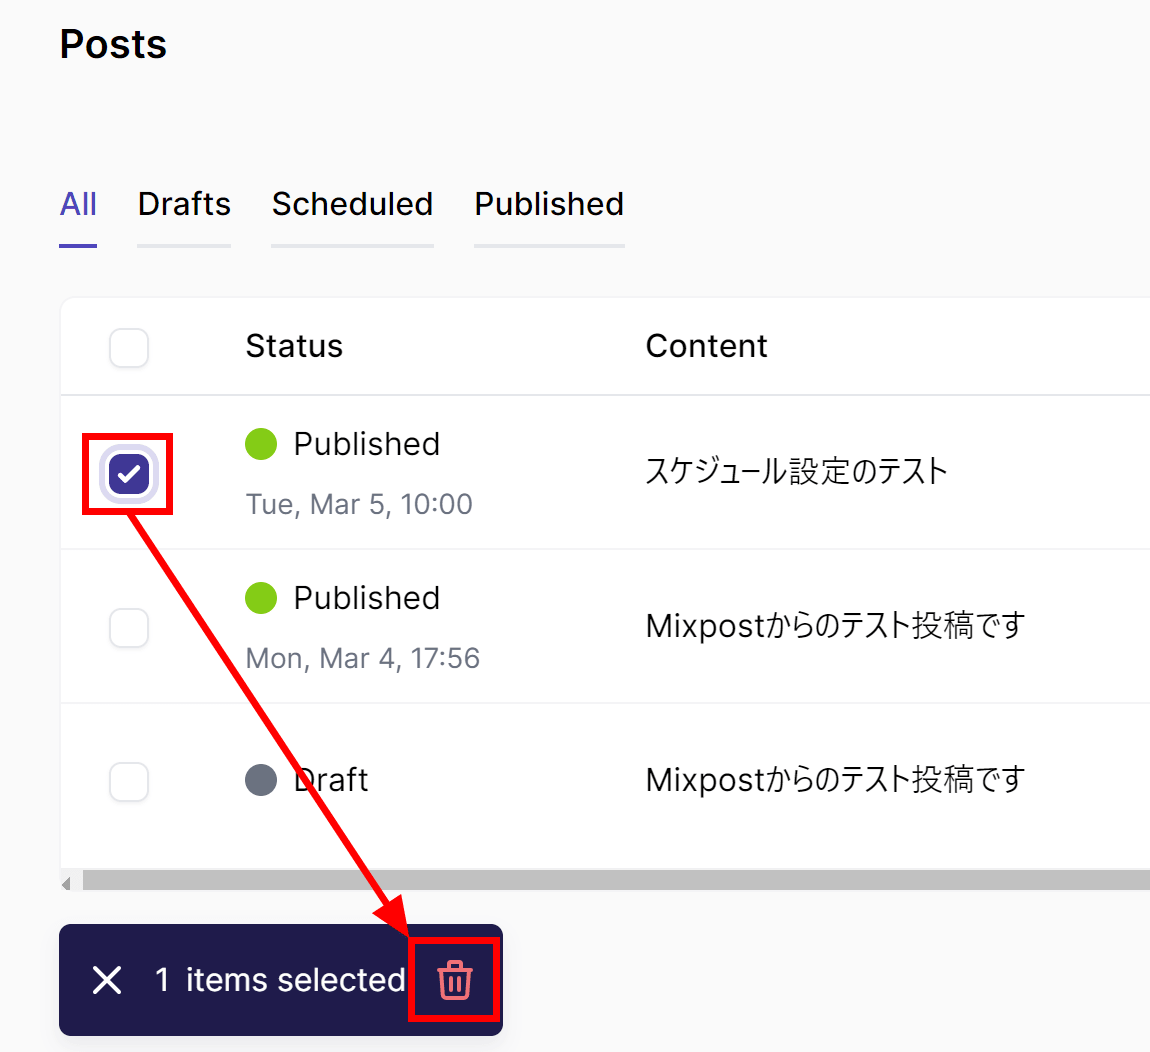
In order to delete content that has already been posted from SNS, it was necessary to perform operations on each SNS.

When you open 'Dashboard', you can check the total number of 'likes', 'retweets', 'impressions', etc. of the post.

You can also embed images and movies by clicking the 'Media' button at the bottom of the post screen.
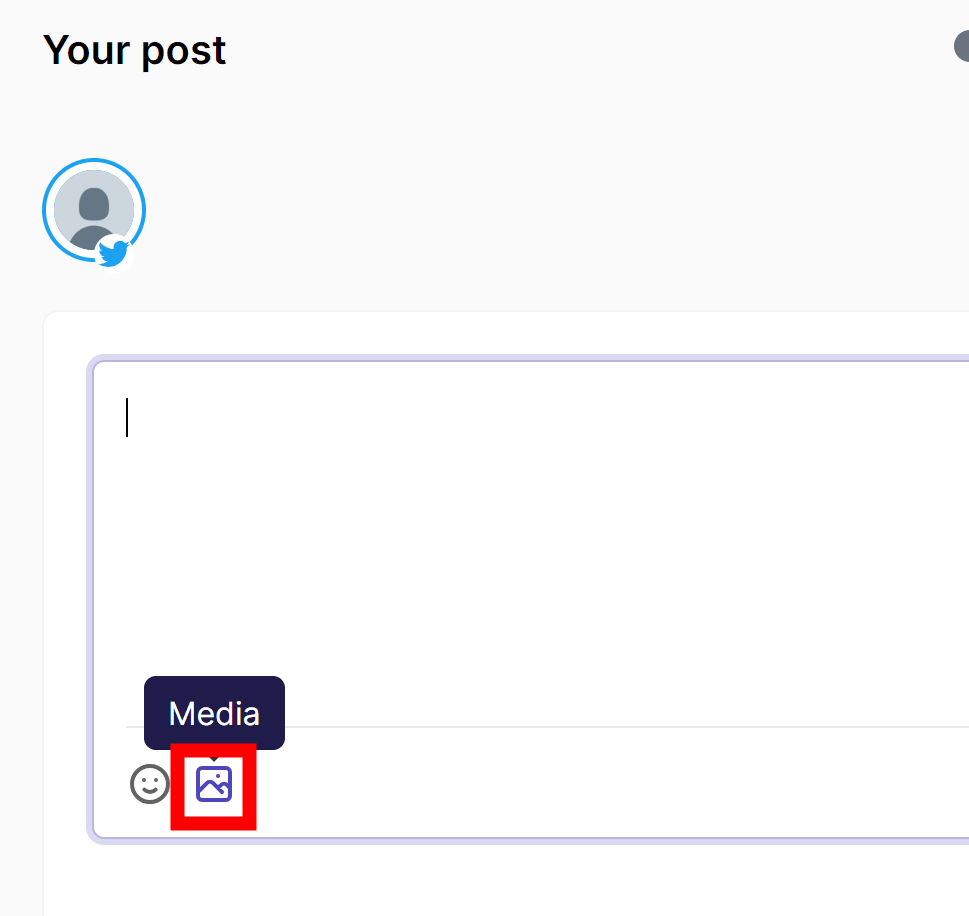
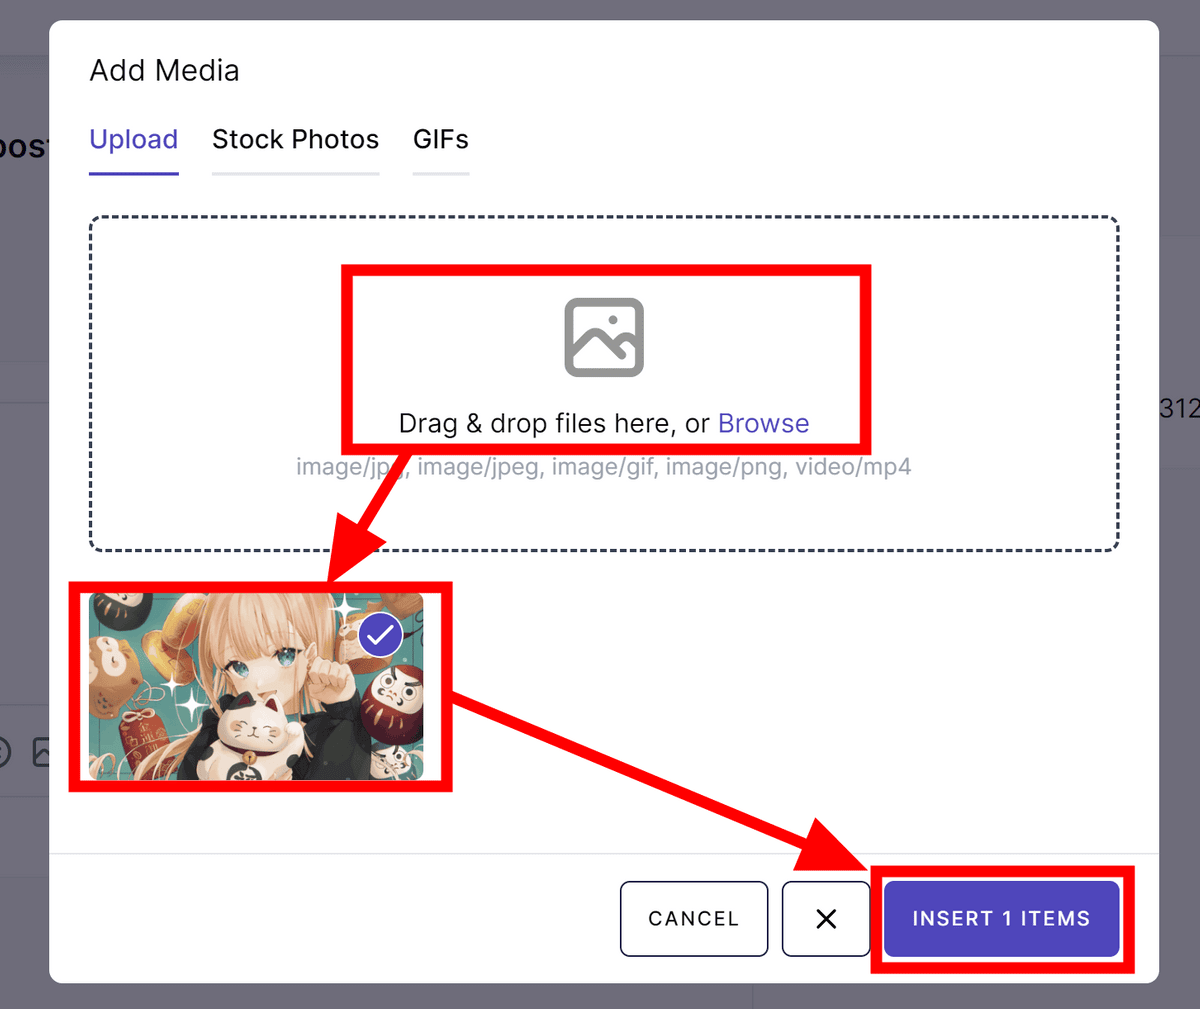
To upload your own files, just drag and drop the movie or image you want to post to the area labeled 'Drag & drop files here.' There is a limit of 5MB per file.
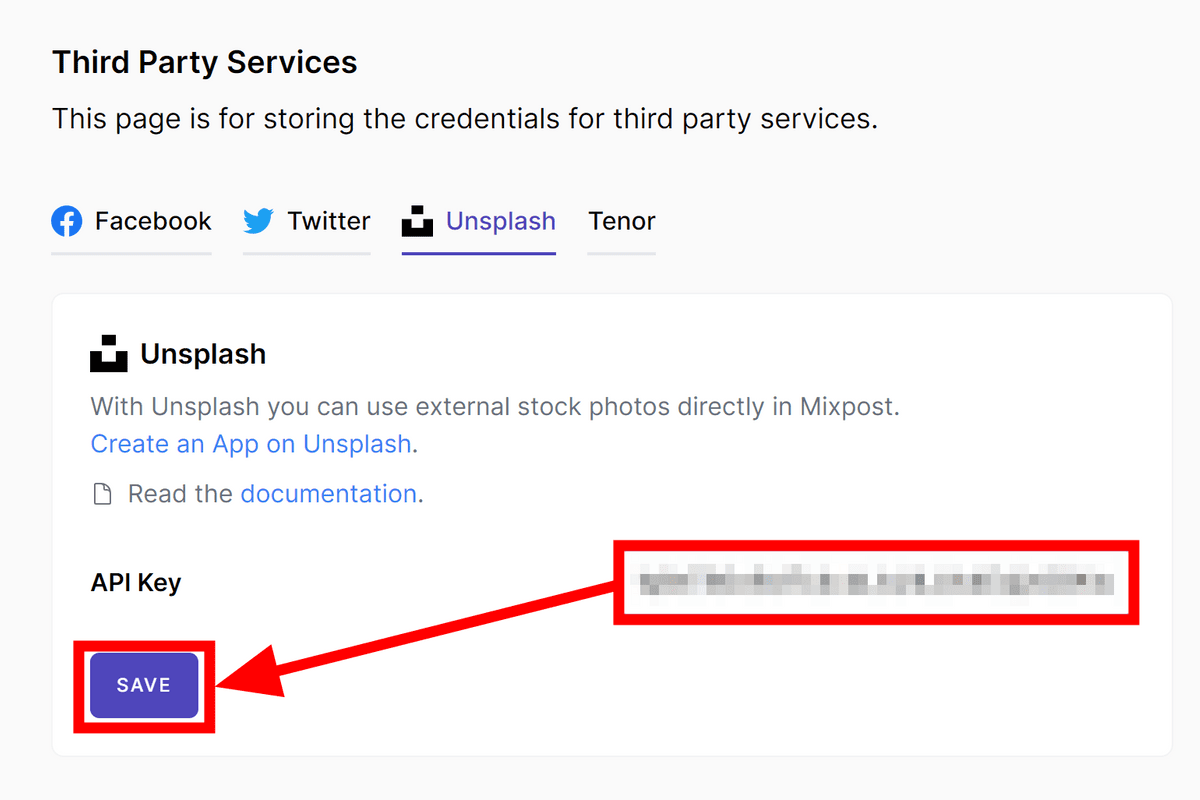
In addition to images you own, you can also post images that have been uploaded to

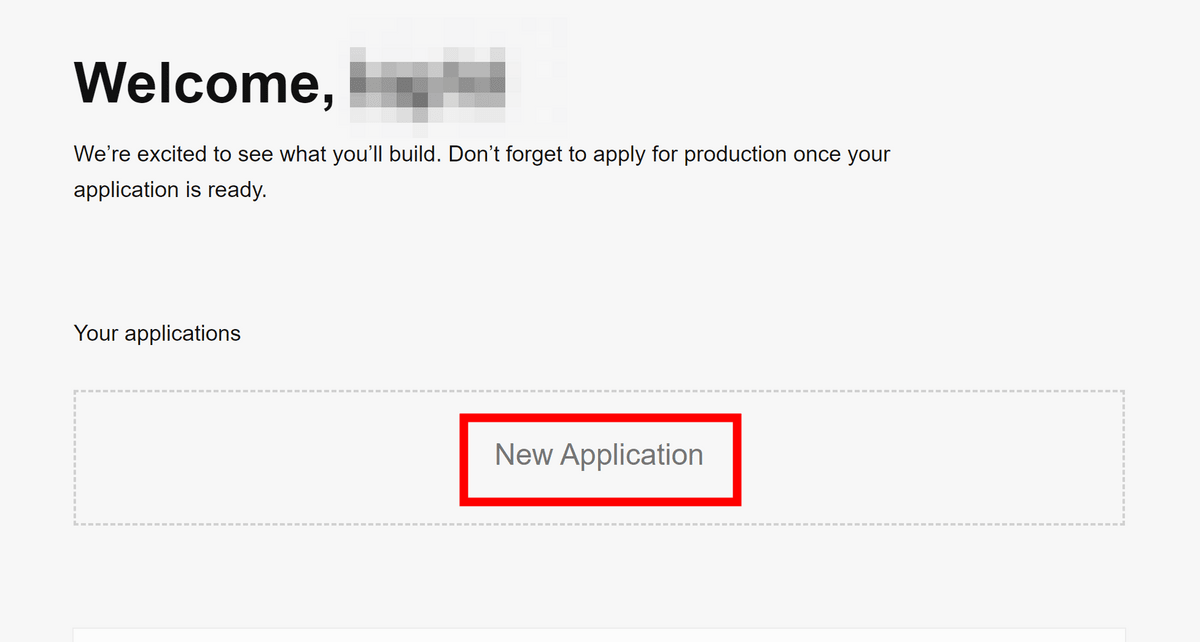
While logged in to

Click 'New Application'.
Check everything and click 'Accept terms'.

Enter the application name and description and click 'Create application'.

Copy the access key that will be displayed.

Return to the Mixpost screen, enter the access key in the API Key field, and click SAVE to complete the preparation.
At the same time, we will also set up 'Tenor', which allows you to use GIF images. While logged in to
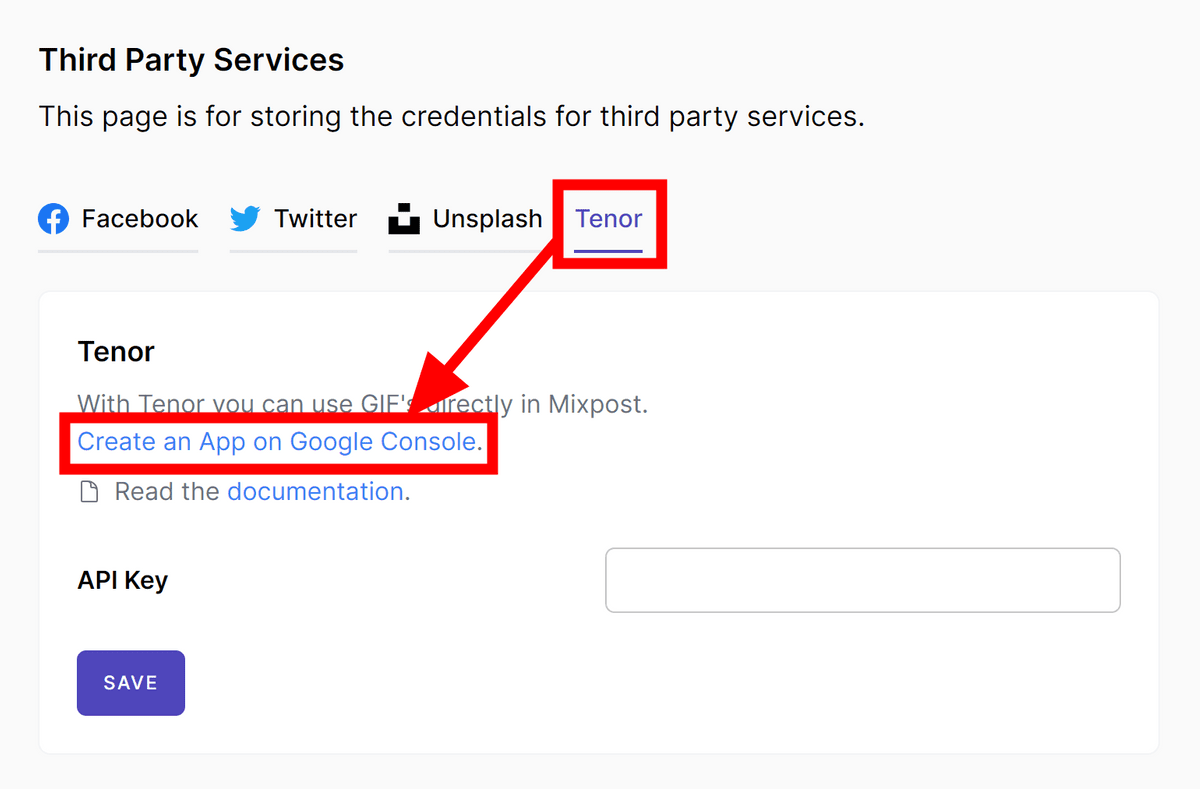
Enter 'tenor' in the search window and click 'Tenor API'.

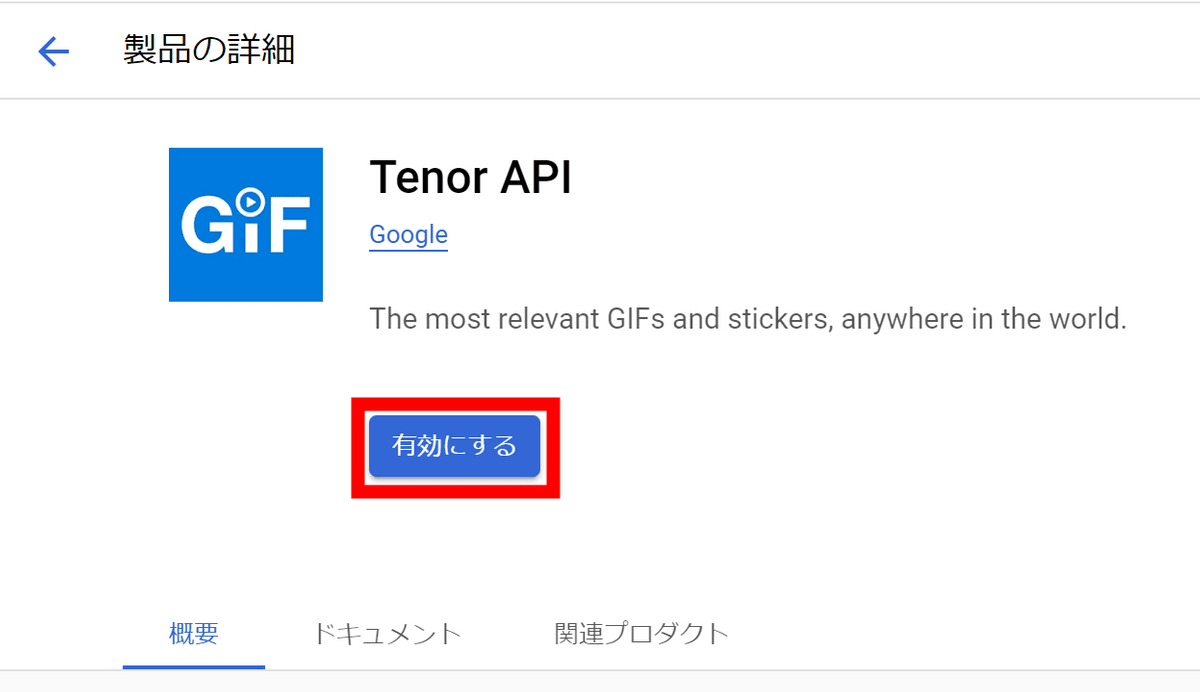
Click 'Enable'.
Click 'Credentials' in the side menu.

Click 'Create Credentials' and then 'API Key'.

Copy the API key that will be displayed.

Return to the Mixpost screen, paste it in the 'API Key' field and click 'SAVE'.

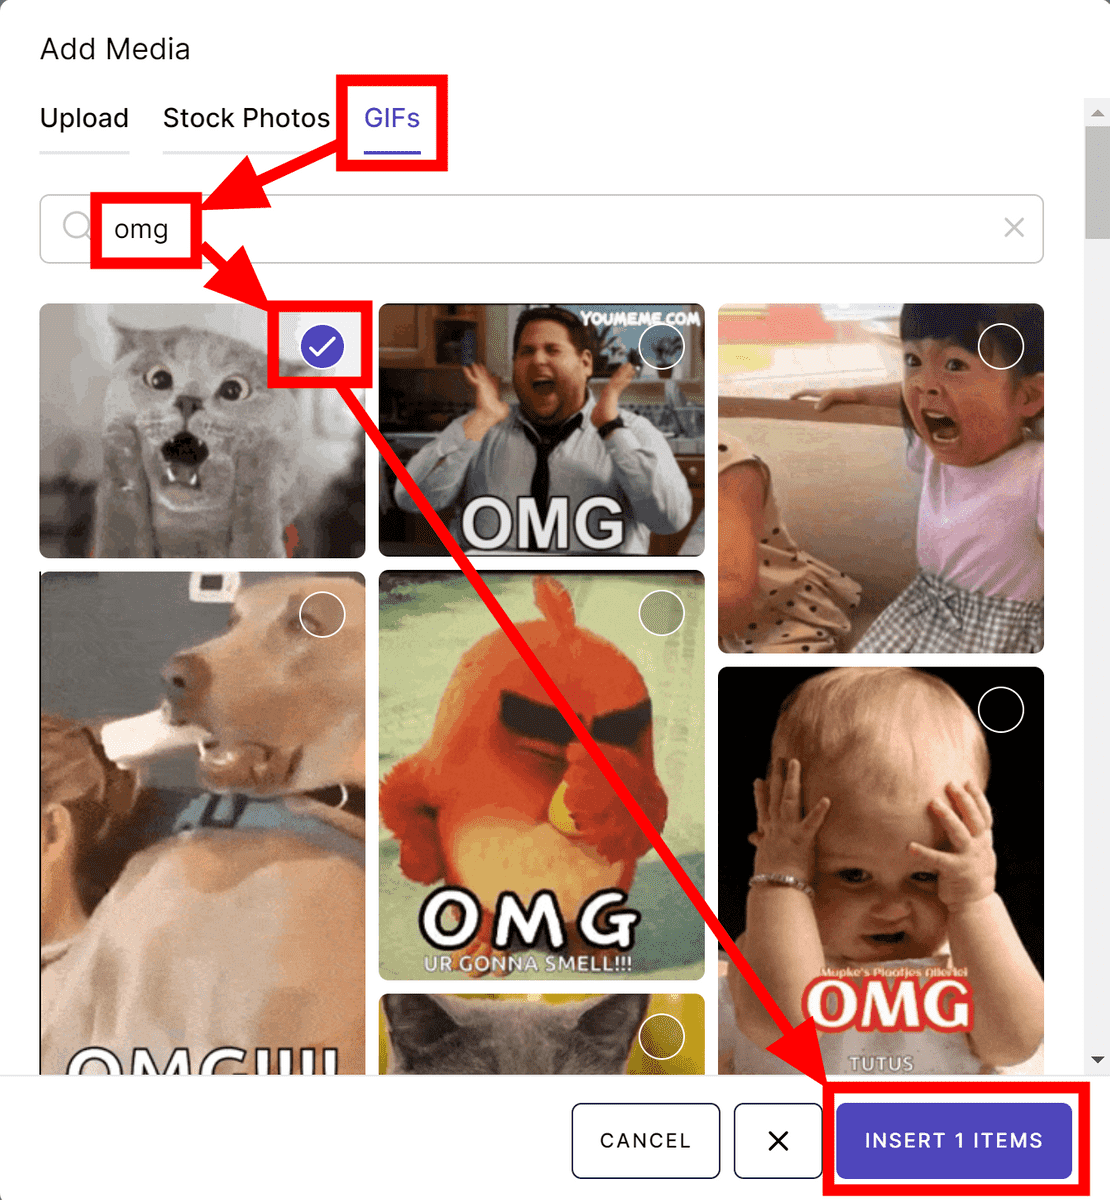
You can now select Unsplash and Tenor images on the media addition screen. Click 'Stock Photos' and enter the search characters to display Unsplash search results. Check the images you want to use and click 'INSERT 1 ITEMS'.

If you want to insert a GIF image, you can do the same operation on the 'GIFs' tab.
Various media can be attached to a single post, but an error message would appear if the post contained media that could not be used at the same time due to restrictions on the posting destination service.

In addition, with the free version, you can only add Facebook, X, and Mastodon accounts, but by purchasing the Pro version of $ 149 (about 22,000 yen), you can add Instagram, LinkedIn, Pinterest, TikTok, Youtube, Youtube. It will be possible to post to Shorts at the same time. Please note that you can only receive continuous updates for one year after purchase.
Related Posts:
in Software, Web Service, Review, Posted by log1d_ts