When "iFixit" decomposes "10.5-inch iPad Pro 2017 model" it will be like this

Presented at WWDC 2017Was done10.5 inch new iPad Pro, IFixit which is known for repair / disassembly manual release and gadget dismantling has been disassembled.IPad 5 which disassembled in March 2017Like, it seems to be a substitute with a high degree of decomposition difficulty.
iPad Pro 10.5 "Teardown - iFixit
https://www.ifixit.com/Teardown/iPad+Pro+10.5-Inch+Teardown/92534
A series of decomposition processes are also published in the video.
iPad Pro 10.5 "Teardown - YouTube
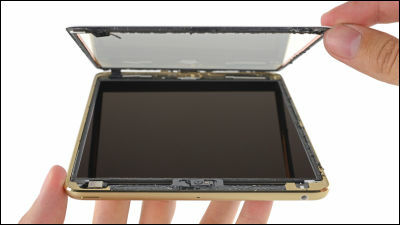
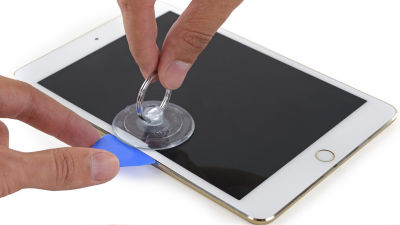
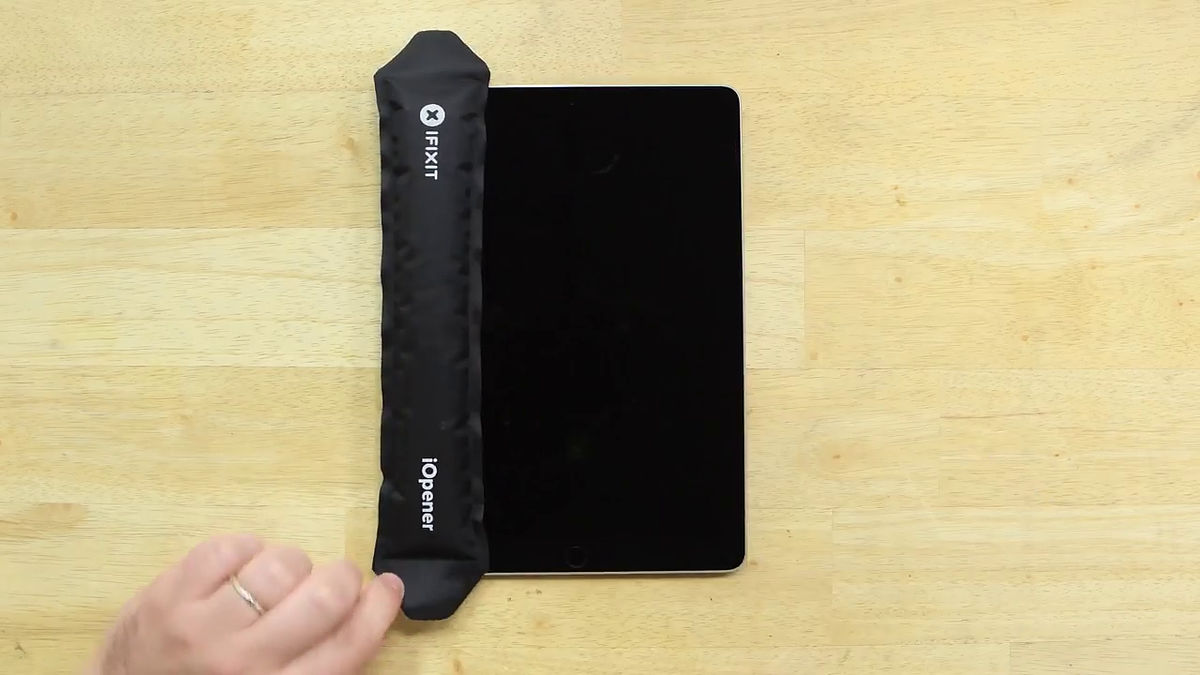
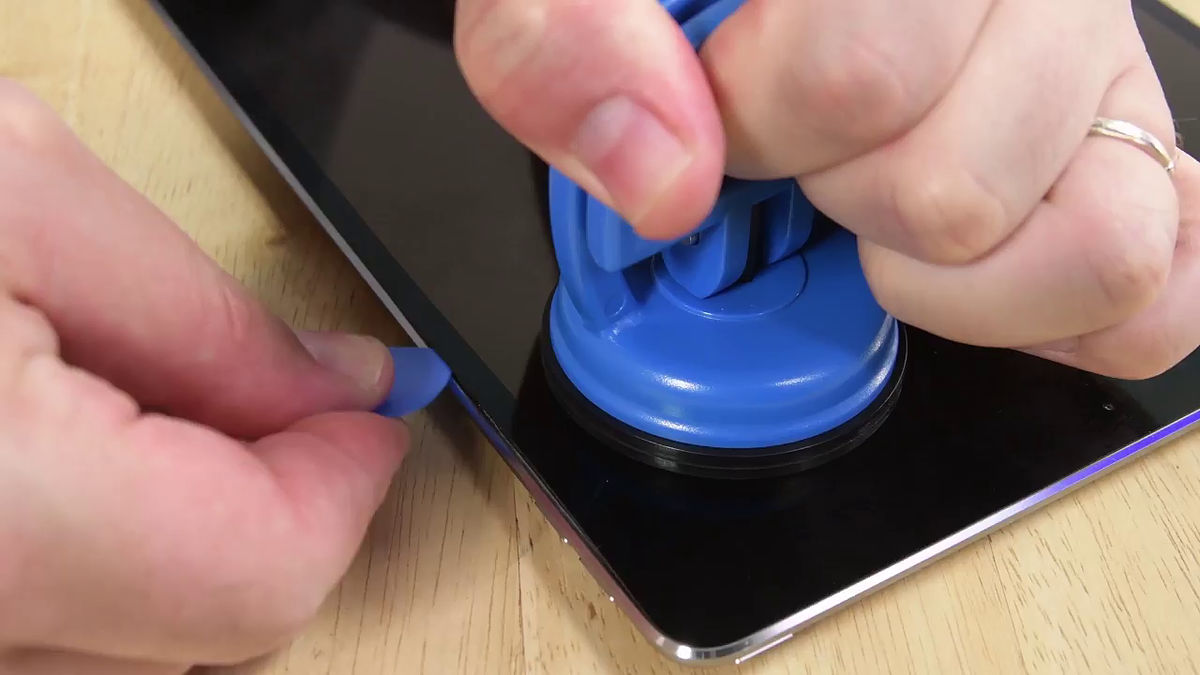
The process starts from warming and softening the adhesive fixing the panel to separate the display panel and the body first.
040 payrence 040 04040 04040 040404040 04040 04040 04040 04040 04040 04040 04040 040 040 2.5 0 closed 04040 04040 040 2.540 040 2.5 0 2.5 0 closed 04040 04040 040 040 040 0 2.5 04040404040404040404040404040404040404040404040404040 closed payrence 0 payrence closed tw pay 2.5 0 0 0 payrence 0 0 payday 0 0 payrence 0 0 payrence 0 0
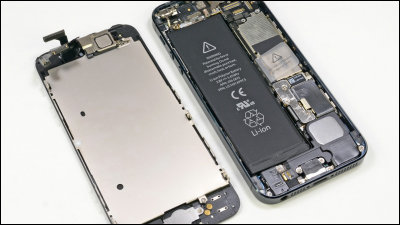
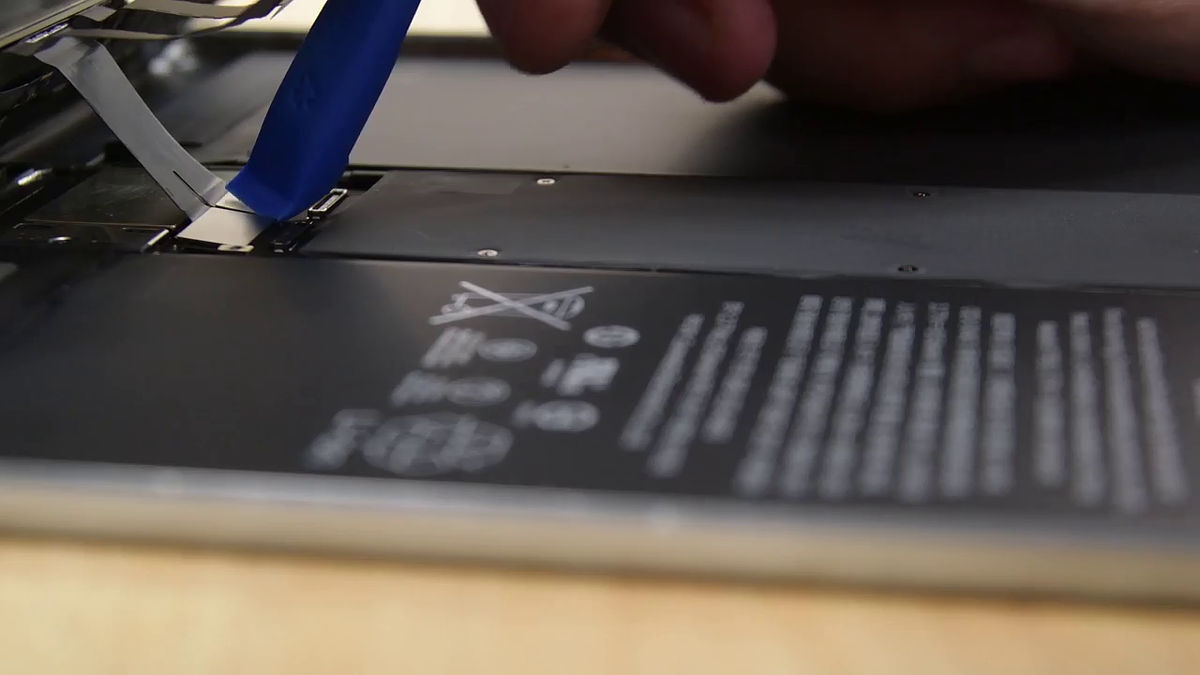
The display was disconnected. According to iFixit, the design where the display cable is centrally located seems to have been since 12.9 inch iPad Pro (2015 model).
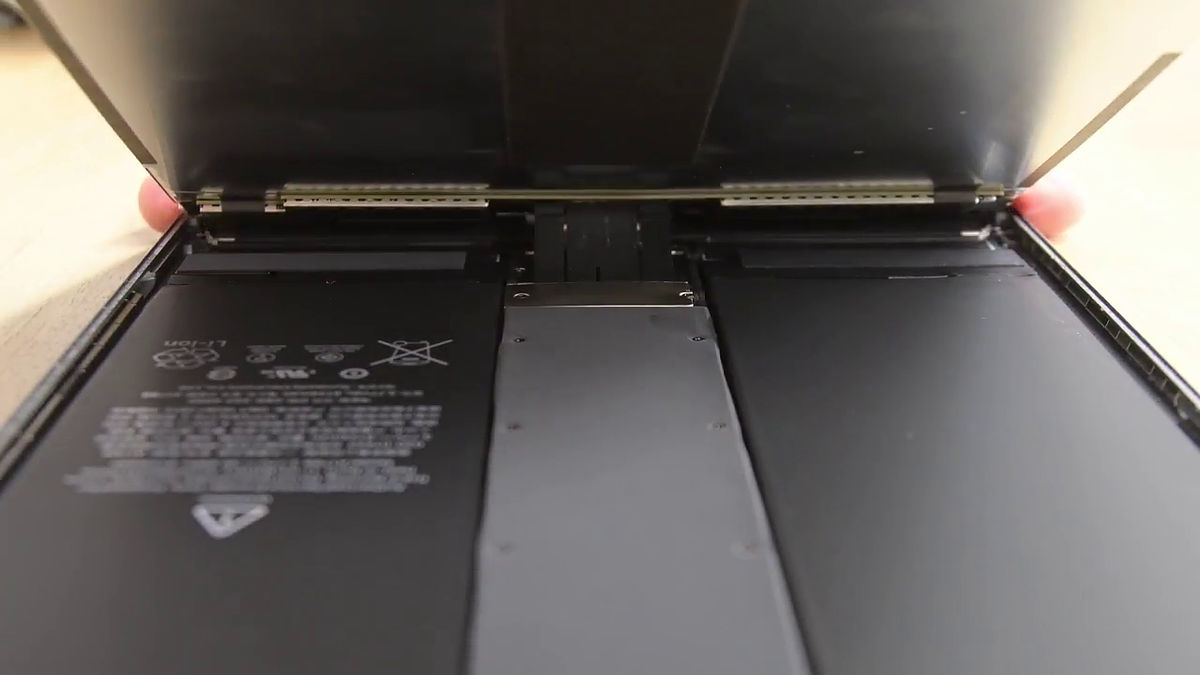
Then, remove the fixing parts of the display cable. A somewhat special three-point screw was used in the iPhone 7 and iPhone 7 Plus, but the thing used here was that it was a screw that can be removed with a regular driver.
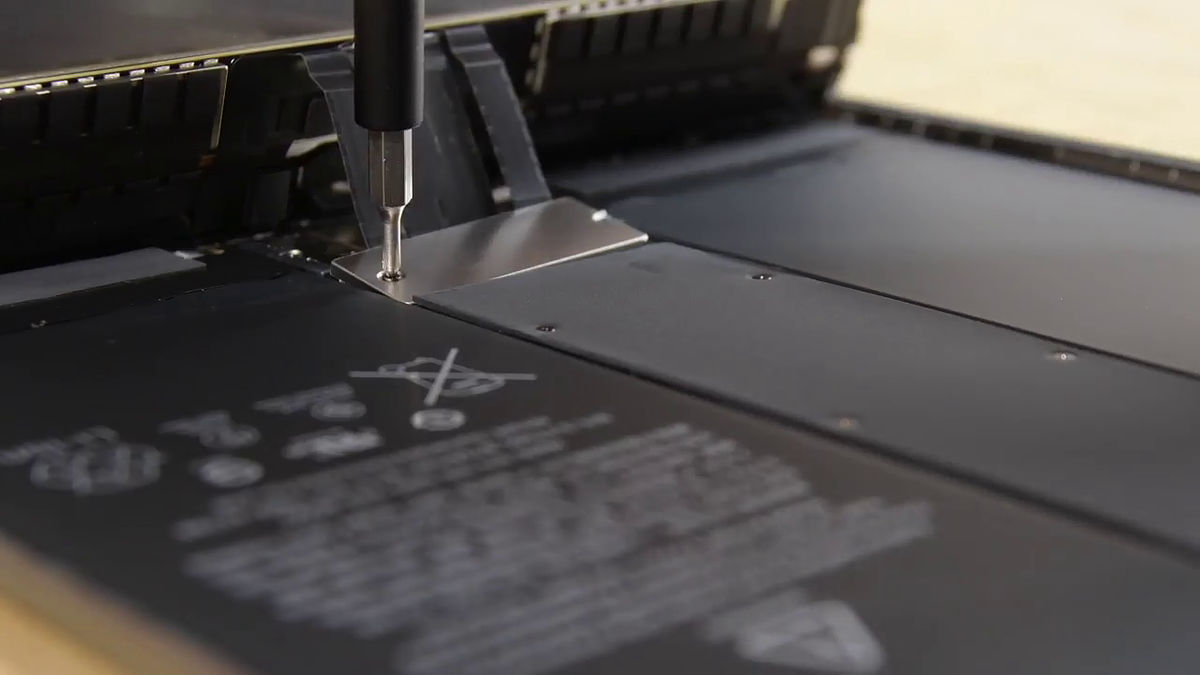
Then carefully pull out the cable.
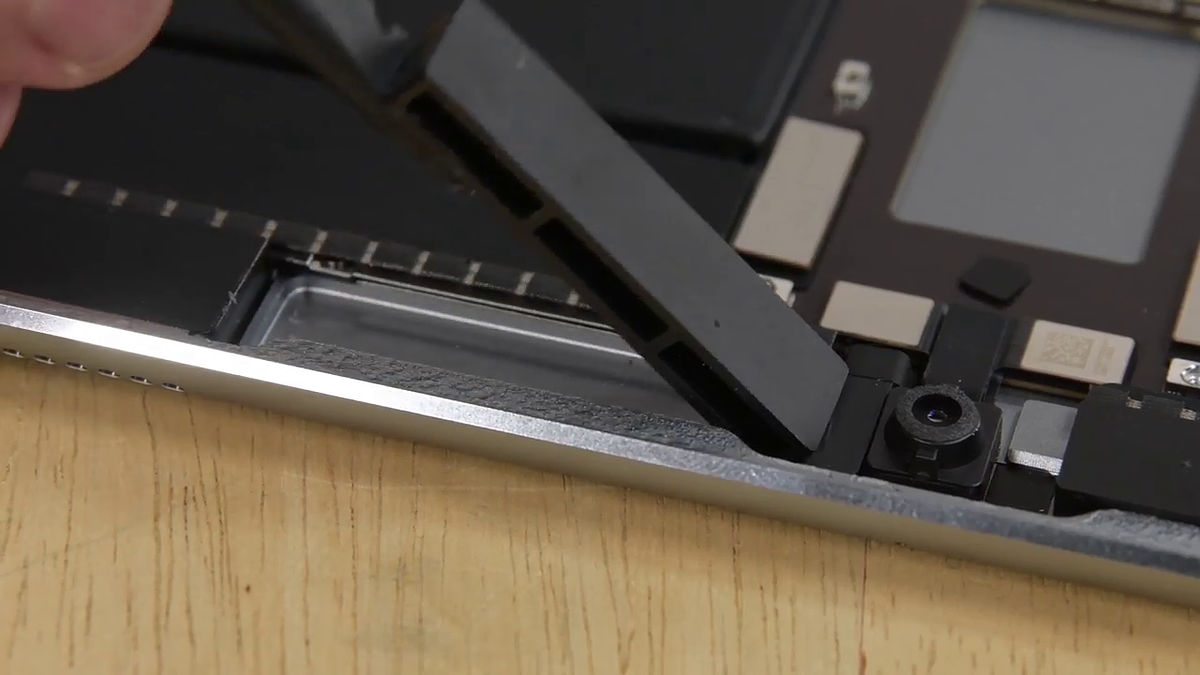
Since the display has come off, I will remove the module inside the main unit. This black chunk is a "mysterious plastic block" which was not found in the 12.9-inch iPad Pro (2015 model).
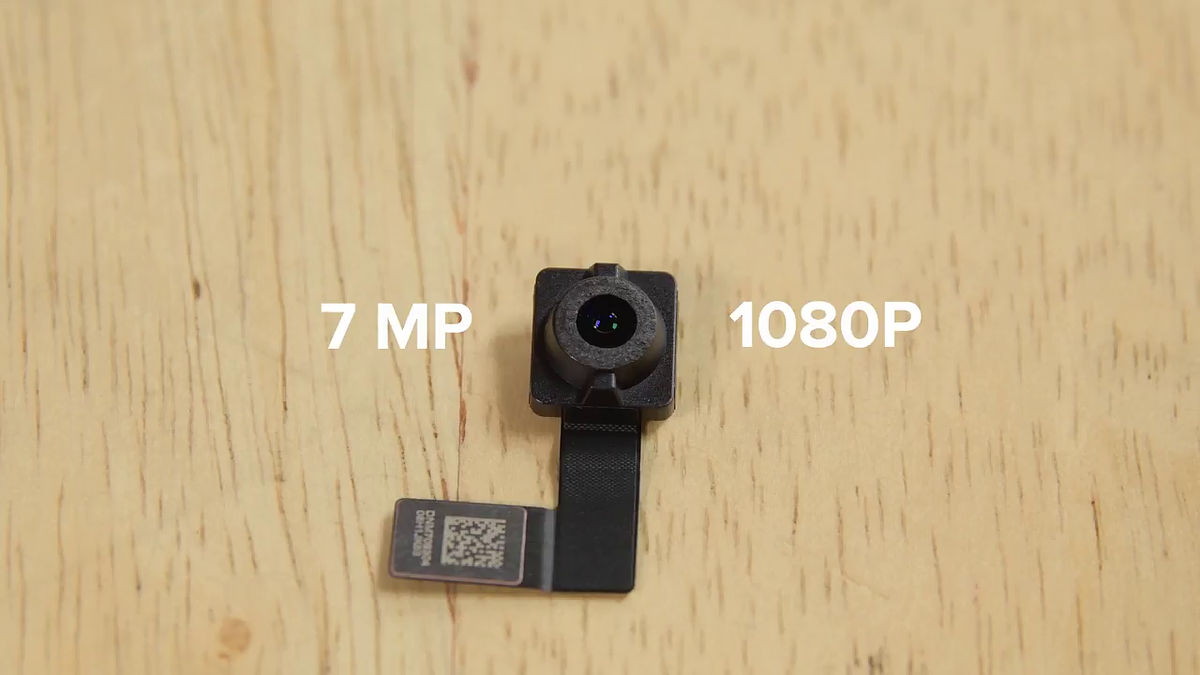
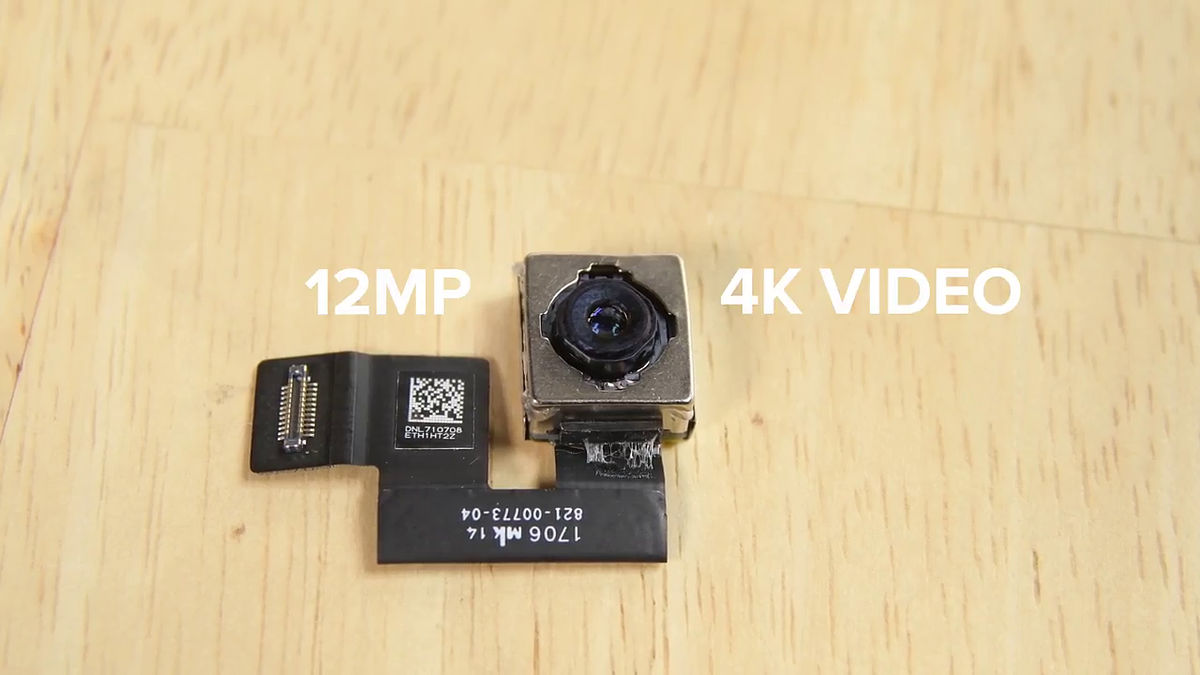
There are two types of camera modules. Front camera supports 7MP · 1080p. The rear camera of the 12.9-inch iPad Pro (2015 model) had the same performance as this front camera.
Rear camera supports 12 MP · 4 K 30 fps.
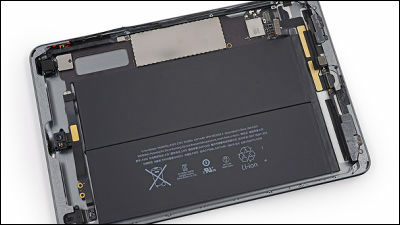
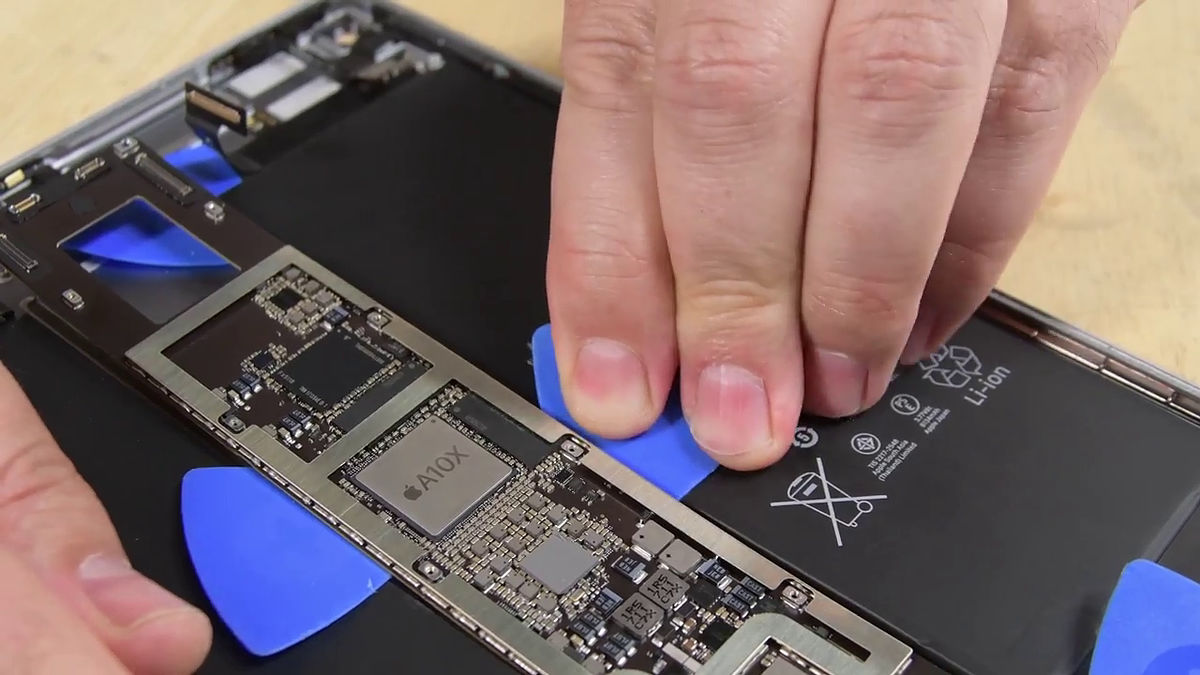
And in the center of the body left is a logic board. The A10X Fusion chip (SoC) shows the face.

Insert multiple picks in the logic board and remove it gently.
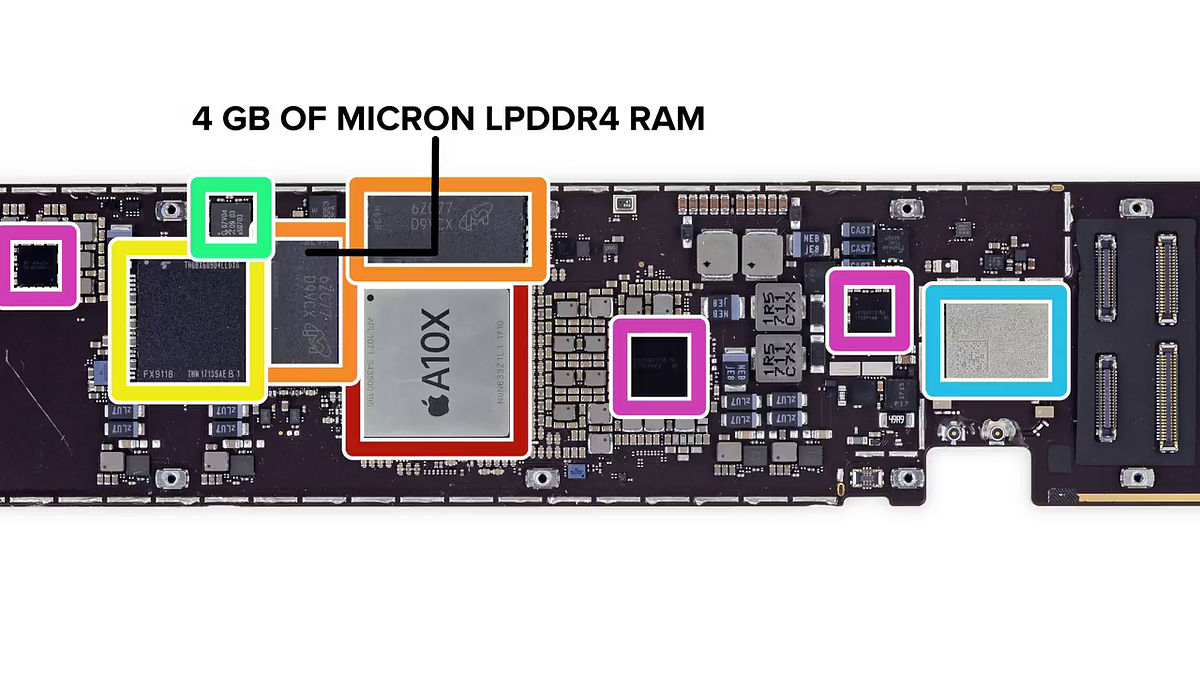
Apple APL 1071 A 10 X Fusion chip inside the red frame. Within the orange frame is Micron's LPDDR 4 memory one 2 GB, because there are two, it is 4 GB. Toshiba's 64GB flash memory is in the yellow frame. NFC controller inside the green frame, wireless module inside the light blue frame.
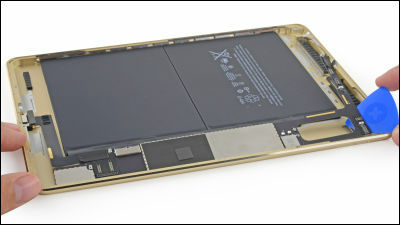
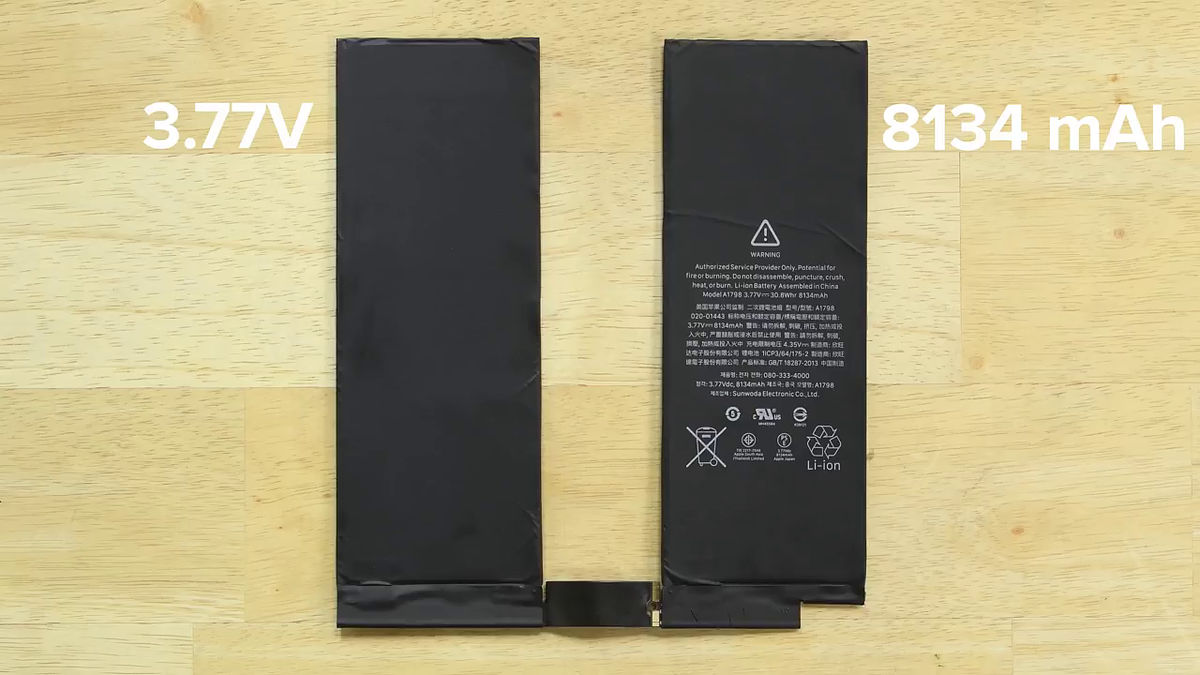
Finally I will remove the battery. It is also necessary to peel off the adhesive here and there.
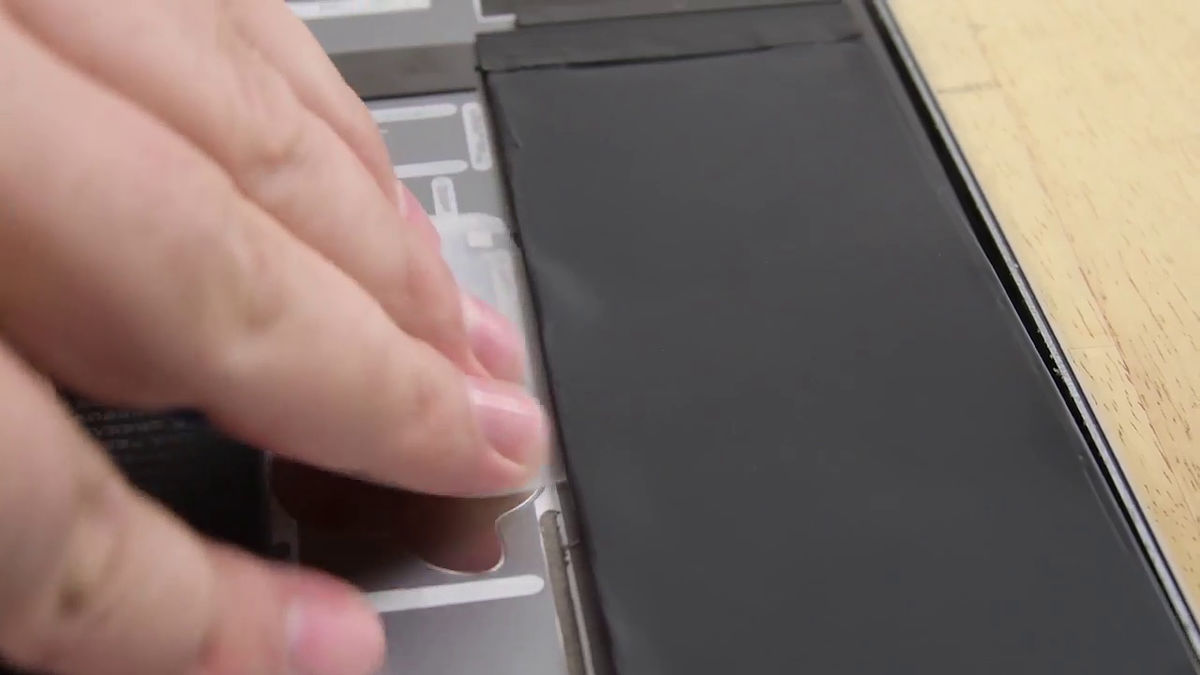
Battery placed so as to sandwich the logic board has performance of 3.77 V · 8134 mAh · 30.8 Wh. The 9.7 inch iPad Pro was 27.91 Wh, so the performance is improved.
It is like this when arranging removed parts.

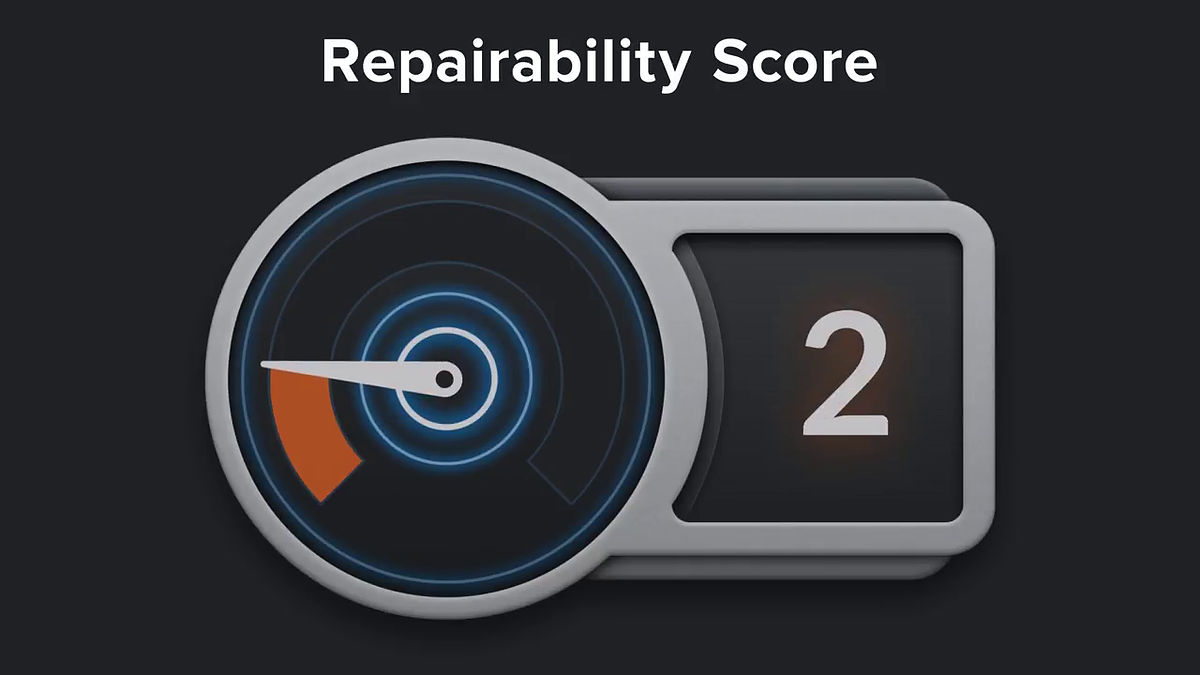
According to iFixit, the higher the score is, the easier it is to disassemble the decomposition difficulty is "2", which belongs to quite a difficult one. Thanks to the integration of the LCD and the front panel, the disassembly procedure became somewhat easier, but as the harmful effect of integration, the risk of LCD damage has increased and the cost of display repair will also rise. Also, as many picks to peel off adhesive in the process of repair have come out, glue is used around here and the parts are fixed in place to the predetermined position, making the repair difficult overall ... apparently ...
The tools that iFixit used to disassemble the 10.5-inch iPad Pro are iOpener ($ 19.95 / about 2190 yen), Suction Hundle (2.95 dollar / about 324 yen), iFixit Opening Picks set of 6 (4.95 dollars / about 544 yen) Phillip # 00 Screwdriver ($ 5.95 / about 653 yen), Halberd Spudger (2.95 / about 324 yen), Plastic Cards (2.95 / about 324 yen), Tweezers ($ 4.95 / about 544 yen), iPad Battery Isolation Pick $ 2.95 / about 324 yen), totaling 47.6 dollars (about 5230 yen). Both are handled with iFixit.
Related Posts: