I tried out 'Cloudflare Tunnel,' which allows you to expose your local environment to the outside world for free without the need for complicated settings like port forwarding.
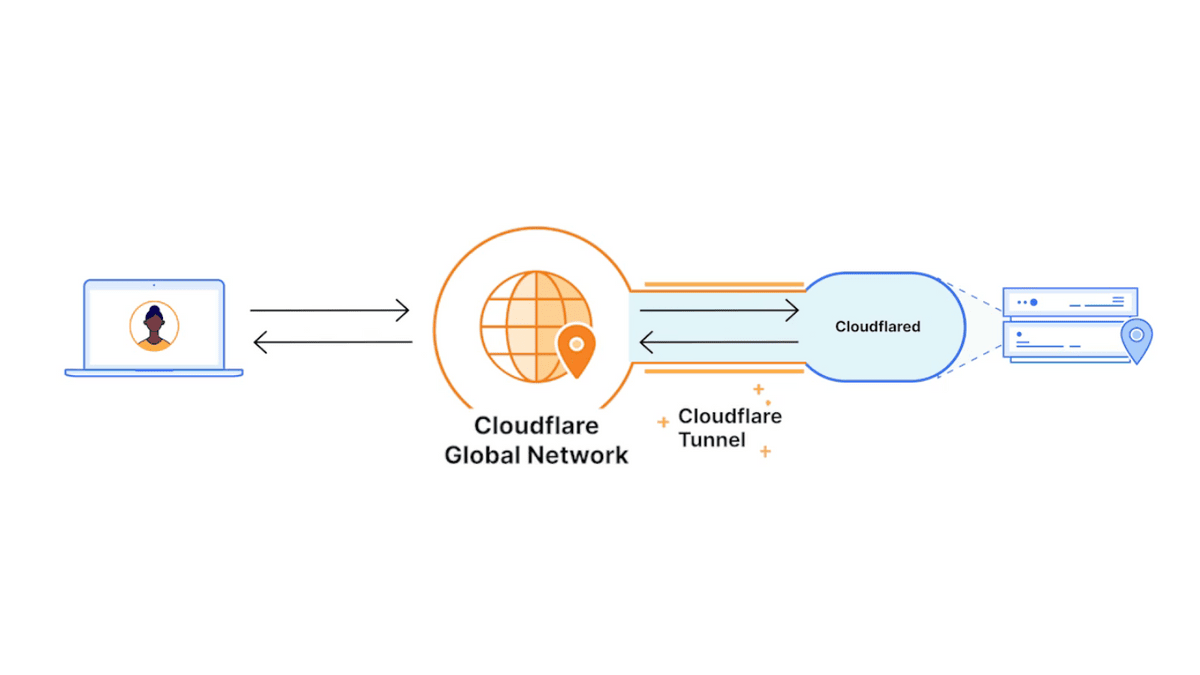
Cloudflare Tunnel is a service that makes it easy to expose applications in your local environment to the outside world. It completely skips various settings such as port forwarding that are necessary to use your 'home server' from outside, and when combined with Cloudflare Access, it also allows you to set up authentication for multiple users. This time, we tried to make a service in a local environment accessible from the outside using Cloudflare Tunnel.
Cloudflare Tunnel · Cloudflare Docs
Previously, I had installed 'Lemonade,' a tool for running local AI , and used it to make Firefox's chat function entirely run on local AI . However, I wanted to be able to use this AI running in a local environment from an external source.
However, setting up a so-called home server involves the hassle of opening ports, obtaining a fixed global IP address, configuring a reverse proxy, and building an authentication mechanism. Furthermore, Lemonade is originally designed to run locally, so exposing it to the internet as is is dangerous.
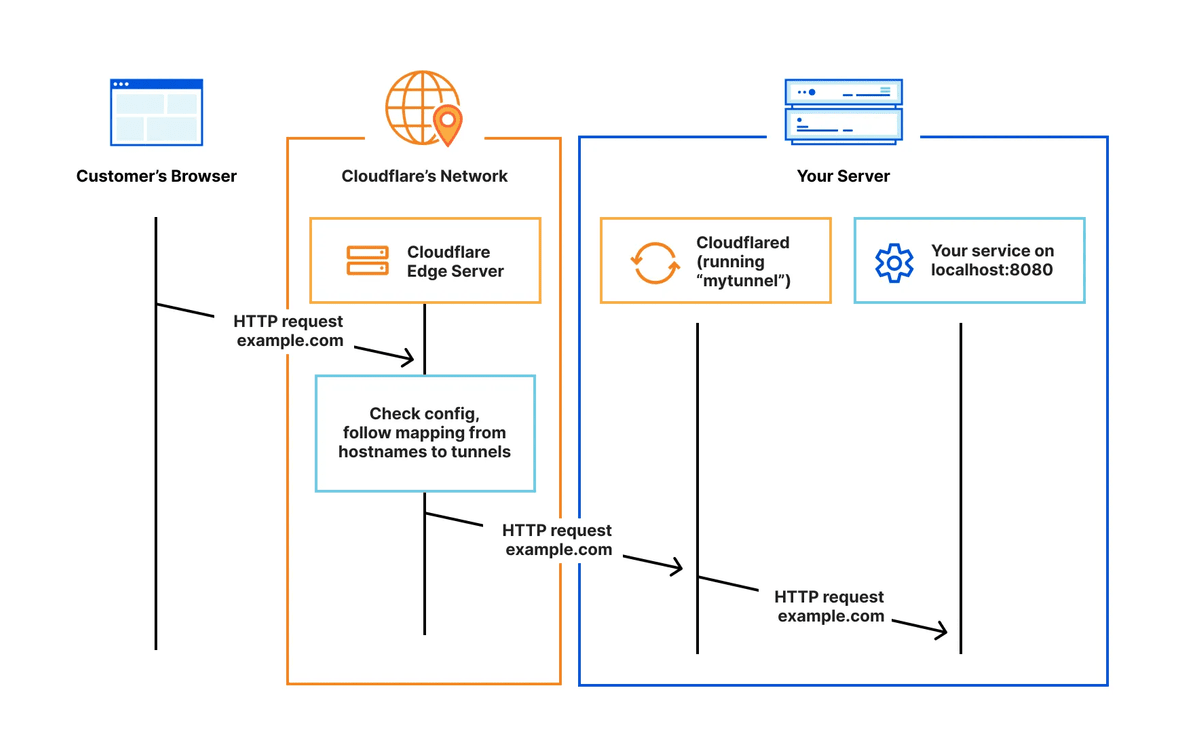
Therefore, this time we decided to use Cloudflare Tunnel. With Cloudflare Tunnel, 'cloudflared' running in the local environment establishes an outbound connection to Cloudflare, and through that path, the local service can be accessed from the outside.
A major advantage is that you only need to create an outbound connection on the local network side, eliminating the need to change the receiving network settings such as opening ports. Since access goes through Cloudflare, it's easy to enable HTTPS and set up a public hostname, and you can use protection features against attacks such as DDoS. Furthermore, by using Cloudflare Access, you can set up authentication for the published URL and restrict access.
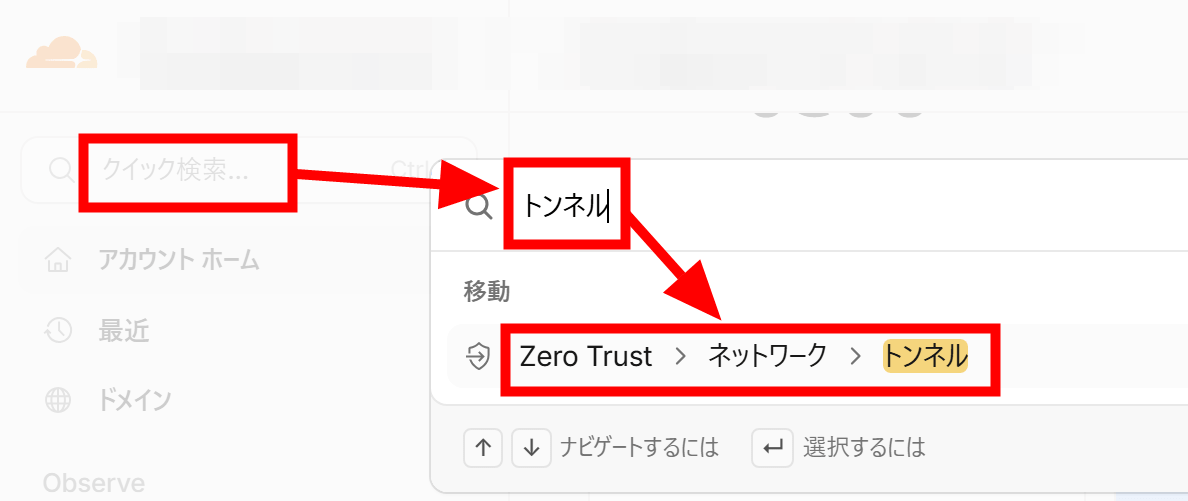
Let's get started setting up Cloudflare Tunnel. First, access
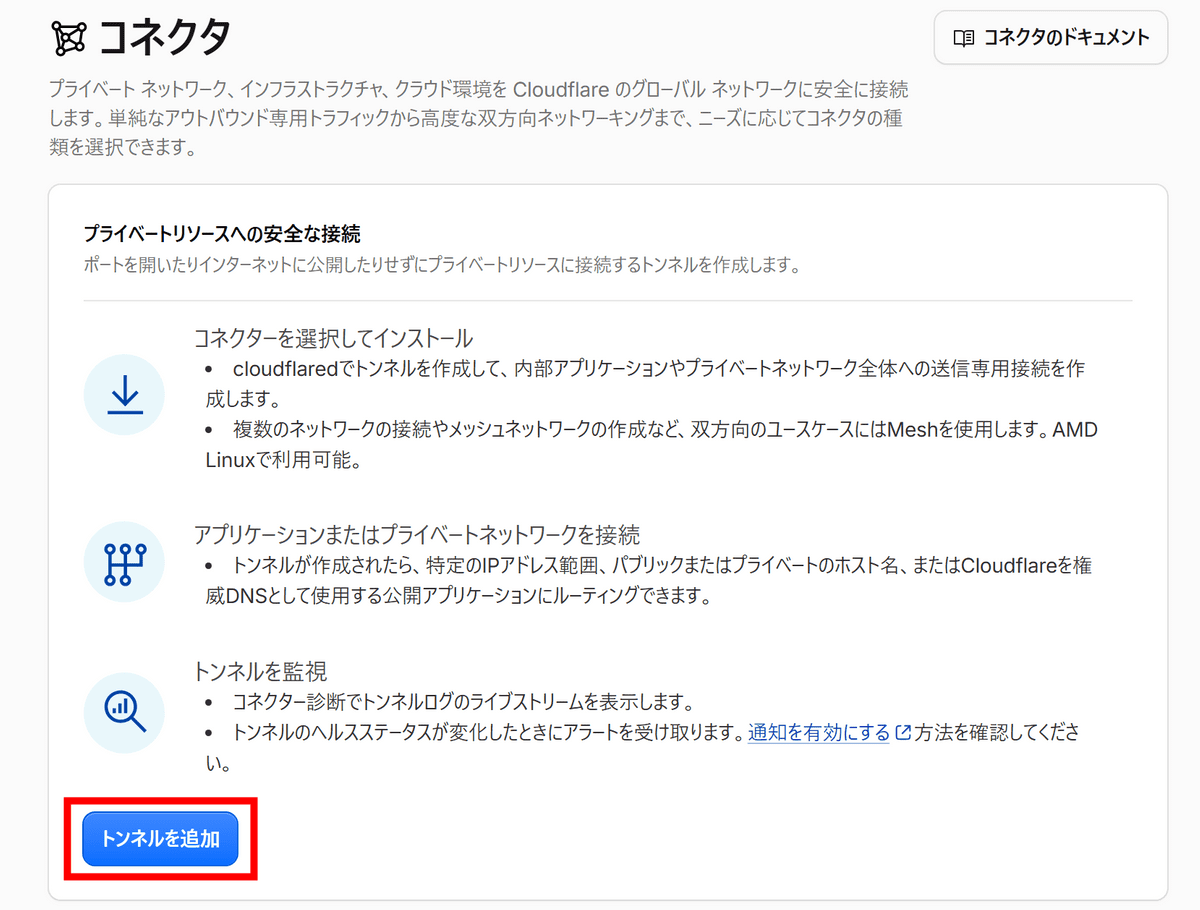
Click 'Add Tunnel'.
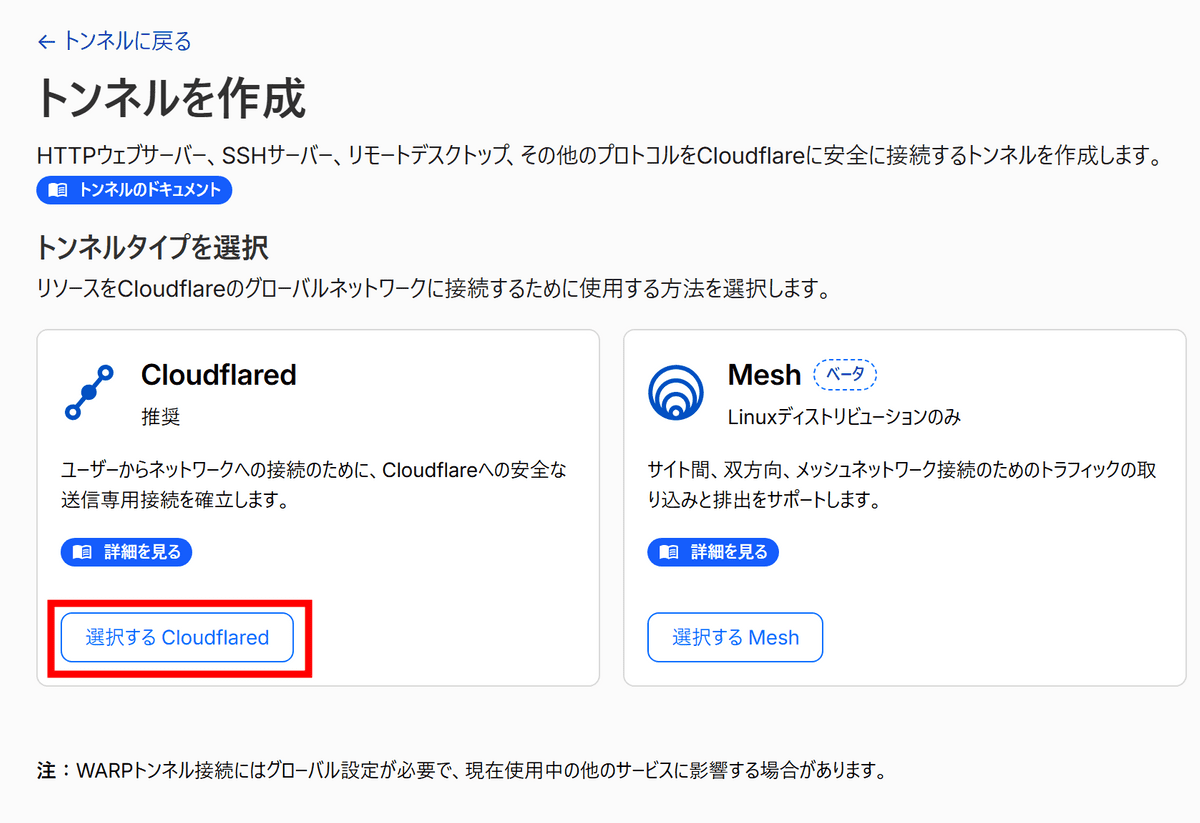
Click 'Select Cloudflared'.
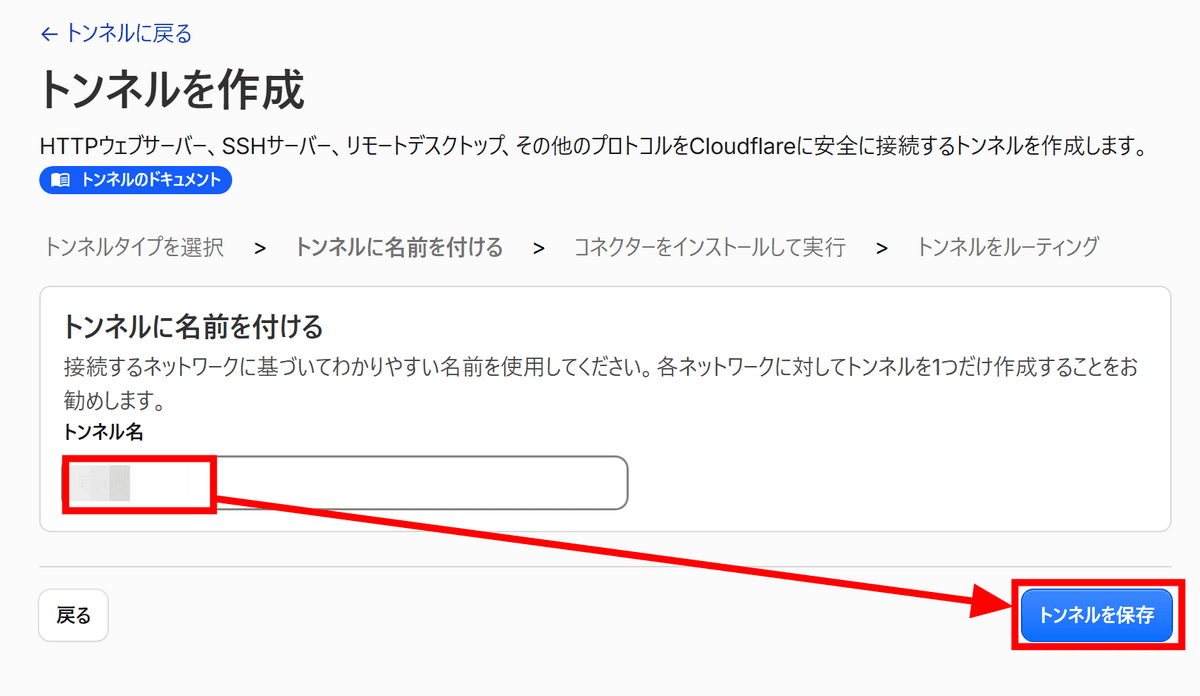
Give the tunnel a clear and descriptive name and click 'Save Tunnel'.
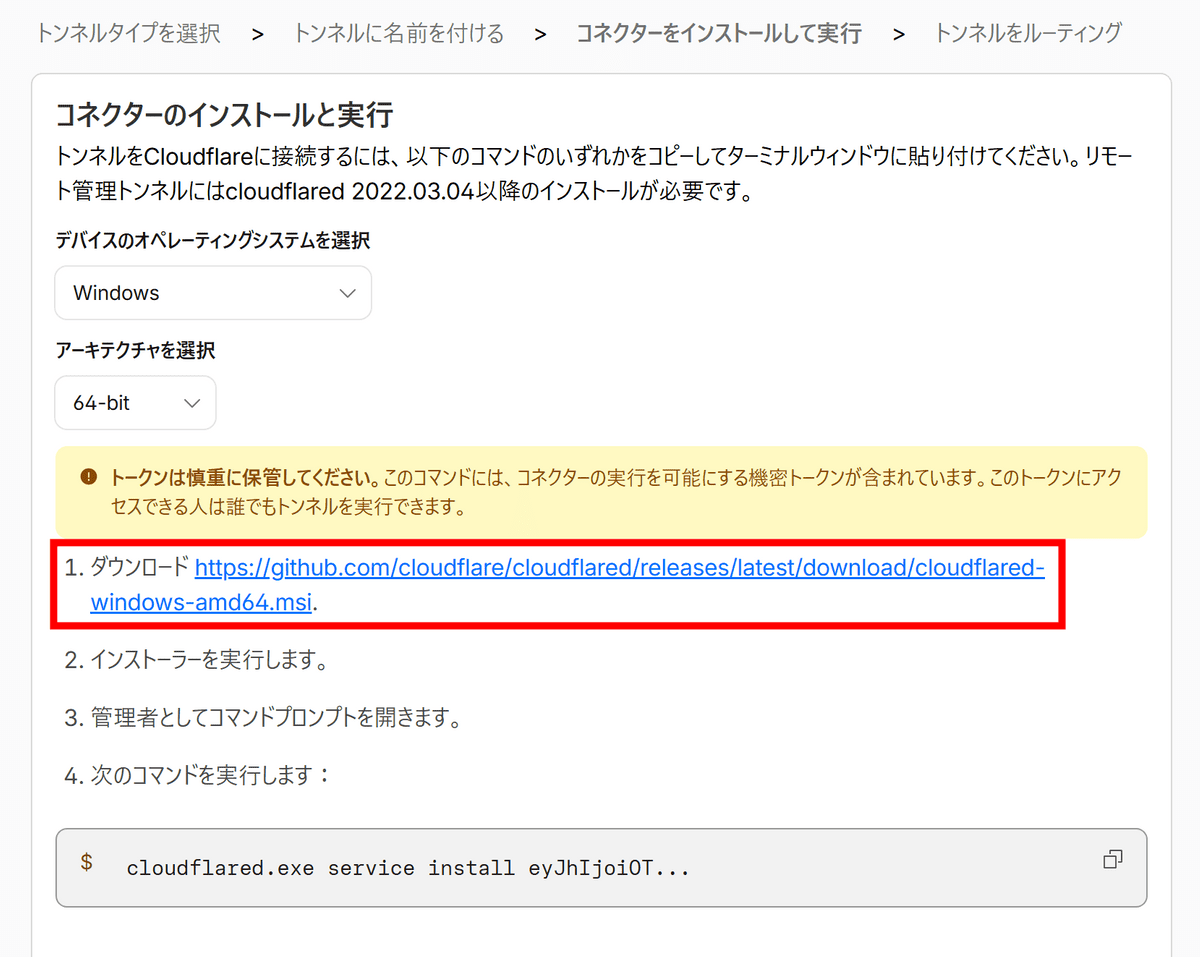
You need to install the connector. Click the URL next to 'Download' to download the installer.
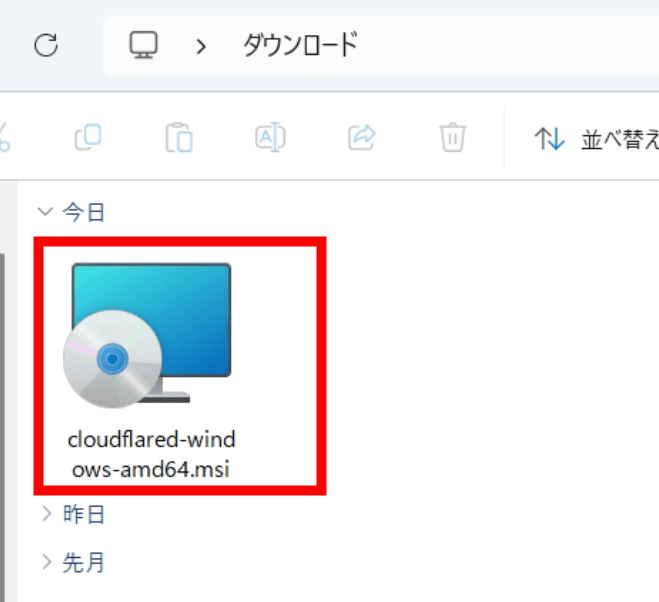
Double-clicking the installer will install the connector. There is no confirmation; the screen will briefly appear and then close, indicating that the installation is complete. Please be careful not to launch the installer multiple times.
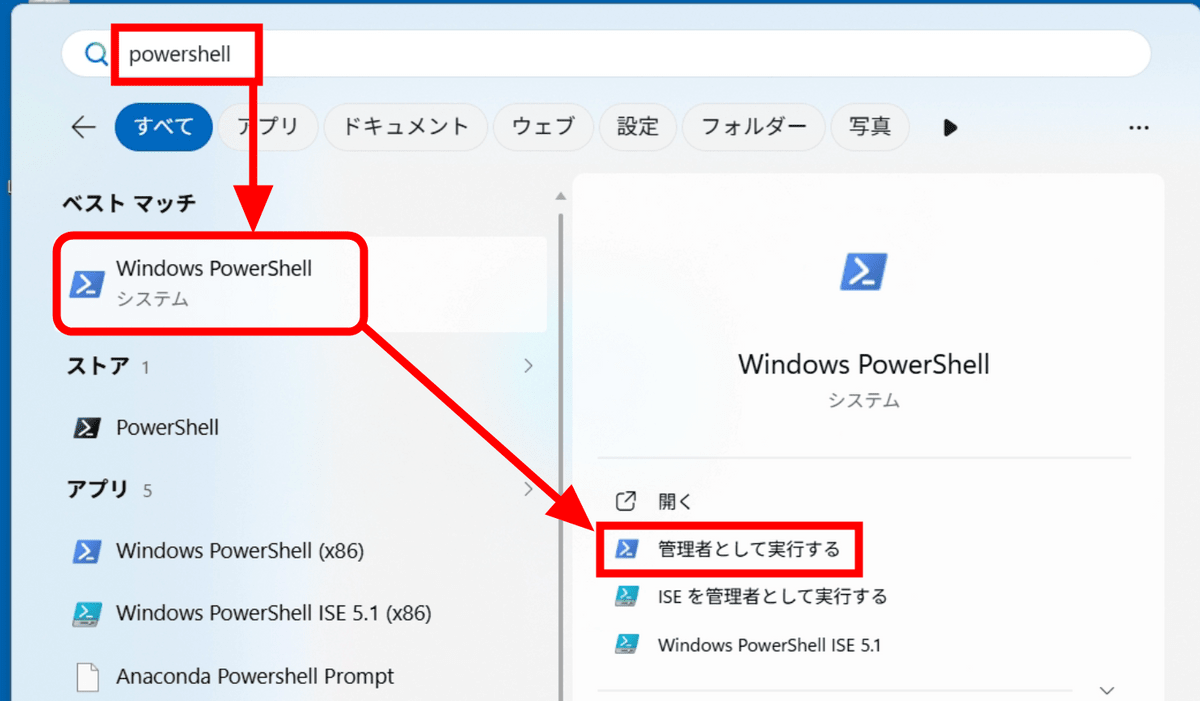
Next, open the Start menu and search for 'powershell'. From the 'Windows PowerShell' entry that appears, click 'Run as administrator'.
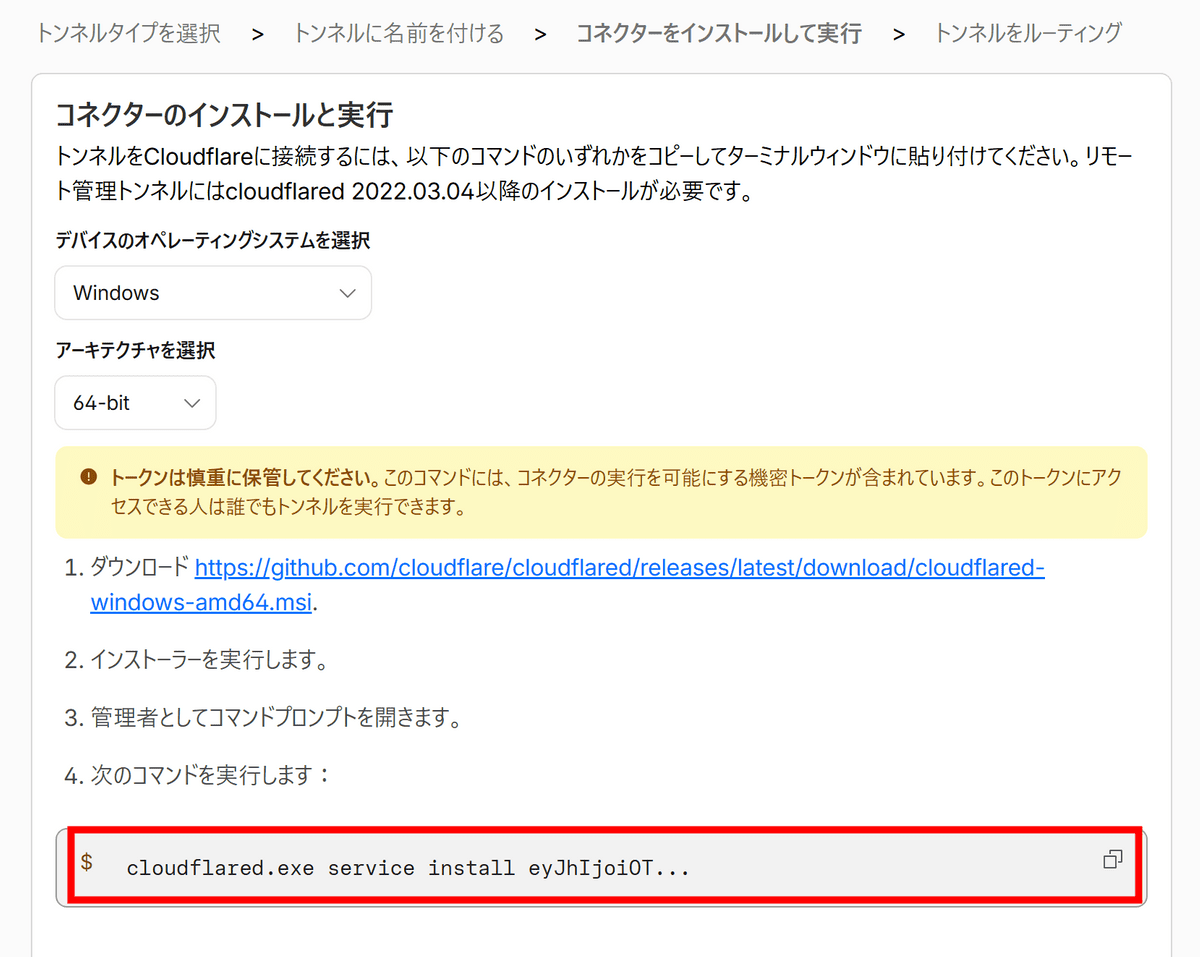
Go back to your browser and click the command under 'Run the following command:' to copy it.
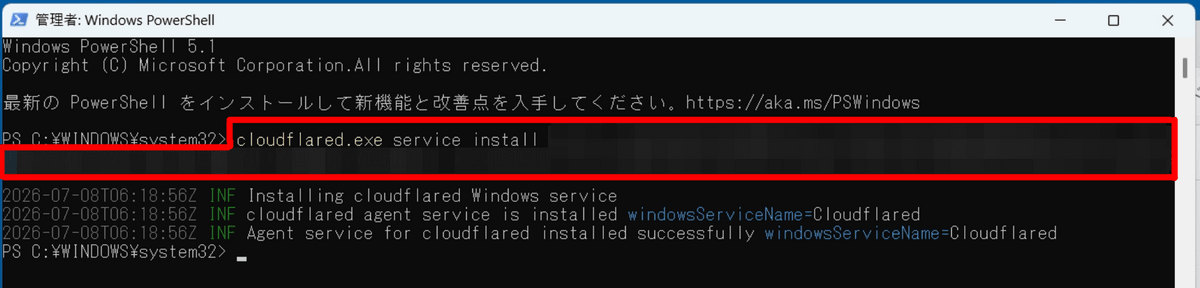
Right-click to paste the code into PowerShell and press Enter to execute it.
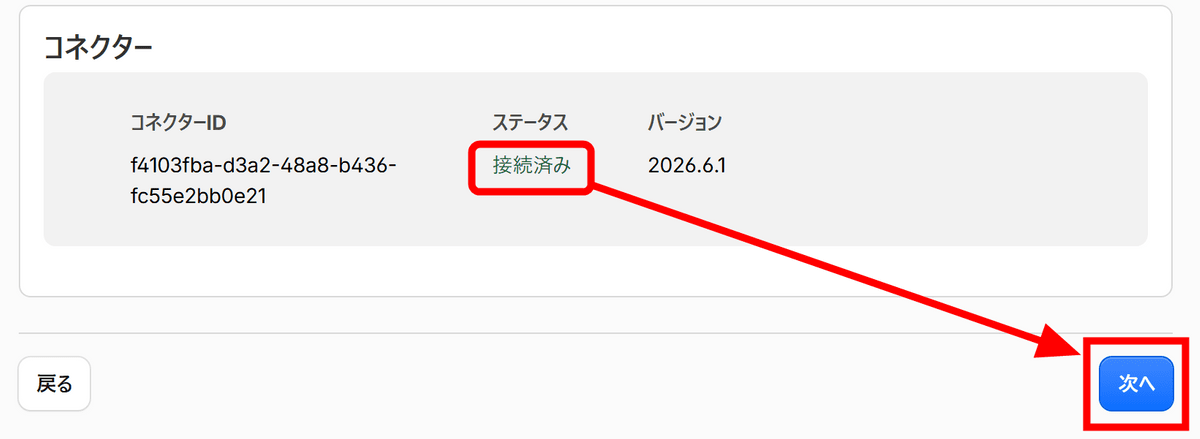
Scroll down the browser screen, and if 'Connected' is displayed in the 'Connectors' section, then it's OK. Click 'Next'.
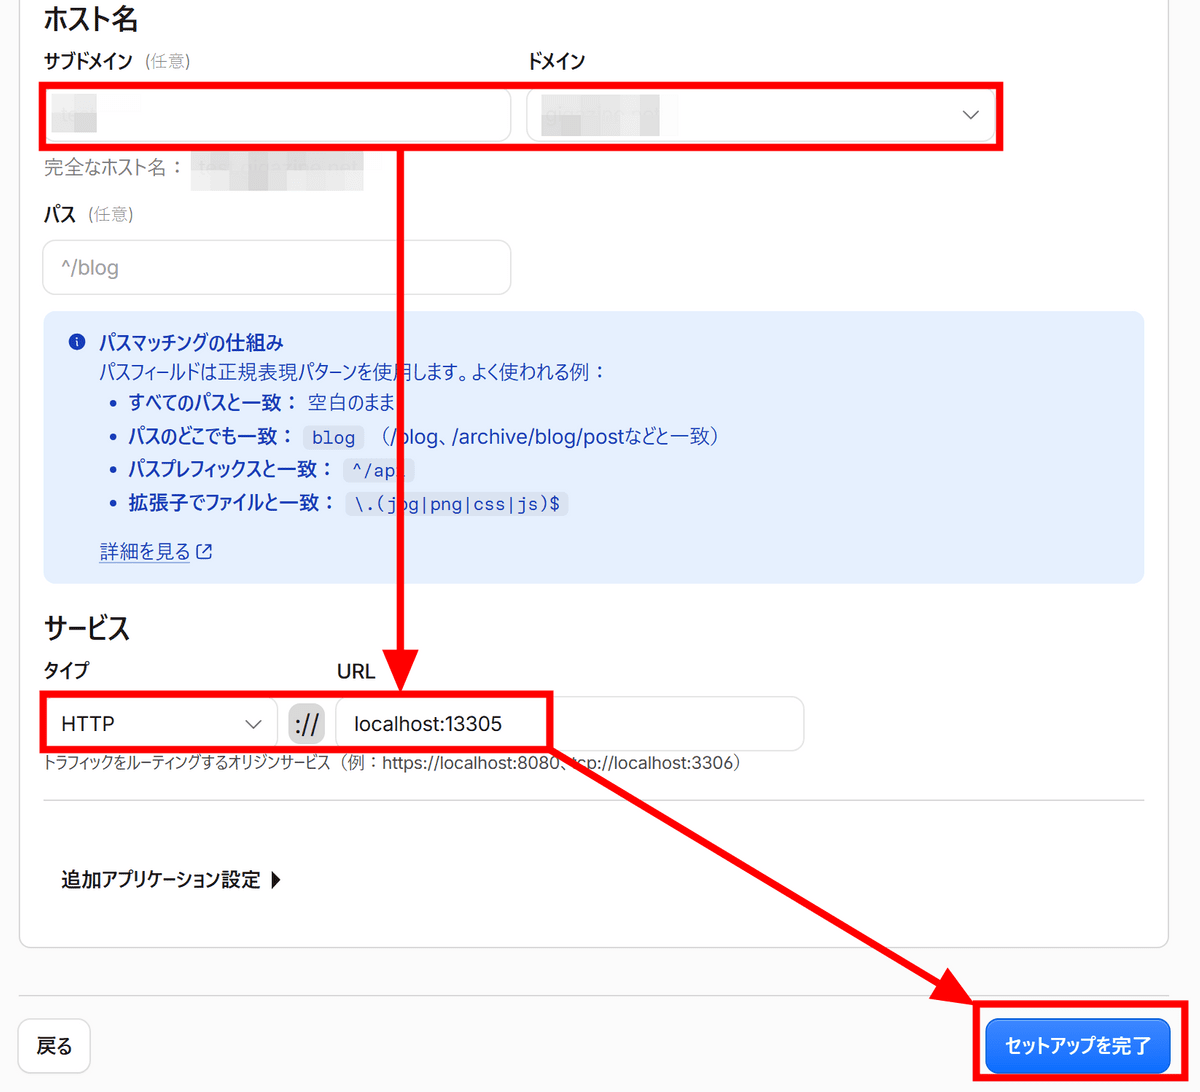
Set the hostname for external access and also set the internal address for routing. Configure it to route to the Lemonade server running at 'http://localhost:13305' and click 'Complete Setup'.
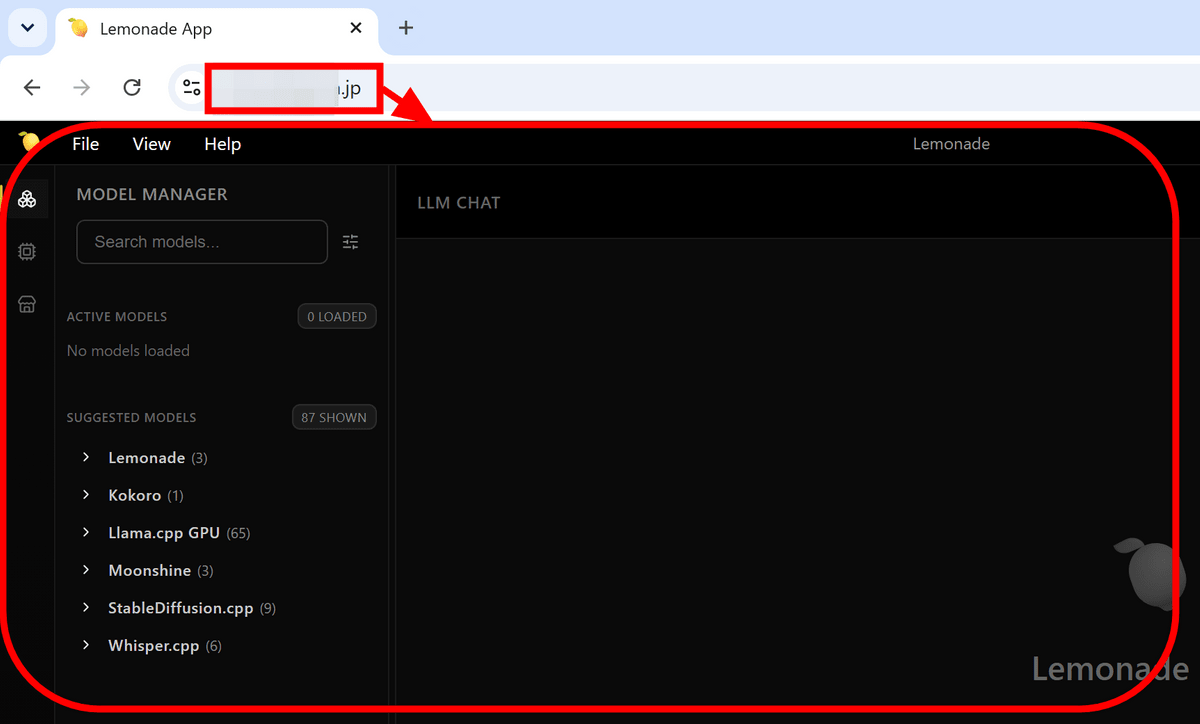
When I tried accessing it from an external source using the hostname I had just set, I was able to access the Lemonade server running locally.
As it is, anyone can access it, so next time we will set up authentication.
Related Posts:
in Software, Web Service, Review, Posted by log1d_ts