Free & KeePass Password Sync Plugin 'KP Sync for Google Drive' Review via Google Drive
KPSync for Google Drive ™ | Secure sync automation with Drive.
https://www.kpsync.org/
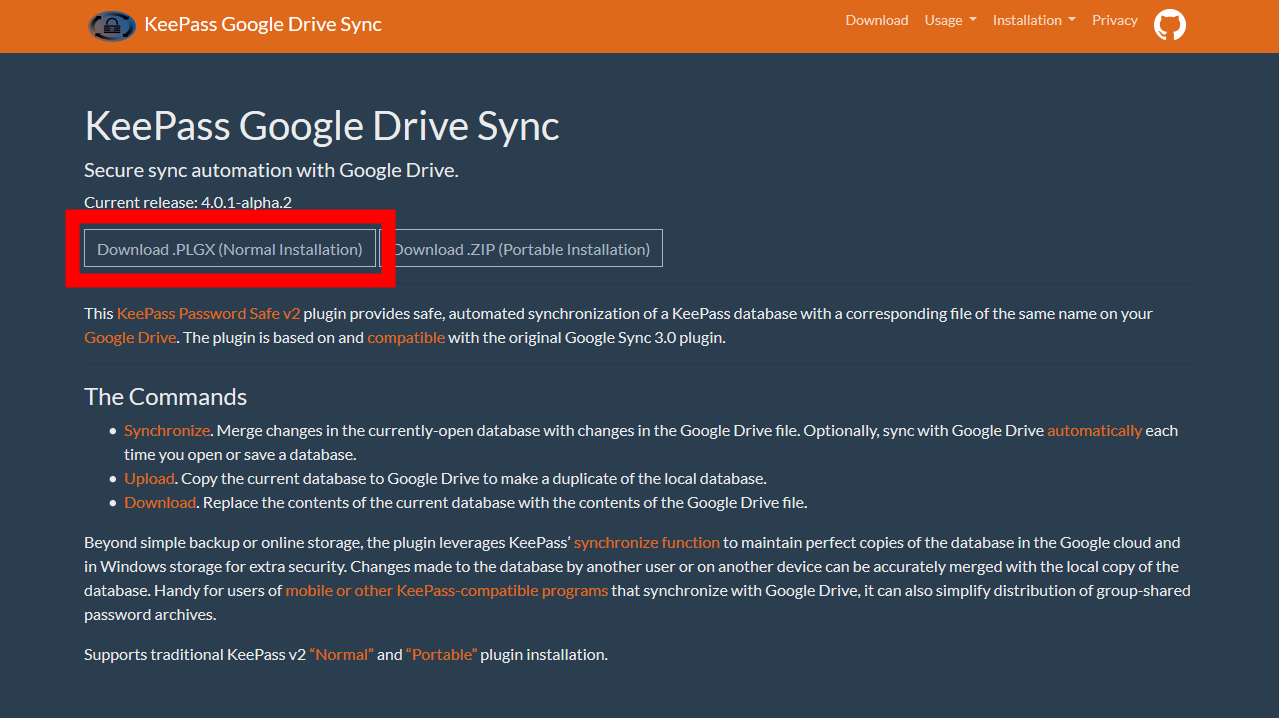
First, access the plugin download page and click 'Download .PLGX (Normal Installation)'.
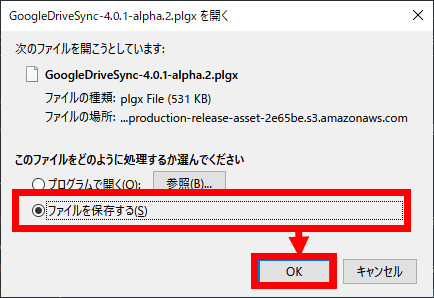
When the pop-up appears, select 'Save File' and click 'OK'.
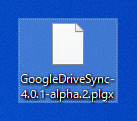
The plug-in file has been downloaded.
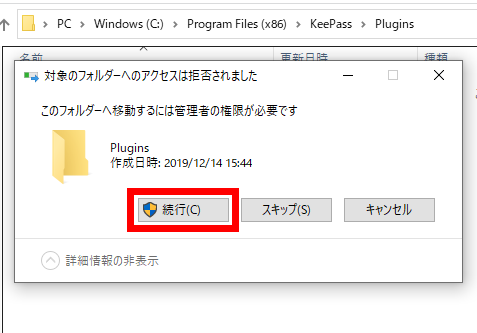
Then install the plugin. If it is the latest version of KeePass (ver2.45) at the time of article creation, if the folder at the time of installation is the default setting, open 'C: \ Program Files (x86) \ KeePass \ Plugins' ...
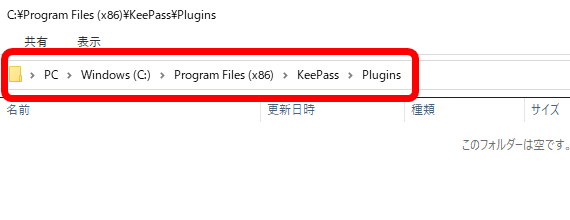
Move the file you downloaded earlier by dragging and dropping. You will be asked for administrator privileges, so click 'Continue'.
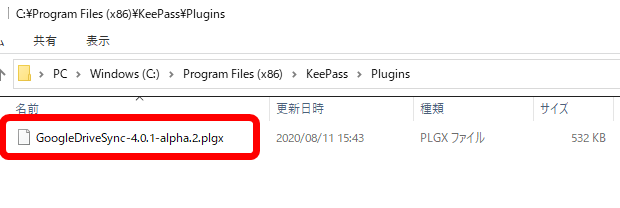
If you can place the files, the installation is complete.
Next, make the settings required for authentication with your Google account. Access the Google API dashboard from the URL below. Log in with the account you want to use for KeePass sync.
Dashboard – APIs and Services – Google API Console
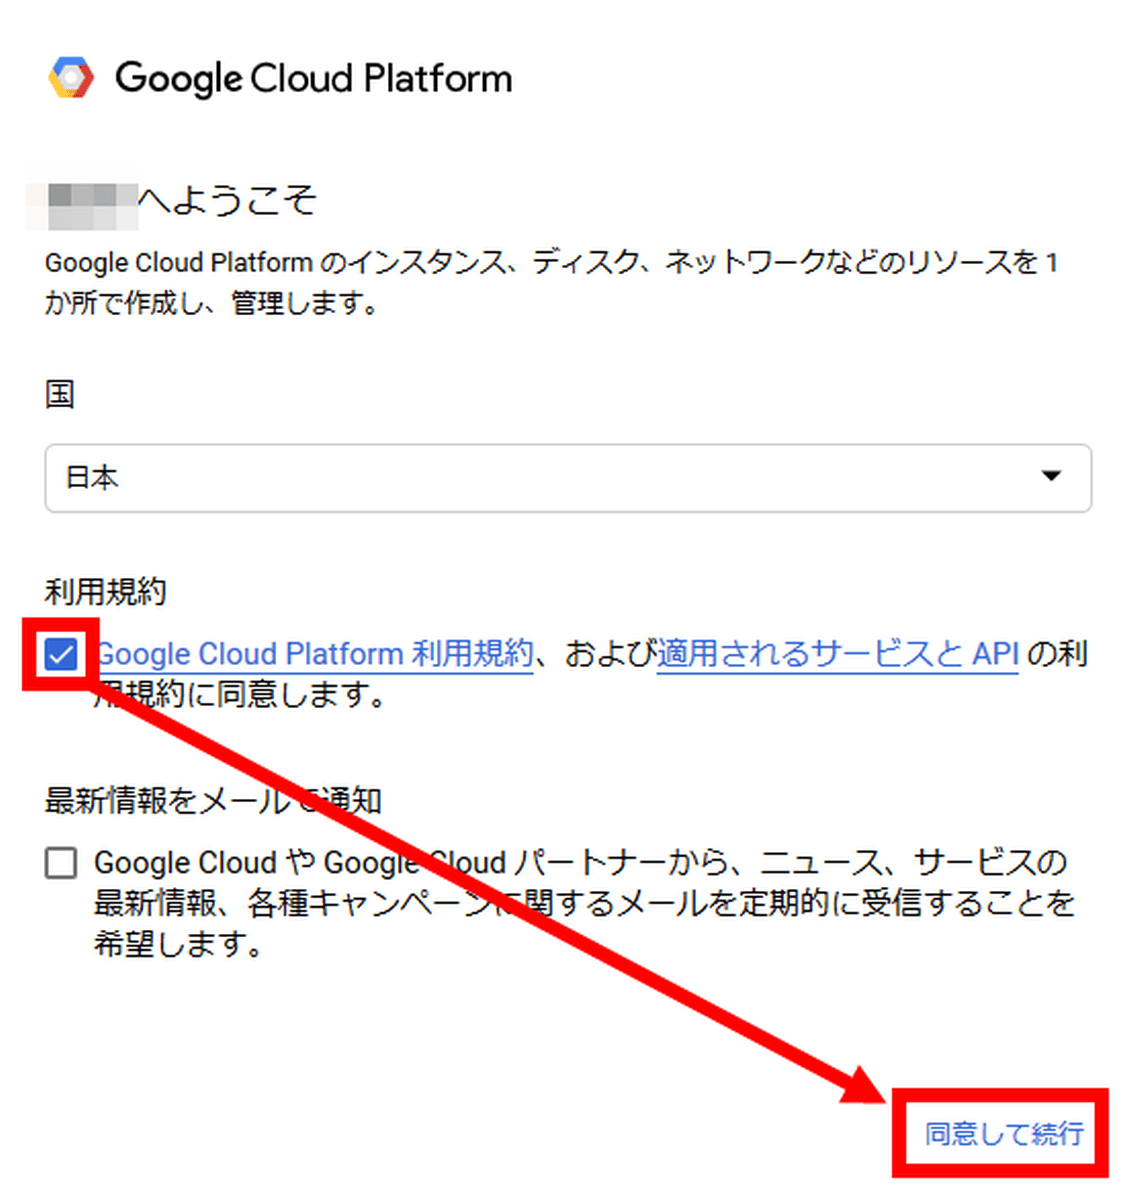
If you are logged in with an account that has never used Google Cloud Platform, the following pop-up will be displayed. Check the terms of use and click 'Agree and continue'.
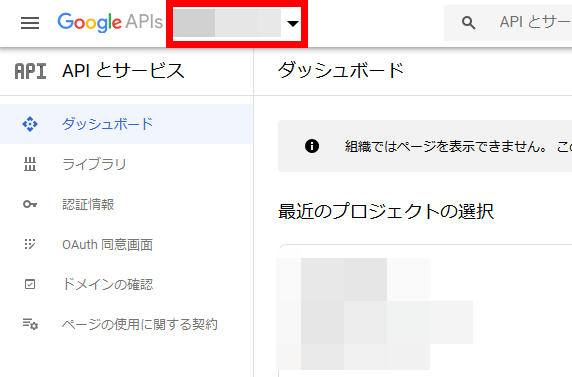
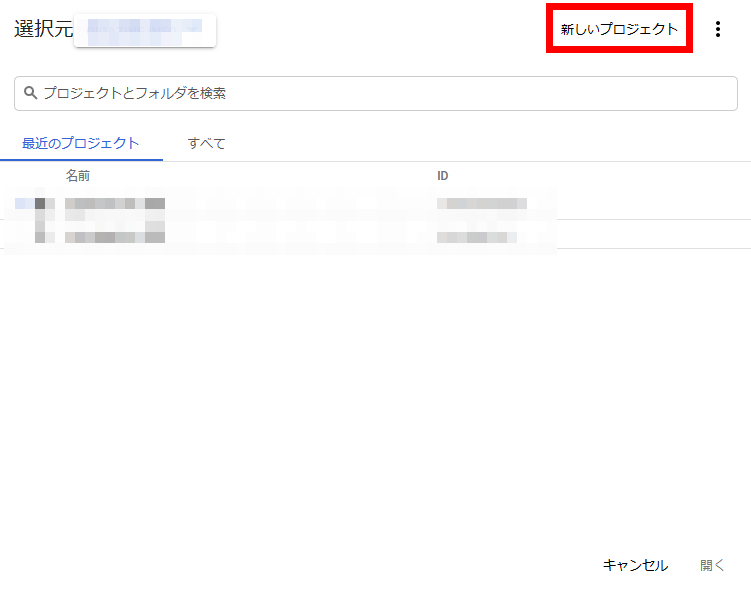
When login is completed, the dashboard will be displayed, so click the part where the organization name or project name is displayed.
Click 'New Project'.
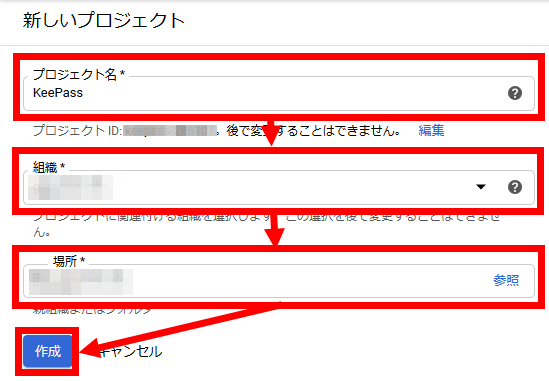
Enter an easy-to-understand name for the project name, check the automatically entered organization and location, and click 'Create'.
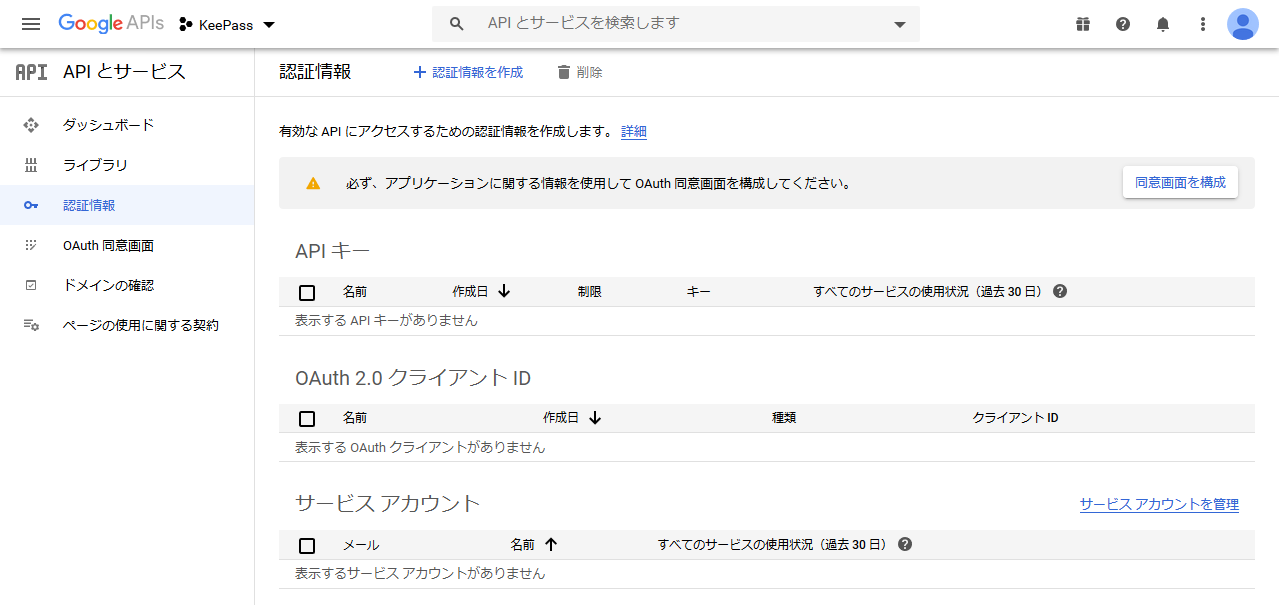
The authentication information screen is displayed.
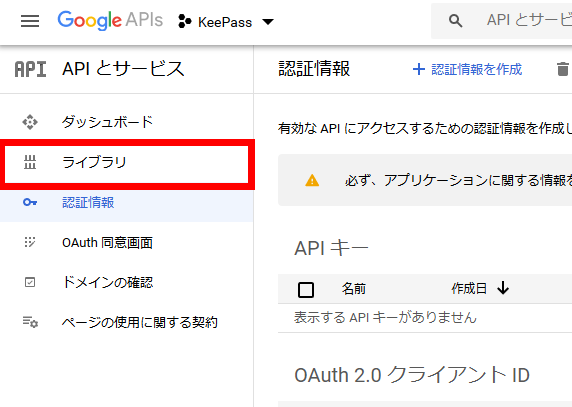
Then click 'Library' on the left to enable the Google Drive API.
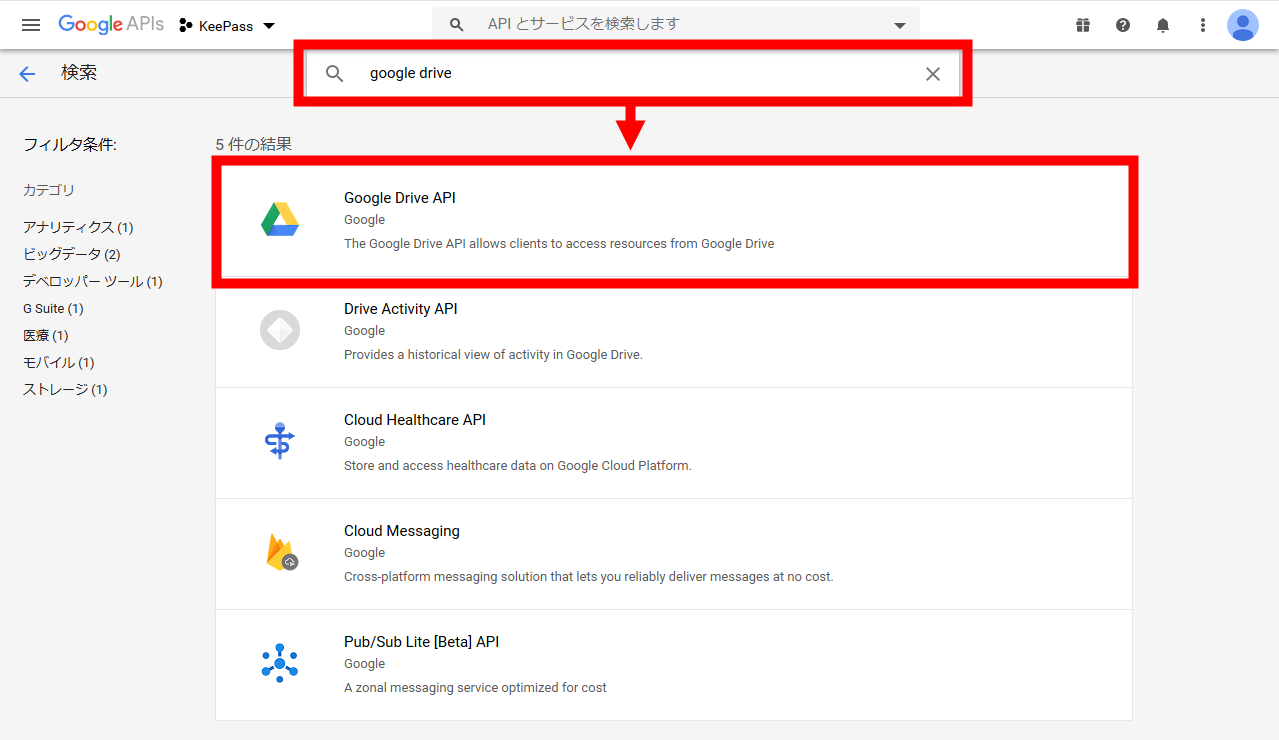
If you enter 'google drive' in the search window, 'Google Drive API' will be hit, so click it.
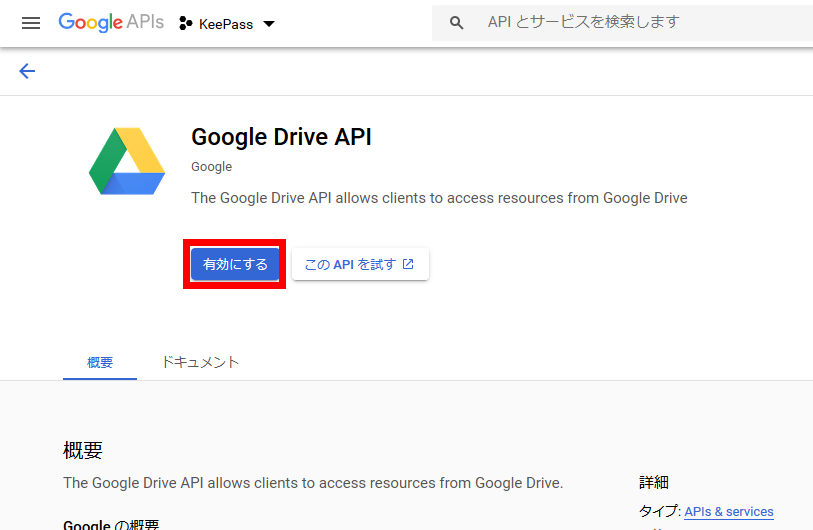
Click the 'Enable' button. The Google Drive API is now enabled.
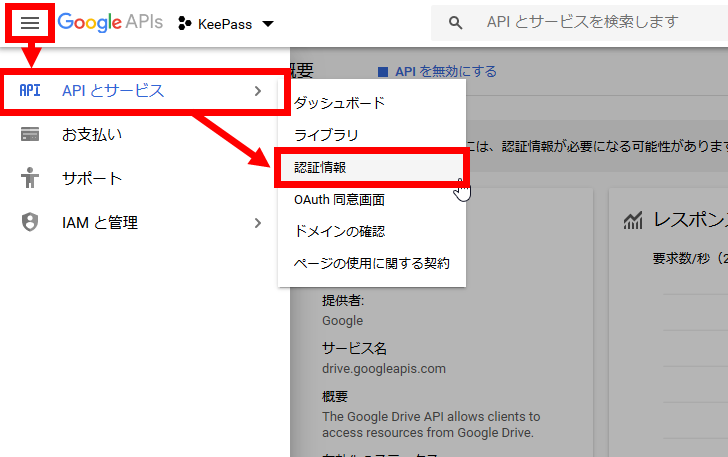
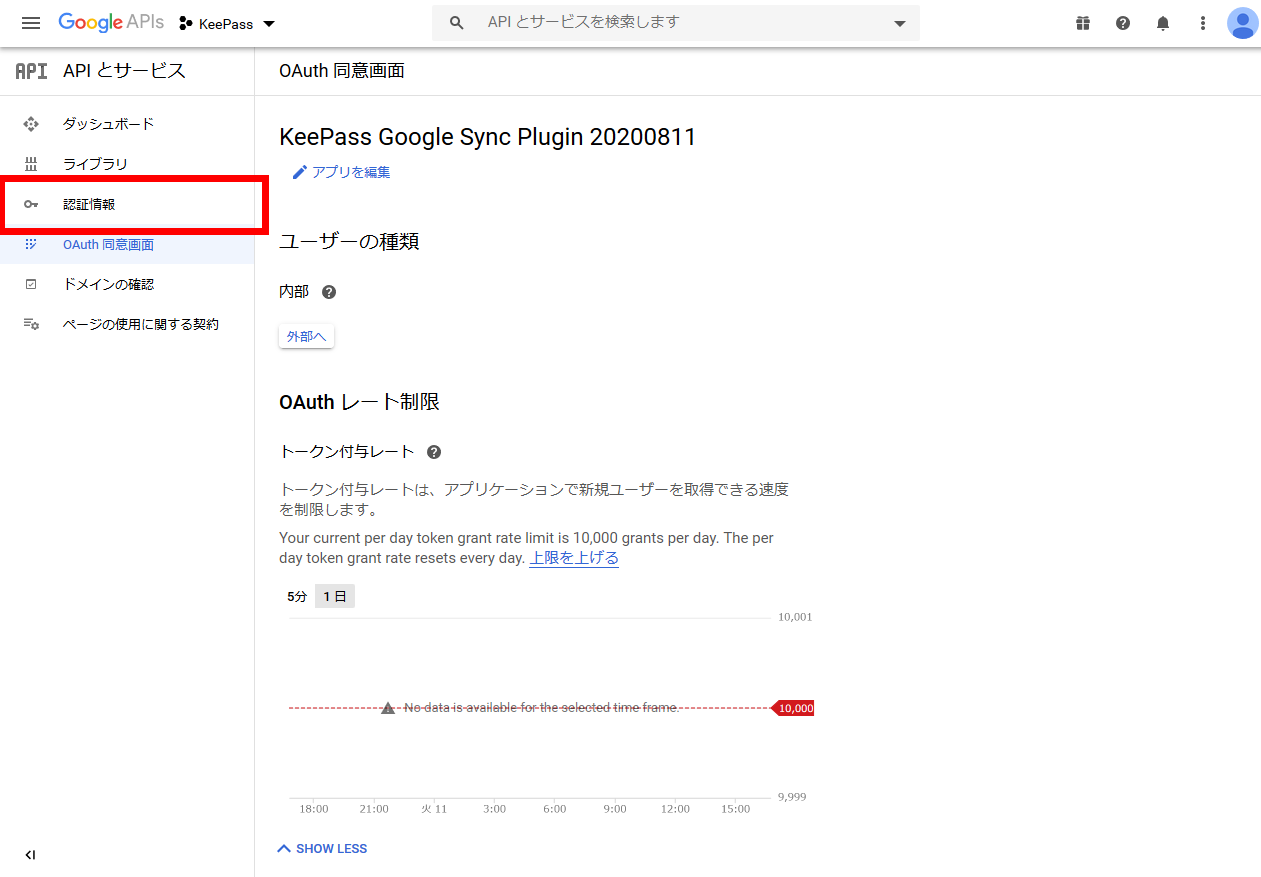
We will continue to make settings for authentication. Click 'Authentication Information' from 'APIs and Services'.
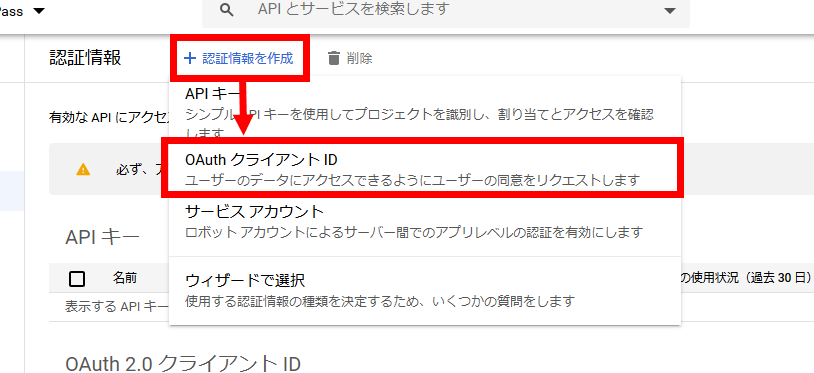
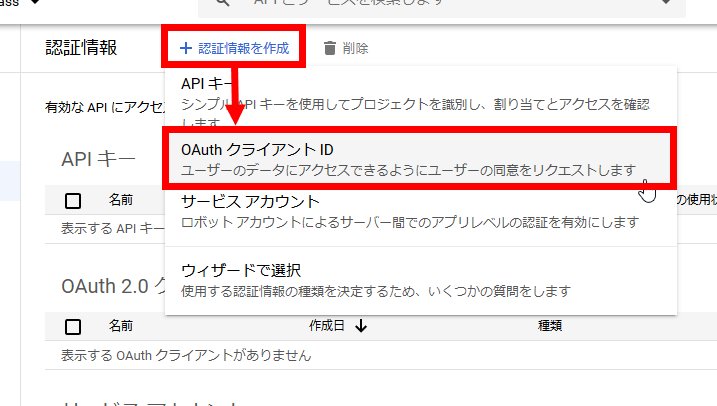
Click 'Create Credentials' and then select 'OAuth Client ID'.
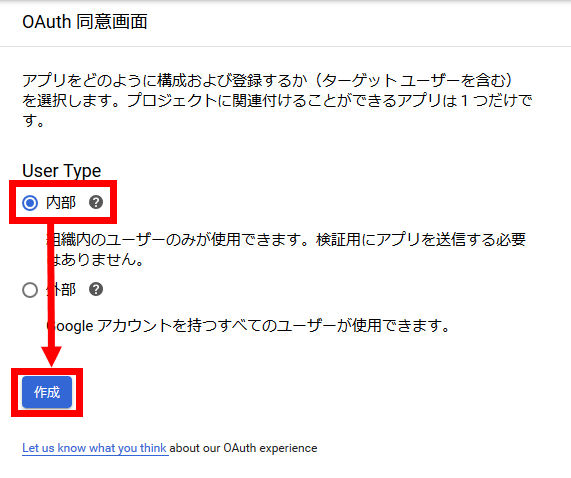
Click 'Set Authentication Screen'.

If you select 'Internal' and click 'Create' ...
The setting screen related to OAuth is displayed.
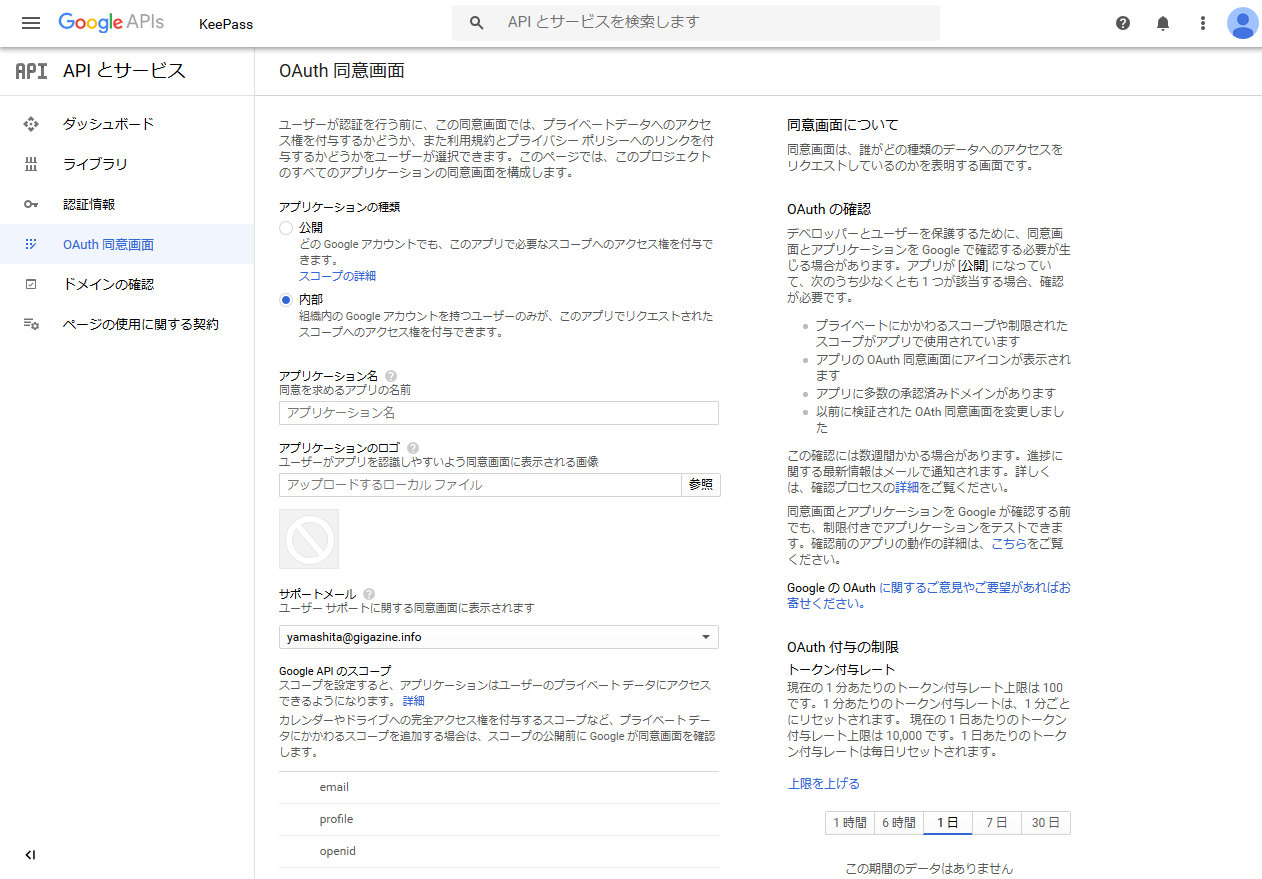
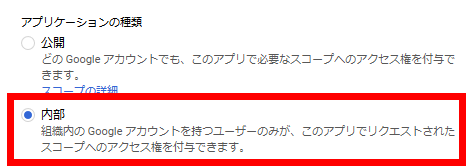
The application type can be 'internal'. This setting is automatically selected.
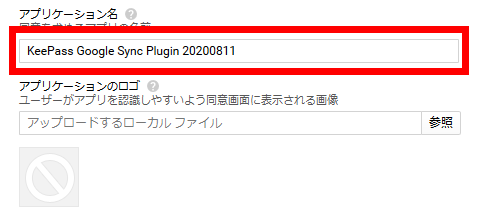
For the application name, enter a name that makes it easy to understand the application to be authenticated and the date and time used for authentication.
The support email is automatically entered with the email address of your Google account, so you can leave it as it is.

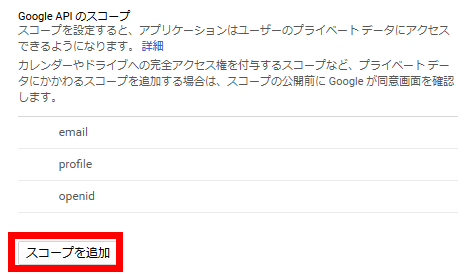
In the scope of Google API, set the range of permissions allowed for this authentication. 'Email' 'profile' 'openid' is set from the beginning, but since this alone is insufficient authority, click 'Add scope'.
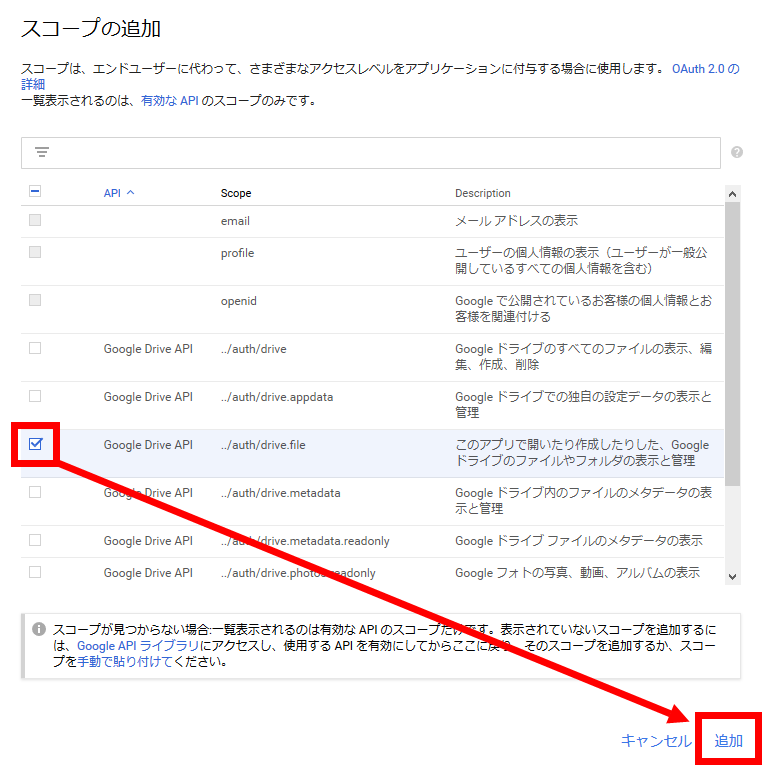
Check '../auth/drive.file' in 'Google Drive API' and click 'Add'.
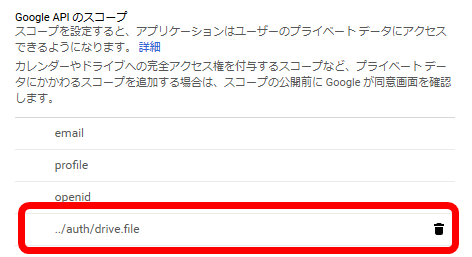
It is OK if you can confirm that '../auth/drive.file' is added to the scope.
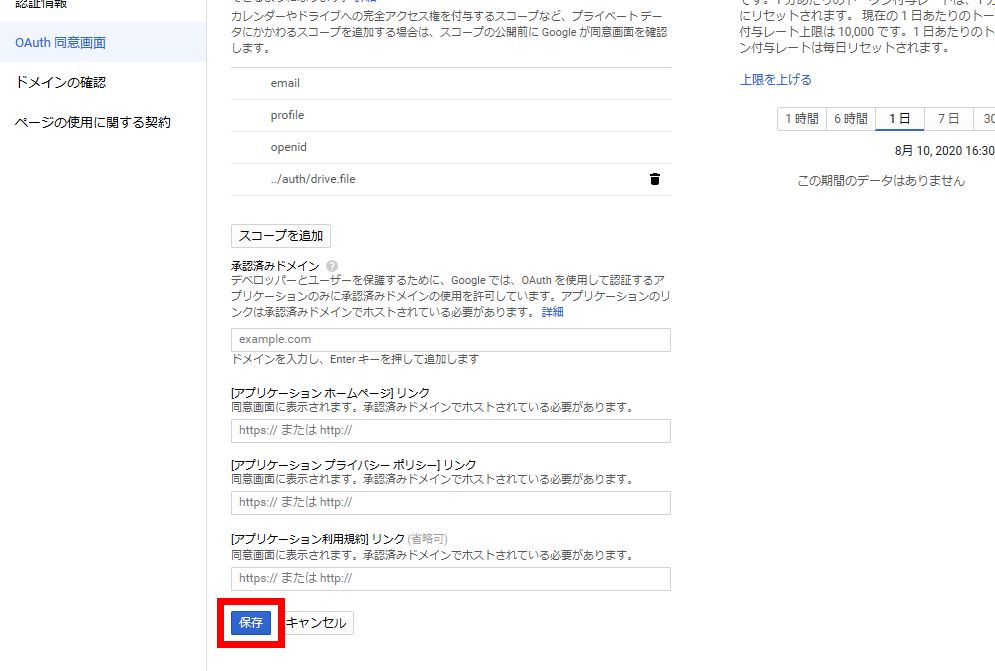
The rest of the settings can be left blank, so click 'Save'.
A consent screen has been created to use for OAuth authentication. Then click 'Credentials'.
From Create Credentials, click OAuth Client ID again.
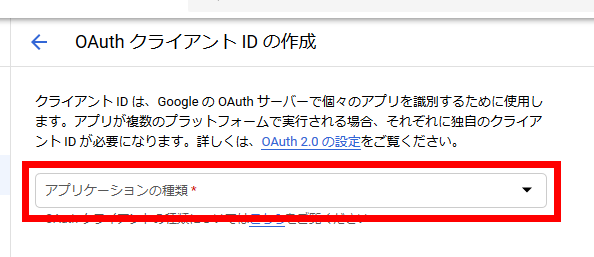
The OAuth client ID creation screen will be displayed, so click 'Application type'.
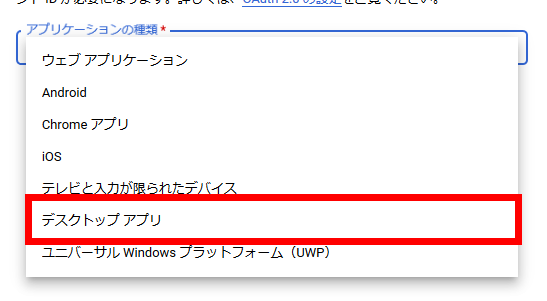
Select 'Desktop App' as the application type.
Click 'Create' ...
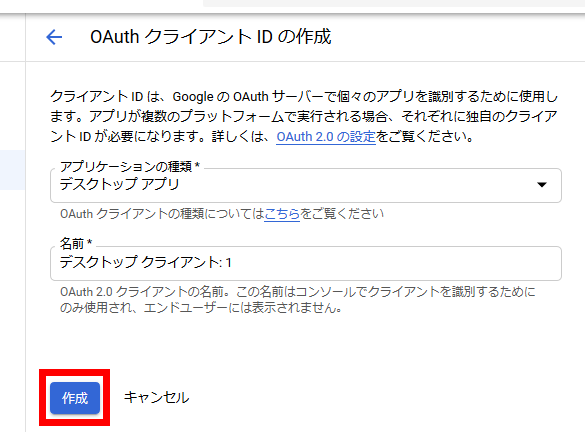
The OAuth client ID and client secret have been created. Make a note of this ID and secret as you will use them later.

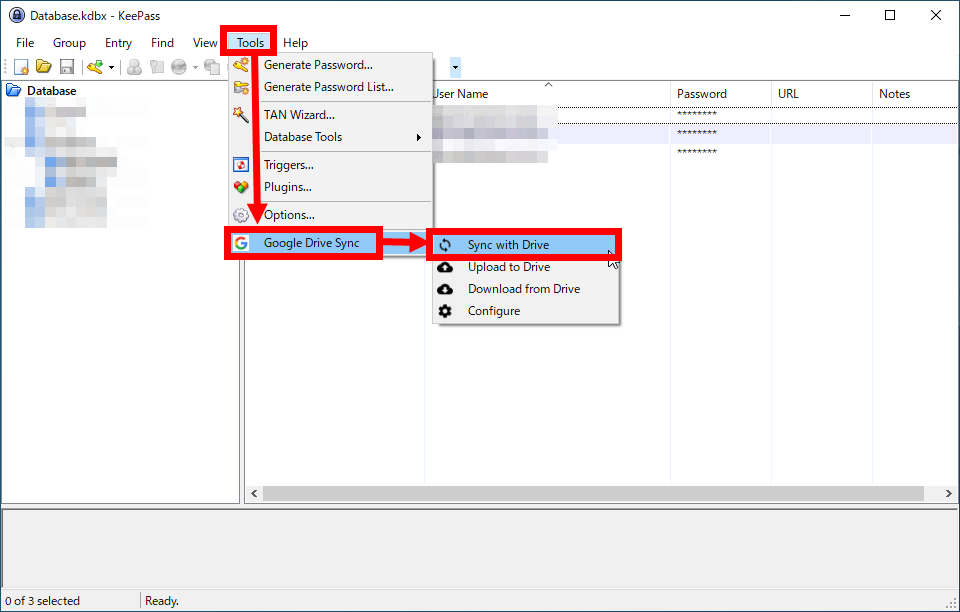
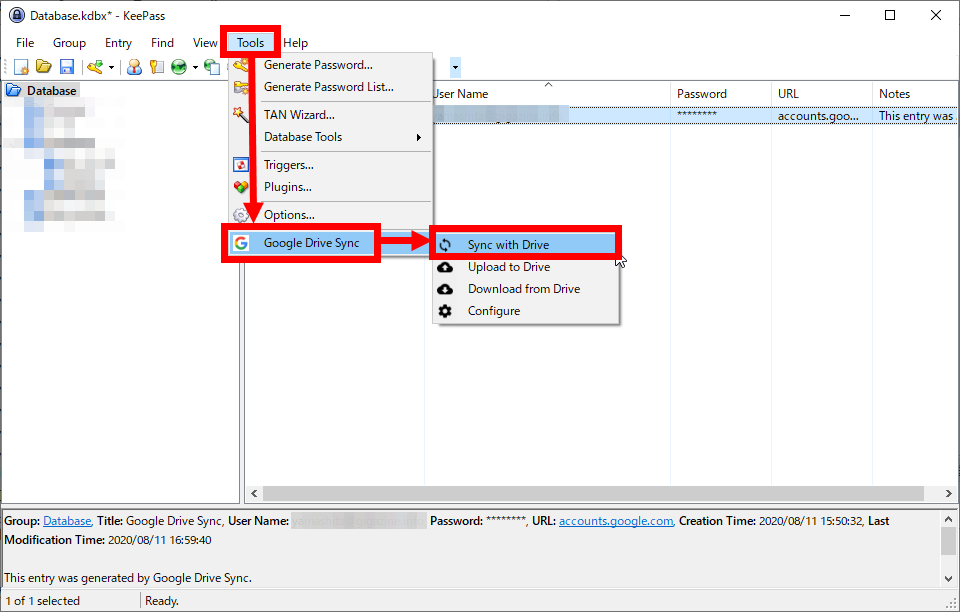
Start KeePass, go to 'Google Drive Sync' from 'Tools' and click 'Sync with Drive'.
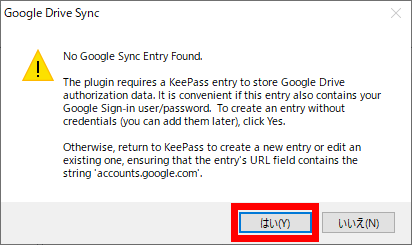
A pop-up indicating that the Google Drive Sync settings have not been completed will be displayed, so click 'Yes'.
Since the setting screen is displayed, uncheck 'Use built-in OAuth 2.0 Client ID', enter the client ID and client secret, and click 'OK'.

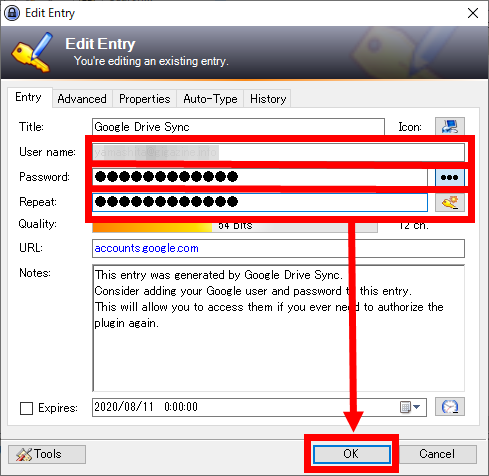
When you click 'Database', an entry for Google Drive Sync is automatically created, so click it.

Enter the Google account email address used for synchronization as the user name and the Google account password as the password, and click 'OK'.
Go to 'Google Drive Sync' from 'Tools' again and click 'Sync with Drive'.
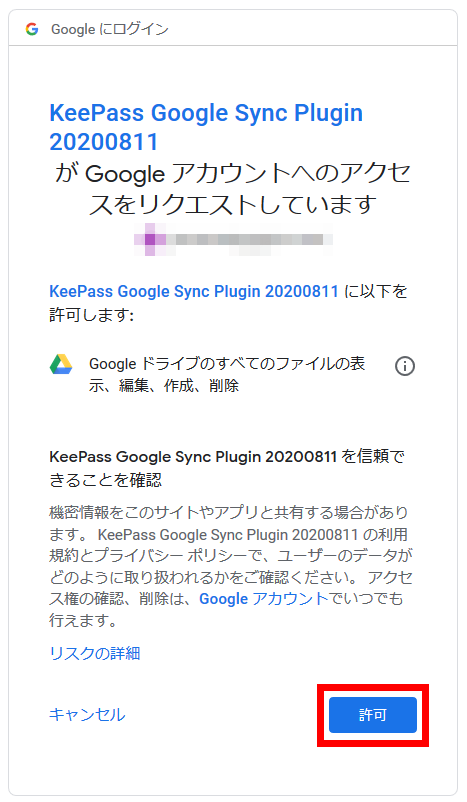
The browser will start and you will be asked to grant permission, so click 'Allow'. This completes the synchronization.
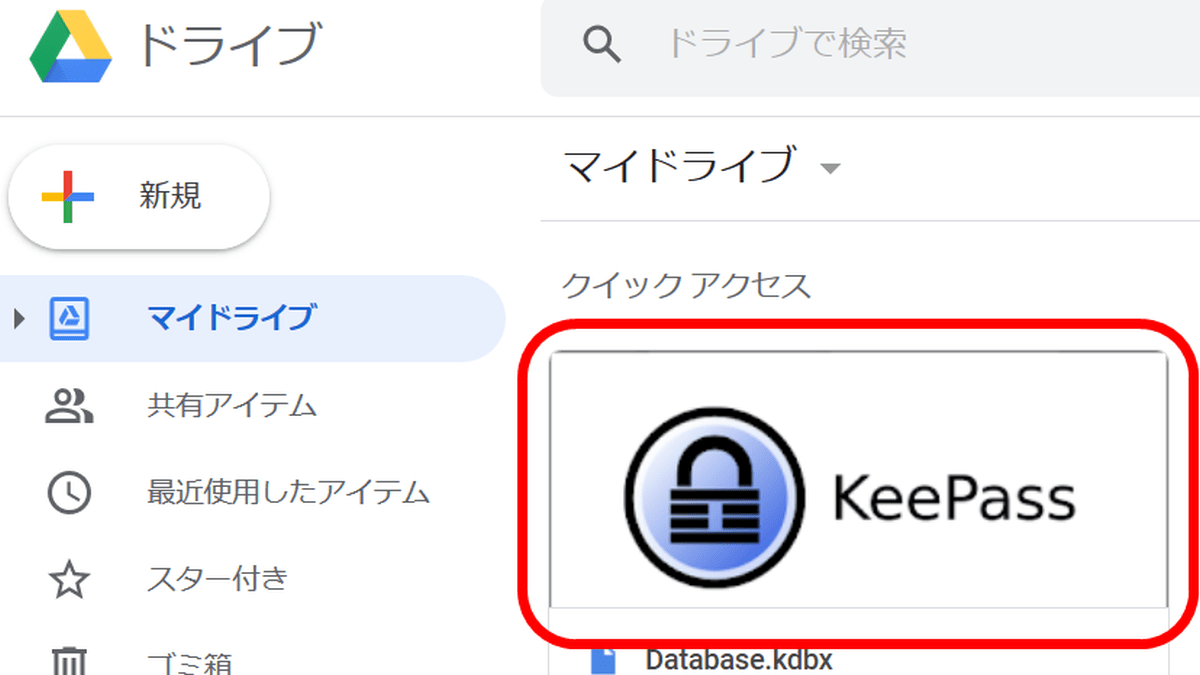
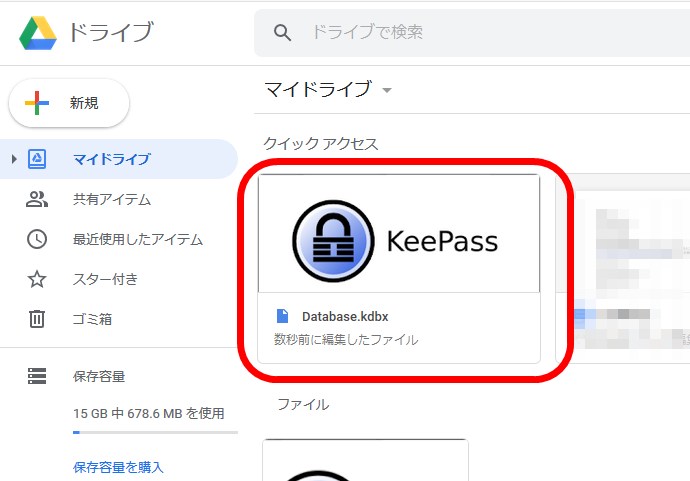
When I accessed Google Drive for confirmation, the KeePass database files were synced.
Related Posts: