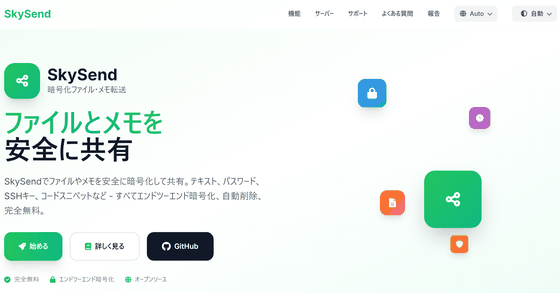
SkySend is a free file and memo sharing application that is available in Japanese. It allows for automatic deletion based on expiration dates and maximum download counts, supports end-to-end encryption, and is open-source and self-hostable.
When you share files and confidential information in the cloud, the data usually remains on the server even after it's sent. SkySend is an open-source tool that completes encryption within the browser, automatically deletes data when it reaches its expiration date or maximum download limit, has a Japanese UI, is free to use without an account, and supports self-hosting.
SkySend | Encrypted File & Note Sharing
Skyfay/SkySend: Minimalist, end-to-end encrypted, self-hostable file and note sharing. Zero-knowledge server - files and notes are encrypted in the browser before upload. No accounts, no telemetry, built for speed and security.
◆ How end-to-end encryption works
Zero-knowledge encryption
Before being sent to the server, the data is encrypted using the Web Crypto API within the browser. This encrypts not only the file itself but also all information such as the file name and file size, so only the encrypted data is sent to the server.
◆Encryption keys are managed using URL fragments
The decryption key is written in the fragment identifier after the # in the shared URL, and is not sent to the server in a normal HTTP request. Therefore, the design ensures that the decryption key is not recorded in the server's access logs.
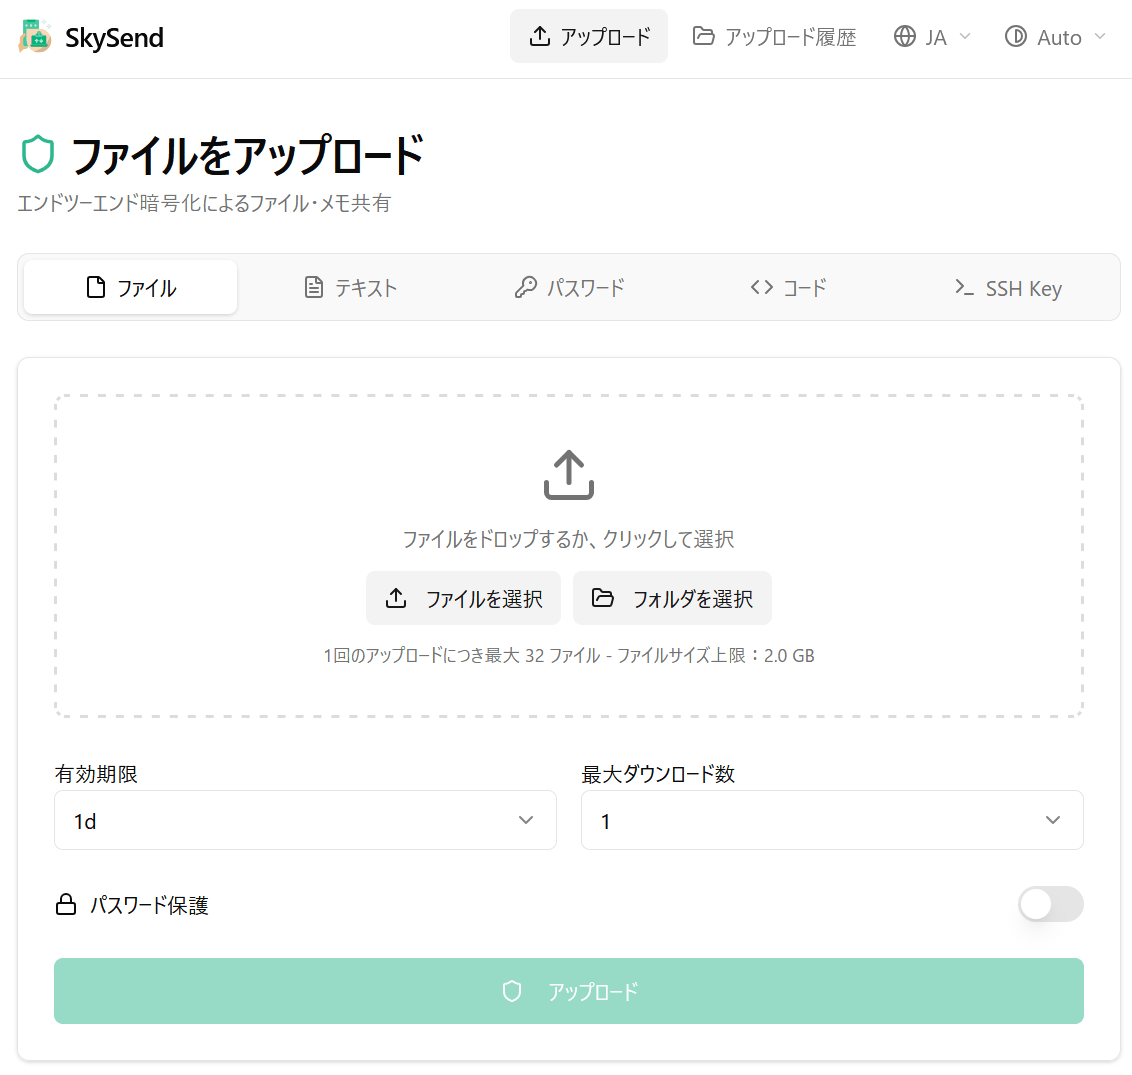
◆ How to use SkySend
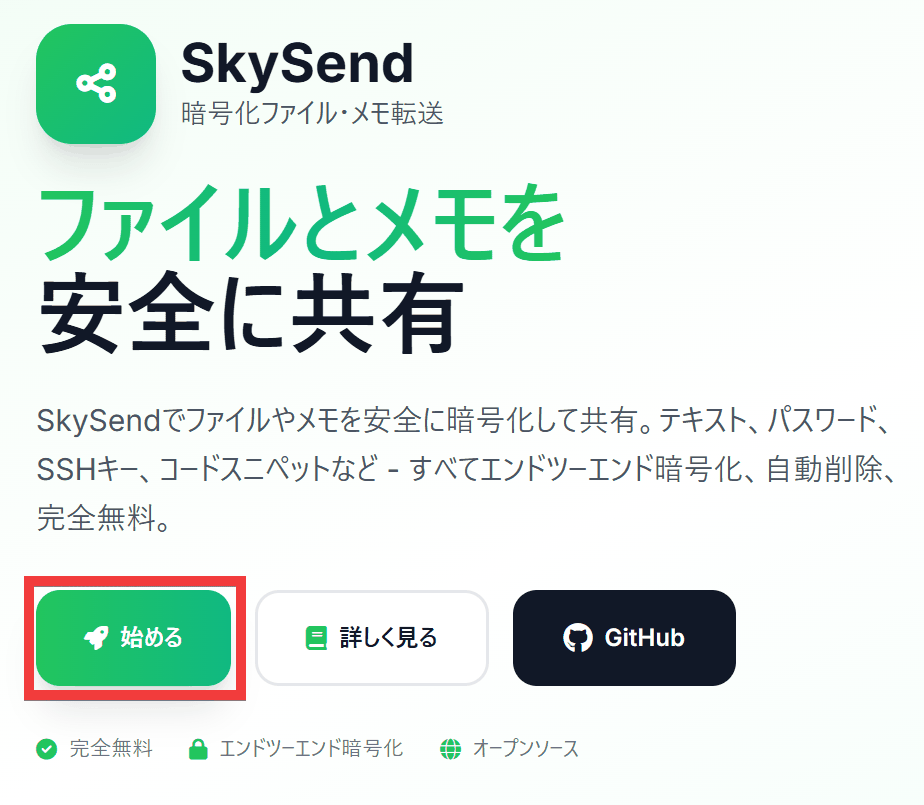
Access the official website and click 'Get Started'.
No account creation is required, and a simple UI is displayed in the language set in your browser.
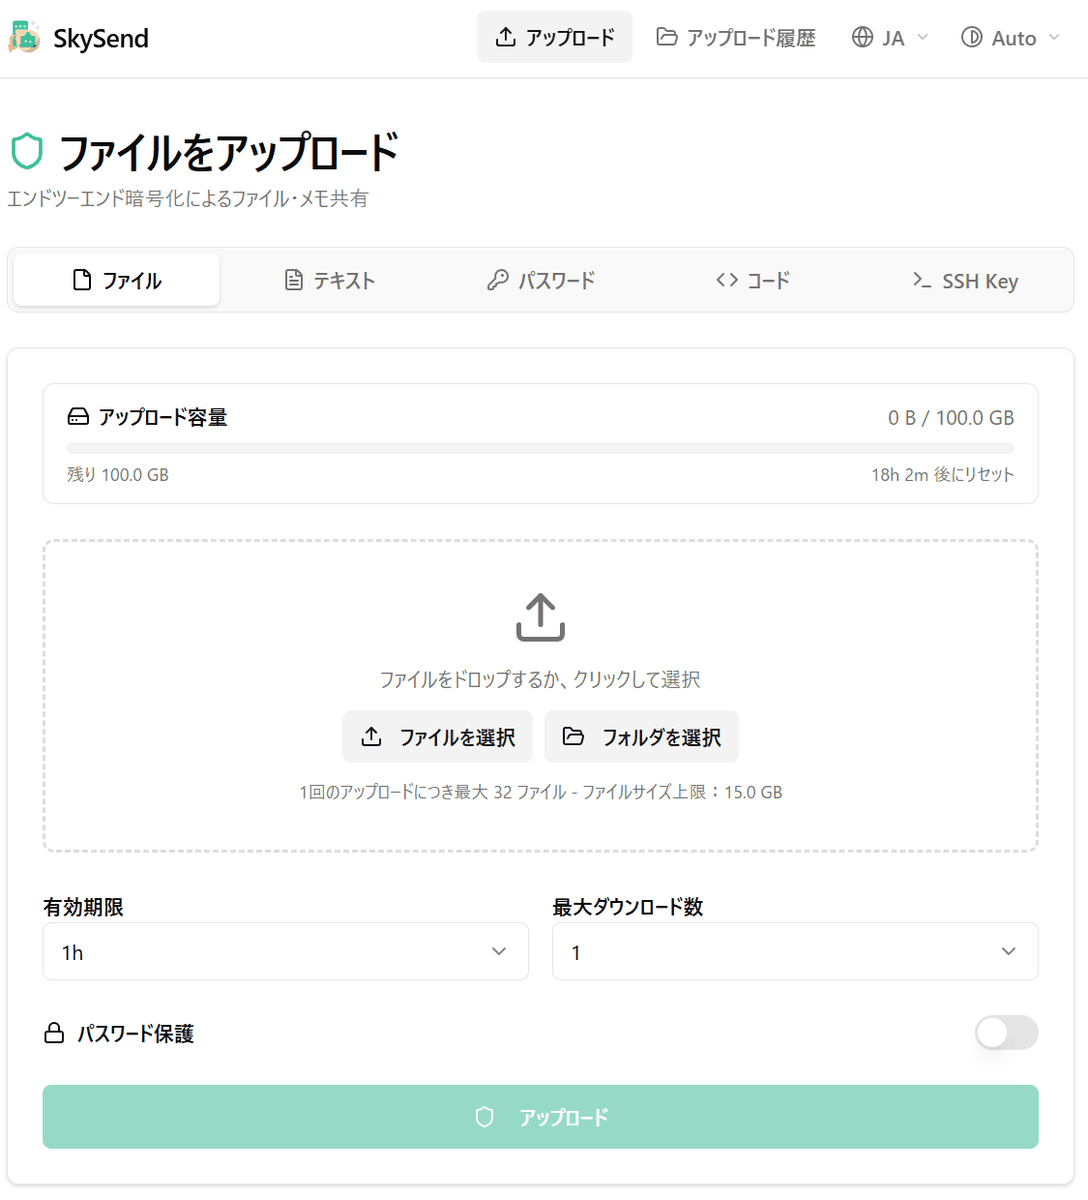
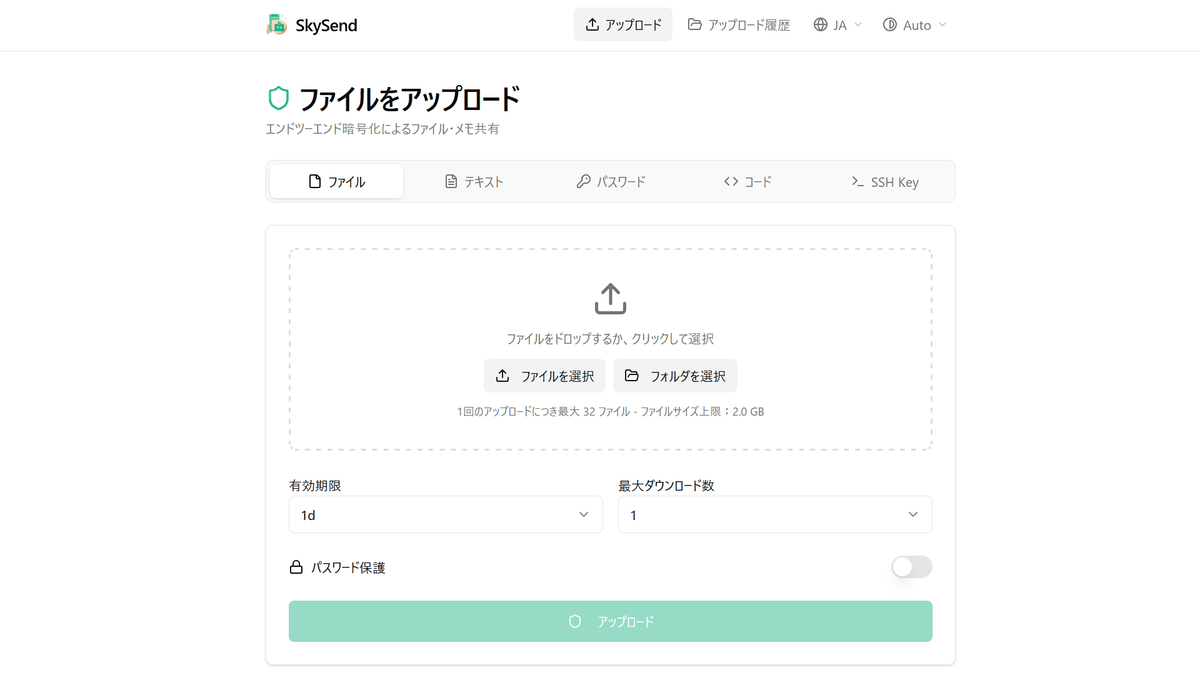
To send a file, select the file or drop it into the drop area.
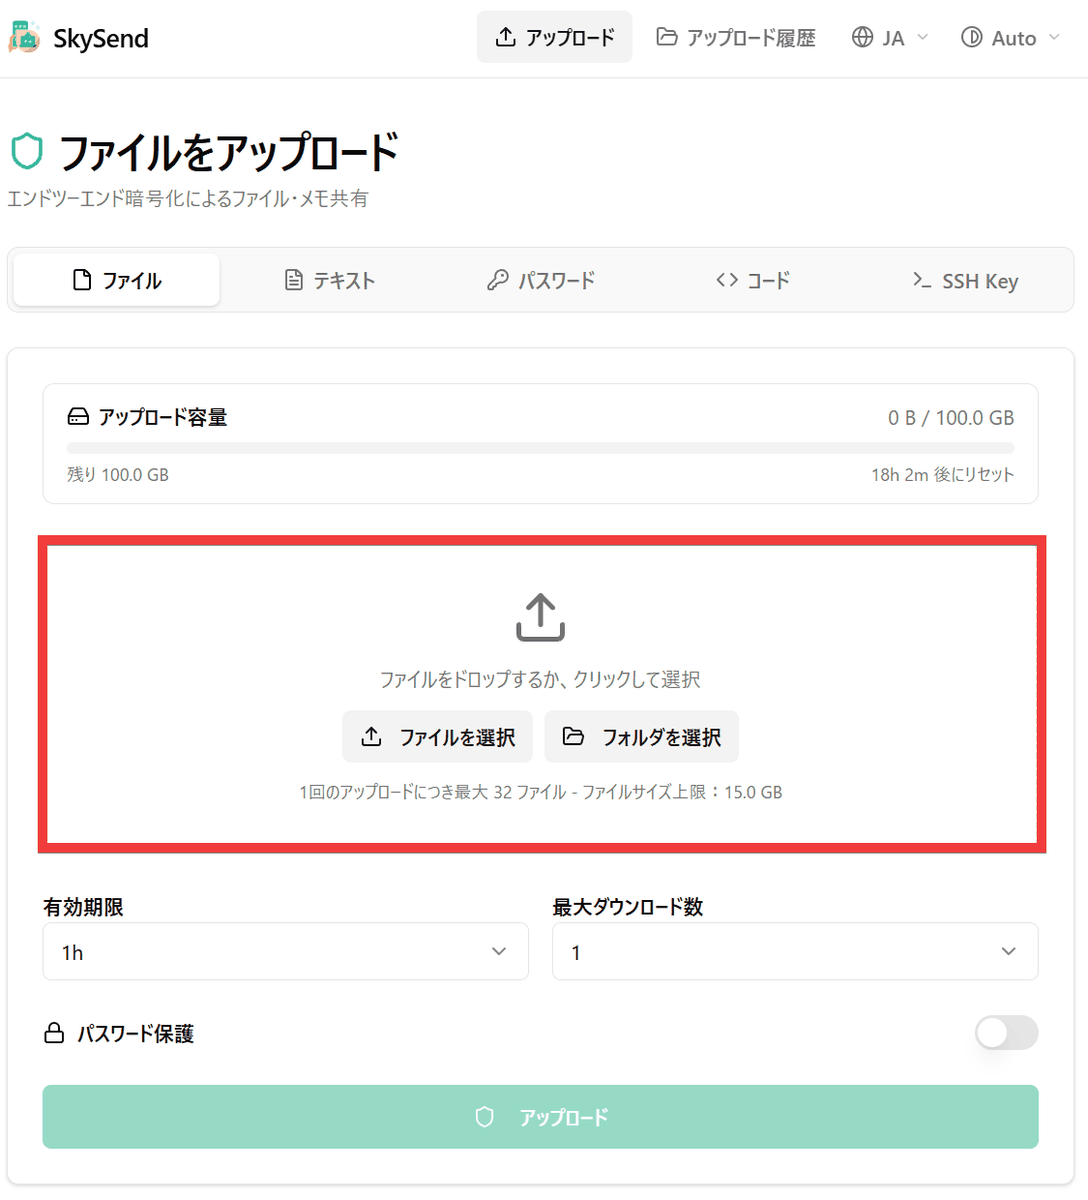
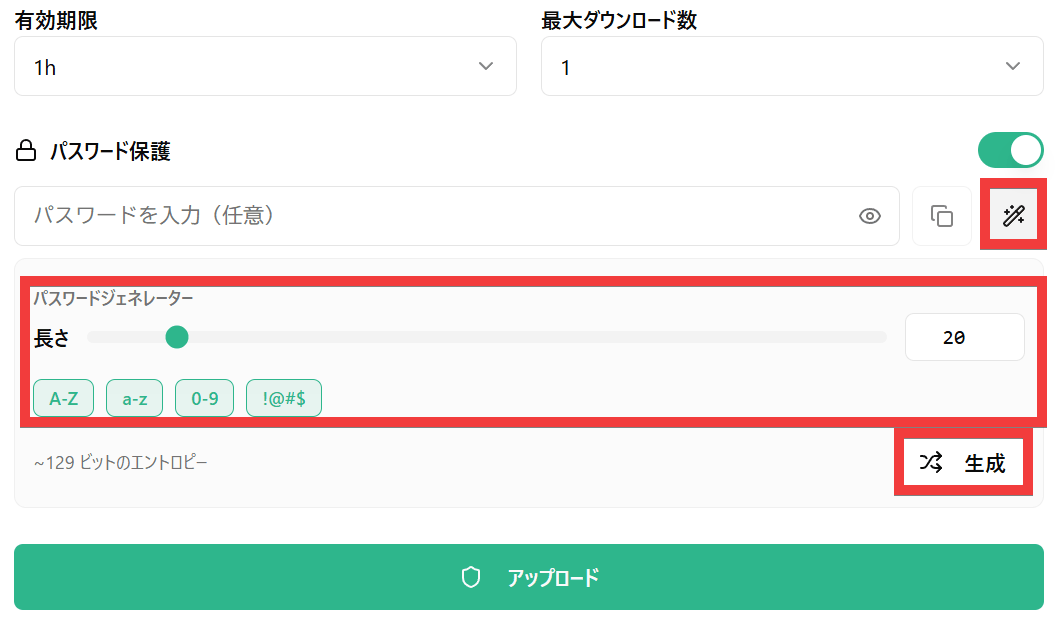
Select your desired expiration date in 'Expiration Date' and your desired number of downloads in 'Maximum Downloads,' then click the 'Password Protected' toggle.

Click the 'Auto-generate' button at the far right of the password input field, select the 'length' and 'characters to include in the password,' and then click the 'Generate' button.
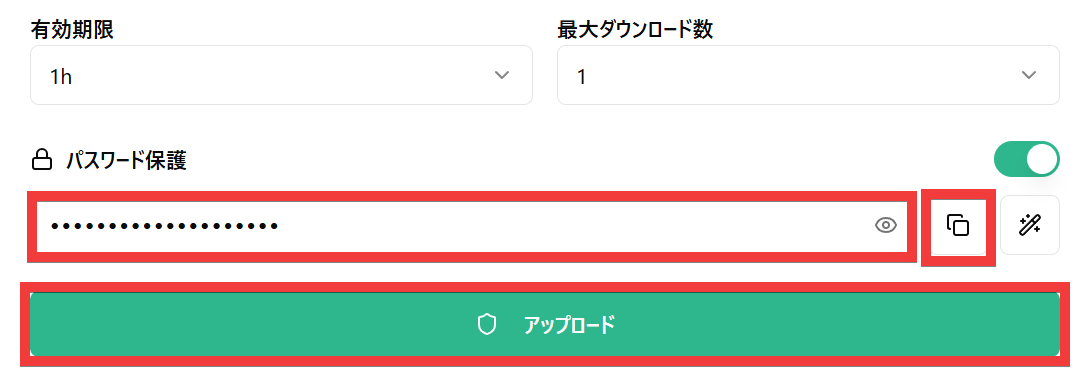
Once the password is generated, click the 'Copy' button to the right of the display field to copy the password, write it down in a notepad or similar, and then click the 'Upload' button.
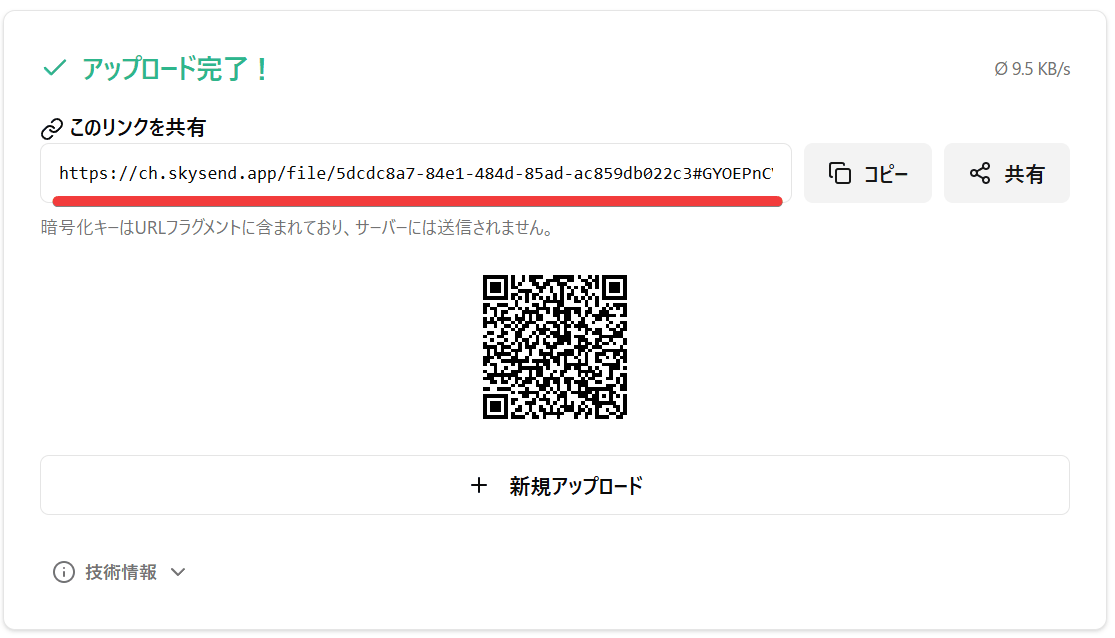
A sharing link will be generated, so you can share the URL and password with the other person by copying it, scanning the QR code, or using an app with a sharing function.
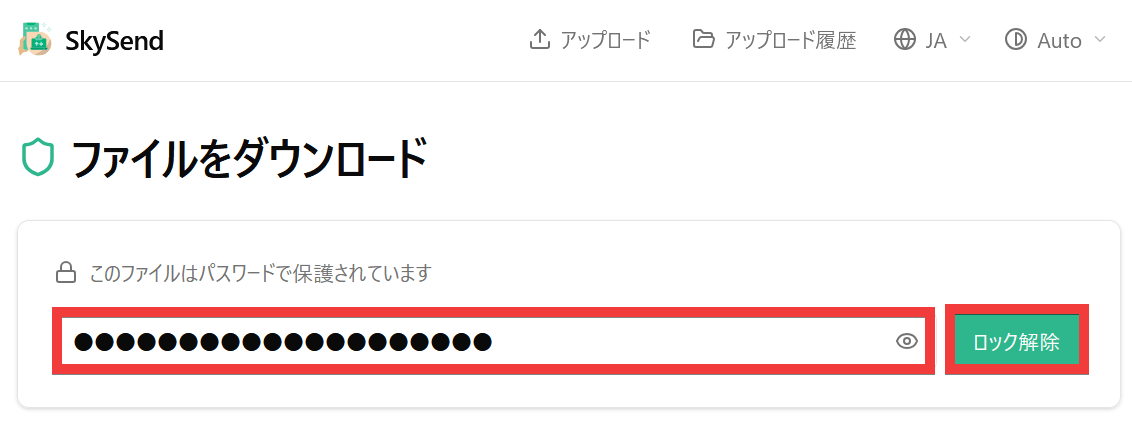
To receive the file, access the provided URL, enter the password, and click 'Unlock'.
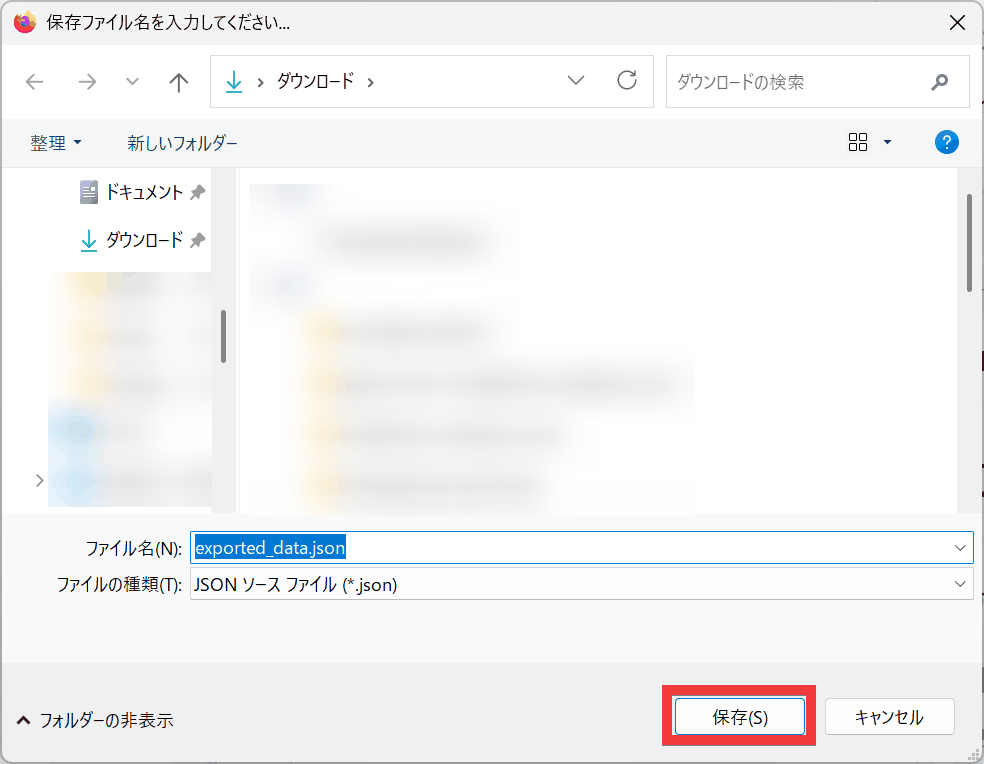
A save dialog box will appear, so specify the save location and click 'Save'.
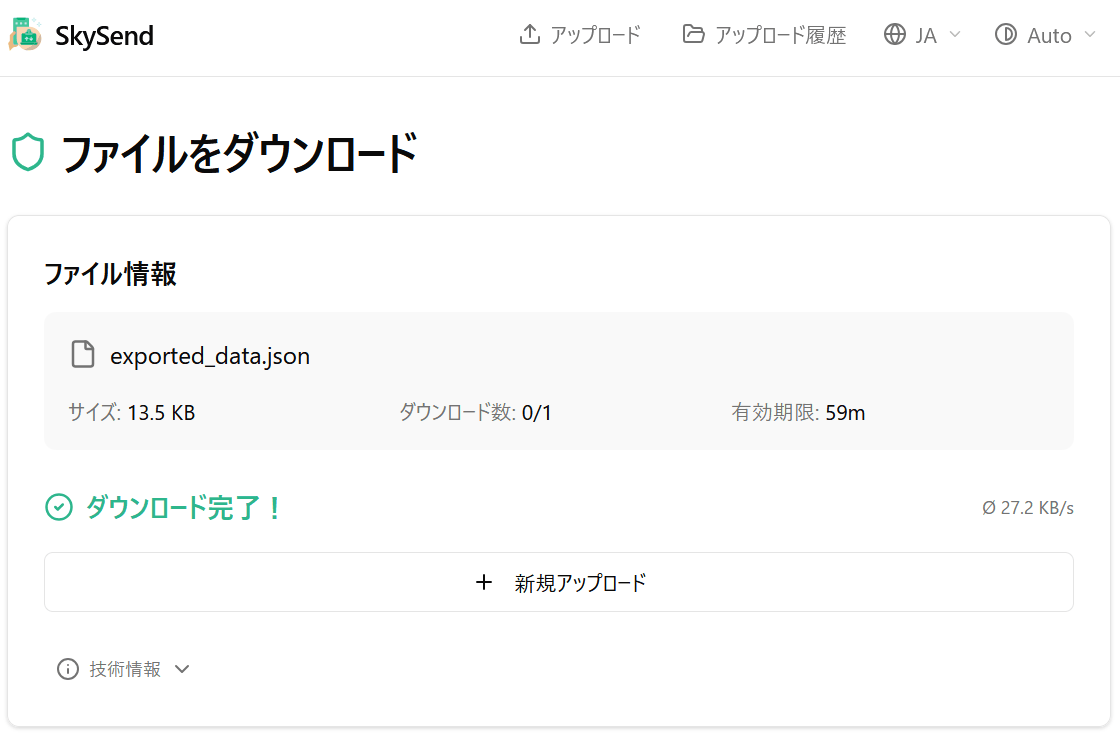
The file will be downloaded.
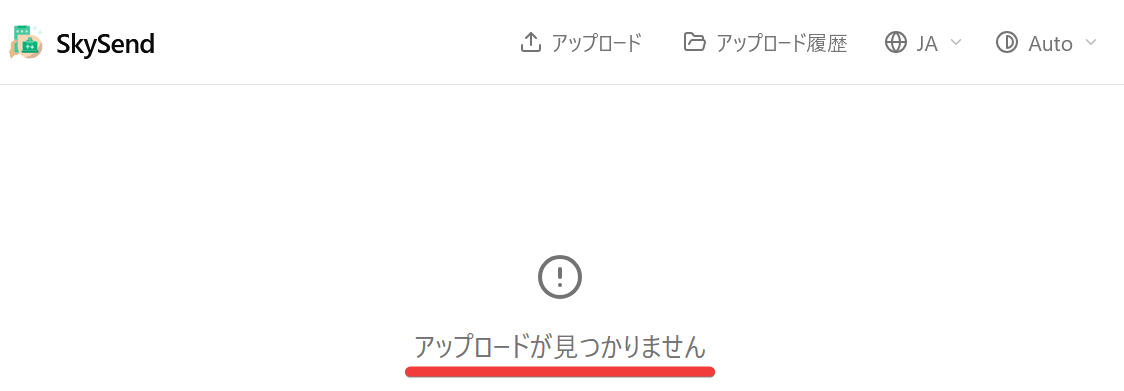
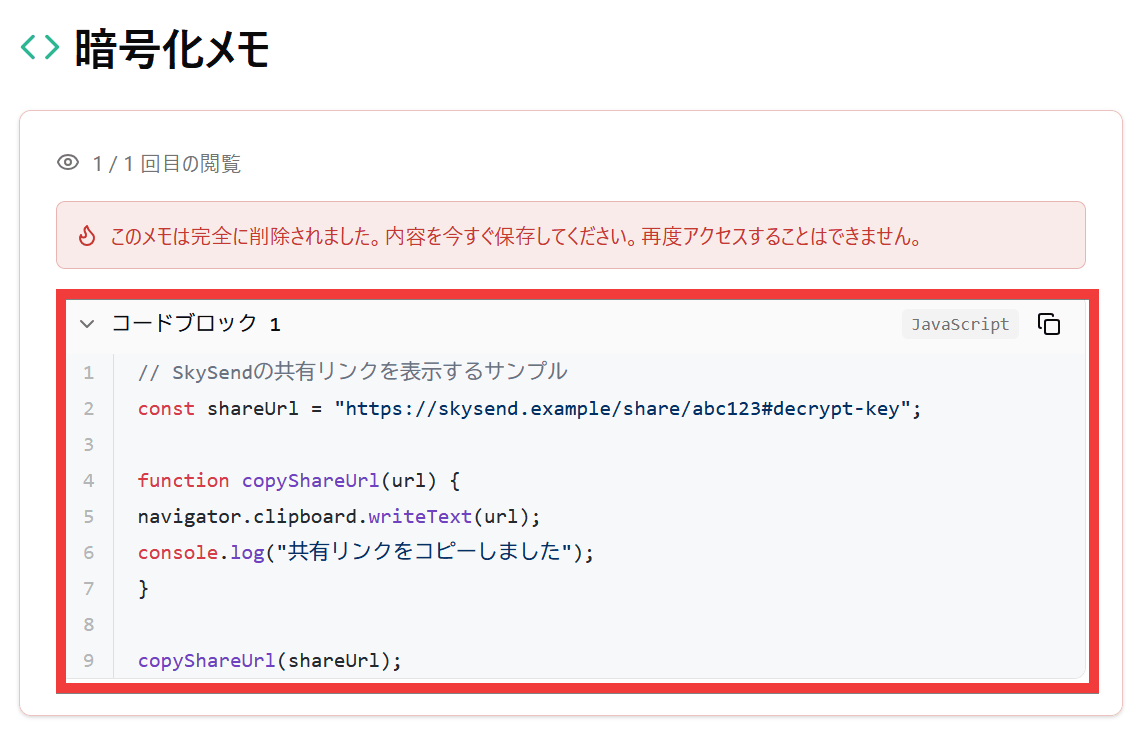
If you create a shared link that is valid only once, accessing the same link after downloading will result in an 'Upload not found' message, rendering it unusable.
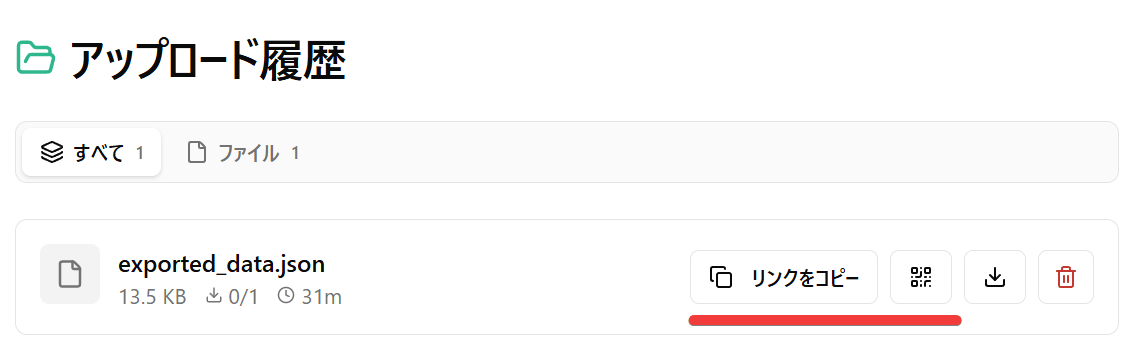
If you forget to save the sharing URL when uploading, click 'Upload History'.

If a valid link exists, it will appear in your history, saving you the trouble of uploading the file again. However, the password will not be displayed again, so if you set a password, be sure to save it.
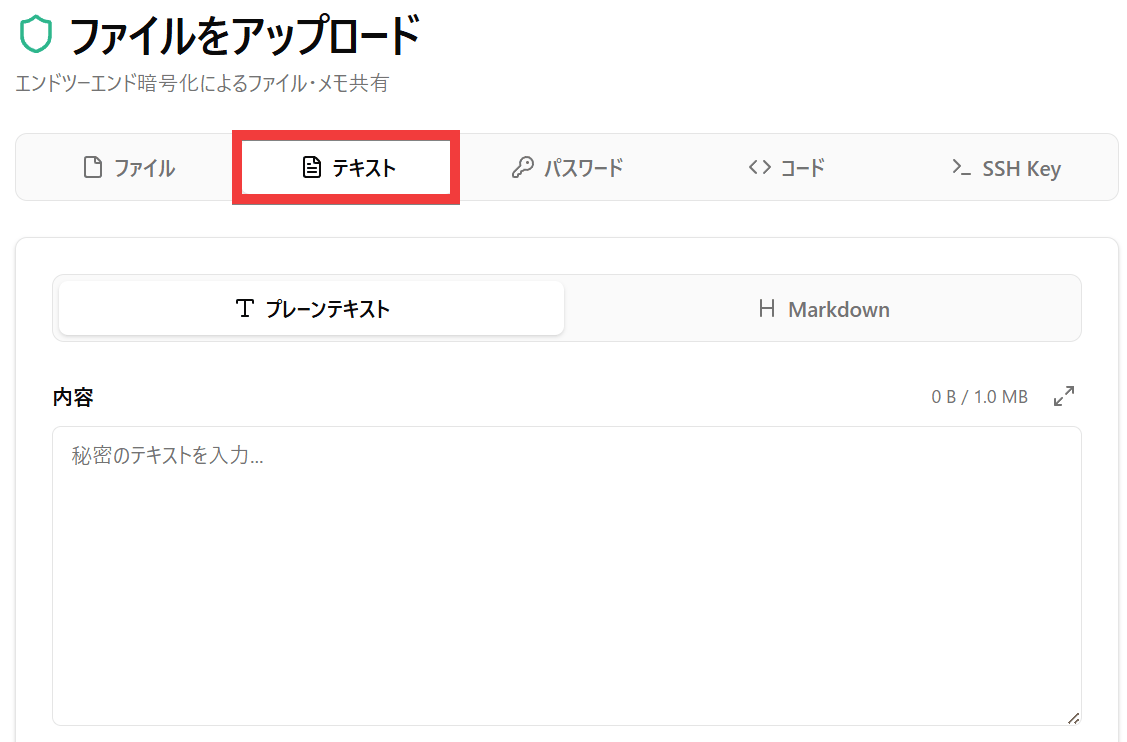
◆Encrypt and send more than just files.
·text
You can choose between plain text and Markdown.
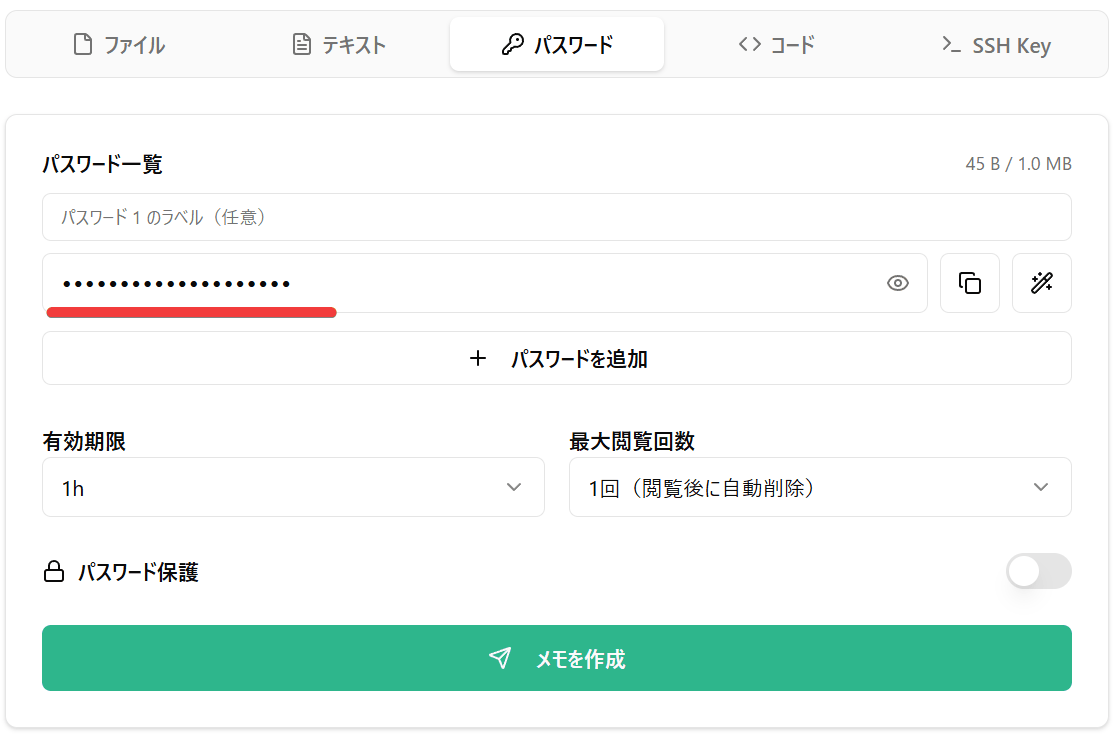
·password
There is a password generation function. Click the 'Password' button in the menu, then click the 'Generate Password' button. A password generation form will appear, where you can select the 'Length' and 'Characters to include in the password' and click the 'Generate' button.
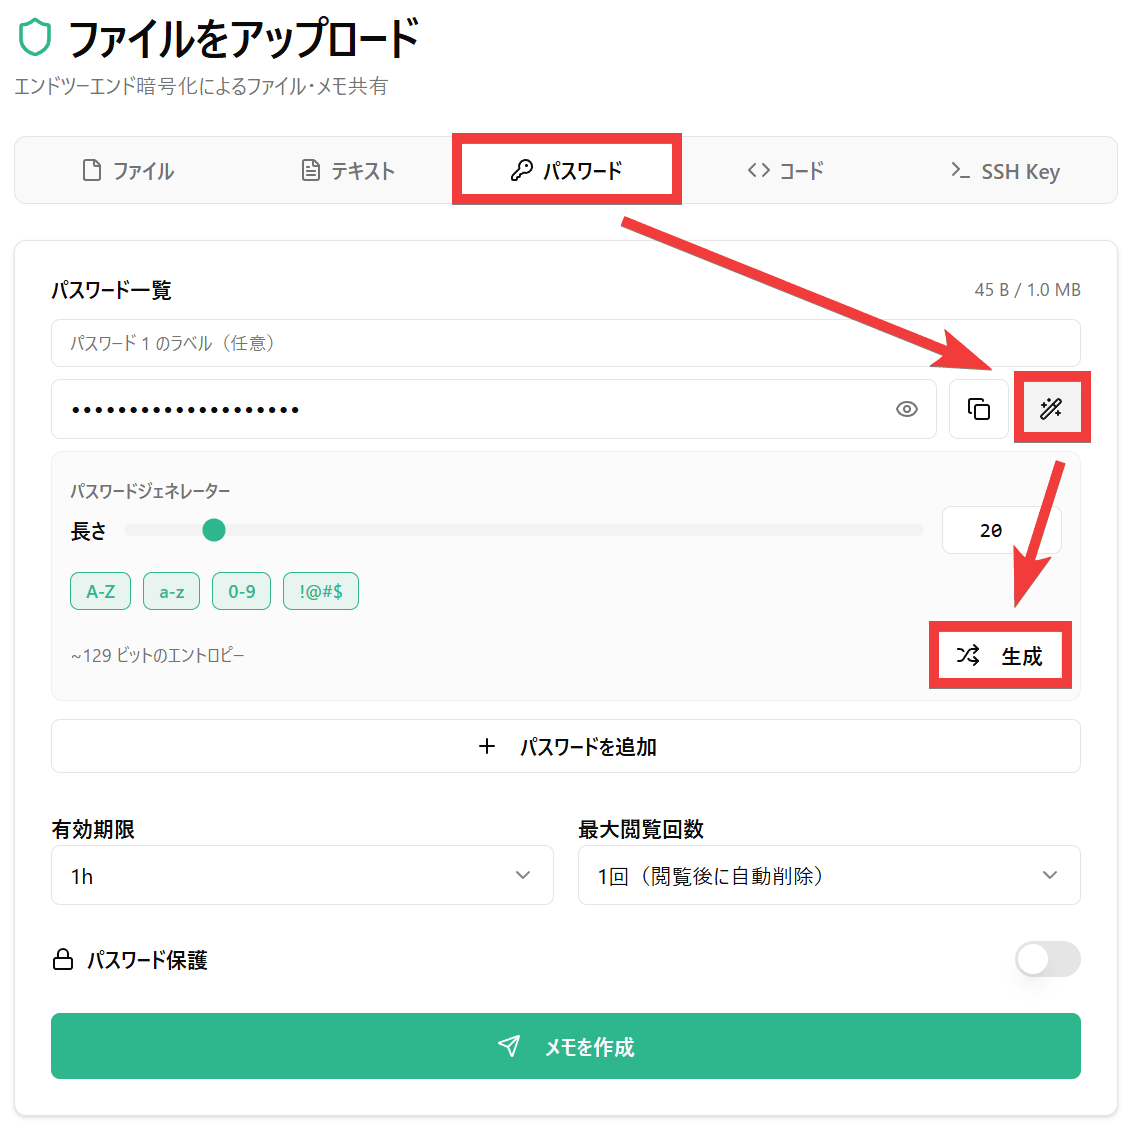
A password will be generated.
·code
When submitting code, use the dedicated code form instead of text. Display the form by selecting 'Code' from the menu, write your code in the 'Code Block,' and click the 'Create Note' button to create a sharing link.
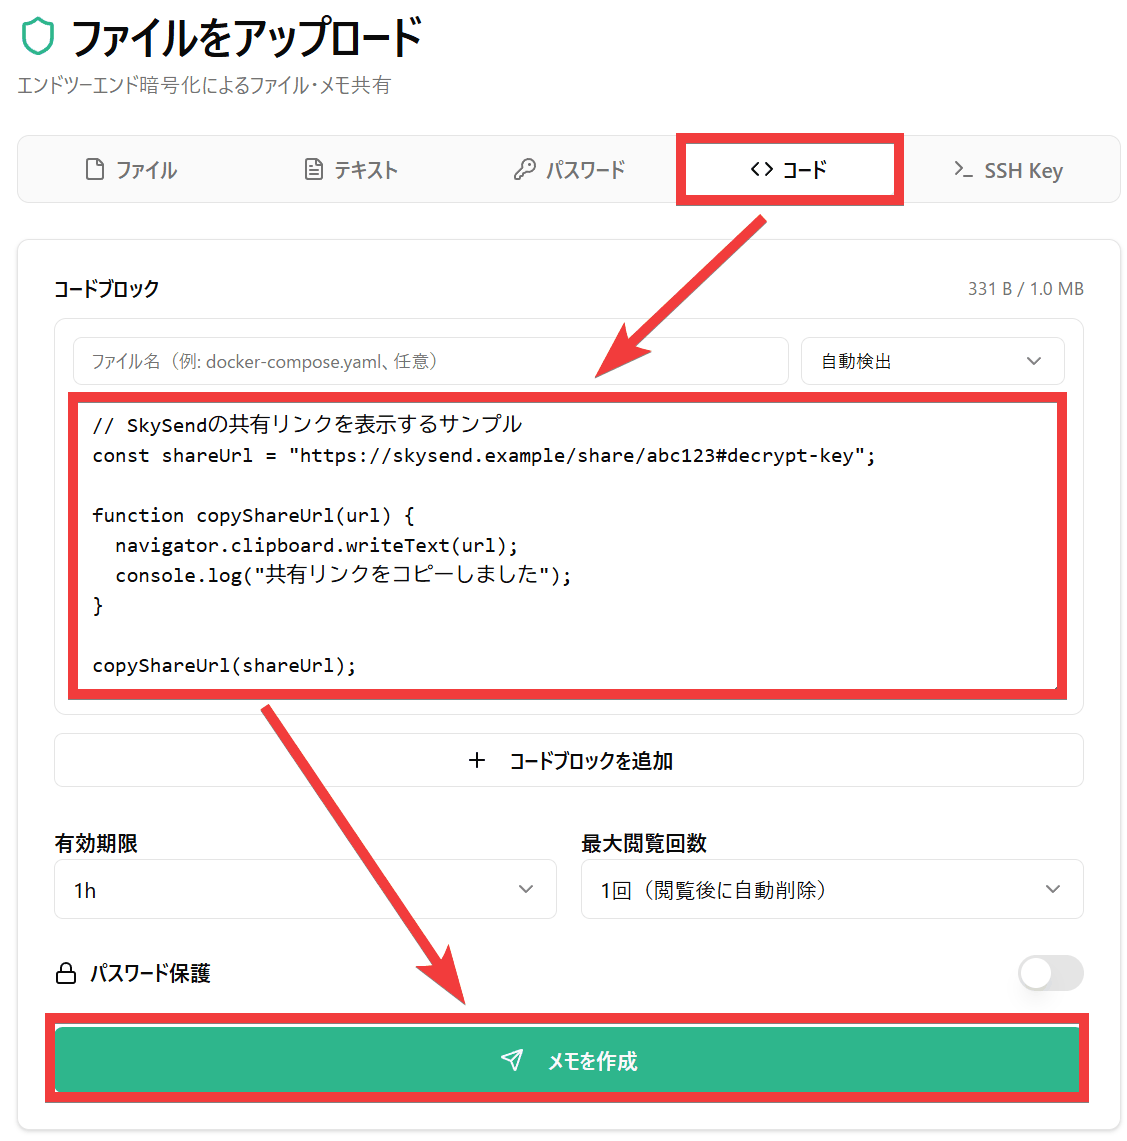
When the recipient of the link accesses it in their browser, the code will be displayed with line numbers and syntax highlighting applied.
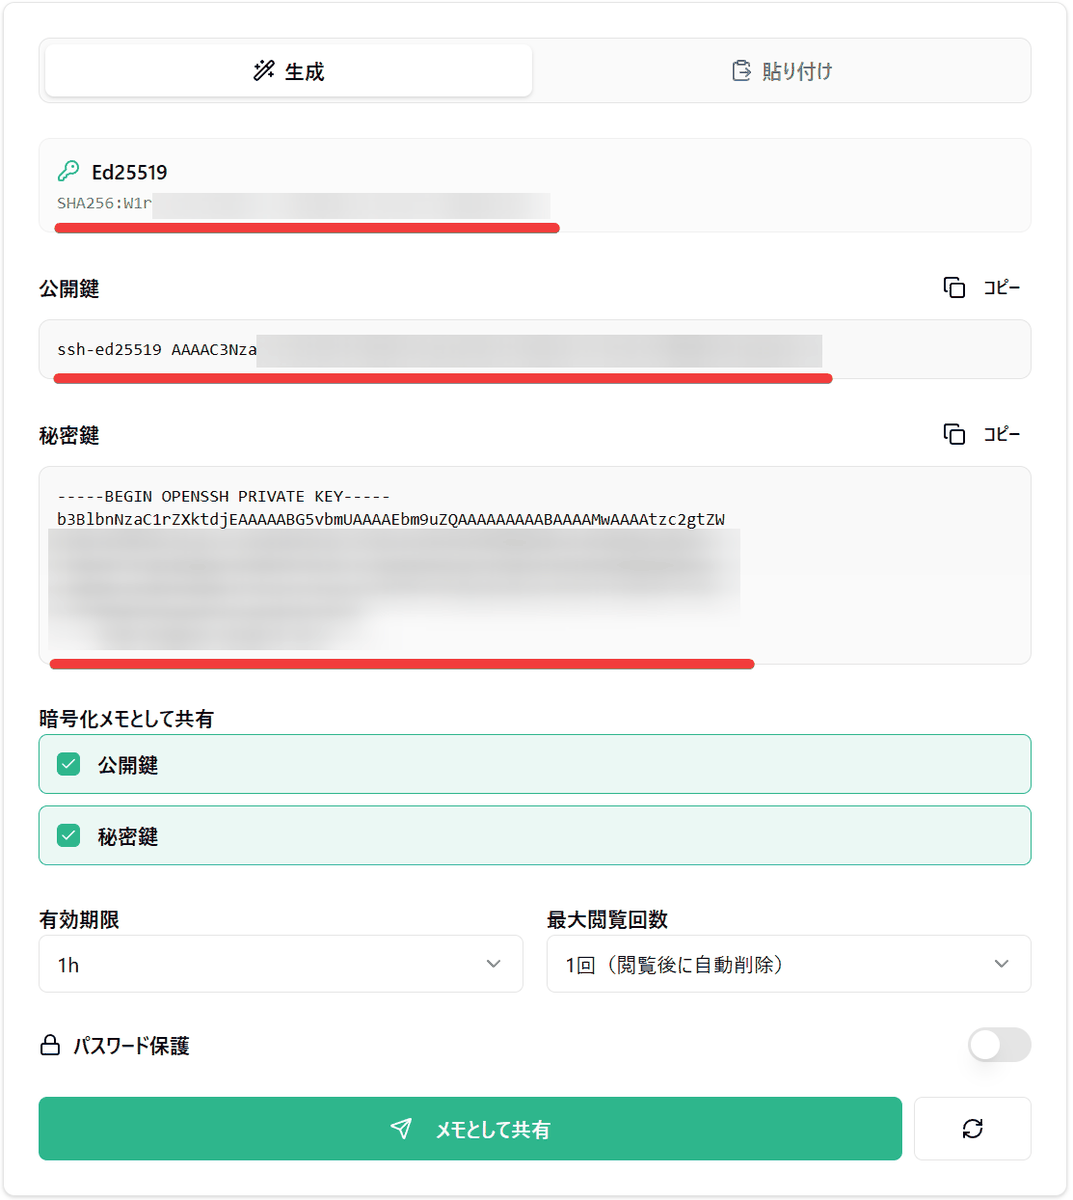
SSH Key
You can submit your public and private keys using a dedicated form. Click the 'Generate' tab under 'SSH Key' in the menu, then click the 'Generate Key Pair' button.
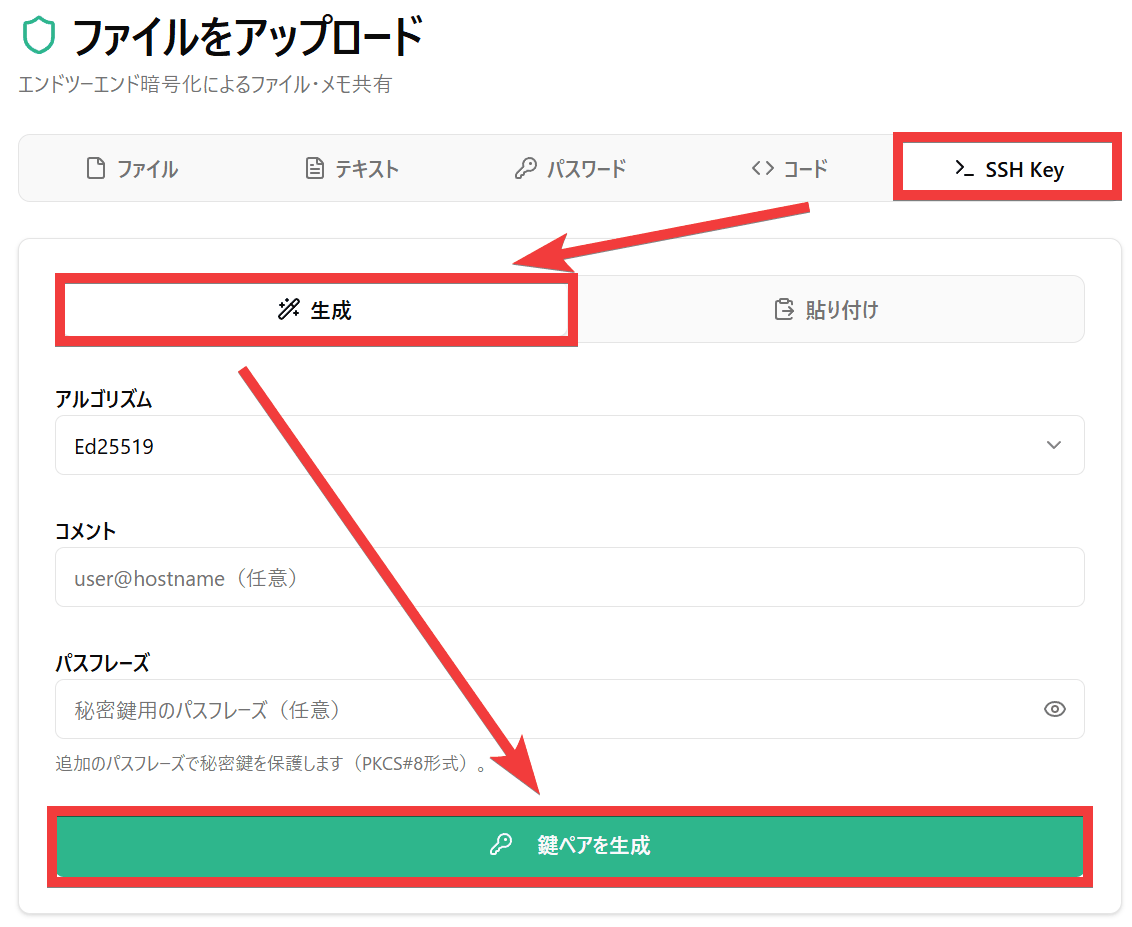
A public key and a private key will be generated.
◆Deleting expired data
Links that have expired or reached their usage limit are automatically deleted, so even if the server is hacked, the data will not exist, reducing the risk of leakage.
◆ How to set up a self-hosted SkySend
By building on a self-hosted environment, you can send encrypted information in a fully controlled state. This time, we will build it in an environment where Docker Desktop and Git Bash for Windows are set up on Windows. Create a docker-compose.yml file in the working folder.
 # docker-compose.yml
 services:
 skysend:
 Image: skyfay/skysend:latest
 container_accountname: skysend
 restart: always
 ports:
 - '3000:3000'
 volume:
 - ./data:/data

- ./uploads:/uploads
 environment:
 -BASE_URL=http://localhost:3000
 - TZ = Asia/Tokyo
 - DEFAULT_THEME=system
Start the container.
docker compose up -d
If you access the address you set in BASE_URL in your browser and the upload screen appears, the installation is complete.
Related Posts: