'Slink' solves the problem of safely sharing images with friends, family, and colleagues for free, allowing you to create a private self-hosted environment
If you want to share images only with close family, friends, colleagues, etc., `` Slink '' is available as a simple image sharing system that can be self-hosted.
andrii-kryvoviaz/slink: Self-hosted image sharing service
◆ Main features of Slink
・Supported formats
Supports many formats including PNG, JPEG, WEBP, SVG, BMP, ICO, GIF, AVIF, HEIC, TIFF, etc.
・Upload multiple files at the same time
Upload multiple files at the same time while checking the progress.
・Image compression function
Compress images to WEBP, AVIF and JPEG at the quality level you specify upon upload.
- Shared link generation and URL shortening function
You can also create shared links and shorten links.
·collection
Create collections of any images and share them with others.
- Duplicate image detection
Automatically detects duplicate images and prevents uploading the same image.
・Hierarchical tag system
Organize your images with tags.
・Comment function
You can comment on the published images.
Bookmarks
Bookmark and manage your favorite images.
・Notification function
Get notified about user actions on your images.
・Registration and Restrictions
Settings such as whether the new account creation form is public or private, and whether uploading is possible without creating an account.
・API
Slink can be operated from external services via API, and API keys are generated and managed individually by each user.
・ShareX integration
It works with ShareX , a free screenshot tool for Windows, allowing you to upload screenshots directly to Slink.
・Storage provider support
You can choose from local, SMB , and Amazon S3 storage options.
◆How to install Slink
This time, we will build an environment with Docker Desktop and Git Bash for Git for Windows on Windows 11. Execute the following command in any folder to create a working folder for Slink and move to the folder.
mkdir slink-app && cd slink-app
Create a folder to store settings and image files.
 mkdir slink/var/data
 mkdir slink/images
Replace 'IP_ADDRESS' in the following command with the IP address of the PC that will start the container and run it.
 docker run -d \
 --name slink \
 -p 3000:3000 \
 -v ./slink/var/data:/app/var/data \
 -v ./slink/images:/app/slink/images \
 -e ORIGIN=http://IP_ADDRESS:3000 \
 -e TZ=Asia/Tokyo \
 -e USER_APPROVAL_REQUIRED=false \
 -e IMAGE_MAX_SIZE=15M \
 -e STORAGE_PROVIDER=local \
 anirdev/slink:latest
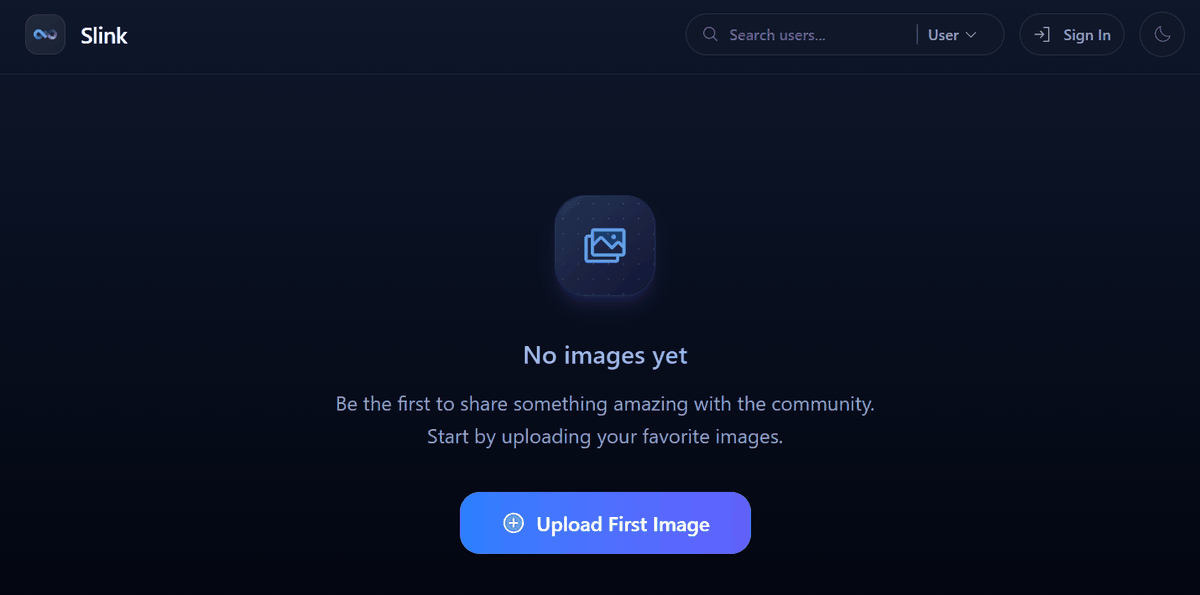
Open your browser and access http://【IP_ADDRESS】:3000 to display the Slink homepage.
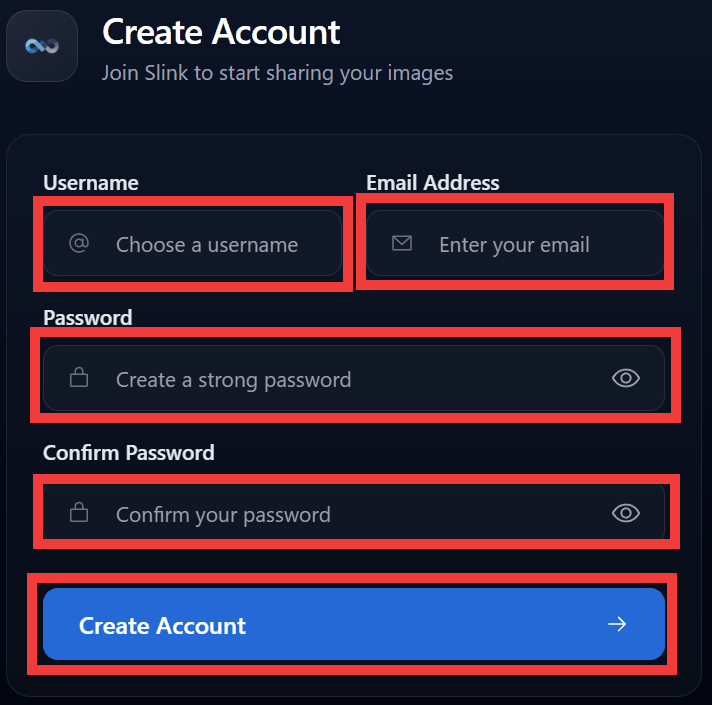
Access 'http://【IP_ADDRESS】:3000/profile/signup', enter your username in 'Username' and your email address in 'Email Address' in the user registration form, enter your password in 'Password' and 'Confirm Password', and click 'Create Account' to create a user.
To promote the created user to administrator, replace 'EMAIL_ADDRESS' with the registered email address and run the following command.
docker exec -it slink slink user:grant:role --email=EMAIL_ADDRESS ROLE_ADMIN
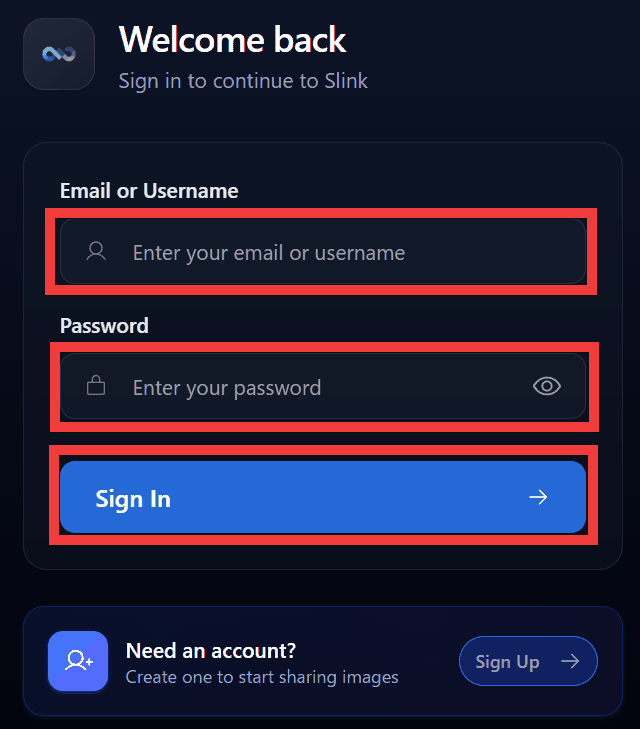
Access 'http://【IP_ADDRESS】:3000/login', enter your username or email address in 'Email or Username', enter your password in 'Password', and click 'Sign In'.
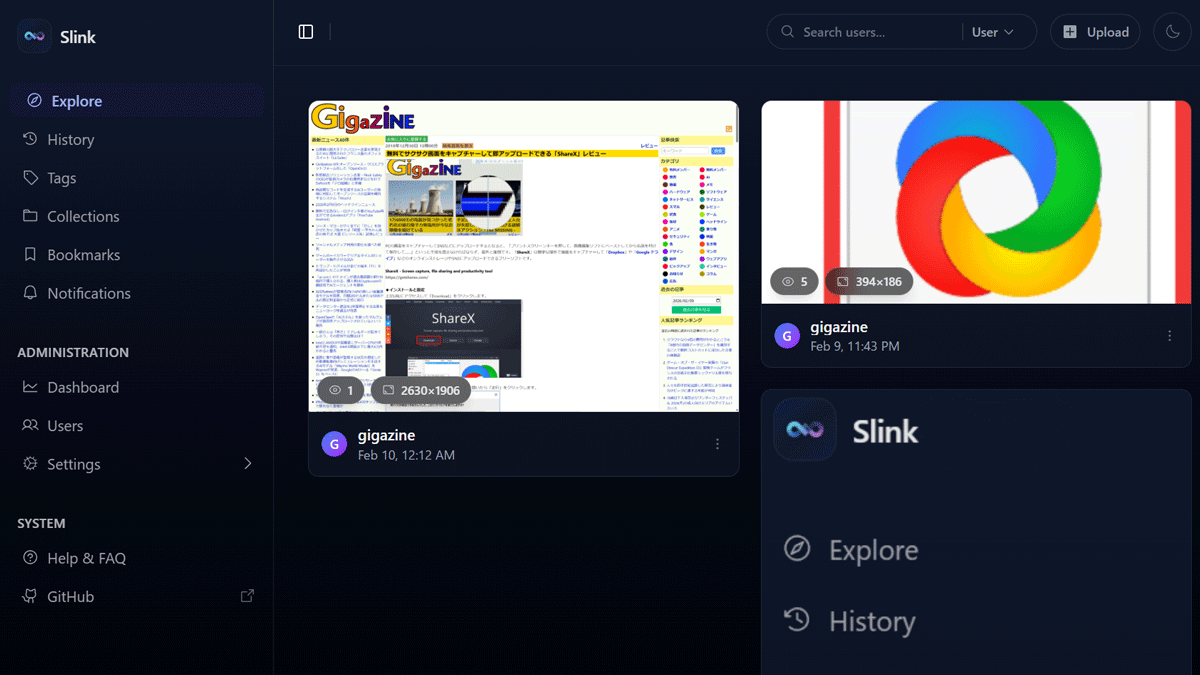
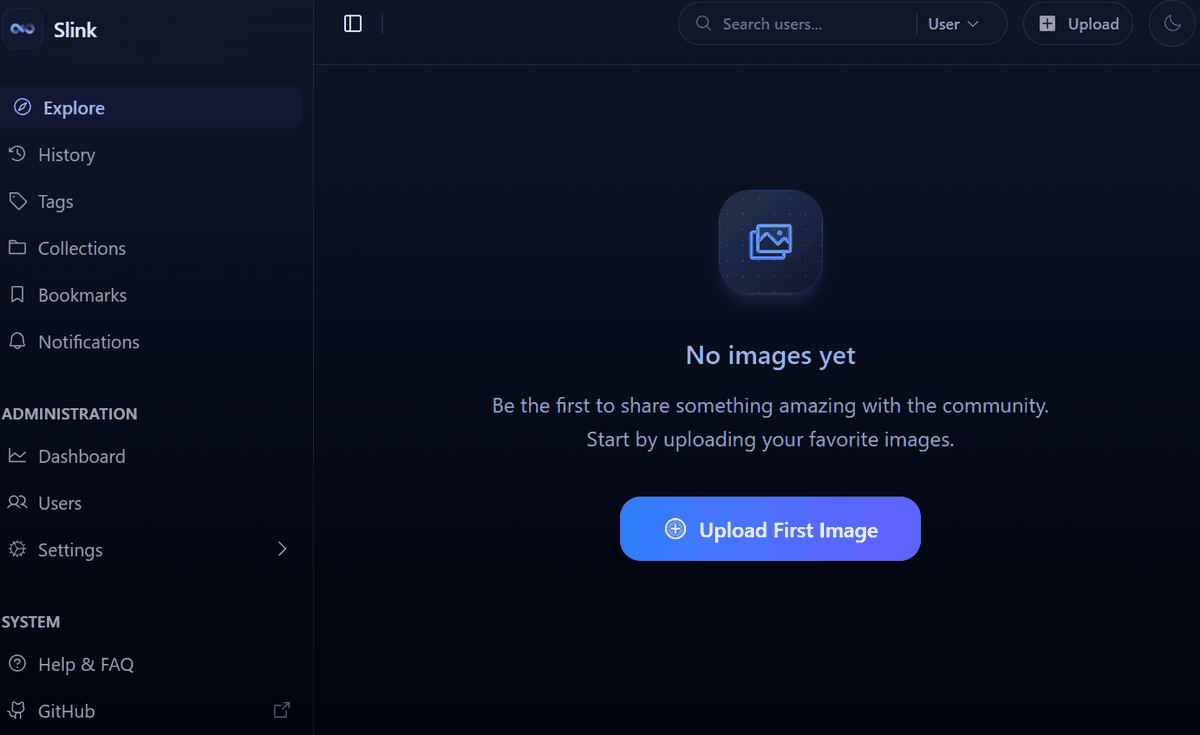
Once you log in, a menu and image list page will be displayed.
◆ Collaboration with ShareX
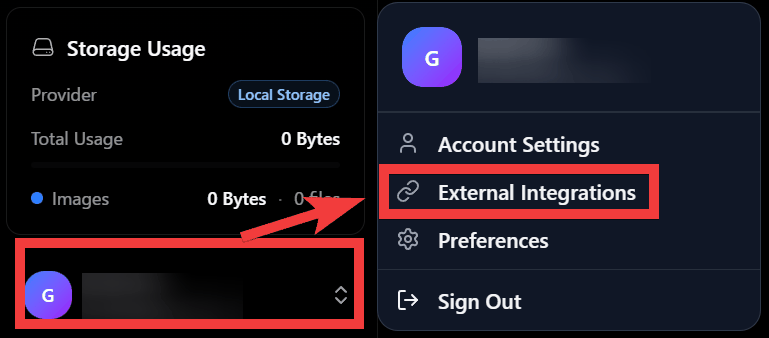
You can take a screenshot and upload it directly to Slink. To set it up, click on the area where your Slink account is displayed, and a menu will appear. Click on 'External Integrations.'
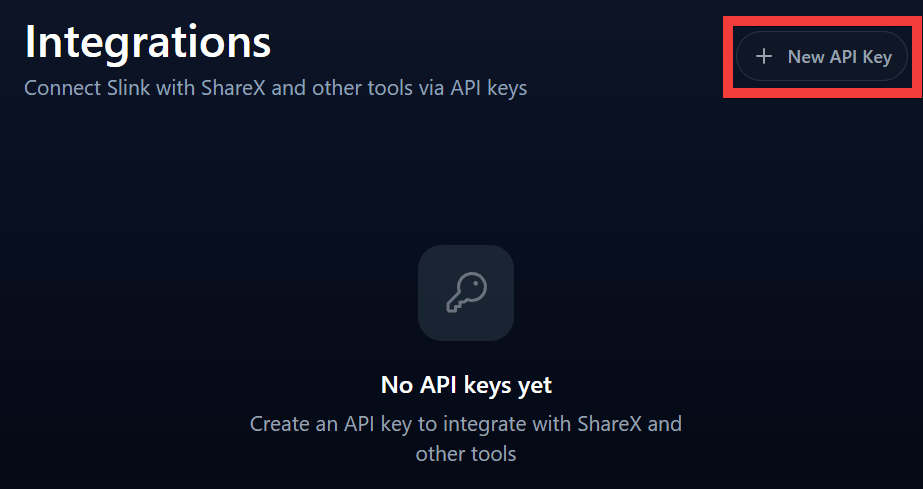
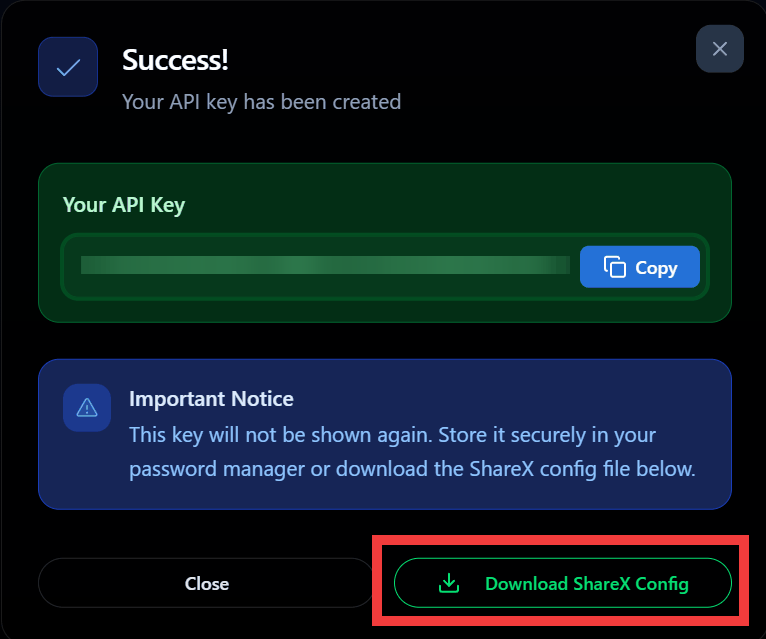
Click “New API Key”.
Enter any name in 'Key Name' and click 'Create API Key'.
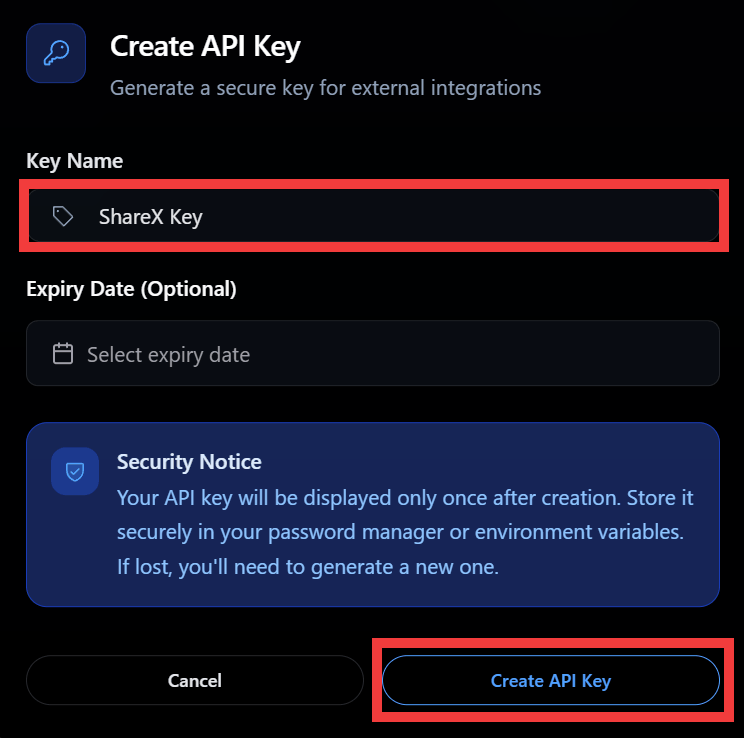
An API key will be created, so click 'Download ShareX Config' to save the configuration file.
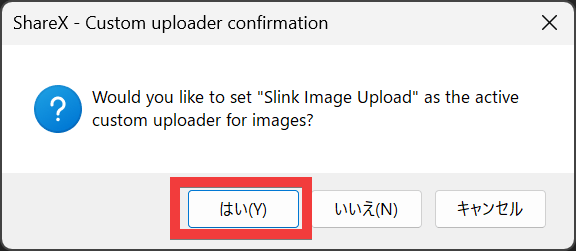
Double-click the saved configuration file.

The Import Settings File dialog box will appear, so click 'Yes'.
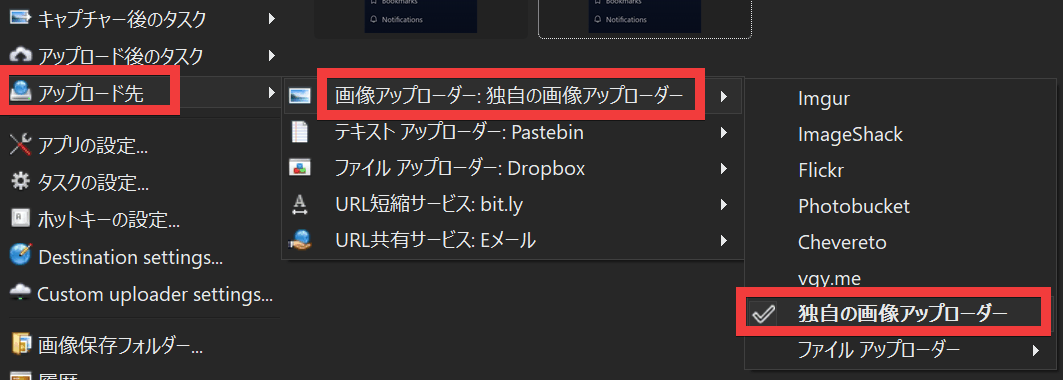
Under 'Upload destination,' check 'Custom image uploader' under 'Image uploader.'
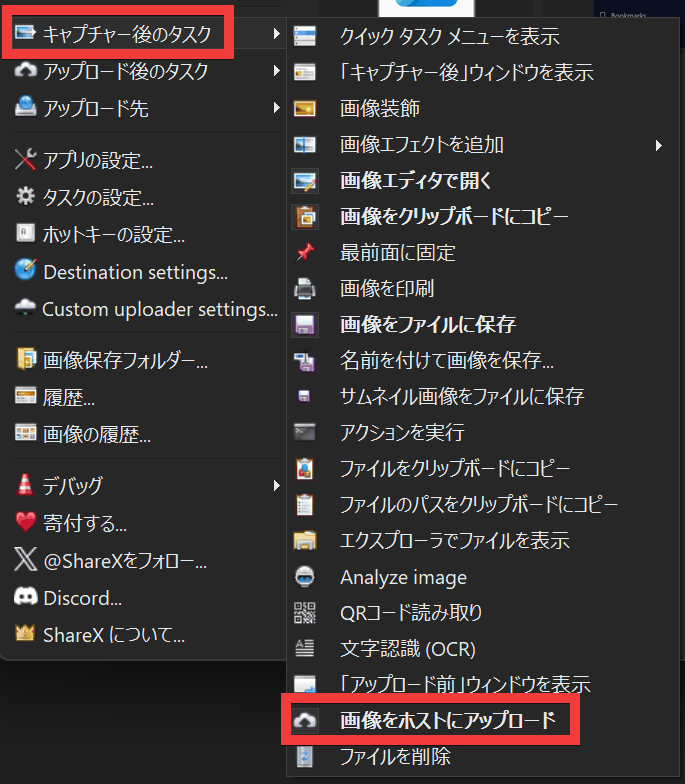
Under 'Post-capture tasks,' click 'Upload image to host' to enable it.
Once captured, the image will be automatically uploaded and displayed in 'Upload History'.
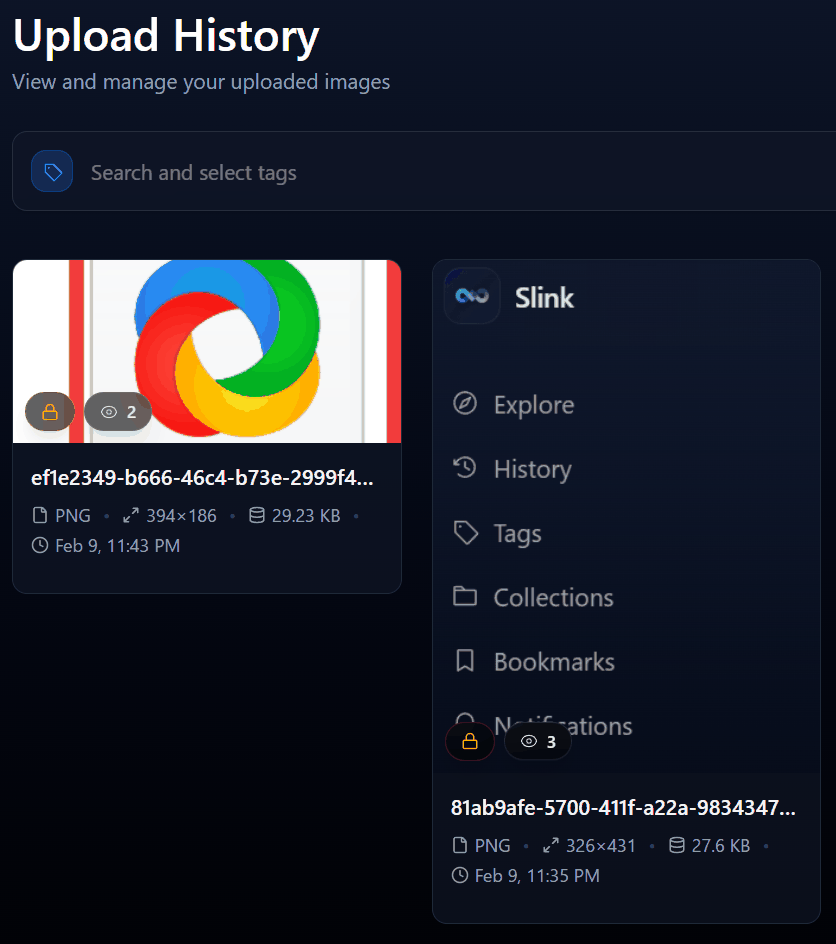
Uploaded images are first recorded in each user's 'Upload History,' and users must then sort them into collections or set their public settings.
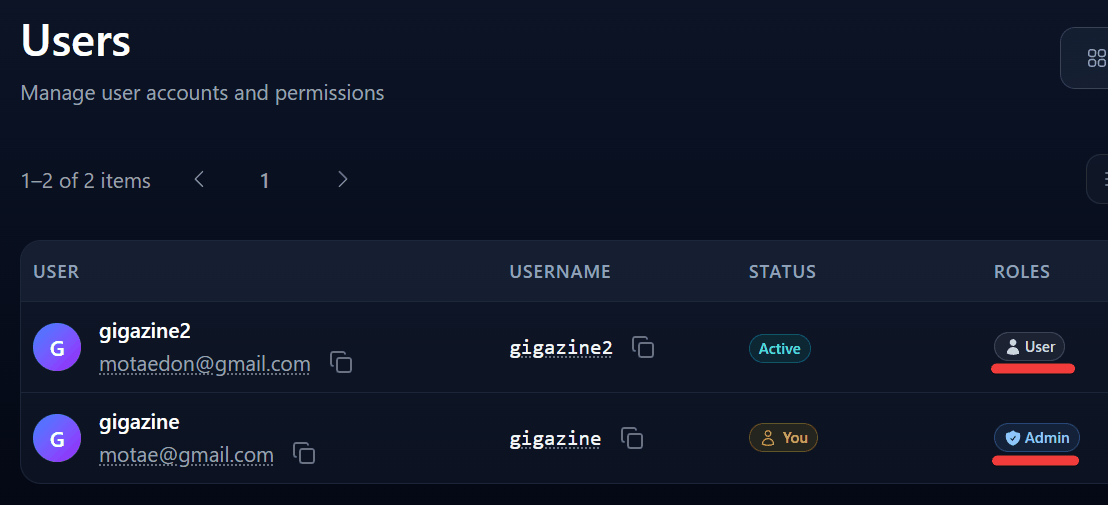
◆About users
There are two types of user permissions: 'User' and 'Admin.' There is no group function, and no function to assign viewing permissions or capacity limits to each user.
Slink has enough functionality to be used as a simple shared album. However, to access via HTTPS, you will need to set up a separate reverse proxy.
Related Posts: