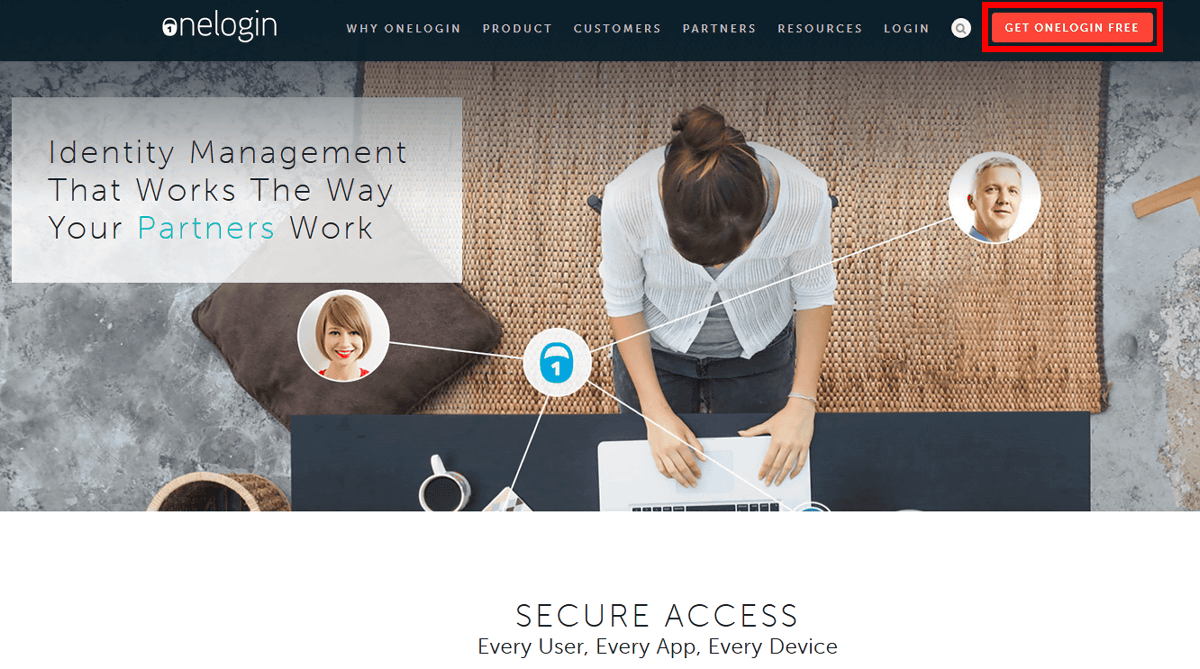
"OneLogin" that allows multiple members to share web accounts even if it is free

When sharing accounts such as Twitter, Evernote, WordPress, etc. with multiple users, it is quite annoying to thoroughly manage each user's settings and login information, but it is a problem that solves such troubles as "OneLogin"is. OneLogin is compatible with over 4000 web services and applications, it is possible to log in to any service with just one click if you register the information necessary for logging in, and also allows login without notifying individual users Can doSingle sign-on(SSO) service. OneLogin, which is equipped with many other practical functions, has plans that can be used for free, so I actually tried how it can be used.
OneLogin | Identity Management Vendor - Single sign-on service provider - SSO Authentication - SaaS
https://www.onelogin.com/
~ Mukuji
◆ User registration
◆ Japaneseization
◆ One click login to web application
◆ Share user and web application account information
◆ Multiple users added in CSV file
◆ Group creation
User privilege setting (Roles)
◆ Collective action for multiple users (Bulk Operations)
◆ Tab setting
◆ User action history management
◆ Notification function
◆ Redirect setting at logout
◆ Branding function
◆ Self Registration function with custom URL
Let's start with user registration and we will look at the typical functions step by step.
◆ User registration
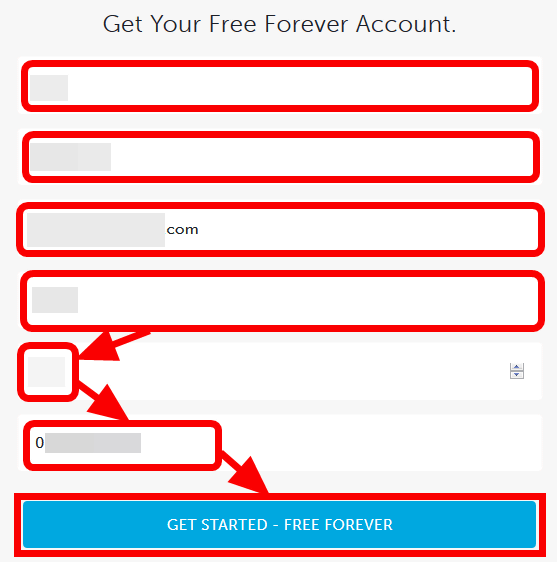
Official site URLOpen "GET ONELOGIN FREE" in the upper right corner of the screen.
Enter "name" "surname" "mail" "company name" "employee number" "phone number" in order from the top and click "GET STARTED - FREE FOREVER". Please note that it was not possible to register accounts via Gmail or Hotmail's mail.
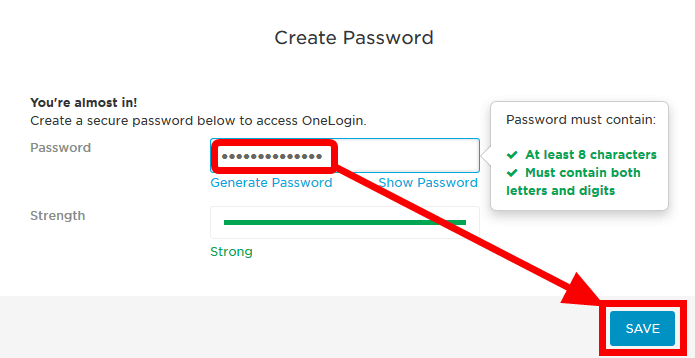
Enter the password and click "SAVE".
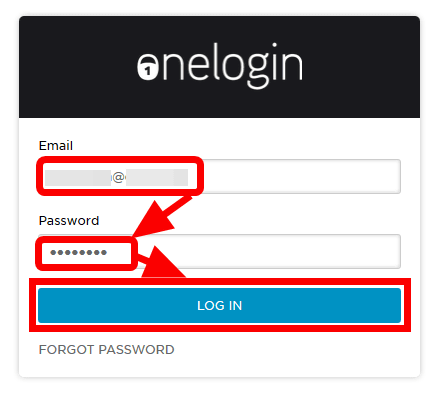
As the login screen is displayed, enter "Mail" "Password" and click "LOG IN".
After logging in, the setup screen opens automatically. Click "CLAIM YOUR SUBDOMAIN".
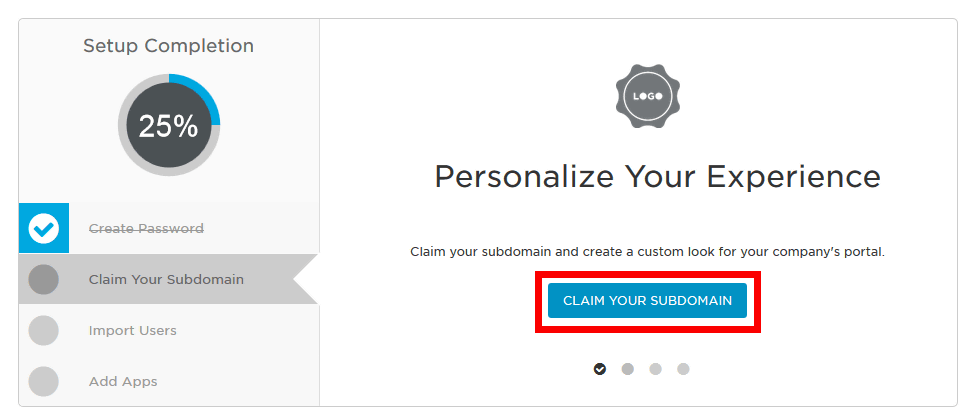
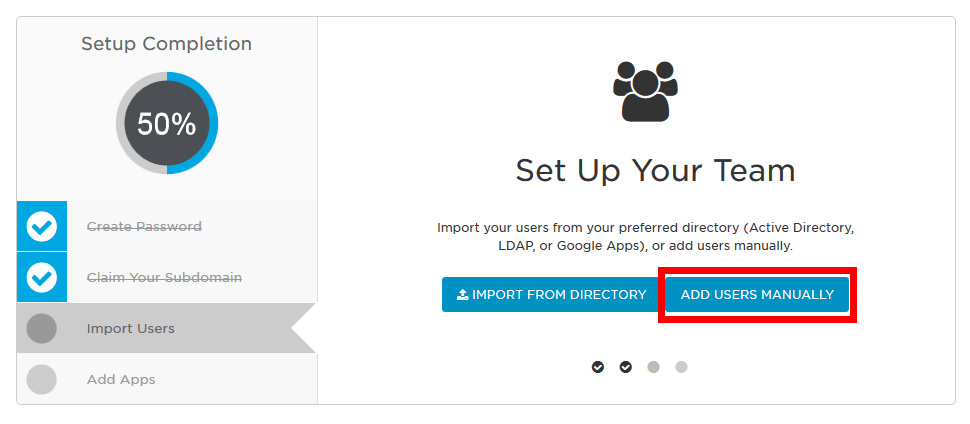
Although customization of the home screen and setting of subdomain are possible here, click "SAVE" at the upper right on the screen to complete user registration first.
Next, click "ADD USERS MANUALLY" to register other users who share the account.
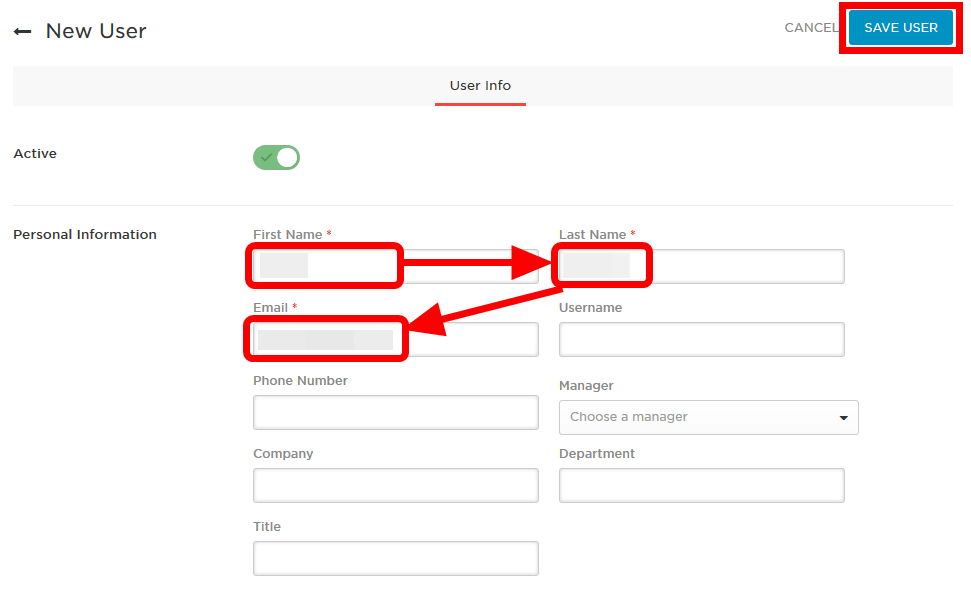
Enter the "name" "surname" "mail" of the member to be shared and click "SAVE USER".
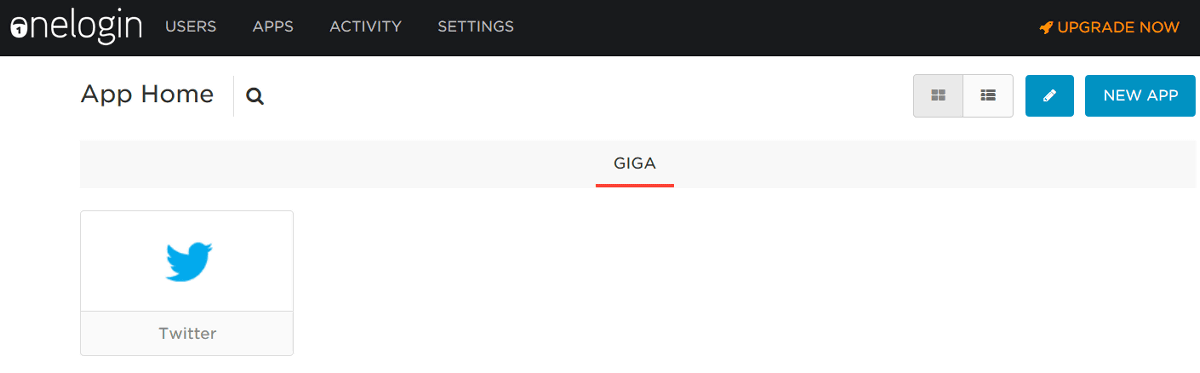
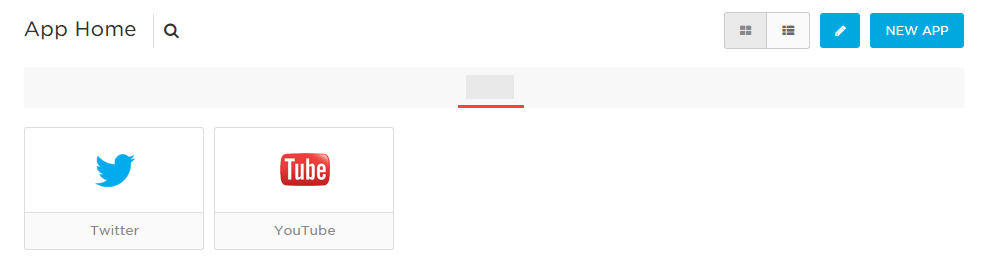
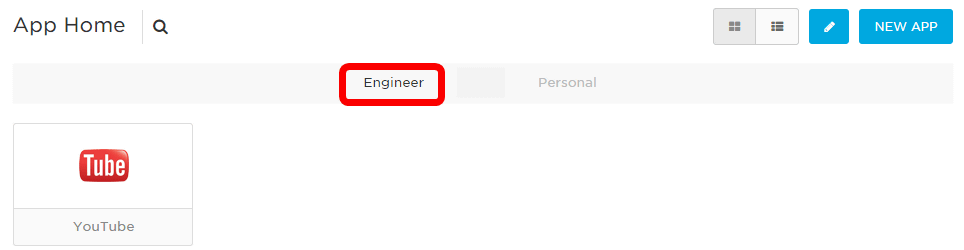
Next, click "ADD APPS" and add the web service to use.
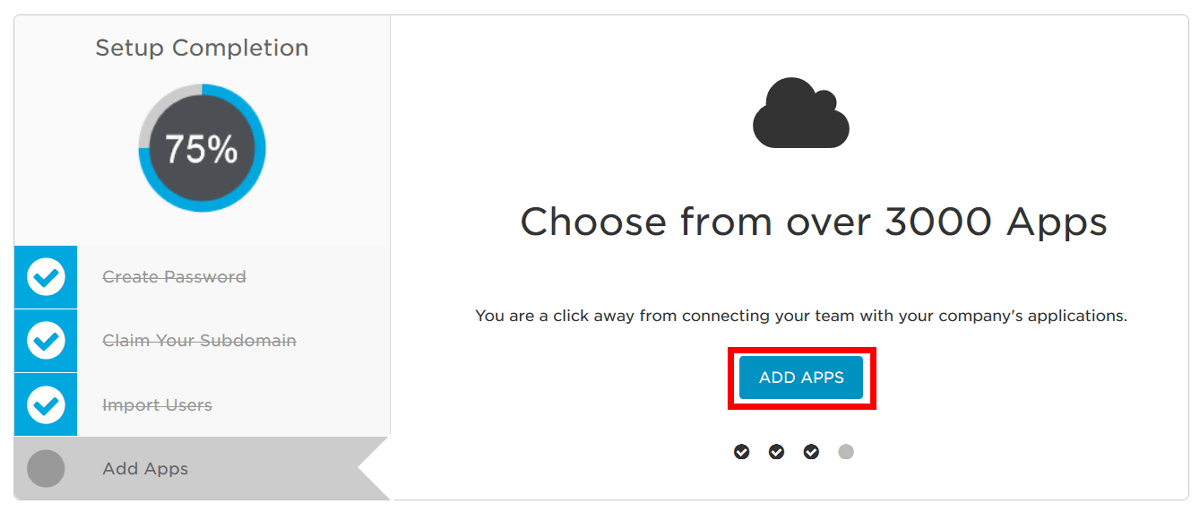
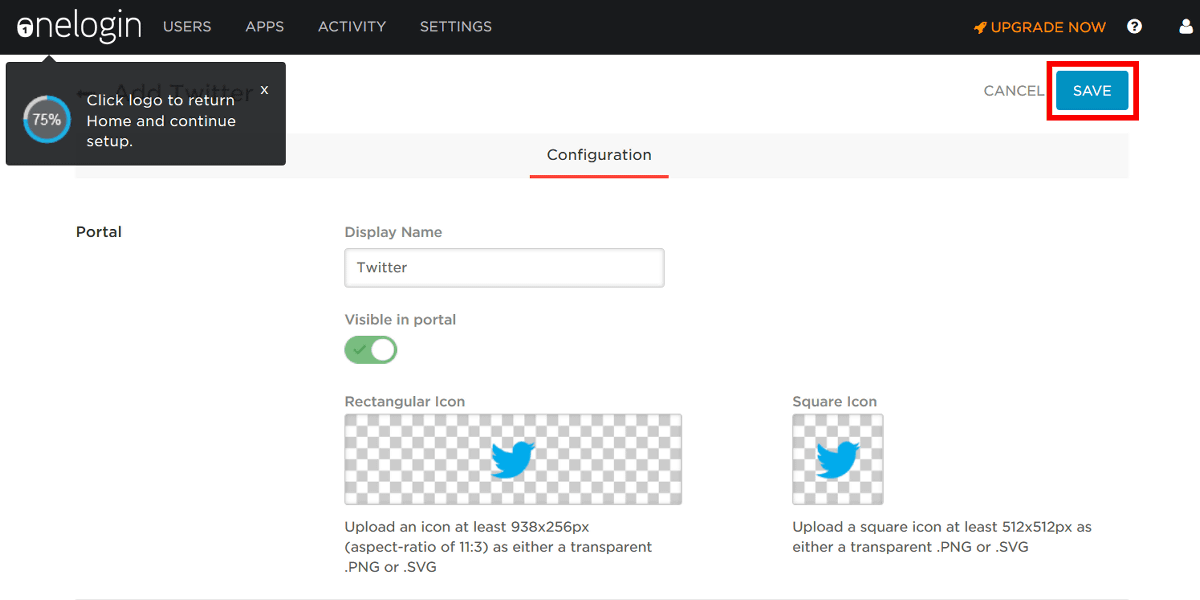
This time I will add Twitter. Enter "Twitter" in the search box and click "Twitter" displayed at the top to select it.

Click "SAVE" to add web service, user registration is completed.
◆ Japaneseization
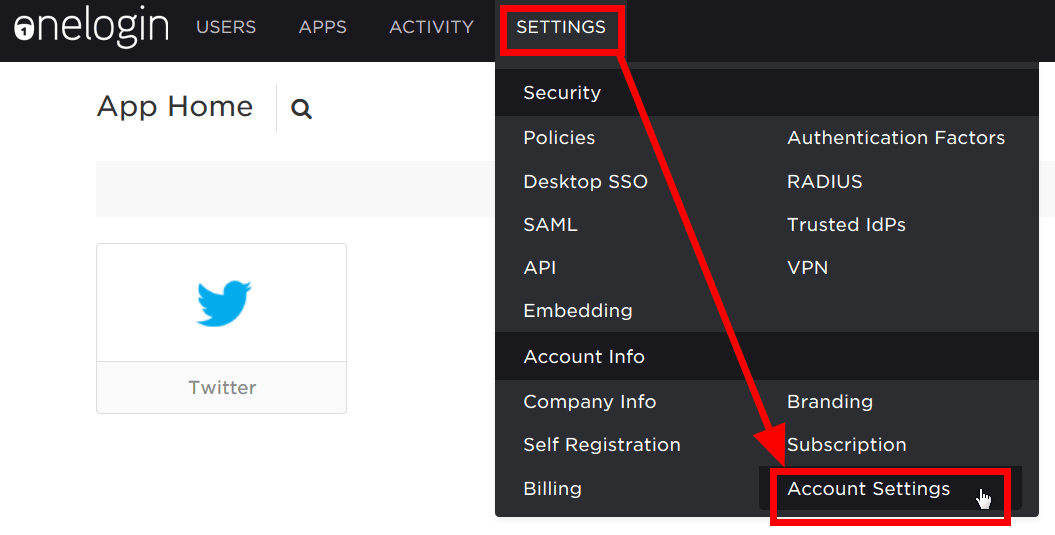
OneLogin can change the language of UI to Japanese. To make it Japanese, move the cursor to "SETTING" at the top and click "Account Setting".
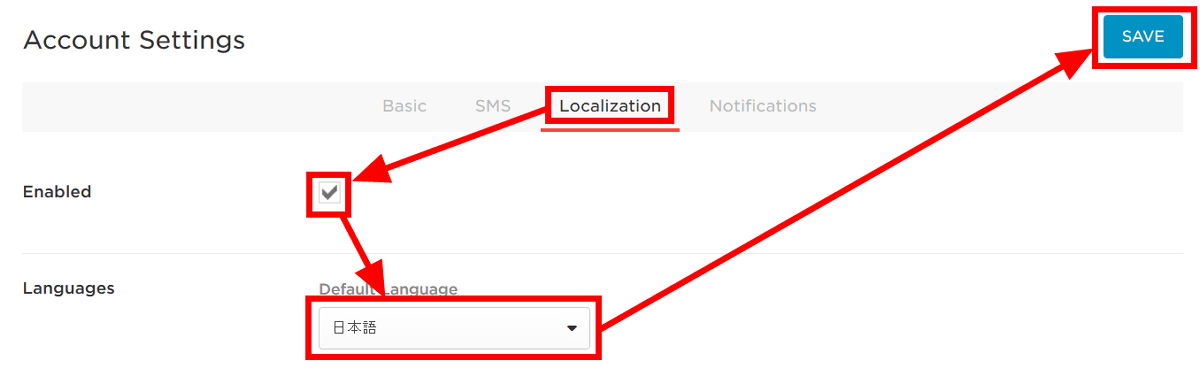
Click "Localization", change the language to "Japanese" after confirming that "Enabled" is checked, and click "SAVE" at the end.
Even if I look at the home screen, English is still displayed yet ......
On a separate screen, some are displayed in Japanese. Even if you set the language to Japanese, it seems that not all of the UI will be translated into Japanese.
◆ One click login to web application
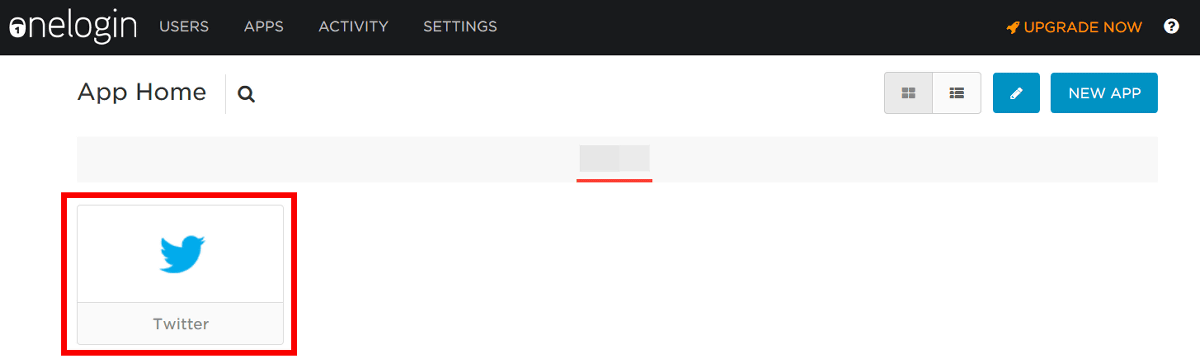
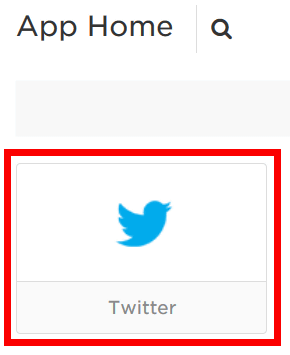
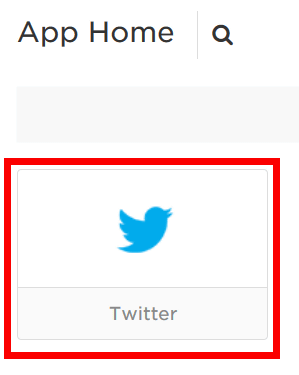
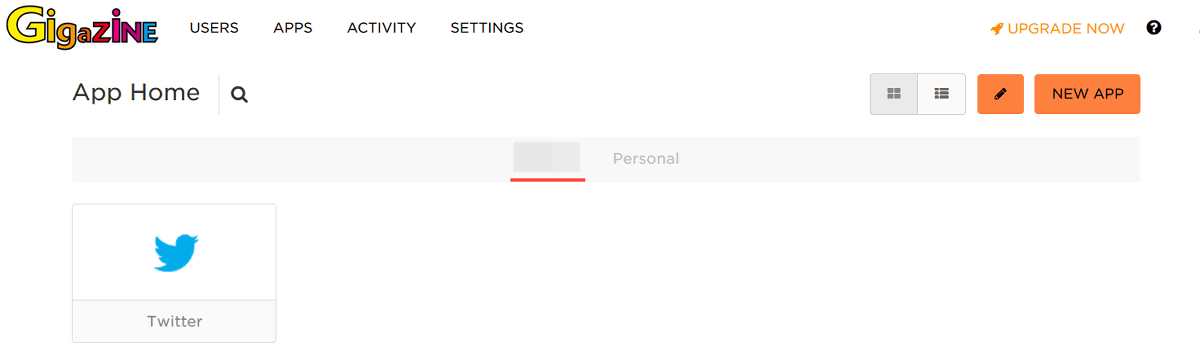
Click on Twitter thumbnail image added at user registration on the home screen because it is displayed.
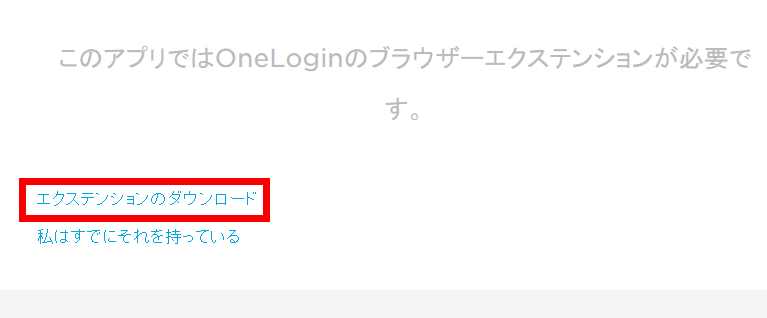
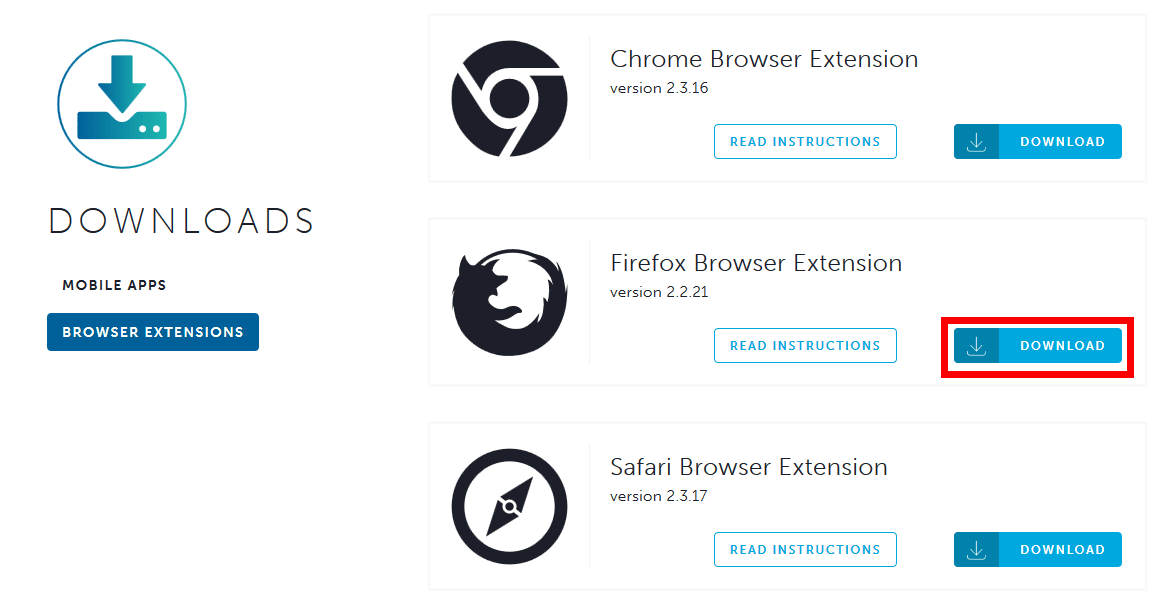
In order to use Twitter with OneLogin, browser extension function is necessary. Click "Download extension".
Select the extension for your browser. Since I am using Firefox this time, click "DOWNLOAD" of "Firefox Browser Extension".
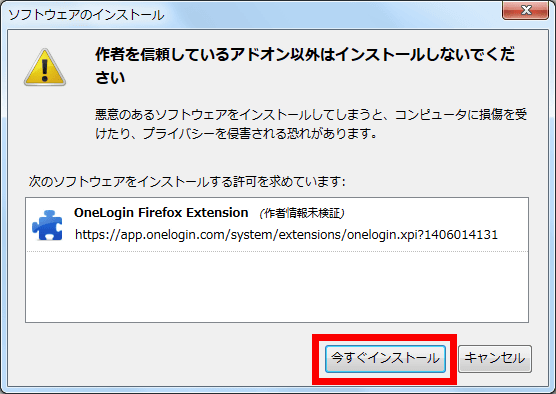
Click "Install Now".
After downloading the extension, click the thumbnail image of Twitter again from the home screen.
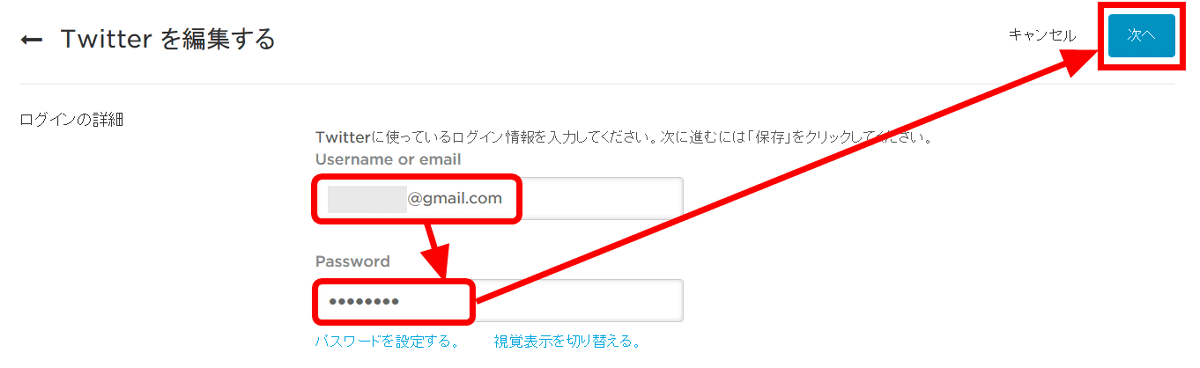
Enter "User name" or "Mail" registered in Twitter account, click on "Next" after entering the password.
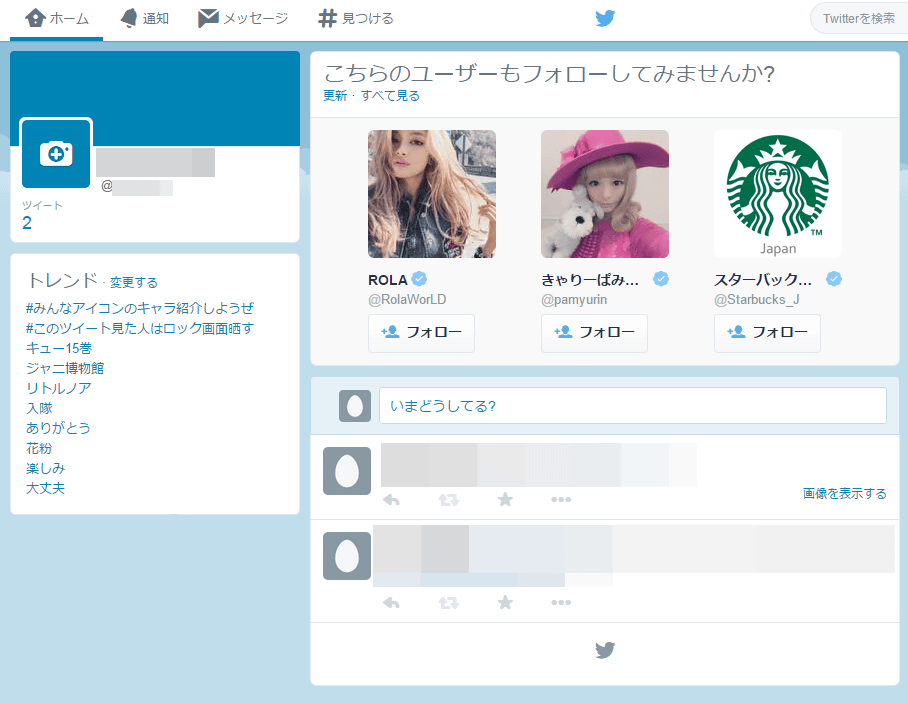
I will return to the home screen again, so clicking the thumbnail image of Twitter again ... ....
I logged in to Twitter. It was necessary to enter login information only for the first time, but from the second time it is possible to log in by clicking on the thumbnail image of the home screen. If you use a lot of web services, you can log in with just one click if you register.
There are Evernote, Dropbox, WordPress, etc. that can be registered, the number of which is 4000 or more.
◆ Share user and web application account information
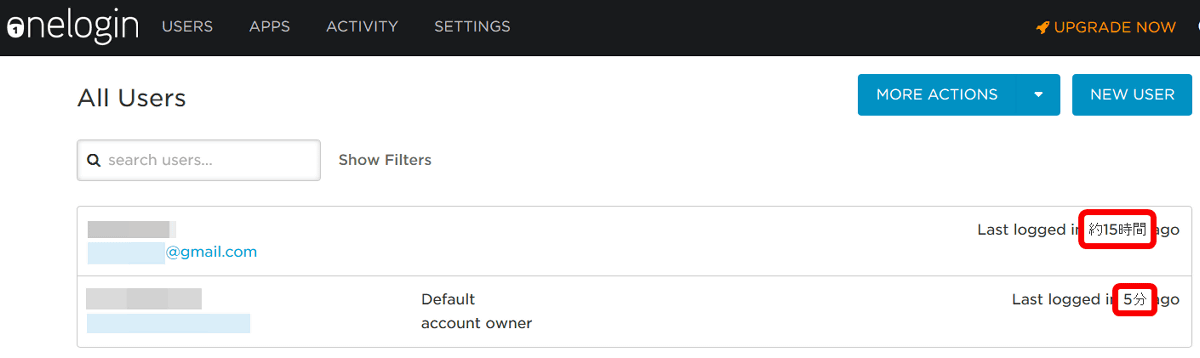
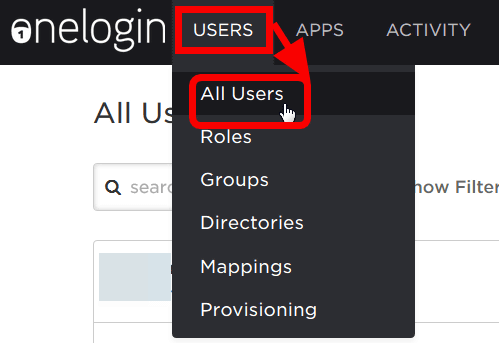
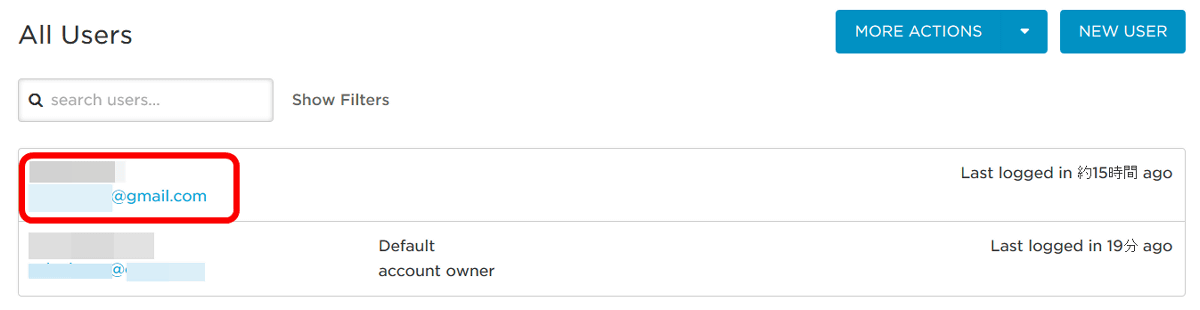
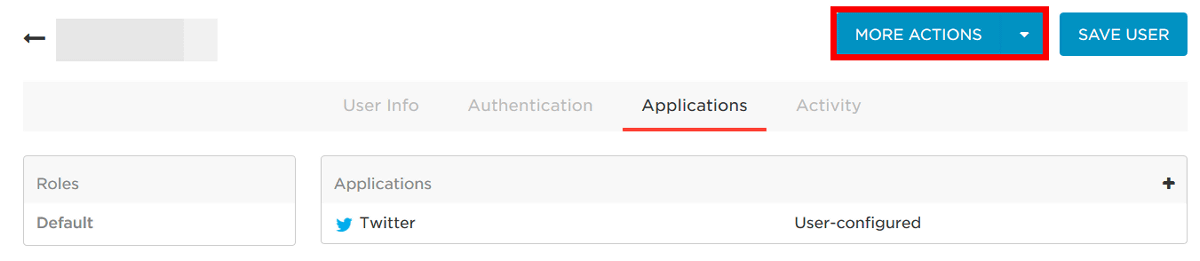
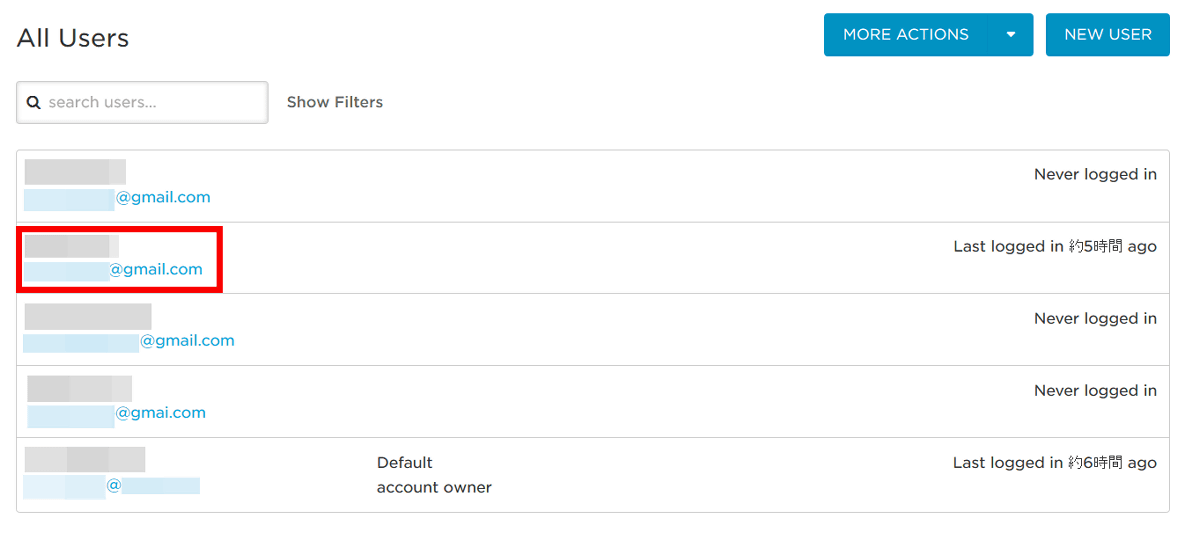
After registering web service, share access so that other users can log in to Twitter with just one click. Move the cursor to "Users" at the top of the screen and click "All Users".
On the user management screen that was opened, click the user registered at the top of the setup that was displayed at the top. The login history is displayed on the right side of each user so that you can know when the user logged in.
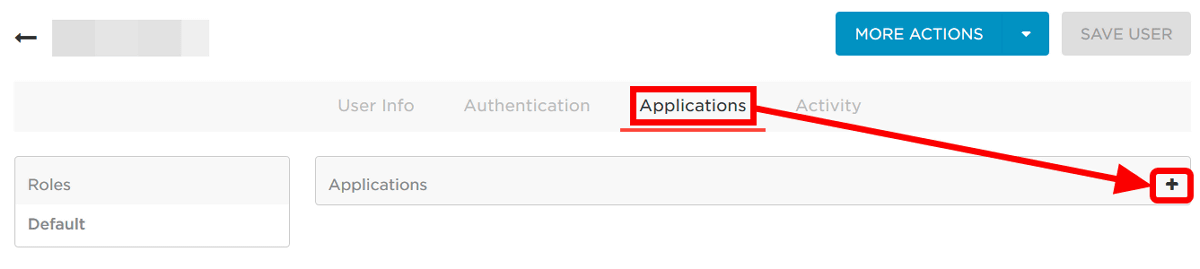
As the information of the selected user is displayed, click "Application" and click "+" on the right side of the screen.
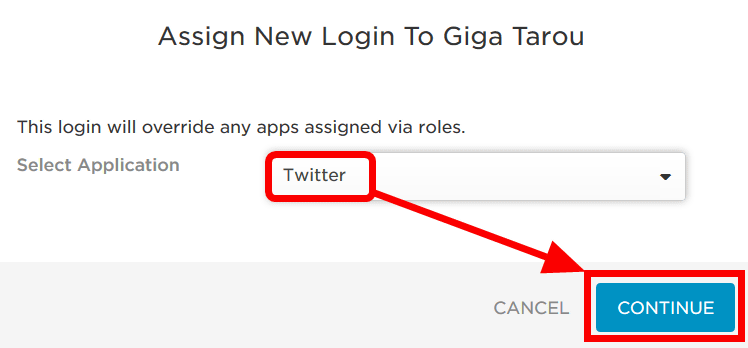
Select "Twitter" and click "CONTINUE".
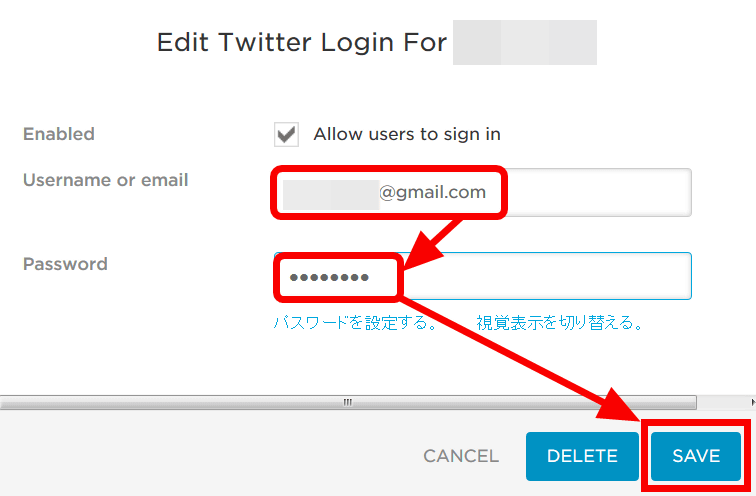
Enter "User name" or "Mail" registered in Twitter account, click "SAVE" when entering password.
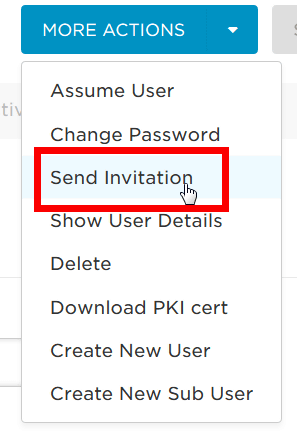
After that we can invite you to OneLogin and users will be able to log in to Twitter with one click. Click "MORE ACTIONS" ......
Click "Send Invitation".
Enter the email of the user you want to invite and click "SEND".
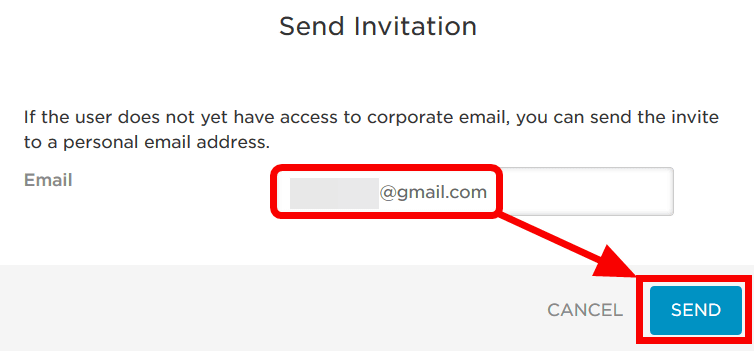
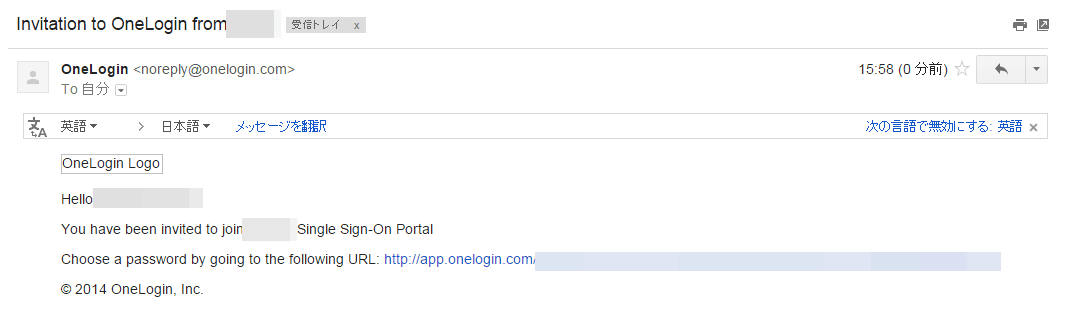
The invited user opens a mail from OneLogin and opens the listed URL.
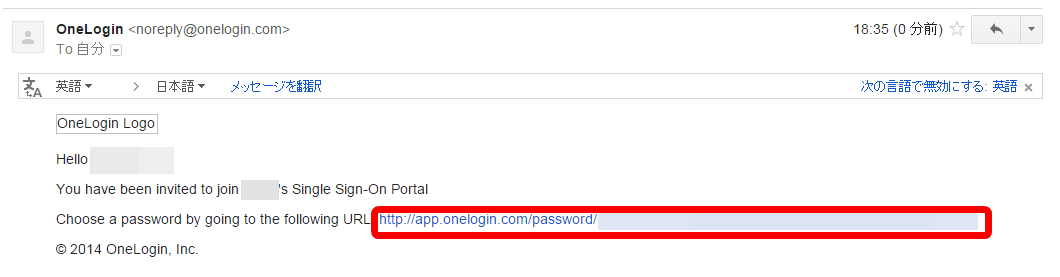
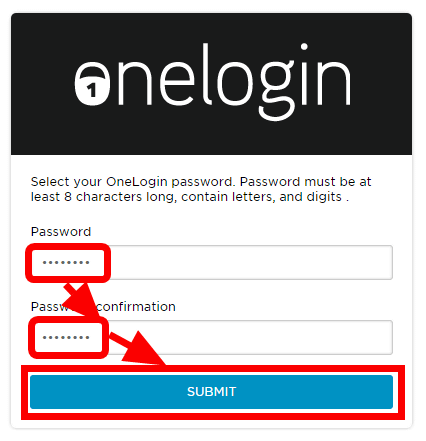
As the password registration screen is displayed, enter 'Password' and 'Confirmation password' in order and click 'SUBMIT'.
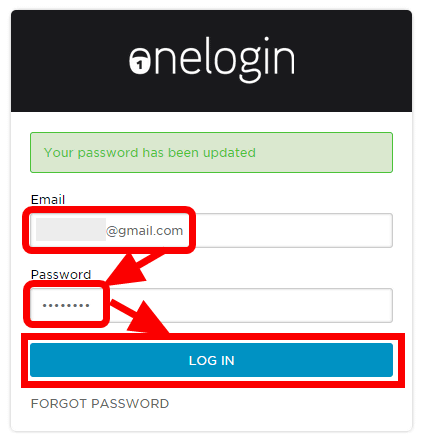
Next, enter "Mail" "Password" and click "LOG IN".
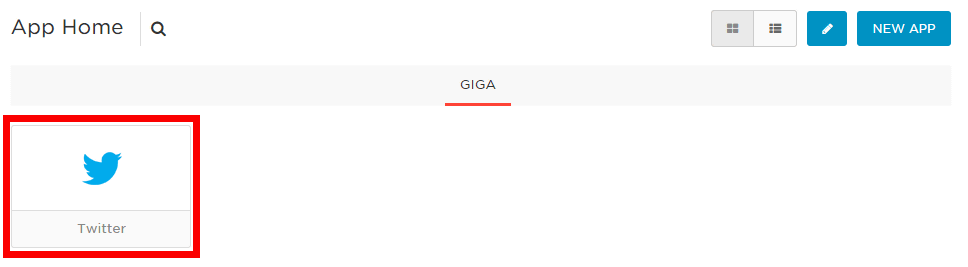
This is the shared user's home screen. Twitter that the administrator shared access right is displayed, so clicking ......
I was able to log in to Twitter with just one click. Only login information of OneLogin was necessary to log in to Twitter. Even if you share multiple web services with OneLogin, you do not need to tell the password to share the users, so it's safe.

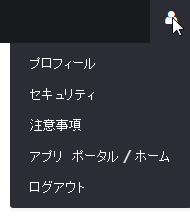
If you mouse over the icon in the upper right corner of the user's home screen, the setting menu was displayed in Japanese. When the administrator makes the home screen Japanese, it seems that the language of the shared user's home screen also changes.
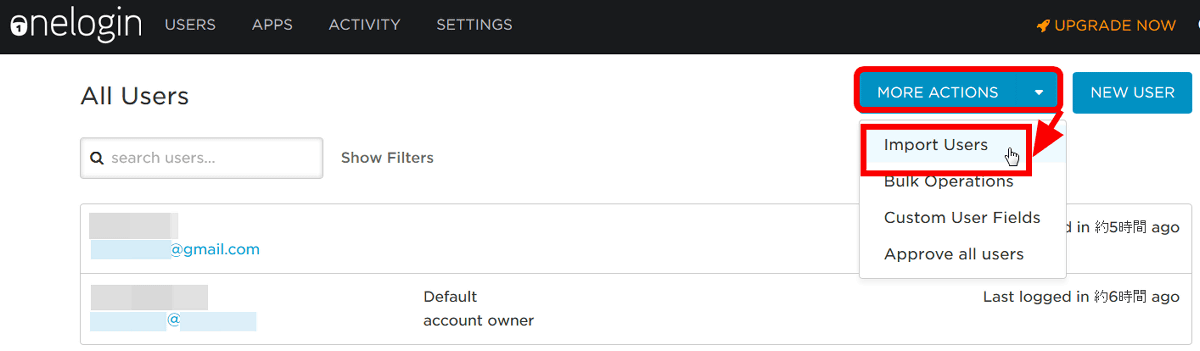
◆ Multiple users added in CSV file
When creating an account, I registered a user manually, but it also supports collective registration by CSV file. To add multiple users in bulk Move the cursor to "MORE ACTIONS" from the user administration screen and click "Import Users".
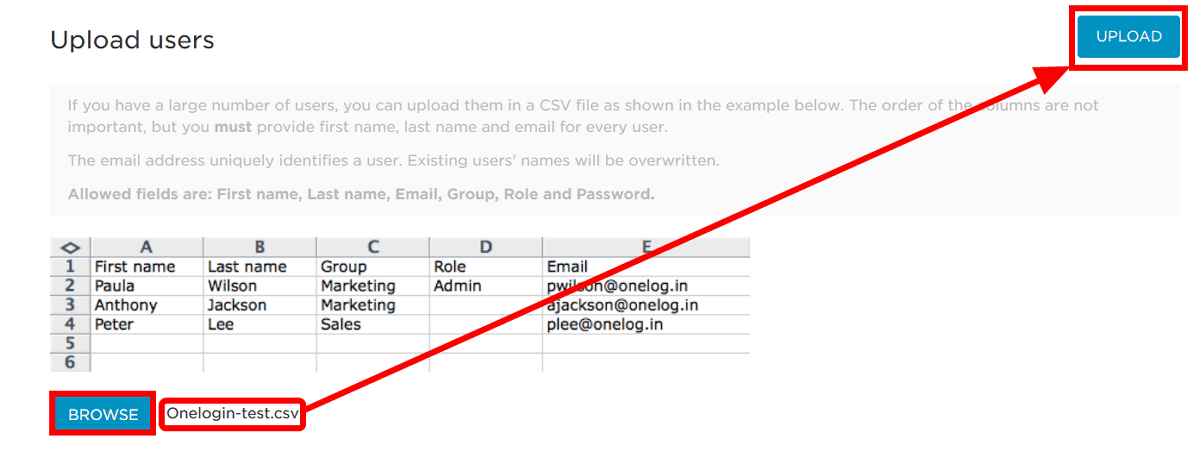
Click "BROWSE", select the CSV file you want to upload, confirm that the selected file name is displayed on the right, and then click "UPLOAD".
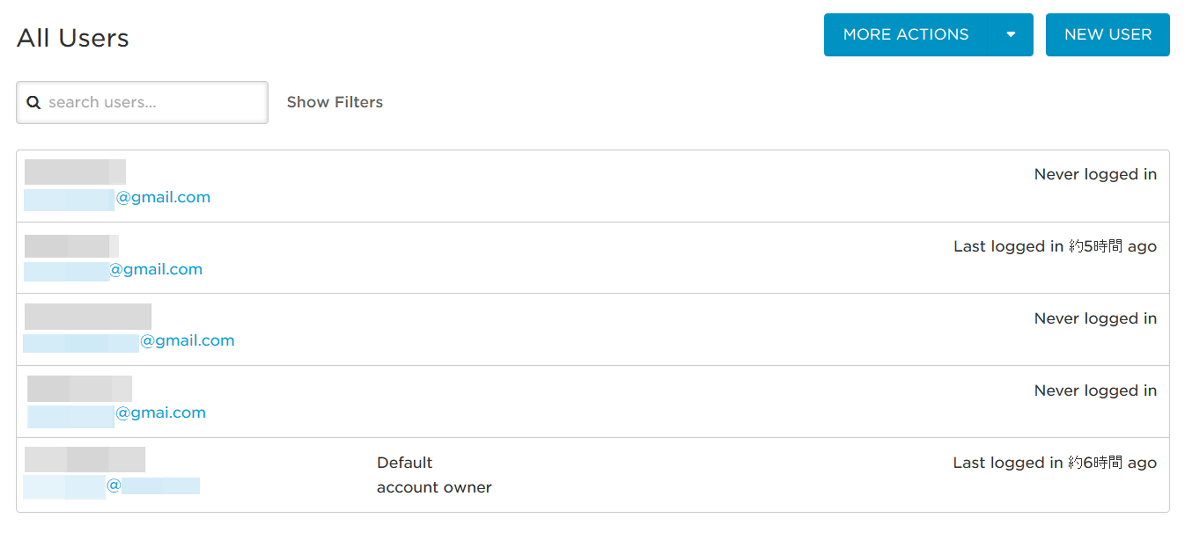
After checking the user administration screen, three users who were in the CSV file were registered.
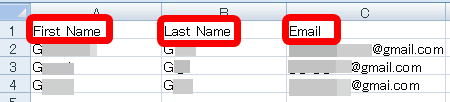
Three items required for registration are "First Name", "Last Name", and "Email". However, if Japanese is included in the name or surname, an error occurs at the time of uploading, so items must be alphabetical or numeric.
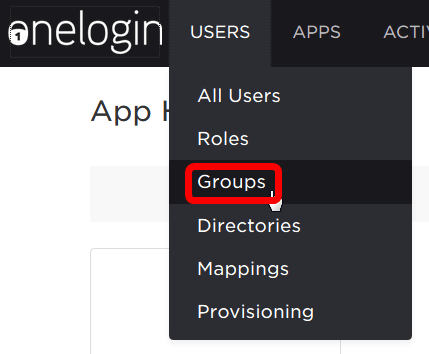
◆ Group creation
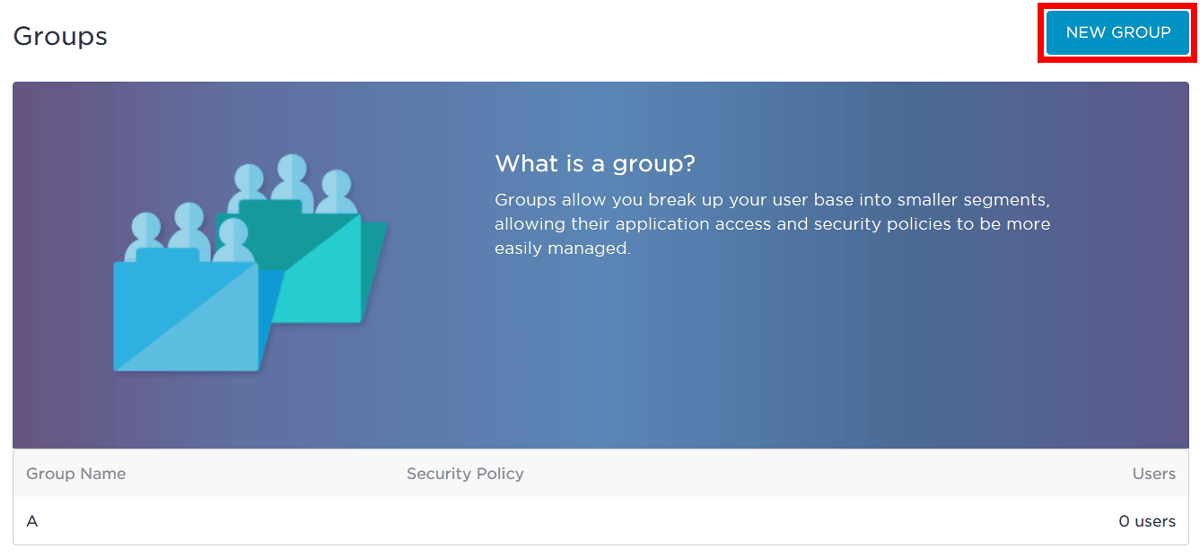
When you create a group, you can group multiple users together and set policies for each. To create a group Click "GROUPS" from "USERS" on the menu bar.
Click "NEW GROUP" in the upper right corner of the screen.
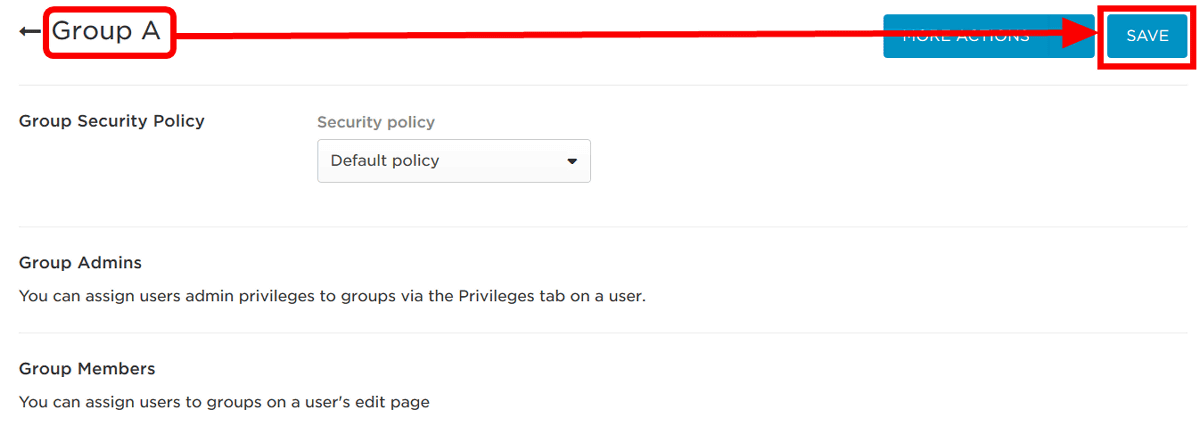
You can create a group by entering the name of the group and clicking "SAVE".
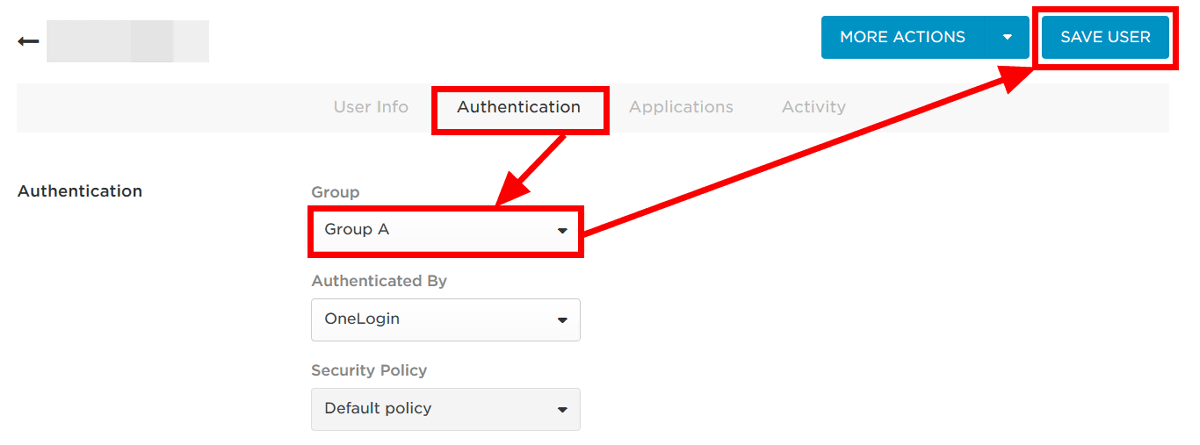
After creating the group, try adding a user. Click on the user you want to add to the group from the user management screen.
Click "Authentification", select "Group A" created earlier and click "SAVE USER", then adding to the group is completed. In the free version, only one policy can be set, so you can not group with different policies, but if you divide it into groups such as "sales department" and "advertising department", user management will be easier.
User privilege setting (Roles)
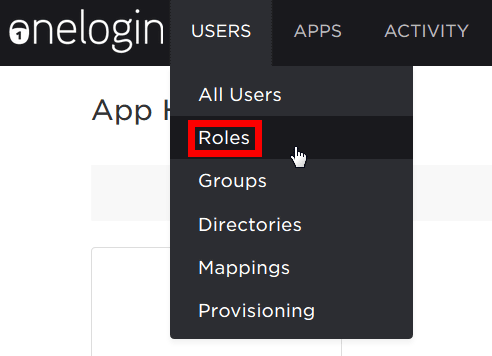
Roles is a function that can manage the access right to the application collectively. Just associating users with Roles who registered multiple applications enables users to access only the applications registered in Roles. To set Roles Click "Roles" from USERS on the menu bar.
Click "NEW ROLE".

Enter the name of Role, click on the registered web service queued at the bottom of the screen to register in Role, click on "SAVE" at the end.

When registering the web service in Role, the tab "USERS" is newly displayed, click it, enter the user name to be associated, and click "SAVE" at the end. When entering the user name to associate, simply entering one initial letter will find the relevant user and display it better.
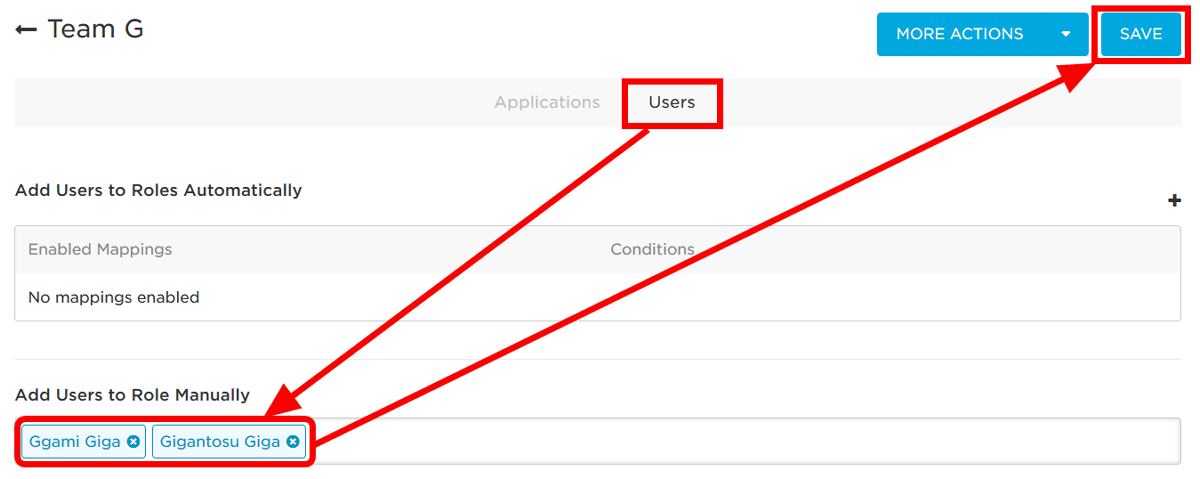
If the registered Role is displayed, the setting is completed.

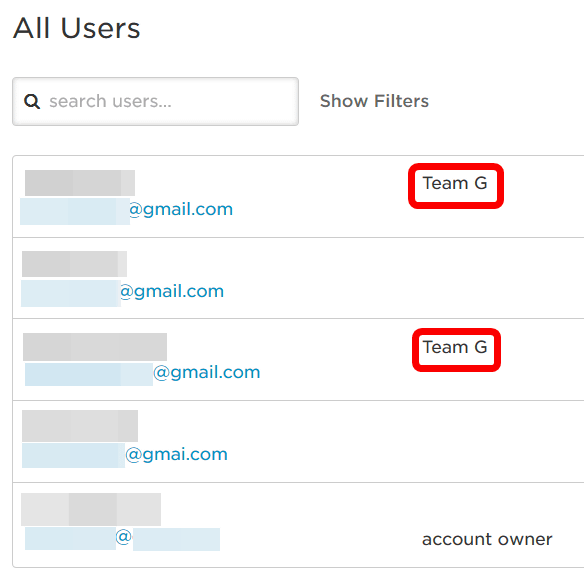
When you check the user administration screen, the name of the Role you registered for the user associated with Role is displayed.
Looking at the home screen of the user associated with the trial, only the web service set by Role was displayed. For example, if you create a Role such as "Sales" or "Human Resources" and register users and web services, management becomes easy.
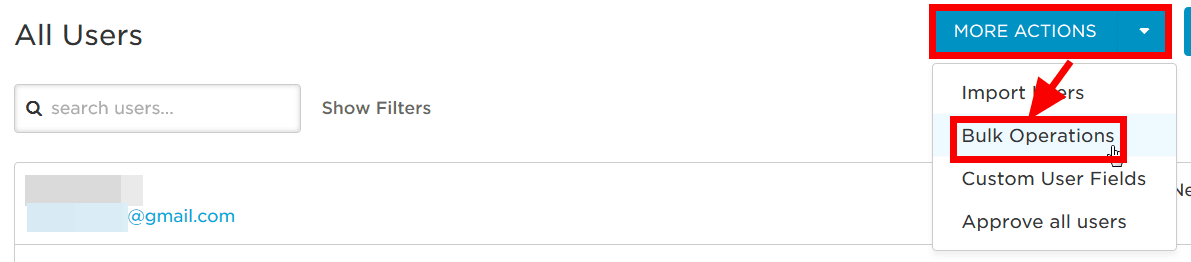
◆ Collective action for multiple users (Bulk Operations)
Using Bulk Operations, it is possible to perform actions on multiple users at once. Move the cursor to "MORE ACTIONS" on the user management screen and click "Bulk Operations".
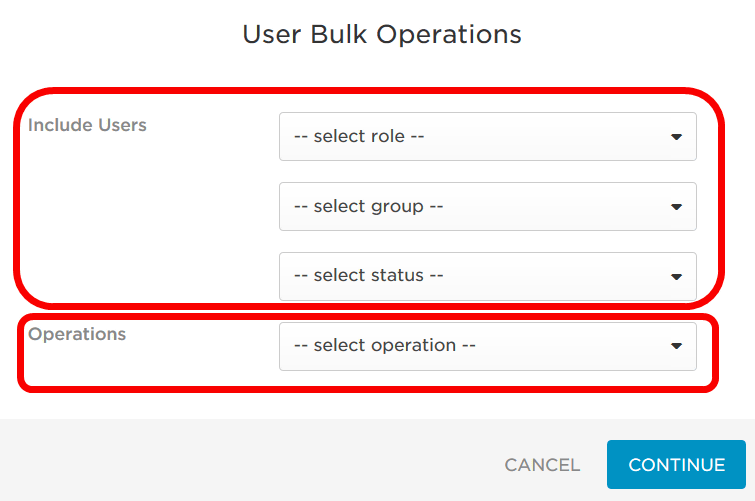
In "Include Users", you can specify the user who is going to take action, and set the action for the user specified in "Operations".
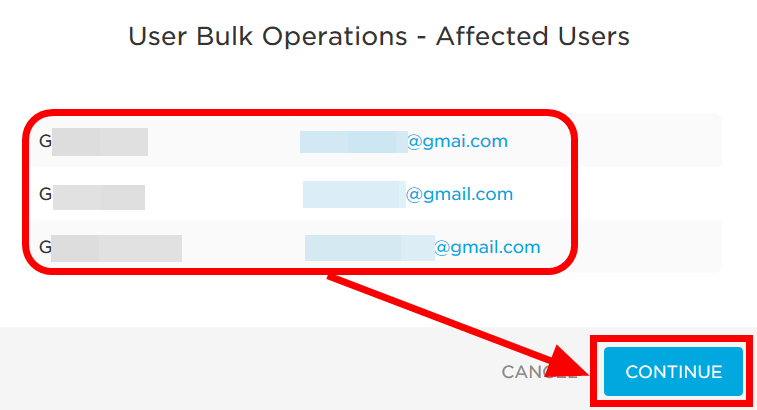
You can specify multiple users with "Role" or "Group", but this time, set "Status" to "Never logged in" (never logged in) and "Operations" to "Send Invitation I will send an invitation to the user who has never logged in. When you designate everything, click "CONTINUE" at the end.
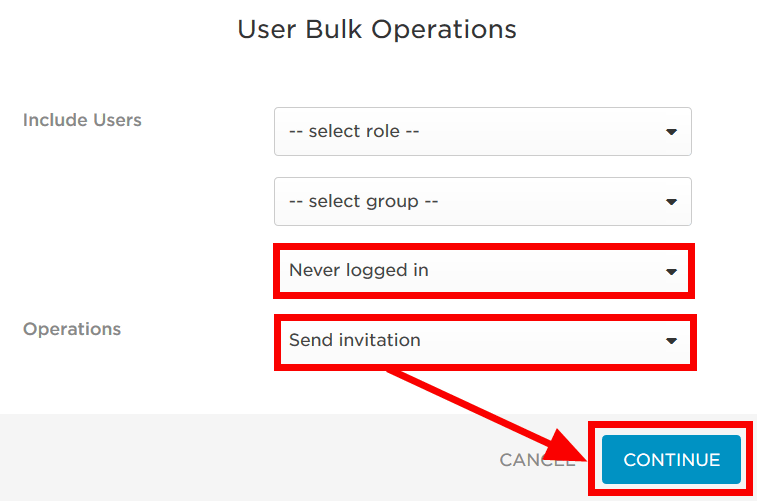
Please confirm that the target user of the action is displayed and click "CONTINUE" to finish.
When I looked at the mailbox of the target user, the invitation was received properly.
◆ Tab setting
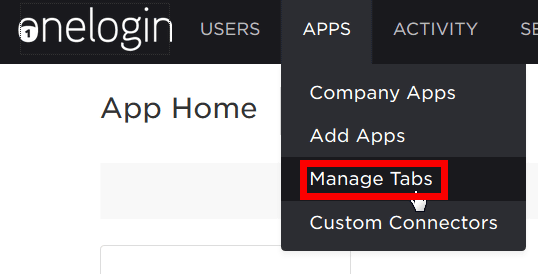
When you register a lot of web services in OneLogin, there are times when it is difficult to find the web service you want to use by enumerating the web service as zlat when the user logs in. Tab setting is useful in such a case. By setting tabs, you can specify the web service to be displayed for each tab. I think that there are parts that are hard to convey in words, so I will actually do it. To set tab settings, click "Manage Tabs" in APPS on the menu bar.
Click "NEW TAB".
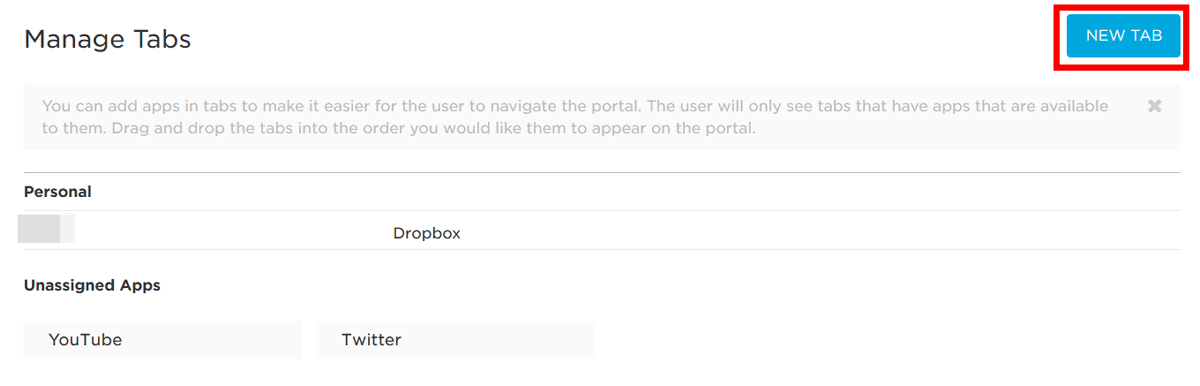
Enter the name of TAB, select the web service to register on the tab, and click "SAVE" at the end to complete.

Make sure that the tab you set on the user's home screen is added and only the web services registered on the tab are displayed. If you create tabs according to the type of web service, you will not get lost when logging in.
◆ User action history management
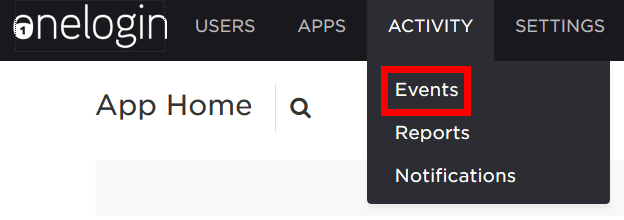
The administrator can check the history, who, when, what action taken. Click "Events" in ACTIVITY on the menu bar and check the user's action history.
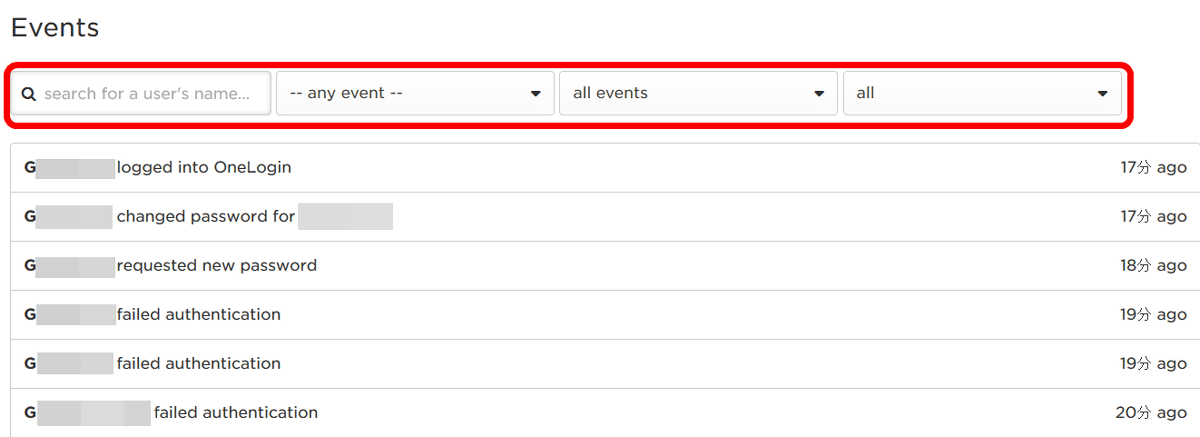
The user's history was displayed in list form. You can also examine only the history of a specific user from the search box at the top of the list or narrow down the history displayed from actions.
◆ Notification function
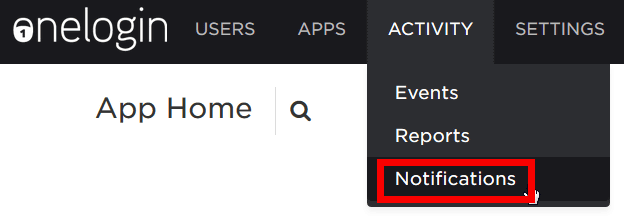
By setting the notification function, it is possible to notify the administrator by triggering new registration etc. of the user. Click "Notifications" in ACTIVITY on the menu bar and try setting the notification function.
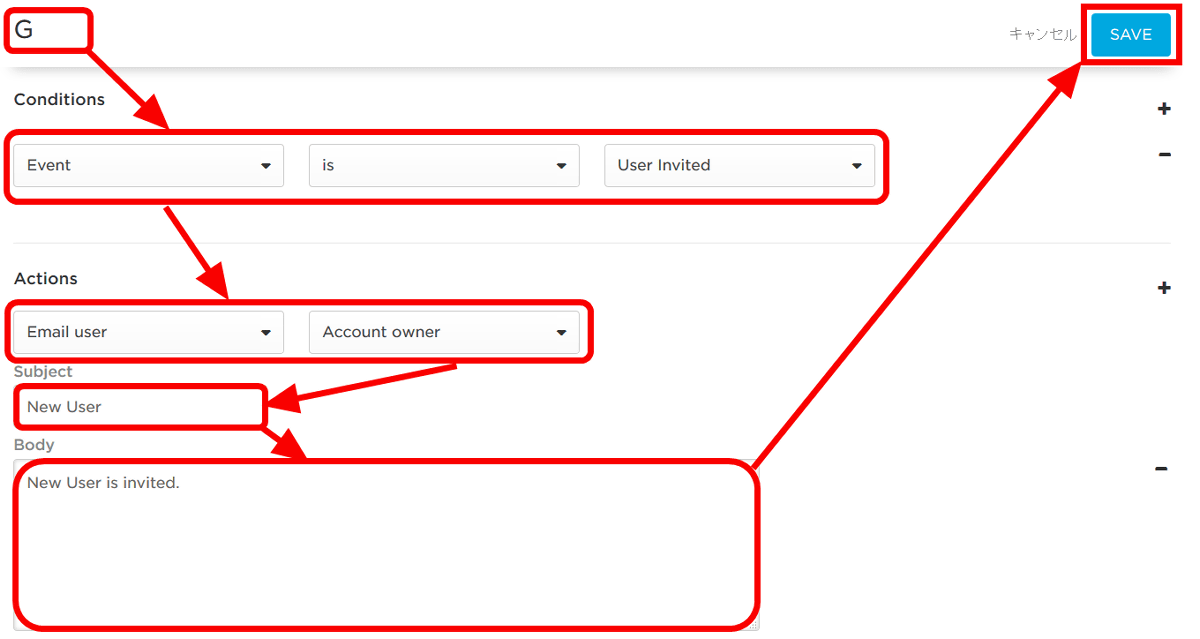
Click "NEW NOTIFICATION" to create a new notification.

First, enter the name of the notification, set the conditions for the next notification, and select the notification method. In this time, we set the condition to "Event + is + User Invited (when the user is invited)" and set the notification method to "Email User + Account owner (send mail to administrator)". Next, enter the title and body of the mail to be sent to the administrator, and click "SAVE" at the end.
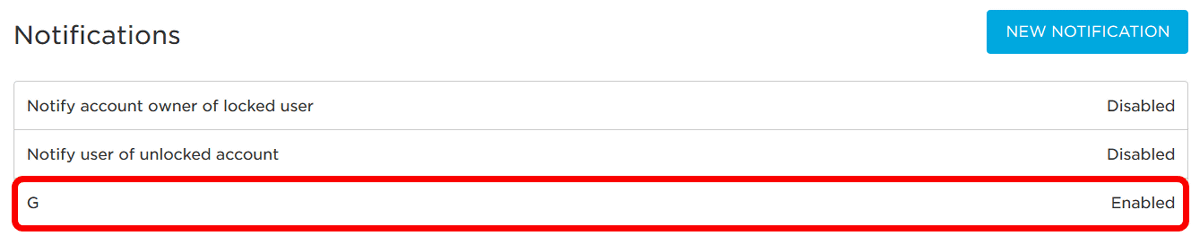
Notifications registered on the Notifications screen are displayed and if "Enabled" is displayed on the right side, notification setting is completed.
◆ Redirect setting at logout
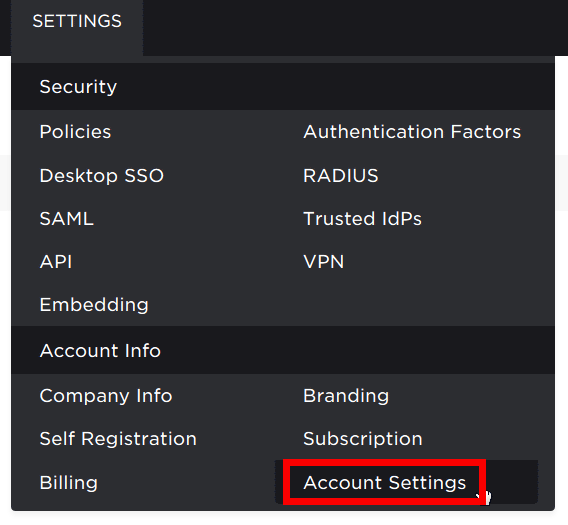
When you set the redirect setting, when logging out you will open a specific URL, such as your own site. Click "Account Settings" from SETTINGS on the menu bar.
In the "Logout URL" box displayed on the "BASIC" tab page, enter the URL you want to open at logout and click "SAVE".
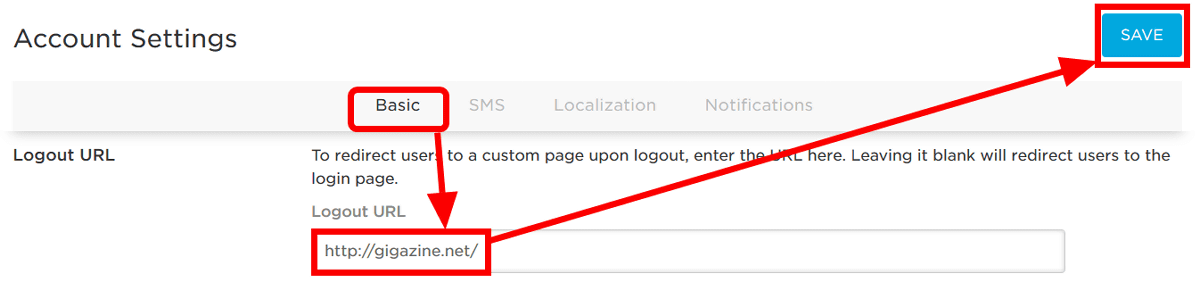
I tried logging out and tried ......

A properly configured URL was opened.
◆ Branding function
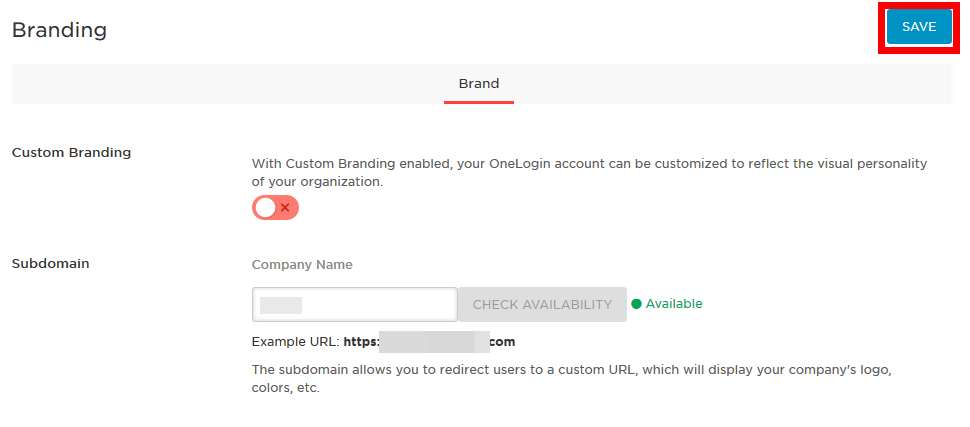
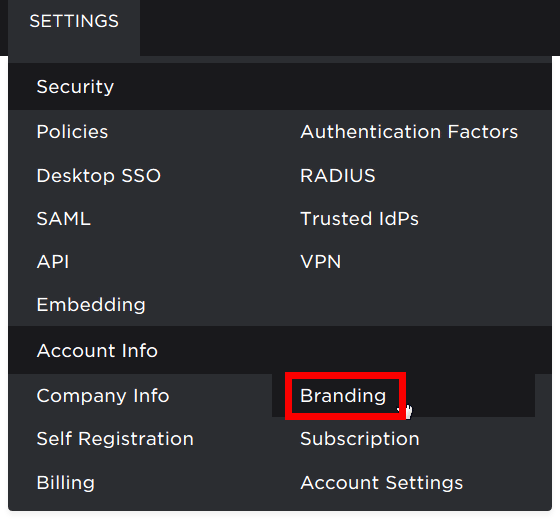
The branding function can customize the home screen and set subdomains. Click "Branding" from "SETTINGS".
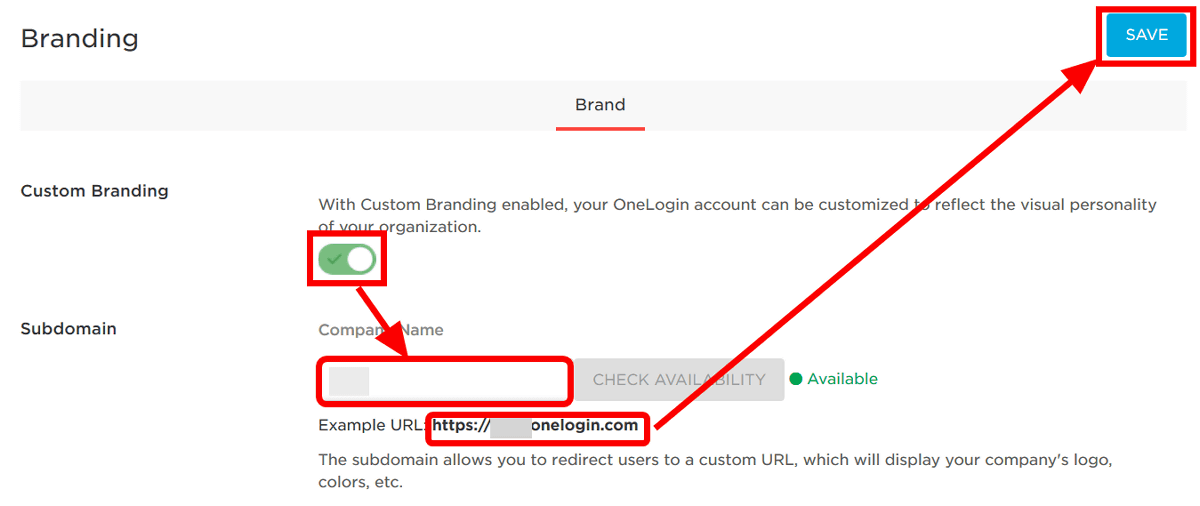
Custom Brandingにあるボタンをクリックし、サブドメインとして使用する会社名を小文字のアルファベットで入力。例えば、「test」と入力すると「https://test.onelogin.com」というをログインページとして使用できるようになり、わざわざOneLoginのサイトを開く必要がなくなるというわけです。次に「SAVE」をクリックすると……
A column for setting the logo is added at the bottom of the page.
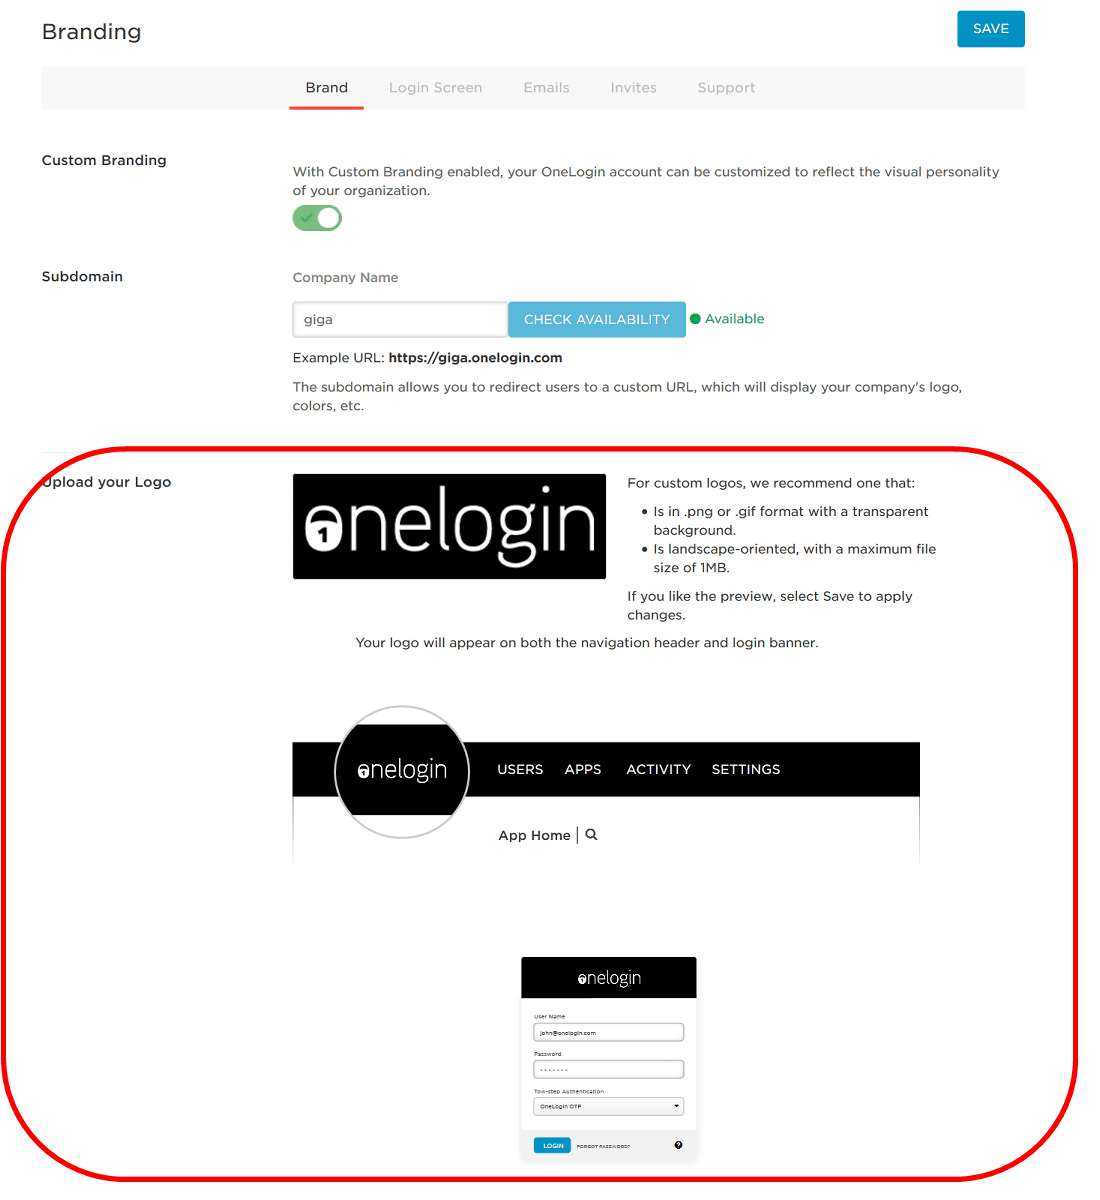
Click on the OneLogin thumbnail image and select the logo you want to use from the local ......
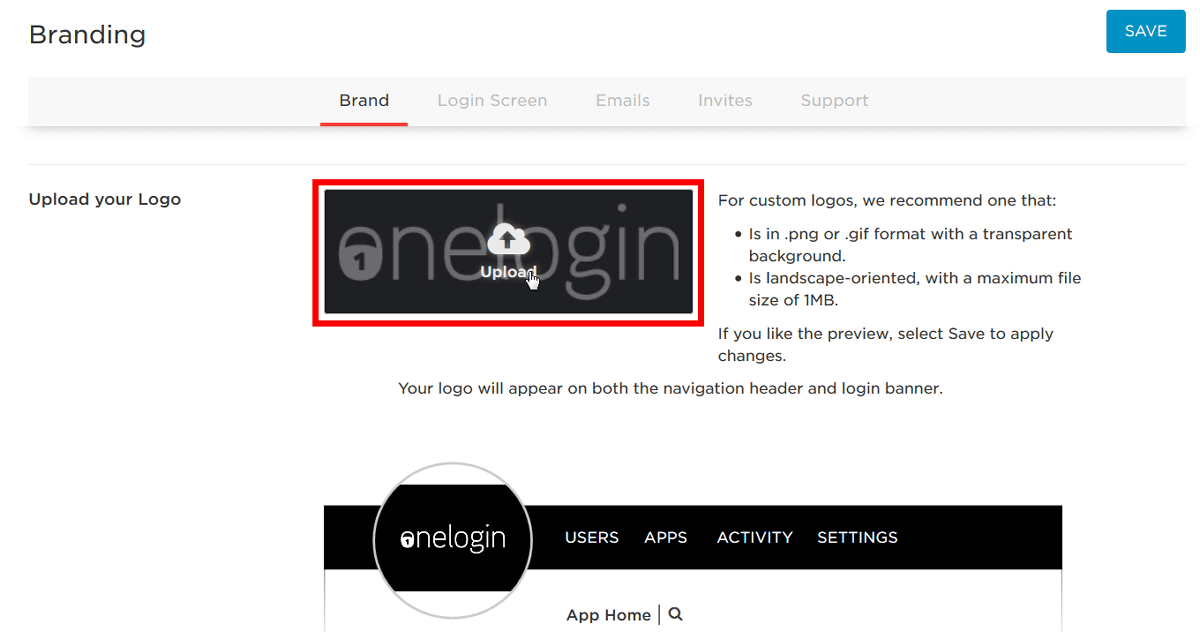
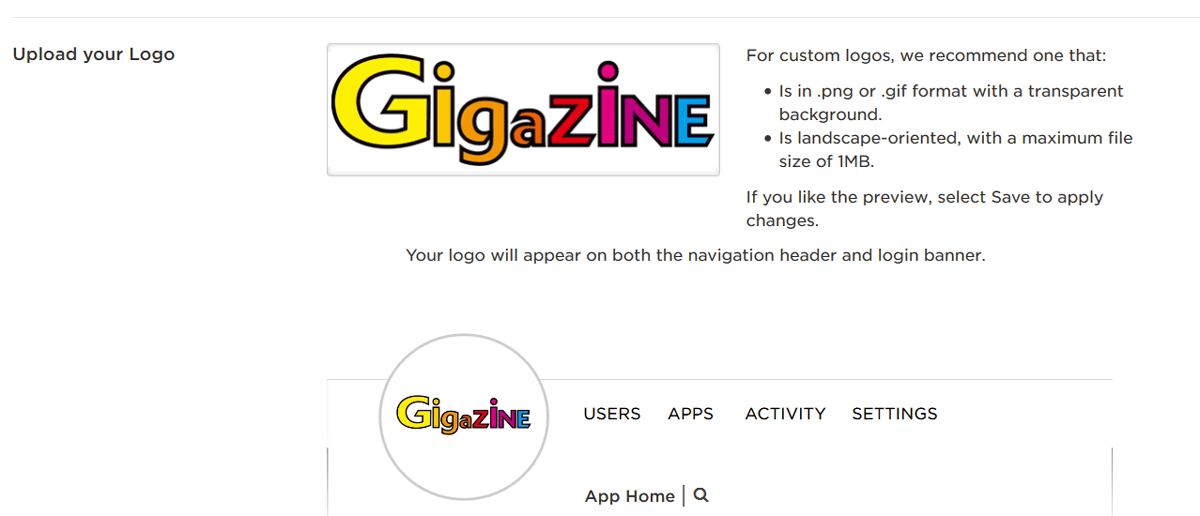
The logo has been changed. Up to 1 MB logo image can be uploaded in PNG or GIF format.
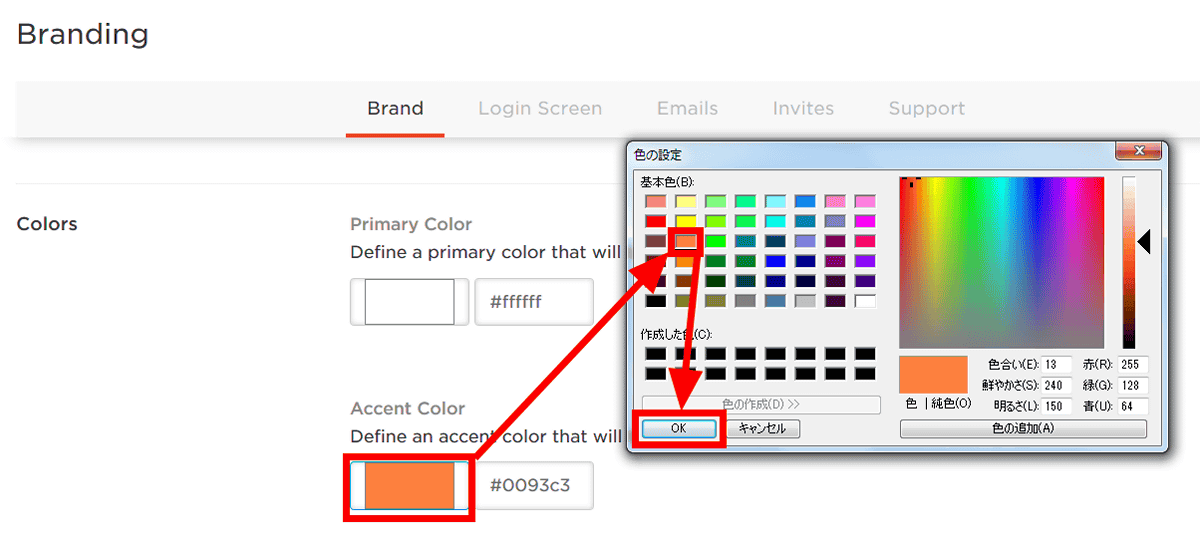
In addition, the background color of the home screen and the color of the button can be changed. Click on the palette, select your favorite color and click "OK" to change the color. It is also possible to change by entering the color code.
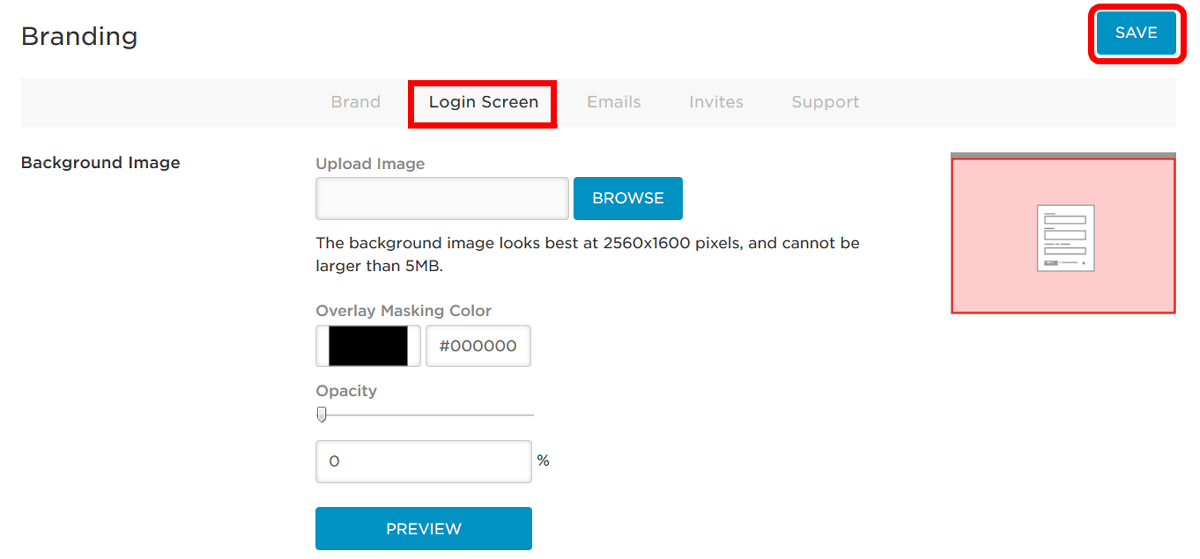
Although it is not set this time, you can customize the login screen from the tab page "Login Screen". Click "SAVE" when all changes are completed.
When checking the home screen, the colors of the logo and the button were changed. Just by displaying the logo, it is wonderful that the attachment will come.
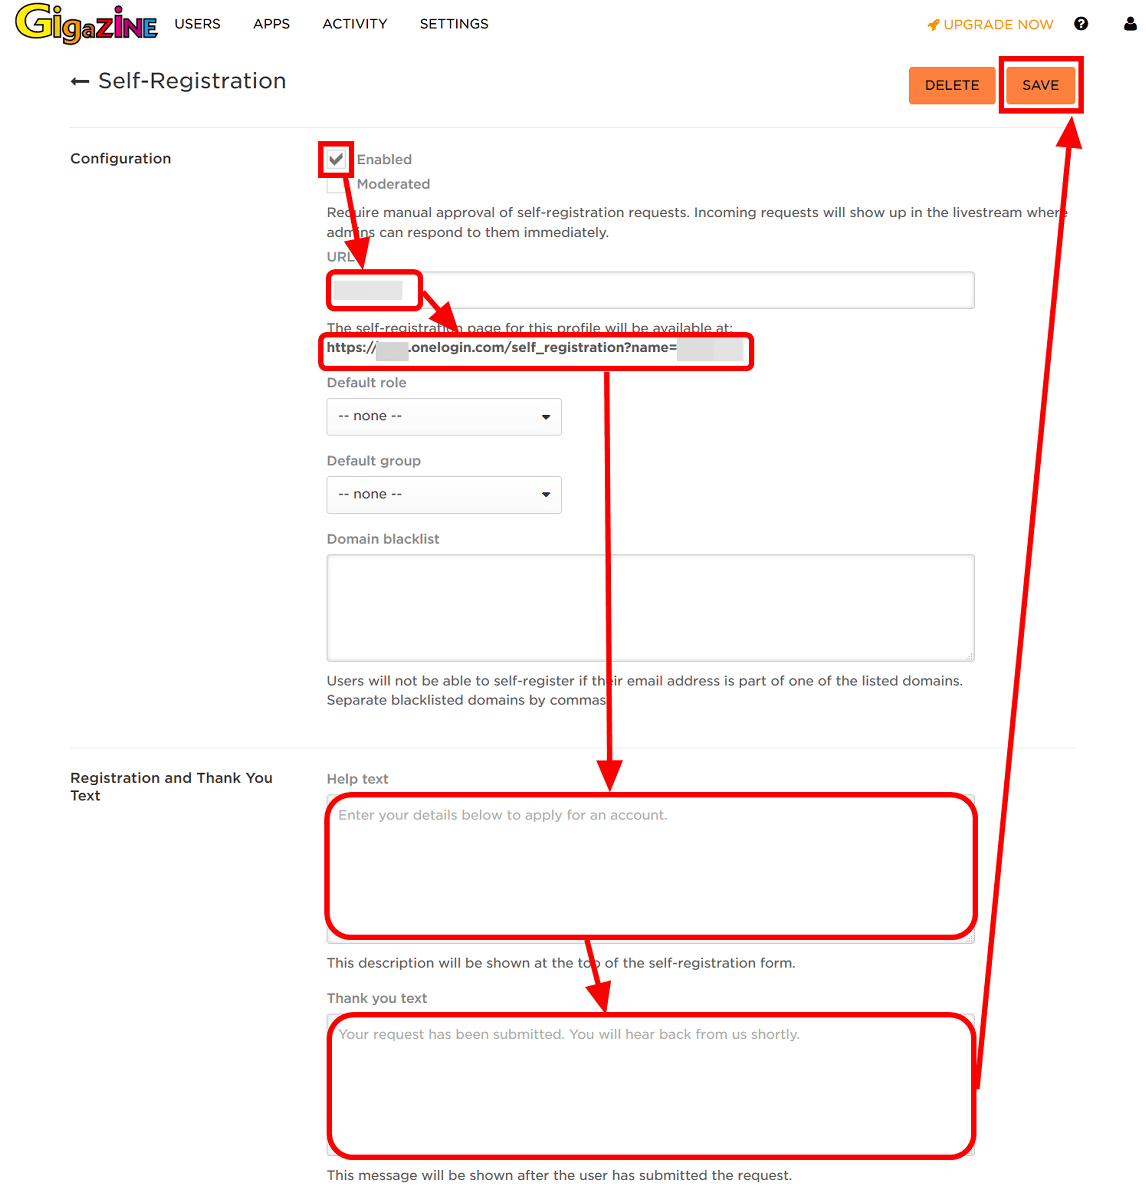
◆ Self Registration function with custom URL
If you use the Self Registration function, you can create a dedicated screen for each user to register users themselves. Click "Self Registration" in SETTINGS.

Click "NEW PROFILE".

「Enabled」にチェックを入れて、専用画面のURLに入れる要素を入力。入力ボックスの下側に、入力した要素を反映したURLが表示されるので確認。例えば、「test」と入力すると「https://会社名.onelogin.com/self_registration?name=test」という感じです。次はユーザー登録画面に表示する説明文とお礼のテキストを入力して、最後に「SAVE」をクリックします。
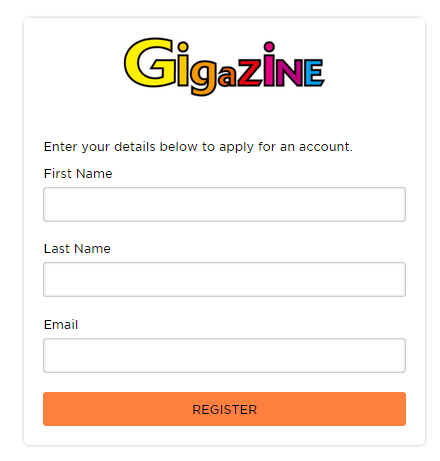
This will be the user registration screen created.
As you can see, OneLogin was able to use many features even with a free plan, and it was possible to efficiently and securely manage web applications with multiple members.
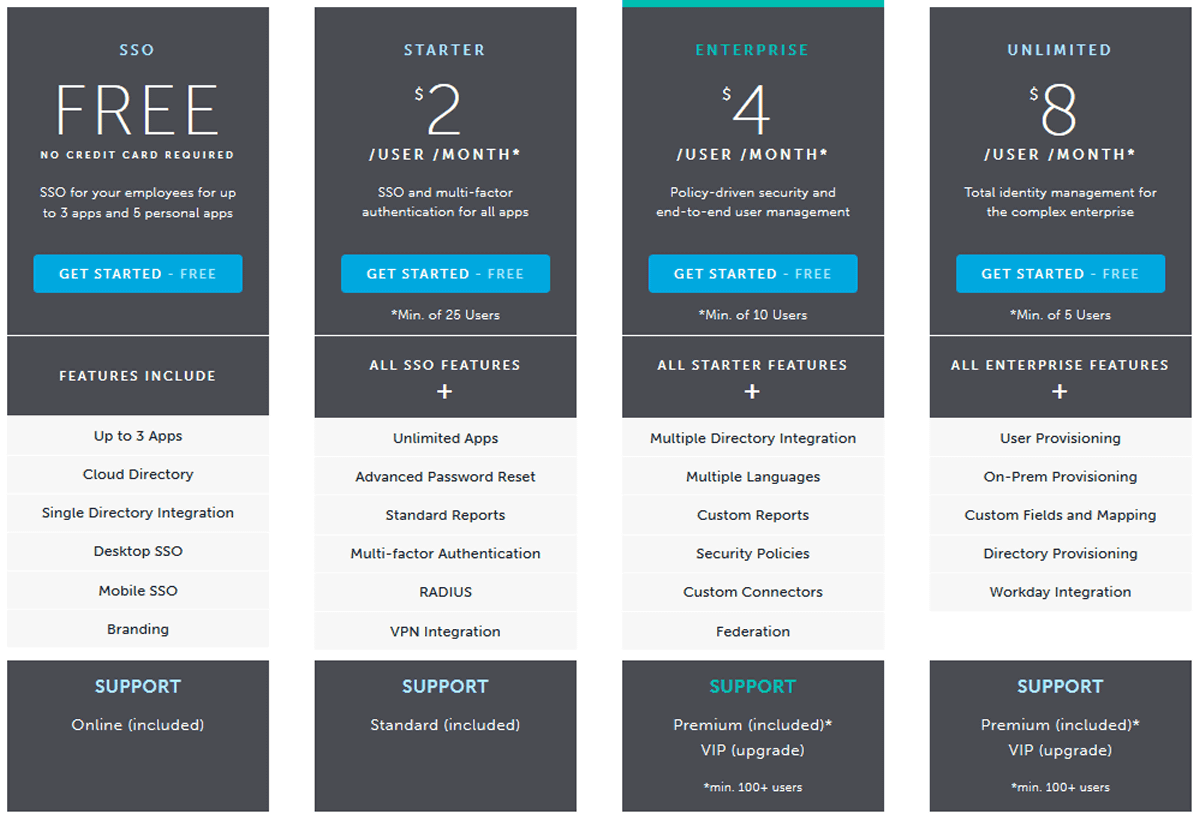
Although the number of users who can give web service access rights in the free plan is unlimited, the number of applications that can be registered is limited to a maximum of three internal applications and up to five applications for personal use . Paid plans are $ 2 per user (about 240 yen), $ 4 (about 480 yen), and $ 8 (about 960 yen) per month, for example, an application that can register as a plan of 2 dollars per user per month Will be unlimited.
Related Posts:


in Review, Web Service, Posted by darkhorse_log