I created a free remote desktop VPN environment using a Synology router
Synology routers are equipped with an easy-to-use GUI management system called 'Synology Router Manager (SRM),' which allows you to set up a remote desktop environment by performing operations such as 'getting a DDNS hostname' and 'creating a VPN server' from SRM. The Synology router '
VPN Plus Server - Synology Knowledge Center
https://kb.synology.com/ja-jp/SRM/help/VPNPlusServer/vpnplus_server_desc
WRX560 | Synology Inc.
https://www.synology.com/ja-jp/products/WRX560
·table of contents
◆1: Install VPN Plus Server on SRM
◆2: Get a hostname with Synology's free DDNS service
◆3: Create a VPN server
◆4: Connect to the VPN from your PC
◆1: Install VPN Plus on SRM
To create a remote desktop environment using the functions of a Synology router, you need to install the VPN management app 'VPN Plus Server' on the router's management system (SRM). The steps to connect the WRX560 to the Internet, proceed with the initial settings, and use SRM can be found in the following article.
I tried using the multi-function Wi-Fi router 'WRX560' that can connect up to 150 devices simultaneously and has four wired LAN ports - GIGAZINE
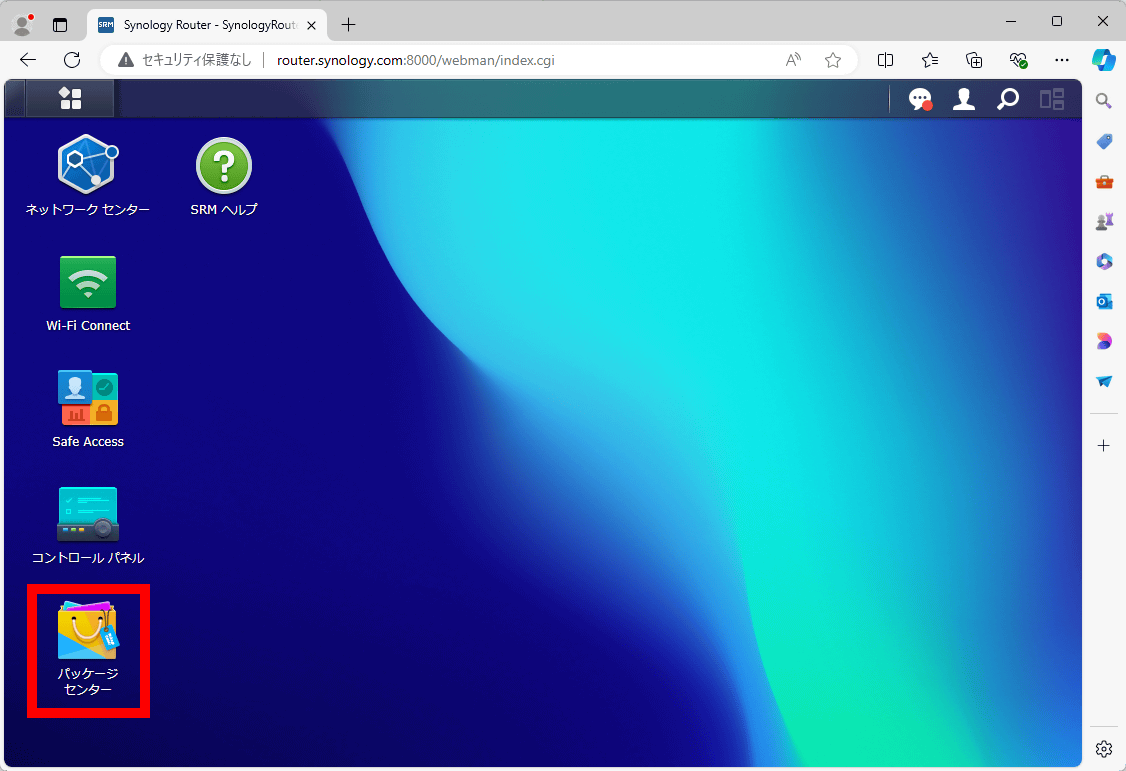
Once the initial setup is complete, open SRM by visiting ' http://router.synology.com:8000/webman/index.cgi ' in your browser and click 'Package Center'.
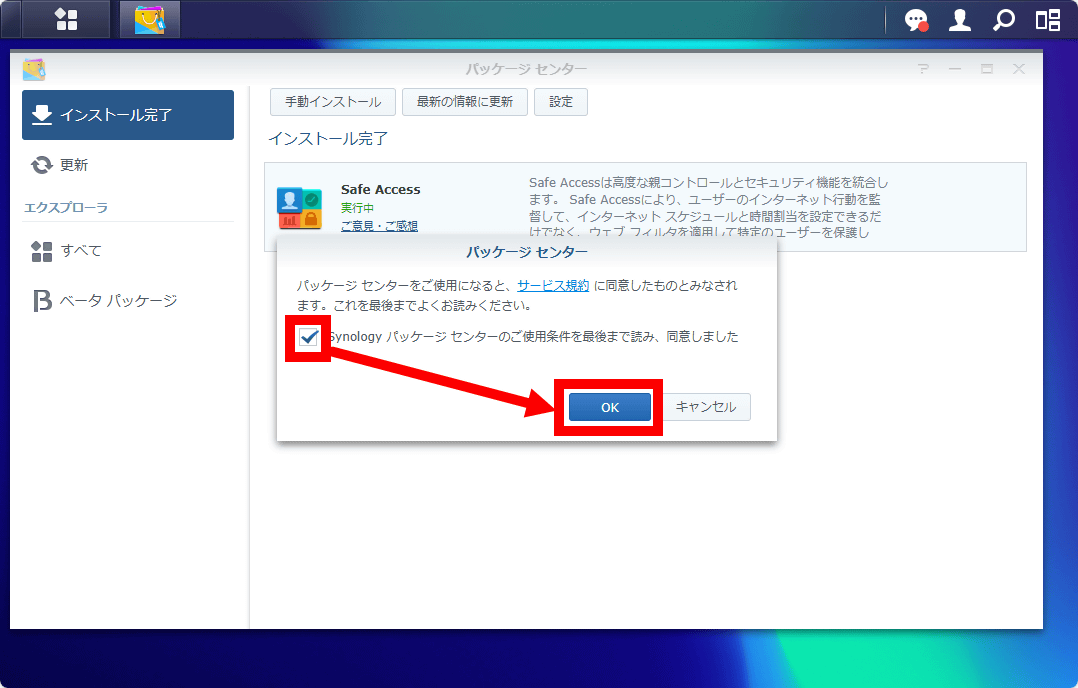
When you first start the Package Center, you will be asked to agree to the terms of service, so read the terms carefully, check the box to agree, and click 'OK.'
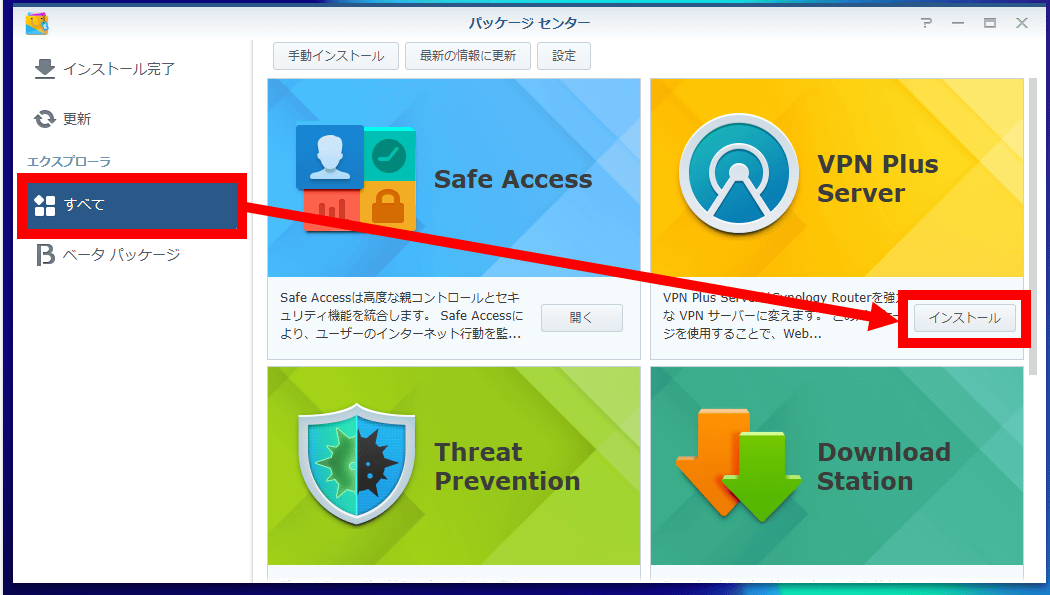
Next, click 'All' to display the list of packages, find 'VPN Plus Server', and click 'Install'.
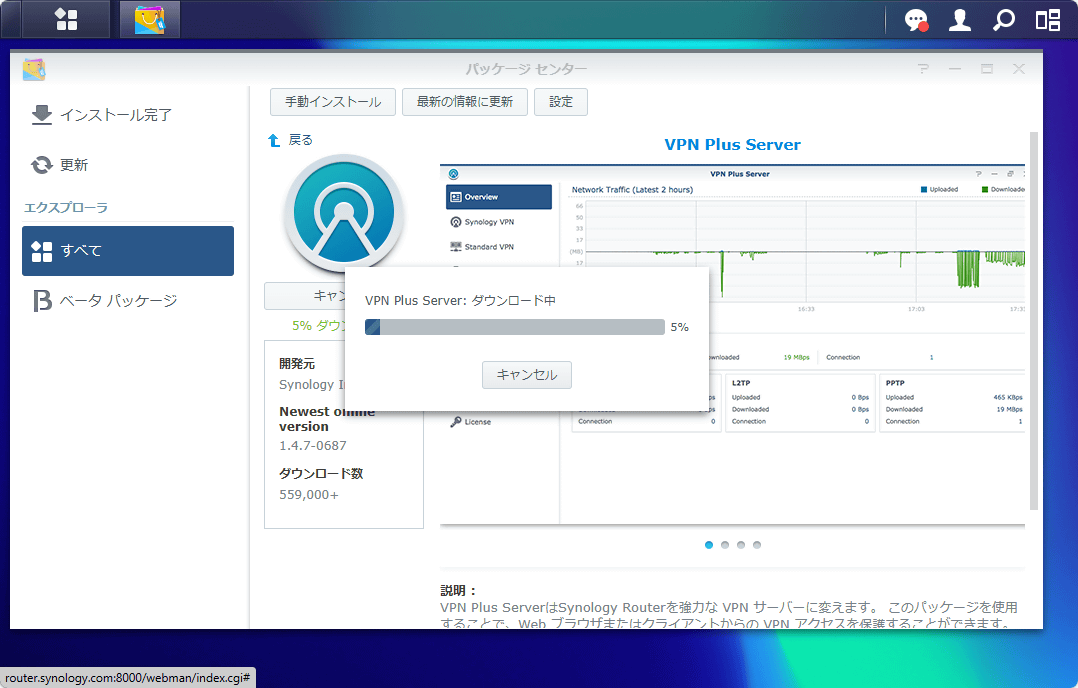
Wait a few seconds until the download is complete.
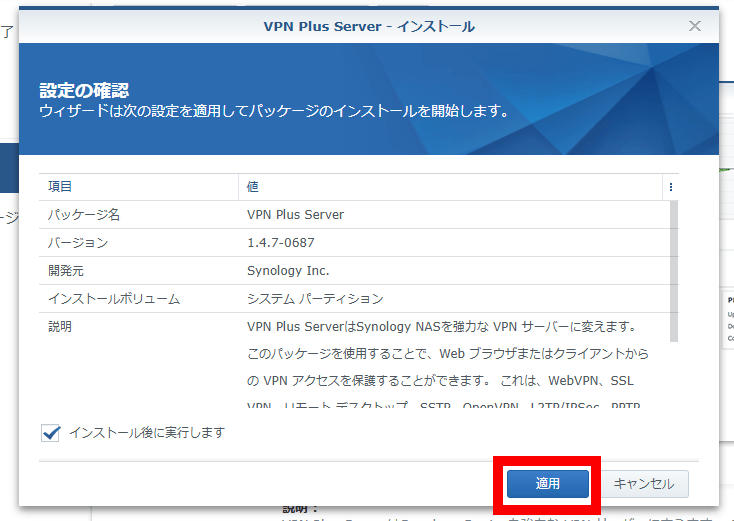
Once the download is complete, click 'Apply' to install.
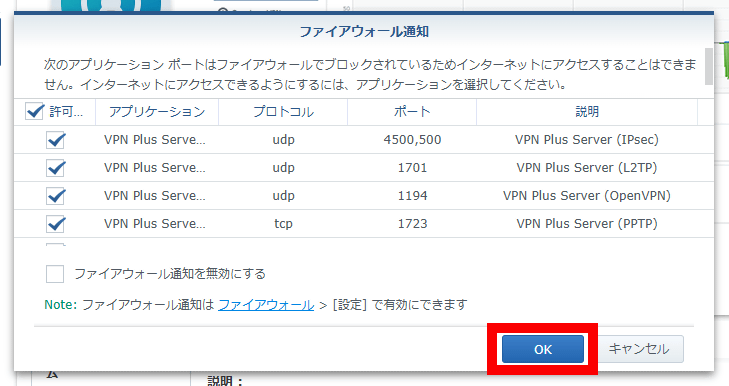
Once the installation is complete, the firewall settings screen will appear, so click 'OK' without making any changes.
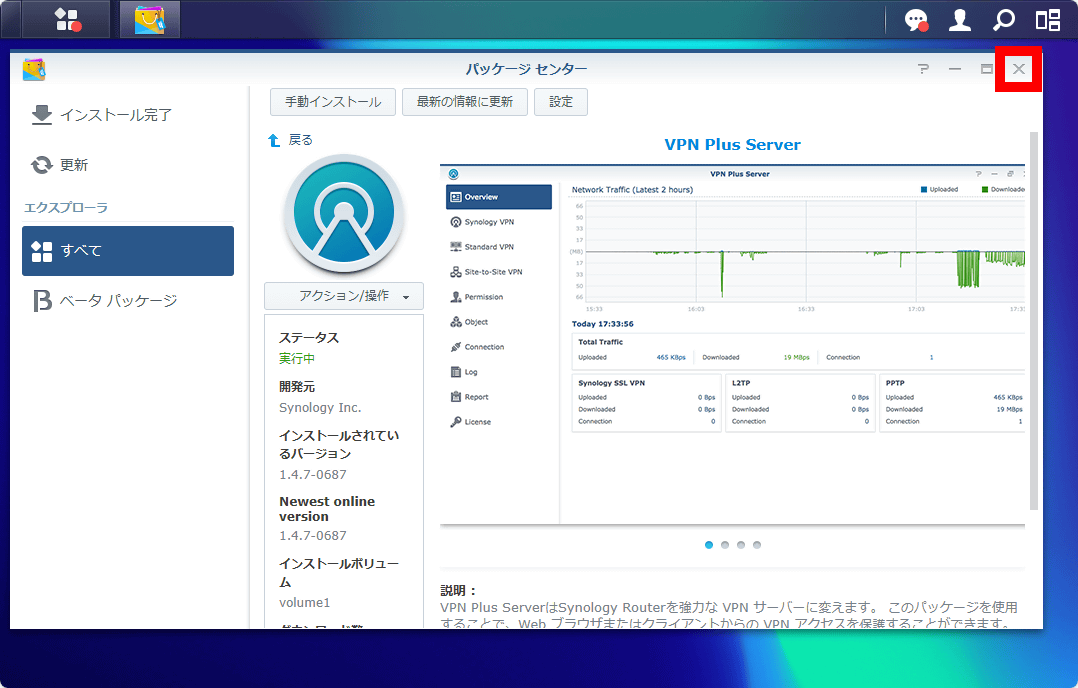
This completes the installation of VPN Plus Server. Click the 'X' in the upper right corner of the screen to close the Package Center.
◆2: Get a hostname with Synology's free DDNS service
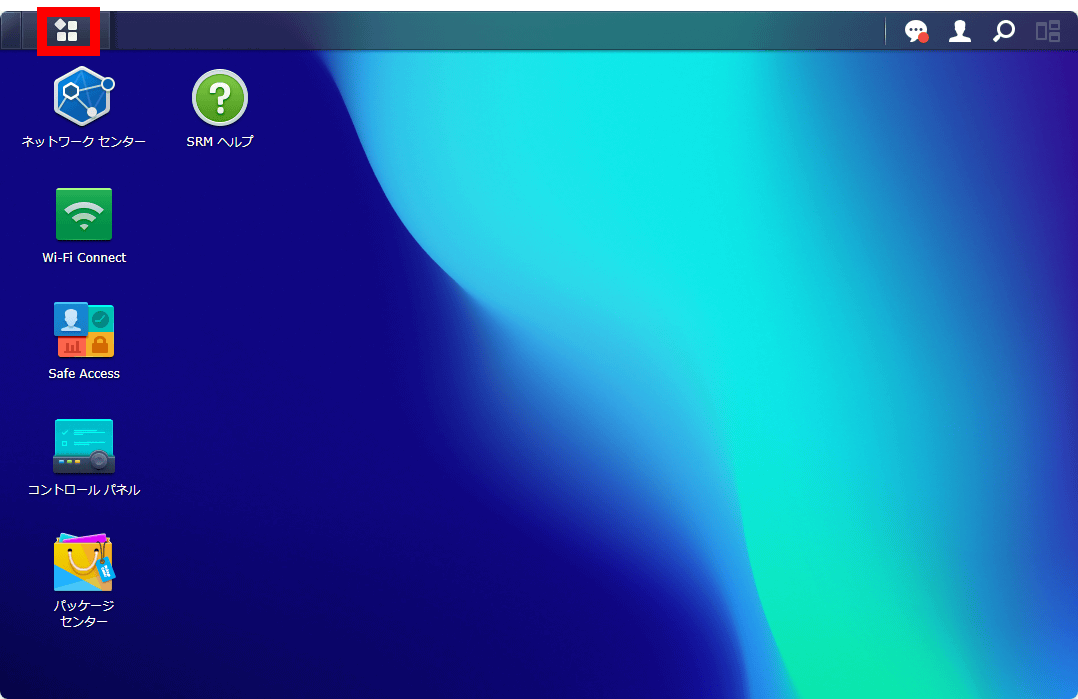
Next, obtain a hostname using Synology's free DDNS service. First, click the menu button in the upper left corner of the SRM screen.
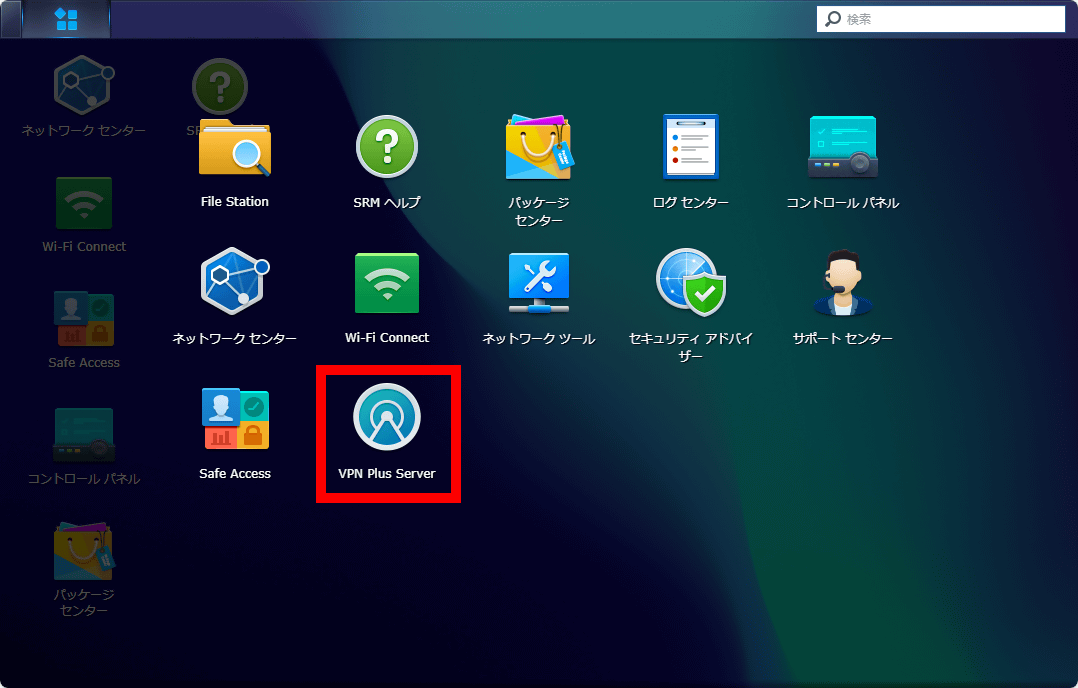
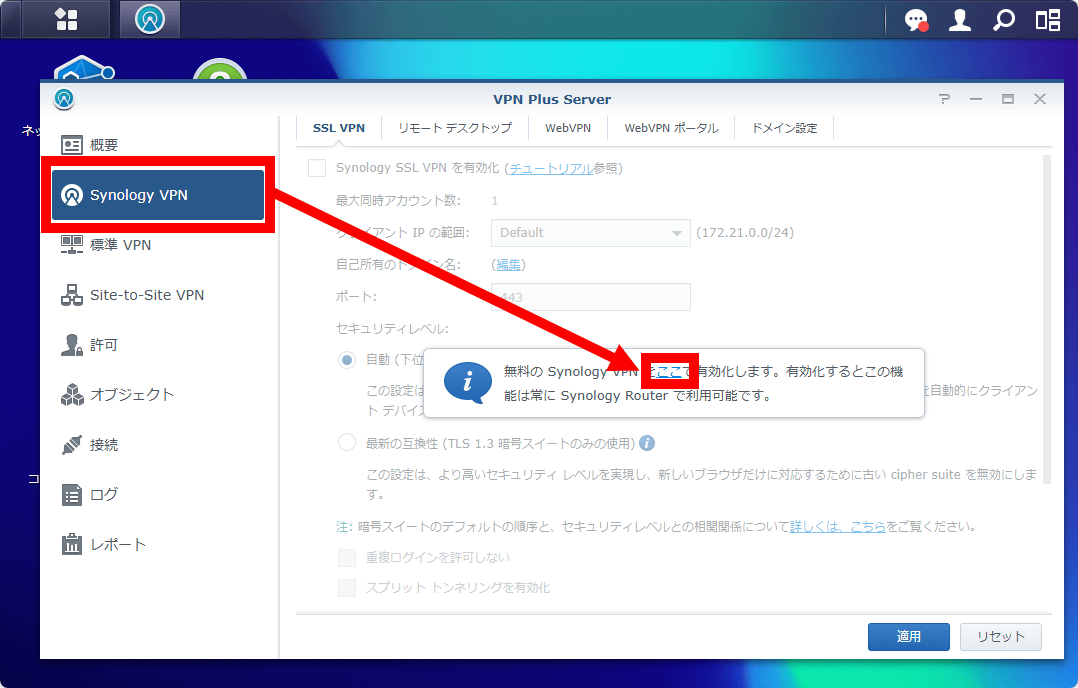
Click on “VPN Plus Server”.
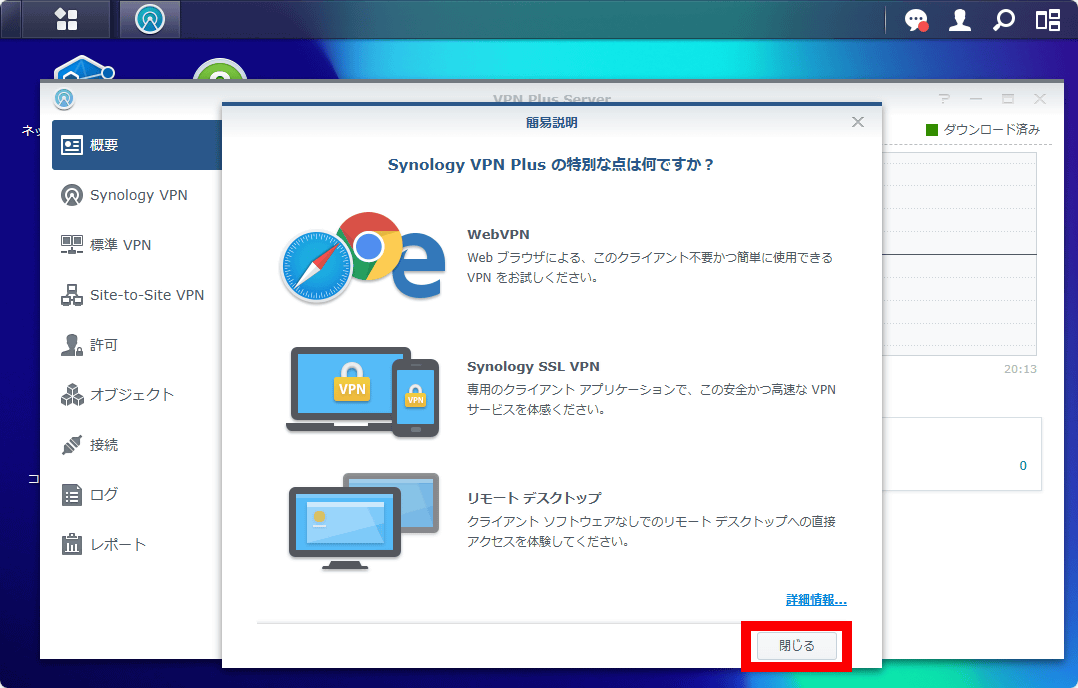
When the explanation appears, click 'Close.'
Click 'Synology VPN' and then click the blue 'here.'
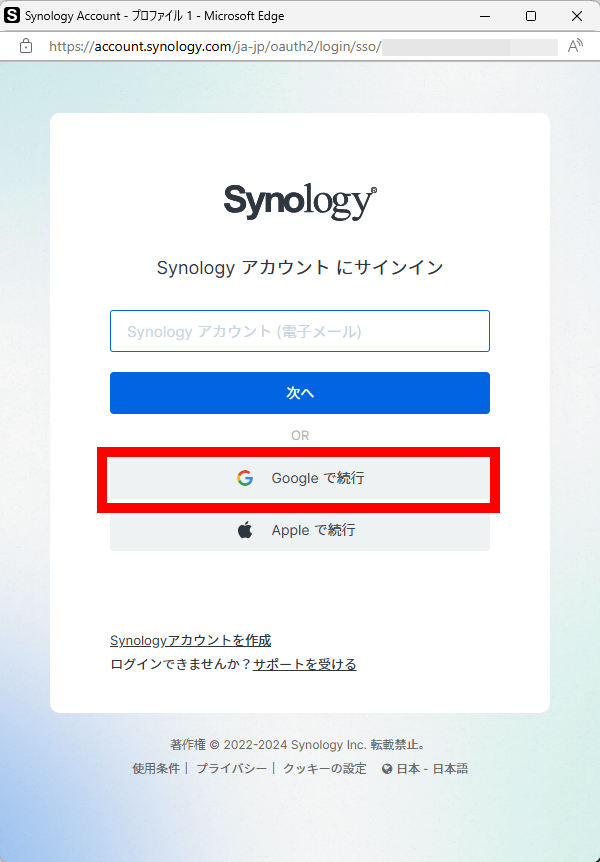
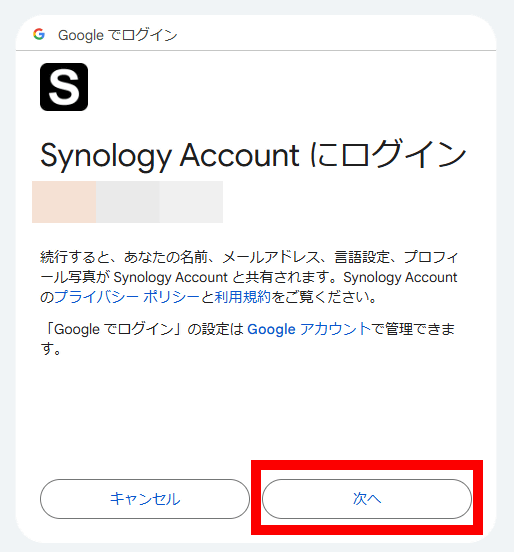
Then, the screen for creating a Synology account required to use the DDNS service will be displayed. An account can be created using a regular email address, a Google account, or an Apple account. In this case, I want to create an account using a Google account, so I clicked 'Continue with Google'.
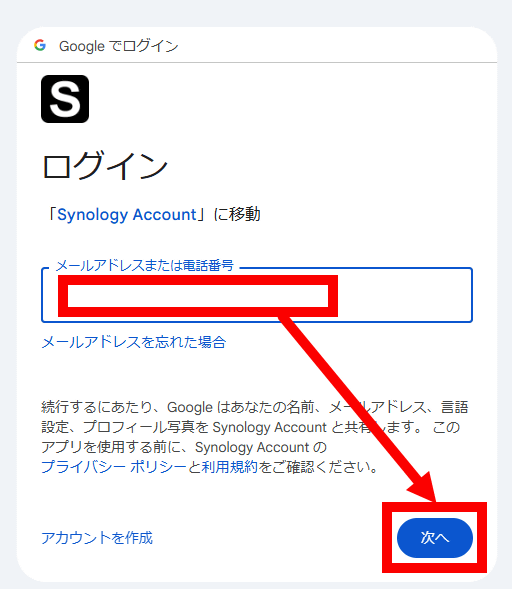
Enter your Google account email address and click 'Next.'
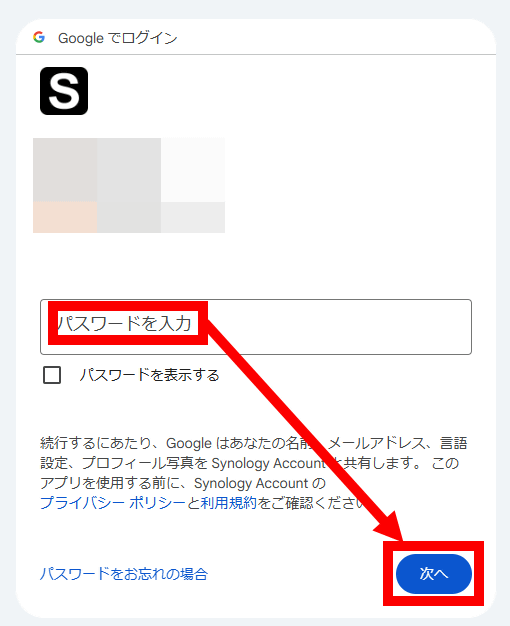
Enter your password and click 'Next'.
Click “Next”.
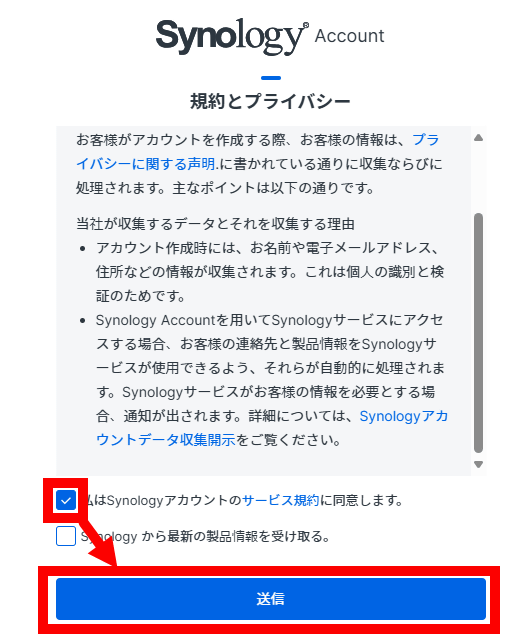
Read the terms of service carefully, check the box to accept, and then click 'Submit.'
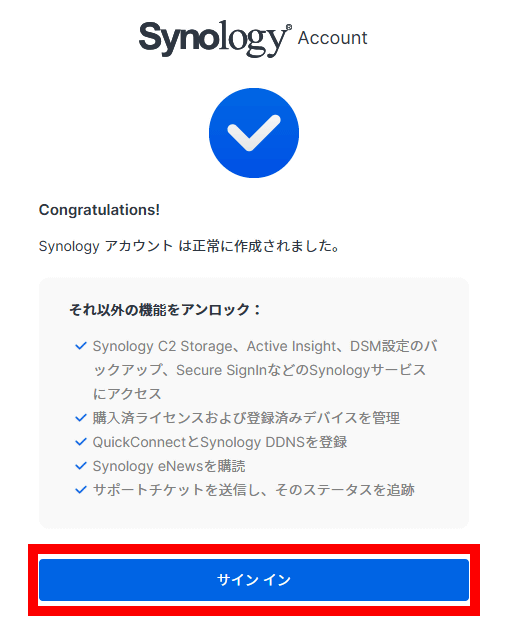
Click 'Sign in'.
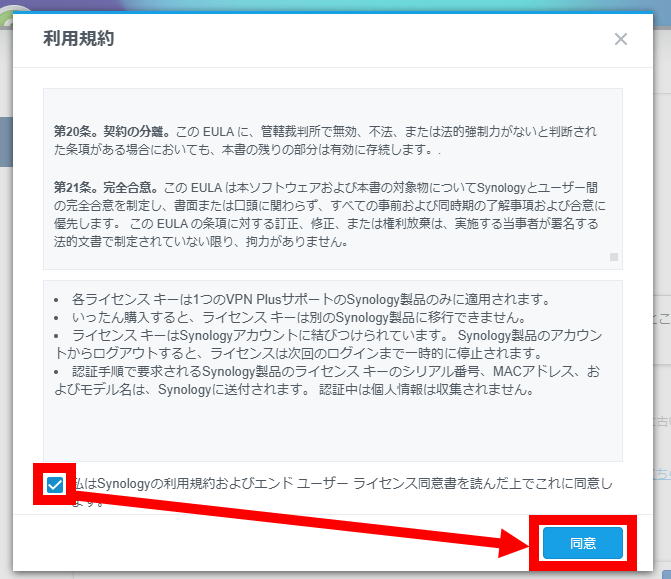
Click 'Authenticate Synology Account'.

Read the terms of use carefully, check the box to accept the terms, and then click 'Agree.'
Once you see the message 'Synology VPN has been activated,' proceed to obtain the hostname.

Click 'Domain Settings' at the top of the screen, then click 'Settings' to the right of 'Synology DDNS'.
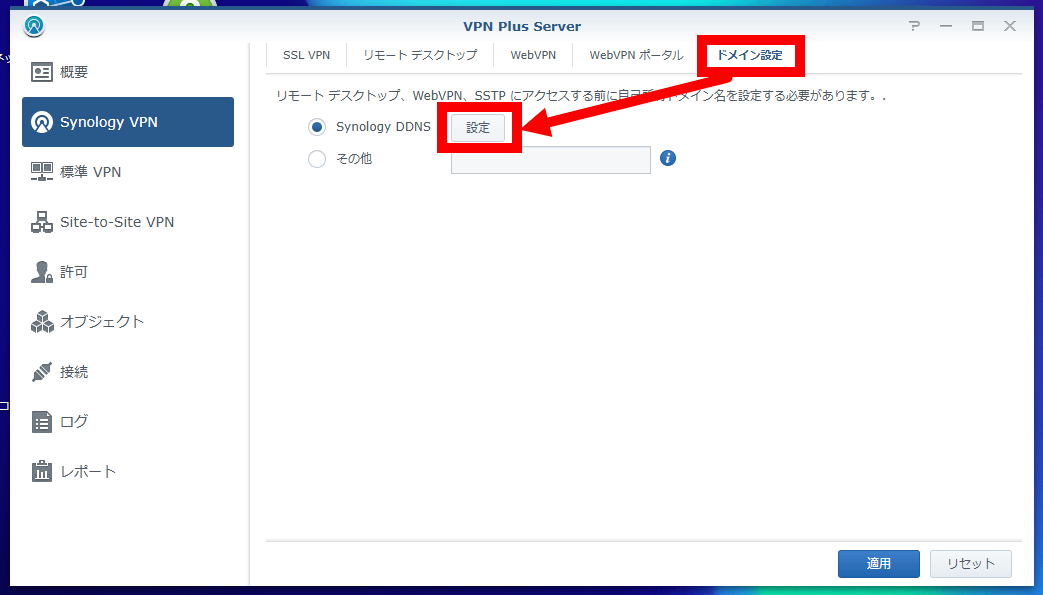
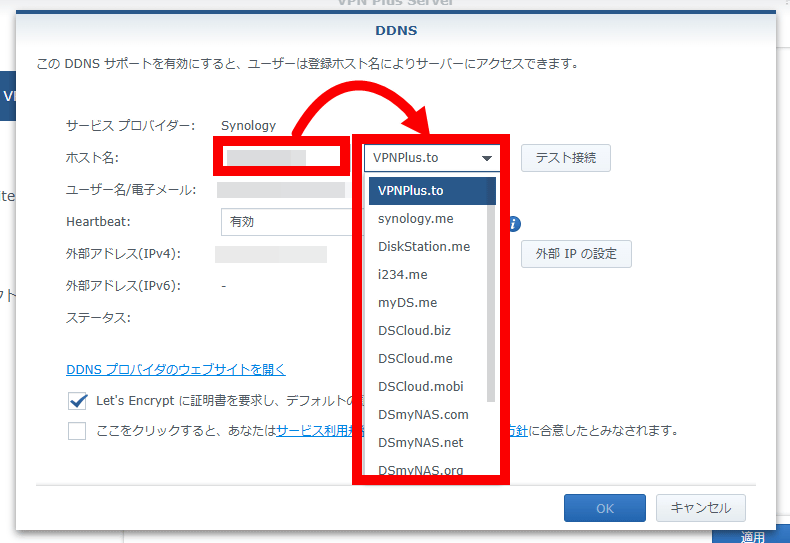
Enter the hostname you want to acquire in the 'Host Name' field and select the subdomain name you want to use from the available options.
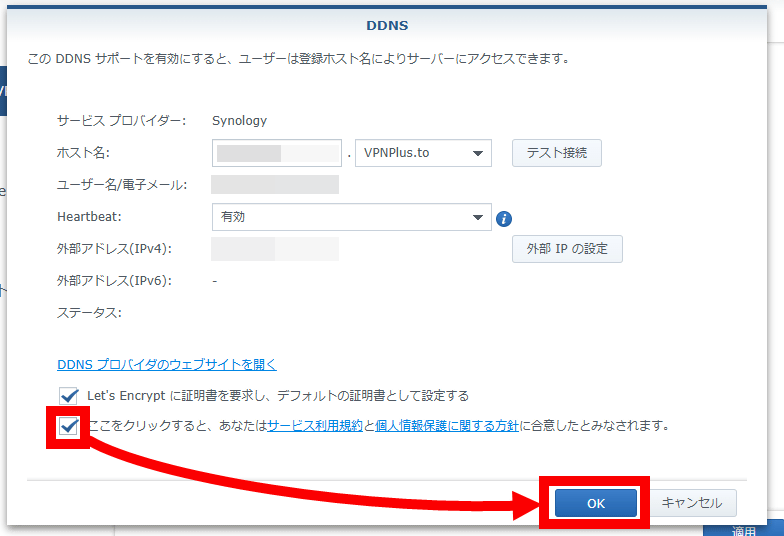
Check the box to agree and click 'OK'. This completes the host name acquisition.
◆4: Connect to VPN from PC
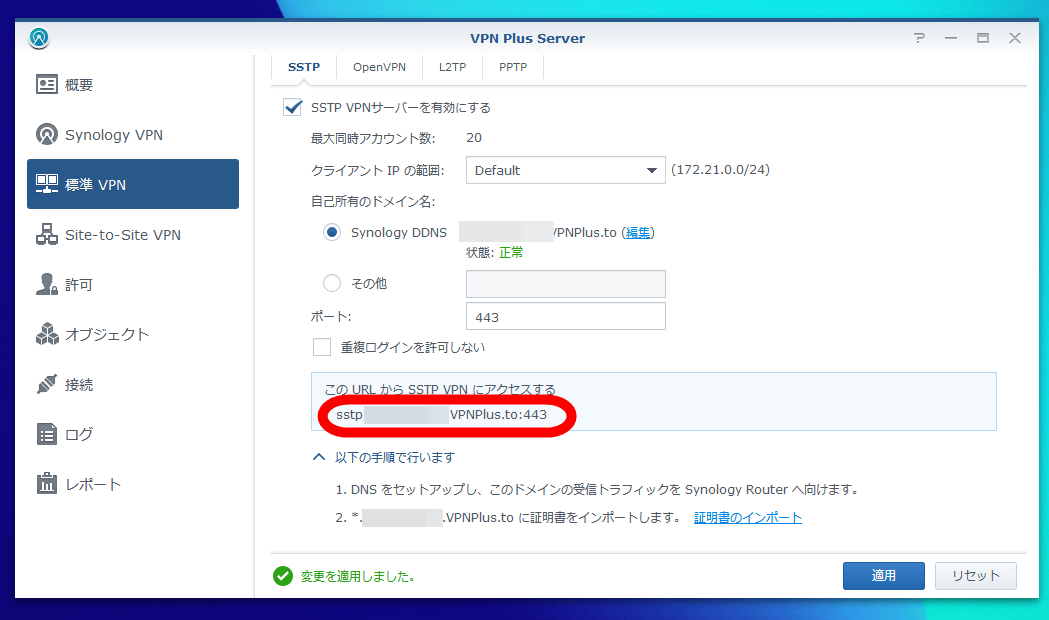
Next, enable the VPN server. VPN Plus Server supports four VPN protocols: SSTP, OpenVPN, L2TP, and PPTP, so we will use SSTP this time.
First, click 'Standard VPN', then click 'SSTP', check 'Enable SSTP VPN Server' and click 'Apply'.
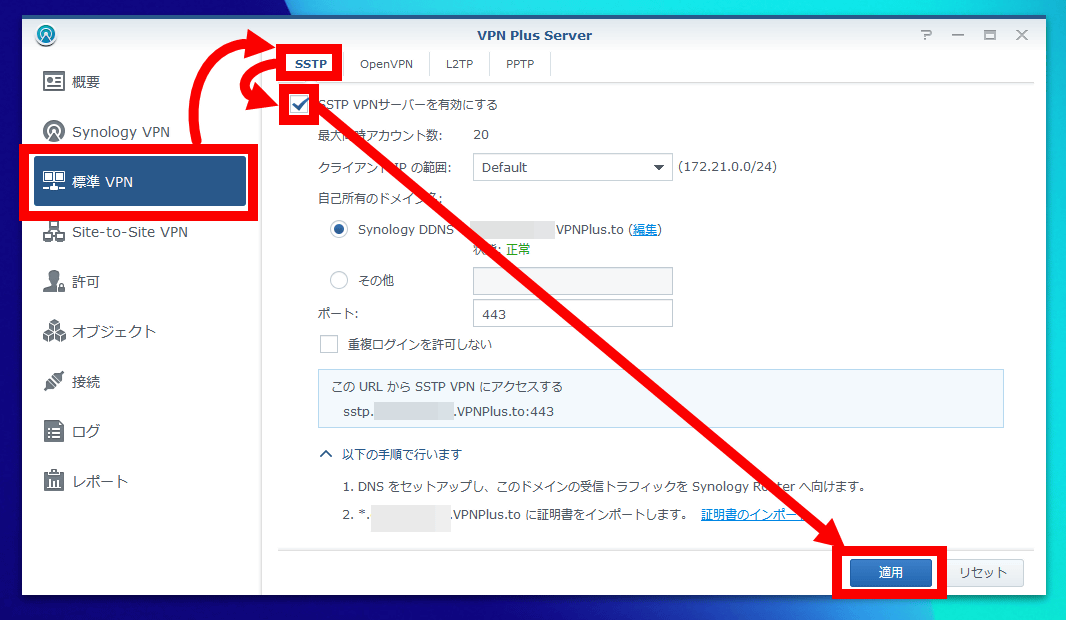
Once you have enabled the VPN server, make a note of the URL displayed in the red box without the leading 'sstp.'.
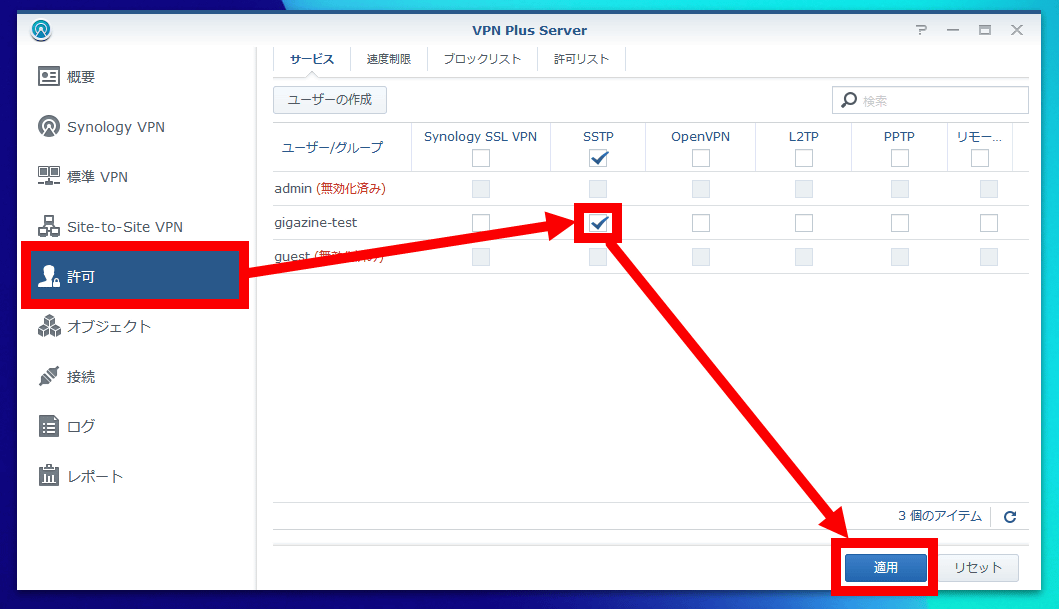
Next, click 'Allow', then check 'SSTP' for the user you want to allow to use the VPN and click 'Apply'. Now you can connect to the VPN server using that user's account.
◆4: Connect to the VPN from your PC
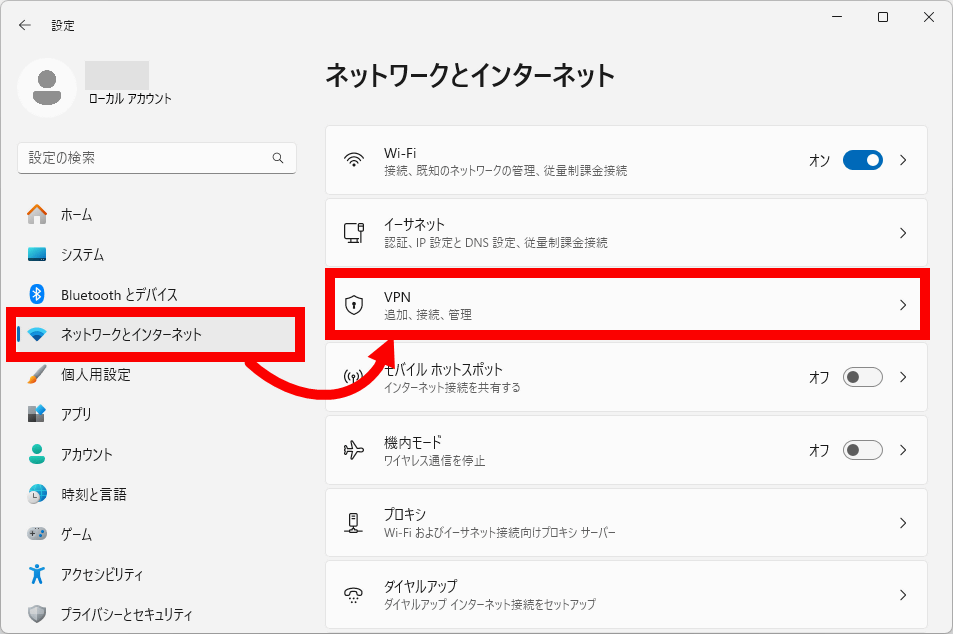
The steps to connect to a VPN server from a client PC are as follows: First, click the Start button, then search for and run 'Settings.'

Click 'Network and Internet' and then 'VPN.'
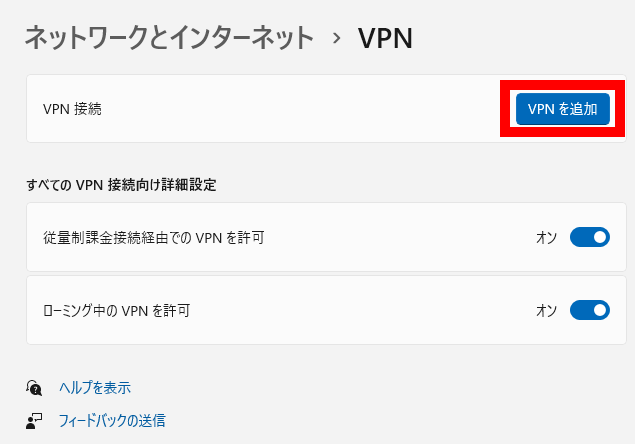
Click 'Add VPN'.
Enter your preferred name in 'Connection Name', the URL you noted down in 'Server Name or Address', select SSTP for 'VPN Type', enter your SRM username in 'Username' and your SRM password in 'Password' and click 'Save'.
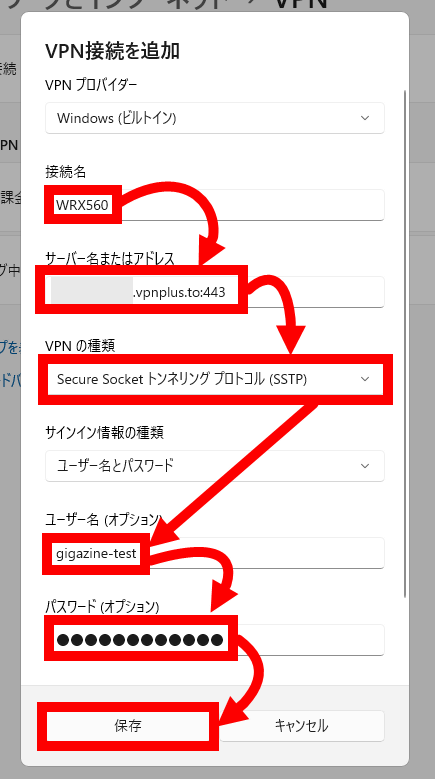
Click 'Connect'.

When 'Connected' is displayed, the connection to the VPN server is complete.
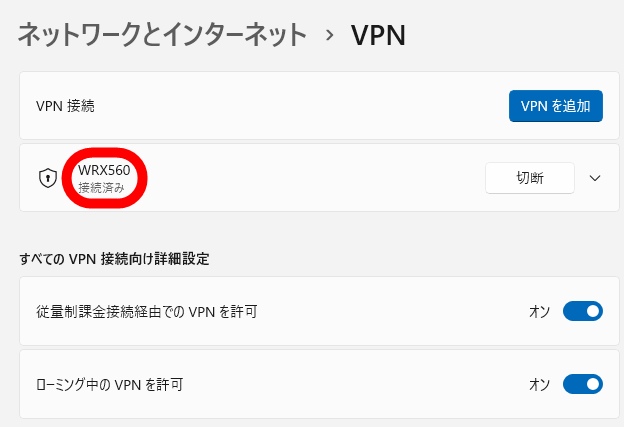
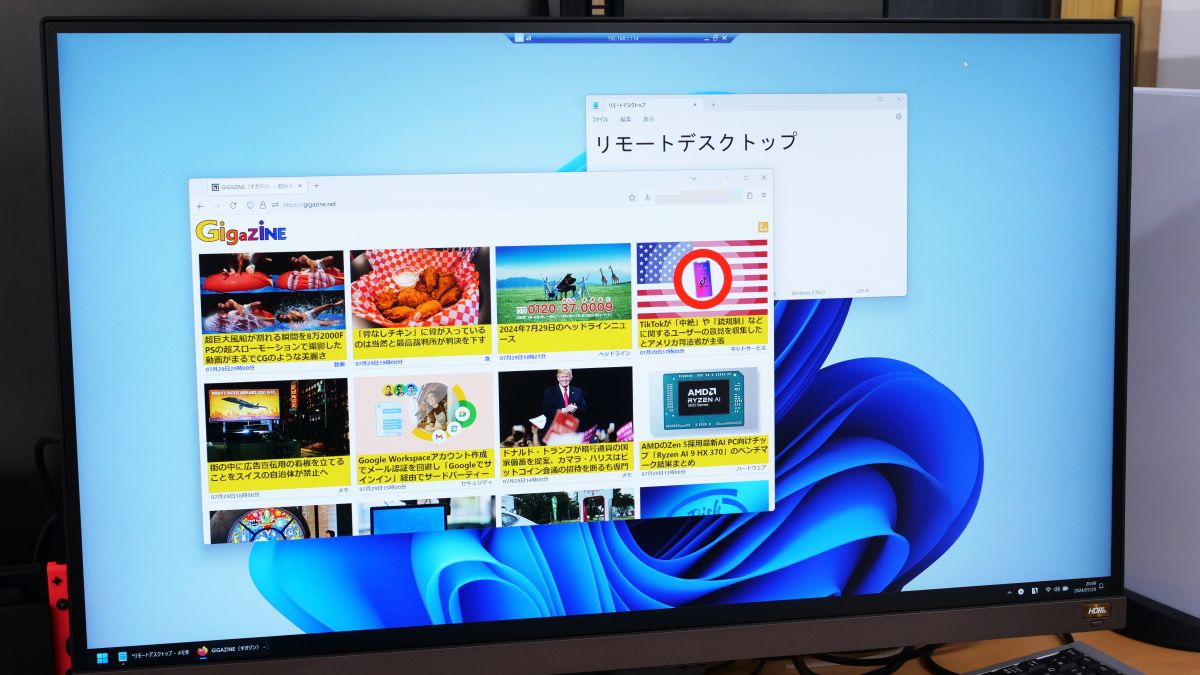
Once you connect to a VPN server, you can use the standard Windows remote desktop function to remotely operate machines located on the same LAN as the VPN server or access file servers.

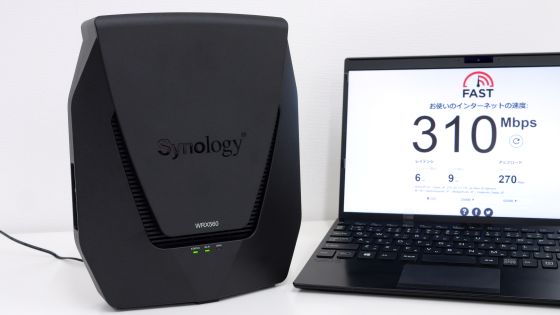
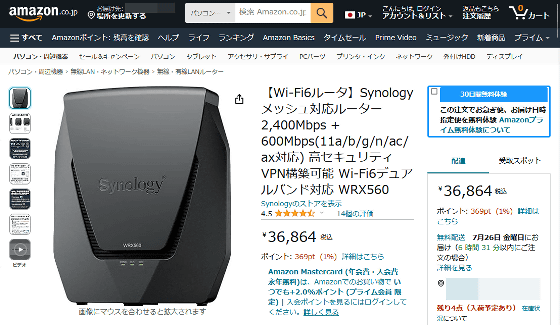
At the time of writing, the WRX560 is available on Amazon.co.jp for 36,864 yen including tax.
Amazon | [Wi-Fi6 Router] Synology Mesh-Compatible Router 2,400Mbps + 600Mbps (11a/b/g/n/ac/ax compatible) High security VPN construction possible Wi-Fi6 dual band compatible WRX560 | Synology | Wireless and wired LAN router mail order
Related Posts:


in Hardware, Software, Web Service, Review, Posted by log1o_hf