I tried using the multi-function Wi-Fi router 'WRX560' that can connect up to 150 devices simultaneously and has four wired LAN ports
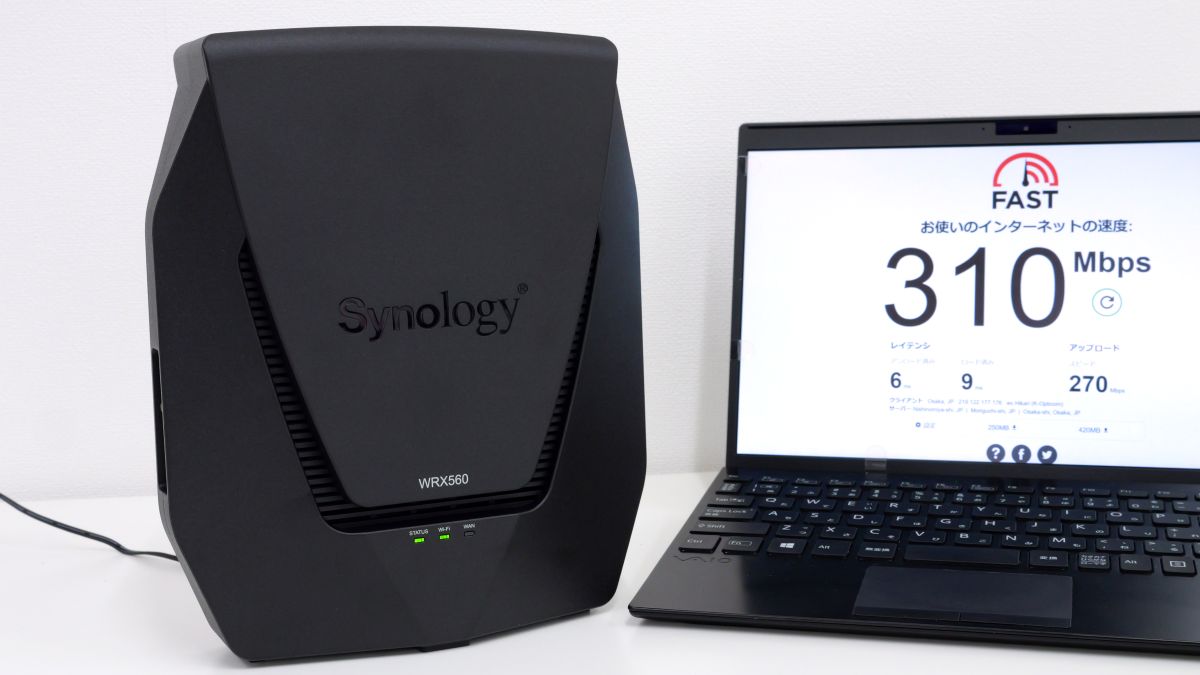
Synology's wireless LAN router ' WRX560 ' supports Wi-Fi 6 and has convenient features such as 'four wired LAN ports', 'up to 150 devices can be connected simultaneously', and 'VPN service can be used for free'. I was offered the WRX560 as a prize for
WRX560 | Synology Inc.
https://www.synology.com/ja-jp/products/WRX560
·table of contents
◆1: Check the appearance and installed ports
◆2: Initial setup procedure
◆1: Check the appearance and installed ports
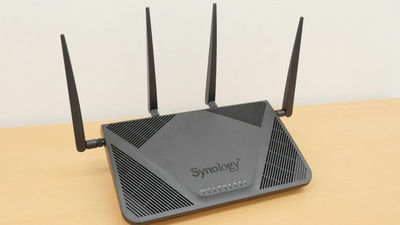
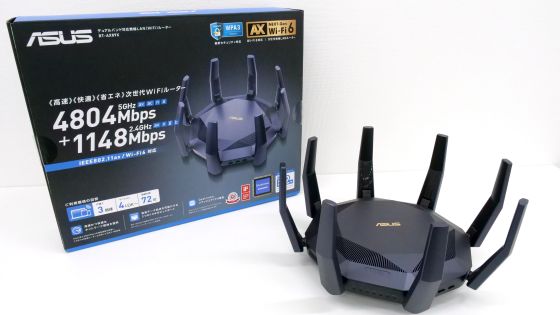
The WRX560 package looks like this.
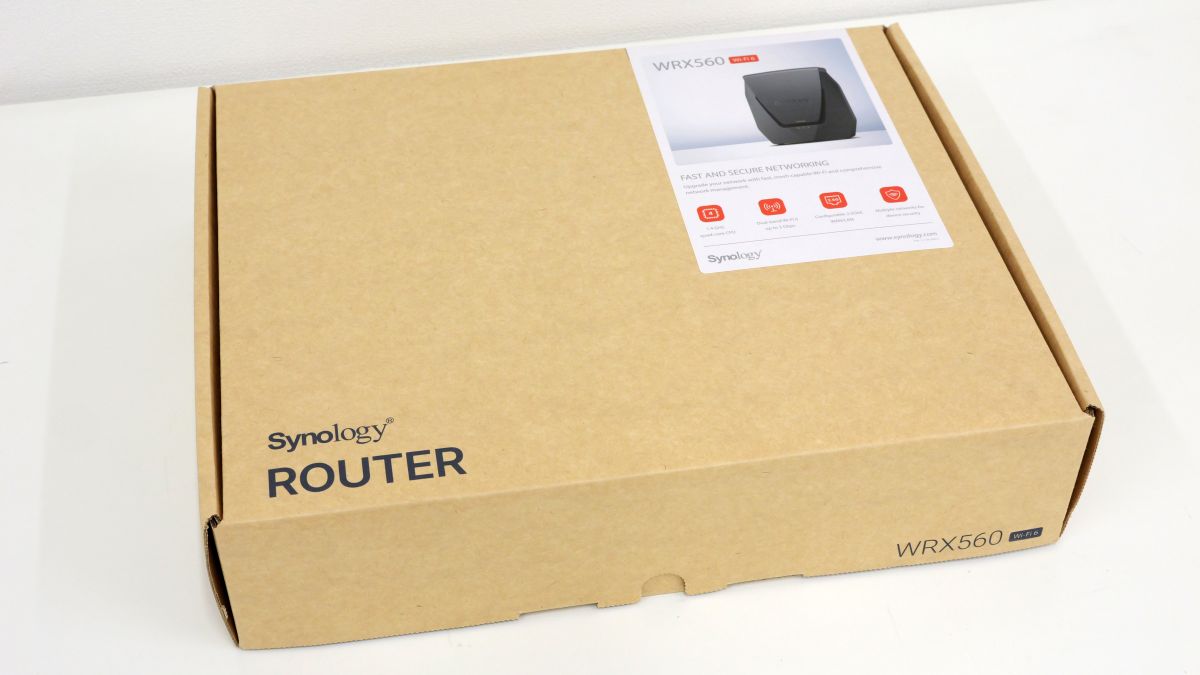
In addition to the WRX560 main unit, the box contained a Category 5e wired LAN cable, an AC power cord, and an instruction manual.

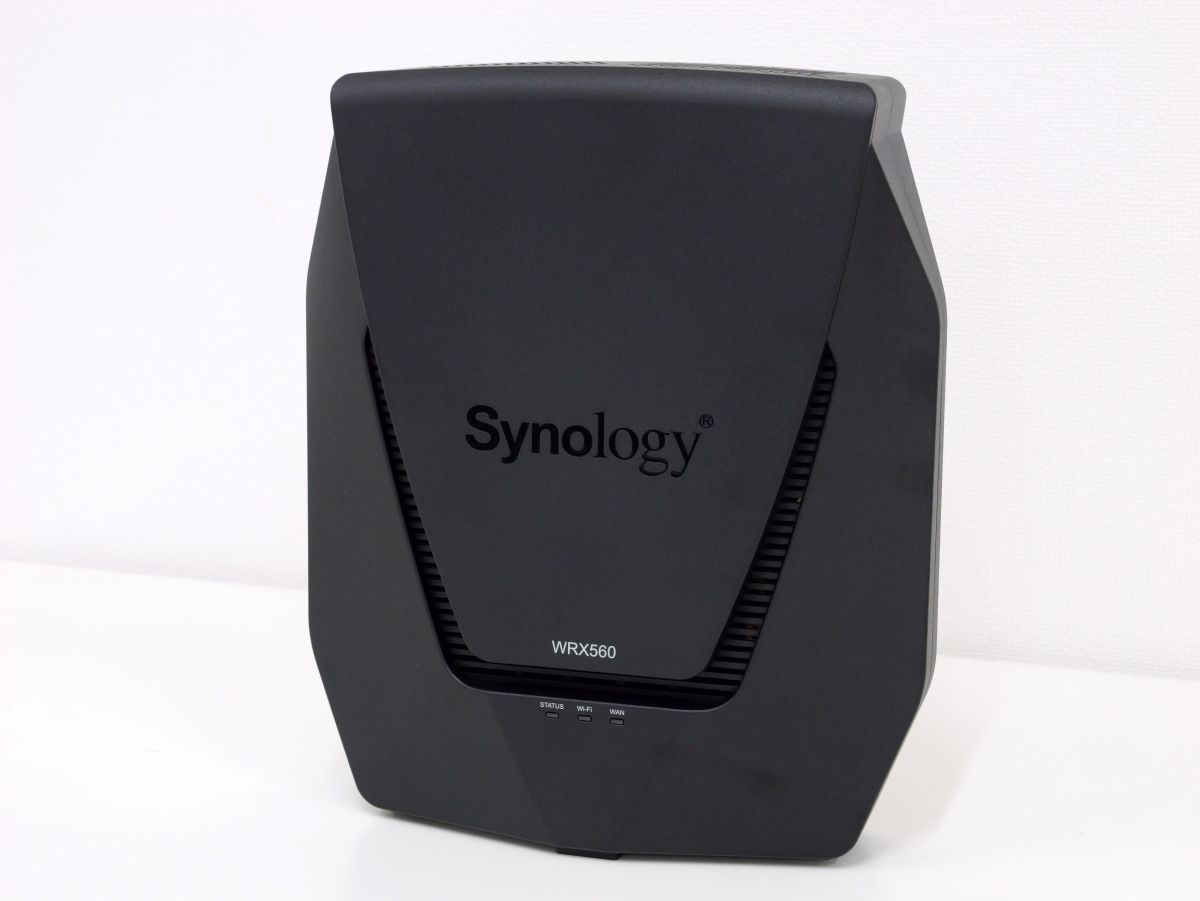
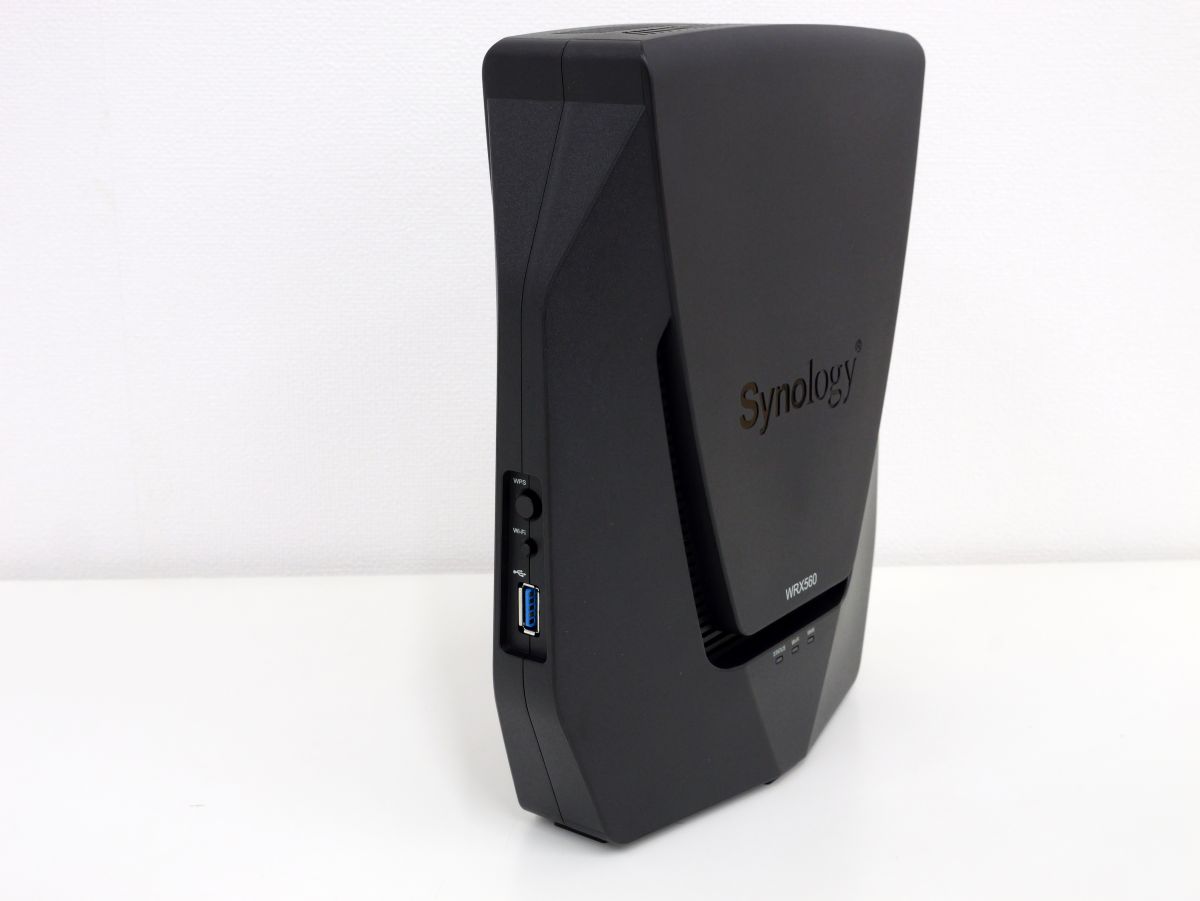
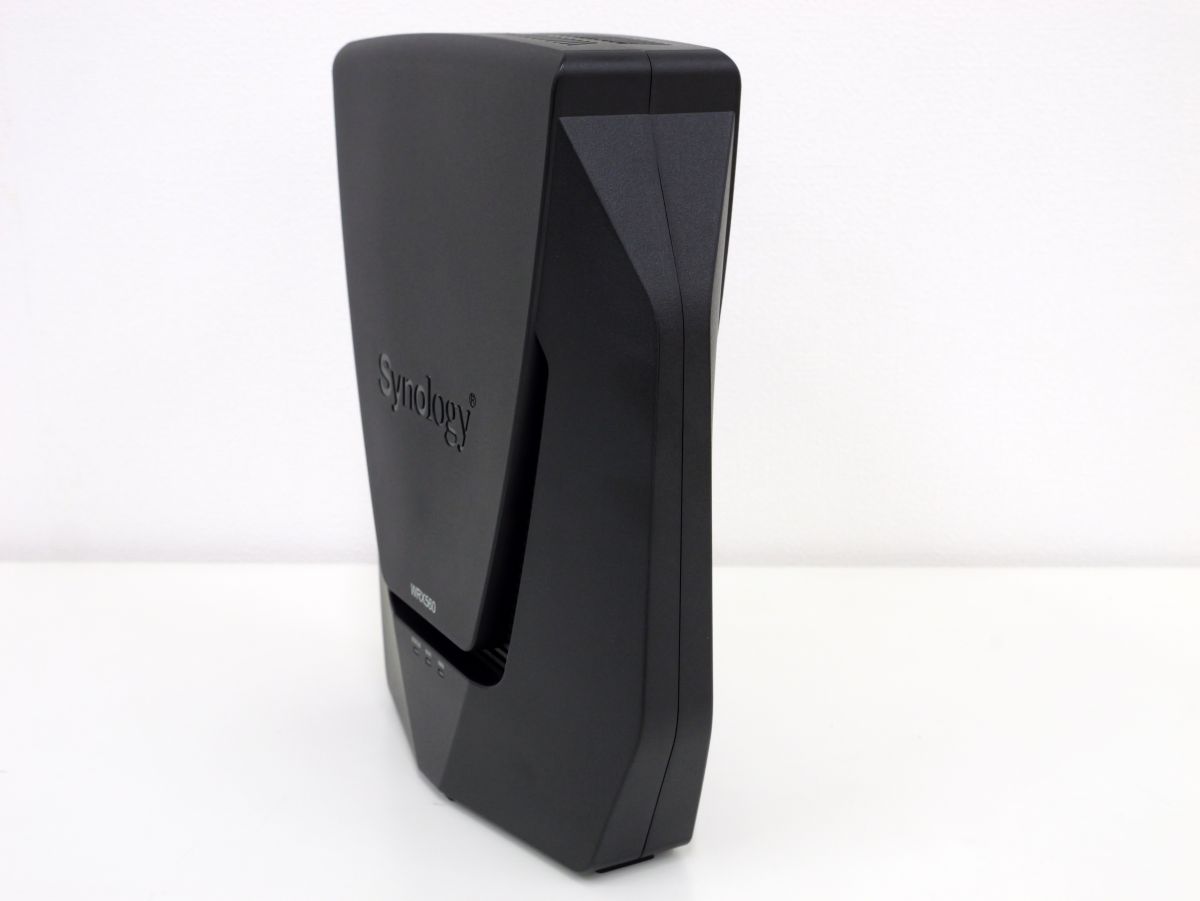
The WRX560 is a vertically oriented wireless LAN router with exhaust vents and LED indicators on the front.
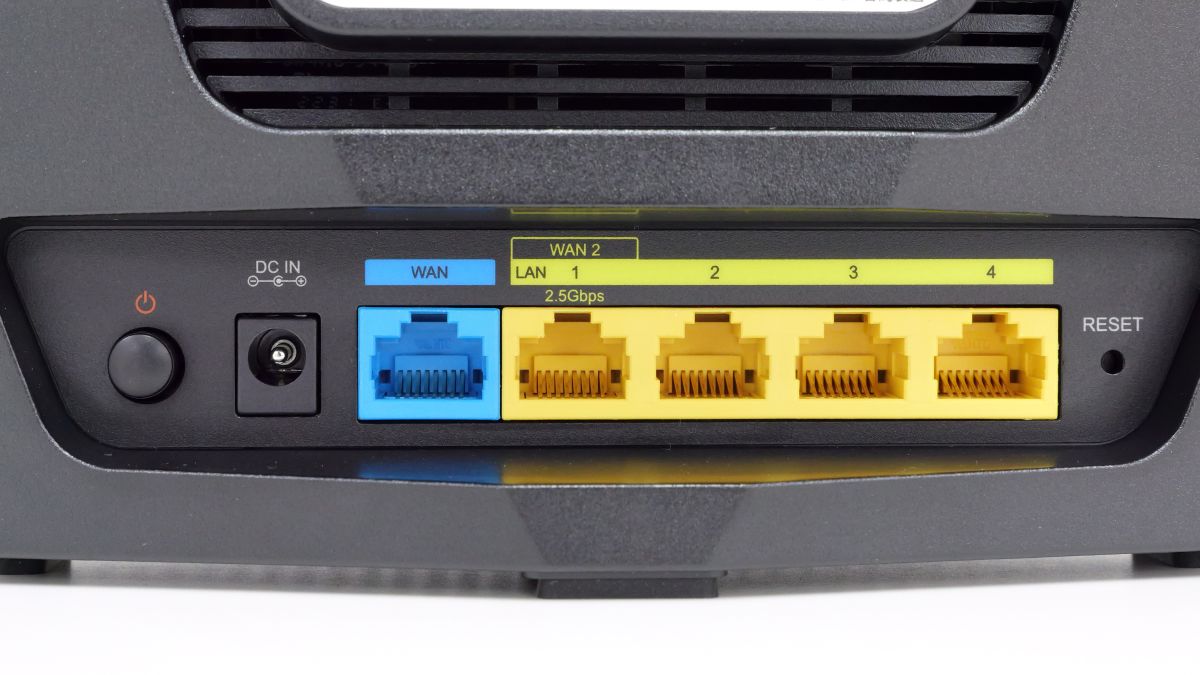
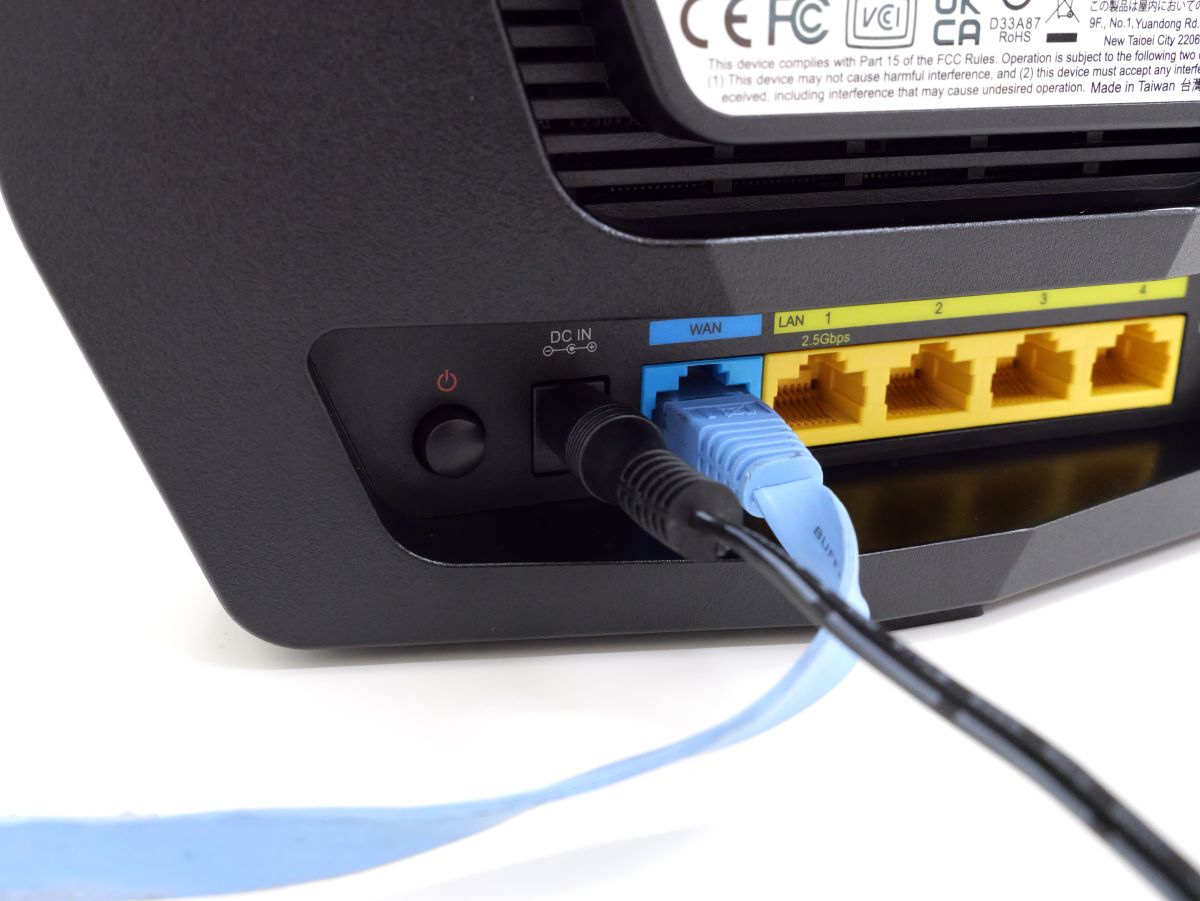
The back is equipped with a power button and various ports.
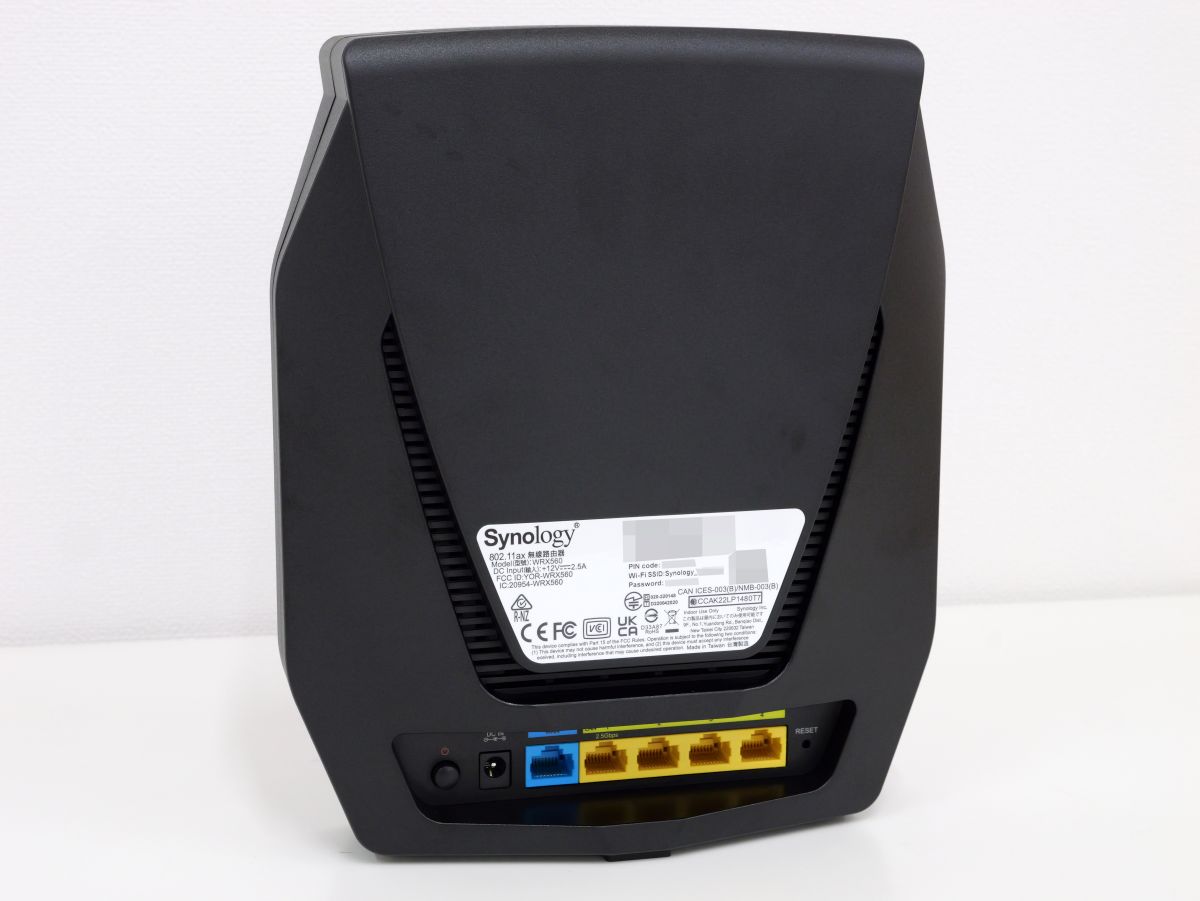
Here's a closer look at the area around the power button. From the left, there's the power button, power port, WAN port, LAN port, and RESET button. Of the yellow LAN ports, the leftmost one supports 2.5Gbps, and the remaining three support 1Gbps.
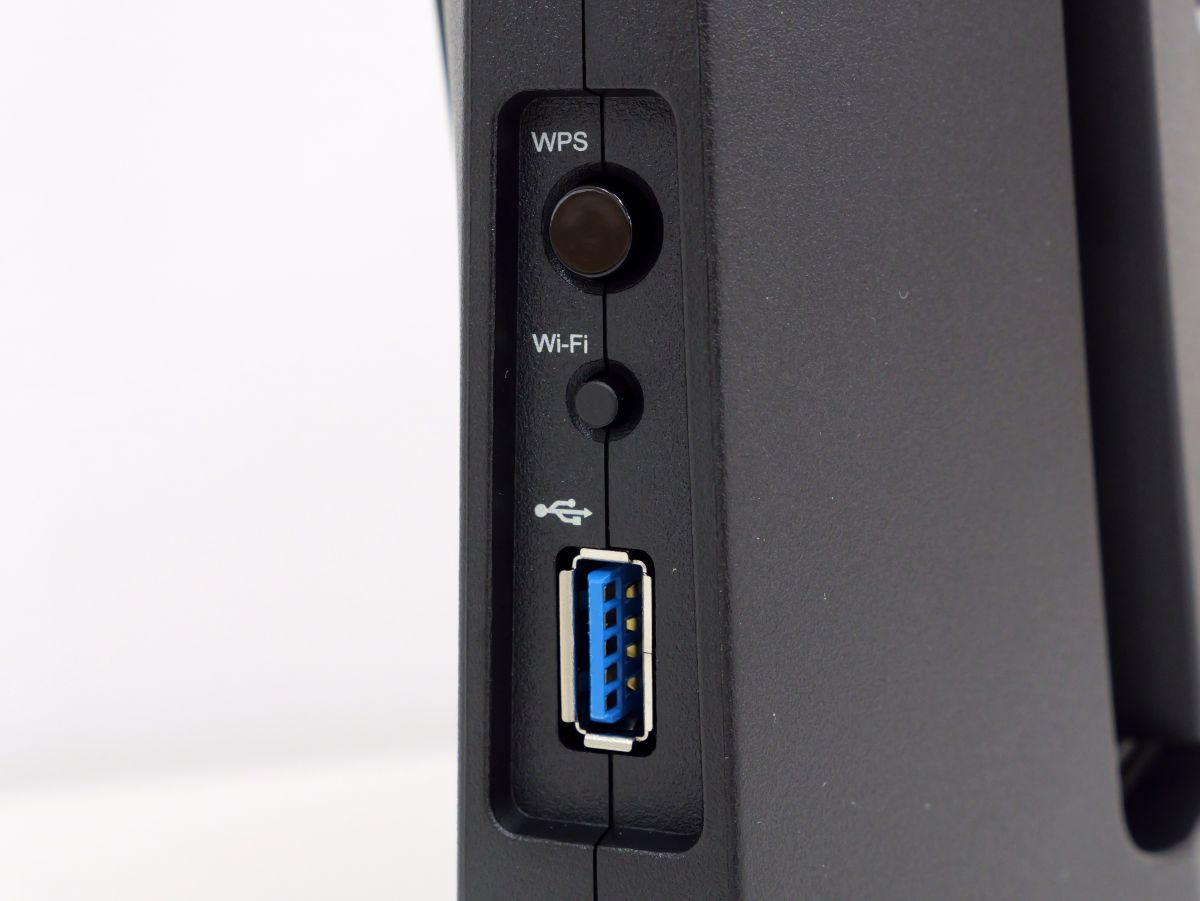
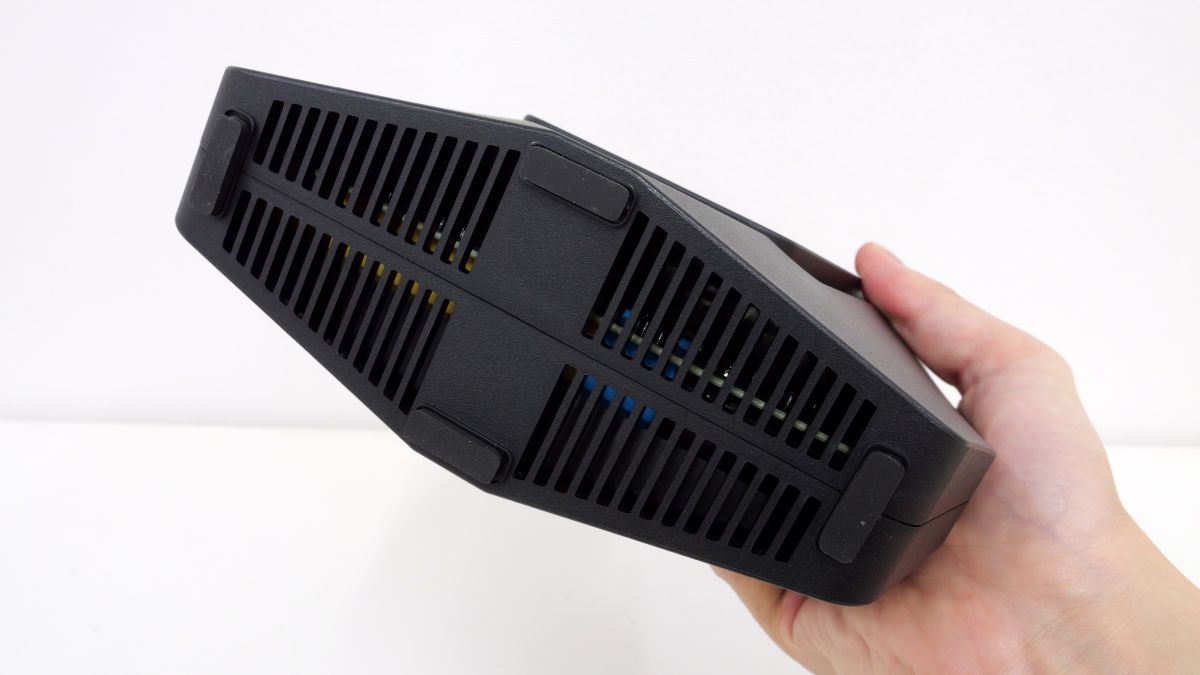
The left side has two buttons and a USB port.
The top button is the WPS button, and the bottom button is the Wi-Fi button for turning Wi-Fi on and off. The USB port supports USB 3.2 Gen 1 and can be used to connect external drives or smartphones for tethering.
There is nothing on the right side.
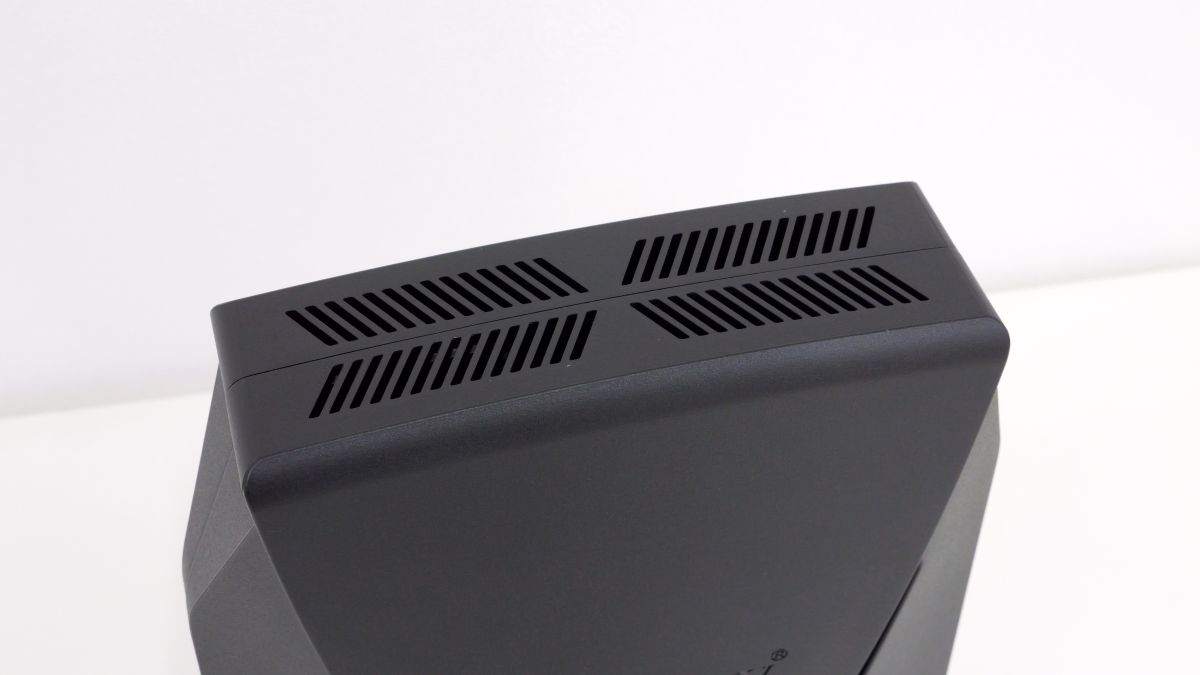
Exhaust holes on the top.
There were four rubber feet and an exhaust hole on the bottom.
◆2: Initial setup procedure
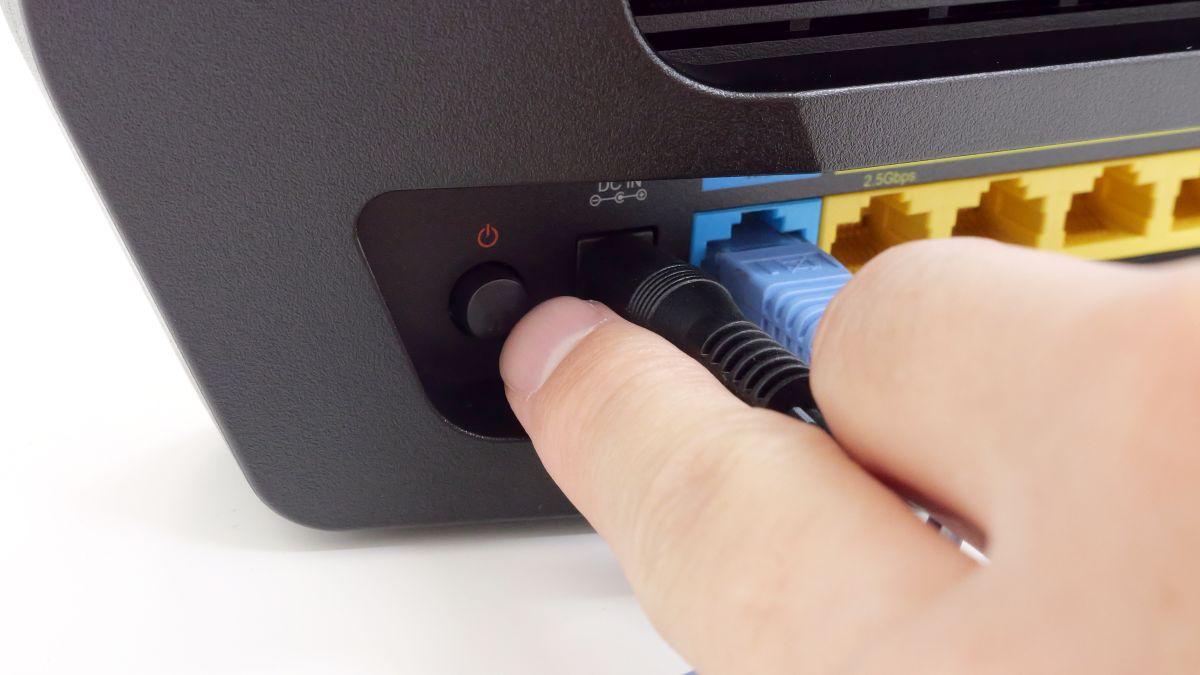
The steps to connect to the Internet using the WRX560 are as follows: First, connect the AC power cable to the power port on the back of the unit, and then connect the wired LAN cable coming out of the modem to the WAN port.
Once all cables are connected, press the power button.
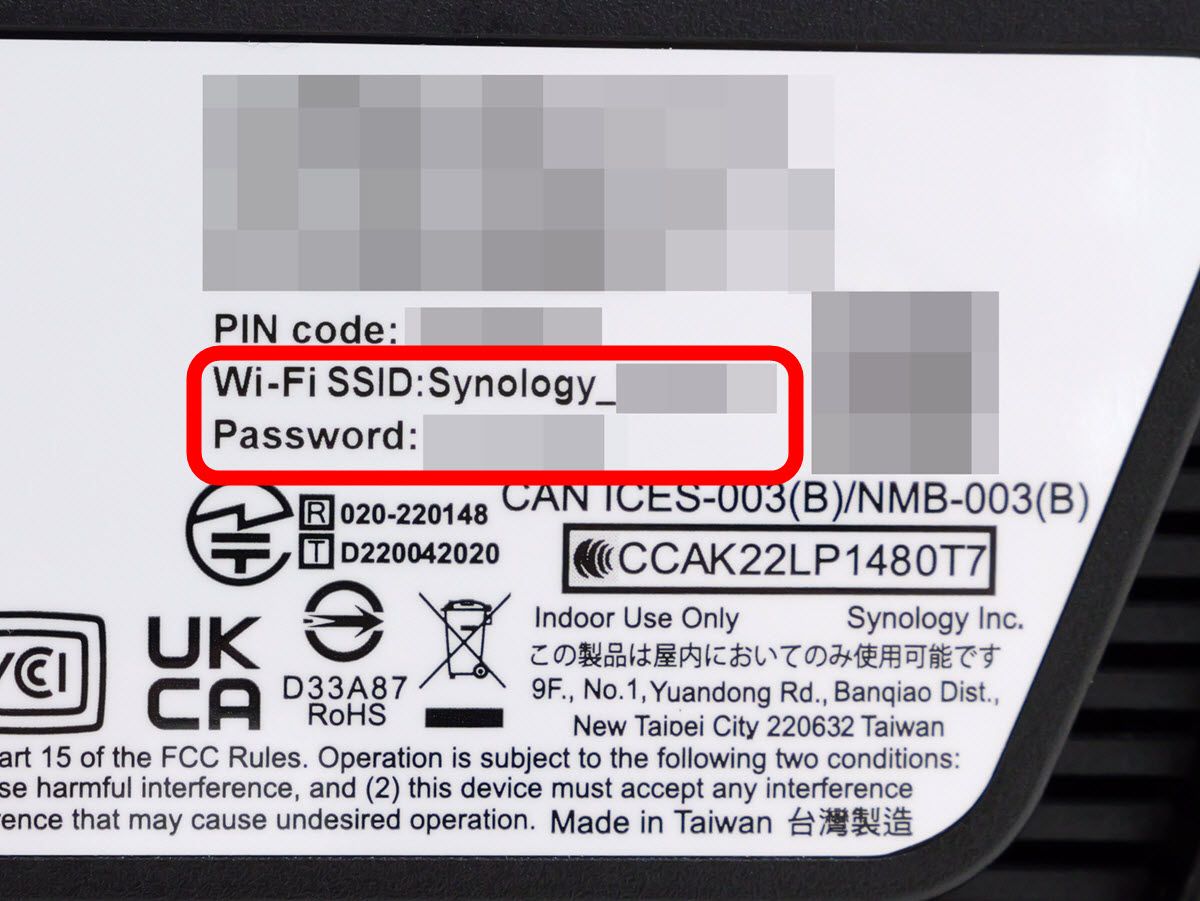
After turning on the device, write down the Wi-Fi SSID and password that is printed on the label on the back of the device.
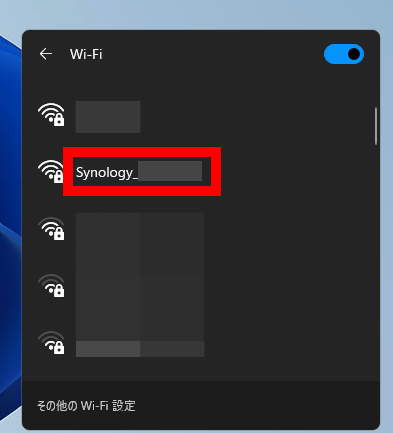
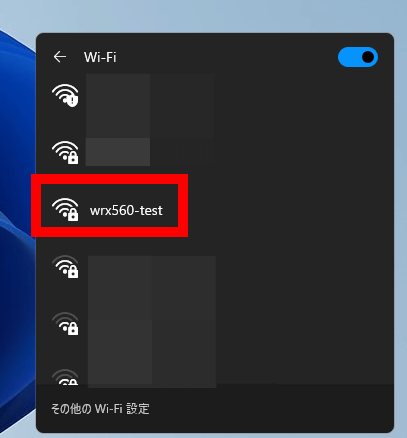
Next, click the area surrounded by a red frame on the PC taskbar and then click the Wi-Fi connection selection button.

In the list of connections, find the SSID that is written on the label and click it.
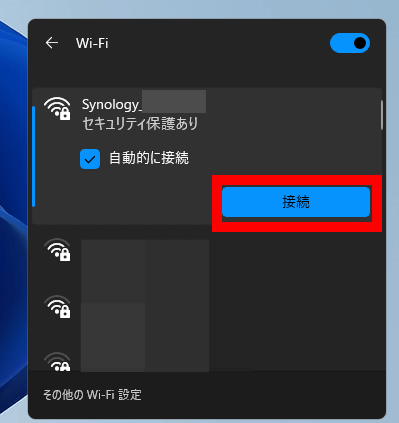
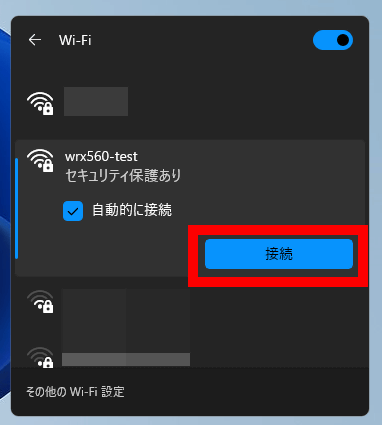
Click 'Connect'.
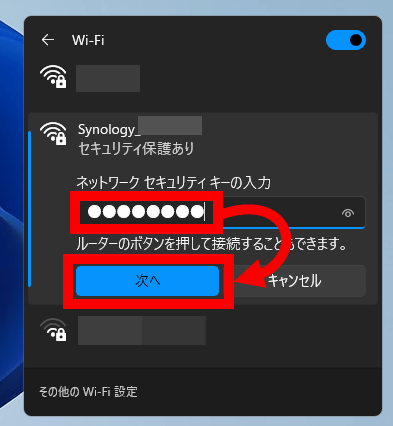
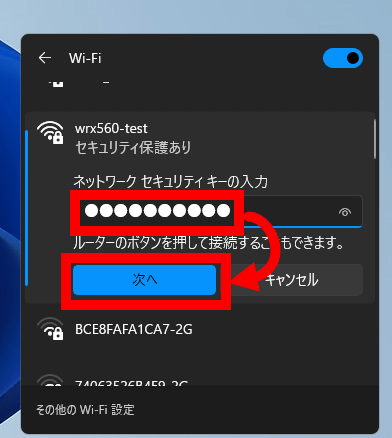
Enter your password and click 'Next'.
If the connection to the WRX560 is successful, the browser will automatically start and the WRX560 management screen will be displayed, so click 'Launch'.

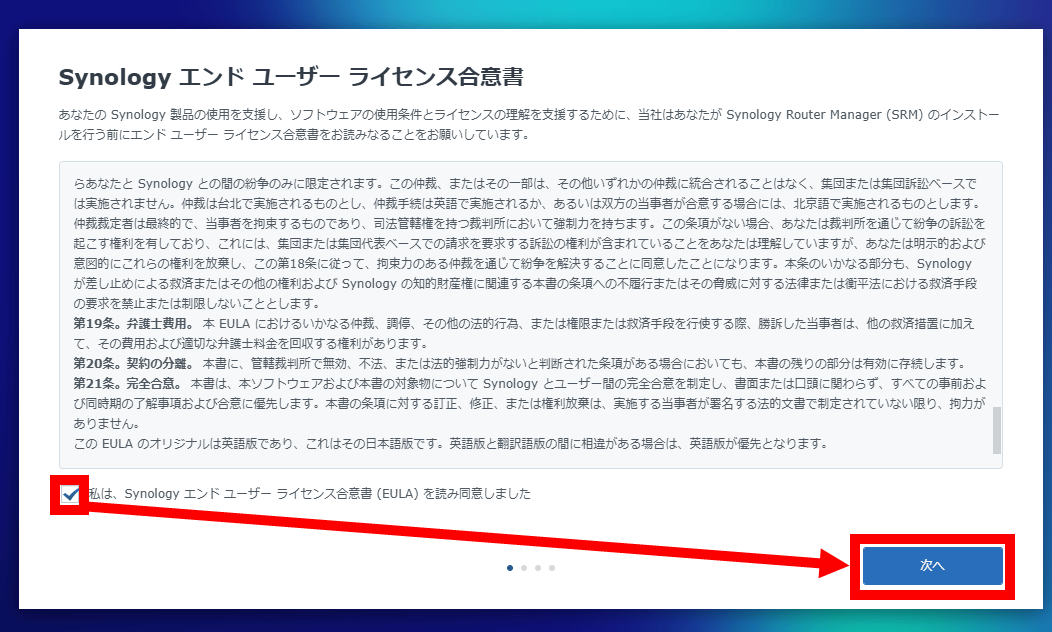
When the Synology End User License Agreement is displayed, read it carefully, check the box to accept the agreement, and click 'Next.'
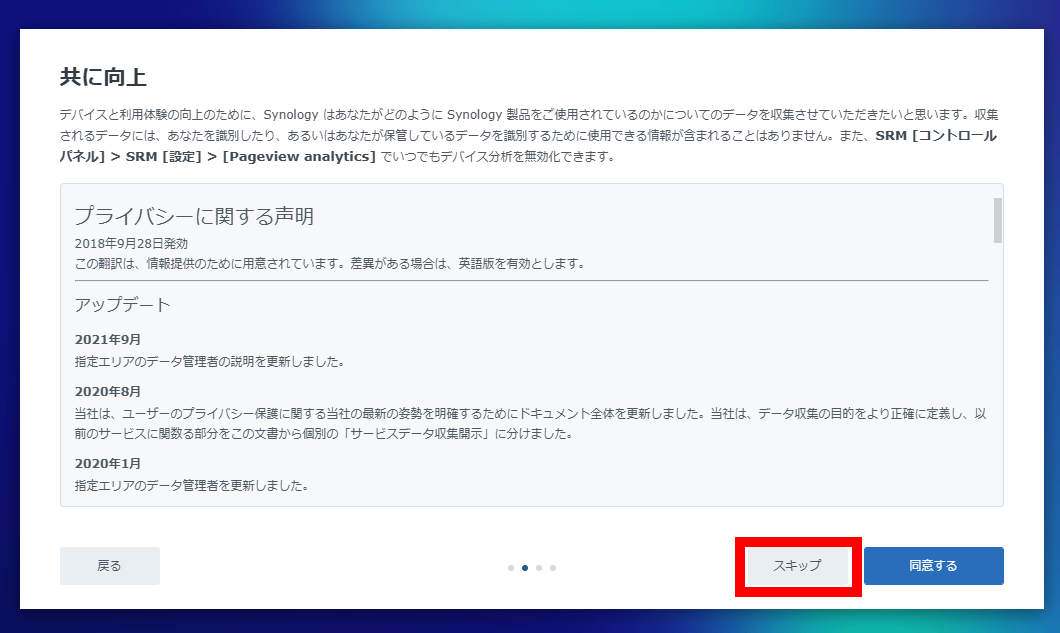
Next, you will be shown a message about usage data collection. Since I don't want to collect data this time, I click 'Skip'.
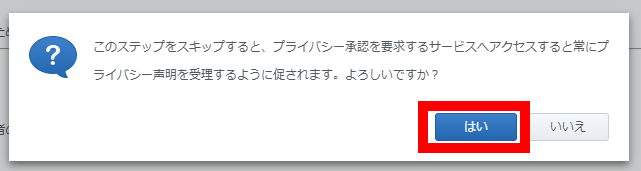
Click “Yes”.
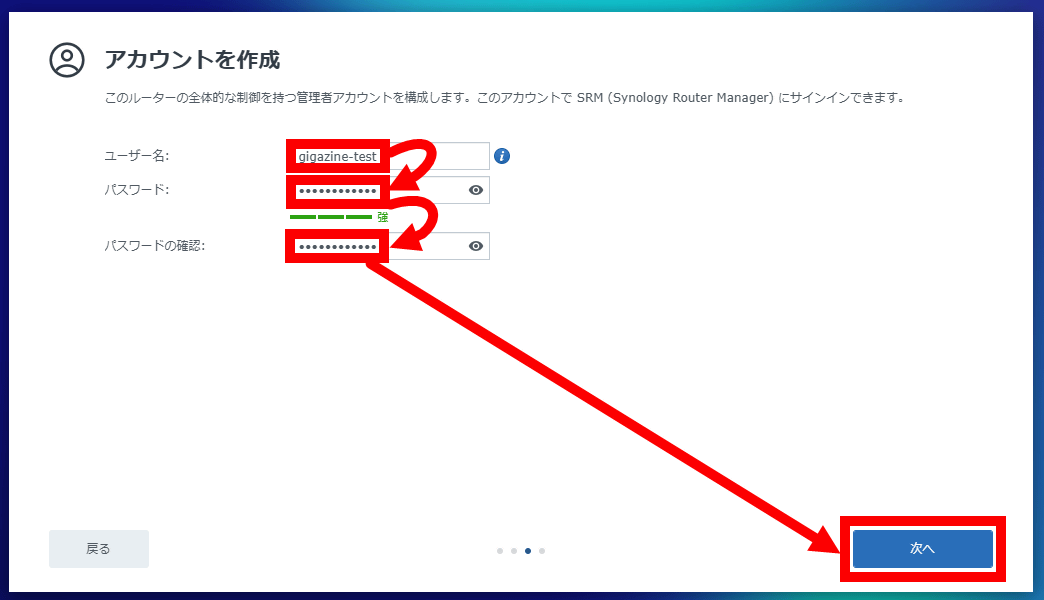
When the account creation screen for 'Synology Router Manager (SRM)', which manages the settings of the WRX560, is displayed, enter your preferred username and password in the 'Username', 'Password', and 'Confirm Password' input fields and click 'Next'.
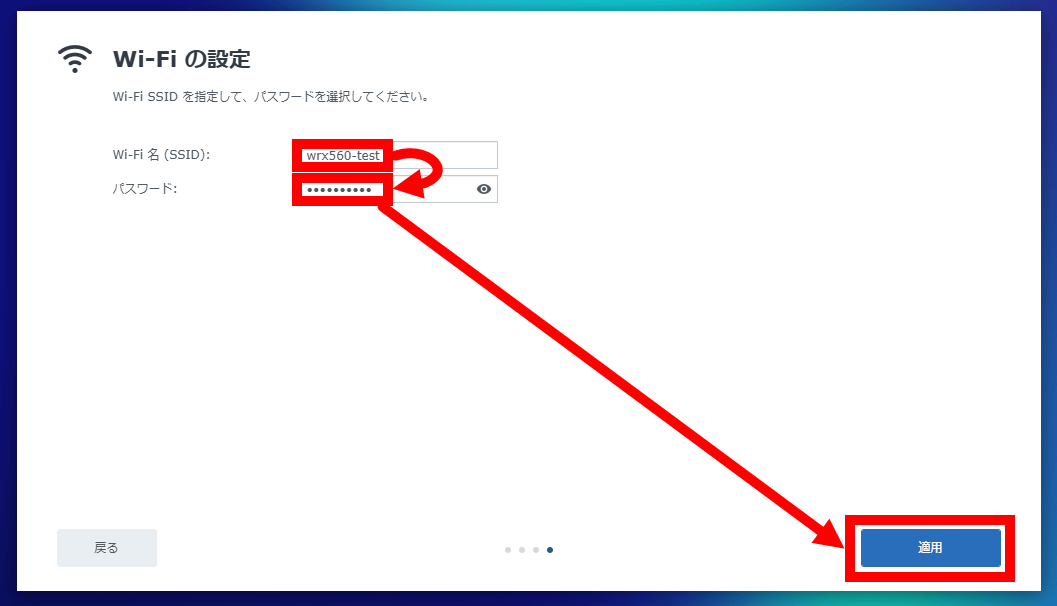
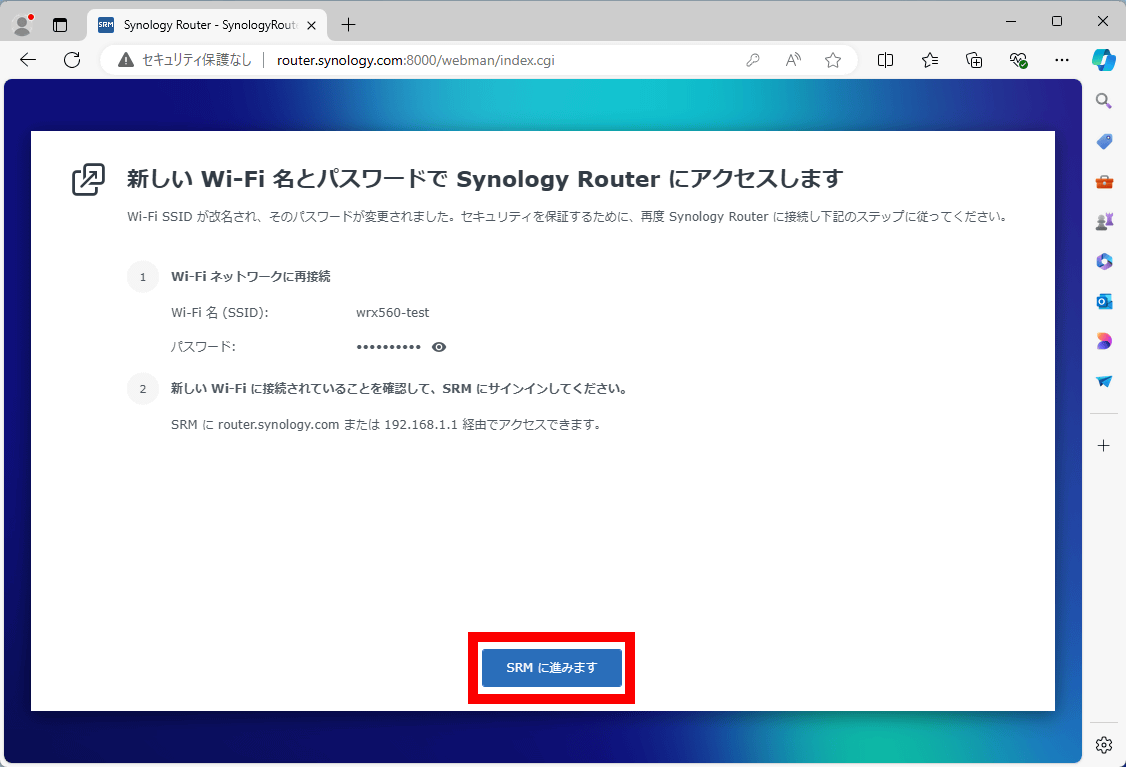
You will be asked to choose a different SSID and password from the default, so enter both and click 'Apply'. Note that once you apply this setting, you will no longer be able to connect using the SSID or password written on the label, so we recommend that you record the newly set SSID and password in a password management app so you don't forget them.
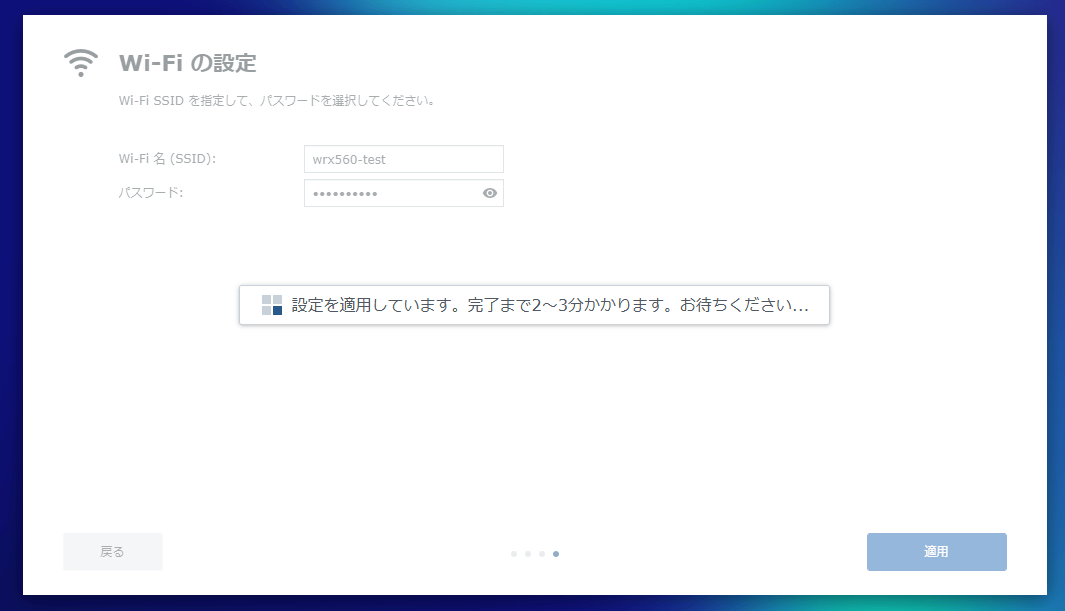
Wait a while until the setup is complete.
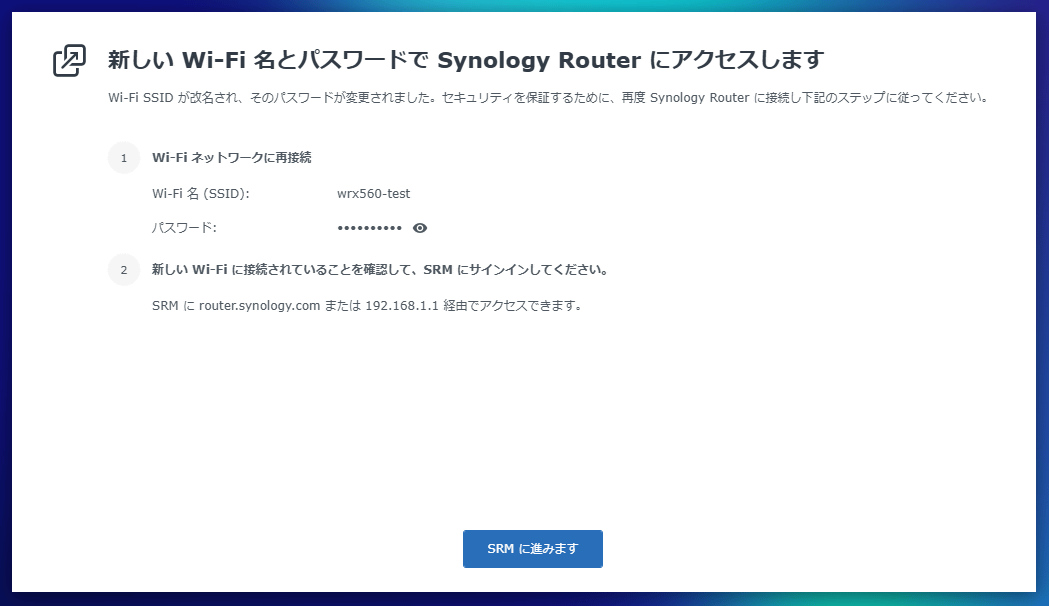
If the following screen appears, reconnect the WRX560 and your PC before continuing with the setup.
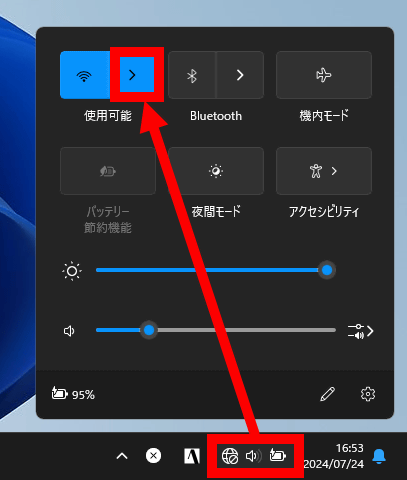
Click the area surrounded by a red frame on the PC taskbar, then click the Wi-Fi connection selection button.
Find the SSID you set up and click it.
Click 'Connect'.
Enter the password you set and click 'Next'.
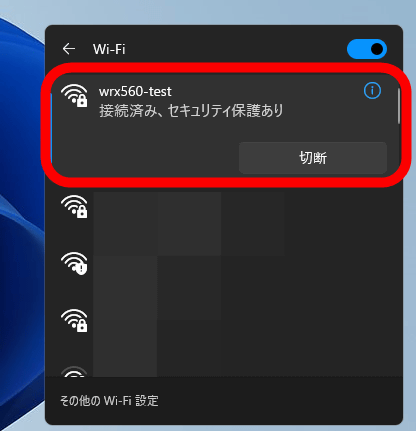
When it says 'Connected,' you will be returned to the SRM screen.
Click 'Proceed to SRM' at the bottom of the screen.
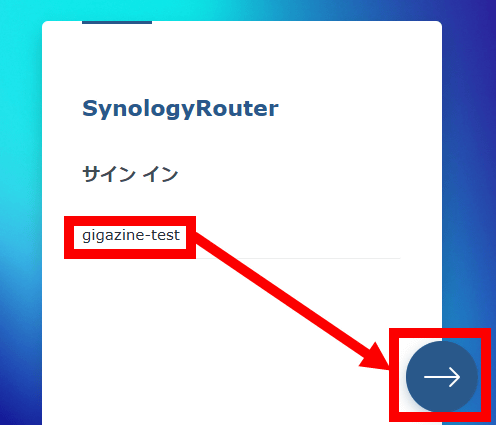
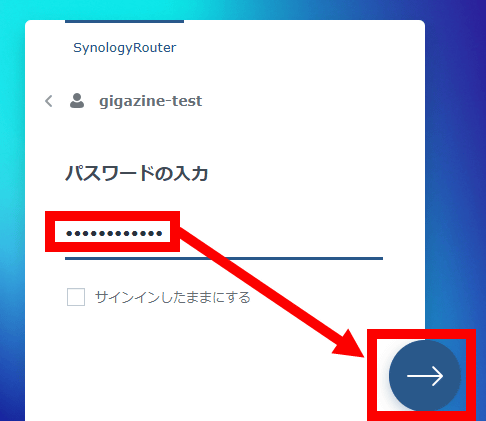
Enter your SRM user name and click '→'.
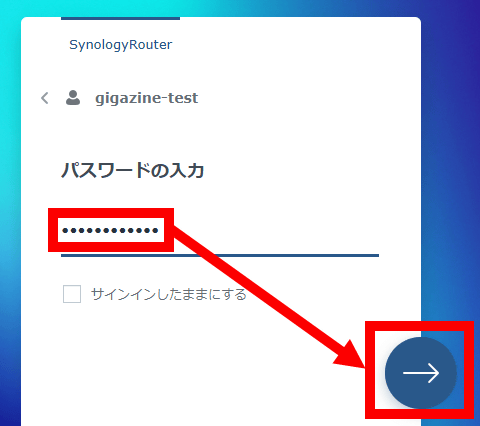
Enter your password and click '→'.
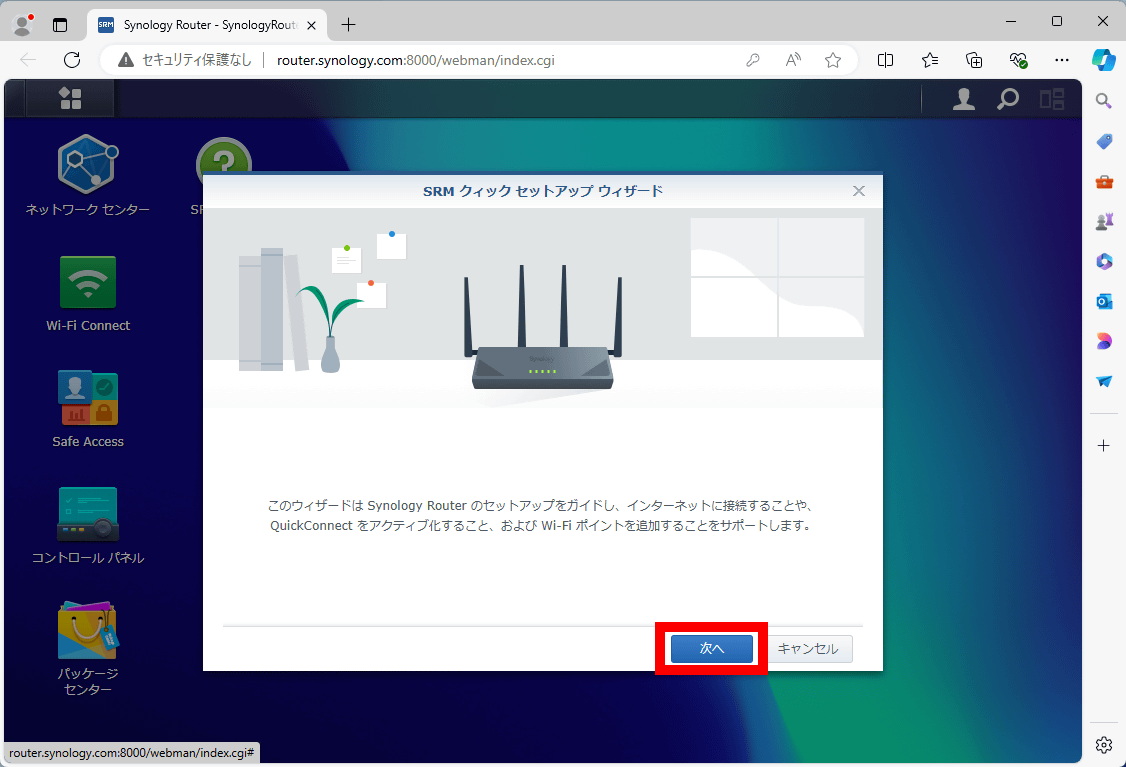
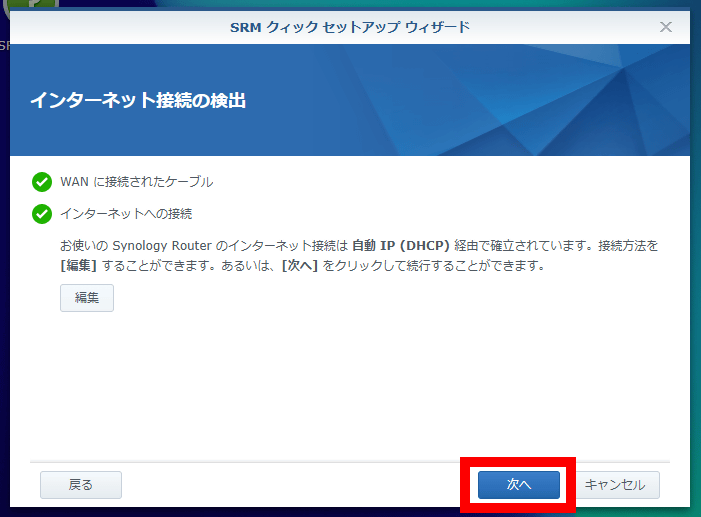
Click “Next”.
The Internet connection status will be automatically determined, so just click 'Next'.
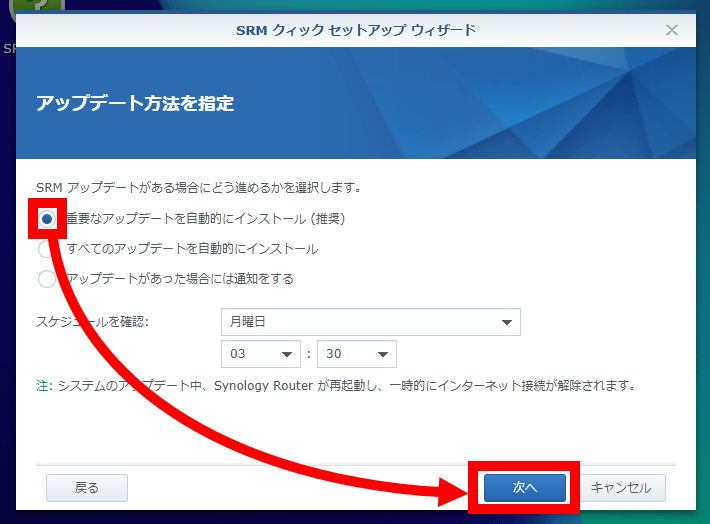
Check 'Automatically install important updates' and click 'Next'.
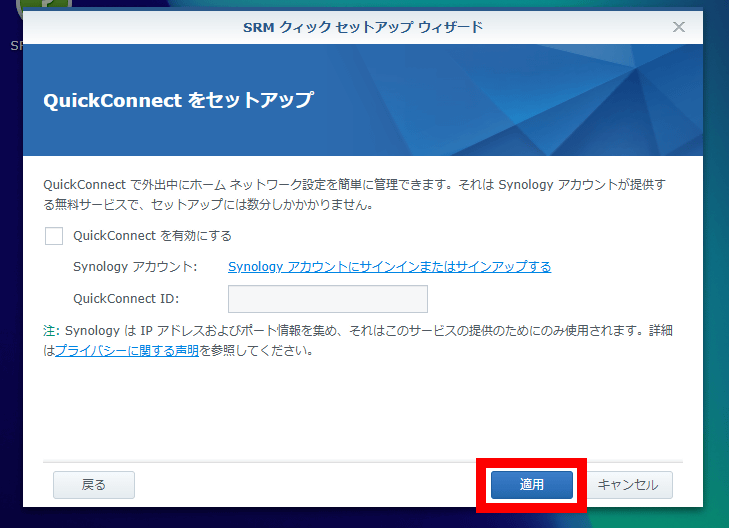
Next, the 'QuickConnect' settings that allow SRM to be accessed from an external network are displayed. Since we won't be using it this time, we just clicked 'Apply' without setting anything.
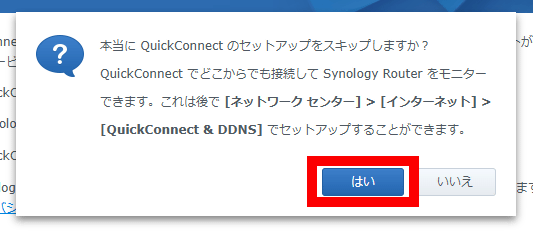
When asked if you really want to skip, click 'Yes.'
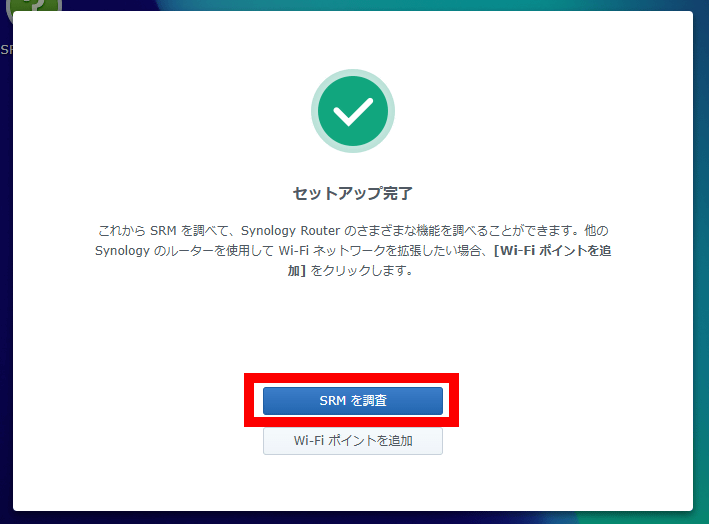
Once the setup is complete, click 'Investigate SRM.'
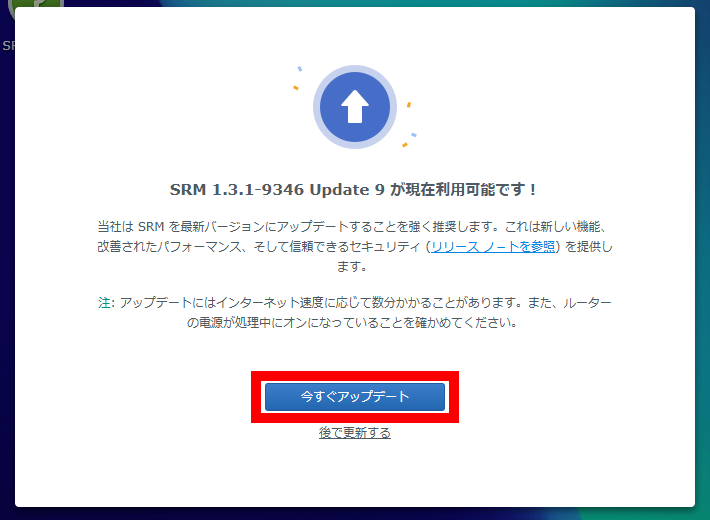
If there is an SRM update, you will be prompted to update it at this time, so click 'Update now'.
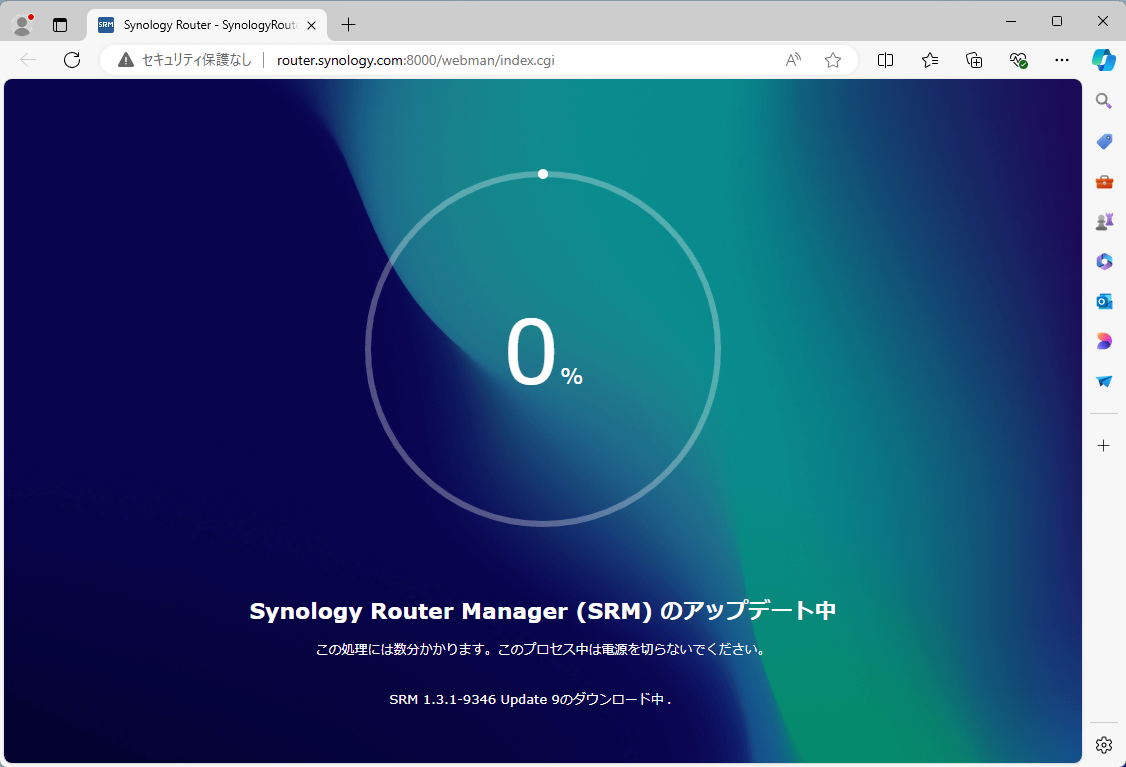
Wait a while for the update to complete. This took about 5 minutes.
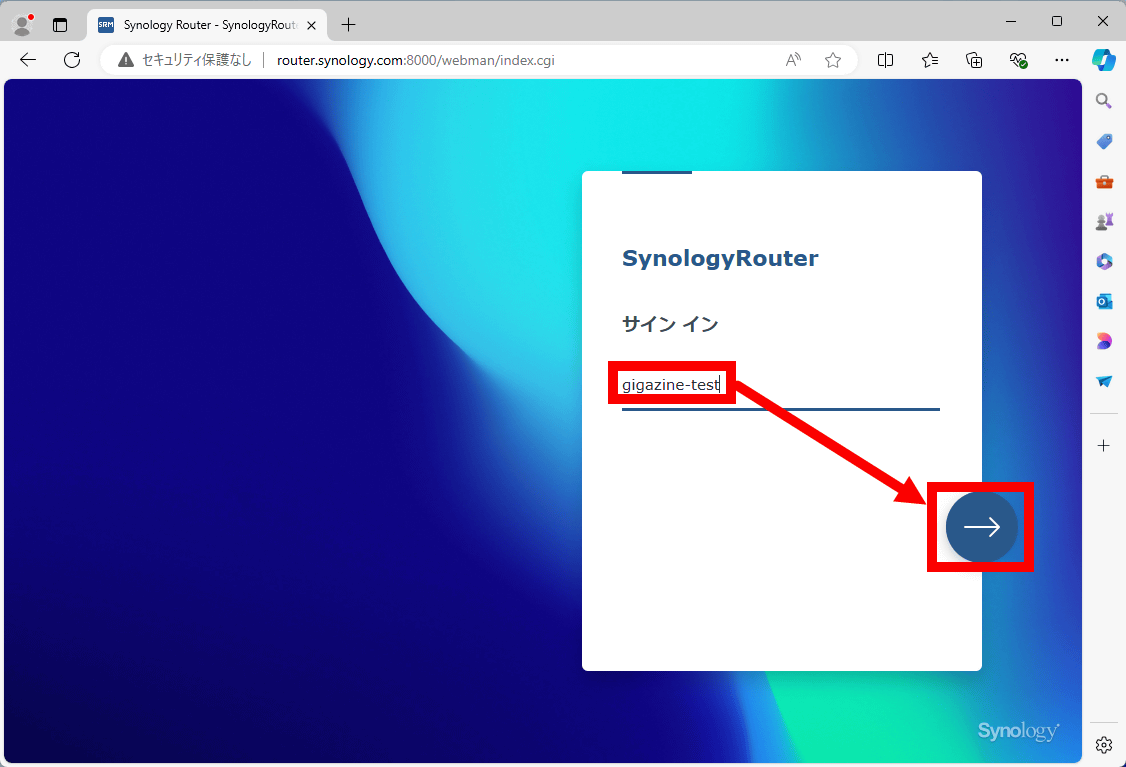
Once the update is complete and the SRM sign-in screen appears, enter your username and click '→'.
Enter your password and click '→'.
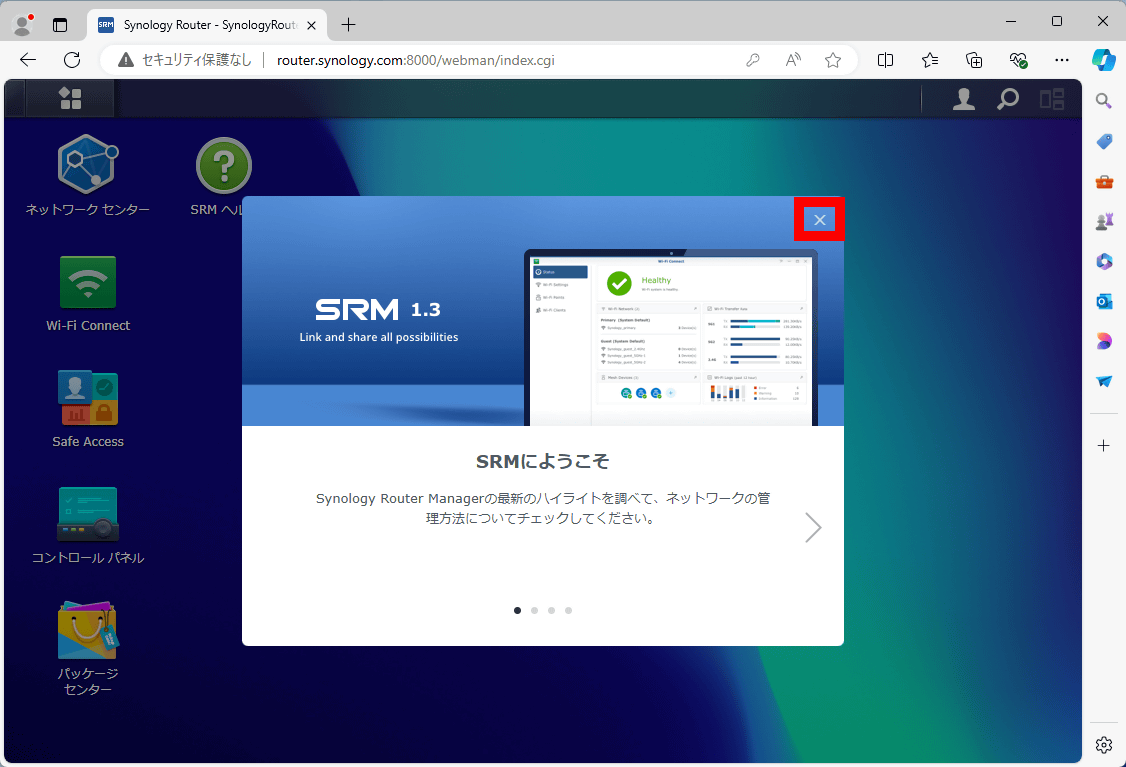
When the SRM explanation screen appears, click the 'X' in the upper right corner to close it.
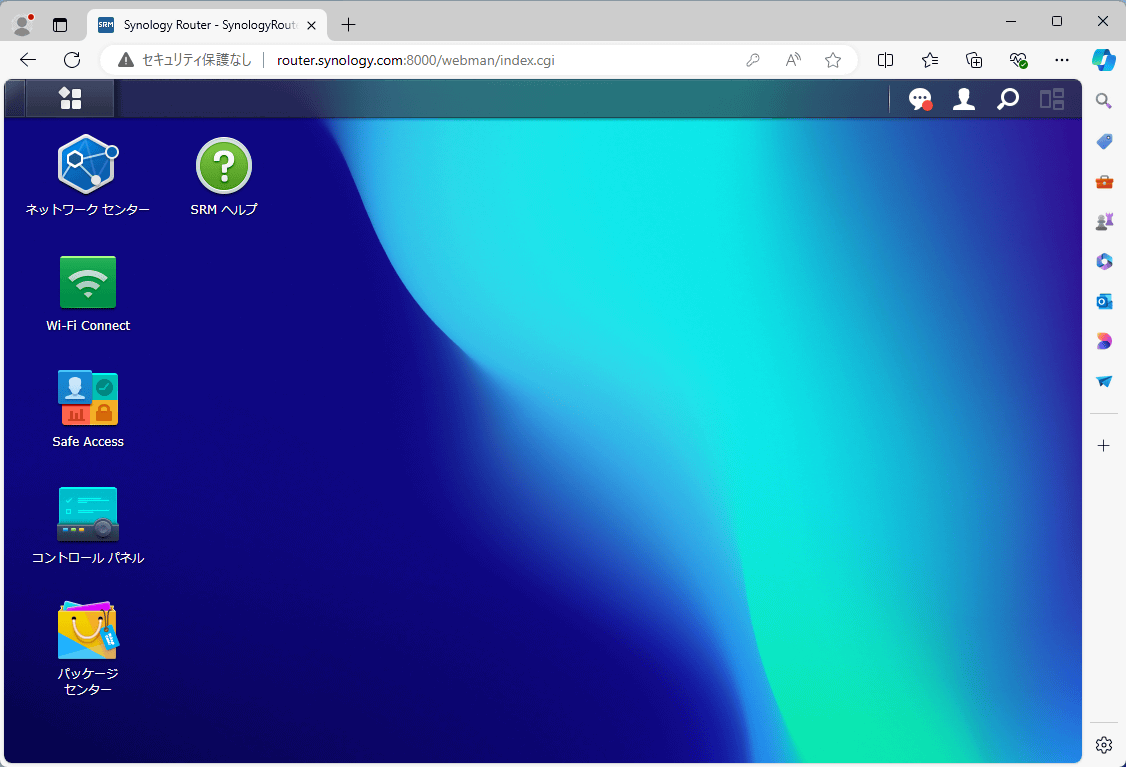
This completes all the settings required to manage your Internet connection and router. In addition, SRM allows you to use functions such as 'change SSID and password,' 'set up VPN service,' and 'website filtering.' From now on, you can access SRM by accessing '
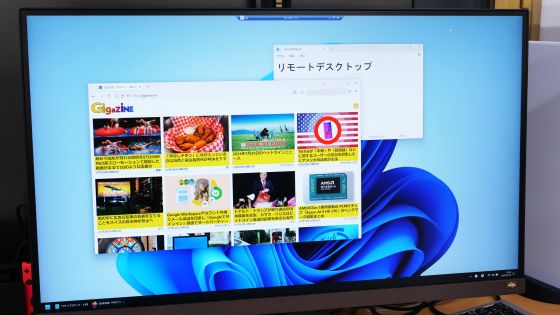
SRM, which controls the WRX560, also has a free VPN and a remote desktop function that can be operated from a browser, so we will be publishing an article on how to actually use it soon.
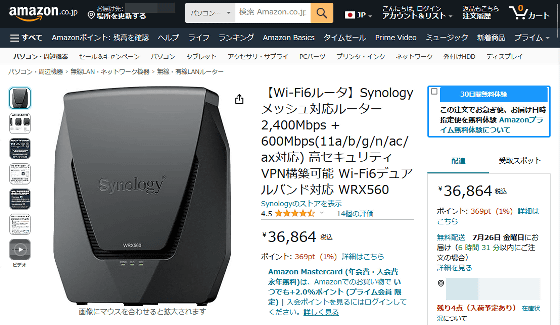
At the time of writing, the WRX560 is available on Amazon.co.jp for 36,864 yen including tax.
Amazon | [Wi-Fi6 Router] Synology Mesh-Compatible Router 2,400Mbps + 600Mbps (11a/b/g/n/ac/ax compatible) High security VPN construction possible Wi-Fi6 dual band compatible WRX560 | Synology | Wireless and wired LAN router mail order
Related Posts: