``Homebox'' review that records various things in the house and makes it easier to manage and search inventory, location, warranty period, etc.

' Homebox ' is a service you can use when you have a variety of products in your house and want to record them all. The GIGAZINE editorial department has over 100 different products such as smartphones and cameras, and we record all kinds of information about the products, such as product names, serial numbers, storage locations, and even warranty dates. I haven't been able to find a convenient way to record information that allows me to understand it at a glance and to perform searches smoothly. That's when I discovered Homebox, which is free to use and allows you to record serial numbers and storage locations for each product. I used this service to record and manage various products.
GitHub - hay-kot/homebox: Homebox is the inventory and organization system built for the Home User
Homebox has a Docker container and a demo version that runs on the browser. In order to use the demo version this time, access the demo from the link below.
Homebox | Organize and Tag Your Stuff
https://homebox.fly.dev/
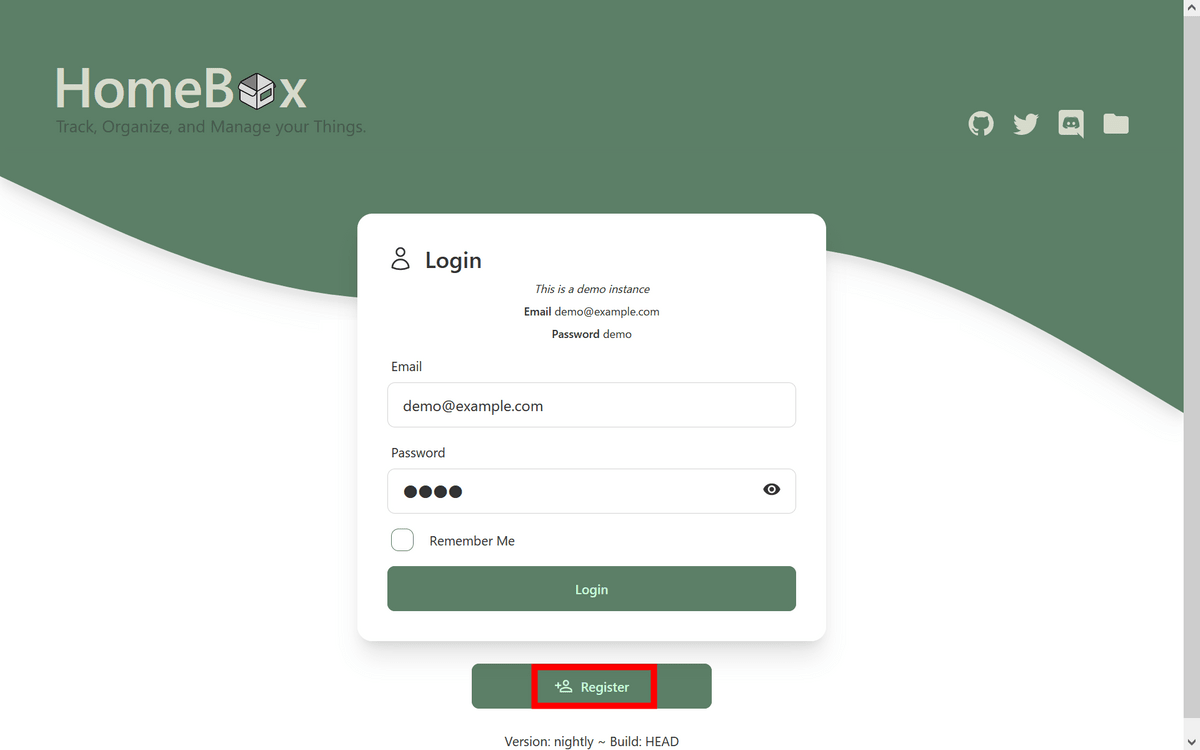
Click 'Register' to register your email address.
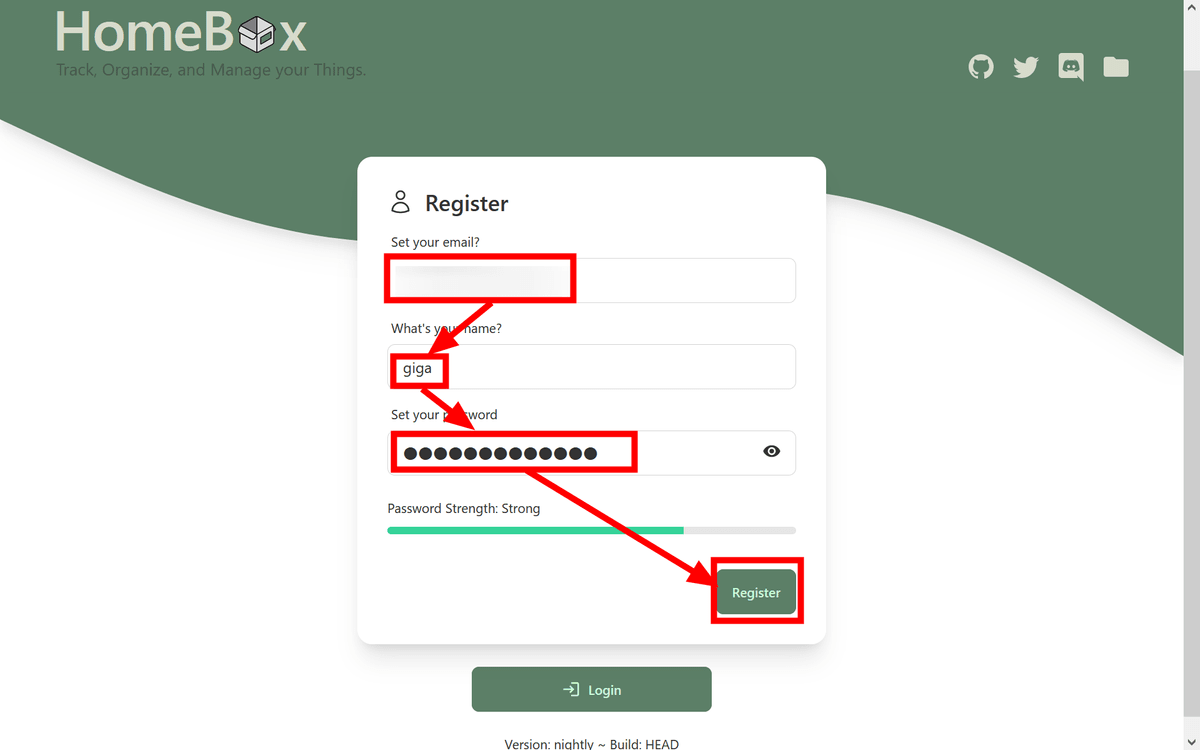
Enter your email address, display name, and password and click 'Register' to complete registration.
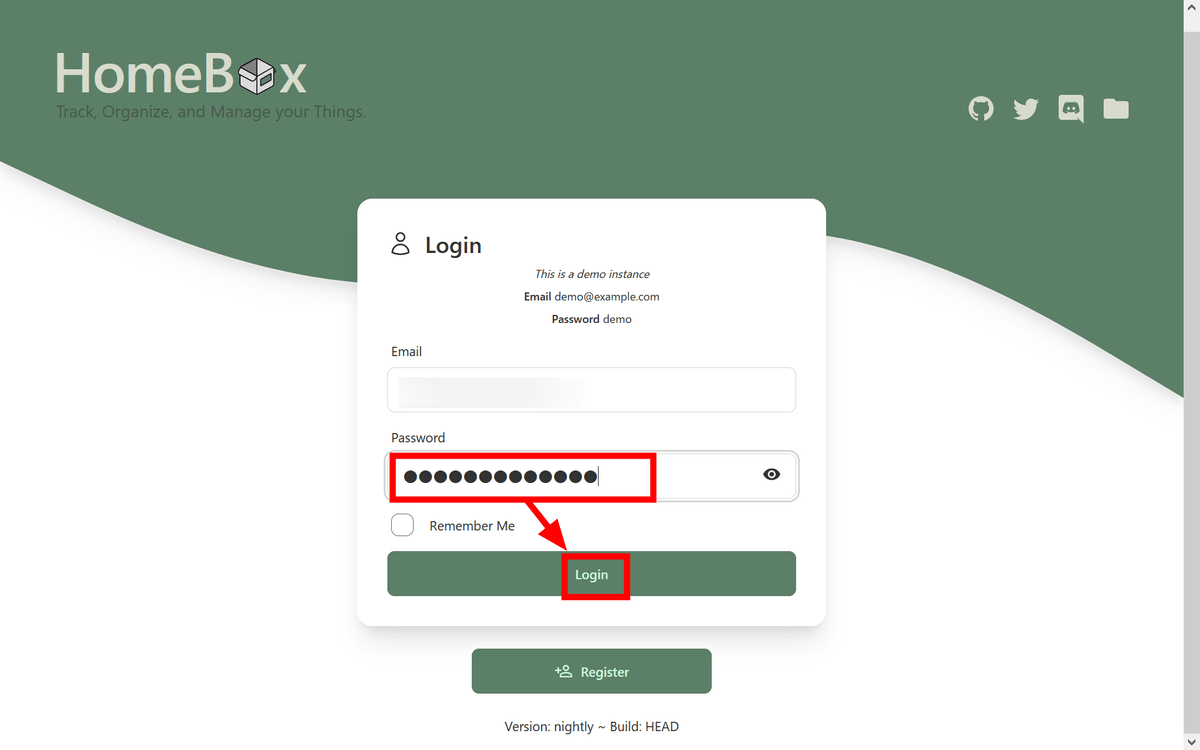
You will be returned to the login screen, so enter your password and click 'Login'.
You can now access the demo version of Homebox. Homebox only supports English at the time of article creation, and there is no way to translate it into Japanese. This time I will continue in English.
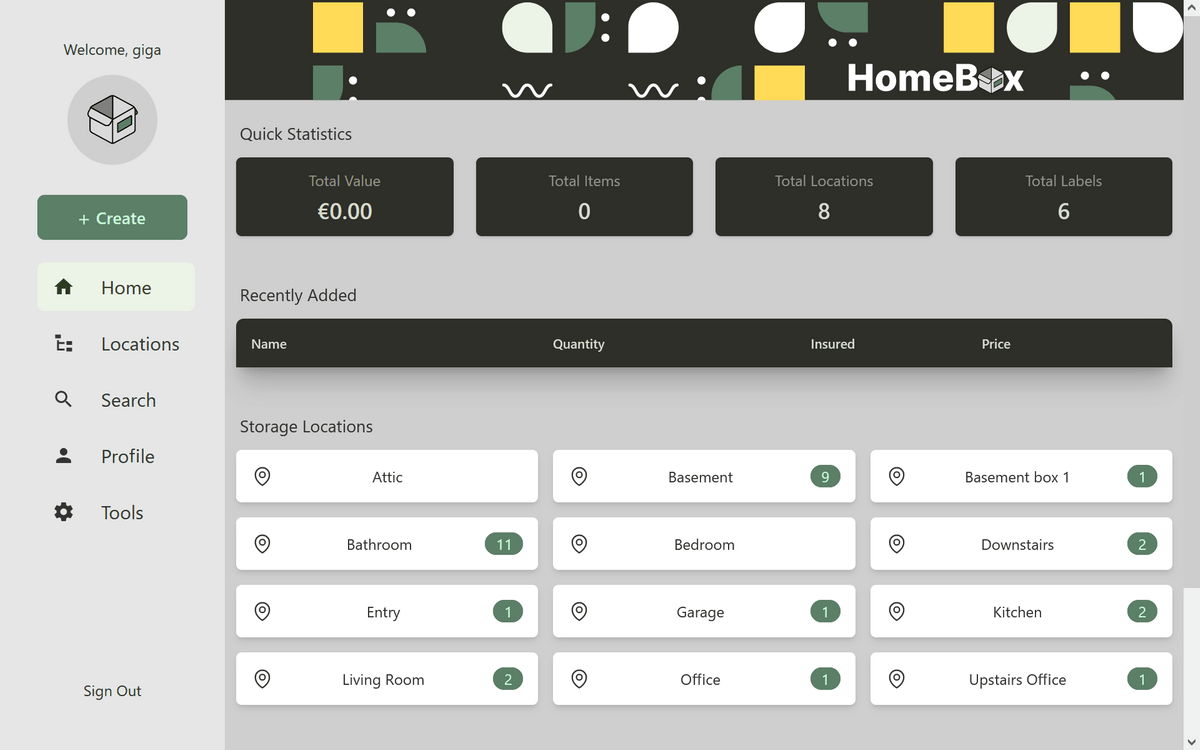
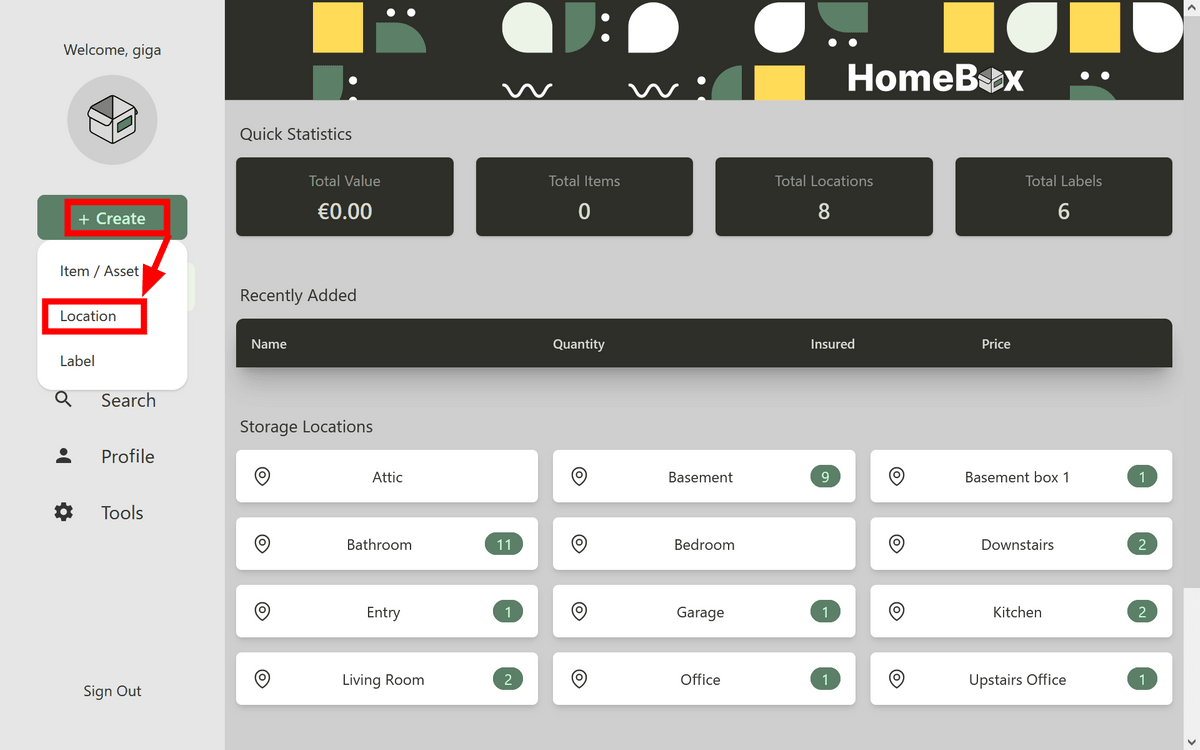
First, click 'Create'. You can register new items by clicking 'Item/Asset', 'Location' for the location where the item is stored, and 'Label' for the label. First of all, you want to create it from 'Item/Asset', but it will be smoother later if you create the location and label first, so click 'Location' first.
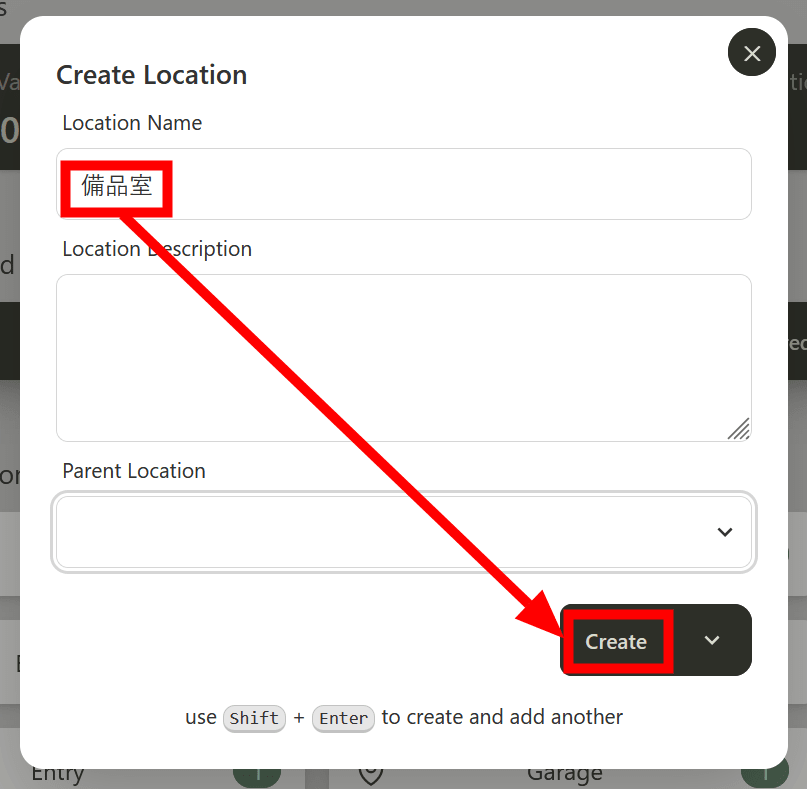
Enter the location name in 'Location Name' and click 'Create' to create a new location. It is OK to input in Japanese.
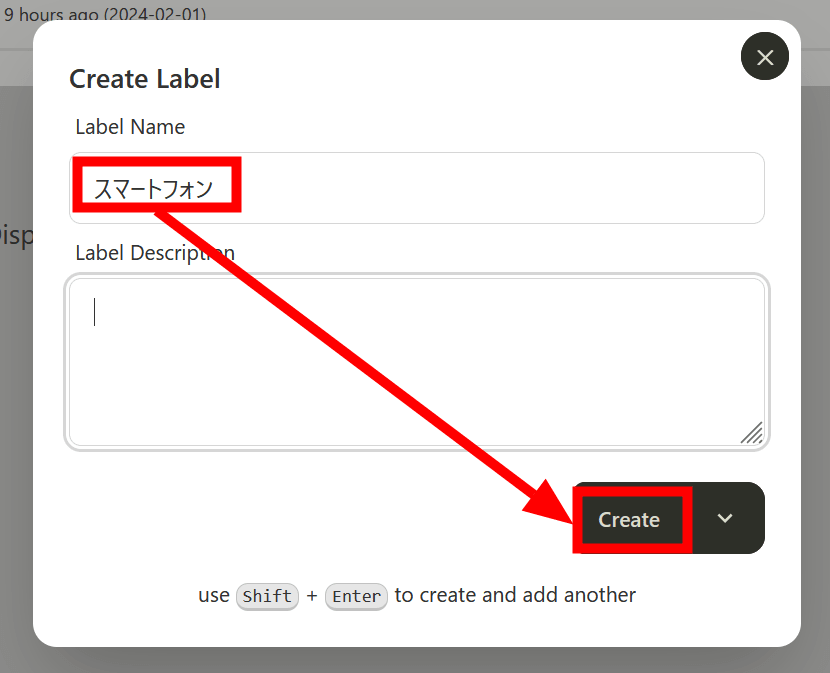
Then click 'Create' and click 'Label'.

Enter the label name in Label Name and click 'Create'.
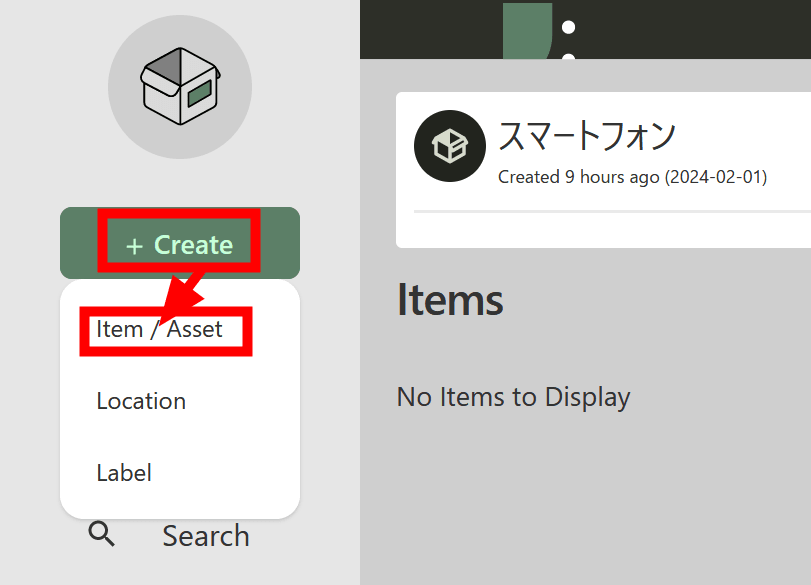
Next, click 'Create' and 'Item/Asset'.
Set the location you created earlier in 'Parent Location' and enter the product name in 'Item Name'. You can register the product in Homebox by setting a label in 'Label' and clicking 'Create'. You cannot create a new location or label on this Item/Asset creation screen, so you must create a location and label first.

The product information created like this is below. Currently, only the name, location, label, and quantity are registered, so click 'Edit' to add more detailed information.
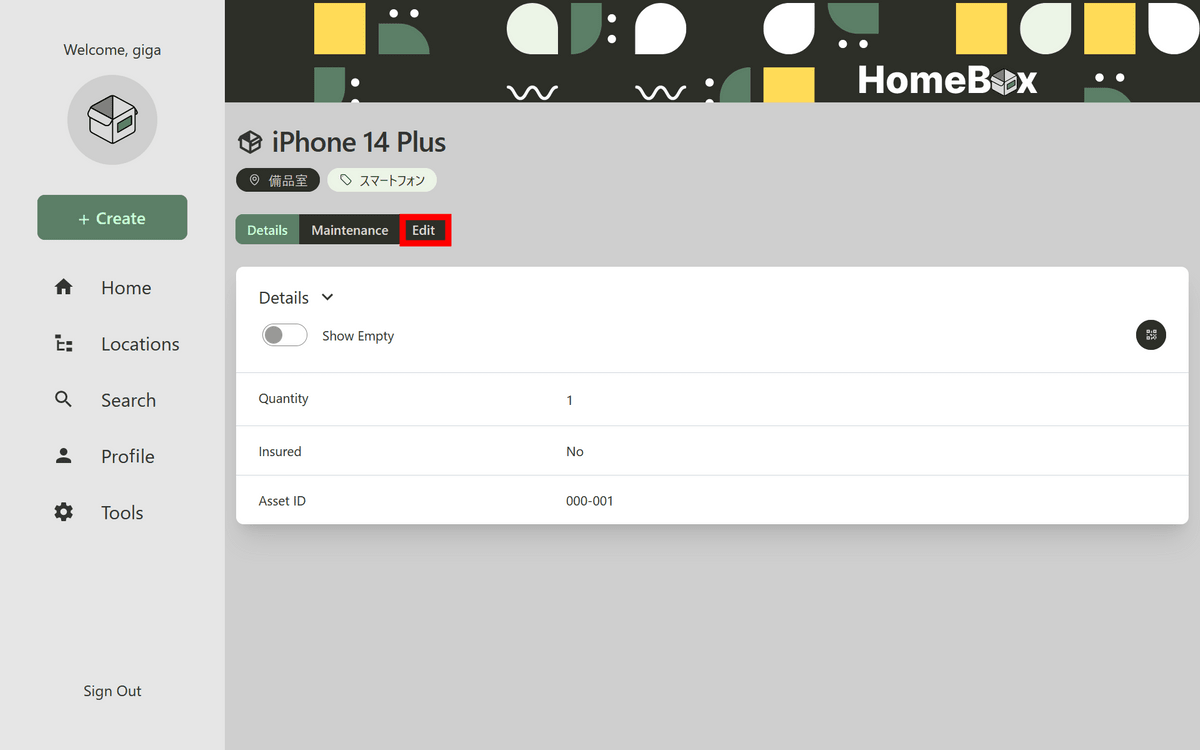
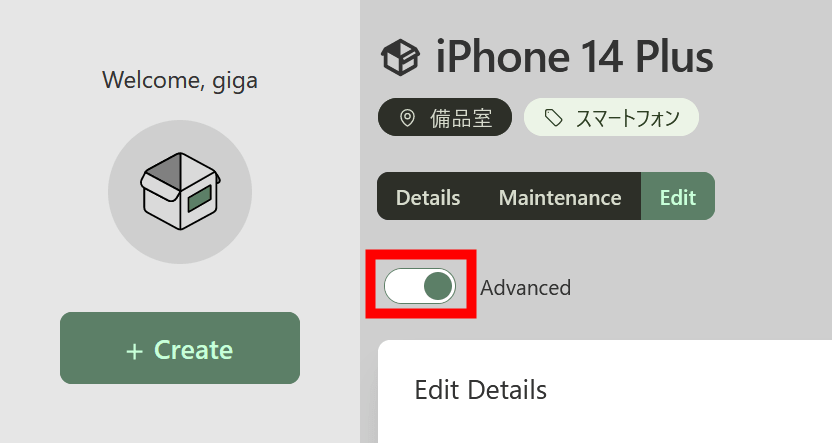
Click 'Advanced' to add product images and information about purchase, warranty, and sale.
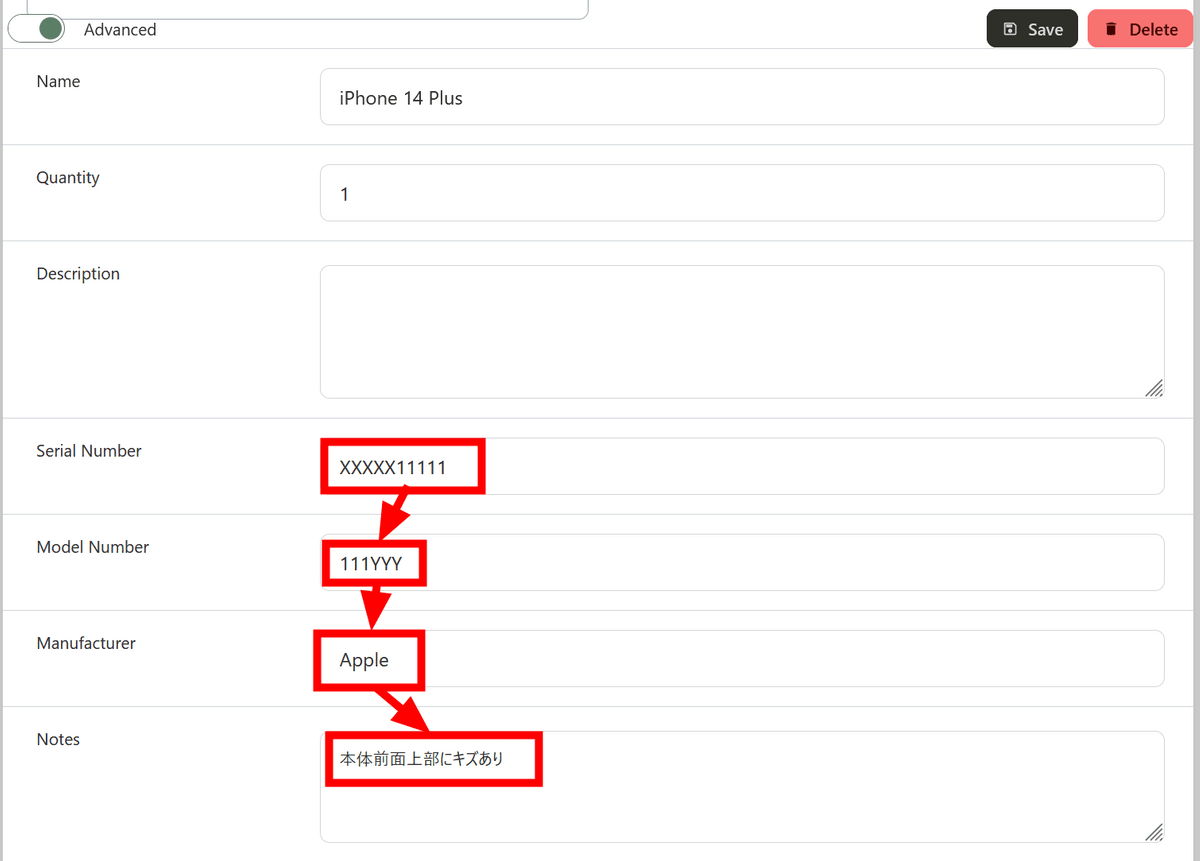
In addition to the product name and quantity that you registered earlier, fields will be displayed in which you can enter the serial number, model number, manufacturer, notes, etc., so enter each of them. To go.
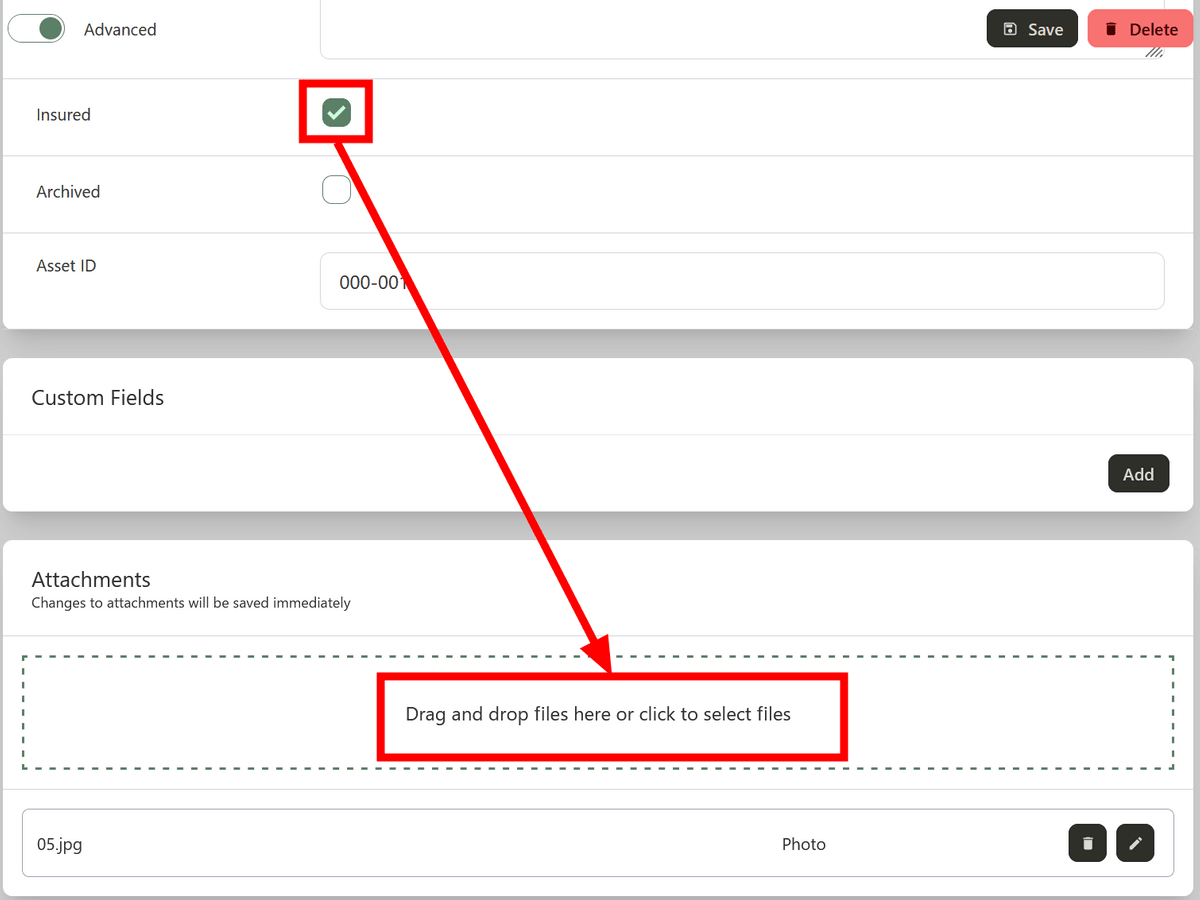
If you scroll down, you will see 'Insured' which indicates whether there is a warranty by checking or not, and 'Attachments' where you can register the product's image file. This time, I registered a product with a warranty, so I checked the Insured box. I uploaded a JPEG file to Attachments.
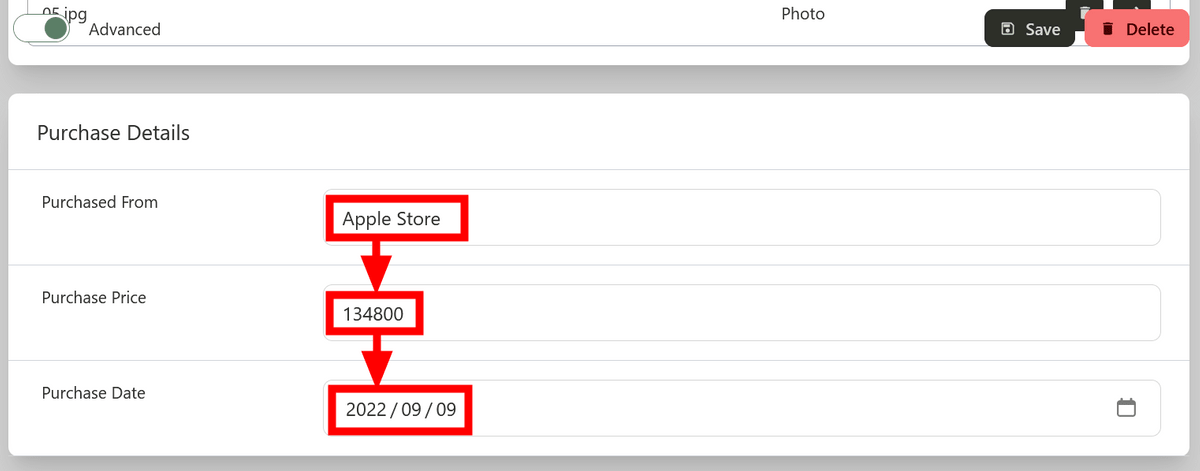
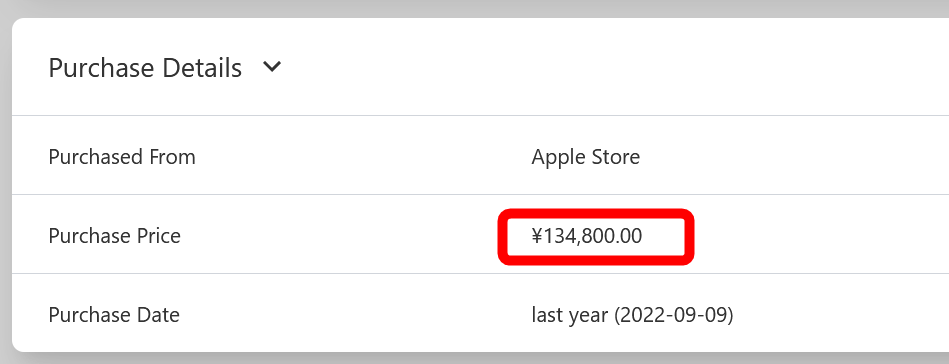
Below that there are fields to enter the purchase location (Purchased From), purchase price (Purchased Price), and purchase date (Purchased Date). I entered 'Apple Store' as the purchase location, '134800' as the purchase price, and '2022/09/09' as the purchase date. At this time, please note that if you enter characters other than numbers in the purchase price field, an error will occur when saving.
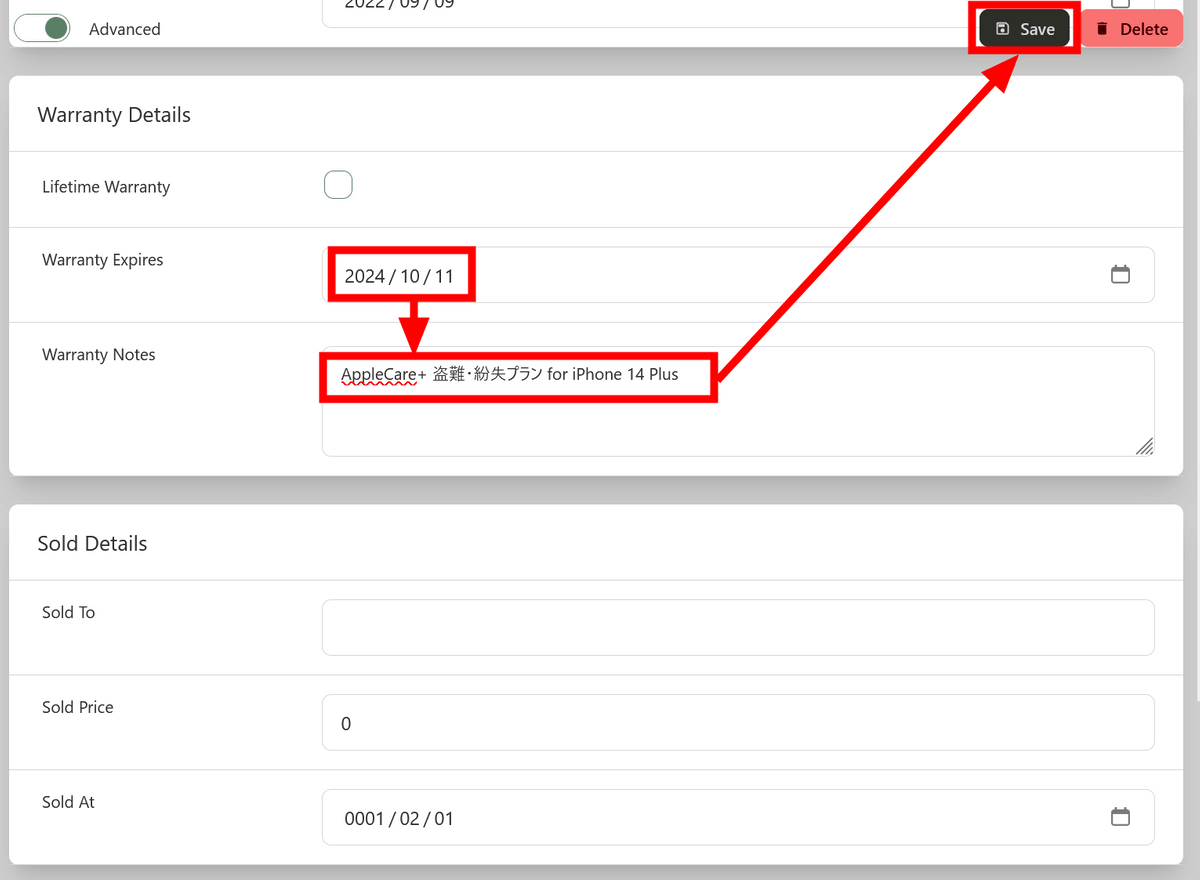
Scroll to the bottom and you will see a field where you can add information about warranties and sales. This time, do not check whether there is a lifetime warranty (Lifetime Warranty), and enter the warranty expiration date (Warranty Expires) and notes regarding the warranty (Warranty Notes). Since we are not selling, we will skip the Sold To, Sold Price, and Sold At dates, and finally click 'Save.'
Now you can add detailed product information.
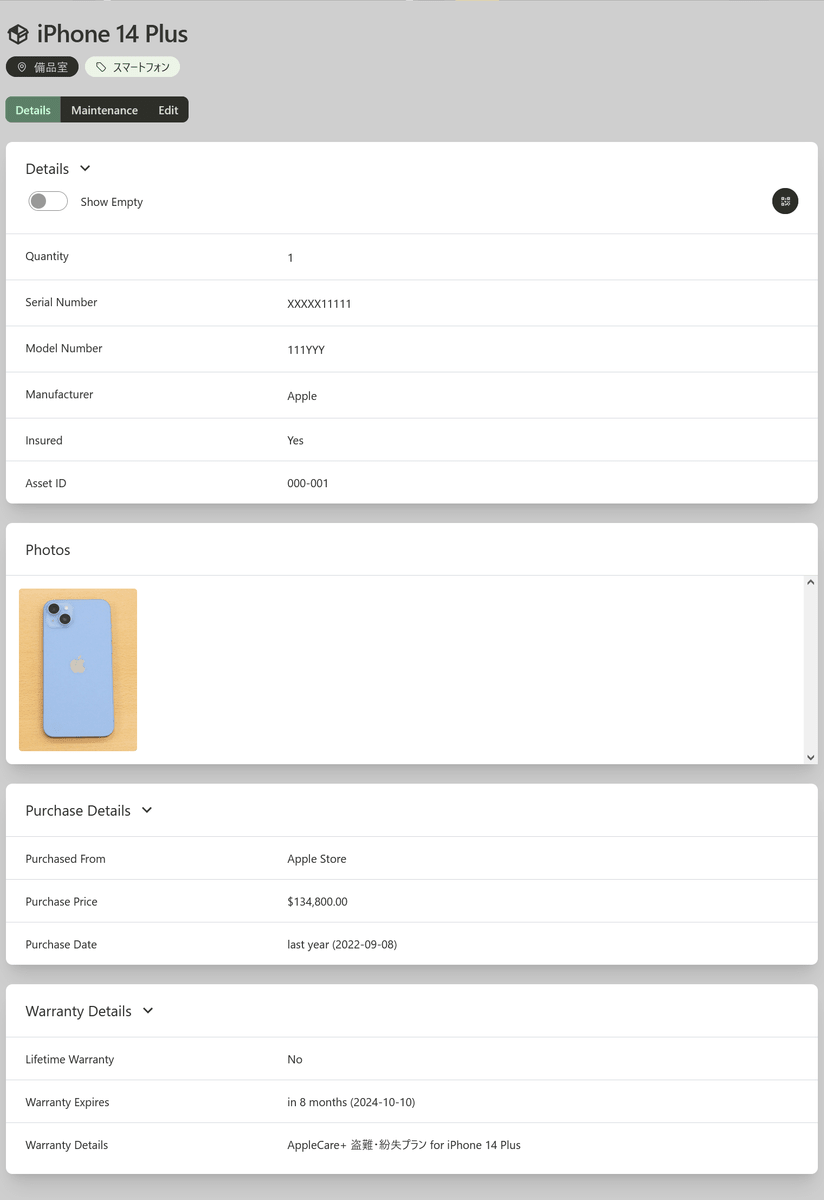
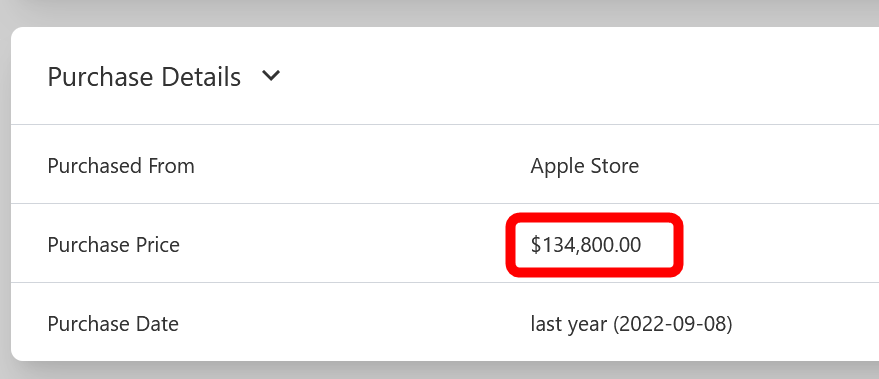
However, I am concerned that the prices are in dollars.
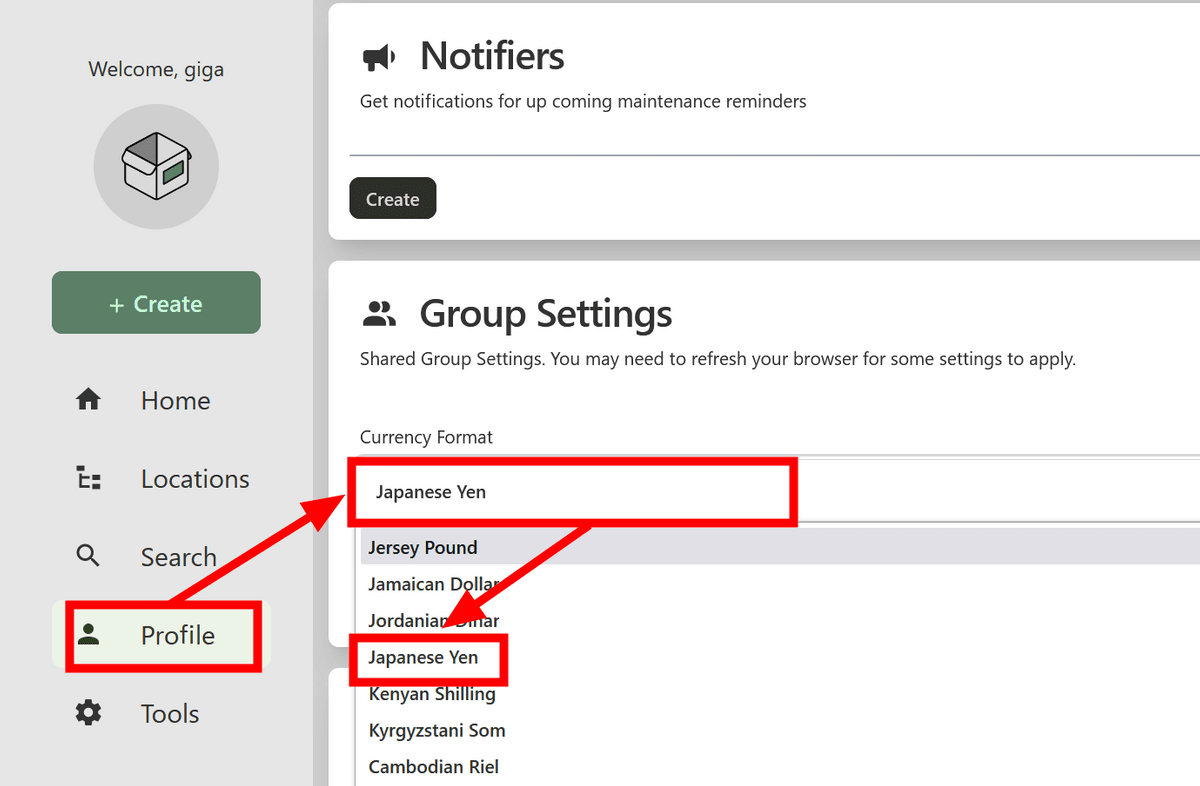
Prices can be changed to yen. Click 'Profile', click 'Currency Format', and select 'Japanese Yen'.
It is now written in yen. In Japanese yen, the decimal point, which is basically not used, is also written, but this cannot be changed.
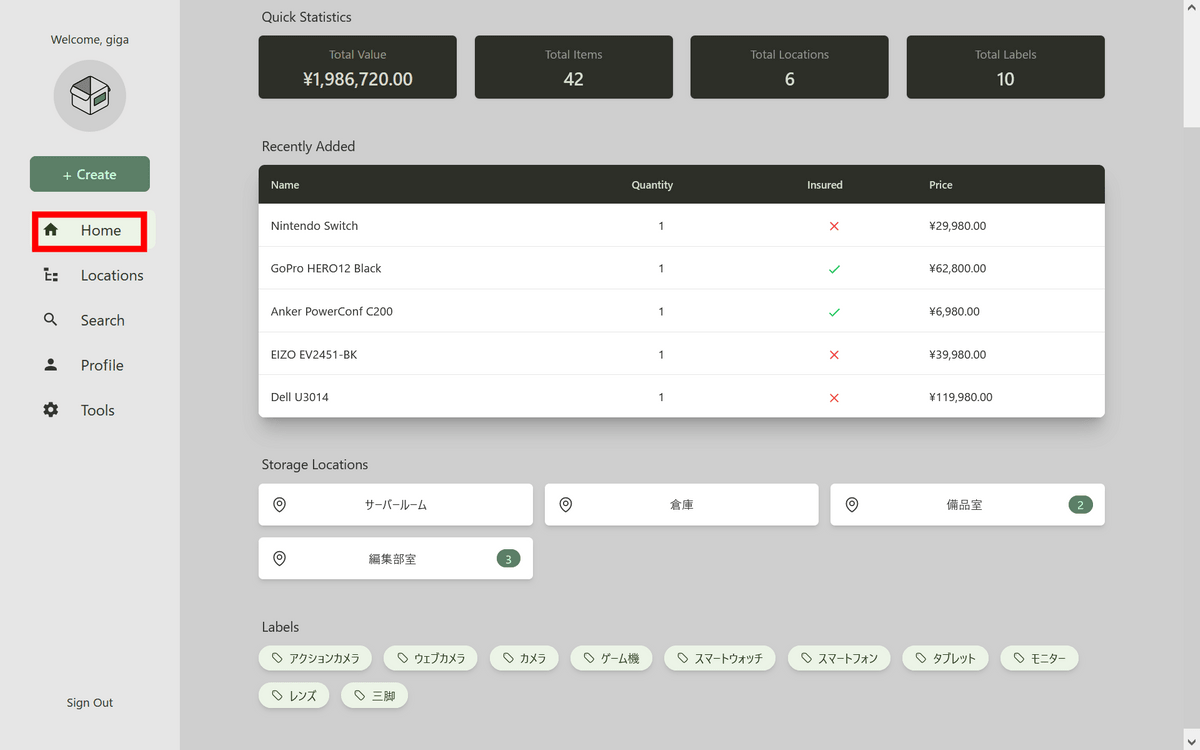
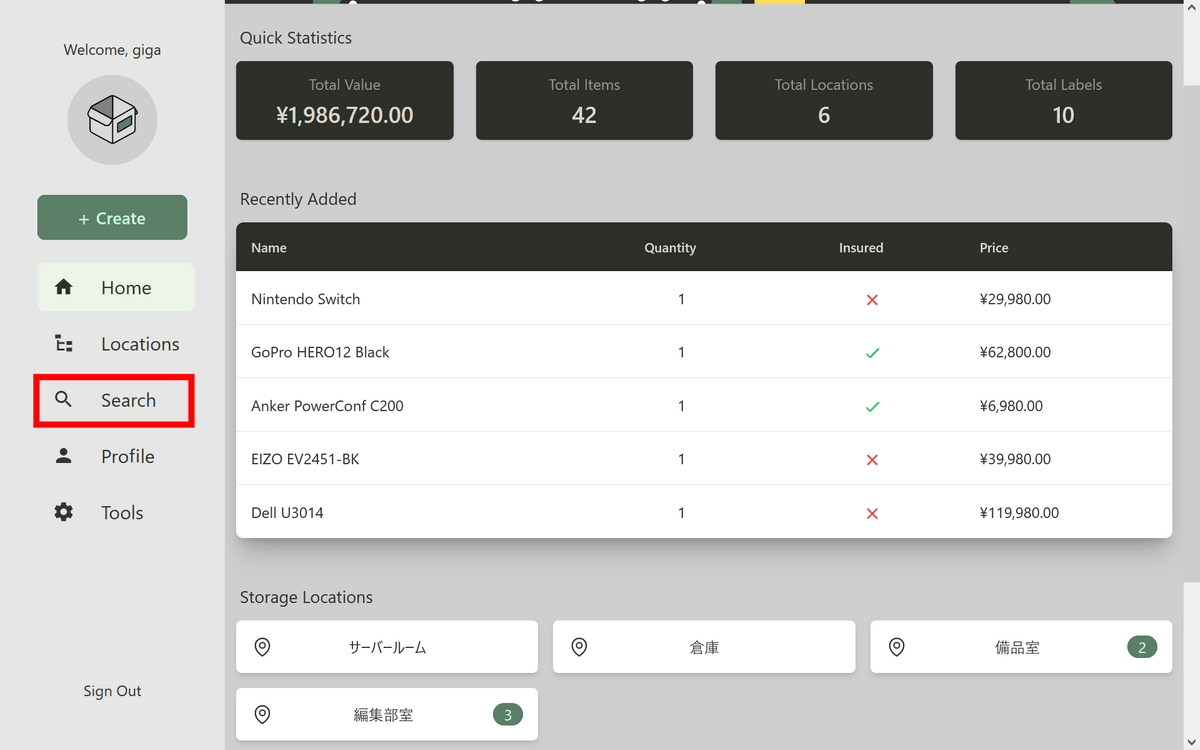
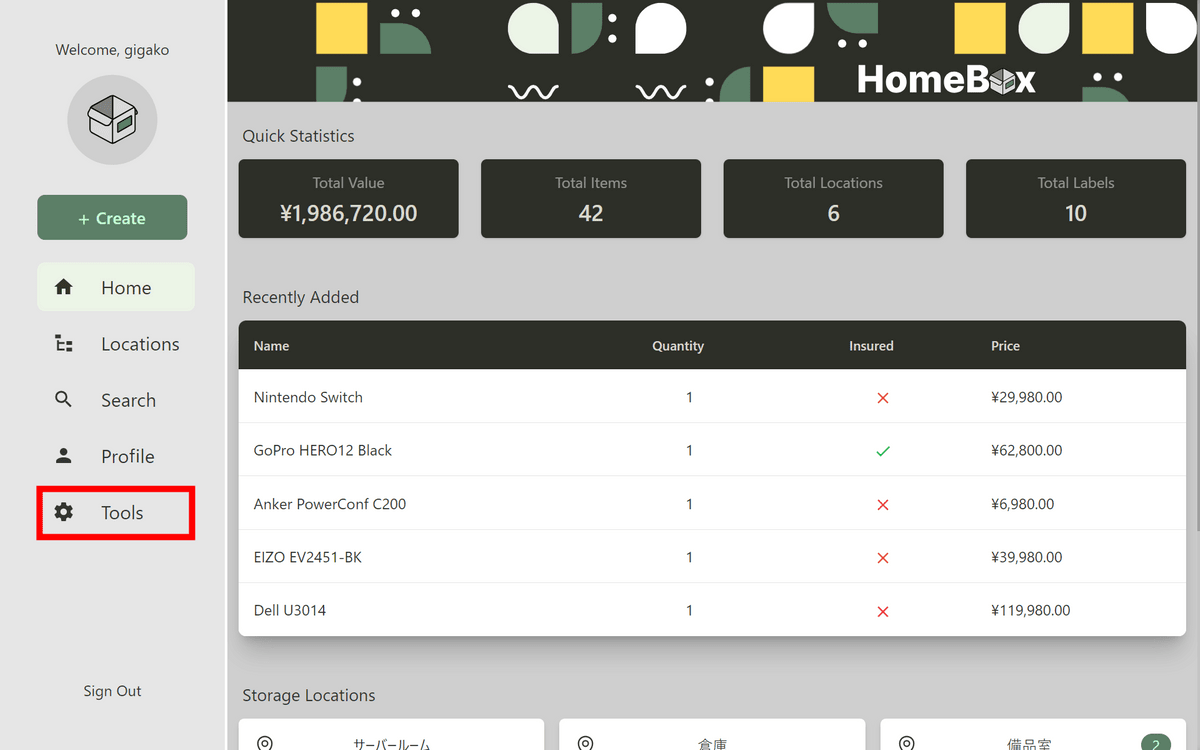
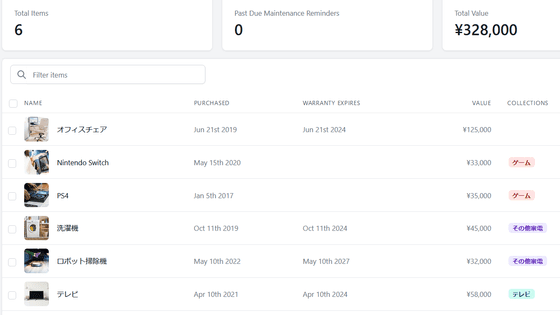
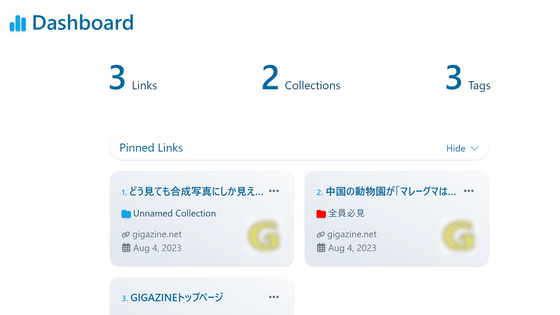
I tried registering various products one by one using the steps above. By clicking 'Home', you can check the total price and number of products registered in Homebox, the number of locations, and the number of labels in a list, as well as a list of recently registered products and a list of locations and labels. .
Dig deeper and click on 'Editorial Department Room' in the location.
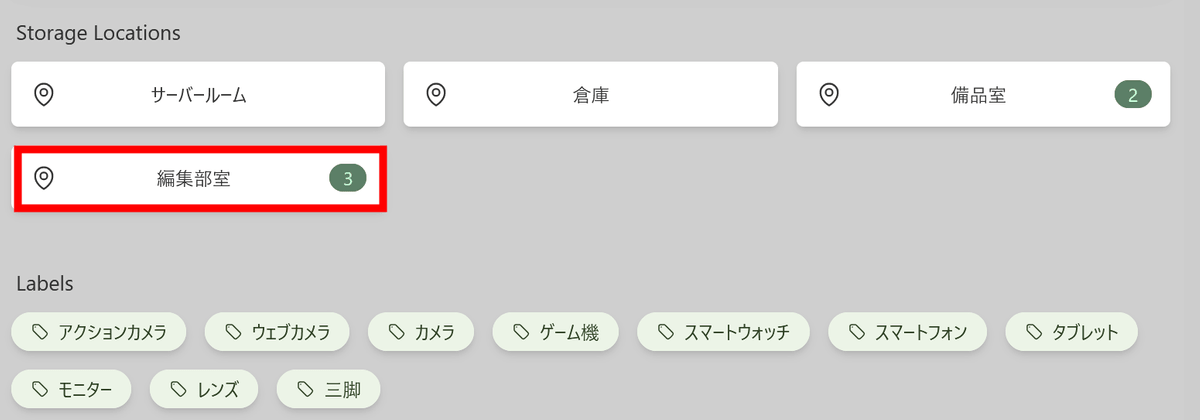
A list of products registered in the editorial department is displayed.
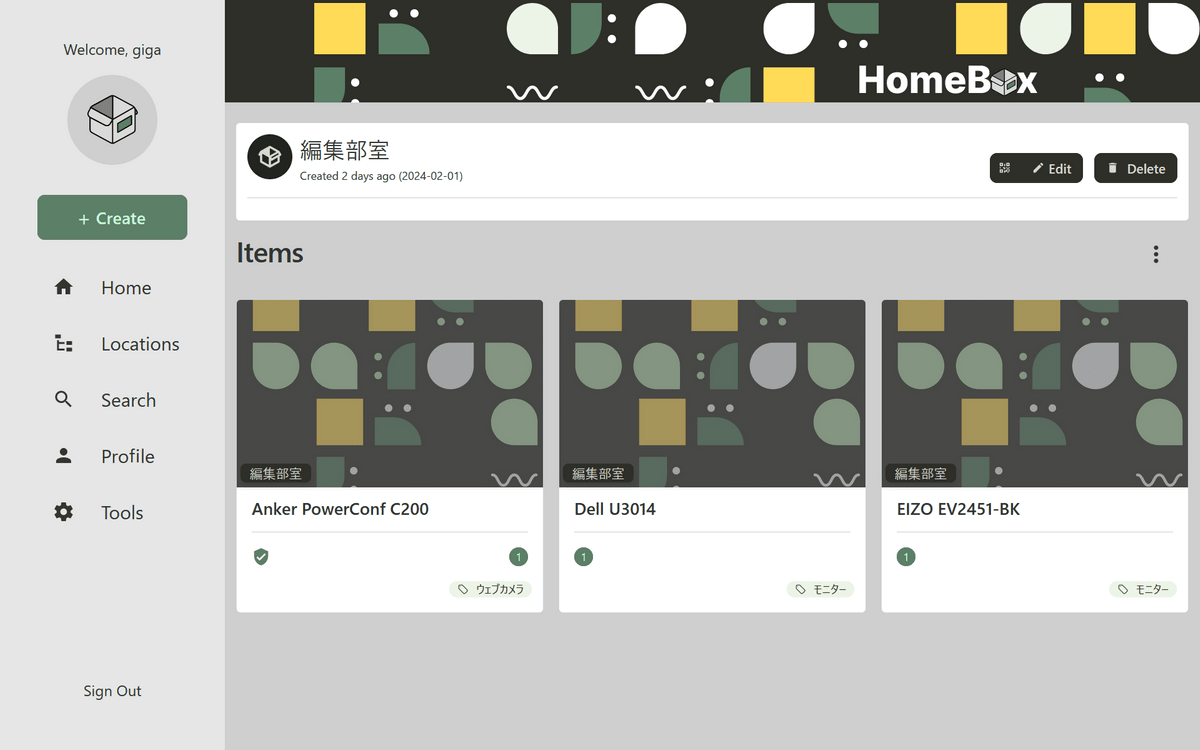
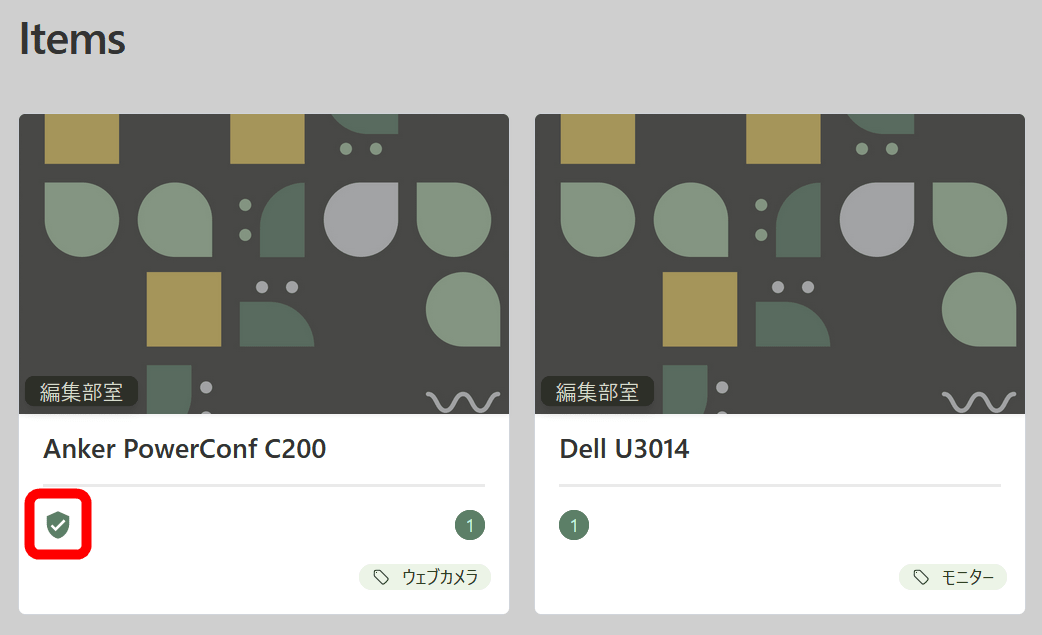
Products that are Insured will have a shield icon to indicate that they are covered by a warranty.
If you want to search for products registered in Homebox, click 'Search'.
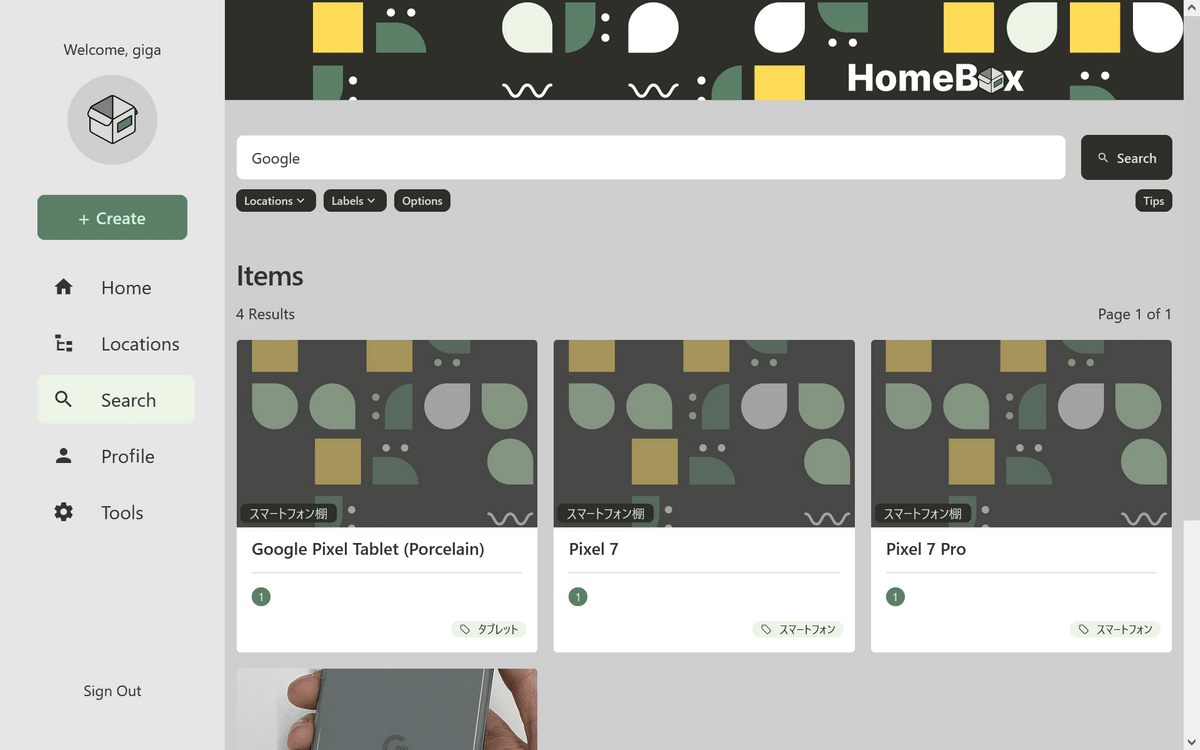
All products registered in Homebox are displayed here in a list. You can search for the product you are looking for by scrolling the screen or entering keywords in the search box.
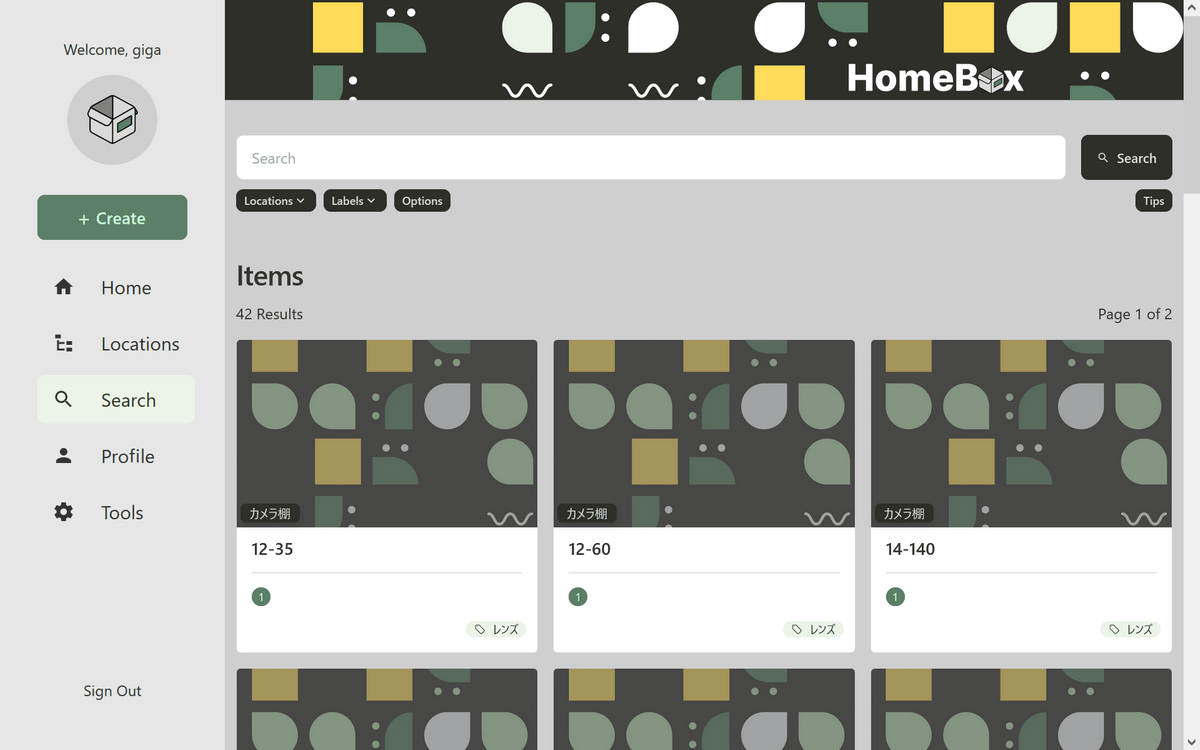
Search also supports Japanese.
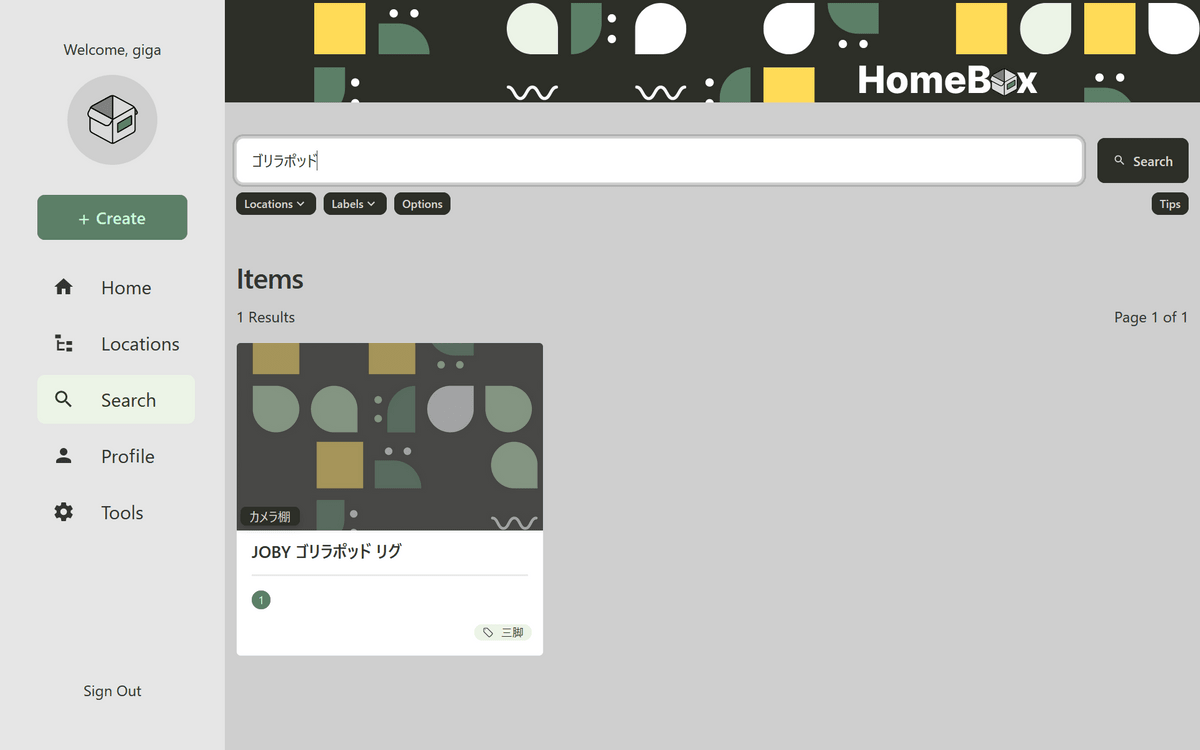
In addition to the product name, words entered in 'Manufacturer' and 'Note' will also be hit, but words registered in 'Advanced' such as 'Purchased From' will not be hit.
So, after using it, my impression is that although the system for ``registration'' is well-developed, ``search'' is difficult. It is necessary and sufficient to simply record the product name, number, and warranty expiration date, but the drawback is that it is not possible to ``search'' for ``more detailed information'' such as ``when is the warranty expiration date''? At the time of writing this article, Homebox is in beta, so it may change in the future.
In addition to registration, you can also 'share' properly, and the feature is that there is an 'export' function for sharing products. If you want to export, click 'Tools'.
'Generate BOM' which exports only basic information such as manufacturer and price, and 'Export Inventory' which exports all information are available.
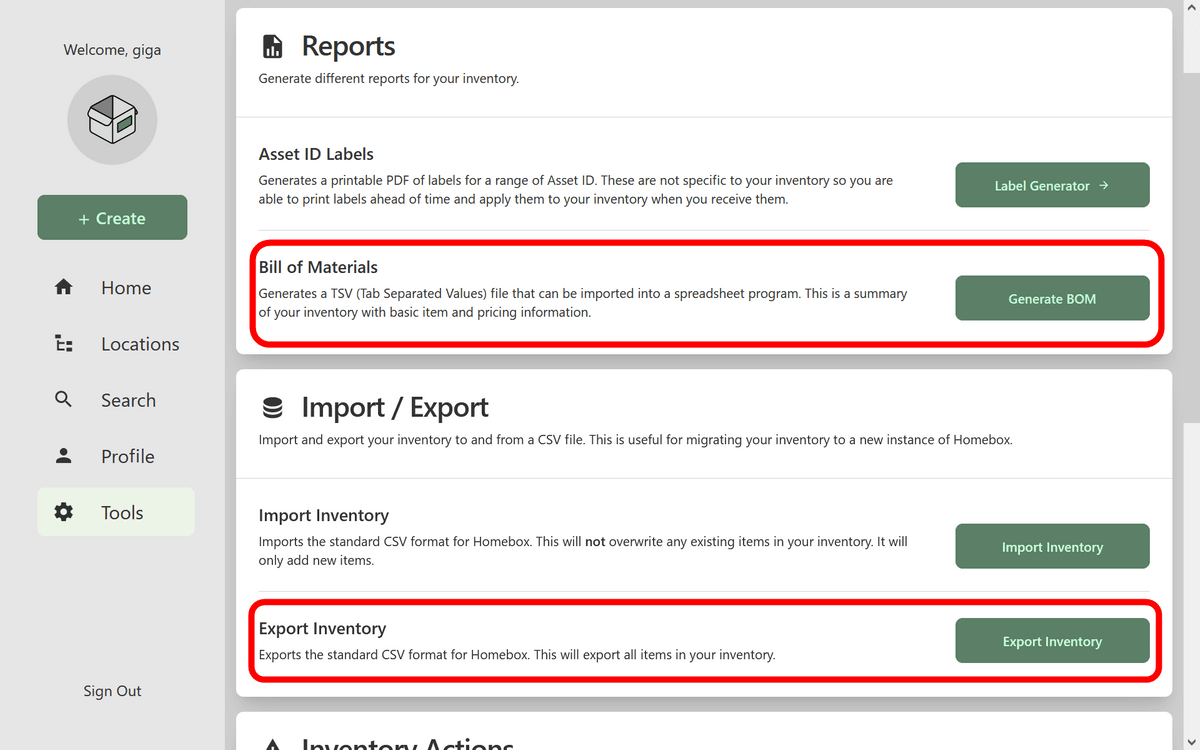
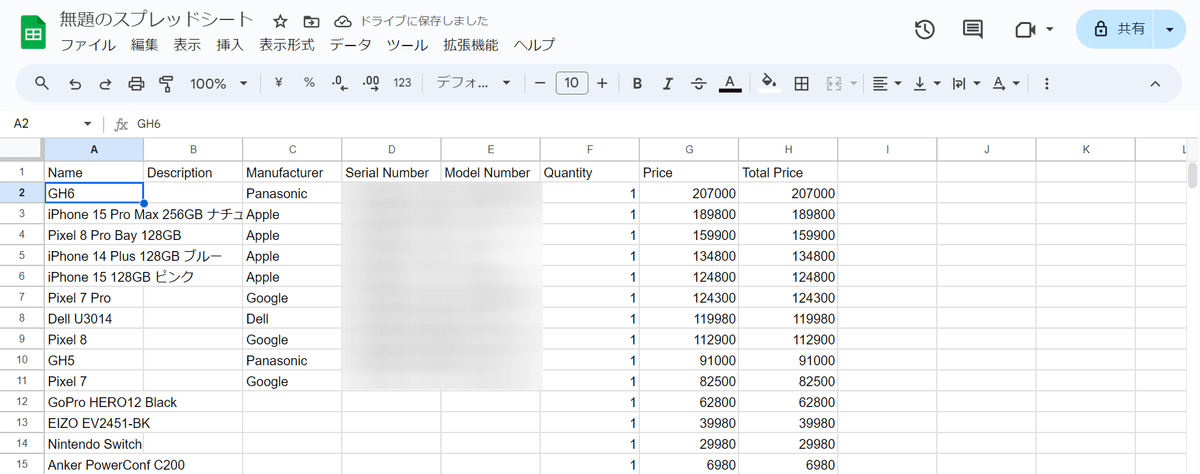
The information output by Generate BOM looks like this.
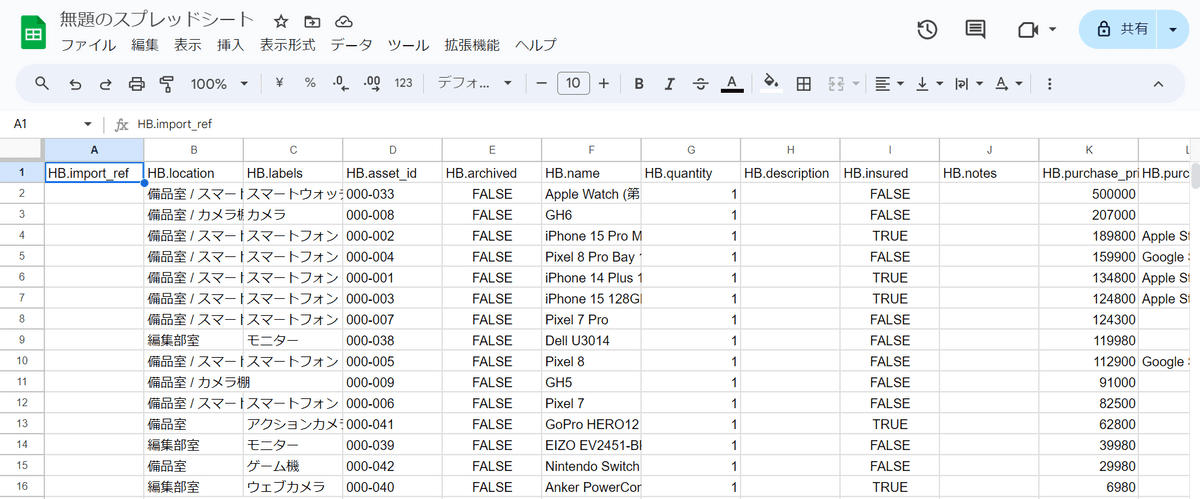
Export Inventory literally all information including location and label is exported.
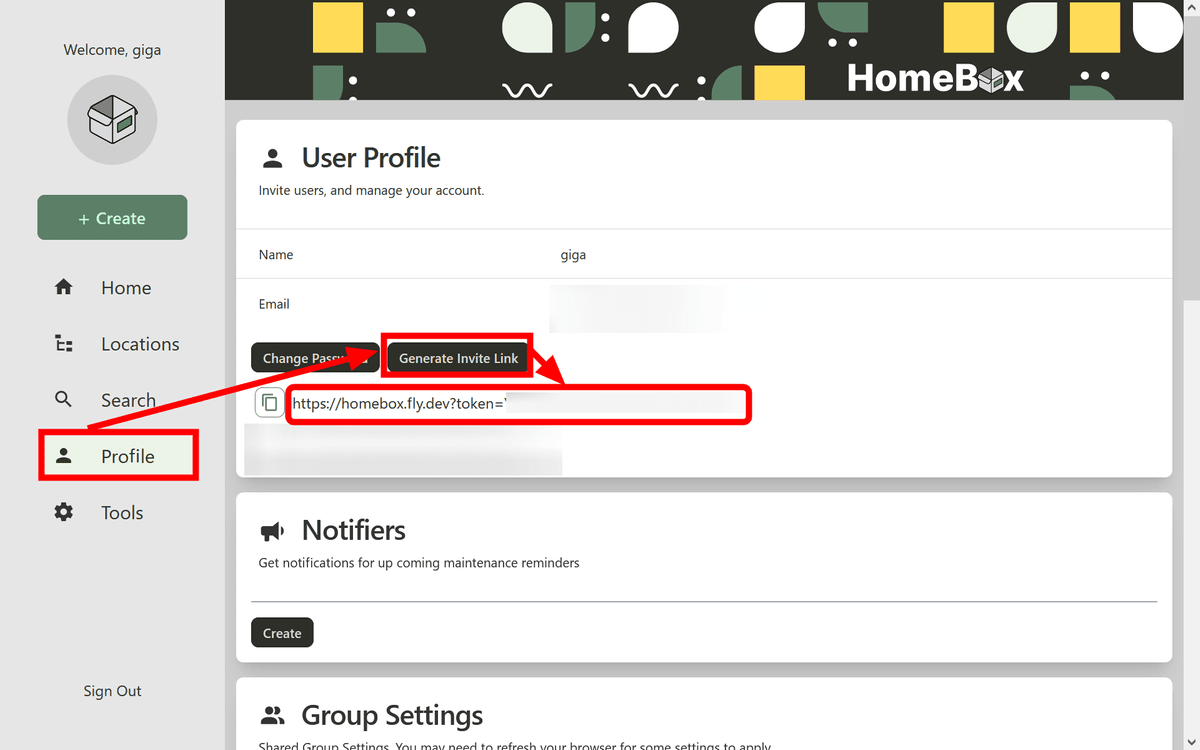
You can also invite others by creating an invitation link by clicking 'Generate Invite Link' from 'Profile'.
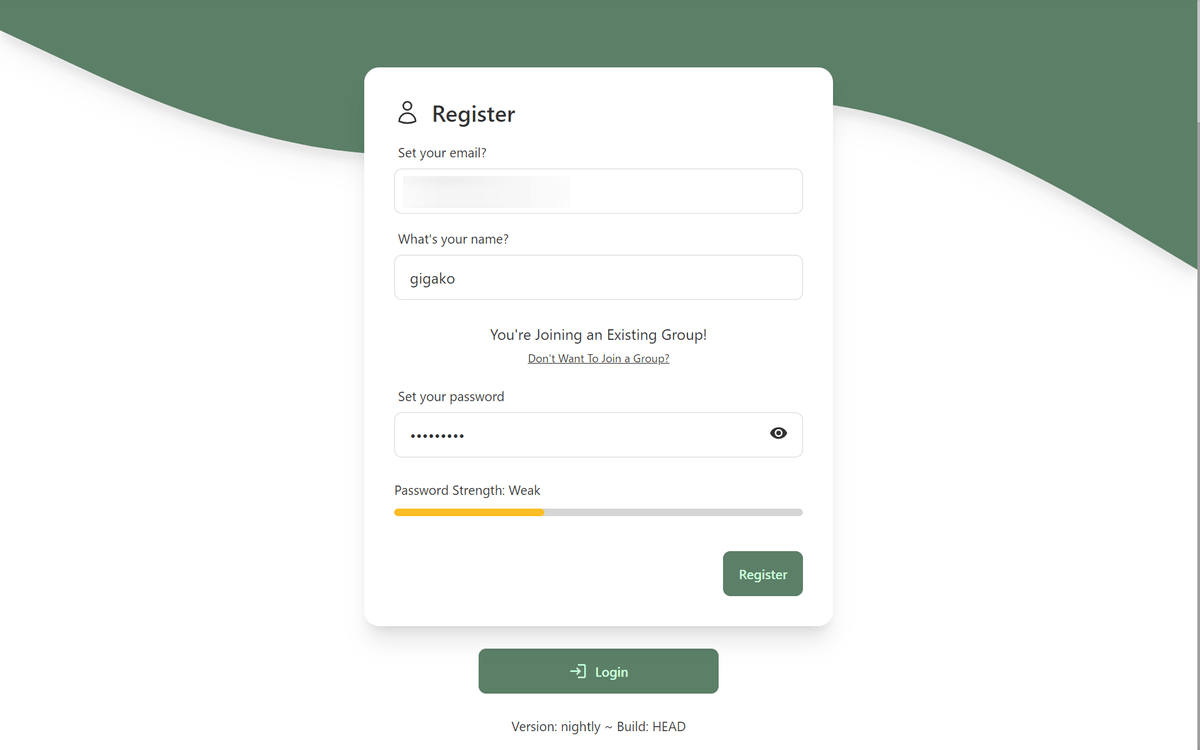
The invited party can create an account from the invitation link and access the other party's management server. Multiple people can view and edit products together, but the problem was that it was not possible to check records such as who participated and who edited.
Related Posts:
in Review, Web Application, Posted by log1p_kr