I installed a 'Switch Bot lock' that just sticks with tape & tried pairing automatically with a smartphone
One of the biggest features of the smart lock ' SwitchBot Lock ' is that it is easy to attach with double-sided tape, and there is no problem even in rental housing because you do not have to make holes in the door or do line construction. So, I actually installed the 'SwitchBot Lock', set up the smartphone application, and installed the ' SwitchBot Hub Mini ' quickly, and tried to make the entrance a smart lock.
SwitchBot Lock – SwitchBot
SwitchBot Hub Mini | Smart remote control that brings together remote controls
https://www.switchbot.jp/products/switchbot-hub-mini
This time, we will check the installation procedure of the SwitchBot lock. You can see how to check the appearance and contents of the SwitchBot lock from the following.
Smart lock 'Switch Bot lock' that enables you to unlock your smartphone with full wireless construction-free photo review --GIGAZINE
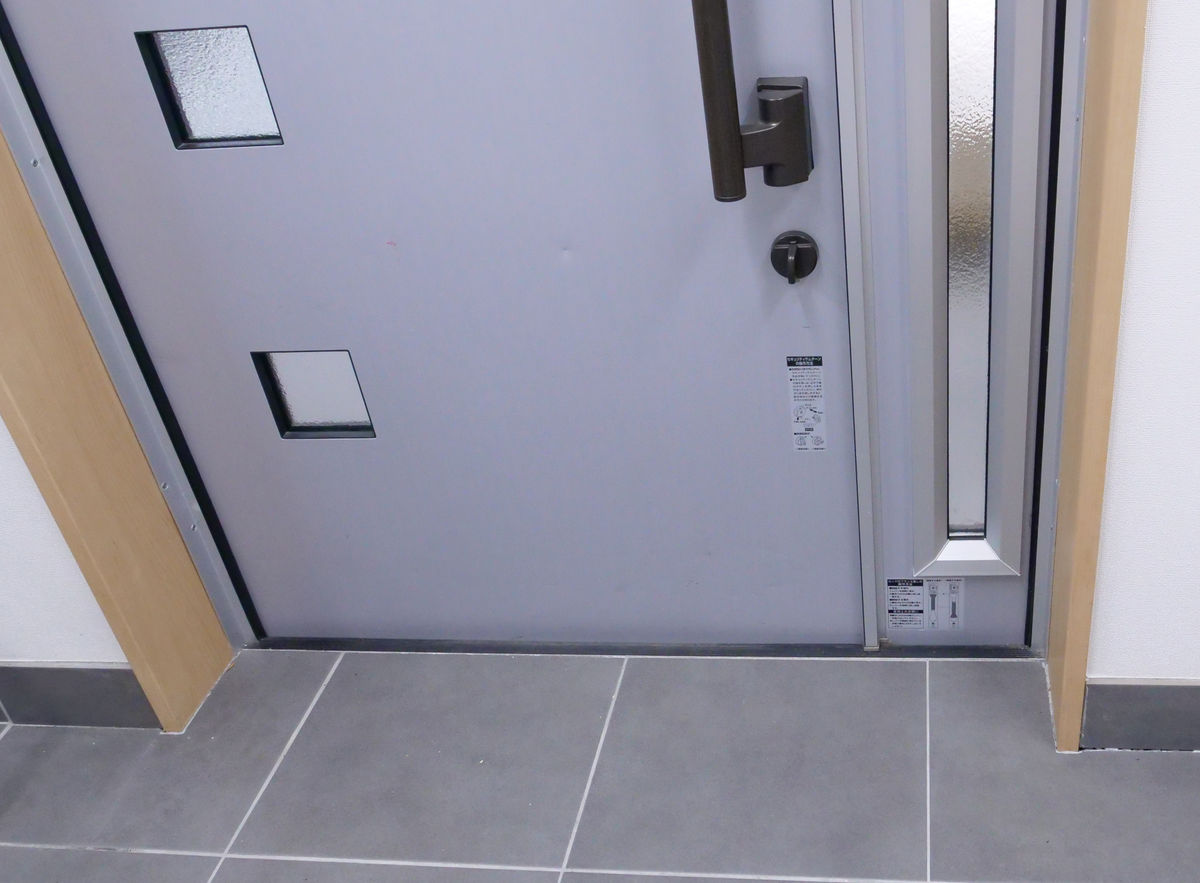
It is this entrance that installs the SwitchBot lock.
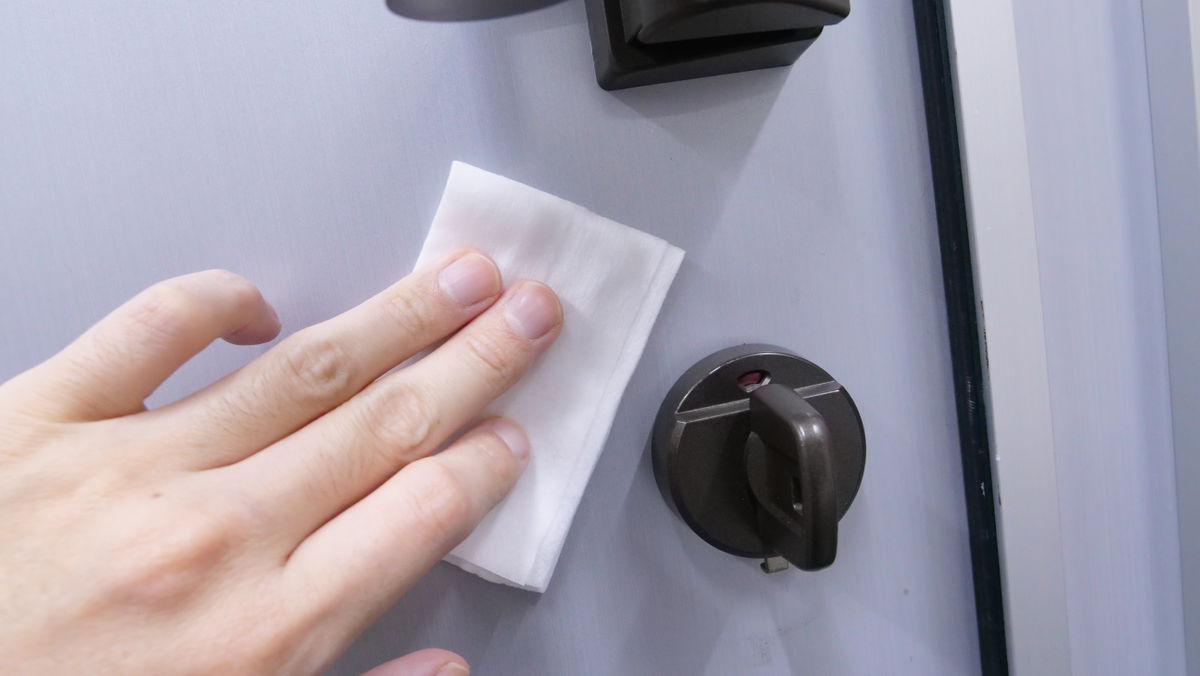
First, wipe the area around the installation site with the included cleaning tissue.
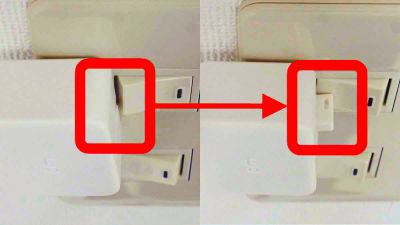
Next, apply the thumb turn adapter to the knob and select the one with the smallest gap.
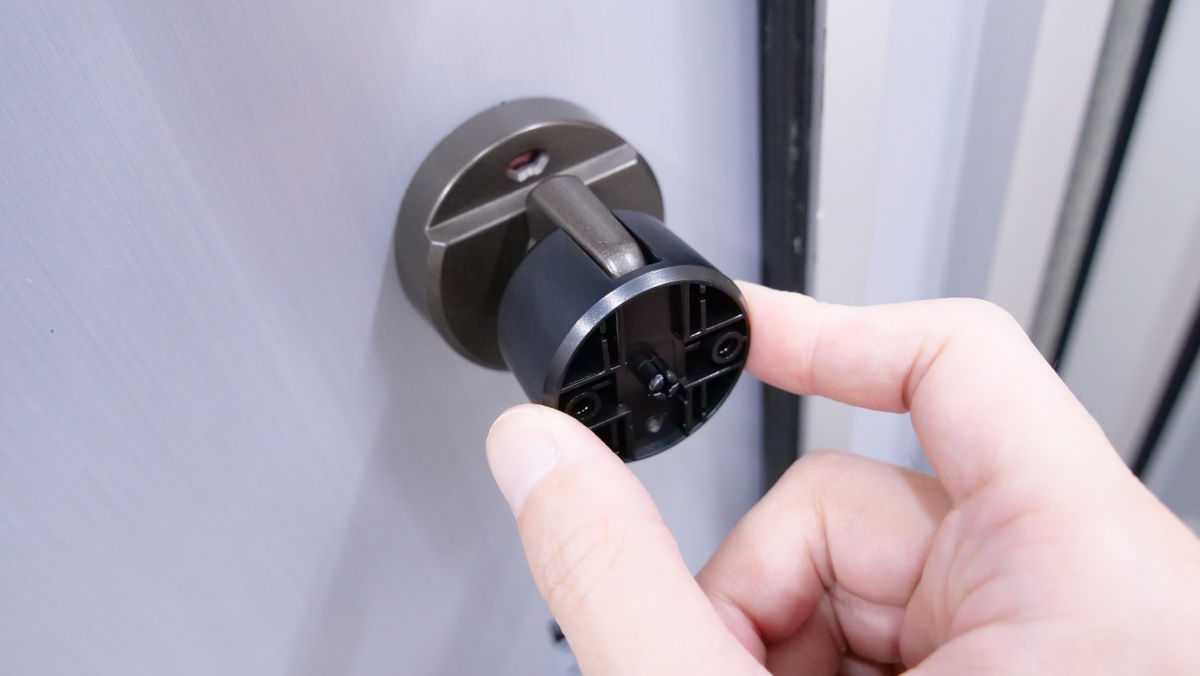
Attach the selected thumb turn adapter to the SwitchBot lock.
Next, place the SwitchBot lock on the door to see if there is space for installation. The SwitchBot lock can be installed vertically or horizontally, so this time I decided to attach it horizontally with plenty of space.

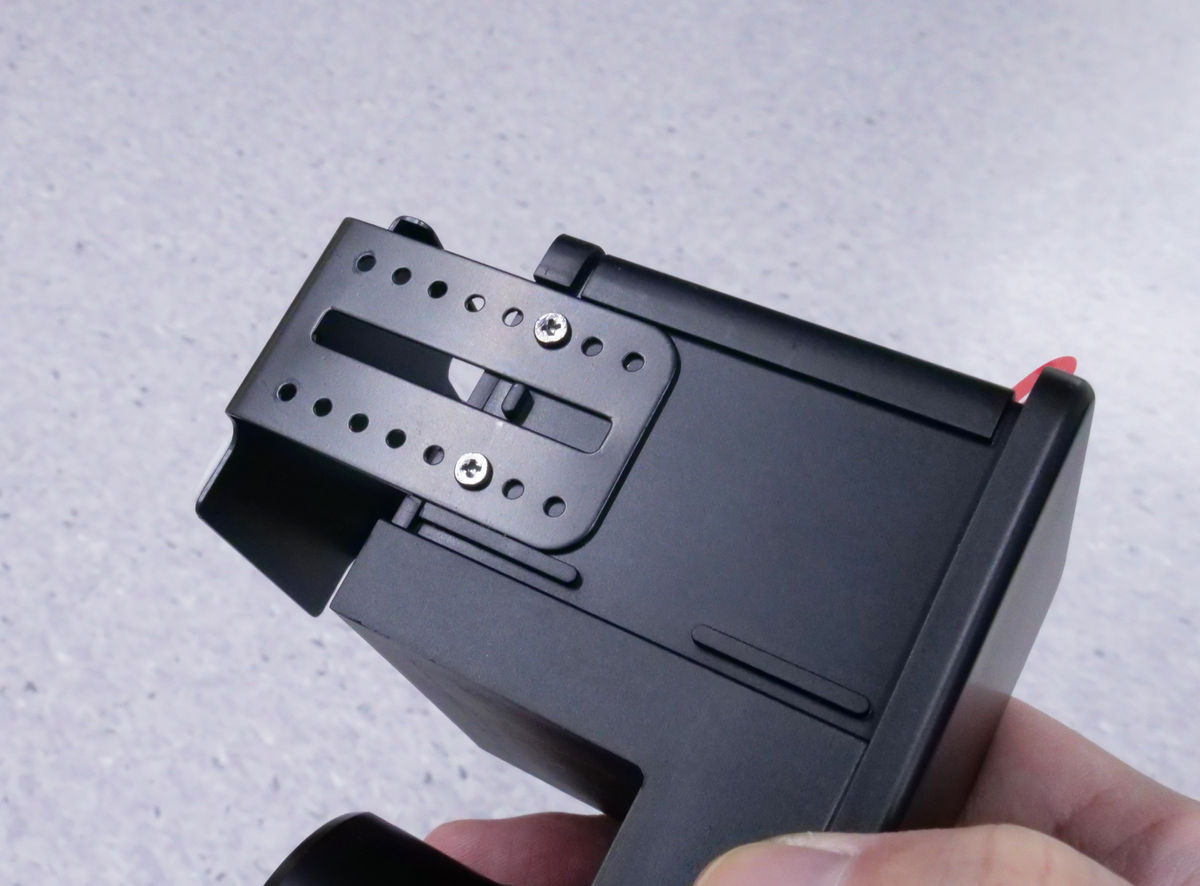
After deciding where to install it, the next step is to remove the cover of the main unit to adjust the height.
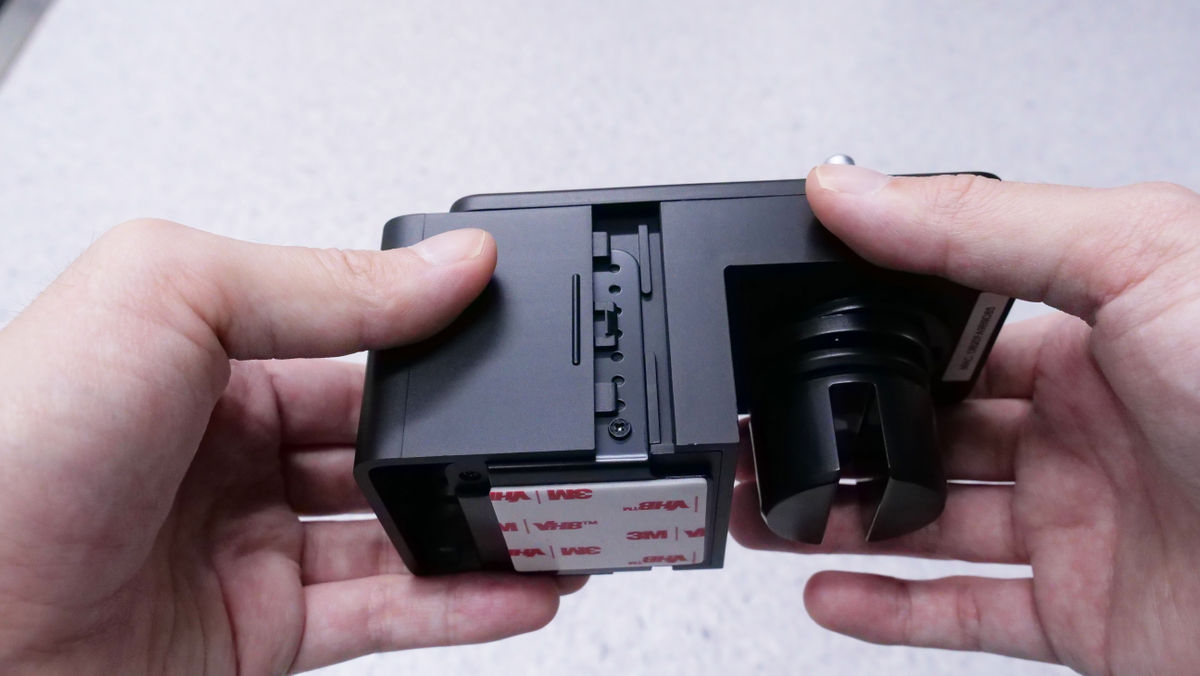
Use the included screwdriver to remove the four screws.
After removing the screws, you will be able to slide the metal parts.
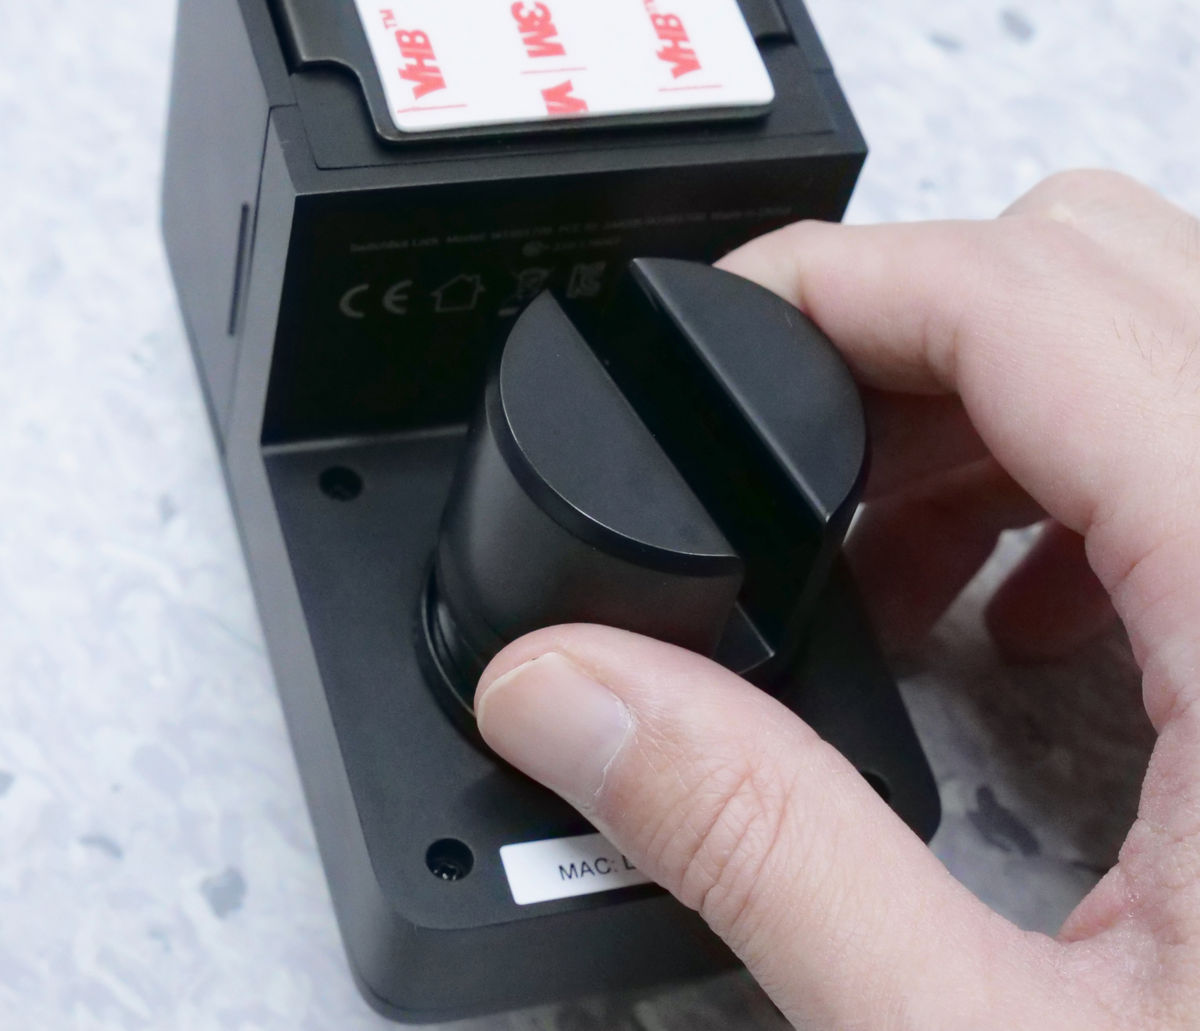
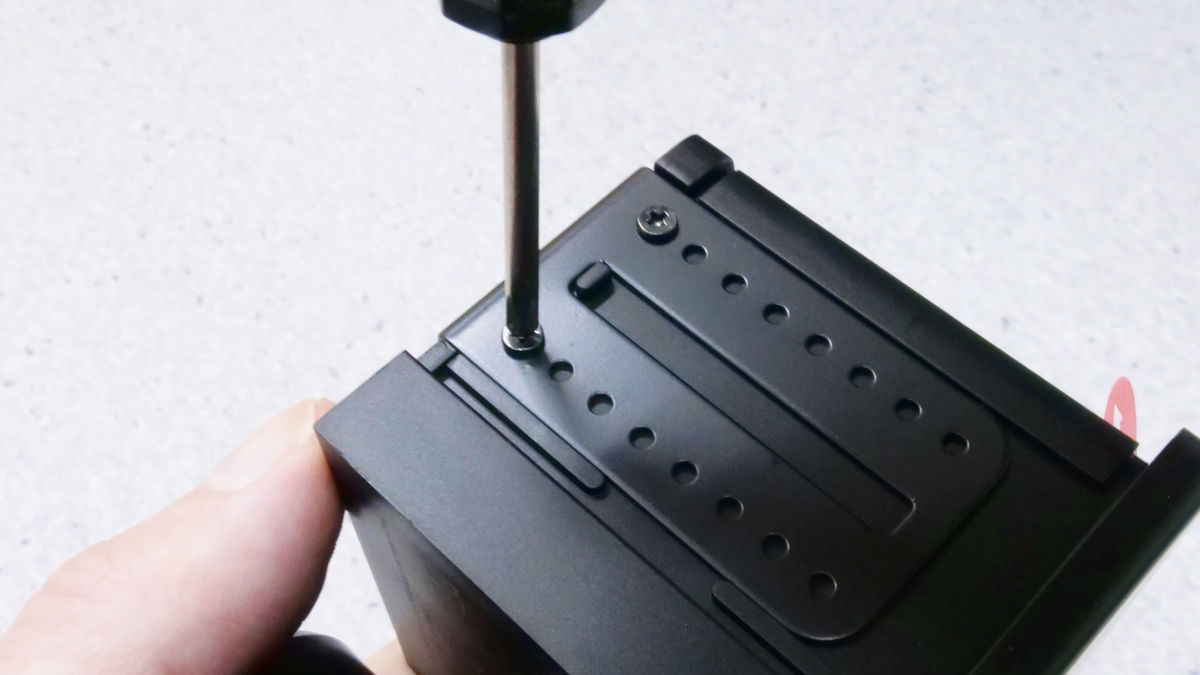
After adjusting the height and applying the SwitchBot lock to the installation location, turn the knob to see if the thumb turn can be turned comfortably.
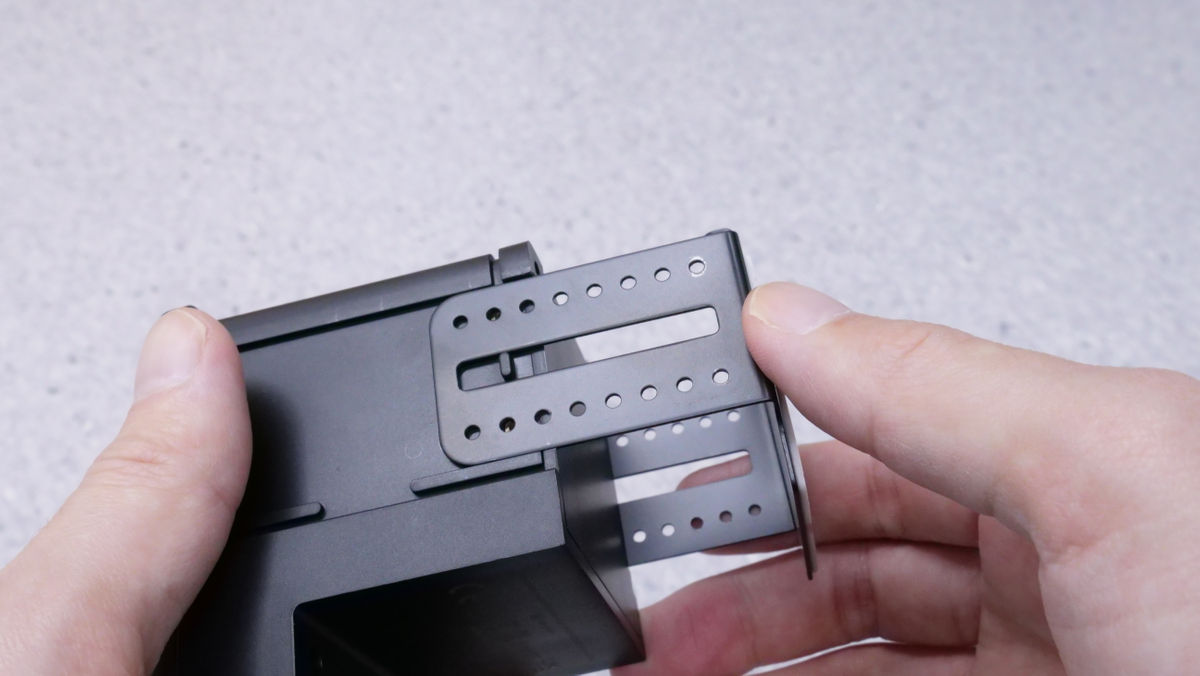
Next, tighten the screws you removed earlier to fix the metal parts.
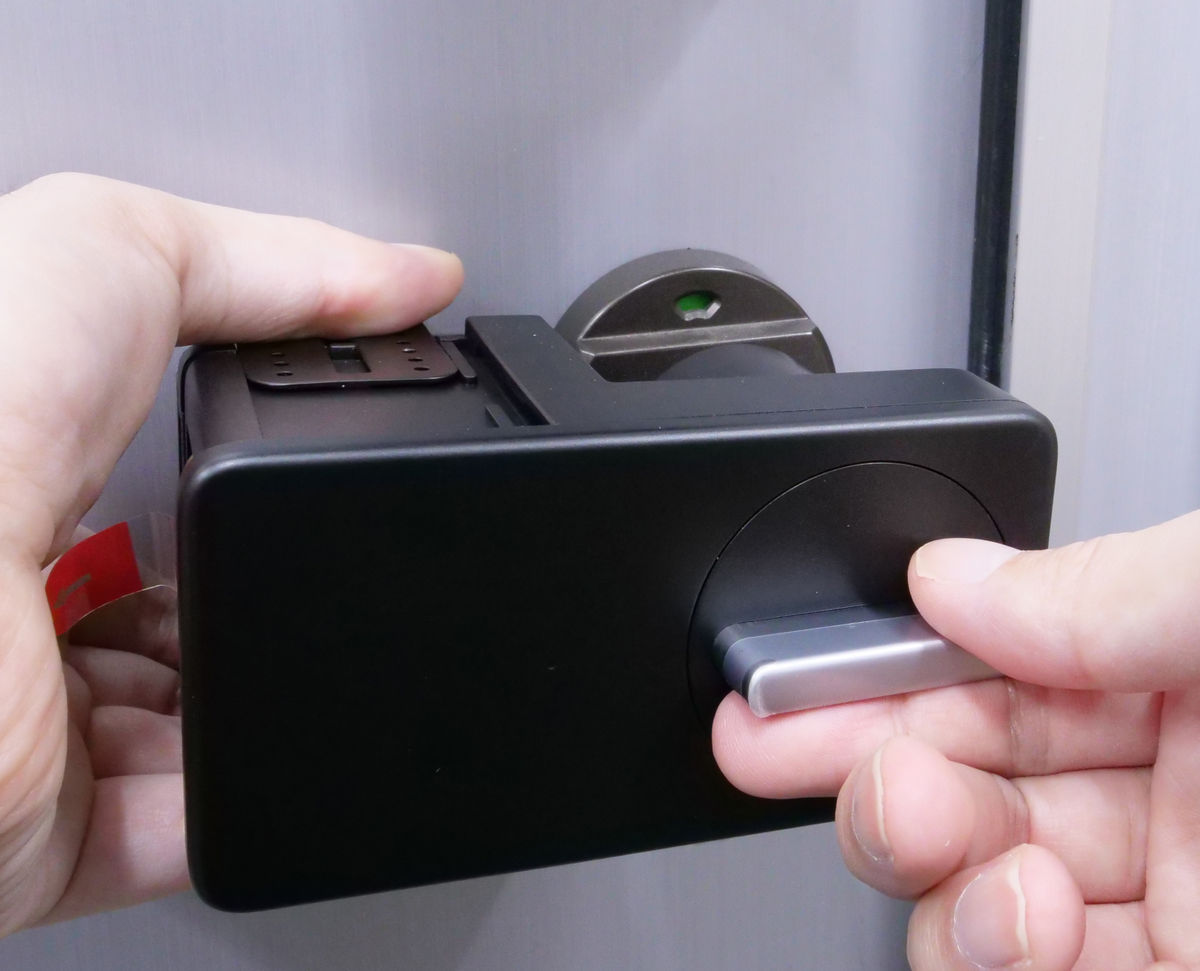
Remove the release paper from the double-sided tape on the back of the main unit.

After that, it is OK if you press the double-sided tape against the installation location for several tens of seconds to fix it.
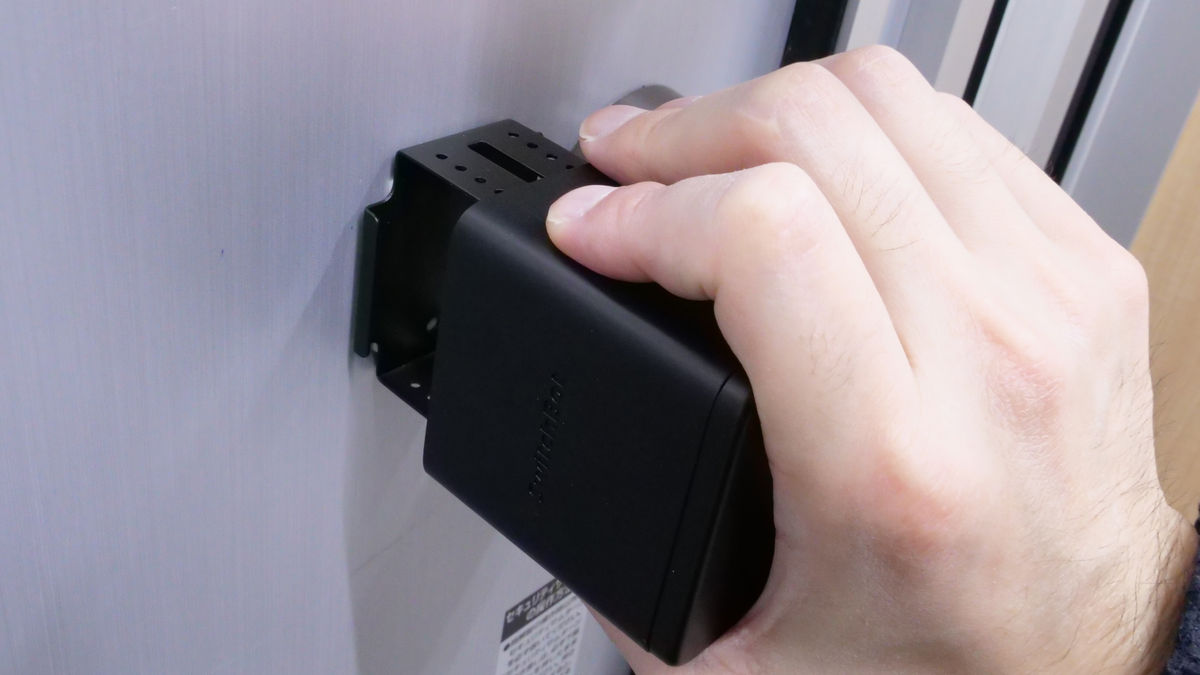
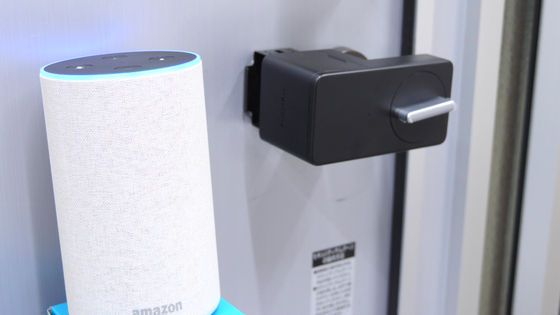
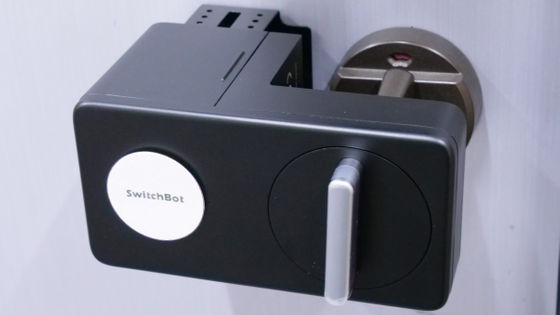
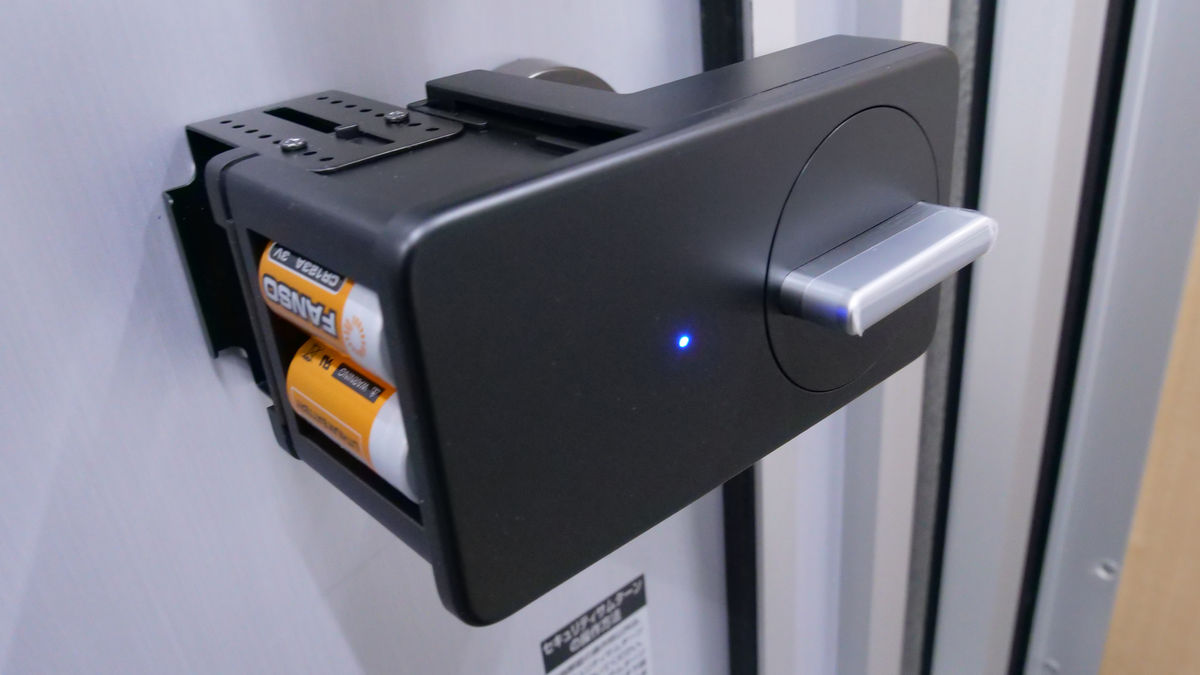
When the installation is completed, it looks like this.

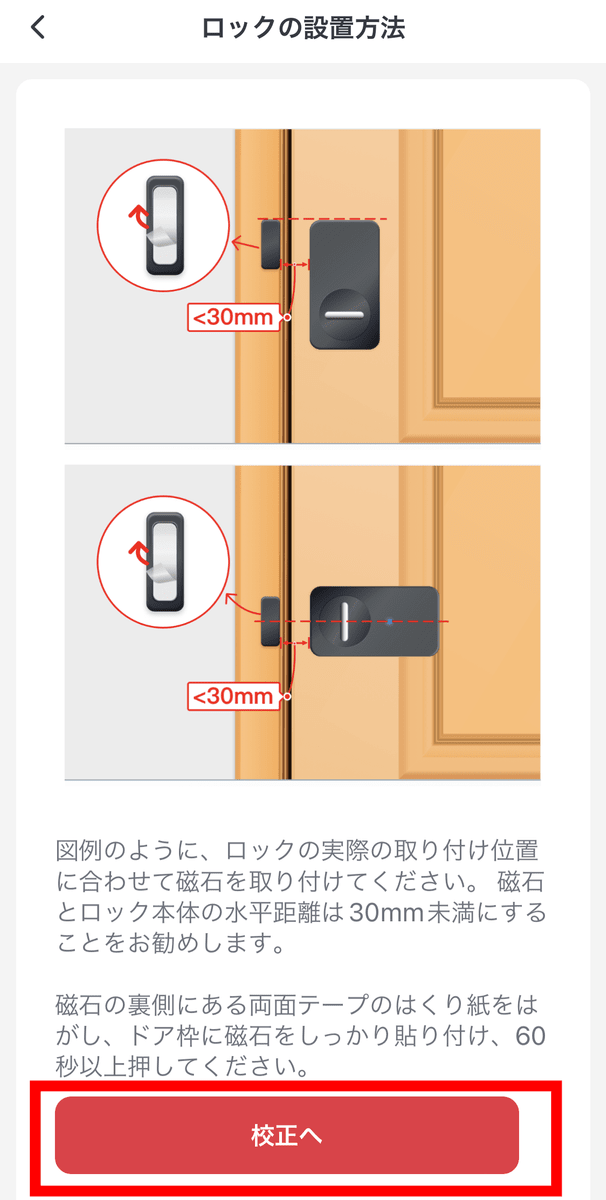
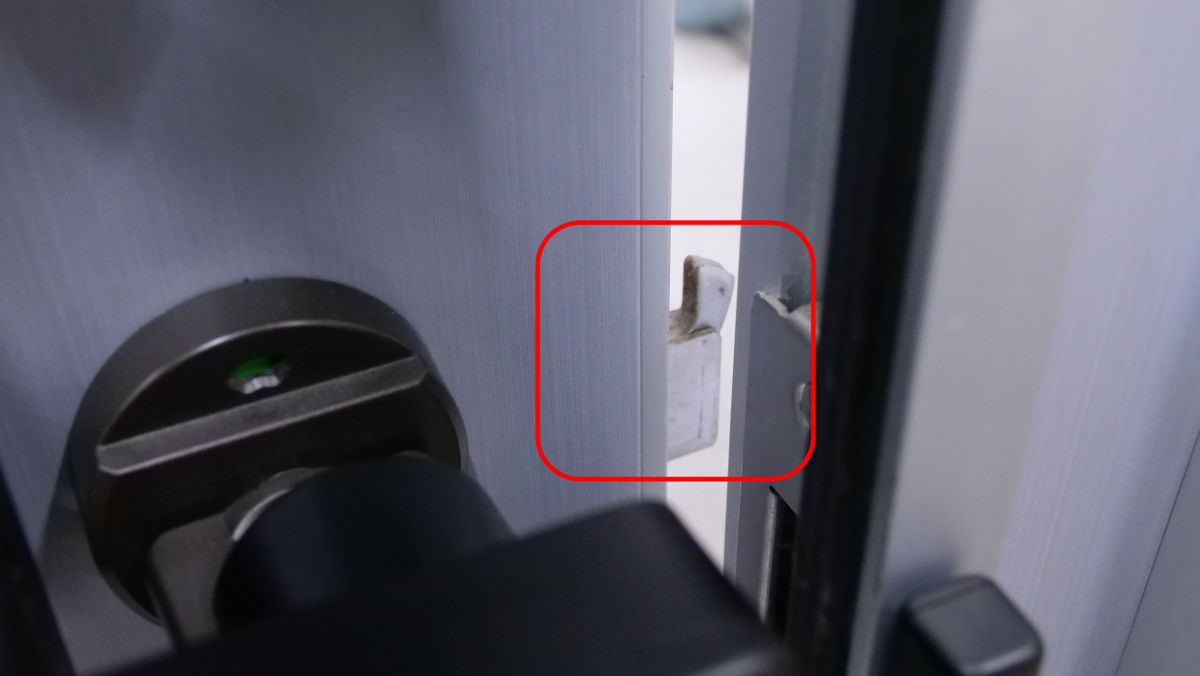
This time, peel off the release paper of the double-sided tape to attach the magnet that will be the open / close sensor.
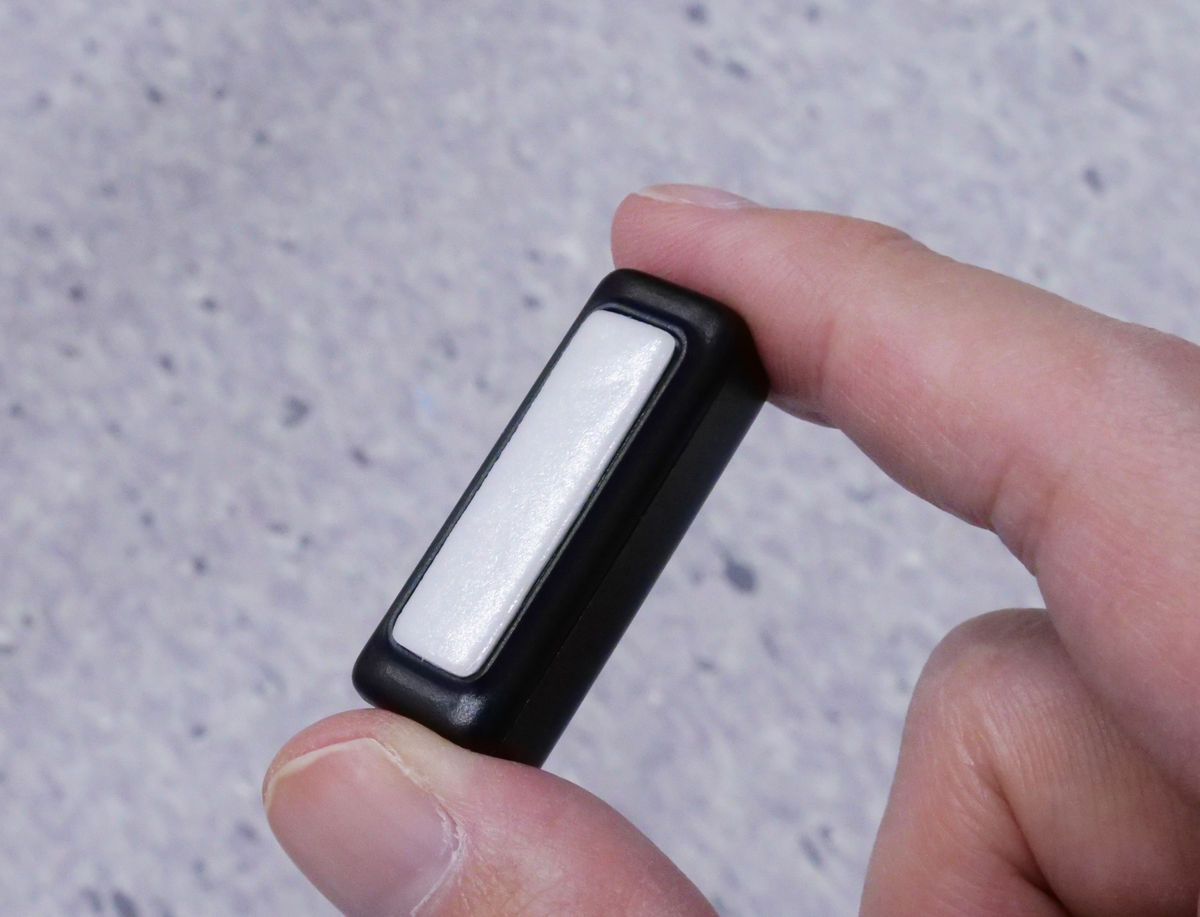
Place the magnet in the door frame next to the SwitchBot lock.
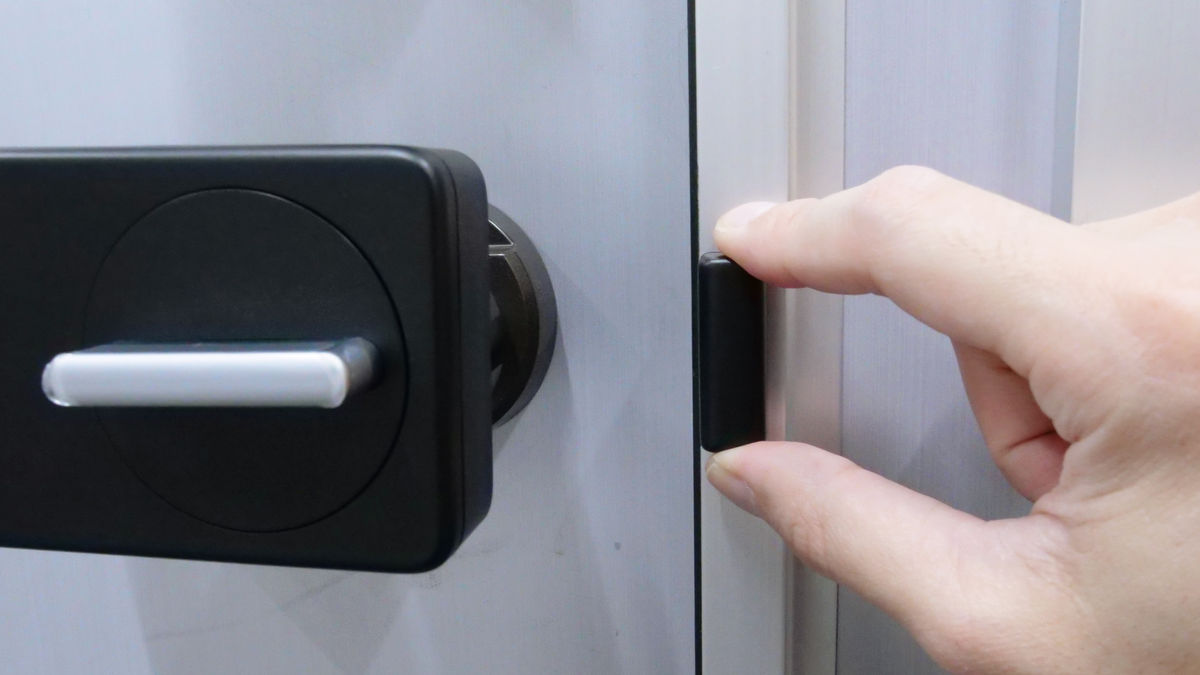
The distance between the SwitchBot lock and the magnet should be 3 cm or less. When I measured it, it was just 3 cm.

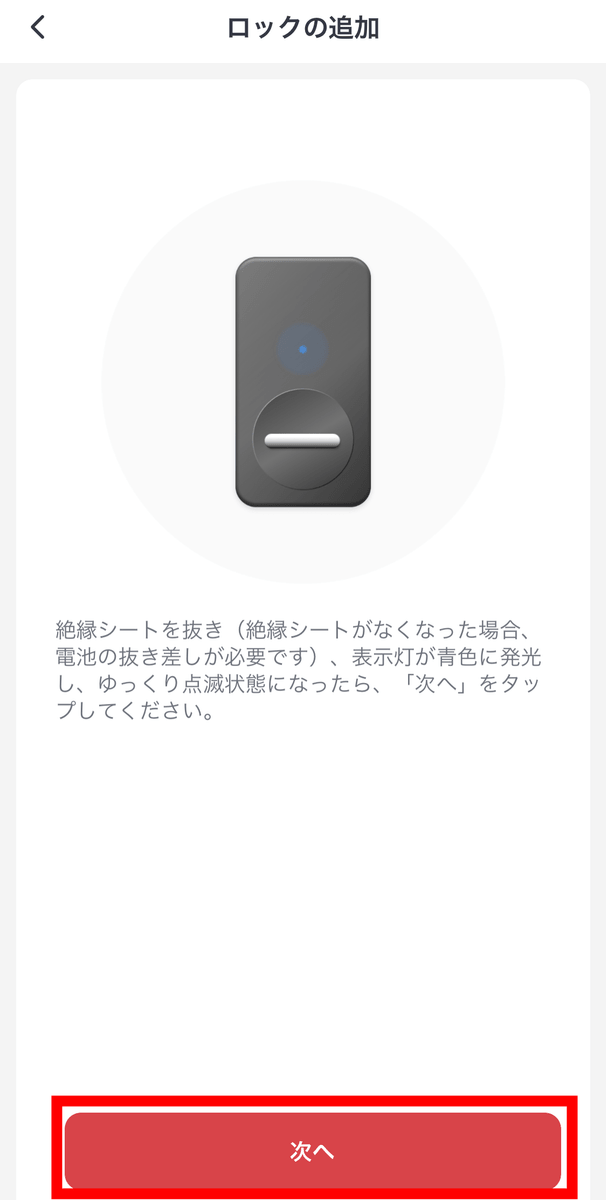
Then pull on the insulating film that is stuck in the battery.
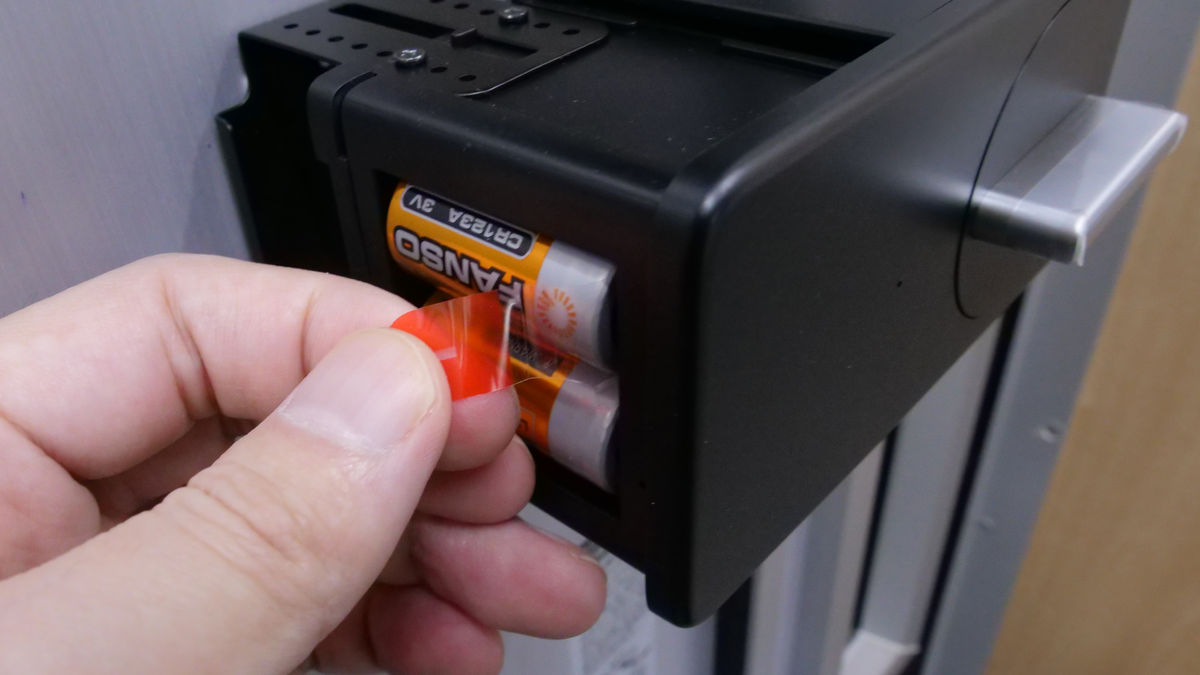
Then, the LED lamp of the SwitchBot lock will blink blue, and the connection will be accepted. The SwitchBot lock does not turn off even with a single battery, so if the insulating film runs out during work, you can restart it by removing both batteries and then reinserting them.
Next, install the app on your smartphone.
SwitchBot-Google Play app
'Switch Bot' on the App Store
https://apps.apple.com/jp/app/switchbot/id1087374760
This time, we will install the iOS version. The smartphone model is iPhone 12 Pro Max and the OS version is 15.2.1. To install, first access the above URL and then tap Get.
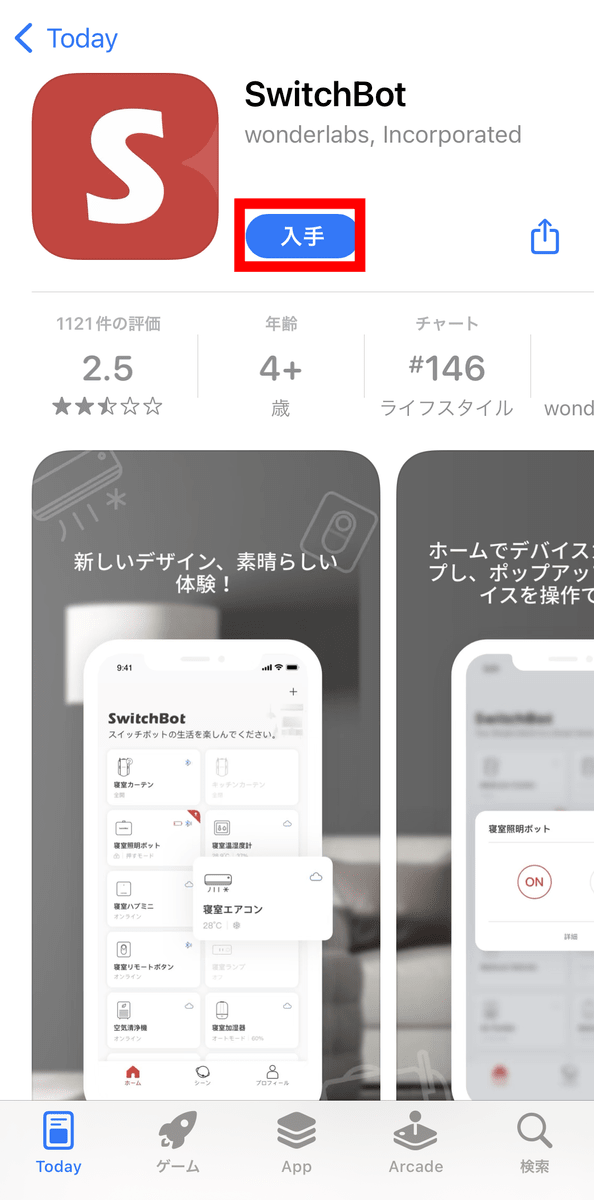
After installing, tap 'Open'.
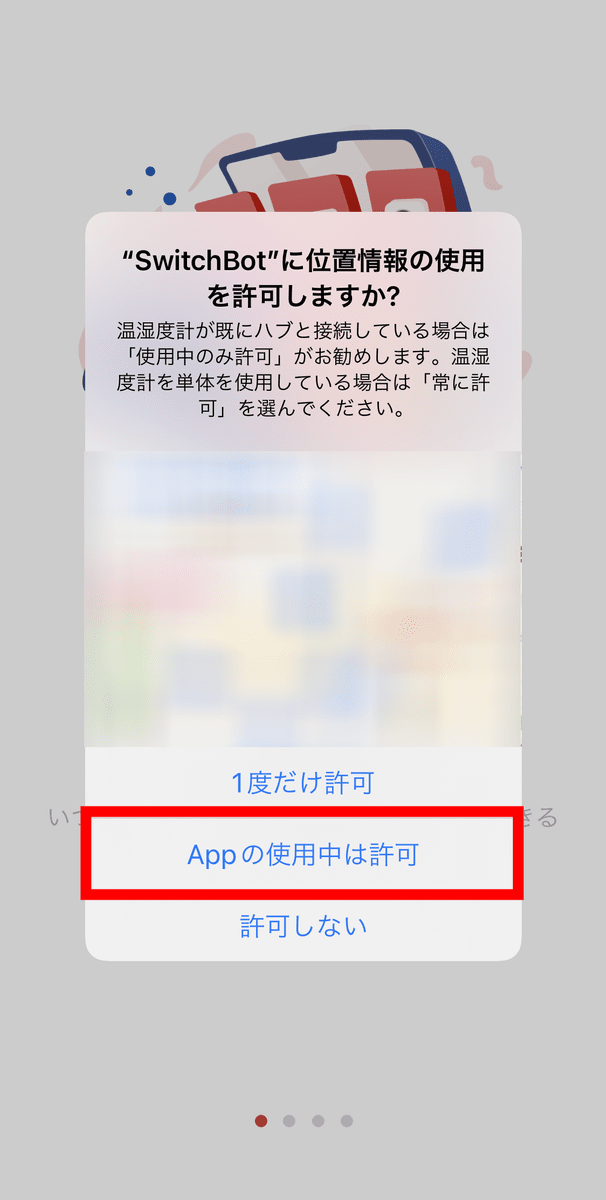
You will be asked for permission to use location information, so tap 'Allow while using the app'.
You will be asked for permission to use Bluetooth, so tap 'OK'.

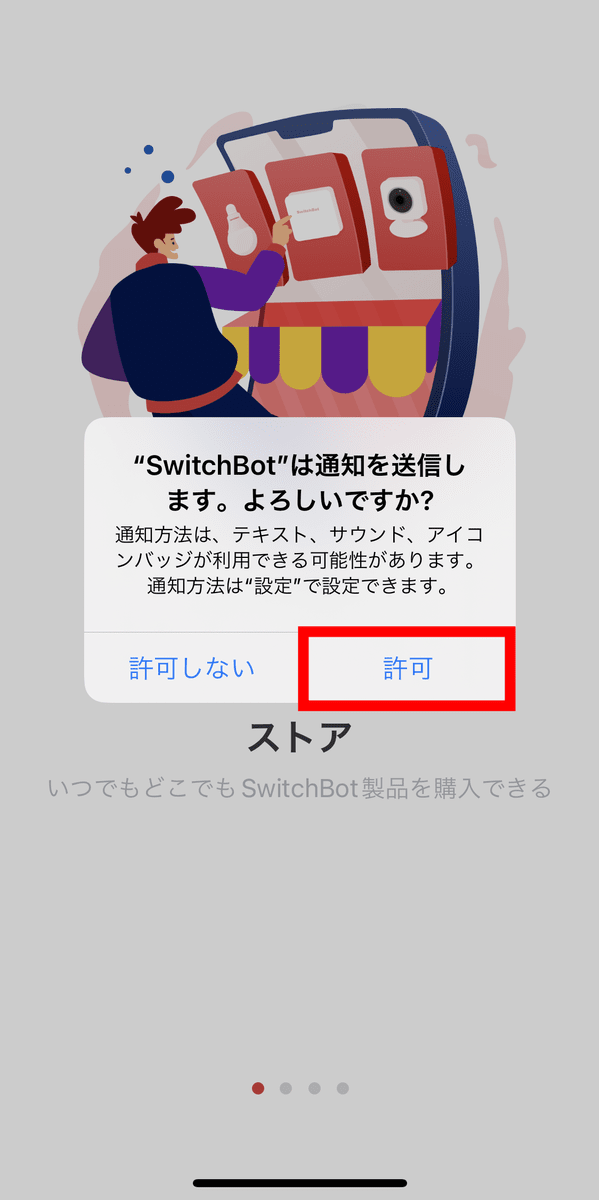
You will be asked to allow the notification, so tap 'Allow'.
Swipe left.
Swipe left.
Swipe left.
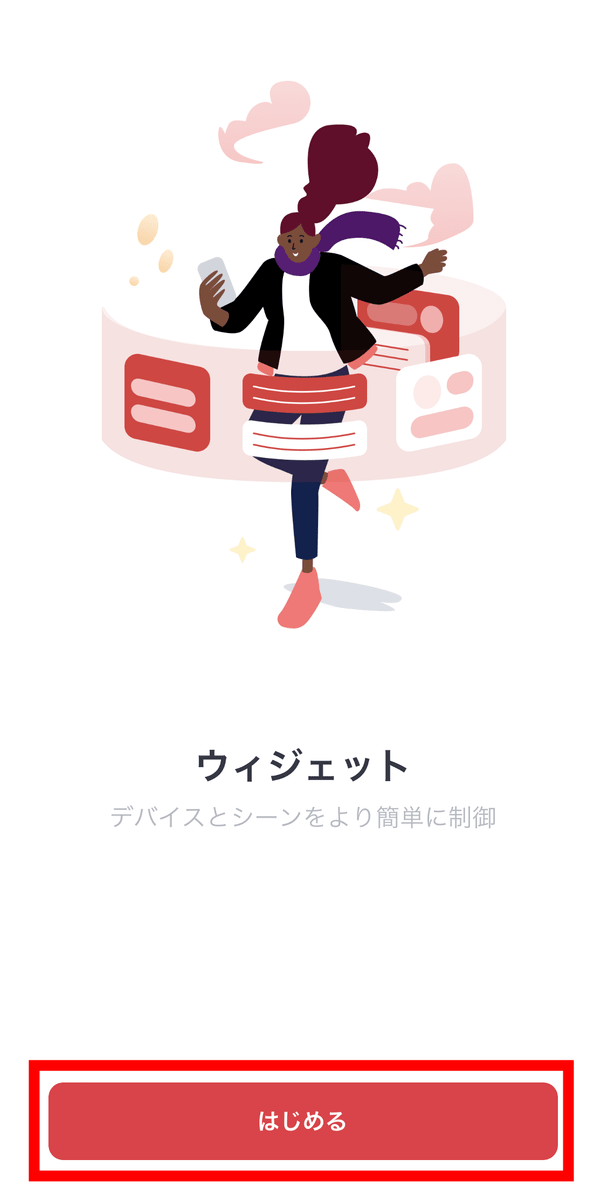
Tap 'Start'.
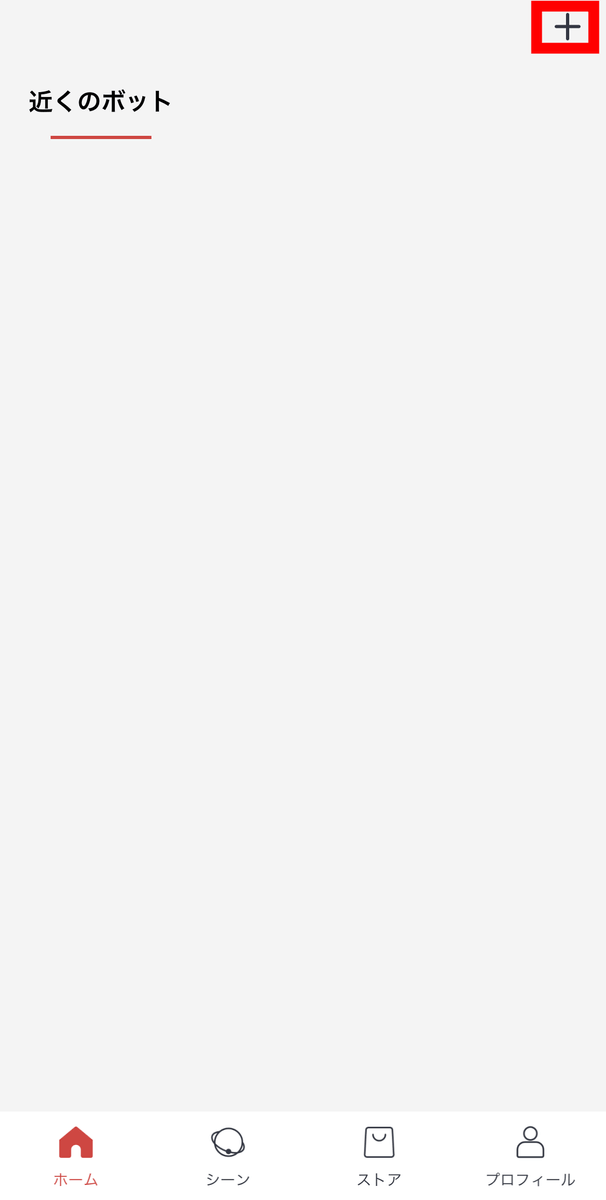
Since the home screen is displayed, first tap the button in the red frame to create an account.
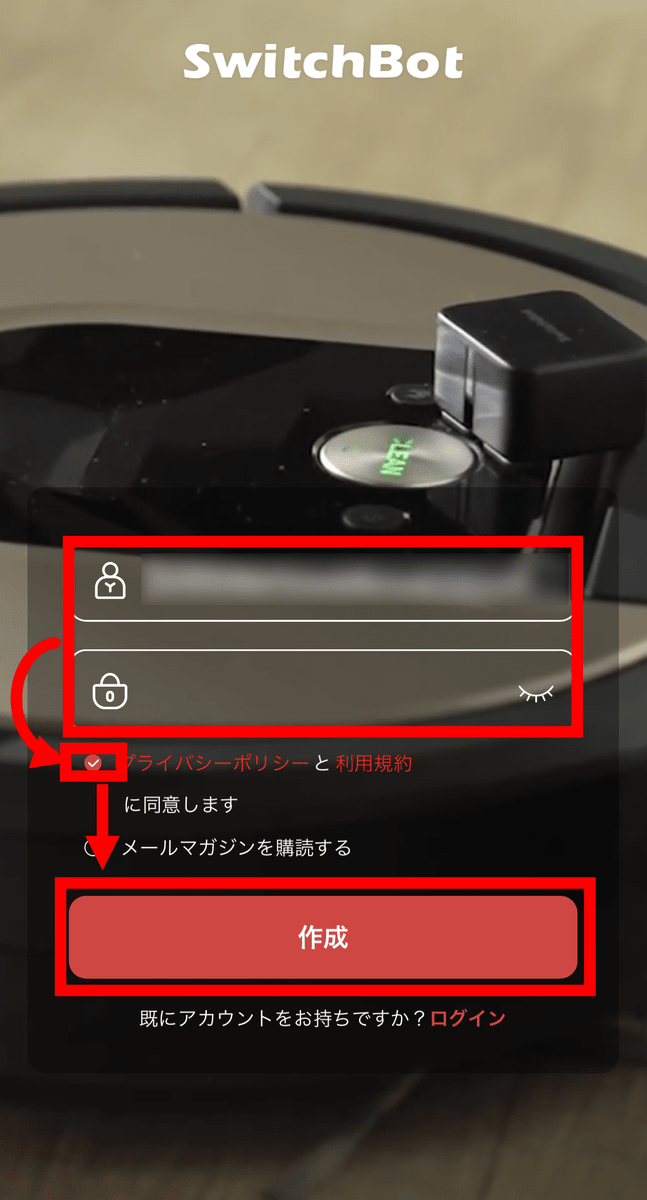
Enter your email address and password, check the 'Privacy Policy and Terms of Service' field below, and tap 'Create'.
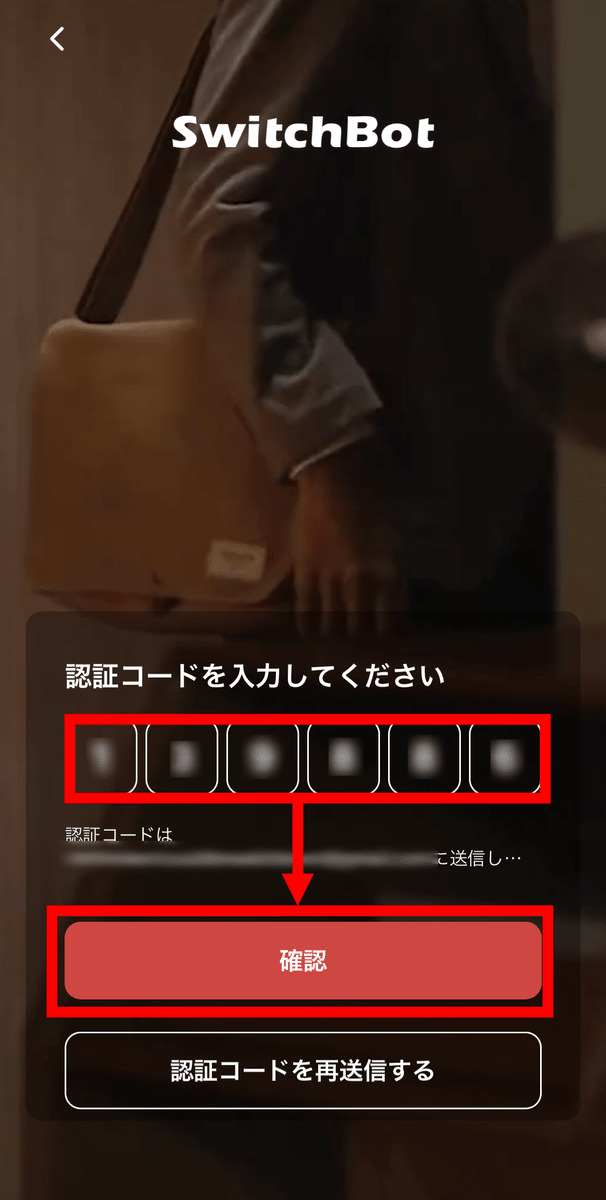
An email with the verification code has arrived at the email address you entered earlier, so enter it and tap 'Confirm'.
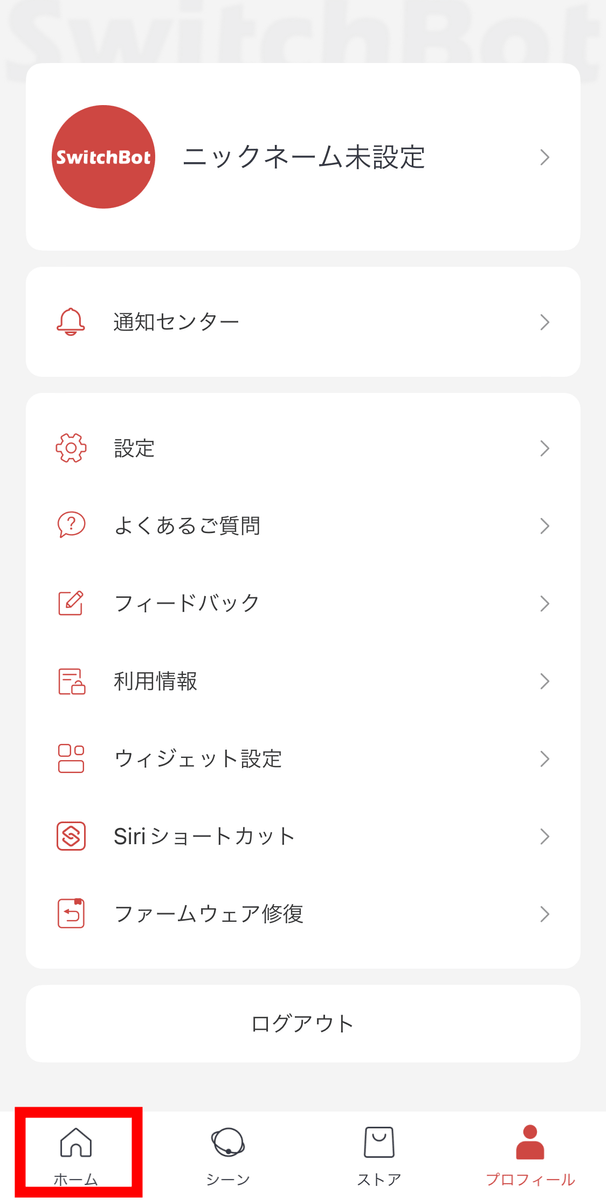
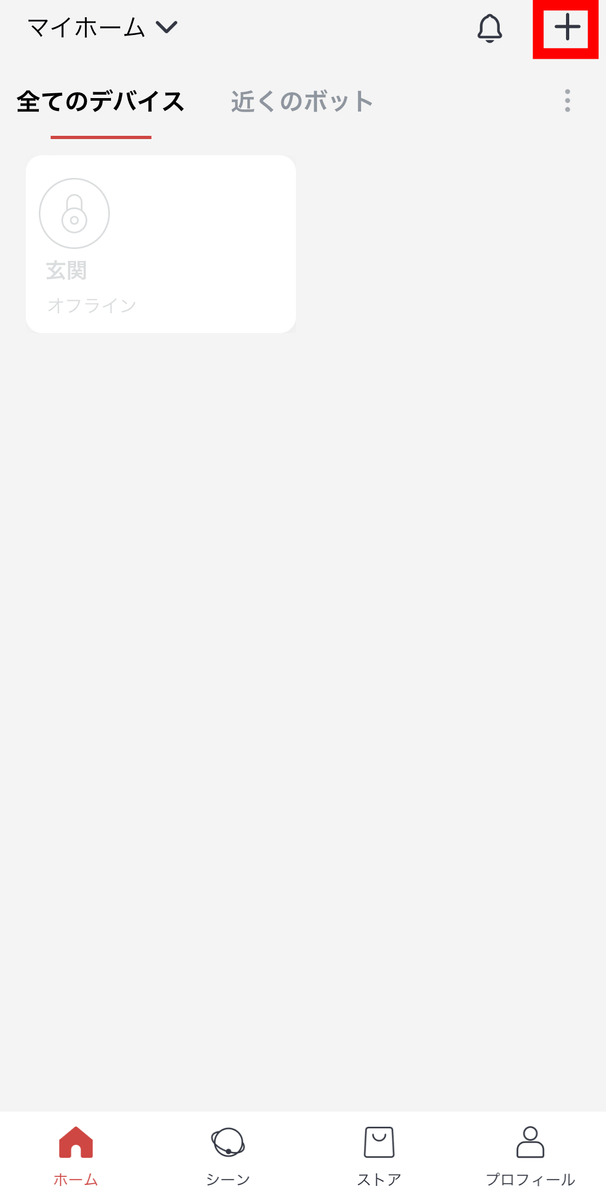
Account creation is complete. Then tap Home to pair with the SwitchBot lock.
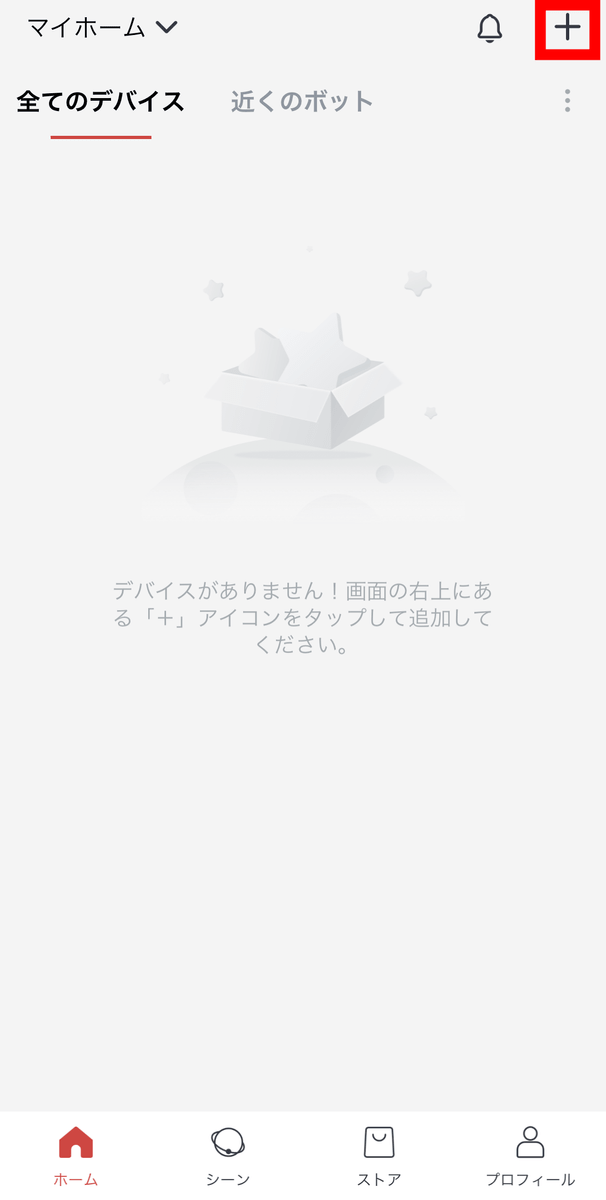
Tap the button in the red frame.
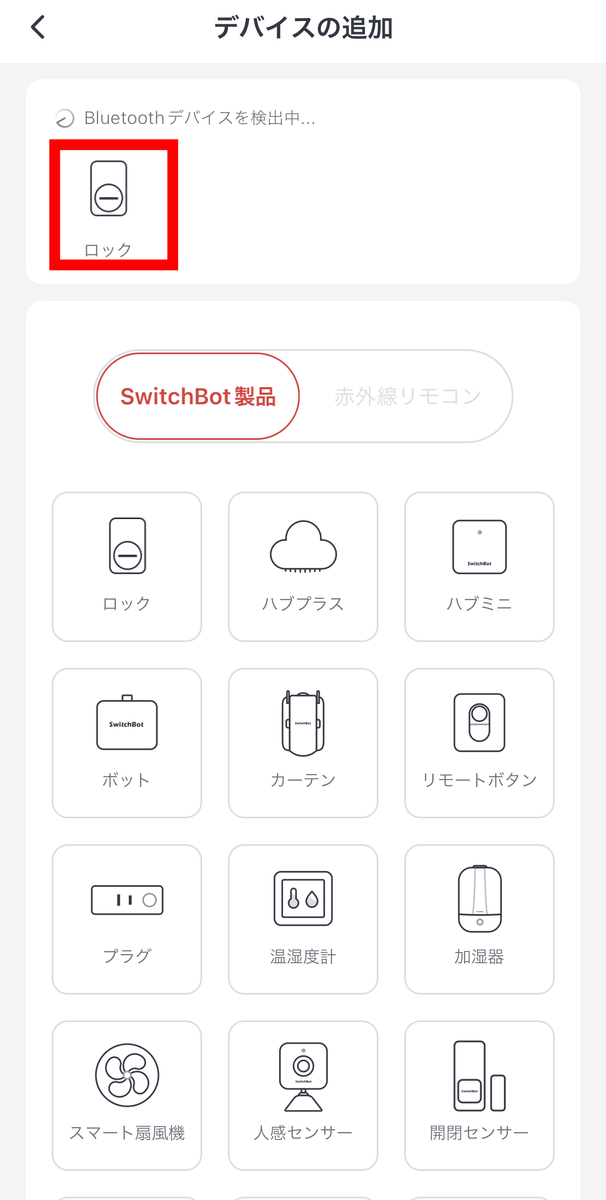
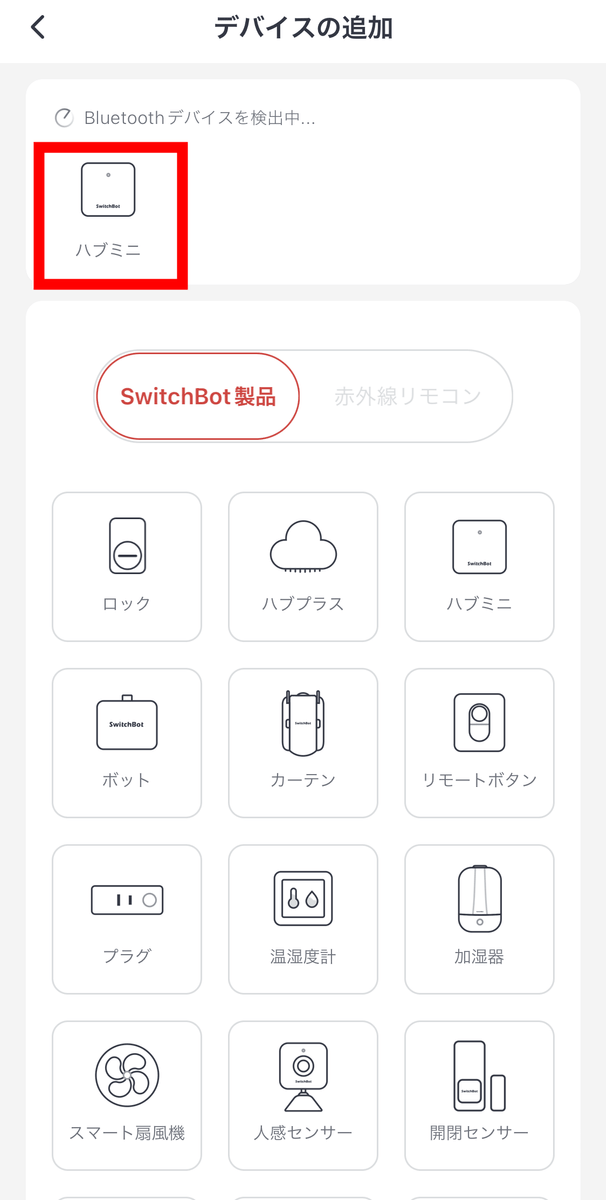
Then, the SwitchBot lock will be found automatically, so tap it.
If the connection acceptance status has ended during the installation of the application, the following screen will be displayed. As mentioned above, insert and remove the SwitchBot lock battery, restart it, and then tap 'Next'.
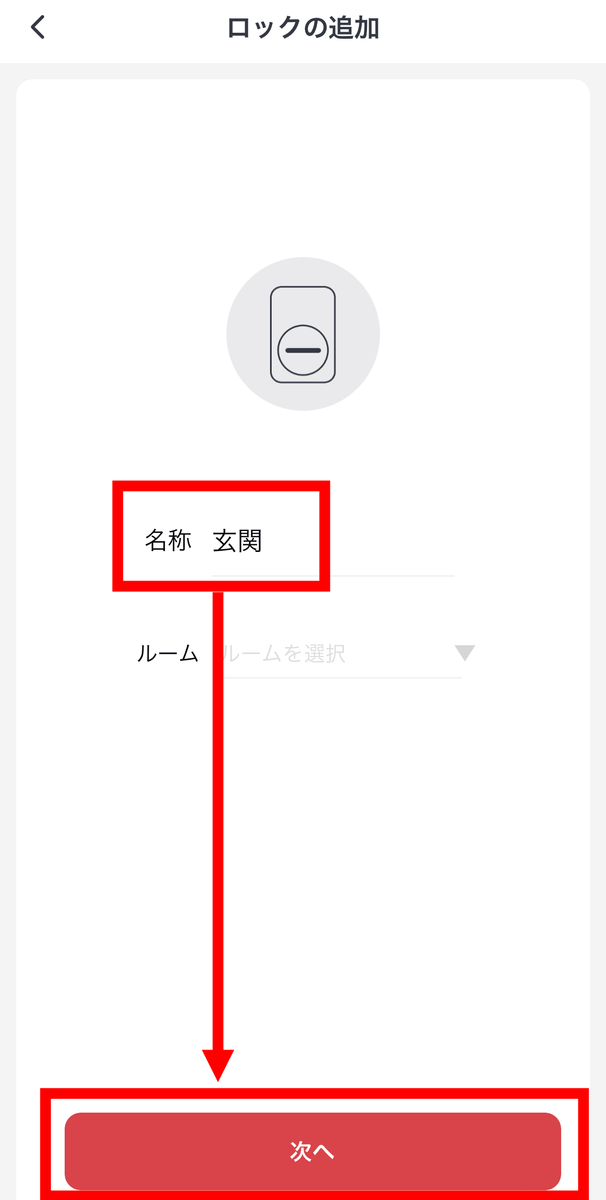
Enter the name of the SwitchBot lock and tap 'Next'.
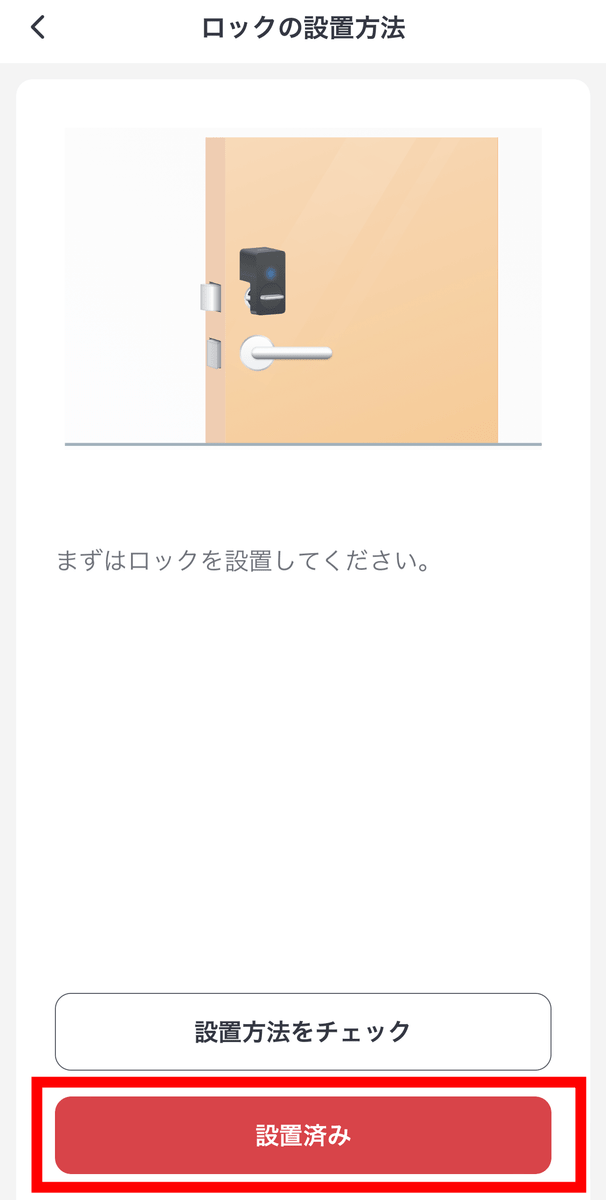
Since the SwitchBot lock is installed, tap 'Installed'.
Since the magnet has been installed, tap 'To calibration'.
Place your smartphone once when the screen below appears.
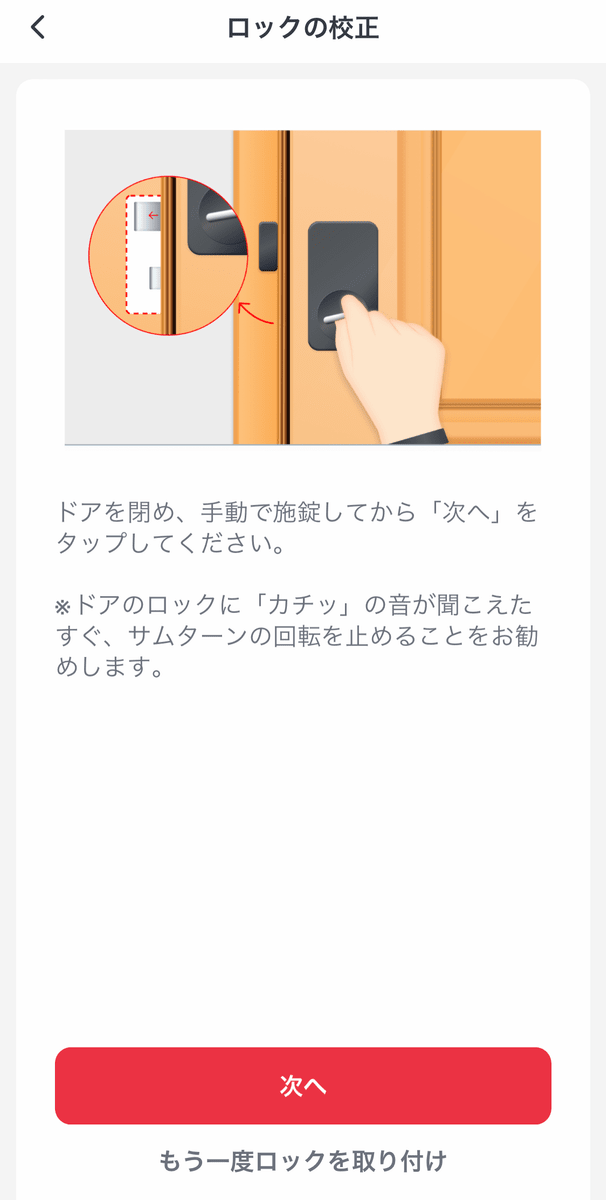
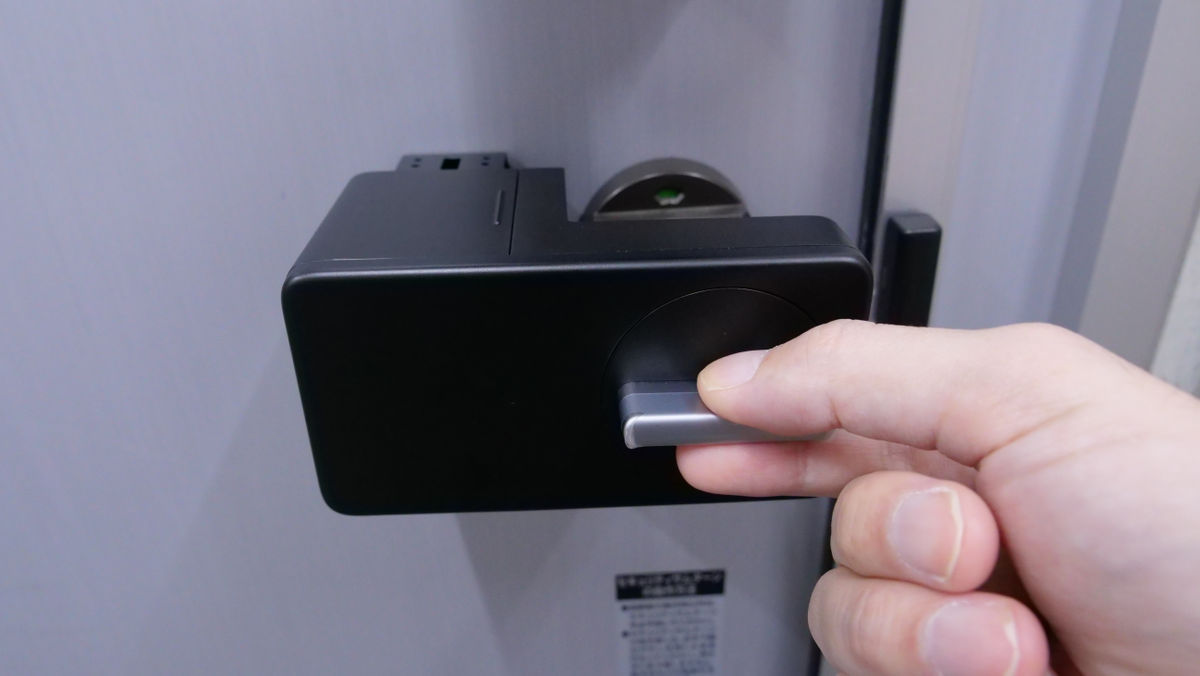
Then twist the SwitchBot lock knob to lock it.
Return to your smartphone and tap 'Next'.

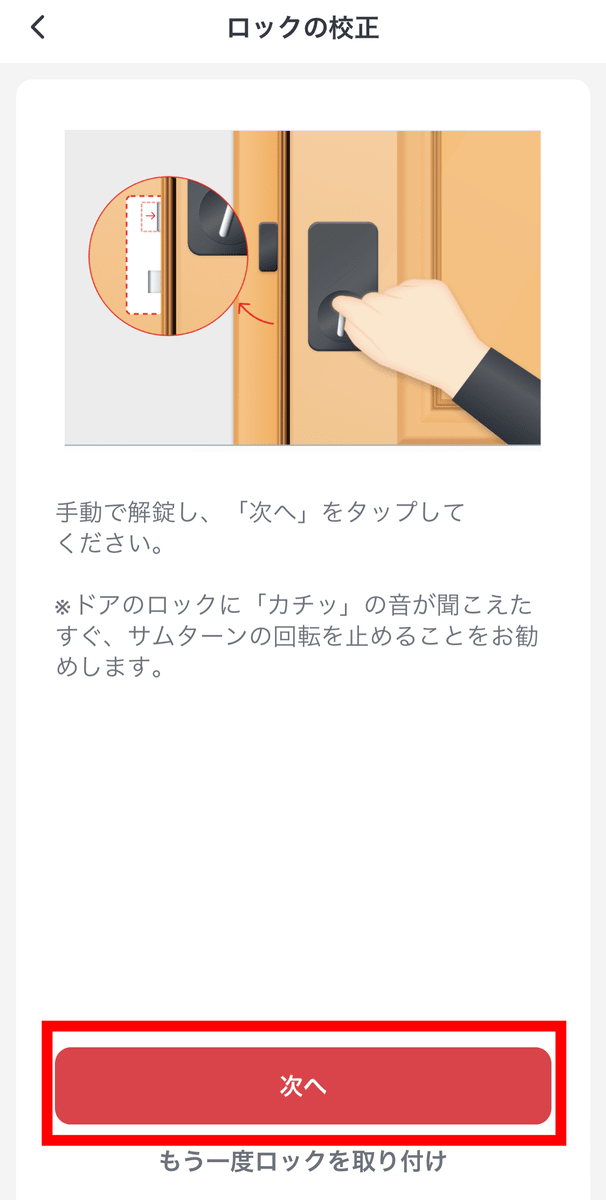
Unlock in the same way and tap 'Next'.
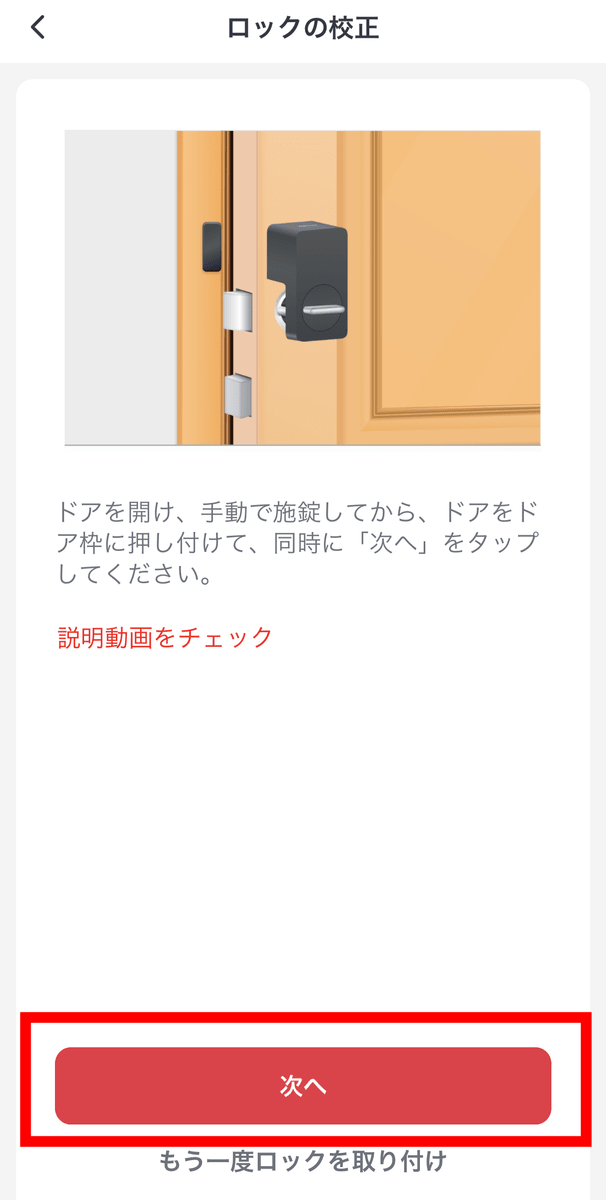
When this screen appears, open the door and then turn the knob to lock it.
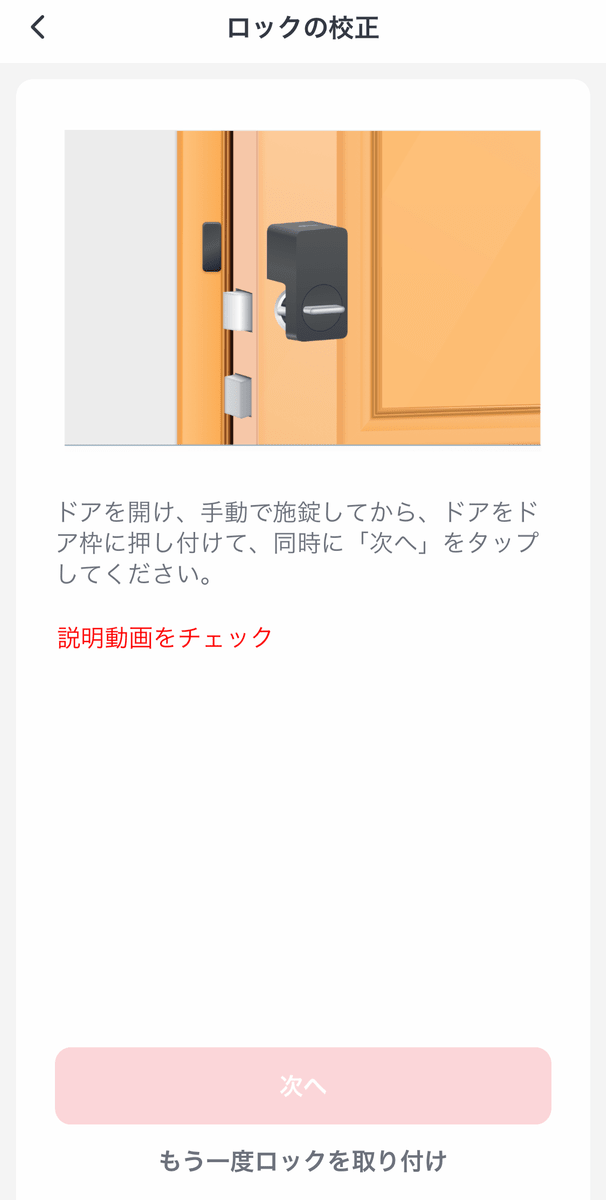
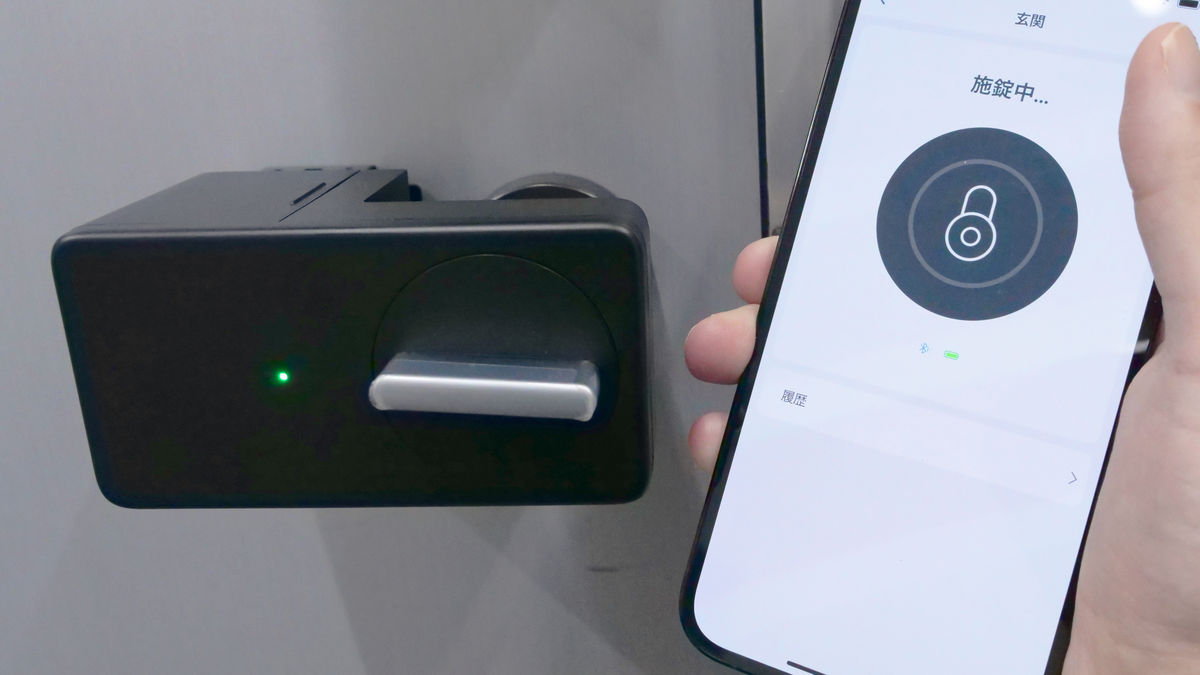
When I actually try it, it looks like this.
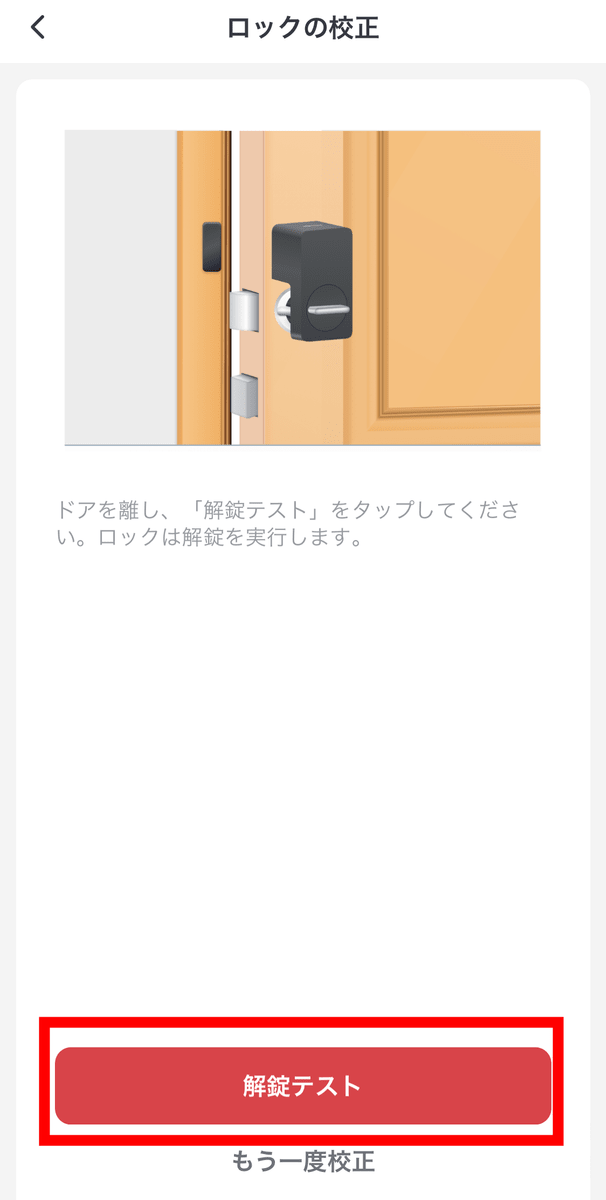
Return to your smartphone and tap 'Next'.
Tap 'Unlock Test' to automatically unlock the SwitchBot lock and close the half-open door.
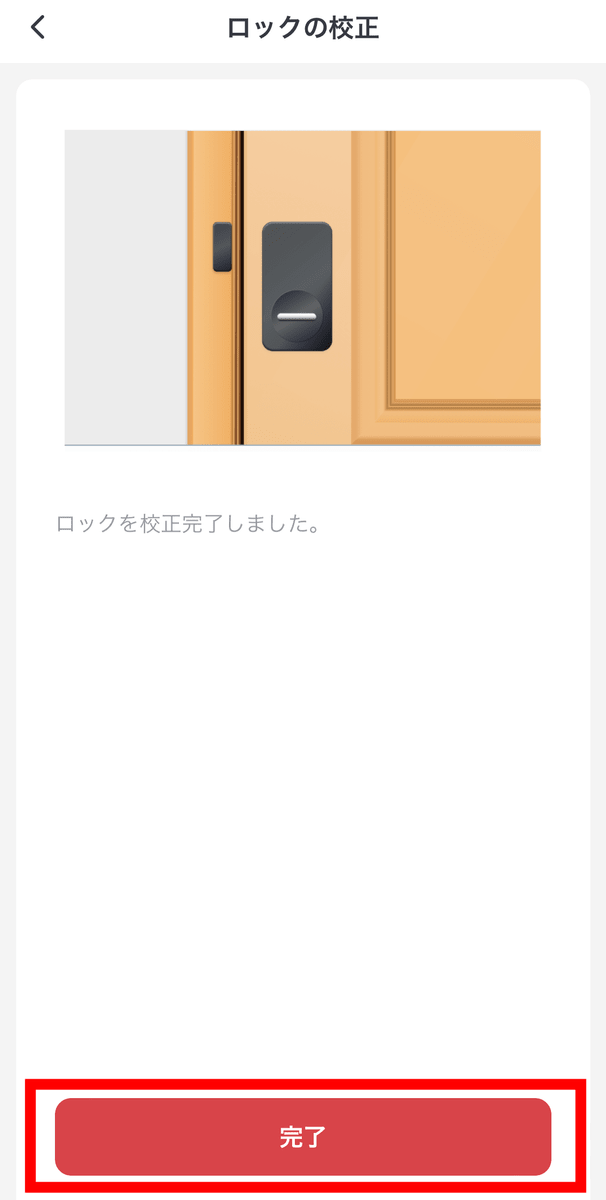
Similarly, tap 'Unlock Test' to lock the SwitchBot lock automatically.

When this happens, setup is complete.
Now that the SwitchBot lock has been connected, it's time to connect the SwitchBot Hub Mini. First, connect the SwitchBot Hub Mini to the power supply with the included charging cable.
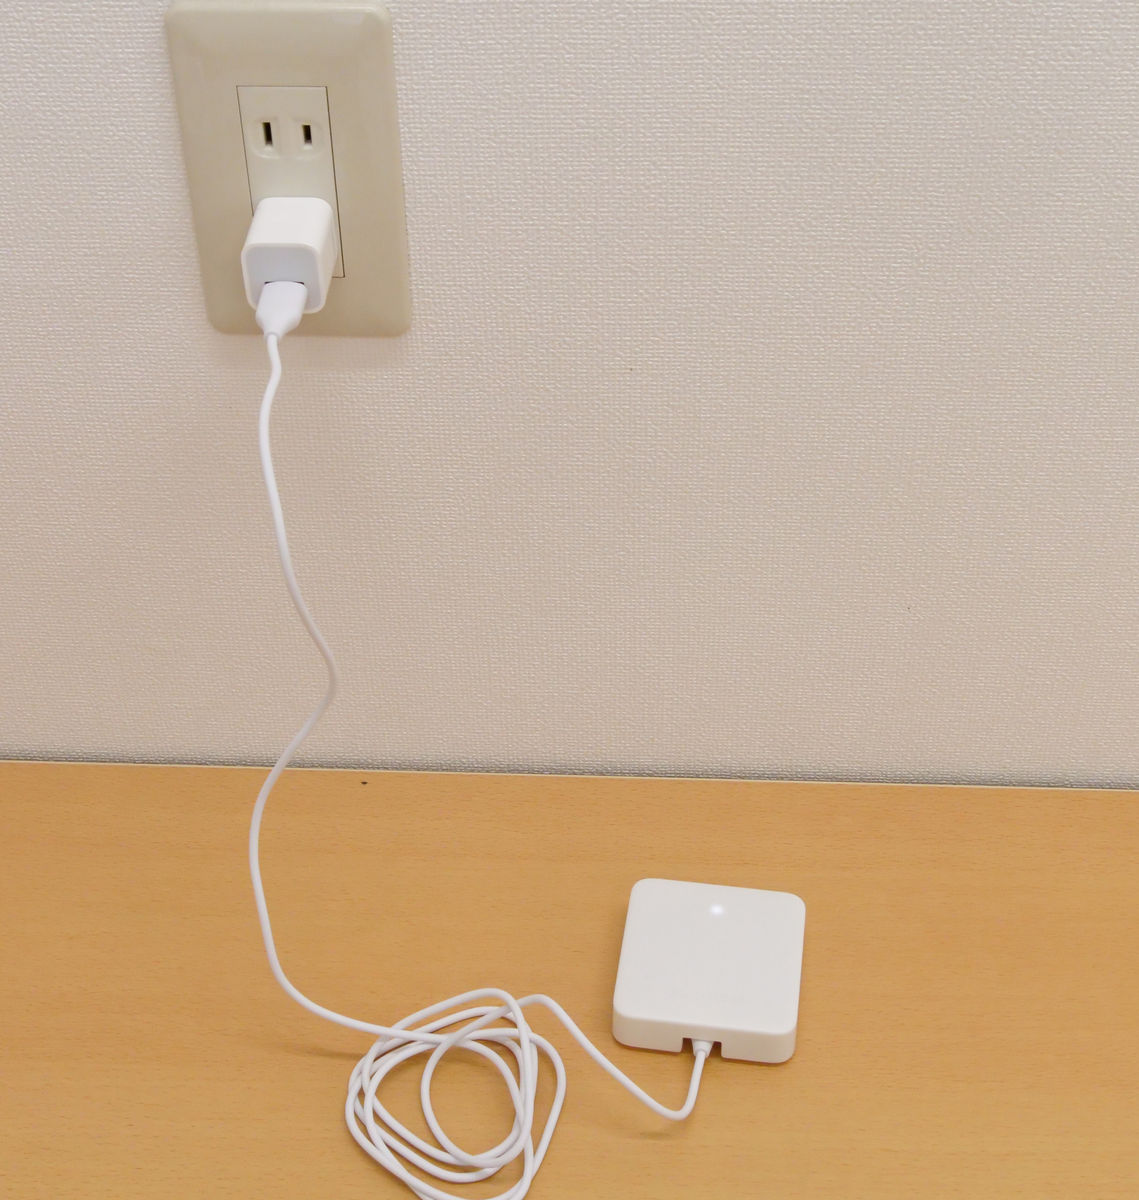
Then, return to the home screen of the app and tap the button in the red frame.
You will find the SwitchBot Hub Mini, so tap it.
Place your smartphone when the screen below appears.

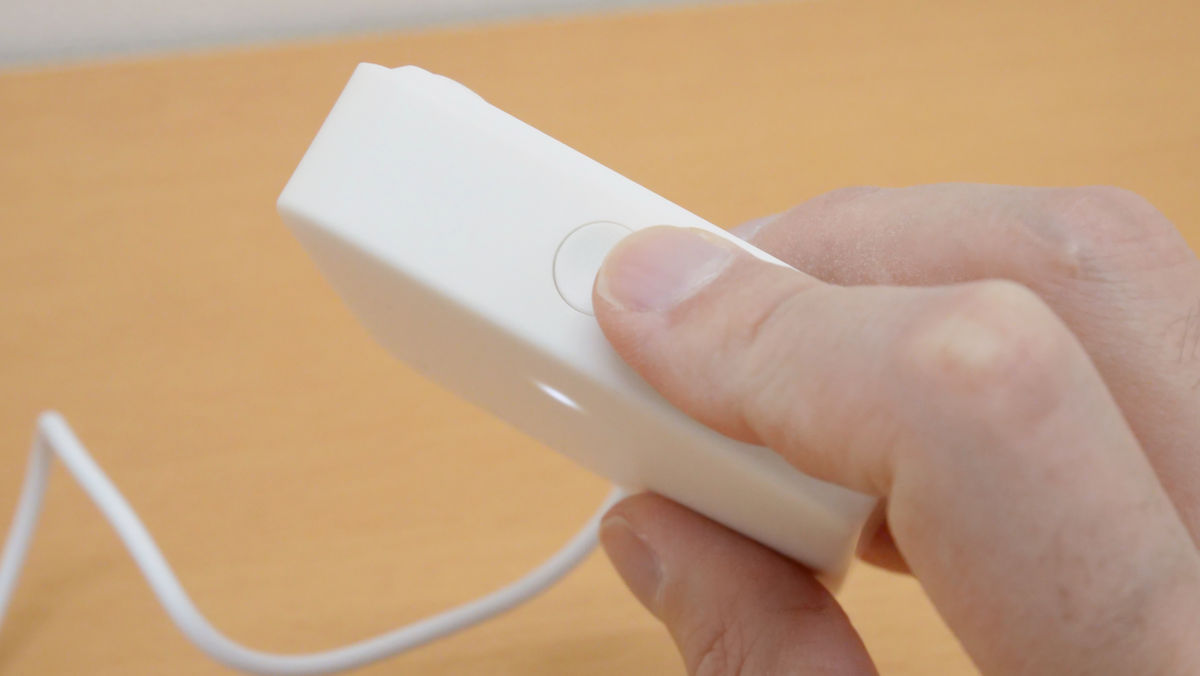
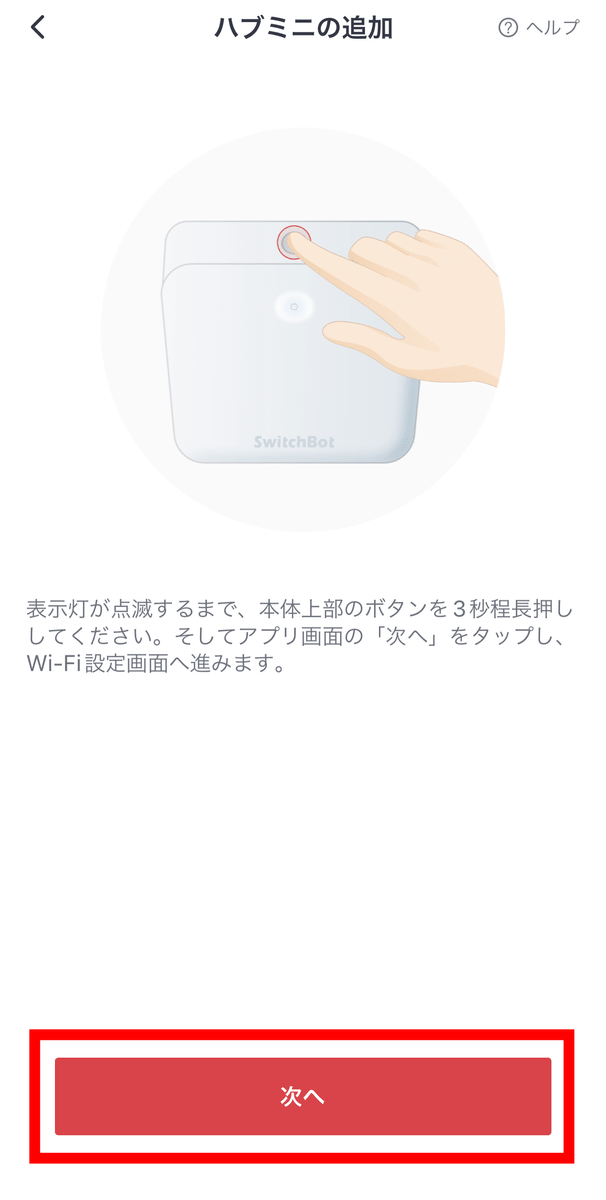
Press and hold the button on the top of the SwitchBot Hub Mini for 3 seconds.
Return to your smartphone and tap 'Next'.
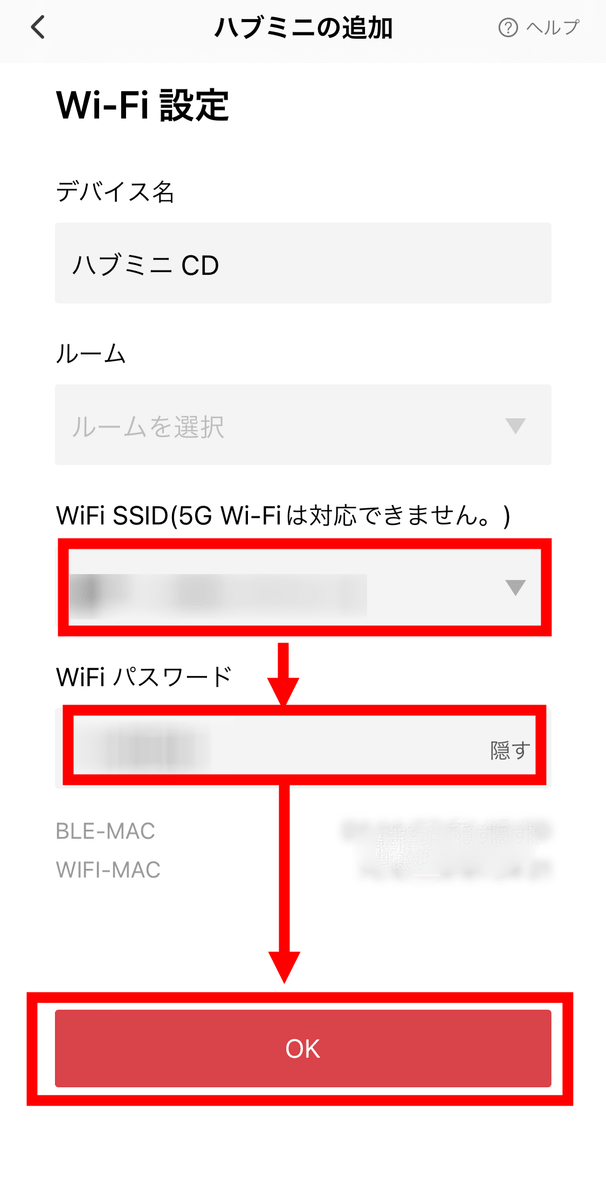
Select the Wi-Fi SSID, enter the password and tap 'OK'. In addition, it is necessary to select Wi-Fi with a frequency band of 2.4 GHz.
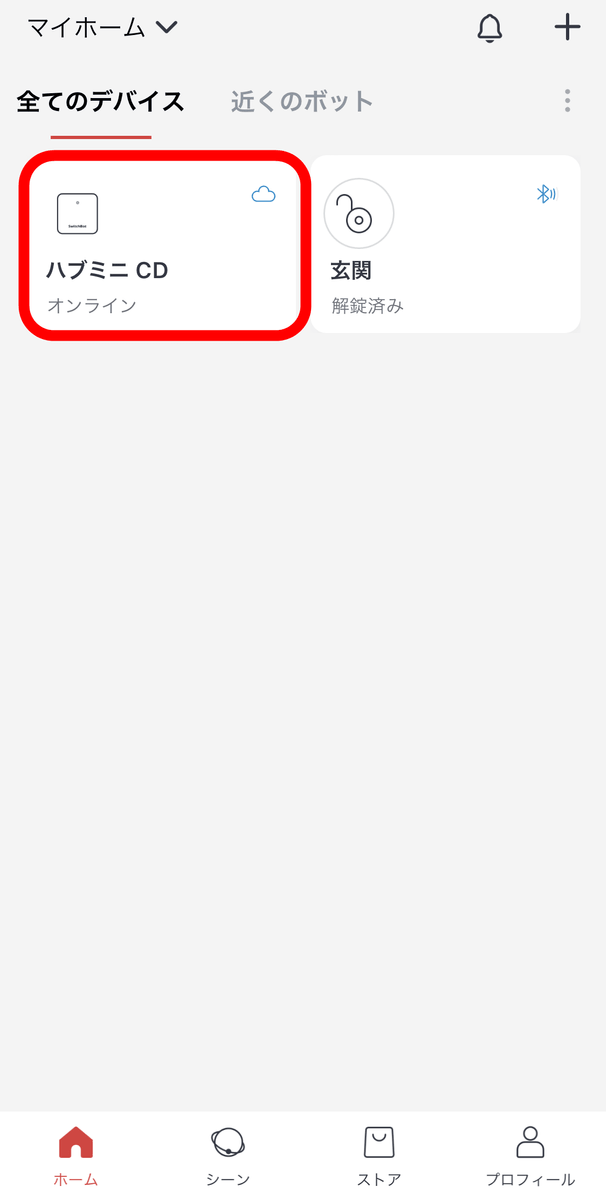
You have now added the SwitchBot Hub Mini.
In the following articles , we will actually review using SwitchBot locks.
Related Posts: