I added SSD to PlayStation 5 and checked the change in load time and startup time
The system software update for '
How to install M.2 SSD on PS5 Japan
https://www.playstation.com/ja-jp/support/hardware/ps5-install-m2-ssd/
◆ Procedure for expansion work
◆ Move to SSD with installed games
◆ I compared the start time and load time of the game
◆ Procedure for expansion work
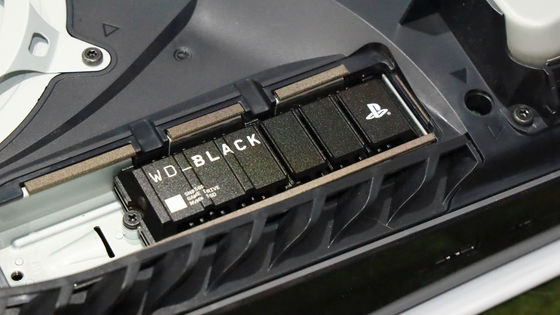
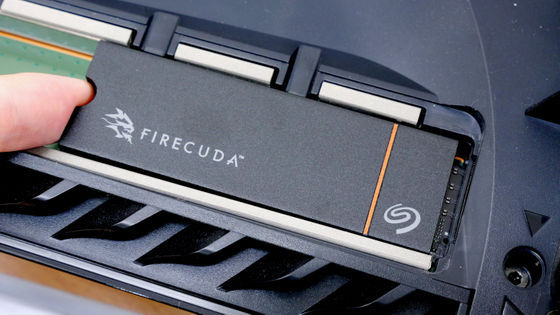
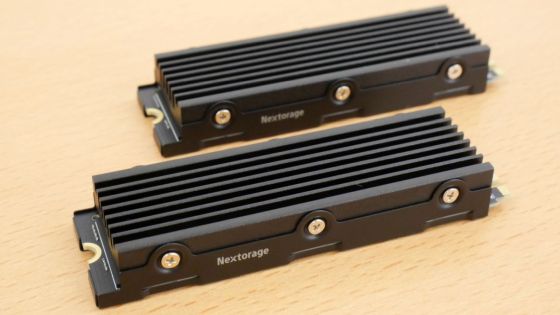
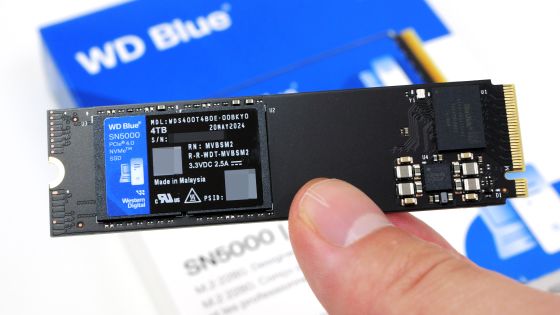
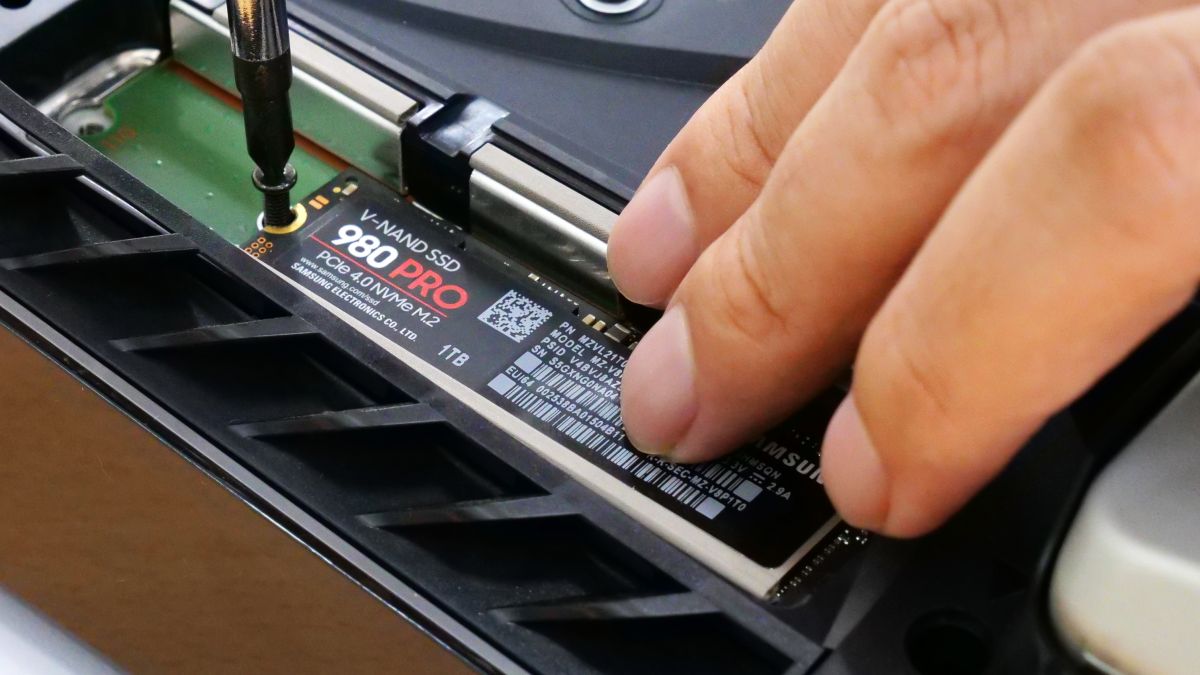
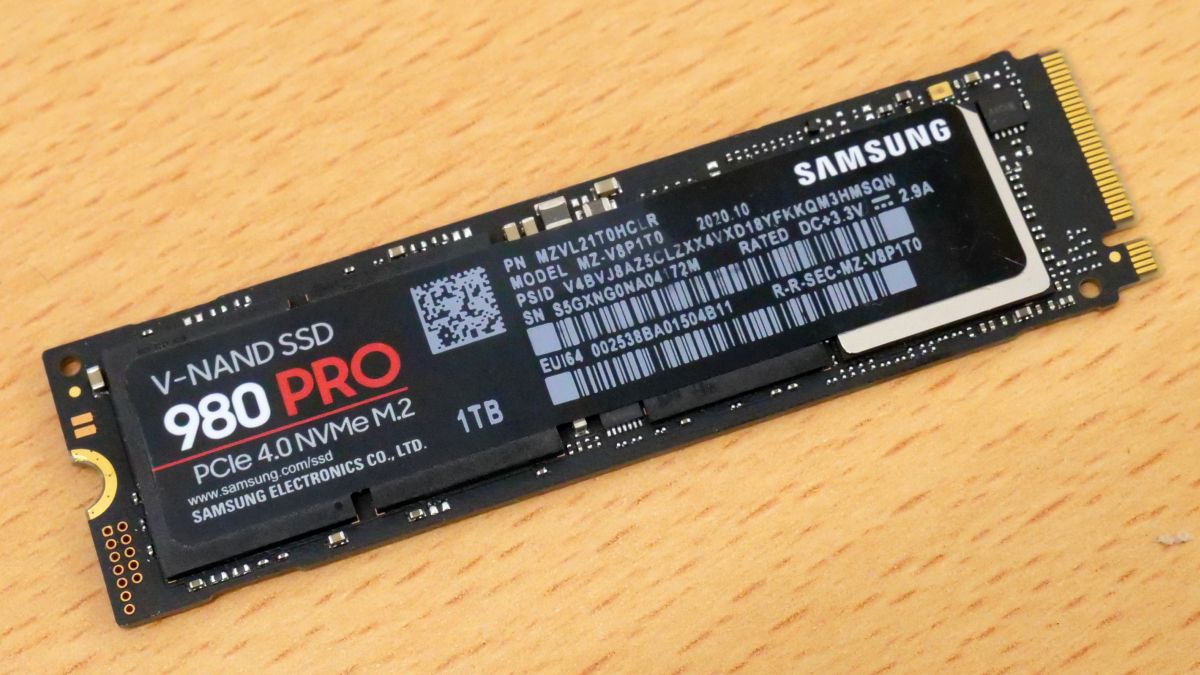
According to official support , the SSD that can be added to PlayStation 5 is a 250GB-4TB M.2 SSD that supports PCI-Express Gen4 x4. This time, I will use the 1TB model of 'Samsung 980 PRO' that meets the requirements. We couldn't prepare a heat sink this time, but the official support states that 'a heat sink or heat conductive sheet or other heat dissipation structure is required', so if you can, prepare a heat sink.
First, update your PlayStation 5 system software to the latest version and turn it off.
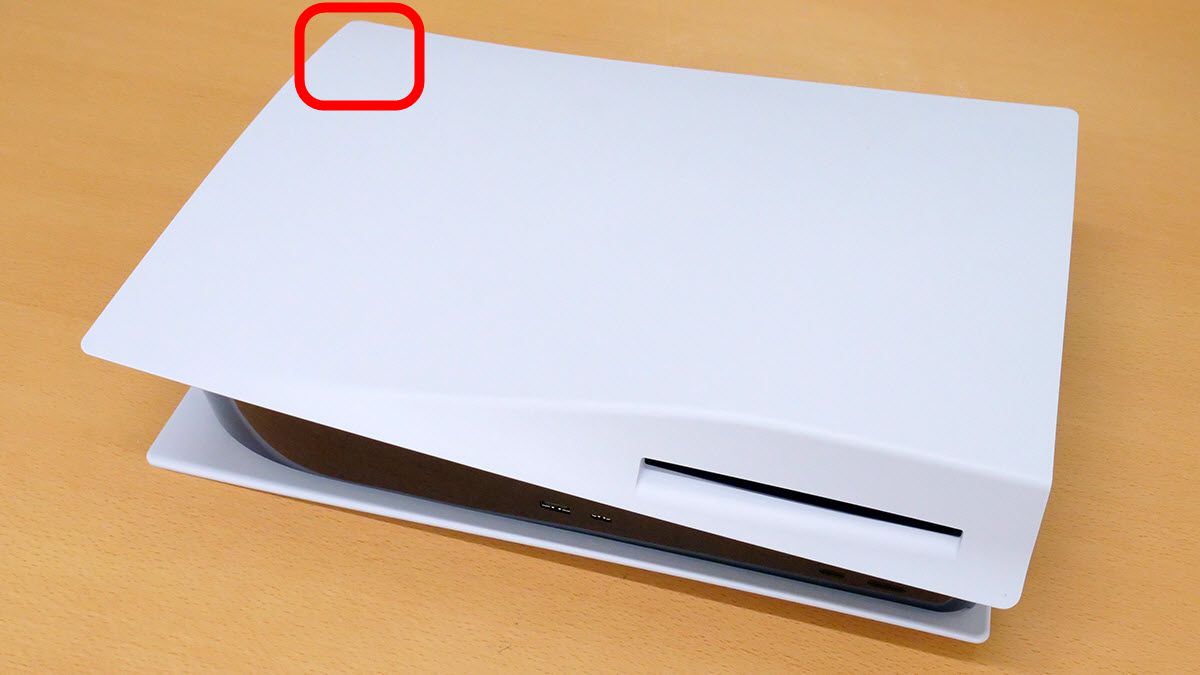
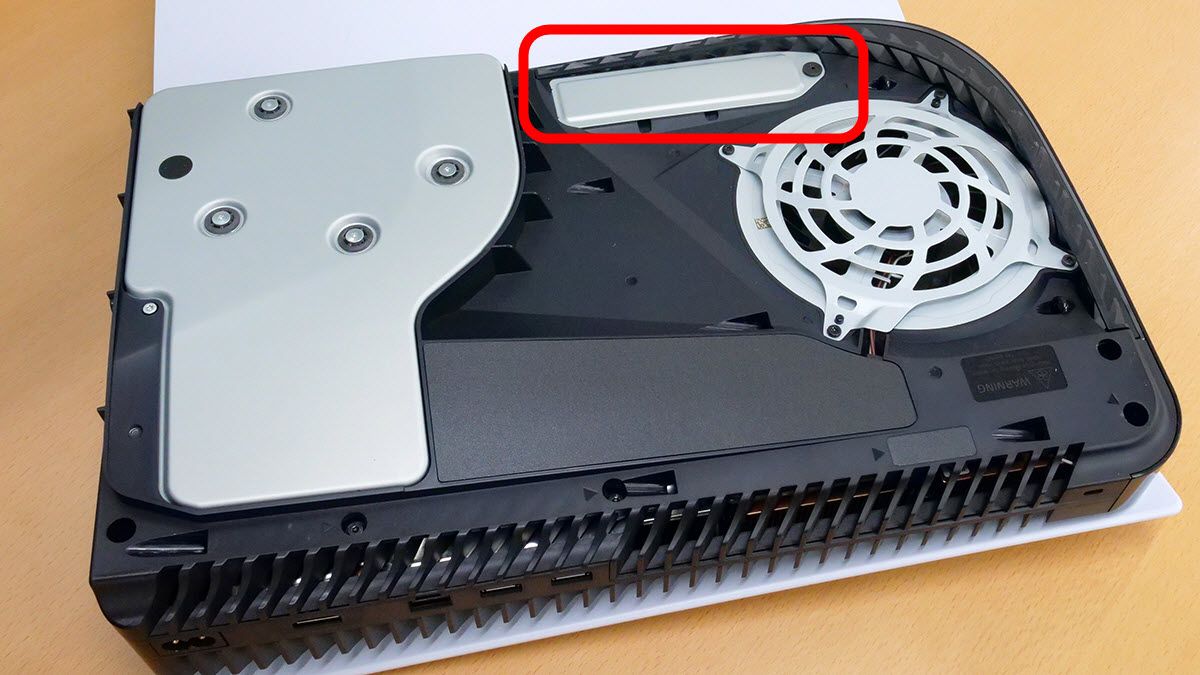
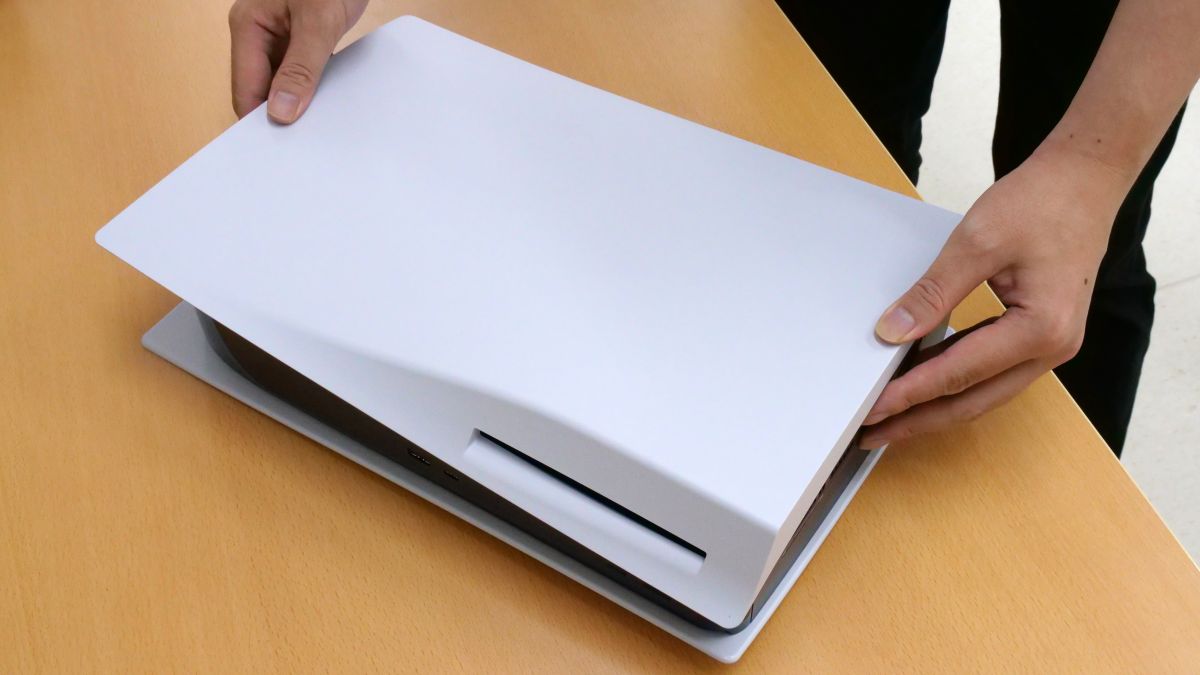
Next, in order to install the SSD, remove the white cover on the side where the disc insertion slot is located (the side that is on the right side when placed vertically and viewed from the front). The white cover is fixed at the position of the red frame, so ...
While pulling the red frame part upward ...
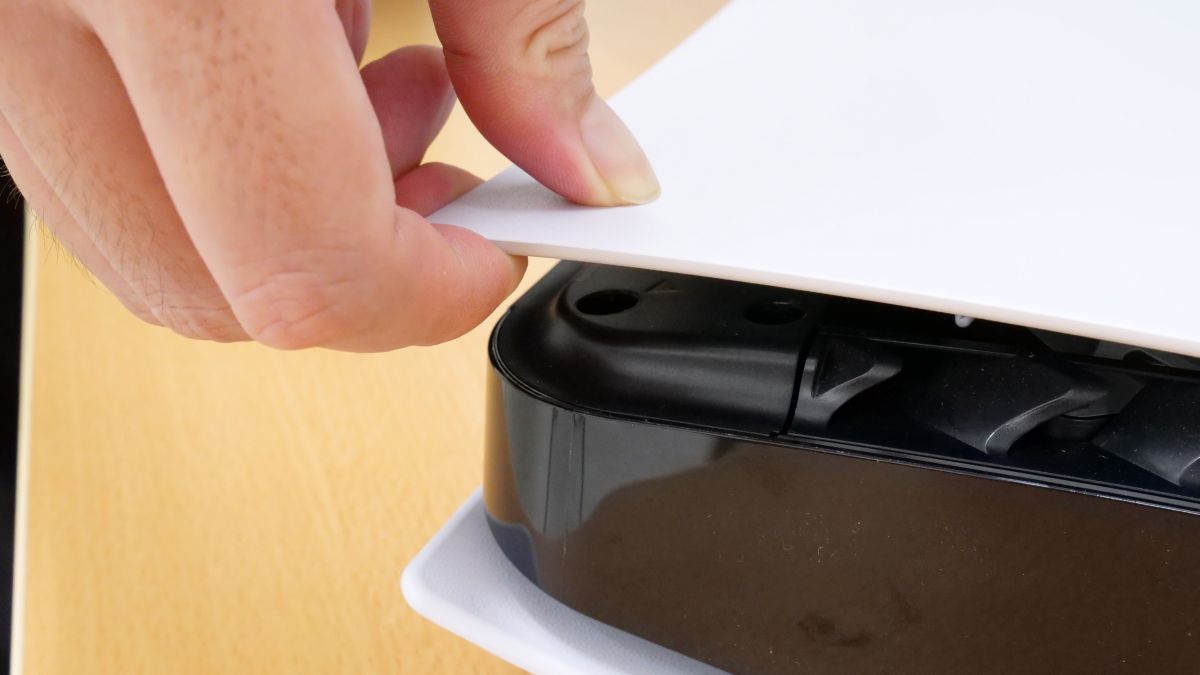
You can remove it by sliding it toward the bottom when it is placed vertically.
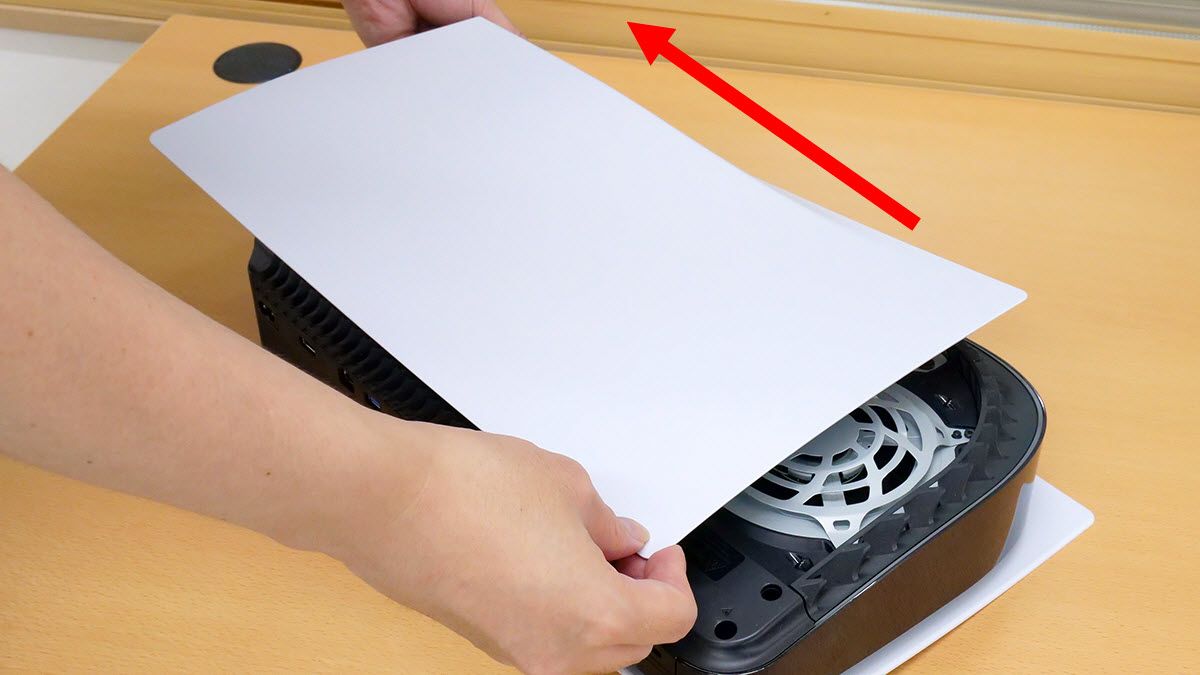
When you remove the white cover, you'll see an elongated silver cover next to the fan. The SSD is mounted under this cover.
Be careful not to drop the silver cover screw into the fan ...
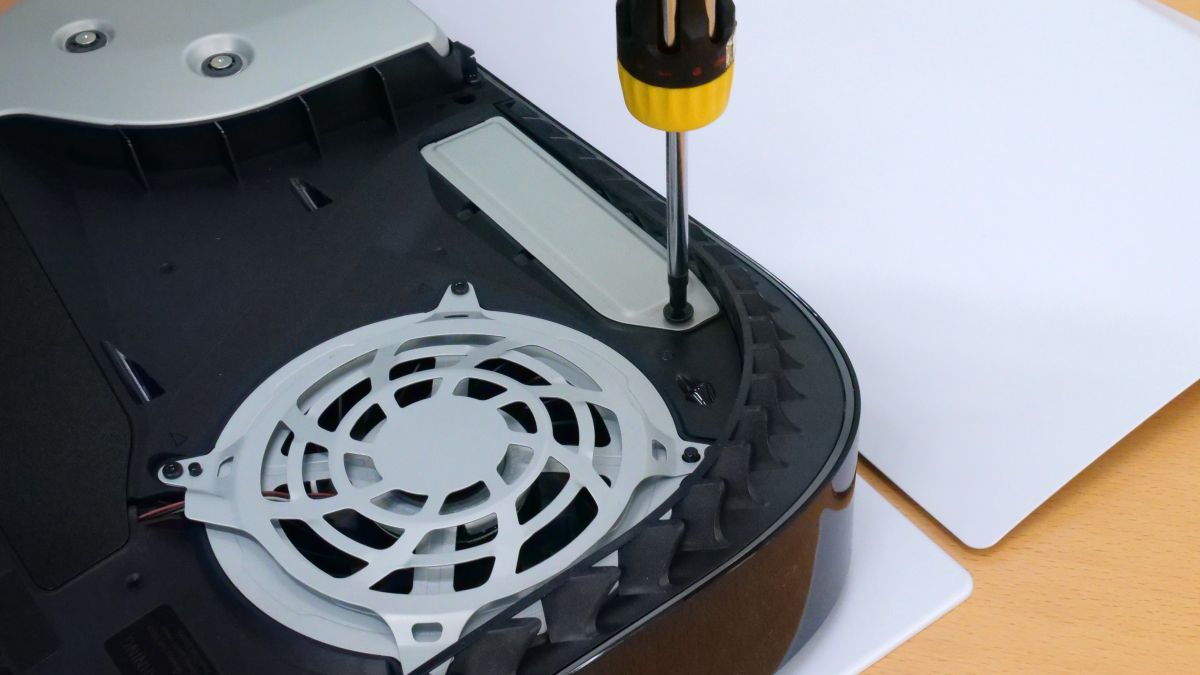
Remove the cover.
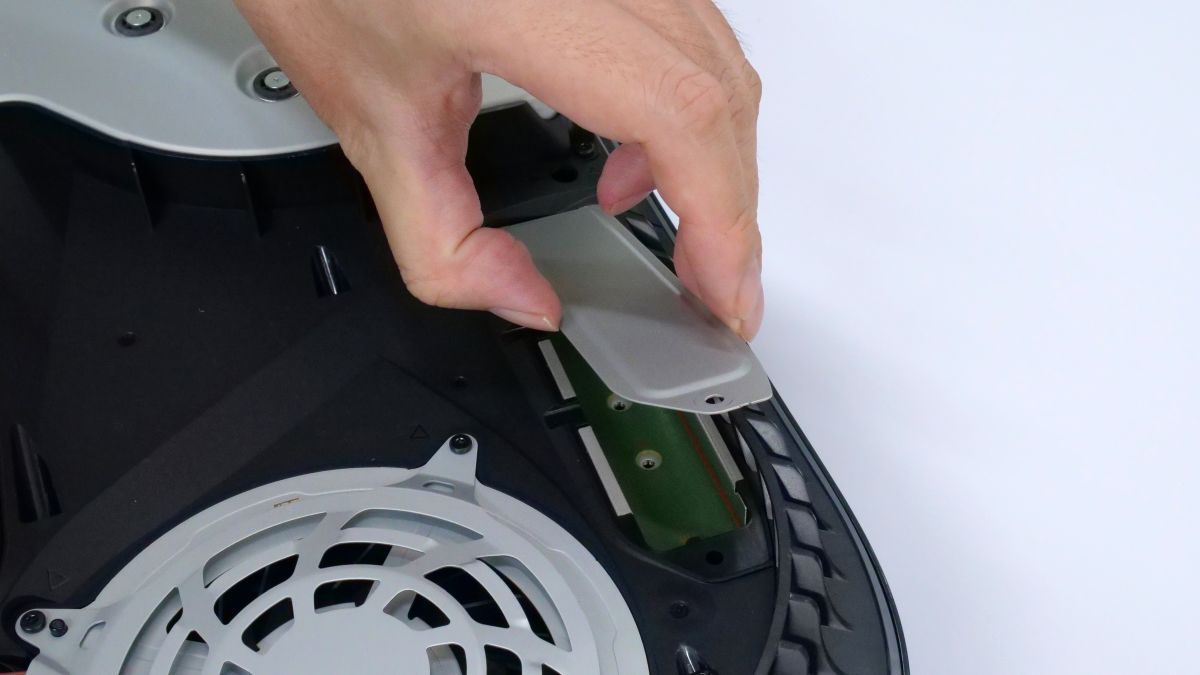
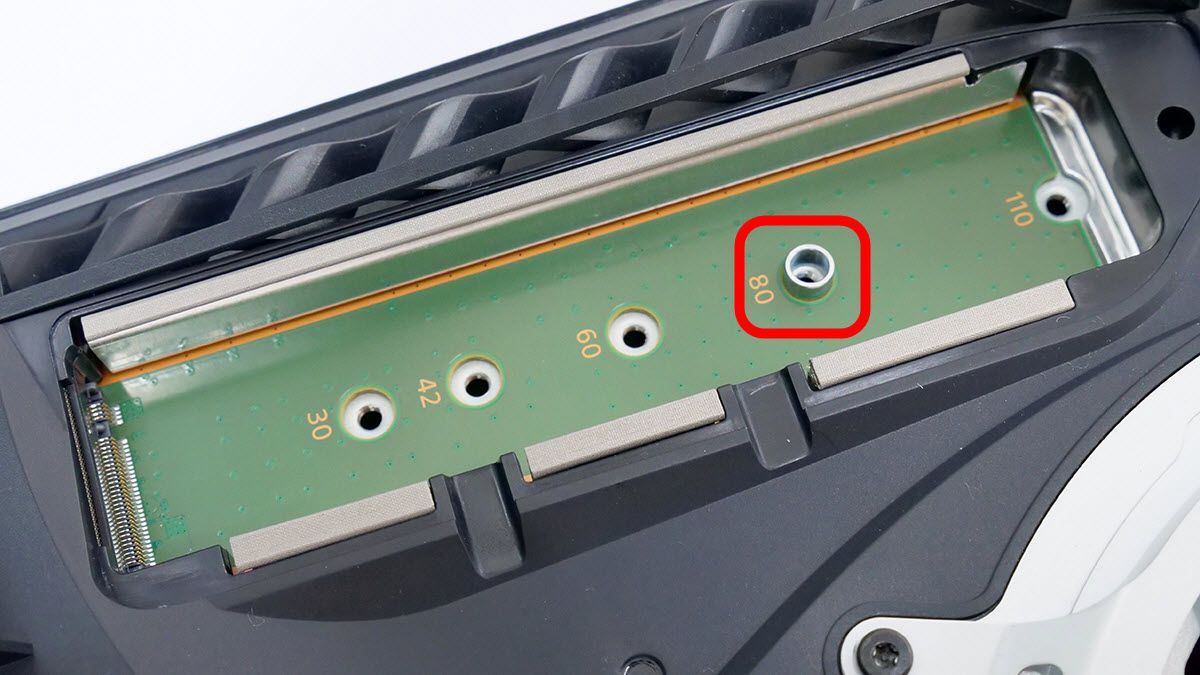
When you remove the cover, it looks like this. Since the spacer is screwed to the red frame part ...

Remove the screws and spacers with a screwdriver.
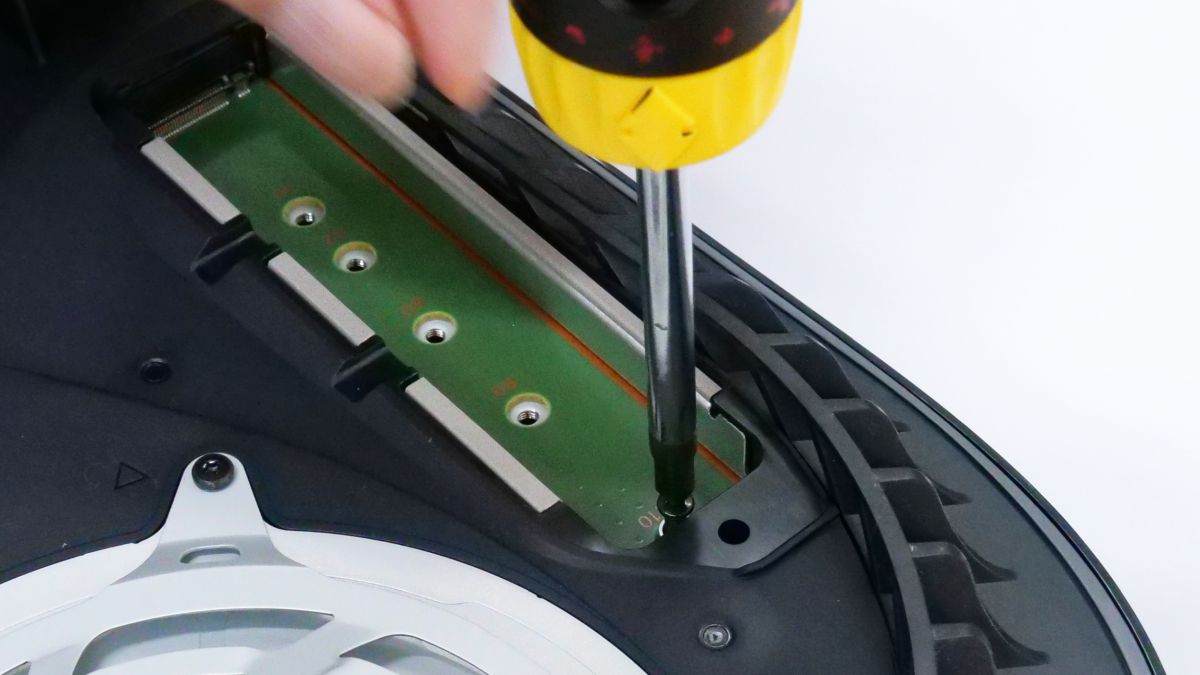
You can move the removed spacer to a hole that matches the size of the SSD to be installed.
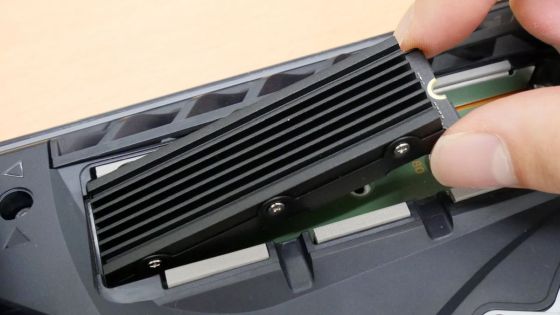
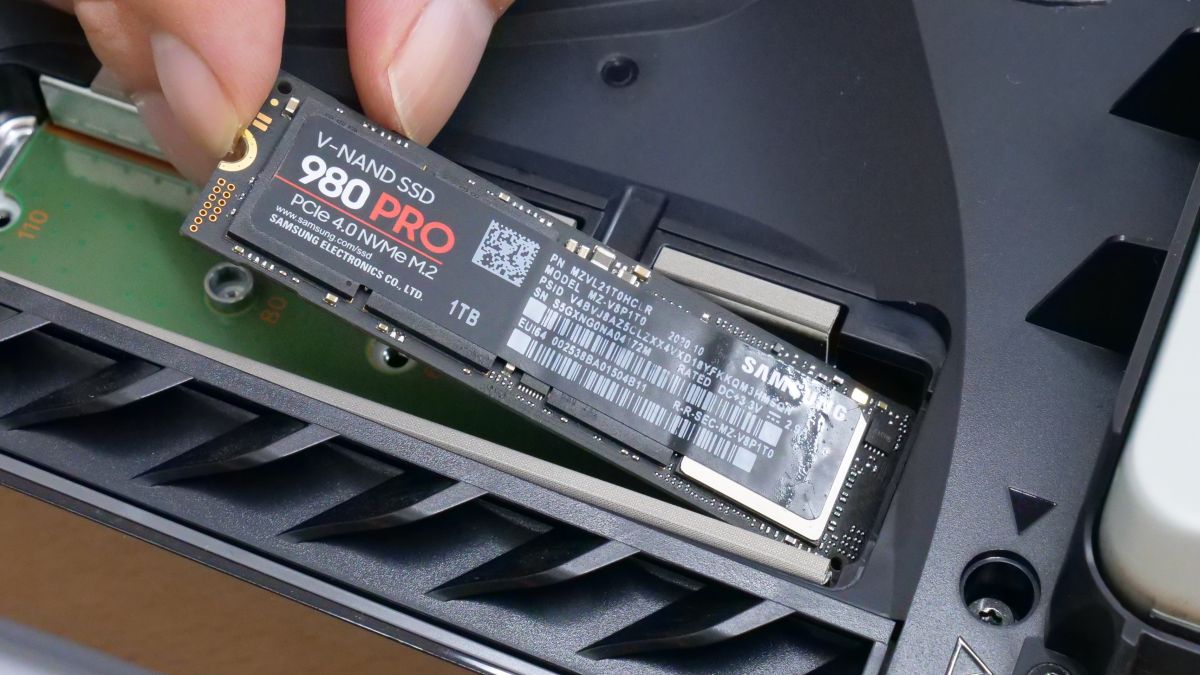
Next, install the SSD diagonally.
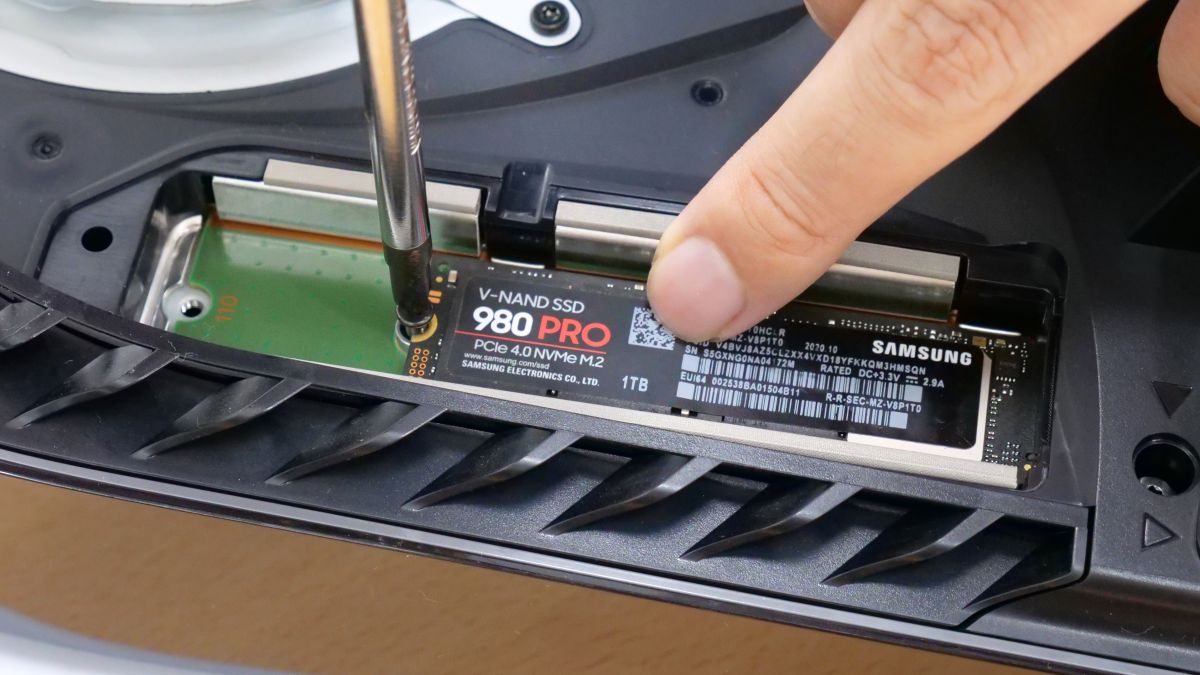
After that, put the screws on the spacer ...
Replace the silver cover ...
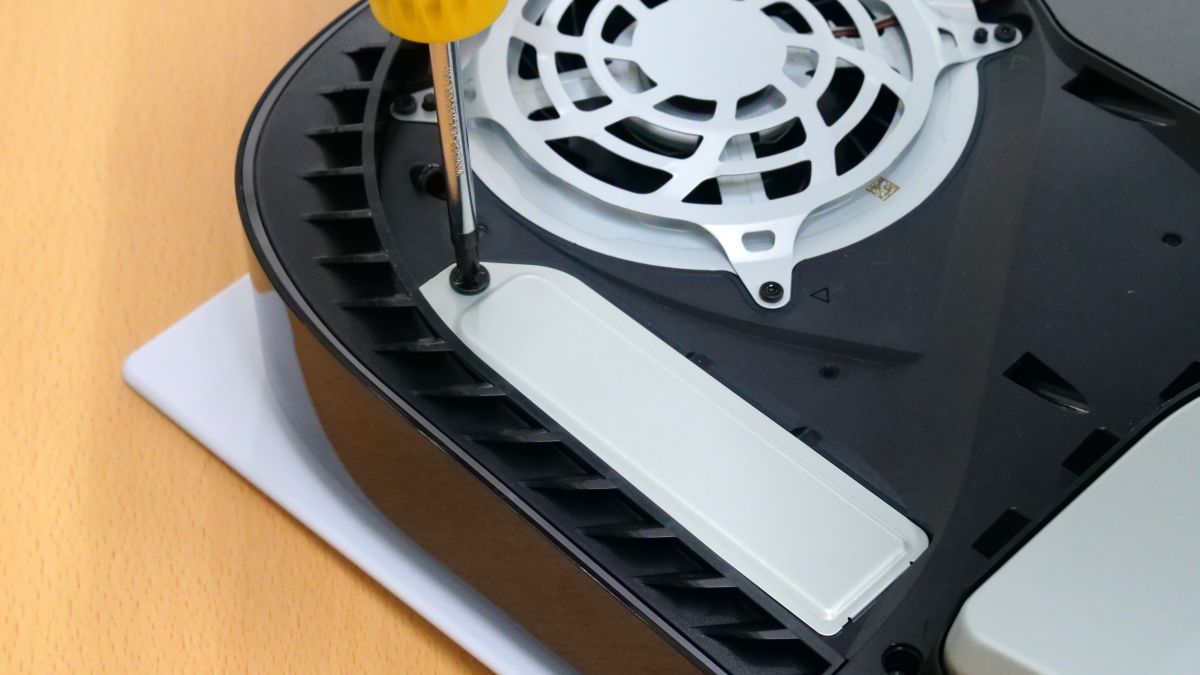
After replacing the white cover, reconnect the power cord and turn on the power.
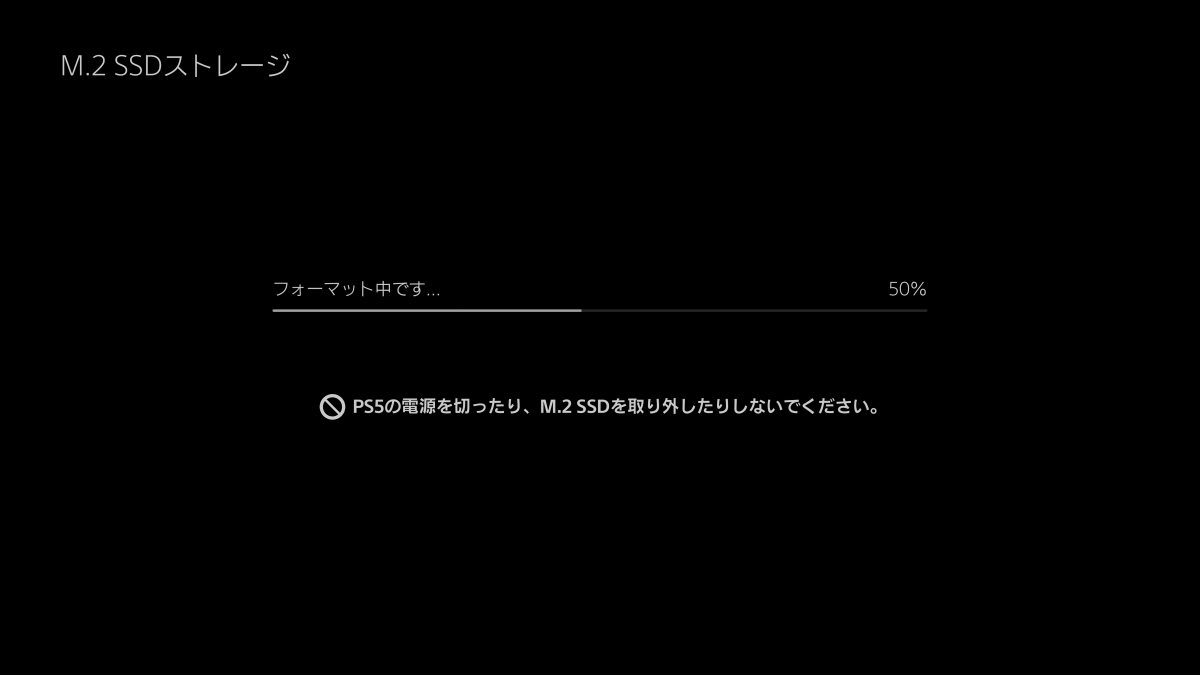
When you turn on the power, the SSD format screen will be displayed. Select 'Format M.2 SSD'.

Wait a moment for the format to complete.
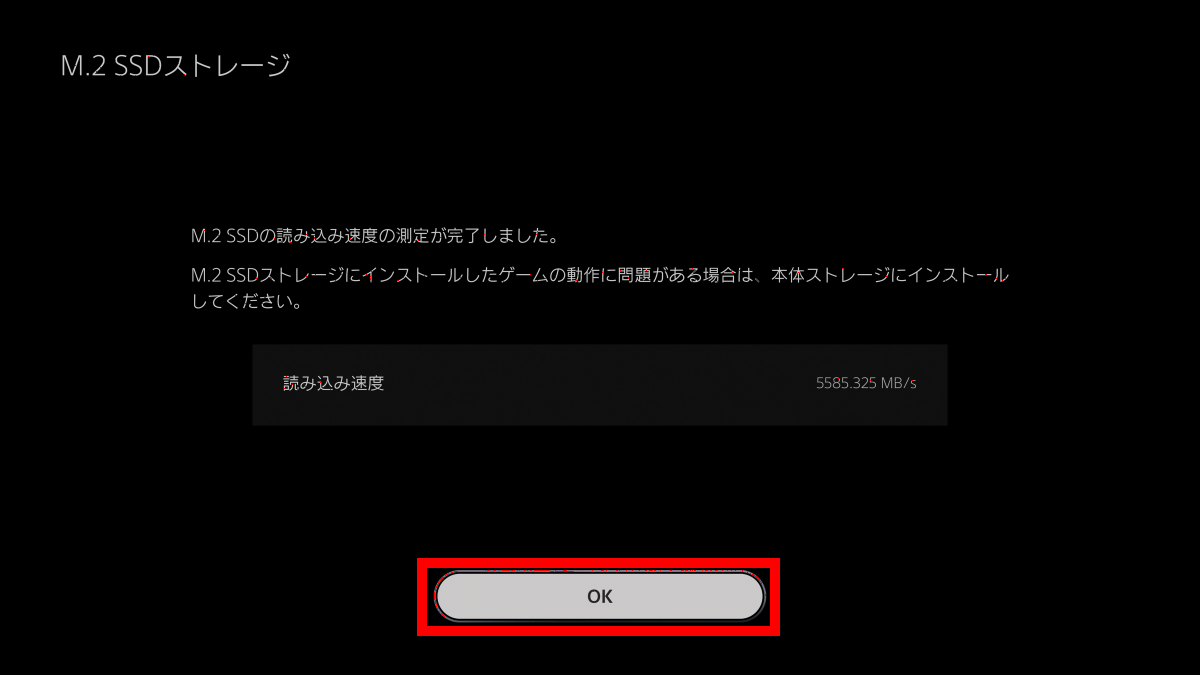
When formatting is completed, the reading speed will be displayed, so select 'OK'.
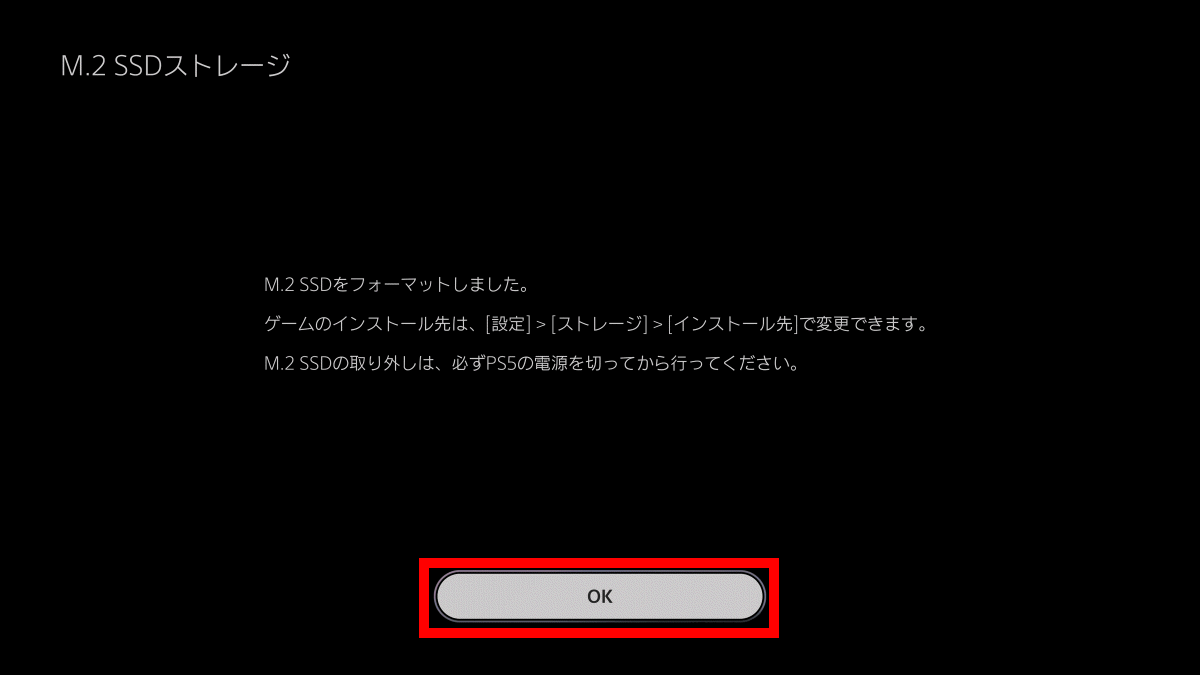
Select 'OK' again to complete the SSD expansion work.
When I actually opened 'Storage' from 'Settings', the model number and free space of the added SSD were displayed in the M.2 SSD storage column.
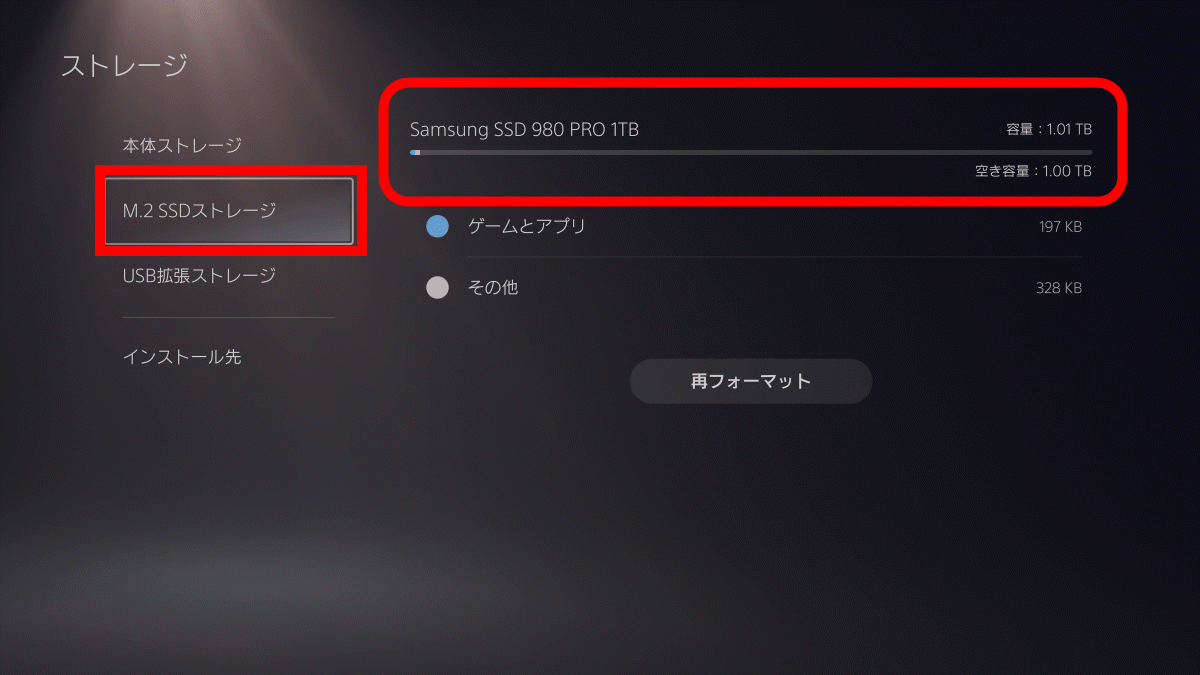
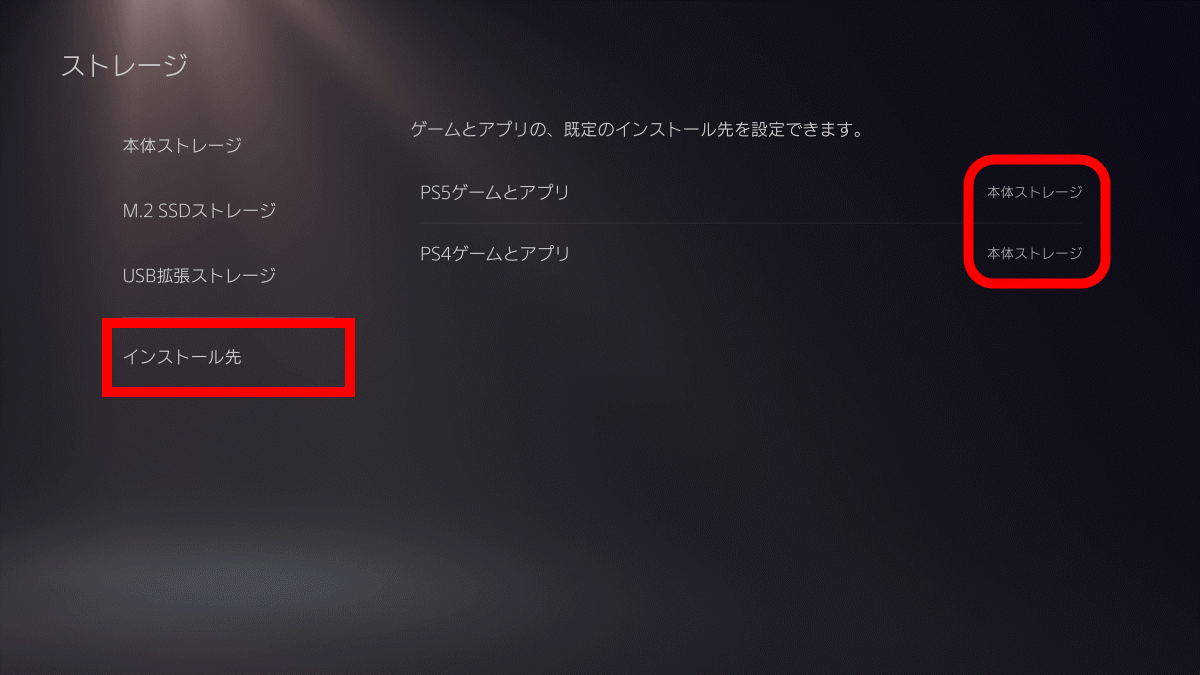
In 'Installation destination' of the storage setting, you can select the installation destination of games and applications from genuine SSD and additional SSD.
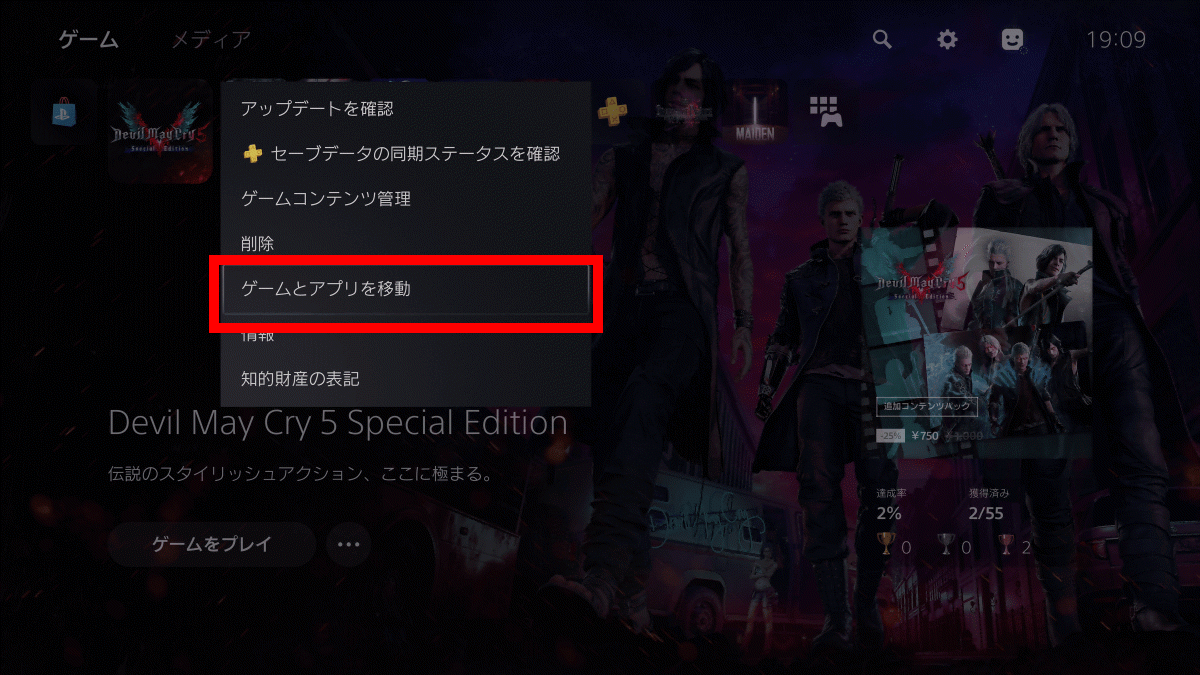
◆ Move to SSD with installed games
To move the game to the added SSD, select 'Move games and apps' from the menu of the game you want to move.
Next, select the game you want to move and select 'Move'.
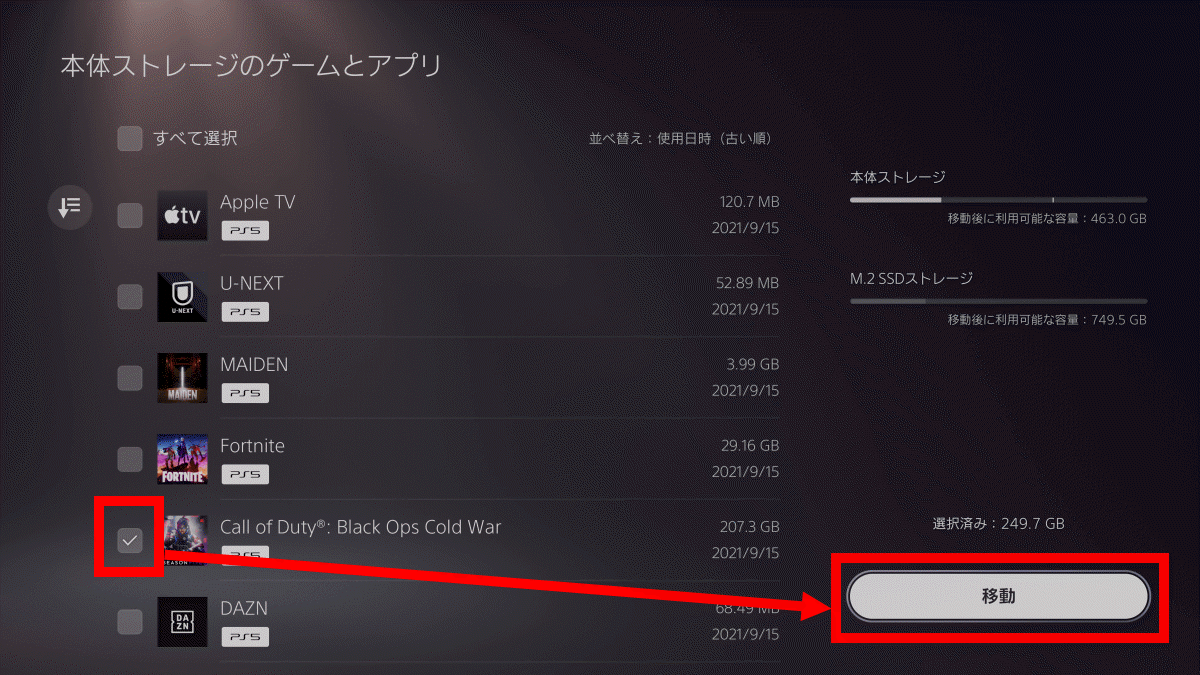
A confirmation screen for the game you want to move will be displayed, so select OK.
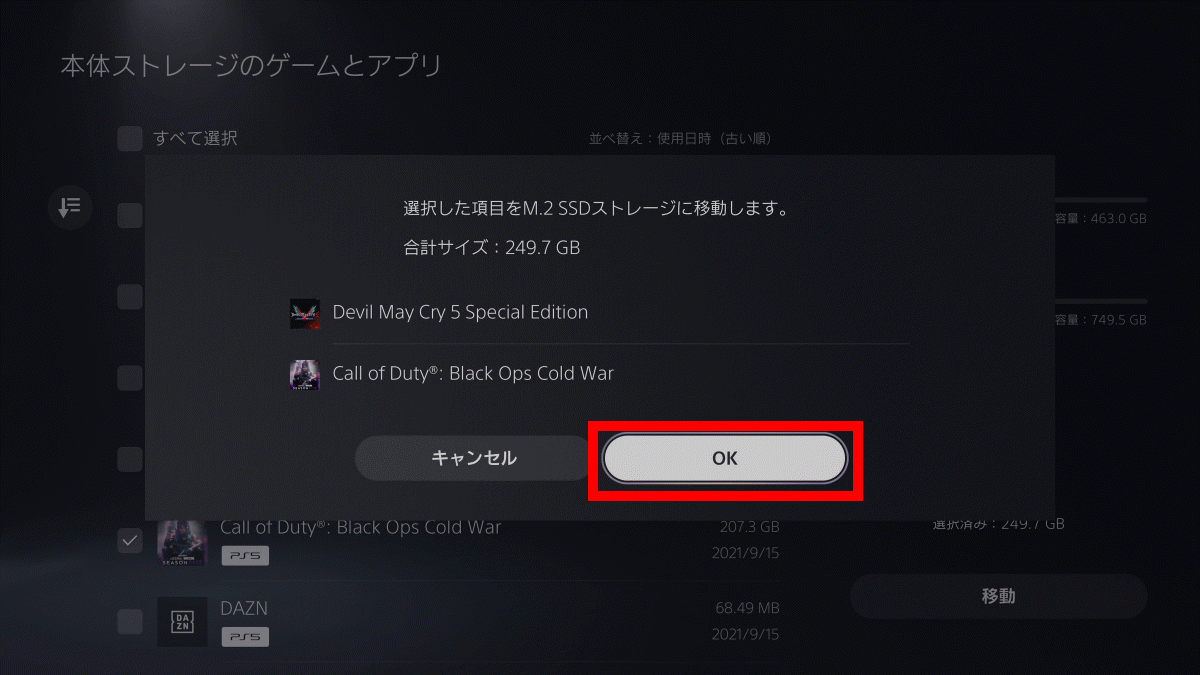
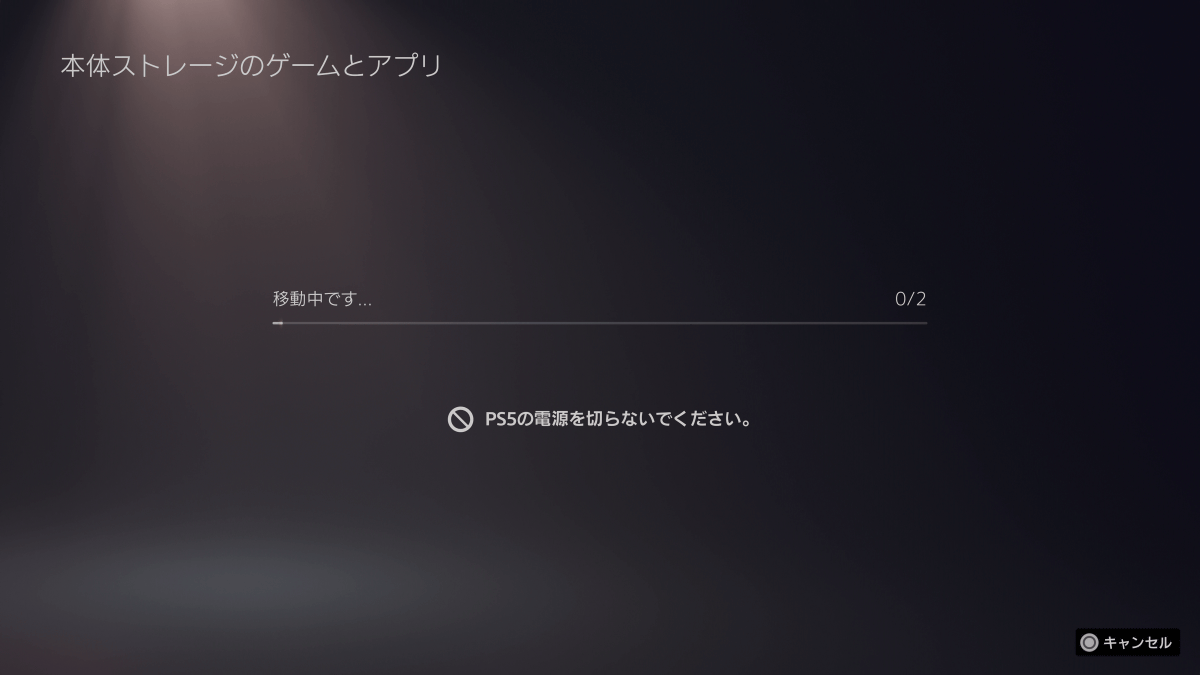
Wait for a while when the game starts moving. This time, the total of 249.7GB of game movement was completed in 3 minutes and 30 seconds.
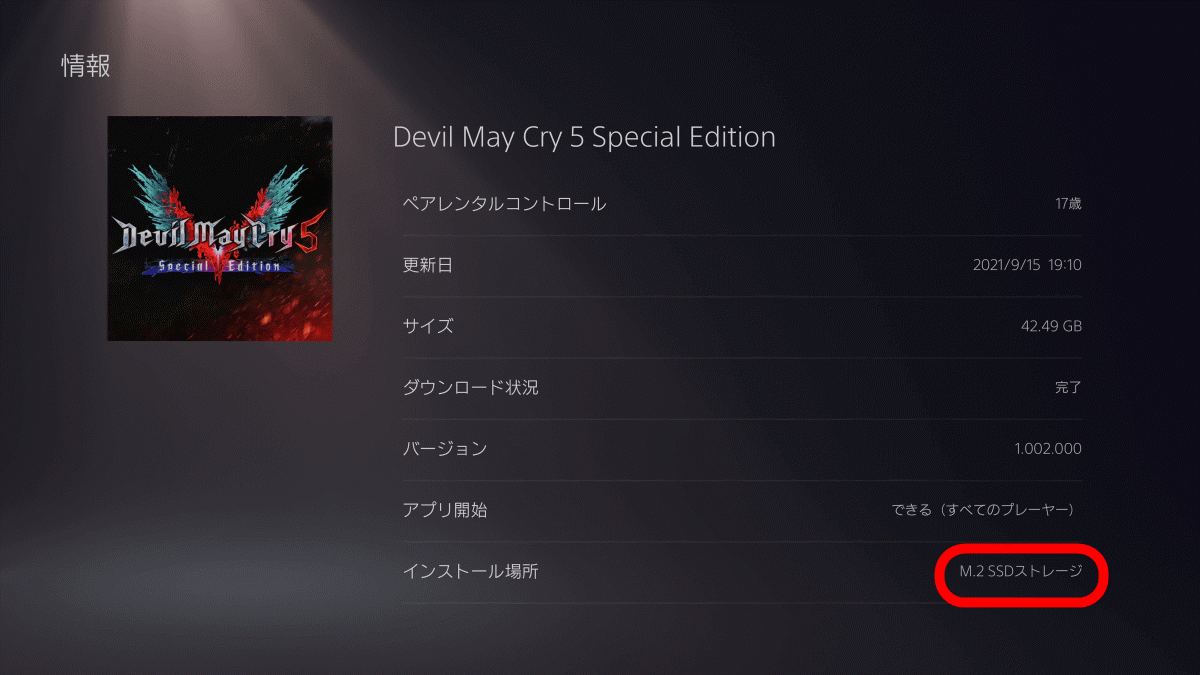
Once the game has been moved, you can play the game as you normally would. If you want to check the installation destination of the game, select 'Information' from the menu ...
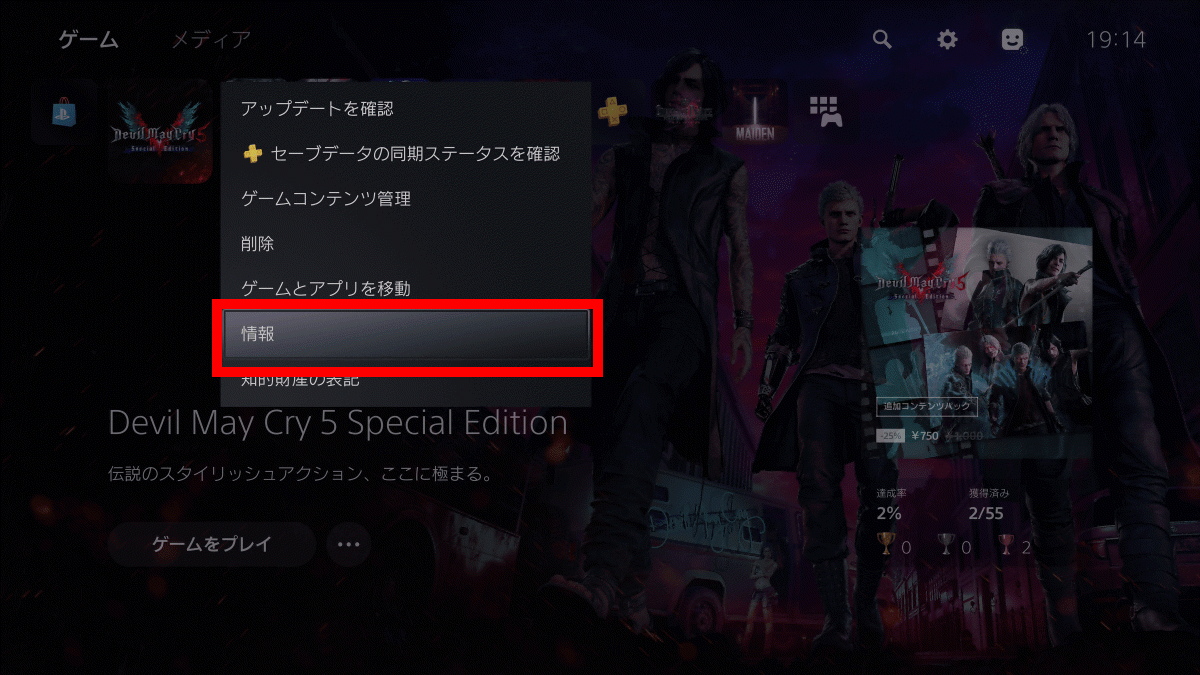
You can check the installation destination in the 'Installation location' field on the information screen.
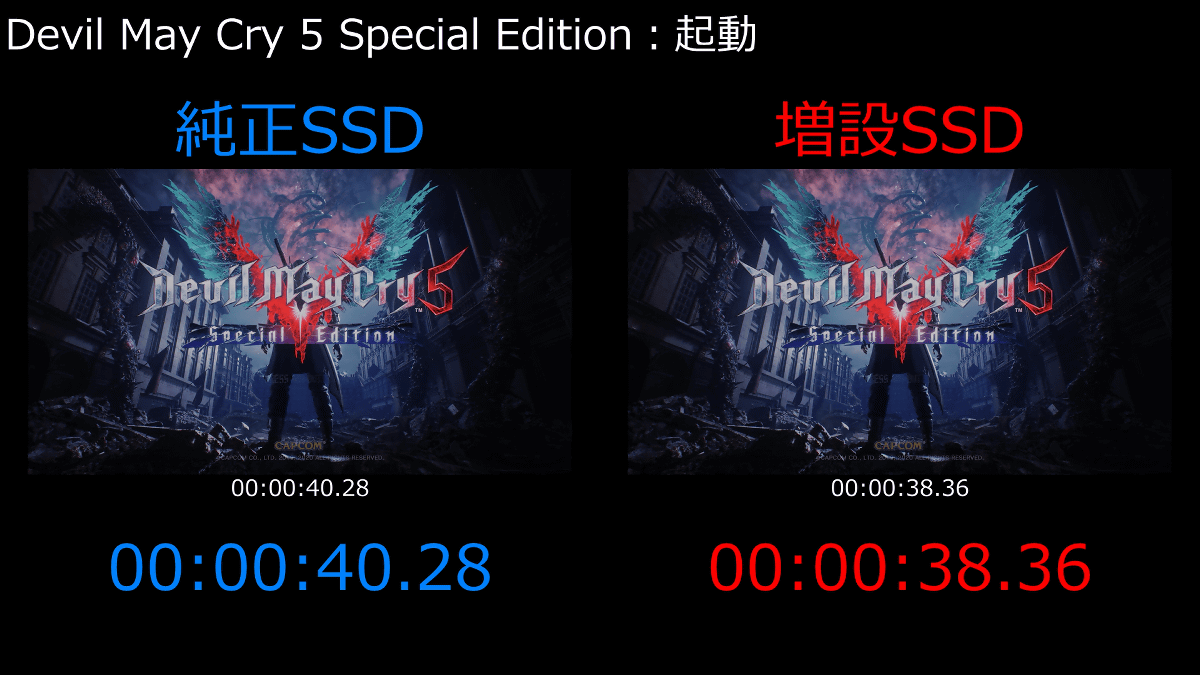
◆ I compared the start time and load time of the game
I was wondering if I could experience the high-speed startup and loading of PlayStation 5 even with an additional SSD, so I installed the same game on the genuine SSD installed in PlayStation 5 from the beginning and the added Samsung 980 PRO to set the startup time and loading time. I compared it. You can see how the game actually starts and loads in the following movie.
I added SSD to PlayStation 5 and compared the game startup time and load time --YouTube
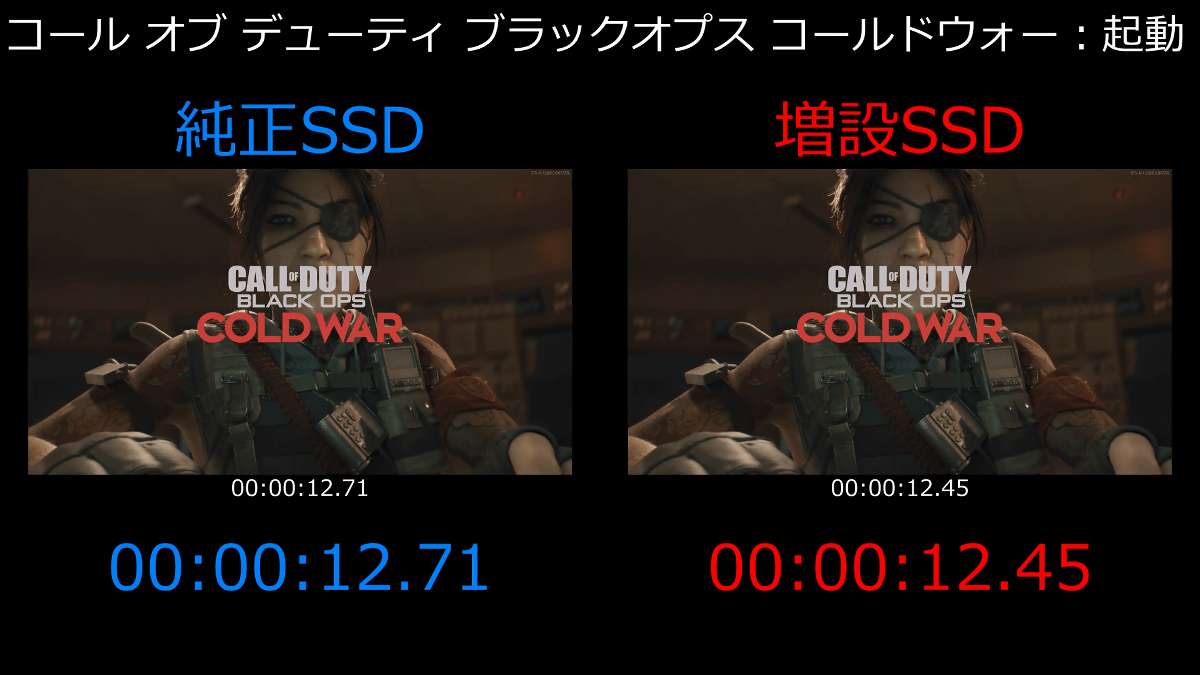
First, when we measured the time from when 'Call of Duty Black Ops Cold War ' was started until 'Start with x' was displayed, the genuine SSD was 12.71 seconds, the additional SSD was 12.45 seconds, and the additional SSD Was able to start slightly faster.
Next,
As a result of measuring the time from when the character touched the keystone of '

When I actually added an SSD to the PlayStation 5, it didn't take a lot of work to add it, and the Samsung 980 PRO I used this time enabled a slightly faster startup and loading than the genuine SSD. However, there are many types of SSDs on the market, and each SSD has different performance, so you need to be careful when choosing an SSD.
The SSD used this time can be purchased from the link below. In addition, official support requires
Samsung 980 PRO 1TB PCIe Gen 4.0 x4 (Maximum transfer speed 7,000MB / sec) NVMe M.2 (2280) Built-in SSD MZ-V8P1T0B / EC Domestic regular warranty --Amazon.co.jp

Related Posts: