A detailed review of the performance of the ultra-fast PCIe 5.0 SSD 'FireCuda 540 SSD 2TB' that exceeds 10GB/s

The ' FireCuda 540 SSD 2TB ' is an SSD that supports PCIe 5.0 and is said to have a literally unprecedented data transfer speed of 10GB/s. We were given the FireCuda 540 SSD 2TB as a prize for
Seagate FireCuda 540 Gen 5 PCIe SSD | Seagate Japan
https://www.seagate.com/jp/ja/products/gaming-drives/pc-gaming/firecuda-540-ssd/
·table of contents
◆1: Opening Ceremony
◆2: Firmware update
◆3: Detailed examination of data transfer speed
◆4: How to check controller information
◆1: Opening Ceremony
The FireCuda 540 SSD 2TB package looks like this.
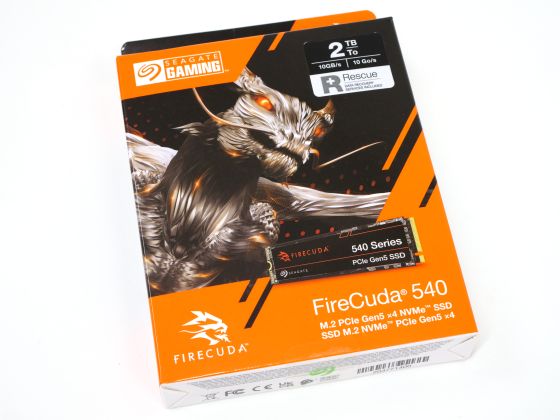
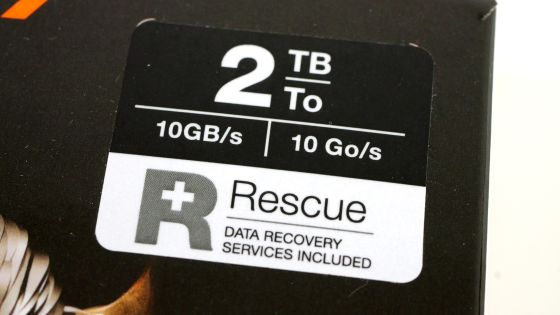
It is labeled to boast data transfer speeds of up to 10GB/s.
In addition to the FireCuda 540 SSD 2TB itself, the package contained a warranty card, a sticker, and an instruction sheet for the data recovery software.
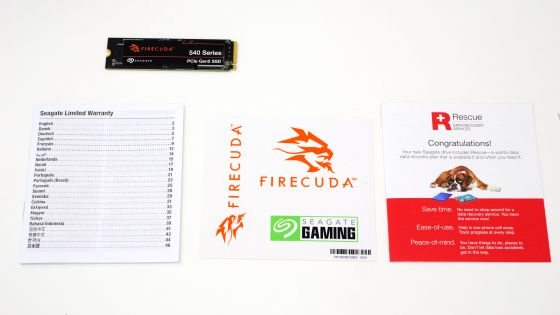
The FireCuda 540 SSD 2TB looks like this.
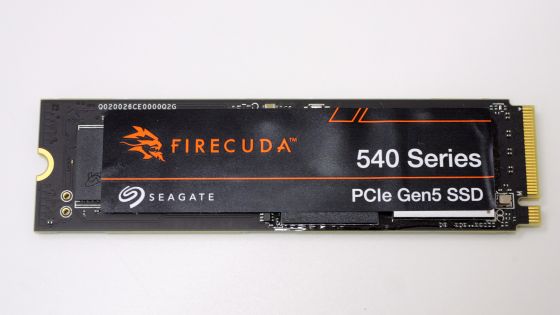
There is also a chip mounted on the back.
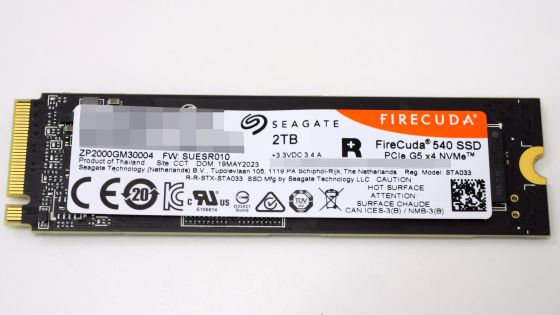
According to the warranty, removing the sticker on the unit will void the warranty.
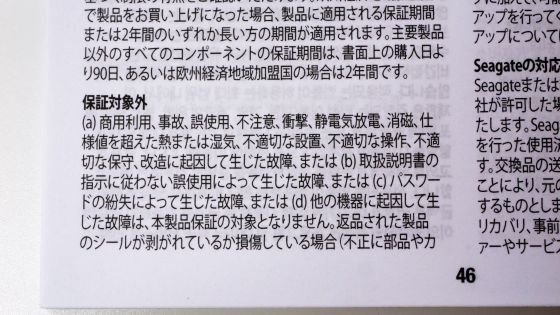
So, to test the performance of the FireCuda 540 SSD 2TB, I installed it on the PCIe 5.0 compatible motherboard '
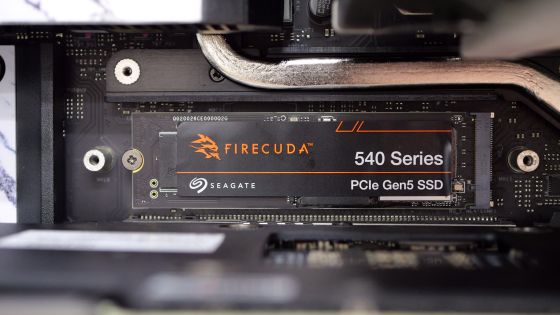
◆2: Firmware update
Before verifying the performance of the FireCuda 540 SSD 2TB, update the firmware to the latest version. First, click the link below.
FireCuda 540 SSD | Support Seagate US
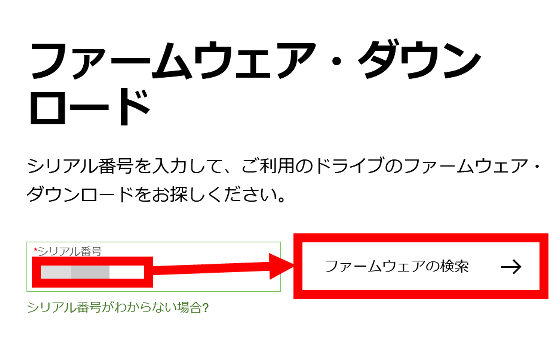
Enter the serial number in the serial number entry area in the Firmware Download section and click 'Search for Firmware.'
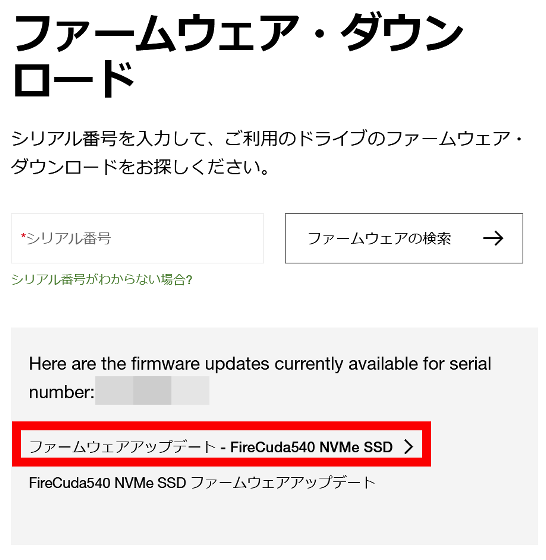
Click 'Firmware Update - FireCuda540 NVMe SSD' to download the firmware.
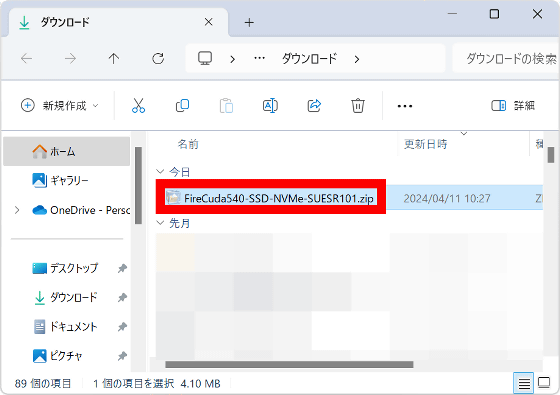
The file containing the firmware is distributed in ZIP format, so you can extract it using standard Windows functions or a compatible app.
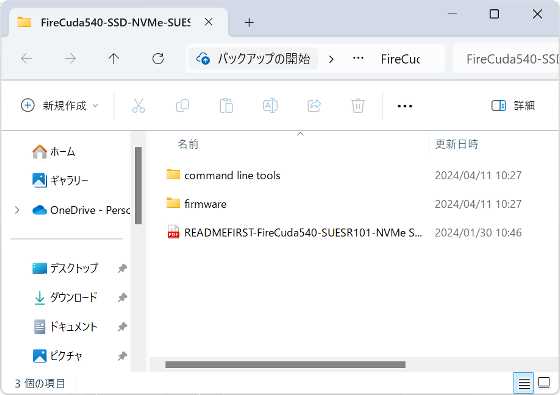
Once you unzip it, it's OK if the following folders and files appear. The firmware is saved in the 'firmware' folder, so remember the location.
Next, download the SSD management tool 'SeaTool5' used to update the firmware. First, click the link below.
SeaTools | Support Seagate US
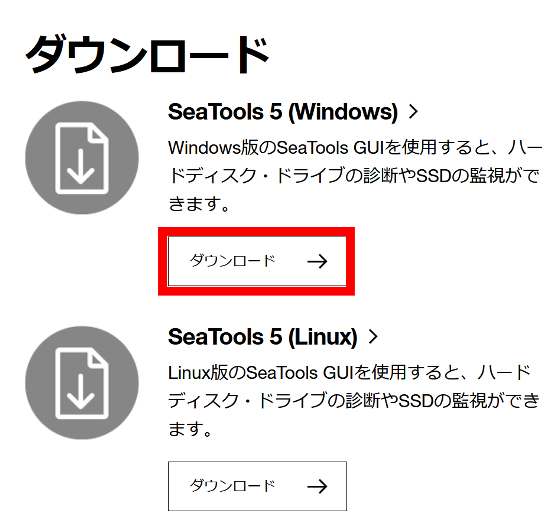
Click the Windows Download button to download the installer.
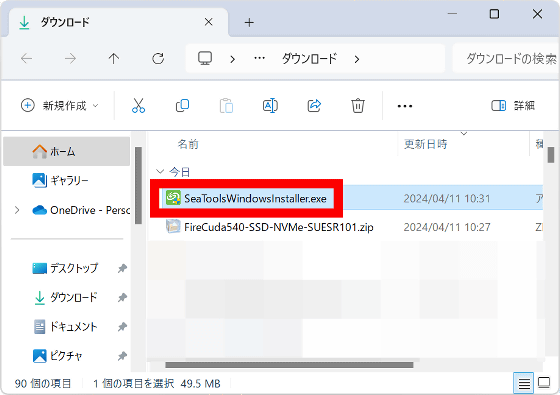
Once the installer has finished downloading, double-click it to launch it.
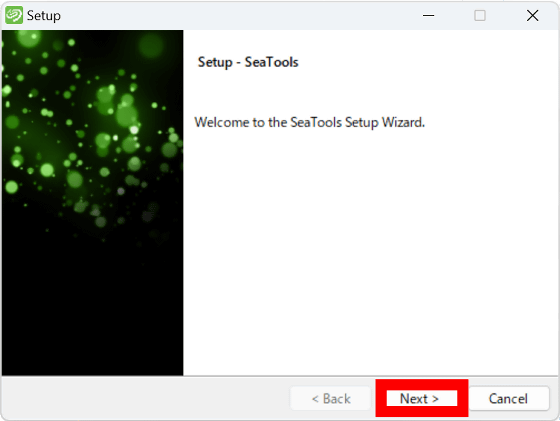
When the installer starts, click 'Next'.
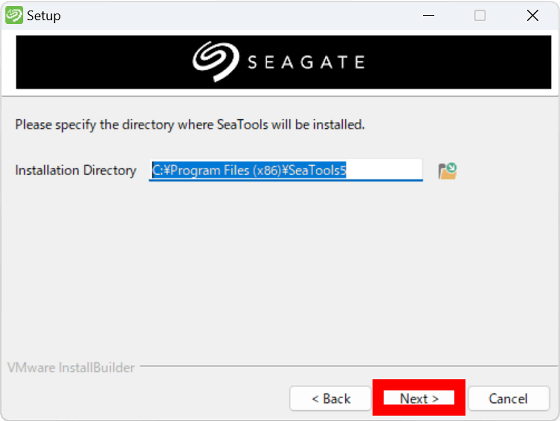
When the installation folder selection screen appears, click 'Next' without making any changes.
Click “Next”.
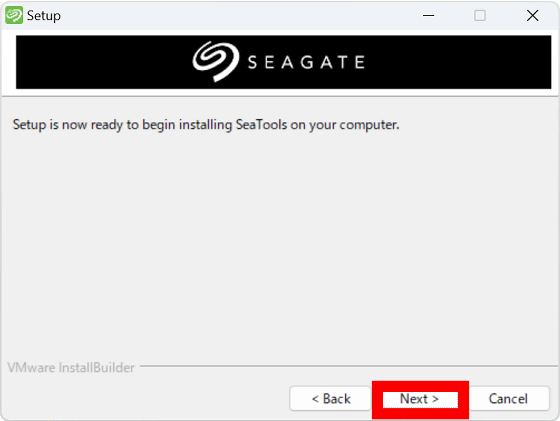
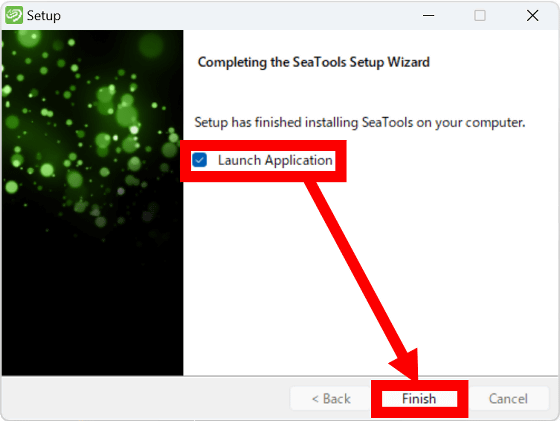
Once the installation is complete, check 'Launch Application' and click 'Finish'.
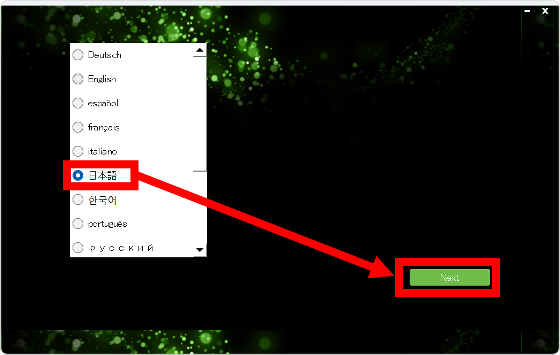
When SeaTools starts, check 'Japanese' and click 'Next'. Note that the Japanese notation of SeaTools is quite unnatural, so if you can read English, it is safe to use it in English.
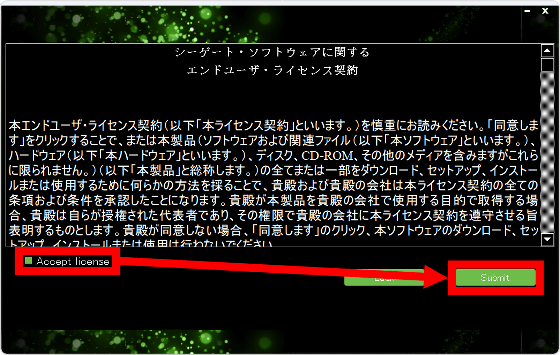
When the license agreement is displayed, read it carefully, check 'Accept license' to indicate your agreement, and click 'Submit'.
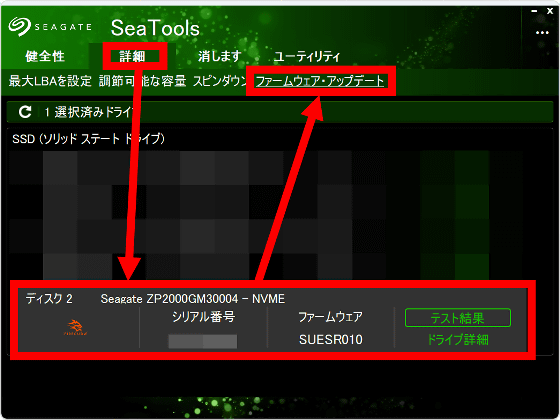
When the list of storage installed on your PC is displayed, click 'Details', then click the storage corresponding to the FireCuda 540 SSD 2TB and click 'Firmware Update'.
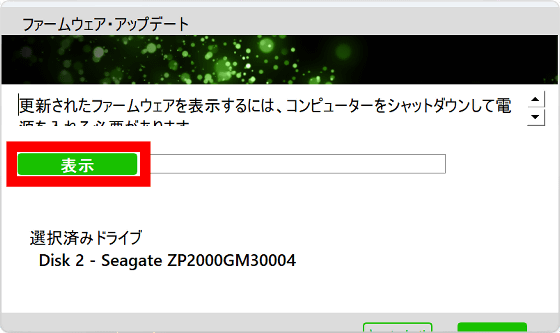
Click Browse to specify the location of the firmware.
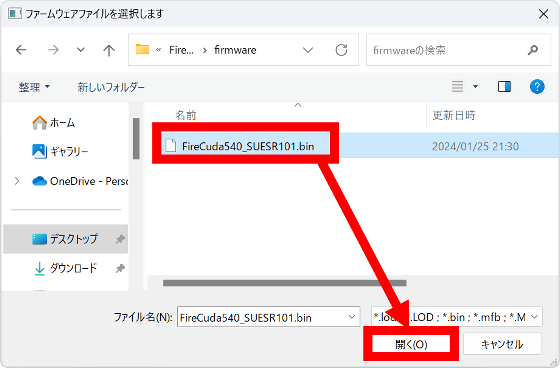
Select the downloaded firmware and click 'Open'.
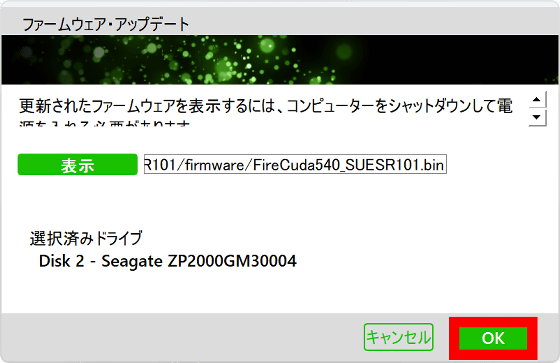
Click 'OK' to start the firmware update.
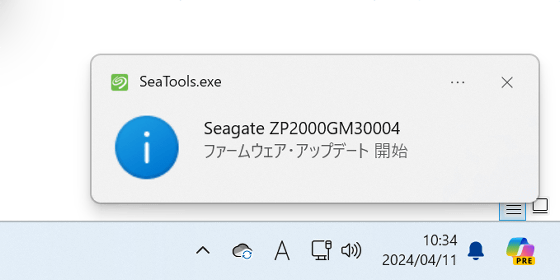
Once the update begins, the notification 'Update started' will appear in the bottom right corner of the screen.
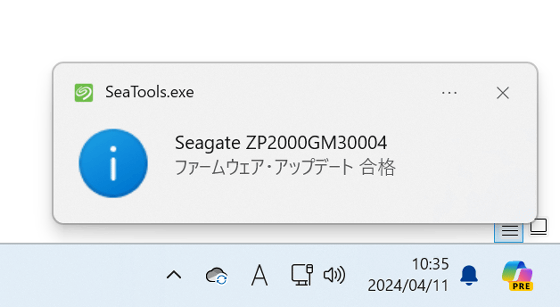
After a while, you will see a notification that says 'Update Successful.' This means the firmware update is complete.
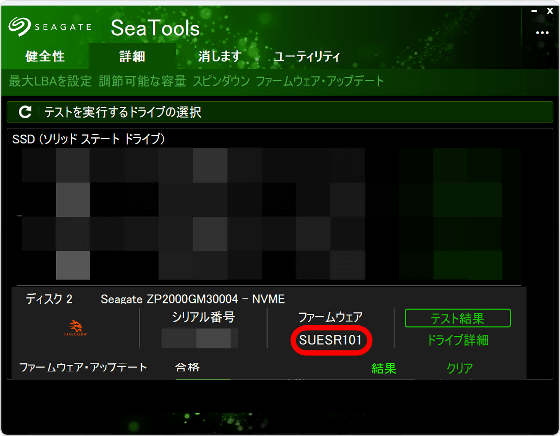
When I checked the SeaTools screen, the firmware had been updated to the latest version.
◆3: Detailed examination of data transfer speed
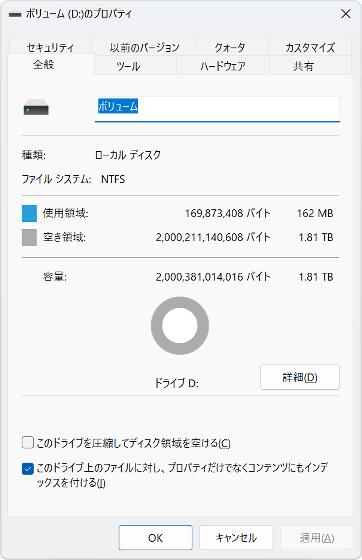
Now that the firmware update is complete, we will verify the performance of the FireCuda 540 SSD 2TB. First, we checked the storage information with '
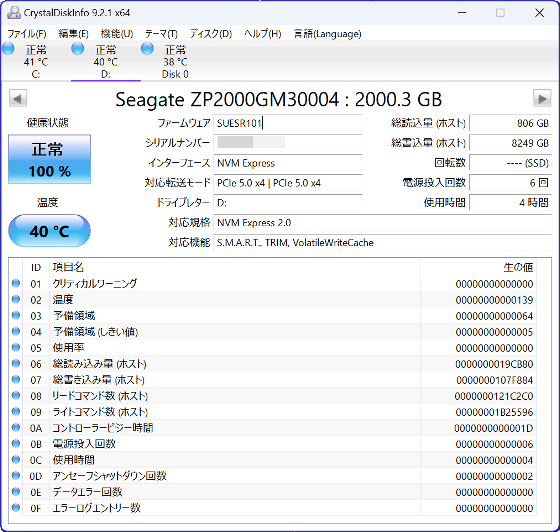
Immediately after formatting, the free space was 1.81TB.
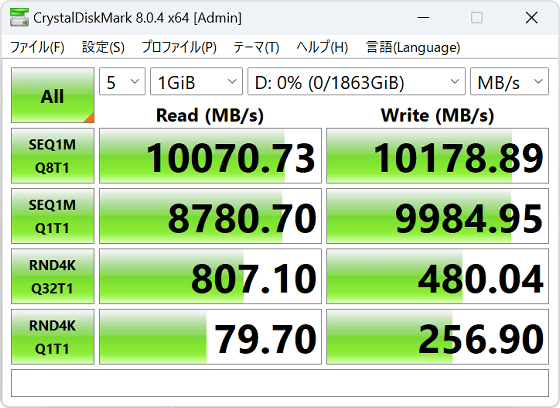
Below are the benchmark results from the popular storage benchmark software '
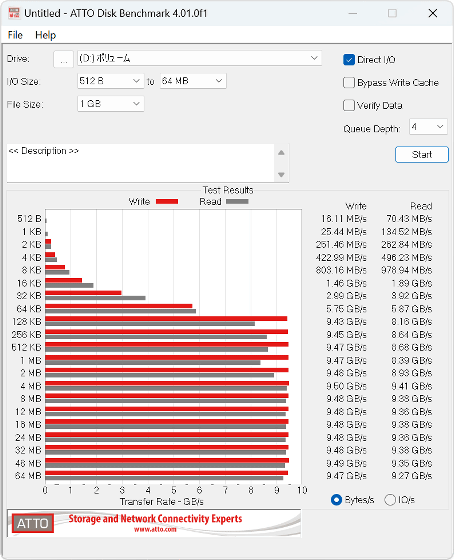
The results of measuring data transfer performance for each block size using '
Below is the speed transition when writing a 1.9TB file using '
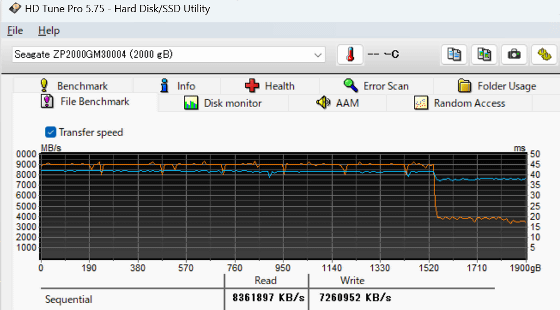
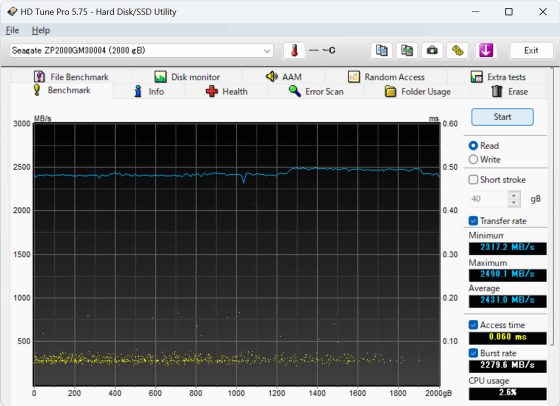
Next, I removed the volume and measured the read and write speeds. The read speed averaged 2431.0MB/s, with little fluctuation.
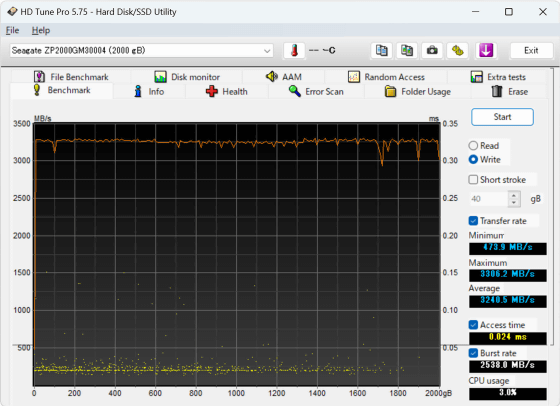
The average write speed was 3240.5MB/s. With a volume, the write speed dropped sharply around 1520GB, but with the volume removed, no drop in write speed was observed. The FireCuda 540 SSD 2TB seems to change its behavior according to the transfer situation.
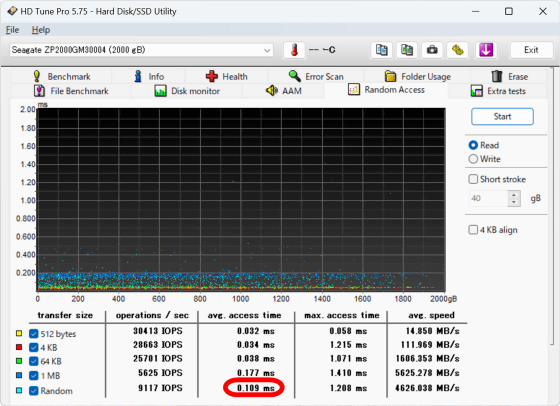
The results of measuring the number of operations per second when reading each area of the storage, the time from issuing a data transfer command to responding (access time), and the performance variation for each area of the storage are shown below. The average access time was 0.109 milliseconds, and the performance variation was small.
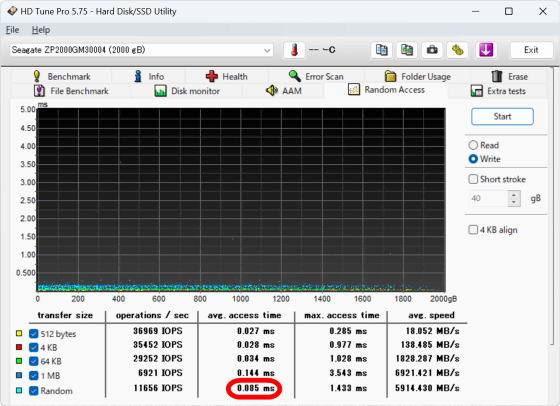
Write performance was as follows: average access time was 0.085 ms.
◆4: How to check controller information
The FireCuda 540 SSD 2TB used this time was equipped with a Phison controller. There is a tool available on the Internet that can be used to check the information of Phison controllers, so I will actually read the controller information of the FireCuda 540 SSD 2TB. First, click the link below to access the distribution page for the information checking tool.
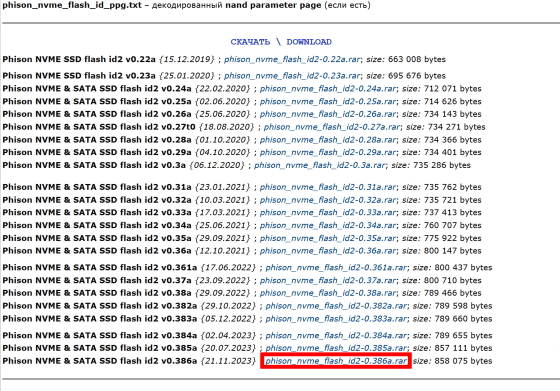
Phison NVME & SATA SSD flash id2 (dll) v0.386a (phison_nvme_flash_id2) – [USBDev.ru]
Once you access the distribution page, download the latest version of the tool. In this example, I clicked on “phison_nvme_flash_id2-0.386a.rar” to download it.
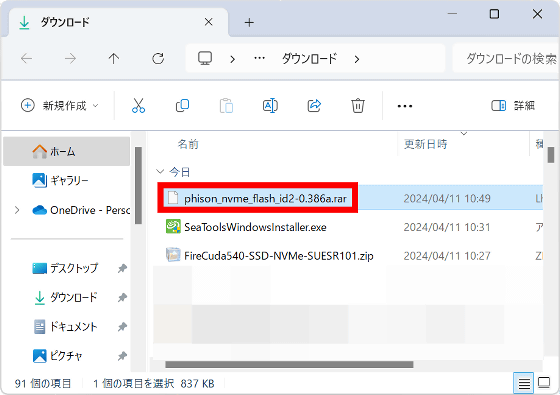
The tool is distributed in RAR format, so you can extract it using standard Windows functions or compatible apps.
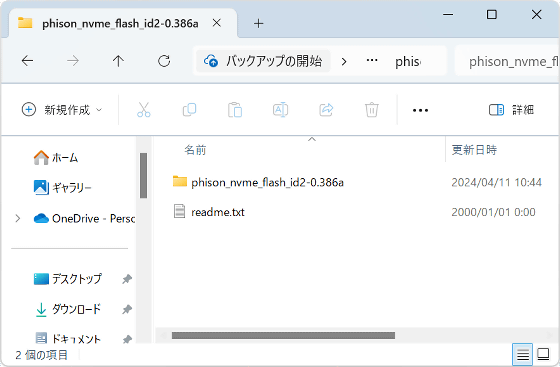
When you unzip it, the following folders and files will be displayed, so open “phison_nvme_flash_id2-0.386a”.
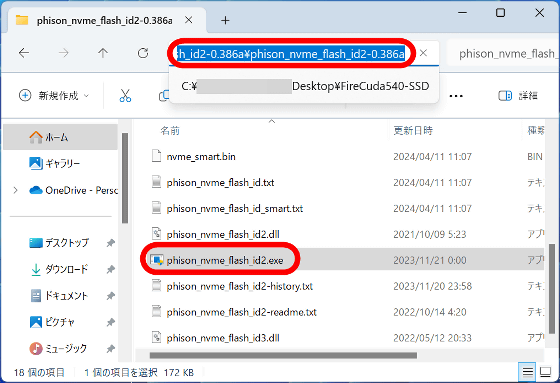
Once you confirm that the executable file “phison_nvme_flash_id2.exe” has been saved, click the address bar to display the folder path and make a note of it somewhere.
The information verification tool must be launched from the command line, so first open the Windows menu, type 'cmd' in the search field, and run the command prompt as an administrator.
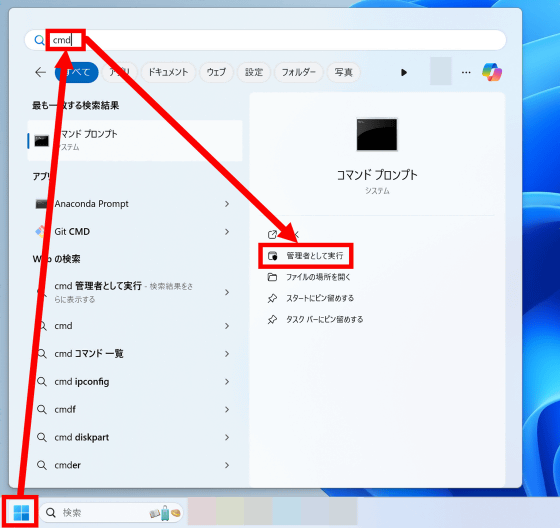
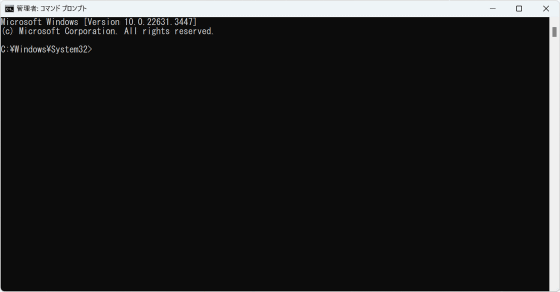
This will launch a command prompt like this:
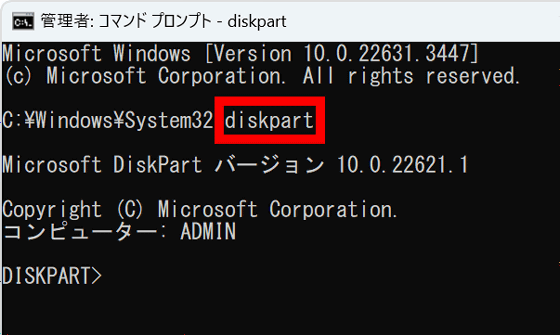
First, enter
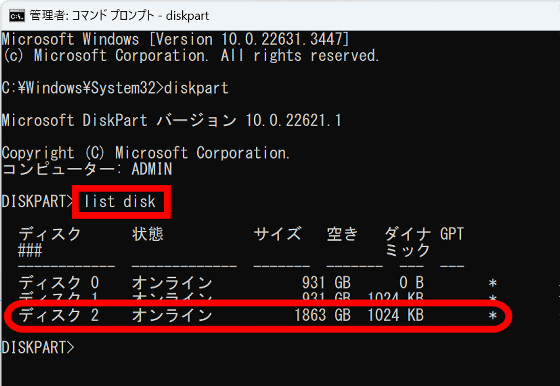
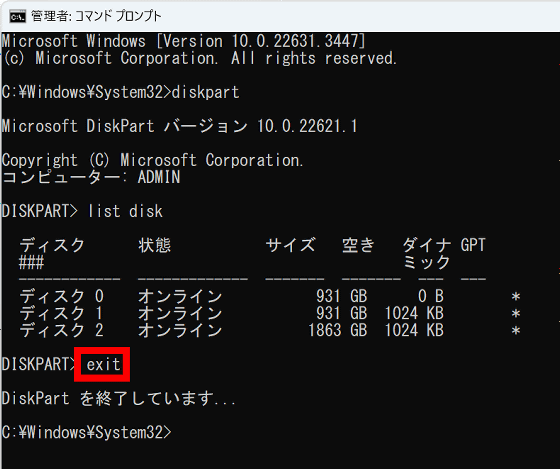
Next, type 'list disk' and press Enter to display the disk list and check the disk number of the FireCuda 540 SSD 2TB. In this case, it was assigned to 'Disk 2'.
After confirming the disk number, type 'exit' and press Enter to exit drive management mode.
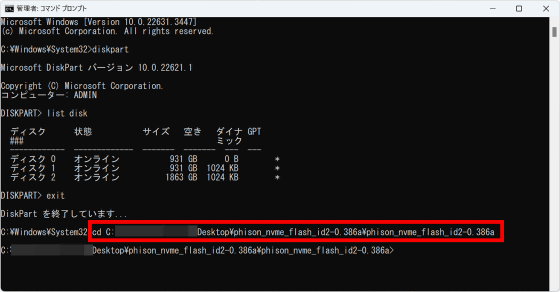
Next, type 'cd [path of the folder where phison_nvme_flash_id2.exe is saved]' and press Enter. There must be a half-width space between 'cd' and the folder path.
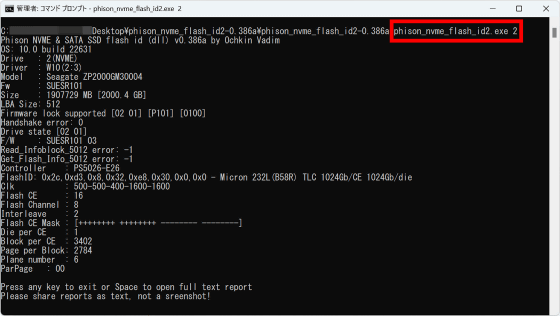
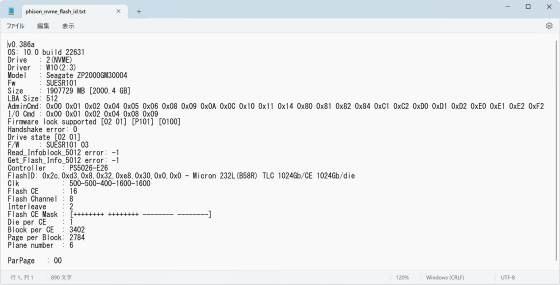
Finally, enter 'phison_nvme_flash_id2.exe [disk number]' and press Enter. In this environment, the disk number of the FireCuda 540 SSD 2TB is '2', so enter 'phison_nvme_flash_id2.exe 2'. This will display the controller model name, firmware version, etc. Press the space bar on this screen to output the controller information as a text file.
Once you have output the text file, you can save it in a location of your choice.
At the time of writing, the FireCuda 540 SSD 2TB is available on Amazon.co.jp for 47,836 yen including tax.
Amazon.co.jp: Seagate FireCuda 540 M.2 Internal SSD [3 Year Data Recovery Included] 2TB PCIe Gen5 x4 Read Speed 10,000MB/s 5 Year Warranty Authorized Dealer ZP2000GM3A004: Computers & Peripherals

Related Posts:


