Google's smart camera 'Google Nest Cam' setup, after installing the smartphone app, you're ready to go
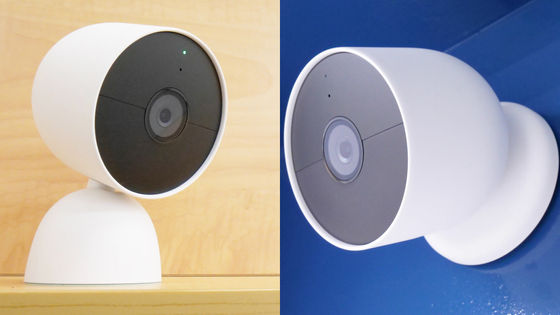
Google's security camera 'Google Nest Cam (battery type) ' that appeared on August 26, 2021 has a built-in battery and is waterproof and dustproof, so it can be installed both indoors and outdoors, and it is also automatic One of our strengths is that we can view recorded images from Google's smart homes via the Internet, and use smartphones to respond to visitors at the front door from wherever we are. So I set it up to use Nest Cam.
Google Nest Cam (Battery) -Google Store
This time, we will actually set up 'Google Nest Cam (battery-powered)' using the smartphone app. The following articles review the look of Nest Cam and the useful accessories for installing Nest Cam indoors and outdoors.
I also looked at Google's smart camera 'Google Nest Cam' photo review that does not require a power supply and can be installed anywhere, a dustproof and splashproof cable that is OK outdoors & a dedicated stand that is convenient indoors --GIGAZINE
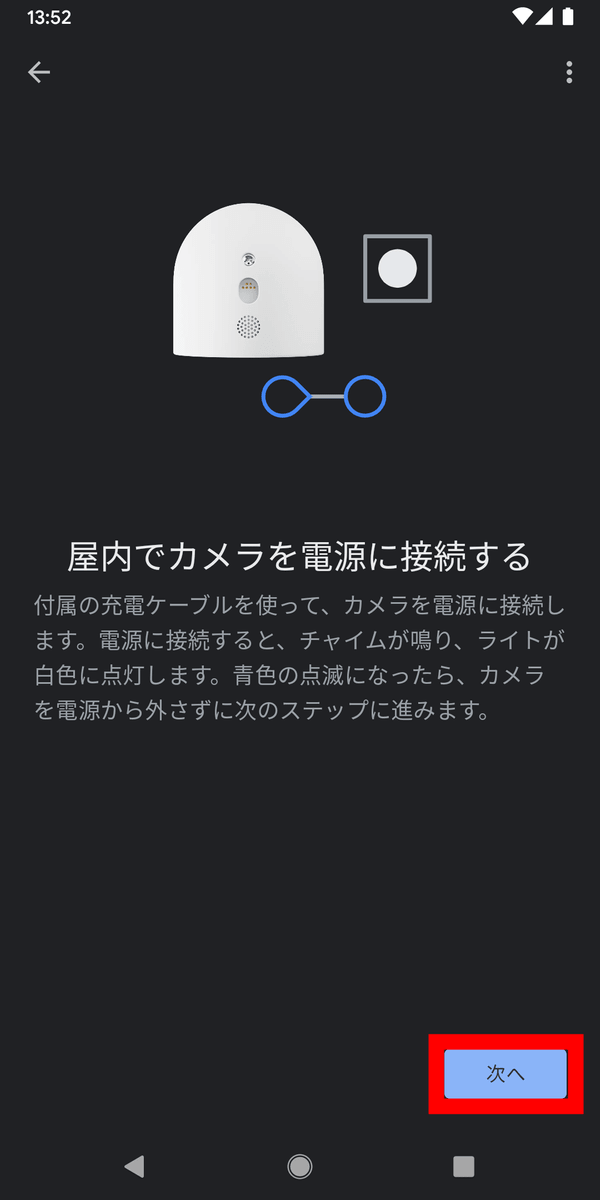
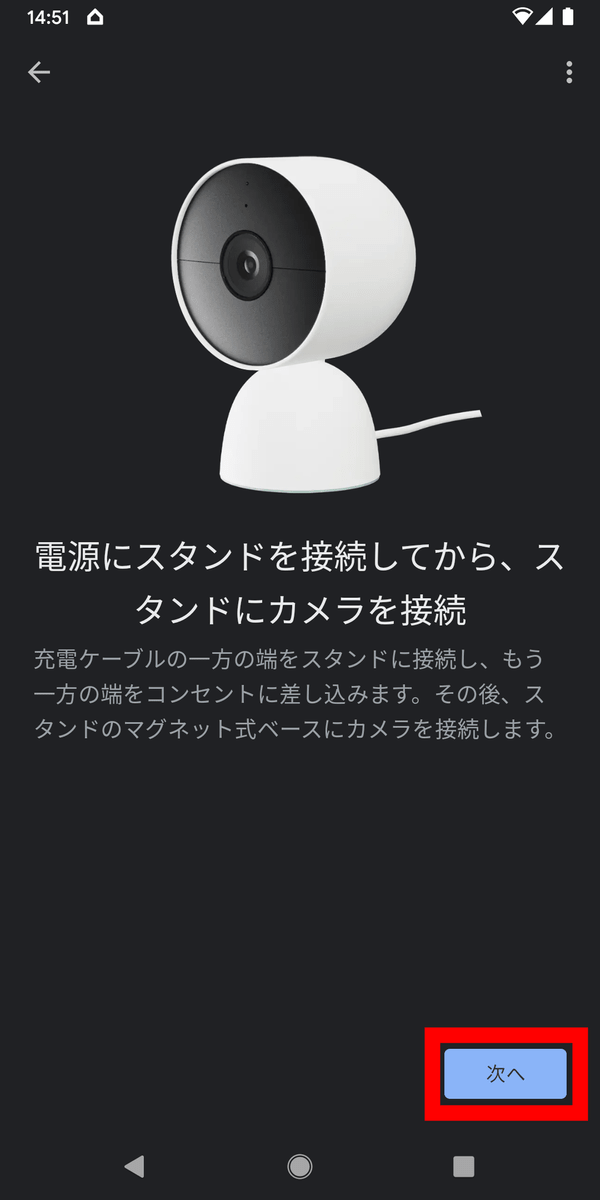
First, insert the charging cable into the main unit according to the instructions in the quick start guide.
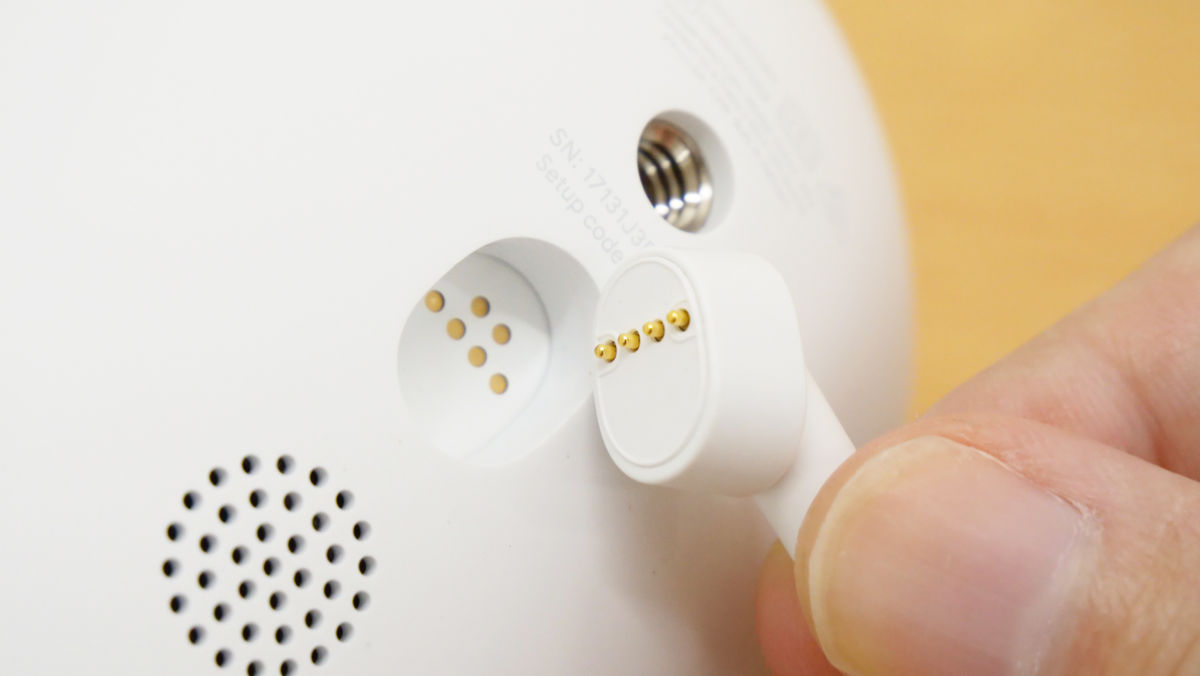
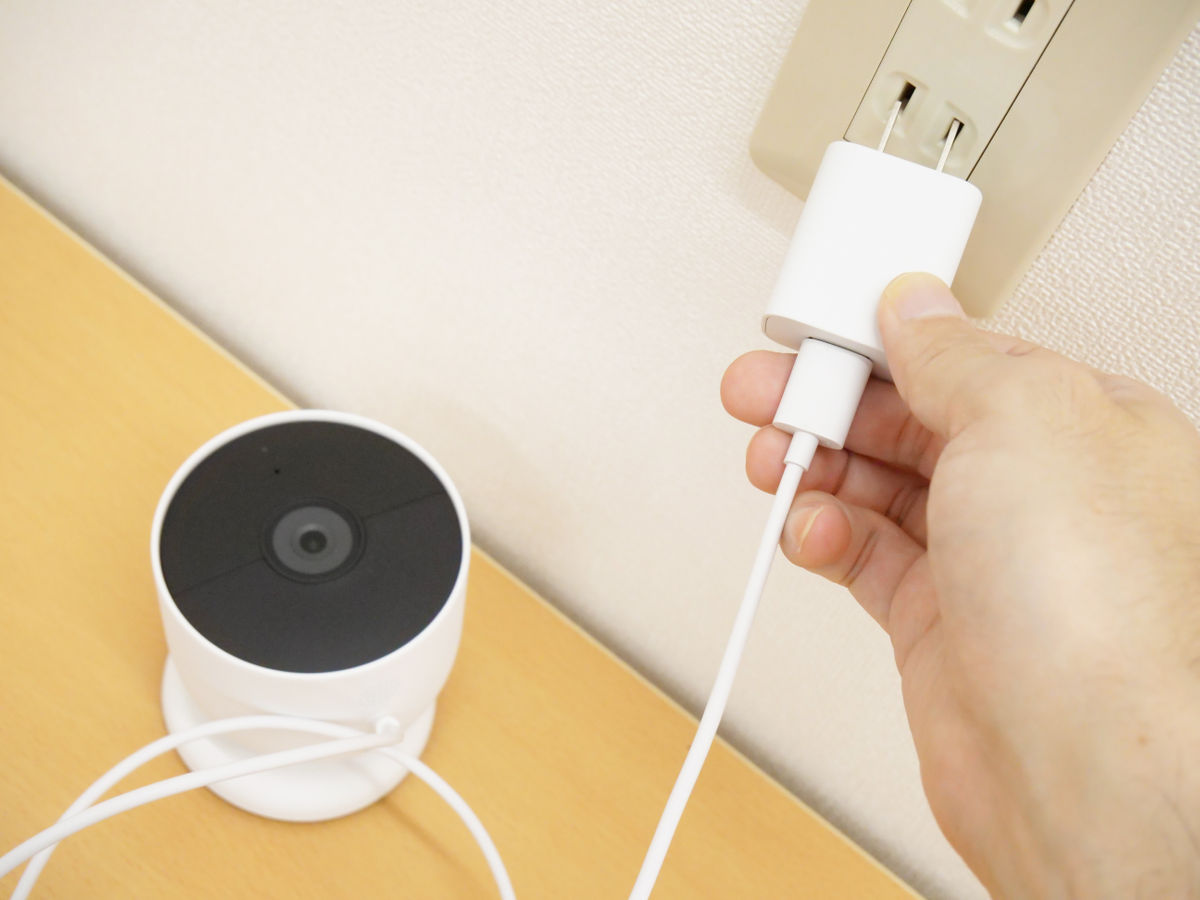
Then connect the other end of the cable to the power supply.
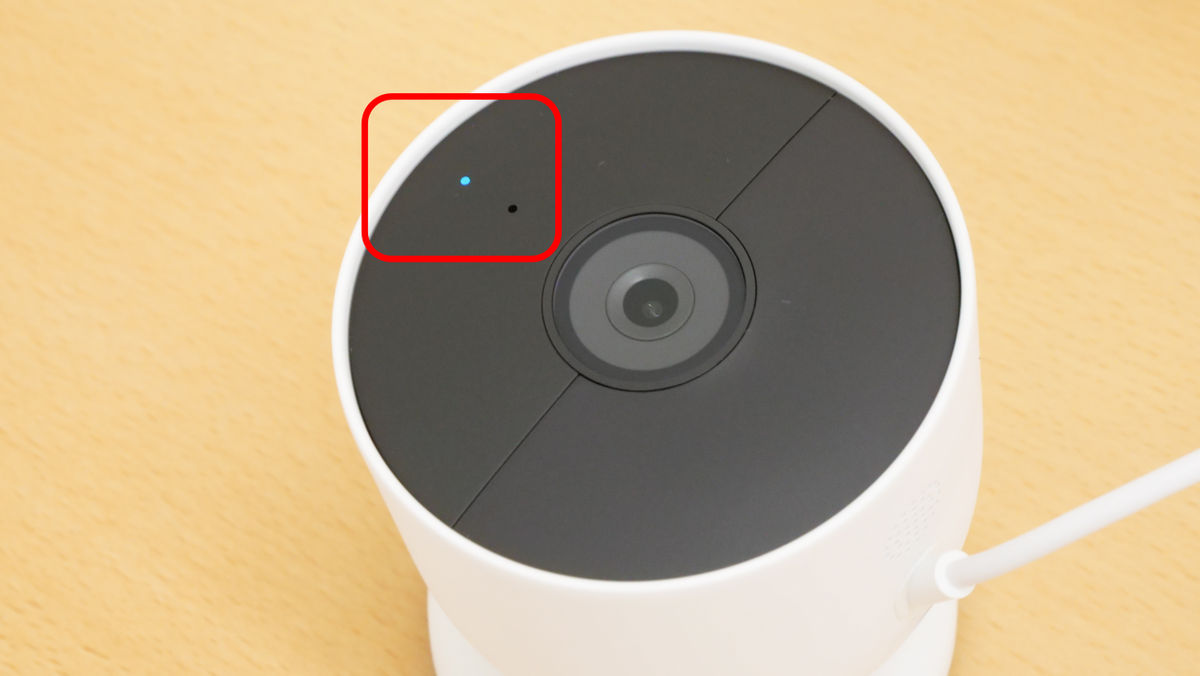
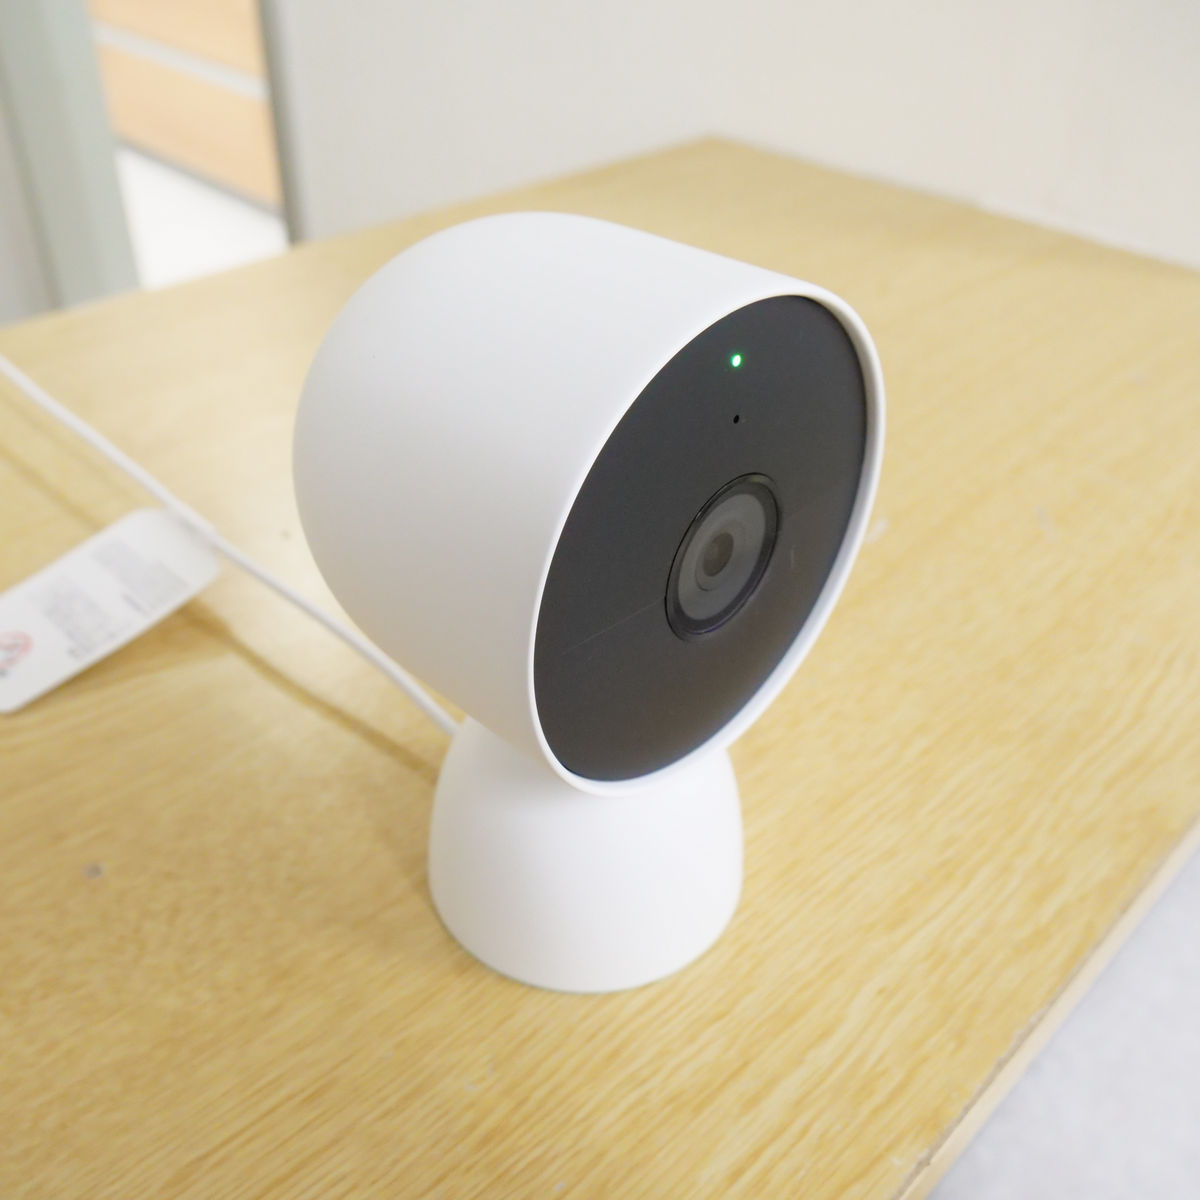
When you are ready, the status lamp on the main unit will light up as shown below.
Next, we will move on to the operation on the smartphone. First, you need to install the Google Home app.
Google Home-Google Play app
https://play.google.com/store/apps/details?id=com.google.android.apps.chromecast.app
'Google Home' on the App Store
https://apps.apple.com/jp/app/google-home/id680819774
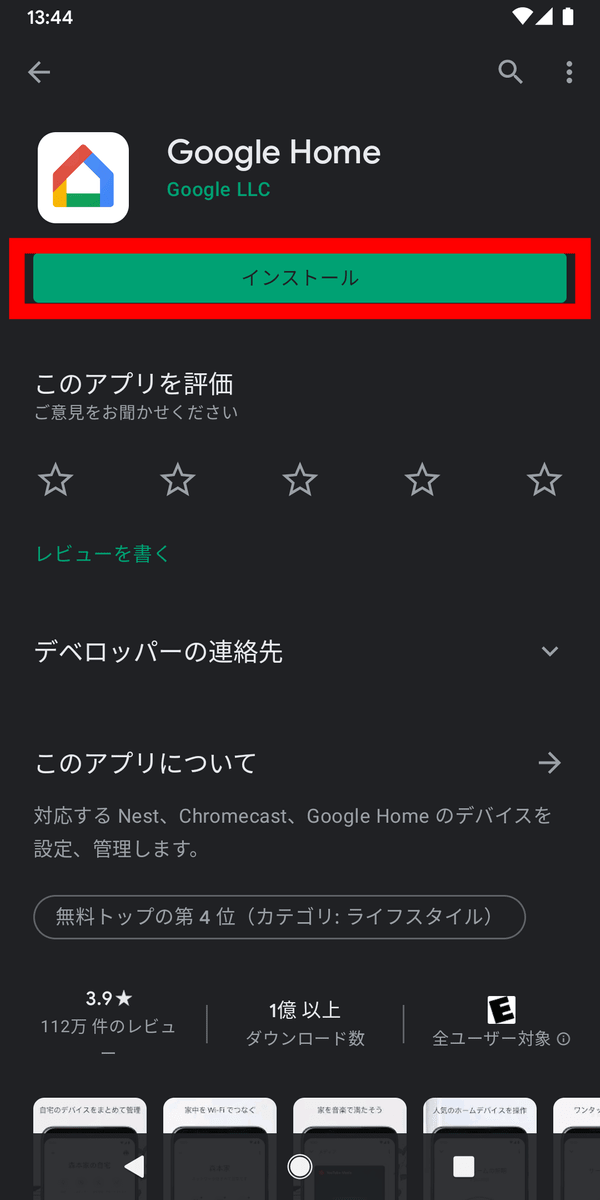
This time, I will use Pixel3a XL (Android 11). After accessing the above URL, tap 'Install'.
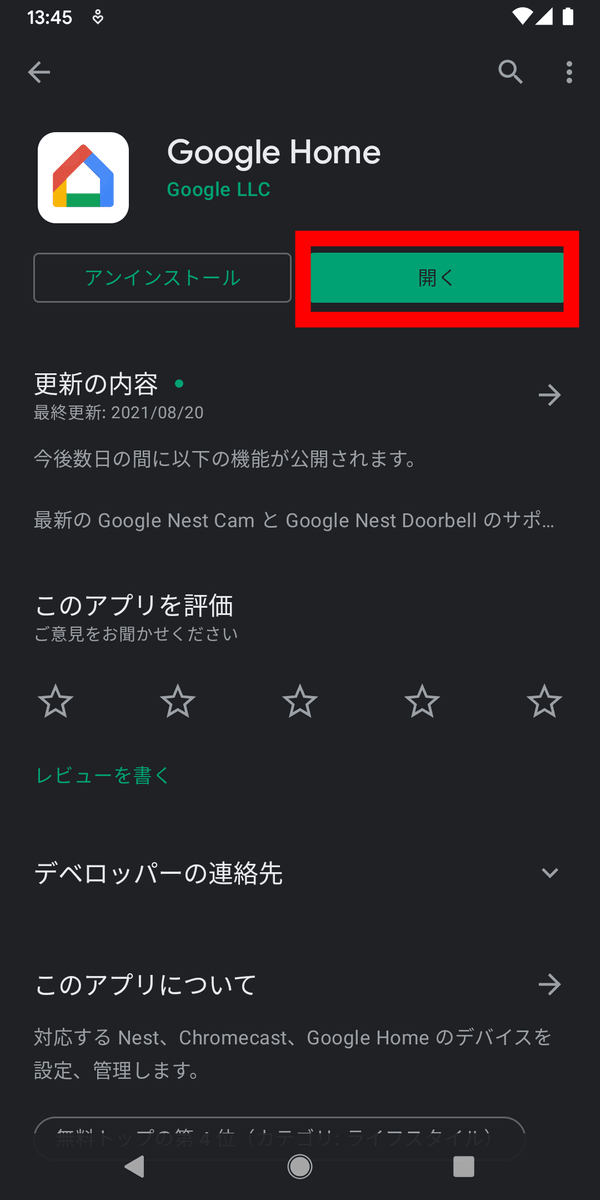
Tap 'Open' when the installation is complete.
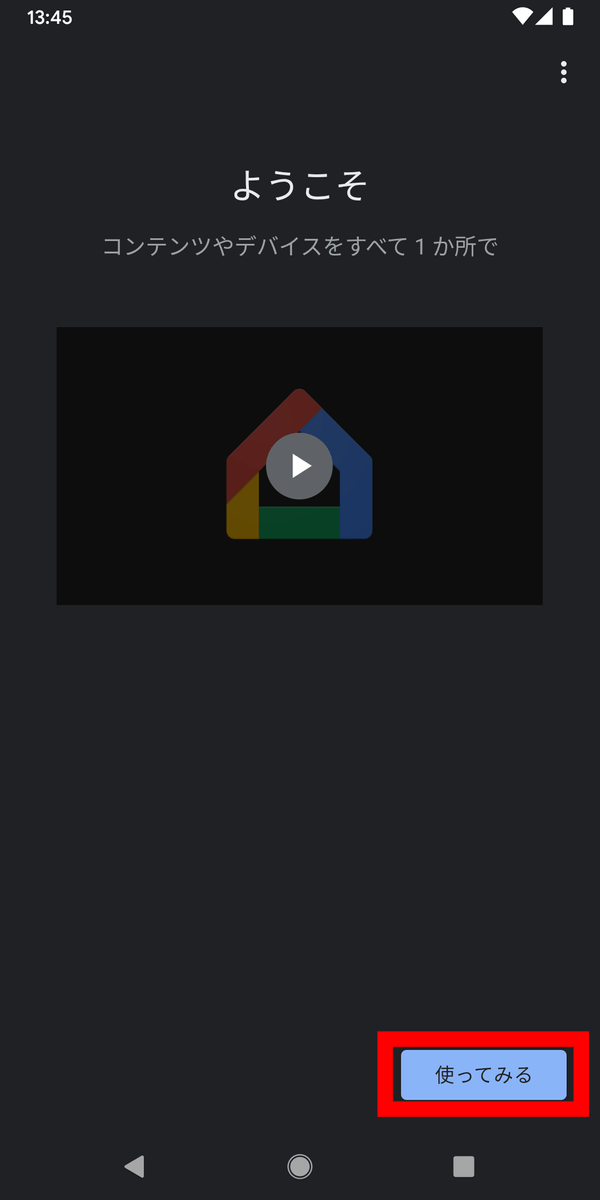
The app will start, so tap 'Try it'.
Then select the Google account you want to use.
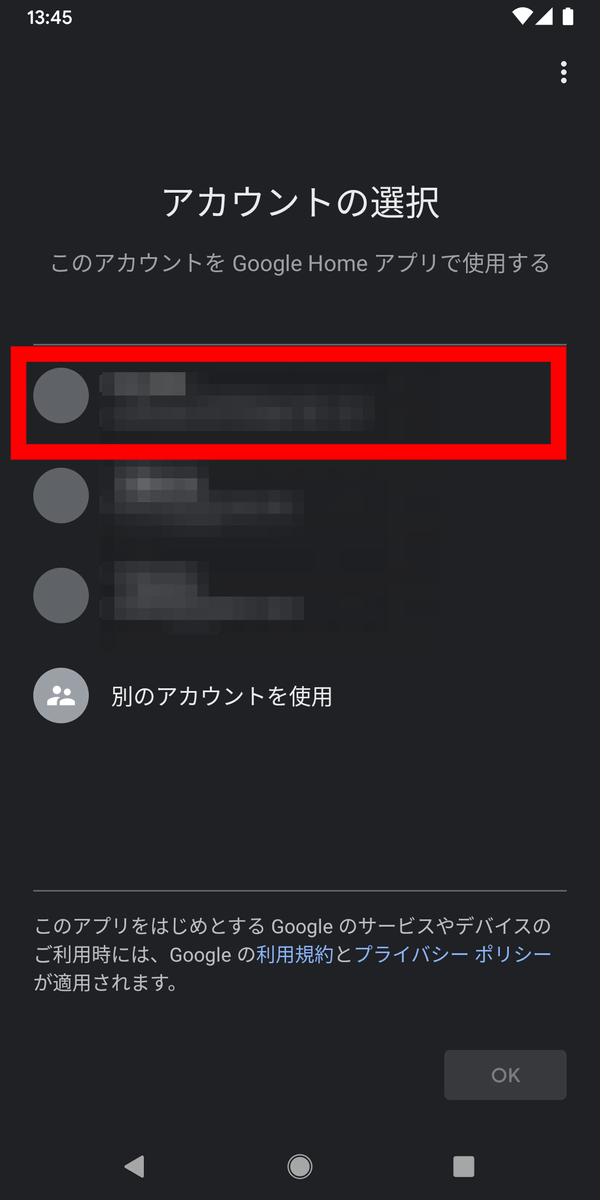
Tap 'Next'.
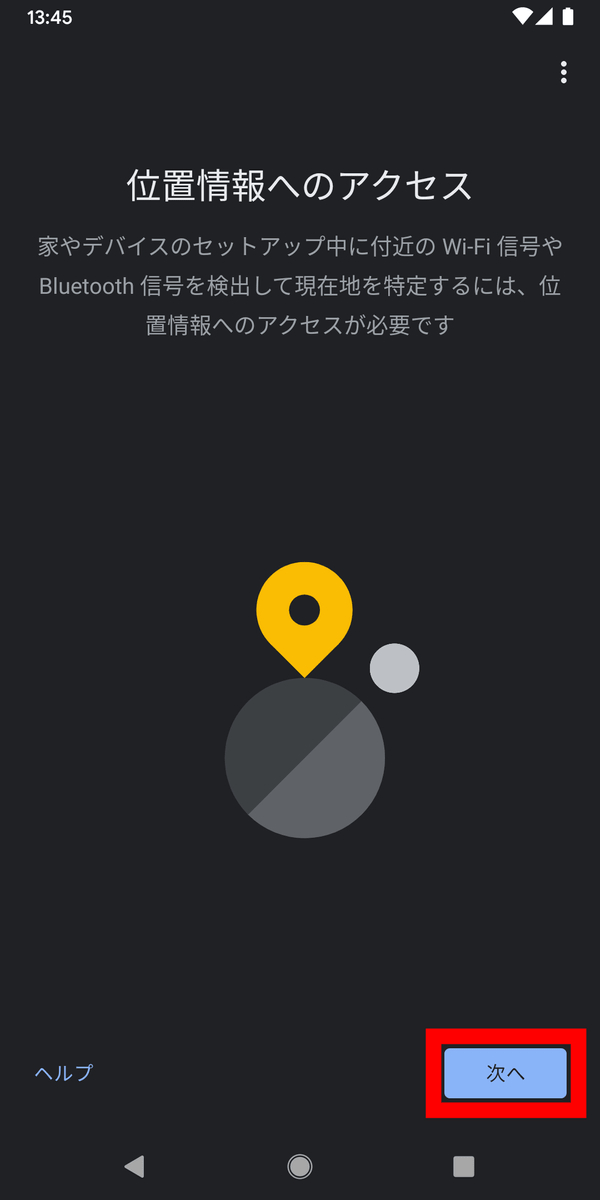
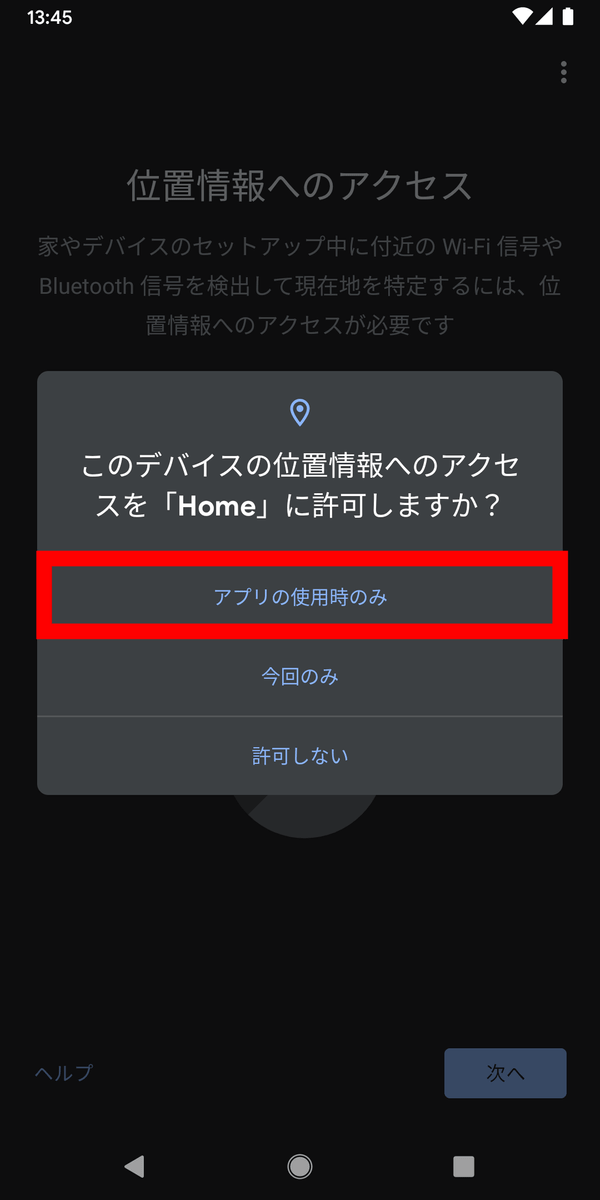
You will be asked for permission to use location information, so tap 'Only when using the app'.
Then, the following screen will appear, so tap 'Try it'.

Give your house a descriptive name and tap Next.

Enter the address and tap 'Next'.

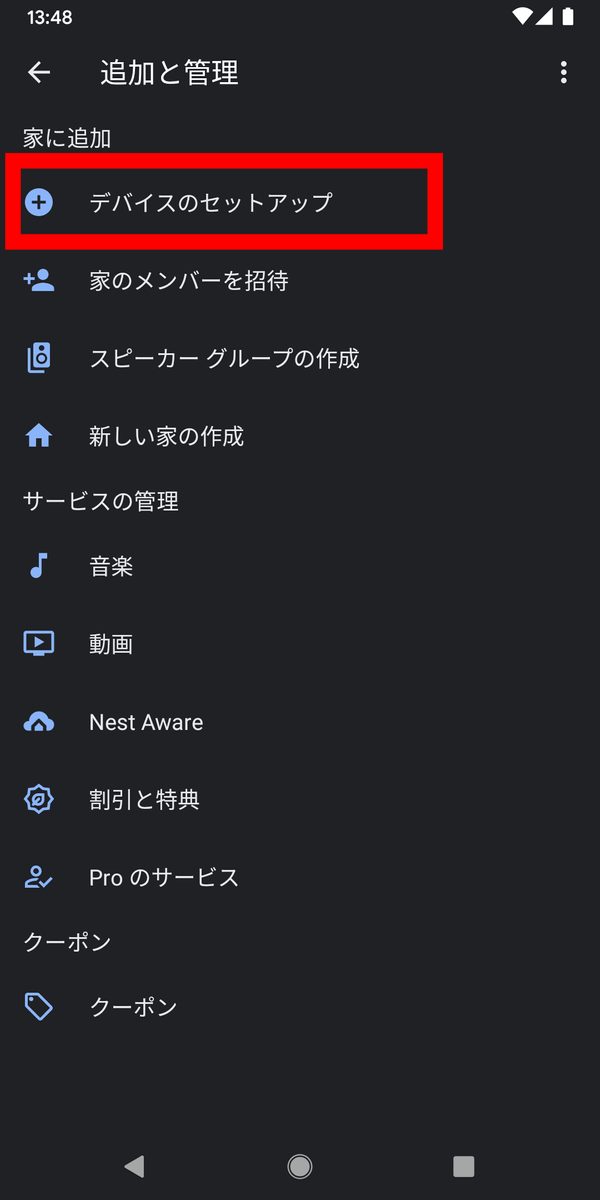
Now that we've created the house, it's time to add more devices. First, tap the '+' in the upper left.
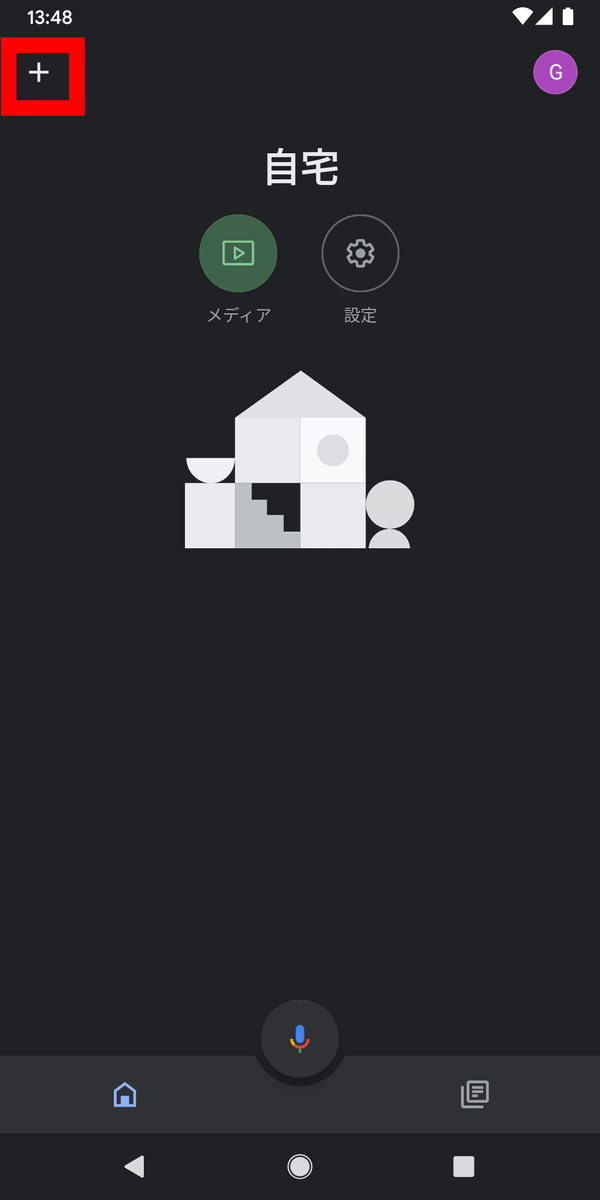
Tap 'Device Setup'.
Tap 'New device'.
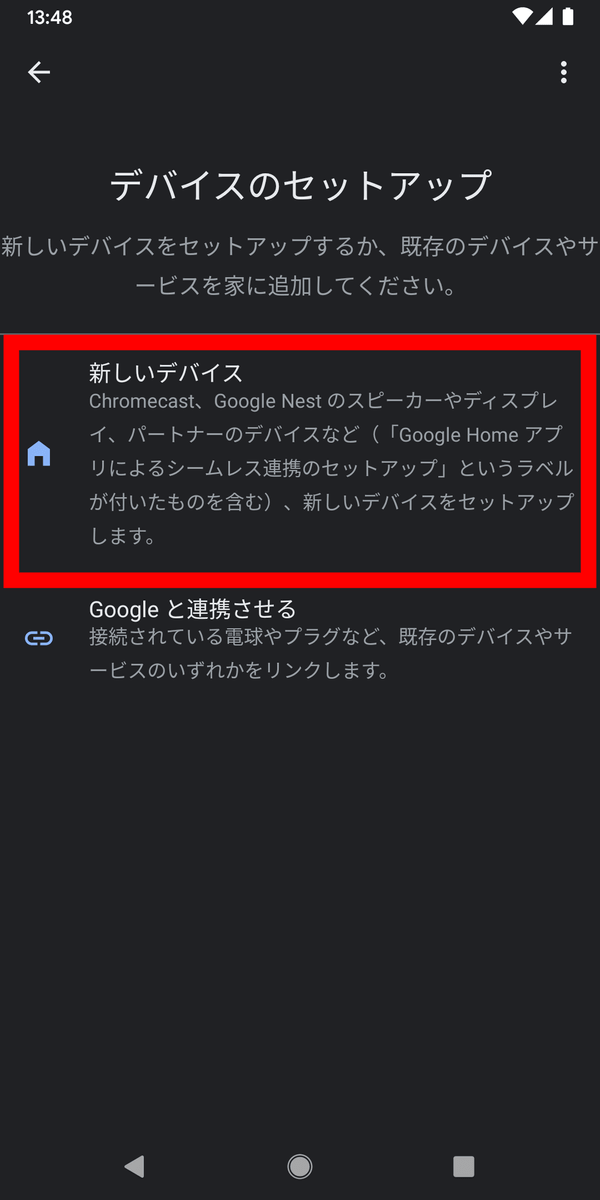
Select your home and tap Next.

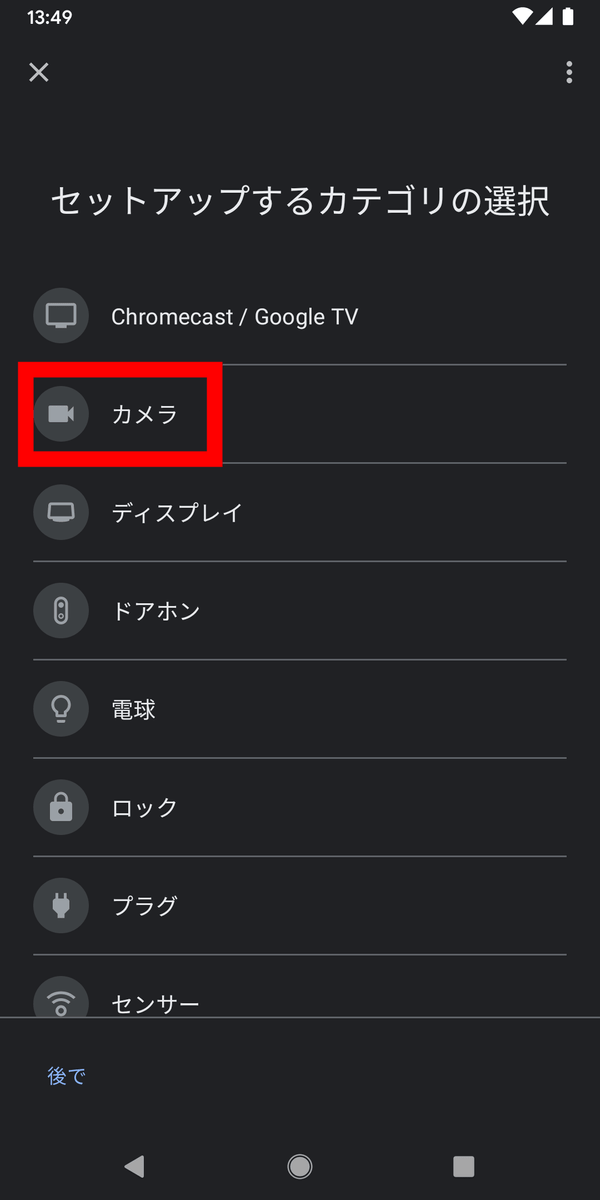
Tap 'Camera'.
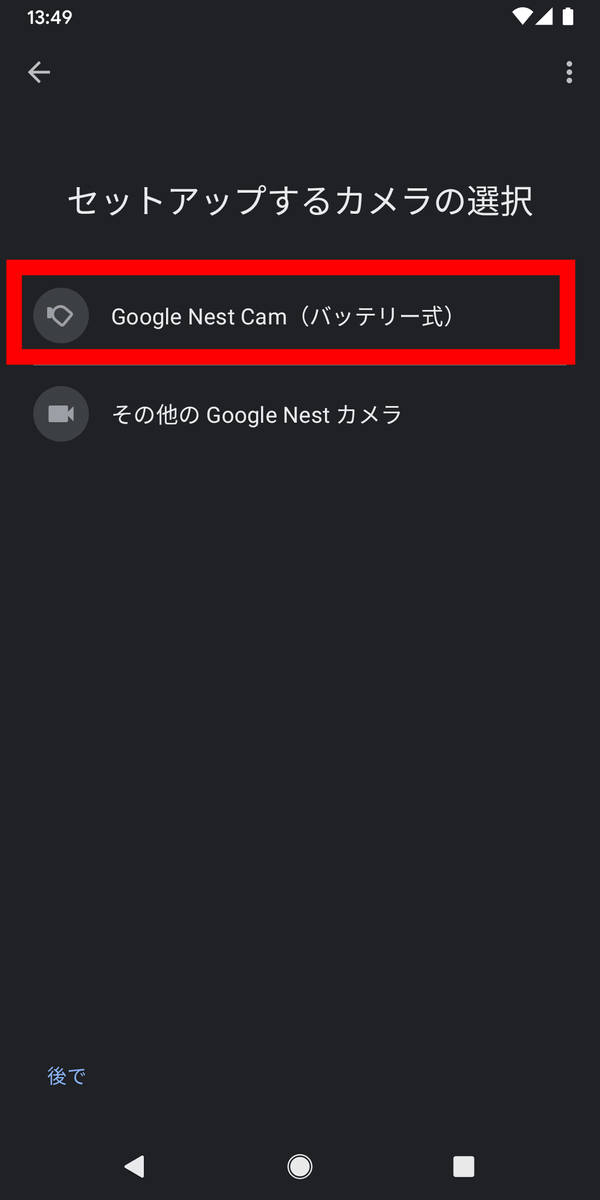
Select 'Google Nest Cam (battery-powered)'.
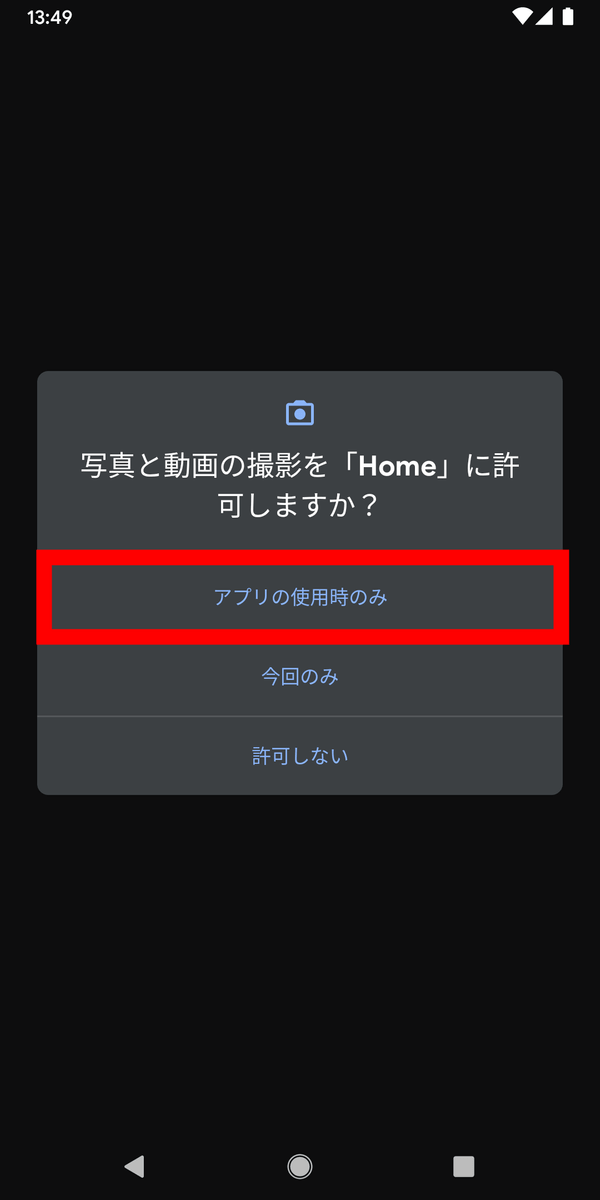
Then connect your smartphone to Nest Cam. When asked for permission to use the camera, tap 'Only when using the app'.
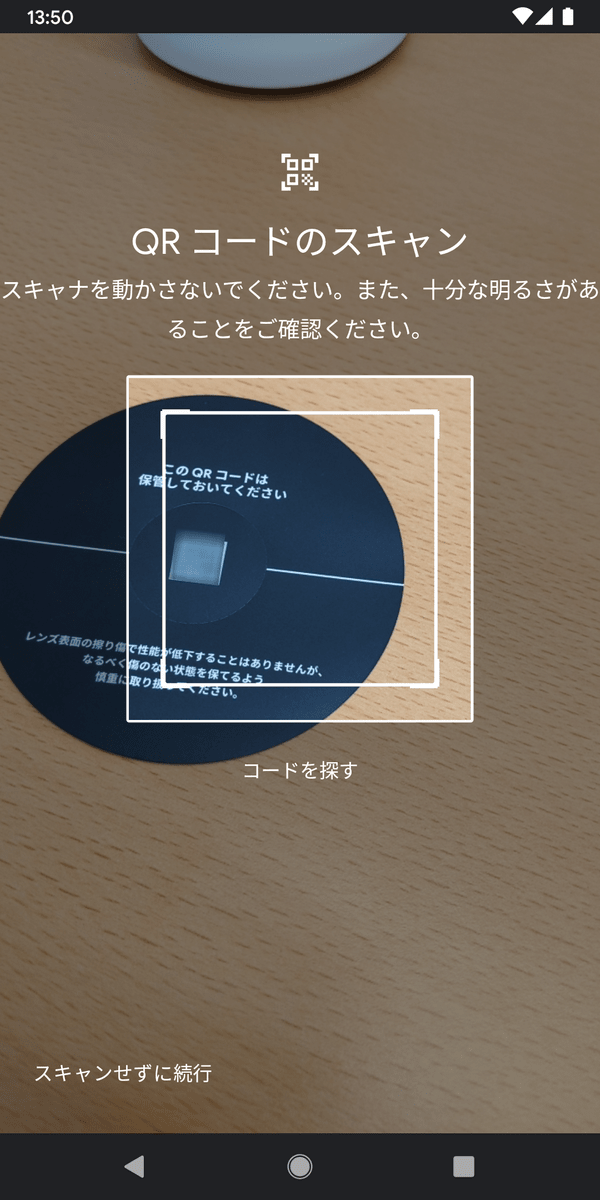
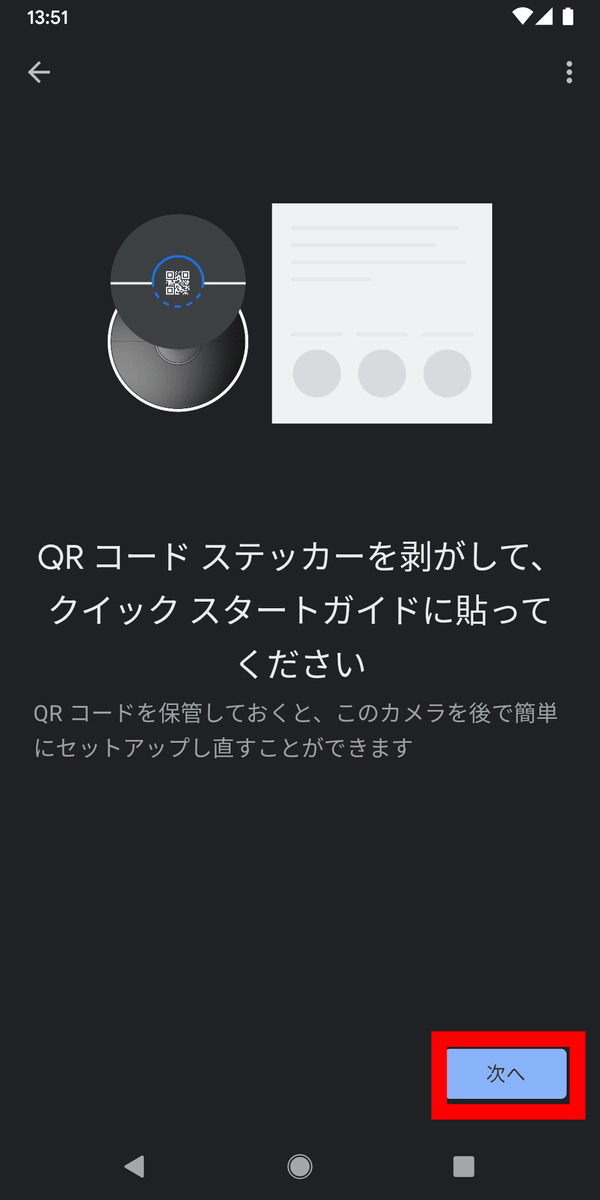
Scan the QR code printed on the Nest Cam protective sticker.
Tap 'Continue'.

Tap 'Next'.
Then tap 'Next'.

If you agree to provide data for functional improvement, tap 'Agree' on the right. If you do not agree, tap 'I do not agree' on the left. This time, I chose 'I don't agree'.

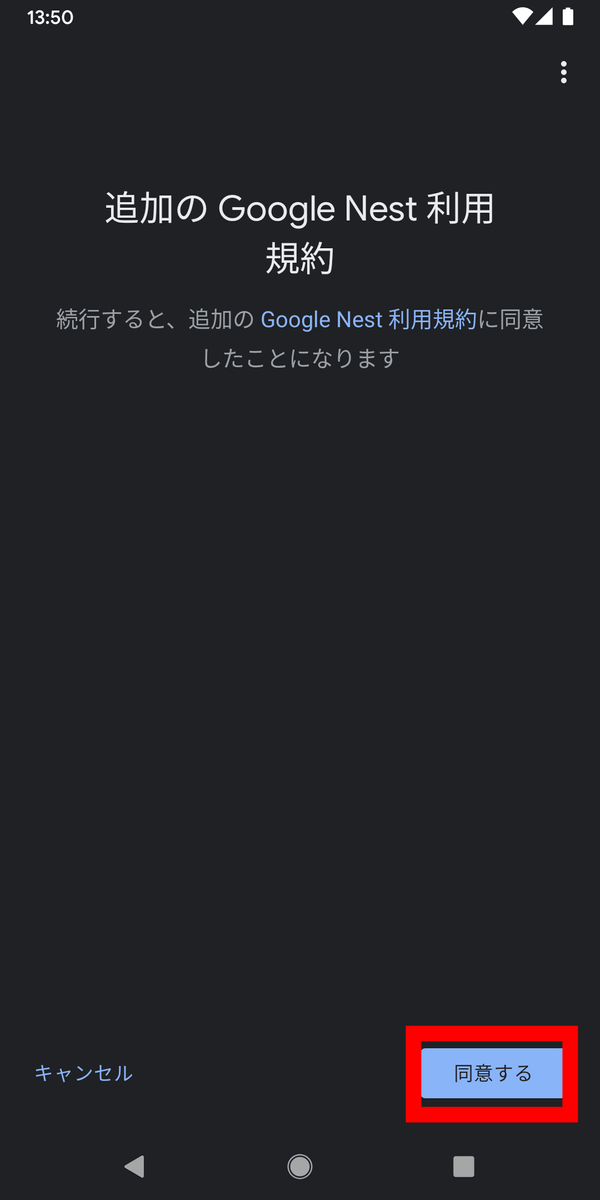
You will be asked to agree to the terms of use, so tap 'Agree'.
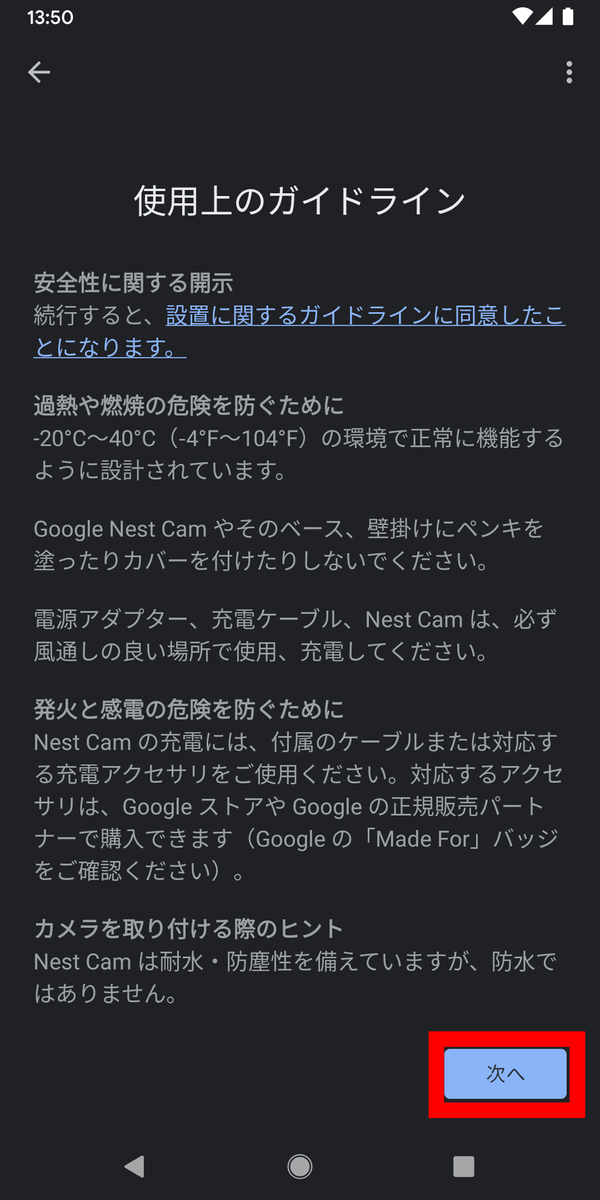
The QR code may be needed in the future, so please attach it to the quick start guide and keep it. Tap 'Next'.
I was instructed to connect the main unit to a power supply. Since it is already connected, tap 'Next'.
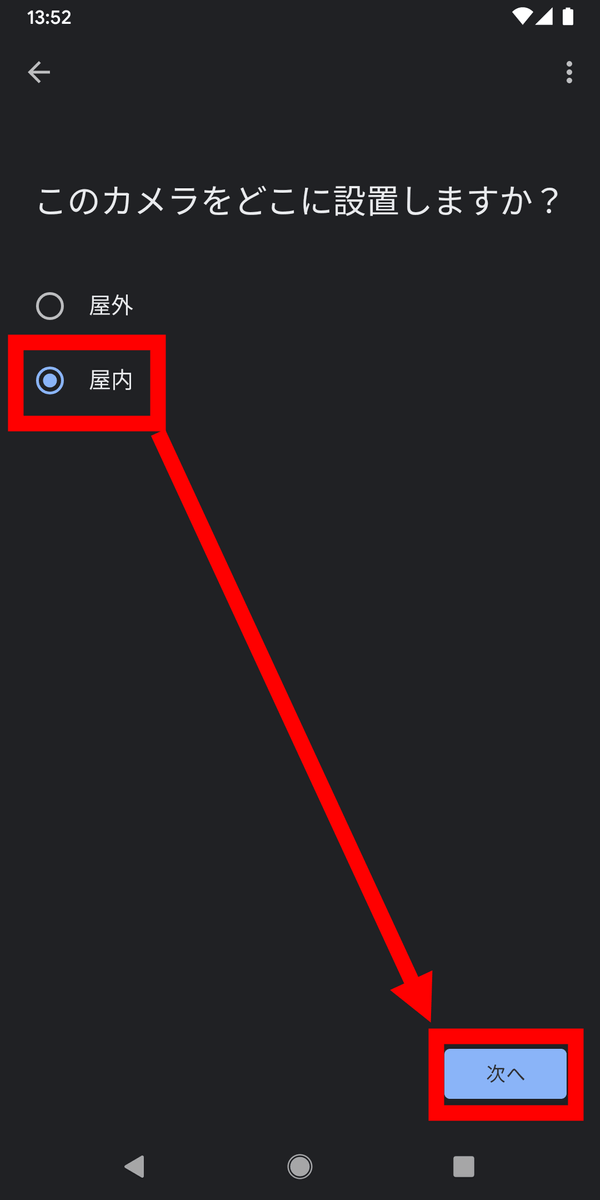
I was asked where to install it. This time, I want to install it indoors for the time being, so select 'Indoor' and tap 'Next'.
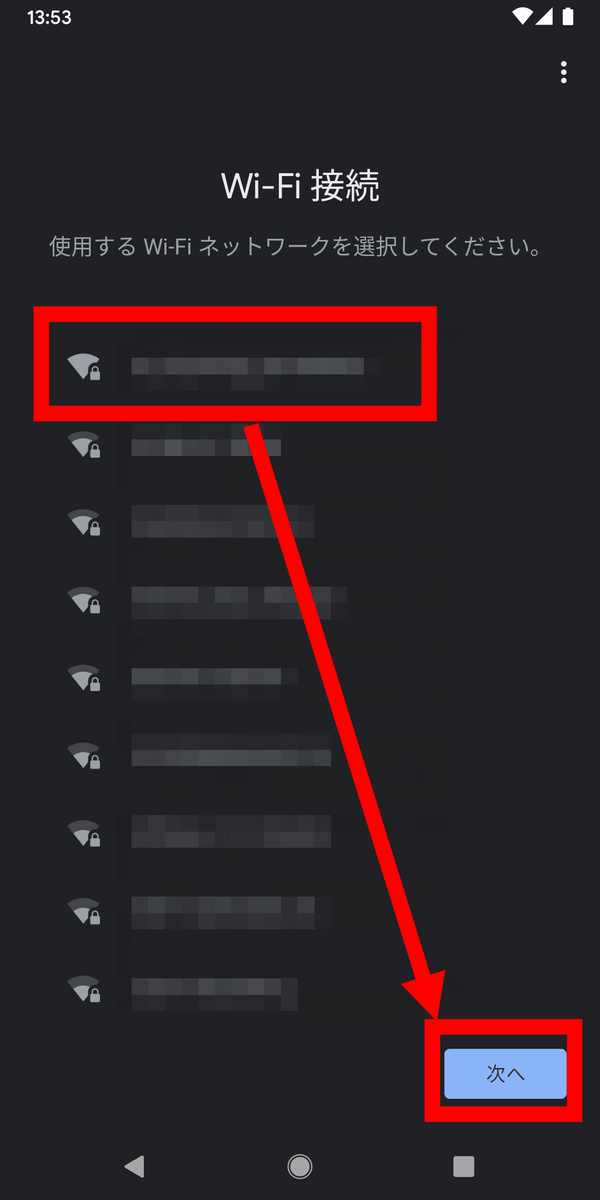
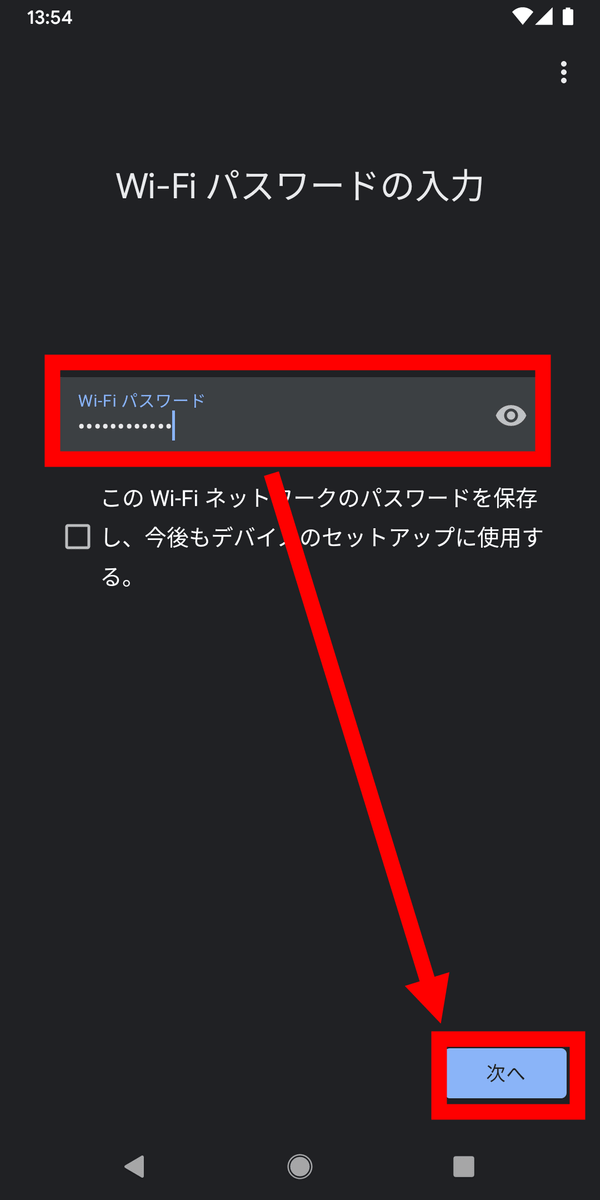
Select the Wi-Fi you want to use and tap Next.
Enter your Wi-Fi password and tap 'Next'.
I was asked where the installation location was.
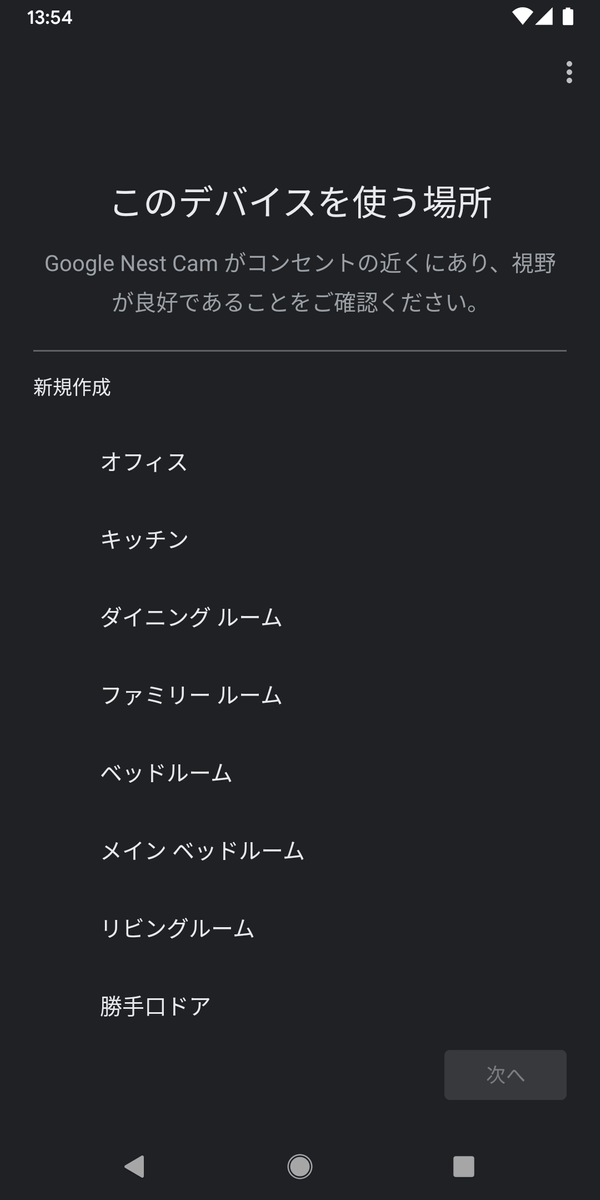
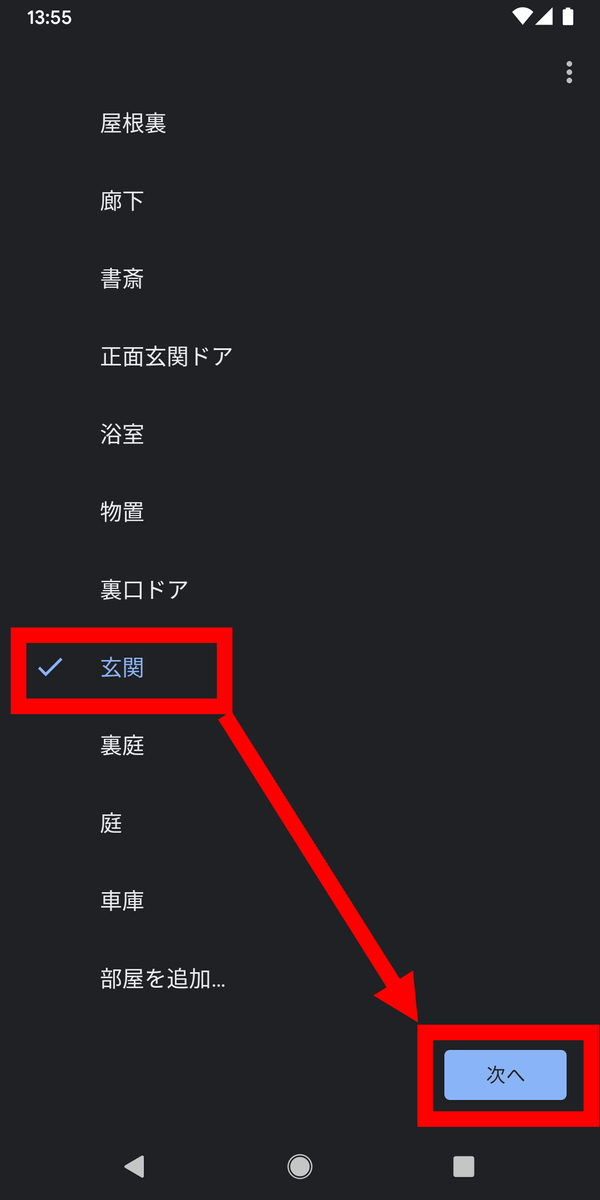
Scroll down, select 'Entrance' and tap 'Next'.
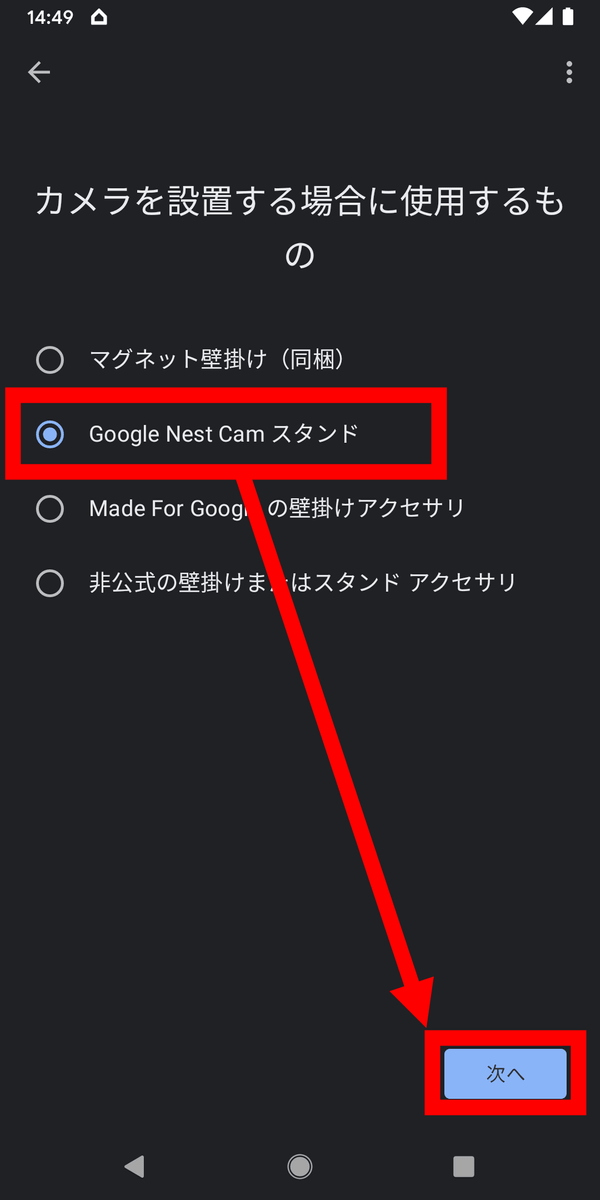
When asked what to use for the installation, I chose 'Google Nest Cam Stand' and tapped 'Next'.
I was instructed to connect with a stand, so I will move away from my smartphone and install Nest Cam.
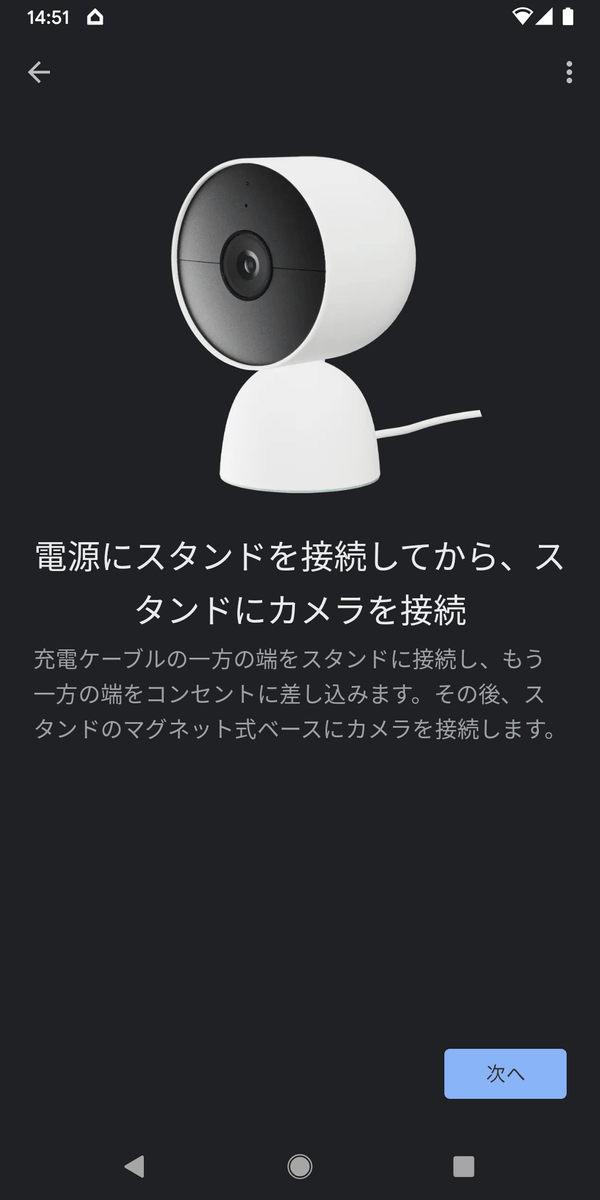
First, insert the charging cable into the stand.

Once you've connected the other end of the cable to the power supply, place the Nest Cam on the stand and you're ready to go.
Return to your smartphone and tap 'Next'.
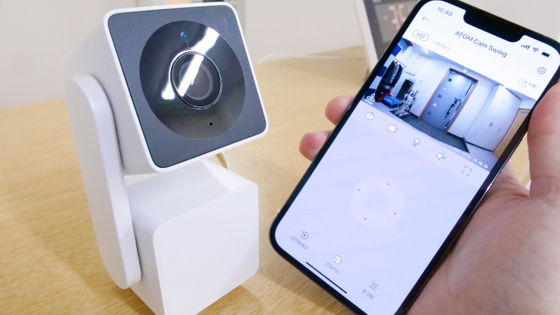
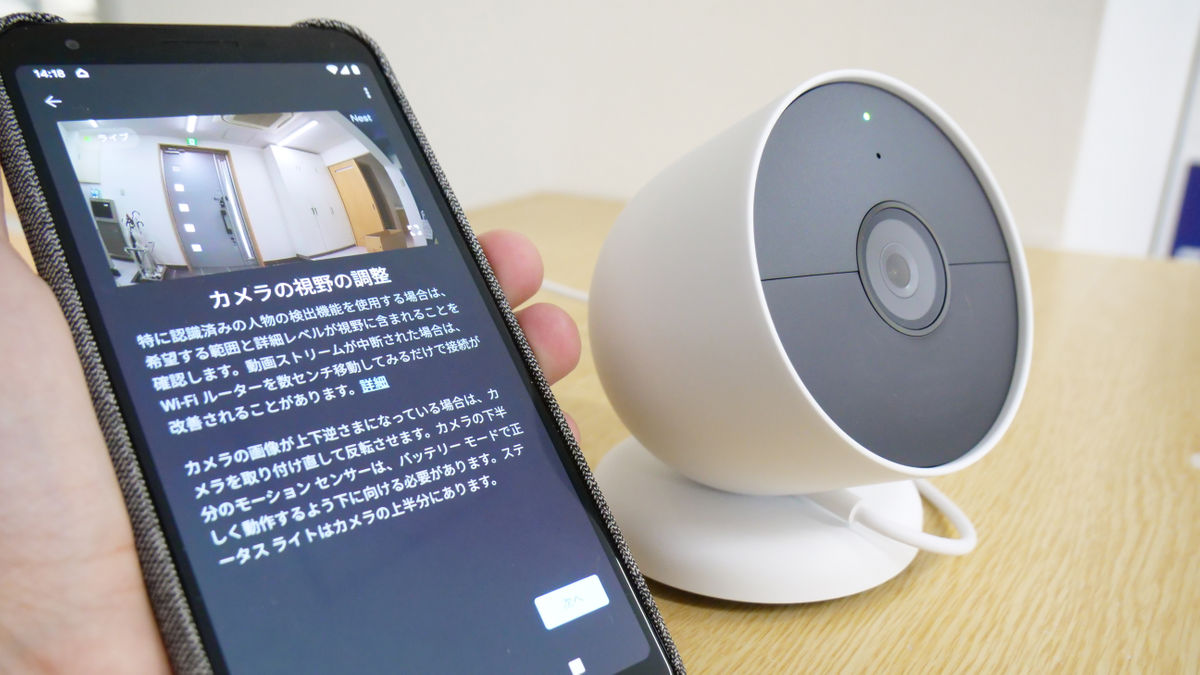
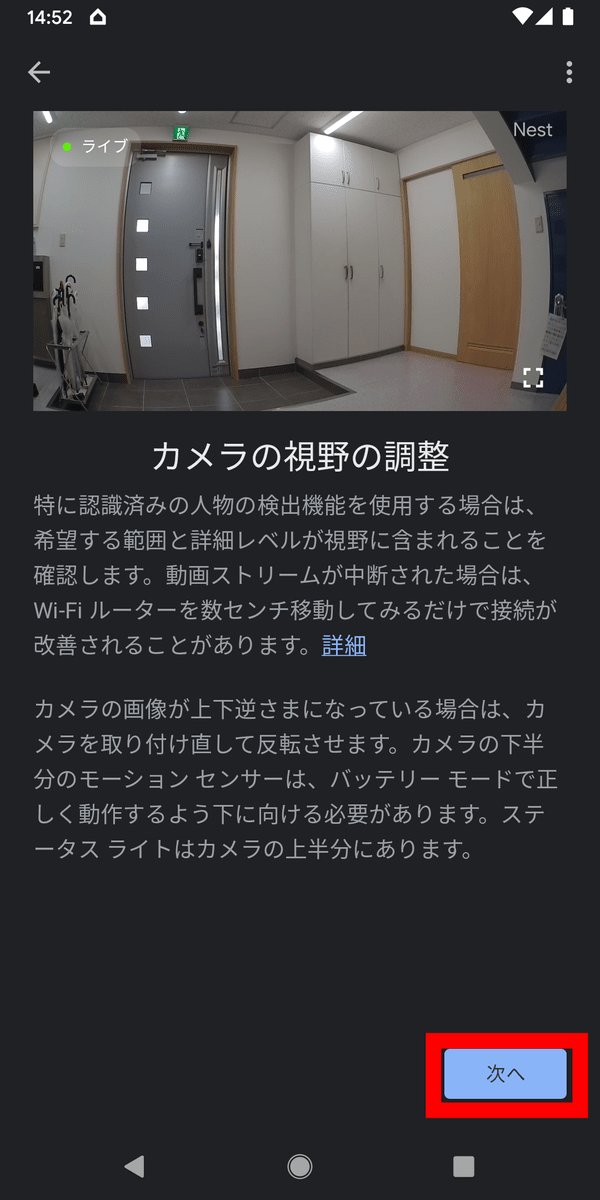
The field of view seen from the camera is displayed, so if there is no problem, tap 'Next'.
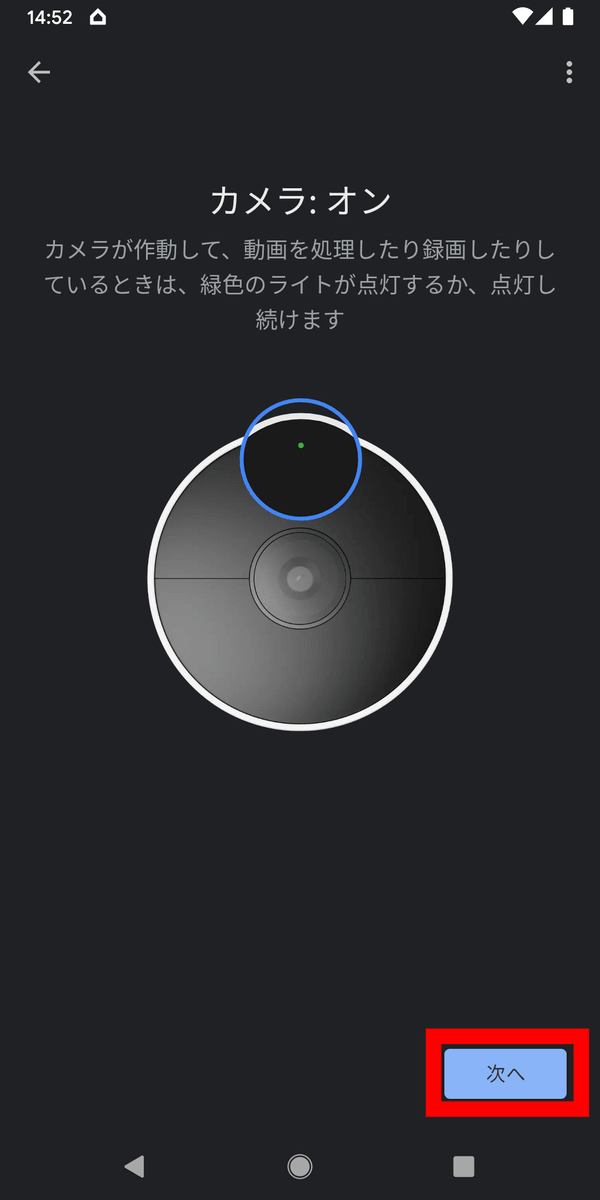
A description of the camera status light is displayed. When the camera is operating or processing a movie, the status lamp lights up in green. After reading, tap 'Next'.
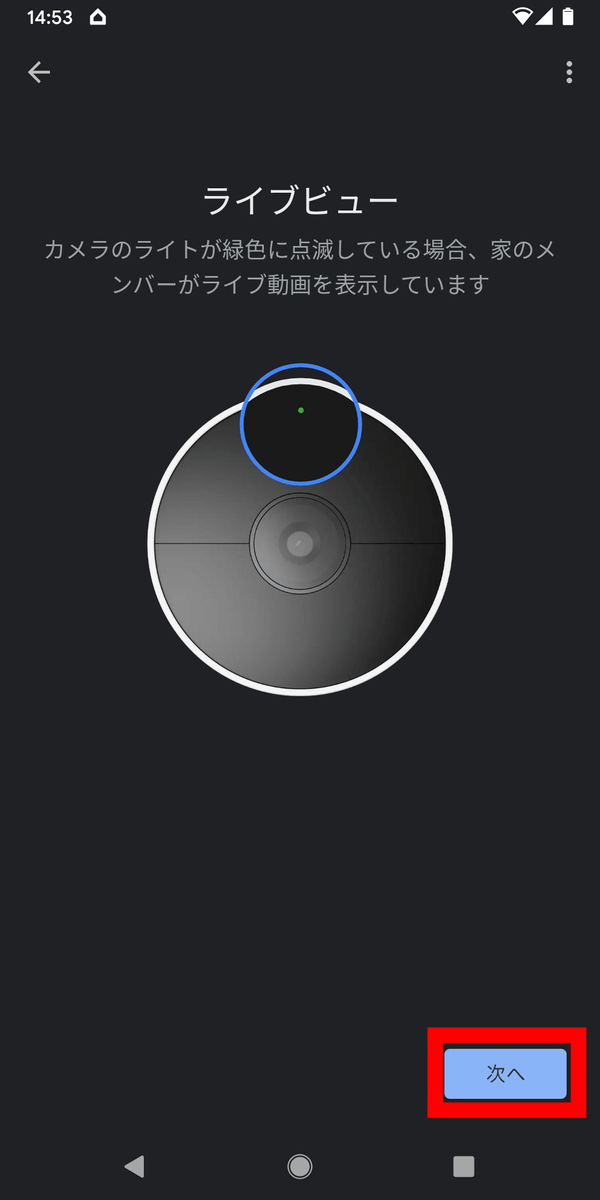
If someone is watching the live video through the camera, the status lamp will blink green. Tap 'Next'.
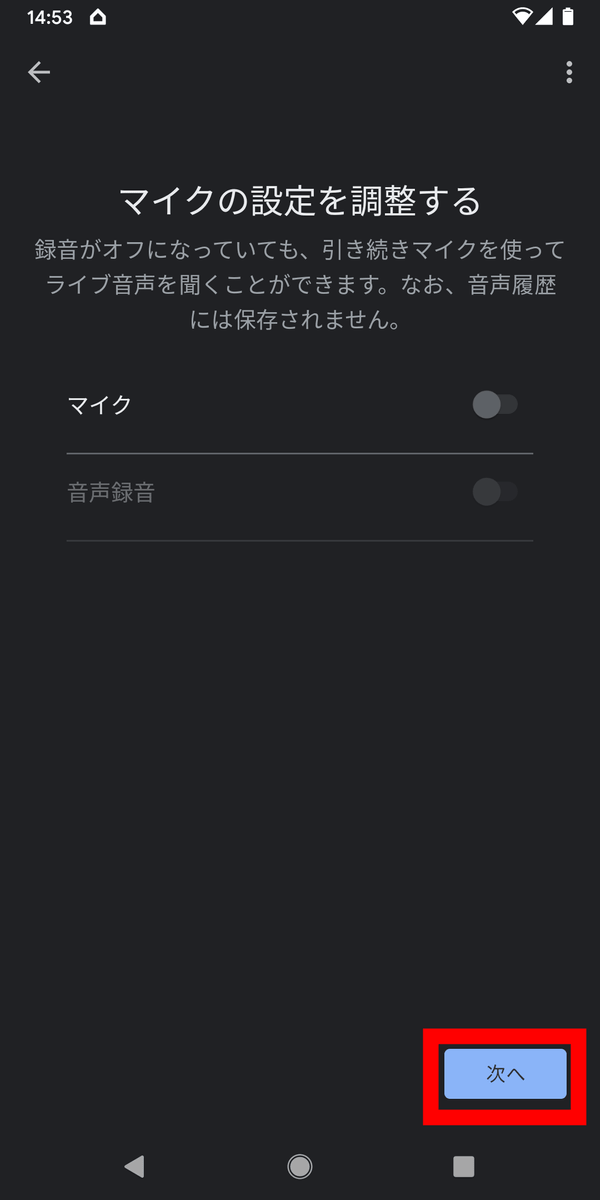
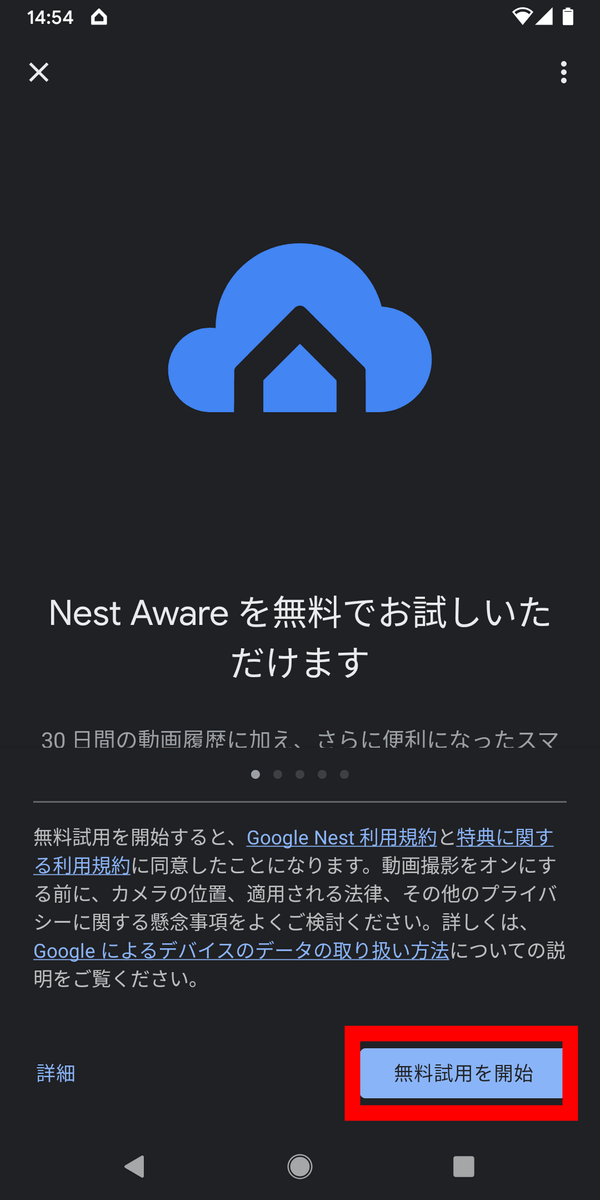
You will be asked if you want to enable recording, so enable it and tap Next.

You will be asked if you want to enable recording, so leave it as it is this time and tap 'Next'. You can change this recording and recording settings later.
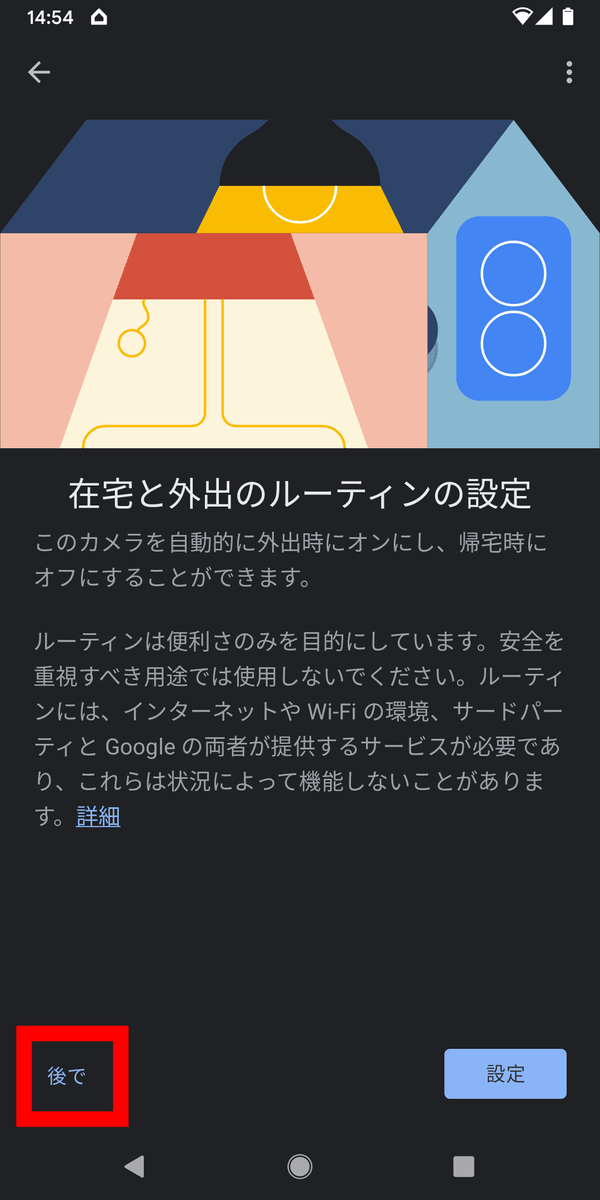
Nest Cam has a feature called 'routines' that allows users to turn the action on while they're on the go and turn it off when they get home. I will not use it this time, so tap 'Later'.
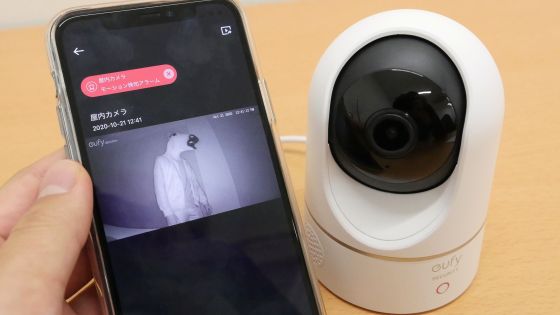
Nest Cam has the ability to not only check live footage, but also detect and record motion, but by default the recording disappears after 3 hours. Therefore, in order to use it to confirm 'Who was it like someone who came in front of the house last night?', Go to
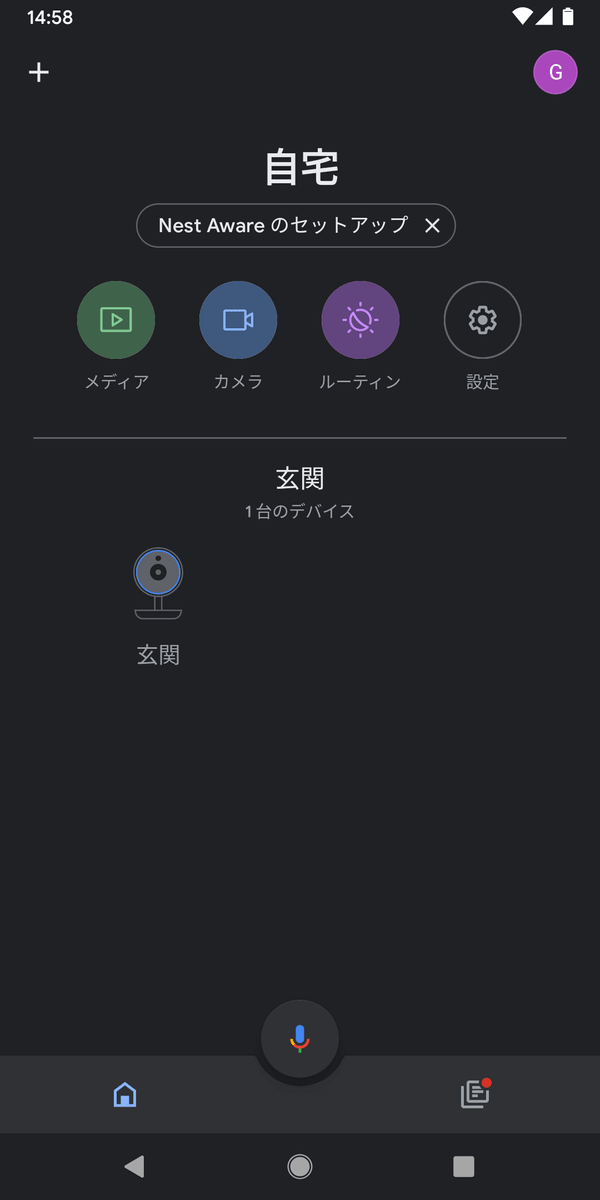
This completes all setup. Although there are many steps, you can set it just by answering the question, and if you need to operate the device, an explanation with animation is also displayed, so you can proceed with preparations quickly without getting lost or making a mistake. rice field.
In the next article, we'll review what it's like to actually use Nest Cam to identify and serve visitors.

Related Posts: