'Walling' is a thought organization tool that allows you to easily write down ideas when you come up with them and easily summarize them later.
Even if you come up with a good idea, when you try to use it later, you have already forgotten it, and you often get 'I feel like I came up with a good idea, but what was it ...?' .. However, on the contrary, if you write down all the ideas, it will be difficult to organize them, but a web service called 'Walling' is useful there. With Walling, you can easily organize it later just by writing down the ideas that came up, so I tried to see what you can actually use.
Walling --Let your ideas connect
I will open the Walling site immediately. Click 'Start walling, it's free'.

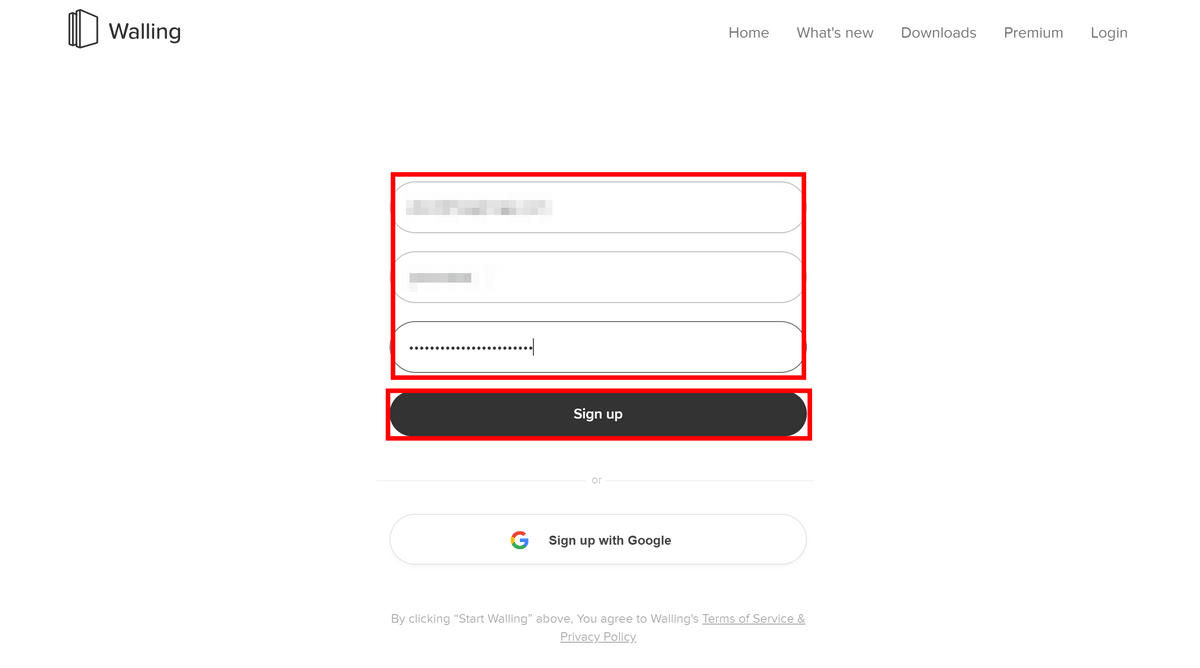
The account creation screen is displayed. It seems that you can log in with your Google account, but this time enter your email address, name and password and click 'Sign up'.
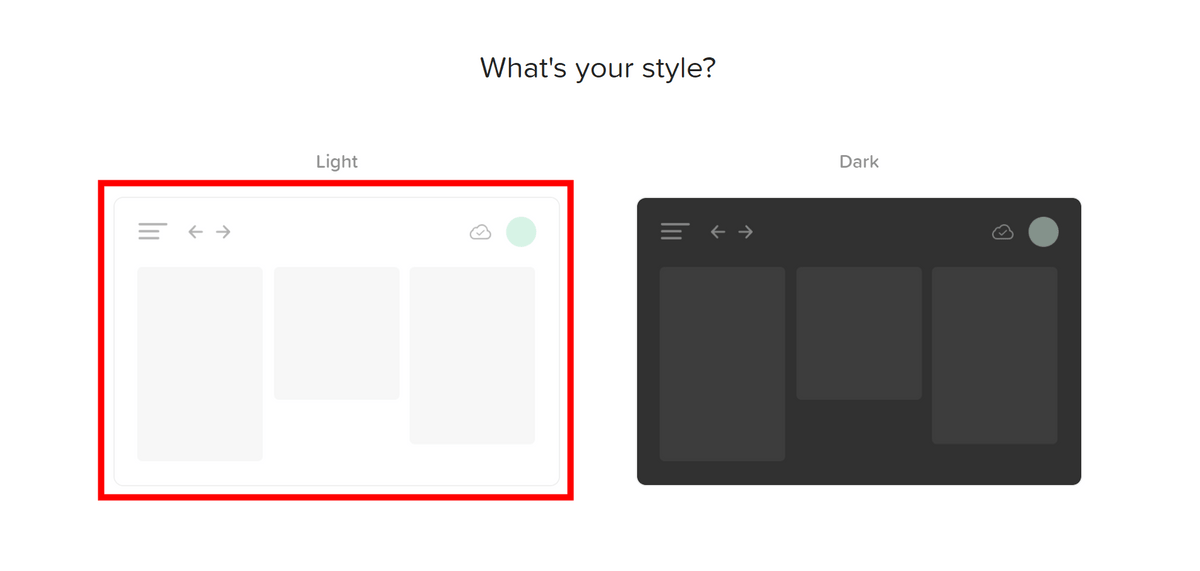
You can choose a light theme or a dark theme. This time, select the light theme.
In addition to the web version, Walling has macOS version, Windows version,

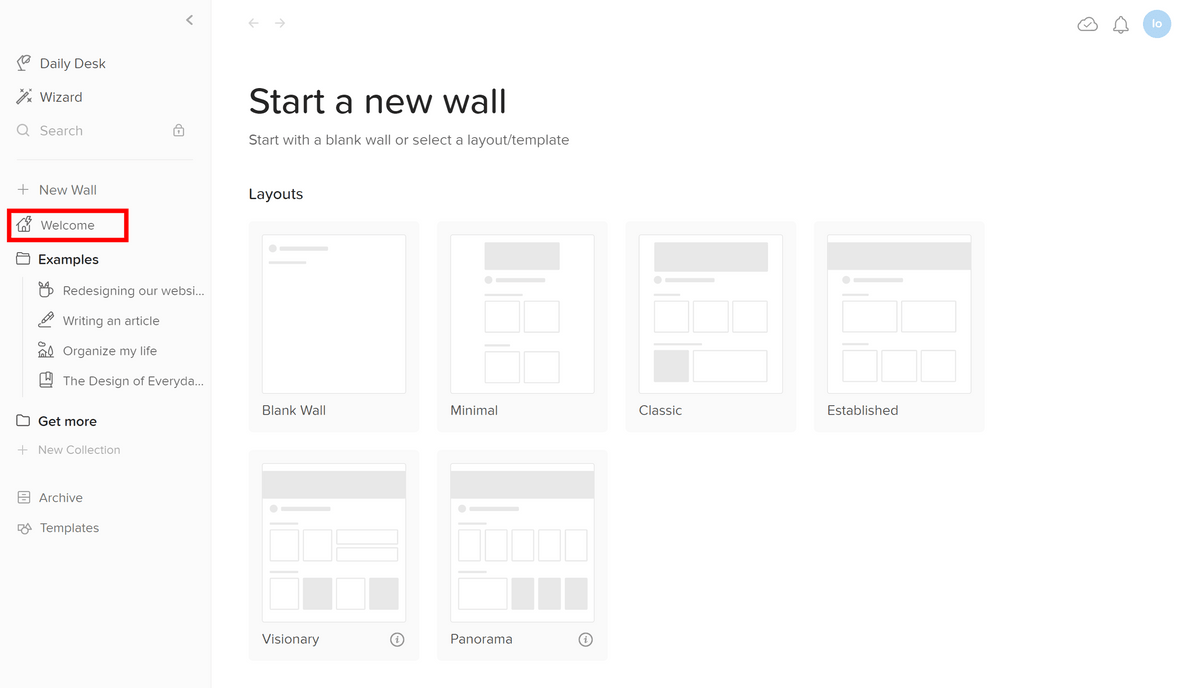
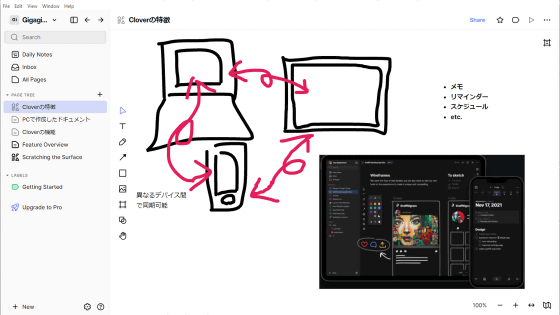
The app screen is displayed. At first, it is the wall creation screen, but first, to know what kind of application it is, click 'Welcome' from the left column and look at the welcome wall.
The wall screen looks like this. Click the plus button at the bottom right ...

One card has been added. This card is called 'Brick'.

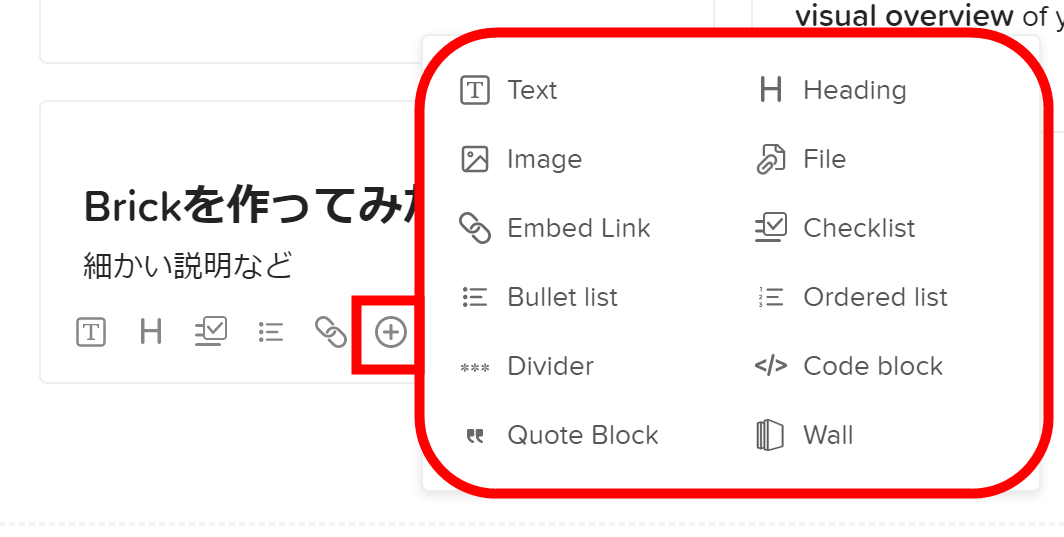
The newly created Brick has a title and text section. You can also fill in images, files, links, checklists, lists, ordered lists, horizontal lines, code blocks, citation blocks, and links to Walls by clicking the plus button at the bottom of Brick. Commonly used texts and titles, checklists, lists, and links are also displayed to the left of the plus button, making it easier to add.
Brick can be easily repositioned by dragging and dropping.

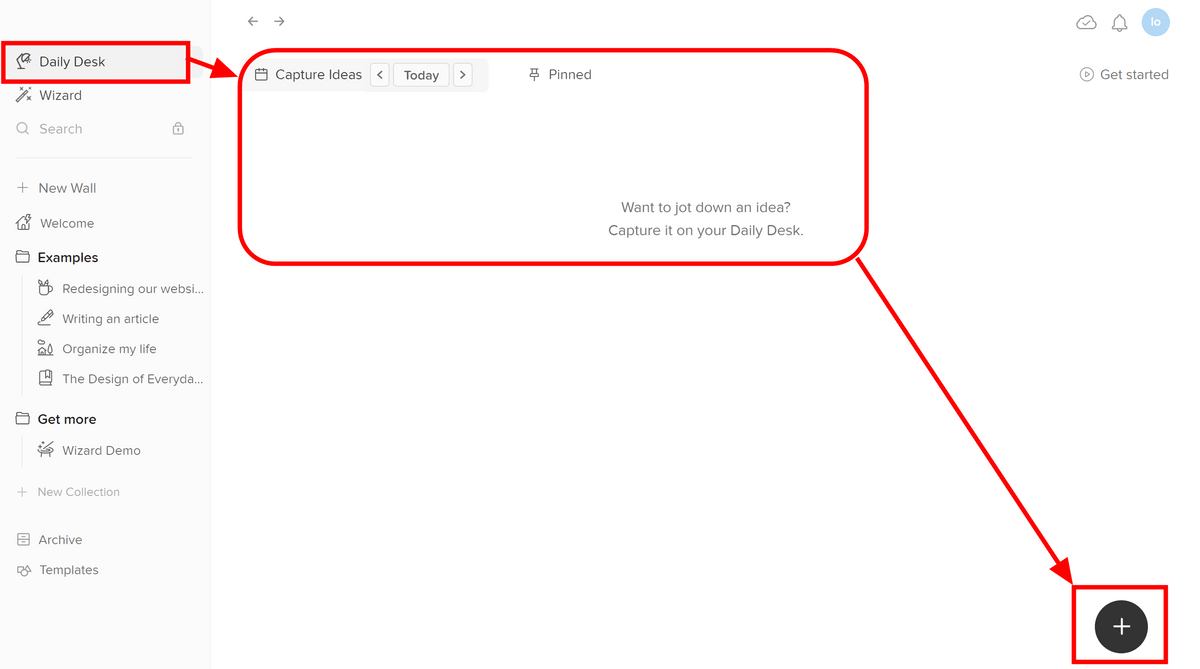
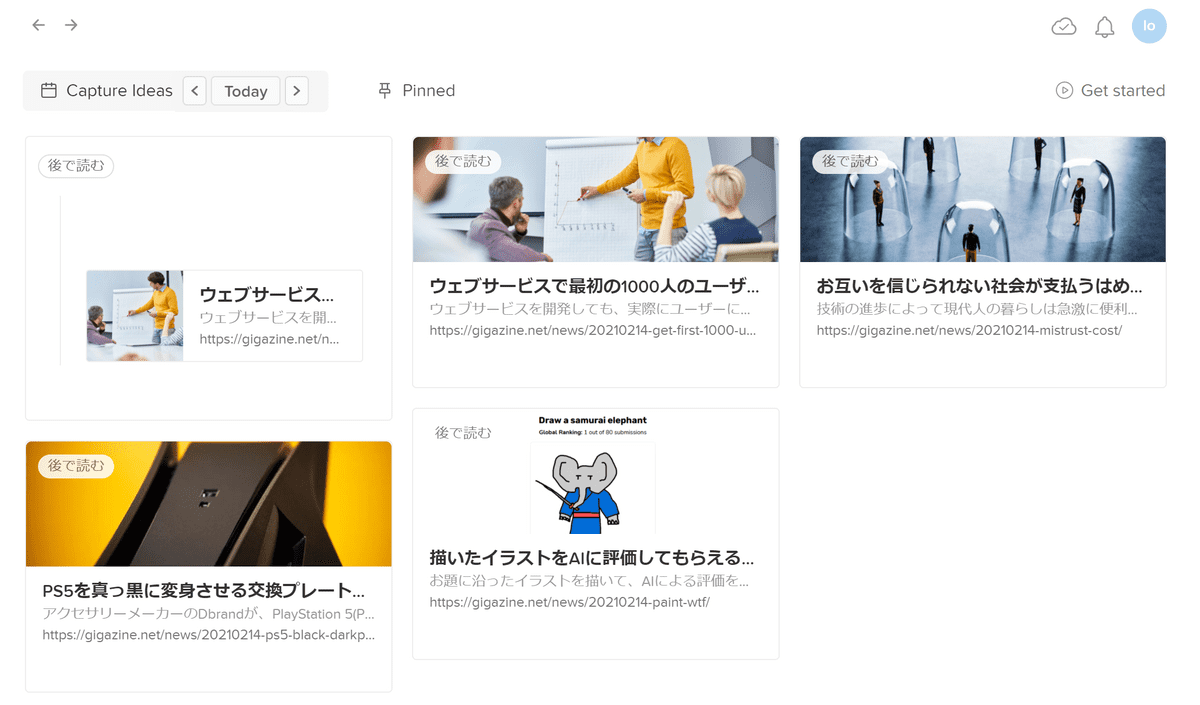
It is quite a hurdle to suddenly put a little idea every day into the wall, but walling has a function called 'Daily Desk', and you can use it to make a brick for the time being and think about it later. If you select 'Daily Desk' in the left column, the Brick created today will be lined up on the right. Again, try creating a Brick from the plus button at the bottom right.
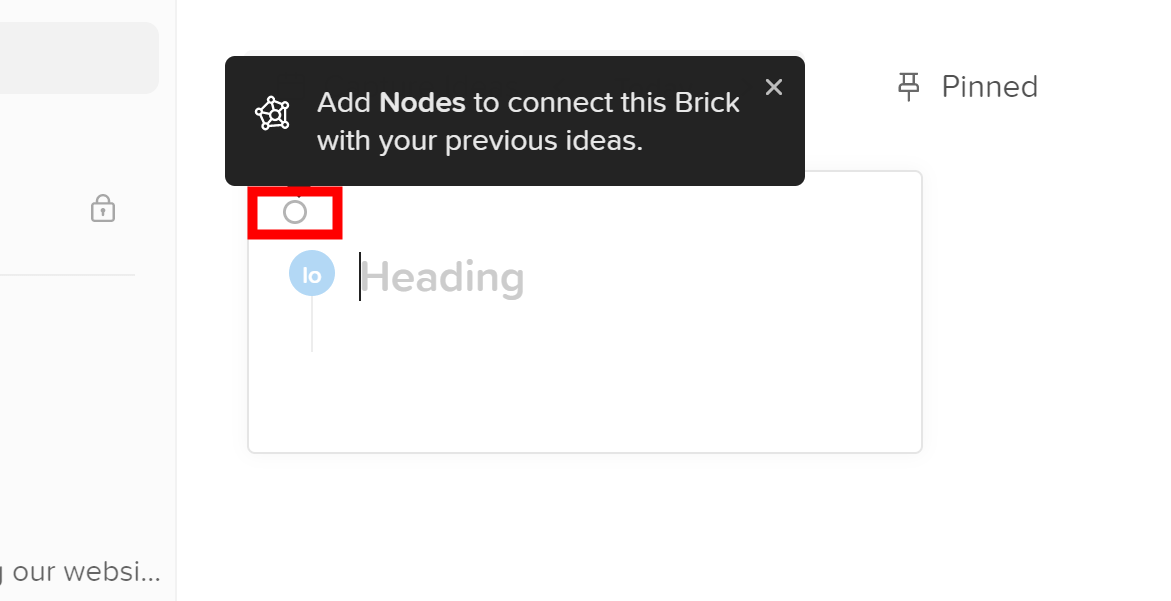
A hint was displayed that you can add a 'node' to Brick by clicking the small circle in the upper left.
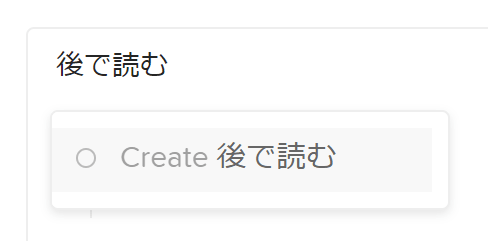
This time, I typed 'read later' and created a new node called 'read later'. Think of it as a tag.
Let's add a link to this Brick.
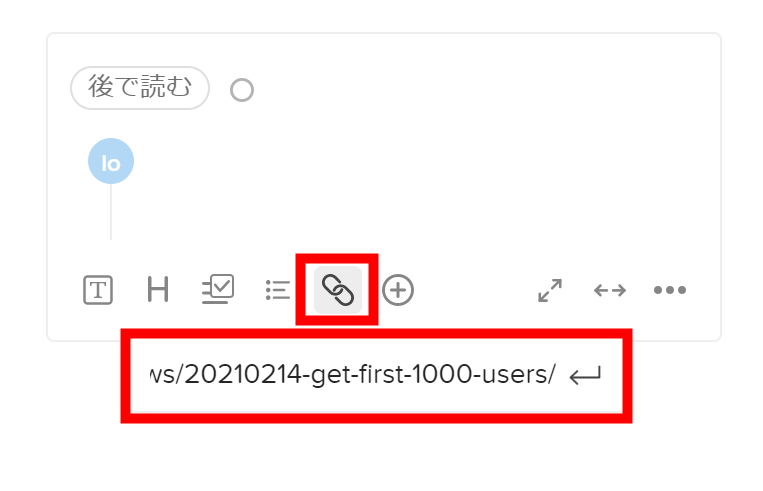
Then, a small link was embedded like Brick on the left side. If you paste the URL in the empty space on the right side, a large link will be displayed Brick is automatically created, so if you do not want to add supplements or annotations to the link, it seems better to just paste the URL.
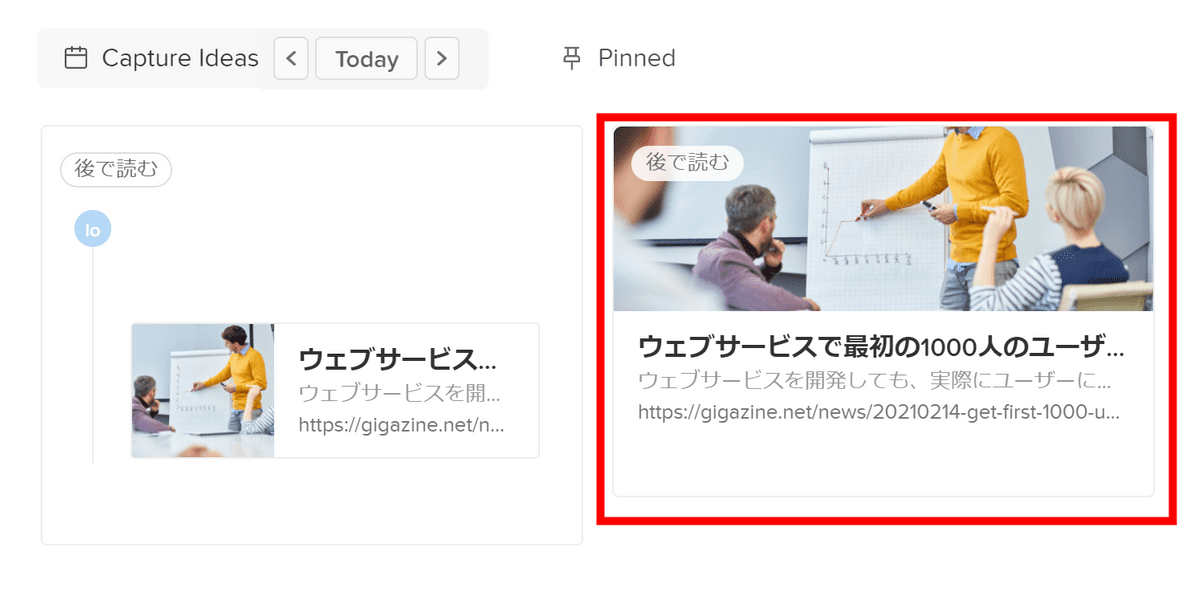
I added some links to Brick.
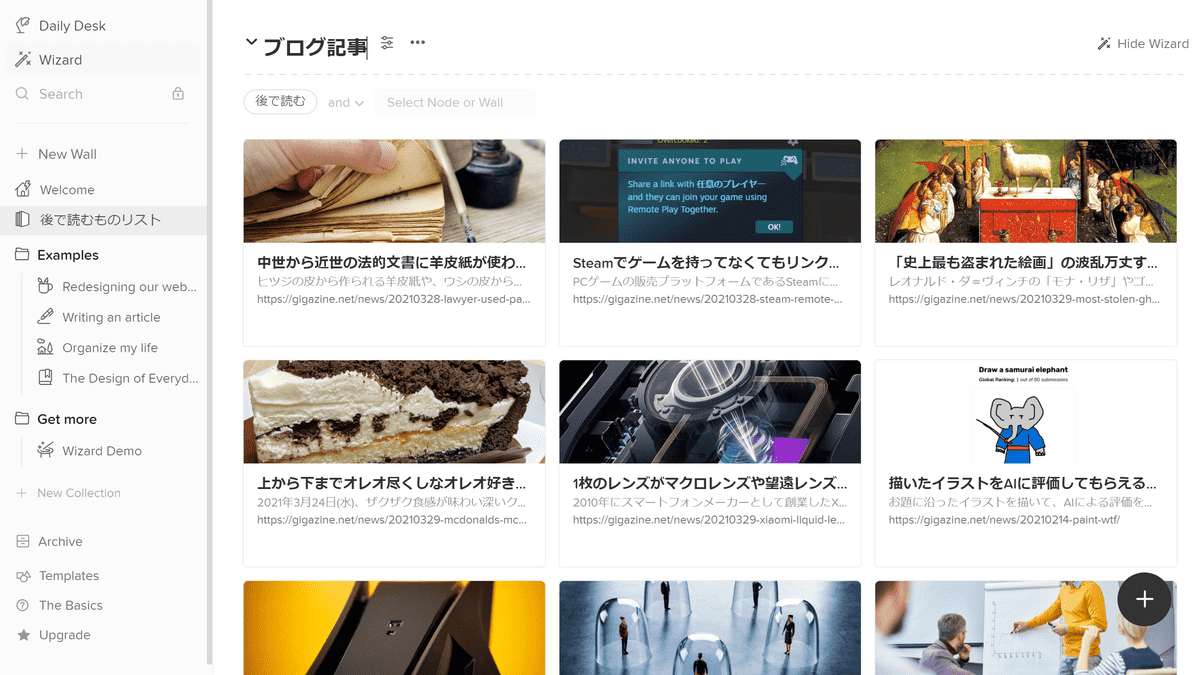
Brick added to Daily Desk every day in this way can be narrowed down and displayed by node from the 'Wizard' menu.

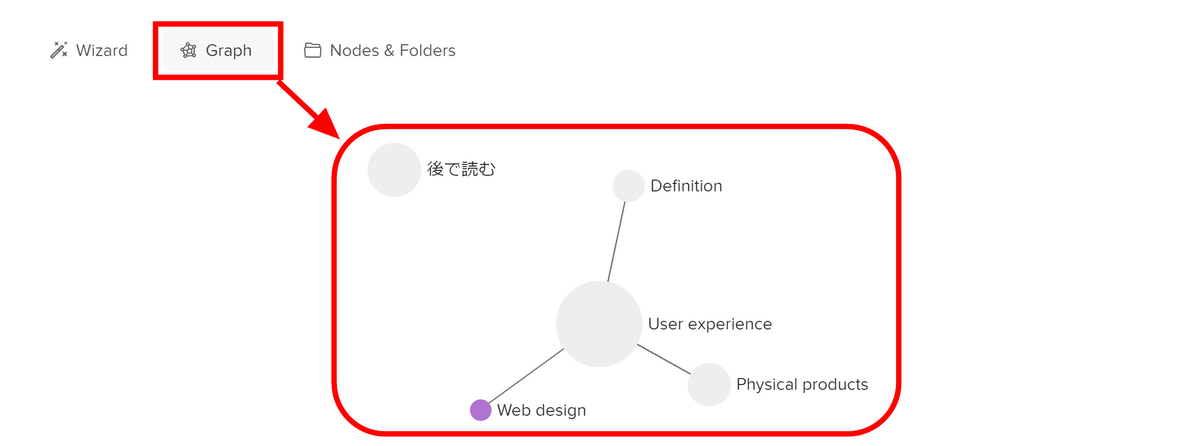
In addition, if you select the 'Graph' tab on the Wizard screen, a graph will be displayed that shows at a glance how the nodes are connected. Nodes such as 'User experience' on the right are sample nodes that were prepared from the beginning, for example, if one or more Brick has both 'User experience' and 'Web design' nodes added, a line in this graph Is connected and displayed. The 'read later' node that I just added was popped to the left.
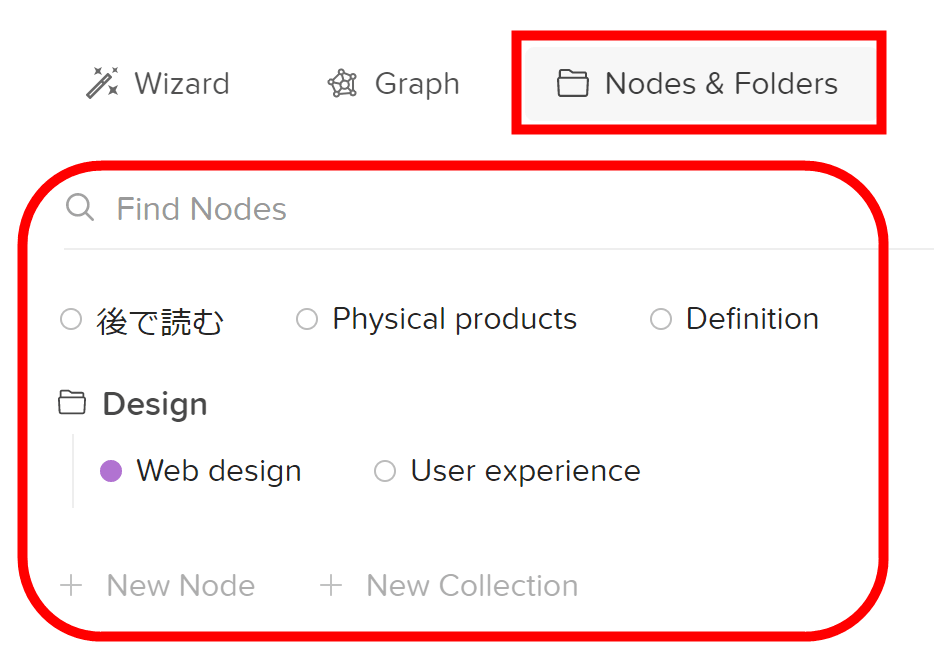
In 'Nodes & Folders' next to the Graph tab, you can list and manage nodes.
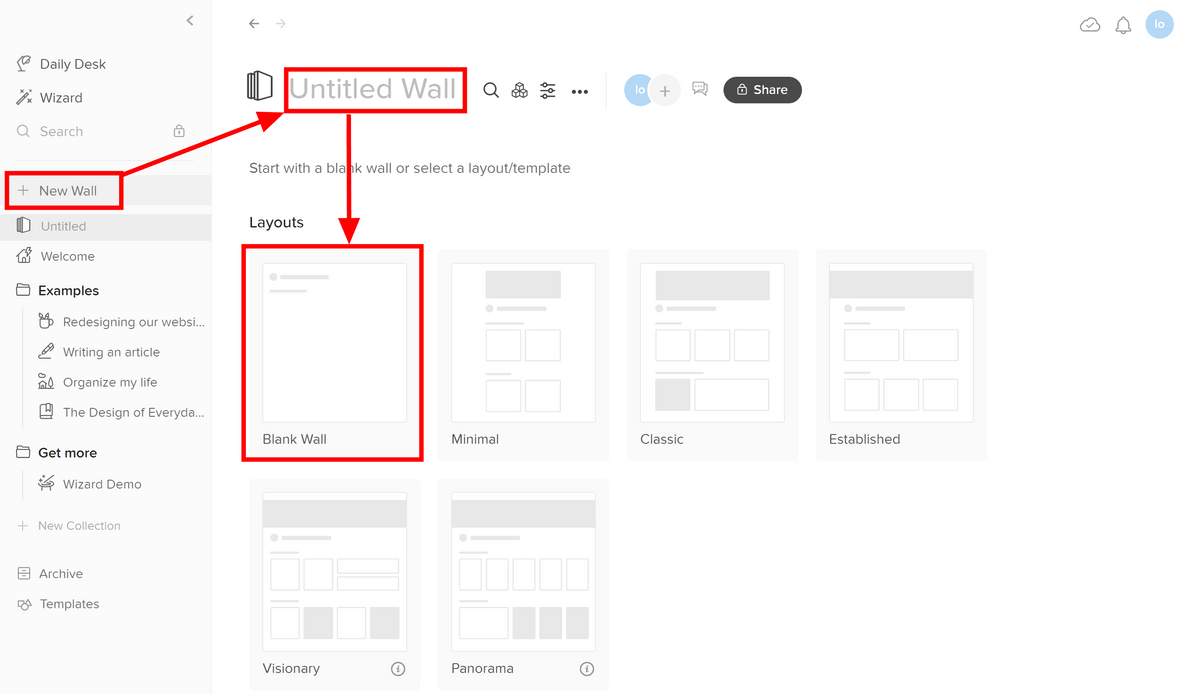
Now that I've learned a lot, I'll make a Wall. Click 'New Wall' in the left column, enter the title of the wall, and then select the layout. Click Blank Wall this time.
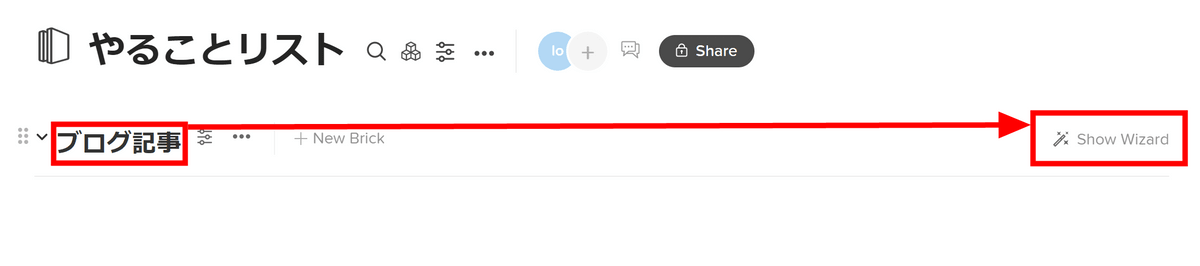
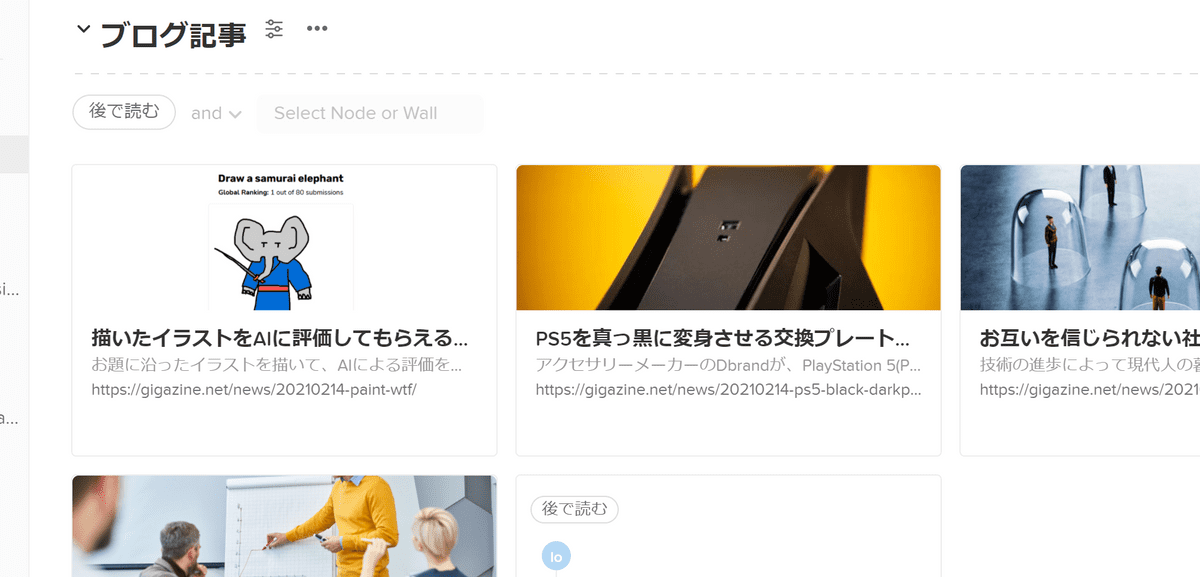
The name of the first section is 'Blog Article'. You can add Brick yourself as it is, but you can also use the 'Wizard' function mentioned earlier. Click 'Show Wizard' ...
A selection frame for nodes and walls appears below the section. Try selecting 'Read Later'.
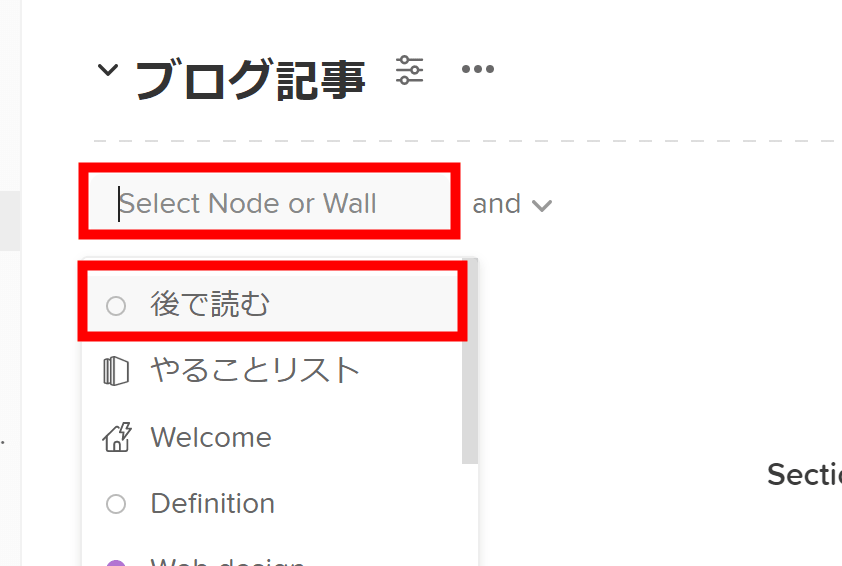
Then, the Brick I added earlier appeared.
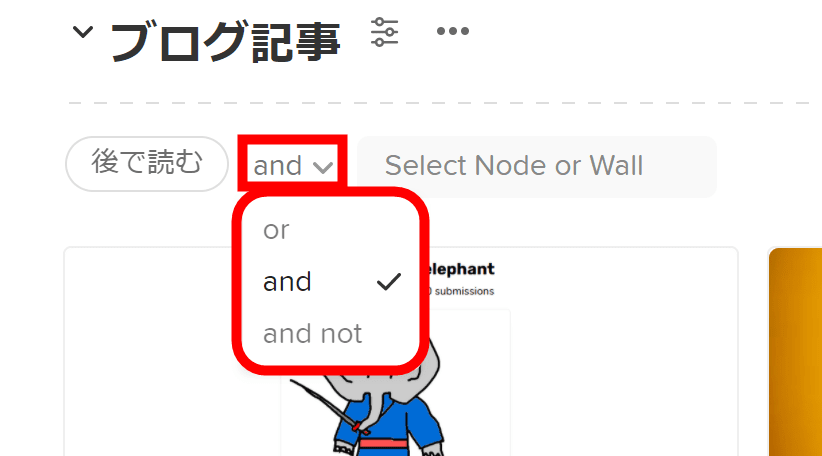
Not only can you select one node, you can also select only those in a specific wall, or only Brick with multiple nodes, so you can easily arrange the ones you intended. It is designed to be.
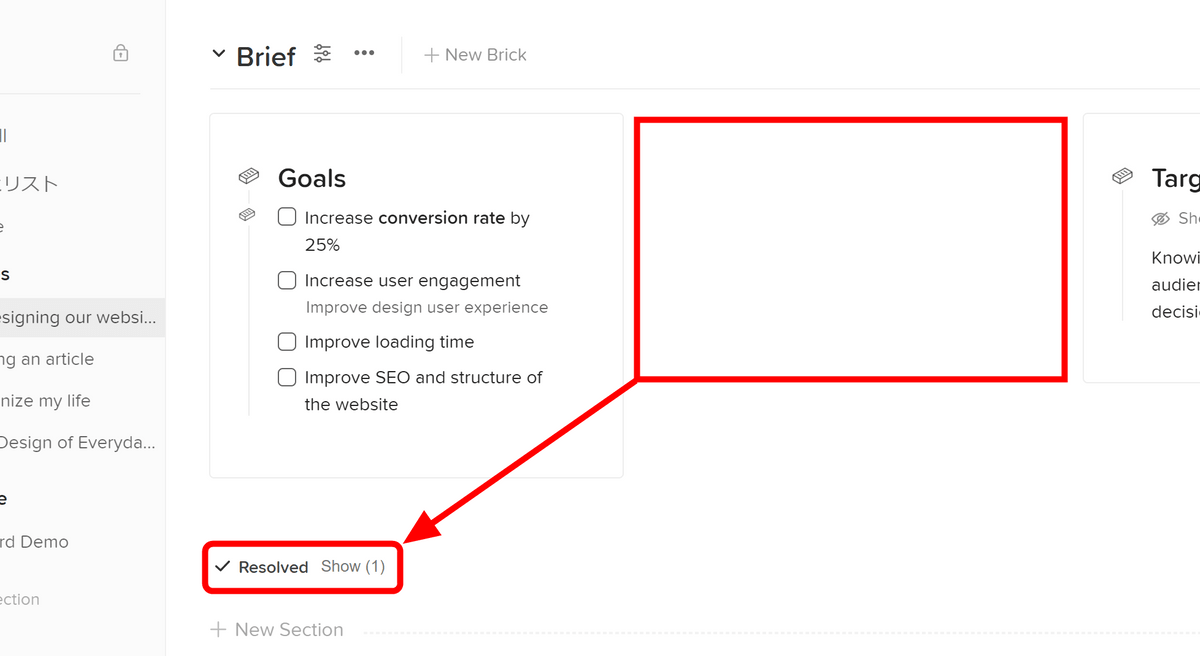
You can also change the background color of Brick with the '...' button at the bottom right of Brick, and move / copy it to another wall or section. At first glance, I don't really understand the function of 'Resolve Brick', but when I click it ...
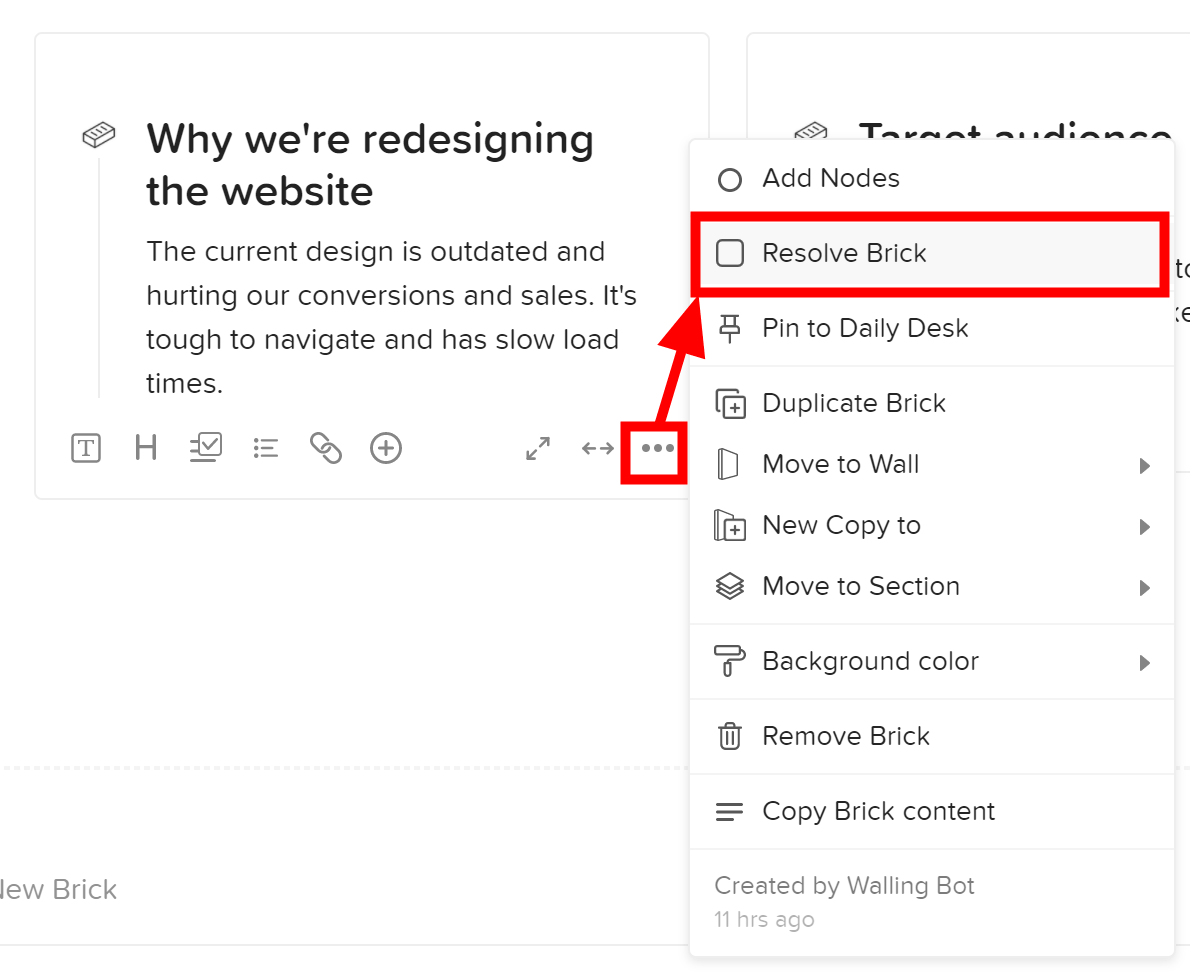
Brick disappeared from the section and moved to 'Resolved'. It is a very convenient function when using it like a to-do list.
You can share the created Wall with others by setting 'Shareble Link' to 'Enabled' from the 'Share' button and passing the link, or by entering the other party's email address and inviting.

However, if you share it with the free plan, you can only view it, and you need to subscribe to the premium plan to perform joint editing. The premium plan is $ 8 (about 800 yen) monthly for monthly contracts and $ 60 (about 6000 yen) for one year for annual contracts, and in addition to the real-time co-editing function, the maximum number of Brick It seems that it will be possible to use functions such as abolition, search function, and OCR processing of images to make them searchable.
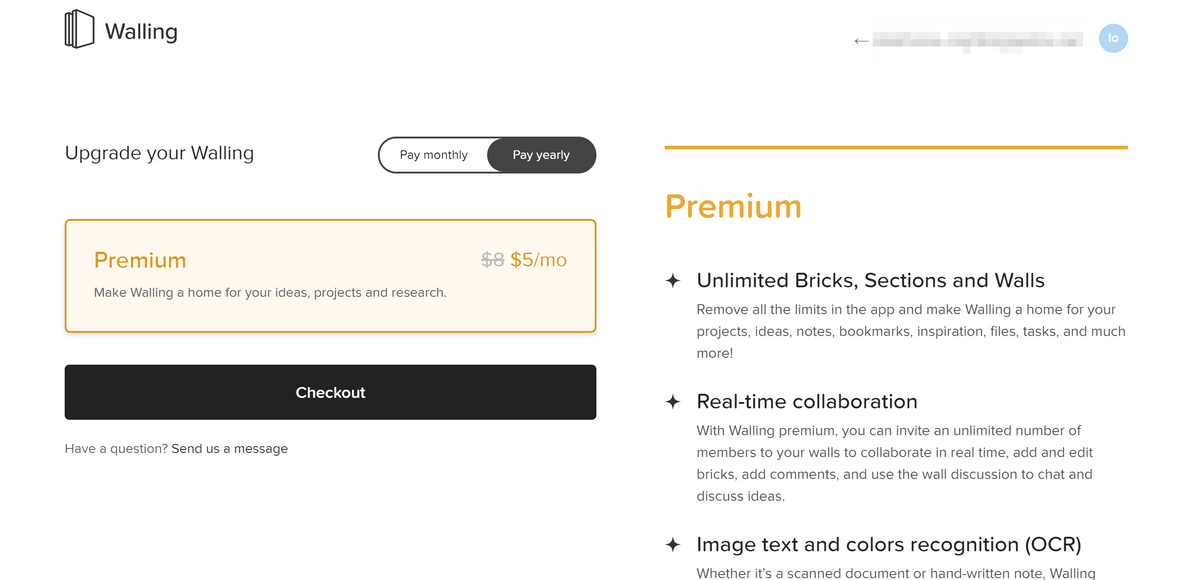
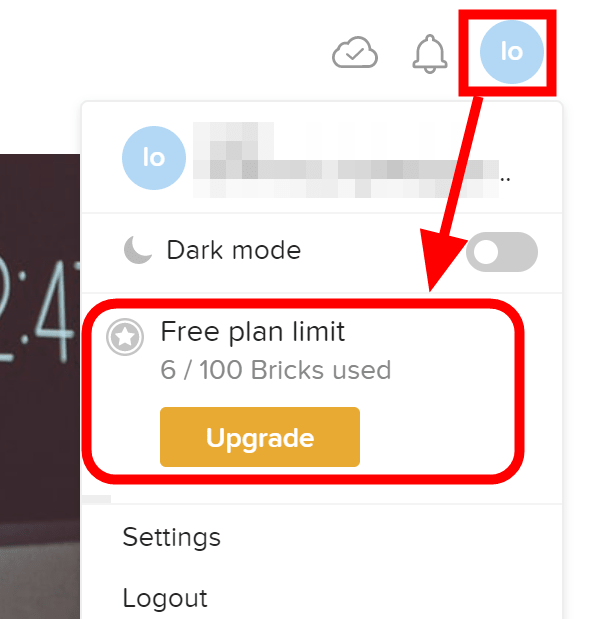
The number of Brick in the free plan is limited to 100. You can check how many Bricks you have created by clicking the account settings in the upper right corner.
Related Posts:


in Web Service, Smartphone, Review, Web Application, Posted by log1d_ts