I tried using "Airtable" which can create a database on the web and operate it visually by easy operation

When working with a big team, work management using databases is often necessary. There may be a small team in a large team, but for small teams, we want to manage it with simpler content, apart from the database used by the whole team. However, for small teams, introducing groupware and creating a database based system for teams is expensive and not realistic. Actually, it will be creating and managing things like databases in Excel and spreadsheet, but for members it is difficult to see visually and it is often difficult to use after all. "Airtable"I tried using it because it is possible to create a database with easy operation and make the created database visually easy to understand.
Airtable
https://airtable.com/
◆ Registration
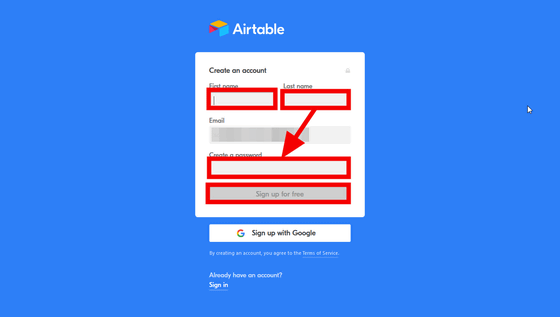
Please access "Airtable", enter your email address in "Enter your email" and click "Sign up for free".

In First Name, enter your last name in "Last name", password in "Create a password", and click "Sign up for free".
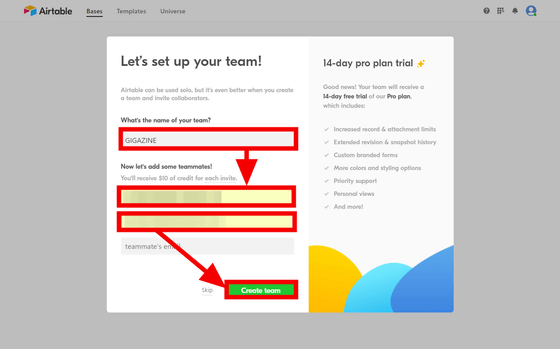
As the team setup screen is displayed, enter the team name in "What's the name of your team?" And suppose that there are two teammates wanting to see the database in "Now let's add some teammates! After entering the mail address of two people, click "Create team" and registration and team setting are completed.
· When you receive an invitation
When you are invited, the following e-mail will be sent, so click "Accept invitation" ...
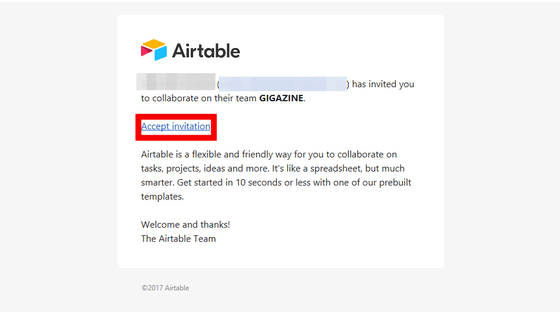
Please enter the first name in "First name", the last name in "Last name", the password in "Create a password", click "Sign up for free", registration is completed.

◆ Try it
Here we will create a "database that integrates task assignment and progress management" of the team that creates the website. In "Airtable" you can load already created databases, but here we will assume that you create a new one.
· Database creation
First, click "New Base".

Click "Import a spreadsheet".

When "Import a spreadsheet" is displayed ......

Copy the item you want to manage in the database that was created in Excel in advance.

Paste into "Or, paste table data here" and click "Import pasted data".
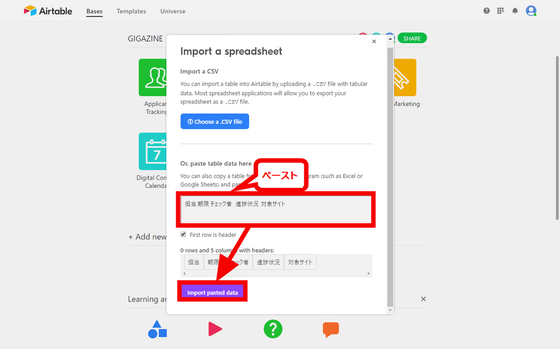
Input the database name screen, so enter "site DB" here. There is no problem with any color color, but click on orange and click outside the input screen. Now we have a management database for the website creation team.

Next, click "Site DB".

The "Site DB" screen created earlier will be displayed.

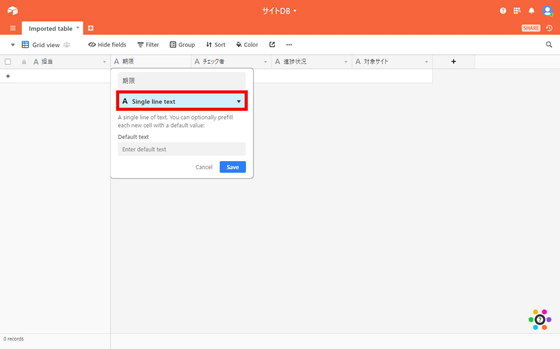
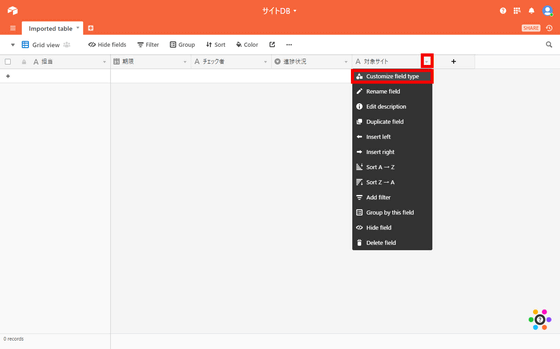
In the initial state, each item can enter 1 line of text, but I do not want to enter the deadline etc. in text. So, click "triangle" on the right side of "Due Date" and click "Customize field type".
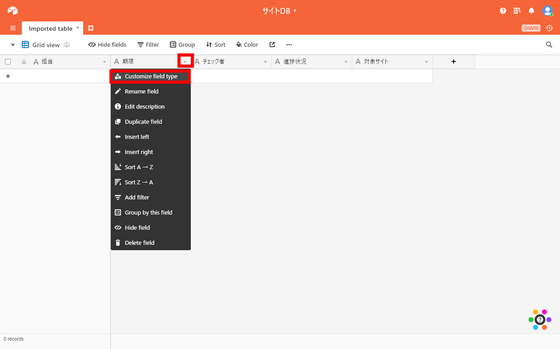
Click "Single line text" ......
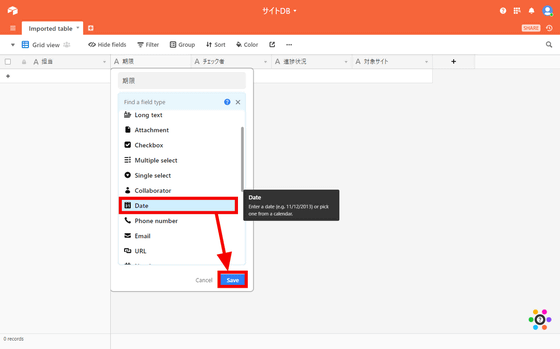
Click "Date" in the field type pull-down box.
Then click "Include a time field".

Click "Time format", click "24 hour" from the pull-down box, and click "Save".

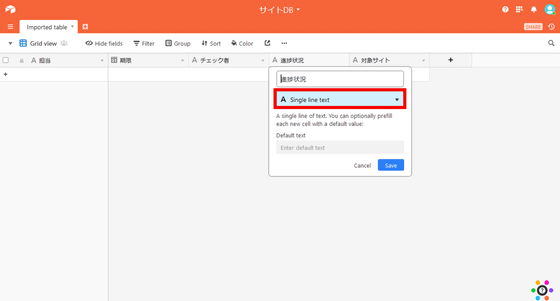
Next, in the "progress status" column, try to select an input item so that it can be input. Click "triangle" on the right side of "progress status" and click "Customize field type".

Click "Single line text".
Click "Single select" ......

As the input form addition form is displayed, after entering the item to be added, click "Add an option".

In this example, add four items of "Not Started", "Working", "Checking", and "Completed", and click "Save".

Next, "target site" is a long sentence input area that can input multiple lines so as to enter the site to be created and detailed information. Click "Triangle" on the right side of "Target site" and click "Customize field type".
Click "Long text" from the field type and click "Save".

Next, I want to be able to select and input the person in charge in the "responsible" column, but the method to specify in the selection field of the input item like "progress situation" is that the omission of addition / deletion of person in charge Because I may get up, I want to clearly manage it. Therefore, we also create a database of personnel in charge so that we can retrieve the person in charge from the database. Click the "+" button at the top left and click "Import a spreadsheet".
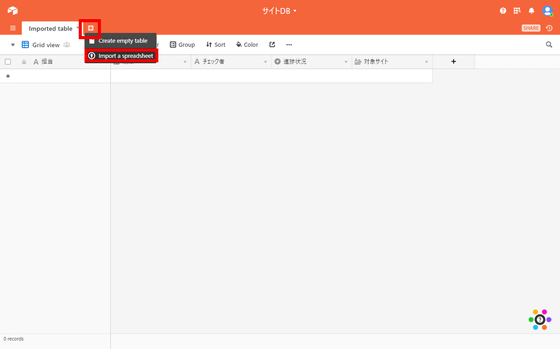
Copy "Name" "E-mail address" as an item for responsible from Excel ... ...

Paste into "Or, paste table data here" on "Import a spreadsheet" screen and click "Import pasted data".

Since the tab name is hard to understand as "Imported table" "Imported table 2", change it to a meaningful name. First, click "triangle" on the right side of "Imported Table 2" and click "Rename table".

You can change the name by entering "Name" and clicking outside the entry field.

Similarly, the name of "Imported table" has been changed to "Task".

Next, click the "Name" tab, click "Triangle" to the right of "E-mail address", and click "Customize field type".
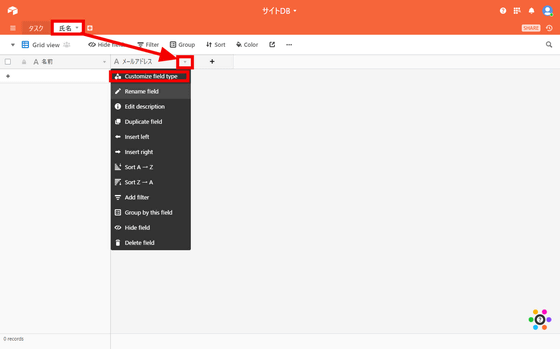
After clicking on the field type, click "Email" and click "Save". This makes it impossible to enter anything other than a mail address in the "mail address" column.

Next, enter the data in the database that manages "name" and "mail address". Click "+" in the lower left of "Name" ... ...

Here we have entered the three names of "GIGAO" "GIGAKO" "GIGAZO".

Click the "Task" tab, click "triangle" on the right side of "responsible", click "Customize field type" ... ...
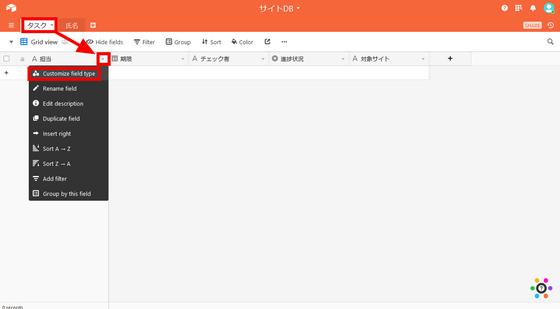
I attempted to change the field type, but I do not have a field type to refer to the "name" database.

The left most field is "Primary key"It seems that" Airtable "does not permit reference of different databases.

So, click "triangle" on the right side of "responsible" and click "Insert right".
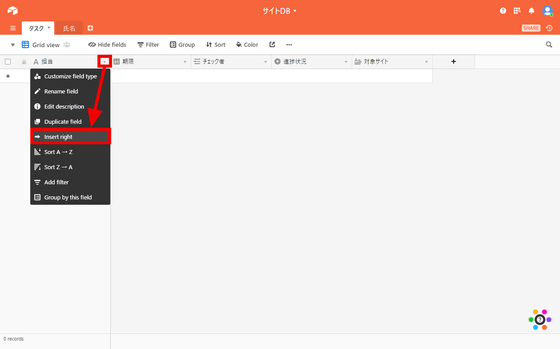
Enter the field name as "Person in charge", click "Field type", and click "Link to another record".

Click "Name" and click "Save". The added "person in charge" field can now input by referring to the contents of the "name" database.

Change the "responsible" field to the name "task name" so that it can be used as the primary key. Click "triangle" on the right side of "responsible" and click "Rename field".

Enter Task Name and click Save. The field name change is completed with this.

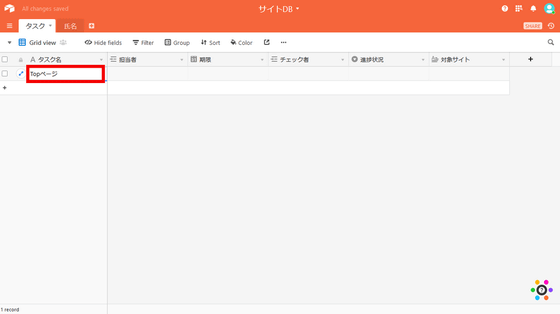
Next we will enter the data. Click the "+" at the bottom left of the task name ... ...

Enter "Top Page" as the task name.
The person in charge clicks "+" ... ...

Click "GIGAO" from the person in charge.

From the calendar the deadline is to click December 19 ... ...

Enter the time as "11: 45".
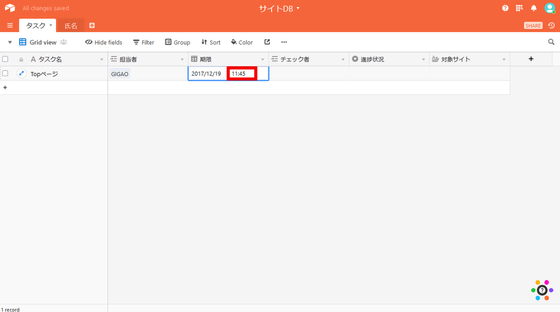
In this way, we added 5 rows to the database.

· Change the display method of the database
Just creating a table does not change much from Excel or spreadsheet, but in "Airtable" you can change the way you view (view) visually. To change, click "Grid view" ......

In addition to Grid display, "Form" "Calendar" "Gallery" "Kanban" can be displayed.

"Form" can display the input form for registering in the database.

"Calendar" displays the contents registered in the database as a calendar.

"Gallery" is to display the contents registered in the database as cards. If you click "+" in the lower right here ... ...
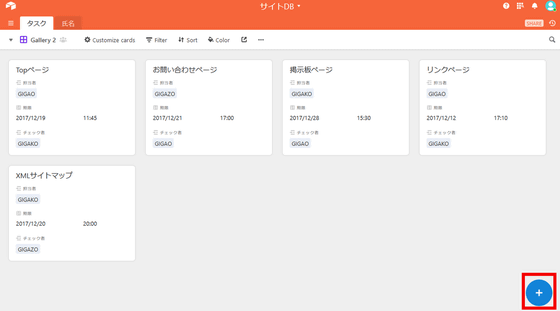
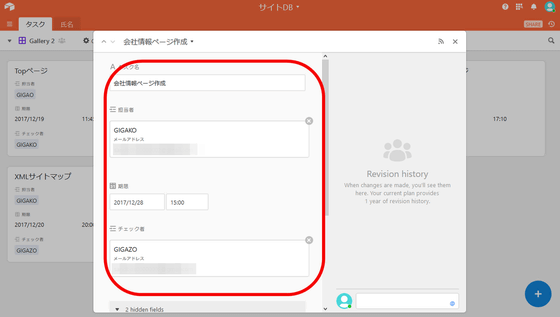
You can register information in the database by adding cards.
"Kanban" displays cards by categorizing them. Dragging the inquiry page of "Working" to "Checking" ... ...

You can also move categories.

· Embed in website
You can embed the database created in "Airtable" in the site. Click "SHARE" in the upper right of the view you are viewing.
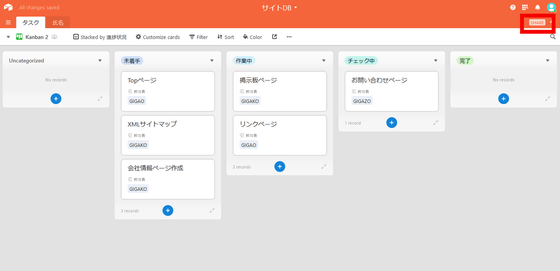
Click on the bottom "Shared view links" ......

Here we will embed the view of "Kanban". Click the embed mark of "Kanban".

You can copy the embed code that is displayed and paste it on another website or team sharing page.
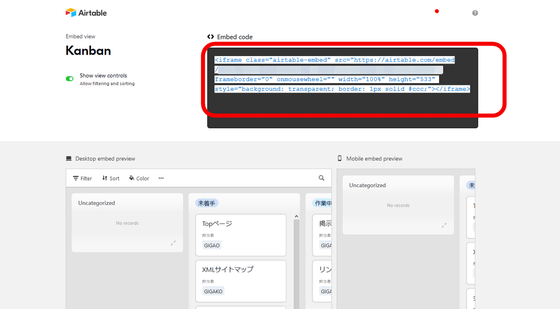
By the way, screens embedded in other websites do not seem to be automatically updated, so the screen may not be reflected even if you change the database. When embedding, it is necessary to take measures such as automatic updating at regular intervals separately.
◆ Template
"Airtable" is primarily for database creation, but there are several templates that you can use immediately for those who do not have database design experience or want to use large databases right now. Some of them are introduced below.
· Product catalog template

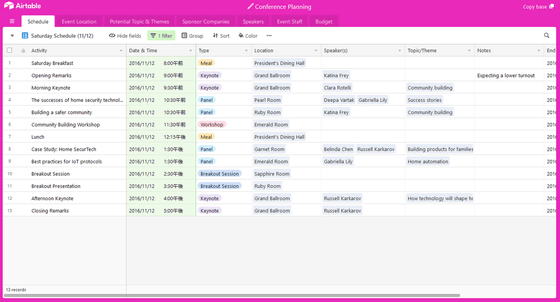
· Conference planning template
· Debugging template

◆ Price
"Airtable" can use all basic functions even if it is free. There is no limit to the number of databases that can be created, but there are registration restrictions of up to 1200 lines per database, and the capacity can be used up to 2 GB. You can also save a snapshot of the database for two weeks and even if an emergency happens, you can return it if it is up to 14 days ago. In the "Plus" plan of 10 dollars a month (about 1140 yen), the number of rows that can be registered per database is 5000 rows, up to 5 GB capacity is available, and snapshots for 6 months can be saved. The "Pro" plan of 20 dollars per month (about 2270 yen) can save snapshots of 50,000 rows, 20 GB capacity, 1 year, and can remove the "Airtable" logo from the database you created I can do it. There are also other "Enterprise" plans for enterprises.

◆ Use with the application
"Airtable" is "macOS" "Windows" "iOS"AndroidYou can use it also in the application. Here I will try using "iOS version" and "Windows application version".
· Windows application version
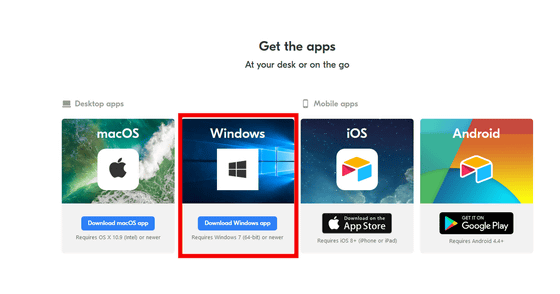
https://airtable.com/downloadsClick on 'Windows' to download the application.
Right-click the downloaded file and click "Open".

Enter the e-mail address registered in "Airtable" as "Email", the password as "Password" and click "Sign in". There was no function that can not be used with the Windows application version, and "Airtable" was available in the same way as the web version.

· IOS application version
Access the following URL on the iOS terminal.
Airtable on the App Store
https://itunes.apple.com/JP/app/id914172636

Tap Acquisition.

Tap installation ... ....

Tap "Open"

Tap "Get Started".

The Airtable registration screen will be displayed. Since I will use the already registered account here, tap "Sign in".

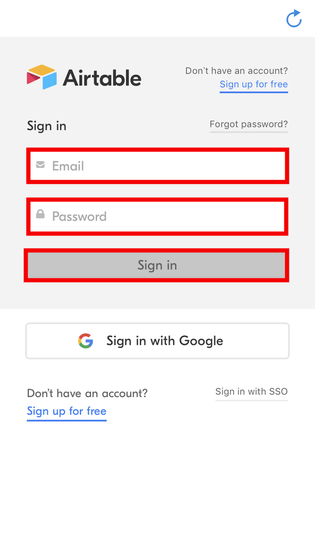
You can login by entering the e-mail address registered in "Airtable" as "Email", the password as "Password" and clicking "Sign in".
Operation after login displays database, ... ....

Although you can register and use the basic functions ... ....

When trying to display different views such as "Calendar" or "Kanban", "Not compatible" is displayed.

Also, when creating databases, there is no function to copy and paste fields from spreadsheet etc. that were available on the web version, so it is only possible to create databases manually from scratch or only using templates was. It is expected to respond in future updates.

Related Posts:
in Software, Web Service, Review, Posted by darkhorse_log
