I tried to make a shop application with "KickAppBuild" which can create applications with only browser without knowledge of programs and web development
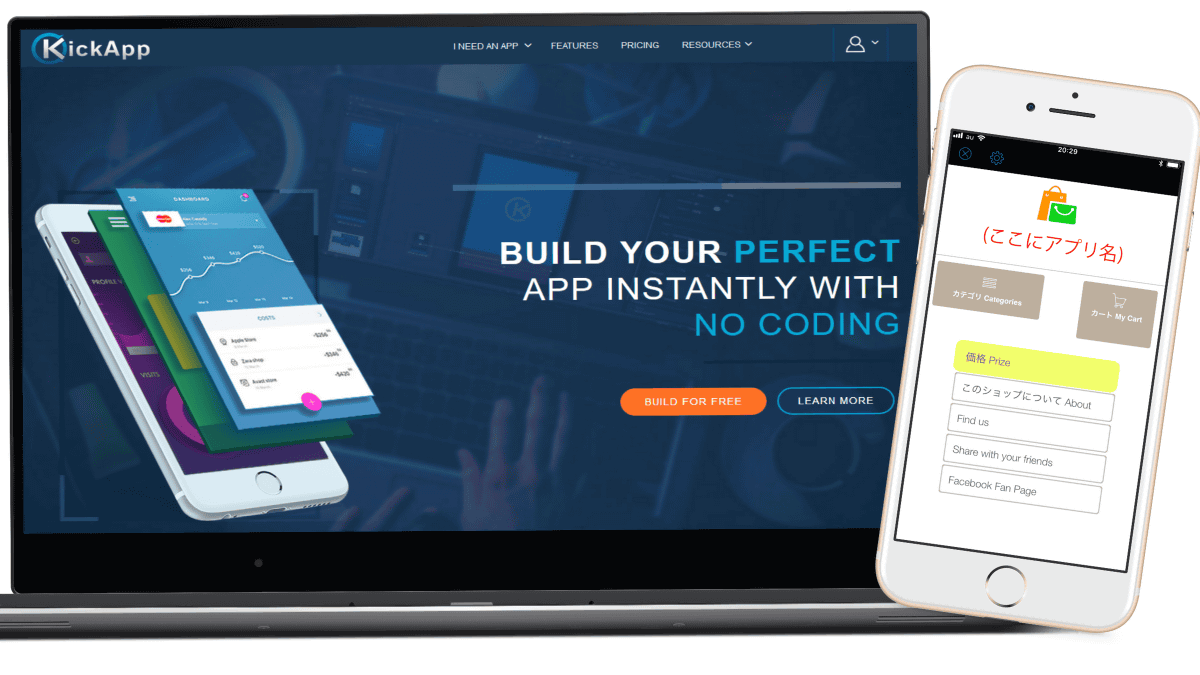
It is possible to create applications for smartphones such as net shop applicationsKickAppBuild"By using more than 48 templates prepared on the cloud, you can create applications for smartphones in a short time with a feeling like wearing puzzle pieces. In addition to using templates, HTML, CSS, JavaScript, andjQuery MobileIf you have knowledge of it you can also make unique apps. Application platforms that can be created are iPhone, iPad, Android OS, and Kindle. I actually made one net shop application which can actually be created.
Apps Builder - Build & amp; Publish Powerful iPhone & amp; Android Apps. No Coding.
http://kickappbuilder.com/
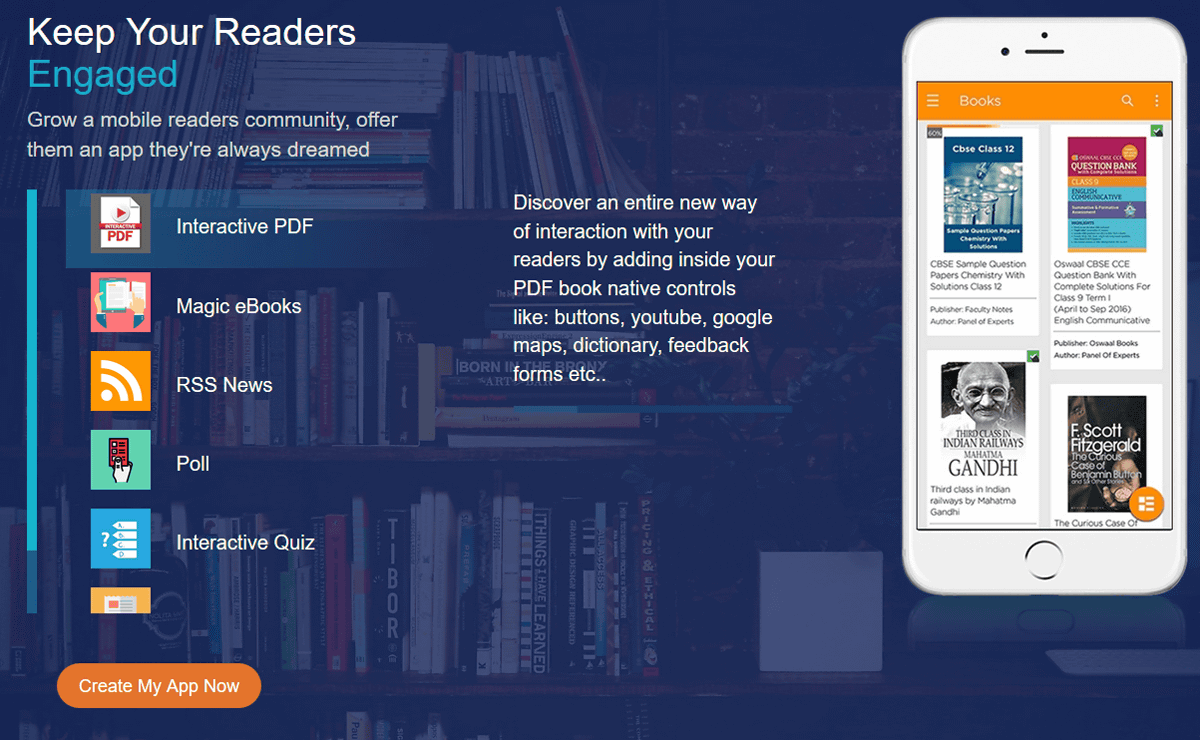
If you use "KickAppBuild" you can use an e-book application or ...
Event site and artist's fan club application

Service using location information

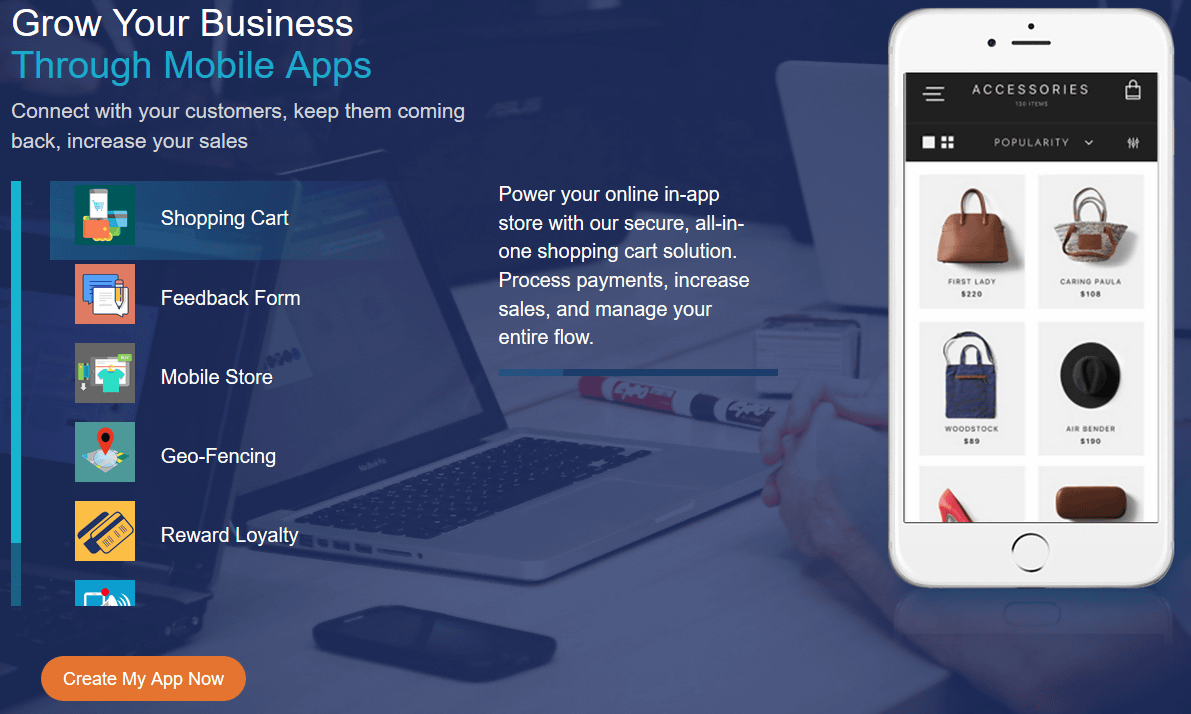
You can create more than 10 kinds of applications such as net shop application.
This time using KickAppBuild, I actually tried making a net shop application.
Place attractive items freely ......
You decide yourself affordable prices and purchase options yourself ....
You can create multiple categories and classify them freely and display them.

And since the settlement system is prepared, it is okay even if there is no complicated system or security knowledge.

When products are actually purchased ......
The ordering party receives a billing e-mail with payment options such as purchased goods and amount, shipping method and settlement method ......

The order form is automatically sent to the mail address addressed to you. The settlement method is cash or actual goods exchange payment,PayPalYou can set.
◆ I actually tried creating an application
The creation of the application and the test with the exclusive application can be done up to 10 pieces for free. However, in order to open and operate it in general, it is necessary to subscribe to a pay plan. The application created by KickAppBuild is operated on the cloud server, you do not have to set up the payment system yourself or operate the server, but you have to pay the usage fee to use the whole system It is a mechanism.

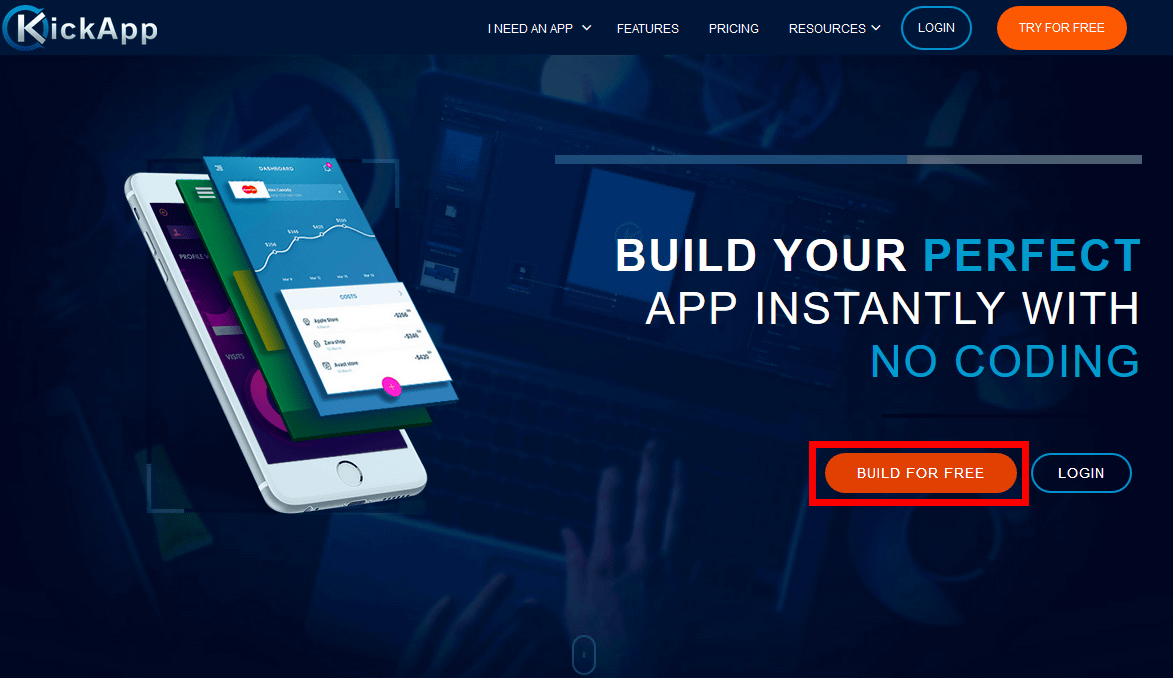
I will make an application at once. Click "Build For Free" (create free of charge) on the top page
Go to the template selection screen. Click "CATEGORY (category)" on the left side of the screen.
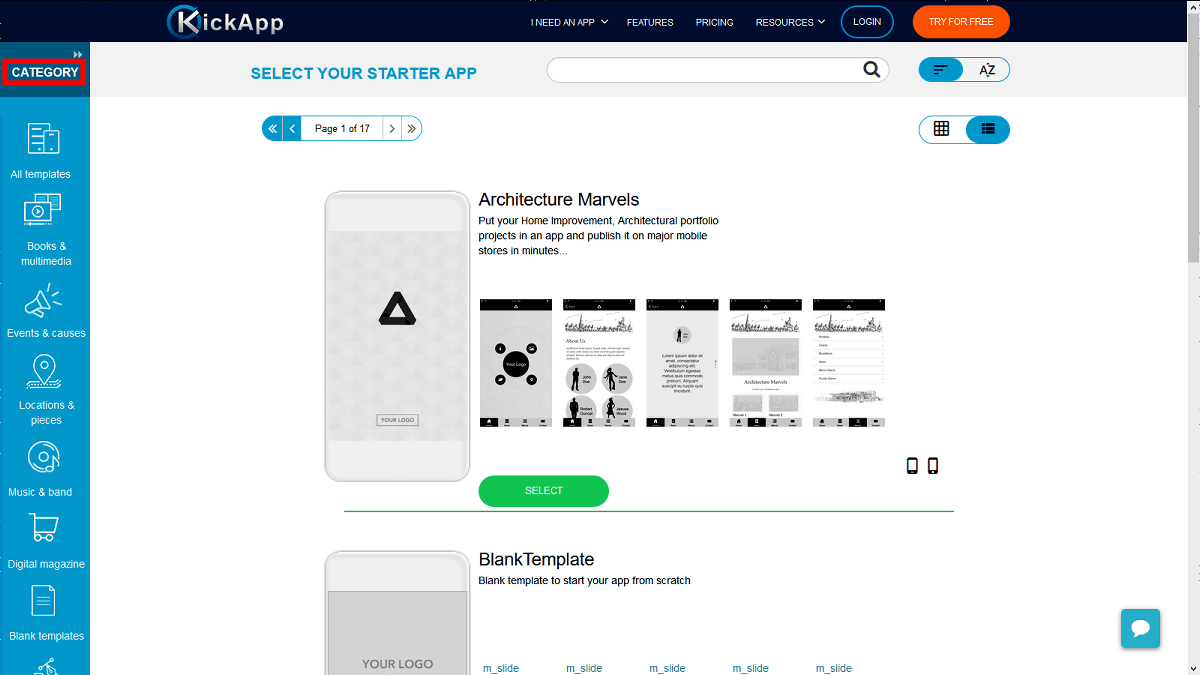
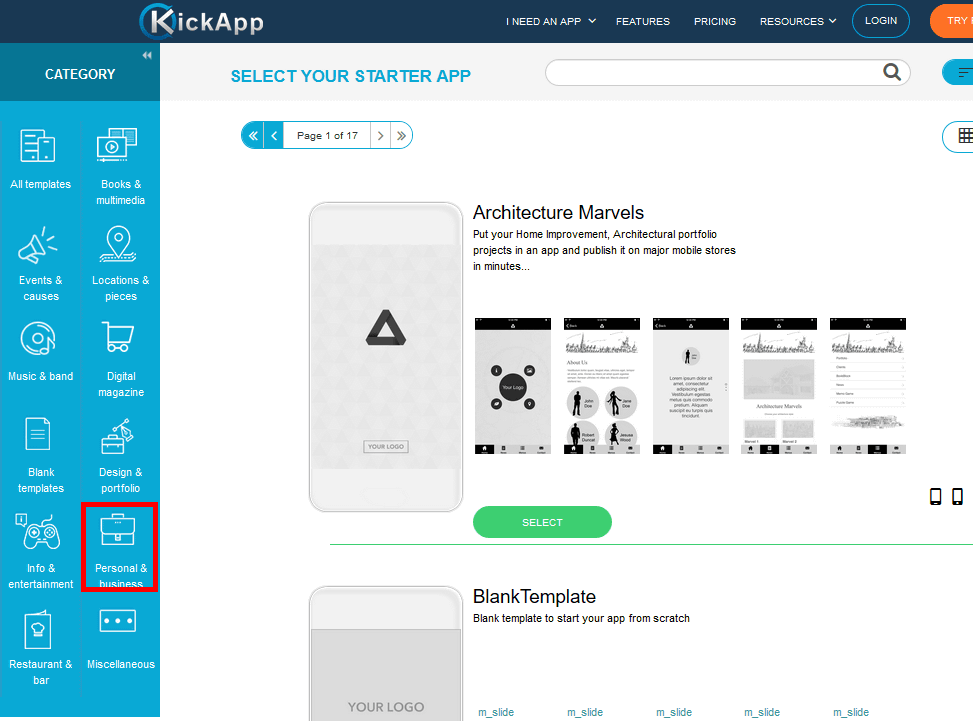
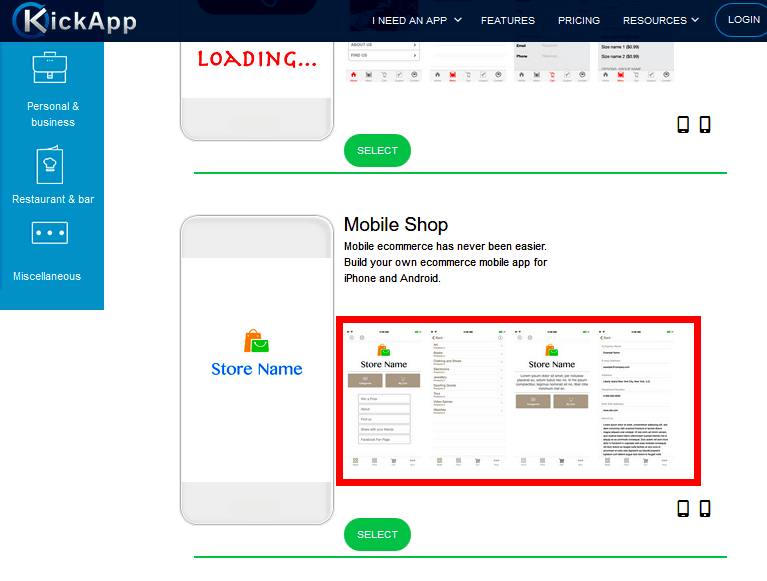
Categories are displayed in a list, and you can narrow down the target template by adding tags of categories that match your purpose. This time I will make a net shop application for iOS. Click "Personal & amp; business".
The categories that are prepared are "All templates", "Books & amp; multimedia (book & amp; multimedia)", "Events & amp; causes" "Locations & amp; pieces (place & amp; "Music & amp; band" "Digital magazine" "Blank templates" "Design & amp; portfolio" (design & amp; photo collection) "Info & entertainment "," Personal & amp; business "" Restaurant & amp; bar "" Miscellaneous (others) ".

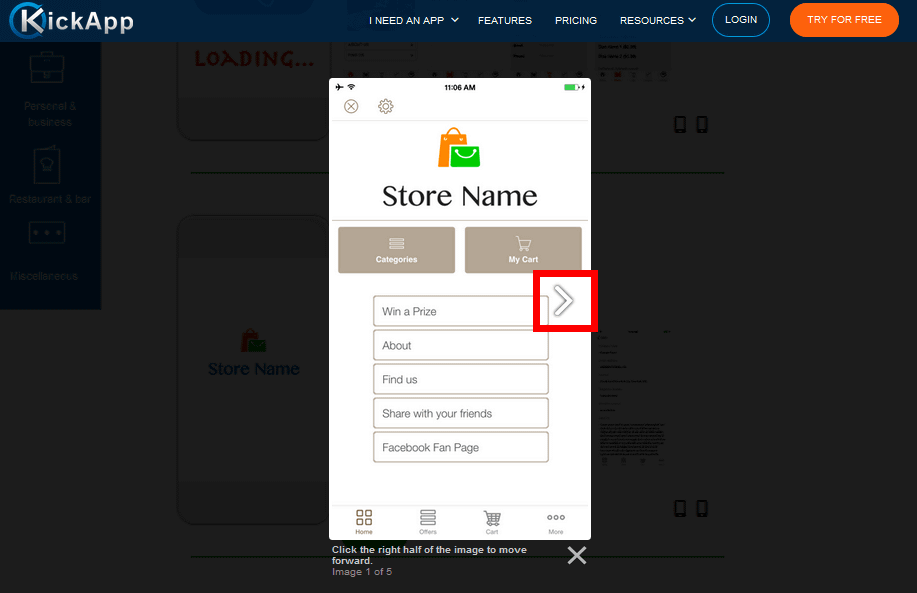
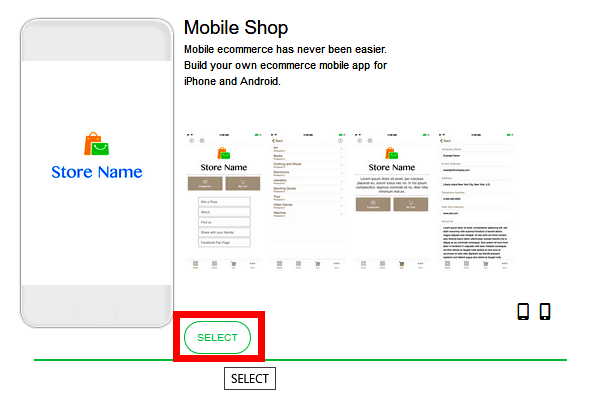
Next, select the template of the desired application. Since this time is a net shop, "Mobile Shop" seems to be available from the template. When I click on the image on the right image of the smartphone template ......
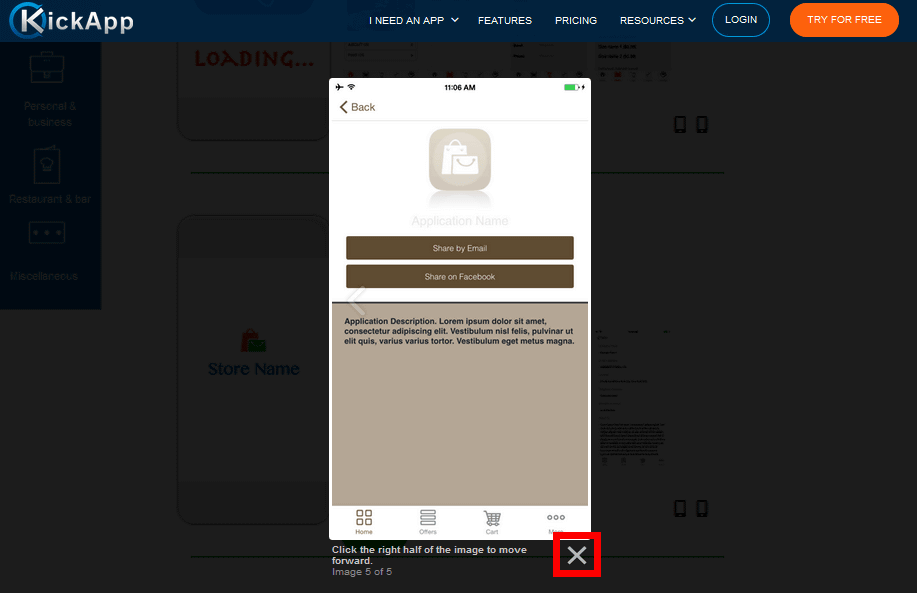
Since the image being operated on the application is magnified and displayed, it becomes easier to image the completed form. Click the ">" arrow to display the next image.
Click "×" to close the image.
After choosing a template candidate, click "SELECT".
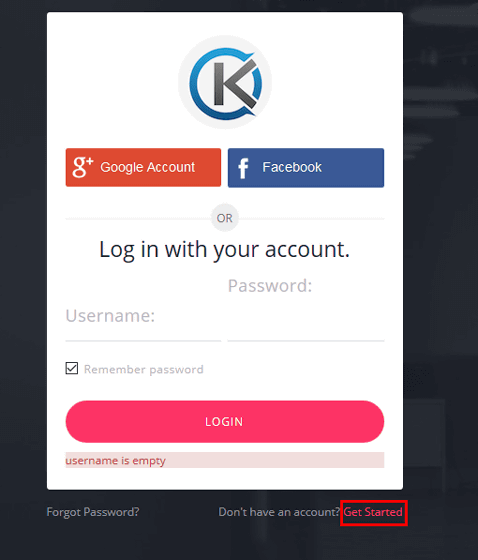
Then login was requested here. To log in, you can use Google Account and Facebook Account, but this time create a new account. Click "Get Started" at the bottom of the window.
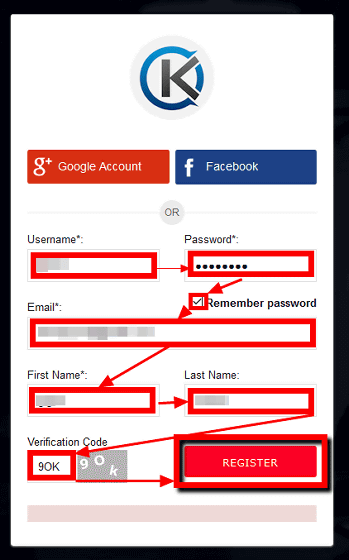
As the account creation screen is displayed, enter the user name and password, the email address and name to be registered, enter the same alphanumeric characters as the image displayed to the right of the input box in "Verification Code". And lastly click "REGISTER" to register. Please note that the registered e-mail address does not contain the URL to check the e-mail address and account linkage, so you can continue to create the application as it is.
◆ "Step 1. Pick Template (Step 1. Choose Template)"
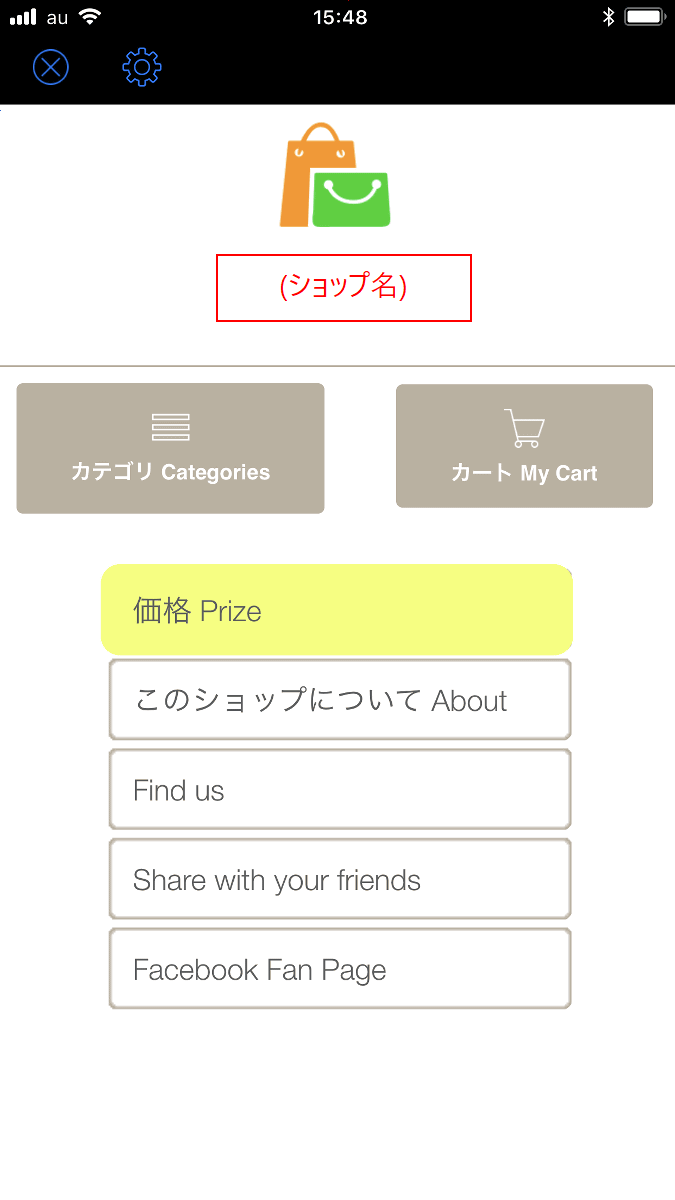
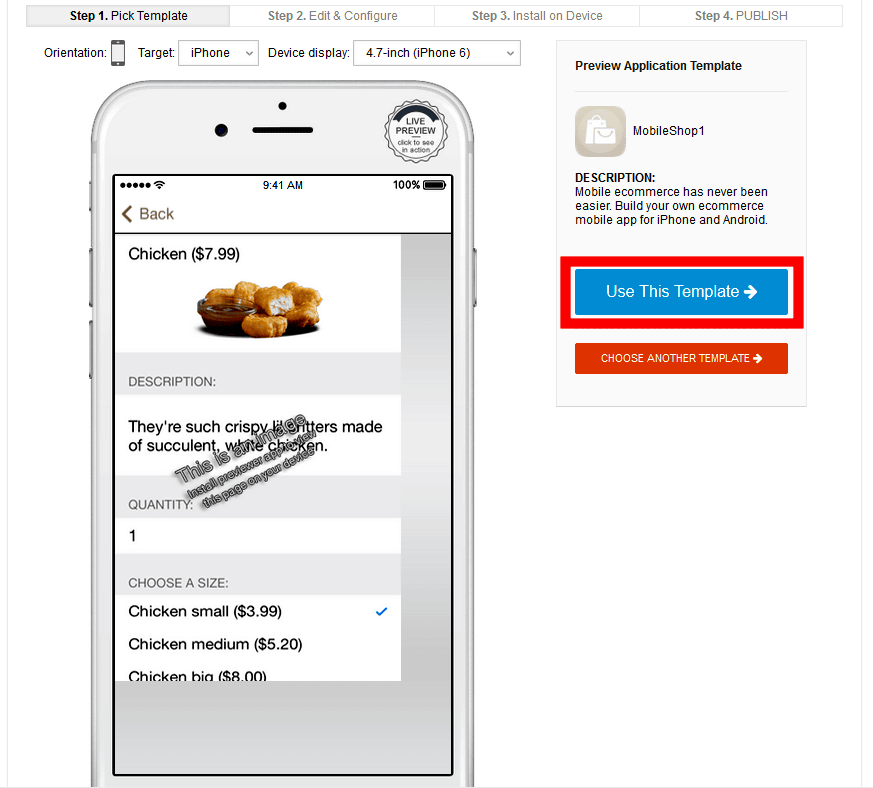
Move to the screen for creating the application based on the selected template. Here you can grasp the image of the application based on the template to some extent. For example, if you click "Categories" ...

The image of the page selling the product "Chicken ($ 7.99)" will be displayed. Grab the approximate image on this page and click "Use This Template" when you decide to make an application in earnest using this template.
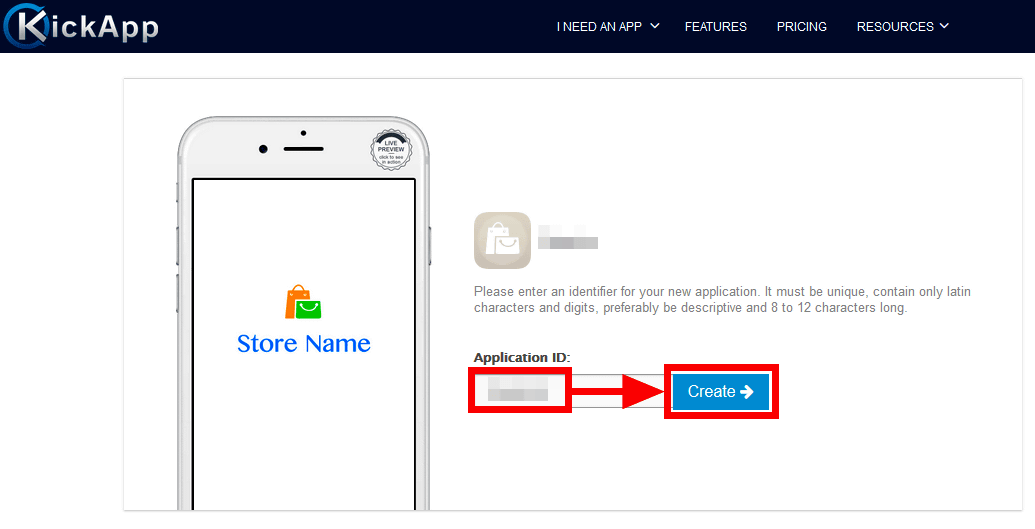
Since you decide the name of the application, decide an arbitrary application name in "Application ID" input box and input it.
Since it decides the platform of the application, it selects from among all 4 types "Native iPhone" "Native iPad" "Native Android" "Native Kindle" "Web App". Since I try to make an application for iPhone this time, I select "Native iPhone". Next, click the "Navigation" tab.
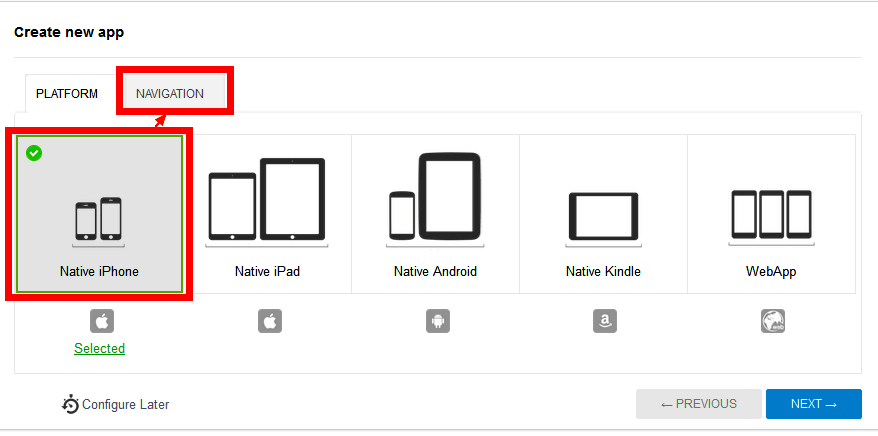
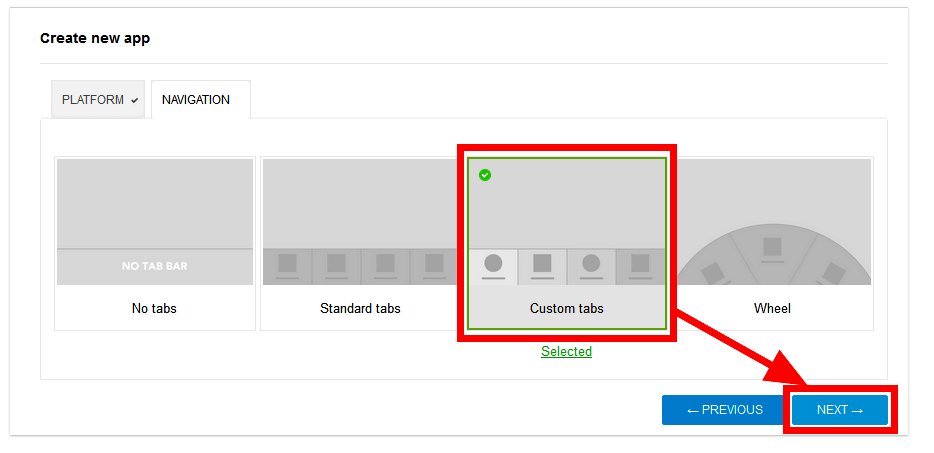
Decide the tab display method of the application. Select from "No tabs", "Standard tabs", "Custom tabs", "Wheel". This time I will make a net shop with several categories, so I will select "Custom tabs".
◆ "Step 2. Edit & amp; Configure (Step 2. Edit & amp; Design)"
You can edit the colors and functions of the entire application.
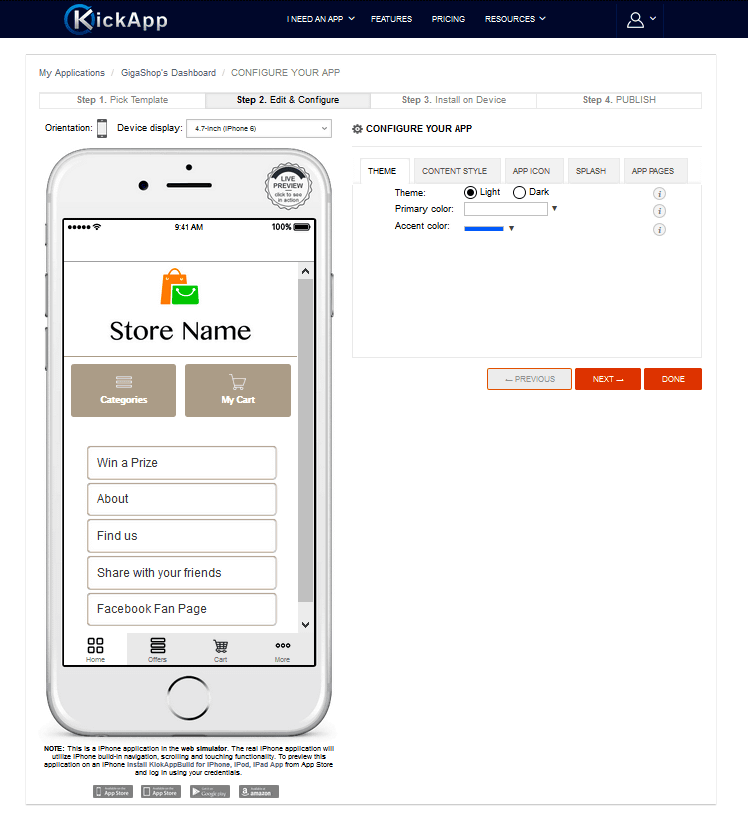
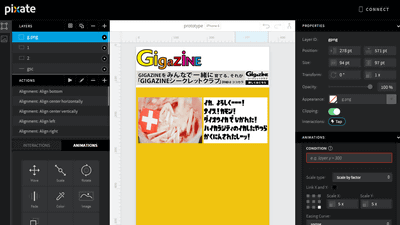
You can edit the color at the top of the screen with the "THEME" tab. Click the pull-down menu to the right of "Primary color" and use the color picker to select the color. Color codes can also be used. After choosing a color, click "choose".
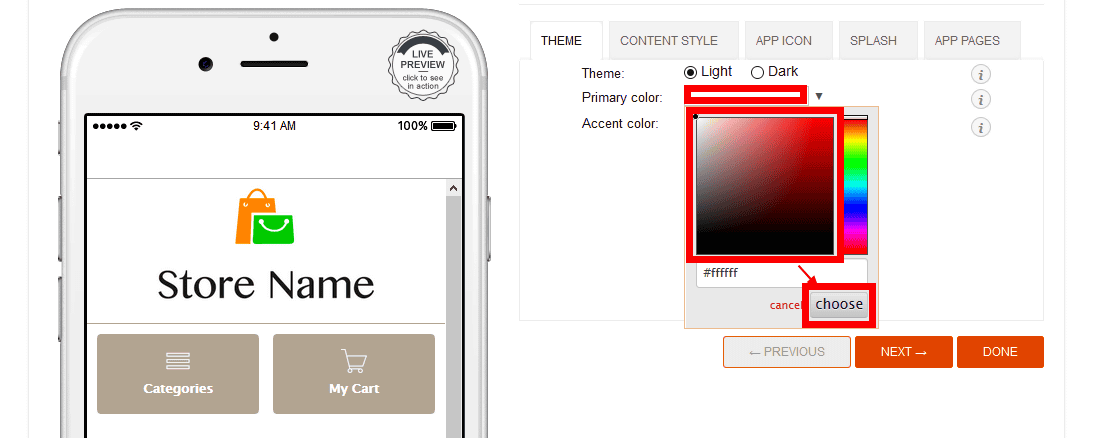
This time I made the color of the upper part of the application screen from white to black.

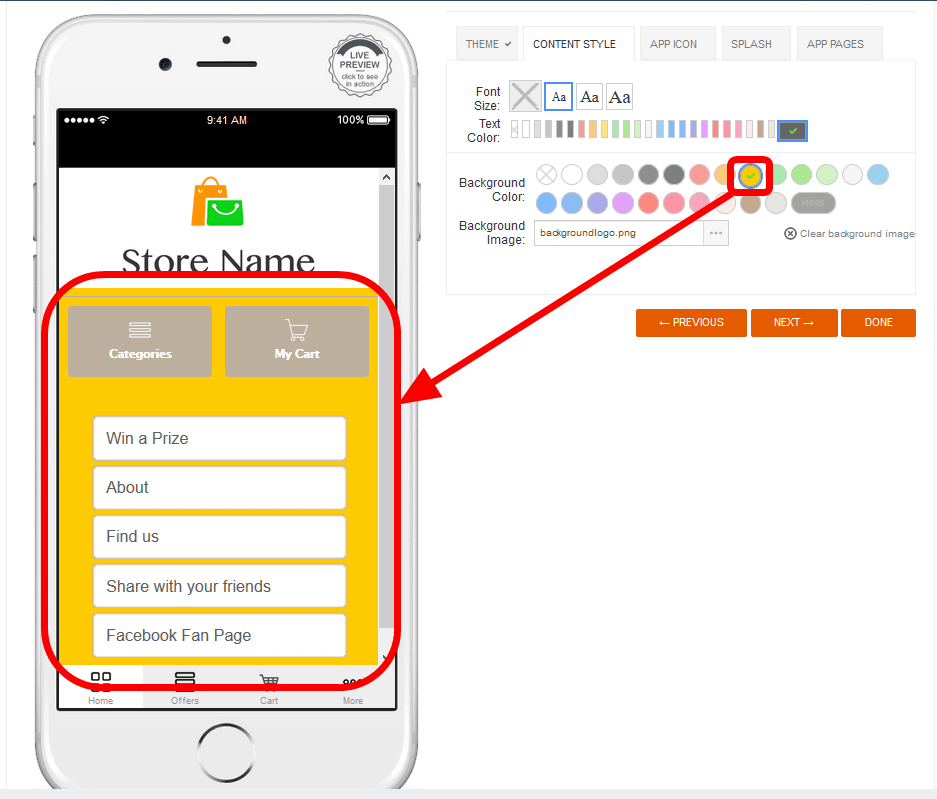
The "CONTENT STYLE" tab sets the color and background of the entire screen. Since this time I will select yellow as the background, click the yellow icon of "Background Color".
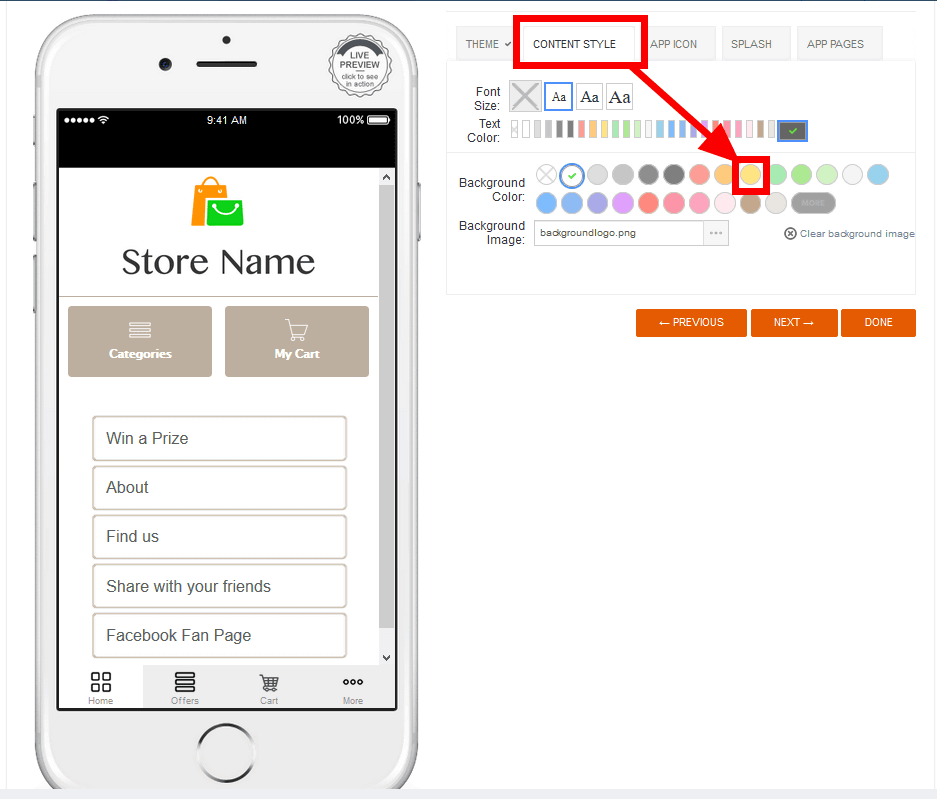
The background of the whole application turned yellow.
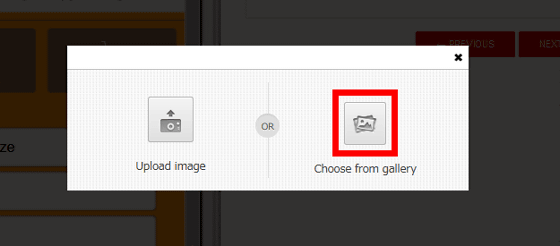
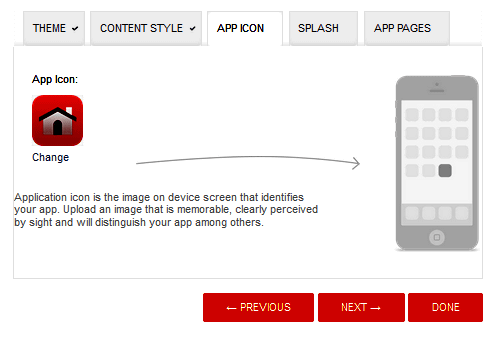
In the "APP ICON" tab, decide the design of the icon displayed on the iPhone's home screen. You can prepare the image by yourself or you can use the image prepared in advance. Click the image under "App Icon" to change the start icon.

Icons can be uploaded to your favorite images or made from pre-prepared samples. In this time I will use the prepared image, so click "Choose from gallery".
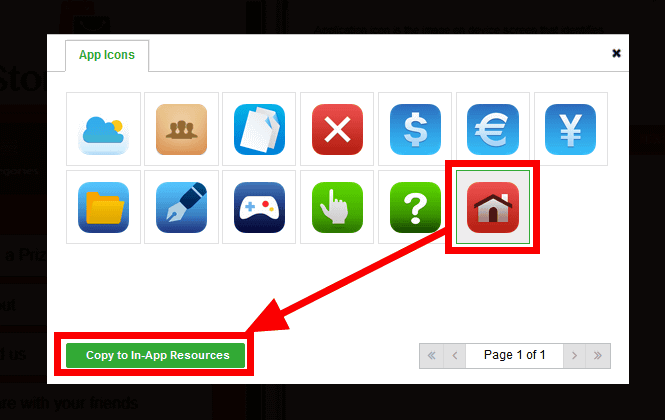
Click on the image you want to use and select it and decide on "Copy to In-App Resources".
The candidate icon is magnified and edited. As the range of the dotted line is the range that can be used for the activation icon, drag the dotted line or click "RESIZE" to adjust the range. If you click "RESIZE", the range is automatically adjusted.
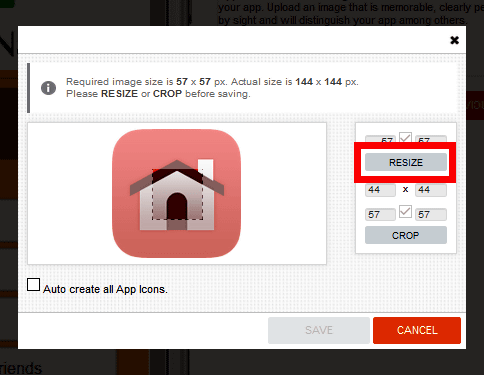
Save the changes with "SAVE".
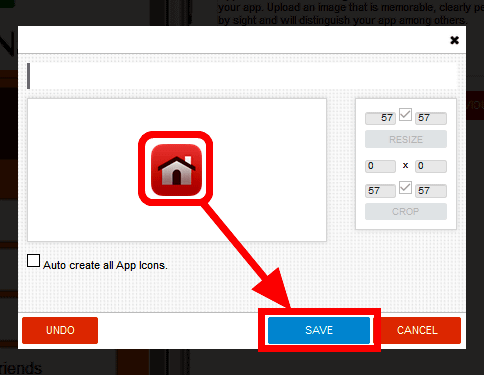
The launch icon was designed.
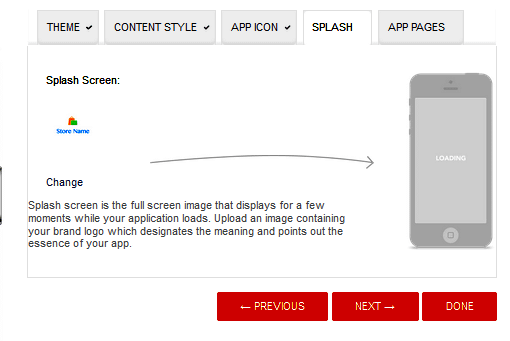
On the "SPLASH" tab, you can change the image displayed during loading at startup. Although I tried to make it as default this time, it is recommended to set it if there is a shop's logo etc.
You can add functions and external service pages to the application on the "APP PAGES" tab. The page used in the application is checked in green. To add a page, click the button with the function to be added and the external service "+", and then "ADD PAGE", you can embed the corresponding service and SNS page. This time, I will add a page of inquiry form. Click "ADD Form" to add the input form and click "ADD PAGE" to add the page.
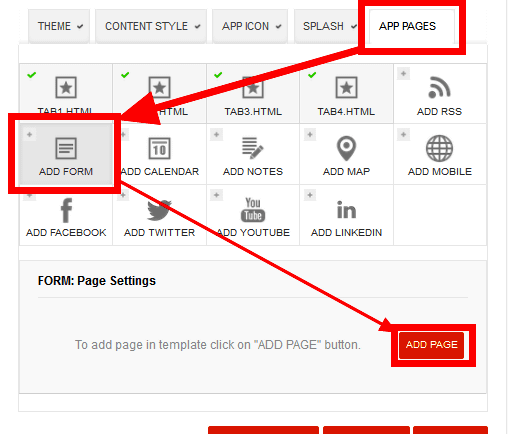
The pages that can be added are as follows. "ADD RSS (Add RSS reader)" "ADD Form (add input form)" "ADD Calendar (add calendar)" "ADD Notes (add note to note etc.)" ADD Map ADD Mobile (AWSADD Facebook (Add Facebook page) "" ADD Twitter (Add Twitter page) "" ADD Youtube (Add Youtube video "" "ADD Linkedin (Add Linkedin page)" Add ADD Facebook "
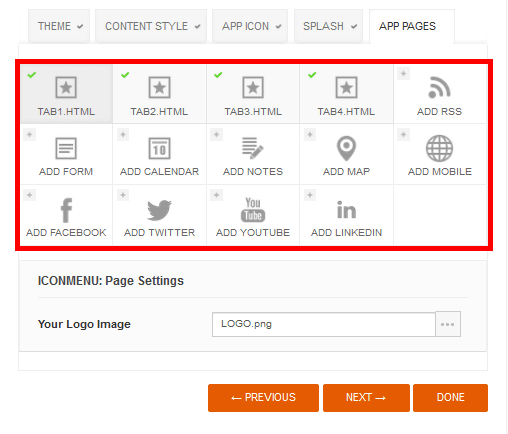
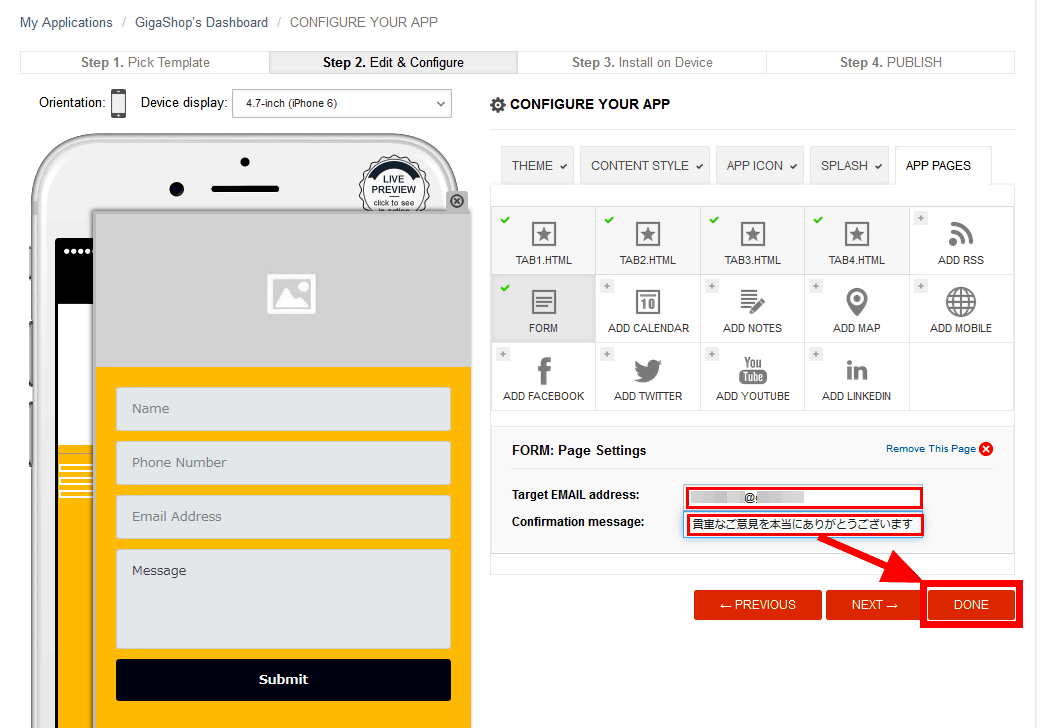
Since the image when using the input form is displayed, enter the text to be displayed after sending the inquiry content to the "Target EMAIL address" mail address to which the content entered is sent, and enter "Confirmation message". If you add a page, you need to create a link that leads to the page you added later. Complete the work with "DONE" and move on to the next process.
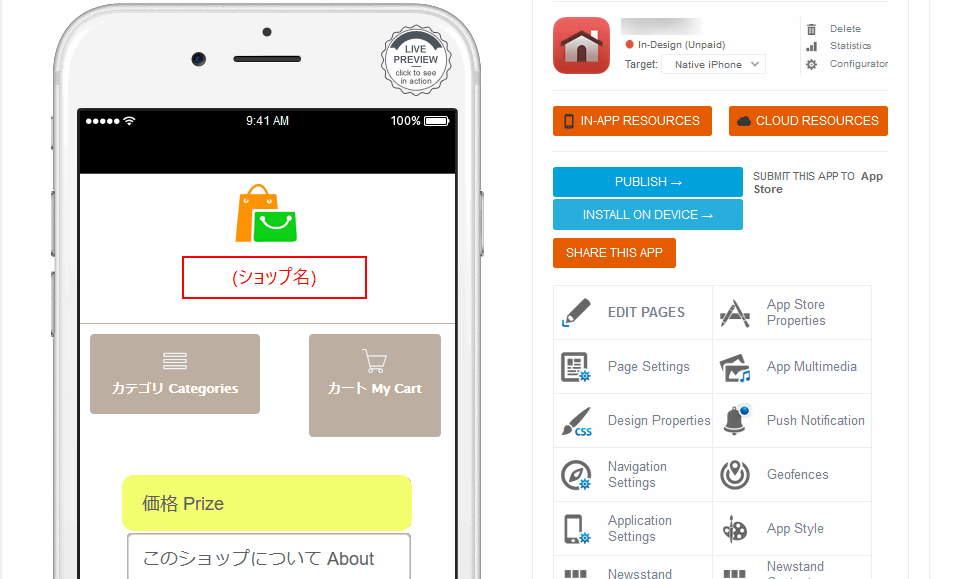
◆ Application Dashbord
Application Dashbord allows you to edit details of the application.
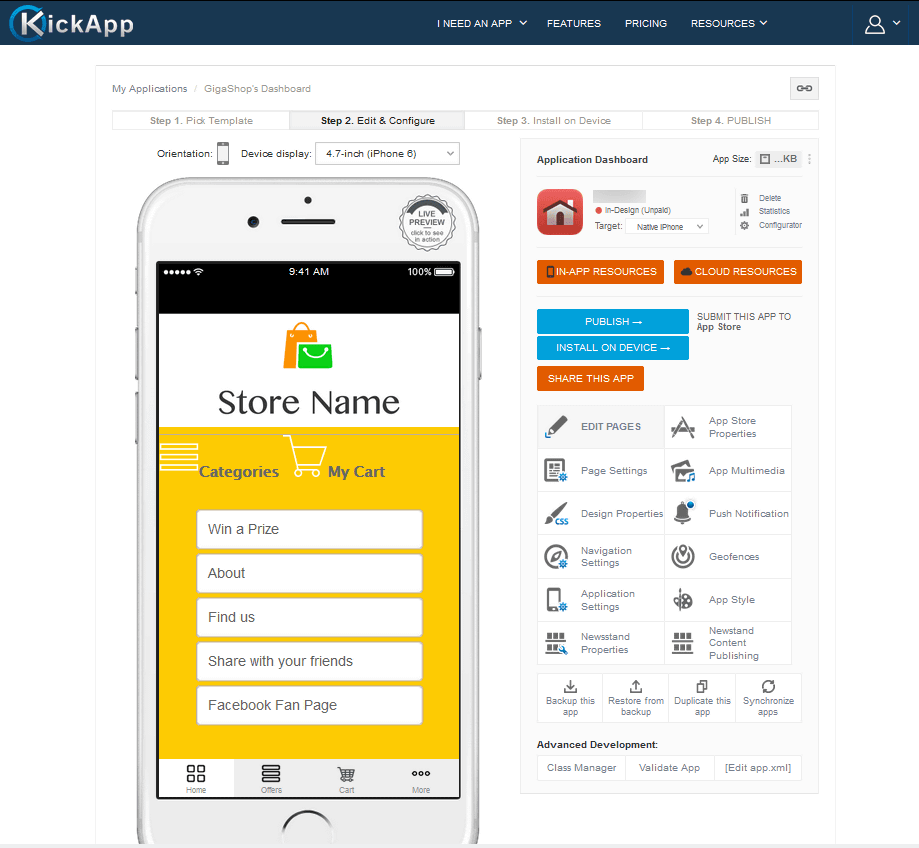
You can change the application platform again from this state.
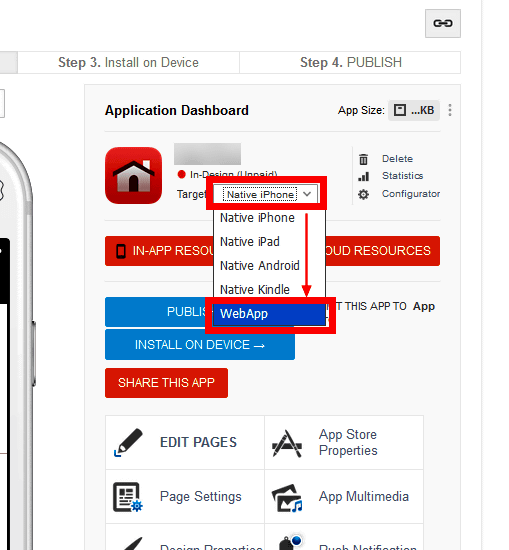
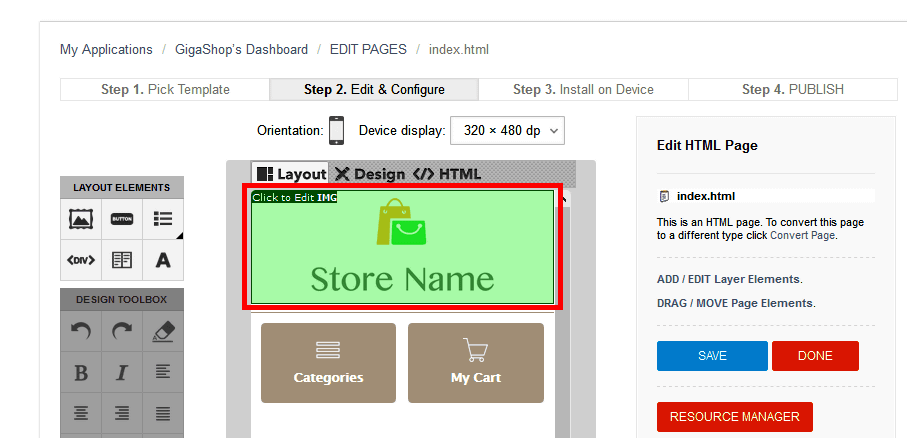
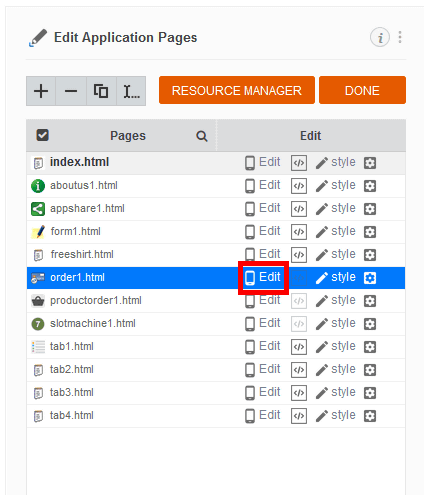
To edit the application finely, click "EDIT PAGES".

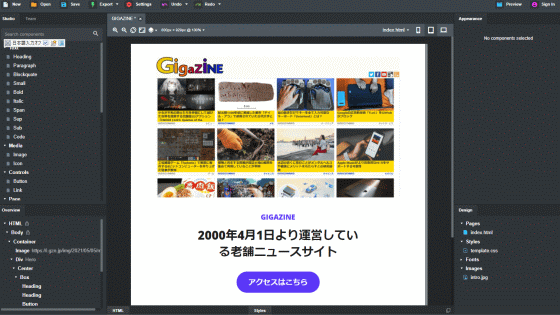
I will edit the top page. Click "Edit" on the right of "index.html".

· Replace files used in applications such as logo images
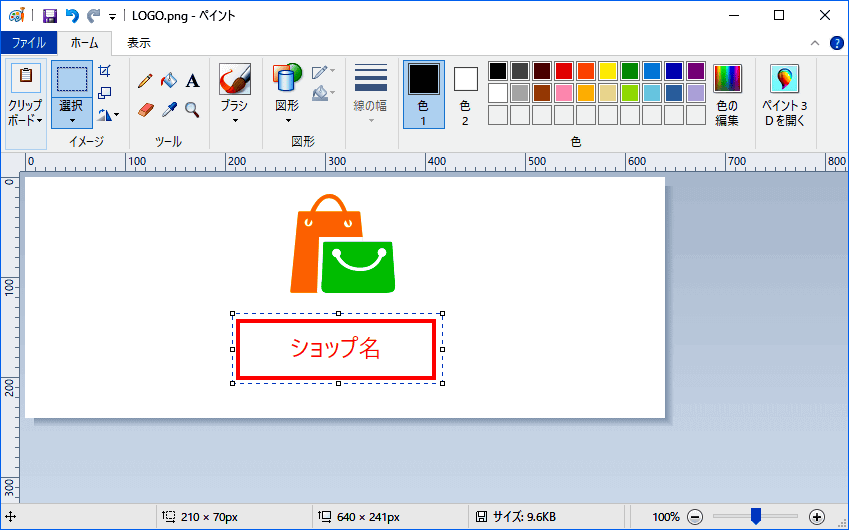
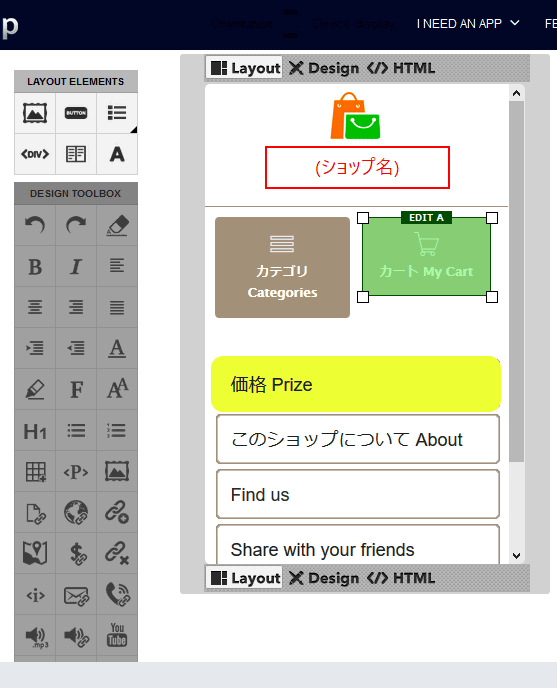
I will change the logo image to the original one. Double click on logo image.
Linked file name "logo.png" Click the pencil icon on the right.
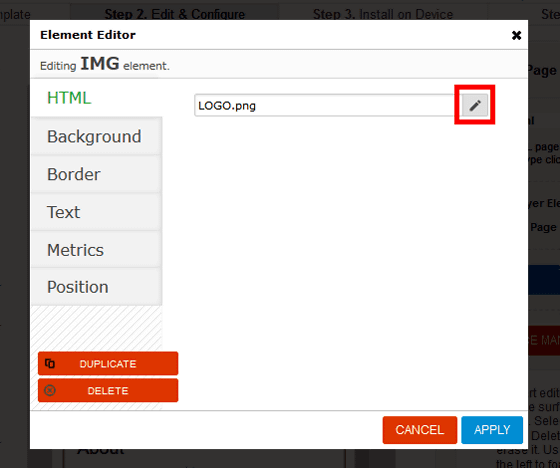
Click on logo image file to select.
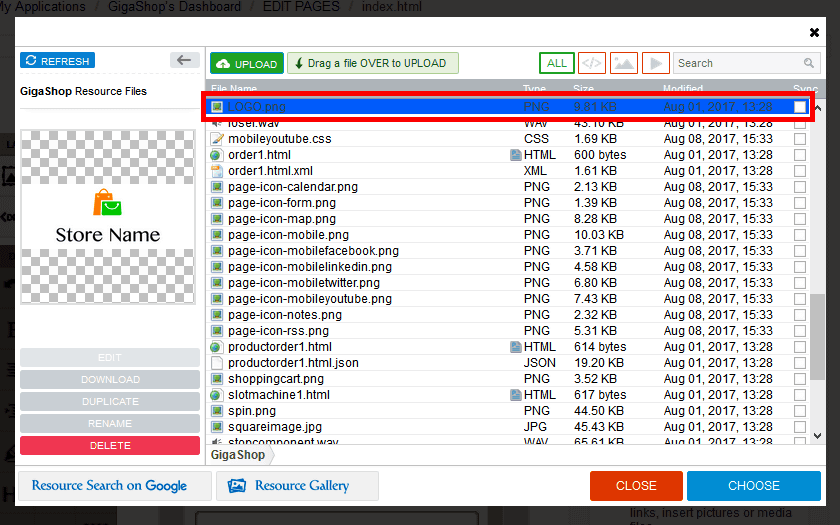
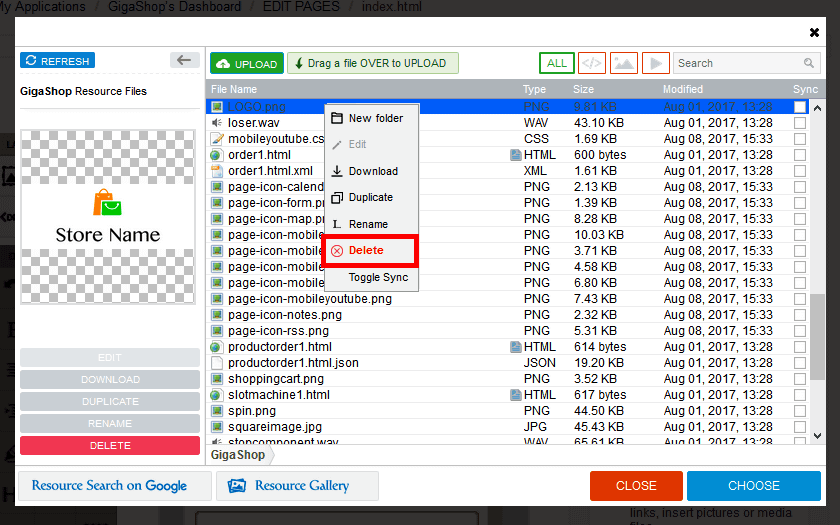
Right click and click "Download" to download the logo image file and back it up.
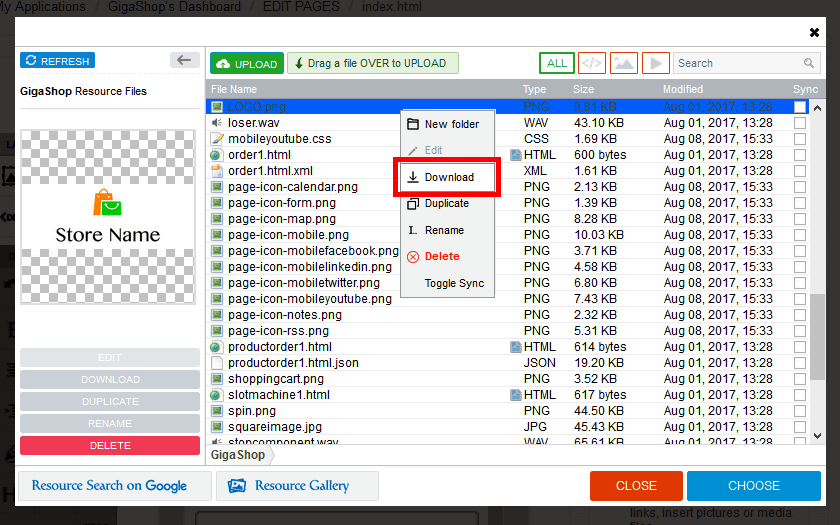
Prepare an image file of a new logo with the same name so that the link works.
Next, right-click the image file name of the logo and click "Delete" to delete the image file of the logo in the application.
Tap "UPLOAD" to make it a new logo image file. Upload it on the server.
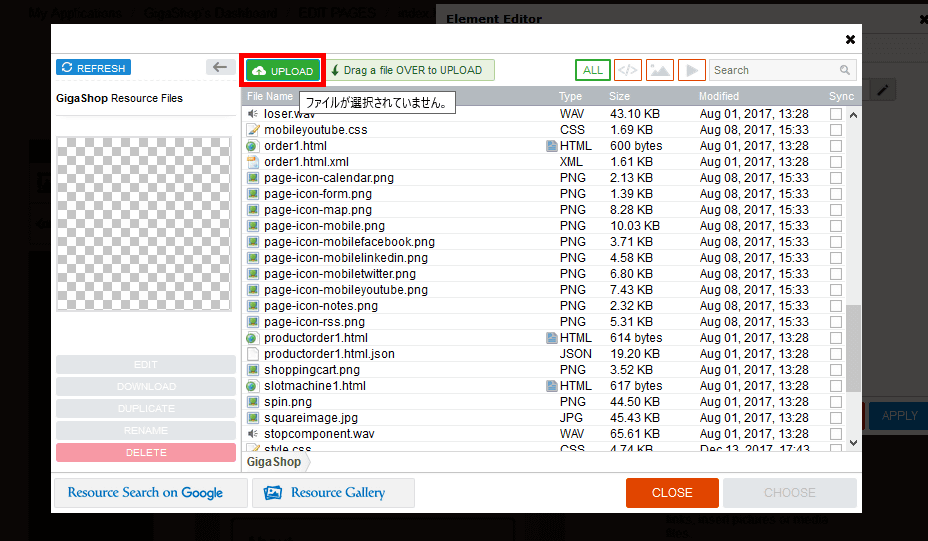
Select the image file of the new logo and click "Open".

I changed it to a new logo image file. Then click "CLOSE".
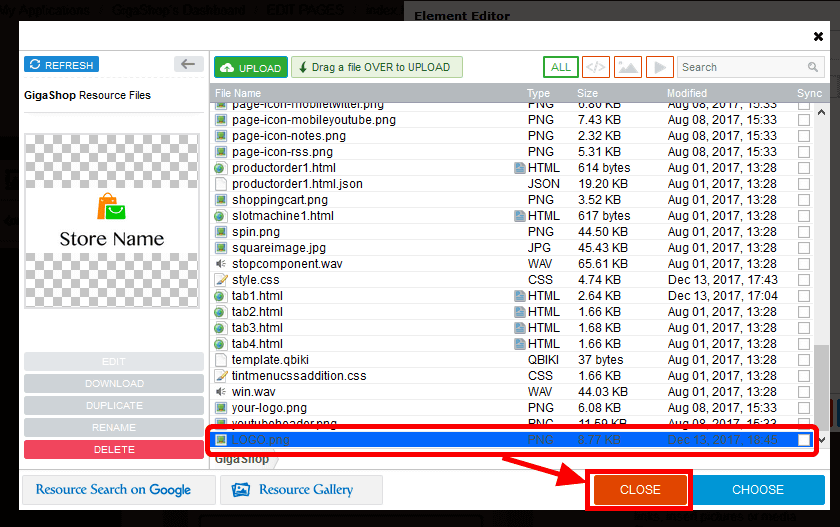
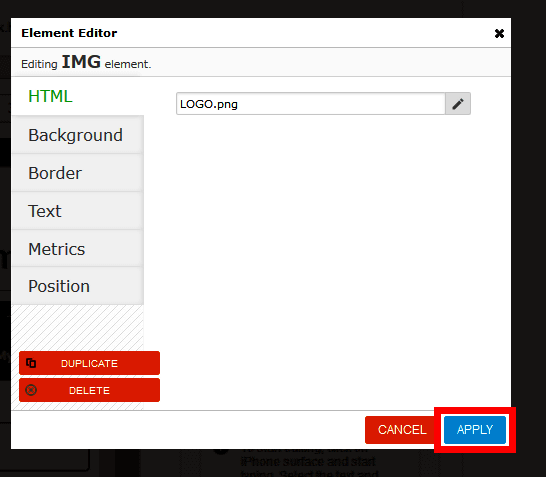
Finally, apply "APPLY" to apply changes.
I can change the logo image. Other files can also be swapped in this way.
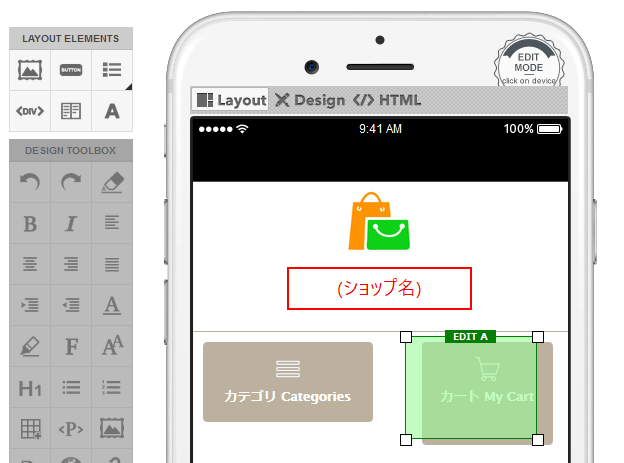
· Edit buttons
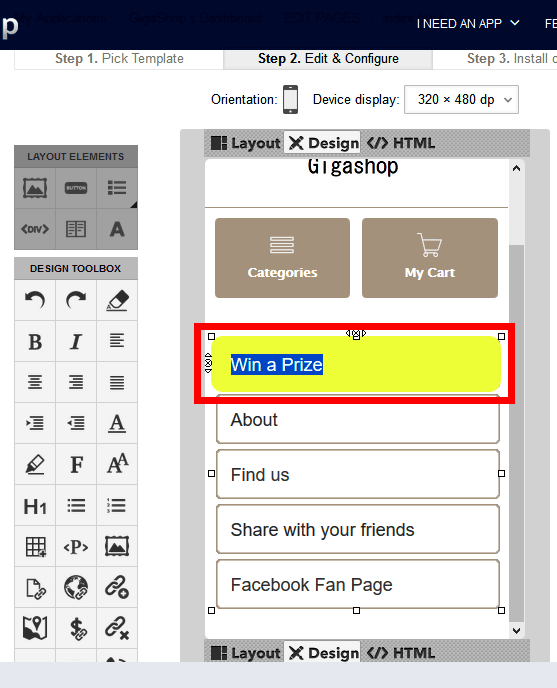
To edit the color of buttons and typeface of characters, double-click the button, if you click single click, you can change by dragging the size of the button.

You can change the background color by the same procedure as when changing the color with "THEME" in "Background". Change the behavior when the button is pressed with "Border" with the border, "Text" with the text color and font, "Metrics" with the button size and "Position".
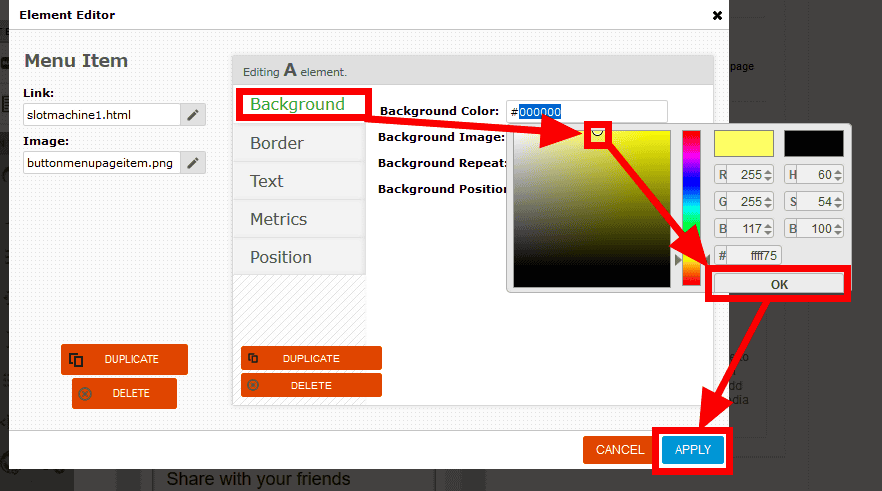
After selecting the color, click "APPLY".
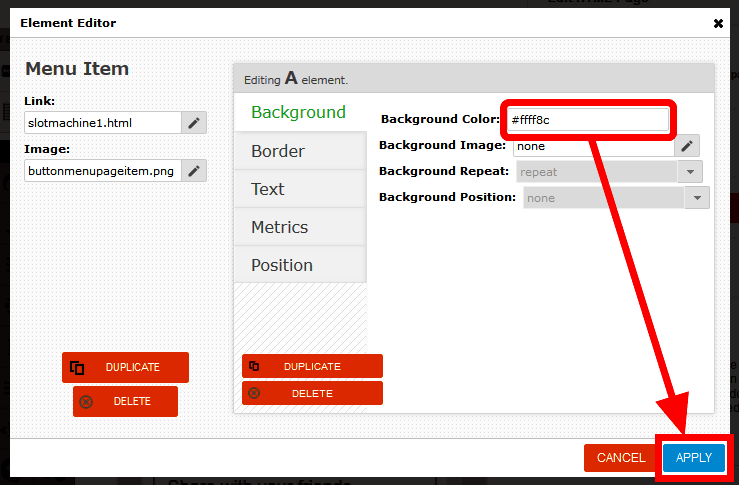
You can change the color of the button.
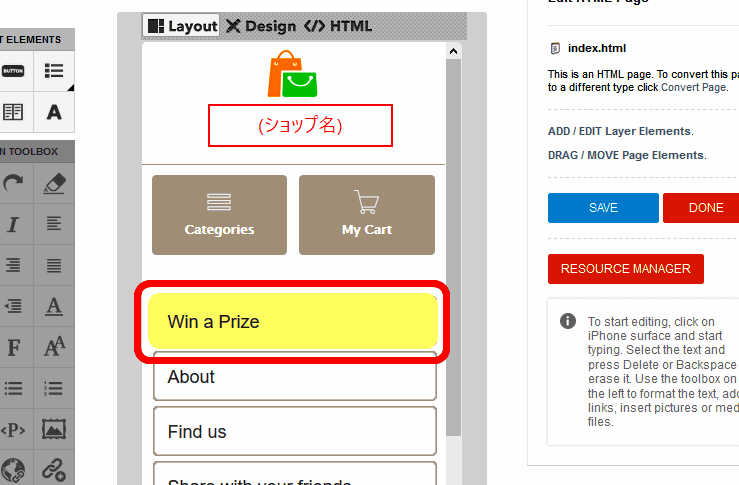
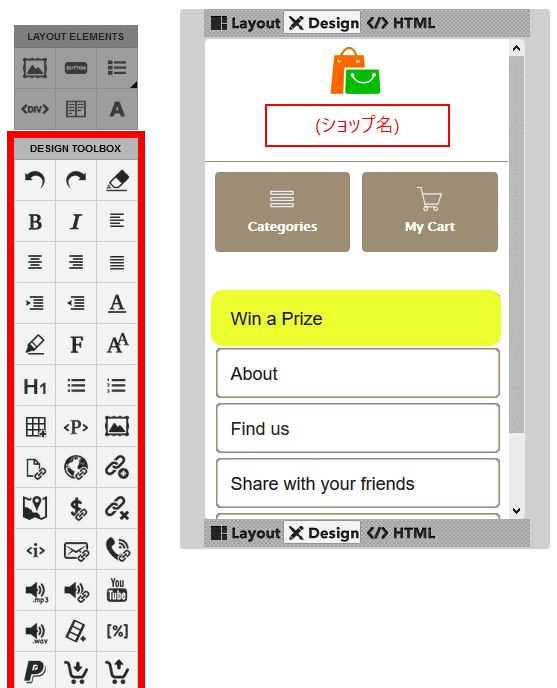
When you want to change the characters displayed in the application, you can change the contents of the letters and the size of the letters with "DESIGN TOOLBOX", add position information, link.
Try changing the character displayed on the button. Double-click the part of the character you want to change.
Characters are selected and can be entered.
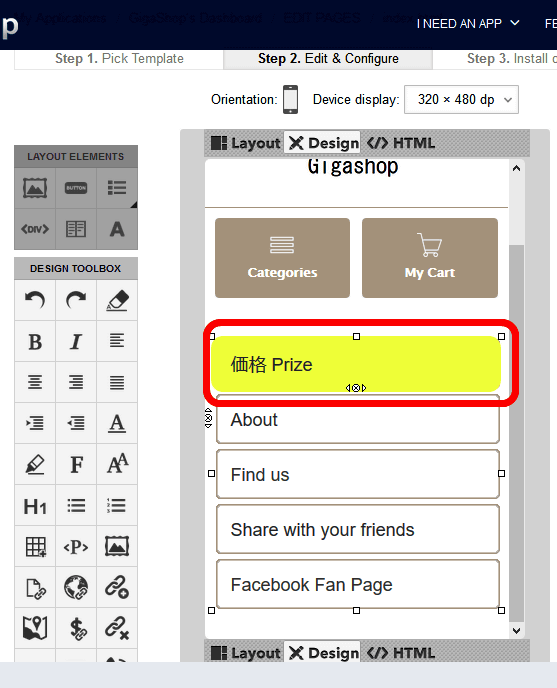
You can also change the letters of other buttons in this way.
「HTML」をクリックするとアプリ全体をHTMLを使って編集できます。

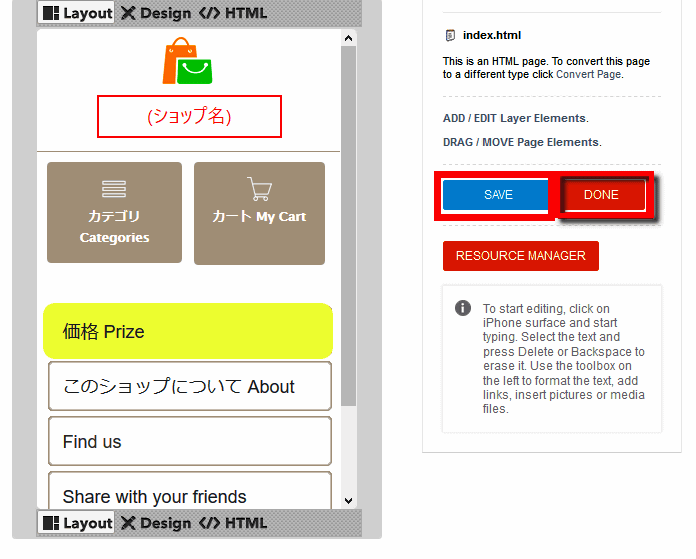
When you finish editing the page, save it with "SAVE" and end with "DONE".
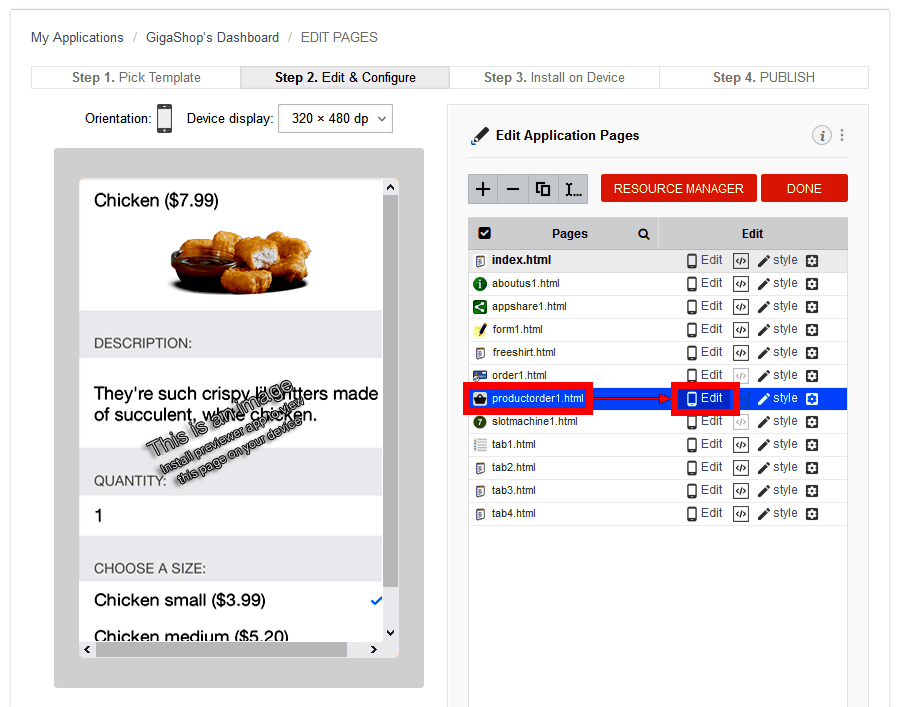
· Set products
Click "productorder1.html" and click "Edit".
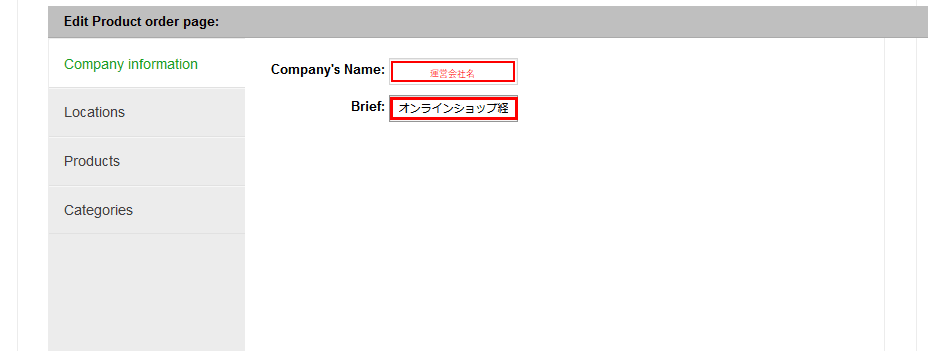
Enter the name of the company that owns the net shop application in "Company's Name" and enter the business contents in "Brief"
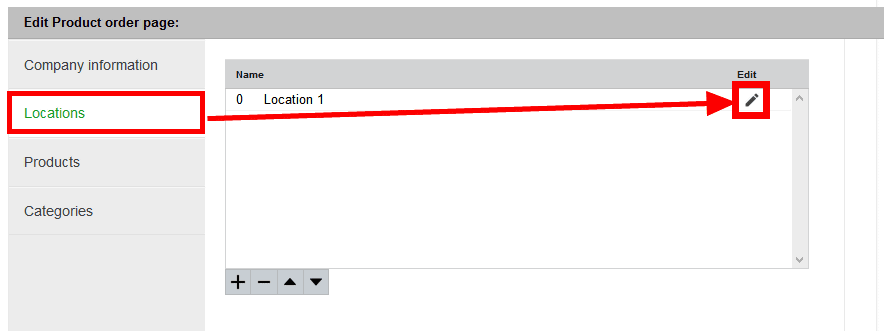
Enter the location of the operating company Click the pencil icon on the "Locations" tab
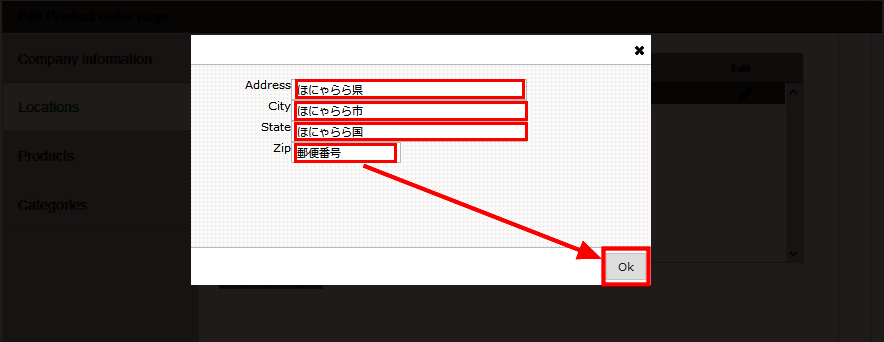
Enter the prefecture in "Address", the municipality in "City", the country name in "State", the zip code in "Zip" and click "OK" to complete.
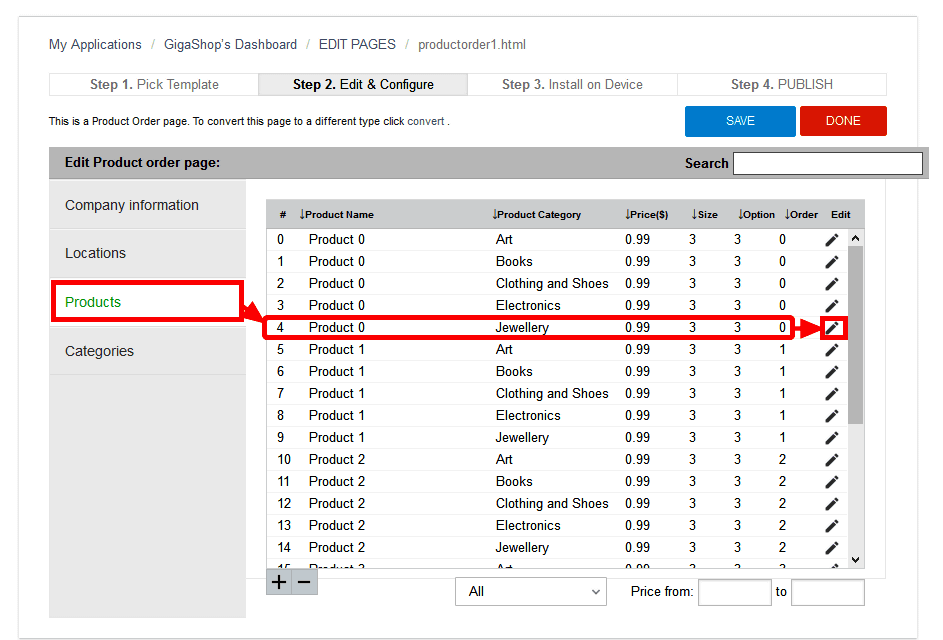
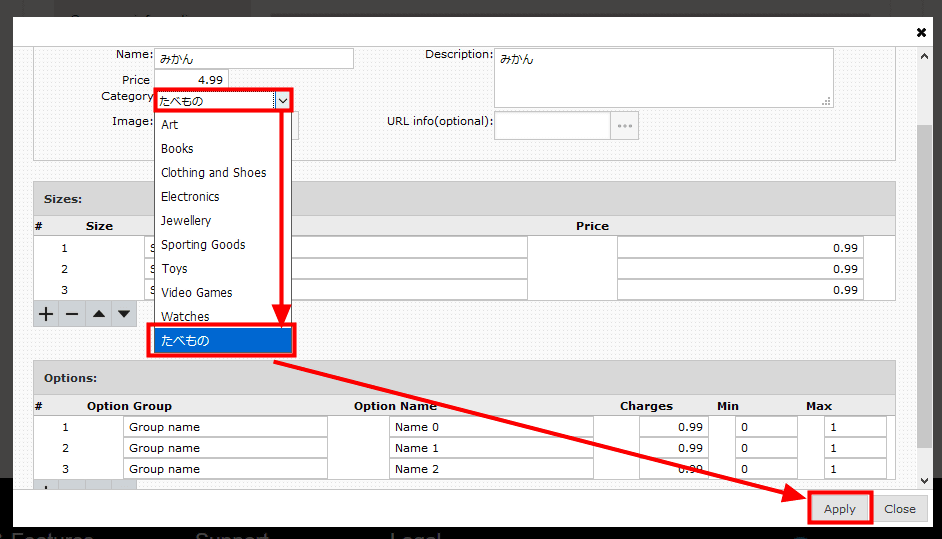
Next we will set up the item. Click "Product (product category)" and click the pencil mark at the end of the product name you want to edit.
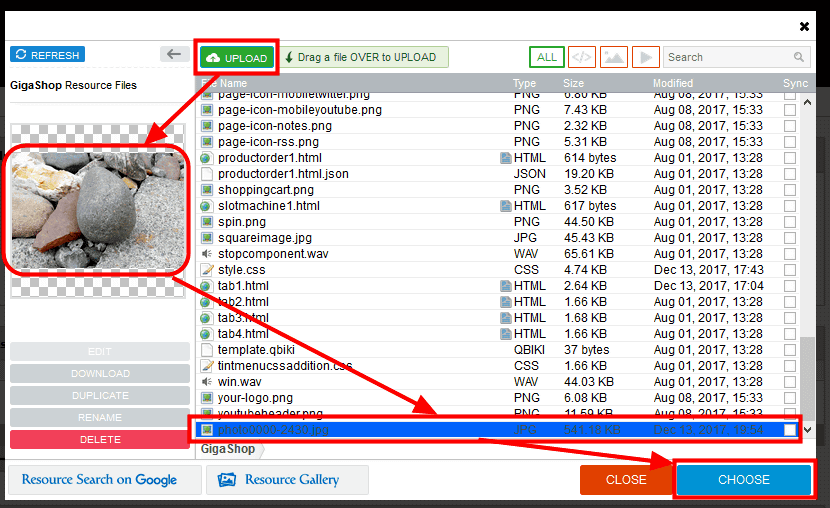
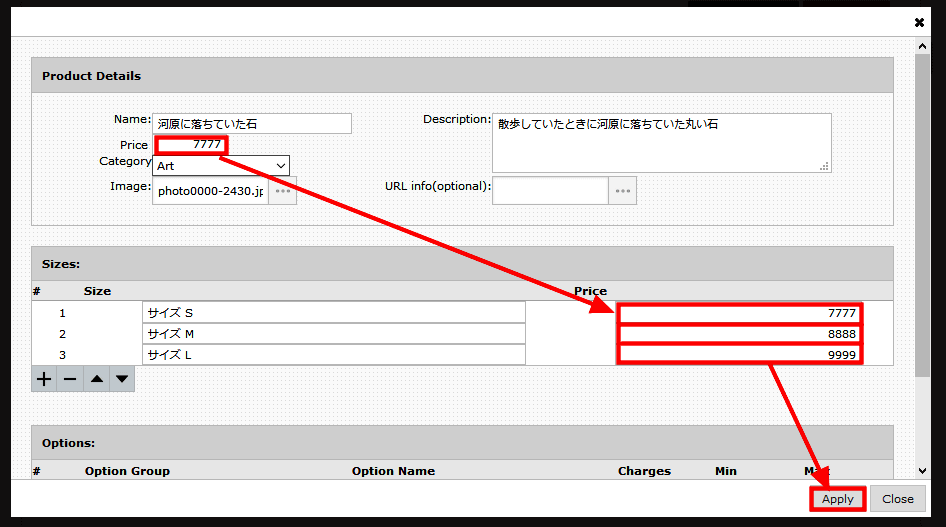
Click "..." on the right of "Image" to upload product images.

Upload the image of the product and set it by the same procedure as when exchanging the image file of the logo. This time the stone is displayed in the shop. Click "UPLOAD" to upload the image, then click on the image to confirm the image content, click "CHOOSE".
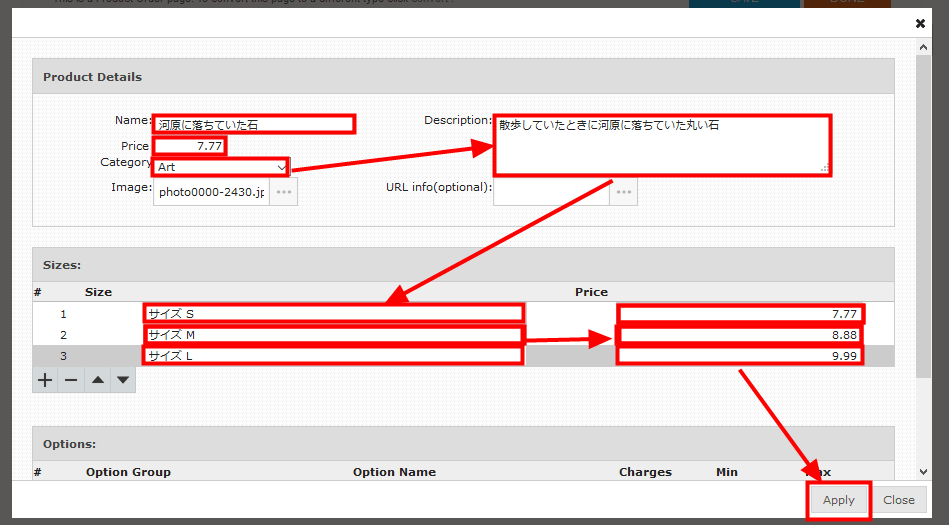
Enter necessary information for the product such as "Product Name (product name)" Product Category (product category) "Price ($) (dollar unit price)" "Size" and click "APPLY"
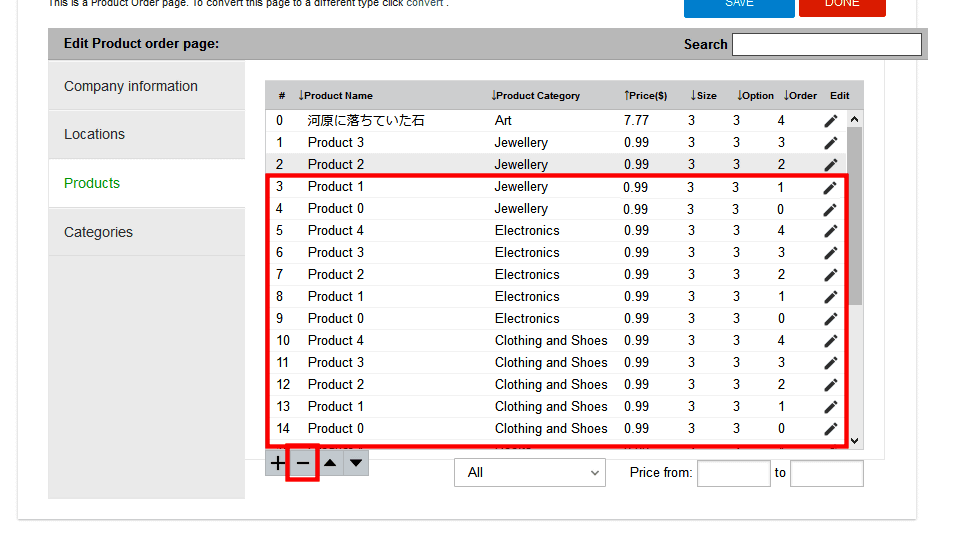
You can select items that do not line up in the shop, and you can delete them by clicking the "-" at the bottom.
You can add and edit product category on "Categories" tab. Click "+" and enter category name to increase product category, "-" to delete category.
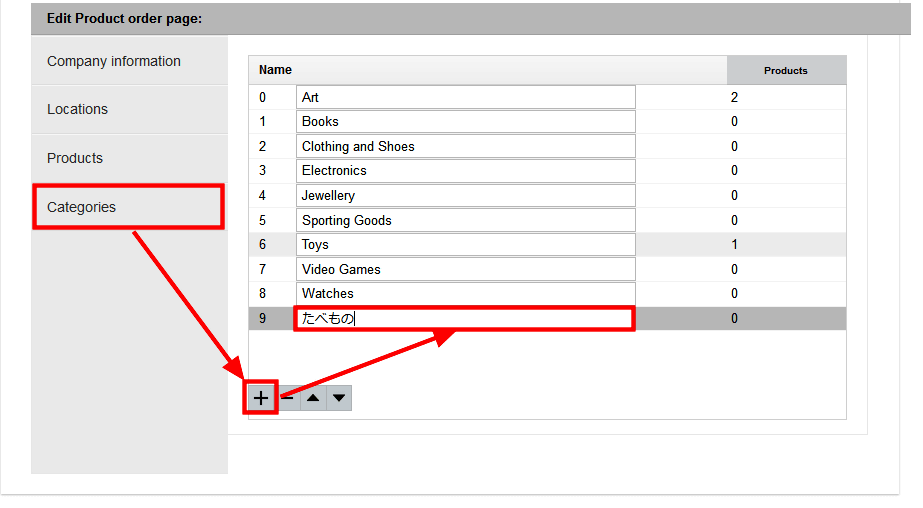
You can change the category you added from the setting page of each item.
We are going to finish the appearance soon. I created it for "WebApp" but this time I will make a net shop application for iOS, so change the application platform again. Since the application is automatically changed for iOS on the server, the design has collapsed a bit but problems do not occur in operation.

Change complete. Because the platform is different, the balance of the button got a little bad.
In that case, you can adjust the button size with "Layout" of "EDIT PAGES" OK.
· Set order method such as settlement method and delivery method
Click "Edit" in "order1.html".
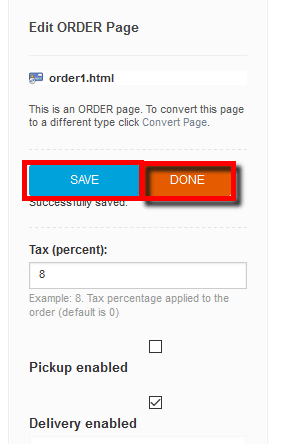
Enter the consumption tax rate number in "Tax (percent)".
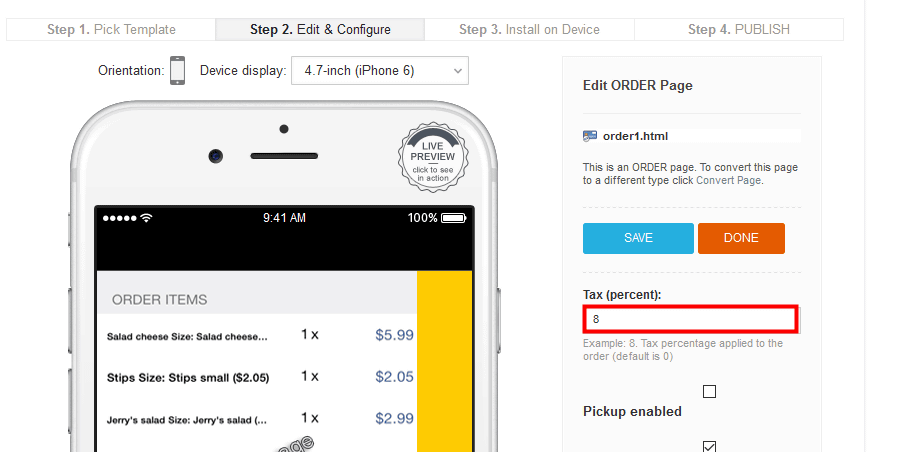
Enter the mailing address of the operating company to which the order form will be sent when shipping fee is charged for "Delivery price" and "Merchant email" is ordered.
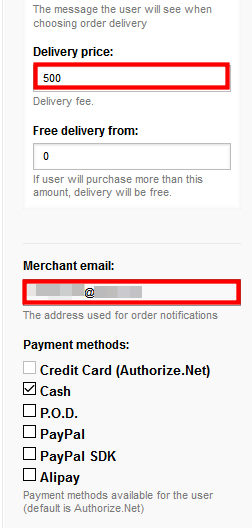
Check the settlement method used in the shop. When making a net shop application, payment processing includes "Credit Card (Authorize.Net) "," Cash ", so-called cash on delivery payment" P.O.D. ","PayPal, "PayPal SDK", and "Alipay"You can set the. Since I did not prepare accounts for each settlement service this time, I chose "Cash".
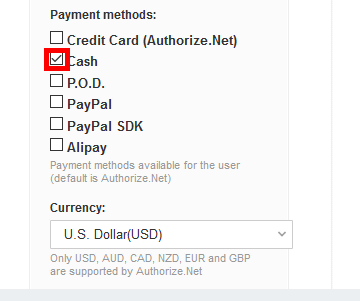
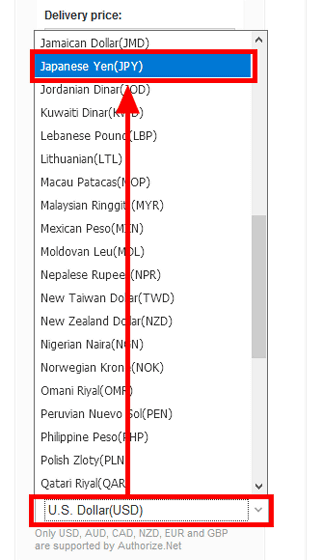
When you want to release the application for Japan, you can change the unit of price from "U.S. Dollar (USD)" to "Japanese Yen (JPY)" by clicking "Currency" and using the drop down menu.
Mail sent to buyer and operator after ordering can be set with "Email Options" of settlement setting. Subject of the invoice email sent to the buyer with "Receipt email subject".
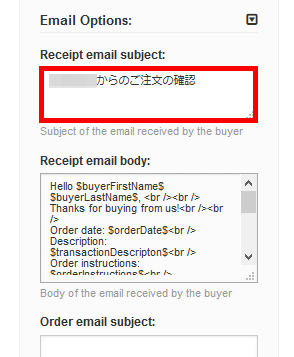
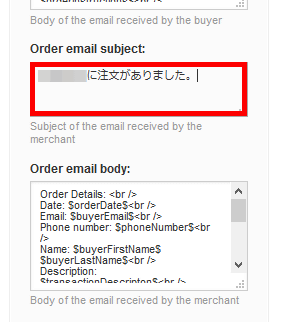
You can change the subject of the order form mail to be sent to the operating company with "Order email subject".
When setting is completed, click "SAVE" and click "DONE".
Be careful not to forget to adjust the price with 'productorder1.html' in order to adjust the price set in US dollar unit to Japanese Yen unit if you change the unit of price to 'Japanese Yen (JPY)'.
This completes the fundamental part of the application. Next, install the previewer application on the smartphone and check it.

◆ Check the platform that releases the behavior of the application
You can check the operation of the created application by installing a dedicated test application on the terminal. In addition to the iOS version tested this time,Android version,Kindle versionHas been released.
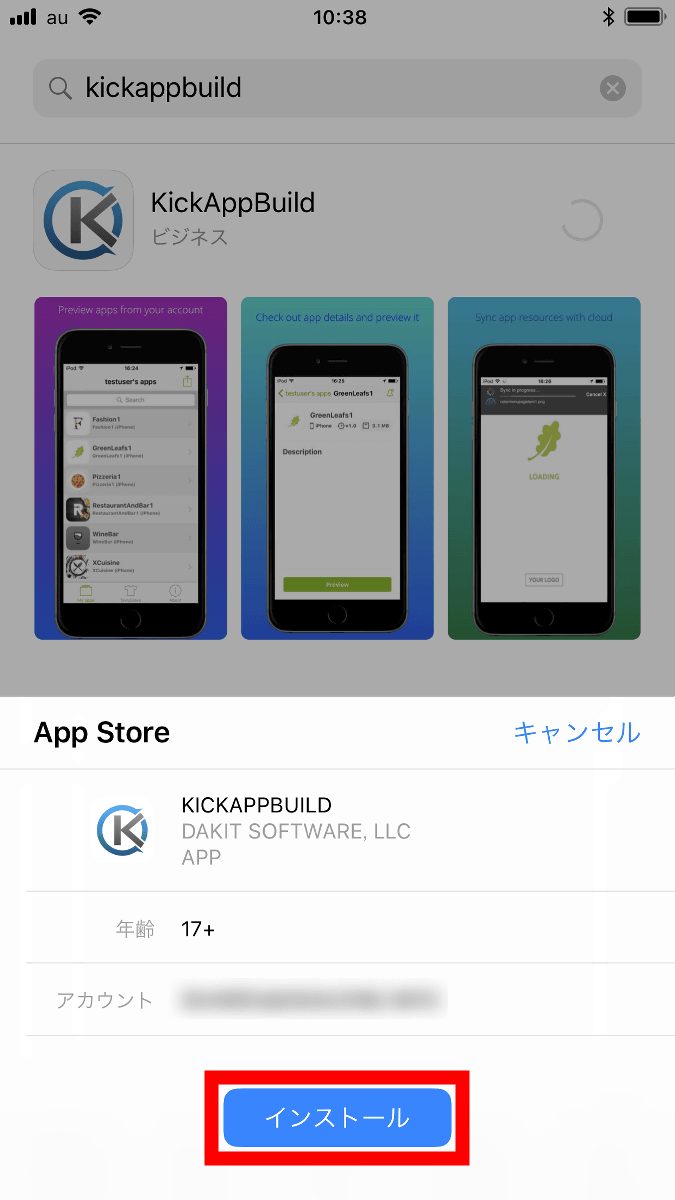
Because it is for iOS this timeApp StoreDownload KickAppBuild from.
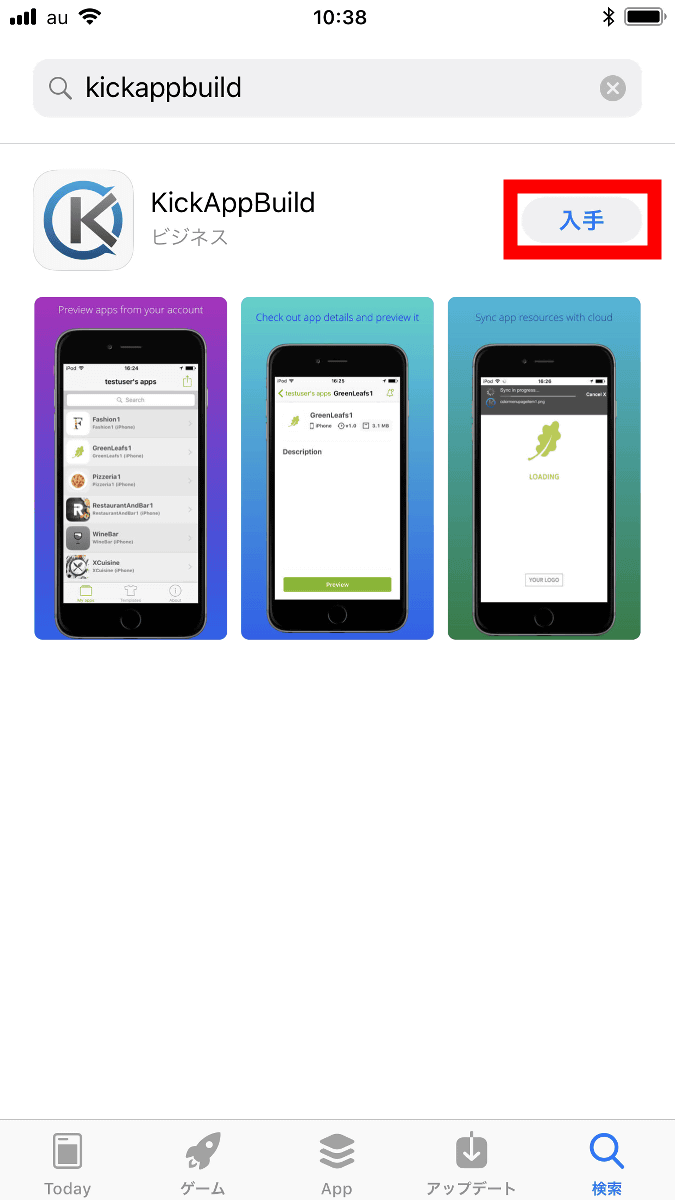
Tap "Install"
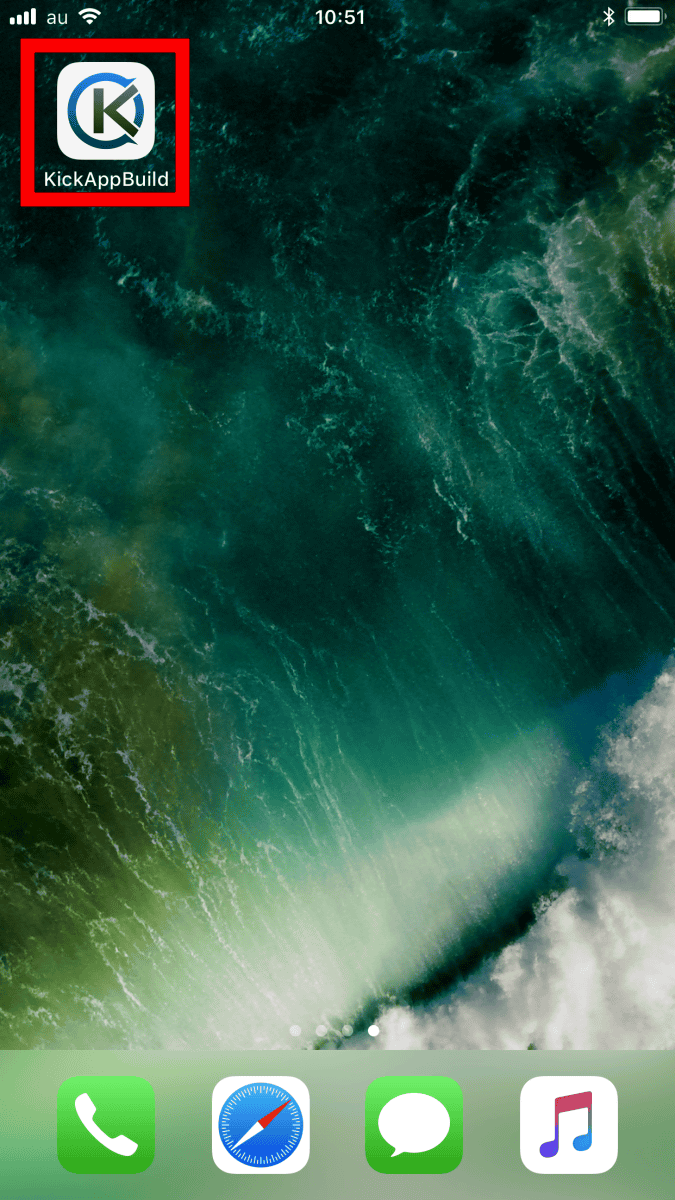
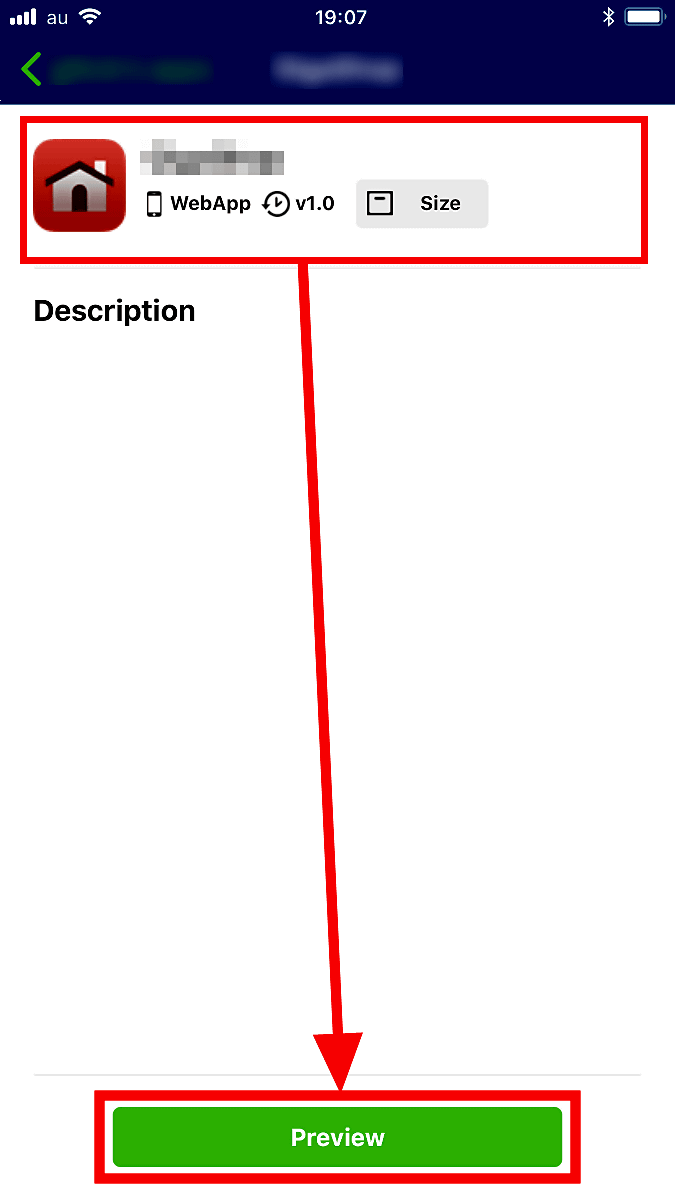
Tap the following icon to launch the previewer application.
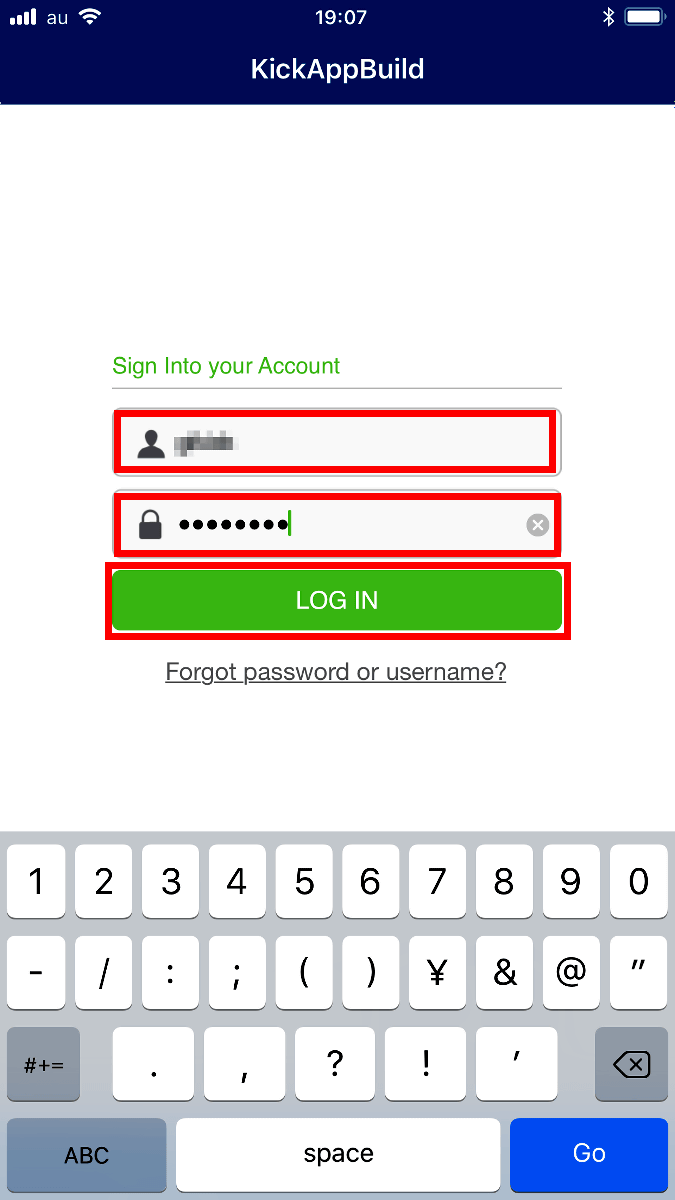
Enter the ID and password registered in KickAppBuild and tap "LOG IN".
Tap the application you want to preview and tap "Preview".
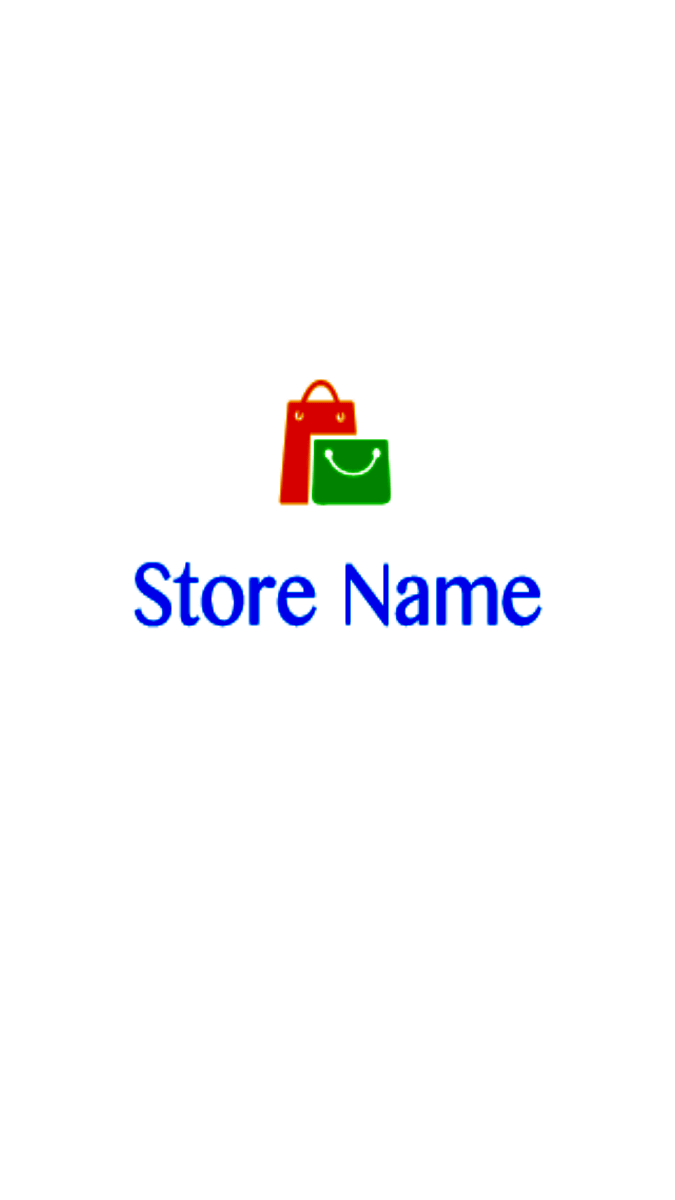
Since I did not set anything, the splash screen during application launch was "Store Name".
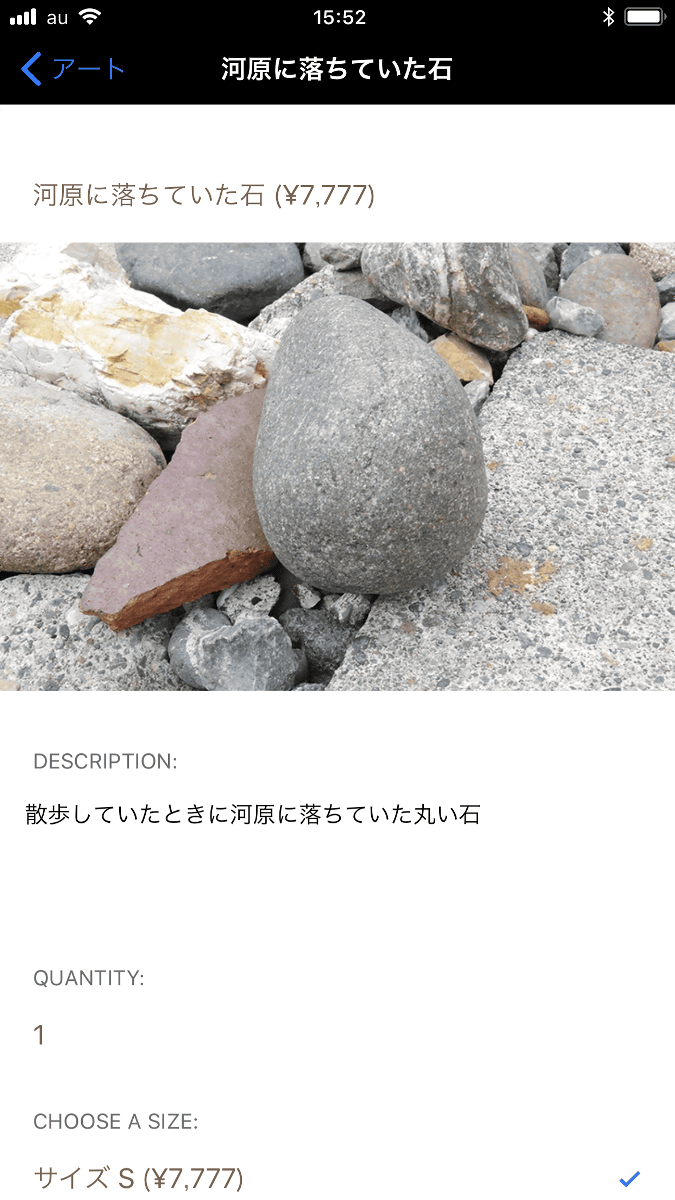
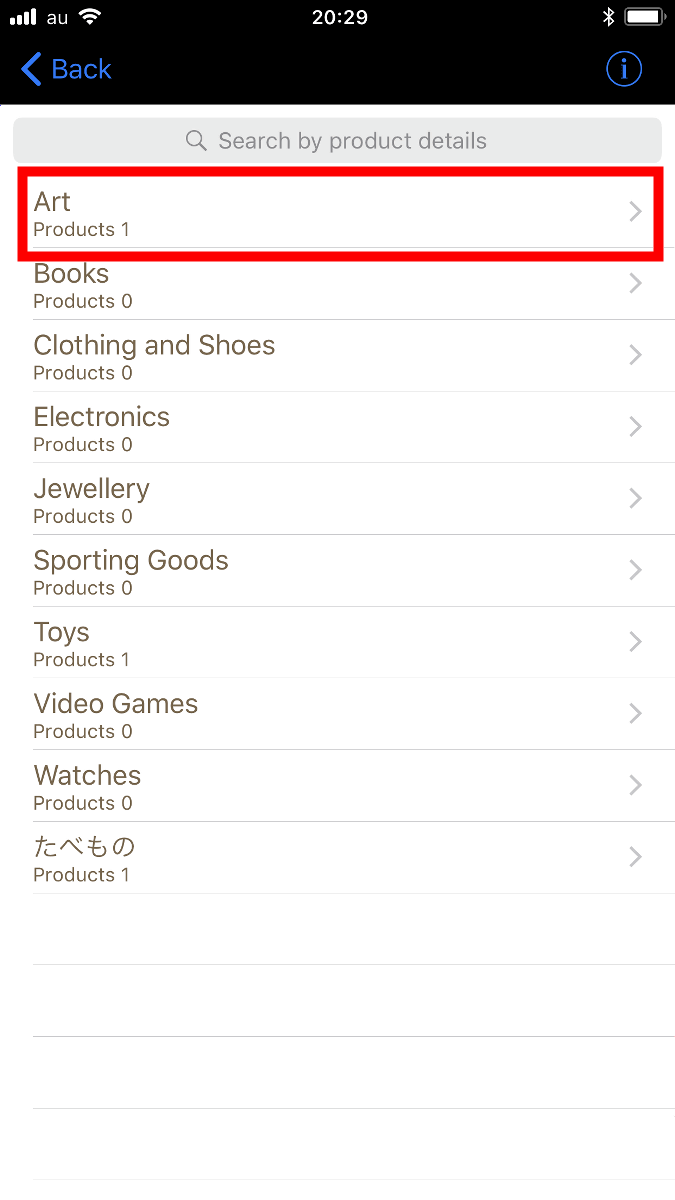
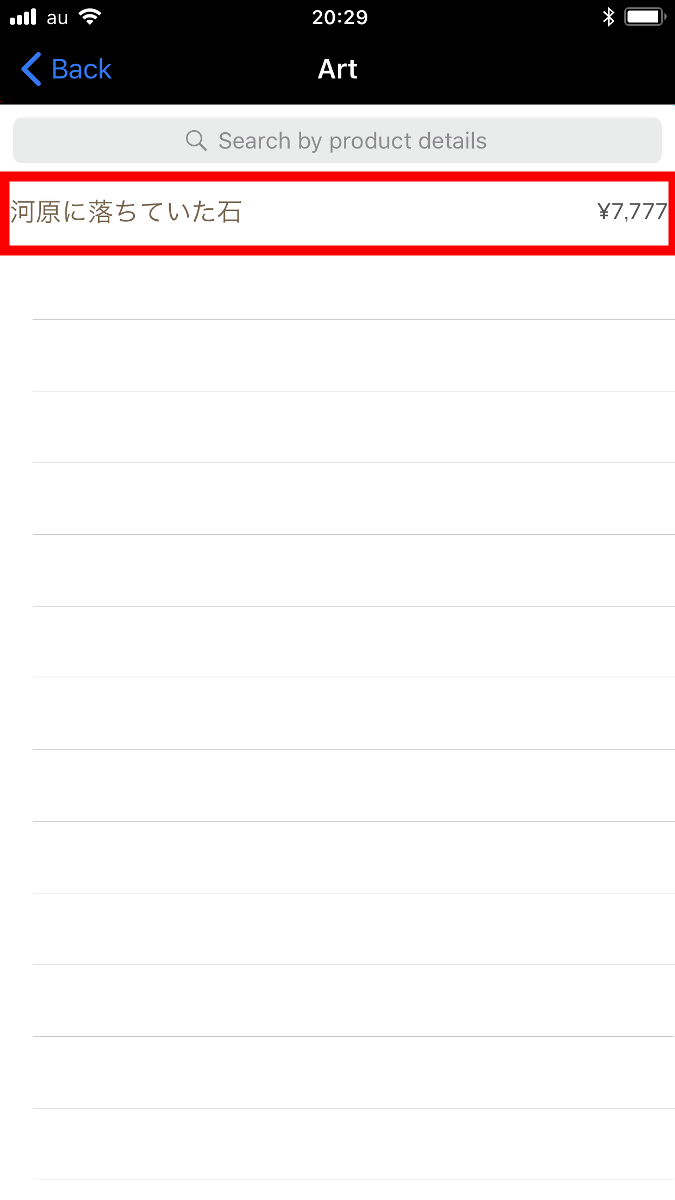
The same top screen as when I was making on PC was displayed on smartphone. I will try to purchase "the stone that had fallen on the river" of the item displayed in the shop so I will move to "category".
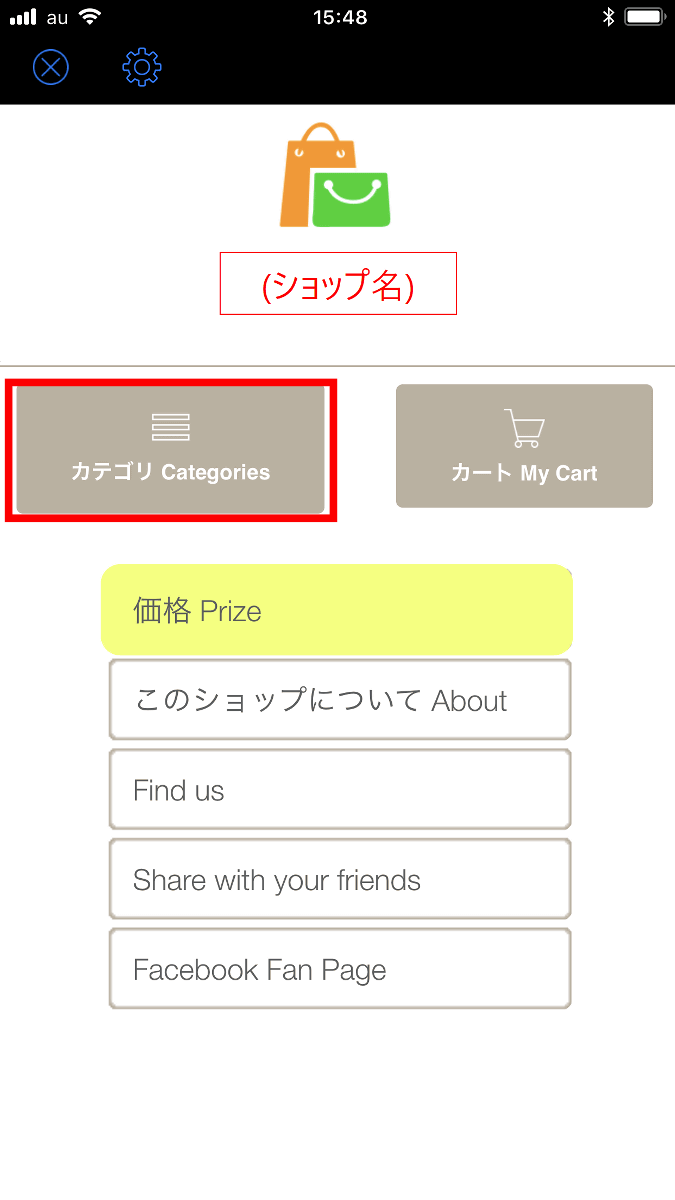
Click "Art" in the category in which the product is set
Since the set item was displayed, tap the product name.
Product name and product image are displayed and scroll down to set options such as size.
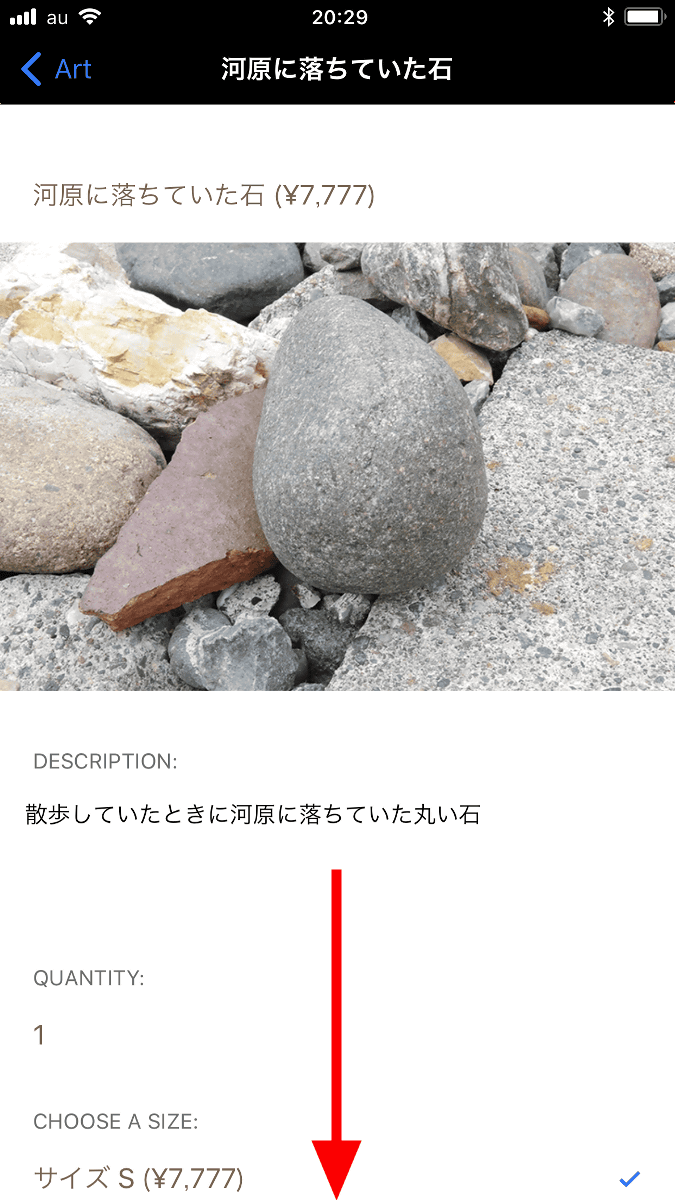
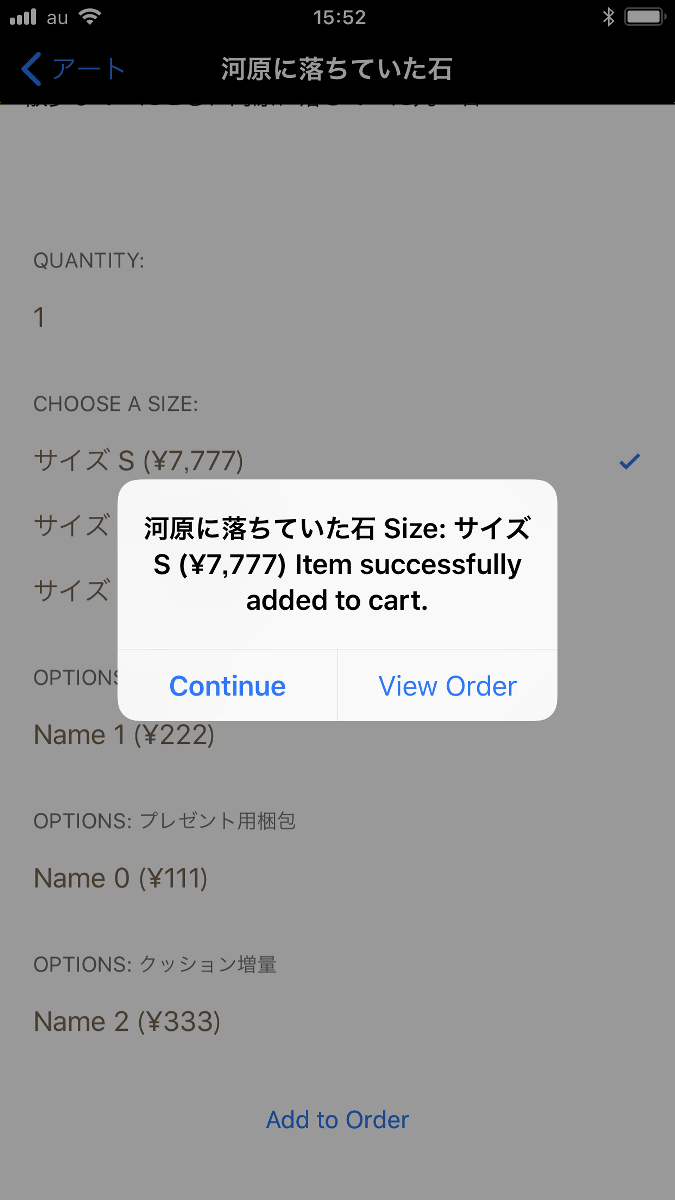
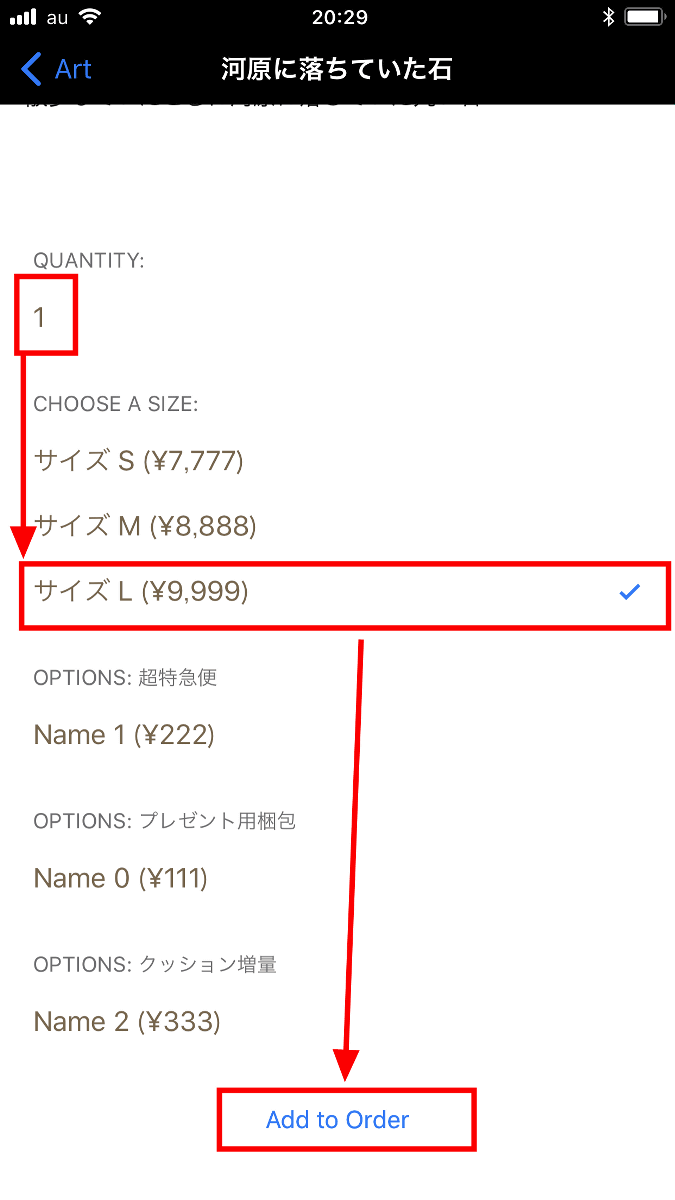
In "QUANTITY", tap the amount to purchase, decide the size you set in the option, and put it in the cart with "Add to Order".
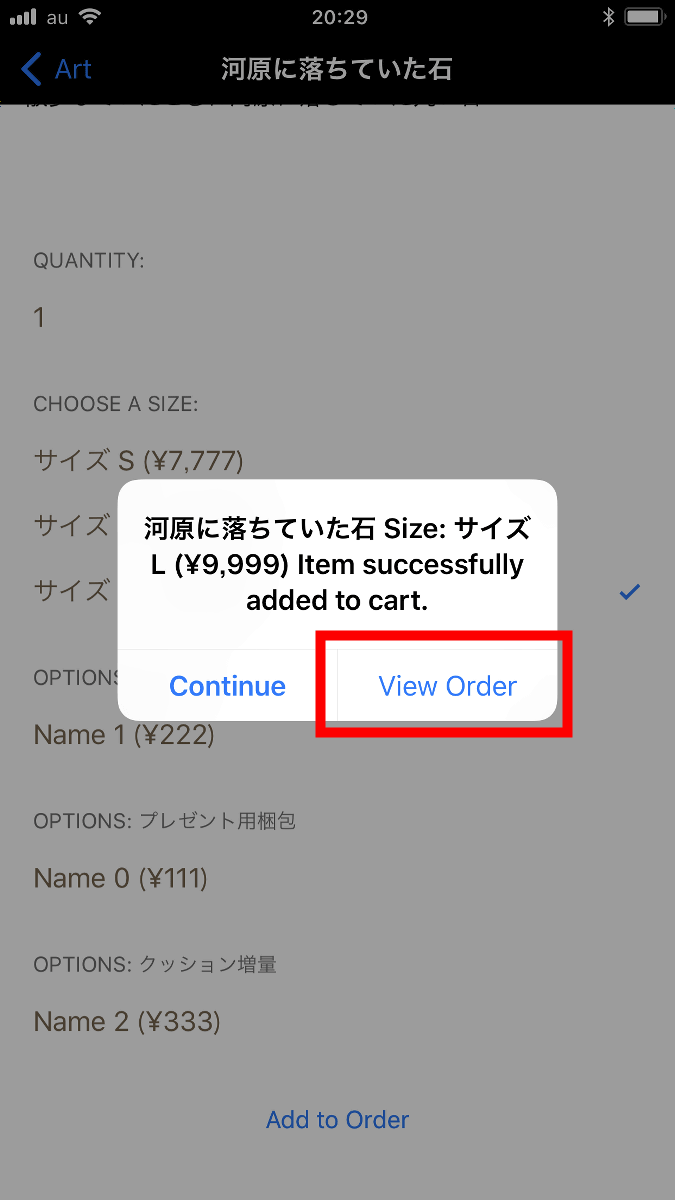
I entered the cart with the price and option as set up. Tap "View Order" because it will settle as it is without continuing shopping.
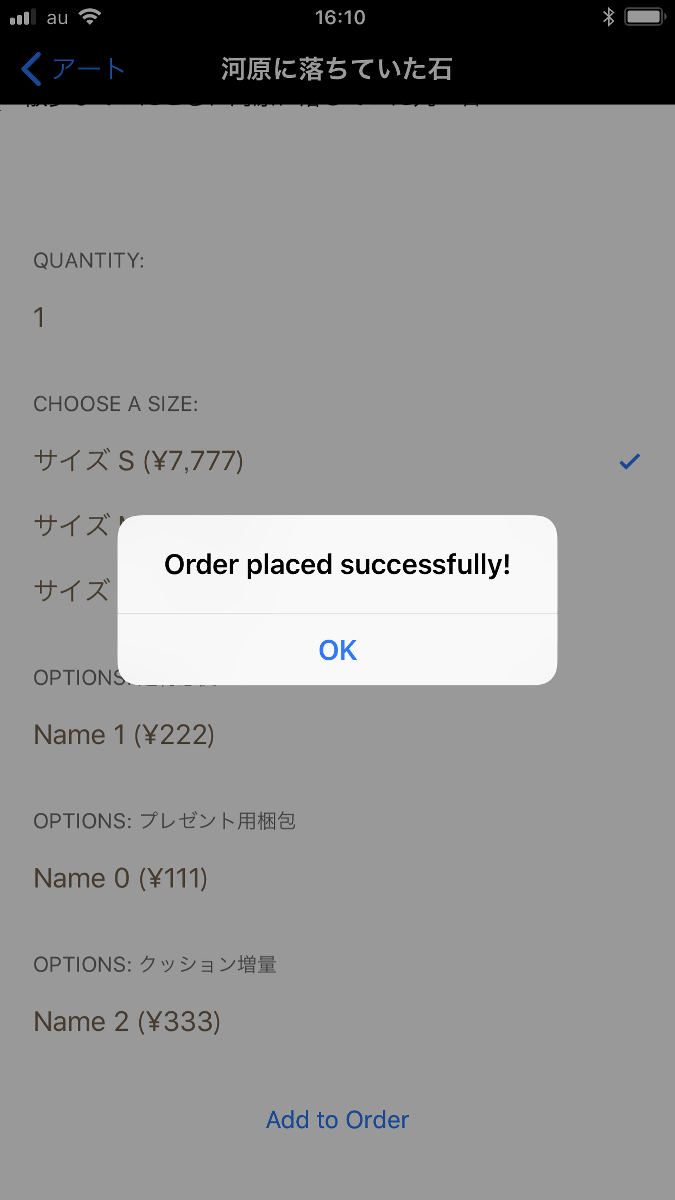
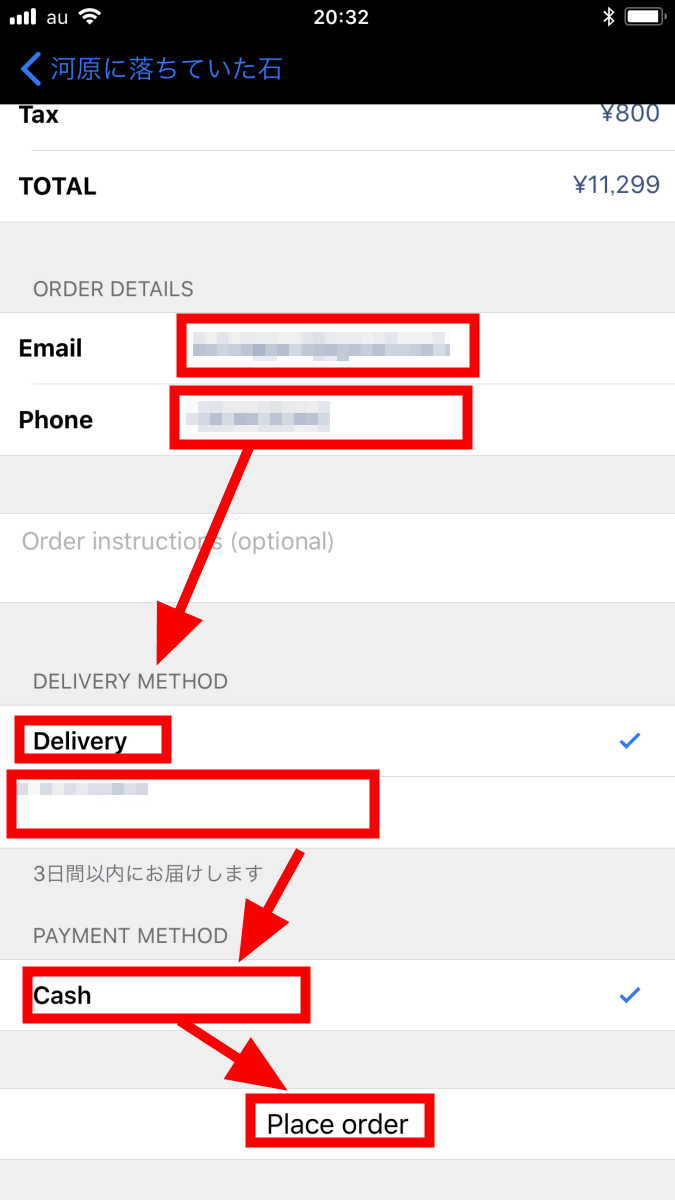
The details of the order will be displayed. Scroll down as it is ......

Select the e-mail address of the orderer and "Phon (telephone number)", and select delivery method "Delivery". Enter "Address" below it, select "Cash (Cash)" in the settlement means and place it in "Place order" ...
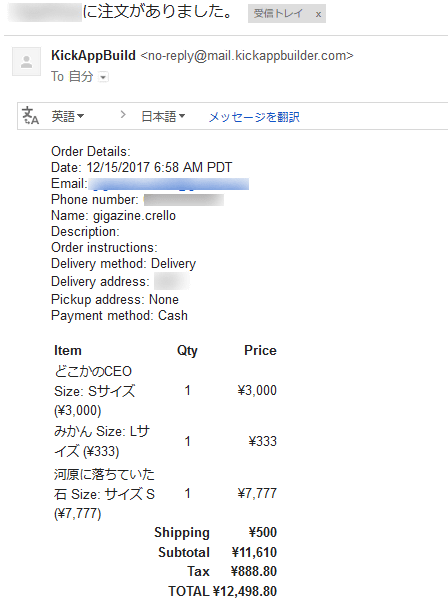
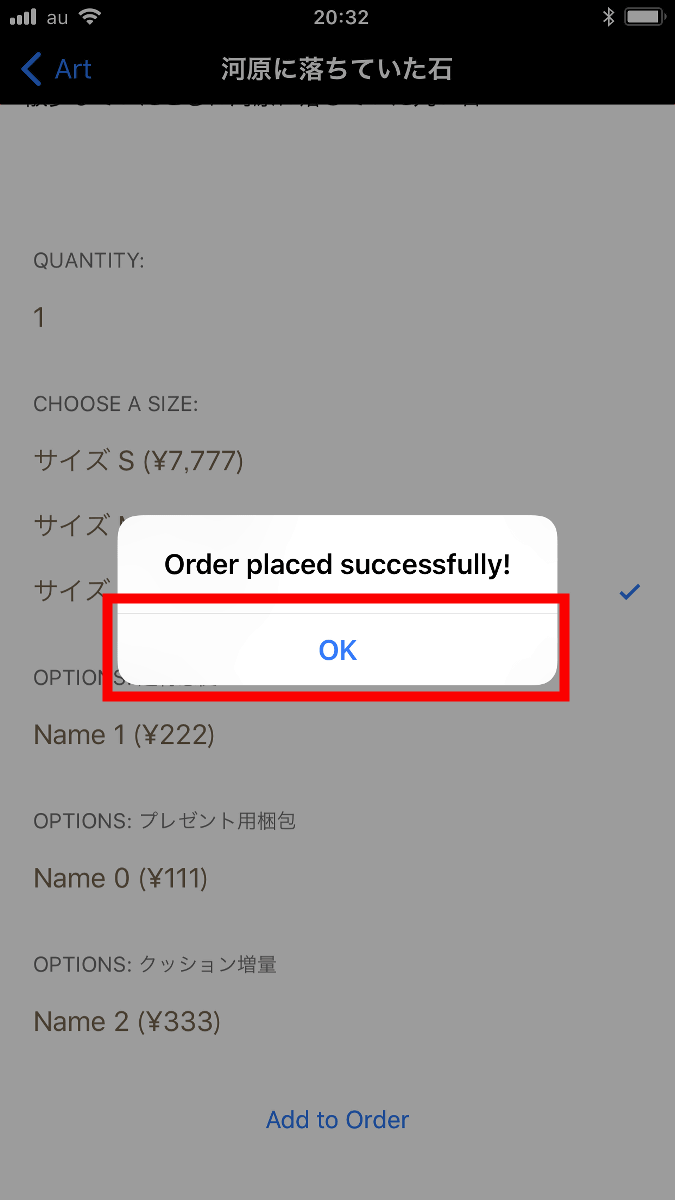
"Order placed successfully!" Order complete. Tap "OK".
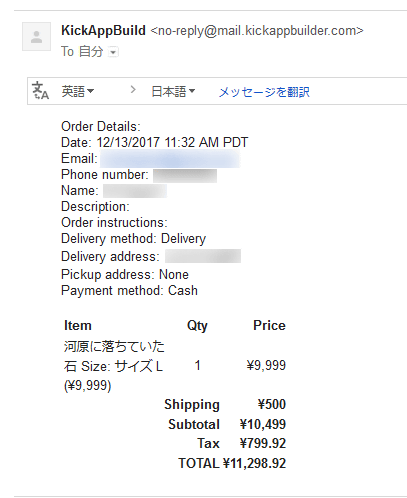
When ordering is completed, the order details as ordered on the mail address arrived at the e-mail address of "Merchant email" registered in the application. The ordering time was displayed in GMT (Greenwich Mean Time) 9 hours ago.
Even if you can not build programming and settlement systems like this, you can create an application. However, in order to actually start operation it is necessary to pay money Variations of prices and services are as follows, detailed price setting and support, specifications are "PricingIt is stated in.
· Starter plan:With a monthly charge of $ 5.99 (about 680 yen), you can operate one application and update once a month, create and test up to 10 applications
· Personal plan:With a monthly charge of $ 78.00 (about 1360 yen), the operation of three applications and cloud resources, the creation and testing of up to 50 applications, the monthly update and tests etc.
· Advanced plan:With a monthly charge of $ 29.99 (about 3,400 yen), the operation of 10 applications and cloud resources, the creation and testing of up to 10 applications,
Twice monthly update and its test, content synchronization, push notification at abnormal time, geomarketing etc.
· Premium plan:With a monthly charge of $ 78.00 (about 8840 yen), 30 applications and cloud resources, unlimited number of times limit update and test, advanced analysis plus access analysis, shopping cart, royalty coupon etc.
Related Posts:
in Software, Web Service, Smartphone, Review, Design, Web Application, Posted by darkhorse_log