Synology's DSM backed up & failed over & recovered two NASs via LAN & via internet
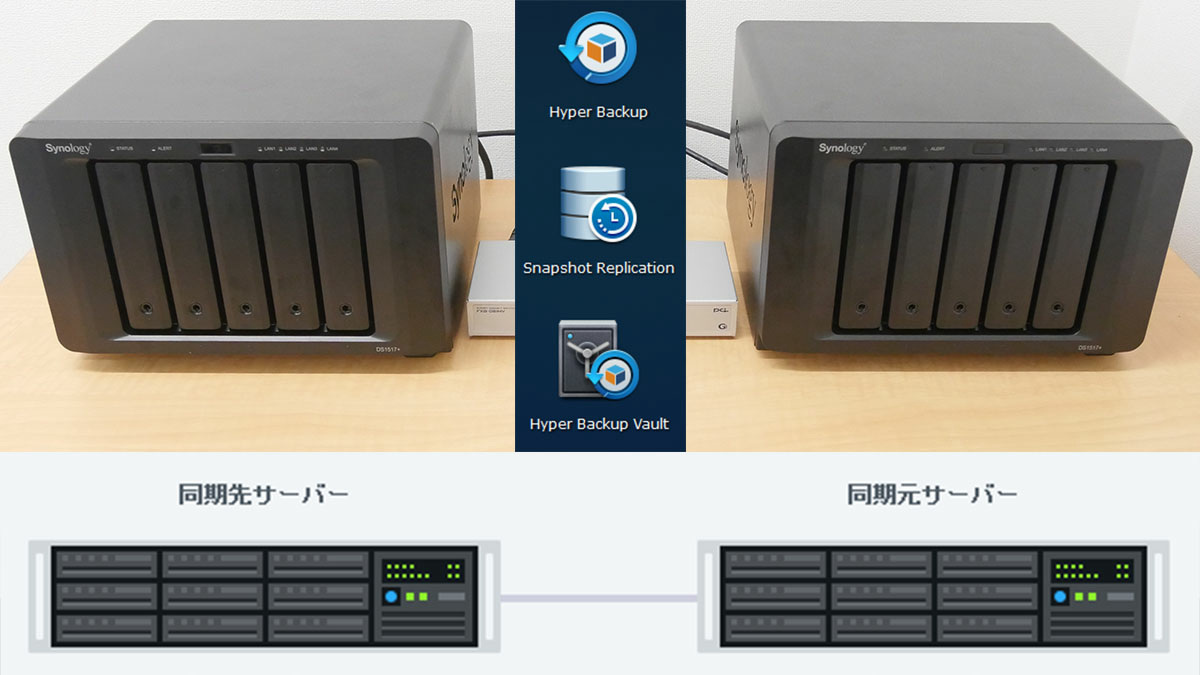
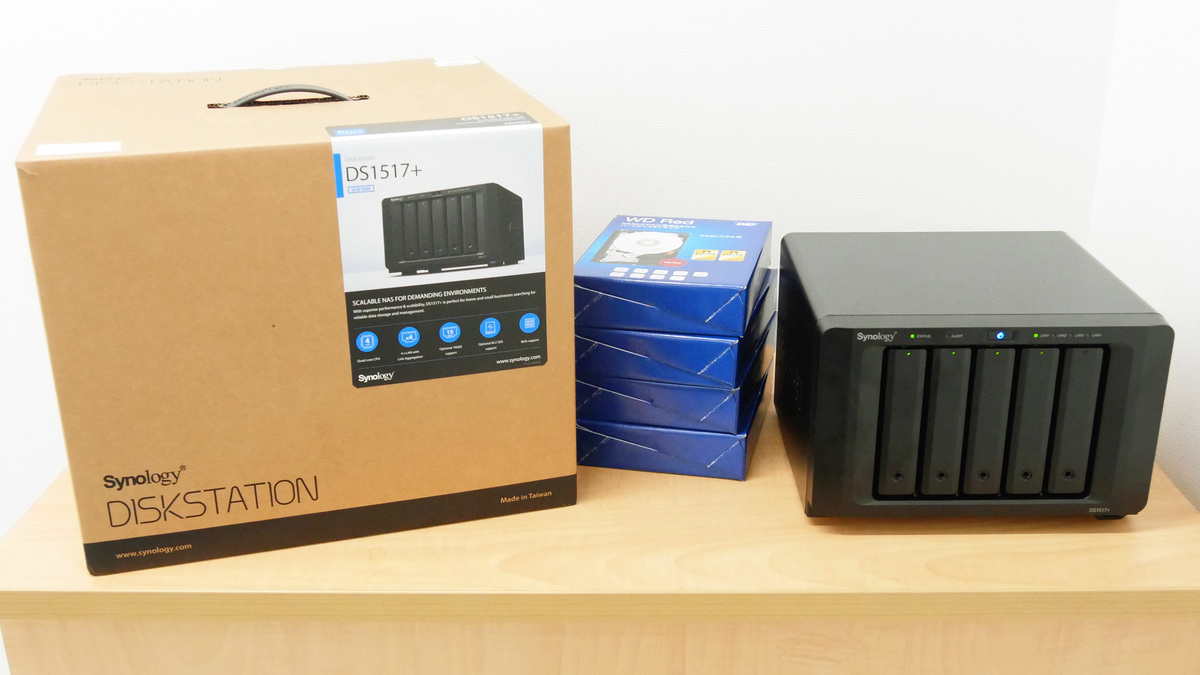
Synology's new 5-bay NAS server kit "DS1517 +"The sixth serial series that sets and extends. In this time we prepared another DS1517 + and backed up and restored the first data to the second one via LAN or via the Internet.
Snapshot Replication | Synology Inc.
https://www.synology.com/ja-jp/dsm/feature/snapshot_replication
Basic setting of Synology "DS1517 +" and dedicated OS "DSMYou can check on the extensions that you have done so far, such as installation of "How to share data", and the following article.
Initial setting summary for introducing the strongest NAS · Synology's 5-bay upper model "DiskStation DS1517 +" - GIGAZINE
Procedure to create shared folders in Disk Station Manager (DSM) and share and save access logs within group Procedure to make e-mail notification when trouble occurs Summary - GIGAZINE
How to make NAS a media server with Disk Station Manager (DSM) and play movies and music streaming from outside with smartphone Summary - GIGAZINE
How to synchronize smartphone · PC · NAS like iCloud with Disk Station Manager (DSM) using Synology NAS Conclusion - GIGAZINE
How to set the procedure for restoring files from right-click "Restore previous version" on Windows using DSM with NAS - GIGAZINE

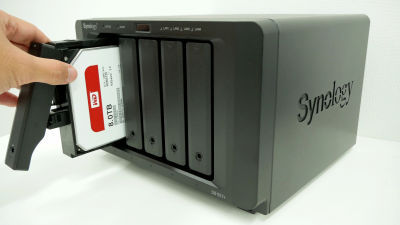
First of all we will assemble the second "DS1517 +". Four sets of 8 TB HDD as same as the first one.
Once assembled, connect to the same LAN as the first "NAS" using the switching hub.

Set up the second Synology, like the first one.
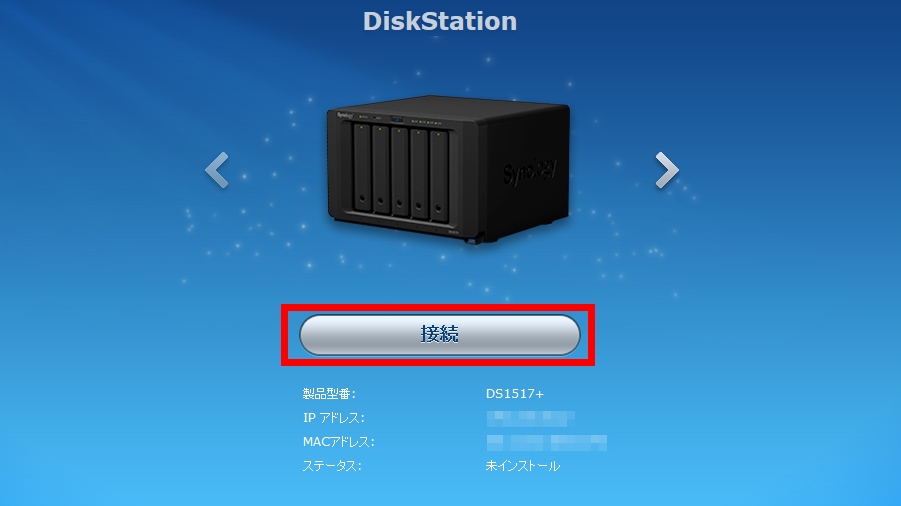
Install "Disk Station Manager (DSM)" of the management operation system.

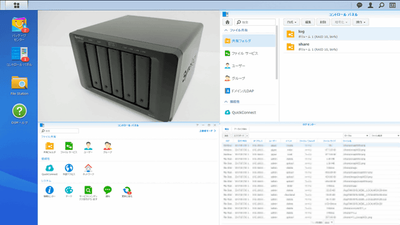
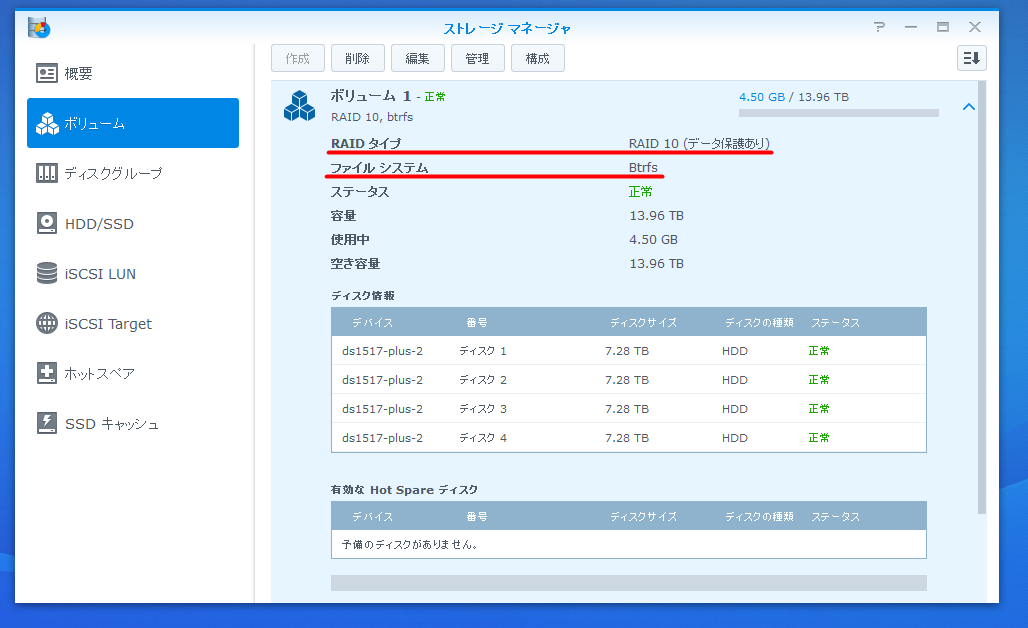
You can check it in "Volume" column of "Storage Manager". Volume is also RAID 10, file system consists of Btrfs. This is the same as the first one.
◆ Connect the two in the same local area network (LAN) and try to synchronize.
Although it is built with RAID 10 and assumes HDD crash to some extent, it can not be said that it is completely countermeasures. It is also fatal that you can not access until crash once it recovers. "Snapshot Replication"In addition to the function that periodically acquires & restores the snapshot, there is also a function that duplicates the snapshot to another NAS in the same LAN. It is also possible to reprocess the data when the main NAS fails. Therefore, if the main snapshot is synchronized with the other one in the same LAN and the second one is operated as a backup, even if the main NAS fails, the data recovery can be done at the explosion speed.
1: Fix two local IP addresses.
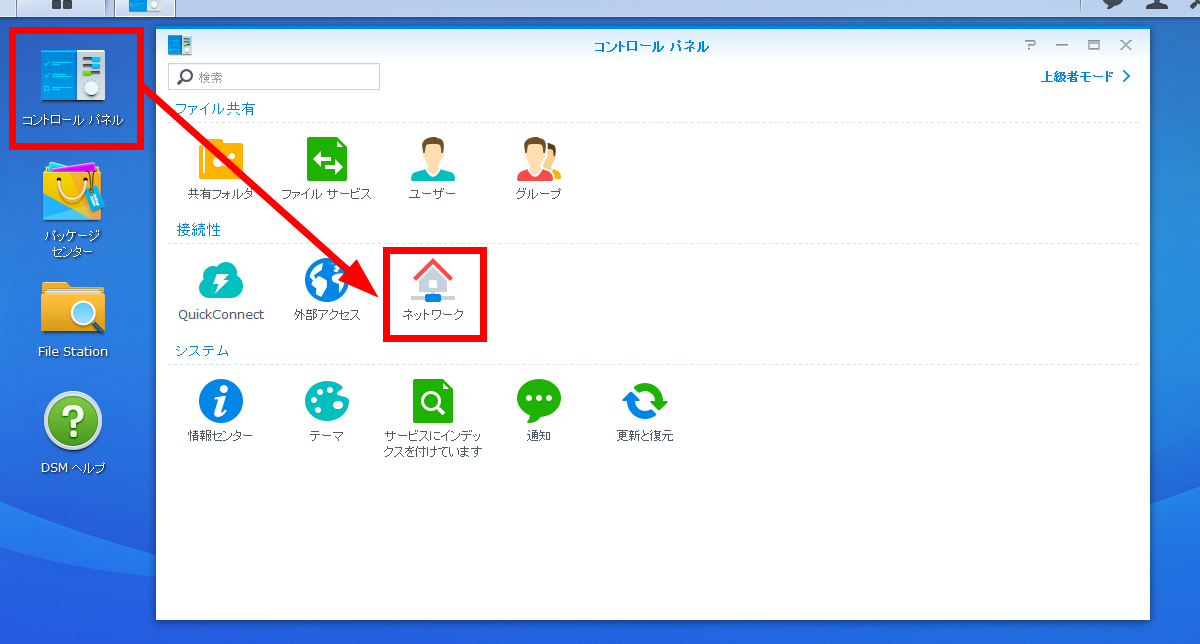
The first NAS and the second NAS are connected by a switching hub, but in that case the local IP address of both NAS must be fixed. Since the first NAS was already fixed, we decided to fix the second NAS with another IP. First connect to the management screen of the second NAS, open "Control Panel", select "Network".
Select the "Network interface" tab, select the LAN of the connection you want to fix and click the "Edit" button.

Select "Set manually", enter an arbitrary address in the IP address field, and click the OK button. The local IP address should have been fixed successfully.

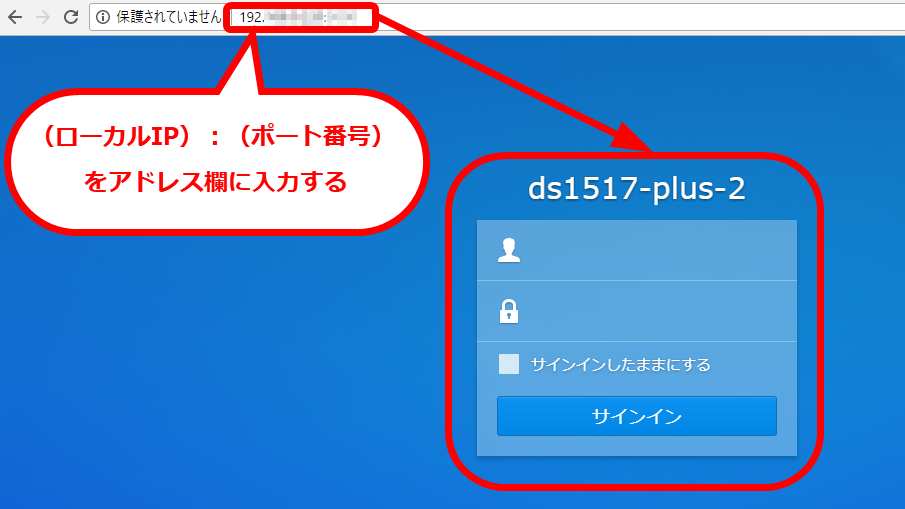
Just to be sure, enter "(2nd local IP address): (port number)" in the URL column of the Internet browser and confirm that the management authentication screen of the 2nd NAS is displayed properly.
2: Duplicate & synchronize the snapshot of the first shared folder to the second one
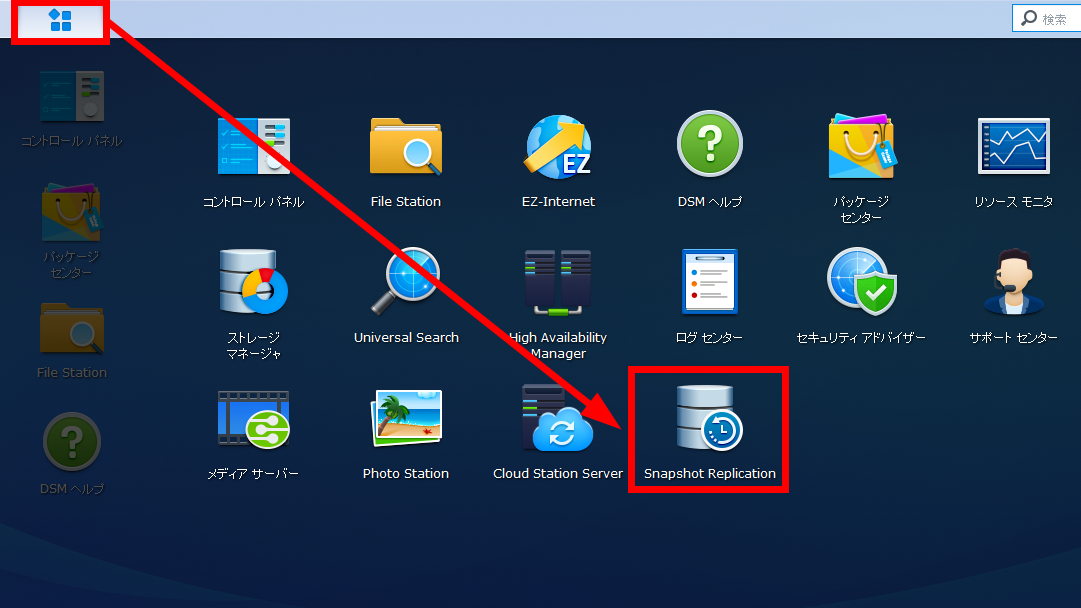
The purpose of this time is to copy the snapshot of the shared folder periodically acquired by the first NAS to the second NAS and make the second NAS function as backup. First install "Snapshot Replication" on the second NAS.

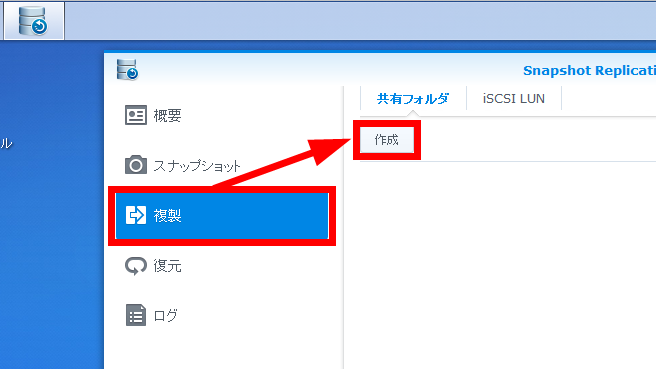
Then connect to the management screen of the first NAS. Start "Snapshot Replication".
Select "Duplicate" from the left column and click "Create" on the "Shared Folders" tab.
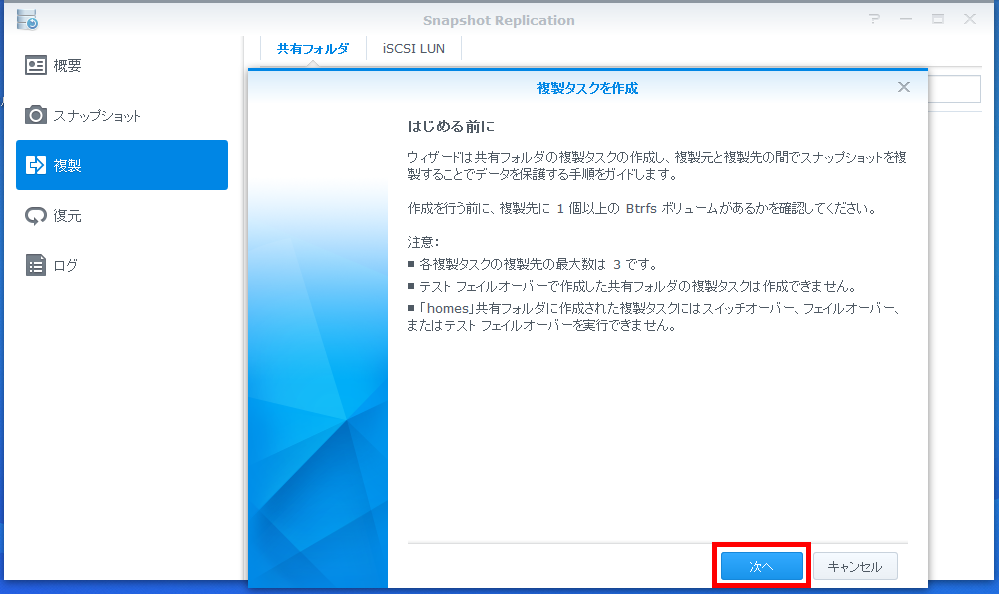
Since you are asked to confirm that Btrfs volume exists at the synchronization destination, click "Next".
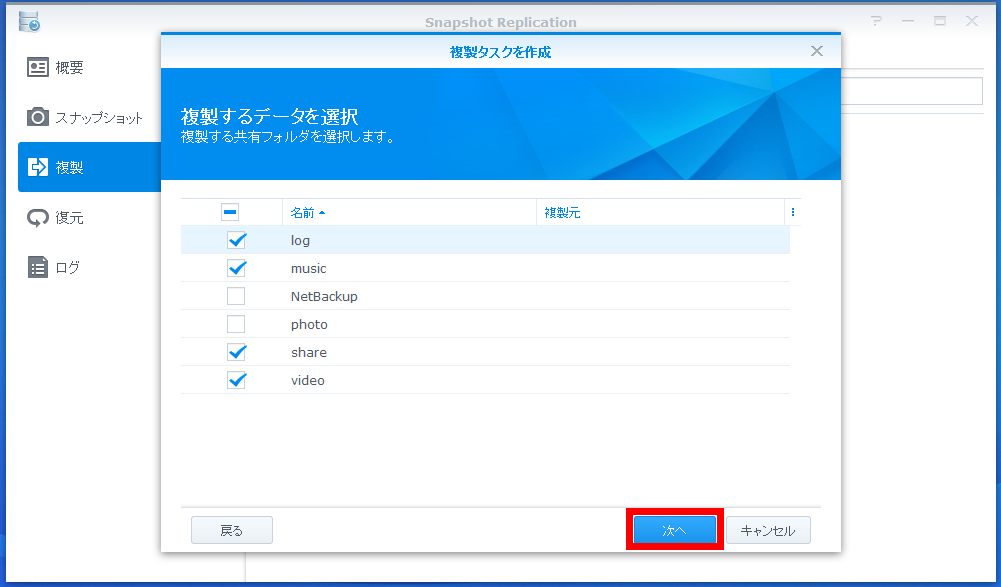
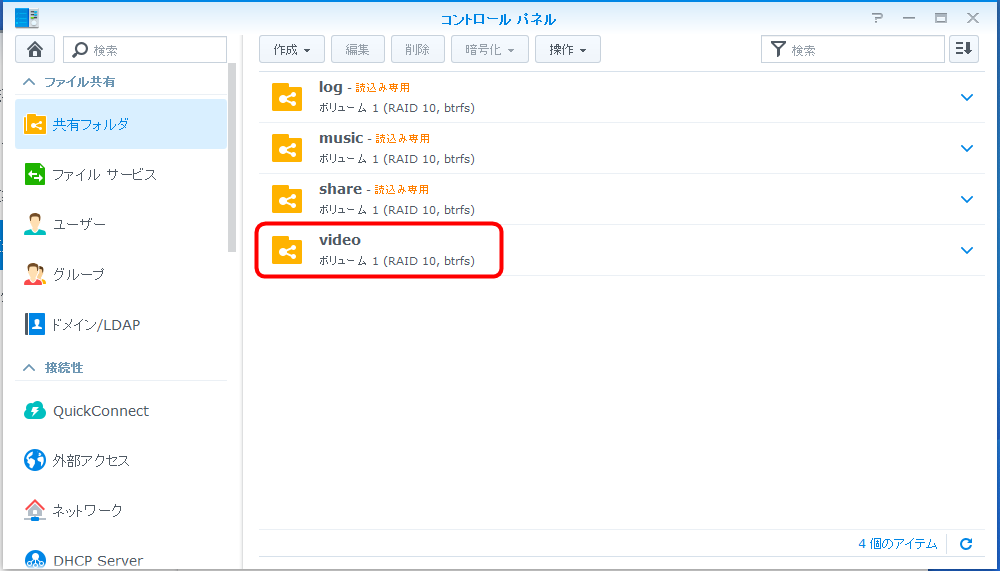
Select the folder to duplicate. For this time, check "4" and click on "Next" to make "log" "music" "share" "video" duplicate on the second NAS.
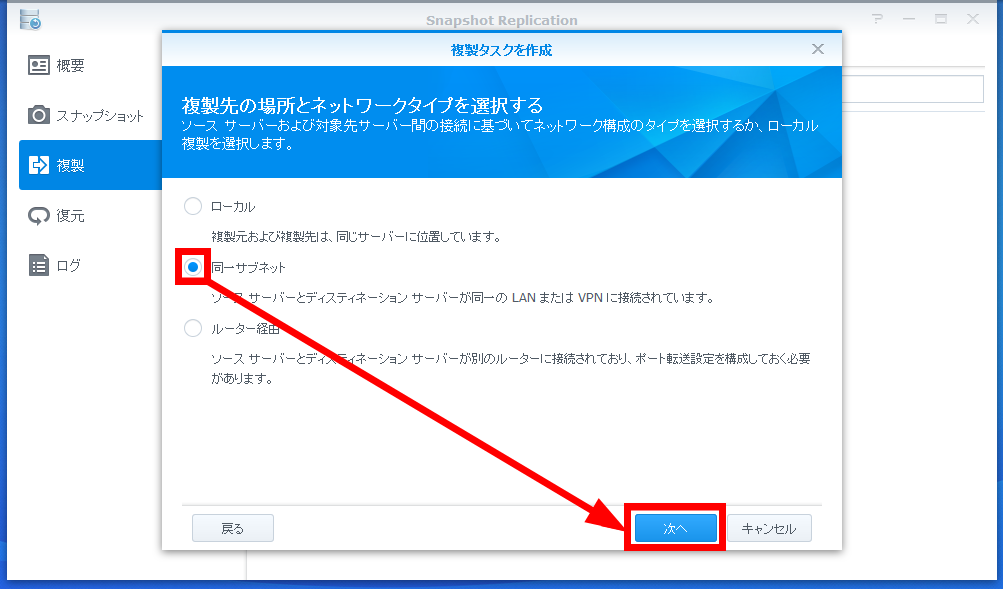
Since the first and second units are connected by the same LAN, this time, select "same subnet" and click "Next".
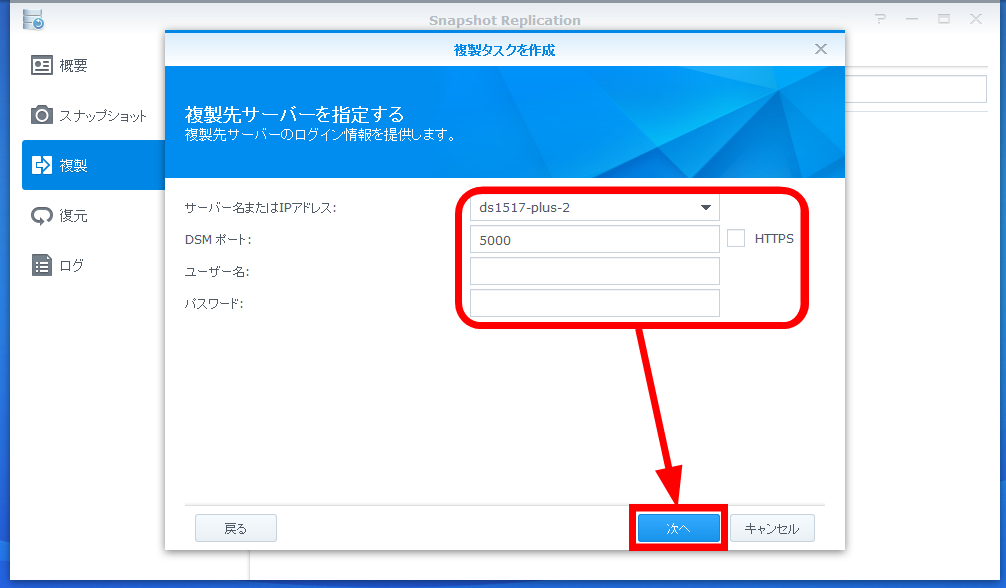
Specify the second "ds 1517 - plus - 2" as the synchronization target NAS. At this time, if you connect to the destination server at the same time, authentication will fail, so you need to make the connection with the synchronization target server offline first. For the user name and password, enter the second administrator account and password.
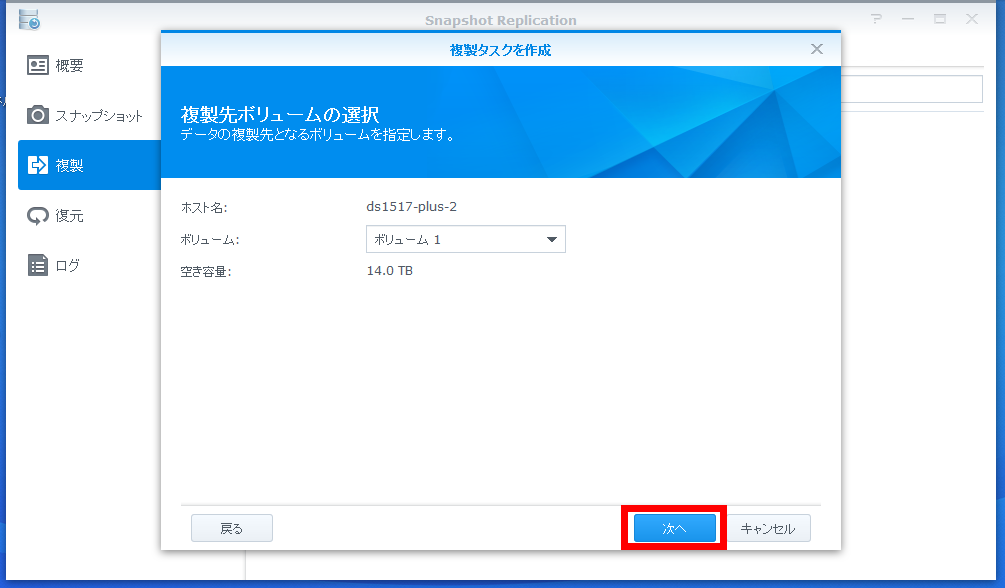
Since the second NAS at the synchronization destination should be building a disk with a single volume, just click "Next".
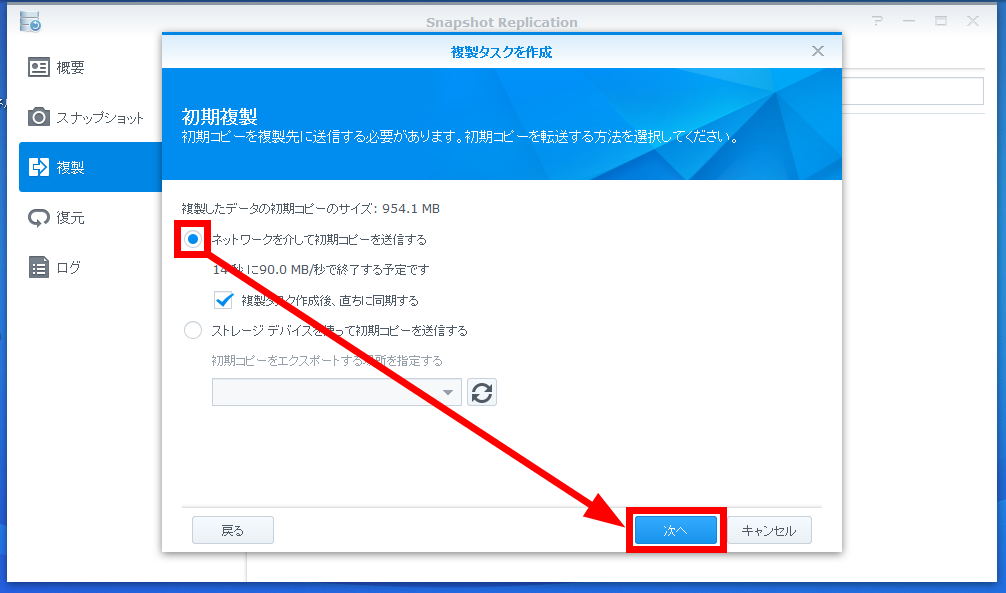
Since it is a duplicate, we copy all the data at the beginning and update the difference data later. Because of that, initial replication takes time considerably depending on the amount of data. Confirm that "Send initial copy via network" is selected, and click "Next".
Check "Enable replication schedule" and select the execution frequency and date. There is no problem if it is set so as not to be shorter than the snapshot acquisition frequency of the synchronization source. In the first NAS, it is the setting that snapshot is acquired every 5 minutes, so set it to duplicate at intervals longer than 15 minutes and click "Next".

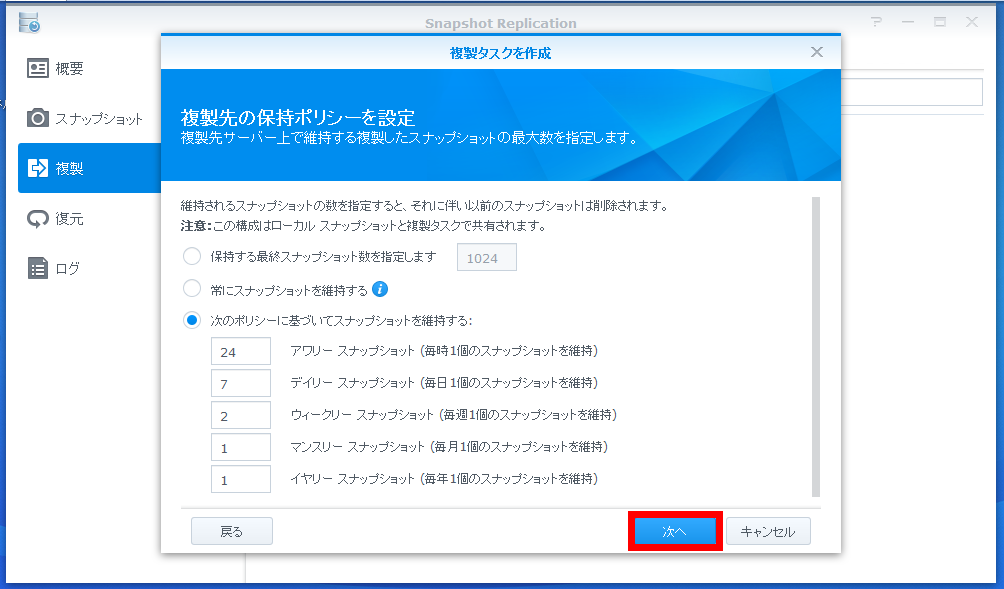
Select "Continue original maintenance policy of selected target".Last timeThe snapshot preservation settings set on the first NAS are handed over to the synchronization destination snapshot as they are.

We also set how long to maintain periodic snapshots. In the setting of the synchronization source, the maximum number of snapshots to keep is 1024, so if you update every 15 minutes, you can only hold about 10 days of snapshots. However, if you set it to maintain a regular snapshot every year or every month, you can restore the state before 10 days. Leave the default and click "Next" this time.
Just to be sure, check "Enable Encryption at Transfer" and click "Next".

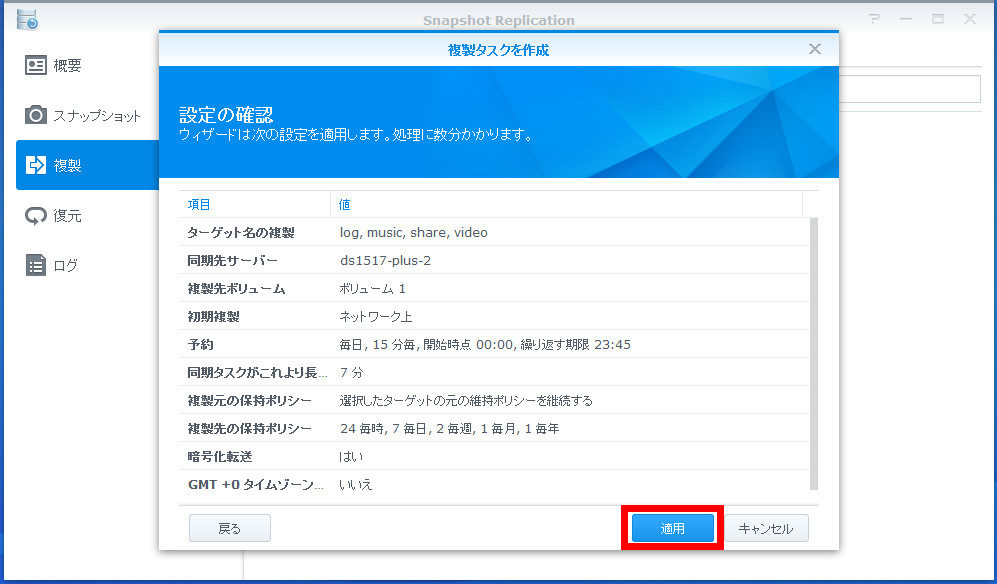
Since the confirmation of the setting so far is displayed, click "apply".
After a few minutes of loading, it seems that you could successfully duplicate. Click "OK".
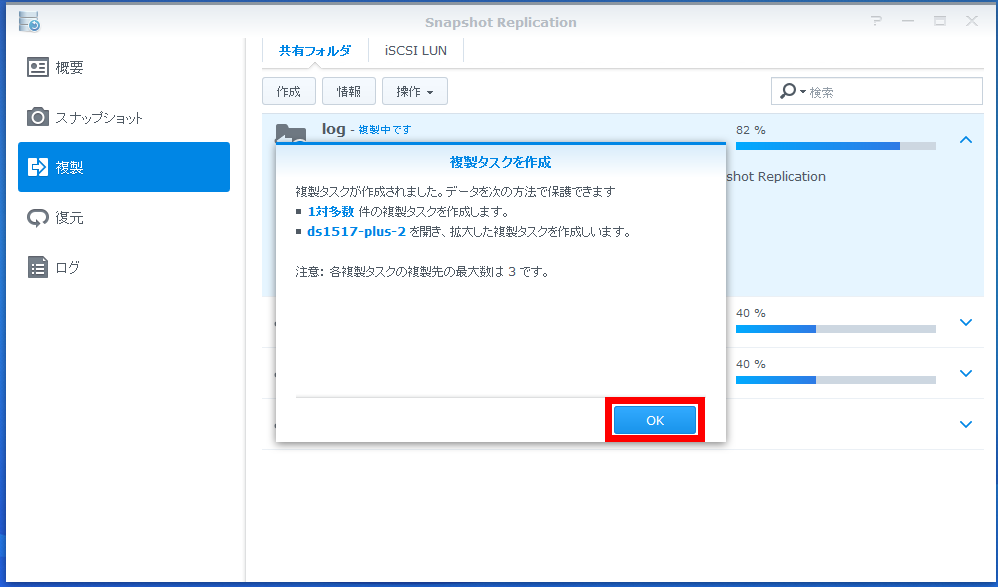
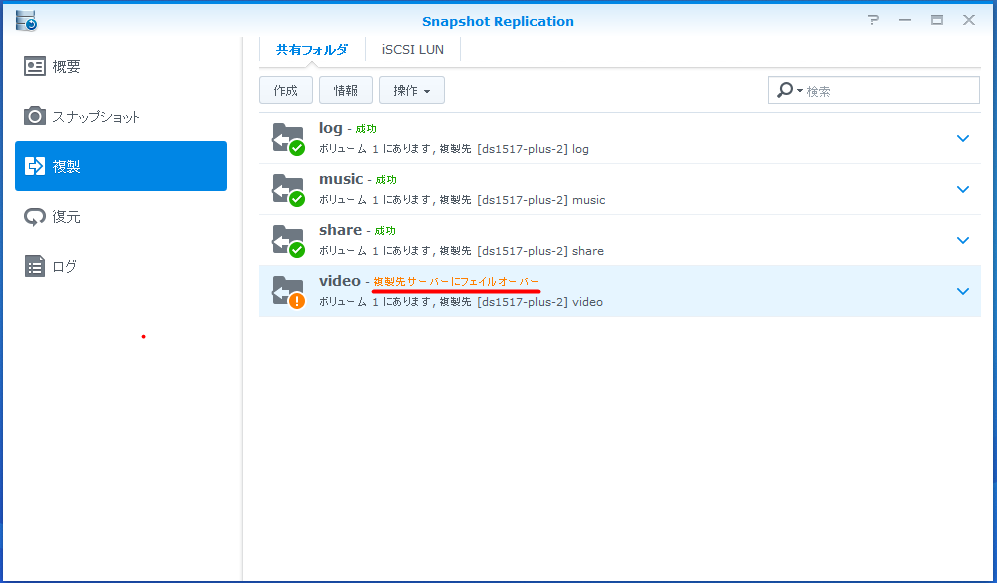
Confirm that duplication of all folders is successful.
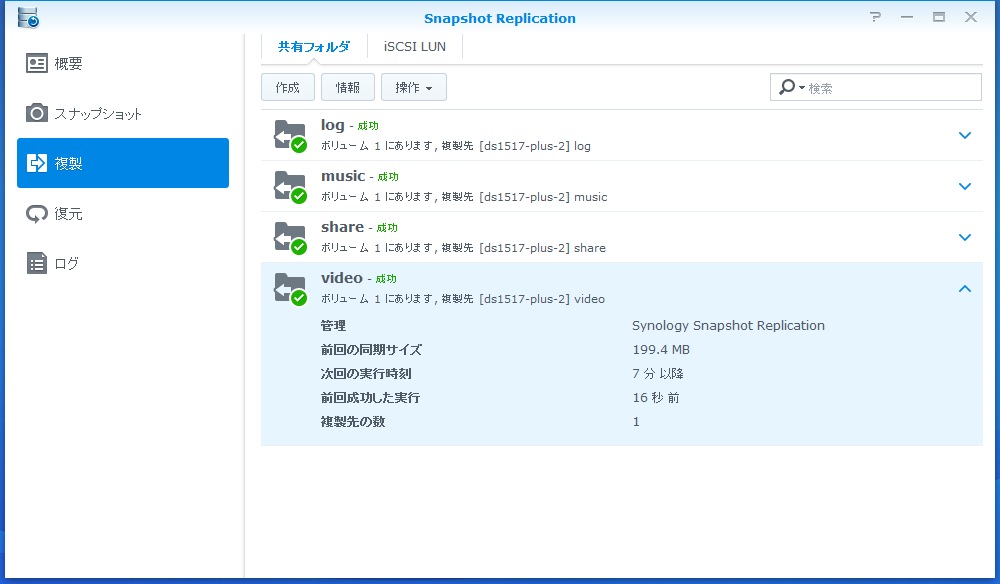
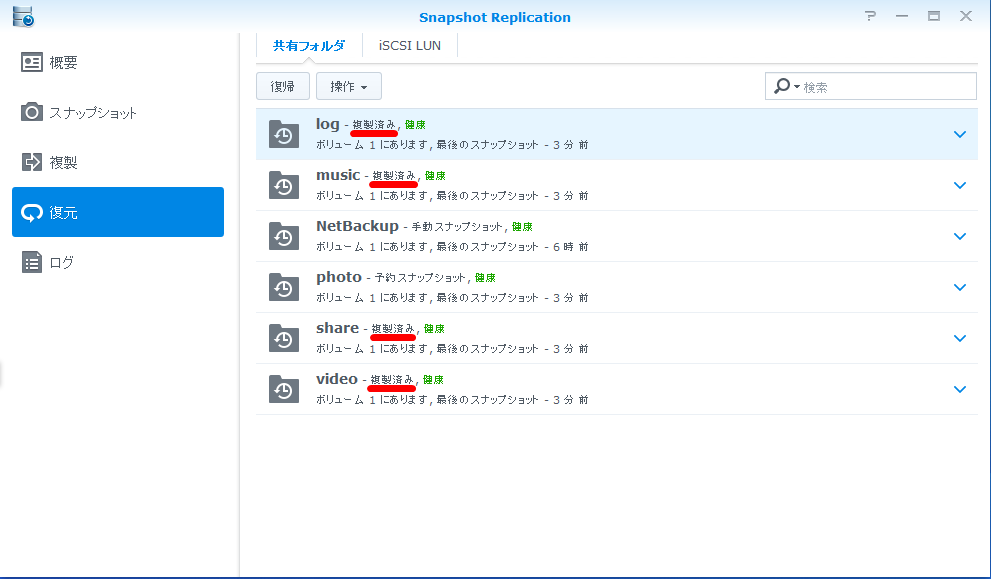
If you open the "Restore" column, you can see that the folder "log" "music" "share" "video" specified for the current synchronization is "duplicated".
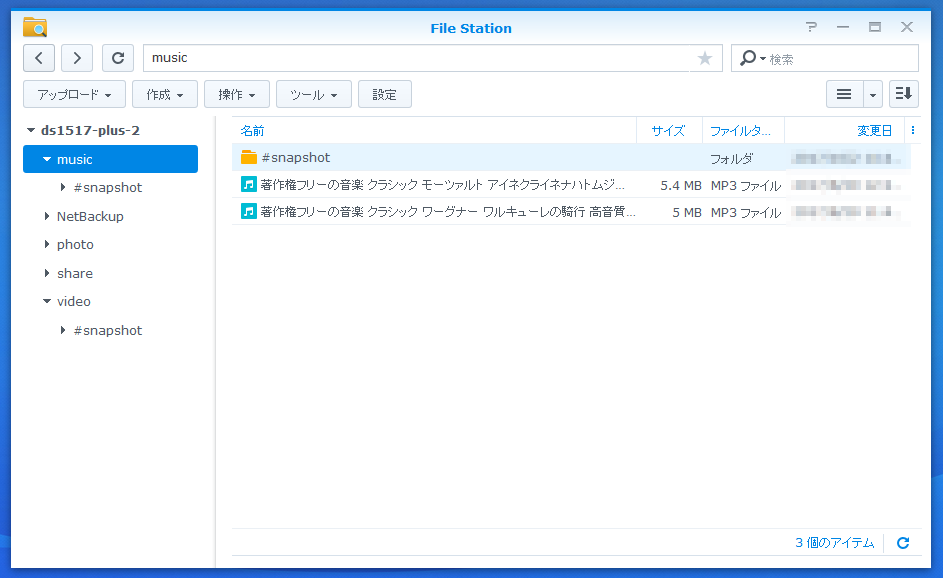
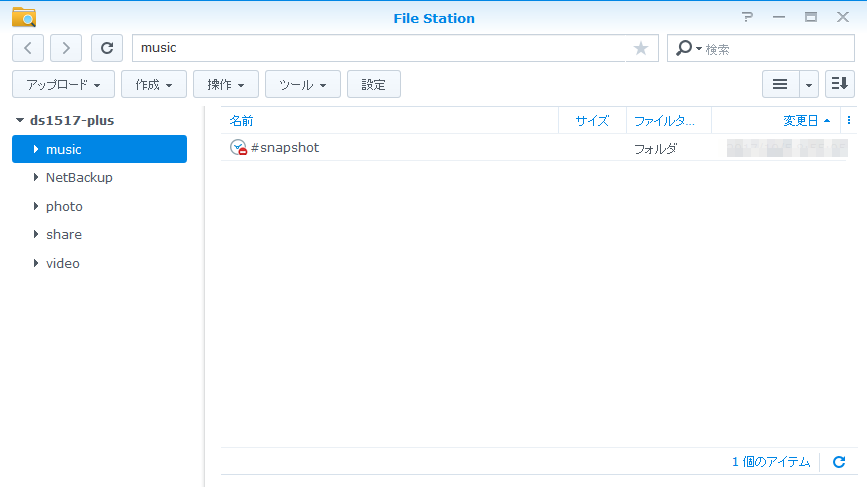
When opening the second shared folder, confirm that there is a folder of "# snapshot" properly. Not only folders, but also snapshots can be synchronized properly. "Snapshot Replication" could be set so that two DS1517 + can safely be synchronized.
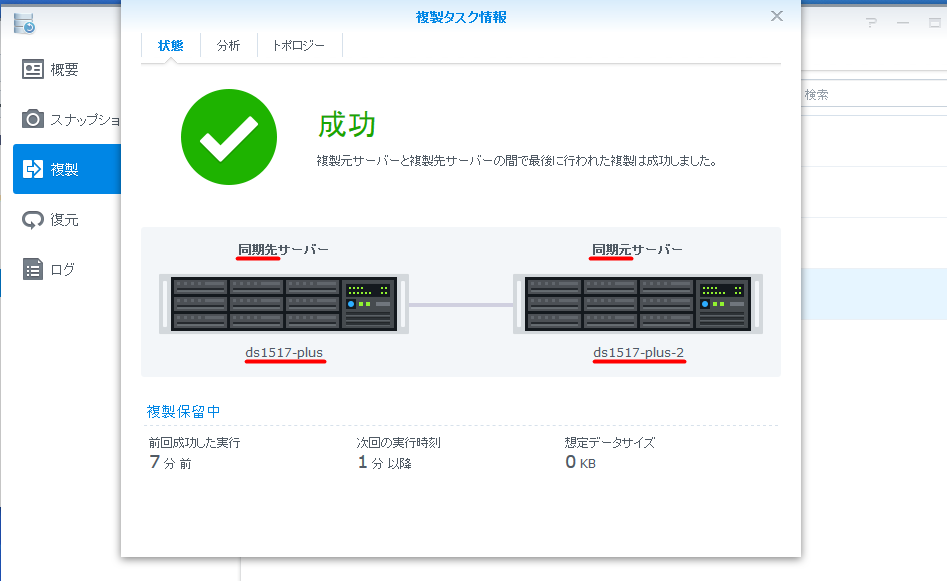
If you select a folder from the "Duplicate" column of "Snapshot Replication" and click "Information", duplicate task information will be displayed. It is very easy to understand because the figure shows the configuration that the first "ds1517-plus" is the synchronization source and the second "ds1517-plus-2" is the synchronization destination.

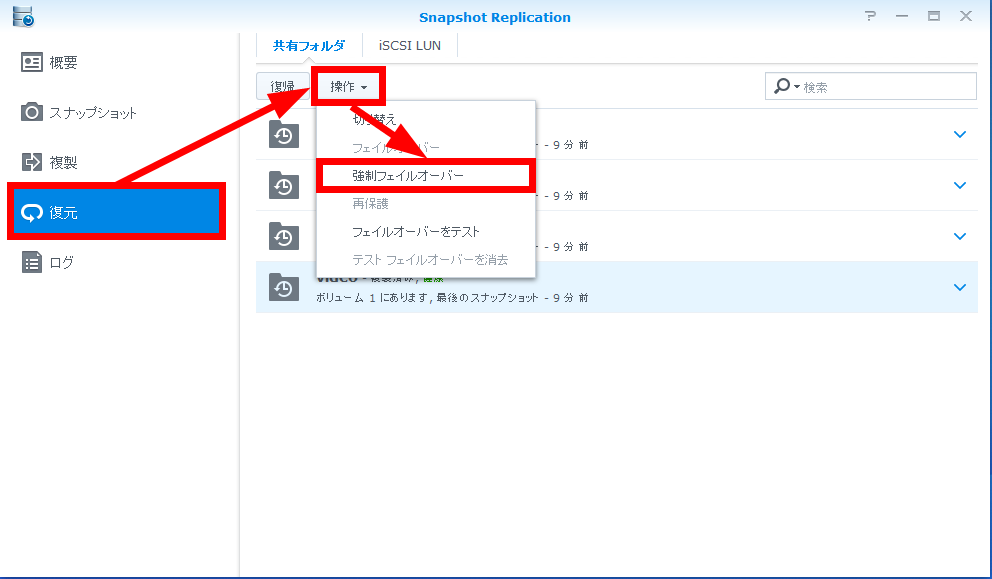
3: Confirm switching and re-protection by forced failover
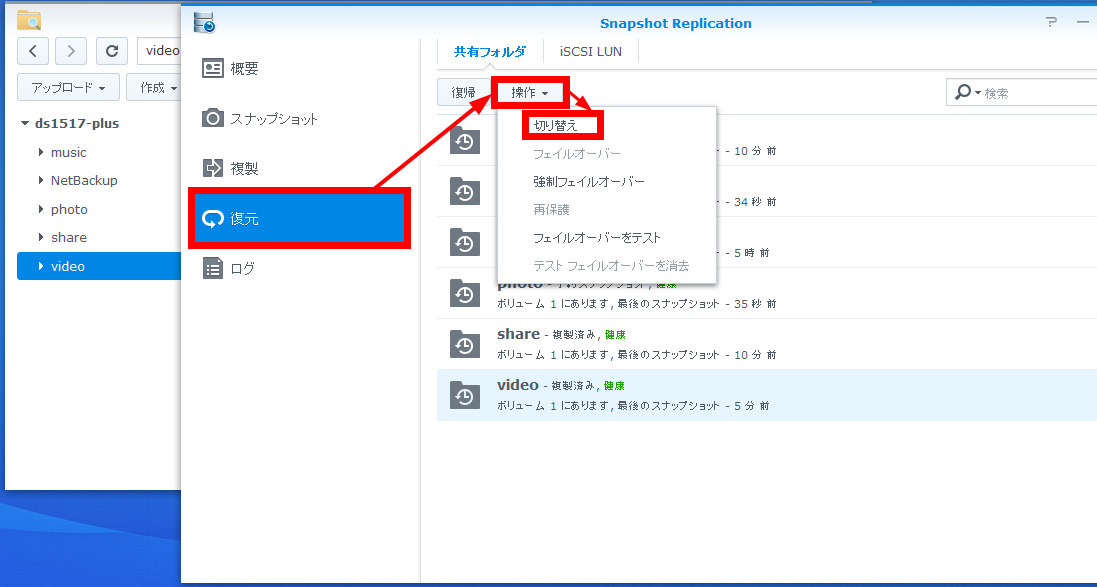
The reason that two NAS are synchronized is that when the main NAS crashes, important files in the shared folder are lost, etc., it will be sent to the standby server waiting In order to be able to switch. If this switchover is done manually, it is called "switchover", if it switches automatically, it is called "failover". Even if an error occurs on the first machine, you can restore the second shared folder to an arbitrary state and make it writable, and after recovering, synchronize the data again to execute reprotection. By doing so, the data saved in the middle of the fault disappeared when it recovered! You can also prevent the situation. However, since it can not actually cause the HDD to crash,Forced failover", And checked whether folder switching and reprotection using snapshots work properly. Launched "Snapshot Replication" on the second machine. Select "Restore" from the left, select the folder to be tested, click the "Operation" button at the top, and click "Force Failover".
Select the version of the snapshot you want to restore and click "Force Failover".

The first "video" folder was writable sync source, the second "video" folder was read-only and writable sync destination, but this was reversed due to forced failover It was. When checking on the second management screen, the display "read only" in the "video" folder has disappeared properly.
If you check the first management screen, the message "failover to the replication destination server" is added to the "video" folder.
When checking the duplication task information of the "video" folder, the first "ds1517-plus" becomes the synchronization destination server and the second "ds1517-plus-2" becomes the synchronization source server It is illustrated that there are, and you can see that the two NAS are properly switched.
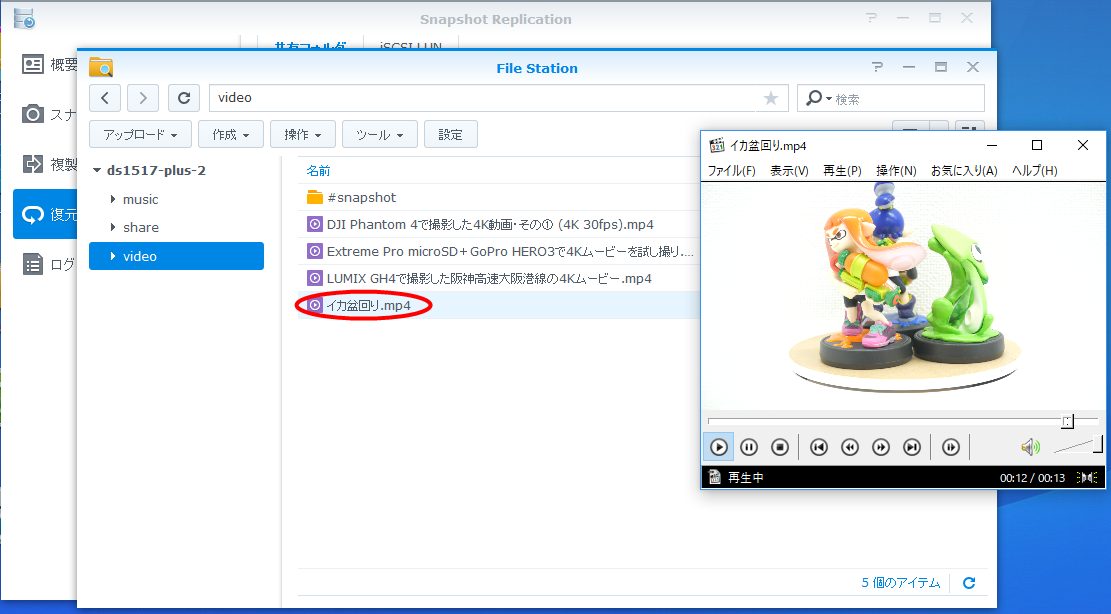
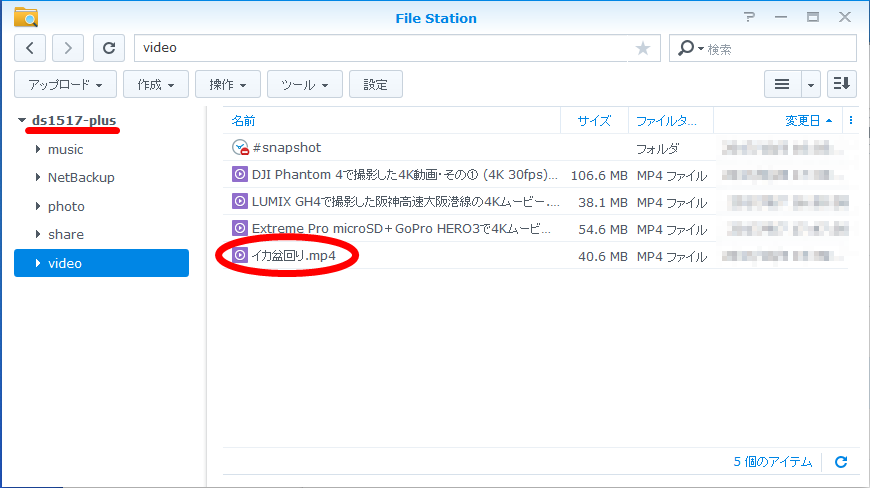
I tried adding a new movie "Ika tray .mp4" to the second "video" folder. It is OK if the addition of data "Ika tray .mp4" is reflected properly in the first folder by reprotection.
Select "video" folder in "Restore" of the second "Snapshot Replication", click the "Operation" button at the top, select "Reprotect".

When you check the 1st "video" folder, "Ika tray .mp4" has been added properly. If data is updated during failover, if you reprocess after the problem is resolved the update will be reflected in the main folder properly.
If this is the case, the source and the synchronization destination are being exchanged, so restore them. If you select the "video" folder in the "Restore" of the first "Snapshot Replication", choose "Switch" from "Operation" so that the contents you reprocessed will not be overwritten by restore. "Switching" is a so-called switchover operation in which server switching is performed manually, unlike failover, automatic restoration by snapshot is not performed. I have confirmed that failover and reprotection are functioning properly.
◆ Back up the contents of the main NAS to the external NAS via the Internet
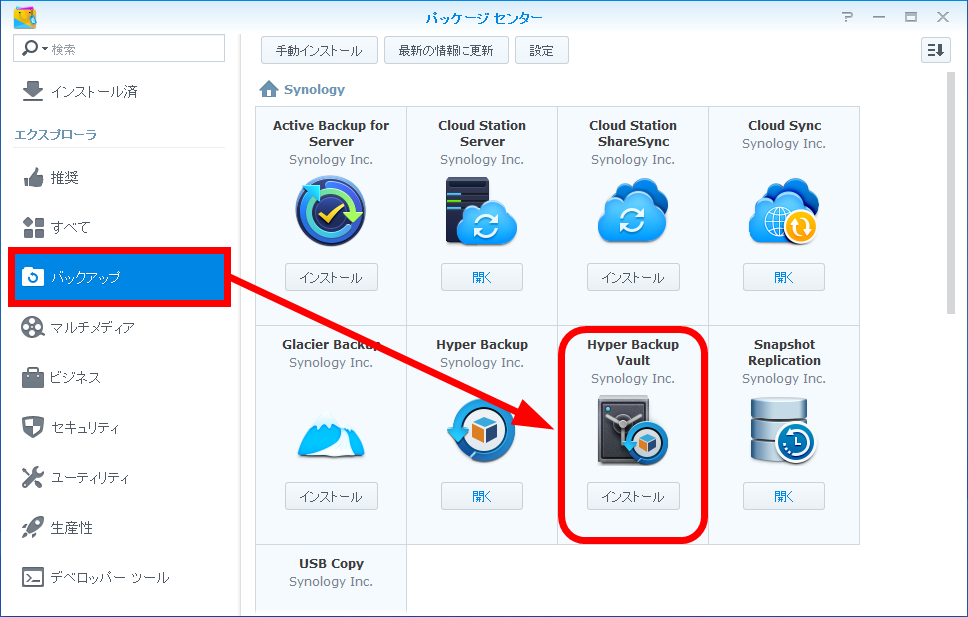
Although it can be quite relieved by preparing a local backup, there is a possibility that data may be lost per local area due to disaster, for example. In that case, there is no problem if it can back up to the outside NAS via the Internet. The official add-on package "Hyper Backup"When"Hyper Backup VaultYou can easily create a backup via the Internet even with a NAS at a remote place. This time I tried to make a backup to the second NAS that was placed outside from the first NAS. First of all, in the management screen of the first NAS, click "Package Center" and select the "Backup" column. Install "Hyper Backup".

Next, access the management screen of the second NAS from the outside, select the "Backup" column from "Package Center", and install "Hyper Backup Vault". "Hyper Backup Vault" is an add-on package that allows you to back up and manage backups via Synology's NAS "Hyper Backup".
When you run "Hyper Backup", the backup wizard starts. In this case, to connect to the external "DS1517 +", select "Remote Synology NAS".
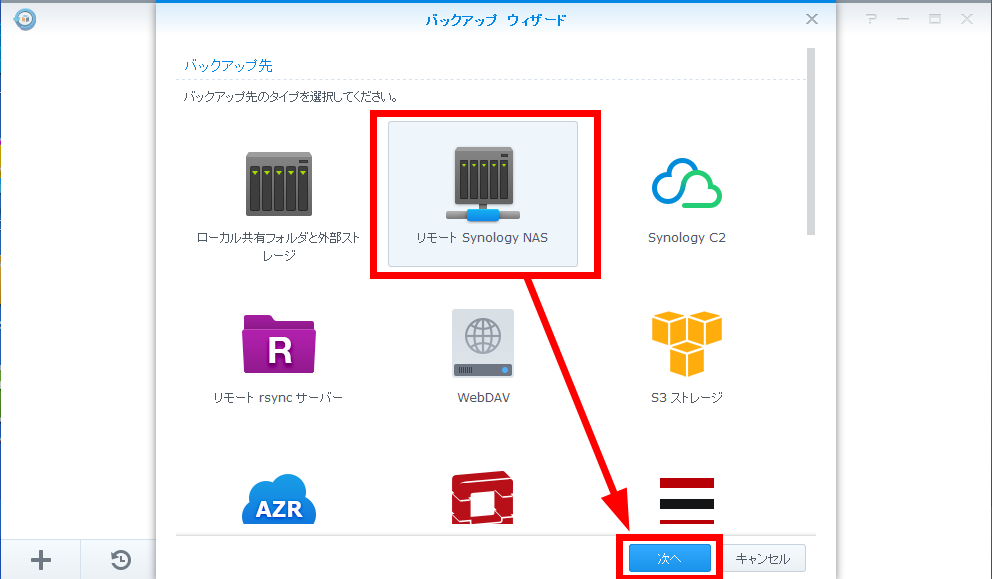
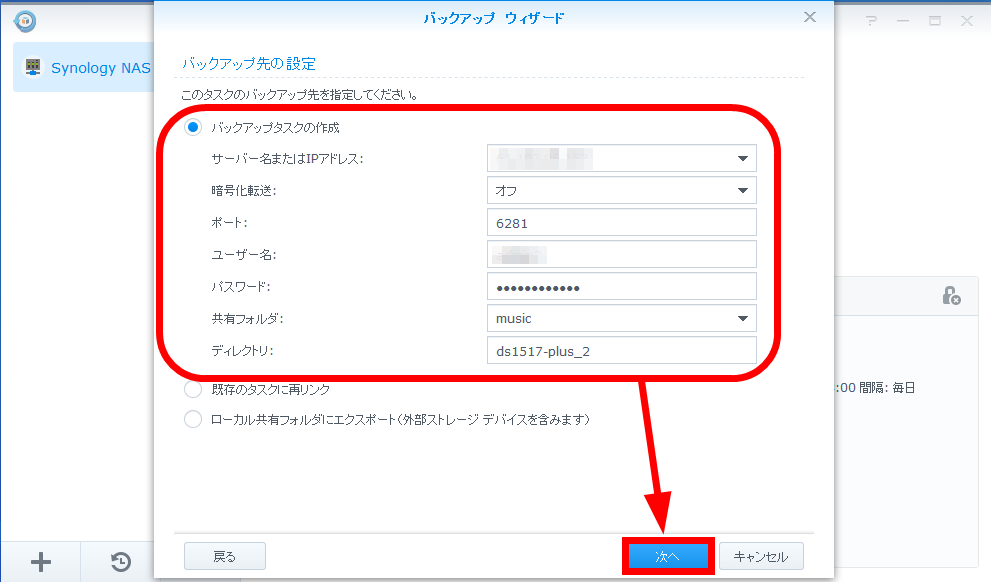
Configure the backup destination. Select "Create backup task". For the server name or IP address, enter the external IP address of the second NAS. In addition, enter the administrator account ID and password of the second NAS for the user name and password, click the "Next" when you also specify the backup destination folder and directory. At this time, please be aware that you can not connect unless you have port open for the second NAS outside.
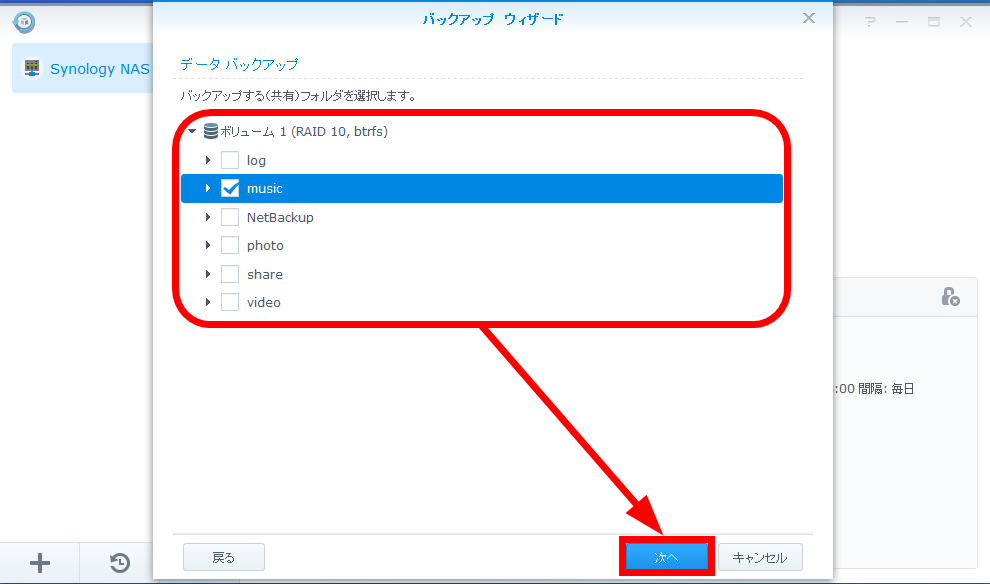
Select the folder to back up. For this time check it down to one "music" folder and click "Next".
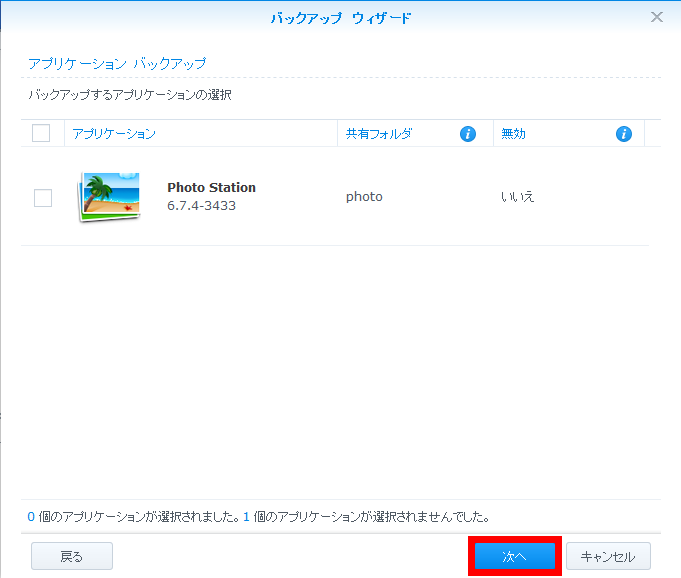
You can choose to back up the application, but Photo Station will not back up this time, so click "Next".
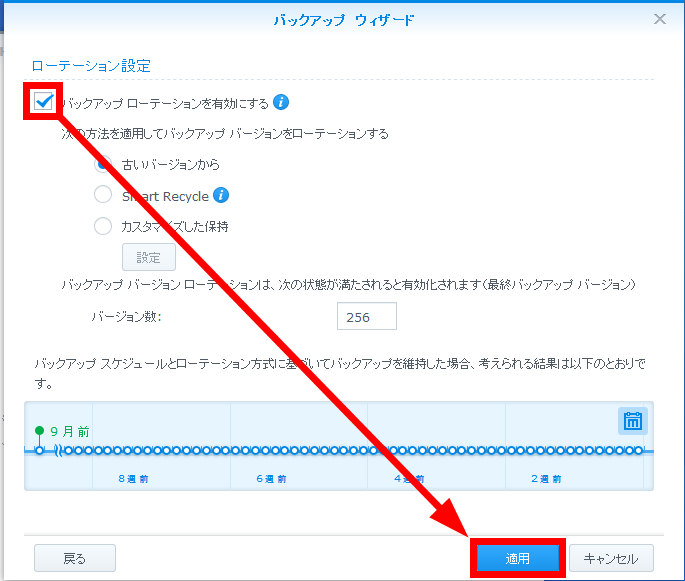
Enable task notification and validate and decide the backup schedule. By enabling task notification, the result of the backup completion / failure report will be delivered to the registered mail address. Backup was set once a day to do at 3 o'clock midnight when no one would access the NAS.

"Backup rotation" is a version control system. Activate this and click "Next".
Backup has started.
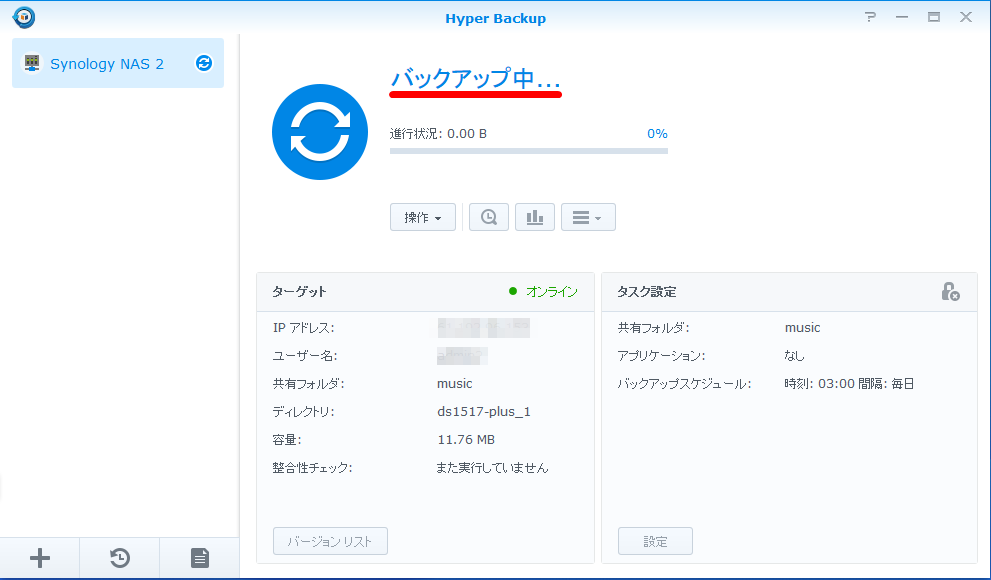
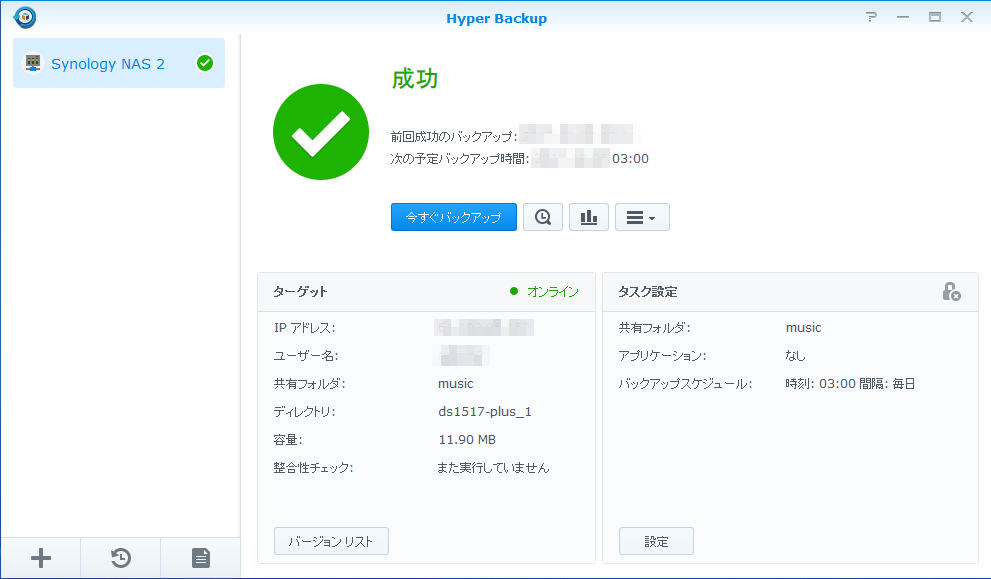
Since the "music" folder has only two music files, the capacity is only about 12 MB, but it took about 20 minutes to complete the backup task. First of all, absolutely you have to back up all the data absolutely, so it's better to take a moment to spare time when doing a big backup. "Hyper Backup" performs "block level incremental backup" of backing up only the part changed and added by the data of the file instead of backing up the whole file in the first and subsequent backups, so the backup speed is It will be fairly fast.
I tried deleting two music files that were in the first "music" folder. Since the file itself has been lost, you can not refer to the data with this.
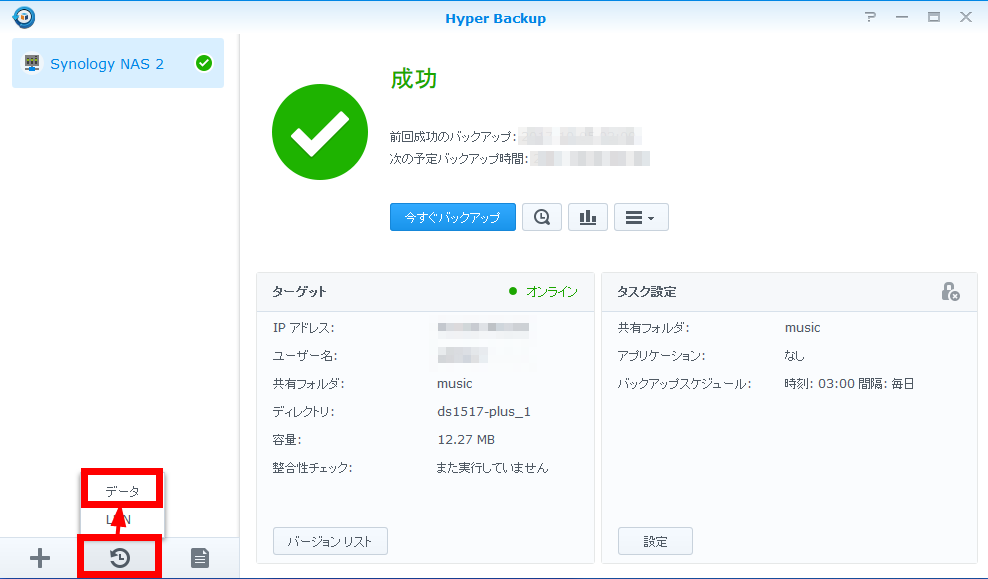
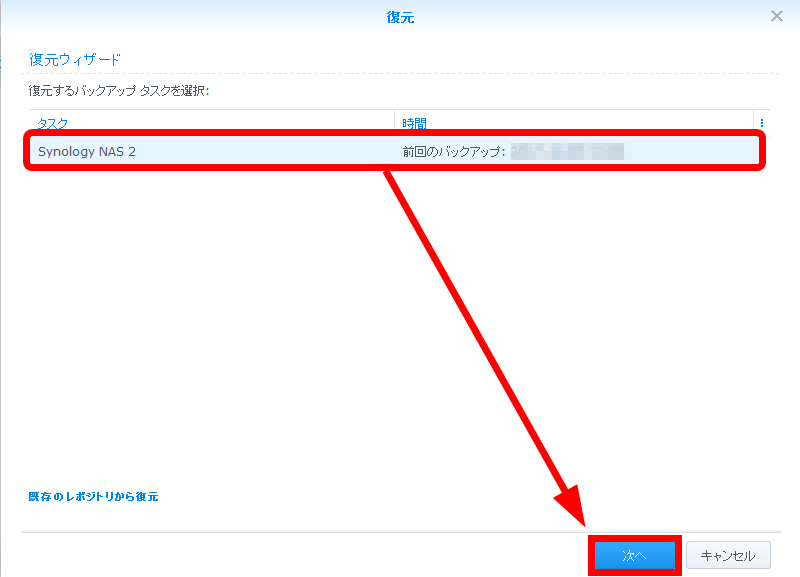
Immediately launch "Hyper Backup" on the first management screen. Click "Restore" in the lower left and select "Data".
Select the backup task to restore and click "Next".
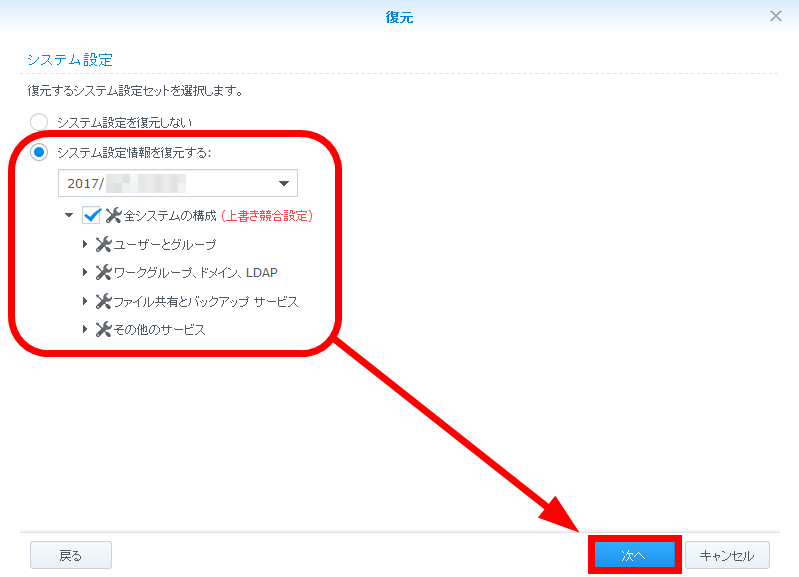
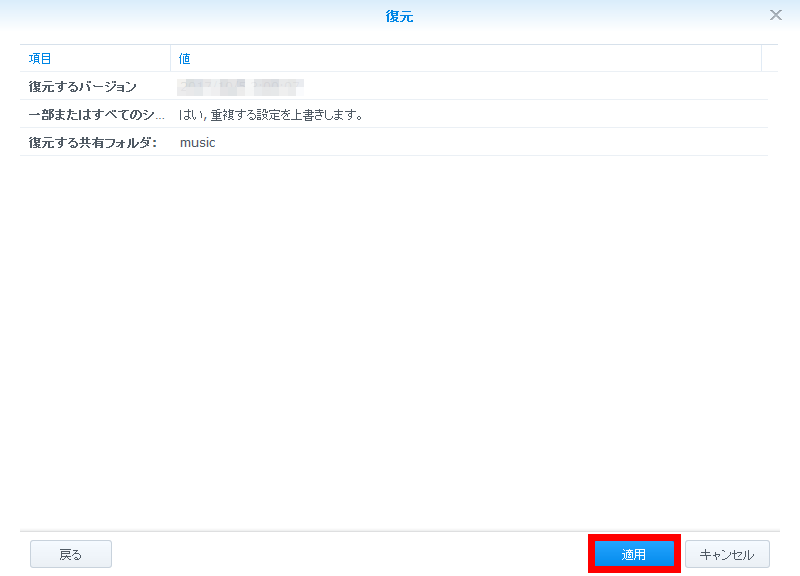
Choose whether to restore system settings. Even if the data is skipped and the file is restored from the backup, the setting can be restored so that the setting is not from 1 ...... again. If you have reconfigured the system before data recovery, check "Do not restore system settings" and restore it. For this time, check "Restore system setting information", select the date of the version to be restored and click "Next".
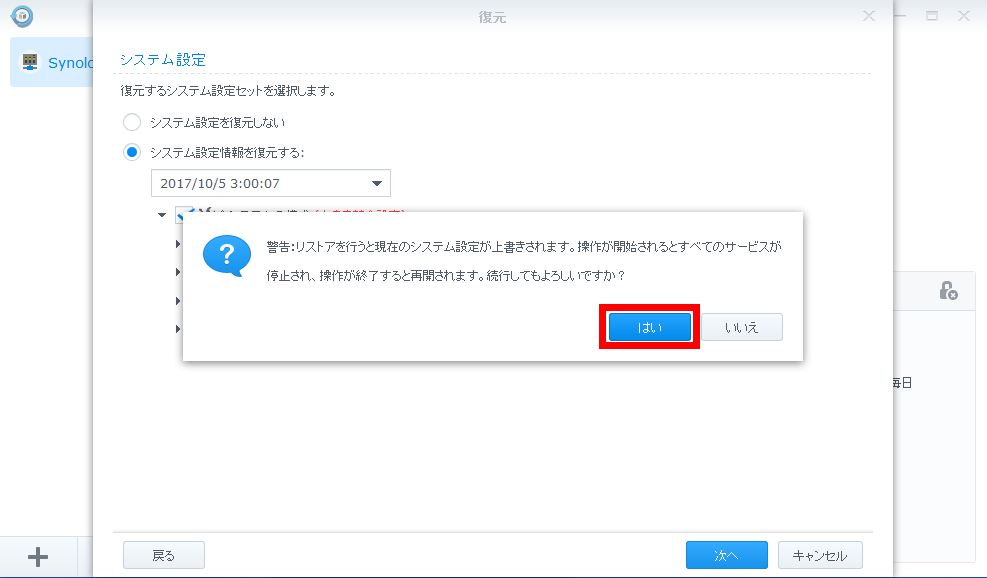
A warning will be displayed, but just click "Yes".
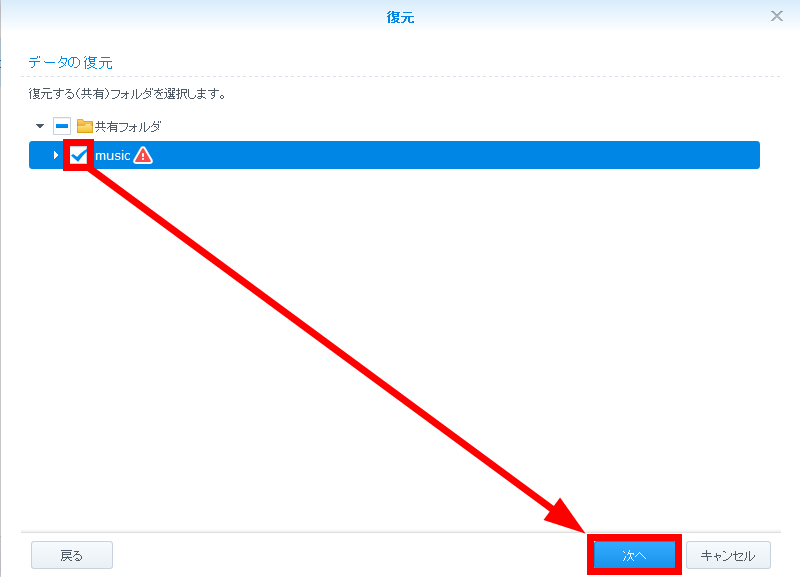
Check the folder to be restored and click "Next".
The last version to restore, restore system settings, confirmation about the folder to be restored will be displayed, so click "Apply".
Click "OK" when restoration is completed.

If you check the 1st 'music' folder, you have 2 music files resurrected properly. It was confirmed that backup and restoration can be done without problem not only locally but also via the Internet. Combining local replication and restoration of snapshots, and even backing up over the Internet makes it quite encouraging as a remedy for something happening.

In this time, the capacity is low, which is a short time, but when you restore the whole large capacity folder it will take a considerable amount of time. If you want only one file of the past version but you can not afford to restore the whole file, you can also download only arbitrary files from the second NAS as the backup destination. First of all, launch "Hyper Backup Vault" on the second NAS that is the backup destination. Click the clock like icon at the right end of the backup task you want to restore.
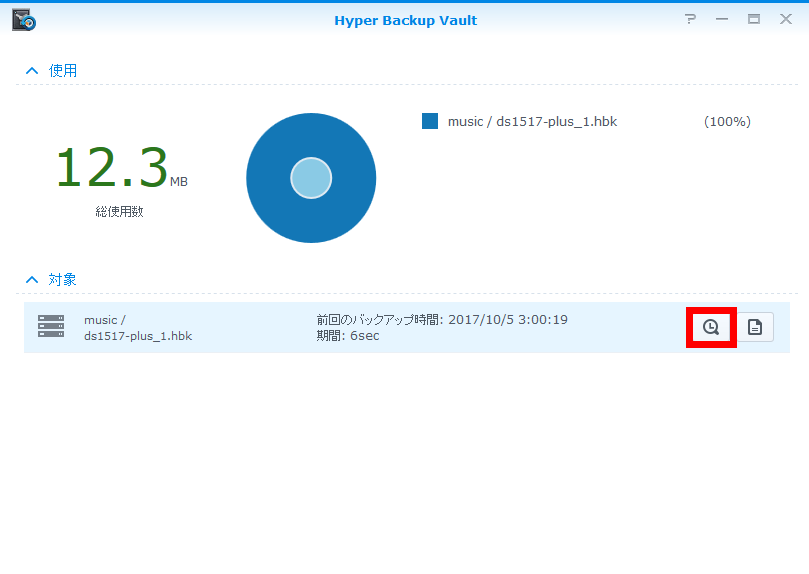
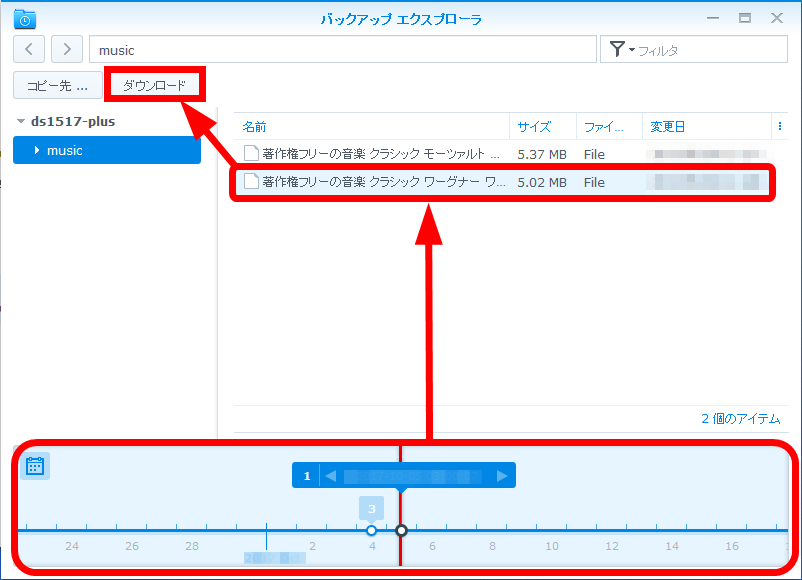
"Backup Explorer" starts up. After selecting the backup version from the bottom calendar, select the file you want and click Download. You can download the file directly to the PC connected to the management screen.
· Continued
How to use NS in groupware with Synology DSM and use calendar · chat · memo · mail · spreadsheet etc. Conclusion - GIGAZINE
Related Posts: