Procedure to create shared folders with Disk Station Manager (DSM) and share and save access logs within the group & mail notification when trouble occurs Summary
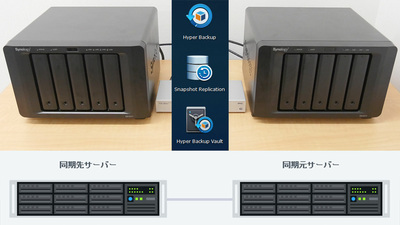
Synology (Synology)As a basic environment improvement of the DiskStation series of, create a shared folder using DSM (Disk Station Manager) and within the members of the groupShare and access foldersProcedures for, and those ofCollect and check access logsFollowing the method, togetherNotify by e-mail when there is a problem on the serverI tried to set it so that it could be done.
DiskStation Manager | Synology Inc.
https://www.synology.com/ja-jp/dsm
For the maintenance of DiskStation and the installation setting of the dedicated OS "DSM", it can be confirmed in the following article.
Initial setting summary for introducing the strongest NAS · Synology's 5-bay upper model "DiskStation DS1517 +" - GIGAZINE
◆ Set up a shared folder so that multiple people can use it
We will use the function of DSM (Disk Station Manager) to share the NAS within the group and use it.
· Create shared folder
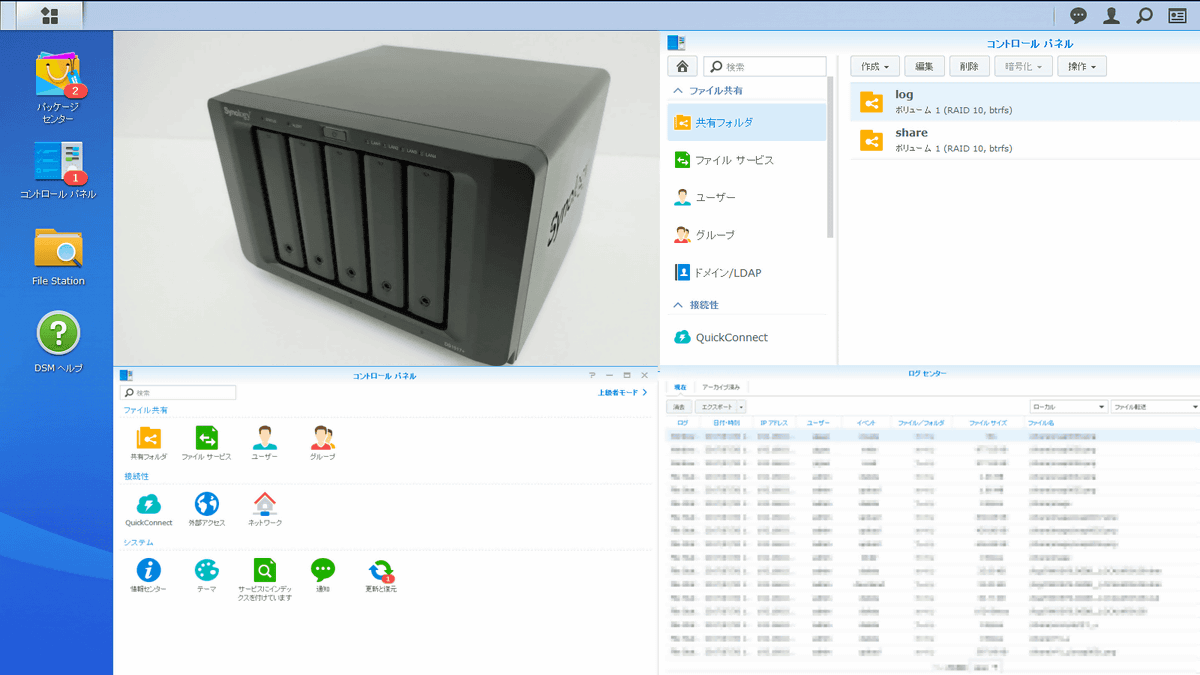
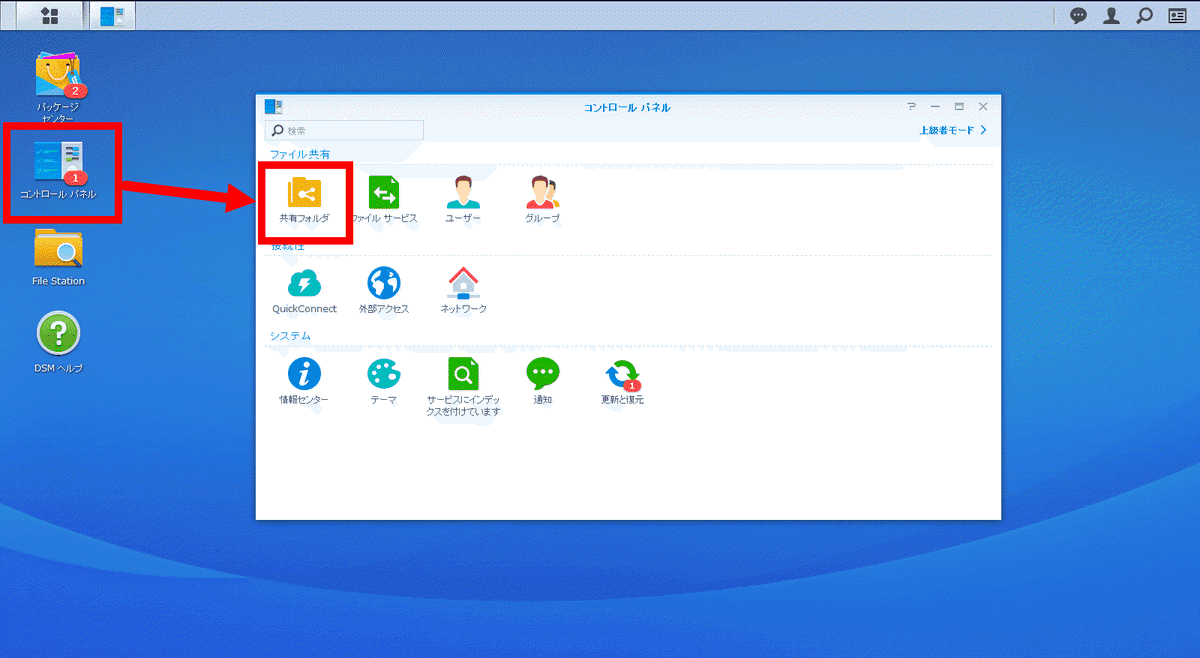
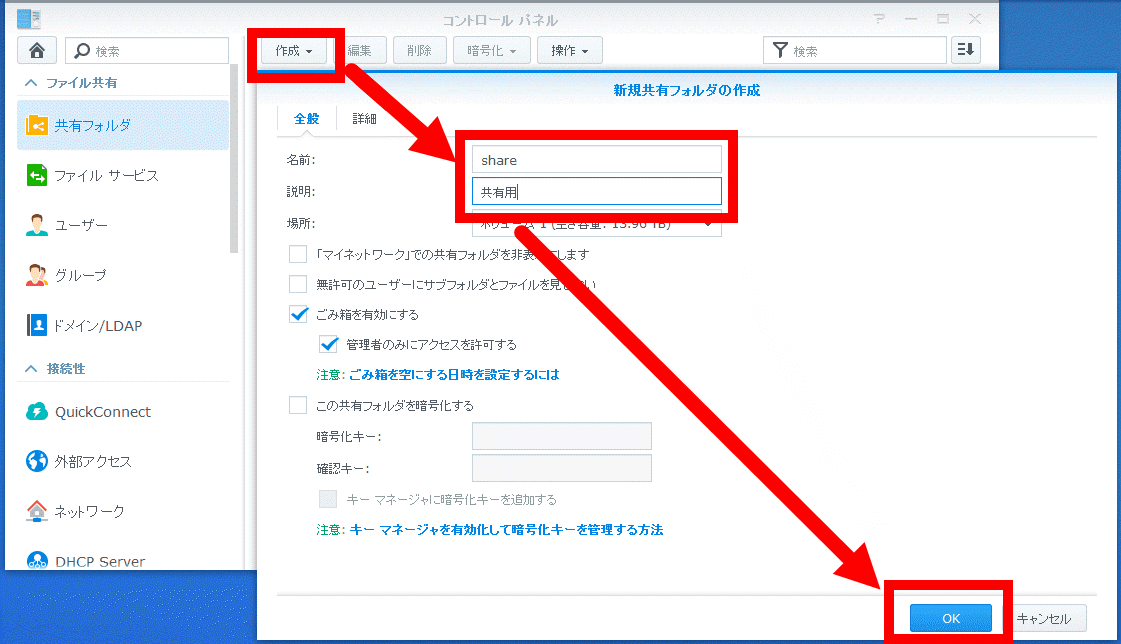
Open the control panel from the DSM home and click the "Shared folder" icon.
Select "Create". Since the input form is opened, set the name of the shared folder to "share" and note "for sharing" in the explanation column. Click "OK" when you can confirm.
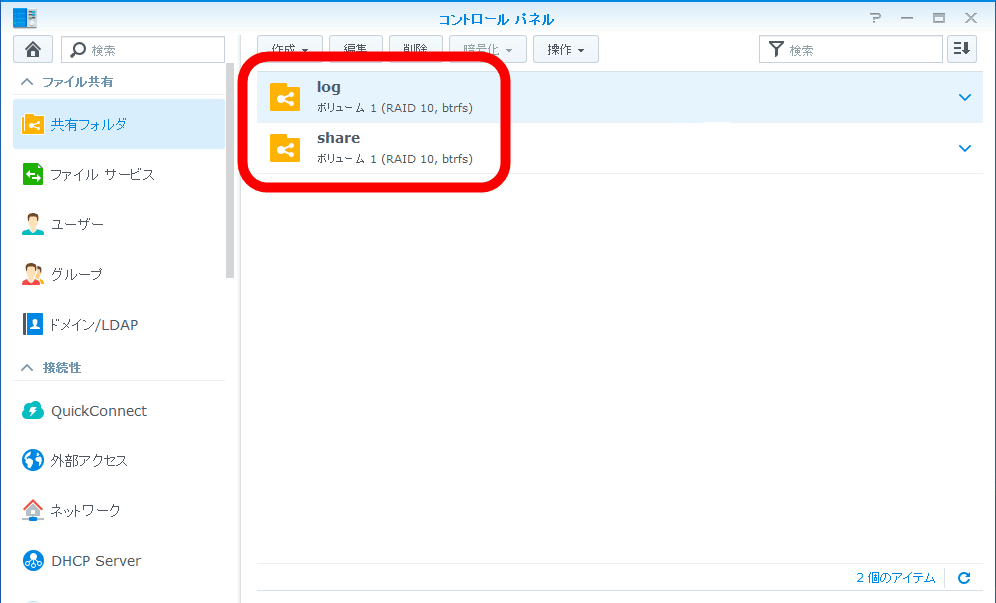
You can see that the screen changes to the "Shared folder" list and that the created folder has been added.

Create a "log" folder for saving the log data by the same procedure.

You can check the "share" and "log" folders. This completes the folder creation.
· Create a group
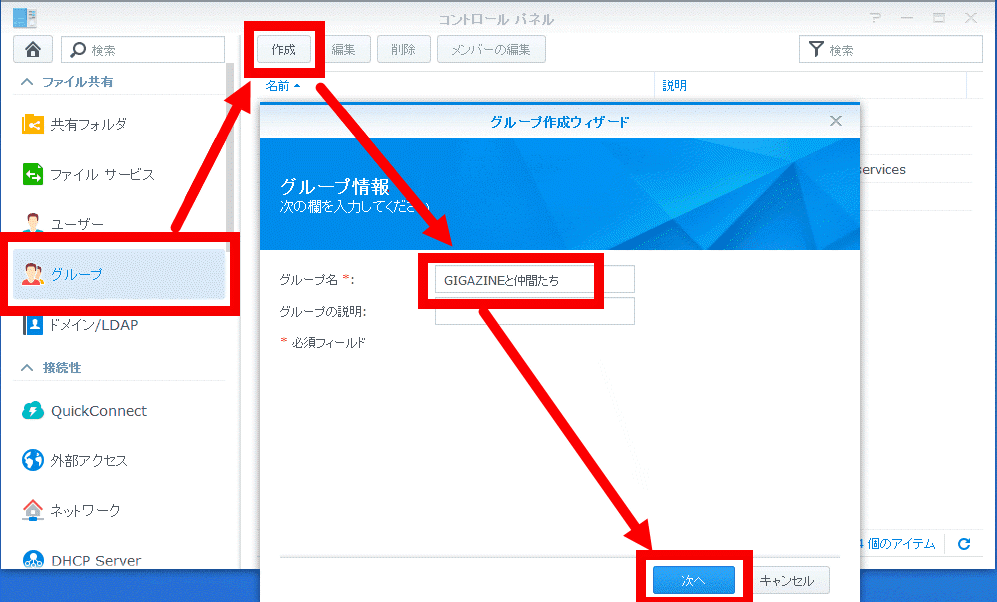
We will set up shared folders created earlier so that they can be shared by group. First, create a group to share the folder. Select the "Group" tab from the list on the left side of the control panel and open the window from "Create". After entering the group name in the input form, click "Next".
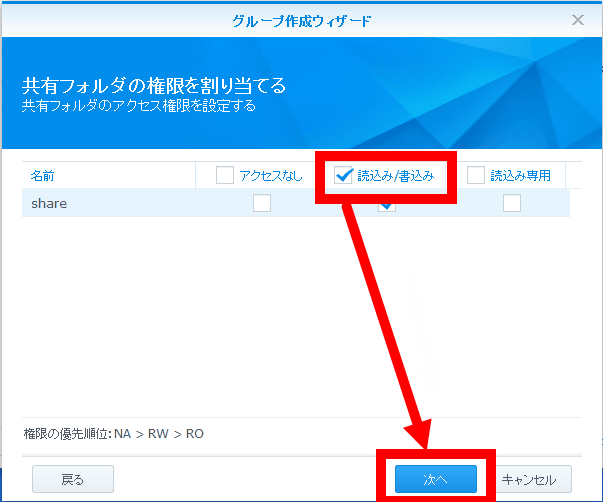
Next is the selection of authority assignment of the shared folder. Since you can choose from three options "no access", "read / write", "read only", check "read / write" and click "next".
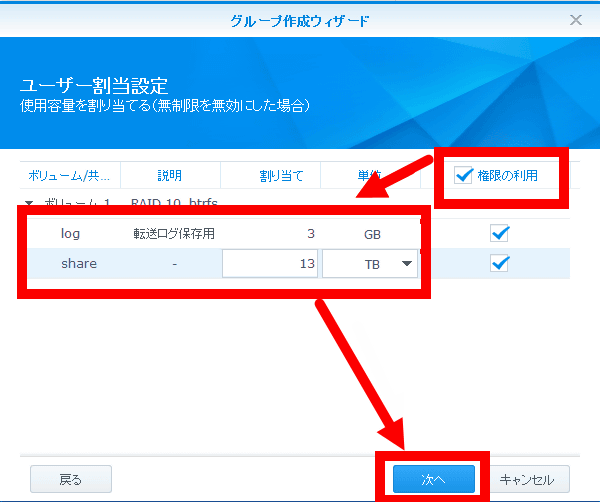
Next we will set user assignment. When there are multiple shared folders, you can finely set the capacity allocated to each. First of all, if you check "Use of authority", you can change the numerical value. Assign 13 TB to "share" and 3 GB to "log" out of the total 14 TB (TB) capacity in the prepared "share" and "log" shared folder and click "Next".
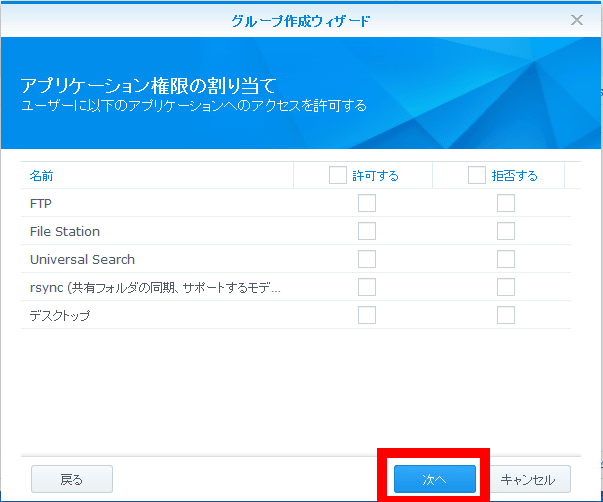
Next is an application authorization assignment screen. You can choose to allow or deny the group access to the displayed application. For this time, click "Next" without setting anything.
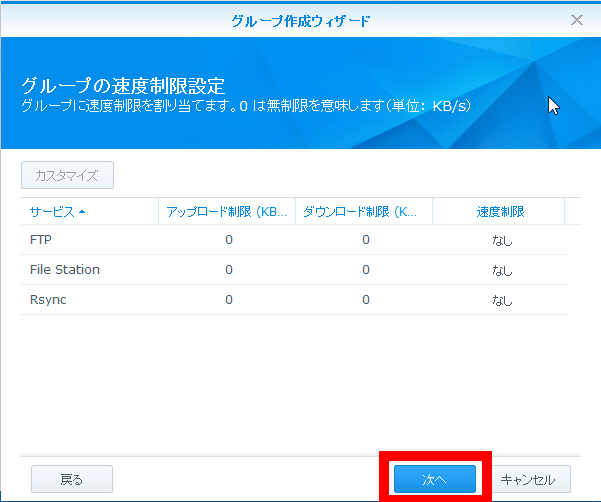
Lastly, speed limit setting. You can fine-tune the speed limit setting for each service upload / download. Leave "0" as it is unlimited, do not change and click "Next".
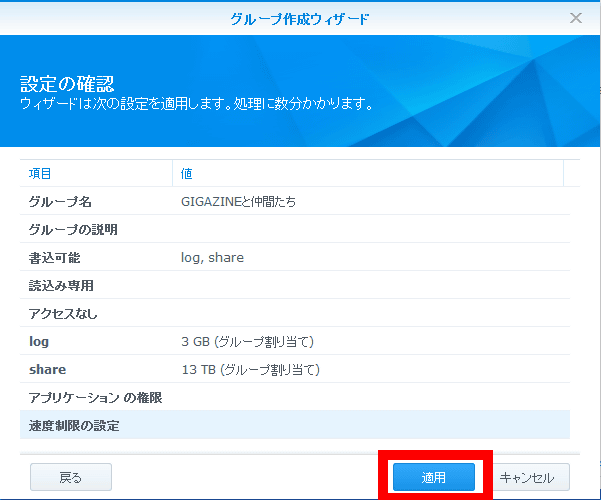
Confirmation screen of set contents. Click "Apply" to complete the setting.
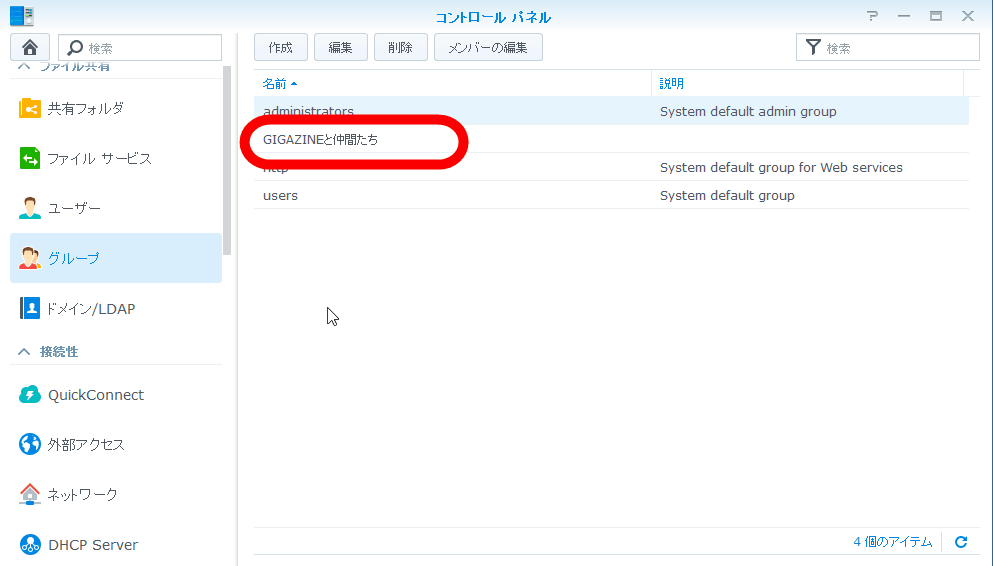
The screen changes to the group list and you can confirm that the group has been added. You can now share folders among multiple users just by adding users to the group.
· Add users
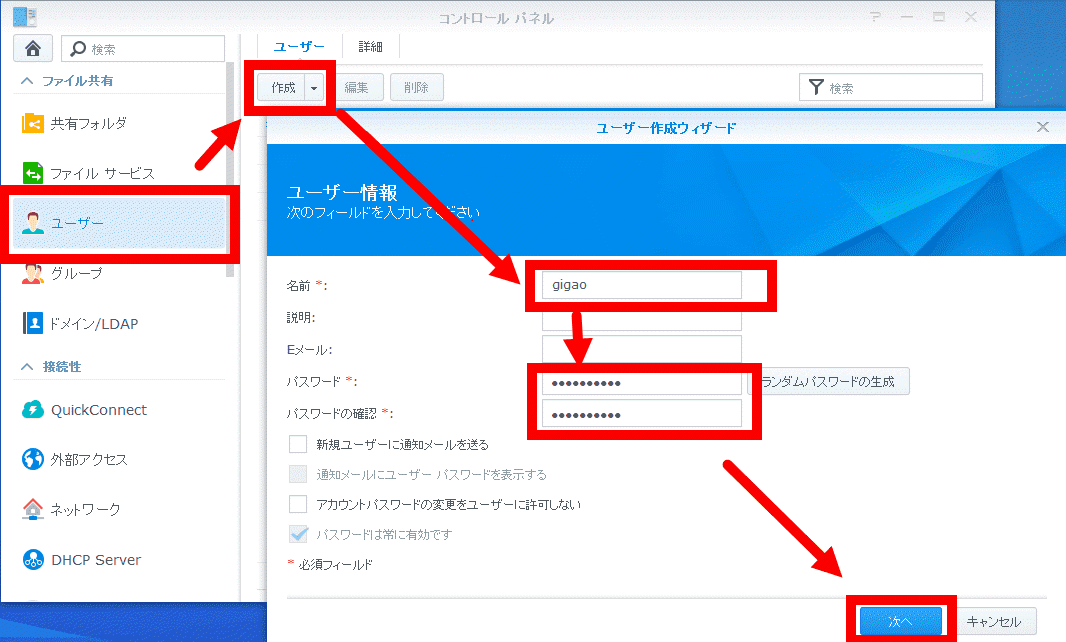
Select the "Users" tab from the list on the left, and click the "Create" in the same way as group setting. Since the input form of user information comes out, and set name, a password. Click "Next" when you are satisfied.
You will be taken to the "Merging Groups" page. Check the created group and click "Next".

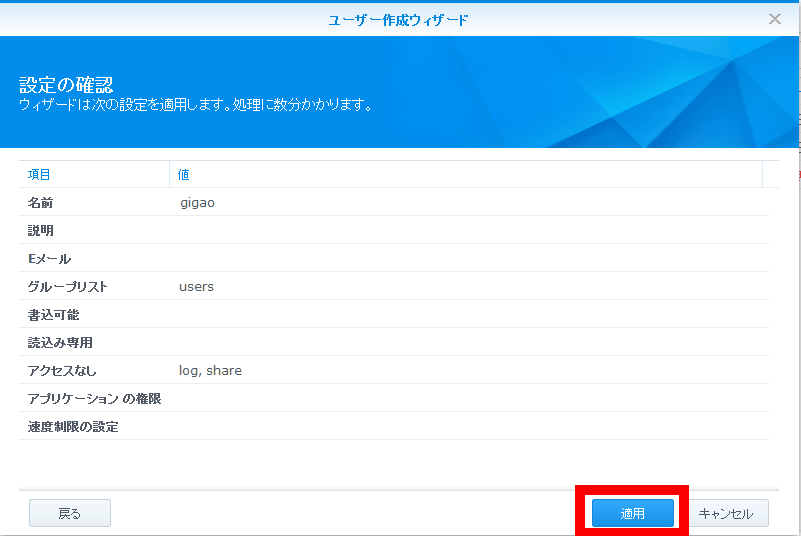
A confirmation screen will appear after setting. Click "Apply" if there is no problem.
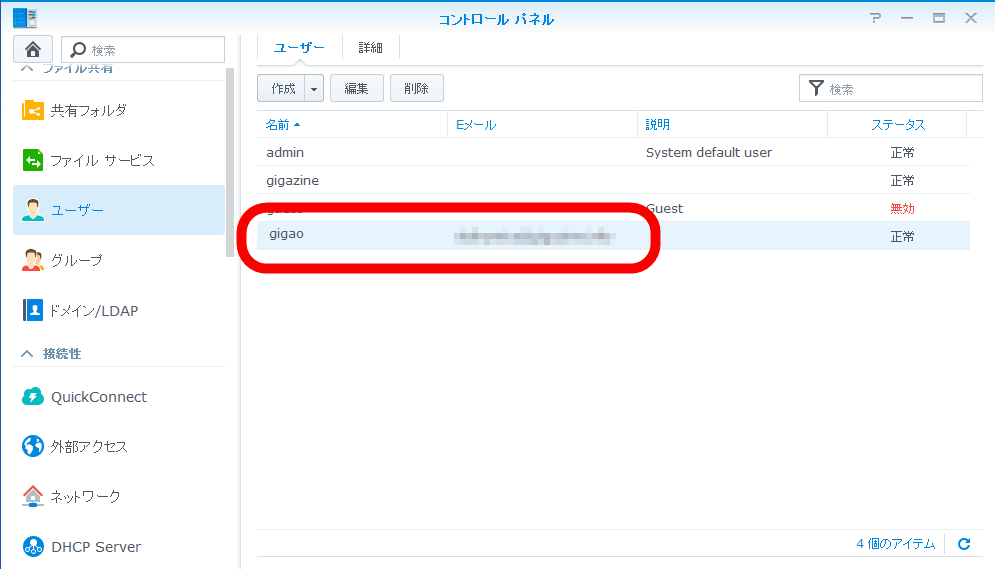
The page changes to the user list and you can confirm that the user is added.
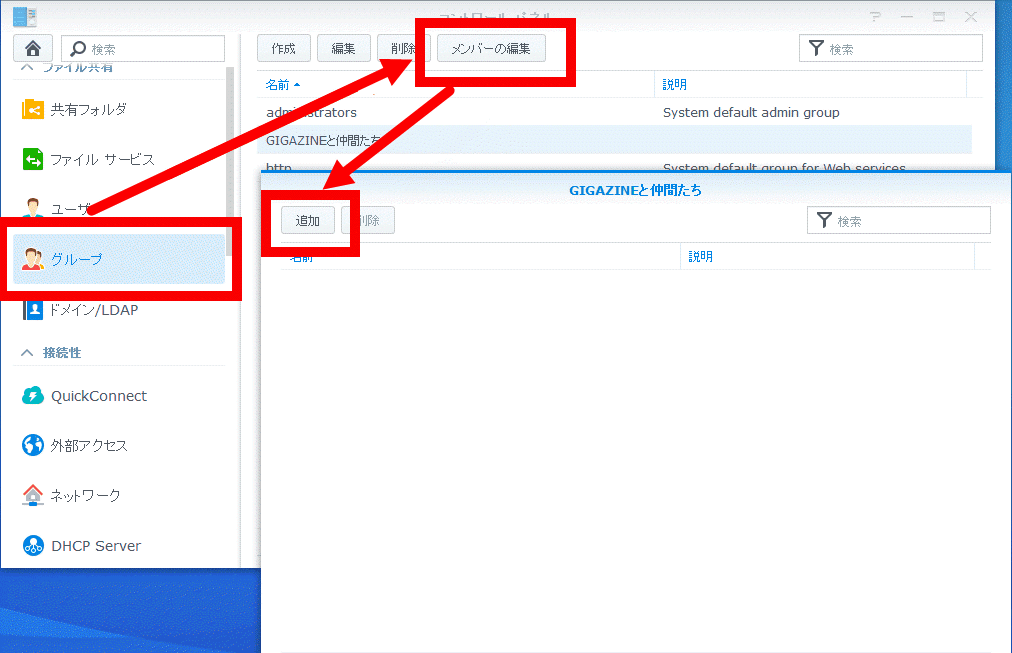
Since I added a user, I will move on to welcome the added user to the group. Select the "Group" tab from the list on the left and click "Edit Member" at the top of the page. The group member list window opens, so select "Add".
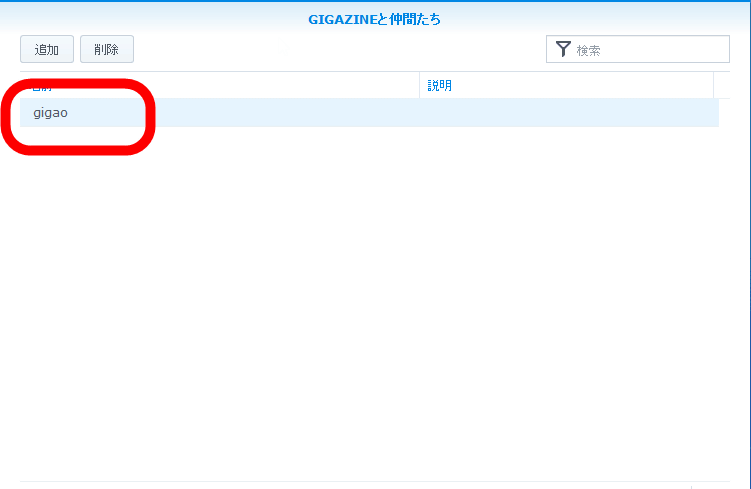
A list of registered users is displayed. In this example, "Giga" is added, so click to select it, then click "OK". The user addition is completed.

"Ginga" has been added to the user list above.
· Access method of added user
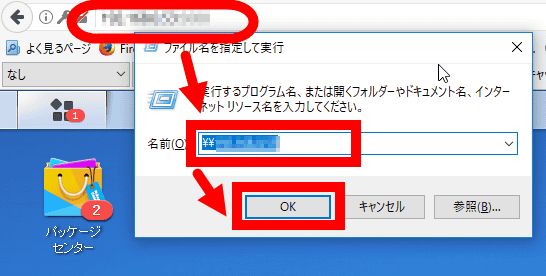
Open the "Execute with file name" window with Windows key + R. Directly enter the IP address at the top of the DSM page of the browser or the machine name assigned to DSM and select "OK". At this time, be careful not to forget to add "\\" before the input address.
The Explorer and the "Enter network credentials" window will appear. In the user name and password here, enter the user ID you registered with DSM, check the box "Store credential information" and click "OK". Now you can open the folder on the NAS directly from the client terminal.
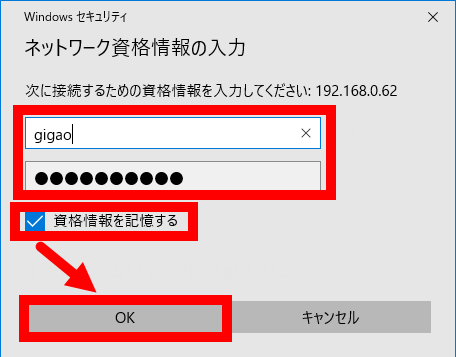
Now you can share files in the same way as ordinary shared folders.

◆ Enable to save logs to record access status
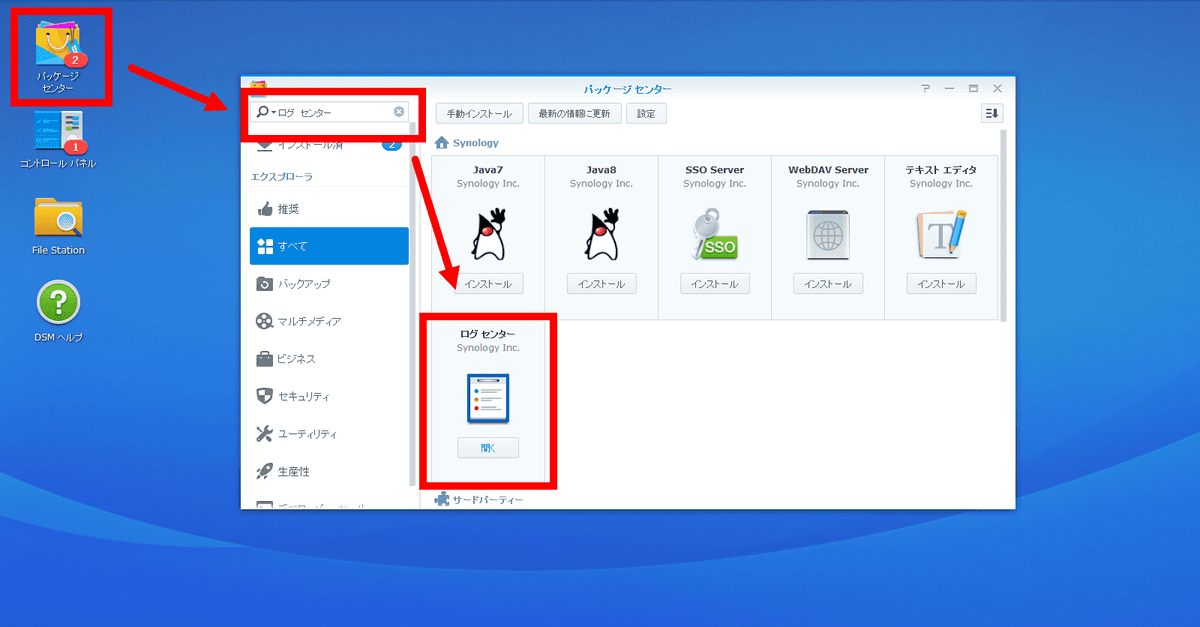
When the user operates in the shared folder, we will set it so that logs can be acquired. First, open "Package Center" from the DSM Home screen, enter a space between "Log" and "Center" and enter "Log Center" in the search window. From the search results, click "Log Center" to install the application.
When installation is completed, click the "Open" button to open the log center window. From the list on the left side of the window, select "archive setting" for log preservation setting.

Check "Archive local log to archive specified above", click "Select location", select the "log" folder created earlier, then click "Apply".

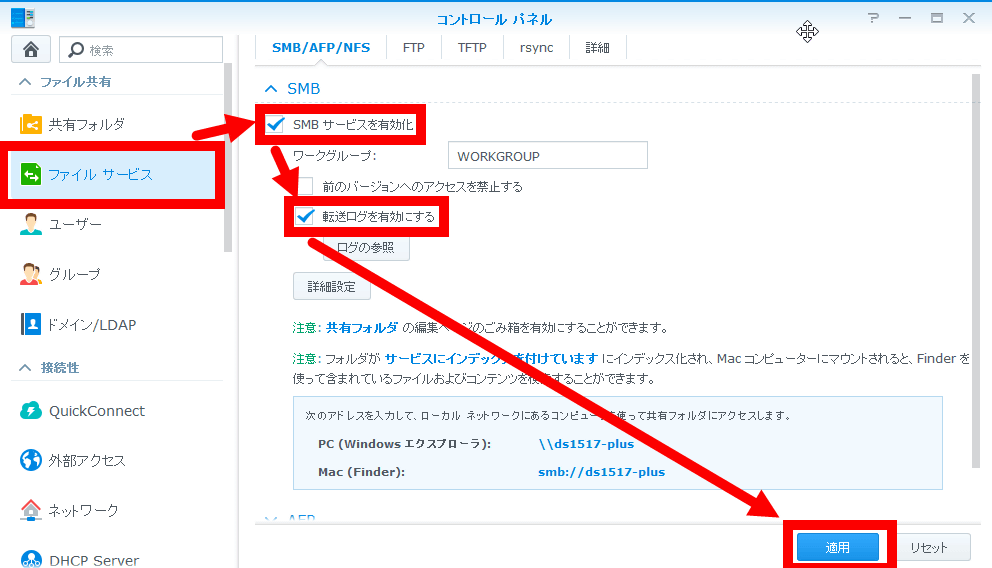
Click "Control Panel" and select "File service" from the list. When the window opens, check "Enable SMB service" and "Enable transfer log" and click "Apply" to complete setting.
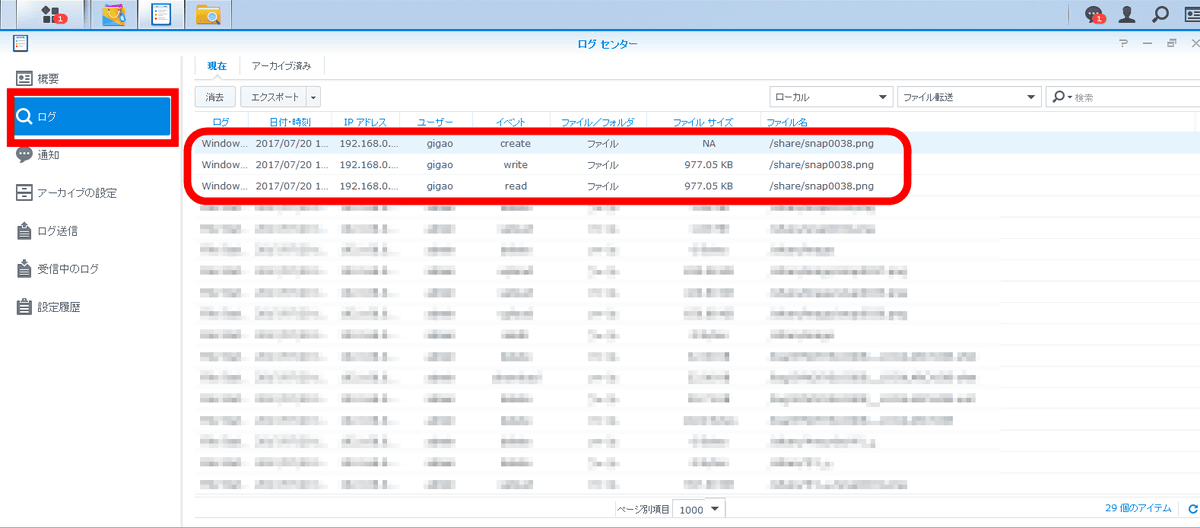
Let's check if the file actually shared by the user is saved as a log. Select "Log" from "Log Center". As surrounded by a red frame, you can see that access from the user "gigao" is logged as opposed to admin. With this, even if more than one person is in the group, we can now see who did what, when and what.
It is saved in the "log" folder created and set up earlier for each fixed amount / fixed amount. Even if the number of accesses increases, there is no worry that the log will flow and disappear.
◆ Set e-mail address so that notification comes when a problem occurs
Use the DSM function to set the notification message to be automatically sent to the specified e-mail address when the system status changes or an error occurs.
· Notification settings window
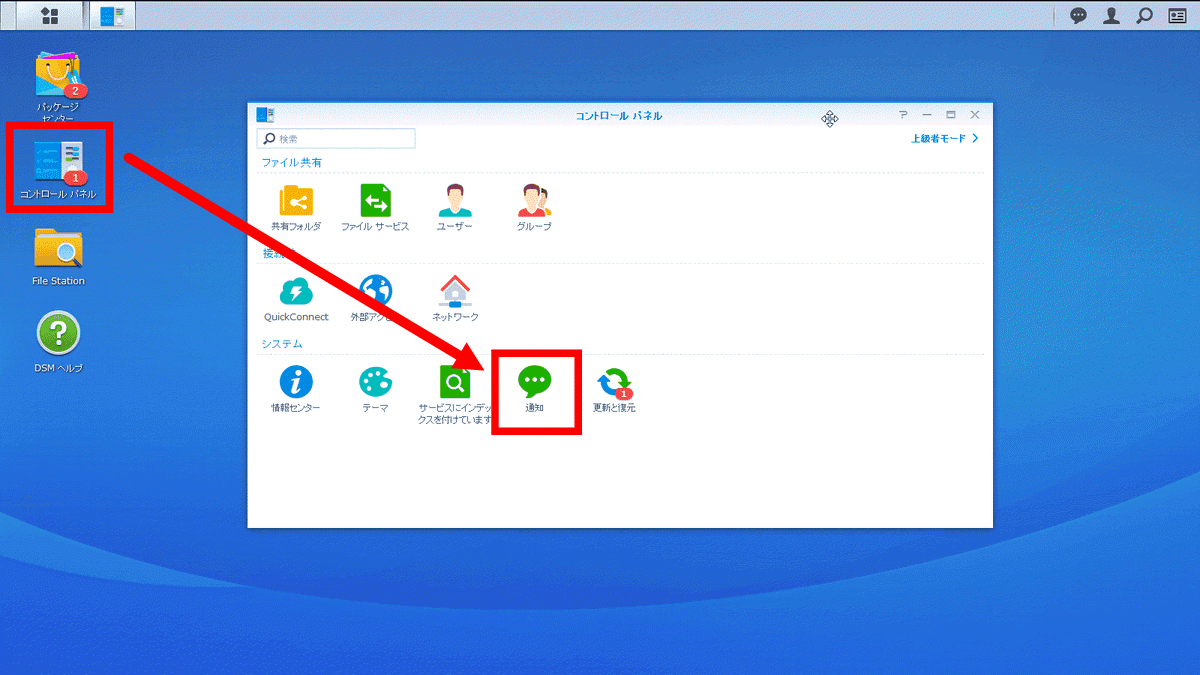
Click "Control Panel" → "Notification".
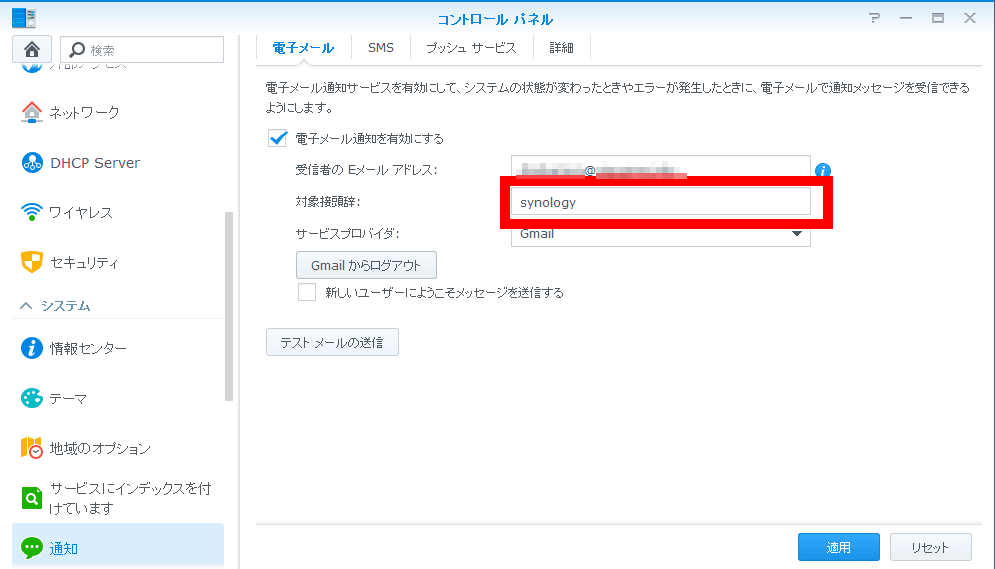
As the following window appears, first check "Enable e-mail notification". Enter your email address and select a provider. Since Gmail is used for reception this time, enter Gmail address for reception at "Recipient's E-mail address". Then select "Gmail" from "Service Provider".

If you enter "synology" so that it is easier to see that the notice comes, you can easily check "target syndrome" at the beginning of the notification e-mail in the "target prefix" item.
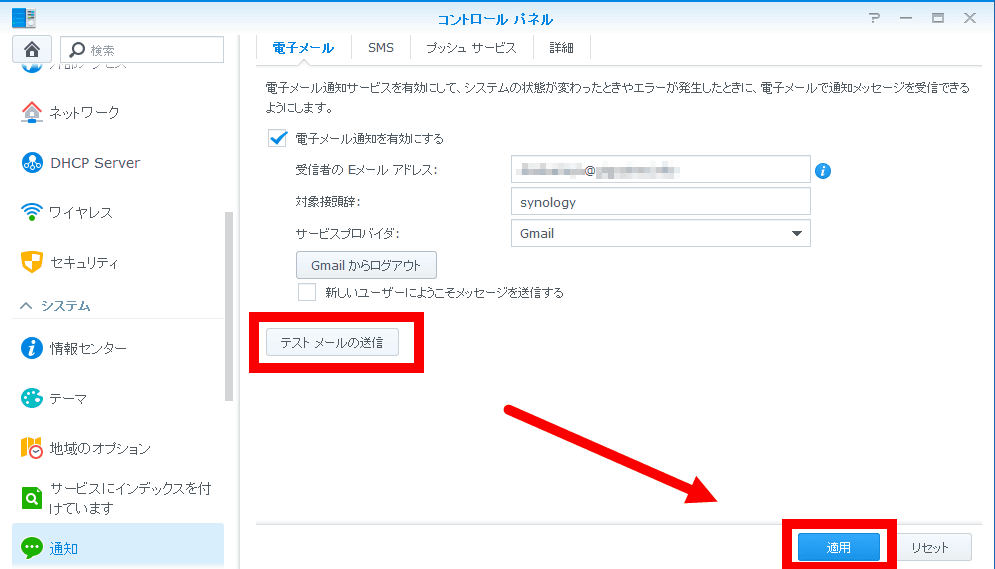
When input is completed, click "Send test mail". A confirmation email will be sent to the registered address. Click "apply", notification setting is completed. This will inform you as soon as there is a problem with the server.
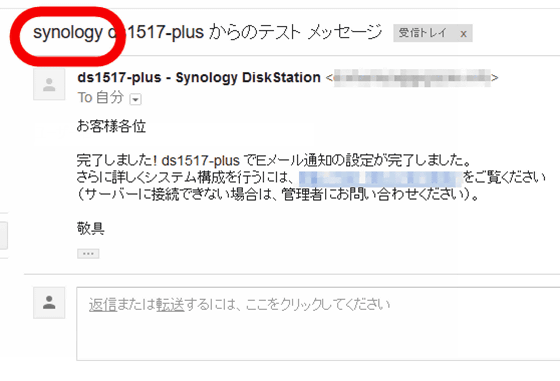
The test mail looks something like this. The character string "synology" entered with "target prefix" is inserted before the sender. If you set clear words, you do not have to worry about missing it.
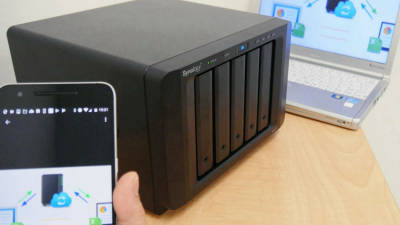
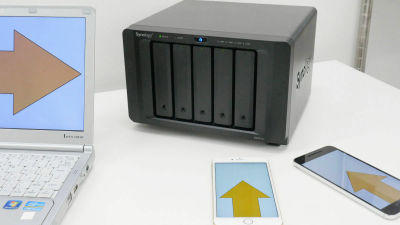
In this time, I created a folder by operating DSM, set up so that even registered users other than the administrator can access it, and set up to manage the log of those operations. In addition, we registered to notify you by e-mail when there was something wrong or error. Following the initial setting of DS1517 +, the article of Synology 's DiskStation has finished the second round, but it is still at the basic setting stage. From the next stage, as a practical stage, we will post an article to synchronize PC / smartphone image / video folder with DS1517 + in real time.
· Continued
How to make NAS a media server with Disk Station Manager (DSM) and play movies and music streaming from outside with smartphone Summary - GIGAZINE
Related Posts: