I tried using a high-performance NAS TerraMaster "F4-220" that can transform into a media server with easy operation
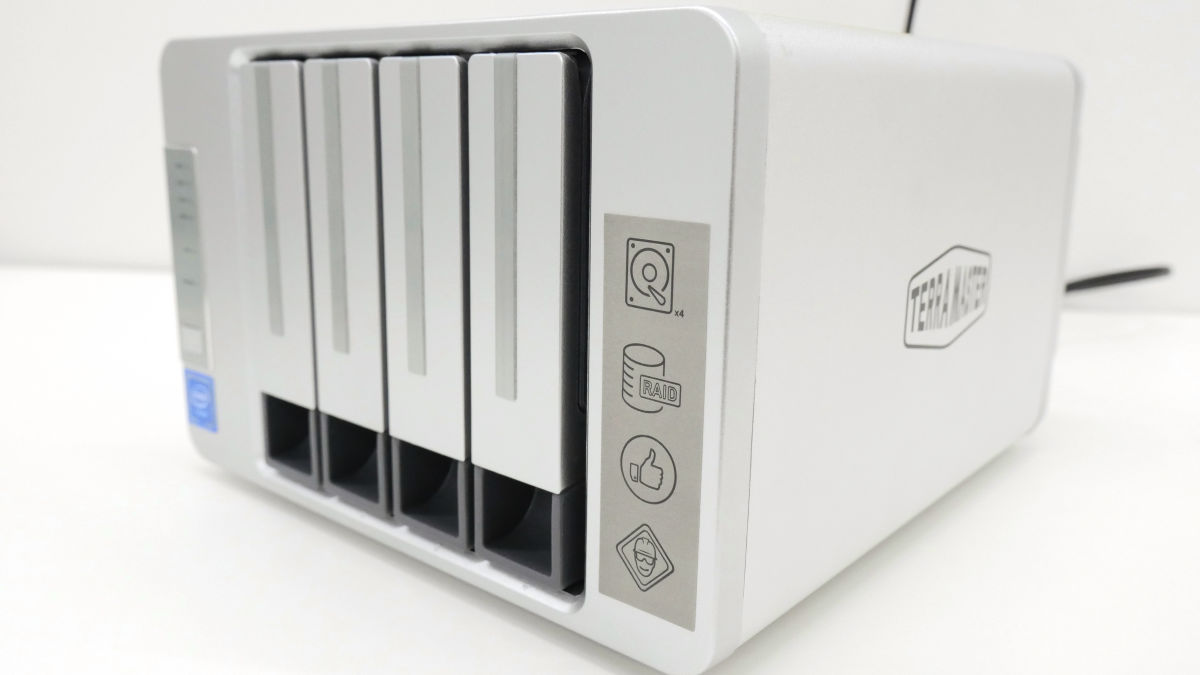
"TerraMaster F 4-220"Intel Celeron's dual-core processor, 4-bay with 2 GB of memoryNASis. It also has sufficient specifications as a server machine for home use, and it can be used for applications such as media server and web server besides NAS. Since the actual product of TerraMaster F 4-220 arrived at the editorial department, I tried using the actual usability as how it feels.
F4-220 - Product
https://www.terra-master.com/jp/products/f4-220.html
◆ Appearance review
The package of TerraMaster F4-220 is based on blue design.

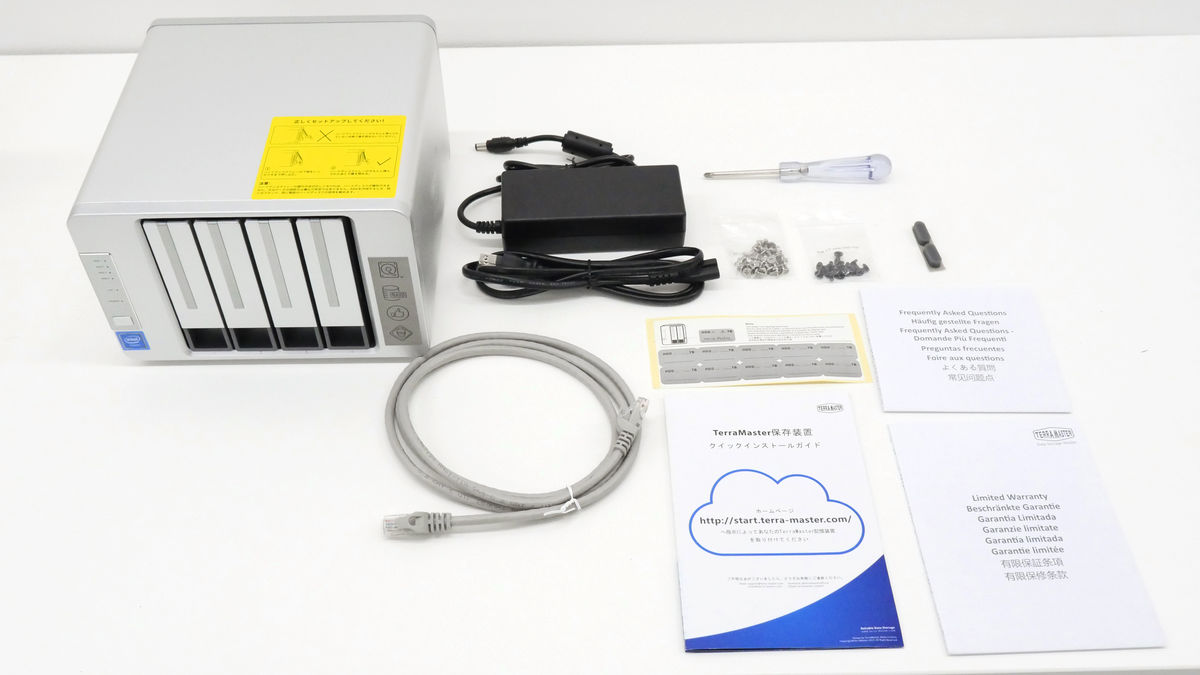
Once opened, there are one TerraMaster F 4-220 in the box, one power adapter and power cable, one Ethernet cable, one Phillips screwdriver, 30 silver screws, 16 black screws, 16 There are two copies of slip stops attached to the bottom, labels that can be stuck on the hard disk, quick installation guide, frequently asked questions, and warranty clauses.
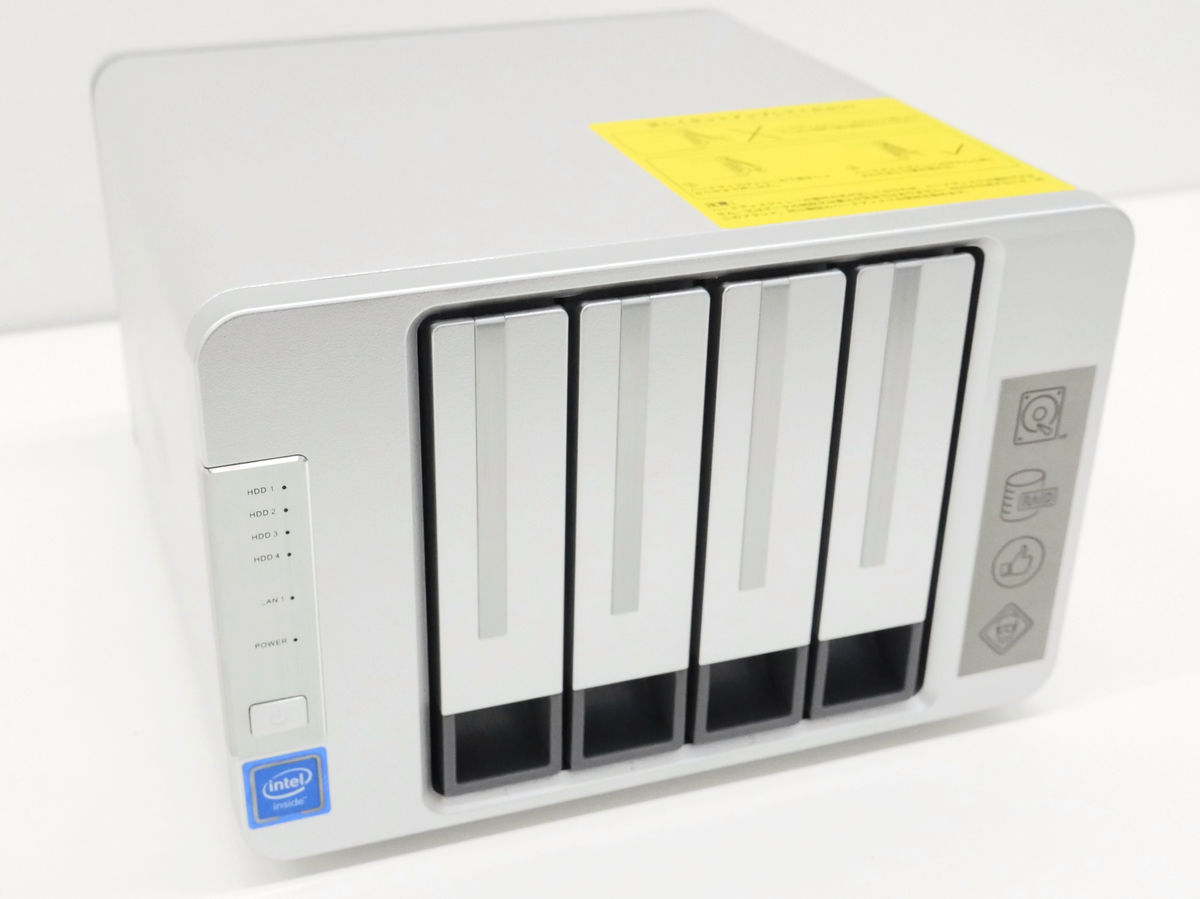
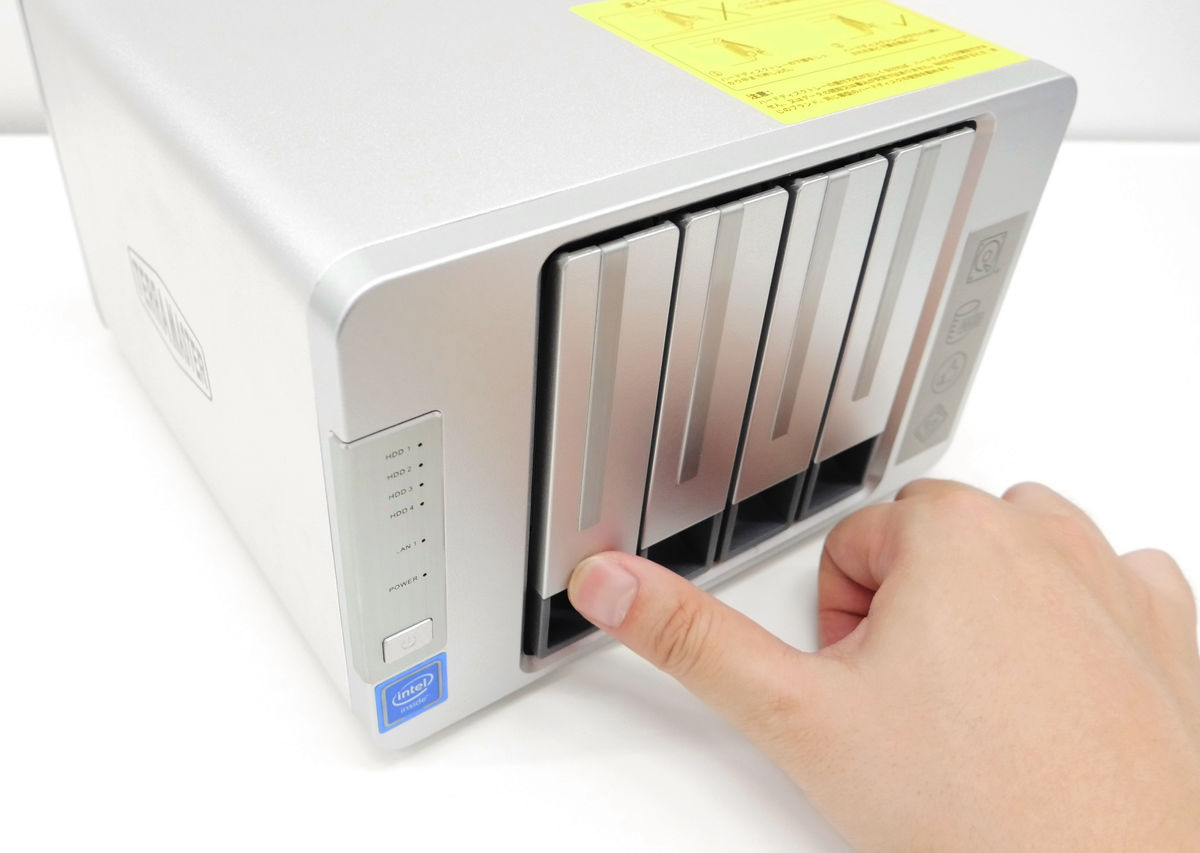
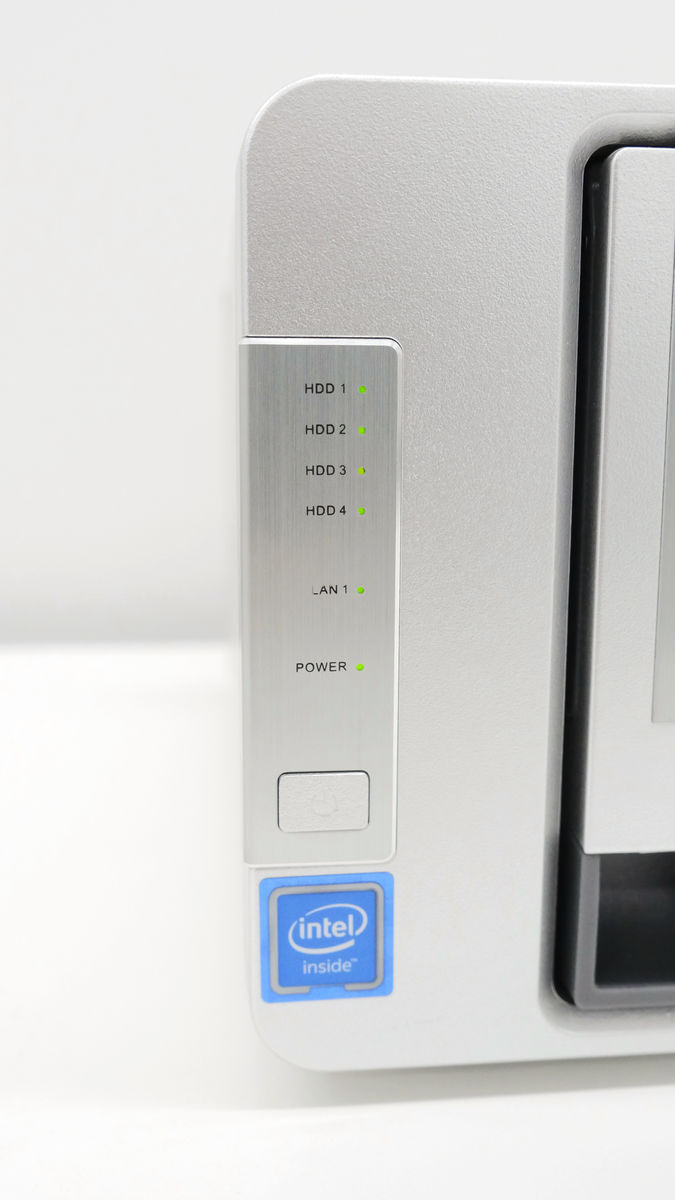
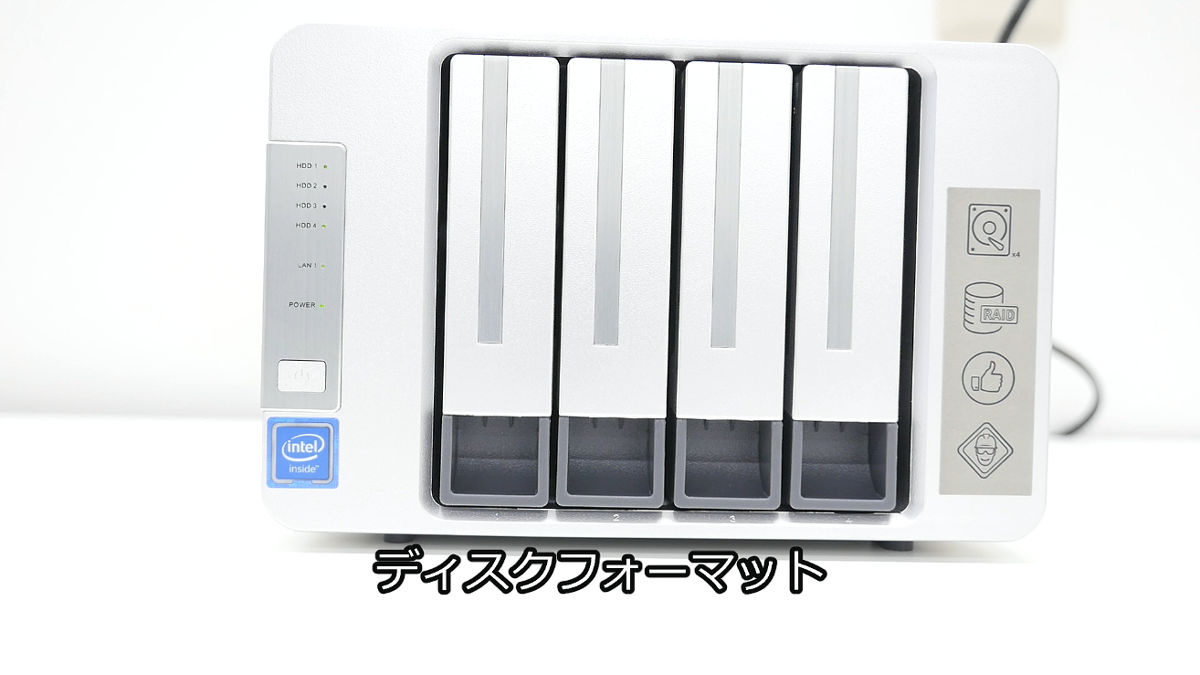
On the front of the TerraMaster F4-220, there are four indicators showing the status of the HDD, an indicator showing the status of the network, power supply, and there is a power button under it. There are also 4 hard-disk bays next to this side.
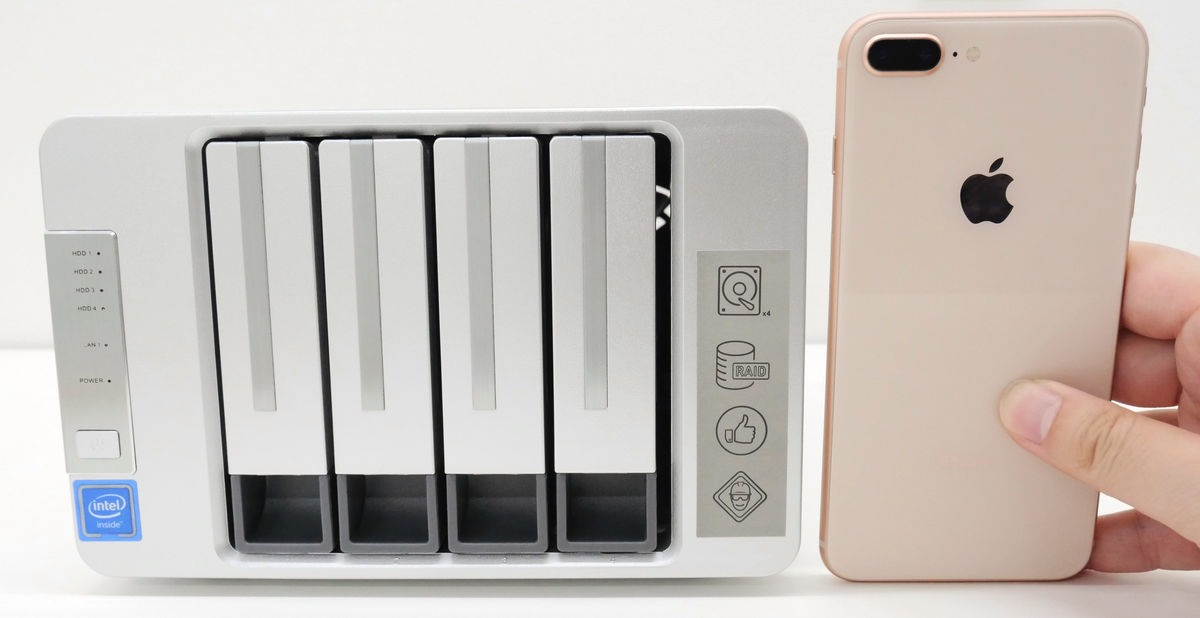
Compared to the iPhone 8 Plus, the height of the TerraMaster F4-220 was 13.5 cm, slightly lower than the long side (158.4 mm) of the iPhone 8 Plus, and the width was 22.6 cm, 1.4 times the long side of the iPhone 8 Plus.
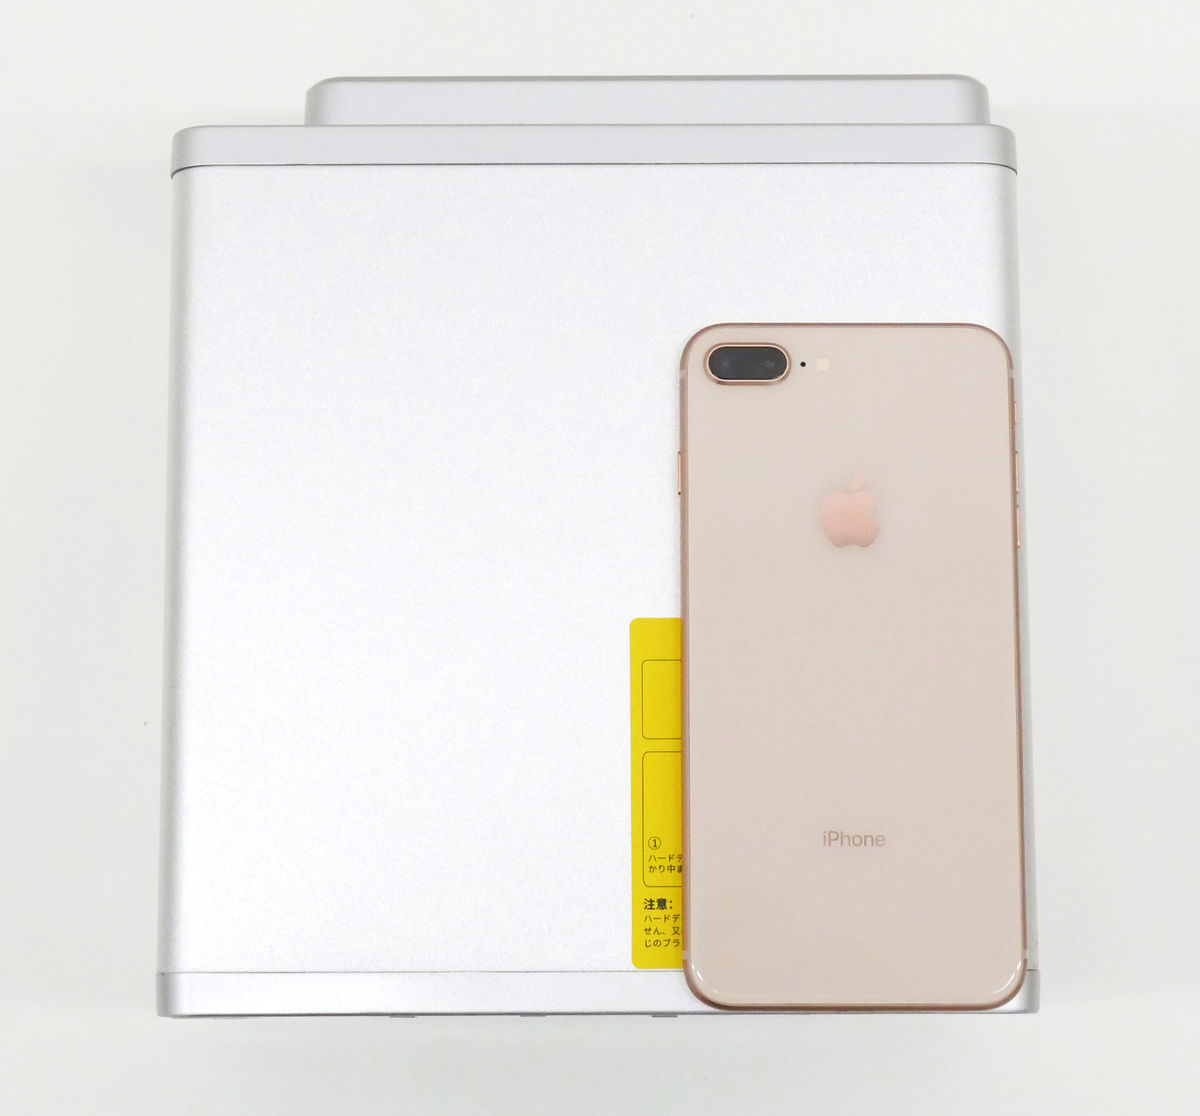
The size of the depth is 22.6 cm which is the same as the width.
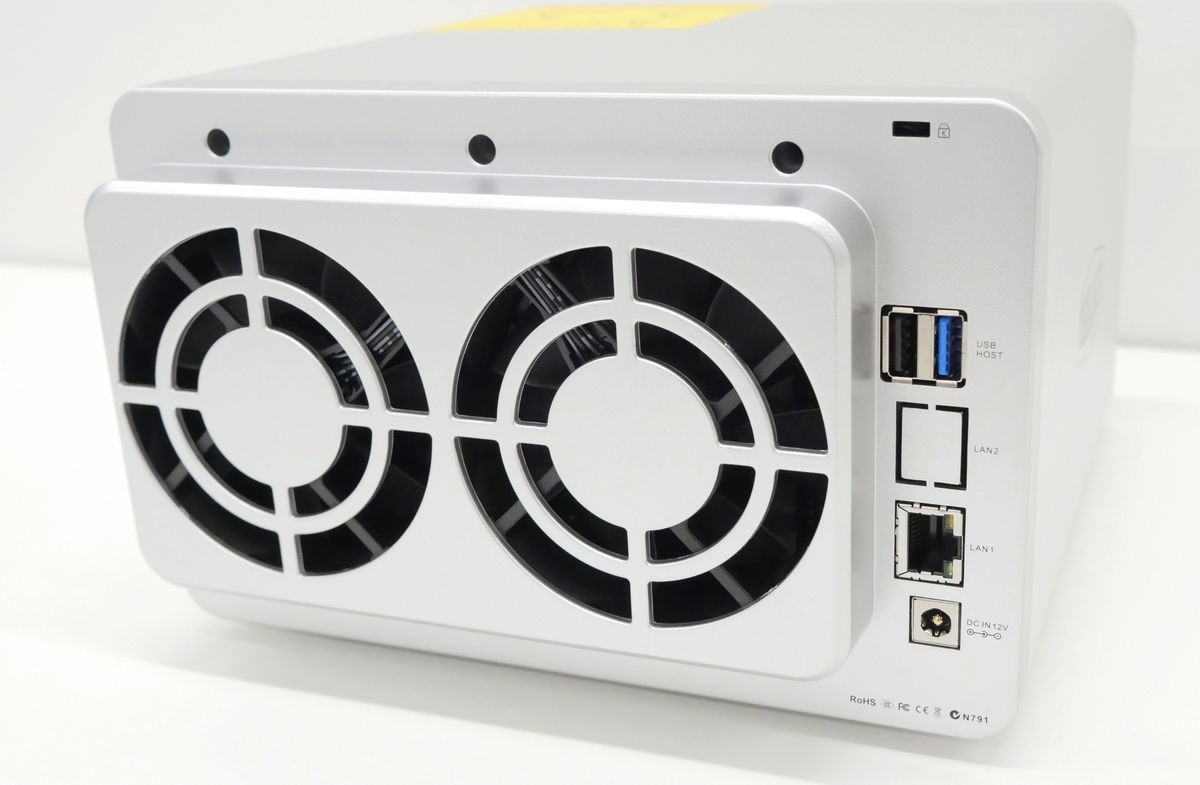
There are two fans on the back side, with one USB 2.0 port, one USB 3.0 port, one Ethernet port, and a power cable connection interface on the right side.
◆ Preparation for using TerraMaster F4-220
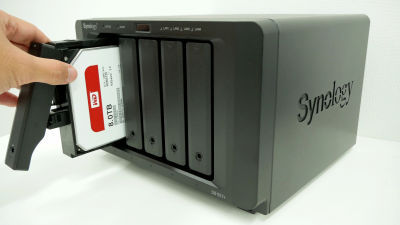
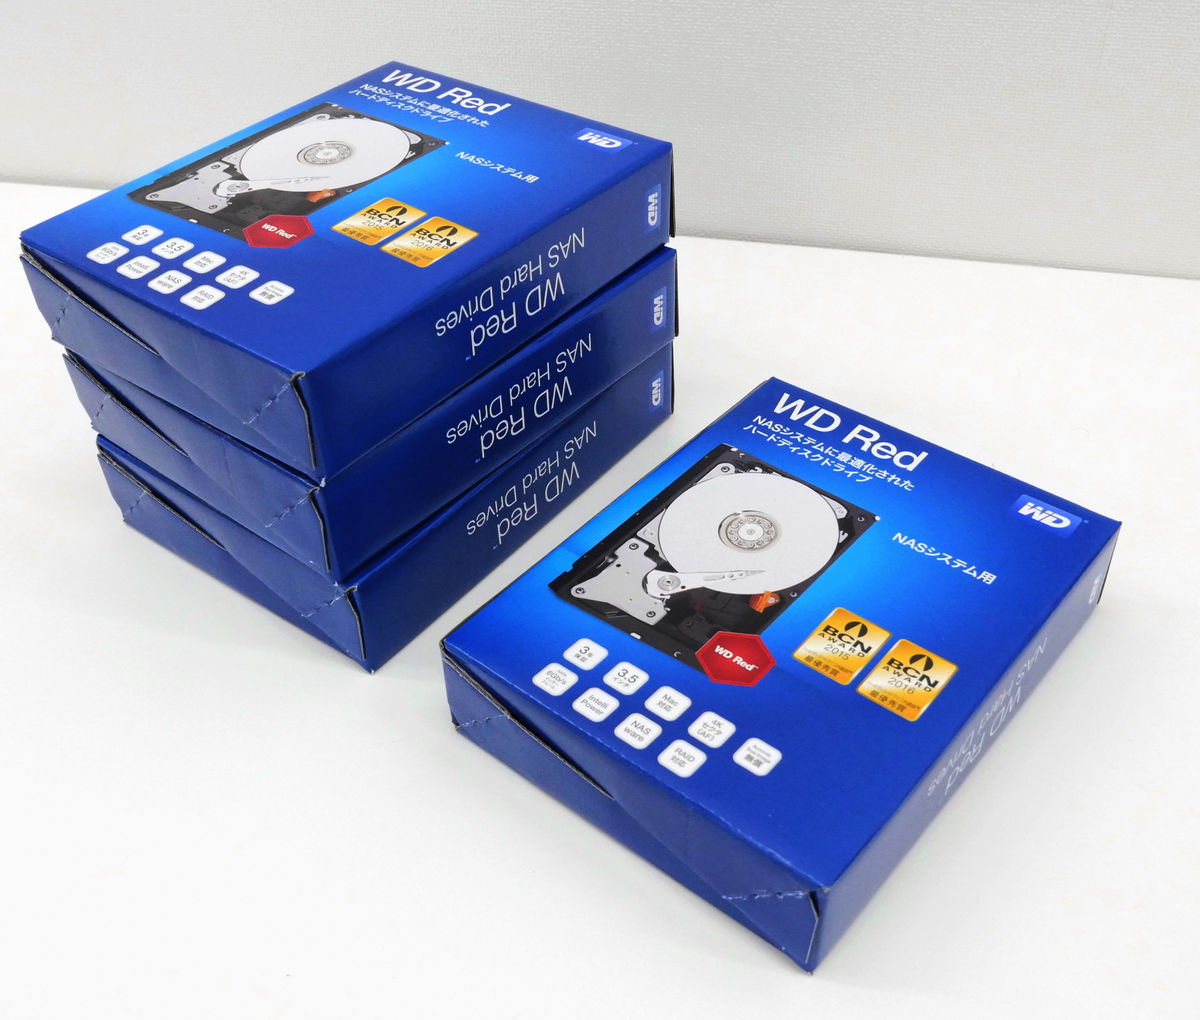
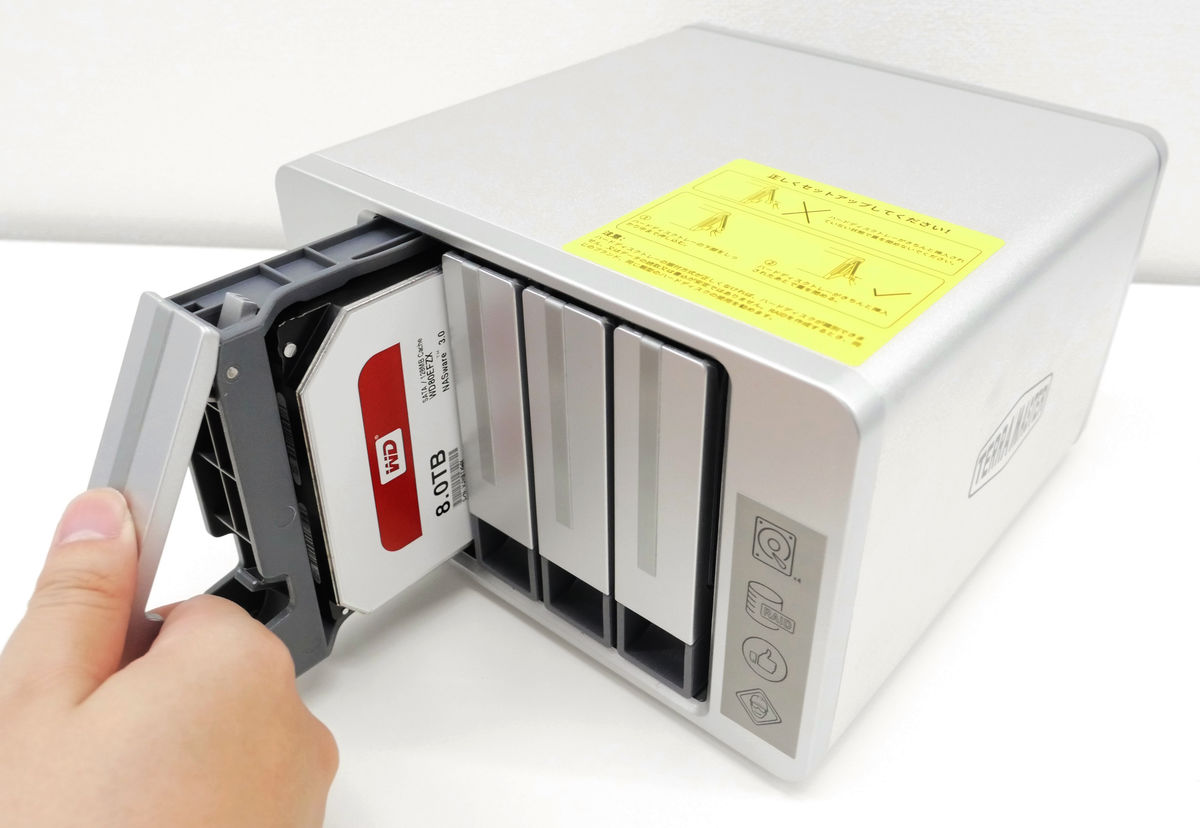
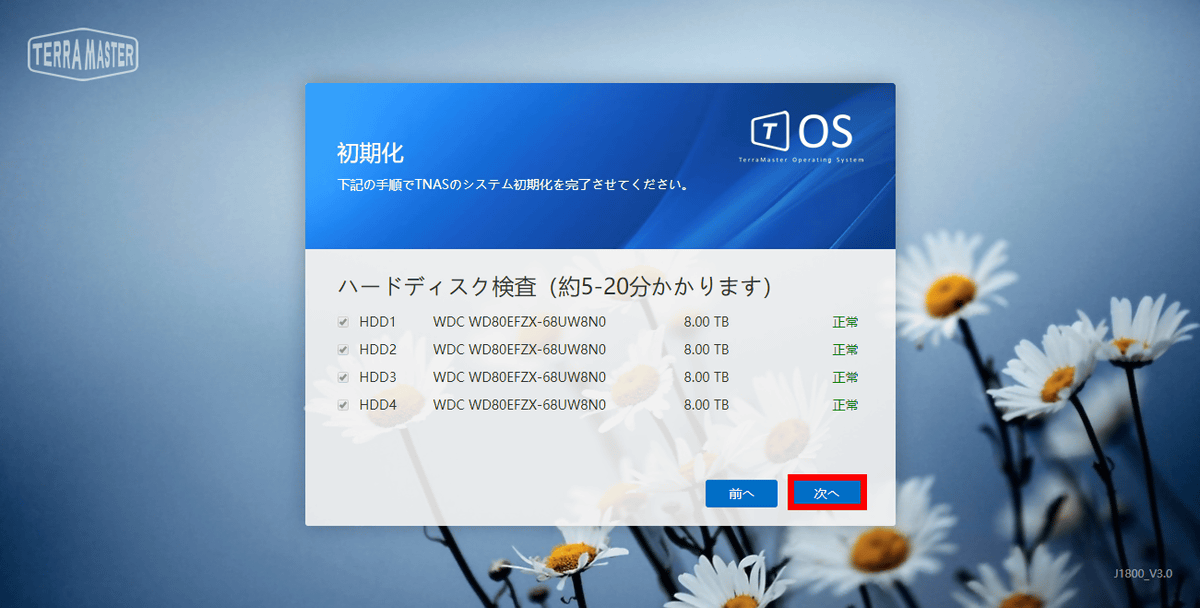
In order to set up immediately, HDD is set to TerraMaster F 4-220. This time Western DigitalWD80EFZX(8 TB) can be used and even if two HDDs fail, it can operateRAID 6I will try to organize. Because it combines RAID 6 with 4 HDDs, the capacity that can be stored in the NAS is 16 TB, which is one half of the total capacity.
To remove the HDD bay from the TerraMaster F4-220, raise the handle at the bottom of the bay and pull it out in that state.

Set the HDD in the pulled out bay ... ...
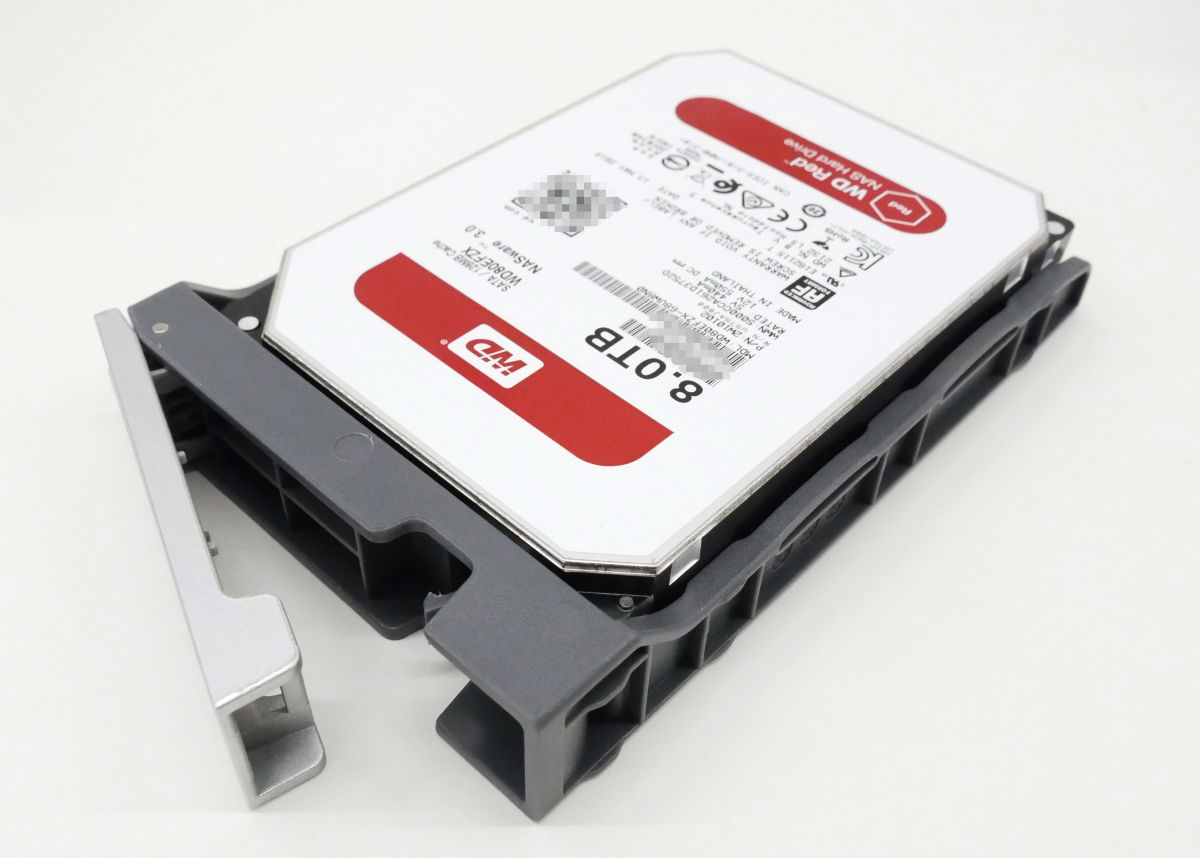
Turn it over and fix the bay and HDD with screws.
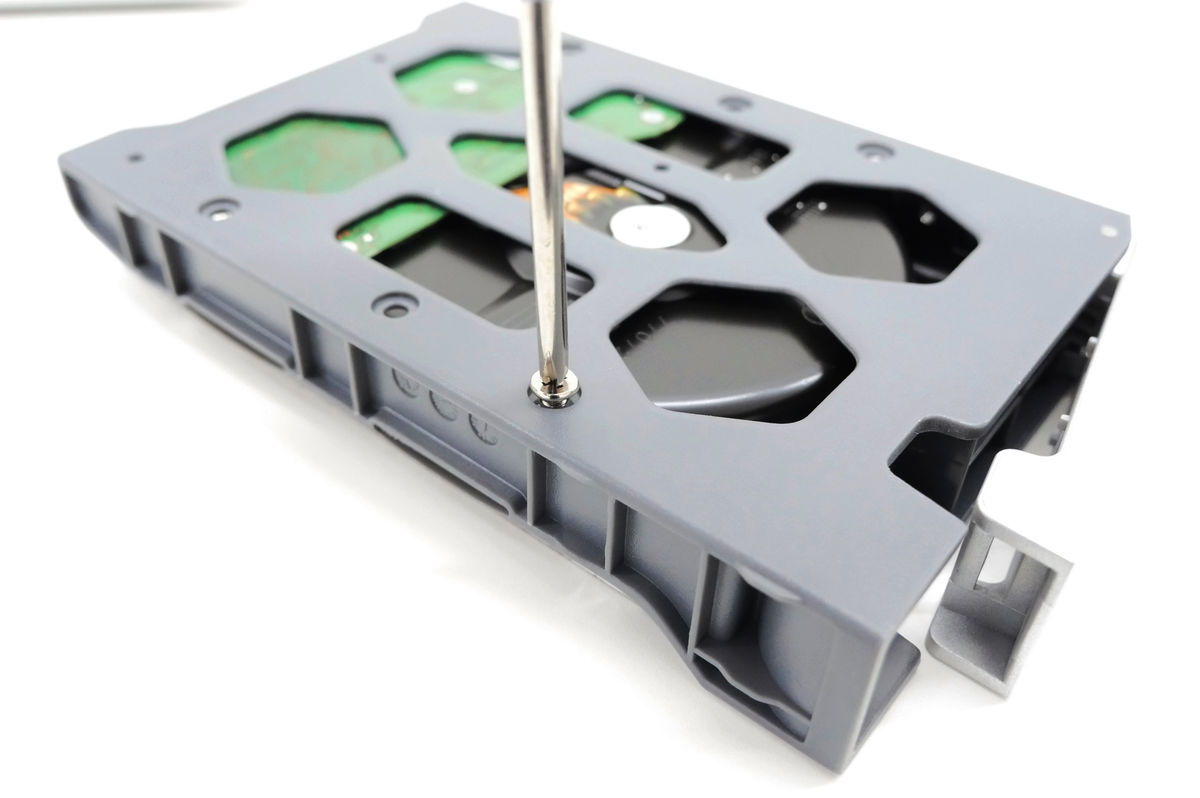
After securing the disc, you can put it in the TerraMaster F 4-220 while pulling up the handle of the bay. When you get in to the back, lower the handle and set the HDD. I will do this for 4 pieces.
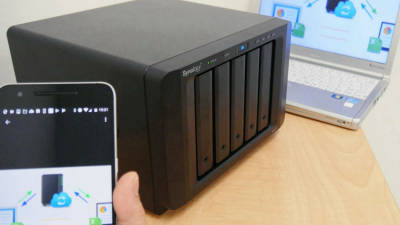
Then prepare an Ethernet cable with one side connector connected to the router and connect it to the Ethernet port of TerraMaster F 4-220.
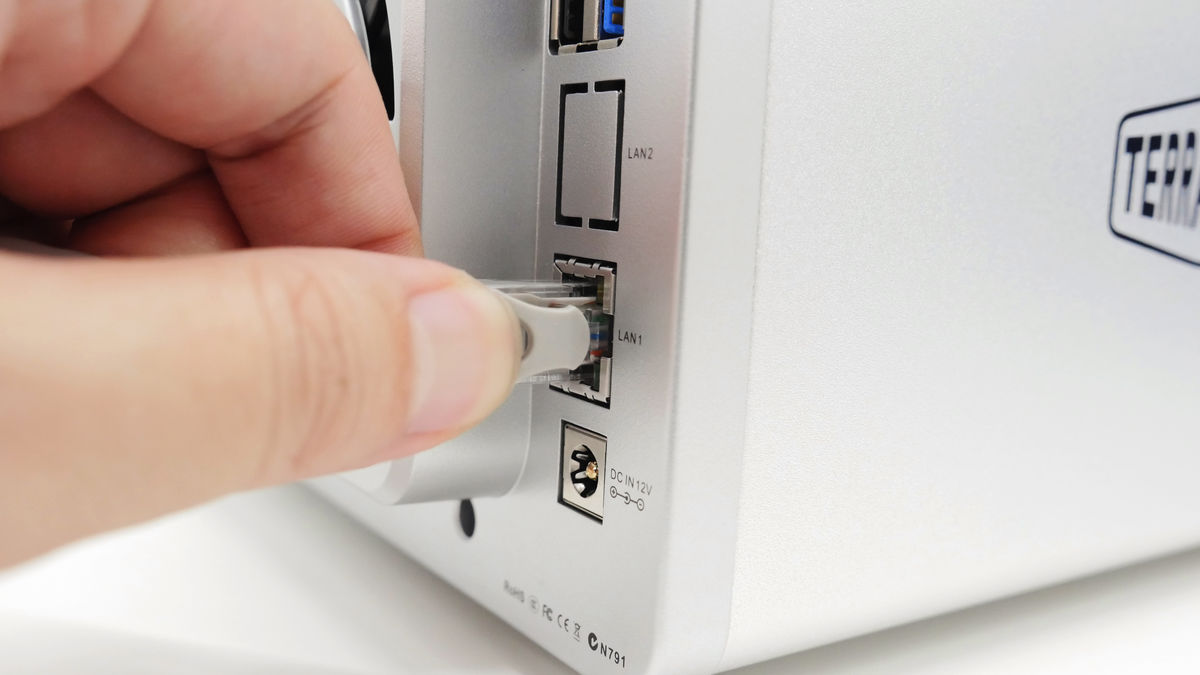
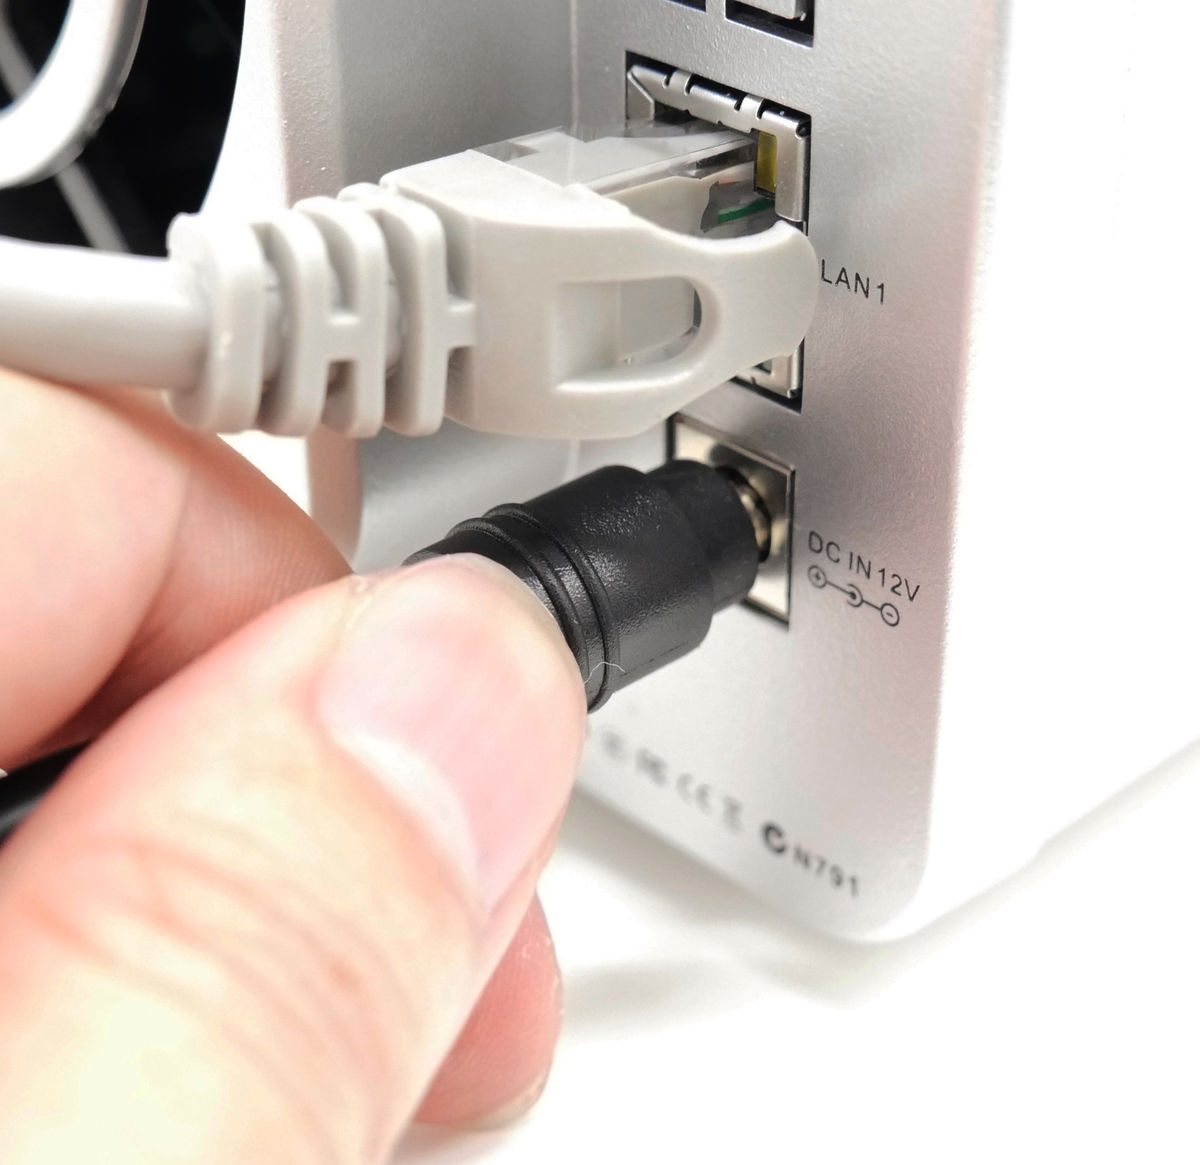
Next, connect the power adapter and the power cable.
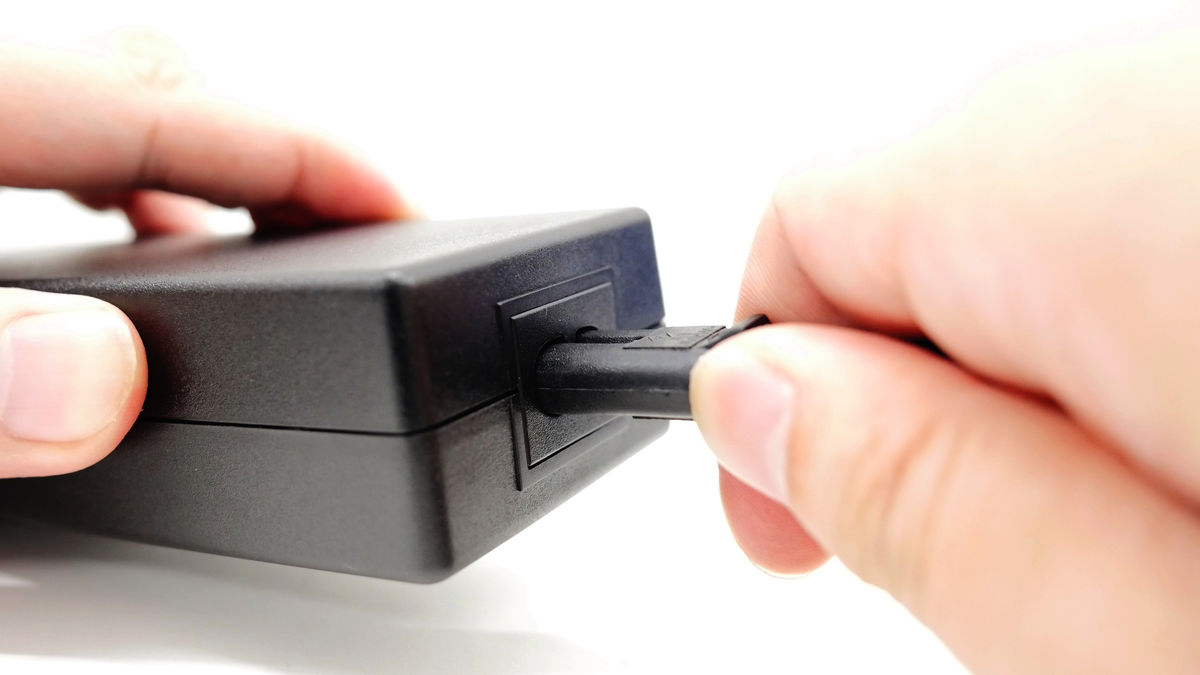
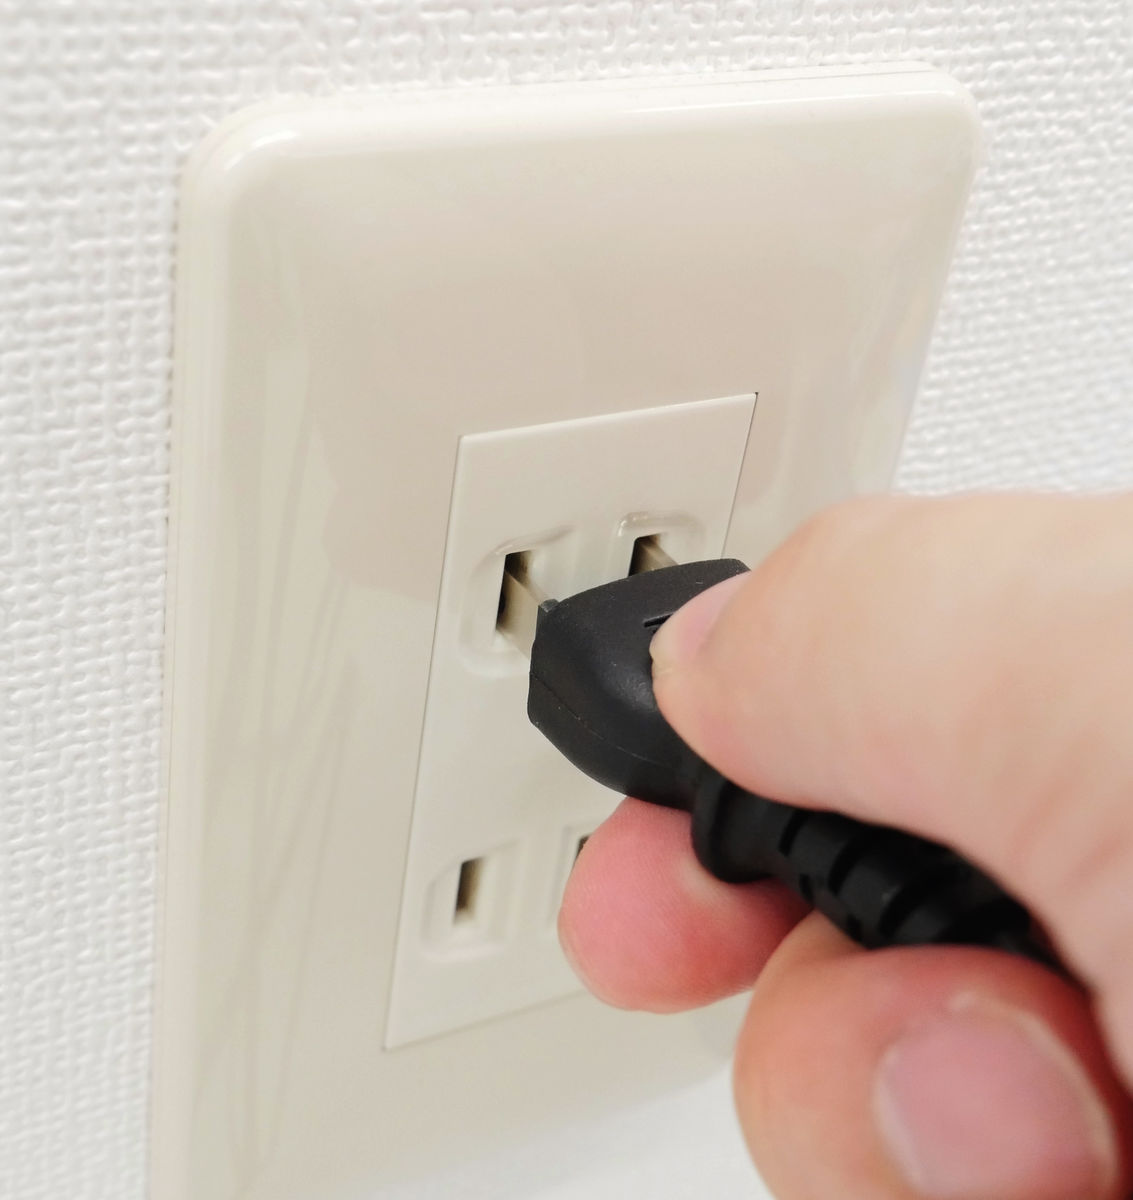
Plug the power cord into an outlet ......
Connect the terminal of the cable to the connection interface of the power cable.
Then press the power button ......
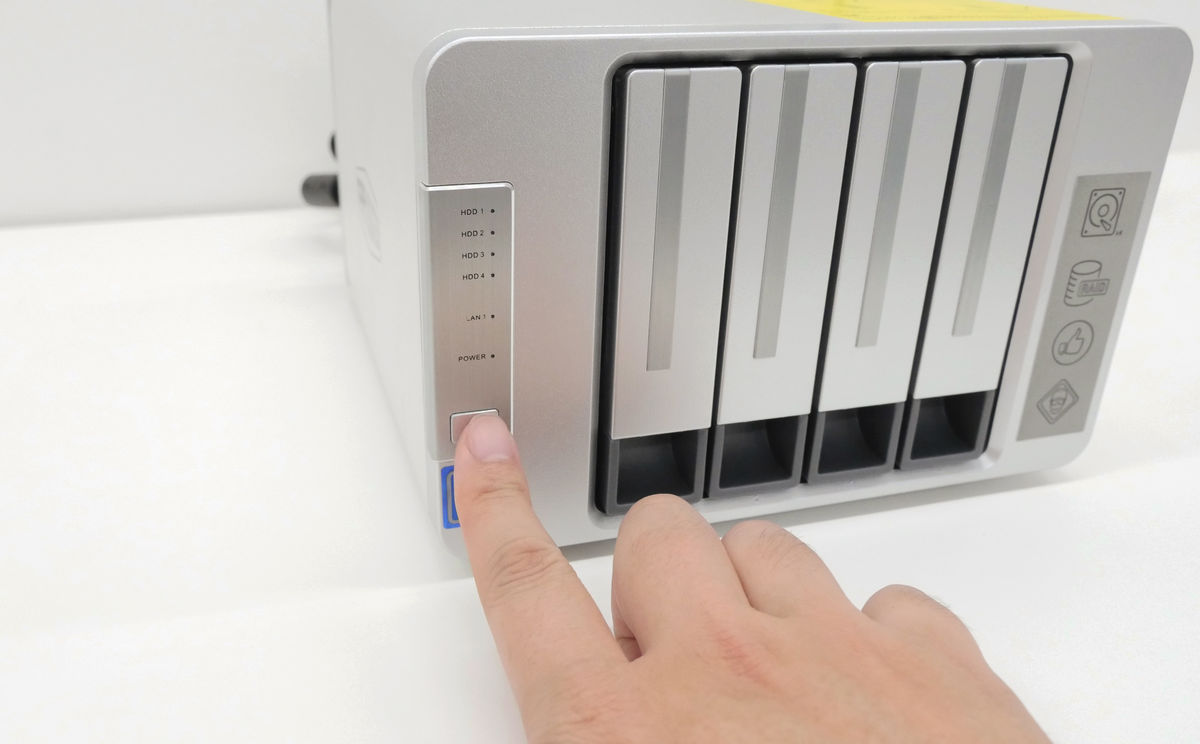
After a while, all the indicators are lit in green and the NAS is ready for use.
◆ Initial setting of TerraMaster F4-220
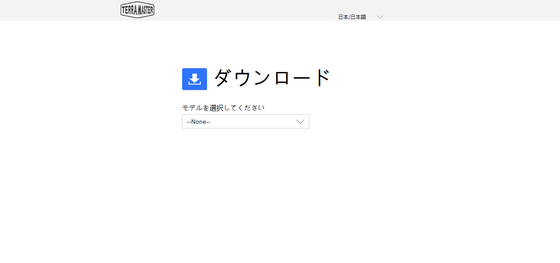
"TNAS Client" is required to set up TerraMaster F4-220. TNAS client supports Windows and macOS, but this time we will use Windows version. On the Windows PC access the following URL ......
download
http://download.terra-master.com/?lng=jp
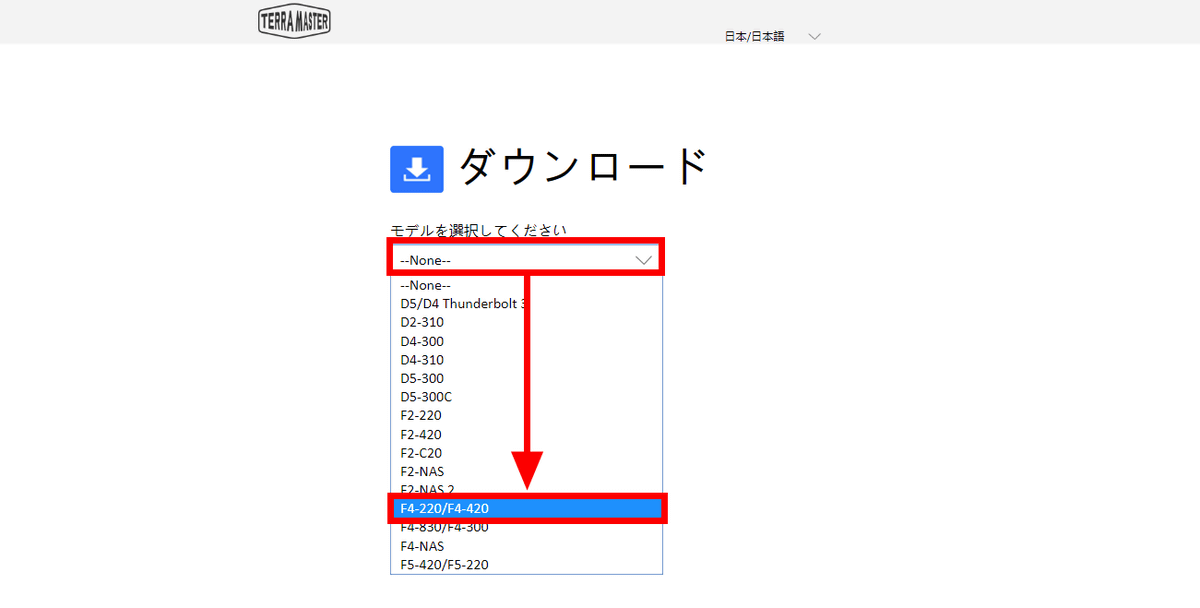
Click "F4-220 / F4-420" in the list immediately under "Please select model".
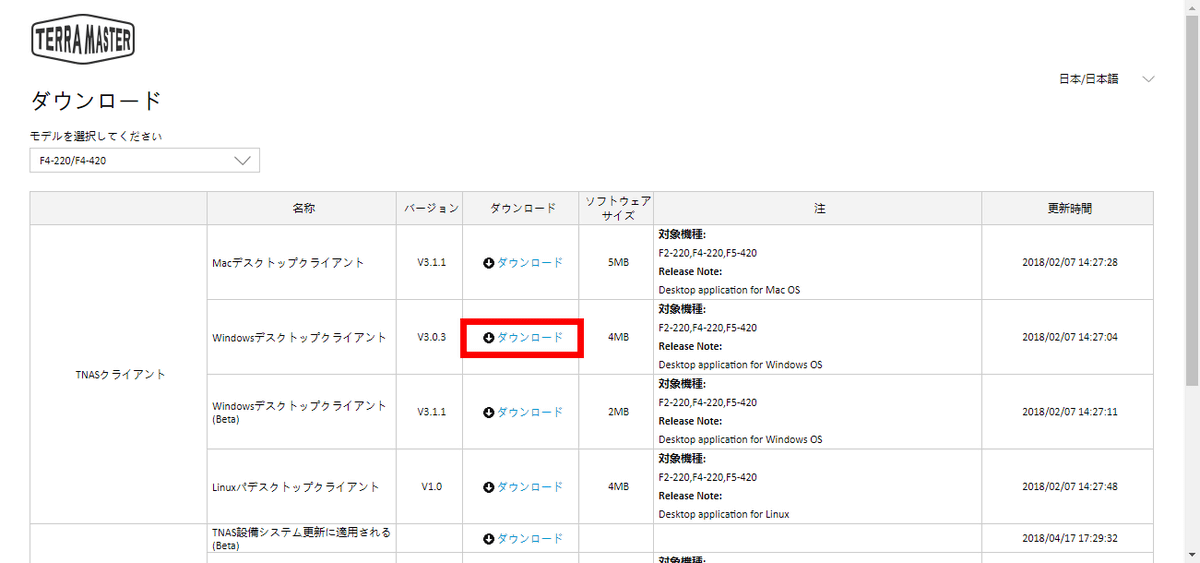
Click "Download" on the right side of "Windows desktop client" to download the TNAS client for Windows.
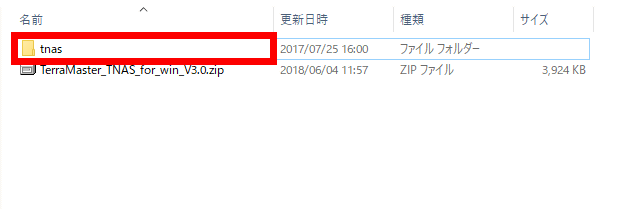
The downloaded ZIP file is referred to as "Explzh"And use it to decompress.

When decompressing, a folder named "tnas" comes out, so open the tnas folder ......
Right-click "TerraMaster.exe" and click "Open".
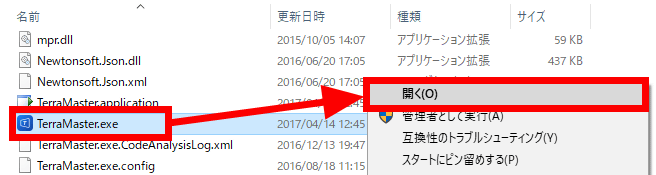
The TNAS client will start up and the IP address of TerraMaster F4-220 set up earlier will be automatically searched. Click here to select "TNAS (LAN 1)" and click "Register".

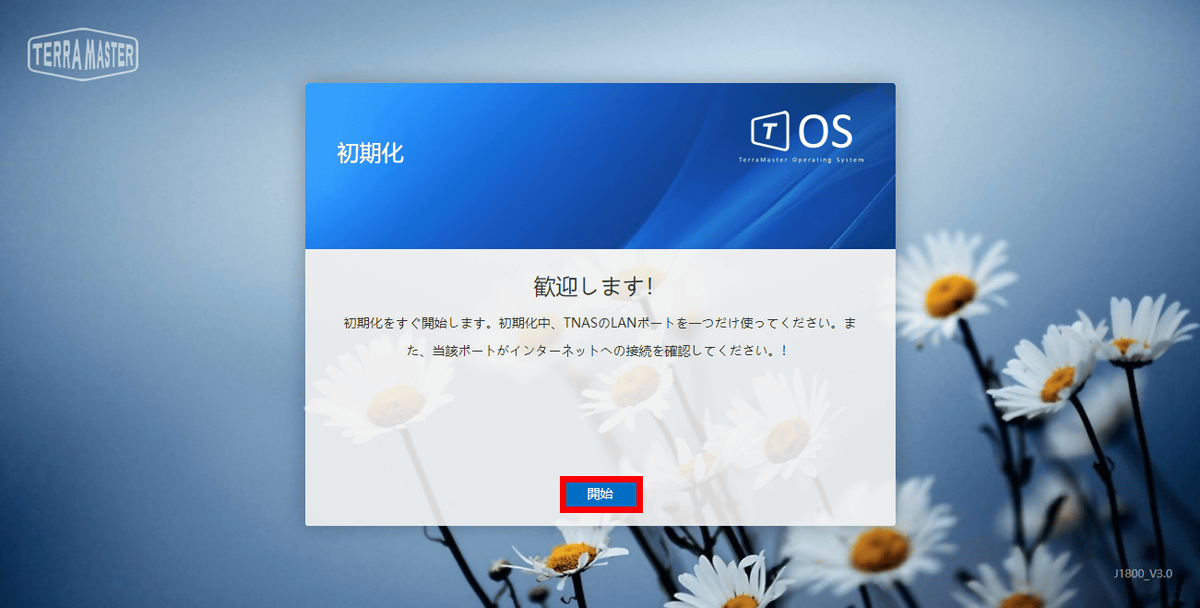
Then, the setting screen of TerraMaster F 4-220 is displayed in the web browser, so click "Start".
The screen of "Hard Disk Inspection (It will take about 5-20 minutes)" will be displayed, so wait for a while until the exam is over.
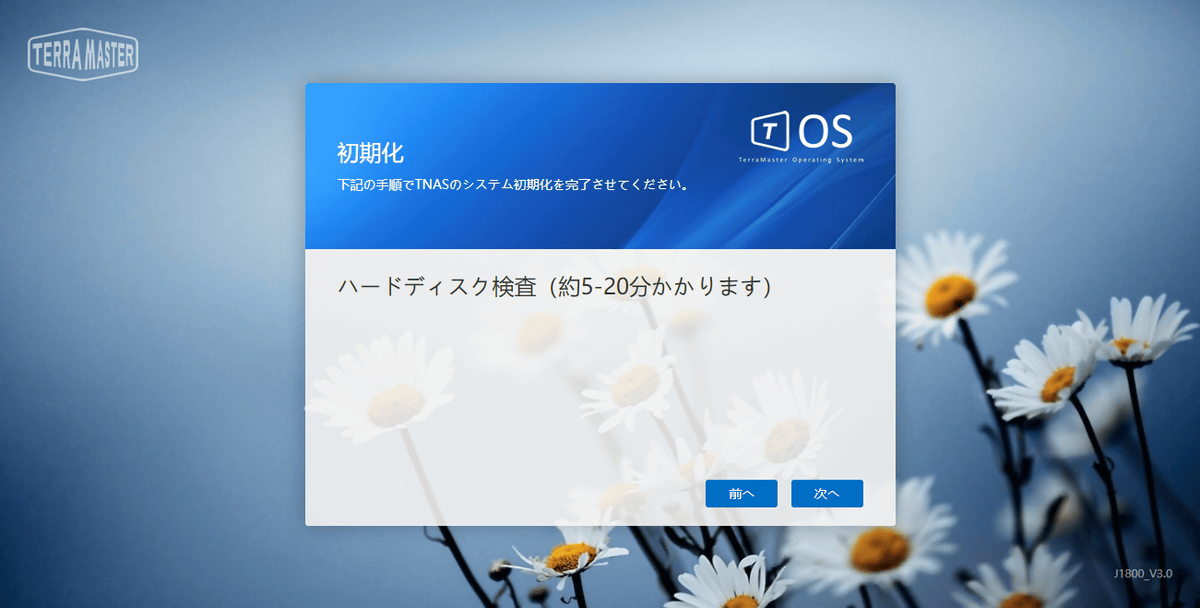
In the editing department's environment it took about 2 minutes to complete the hard disk inspection. Click "Next".
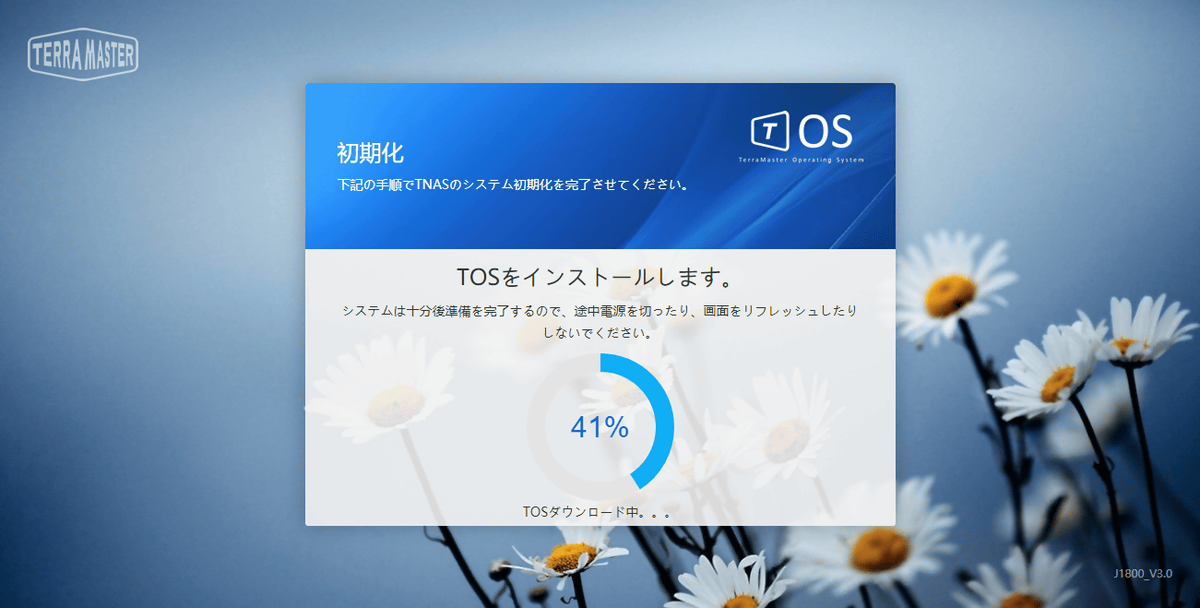
TOSThe installation screen will be displayed. By default, "Automatically download and install TOS system" is selected, so click 'Next' as it is.

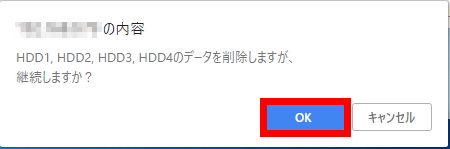
A dialog box of "Are you sure you want to delete the data on HDD1, HDD2, HDD3, HDD4, continue?" Is displayed, click "OK".
The installation status of TOS is always displayed on the screen ......
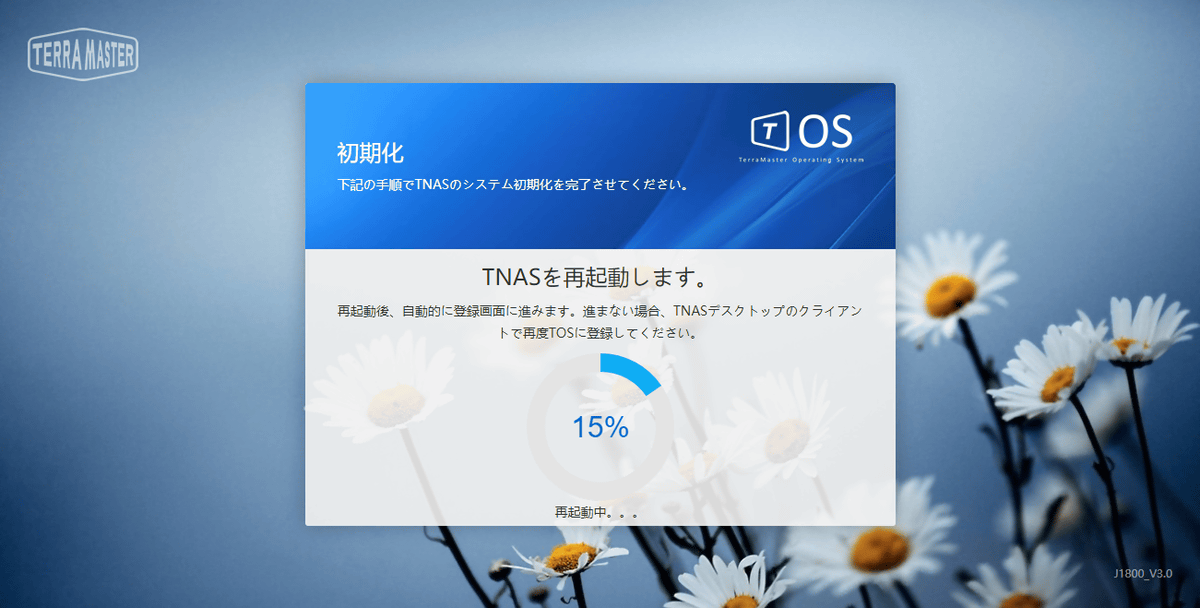
When the installation is completed, it will be restarted automatically.
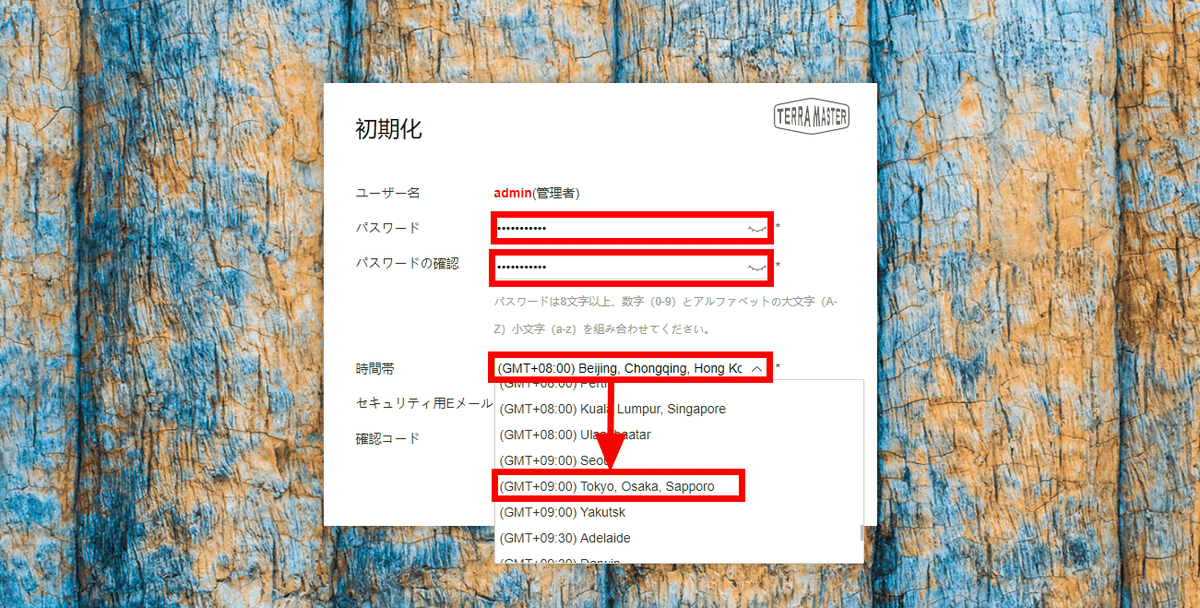
When the reboot is completed, the password setting screen of the administrator ID is displayed. Enter the password in "Password" and "Confirm password", click the "Time zone" list box, and select "(GMT + 09 : 00) Tokyo, Osaka, Sapporo ".
Enter the e-mail address in "E-mail for security" and click "Send confirmation code".
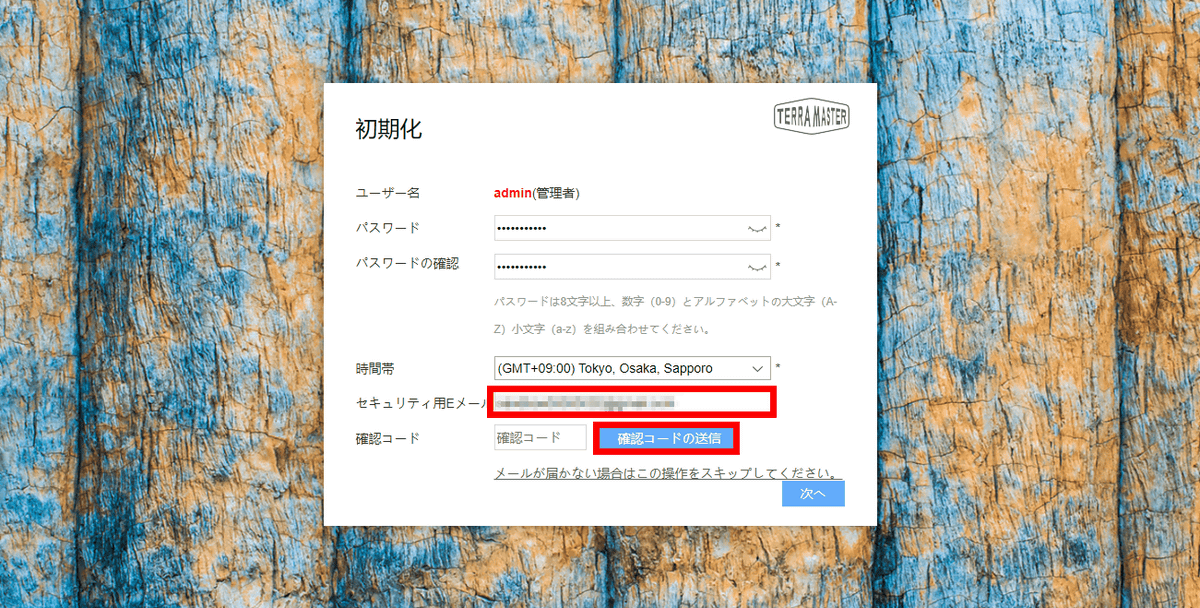
Because the confirmation code arrives at your mail address ......
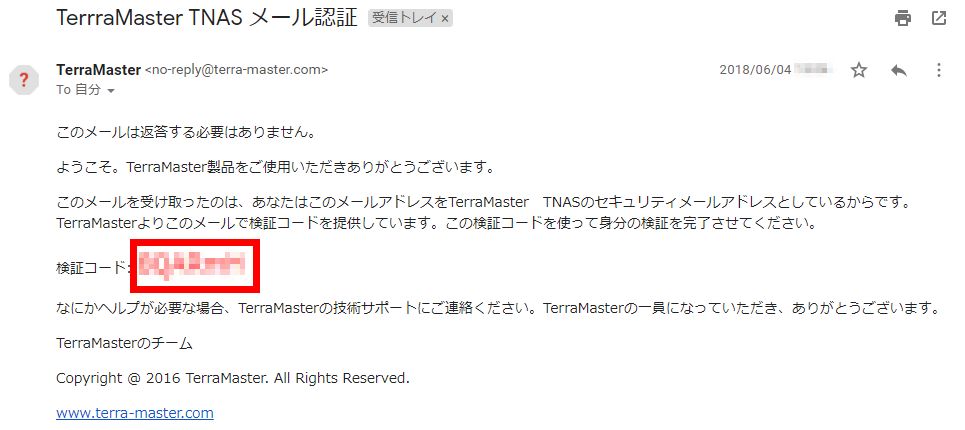
After entering the code written in the email on the form of "Confirmation code", click "Next".

Here the RAID setting screen is displayed. Click on the list box in which "RAID 5" is selected and click "RAID 6".
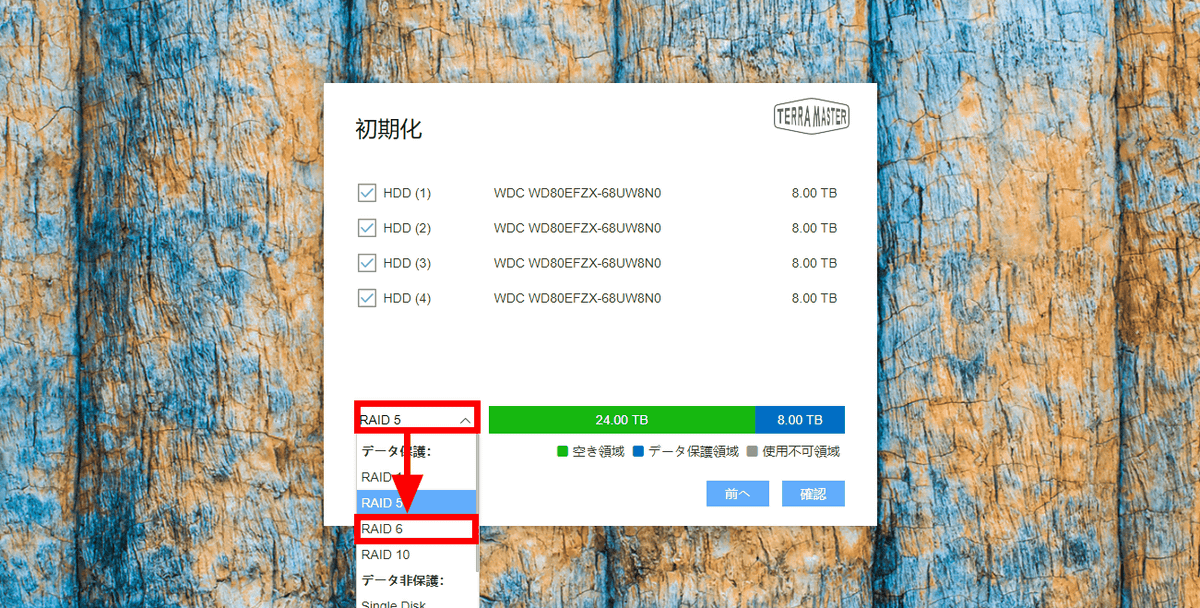
Then, the free space is displayed as 16 TB, so click "Confirm".
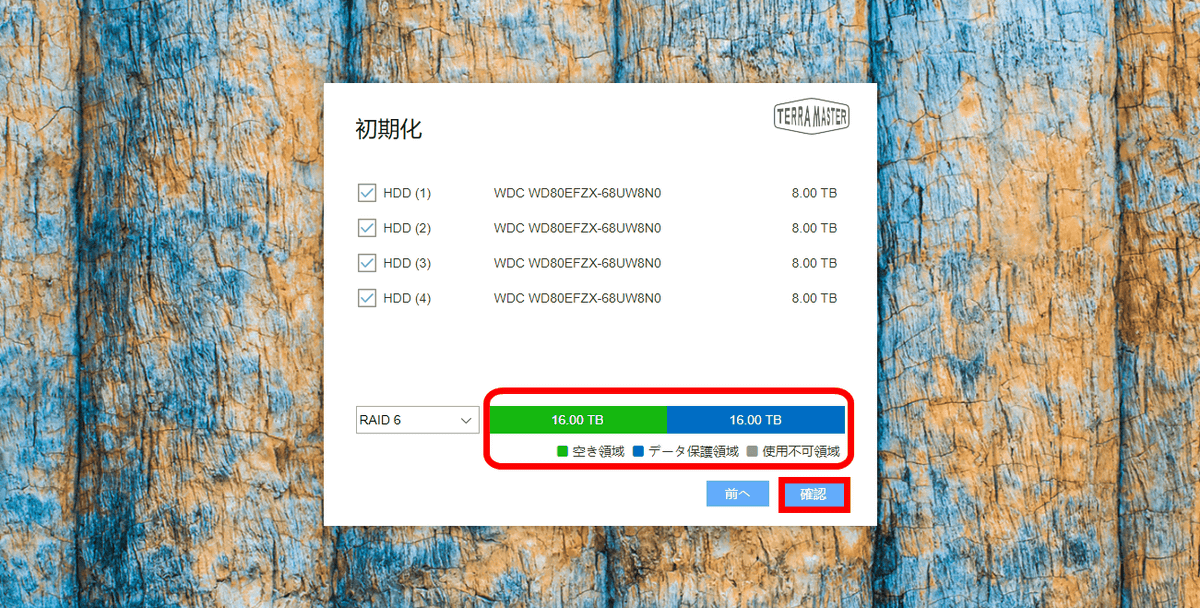
"Doing this operation will delete the data in the hard disk, will you continue?" Dialog will be displayed Click "OK".

HDD formatting is started.
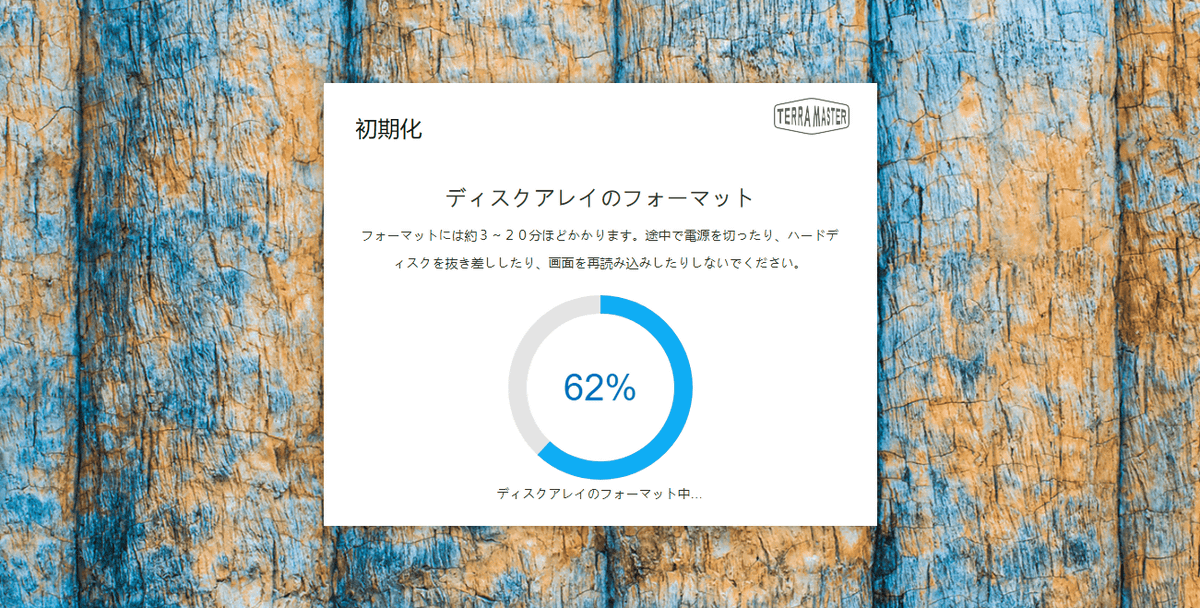
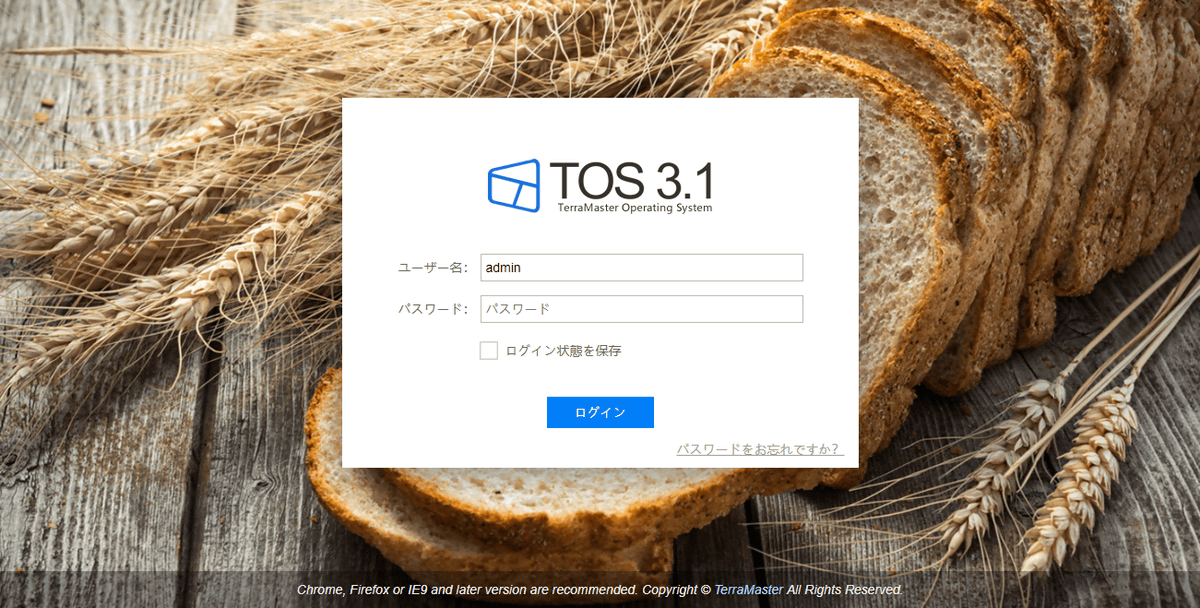
In the environment of the editorial department, formatting was completed in about 2 minutes, and the TOS login screen was displayed. This completes the initial setup of TerraMaster F4-220.
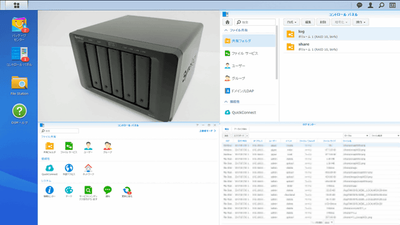
◆ Actually use it
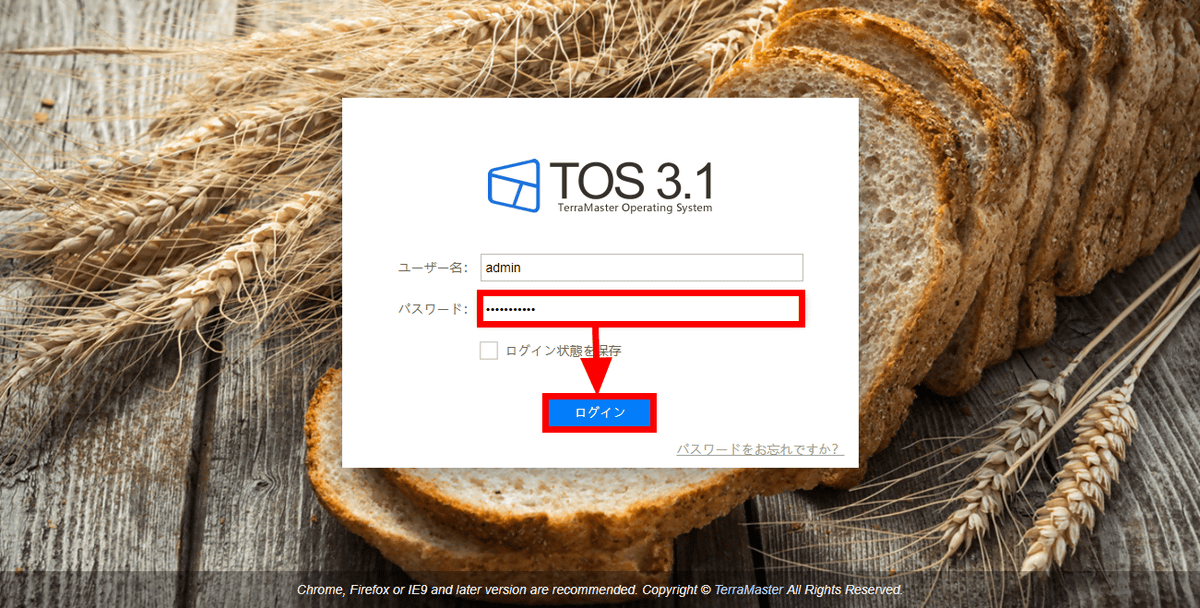
First of all, let's assume that multiple users use TerraMaster F4-220 and try setting user. Enter the password you set earlier in "Password" on TOS login screen and click "Login".
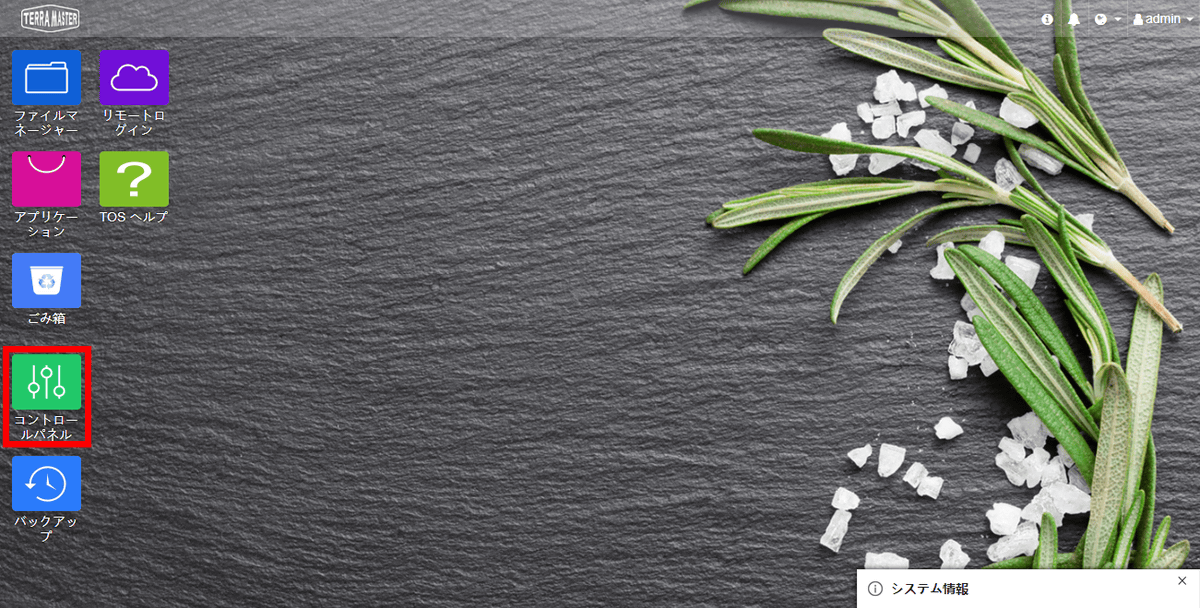
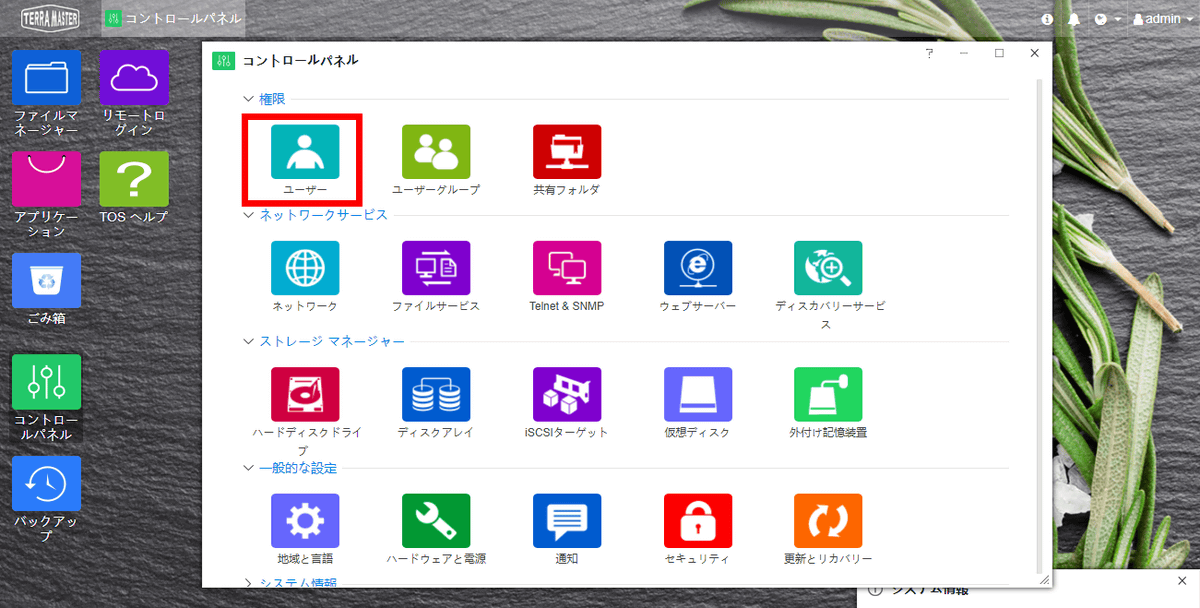
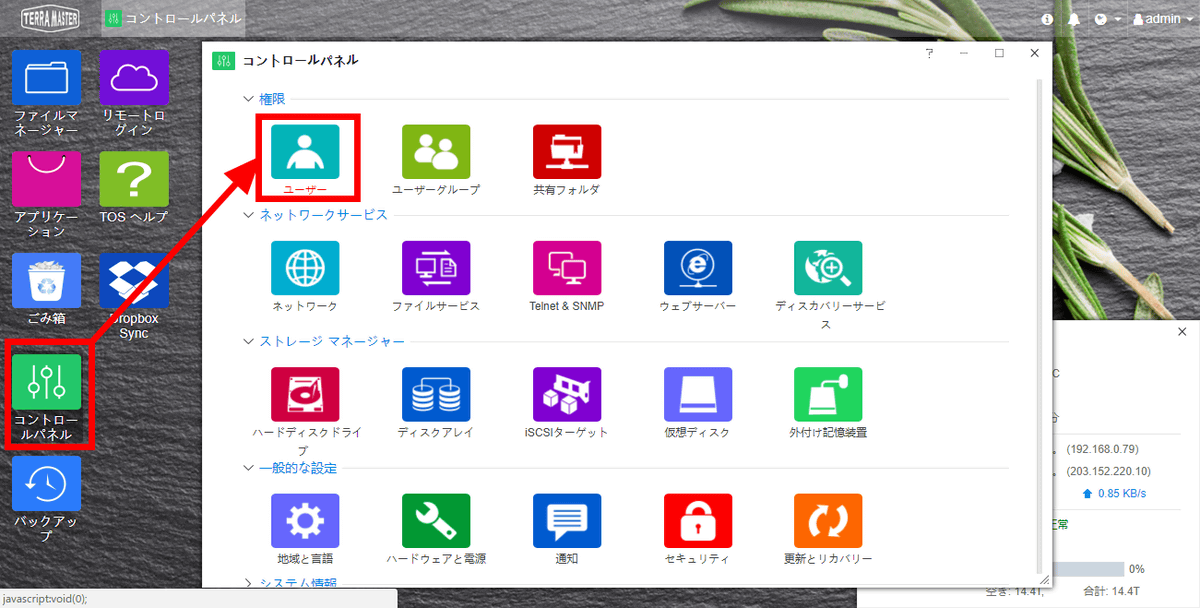
The desktop screen will be displayed, and double-click "Control Panel".
Click "User".
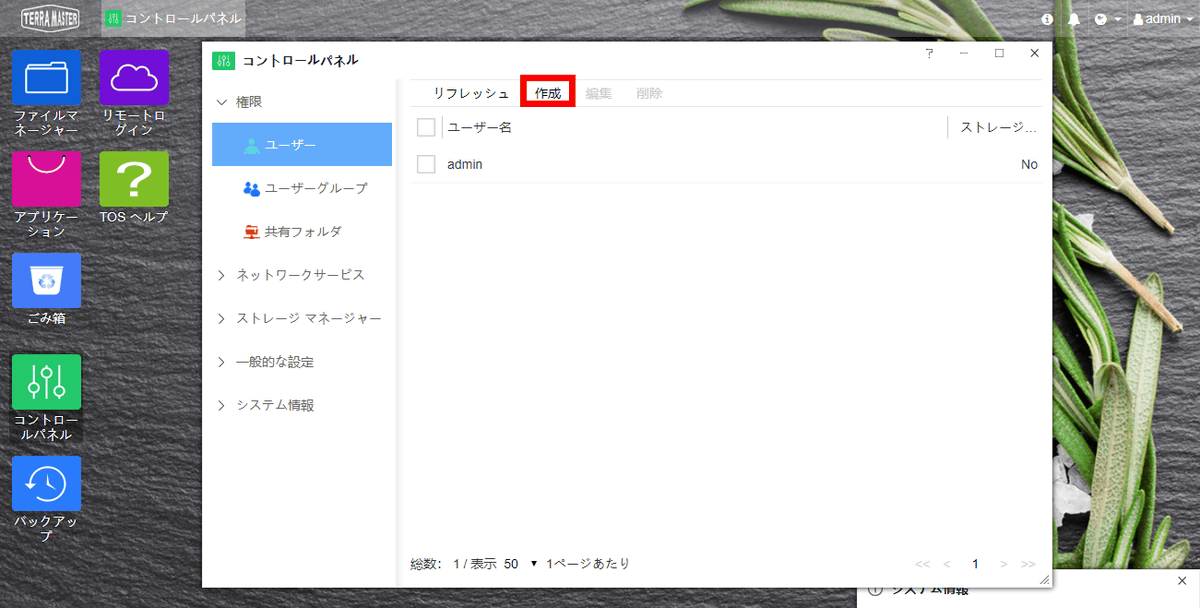
Click "Create".
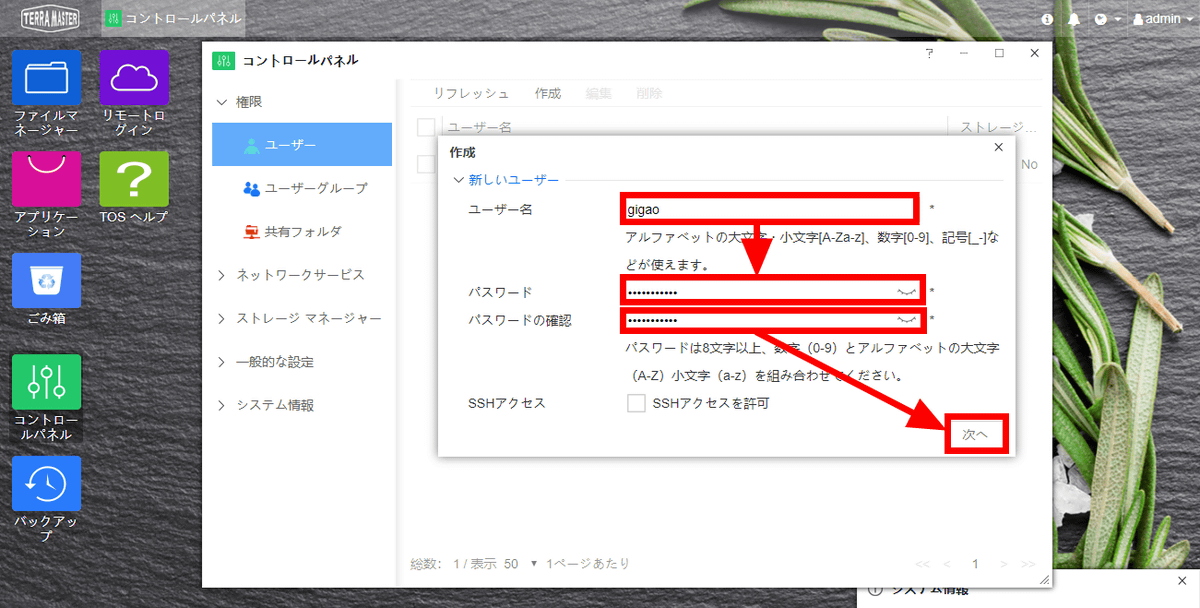
Enter the user name ("gigao" in this example) to be added to "User name", enter the password to be set for "Password" and "Confirm Password", then click "Next".
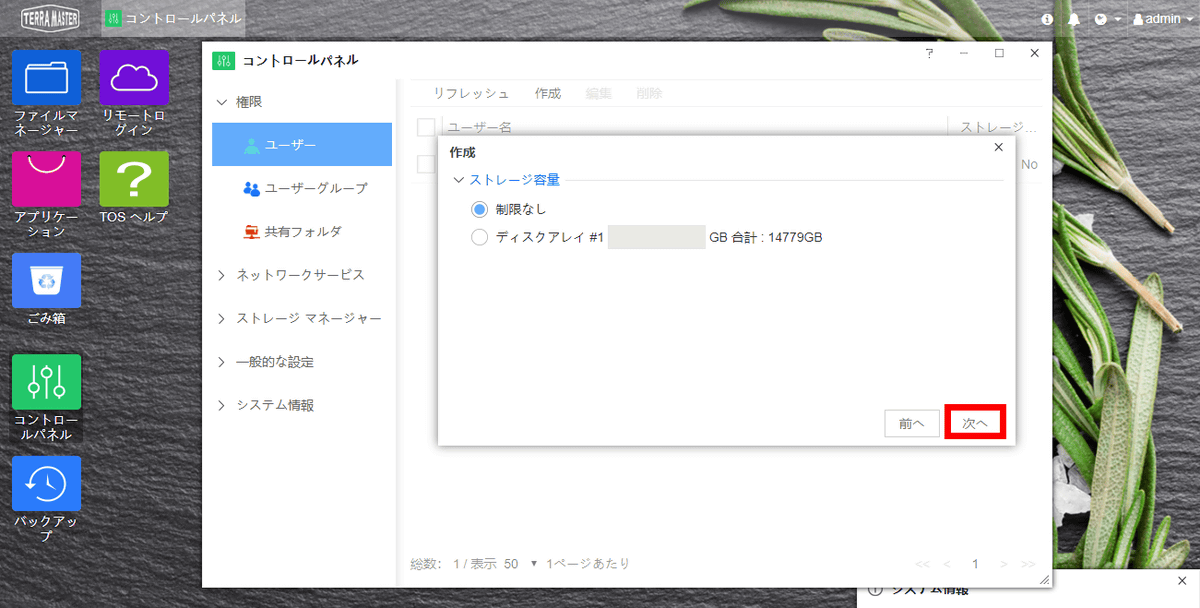
The setting screen of the storage capacity is displayed, but here we decide not to limit the capacity especially to the user, and click "next" as it is.
Next, the setting screen of the user group is displayed, but please do not set it, but click "next" with default setting allusers.
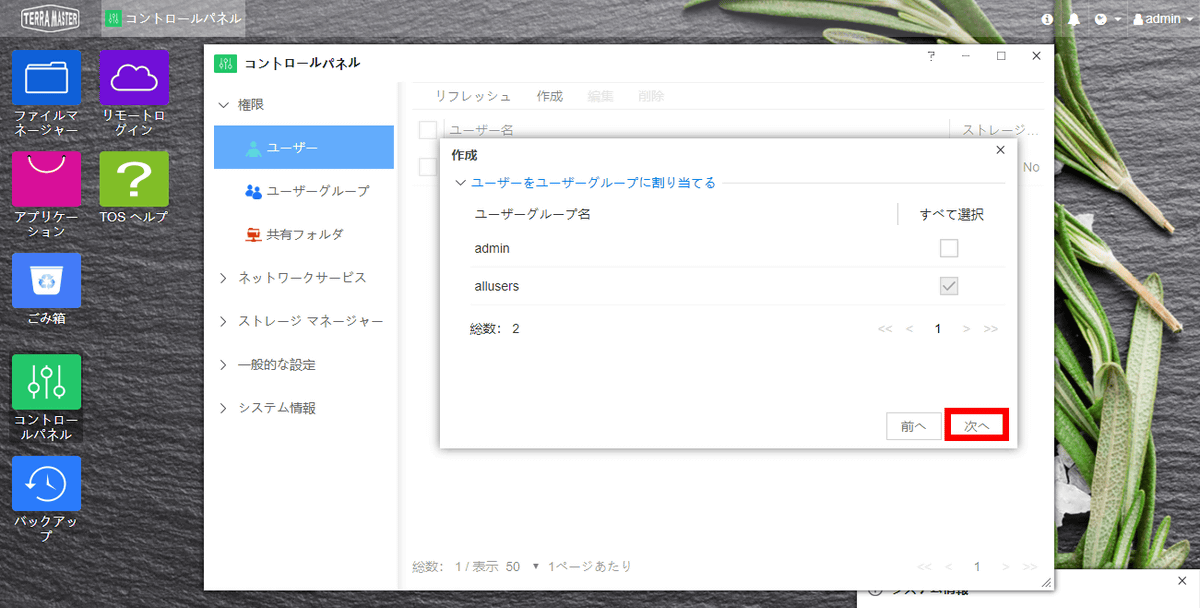
Do not do anything particularly on the permission setting screen of the shared folder, and click "Next".

Click "Create".
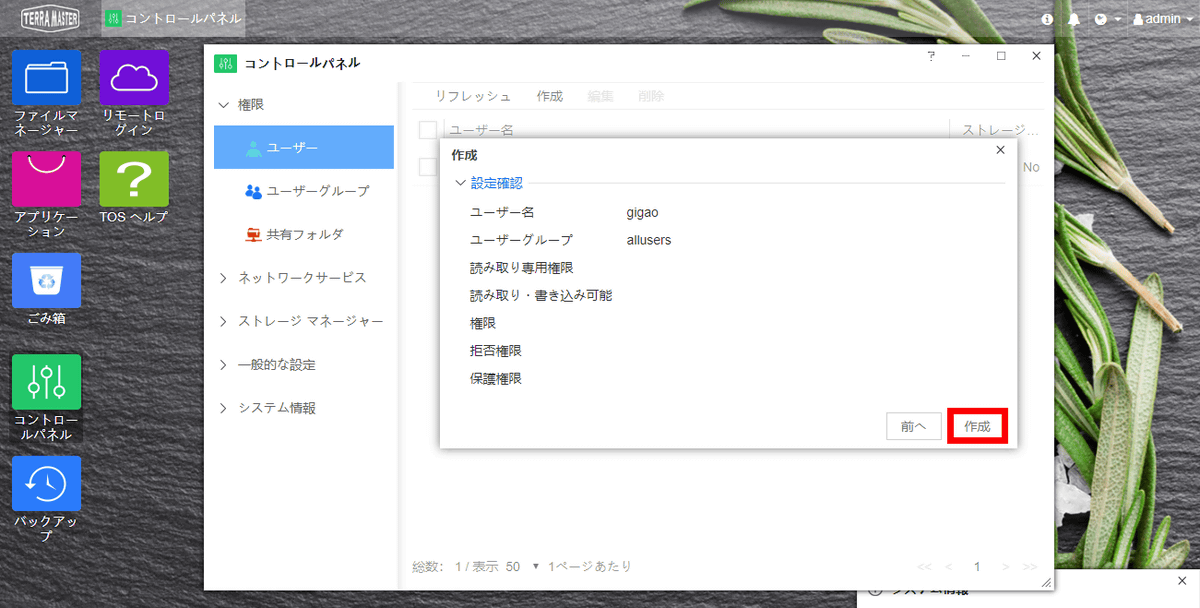
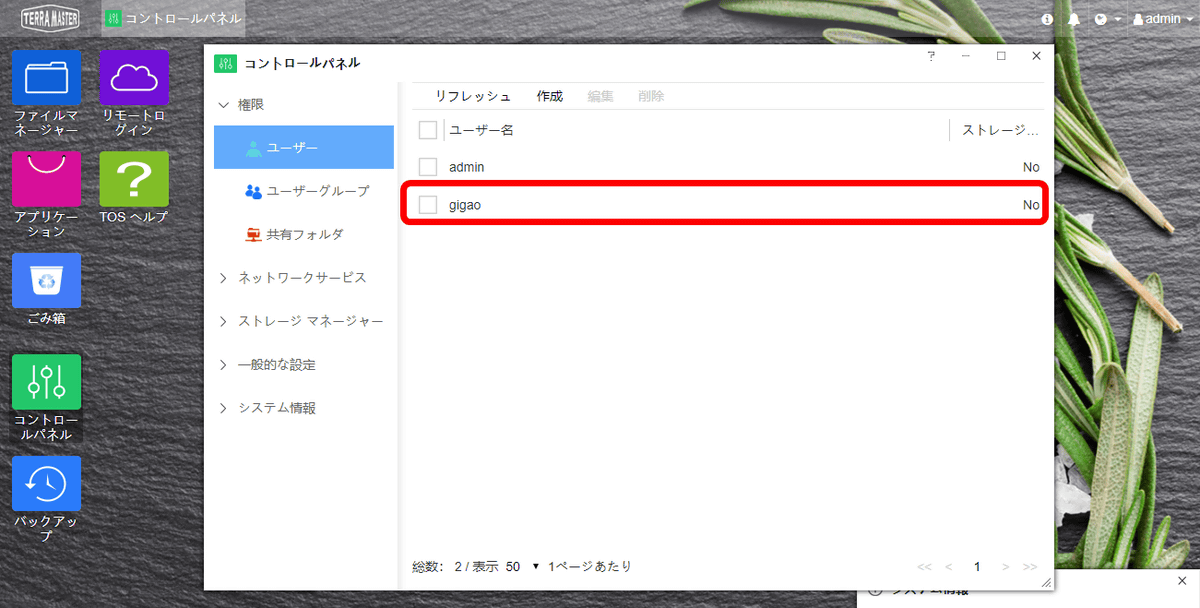
"Gigao" was added to the user setting screen.
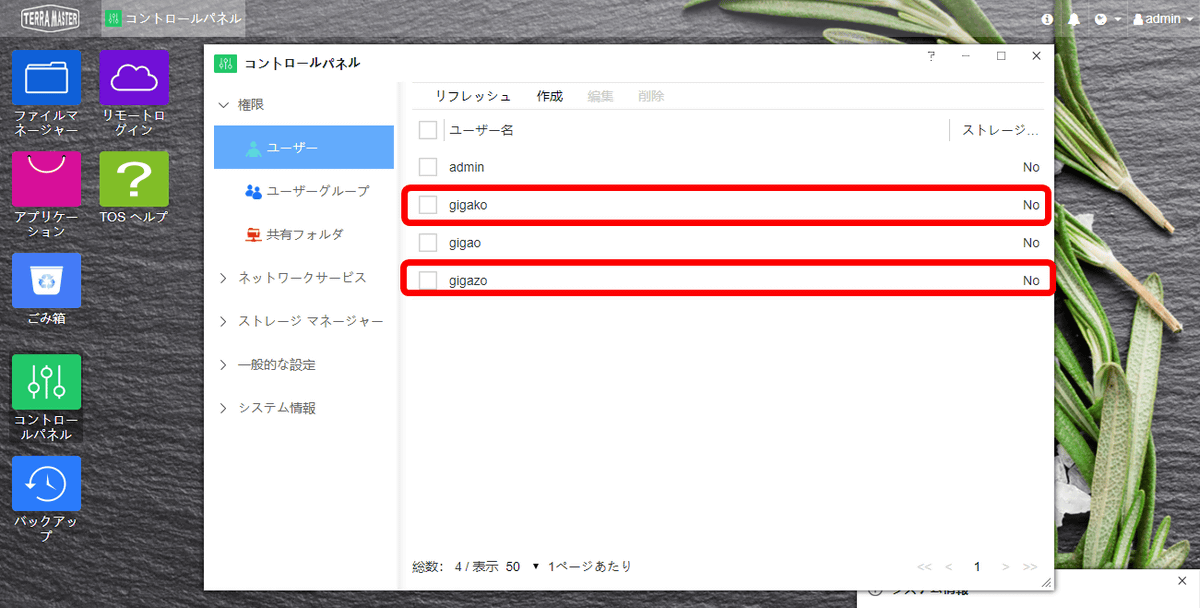
Furthermore, we have added two users "gigako" "gigazo" by performing the same operation.
Next, set up "user group". Click "User Group".
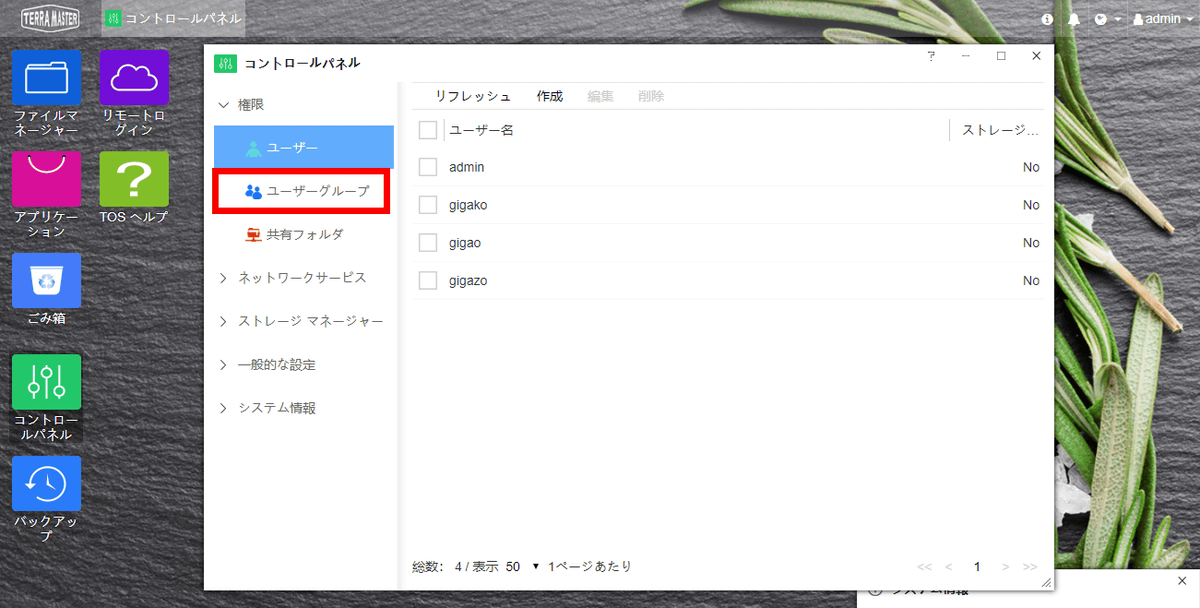
Click "Create User Group".
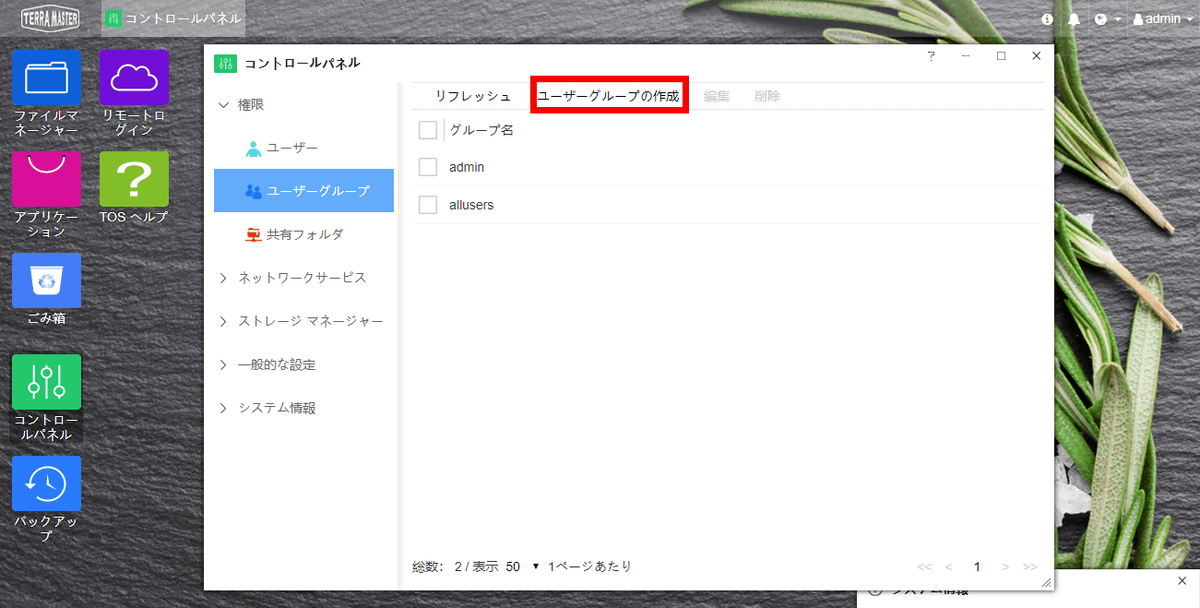
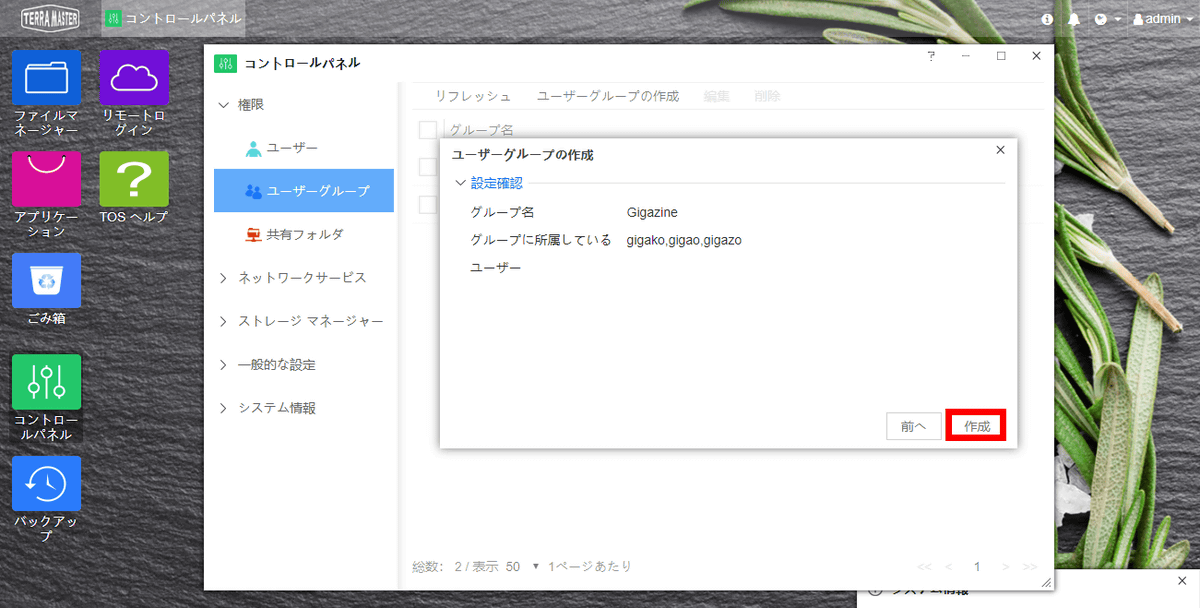
Since the creation screen of the user group is displayed, enter the group name ("Gigazine" in this case) to be added to "group name", and click "Next".

As the selection screen of the user belonging to the group to be added is displayed, check the 3 users of "gigako" "gigao" "gigazo" and click "next".

Click "Create".
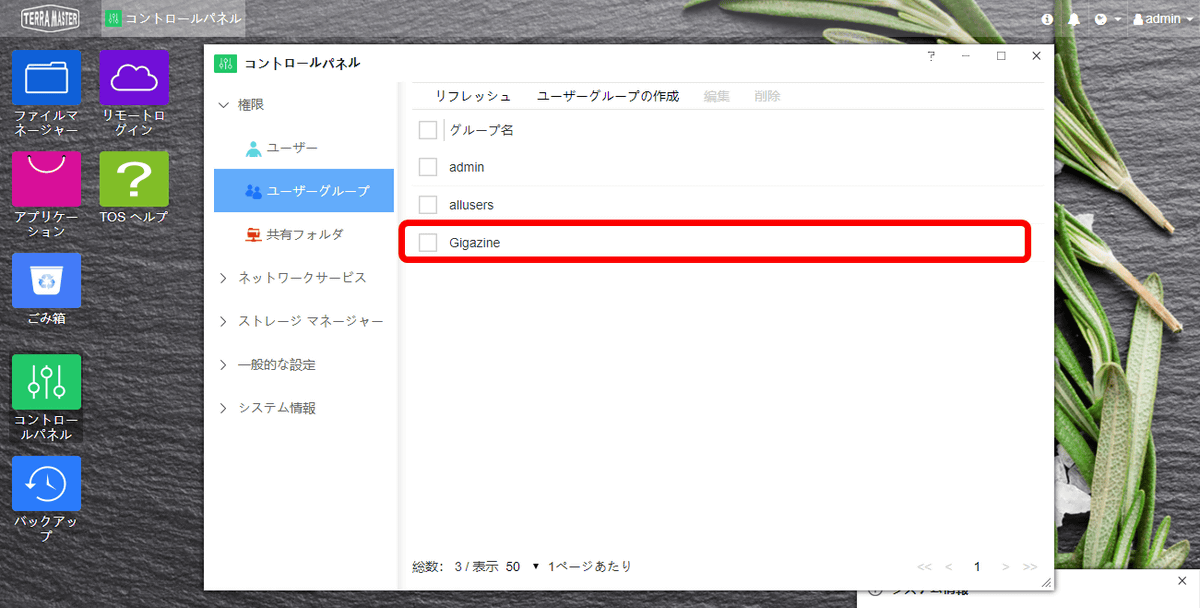
Gigazine has been added to the user group, and the additional setting of the group is completed.
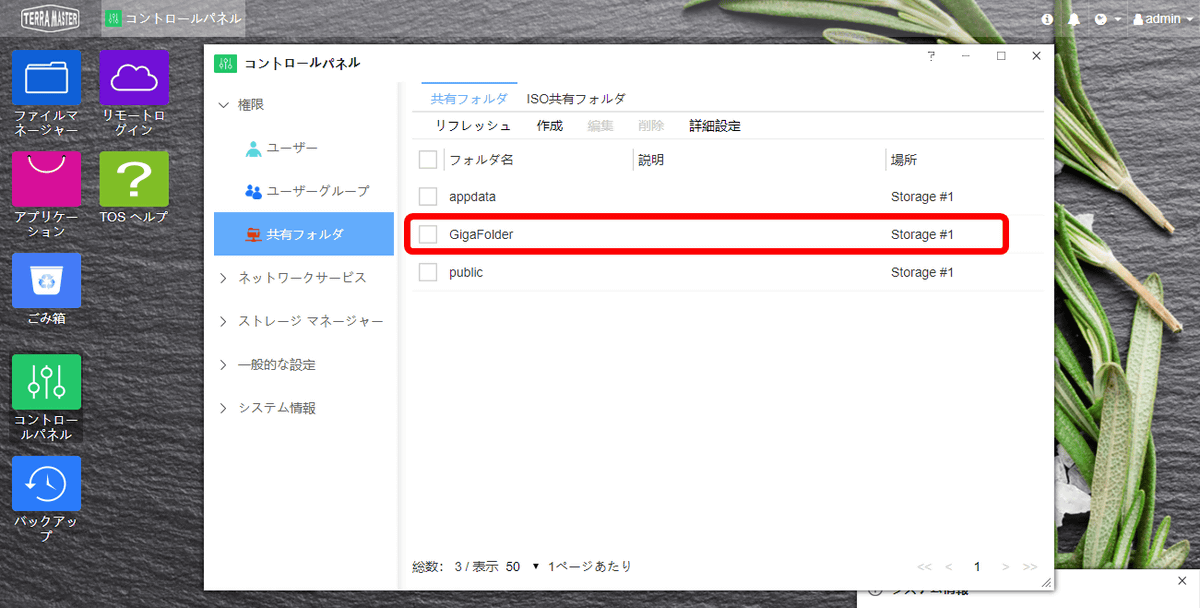
Next, set up a shared folder that can be used by three users belonging to the Gigazine group. Click "Shared folder" and click "Create".
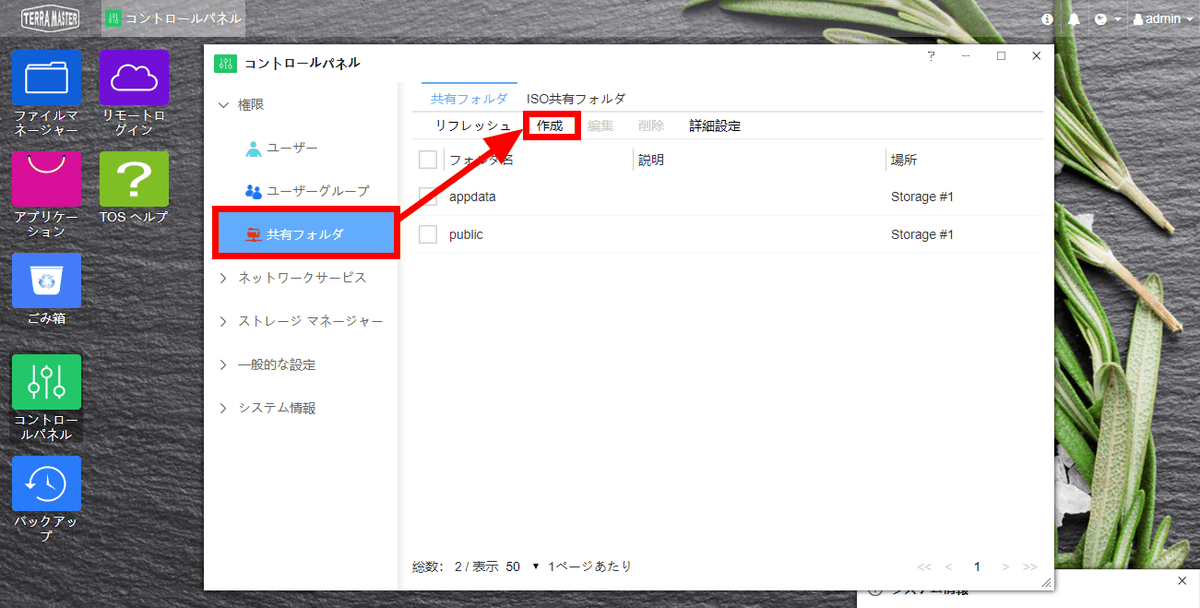
As the Create Shared Folder screen is displayed, enter the folder name ("GigaFolder" in this case) to be added to "Folder Name" and click "Next".
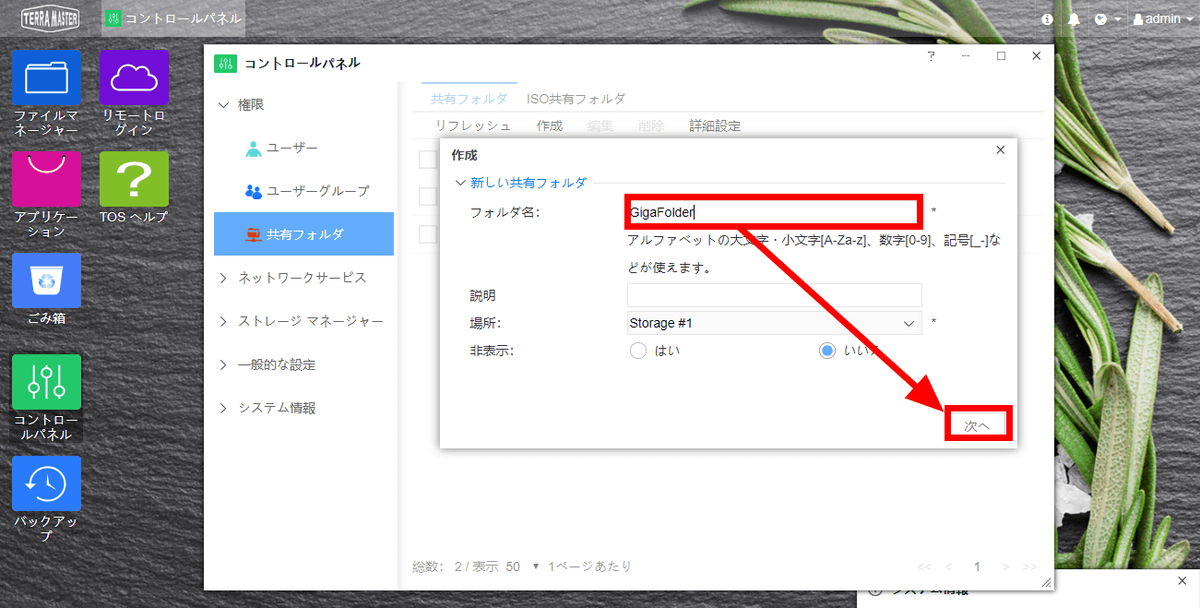
When the permission setting screen is displayed, click the radio button of "For each user group" and click "Next".
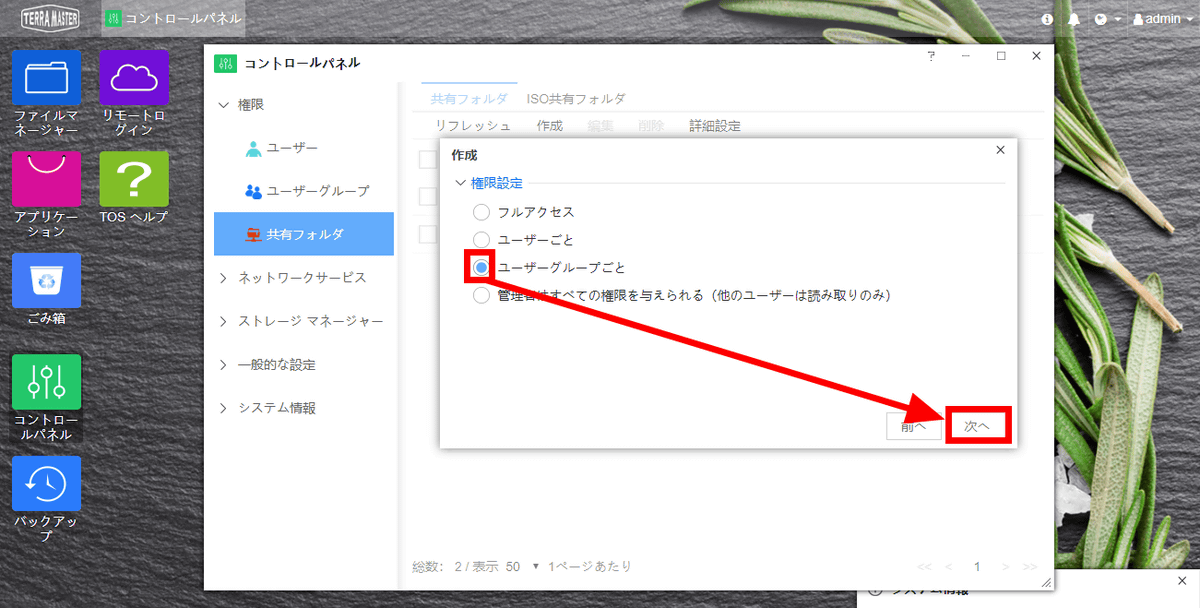
The "Group Authority" screen is displayed. On this screen, you can select four permissions for the folder to be added: "read only", "readable / writable", "rejected", "protected". Since this time we want users of Gigazine group to read and write files, check the check box next to the left of the Gigazine group and click "Next".
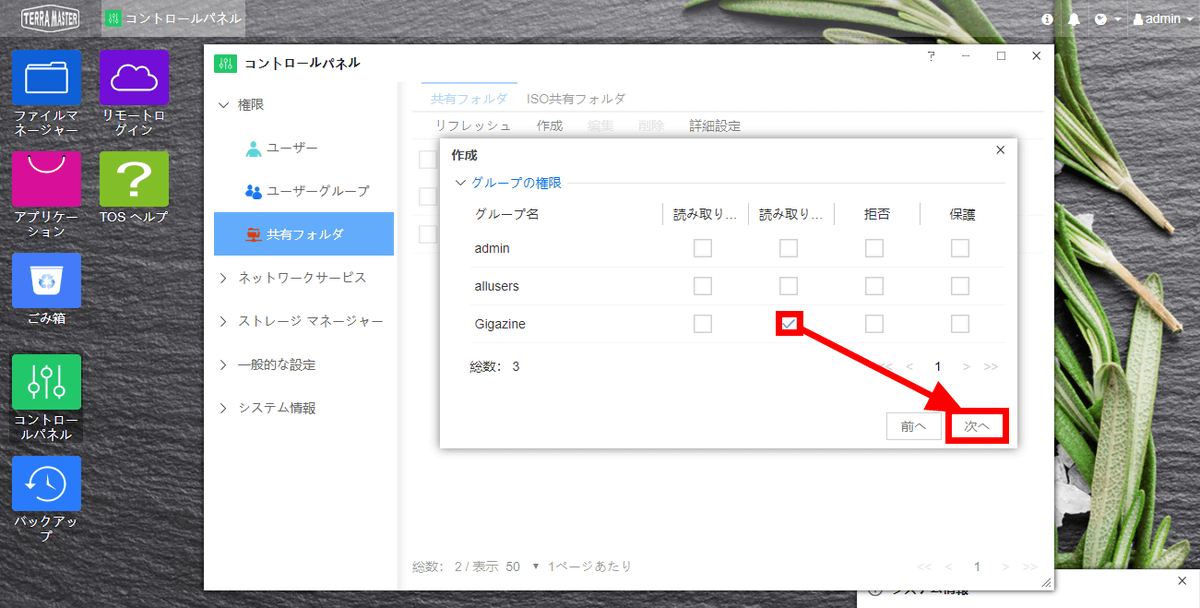
Click "Create".

The previously set GigaFolder has been added to the shared folder, and it is now possible to use it as a NAS.
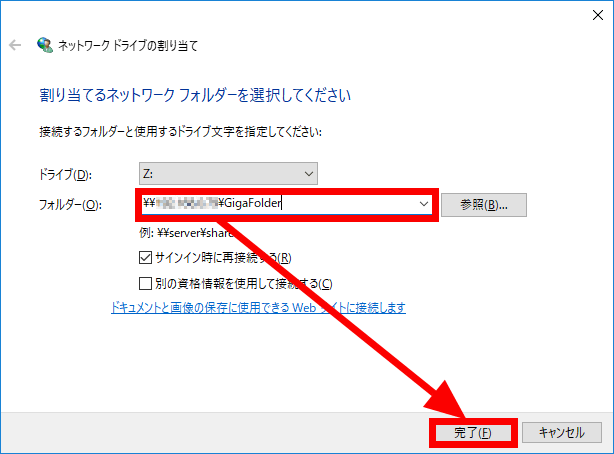
Try to access the folder you actually created. Open Windows Explorer and click "Map Network Drive".
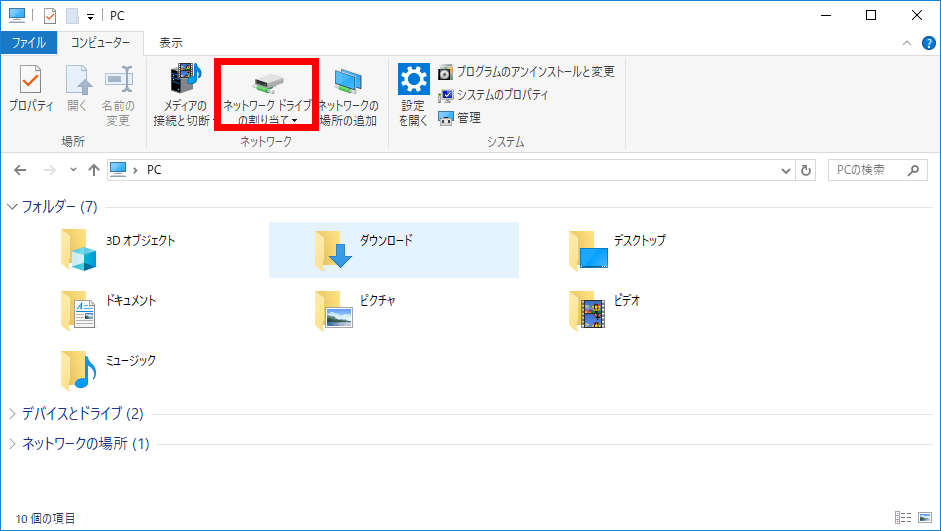
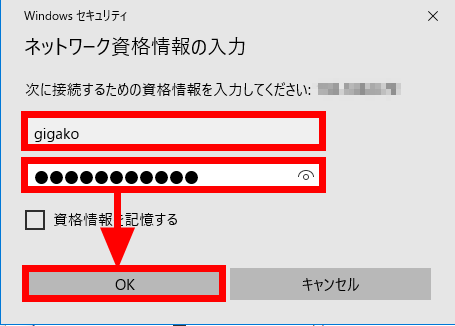
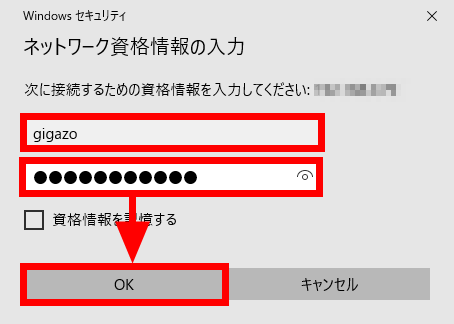
In the folder, enter "\\" IP address of TerraMaster F4-220 "\" Add shared folder name (GigaFolder in this example) "and click" Finish ".
Then, since the authentication screen is displayed, enter the authentication information of gigao registered in TerraMaster F 4-220 earlier and click "OK".
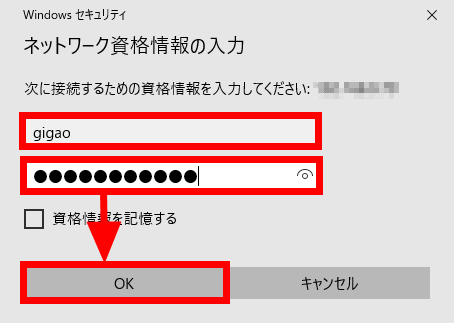
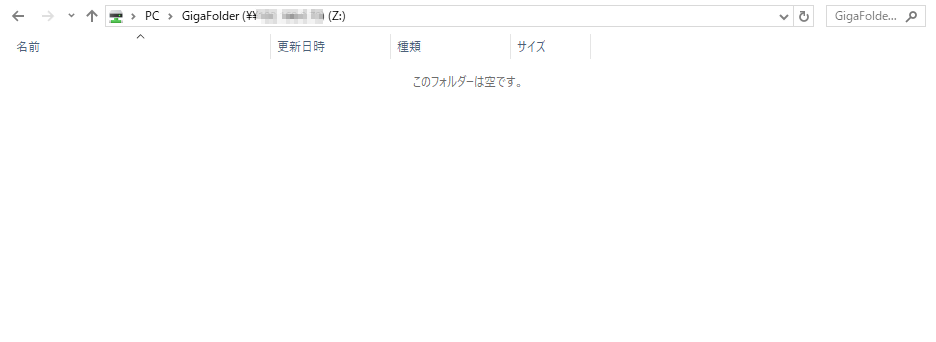
You can now access GigaFolder you created.
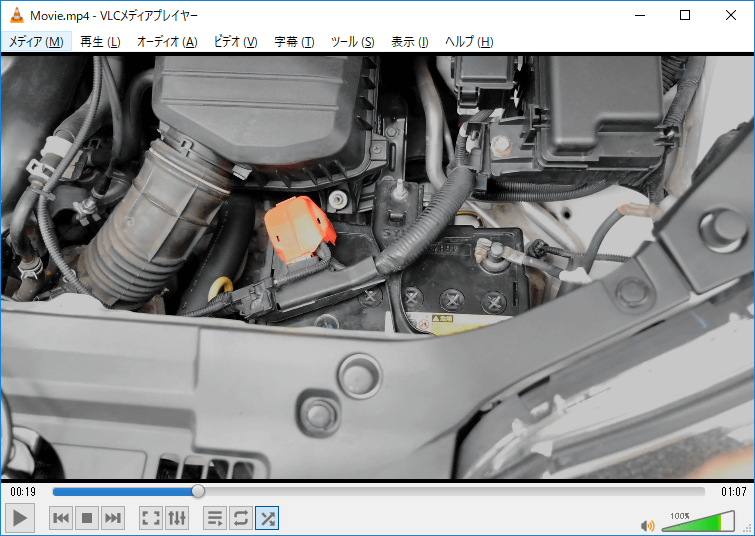
Let's check if you can actually share the folder. Save the movie file with gigao's account.

Then access GigaFolder with gigako's account.
Then, of course, movie playback ... ...
I was able to delete the file.

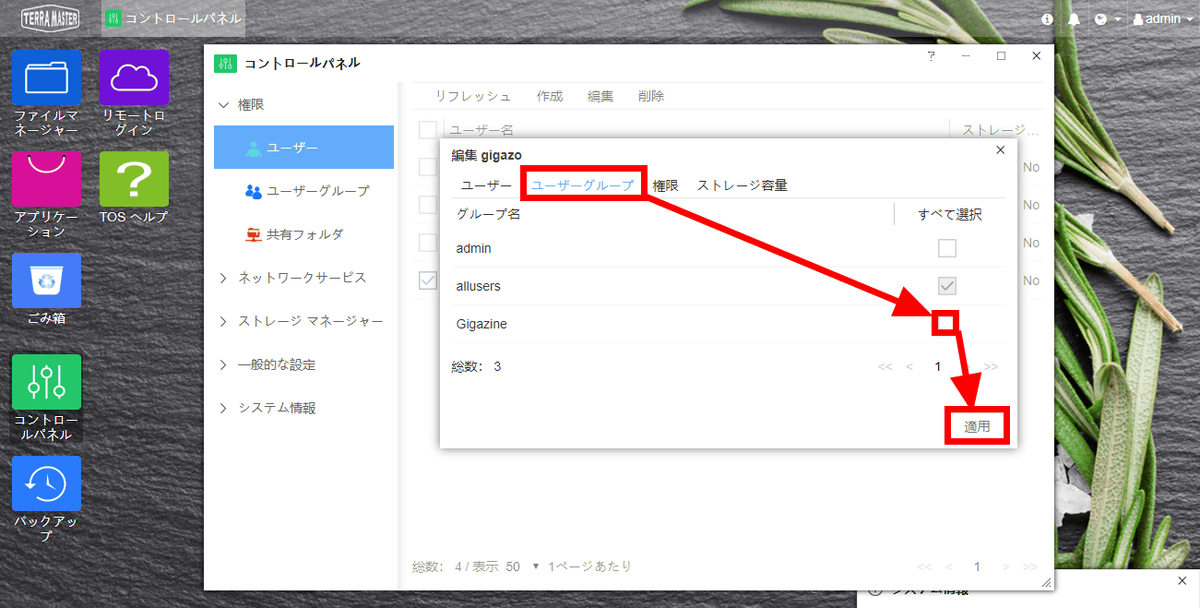
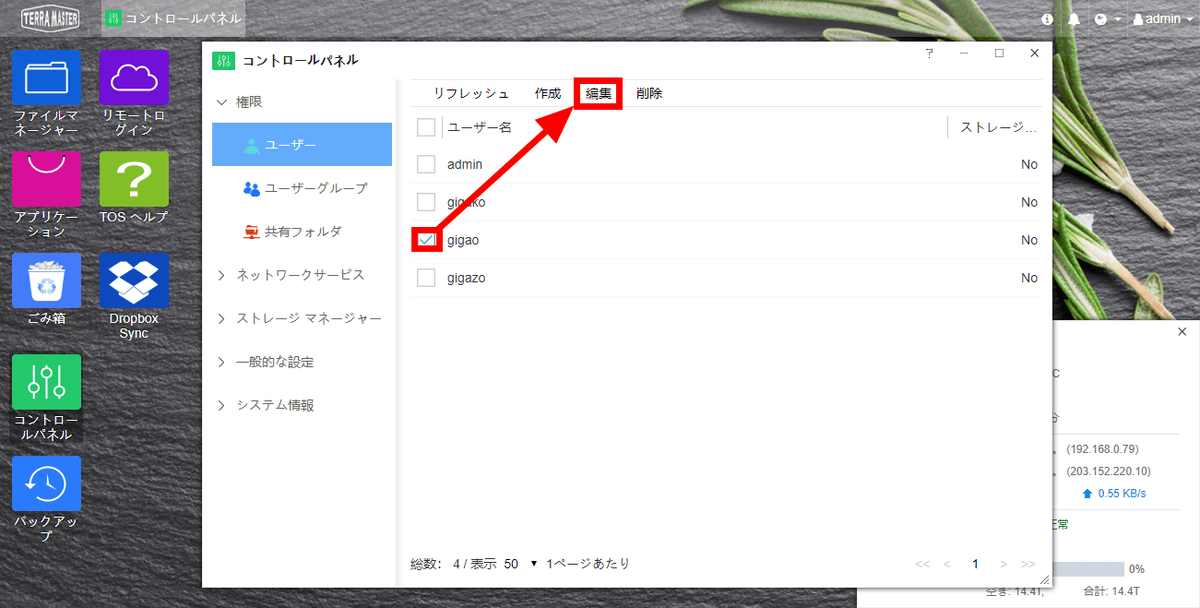
Next, try removing the gigazo account from the Gigazine group. Return to the screen of TerraMaster F 4-220, click "User", then check the checkbox of gigazo and click "Edit".
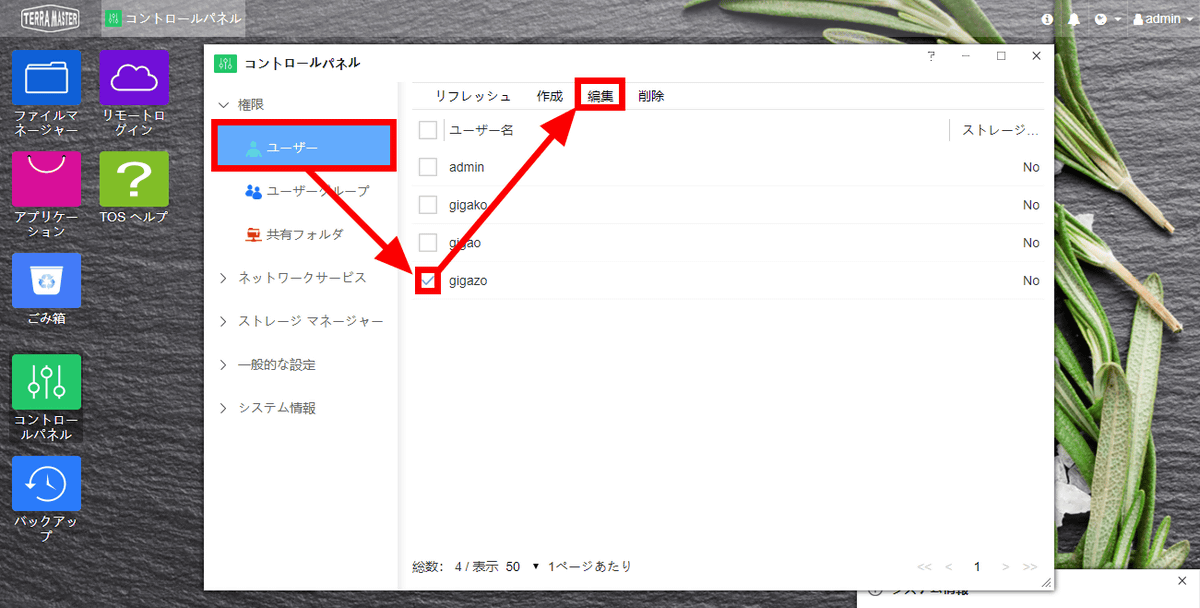
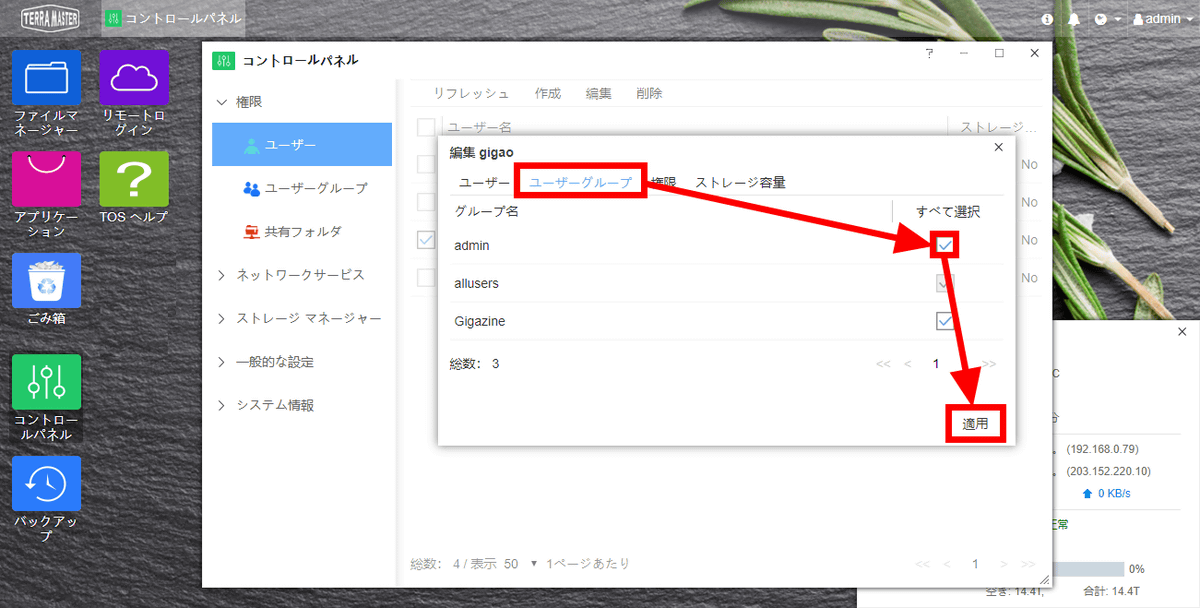
Click "User Group", remove the check in the Gigazine group and click "Apply".
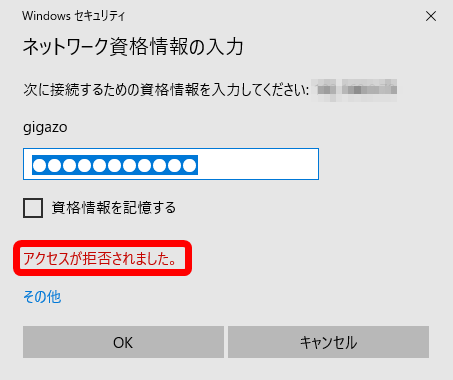
And when you access GigaFolder with gigazo's account ... ...
"Access is denied" is displayed and login was not possible. By doing this, it was confirmed that setting of user authority works without problems.
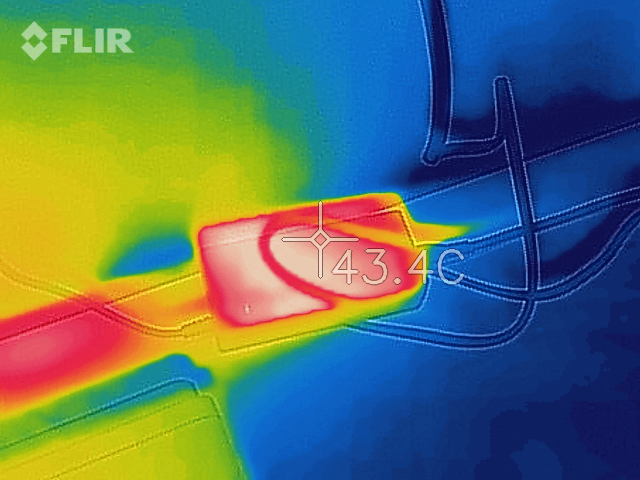
next"FLIR ONE"Was used to examine the temperature when TerraMaster F4-220 was in operation. FLIR ONE increases the temperature in the order of black, blue, green, yellow, orange, and red, and the white part becomes the highest temperature part. When I tried to display the temperature with FLIR ONE, the temperature of the case part was about 31 degrees on average.

The hottest part was the power adapter, showing an average of 43 degrees in the area with the most heat.
Next, let's check the actual driving sound of TerraMaster F4-220. In this case, the movie contains the sound when formatted when the disc is moving most violently and the sound that is played when nothing is done normally.
I checked the sound when TerraMaster F4-220 is running - YouTube
During disk formatting, I felt that all the hard disks were fully operational and it was noisy. Also, even when the disk is not in normal condition, the hard disk always operates with data synchronization, so you can hear a bigger sound. However, I felt it was a level that I did not particularly care if the environment such as a TV always gets in.
◆ Using other functions
Next, try using the sync function with Dropbox. Since you need administrator privileges to use functions other than shared folders, change the gigao account to administrator privileges. Double-click "Control Panel" and click "User".
Next, check the checkbox of gigao and click "Edit".
After clicking "User Group", check the checkbox of admin and click "Apply".
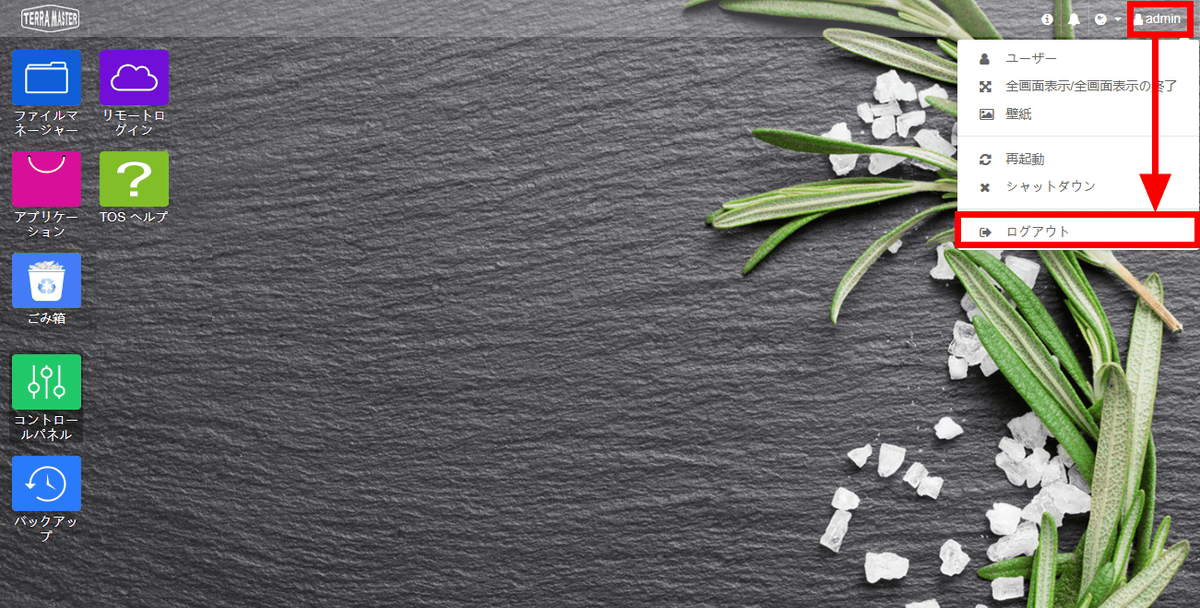
Click "admin" in the upper right corner and click "Logout".
As the TOS login screen appears, enter gigao account information in "User name" and "Password" and click "Login".

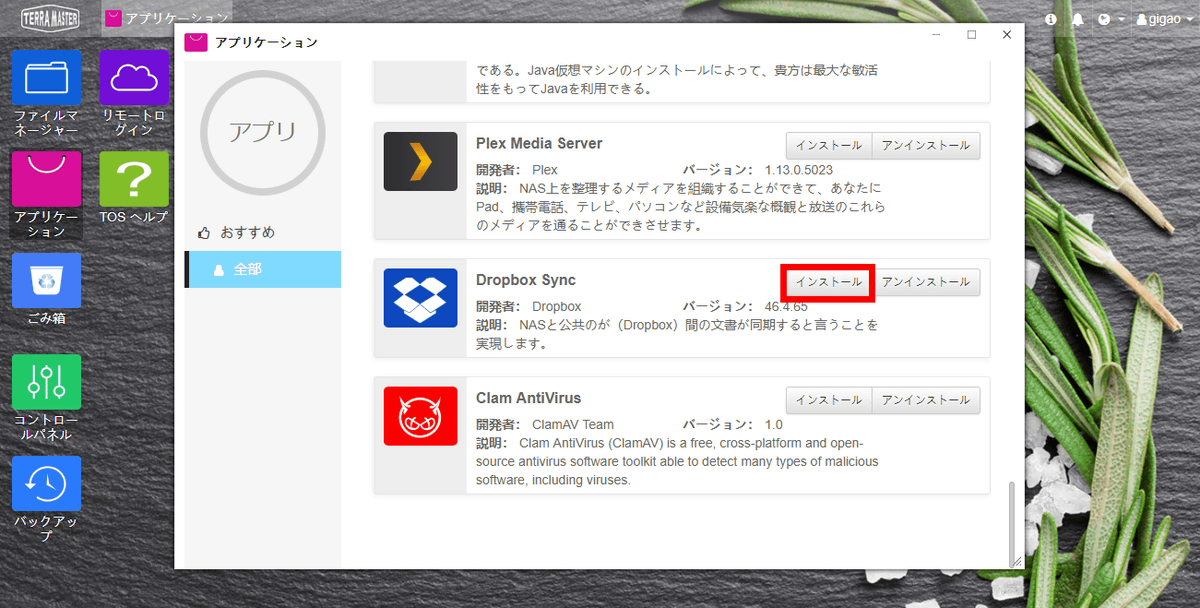
Double-click "Application".

Since the application list is displayed, click "Install" of Dropbox Sync.
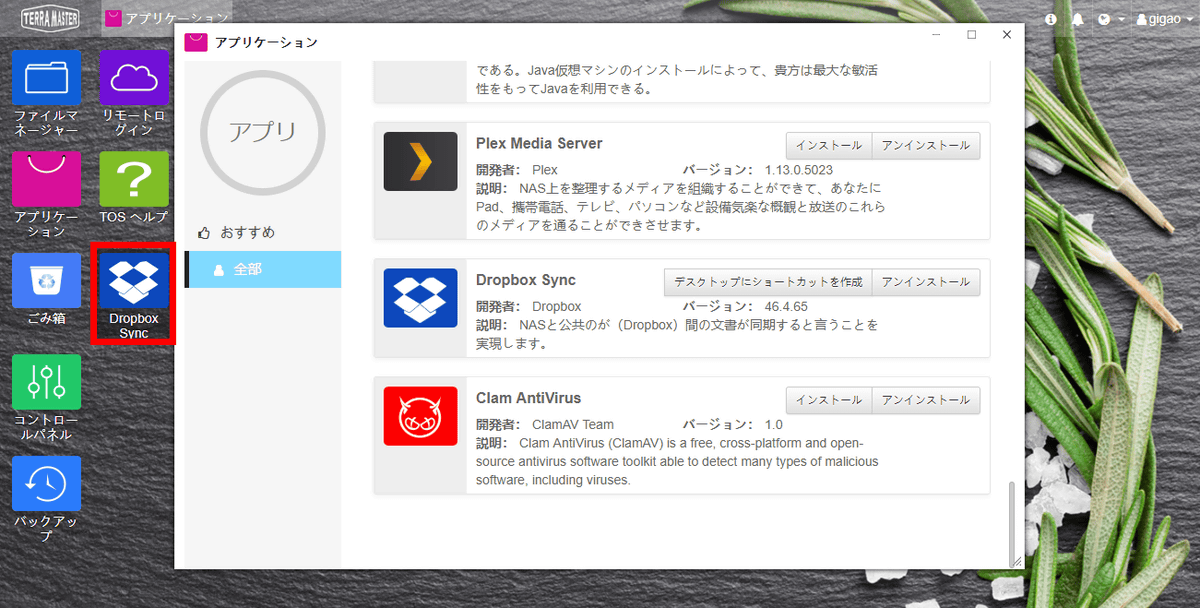
When the installation is completed, the "Dropbox Sync" icon will be displayed on the desktop, so double-click it.
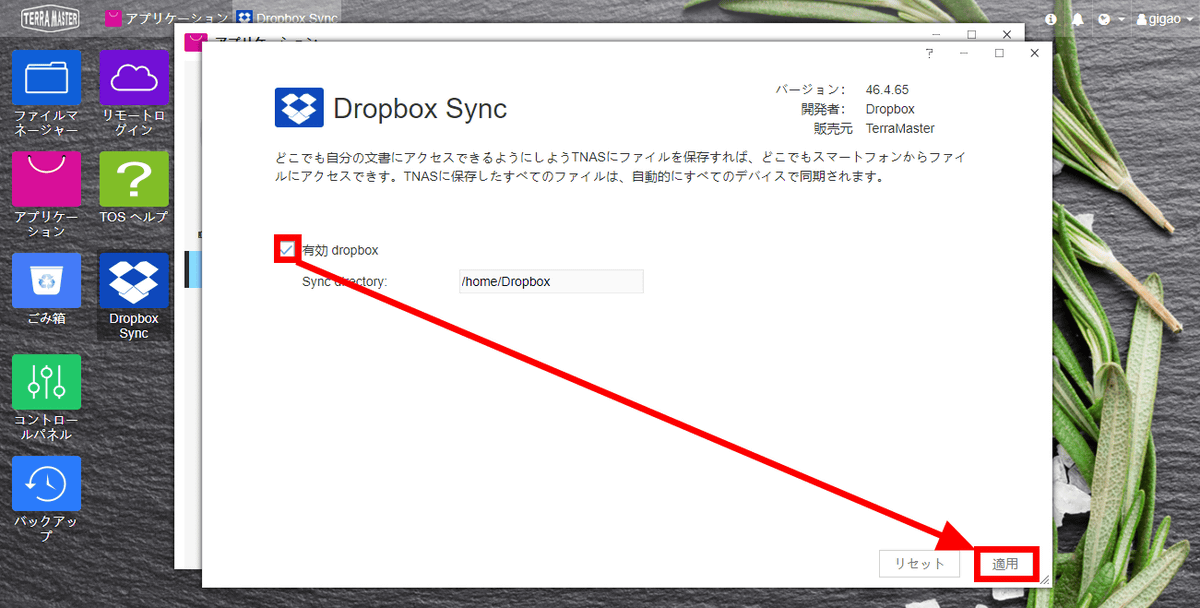
As Dropbox Sync starts up, check the "Enable" checkbox and click "Apply".
The login screen of Dropbox will be displayed. Enter account information of Dropbox and click "Login". Please note that this login screen does not seem to show that pop-up blocking is enabled, so you need to check the web browser settings beforehand.
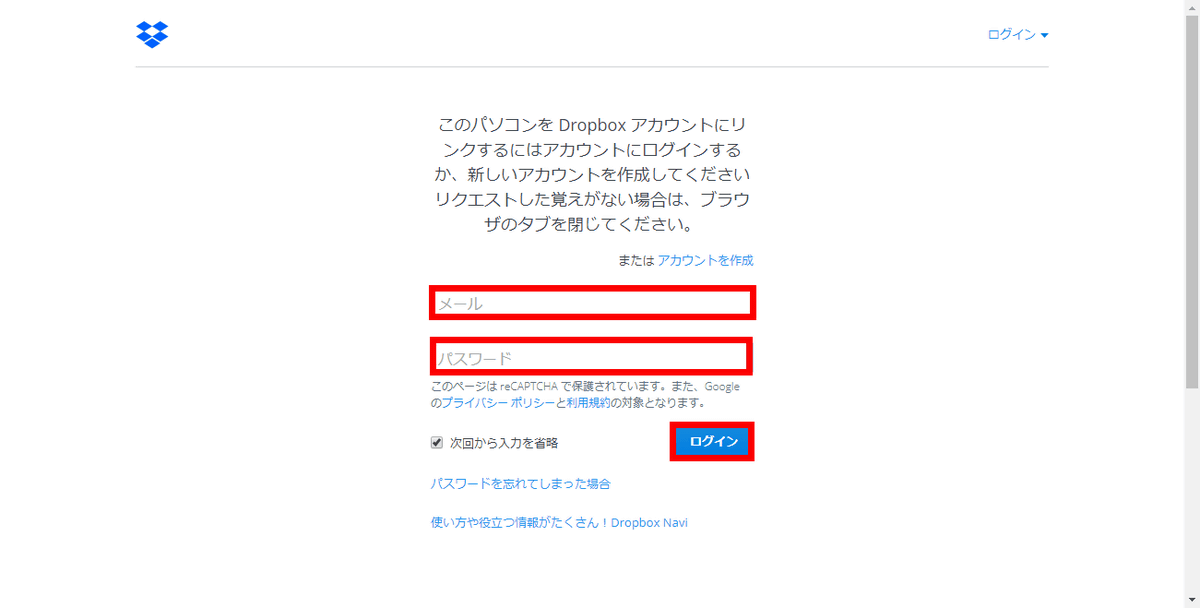
When Dropbox login is successfully completed, "You have successfully linked your computer with your computer" will be displayed.
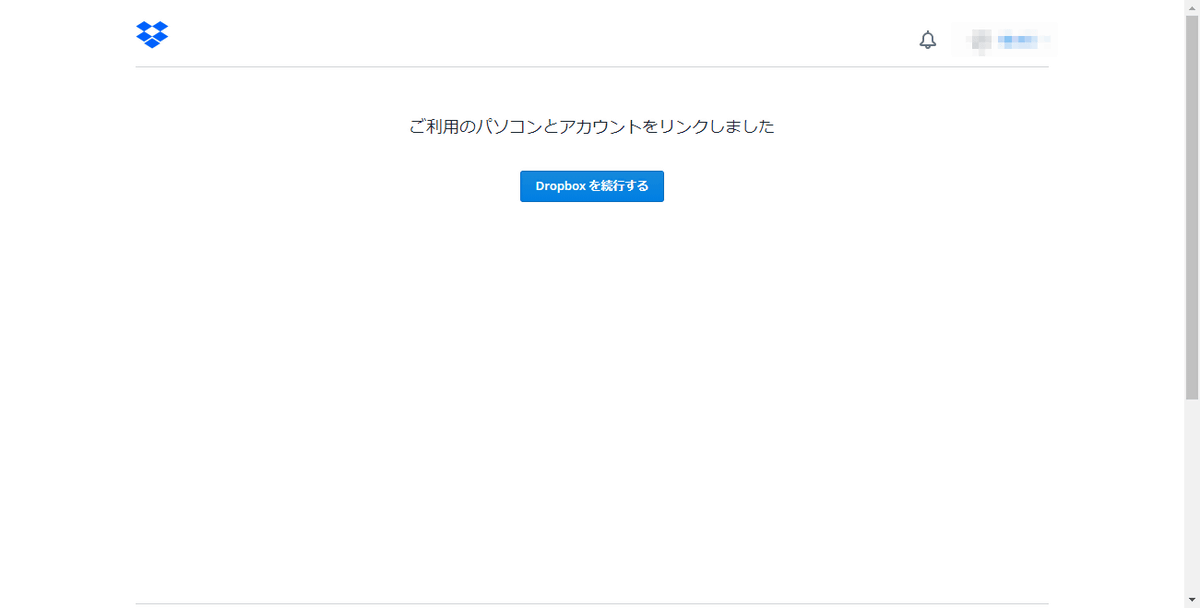
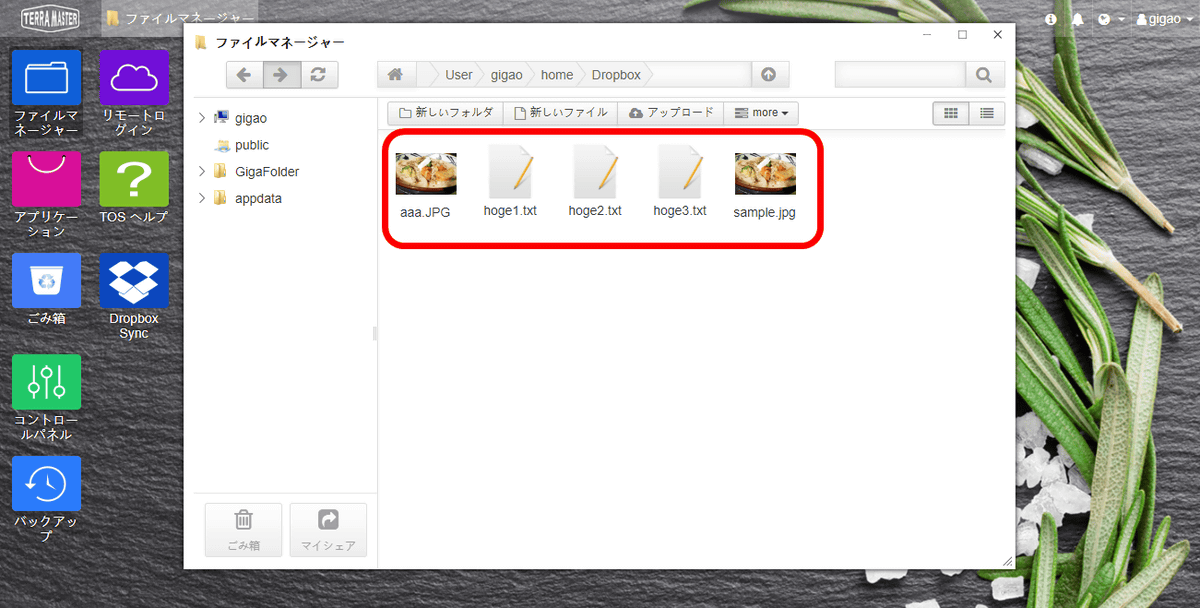
After that, the files saved in Dropbox will be synchronized in the path of TOS / user / gigao / home / Dropbox.
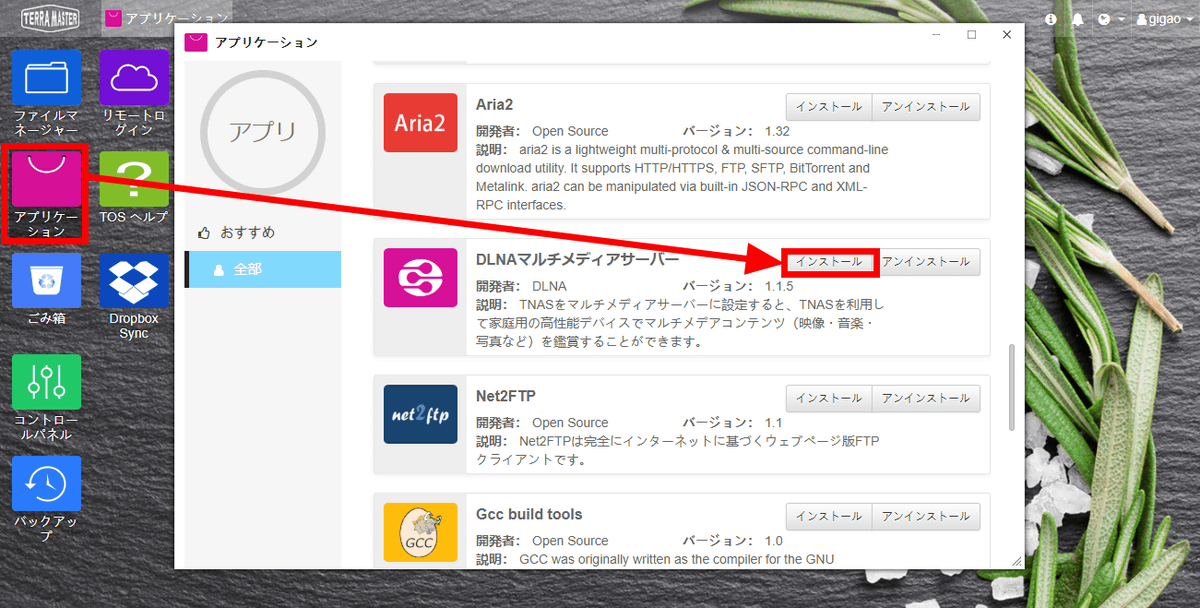
Next let's try to make TOS work as a media server. Double-click "Application" and click "Install" of DLNA multimedia server.
When installation is completed, double click on DLNA multimedia server.
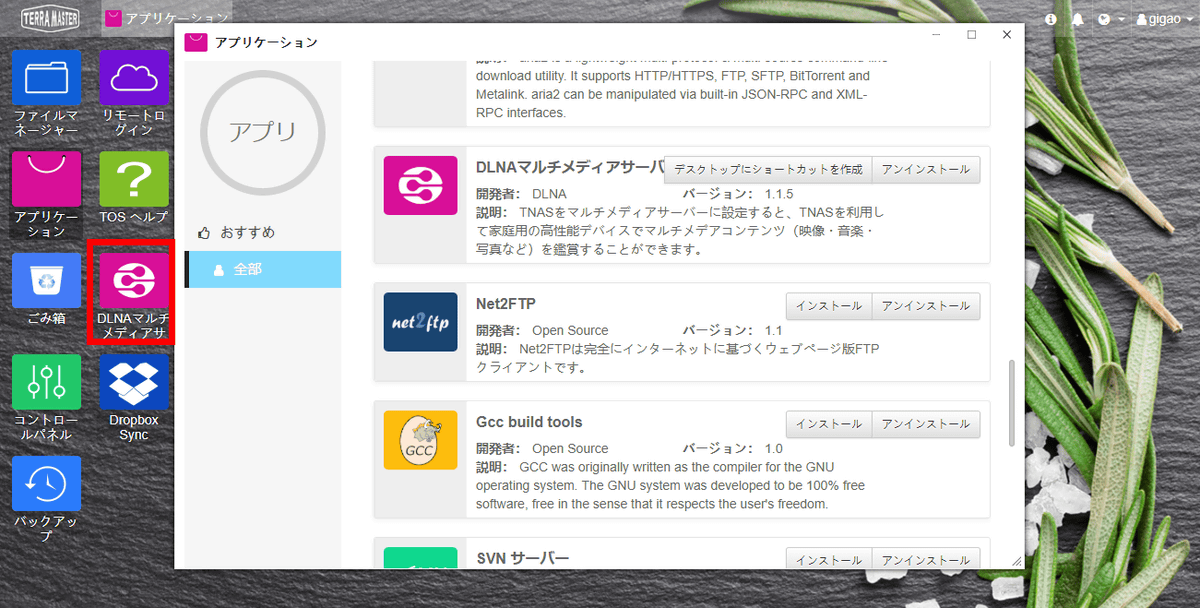
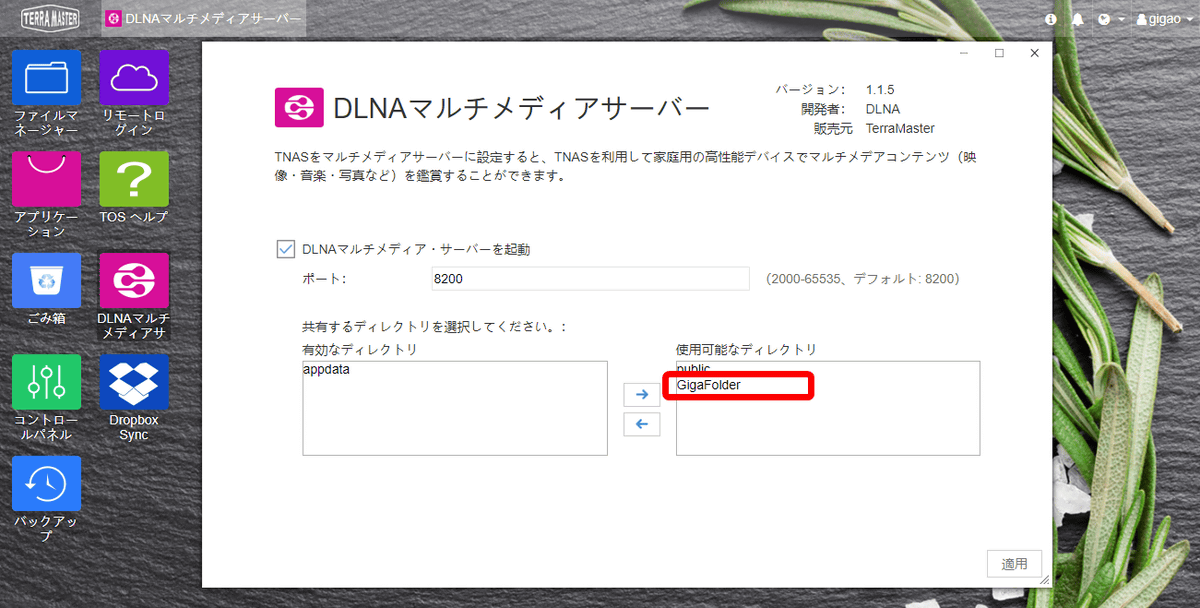
The DLNA multimedia server screen opens. Select GigaFolder in "Active Directory" here and click the right arrow. Then click "Apply".

You can now play movies etc. in GigaFolder on DLNA.
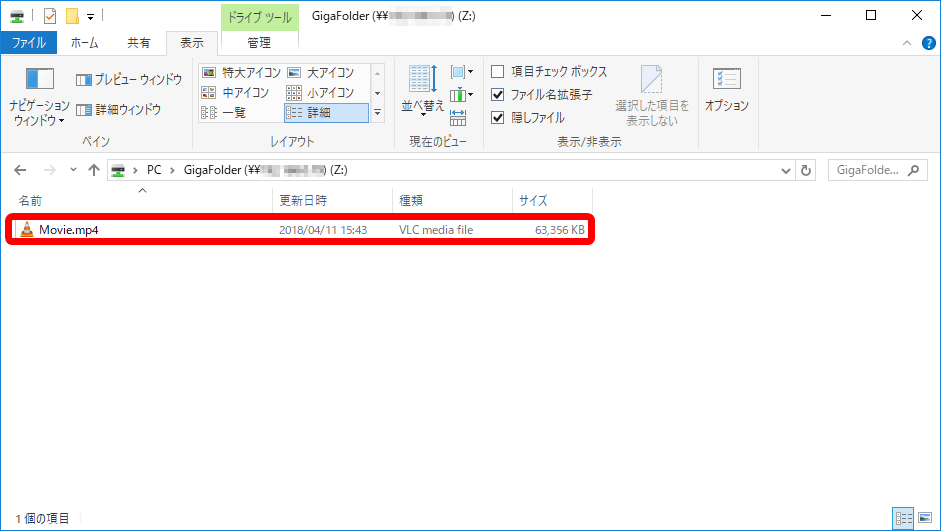
Actually install a movie file in GigaFolder and try playing it with the DLNA player.
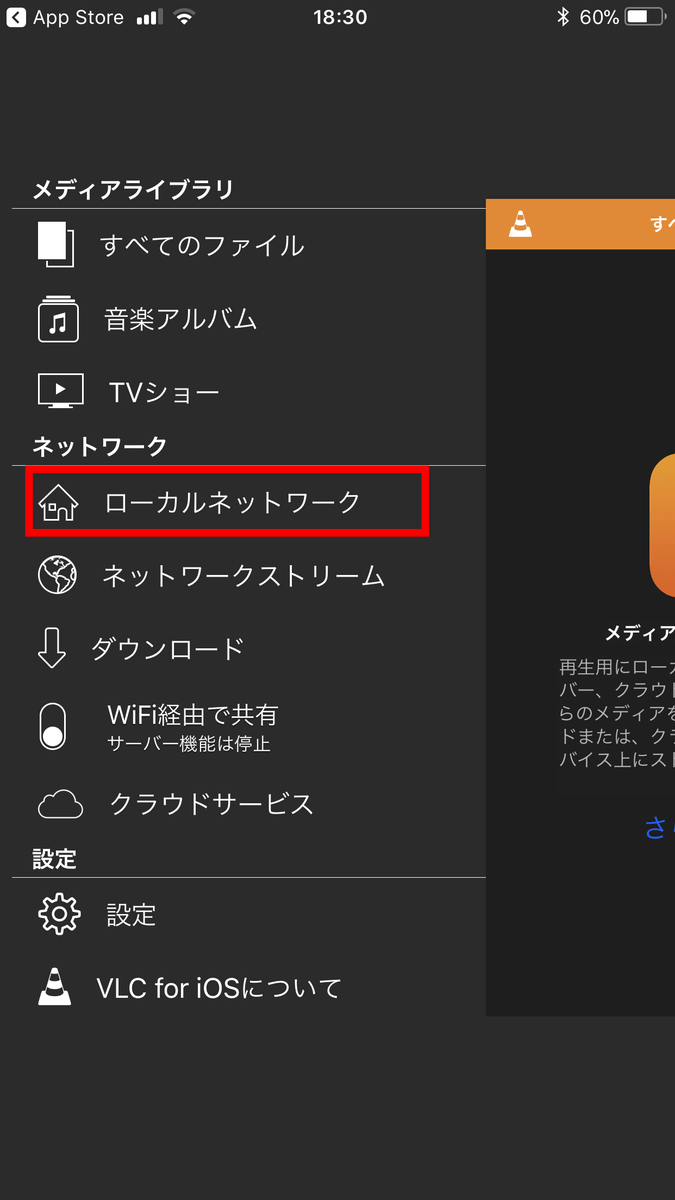
This time iOSVLC for MobileLet's play with. Tap the VLC for Mobile icon on the top right.
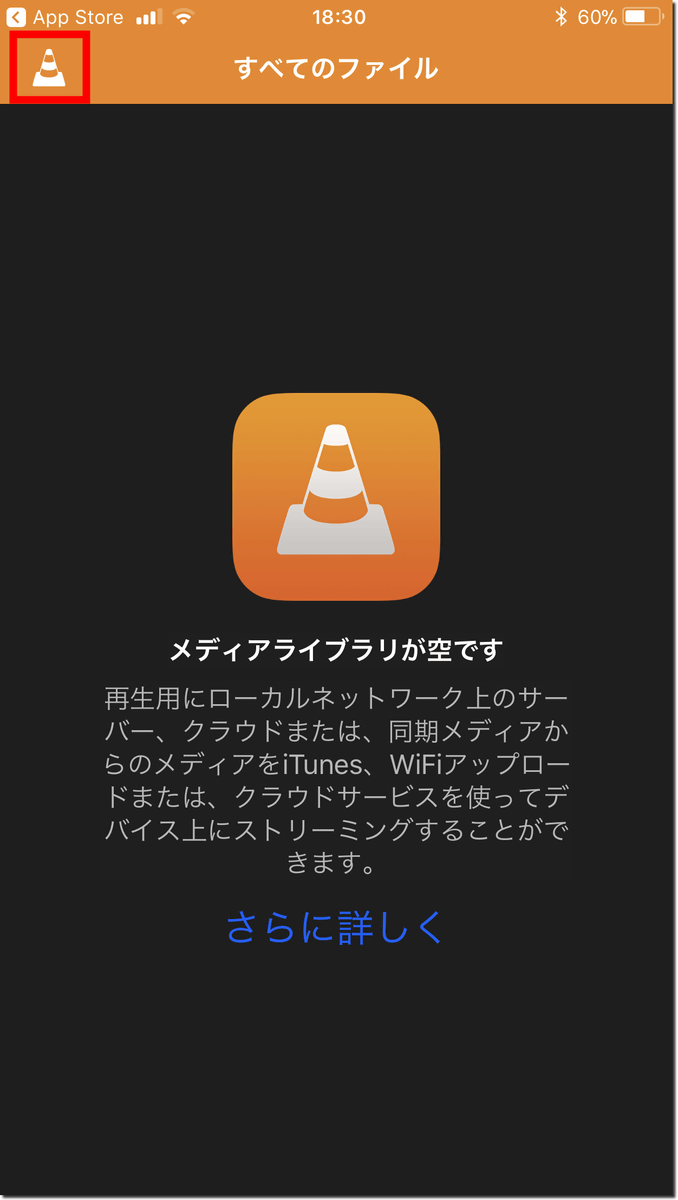
Tap 'Local network' ...
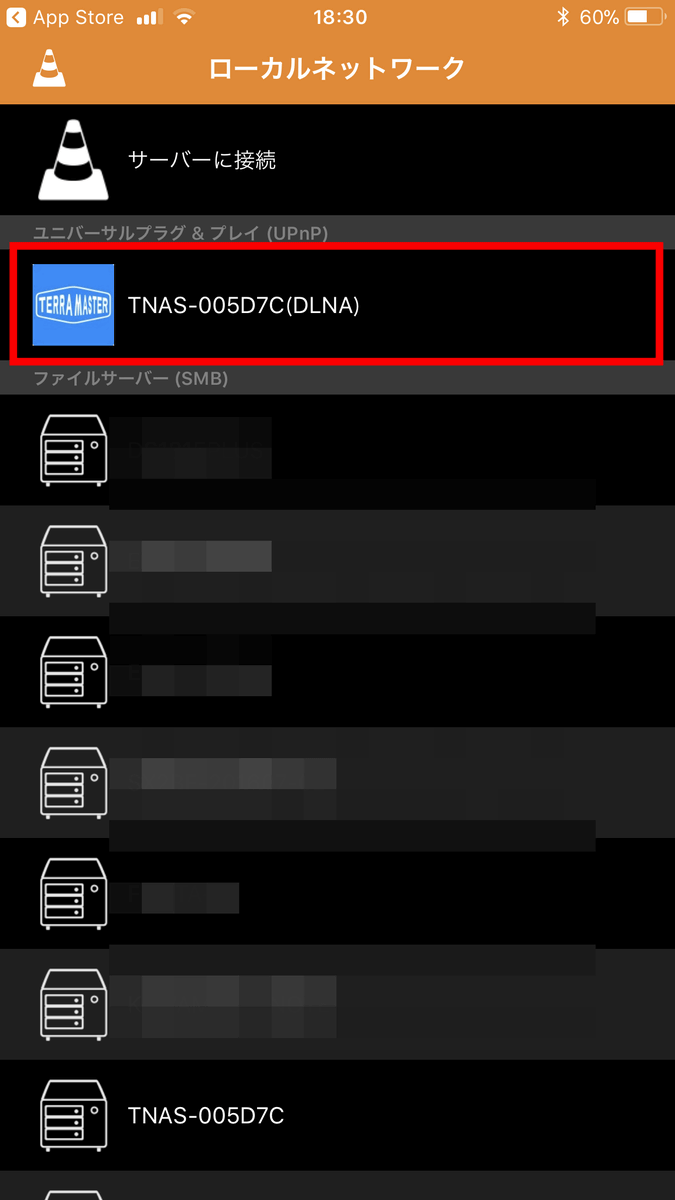
Tap TNAS - 005D7C (DLNA).
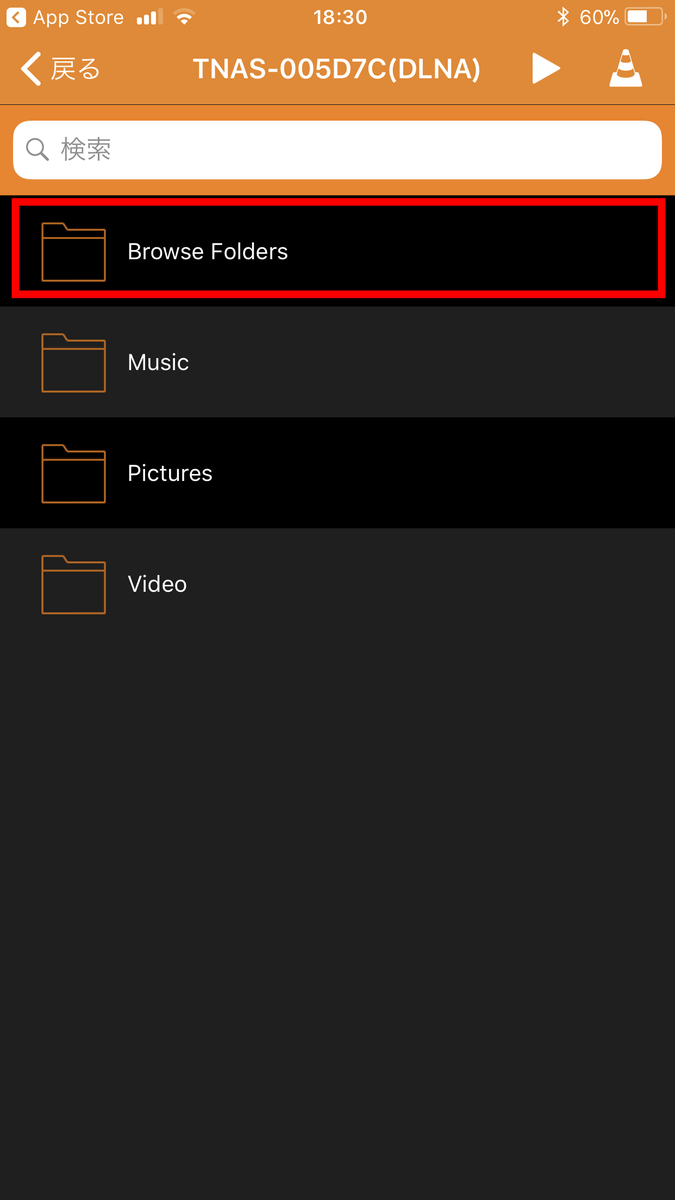
Tap Browse Folders.
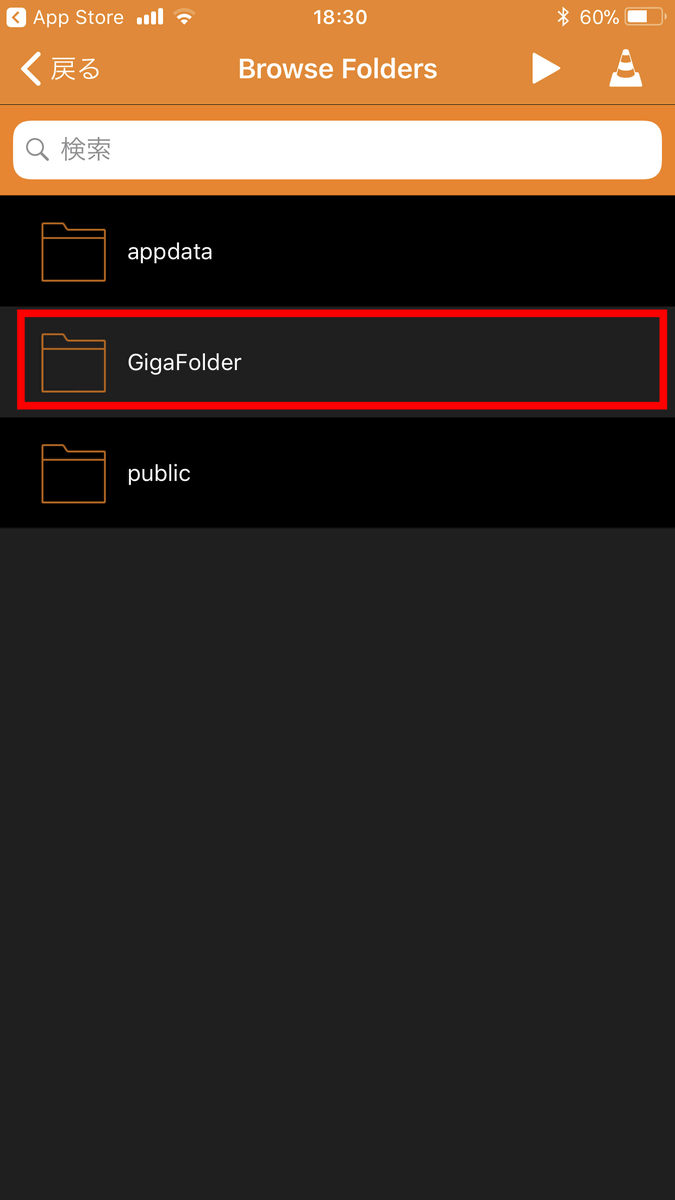
Tap GigaFolder ......
Tap Movie.
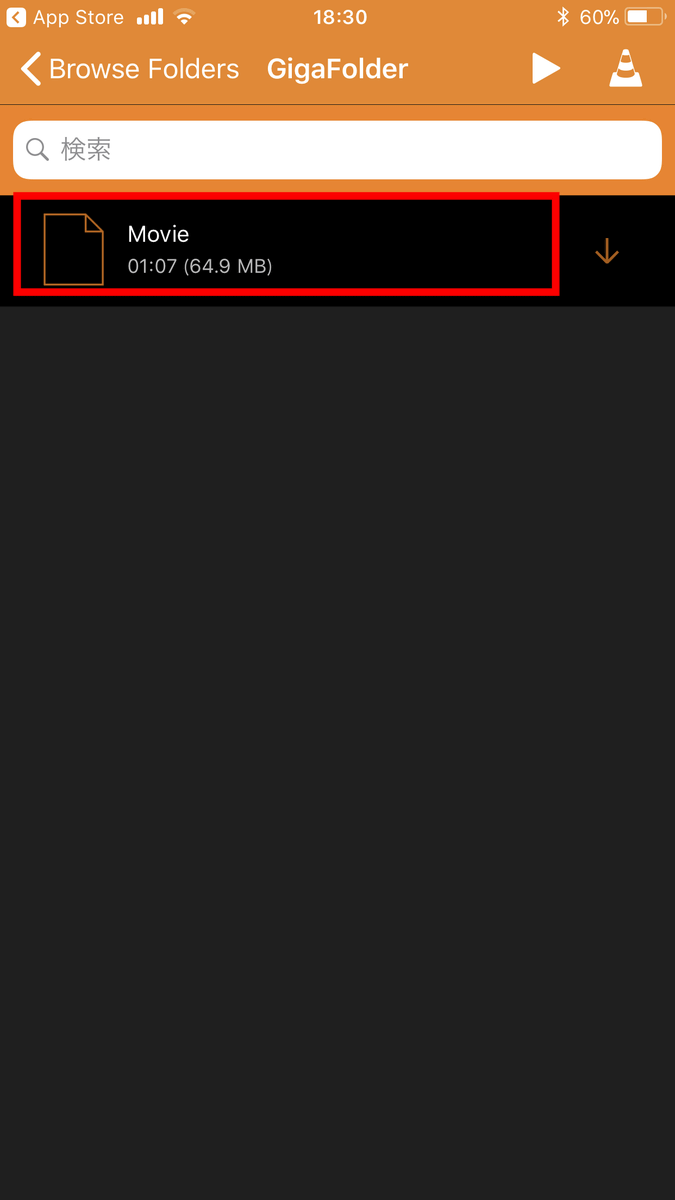
Then, I was able to play the movie. After that, just by uploading movie files and music files to this folder, you can play with DLNA player.
In addition to this, TerraMaster F 4-220 can also be used for a wide range of applications, such as setting up a web server, listening to music files saved on the NAS via iTunes, installing MySQL and development environment.
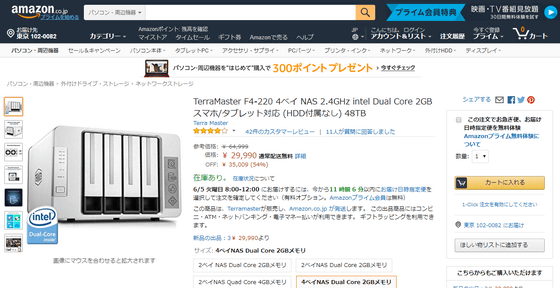
TerraMaster F4-220 was 29990 yen including tax.
Amazon | TerraMaster F4-220 4 bay NAS 2.4 GHz intel Dual Core 2 GB compatible smartphone / tablet (without HDD attached) 48 TB | Terra Master | network storage mail order
Related Posts: