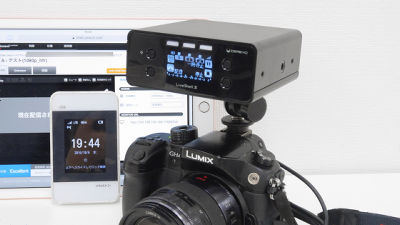
Review using "LiveWedge" which can deliver video while switching multiple cameras with one camera before launch
Video shot with a video camera can be delivered as it isLiveShell PROWe are planning and developing video equipment such asCerevoNew products that can also deliver live video while switching multiple images "LiveWedge"Was announced on January 21. Since GIGAZINE editorial department was able to borrow real machine before announcement, I tried various operations as to what kind of operation is possible.
LiveWedge - Cerevo
http://livewedge.cerevo.com/ja/
Live switcher equipped HD switcher "LiveWedge" official reservation started on January 21 | Notice from Cerevo
http://info-blog.cerevo.com/2015/01/14/871/
◆ "LiveWedge" Appearance Review
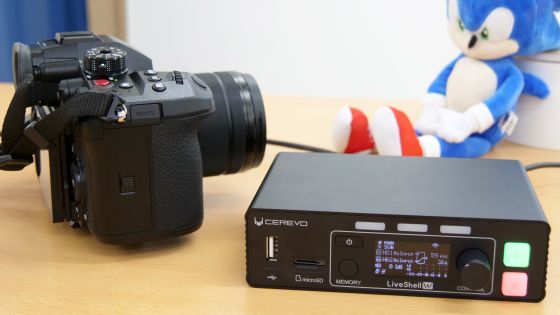
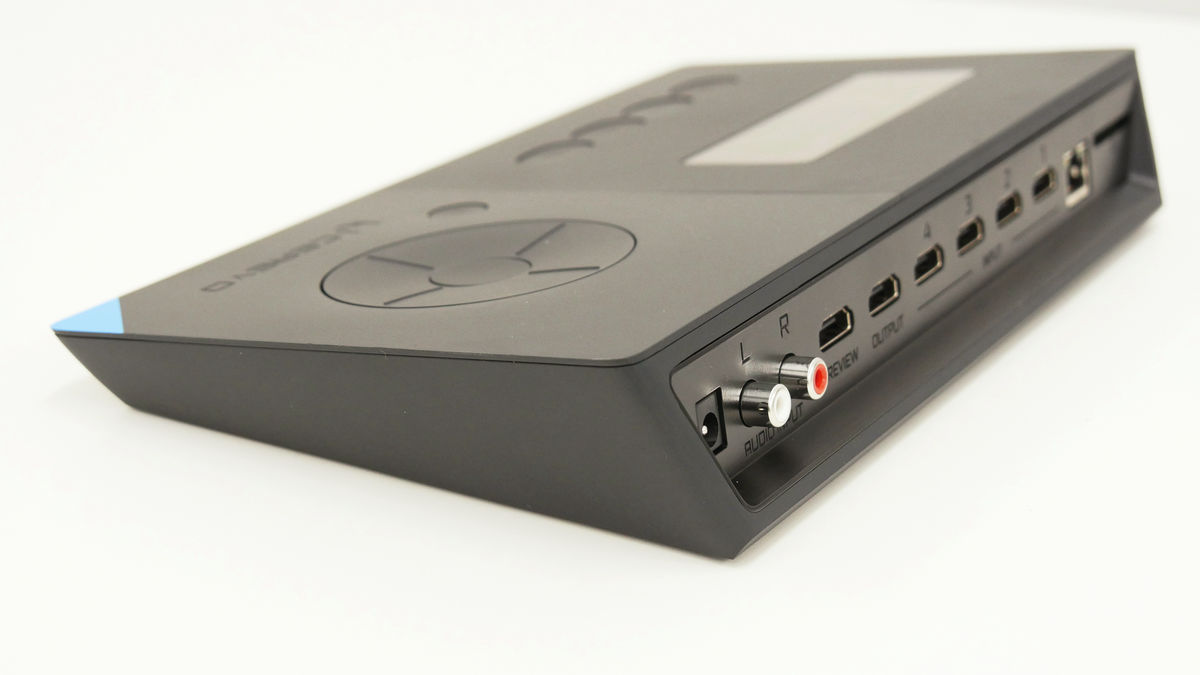
This is LiveWedge's real machine that I got to the editorial department. The external dimensions are approximately 270 × 155 × 41 mm, and the weight is approximately 1.1 kg.
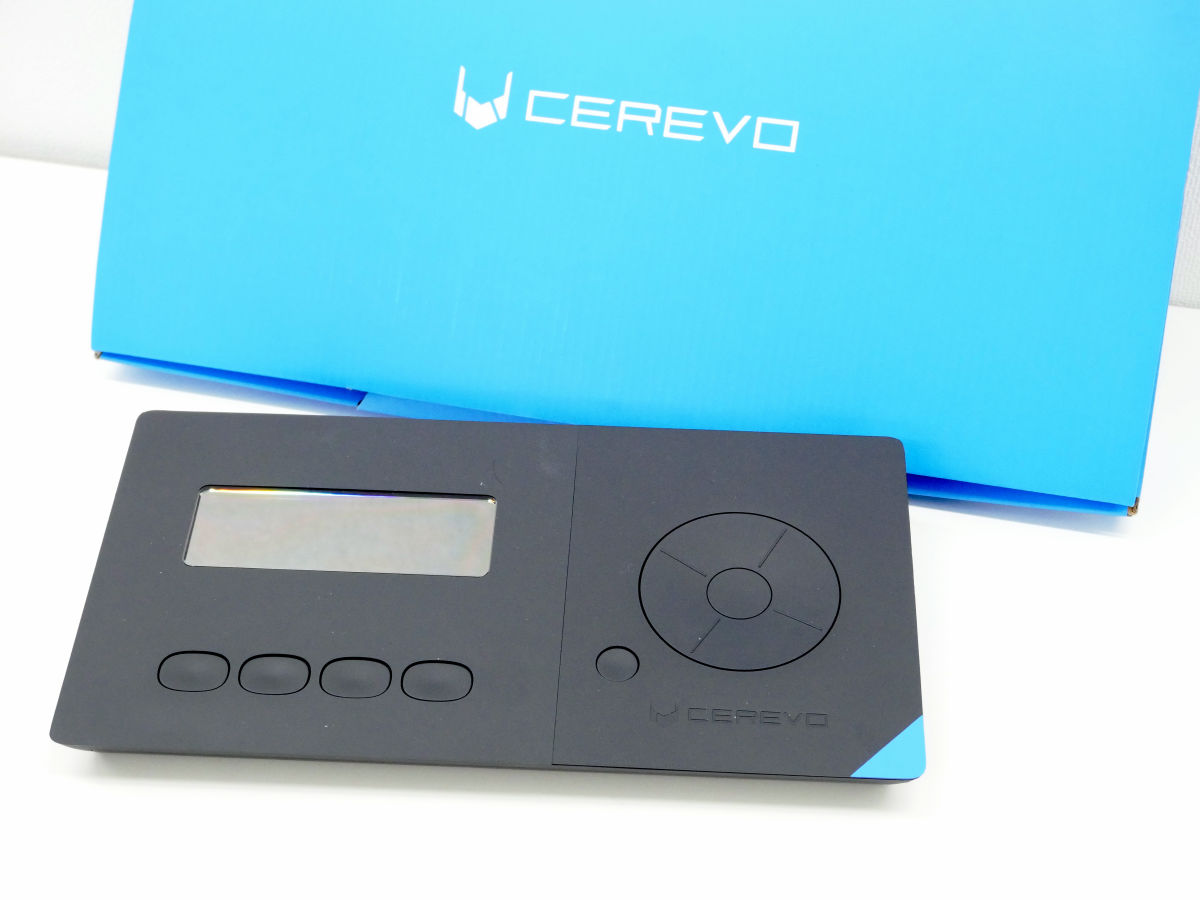
On the left side there was a liquid crystal display and video switching buttons, and on the right side there were layout of operation wheels for various operations and round buttons for "return".
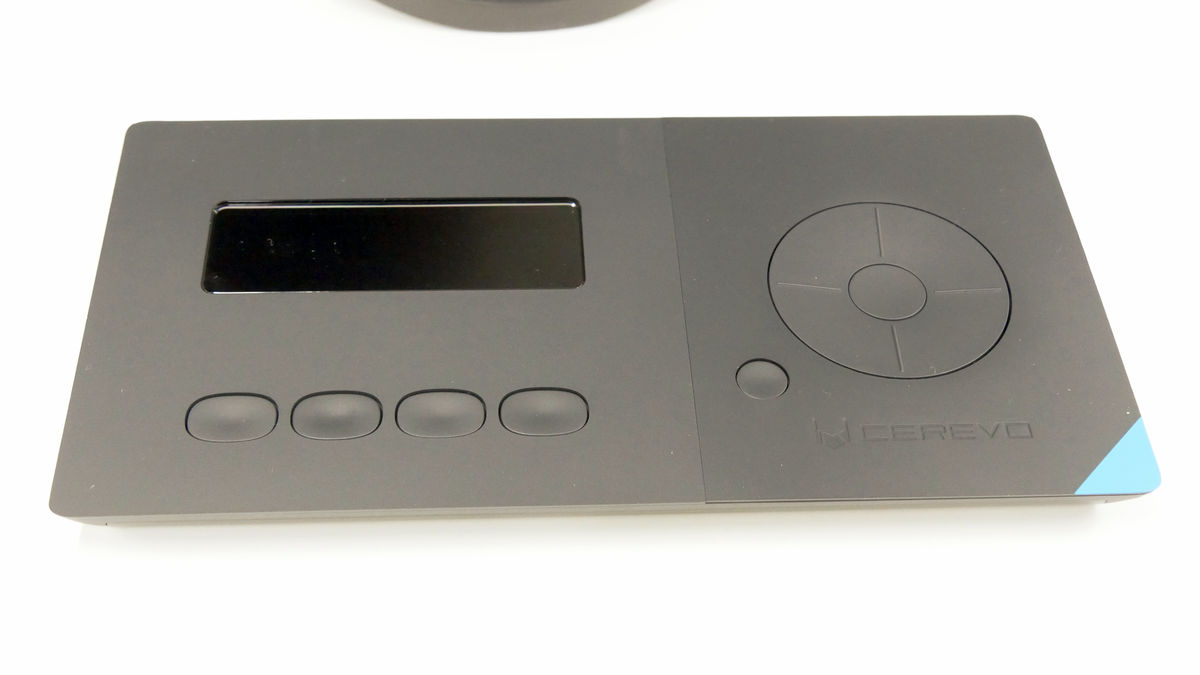
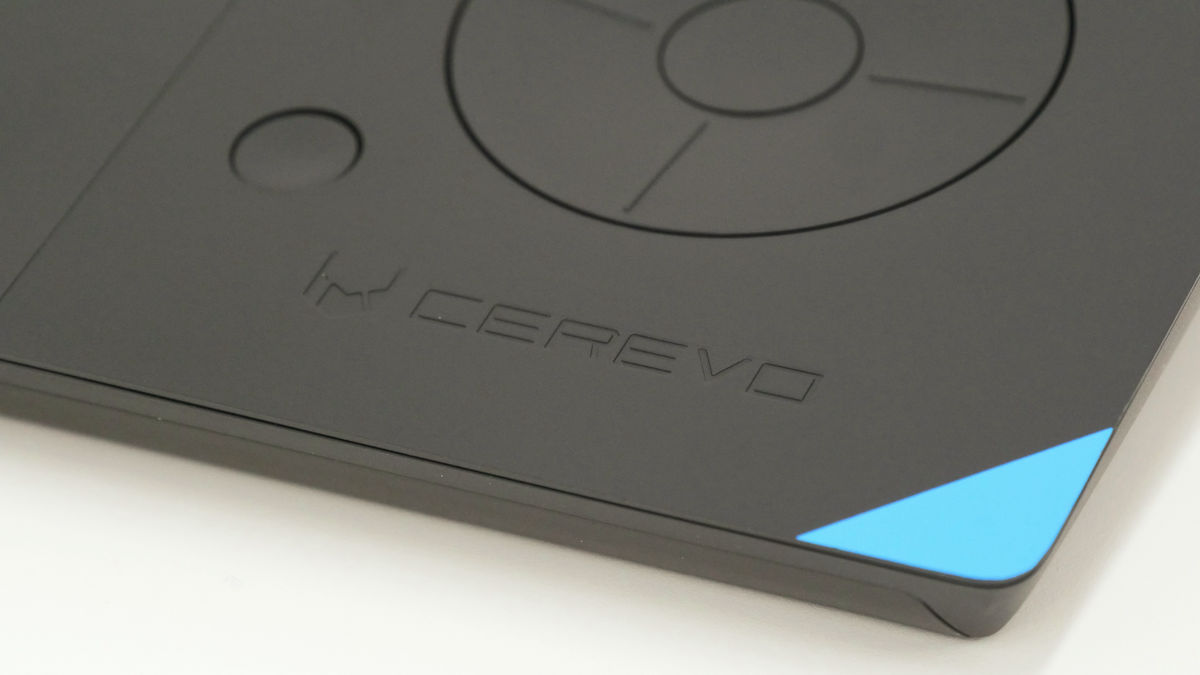
The blue triangle at the bottom right of the main unit and the stamp of "CEREVO" are accented on the design.
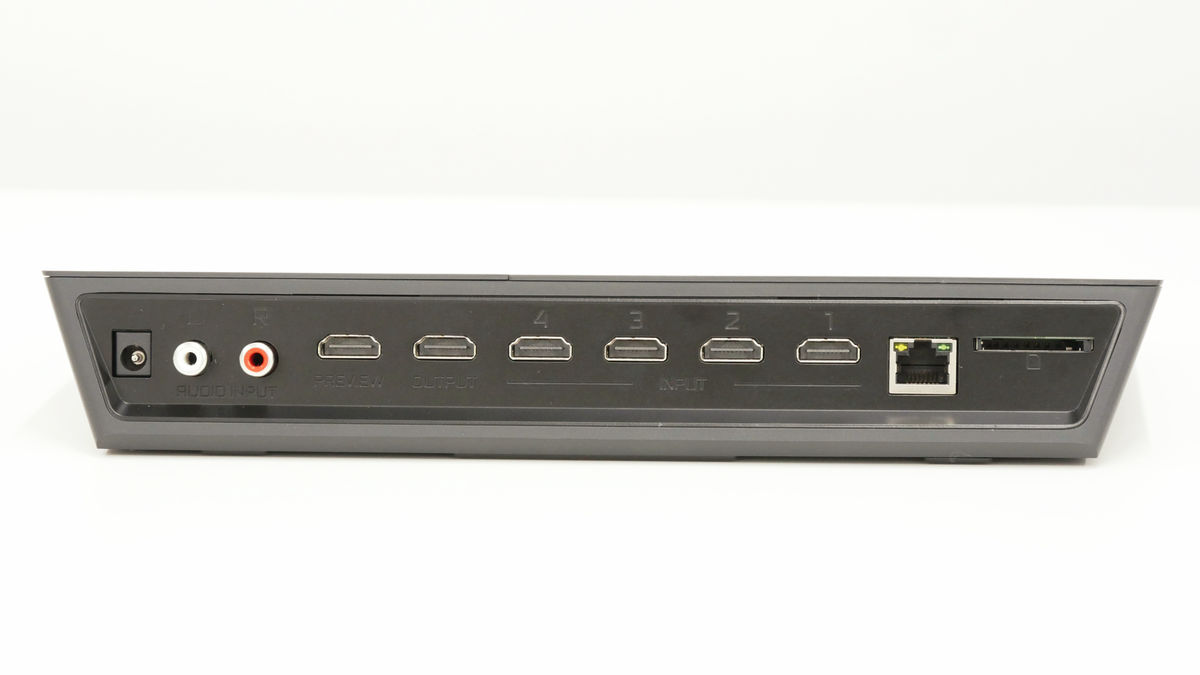
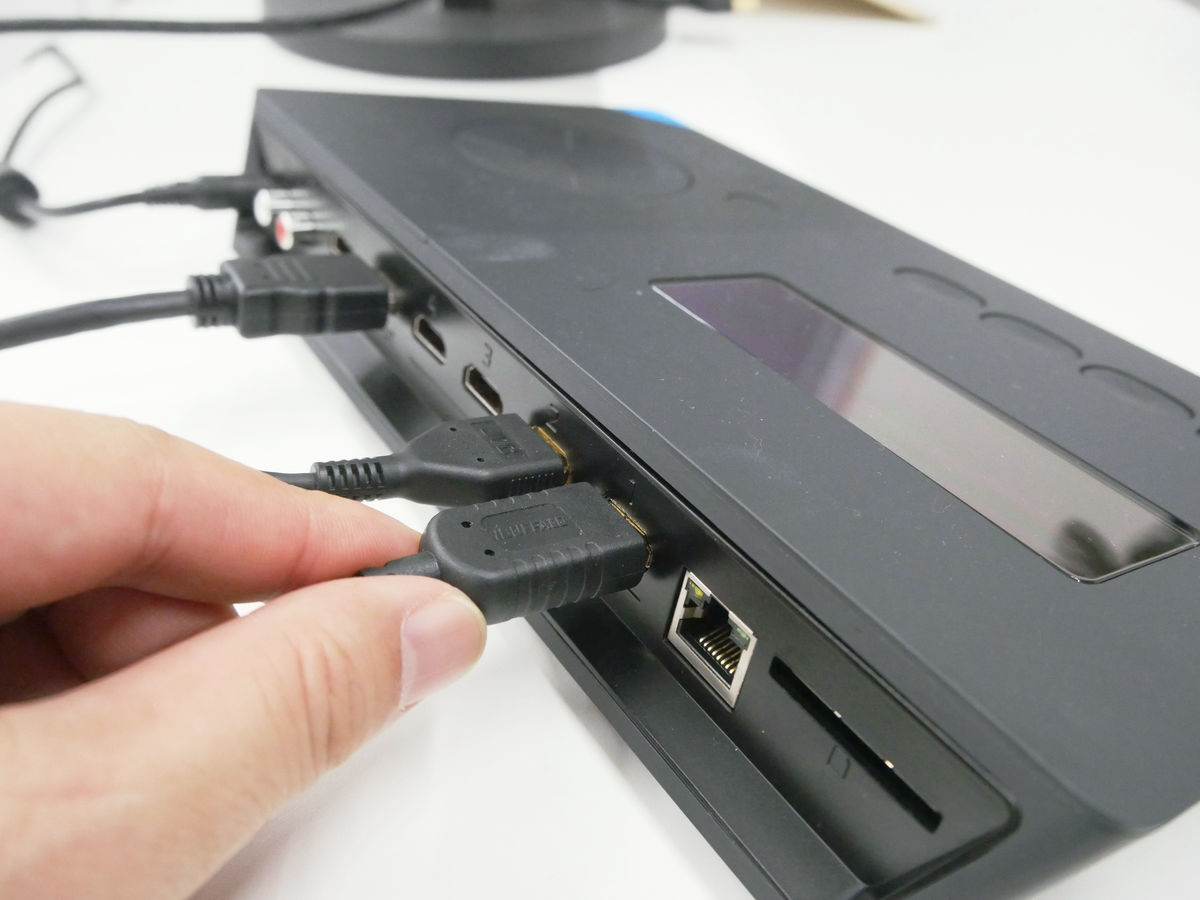
I / O connectors are all gathered on the back of the main unit. From the left, power supply terminal, audio input pin connector × 2, preview output HDMI terminal, program (main video) output HDMI terminal, video input HDMI terminal × 4, wired LAN port and SD card slot are lining up.
The video formats supported by LiveWedge are as follows. With this one, it is possible to realize 720 / 30p HD video live distribution and 1080 PHD video switching.
Nothing was arranged on the left and right sides of the main body.

◆ Turn on the power supply and set various initial settings
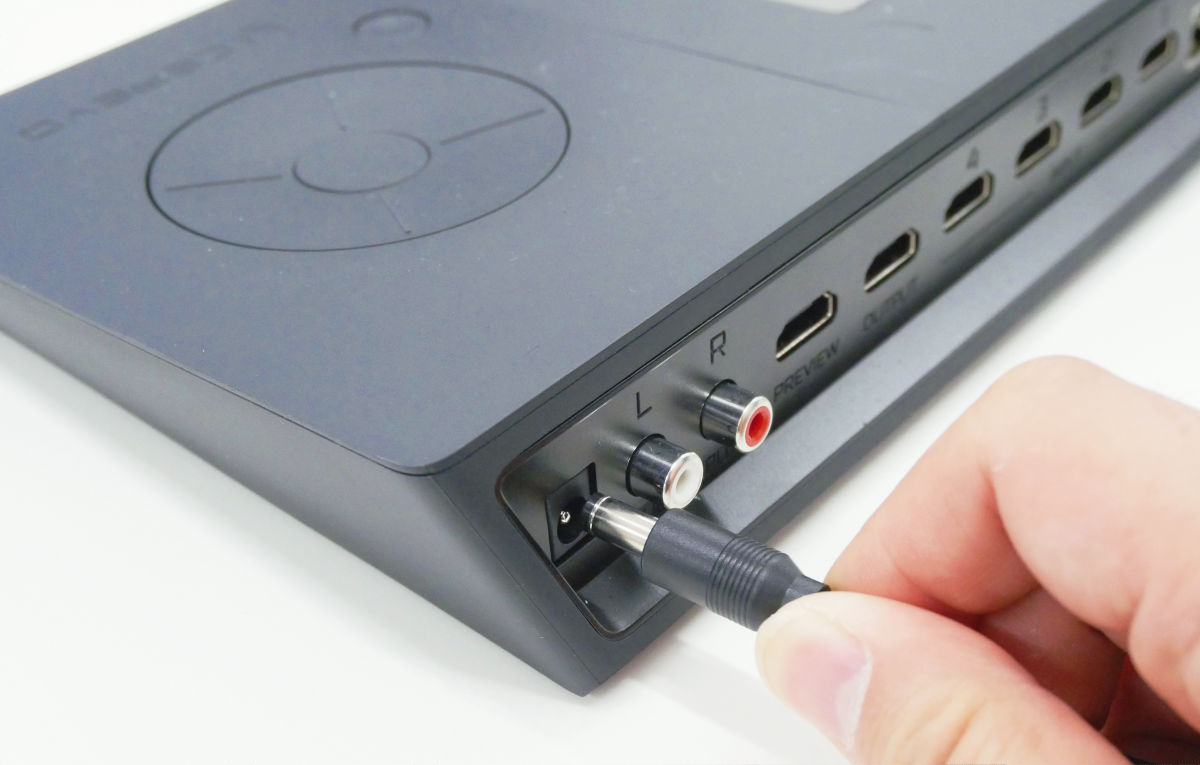
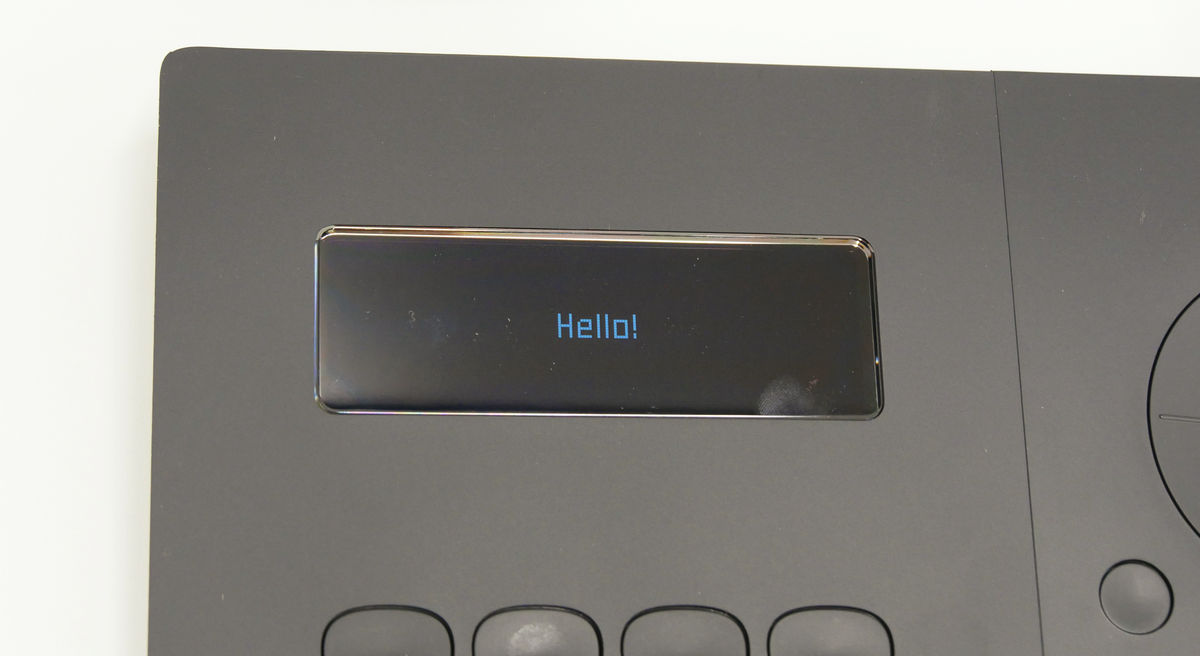
First turn on the main unit. Since switches are not mounted, just plug the cable into the connector on the back of the main unit is OK.
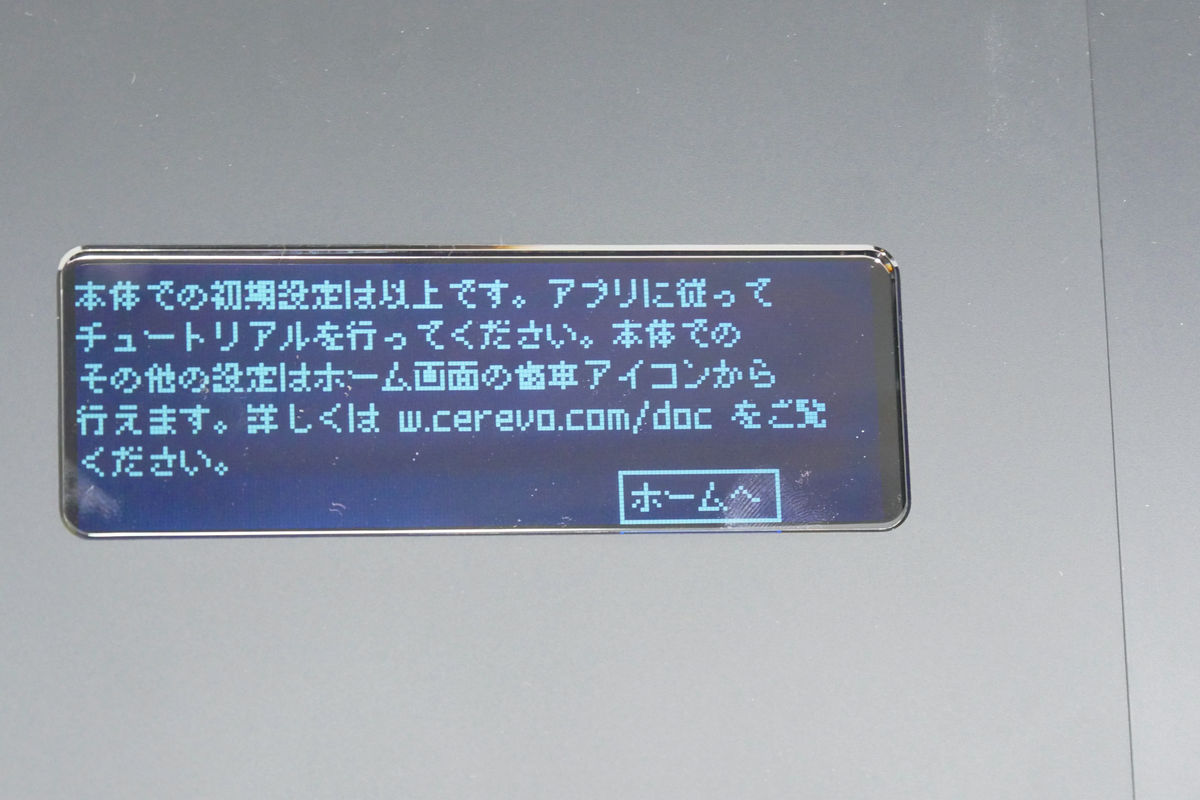
When "Hello!" Character is displayed on the main unit's liquid crystal display, preparation is completed.
In addition, various settings are made at the time of initial startup. First, select screen display from English and Japanese. Turn the operation wheel to select it, then press the center determination button to complete the setting.
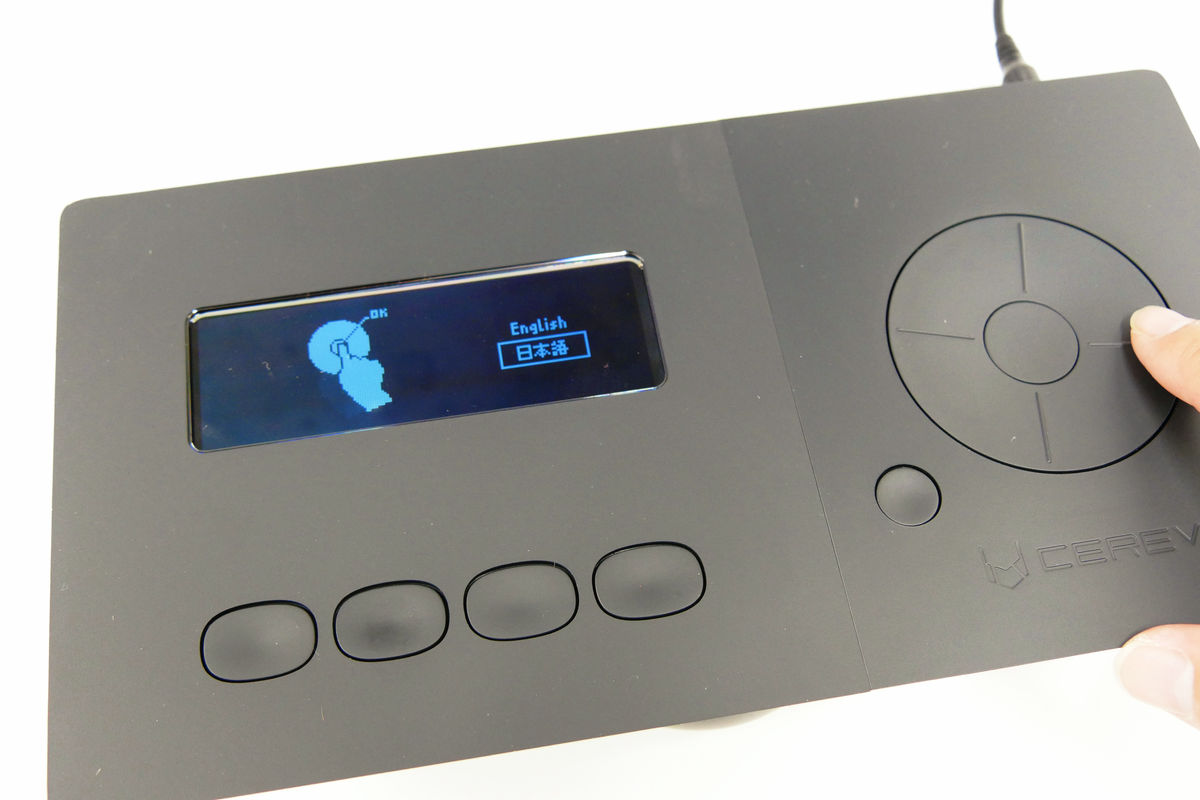
Next, set whether to operate with tablet. Since the degree of operation is overwhelmingly higher by using a tablet, I will choose "Yes" here as well.
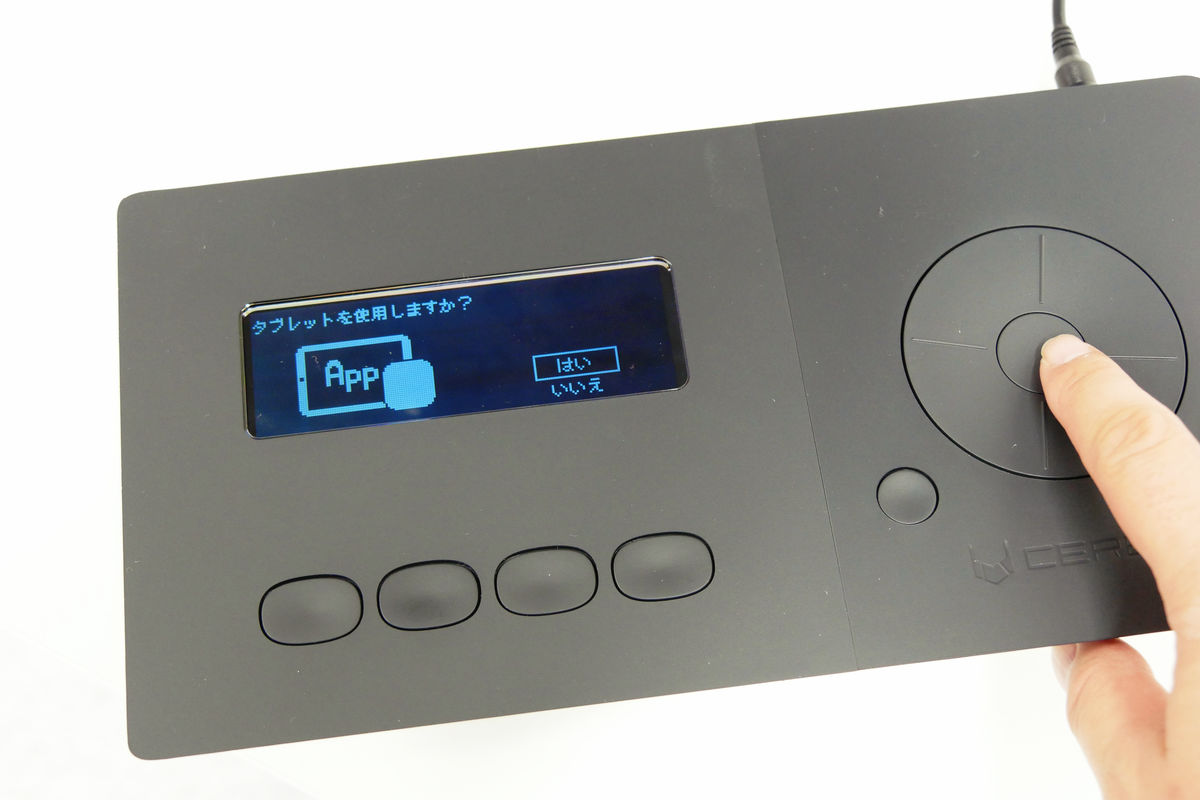
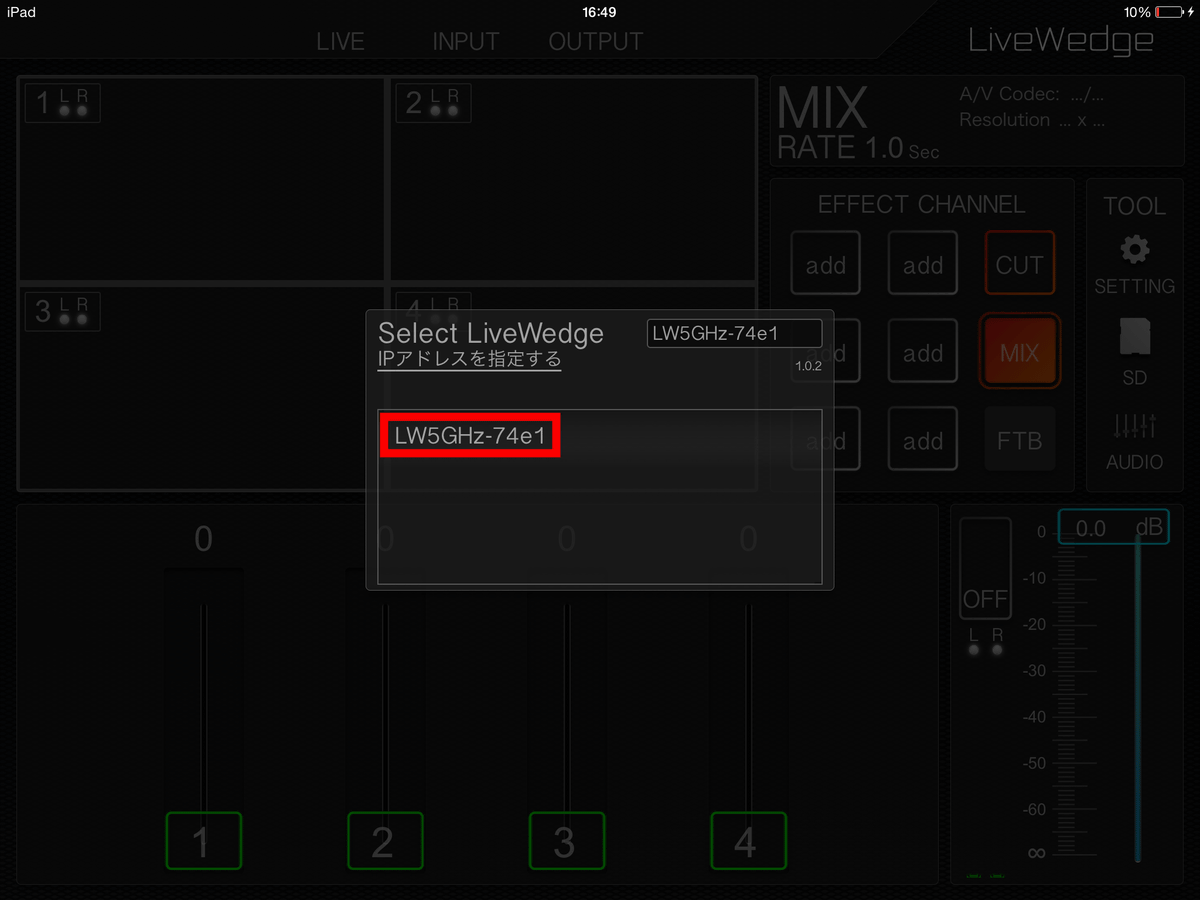
As LiveWedge and tablet connect with Wi-Fi, we first set up access point.
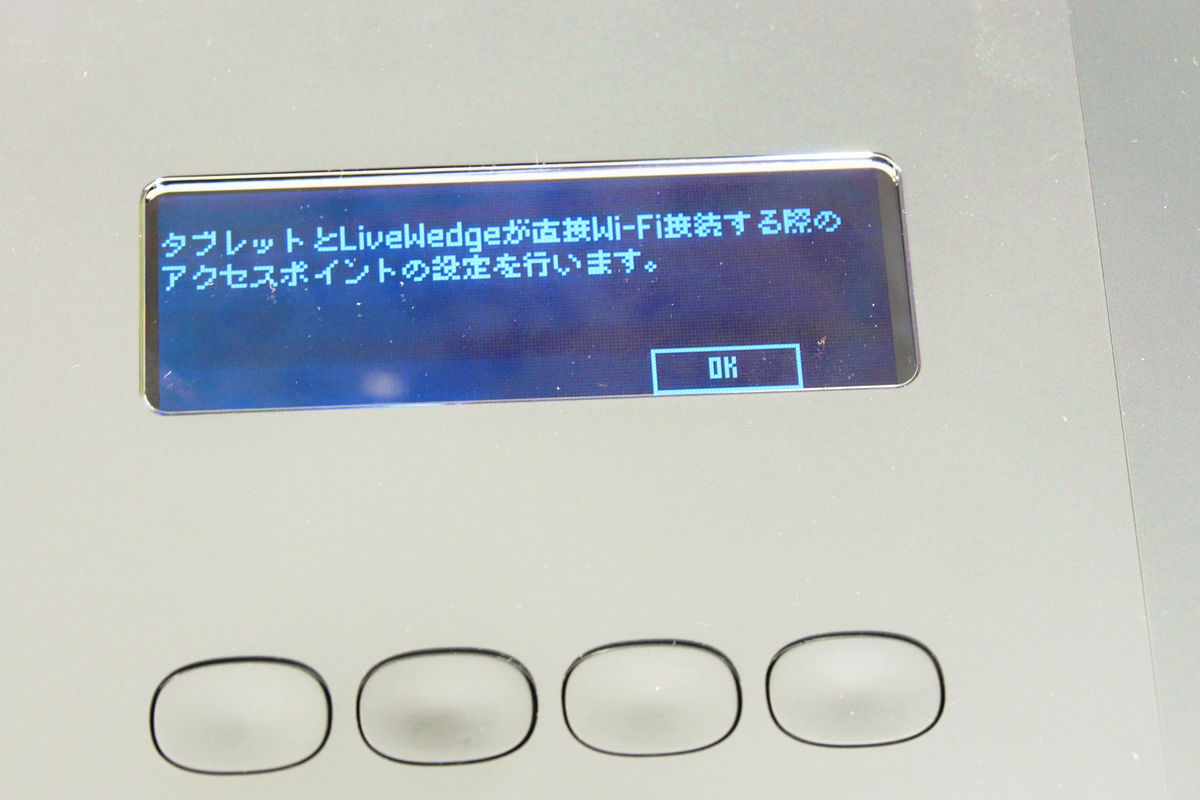
As SSID and passphrase are set in advance, if you have no problem, just press "OK".
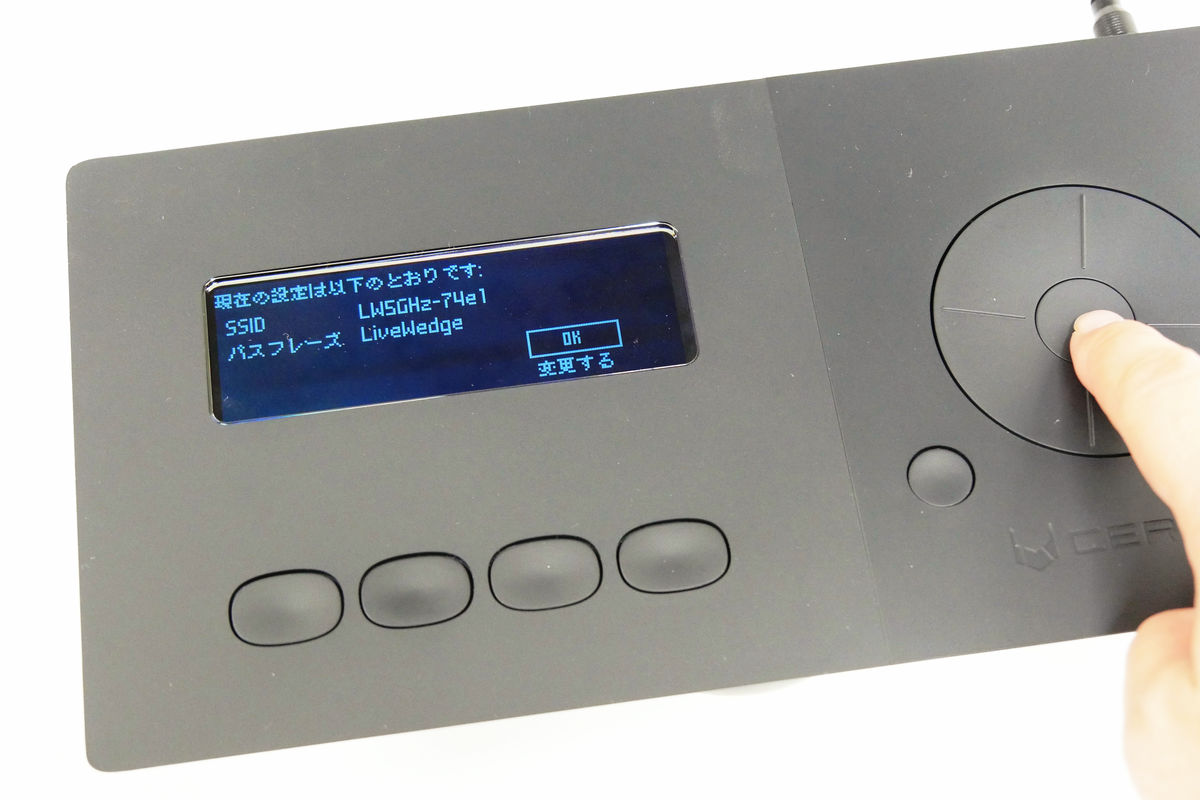
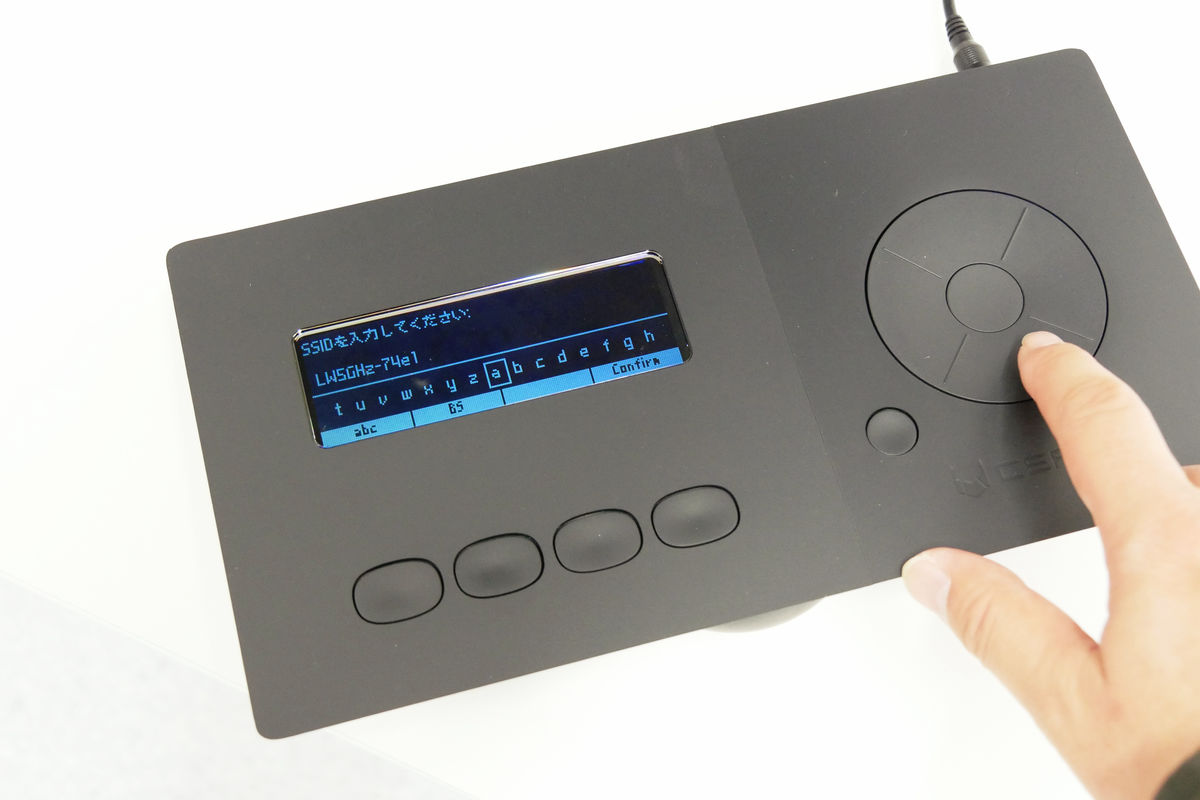
If you want to change the SSID or passphrase, you can enter characters using the operating wheel.
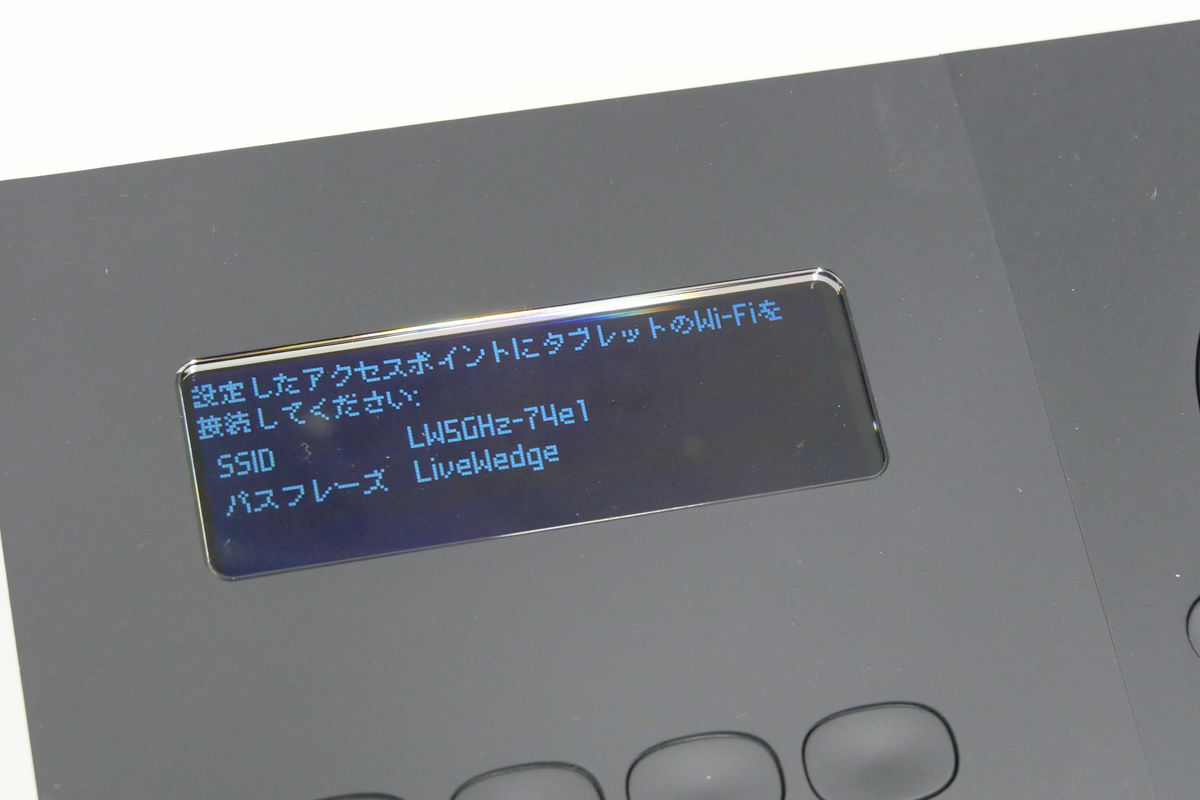
The set SSID and passphrase are displayed. Based on this information, next we will connect the tablet and LiveWedge.
◆ Install app on tablet
When LiveWedge connects and operates a tablet, it becomes possible to fully utilize its function. At the time of article creation, the iPad application has been released, and you can install from the following link. Android applications will be available in the future. Please note that the screen of the application is a development version, so it may be slightly different from the official version.
LiveWedge for iPhone, iPod touch, iPad currently on the iTunes App Store
https://itunes.apple.com/jp/app/livewedge/id814871915
This time I will connect using iPad Air 2. From the Wi-Fi setting screen, select the same SSID that was displayed on the above screen and connect.
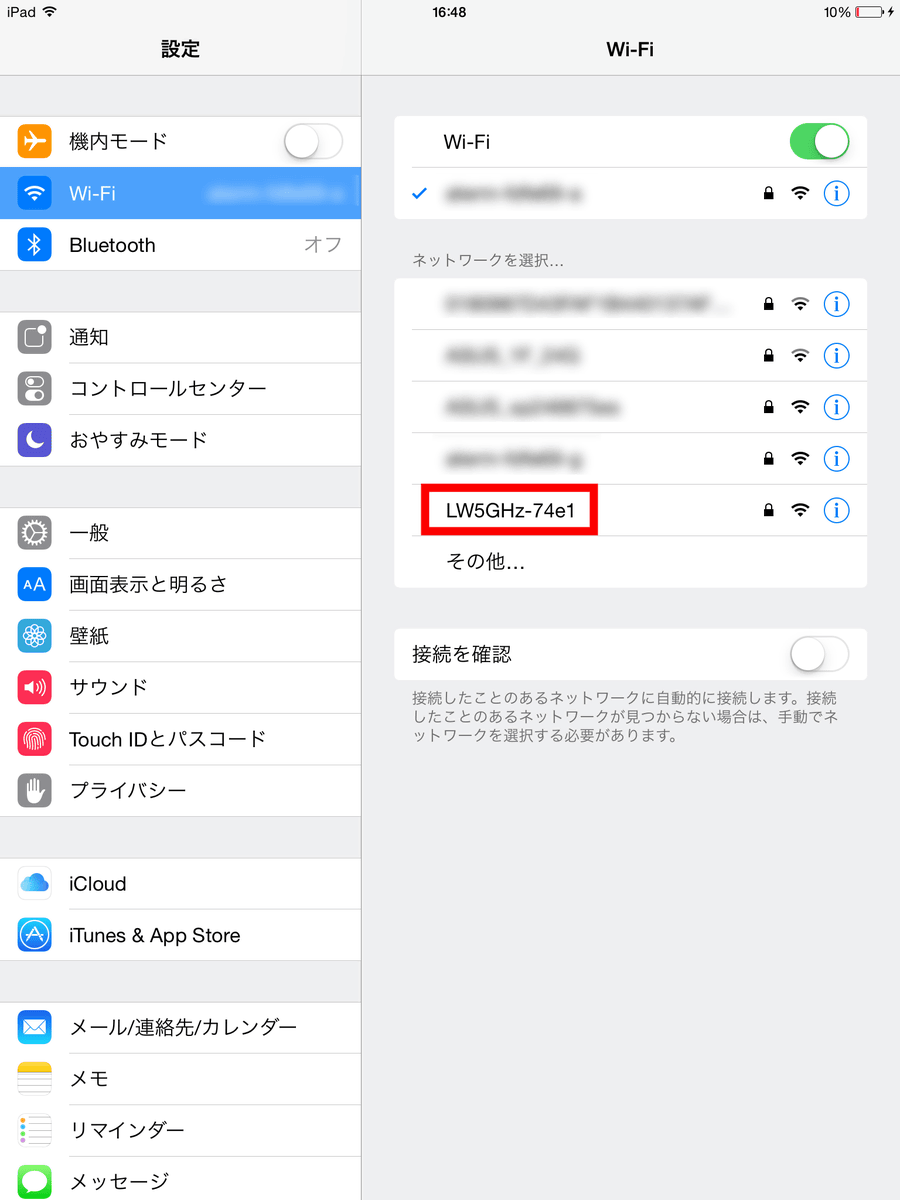
Next, start up the application and once you select the same SSID on the screen, the connection is completed.
The display of the LiveWedge main unit switched, and it was confirmed that setting was completed. This makes it possible for most applications to be done on the application side.
When the initial setting is completed, connect the camera. Just by inserting the HDMI terminal, it automatically recognizes it, so no operation is necessary.
◆ Operate tablet applications
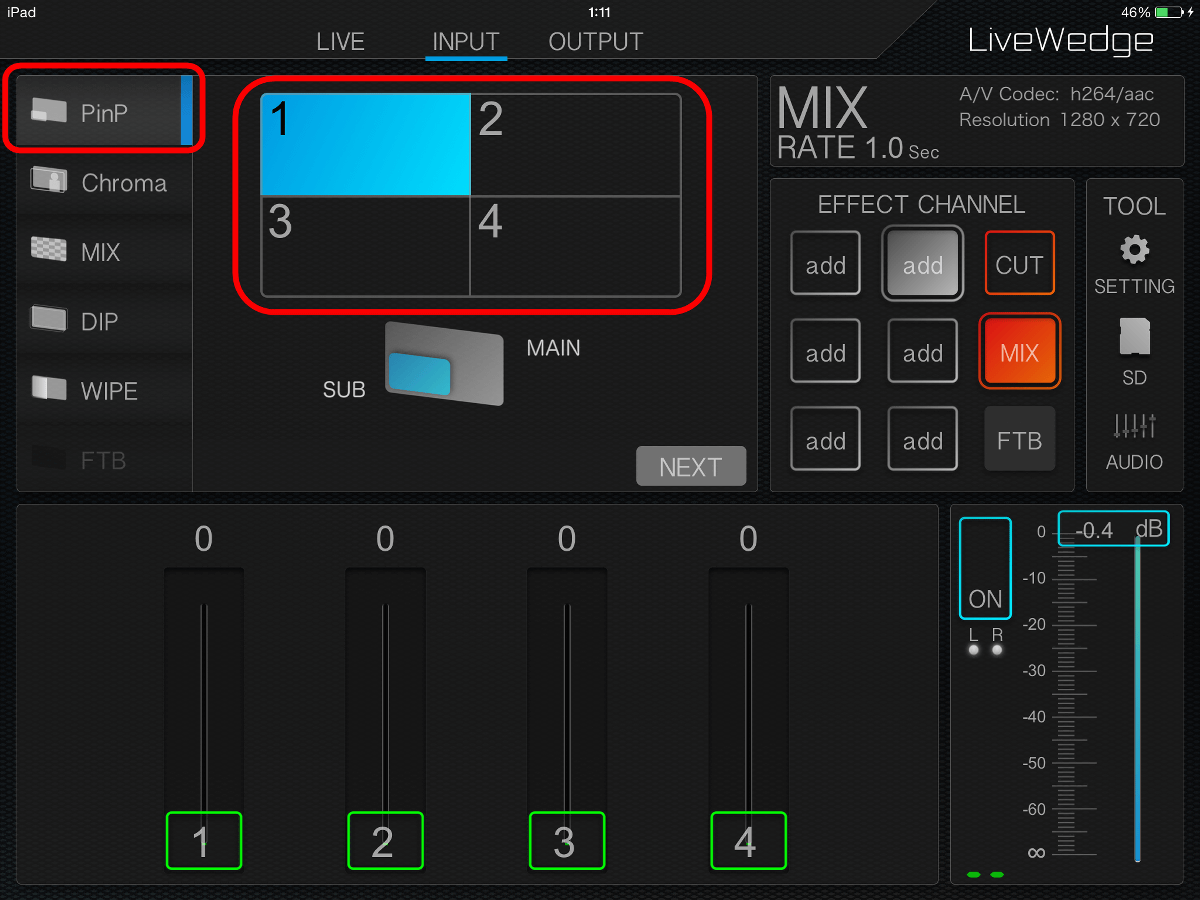
Since the tutorial starts when you launch the application, it may be easier to understand if you are new to the first time. A fader assigned the number "1" to "4" is a switching fader of the video input to the HDMI terminal.

In "Preview touch area", images from each camera are displayed. Also, tablet's advantage is that you can tap this area directly with your finger to select the image.
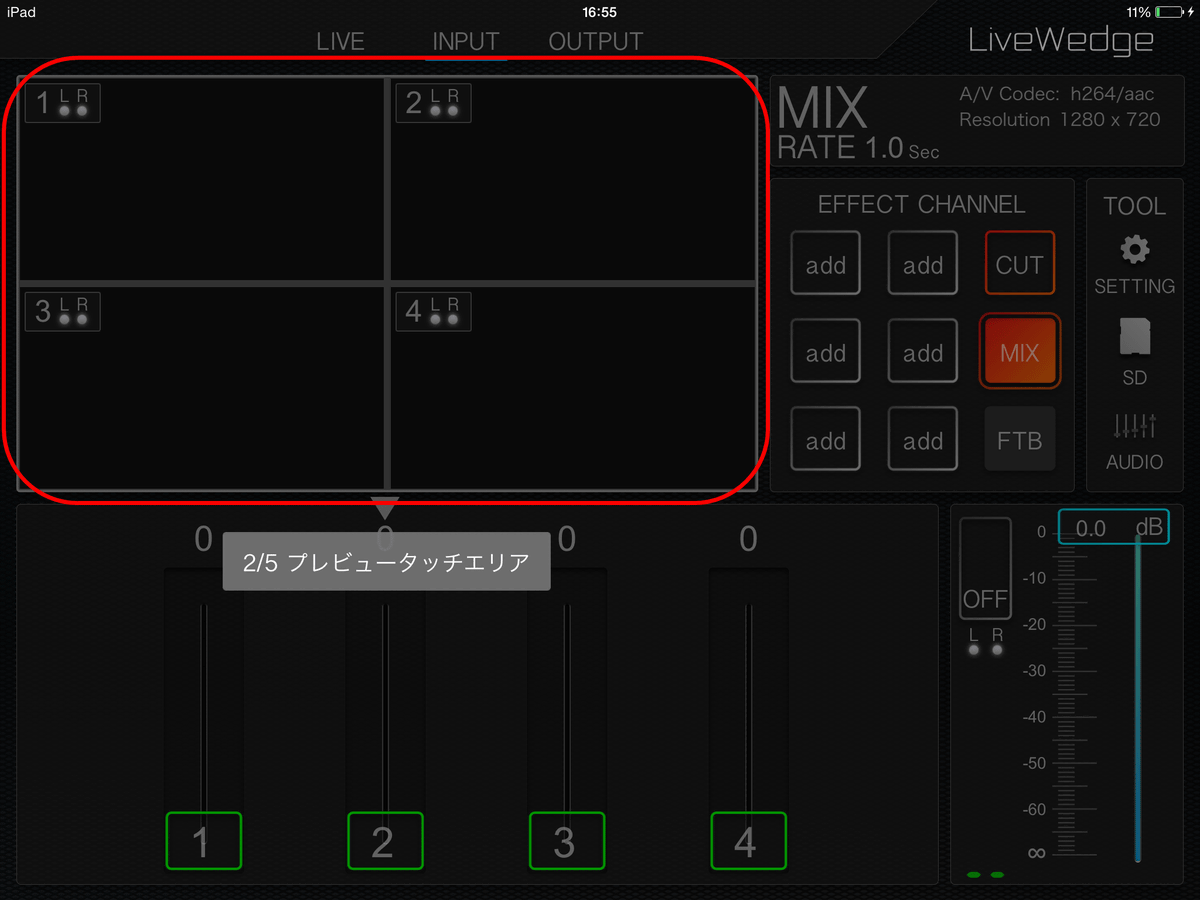
In "Change mode", you can check live distribution, preview of input video, and video after switching.

It is possible to assign 8 settings including "6 user settings" to the "effect channel". If you assign frequently used effects and favorite settings, you can call it immediately by tapping it is convenient.
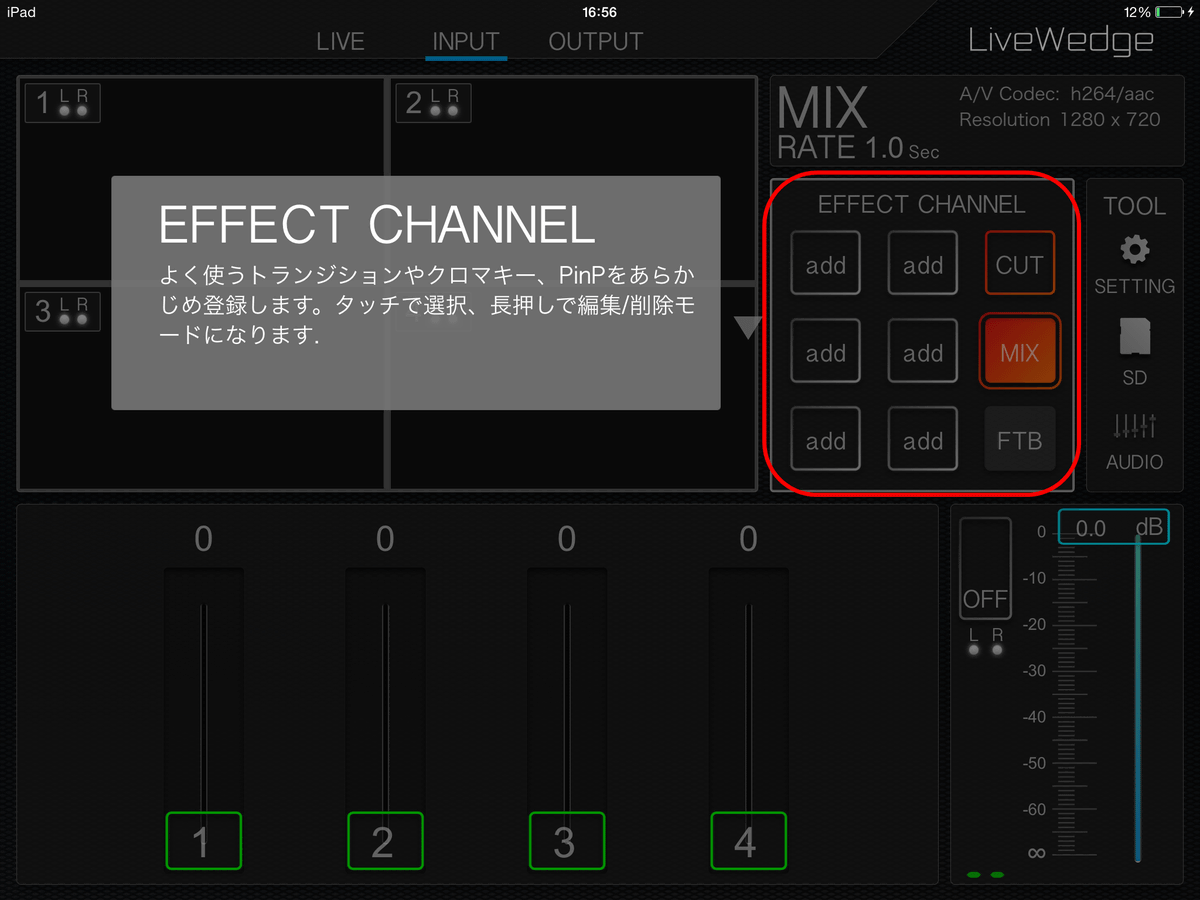
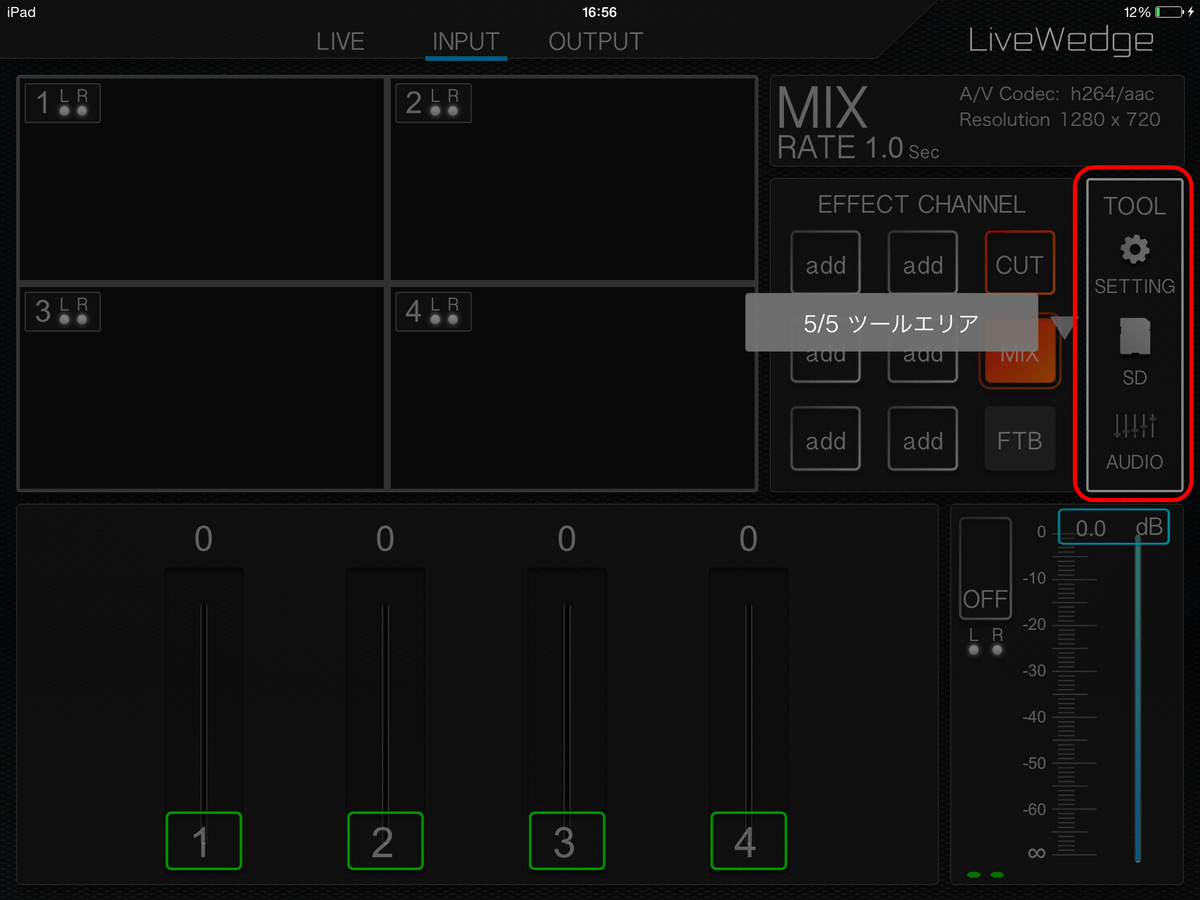
From "Tool Area", you can set video / audio settings and SD card related settings.
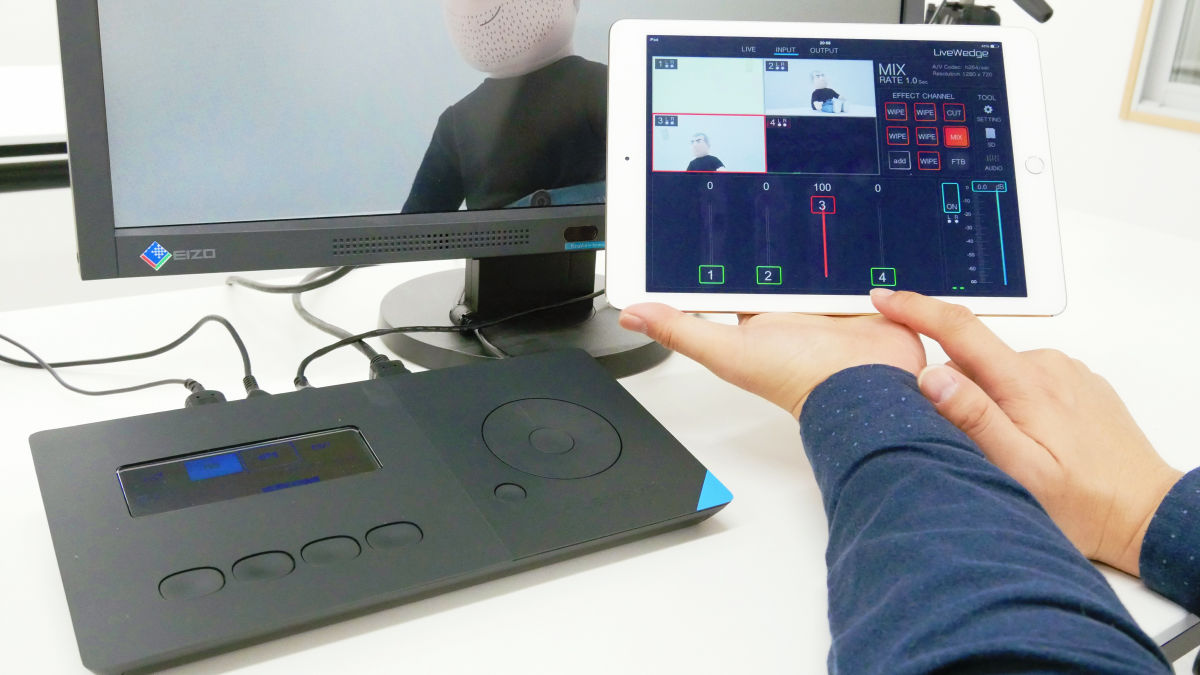
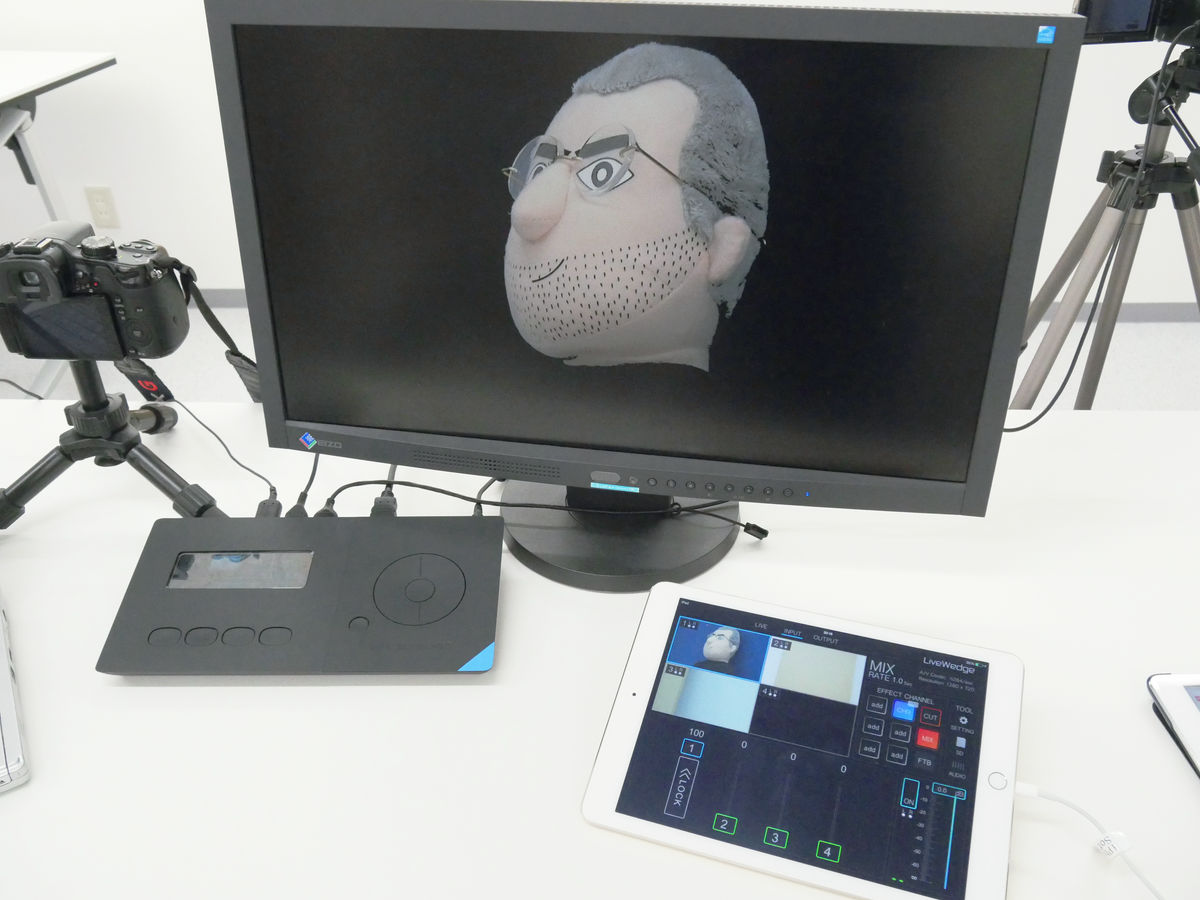
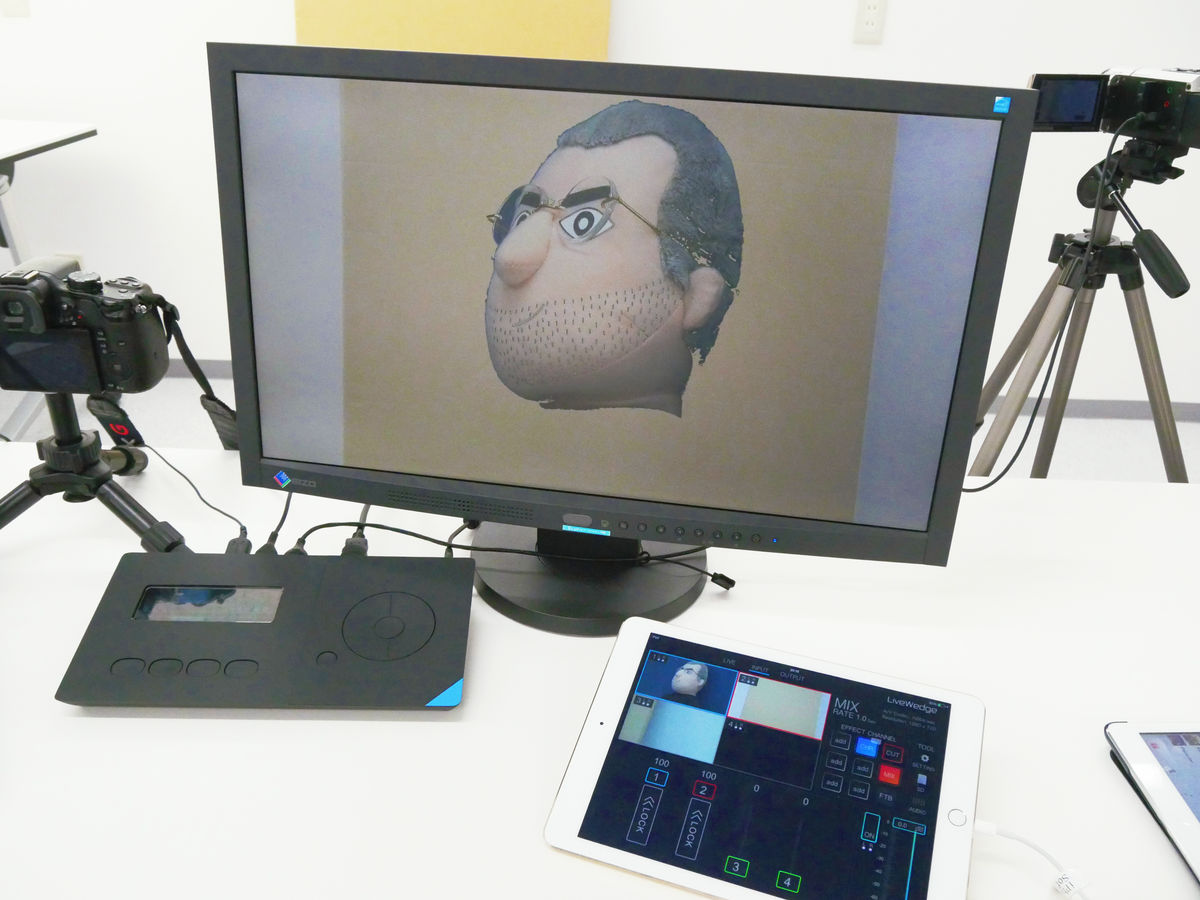
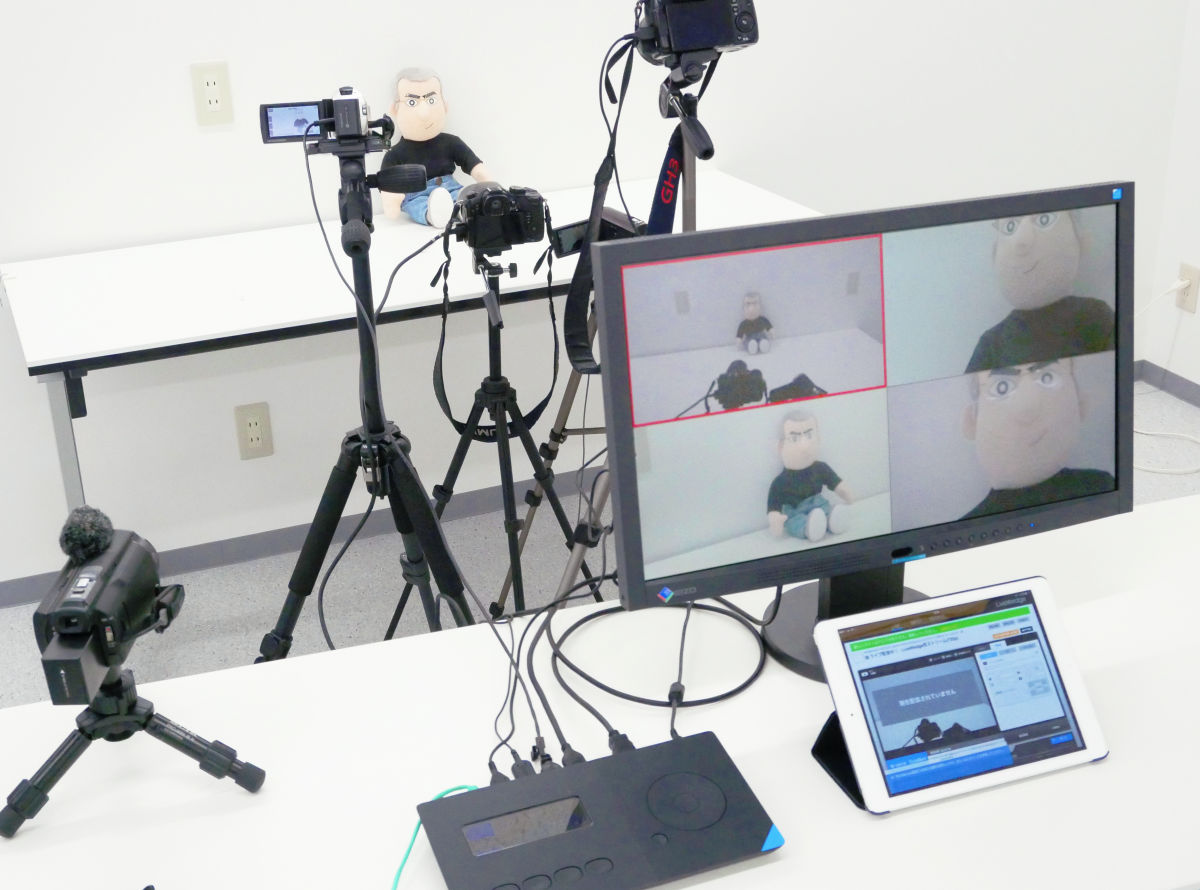
I set 4 cameras and preview display at once. In the back table, material for shooting, Live Wedge main body and iPad Air 2 on the front side table, and display for video confirmation set.

There are four HDMI cables connected to the camera and an HDMI cable for the preview screen connected to LiveWedge. There is a Lightning cable connected to the iPad Air 2 on the right, but this is for securing the power supply. When you start the application, the screen lights constantly and the battery consumption becomes fast, so it is safe to connect the power supply something.
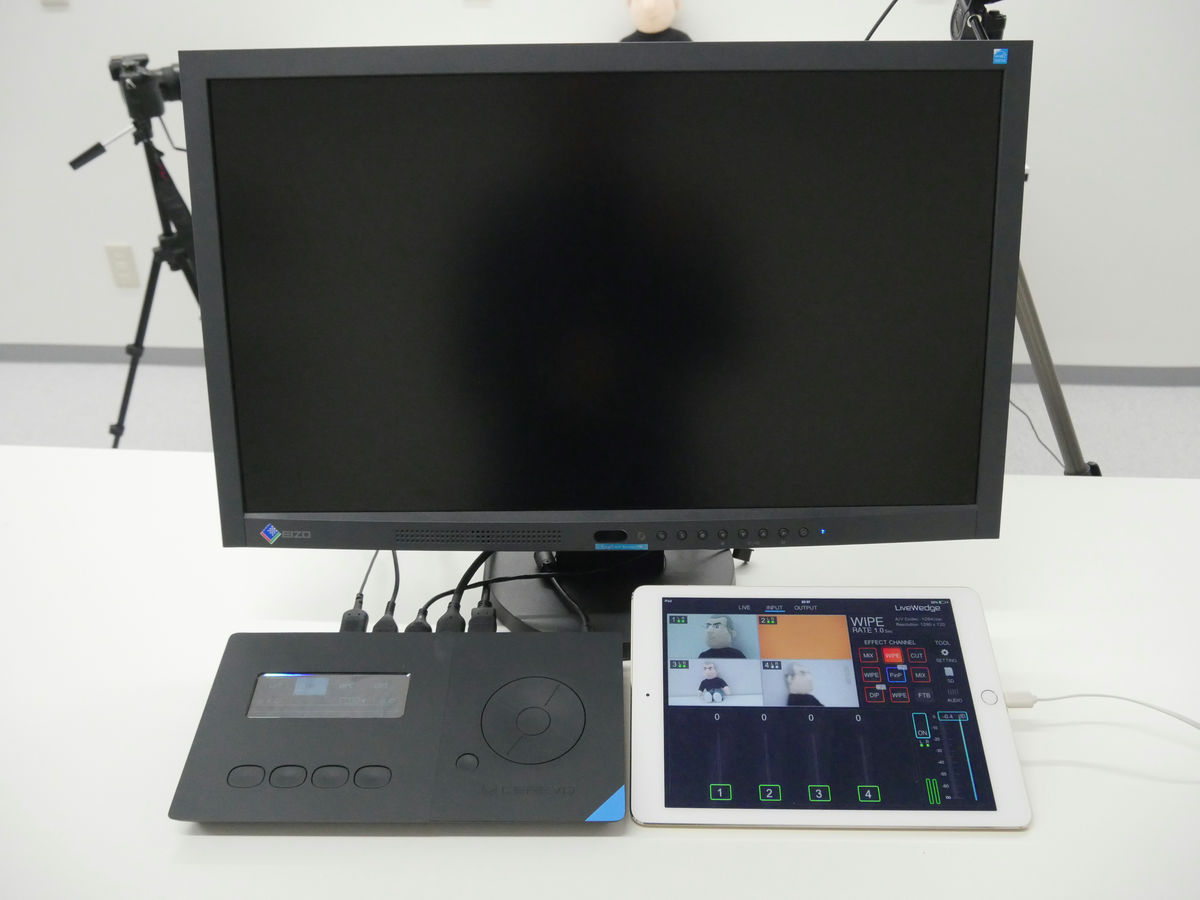
Protective rubber pads are included with the product so that the tablet can be placed on the LiveWedge for use. By placing it on the LiveWedge main body like this, it is possible to take a wider working space and more conveniently.

◆ I tried to manipulate the picture in various ways
As soon as the setting was completed, I decided to mess with Alecolle. Just by raising the fader without thinking about anything, the image will be displayed on the preview screen. Since operation and display are directly connected, latency (delay) to operation is not felt at all, so it seems that you can operate without stress. In the following movie, images were switched according to the fader's operation, and we tried "crossfade" which switched while mixing the two images.
Cerevo 'LiveWedge' and iPad were used to crossfade video - YouTube
◆ Setting the effect channel
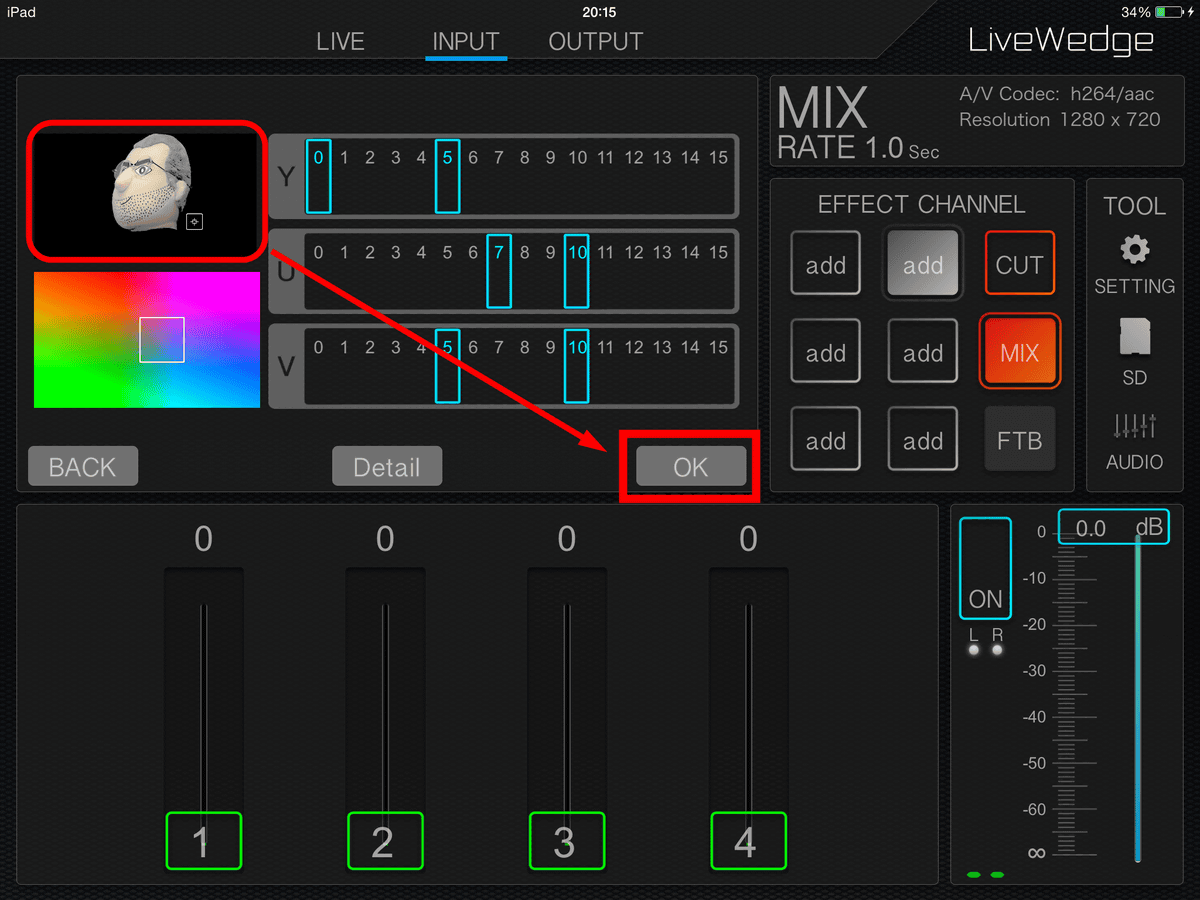
Actually, the above operation is "MIX"It was an operation with the effect channel selected. In the part written "EFFECT CHANNEL" displayed on the tablet screen, in addition to the preset "CUT" "MIX", you can register a total of eight effects total of eight effects.

· CUT effect
Next to MIX, the same preset "CUTTry selecting an effect.
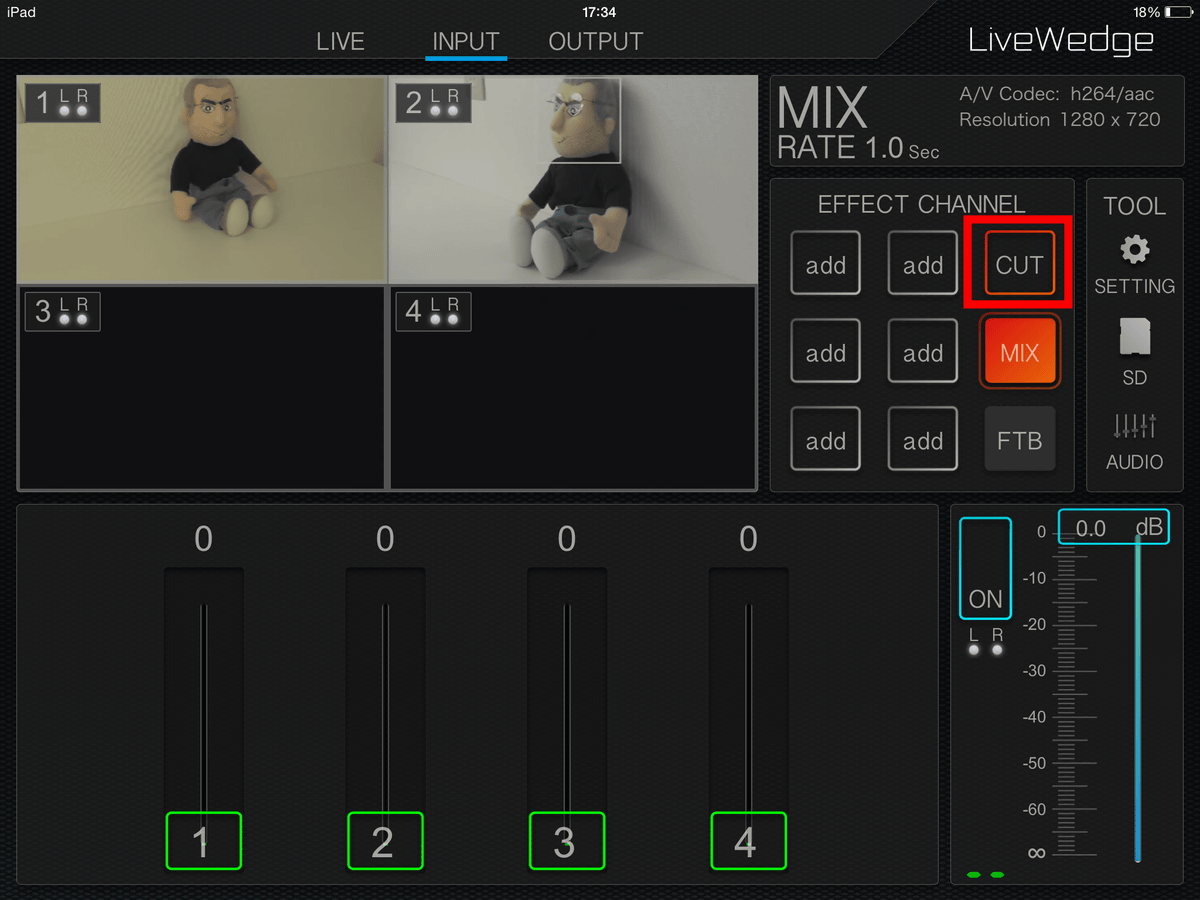
Operate the fader with CUT selected. Even without actually moving the fader up and down, the psychopathi and the picture switched solely by touching the numbers. Even if it says anything for switching fast enough to feel speed.
I tried switched the picture with Cerevo 'LiveWedge' and iPad on a daily basis - YouTube
· PinP effect
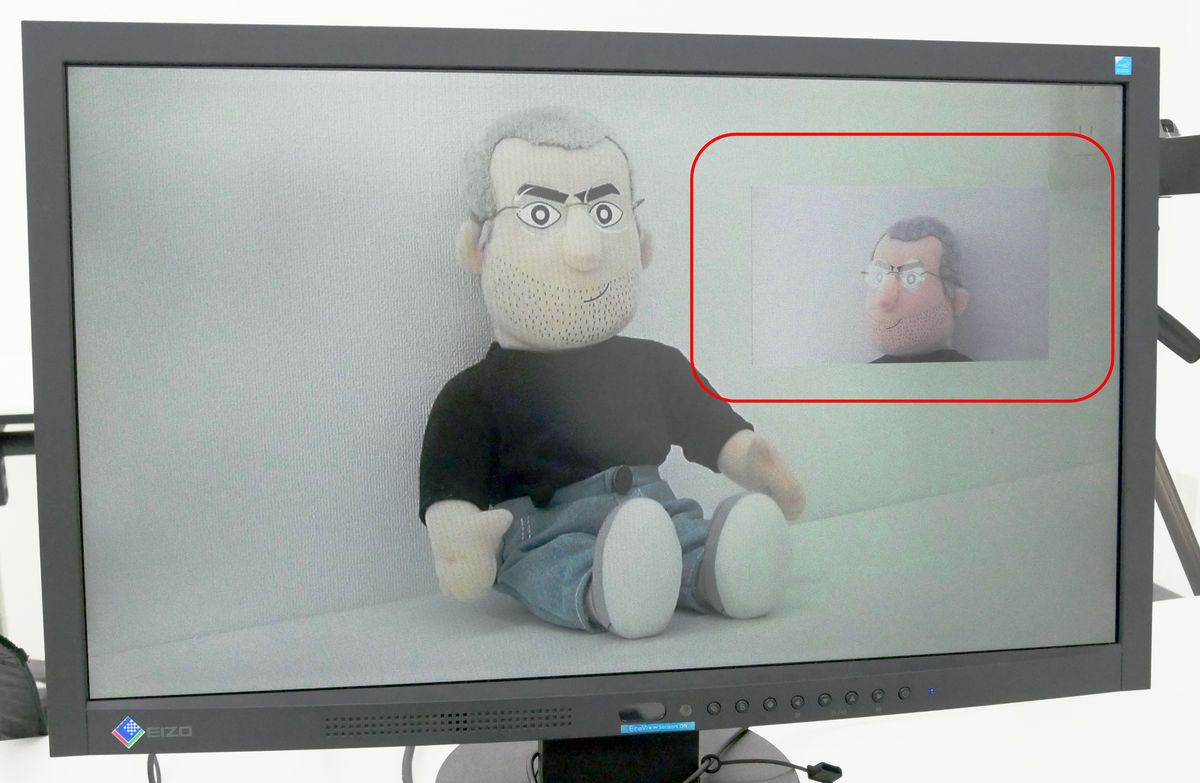
In LiveWedge, another image is superimposed and displayed on the imagePinP(Picture-in-picture), so-calledSuperimposeIt is possible to do. Select "PinP" from the left side of the screen and select the image you want to overlay.
This time, I will try inserting 3ch video into 1ch video. Double tap the image of 3ch with your finger and drag it up on 1ch.

Once you can adjust the size and position, tap again at the end. Then, the sub image became on the main image. It is also possible to work with intuitive operation just by operating the screen with fingers.
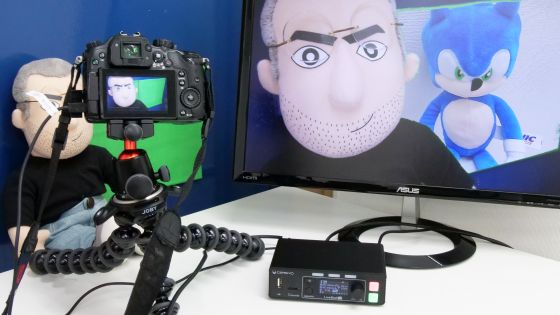
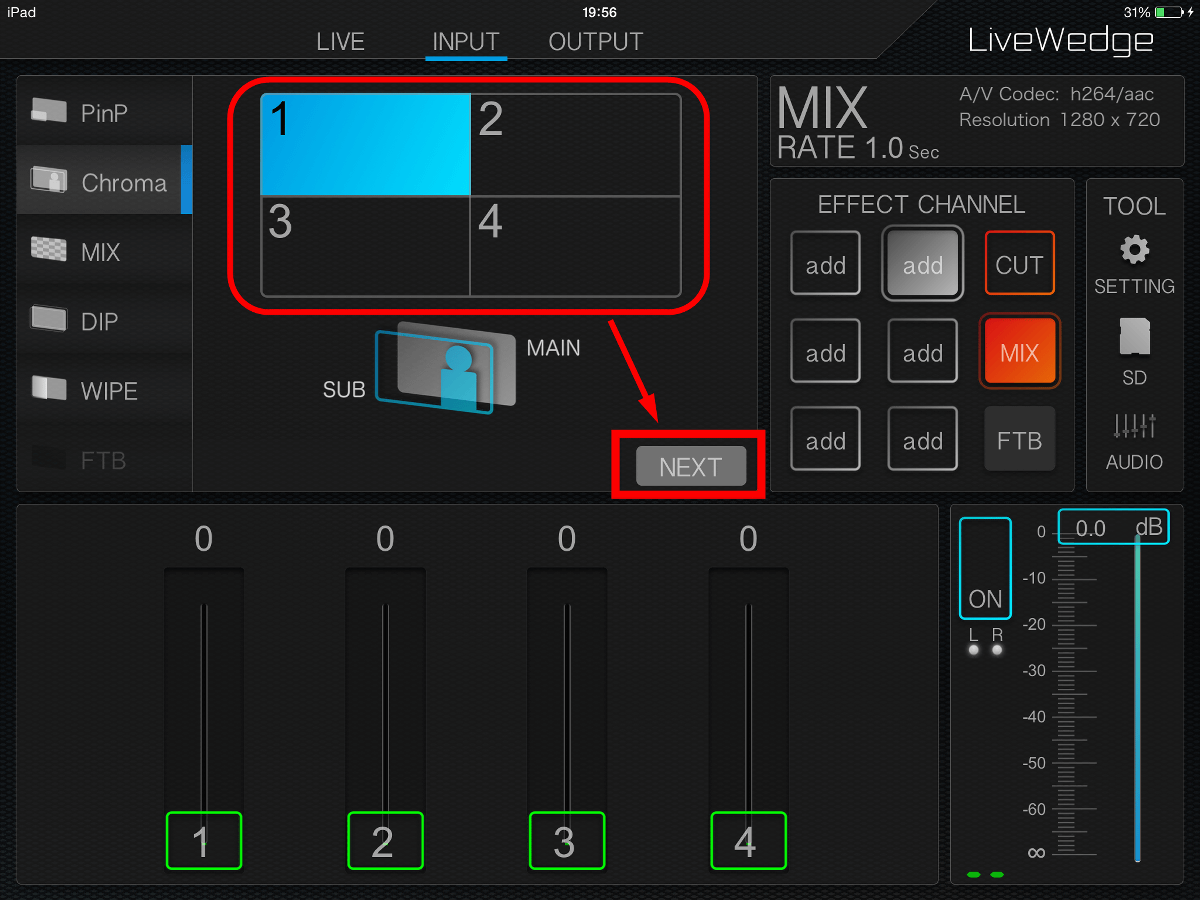
· Chroma effect
Combine with backgroundChromakey synthesisYou can do. Select the channel of the video you want to synthesize and tap "NEXT".
Move the slider "Y" "U" "V" or move the white frame displayed in the image to select the color to be transmitted.
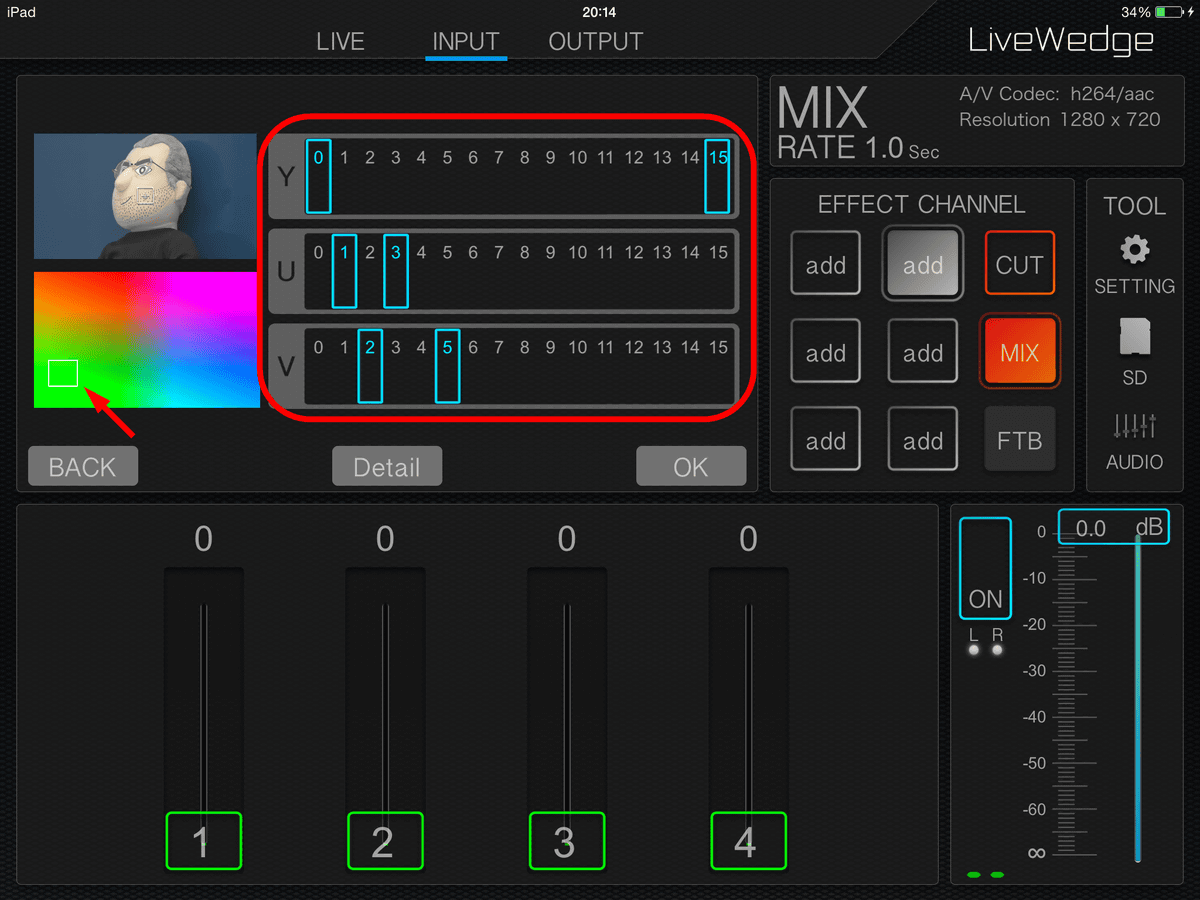
If the background color can be successfully selected, only the necessary part will be displayed on the selection preview screen. Tap "OK" when the desired setting is made.
Similarly, the image with the background color disappeared on the preview screen. If you raise the fader of another channel in this state ......
Only the part of the face was superbly synthesized with the background. Although it is not as precise synthesis as the latest video work with advanced computer processing, considering that it is processing in real time it is possible to synthesize chroma key with remarkably high precision and surprisingly easily It was.
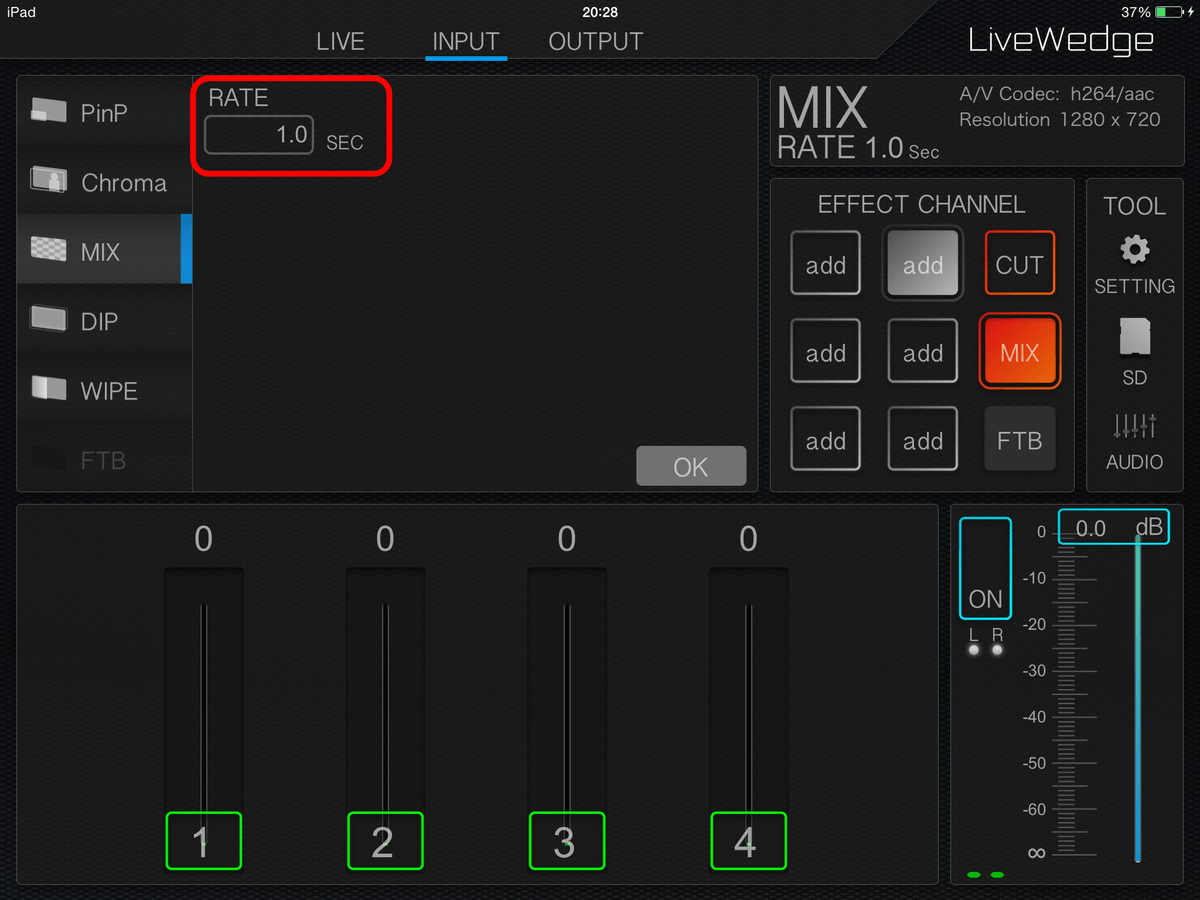
· MIX effect
Although it is the MIX effect as described above, in addition to manual fader operation, it is possible to perform auto fade operation that automatically switches by tapping the video part. The auto fade speed can be set in units of 0.1 second on the "RATE" screen.
· DIP effect
"DIP"An effect is a type of fade that moves from one image to another, but while crossfading another color (image) that has been set in advance. On the setting screen, you can set the fade speed to "RATE" and select the image to be inserted between "DIP SOURCE".
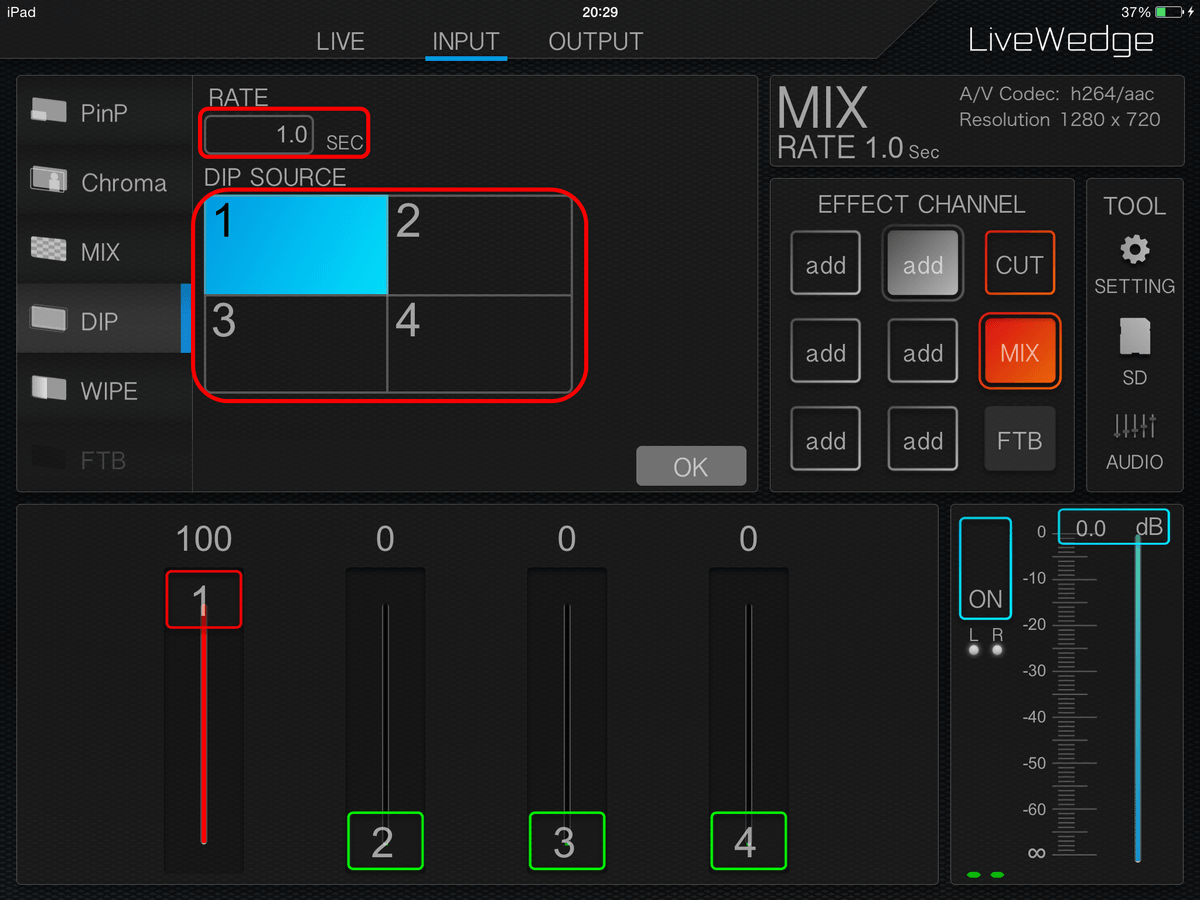
By using this effect, you can insert another image in the middle when crossfading the two images. In the following movie, you can see that a dark blue background color is inserted between the two images.
Cerevo "Live Wedge" "DIP effect" tried to crossfade video - YouTube
· WIPE effect
"WIPEIn the effect, switch the screen by interrupting the next screen on the original screenWipe effectYou can put on. Set the wipe speed with "RATE" and select the wipe type with "PATTERN". If you check "REVERSE", you can reverse the direction of the wipe.
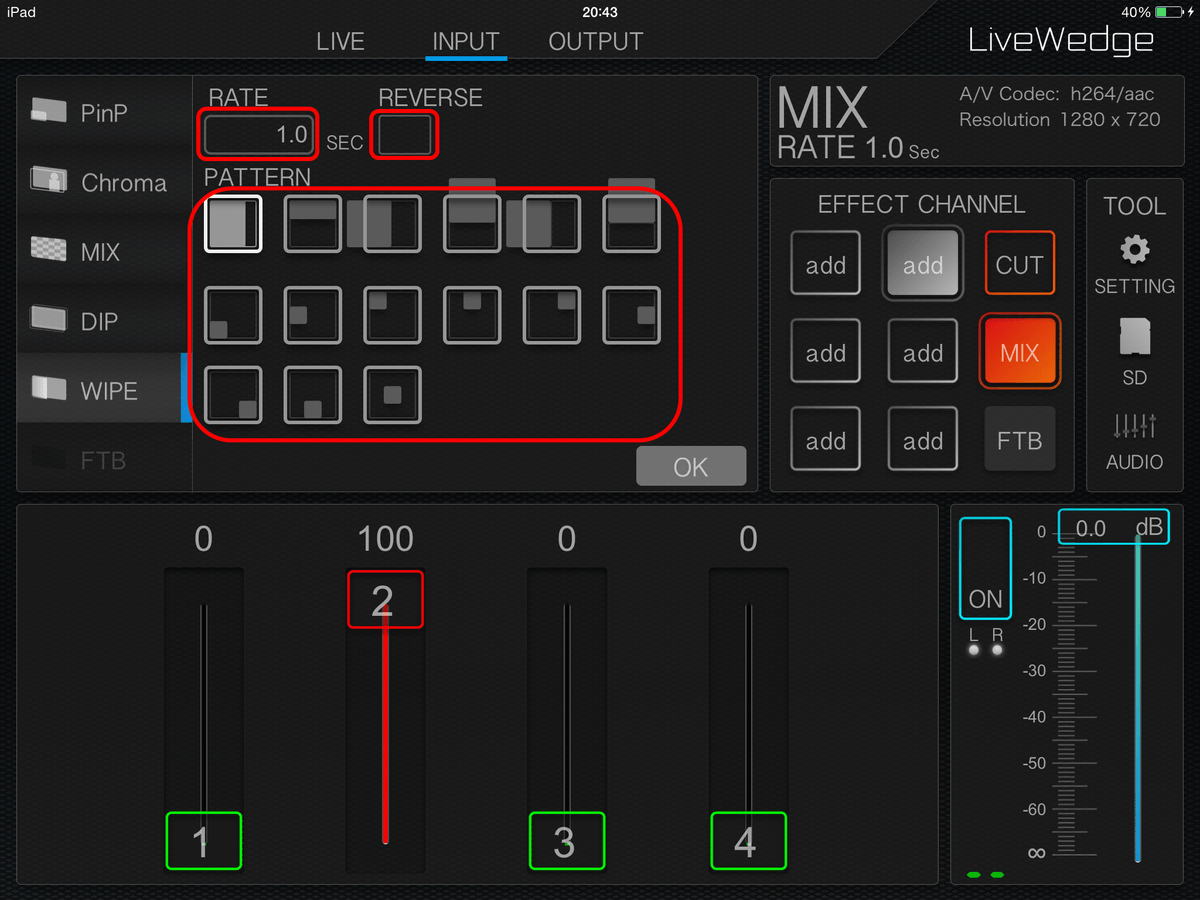
In this way, by connecting the images while combining various effects, it is now possible to add changes to the one-pattern image.
Cerevo 'LiveWedge' in real time with various images - YouTube
◆ Live video distribution function
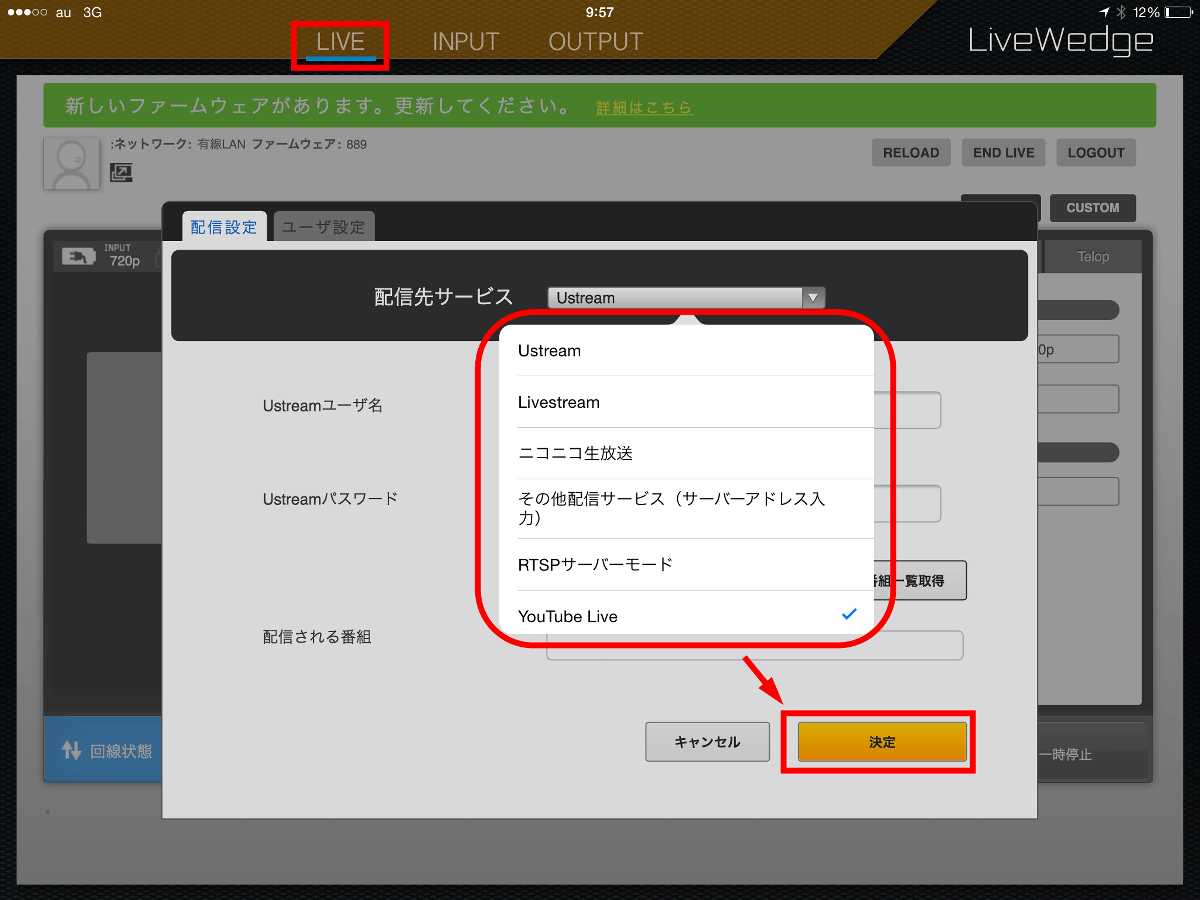
LiveWedge is not just a video switcher, it has a big merit that it has a live distribution function inside the main body. With the camera, LiveWedge, and iPad, it has the big feature that it can easily start streaming distribution.
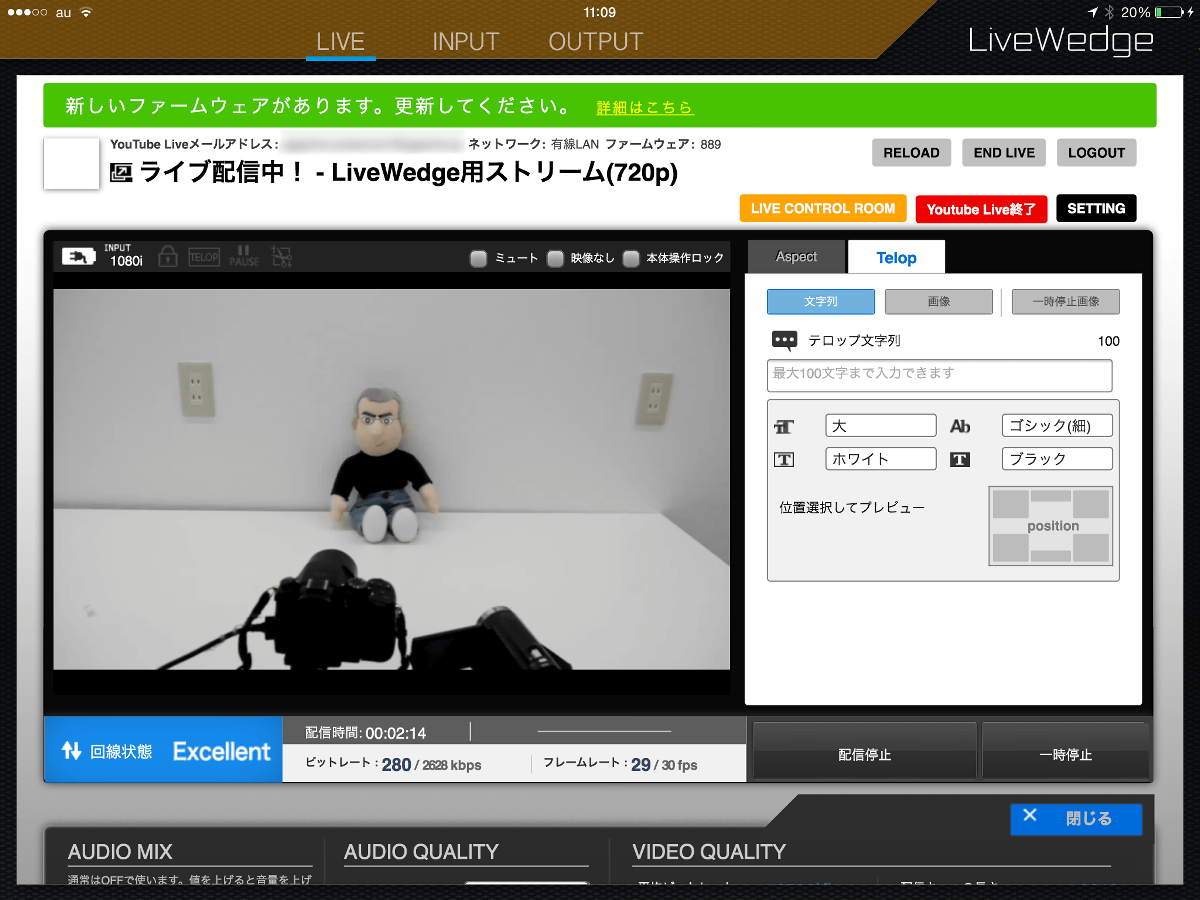
To do live distribution, tap "LIVE" at the top of the application screen. Then, a list of available services is displayed, so select the appropriate one and tap "Decide". I chose YouTube Live this time.
Using the LiveWedge application, it is convenient to be able to create new distribution events on the application and to set streams to determine the quality of video capturing.
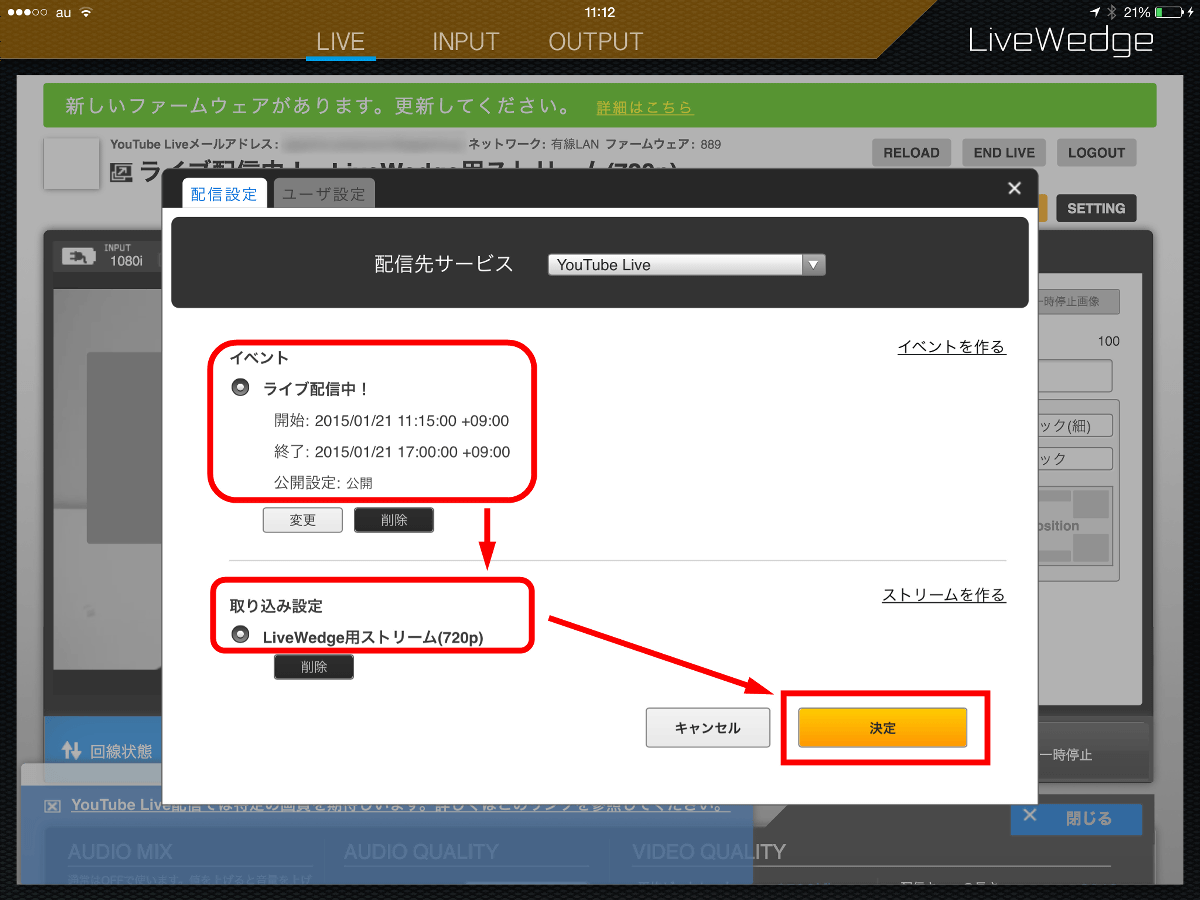
We were able to start streaming delivery successfully by setting up new events and streams.
In addition, the following functions which could not be tried this time will be implemented at the time of product release.
· The SD card recording function, the movie from SD card and the reading function of sound material will be supported by the update after the release. Also, the image quality of the recording function is 720p at the present time, and the response to 1080p is examined afterwards.
· Audio monitor function on iPad will be supported by update after release.
In the case of streaming delivery from the destination, it is important to compact the equipment compactly. Especially when it comes to relaying a number of cameras, the tendency is particularly intensified. In that respect, Live Wedge which compactly summarizes the video switcher and the live distribution function, and which can make a variety of directing if tablets are used seems to have great advantage.
LiveWedge is accepting formal reservations from Cerevo site today. Reservations are to proceed in order from those who applied for advance pre-order. Tax-free price is 95,237 yen, which is scheduled to be delivered sequentially after shipment starts in January.
LiveWedge - Cerevo
http://livewedge.cerevo.com/ja/

Related Posts: