"PNotes" that you can paste a sticky note on which you wrote a note on the other's desktop via the network
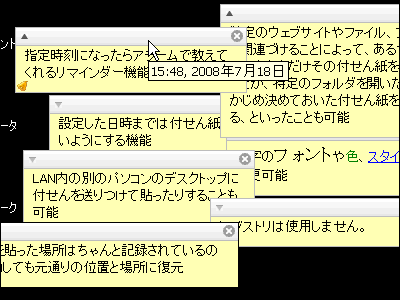
Open source software that can paste a sticky note on the desktop and can easily paste the sticky note on the other's desktop via the network is called "PNotes"is. Backup, synchronization with FTP server, password addition, skin change, rema cindar, tab, group management etc features such as. It can be started on Windows.
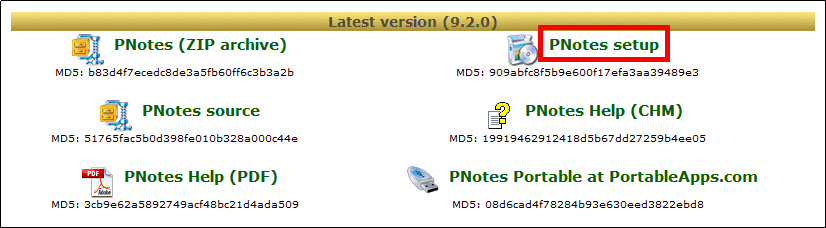
Download, installation, Japaneseization, sending of sticky notes, skin changes etc. from the following.
PNotes
http://pnotes.sourceforge.net/index.php?page=5
Since I download the installer this time, click "PNotes setup" on the above site.
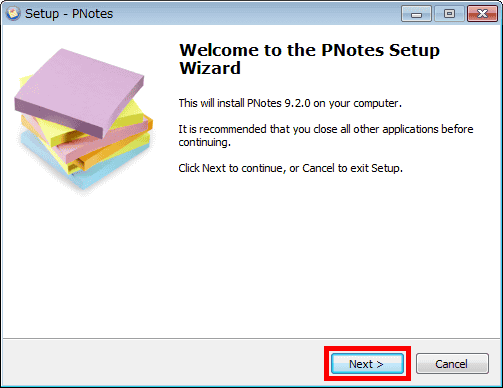
Run the downloaded installer.

Click "Next"
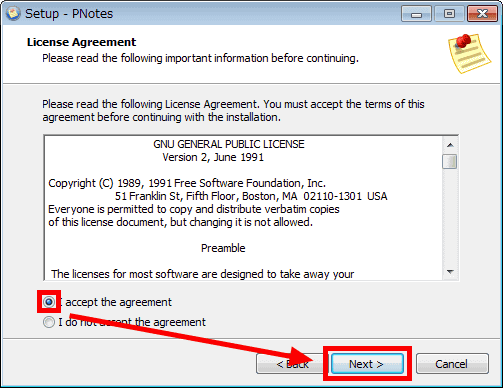
Please check above and click "Next"
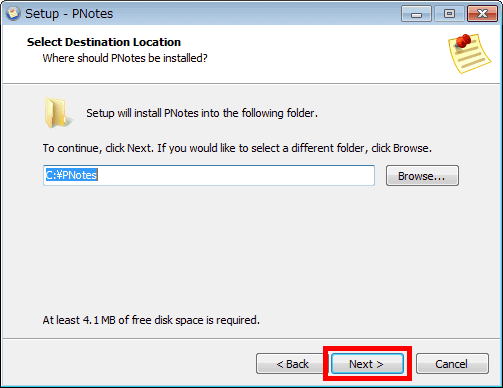
Click "Next"
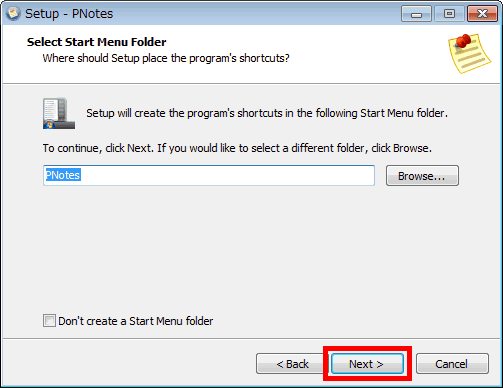
Click "Next"
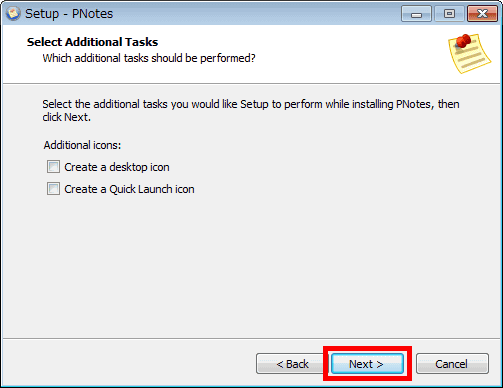
Click "Next"
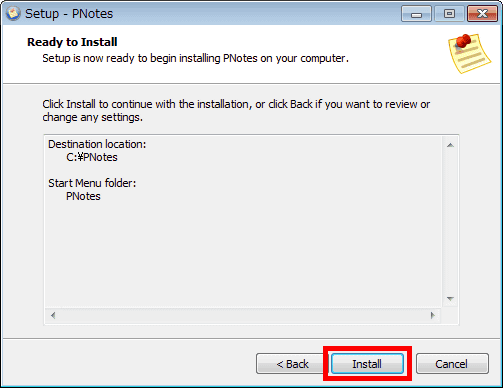
Click "Install"
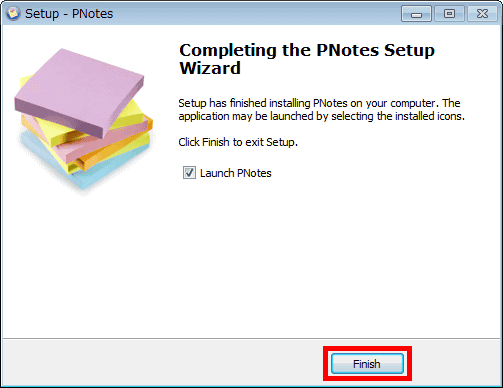
Click "Finish"
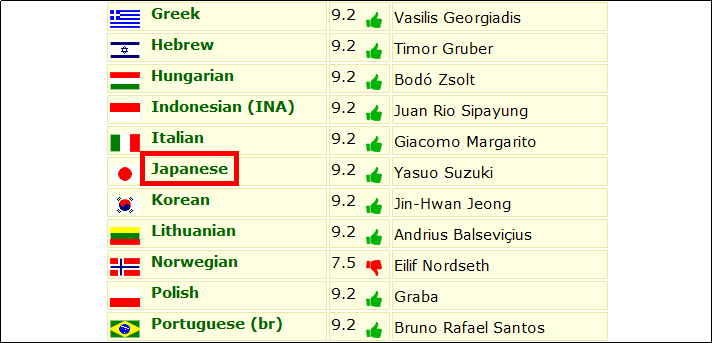
Next, in order to set up Japanese,Pages with language packsClick "Japanese" in the middle row.
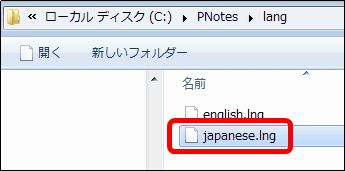
Download the downloaded ZIP fileExplzhExtract it with "etc" and place "japanese.lng" in C: \ PNotes \ lang.
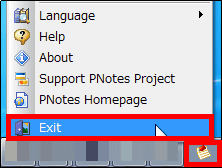
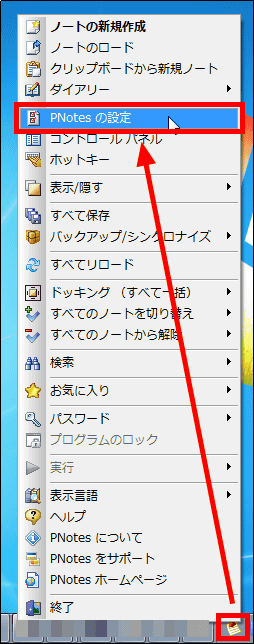
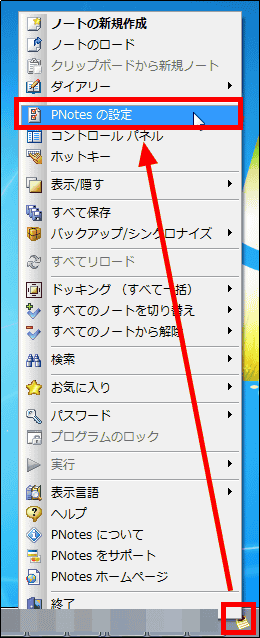
Since it is necessary to restart PNotes, right click on the icon in the task tray and click "Exit".
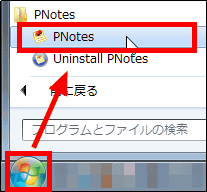
Click "PNotes" from the start button.
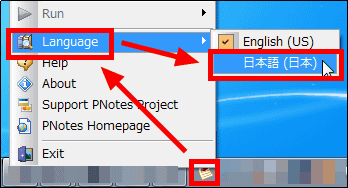
Japanese setting is completed by right clicking on the icon displayed in the task tray and selecting "Japanese (Japan)" from "Language".
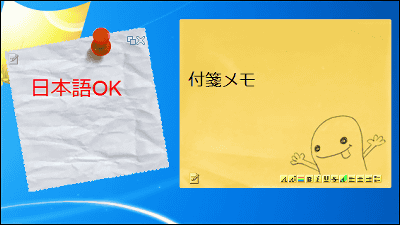
◆ Creating a note (sticky note)
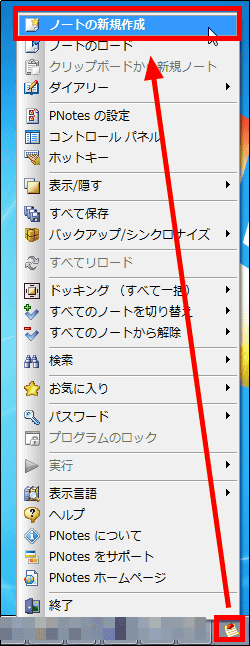
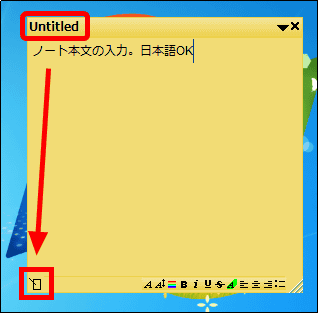
To create a new note, right click on the icon in the task tray and click "Create new note".
Notes will be displayed.
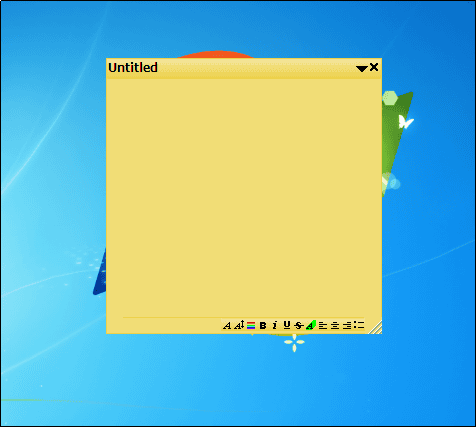
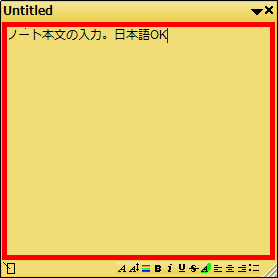
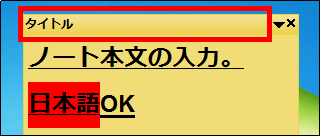
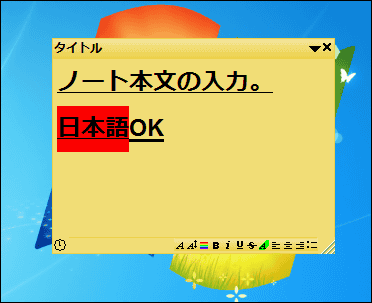
To enter the text of the note, click inside the red frame and enter the text.
To change the title (here Untitled) at the top, click on the icon at the bottom left.
Enter the title name and click "OK".
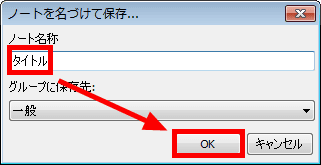
The title is changed.
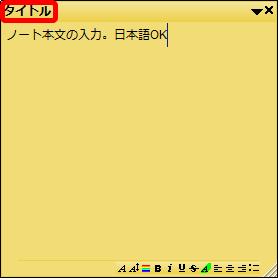
In the character setting in the lower right, it is possible to change the character like this.
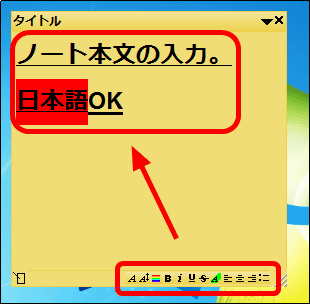
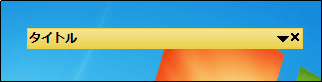
Click on the title part at the top ... ...
In this way you can collapse the text.
You can change the size of the note by dragging and dropping the icon in the lower right.

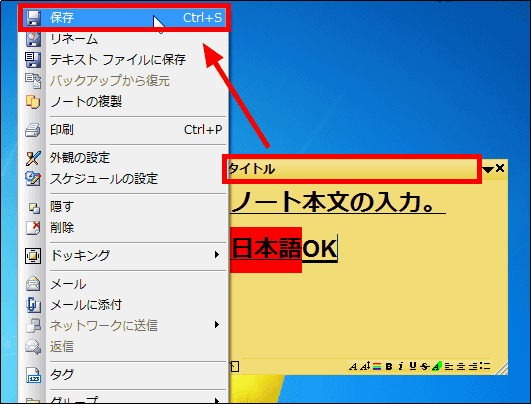
To save the created note, right click on the title part and click "Save" OK.
◆ Sending notes via the network
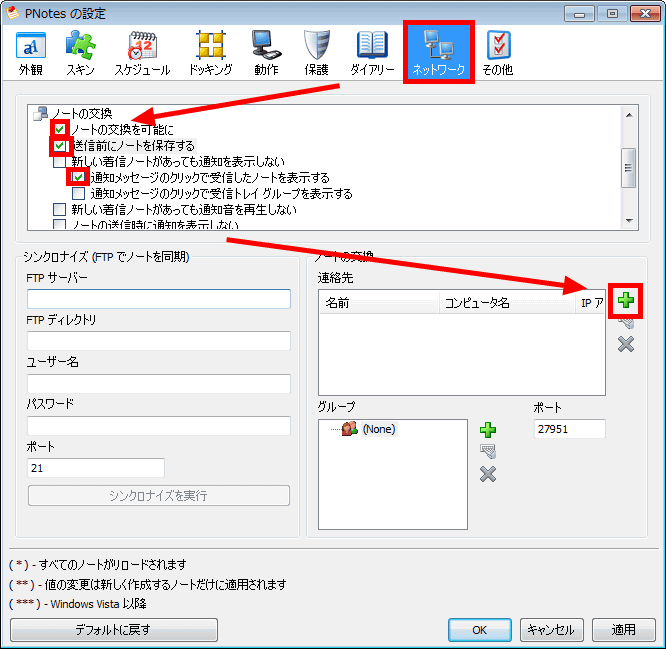
To send a note to the PC on which PNotes is installed over the network, right-click the icon in the task tray and click "Set PNotes".
Click "Network", check "Make note exchange possible" and click "+". In addition, here, I added a check in "Save notes before sending" and "Display notes received by clicking notification messages" in addition.
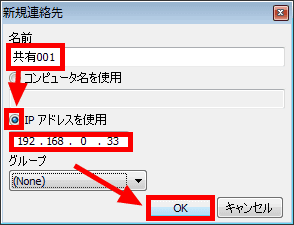
Enter a name, check "Use IP address" this time, enter IP address and click "OK".
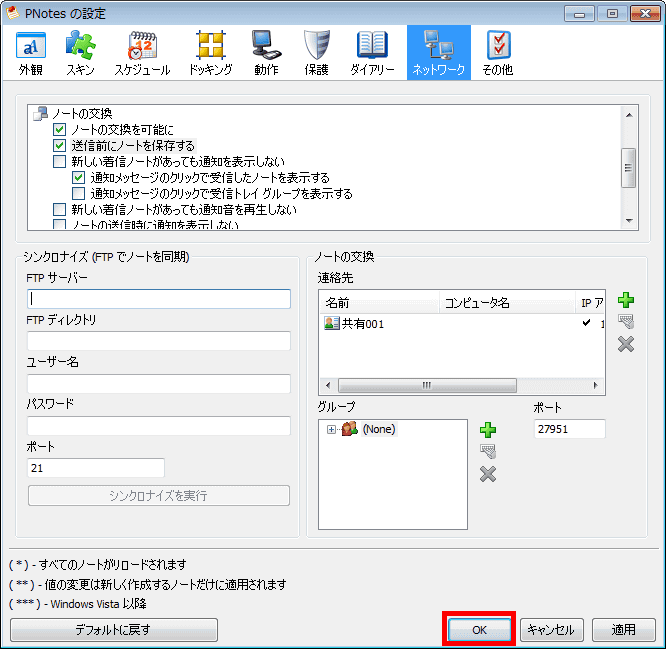
Click "OK" to complete the setting. The same setting is required for PC of the other side to exchange notebooks.
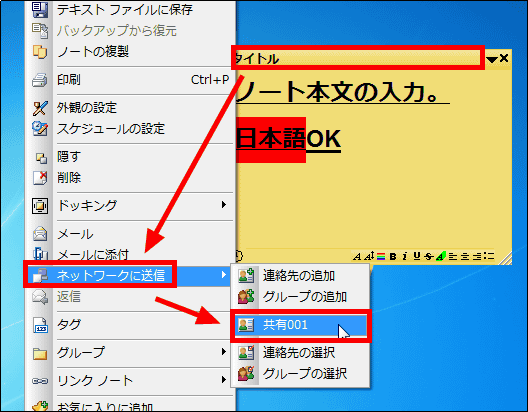
To send a note, right-click on the title part and select the partner to send from "Send to Network".
When a note reaches the other side, a pop-up is displayed, so click "Receive new note".
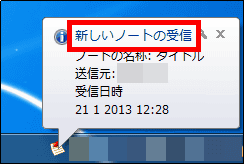
In this way notes are stuck on the desktop.
◆ Reminder function
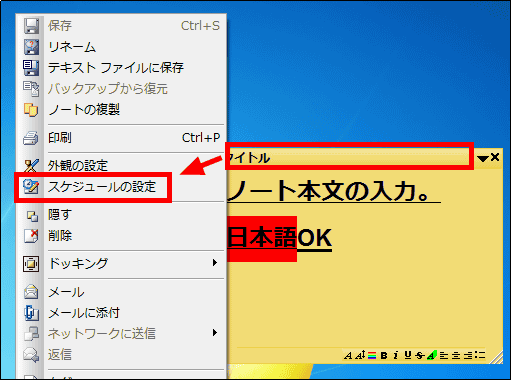
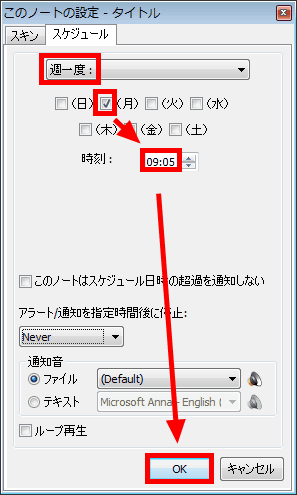
To use the reminder function, right click on the title and click "Set schedule".
Since the setting screen is displayed, click "No schedule" and set the schedule to be notified.
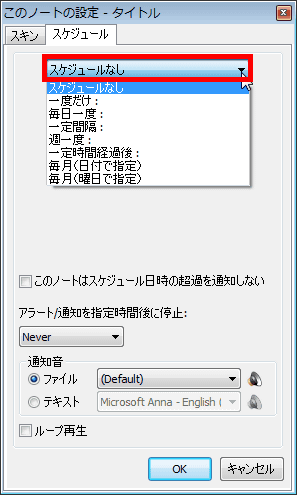
To set the schedule "once a week", set the day and time once a week and click "OK". Additionally, it is possible to add an excess notification of the schedule date and time, and add an alert setting.
◆ Manage all together
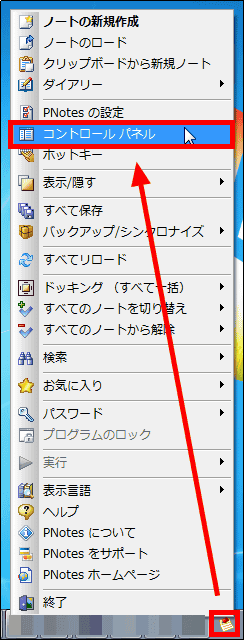
If you want to manage notes collectively, right-click the icon in the task tray and click "Control Panel".
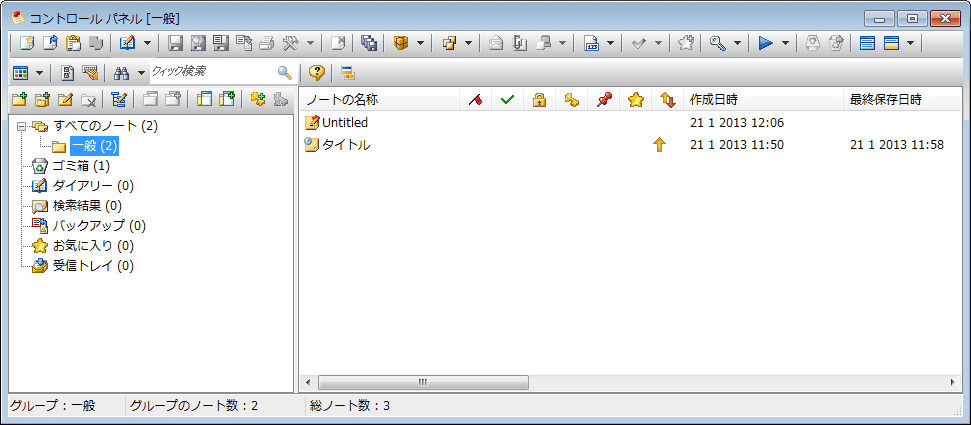
The following management screen is displayed and management can be done easily.
◆ Change of skin
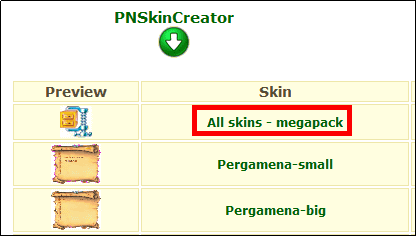
When changing the skin,Page with pack of skinsClick on "All skins - megapack" in.
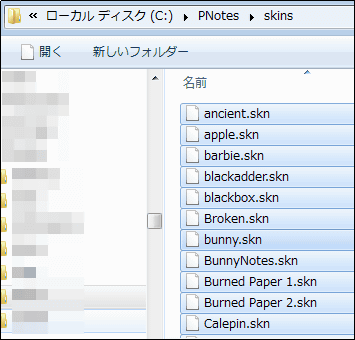
Download the downloaded ZIP fileExplzhExtract it with etc and put all the skin files in C: \ PNotes \ skins.
After restarting PNotes, click on the icon in the task tray and click "Set PNotes".
Click "Skin", select the skin to display and click "OK".

Skin is changed.

Related Posts: