I checked the handwriting function and writing comfort of Kindle's first handwritten memo function equipped device 'Kindle Scribe'
``
Amazon.co.jp: [New] Kindle Scribe Kindle Scribe (16GB) 10.2 inch display Kindle's first handwriting input function with premium pen
·table of contents
◆ 1: I wrote a handwritten note
◆ 2: I wrote a handwritten sticky note while reading
◆3: Procedure for sharing sticky notes externally
◆ 1: I wrote a handwritten note
Kindle Scribe has a function that allows you to create notes and take notes freely, a function to create handwritten sticky notes while reading a novel, and a function to add handwritten notes by importing external files.
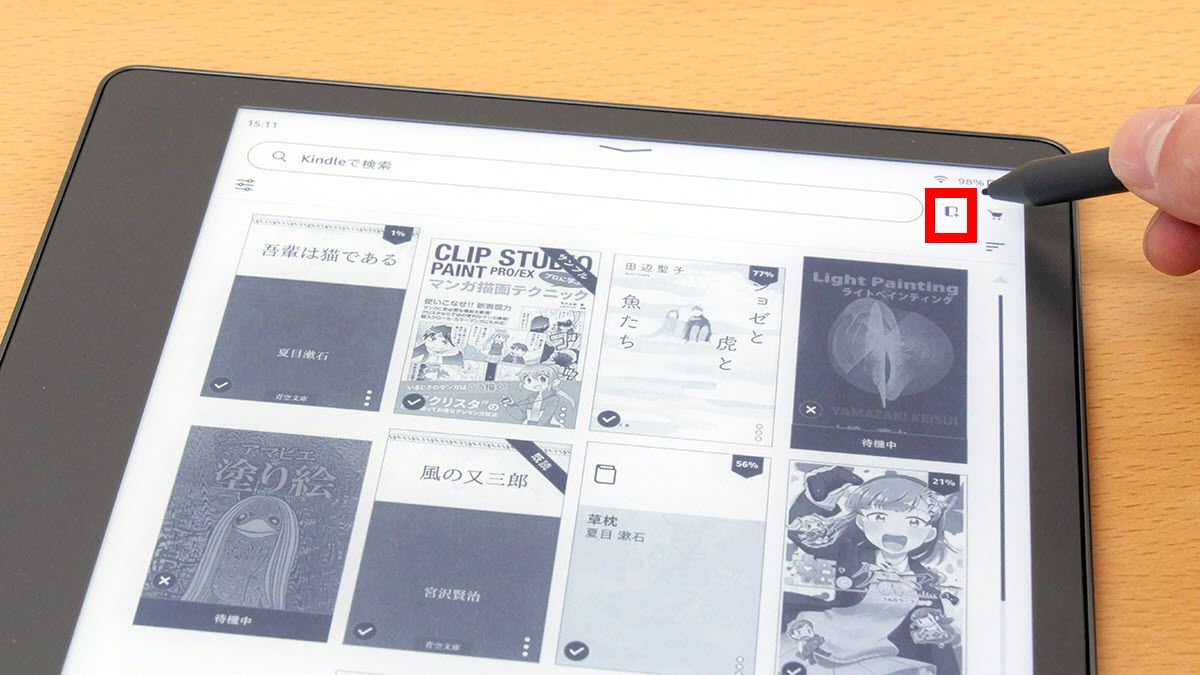
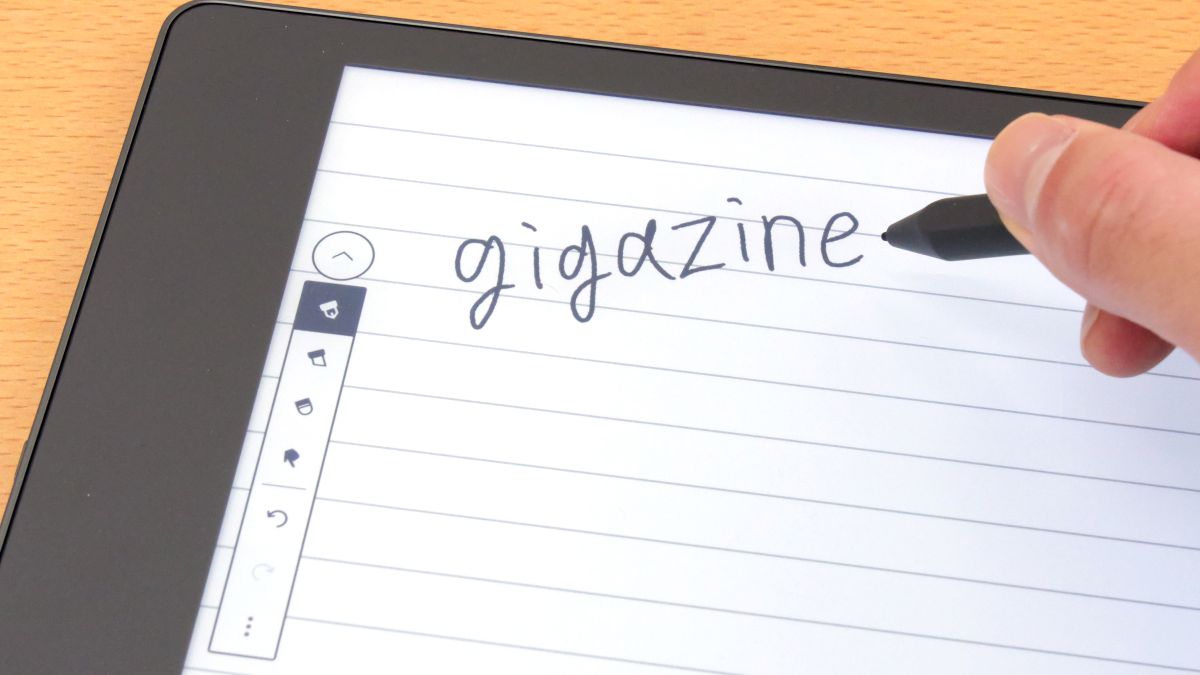
First, let's use the function to create a note and take notes. To create a new note, tap the red frame button located at the top right of the home screen.
Next, select a border template and tap Create.

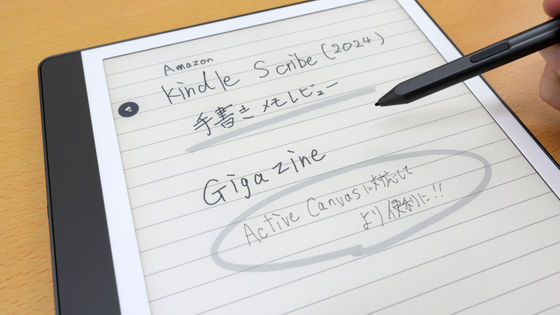
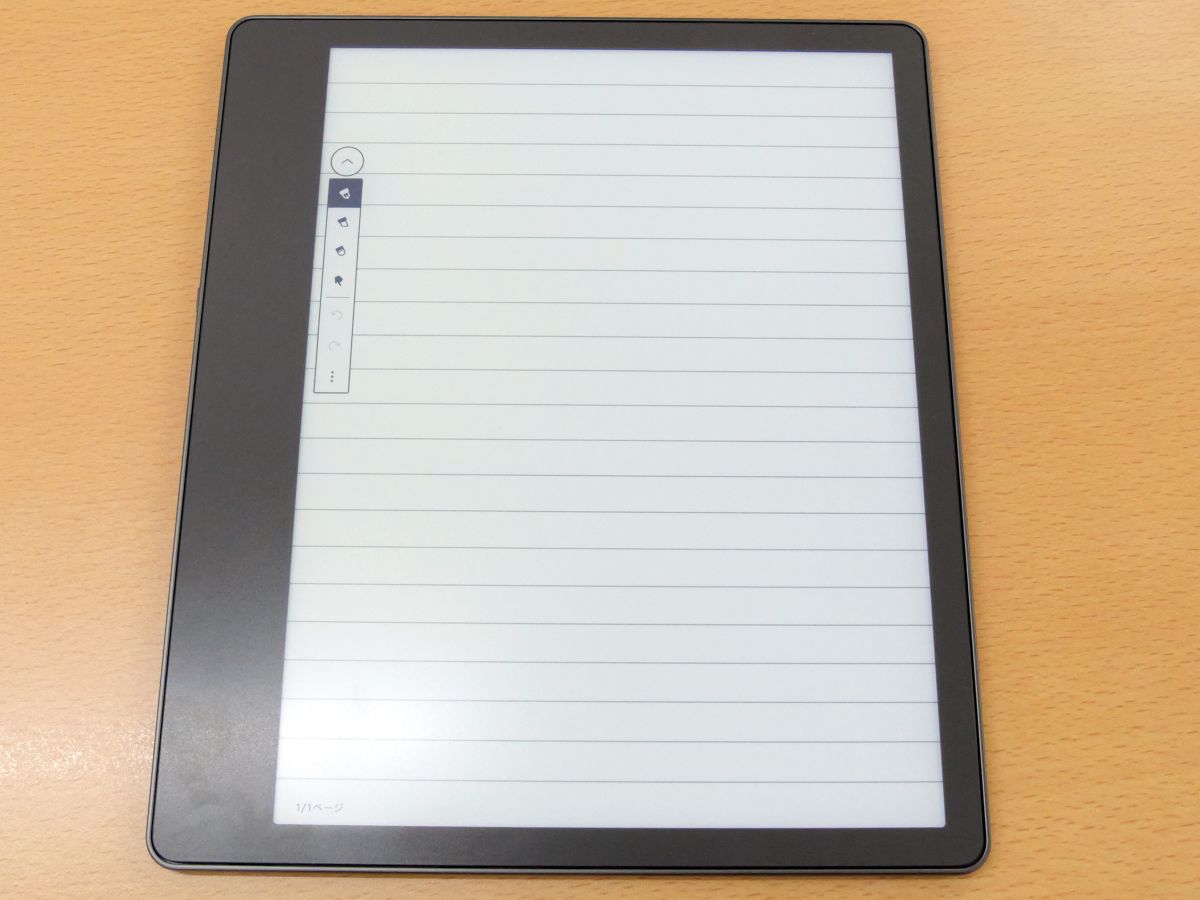
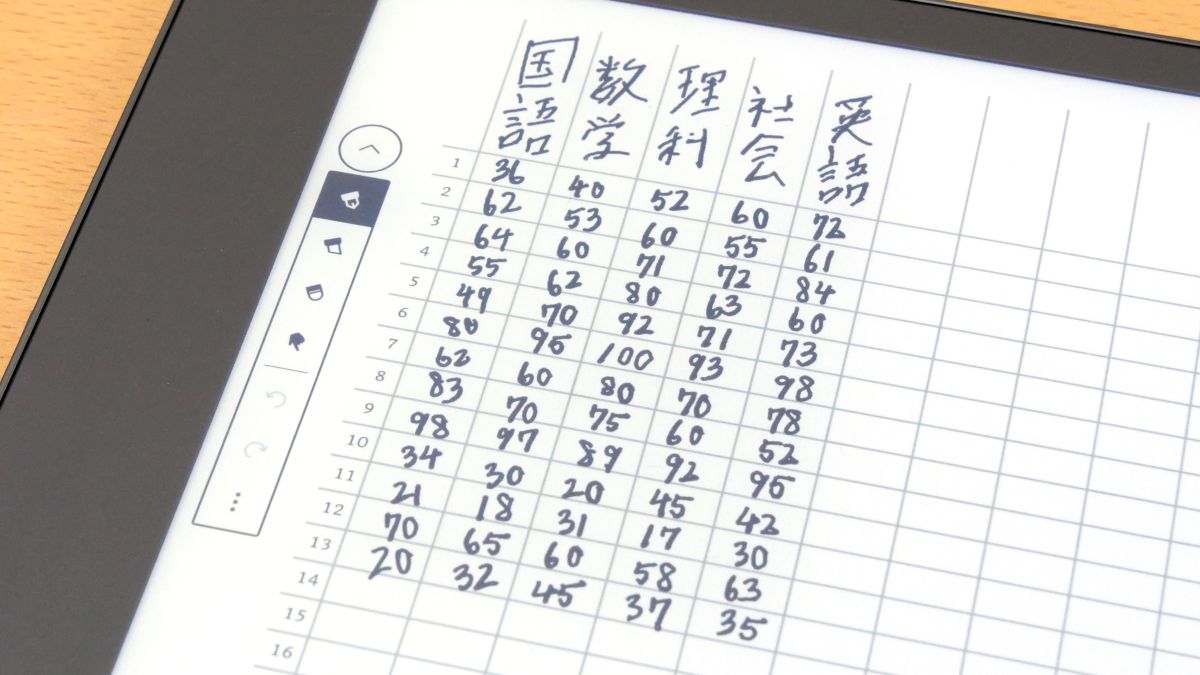
The created notebook looks like this.
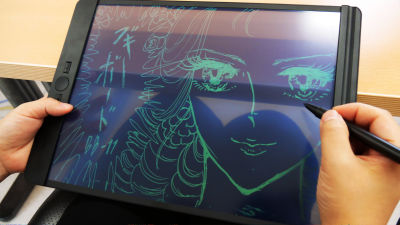
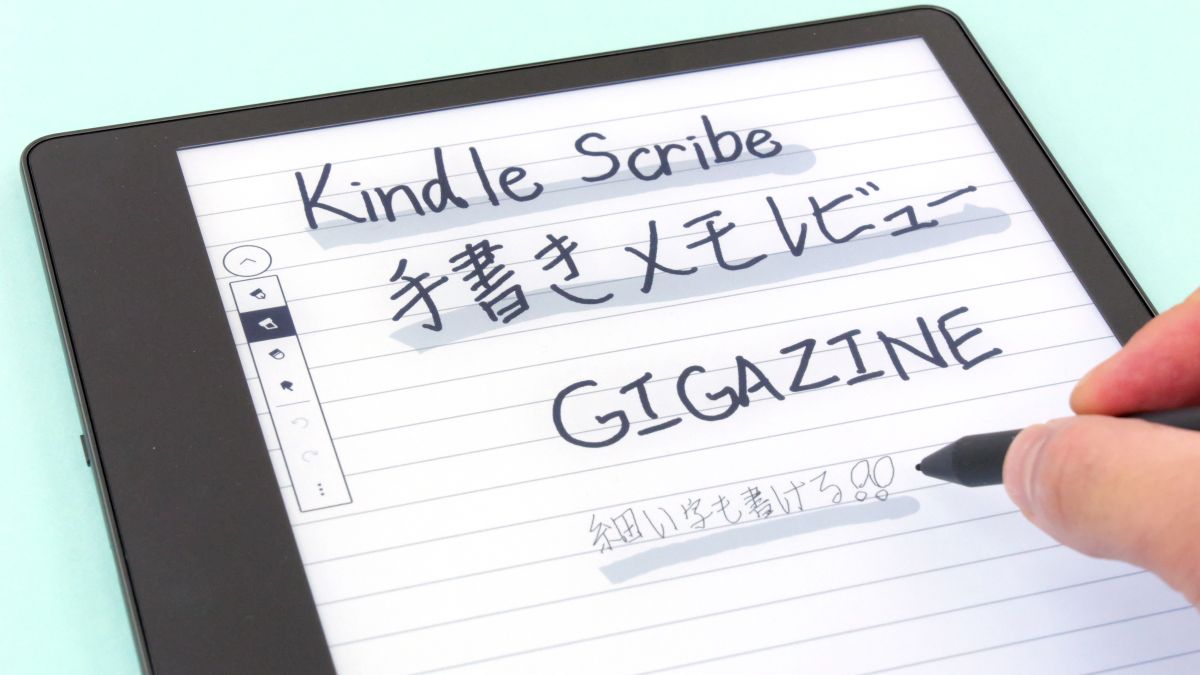
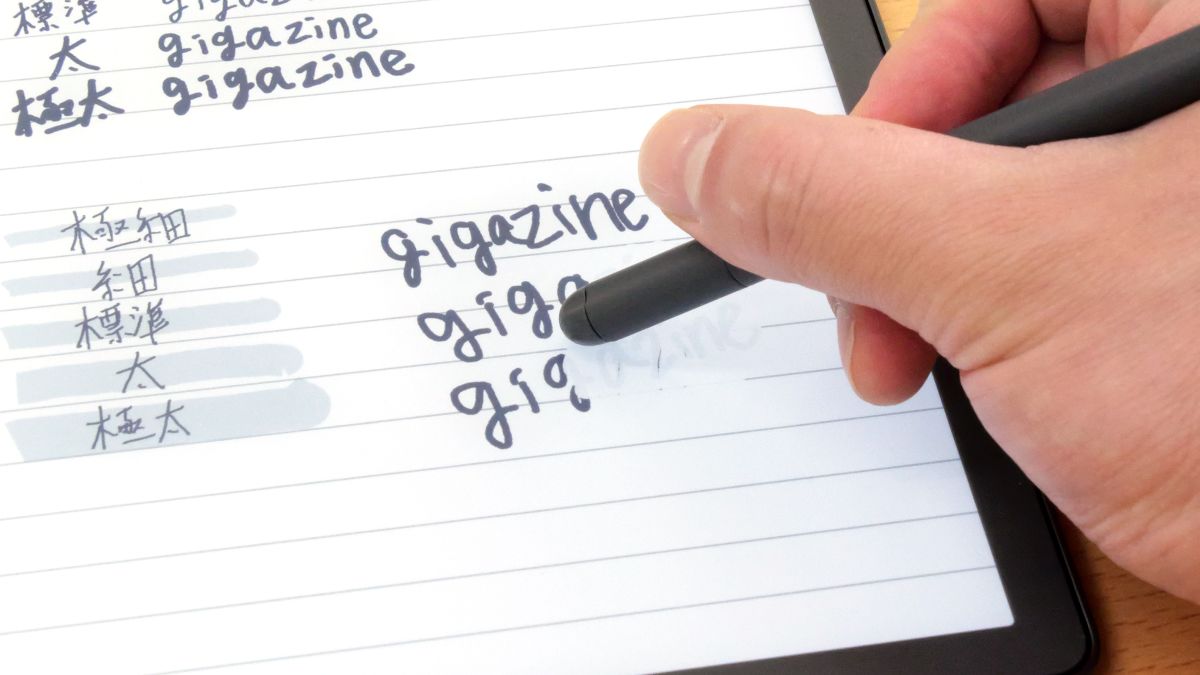
Lines cannot be written with a finger and must be written with the included pen. The writing feel is quite smooth, and even when I ran the pen quickly, it drew as I wanted.
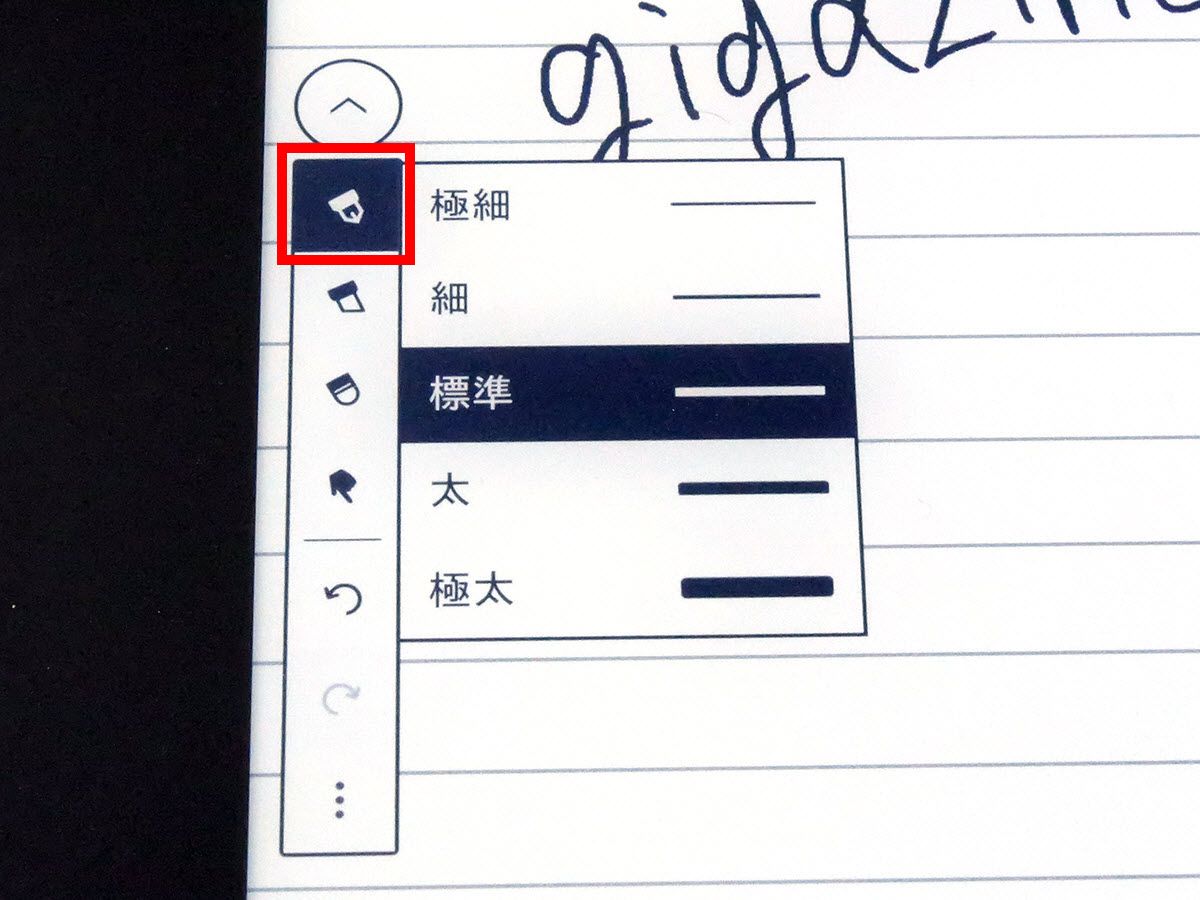
By tapping the pen mark in the menu on the right side of the screen, you can select the thickness of the characters from 5 levels: 'Extra-thin', 'Thin', 'Standard', 'Thick', and 'Extra-thick'. You can also move the menu to the left side of the screen.
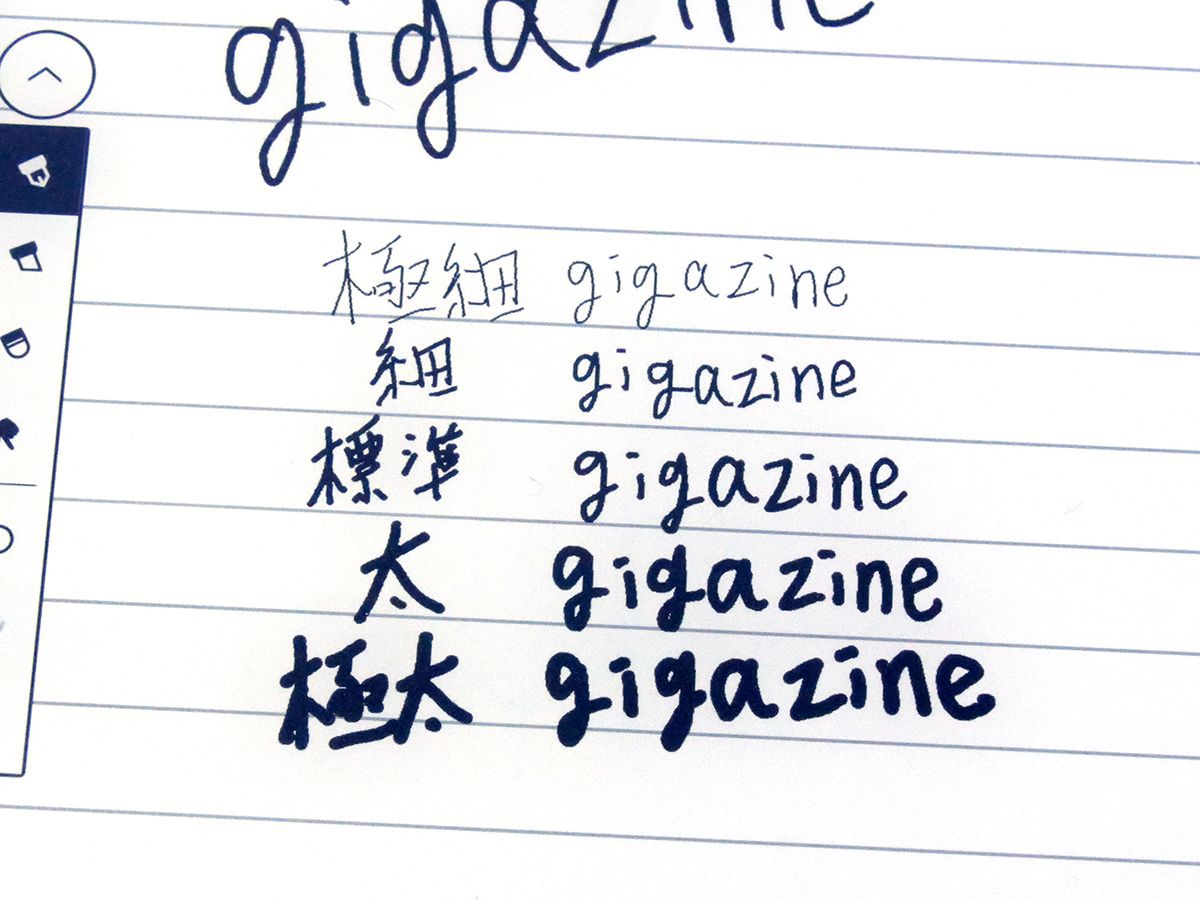
The thickness of each of 'extremely thin', 'thin', 'standard', 'thick', and 'extremely thick' is like this. The extra-fine is quite thin, so you can write kanji with a lot of strokes without crushing.
By tapping the red frame button, you can change to highlight mode. In addition, the thickness of the highlight can be set in 5 steps: 'Extra-thin', 'Thin', 'Standard', 'Thick', and 'Extra-thick'.

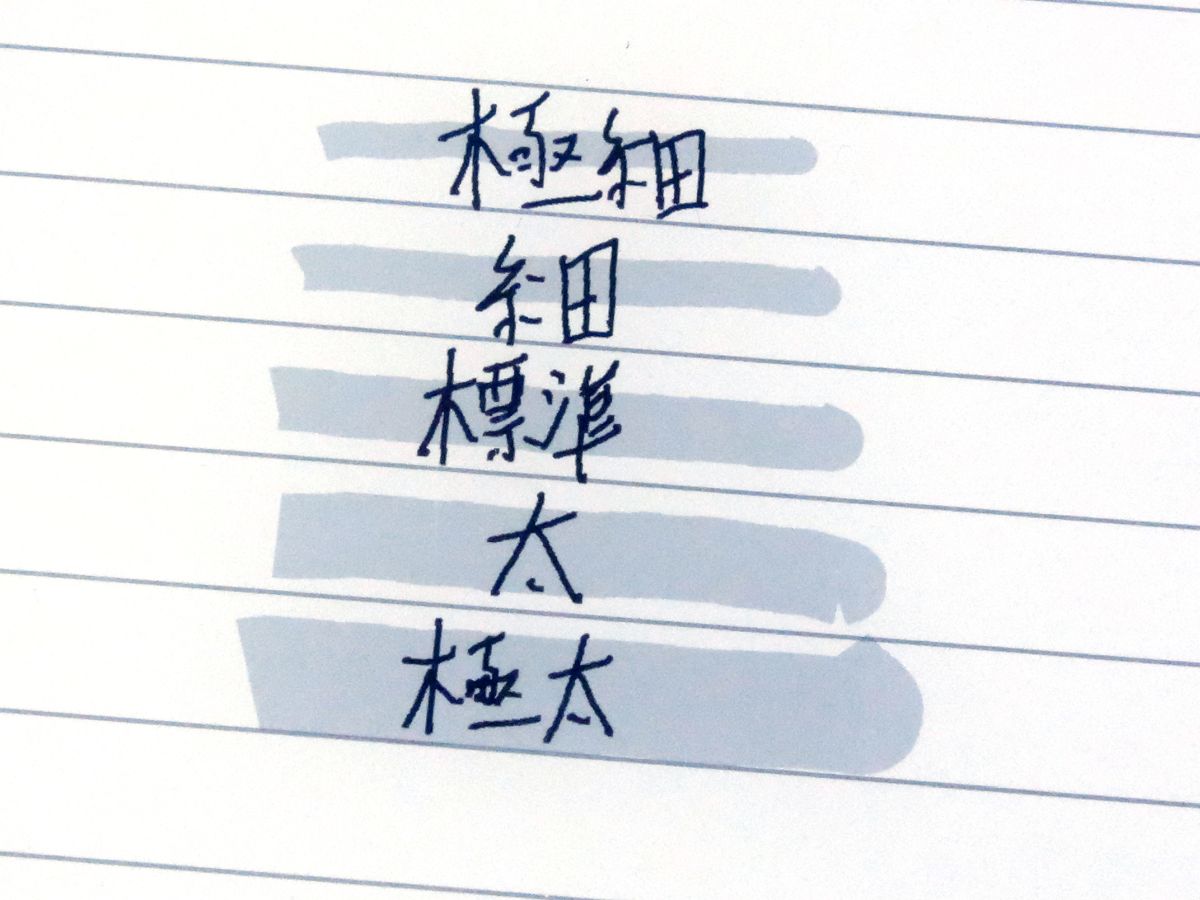
The thickness of each of 'extremely thin', 'thin', 'standard', 'thick' and 'extremely thick' is as follows. Kindle Scribe can draw only one color, but it seems that you can create easy-to-understand notes by adjusting the thickness and making full use of highlights.
You can switch to eraser mode by tapping the red frame button.
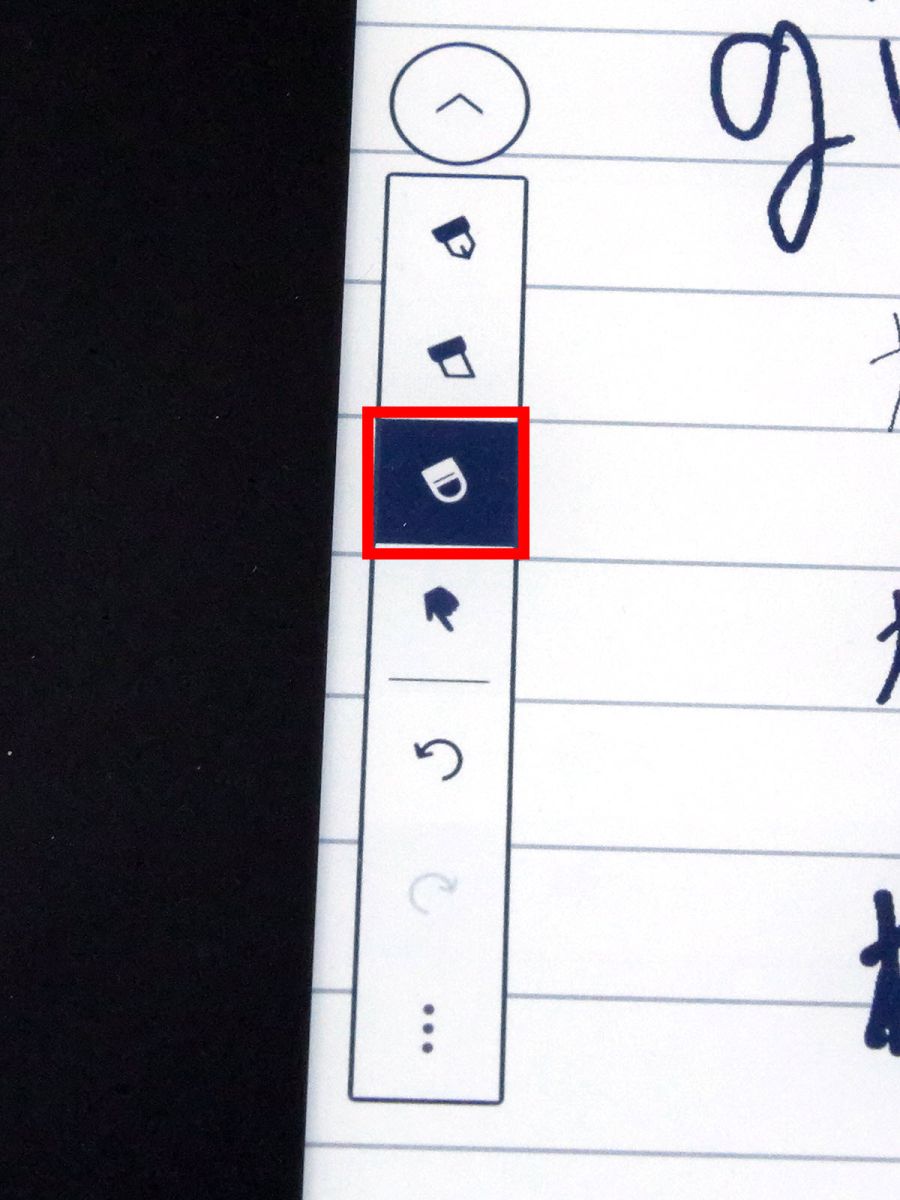
You can also use the head of the pen as an eraser.
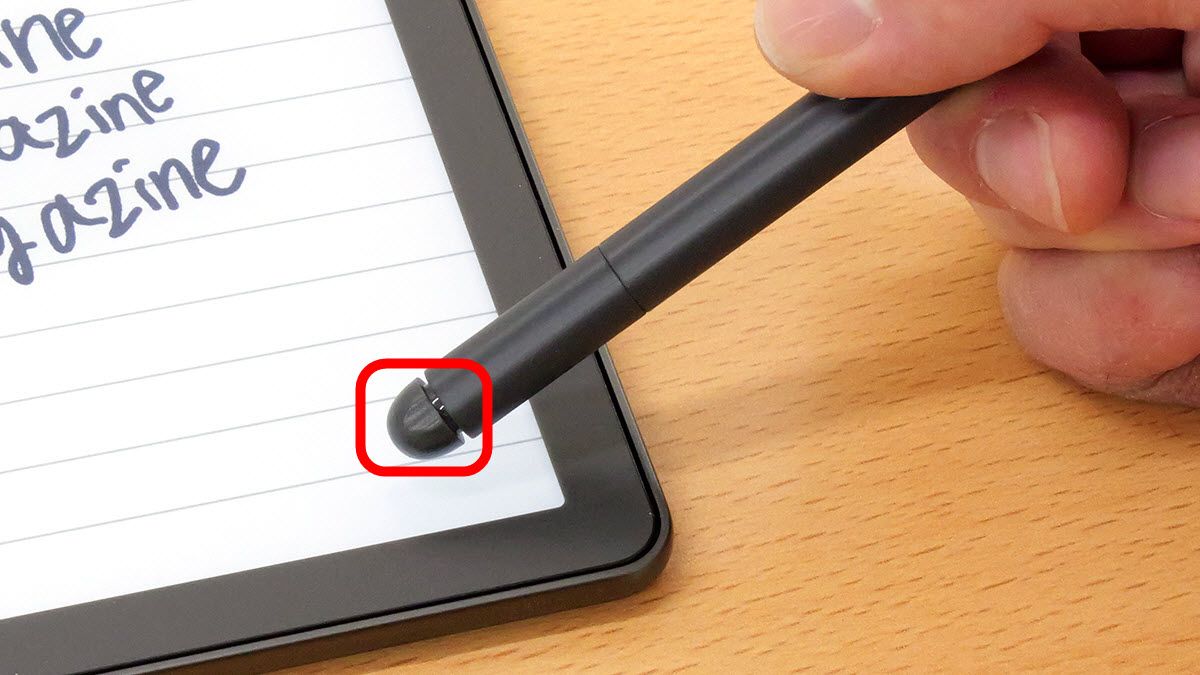
When using the head of the pen as an eraser, the trick is to push it in with a little force.
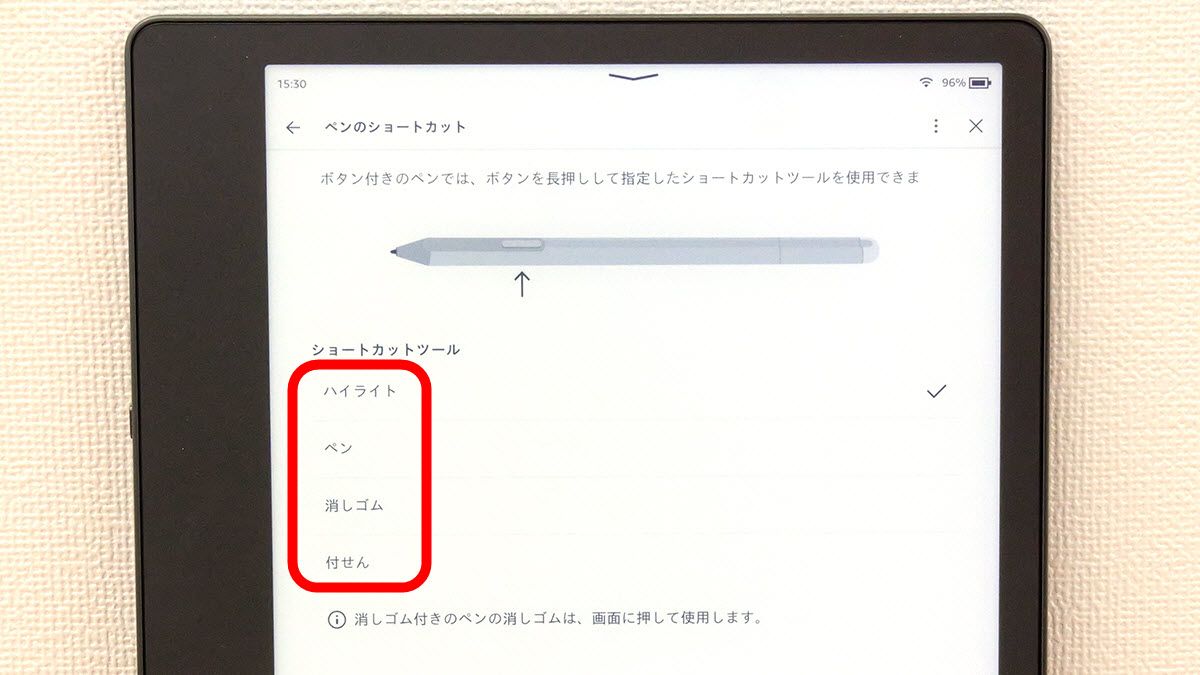
In addition, a shortcut button is installed near the tip of the pen, and various functions can be used with one push.
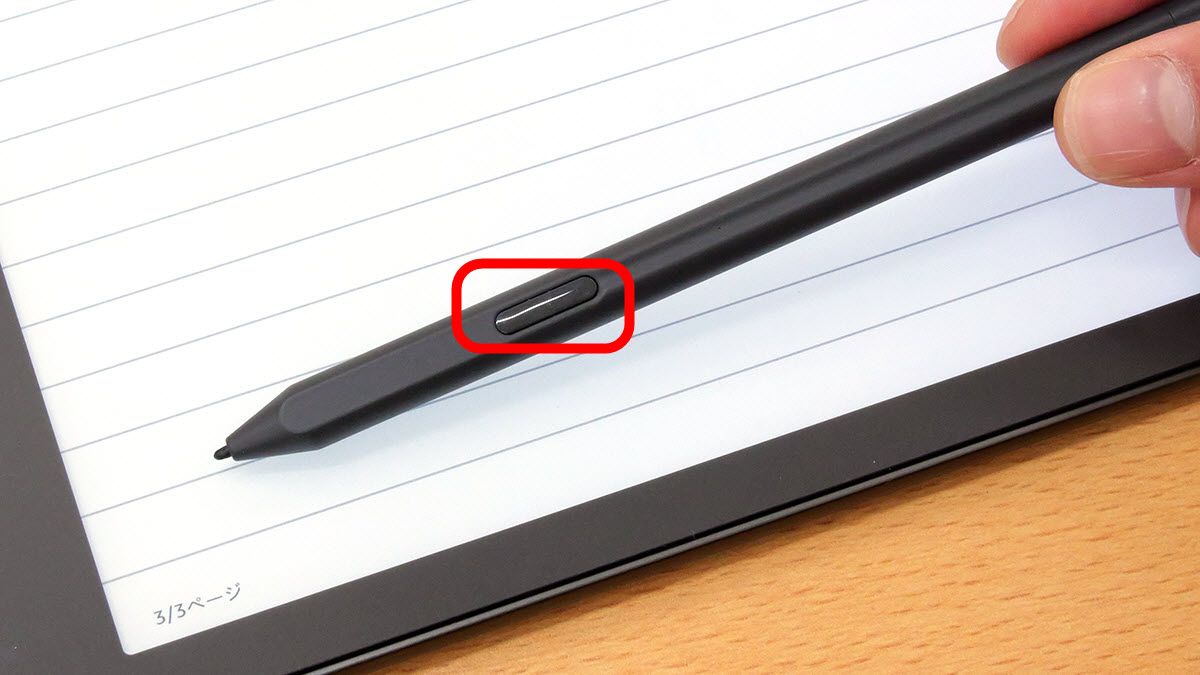
In the standard state, it is set so that you can switch to highlight mode by writing while pressing the shortcut button.
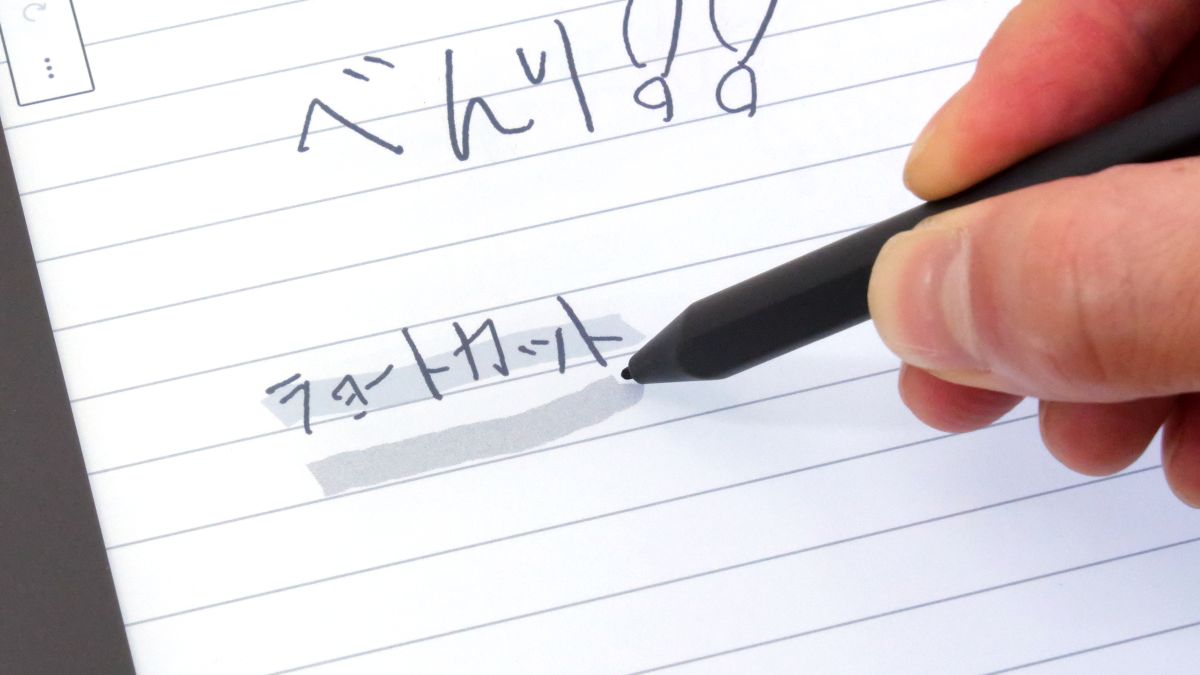
The function assigned to the shortcut button can be selected from 'highlight', 'pen', 'eraser', and 'attachment'.
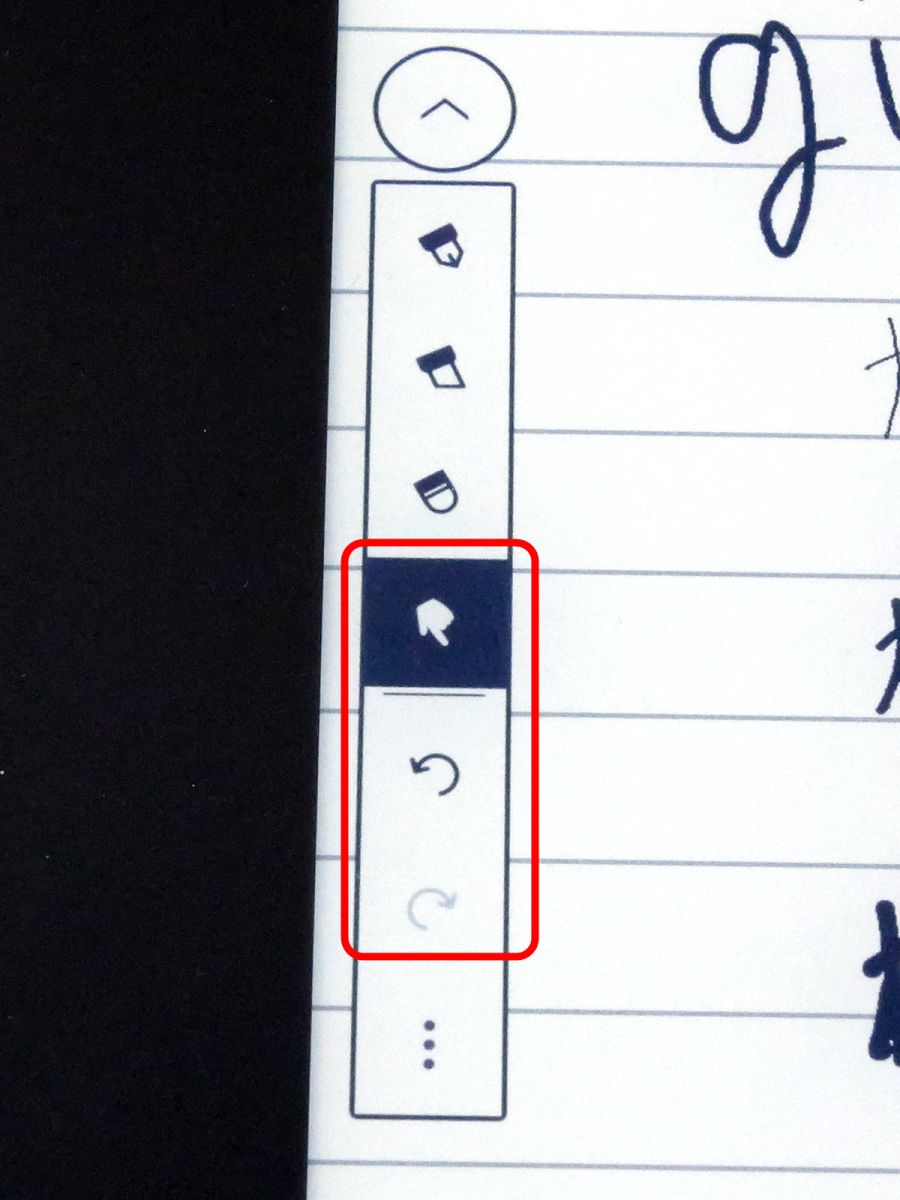
The menu also has page turning buttons and undo/redo buttons.
In the movie below, you can see how notes are created using various functions such as pen function, highlight function, and page turning.
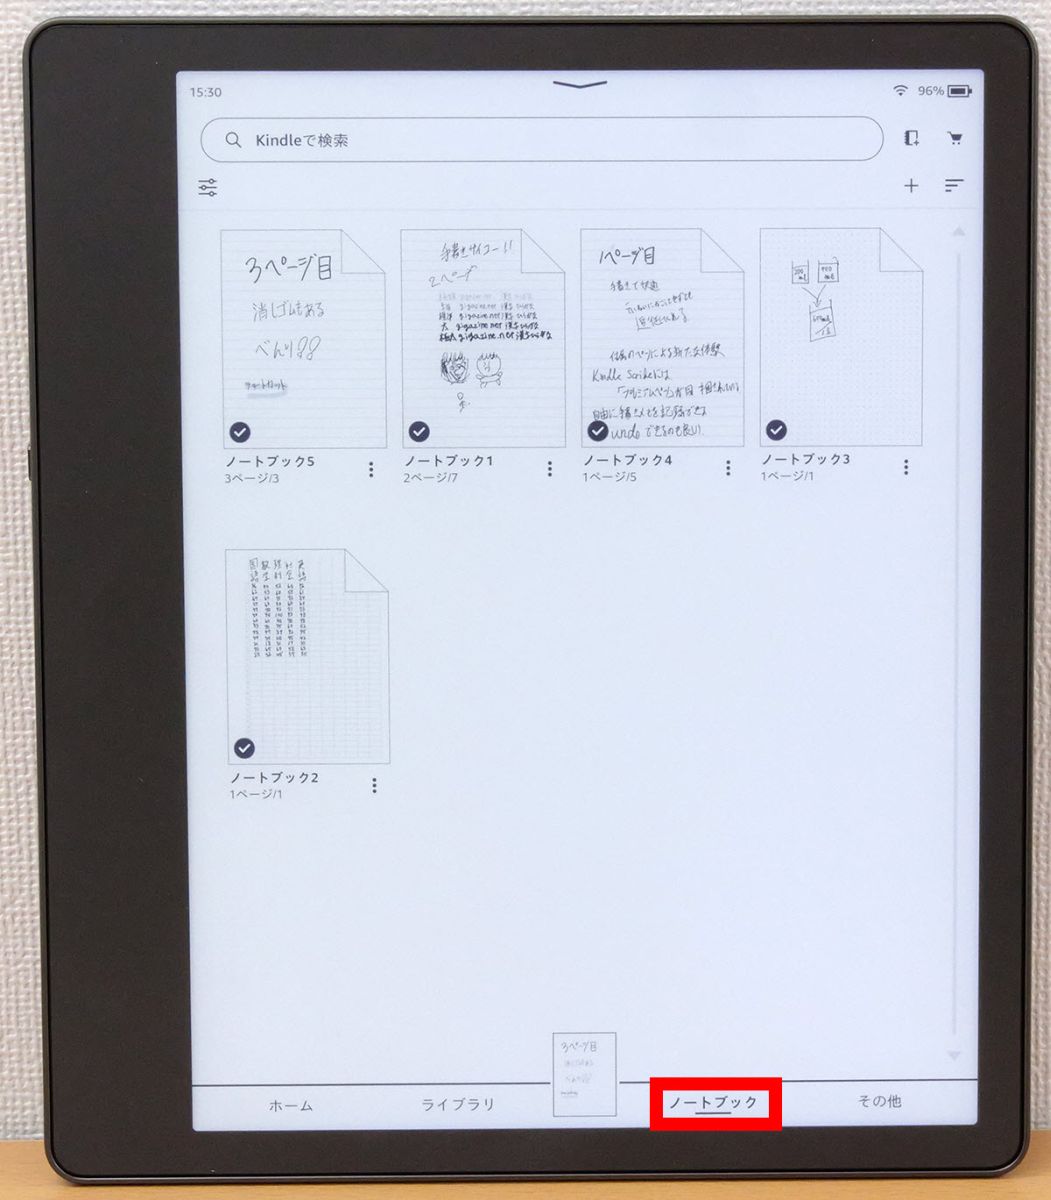
You can check the notes you created on the 'Notebooks' tab on the home screen.
There are many types of borders such as ``blank paper'', ``table'', and ``squared'', so it seems to be useful for various purposes. However, since Kindle Scribe does not have functions such as 'rotate' and 'reverse', it is safe to choose another device if you want to use it as a drawing device.
◆ 2: I wrote a handwritten sticky note while reading
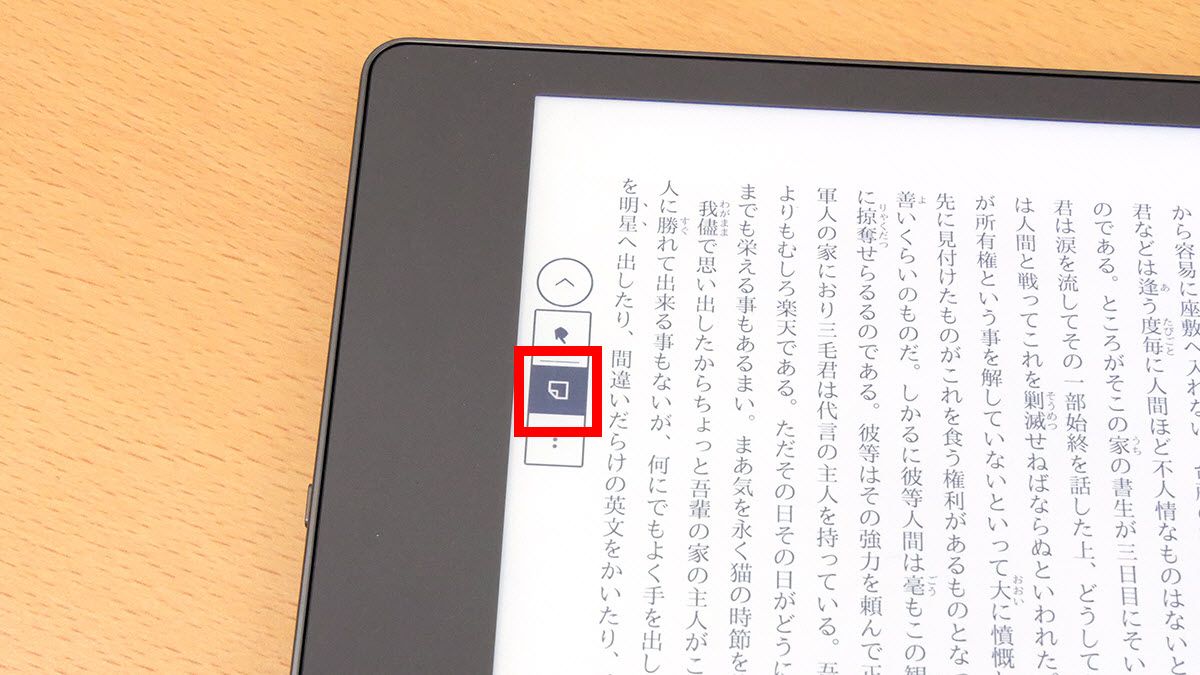
To use the sticky note function while reading, tap the red frame button in the menu on the screen.
Next, tap the position where you want to add the sticky note.
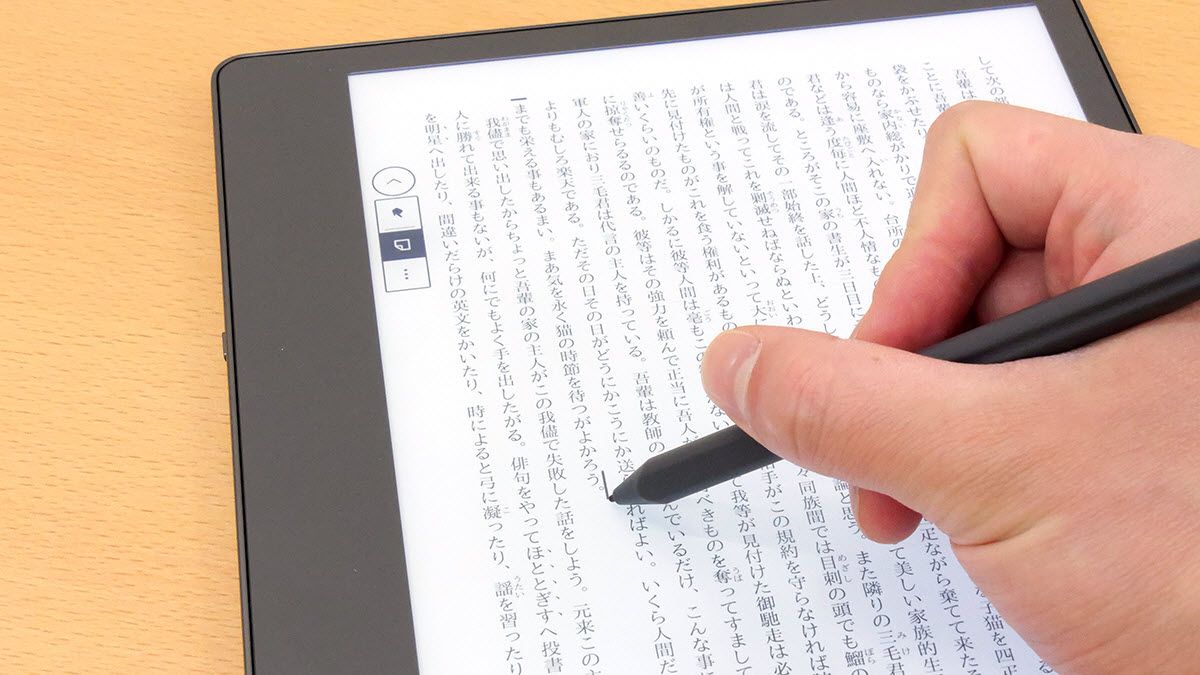
Then, a handwriting area appears on the screen.
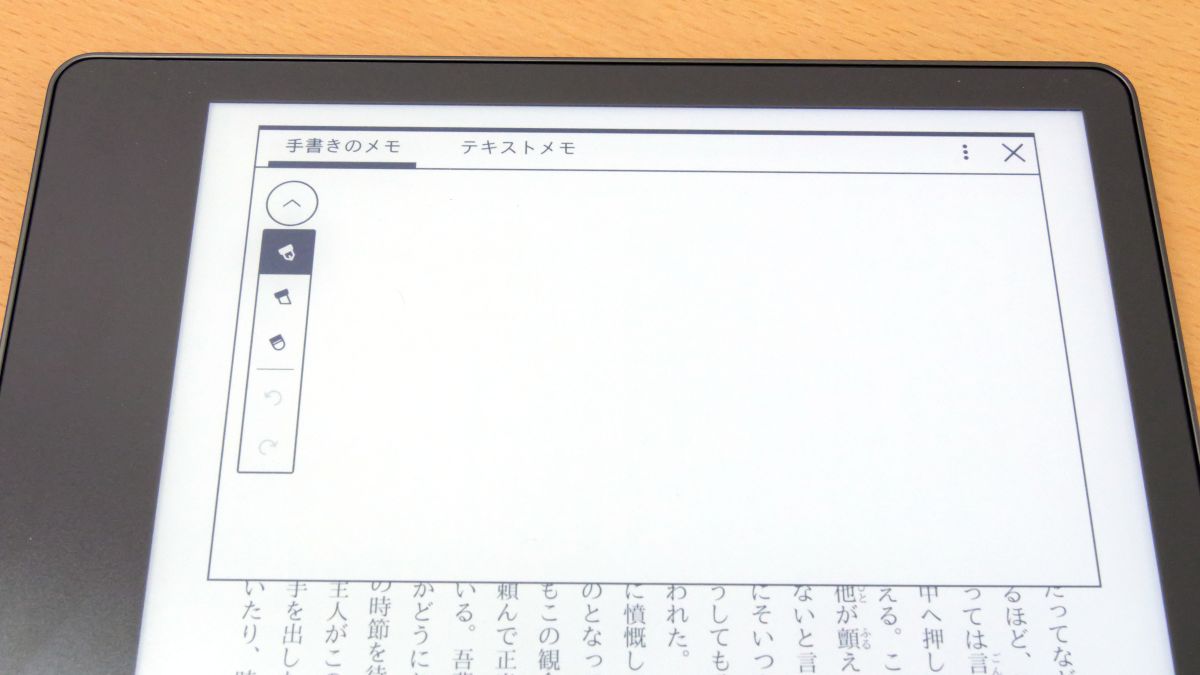
In the writing area, you can change the thickness of the letters and use highlights, just like in a notebook.

The created sticky note is displayed as a small icon in the text. Tap this small icon to see the contents of the sticky note.
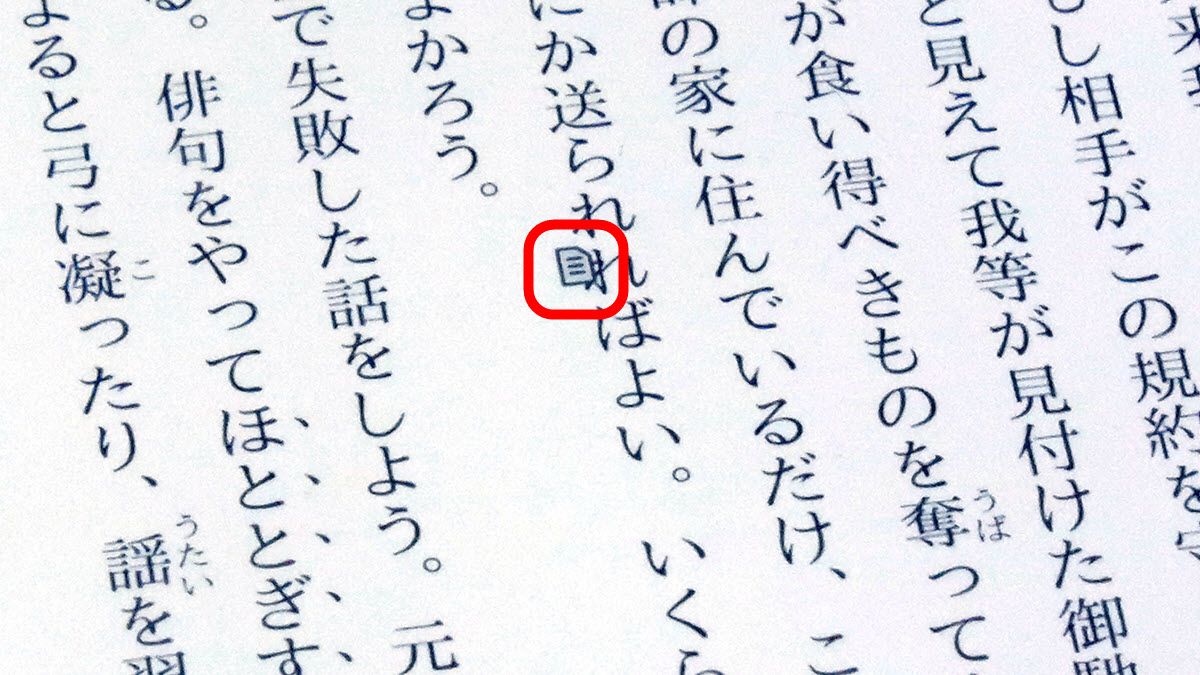
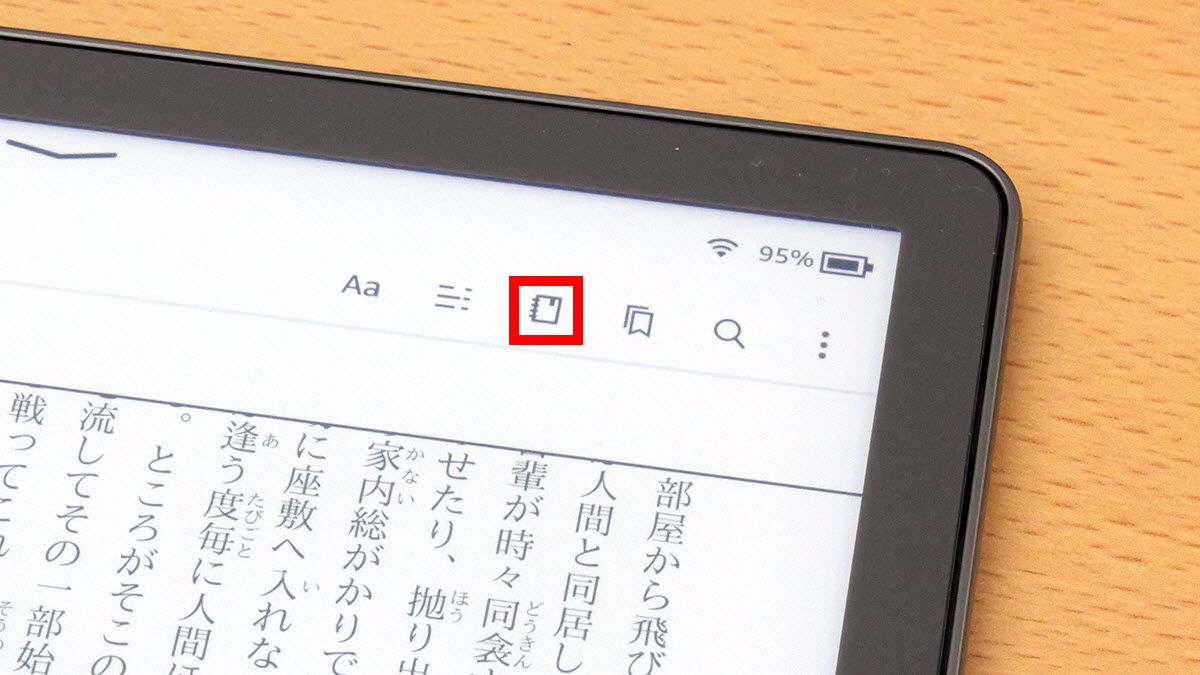
If you want to check the list of sticky notes registered in the book, tap the red frame icon in the upper menu.
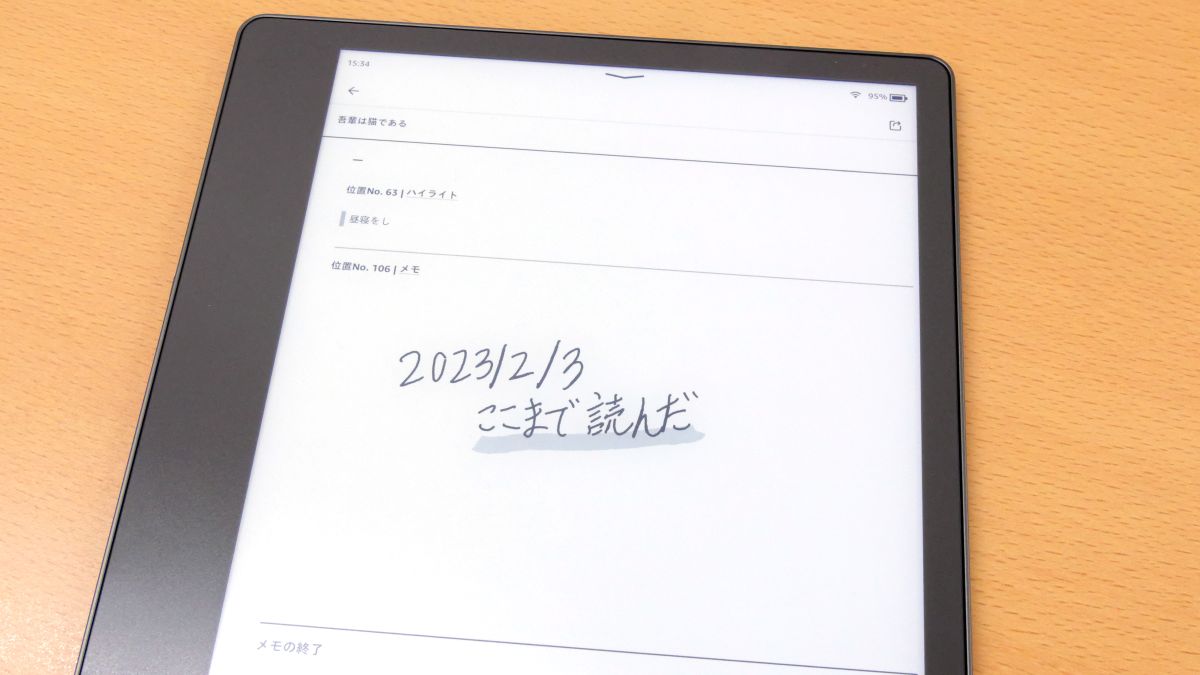
Then, you can browse the list of sticky notes like this.
◆3: Procedure for sharing sticky notes externally
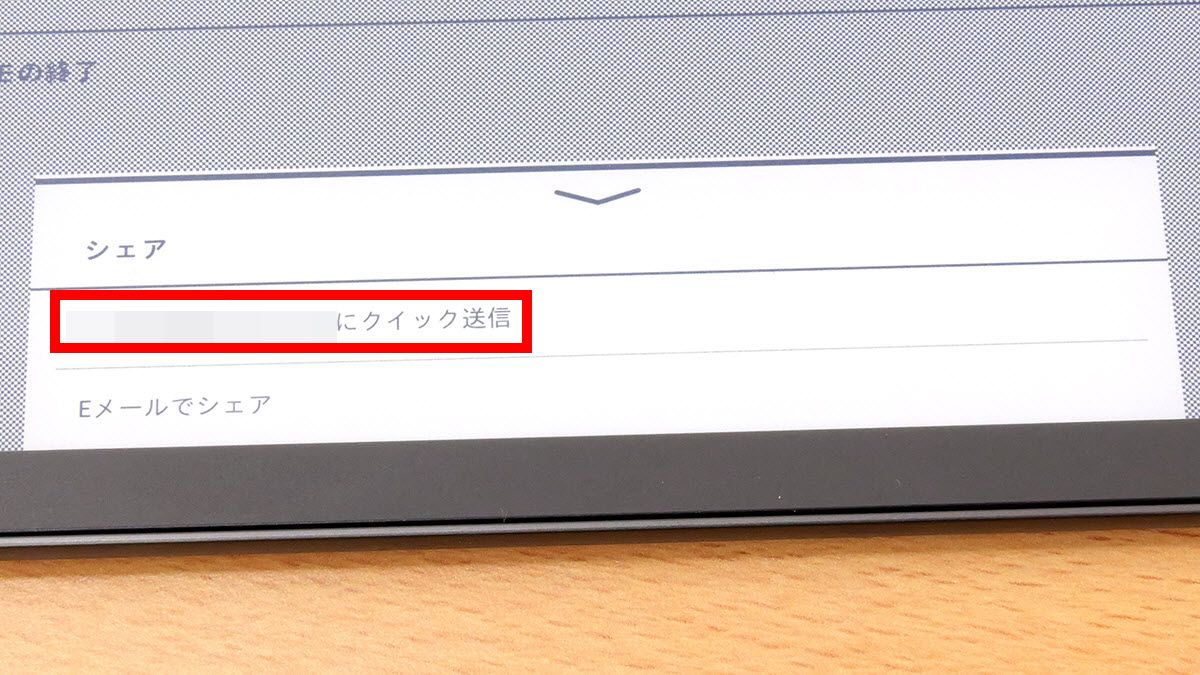
Sticky notes registered in books can be exported as PDF files. To export, tap the icon placed in the upper right of the sticky note list screen.
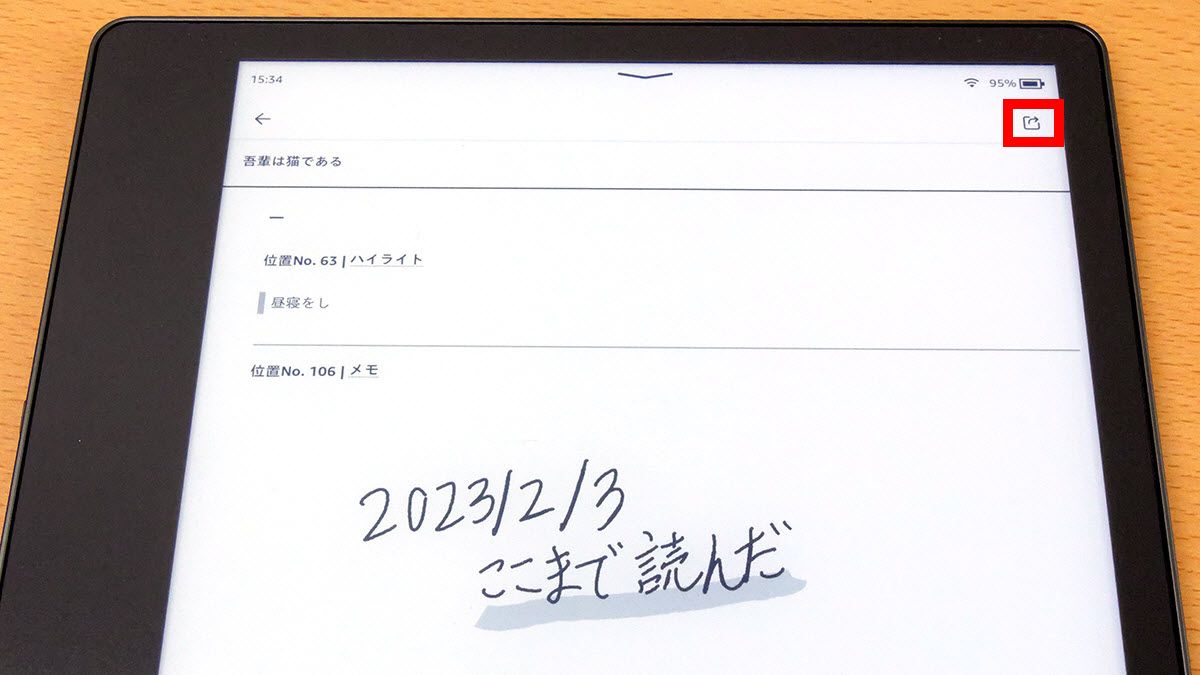
Next, tap 'Quick send to (my email address)' that appears at the bottom of the screen.
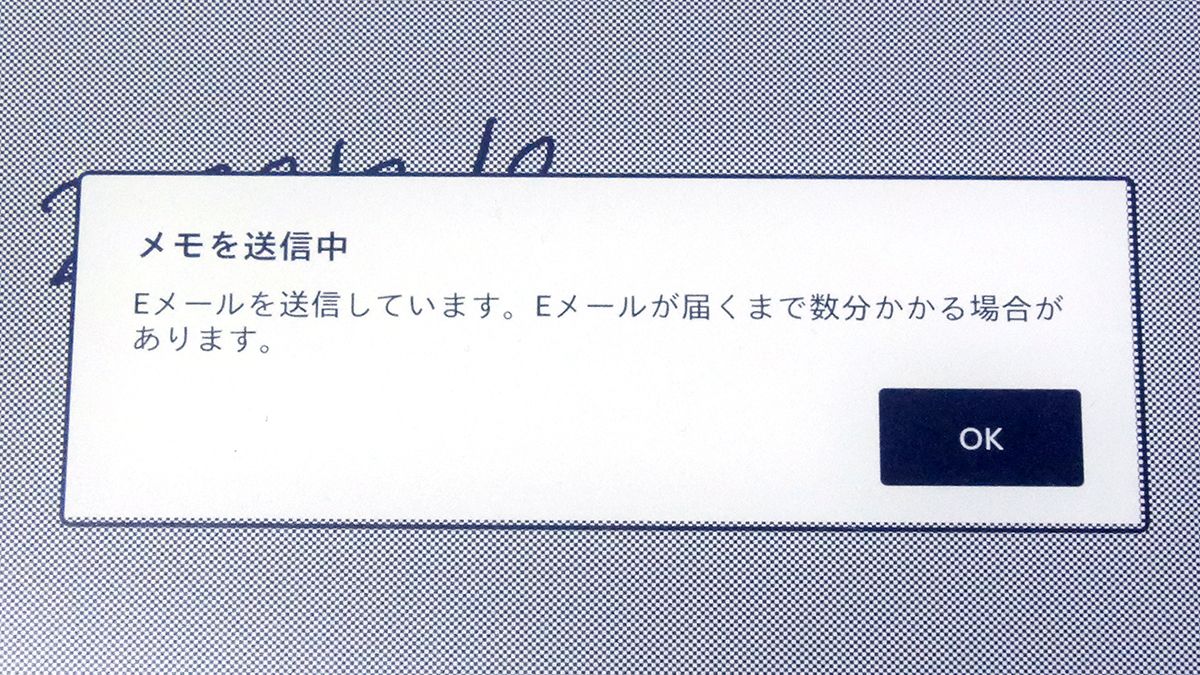
If the following screen is displayed, the operation with Kindle Scribe is complete.
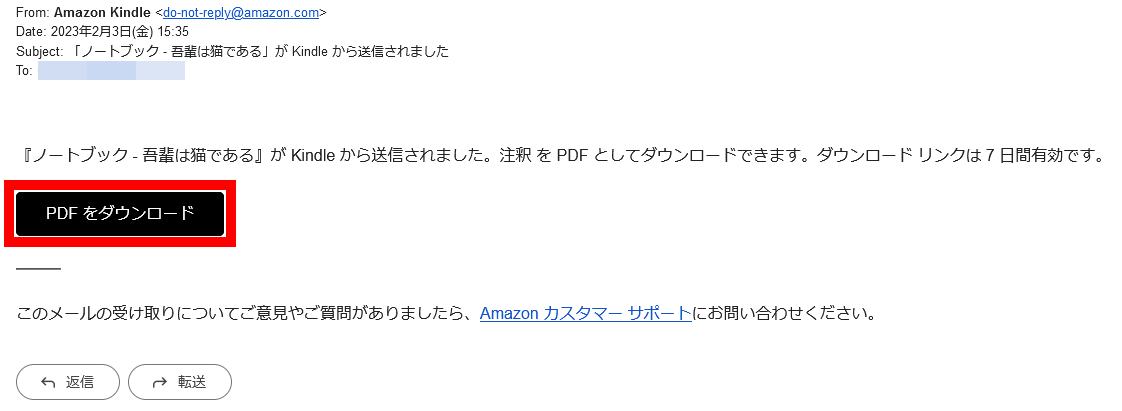
If you check your email inbox after the export is complete, you will receive a non-replyable email from Amazon like the one below. Click 'Download PDF' to download the exported sticky notes.
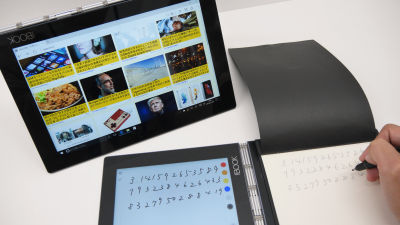
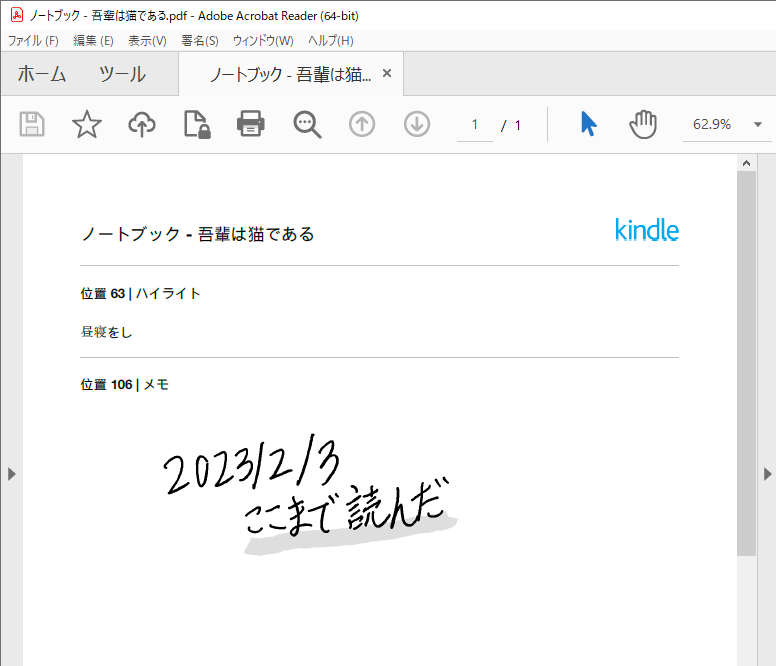
The contents of the downloaded PDF file are as follows. Now you can view the contents of the sticky notes registered with Kindle Scribe on other devices.
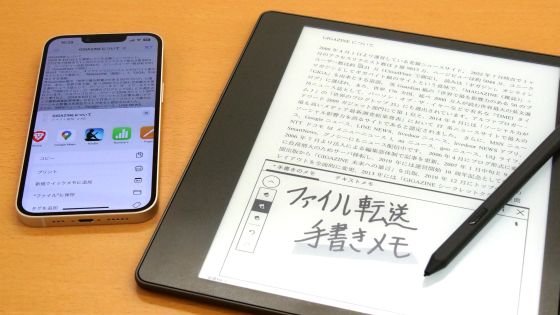
An upcoming article will detail how to transfer files created on other devices to Kindle Scribe and add handwritten notes.
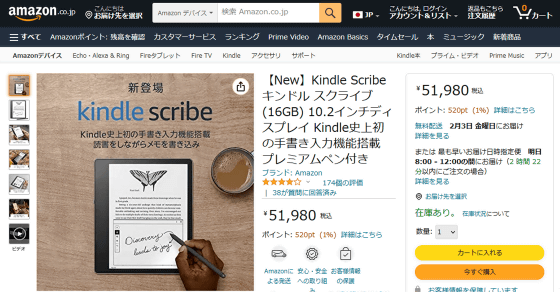
In addition, Kindle Scribe's 16GB premium pen model is available at Amazon.co.jp at 51,980 yen including tax at the time of article creation.
Amazon.co.jp: [New] Kindle Scribe Kindle Scribe (16GB) 10.2 inch display Kindle's first handwriting input function with premium pen
Related Posts: