Introduction procedure & usage summary of the script 'Interpolate' that can generate the 'process until the image changes to another image' with the image generation AI 'Stable Diffusion'

The image generation AI ' Stable Diffusion ' has a function called '
GitHub - DiceOwl/StableDiffusionStuff
https://github.com/DiceOwl/StableDiffusionStuff
◆ Interpolate installation procedure
To use Interpolate, you need to install Stable Diffusion web UI (AUTOMATIC1111 version) first. If you have not installed Stable Diffusion web UI (AUTOMATIC1111 version), please refer to the following article to install it.
Image generation AI ``Stable Diffusion'' works even with 4 GB GPU & various functions such as learning your own pattern can be easily operated on Google Colabo or Windows Definitive edition ``Stable Diffusion web UI (AUTOMATIC 1111 version)'' installation method summary - GIGAZINE

After installing Stable Diffusion web UI (AUTOMATIC 1111 version), access Interpolate's GitHub repository , click the part marked 'Code', and click 'Download ZIP'. File size is 11.6MB.

After downloading the ZIP file, extract the ZIP file using Windows standard function or decompression software such as '

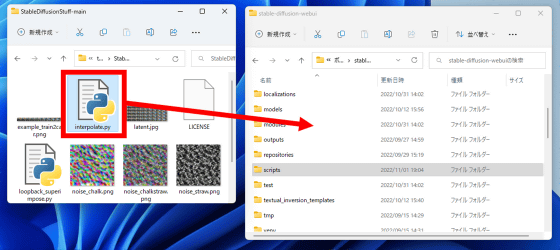
Next, copy 'interpolate.py' into the 'scripts' folder of Stable Diffusion web UI (AUTOMATIC1111 version).

If there is 'interpolate.py' in the 'scripts' folder as shown below, the installation of Interpolate is complete.

◆ How to use Interpolate
To use Interpolate, first prepare 'beginning image (image A)' and 'end image (image B)'. This time, I decided to use the left side of the following image as 'Image A' and the right side as 'Image B'.

After preparing the image, click the img2img tab on the Stable Diffusion web UI (AUTOMATIC1111 version) and drag and drop image A into the image input area.

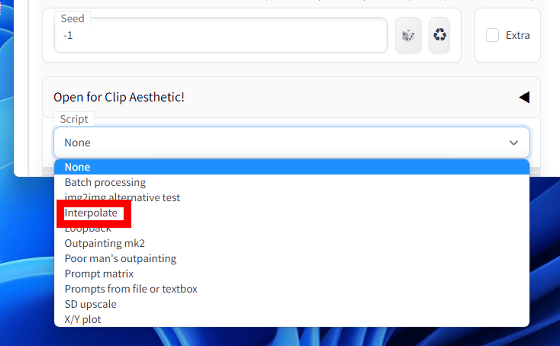
Next, select 'Interpolate' from the 'Script' selection field at the bottom of the screen.

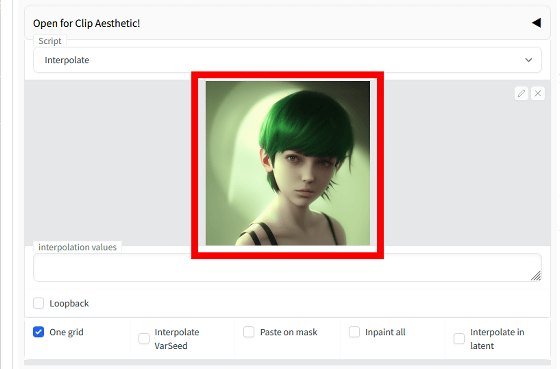
Then, the image input area of Interpolate appears, so drag and drop image B.

Next, after considering the prompts for Image A and Image B, enter prompts in the format 'Prompt for Image A: 1~0 AND Prompt for Image B: 0~1 ' in the prompt input area at the top of the screen. . For example, if the prompt for image A is 'big apple, anime style' and the prompt for image B is 'small apple, anime style', then 'big apple, anime style: 1~0 AND small apple, anime style: 0~1' Enter OK. At this time, be careful not to include spaces before and after ':'.

After entering the prompt, go to the bottom of the screen and enter 0-1[11] in the input area labeled 'Interpolation values'. The settings are now complete.

After completing the settings, click the 'Generate' button to generate the image.

After waiting for a while, 'image interpolating the change from image A to image B' was output as shown below.

Related Posts:


