Simple usage summary of `` img2img '' that can automatically generate images with composition and color similar to the original image with image generation AI `` Stable Diffusion web UI (AUTOMATIC 1111 version) '' and change only the specified part

' AUTOMATIC 1111 version Stable Diffusion web UI ', which allows you to easily introduce image generation AI / Stable Diffusion to Windows environment or Google Colab, and can be easily operated from the user interface (UI) instead of the command line, is installed in other UIs. It is a tool that can be said to be the definitive version that includes functions that are not available. In the AUTOMATIC 1111 version of Stable Diffusion web UI, which is updated and improved at an amazing speed every day, I summarized how to actually use ' img2img ' that can generate new images from the input image in the AUTOMATIC 1111 version of Stable Diffusion web UI. .
GitHub - AUTOMATIC1111/stable-diffusion-webui-feature-showcase: Feature showcase for stable-diffusion-webui
https://github.com/AUTOMATIC1111/stable-diffusion-webui-feature-showcase
The following article summarizes how to introduce the AUTOMATIC1111 version of Stable Diffusion web UI to the local environment.
Image generation AI ``Stable Diffusion'' works even with 4 GB GPU & various functions such as learning your own pattern can be easily operated on Google Colabo or Windows Definitive edition ``Stable Diffusion web UI (AUTOMATIC 1111 version)'' installation method summary - GIGAZINE

Also, you can understand the basic usage of the AUTOMATIC 1111 version Stable Diffusion web UI by reading the following article.
Basic usage of ``Stable Diffusion web UI (AUTOMATIC 1111 version)'' that can easily use ``GFPGAN'' that can clean the face that tends to collapse with image generation AI ``Stable Diffusion''-GIGAZINE

And by using the 'Script' function of the AUTOMATIC 1111 version Stable Diffusion web UI, it is possible to generate a large number of images simultaneously based on multiple conditions with prompts and parameters. Comparing the images generated using the method in the article below is very useful as it visualizes the impact of prompts and parameters.
How to use 'Prompt matrix' and 'X/Y plot' in 'Stable Diffusion web UI (AUTOMATIC 1111 version)' Summary -GIGAZINE

In addition, 'CLIP interrogator', which can disassemble and display what kind of prompt the image automatically generated by Stable Diffusion was, is summarized in the following article.
How to use ``CLIP interrogator'' that can decompose and display what kind of prompt / spell was from the image automatically generated by image generation AI ``Stable Diffusion''-GIGAZINE

◆ Basic usage of img2img
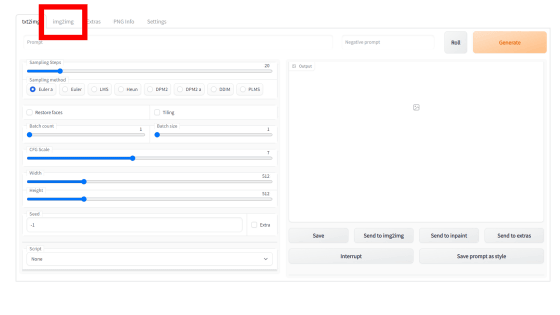
To use img2img, click the 'img2img' tab at the top.
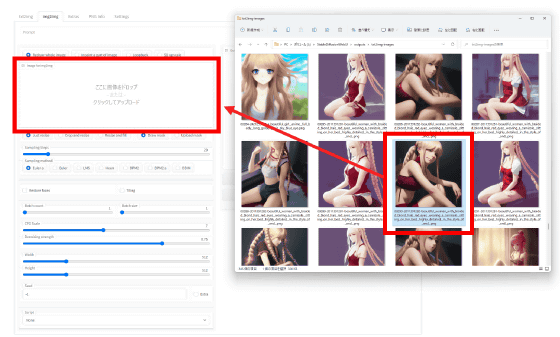
Load the image by dragging and dropping the image to the 'Image for img2img' column in the left column or by clicking to select it.
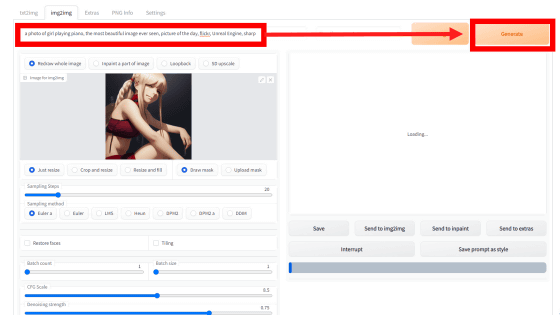
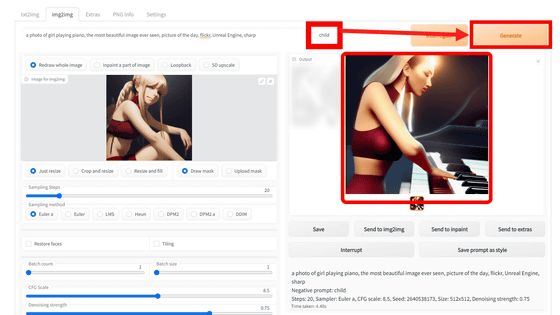
Then, by entering text in the prompt and clicking 'Generate', Stable Diffusion will generate a new image based on the loaded image. This time, 'a photo of girl playing piano, the most beautiful image ever seen, picture of the day, Unreal Engine, I typed 'sharp'.
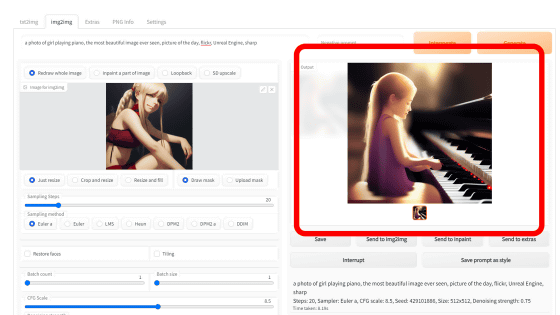
Then, an image of a girl playing the piano was generated with a composition similar to the original image like this.
The right side of the prompt input field is the input field of 'Negative Prompt' to specify and enter 'elements to be excluded' from the generated result. For example, if you enter 'Child' and regenerate, the piano player has changed to an adult woman as follows.
◆ Resize function
Images generated by img2img can be changed not only in size but also in aspect ratio, by default the aspect ratio is 1:1 and one side is 512 pixels. With the AUTOMATIC1111 version of Stable Diffusion web UI, you can specify the resizing method if the image input with img2img and the image you want to output have different aspect ratios.
GitHub - AUTOMATIC1111/stable-diffusion-webui-feature-showcase: Feature showcase for stable-diffusion-webui
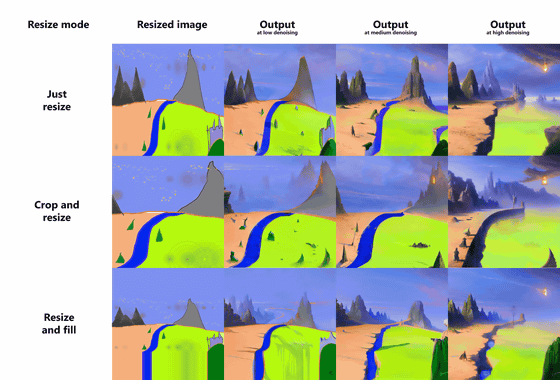
For example, if the input image has an aspect ratio of 16:9 and the generated image has an aspect ratio of 1:1, the composition of the input image will change significantly. Therefore, you can specify from 3 types of resizing methods under the 'Image for img2img' field.
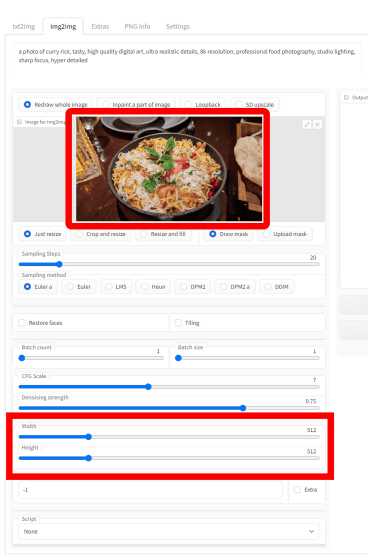
The default setting 'Just resize' ignores the aspect ratio and generates the image as it is. If the input image is 16:9 and the output image is 1:1, the composition will be slightly squeezed from the left and right as shown below.
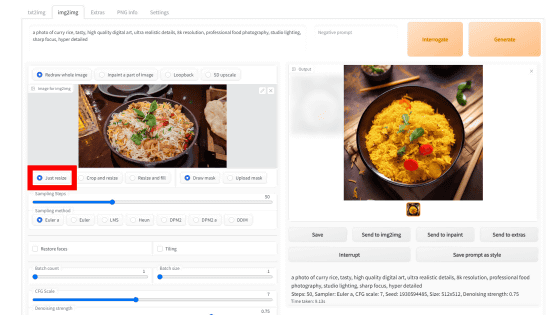
'Crop and resize' is a mode that generates an image while maintaining the aspect ratio of the input image and automatically crops according to the aspect ratio of the output image. For example, in the input image below, there are margins on the left and right of the food, but the generated output image has the left and right cut off and the food fills the screen.
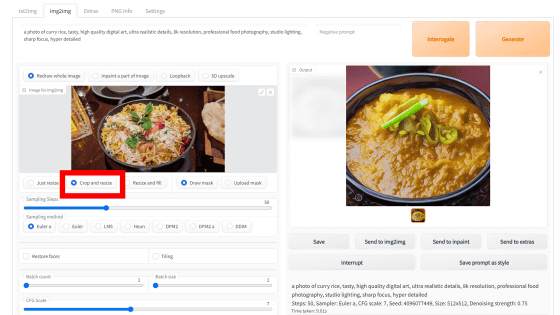
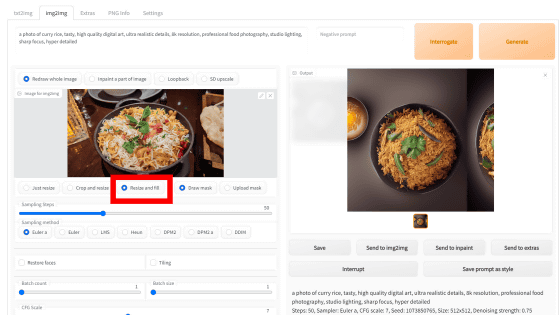
'Resize and fill' is a mode that generates an image while maintaining the aspect ratio of the input image and automatically generates and fills the margins created by the aspect ratio of the output image.
◆Inpainting function
When I check images generated by Stable Diffusion, I often think, ``If this wasn't there, it would be pretty close to ideal.'' ``It would be nice if even this part was improved.'' Therefore, if you use the Inpainting function, you can specify and edit any part in the image.
GitHub - AUTOMATIC1111/stable-diffusion-webui-feature-showcase: Feature showcase for stable-diffusion-webui
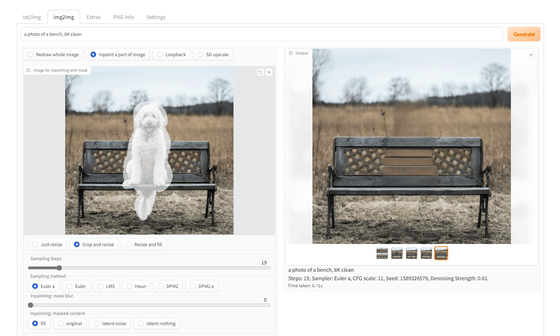
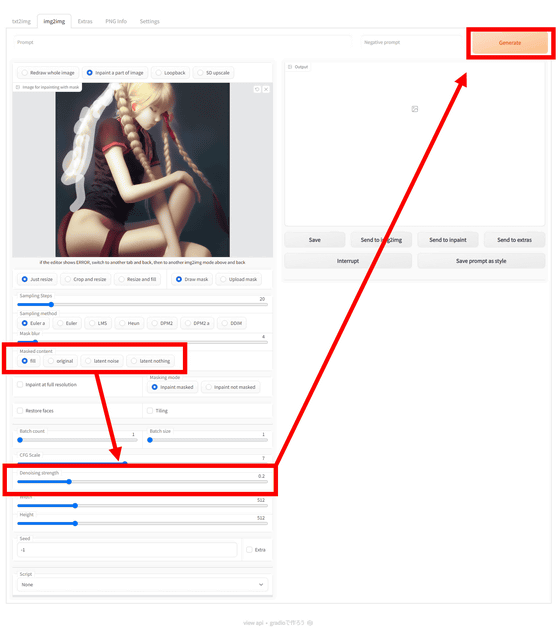
To use the Inpainting function, after loading the image, select 'Inpaint a part of image' above the 'Image for img2img' field. Then drag and trace the input image to apply a mask.
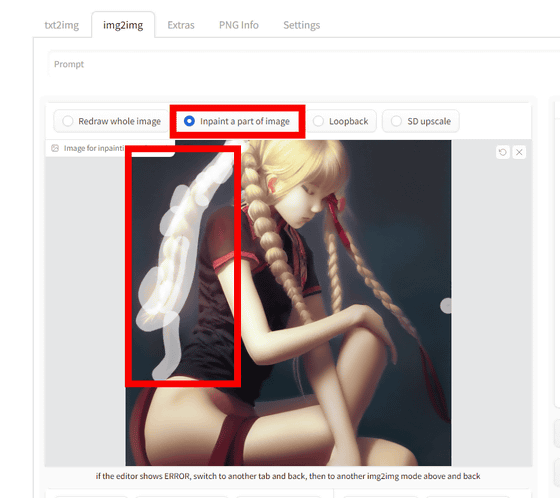
Four types of Inpainting processing are available: ``full'', ``original'', ``latent noise'', and ``latent original''. Select the processing method, adjust 'Denoising strength' and click 'Generate'. Denoising strength indicates the strength of noise removal in Stable Diffusion's machine learning algorithm and requires some adjustment. This time I set the Denoising strength to 0.2.
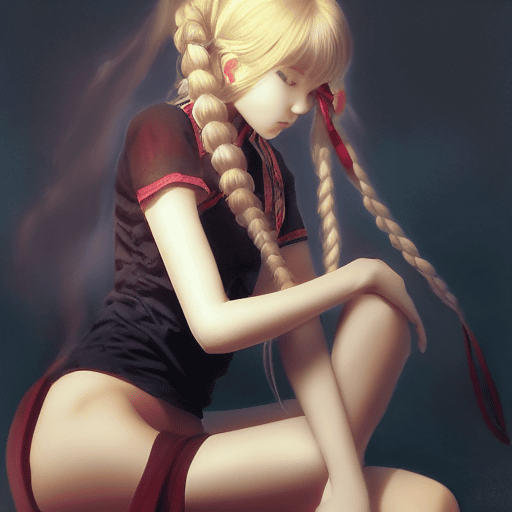
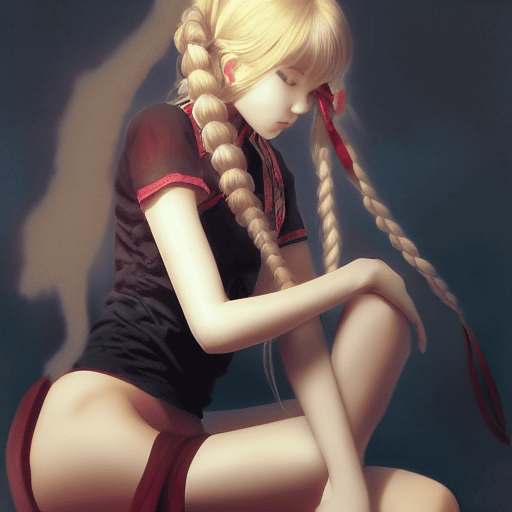
Below is an image processed with 'full'. The pigtails of the masked braid are filled in to match the background.
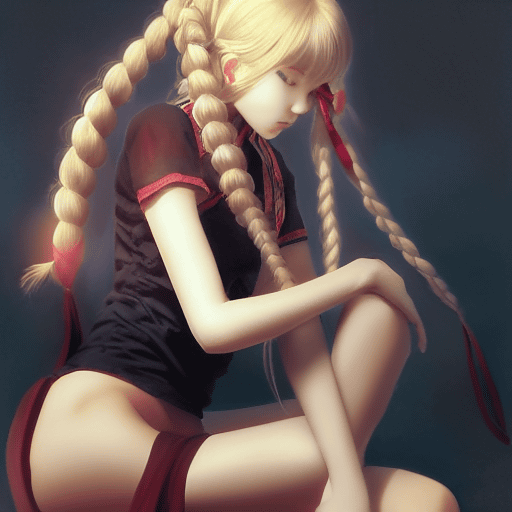
'Original' is to correct based on the original picture of the area selected by the mask.
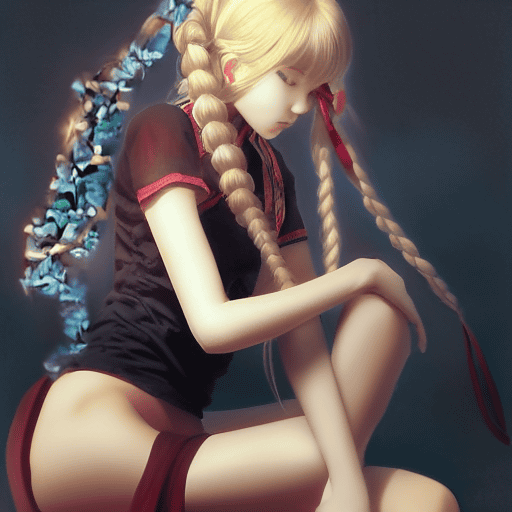
'Latent noise' fills the mask part with noise. The pigtails are replaced with a completely different color scheme and pattern than the surroundings.
'Latent nothing' replaces nothing. The process is different, but the result is that the mask area is filled with a solid color, similar to 'full'.
◆Loopback function
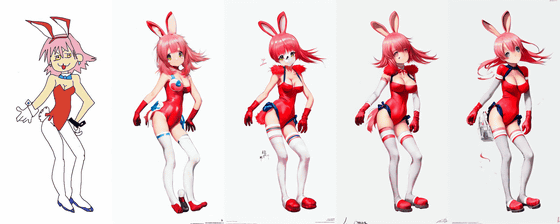
img2img is 'generate new image based on input image and prompt'. Therefore, the function to generate images by feeding back the output image to img2img many times, such as 'Use the image output by img2img as a new input image for img2img and generate further images using the same prompt' is ' Loopback'.
GitHub - AUTOMATIC1111/stable-diffusion-webui-feature-showcase: Feature showcase for stable-diffusion-webui
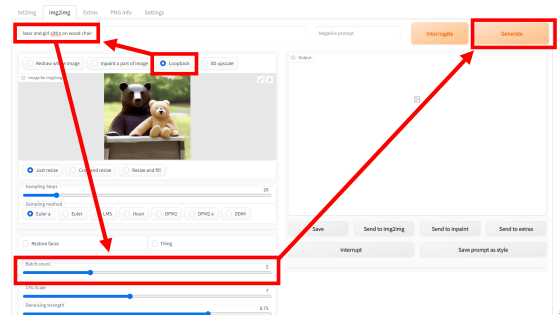
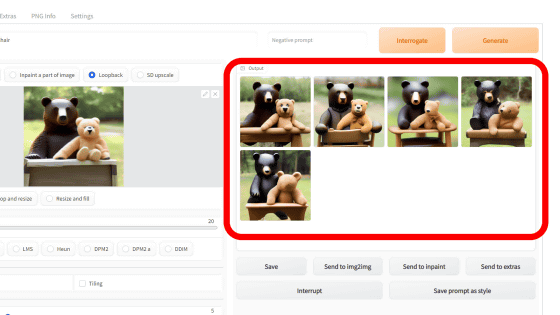
For Loopback, check 'Loopback' at the top of 'Image for img2img'. After entering the image and prompt, decide the number of loops with 'Batch size' and click 'Generate'.
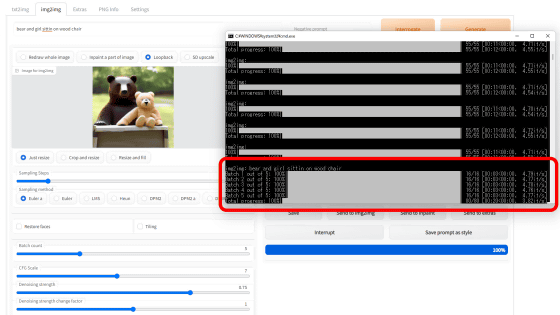
Looking at the command prompt, image generation is done 5 times.
The generated result looks like this. You can see that the image is changing little by little by performing Loopback generation 5 times from the input image.
◆SD Upscale
In the case of a low-resolution, small-size image, even if you forcibly increase the size, if the resolution does not change, it will be roughly stretched. Is required. This SD Upscale is a method of upscaling multiple images using algorithms such as
GitHub - AUTOMATIC1111/stable-diffusion-webui-feature-showcase: Feature showcase for stable-diffusion-webui
https://github.com/AUTOMATIC1111/stable-diffusion-webui-feature-showcase#stable-diffusion-upscale
After loading the image, click 'SD Upscale' at the top of 'Image to img2img', select an algorithm from 'Upscaler' and click 'Generate'.
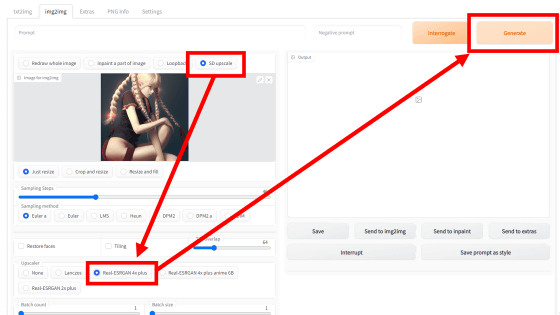
This time, I read an image of 256 x 256 pixels and had it enlarged to 512 x 512 pixels. Below is a comparison of the original image simply enlarged to 512 x 512 pixels (left) and the one upscaled by each algorithm (right), which can be compared by moving the slide bar in the center left and right. increase. Since it is a setting that creates nine images for each, overlaps them, and scales them, unlike scaling with general image editing software, there is a big change in the touch and details of the picture.
Lanczos is a standard image scaling algorithm, and while the faces are a little cleaner, it's generally more faithful to the original.
The Real ESRGAN 2x Plus has a slightly warmer color tone, and the details such as wrinkles on hair and clothes are a little blurry, giving a soft impression.
Whether Real ESRGAN 4x Anime 6B is an algorithm specialized for animation, the impression is that it is uniformly painted overall and has been corrected so that the colors are clearly separated rather than gradation. Also, the face after retouching has a slightly anime character-like atmosphere.
Real ESRGAN 4x has soft and fuzzy touches, especially when you look at the girl's skin touch. However, the bangs and the bridge of the nose were fused, probably because it was too fuzzy.
In addition, next time, I will explain the function of outpainting with 'Script' of Stable Diffusion web UI for AUTOMATIC 1111, so please look forward to it.
・Continued
Summary of img2img Script usage such as `` Out painting '' that adds background and continuation while keeping the pattern and composition with image generation AI `` Stable Diffusion ''-GIGAZINE

Related Posts:
in Software, Web Service, Review, Creation, Web Application, Posted by log1i_yk


