You can easily install the image generation AI ``Stable Diffusion'' on Windows for free
The image generation AI '
My easy-to-install Windows GUI for Stable Diffusion is ready for a beta release! It supports img2img as well, various samplers, can run multiple scales per image automatically, and more!
https://www.reddit.com/r/StableDiffusion/comments/x1hp4u/my_easytoinstall_windows_gui_for_stable_diffusion/
NMKD Stable Diffusion GUI - AI Image Generator by N00MKRAD
https://nmkd.itch.io/t2i-gui
◆ Contents
◆1: Basic usage of 'NMKD Stable Diffusion GUI'
◆2: Effects of various setting items
◆ 3: How to set 'img2img' to specify a reference image
◆ 4: Procedure to output your favorite image
◆ 1: Basic usage of 'NMKD Stable Diffusion GUI'
The original Stable Diffusion is a type of software that is used by typing commands into a 'black screen' such as a command prompt, and it is difficult for beginners to use. NMKD Stable Diffusion GUI is Stable Diffusion that can be used with mouse operation, and installation can be done with just a click of a button.
The procedure for installing NMKD Stable Diffusion GUI is detailed in the following article. Note that an NVIDIA GPU is required to generate images using the NMKD Stable Diffusion GUI. If your machine does not have an NVIDIA GPU, you can use ' stable_diffusion.openvino ', which enables Stable Diffusion with an Intel CPU, or a Google service that allows you to use Stable Diffusion regardless of machine specifications. try The specifications of the PC used this time are 'GeForce RTX 3060' with 12 GB video memory for GPU, 'Intel Core i7-6800K' for CPU, and 'Windows 11 Pro' for OS.
``NMKD Stable Diffusion GUI'' that can install image generation AI ``Stable Diffusion'' in Windows environment with one button & can be operated with GUI is finally here-GIGAZINE
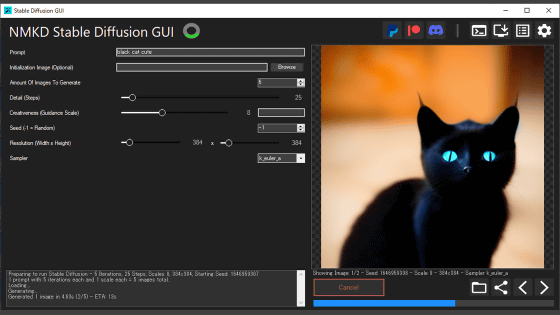
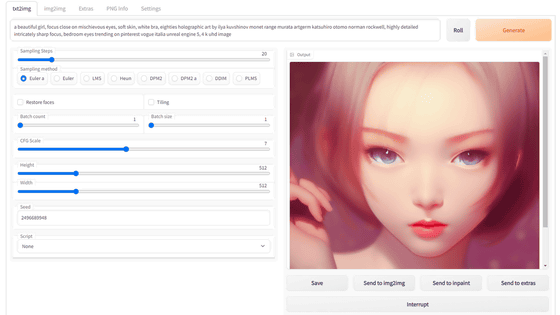
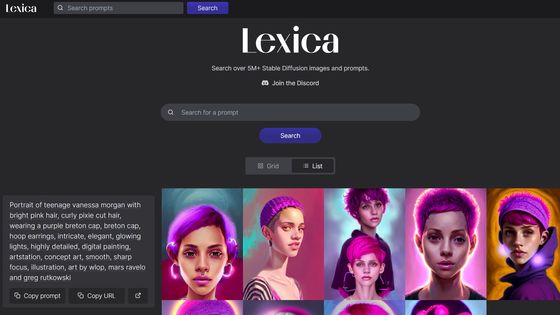
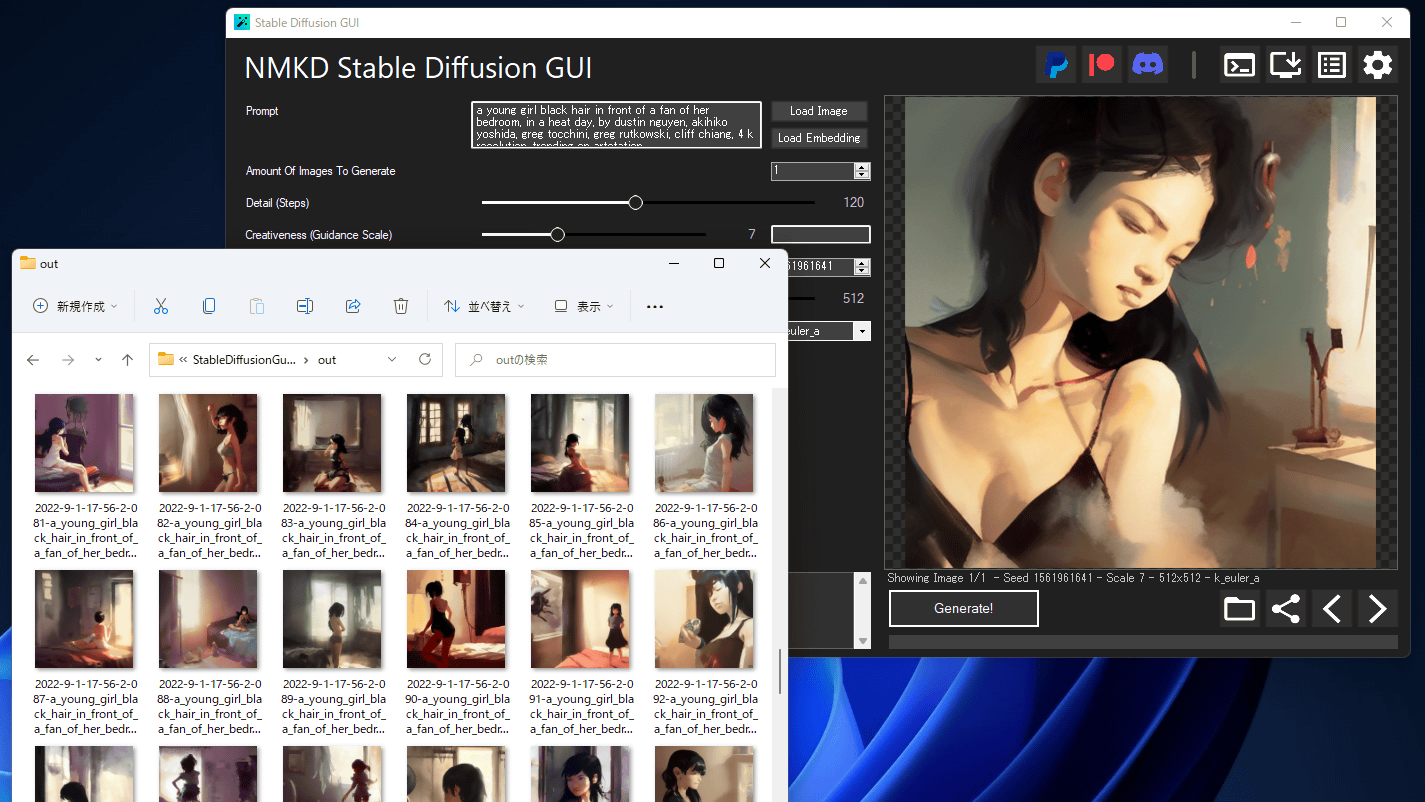
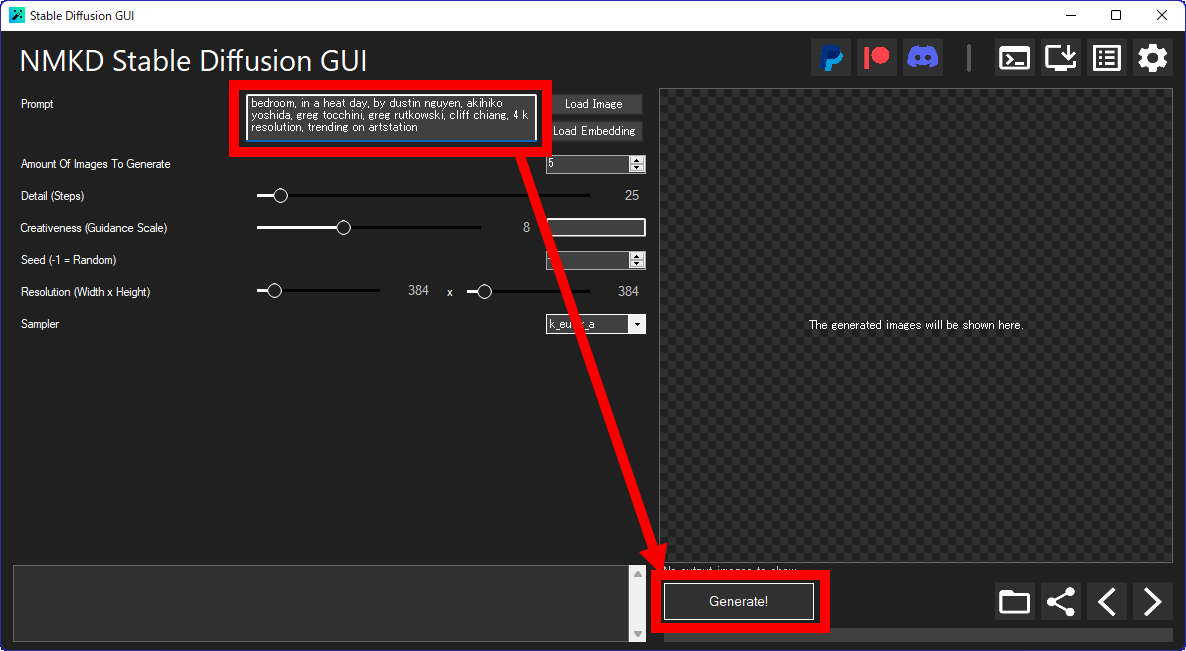
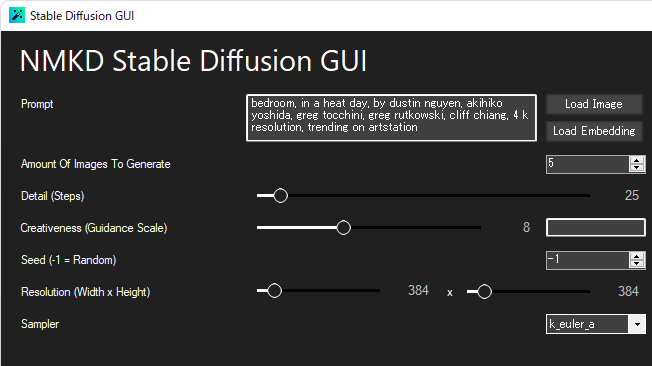
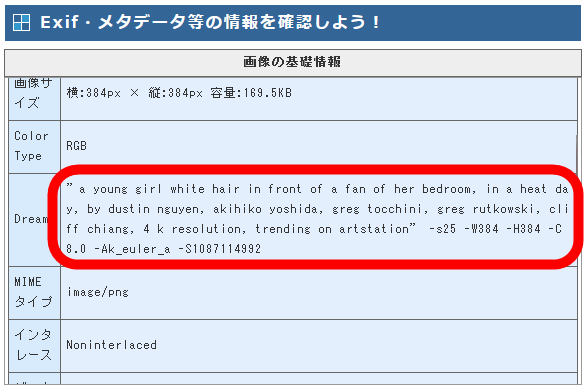
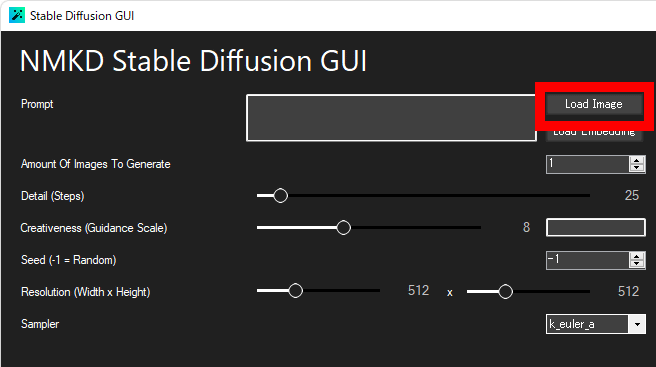
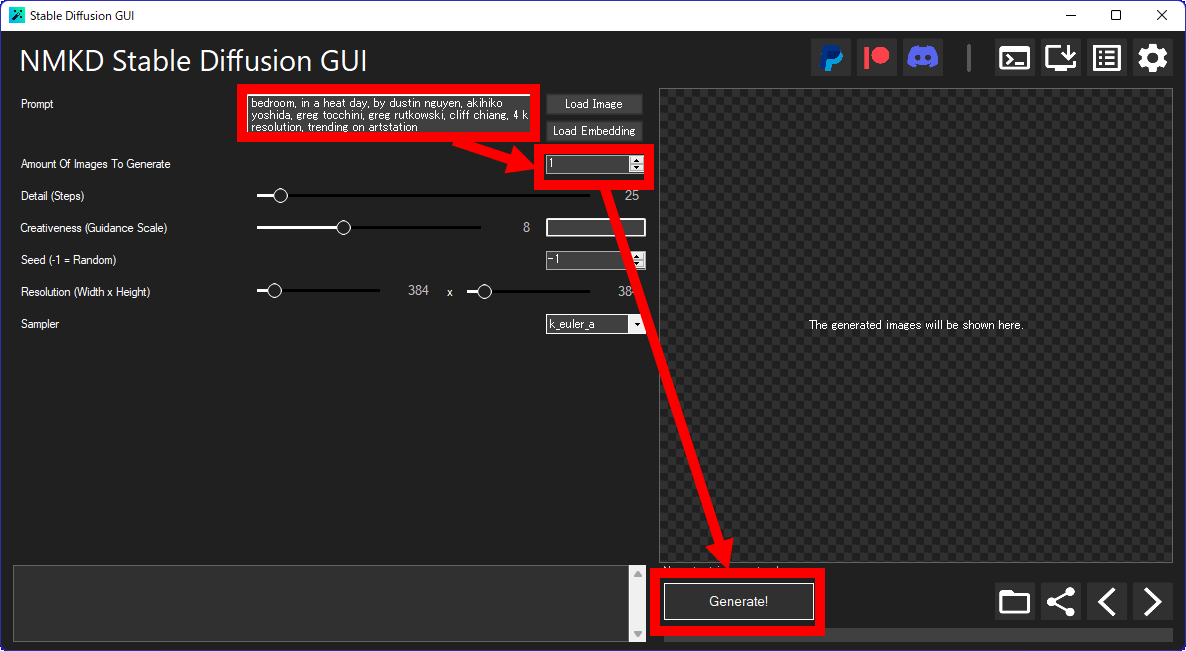
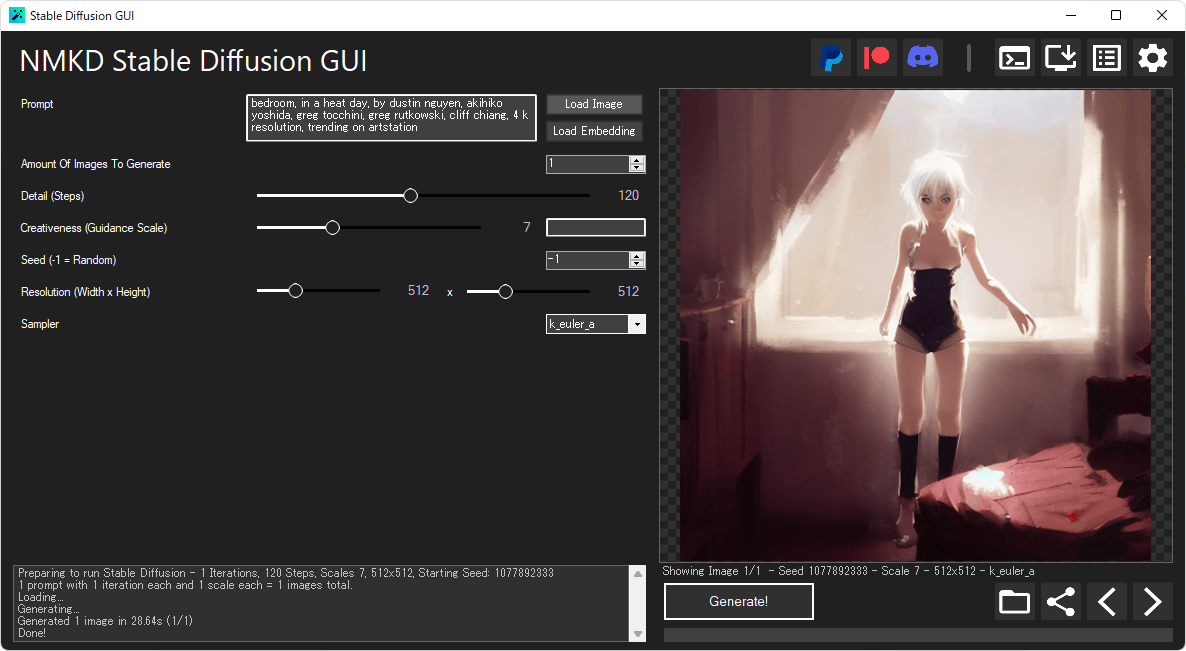
The basic usage of NMKD Stable Diffusion GUI is very simple. Just enter the description of the image you want to generate in English in the input field at the top left of the screen and click 'Generate!' At the bottom of the screen. This time, referring to the Stable Diffusion input example sharing site ' Lexica ', 'a young girl white hair in front of a fan of her bedroom, in a heat day, by dustin nguyen, akihiko yoshida, greg tocchini, greg rutkowski, cliff chiang , 4k resolution, trending on artstation (A girl with gray hair blowing in the wind in her bedroom, hot day, drawn by Dustin Nguyen, Akihiko Yoshida, Greg Tocchini, Greg Rutkowski, Cliff Chen, 4K resolution, ArtStation You entered the instruction 'Popular in
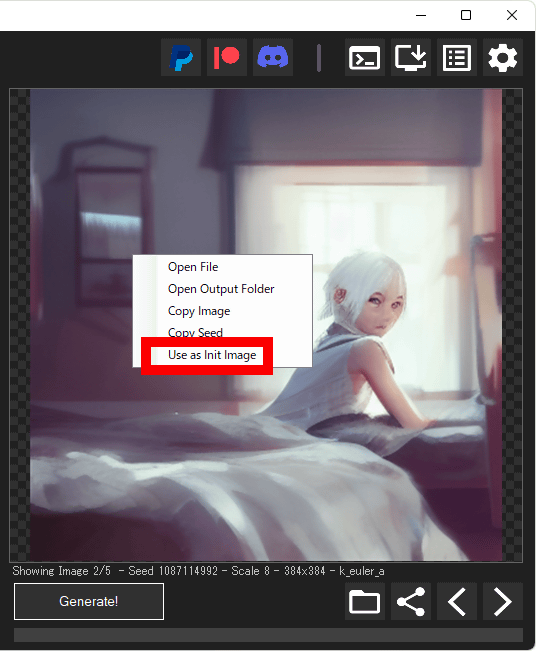
By default, 5 images are output based on the same instruction. You can browse the output images in order by clicking the left and right buttons placed on the image stock.
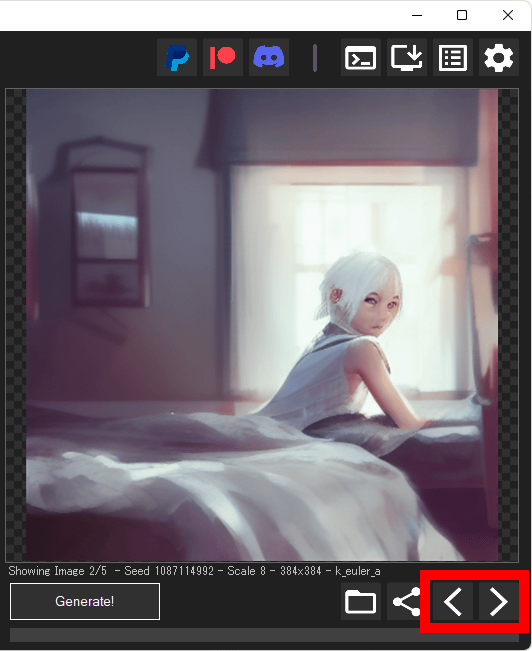
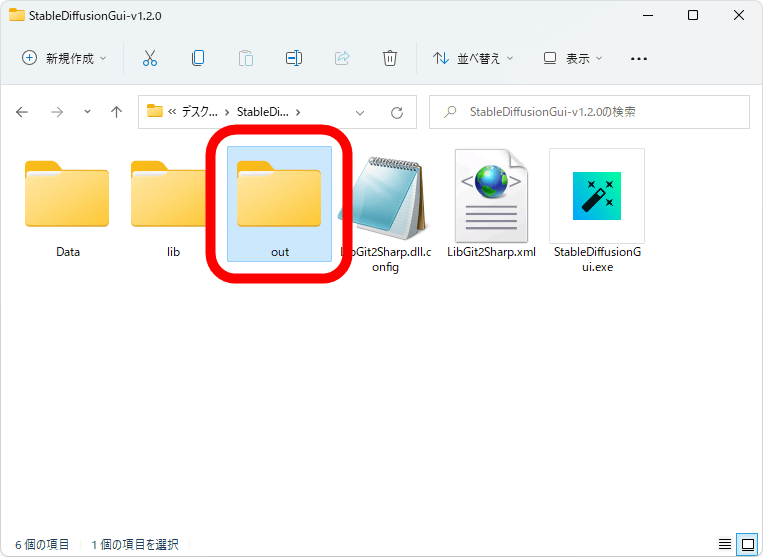
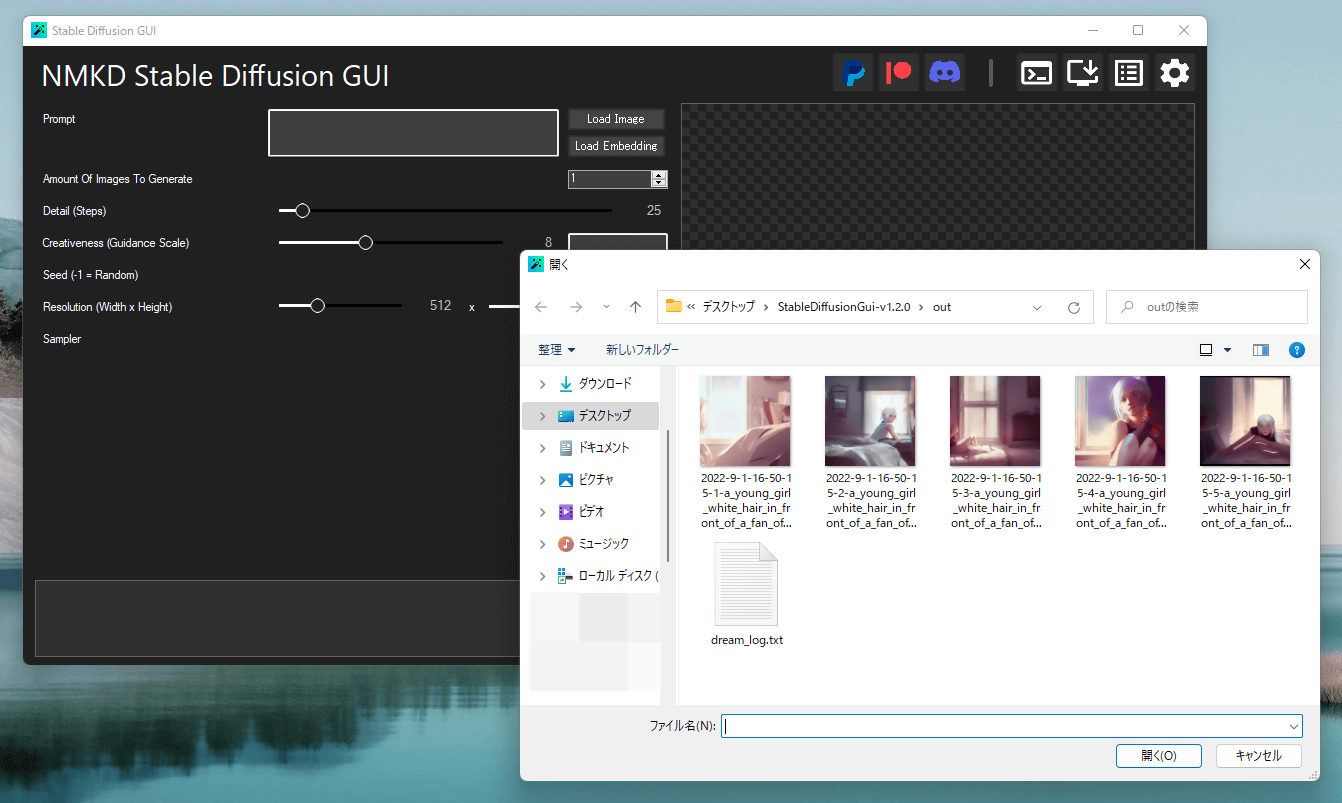
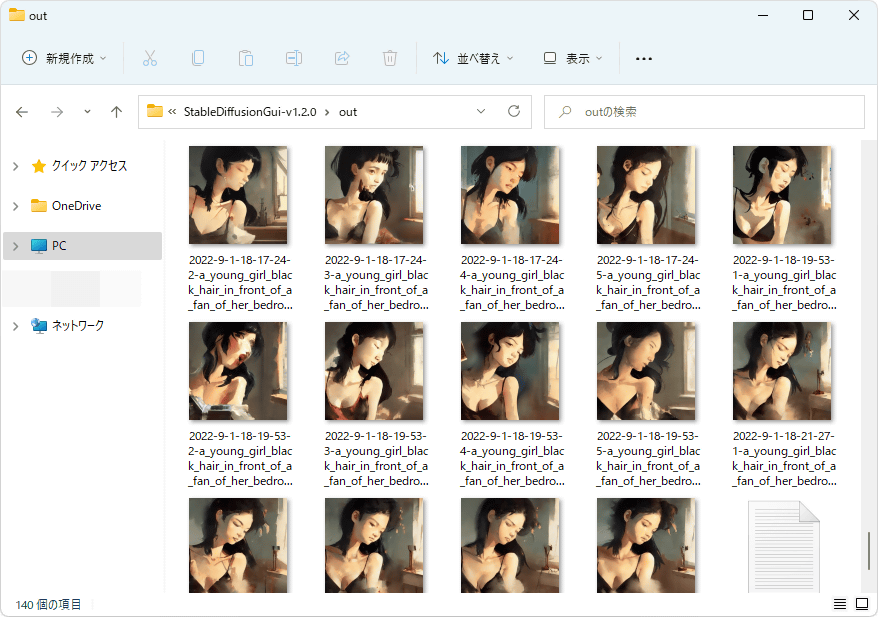
Click 'Open Output Folder' from the right-click menu ... ...
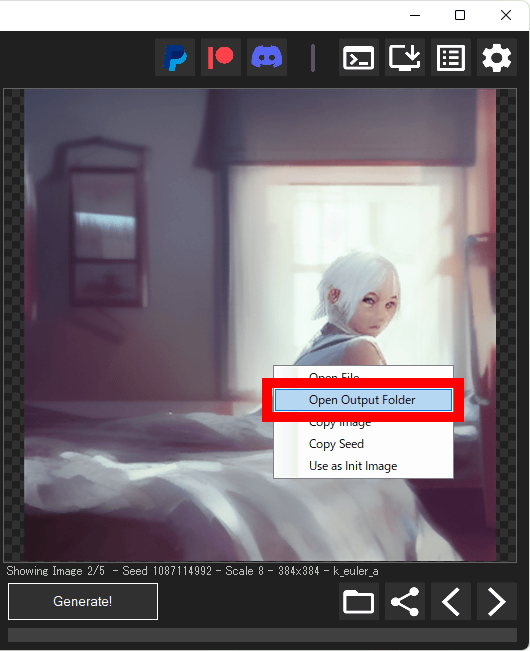
Open the folder where the output image is saved.

The output image is saved in a folder named 'out' in the same hierarchy as the NMKD Stable Diffusion GUI executable file.
◆2: Effects of various setting items
There are multiple setting items on the left side of the NMKD Stable Diffusion GUI screen, and you can change the generated image by changing various settings.
The effect of each setting item is as follows.
・Amount Of Image To Generate
You can specify the number of images to be generated for each 'Generate!' It is also possible to 'generate thousands of sheets while sleeping'. You can also stop printing before reaching the specified number, so there is no problem even if you set it a little too high.
・Detail (Steps)
The higher the value, the finer the generated image. As a result of many experiments in the editorial department, it was found that setting Detail (Steps) to 100 to 120 resulted in just the right amount of drawing. However, the larger the number, the longer the processing time for each sheet, so it is recommended to first generate one sheet at a time and judge the tolerance of the writing condition yourself.
・Creativeness (Guidance Scale)
The higher the number, the more images will be generated along the given string. However, if the value is too large, a chaotic image will be output, so be careful. The editorial department came to the conclusion that 7 to 12 is just right.
・Seed (-1=Random)
In Stable Diffusion, even if you enter the same text with the same settings, by changing the seed value (Seed), a different image is generated each time. On the contrary, the same image can be generated by arranging the input text, various settings, and the seed value. The initial setting of the seed value is '-1', which represents randomness, and can be changed arbitrarily.
・Resolution (Width x Height)
You can specify the number of horizontal (Width) x vertical (Height) pixels. The more pixels, the more GPU memory is required. If image generation fails, it may be solved by reducing the number of pixels. In addition, Stable Diffusion is developed to demonstrate the maximum effect at 512 × 512 pixels.
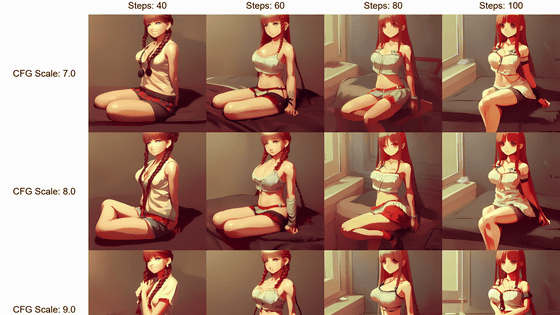
・Sampler
You can select your favorite sampler from 8 types of samplers. Depending on the sampler you choose, the same seed value will produce different nuances of the image.
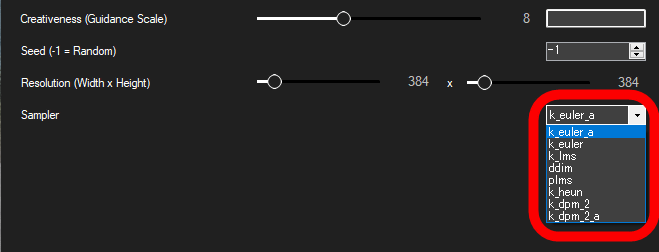
The difference in features for each sampler is clearly shown in the image below.
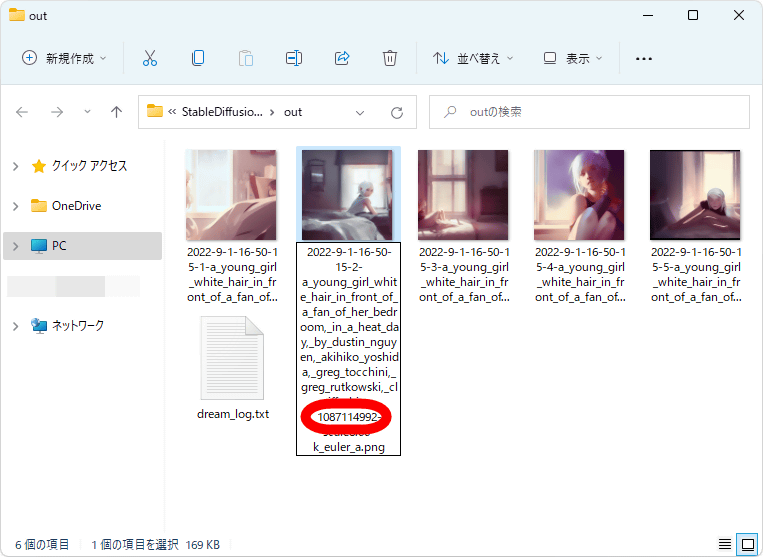
Generating an image with the NMKD Stable Diffusion GUI records the seed value in the file name. If you want to generate an image using the same seed after image generation, you can check the file name.
In addition, the metadata of the generated image records the entered sentences, various setting items, and seed values. When I tried using a
◆ 3:
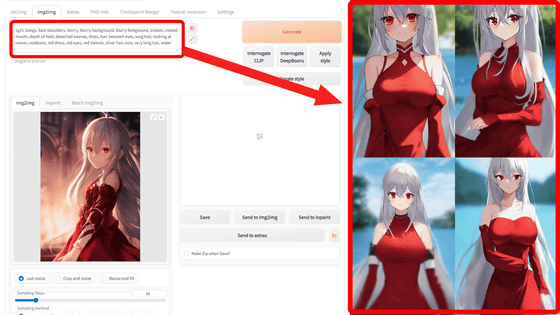
With Stable Diffusion, you can output an image close to your image by entering a detailed description, but there are many cases where the composition and color are not output as you imagined. In such a case, it is OK if you use the function 'img2img' that allows you to specify a reference image. 'img2img' is also available in NMKD Stable Diffusion GUI.
To specify a reference image in the NMKD Stable Diffusion GUI, first click 'Load Image'.
Then, the file selection dialog opens, so it is OK if you select the specified image.
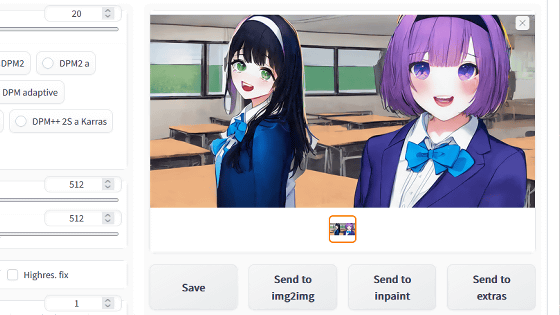
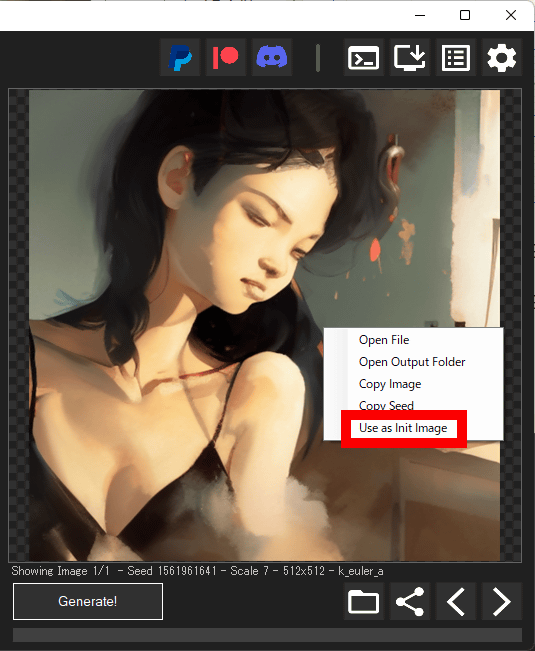
Also, in the NMKD Stable Diffusion GUI, you can generate a new image that incorporates the nuances of the generated image by right-clicking the generated image and selecting 'Use as Init Image'.
◆ 4: Procedure to output your favorite image
As mentioned above, the NMKD Stable Diffusion GUI can generate images with simple operations, and you can generate images that are close to your image by thoroughly setting the settings. Even in the editorial department, we are running image generation to output our favorite images, and we have learned to some extent how to generate images that we like.
Step 1: Find a resolution that allows stable output on your PC
In order to output a favorite image with NMKD Stable Diffusion GUI, it is necessary to output a large number of images and find an image that is close to your taste. For this reason, you first need to find a resolution that can stably output with your machine's specs.
First, enter text in the input field. Next, set the value of Amount Of Image To Generate to 1 and click 'Generate!' to generate one image. At this time, the resolution setting (Resolution) is OK with the initial state. This time, as at the beginning of the article, 'a young girl white hair in front of a fan of her bedroom, in a heat day, by dustin nguyen, akihiko yoshida, greg tocchini, greg rutkowski, cliff chiang, 4 k resolution, trending on artstation (a girl with white hair blowing in the wind in her bedroom, a hot day, drawn by Dustin Nguyen, Akihiko Yoshida, Greg Tocchini, Greg Rutkowski, Cliff Chen, 4K resolution, popular on ArtStation) entered.
Once the image is successfully generated, it's time to set the optimal resolution for Stable Diffusion to 512x512 pixels and generate the image.
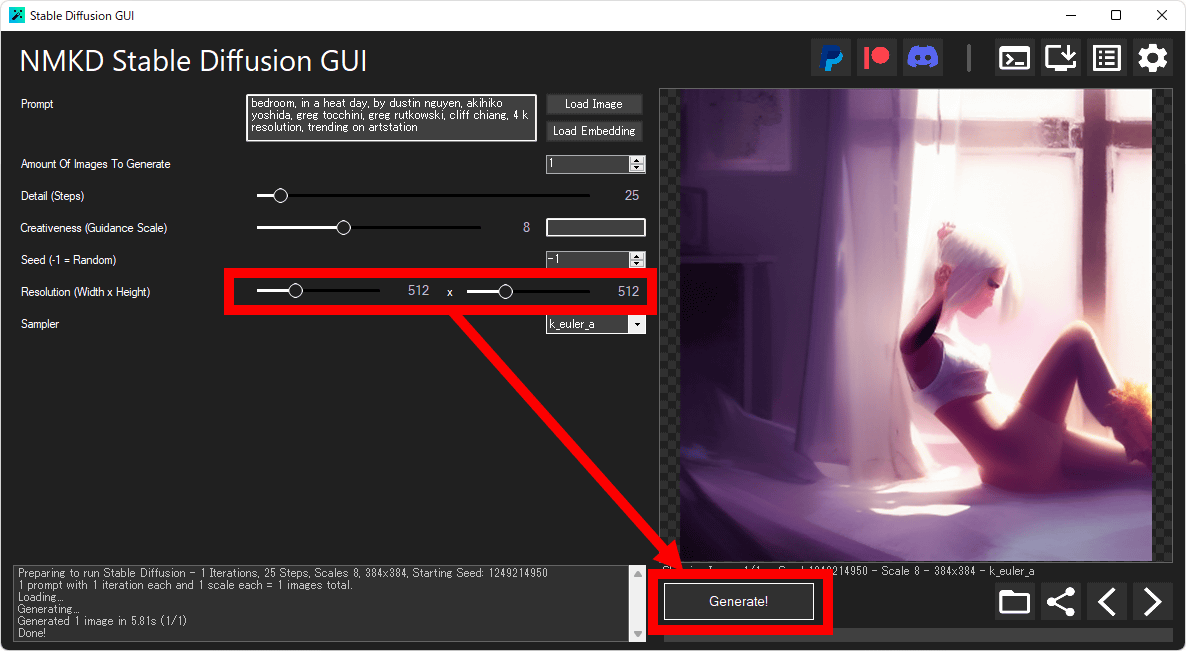
If the image is generated normally even with 512 × 512 pixels, it is OK if you do the following work with 512 × 512 pixels. If image generation fails, you may need to reset the resolution to a lower value.
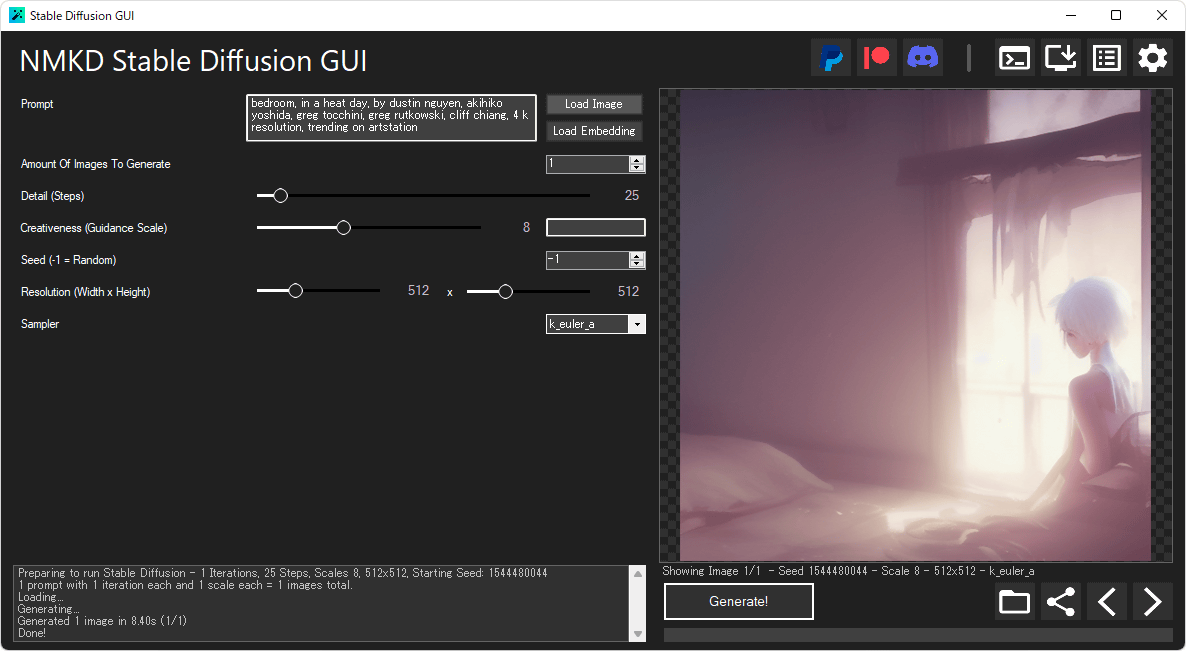
Step 2: Check if the instructions work properly
After determining the resolution, next generate the image with Detail (Steps) set to 100-130 and Creativeness (Guidance Scale) set to 7-12.
It is OK if an image with the atmosphere of the image is generated. In the next step, a large amount of images will be generated to find an image that is close to your taste, so at this point it is OK if it is not too far from the image. If an image that is too different from the image is output, it is necessary to correct the sentence.
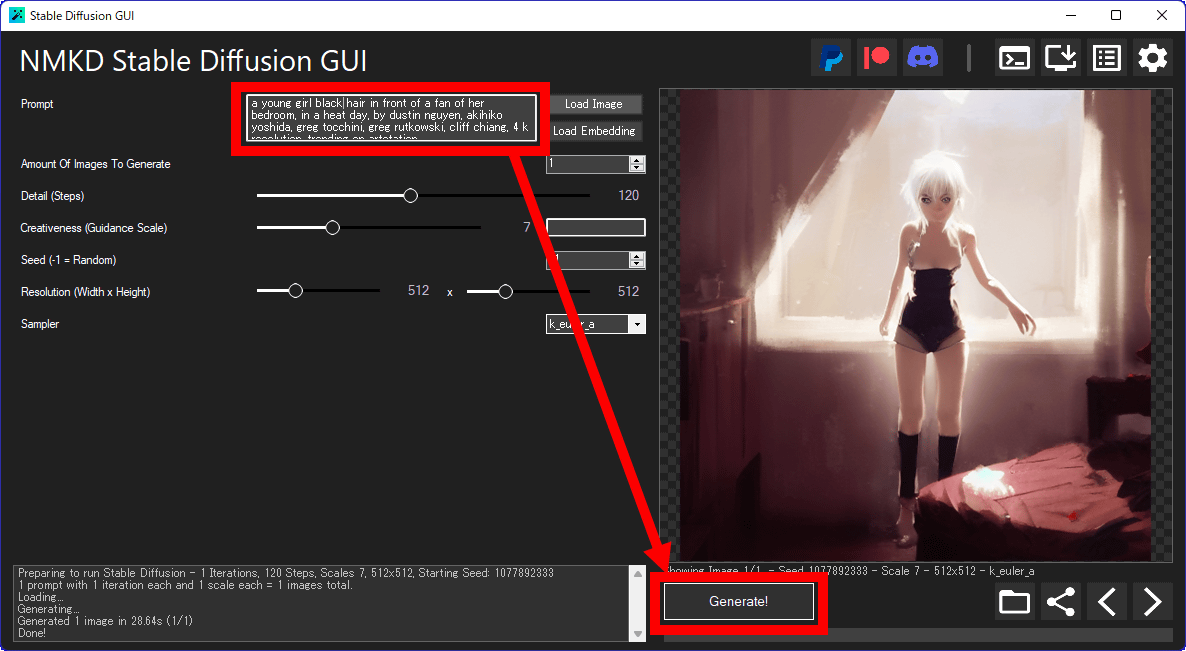
Step 3: Tweak Instructions
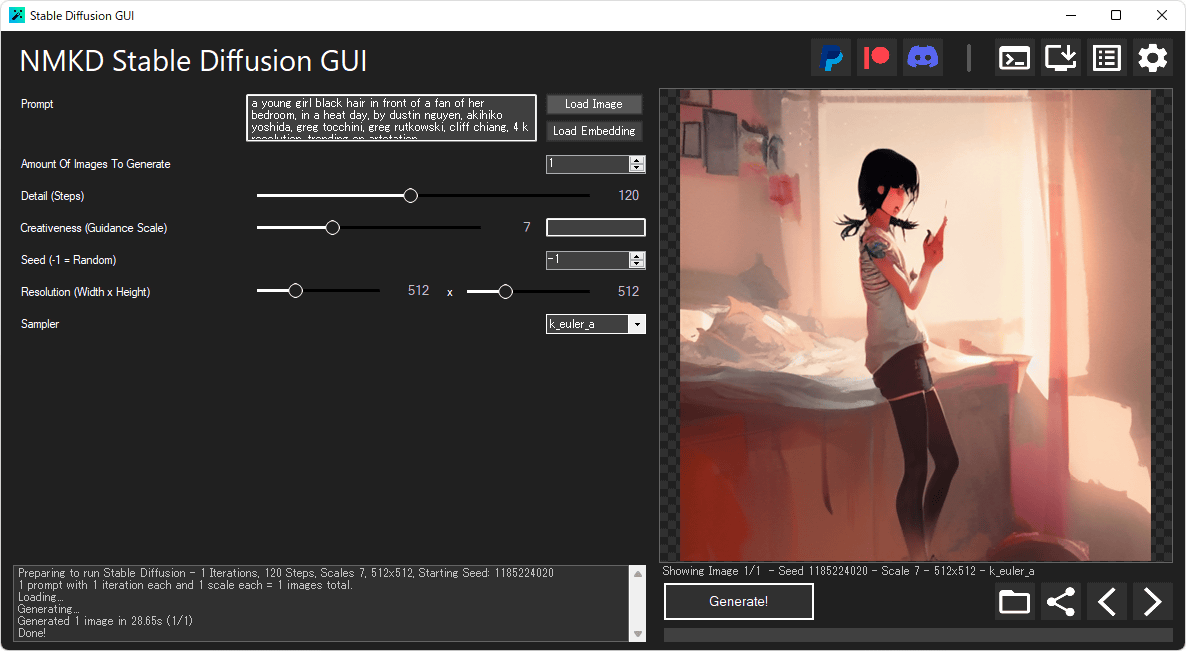
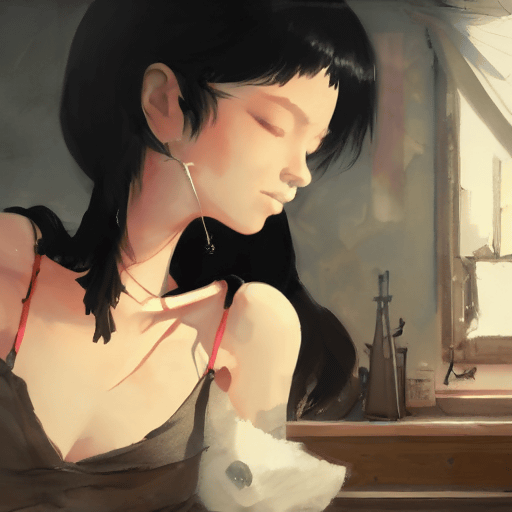
Knowing that the steps so far have generated the image correctly, it's time to tweak the nuances of the instructional text. This time, the part of 'a young girl white hair in front of a fan of her bedroom' is replaced with 'a young girl black hair in front of a fan of her bedroom' A girl with hair is blowing in the wind in the bedroom)' and generated an image.
It is OK if the image as instructed is generated. Even a small change in the instruction text can cause the generated image to break down, so in that case, fine adjustments are repeated to generate an image that is close to the image.
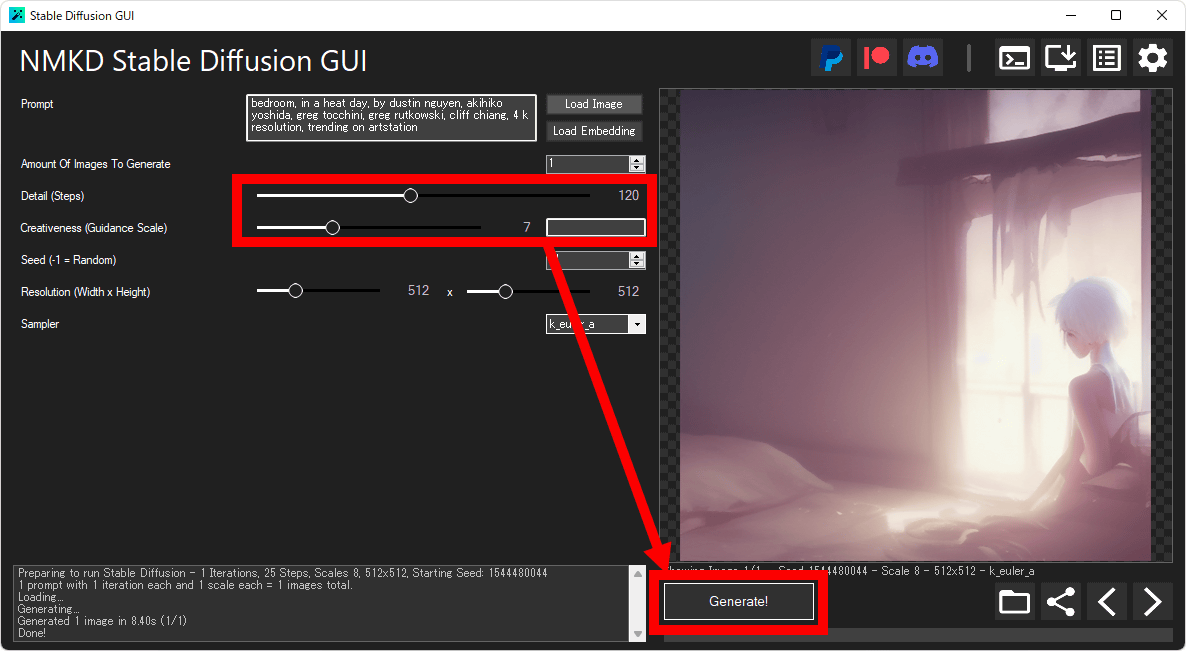
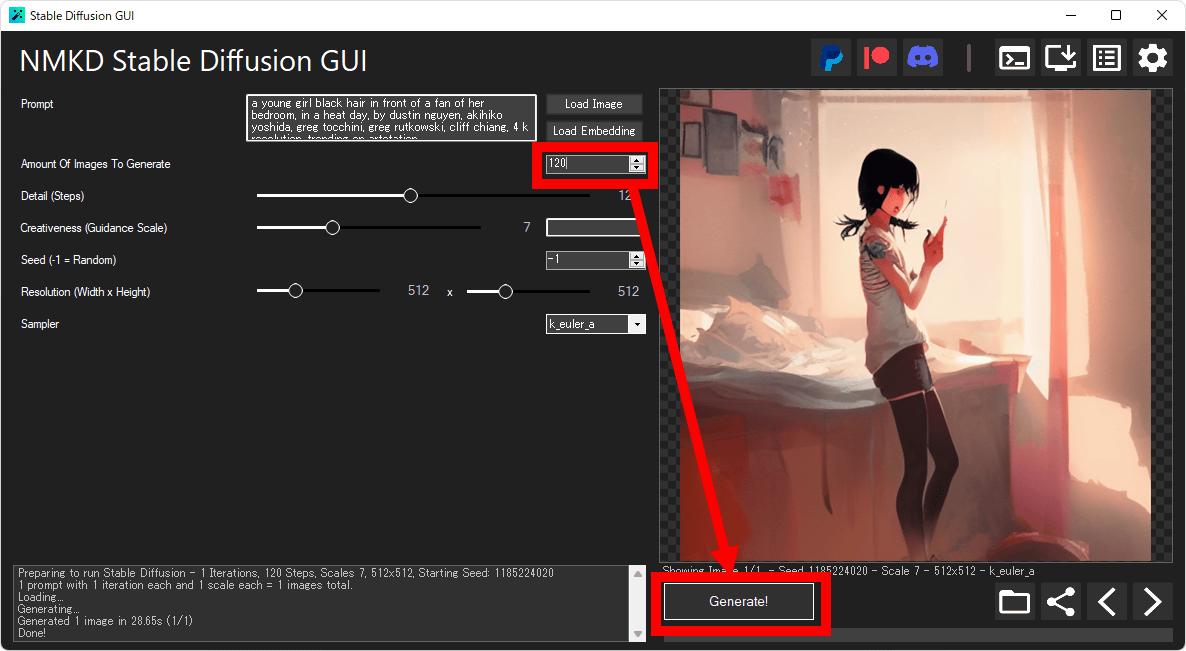
Step 4: Mass Generate Images
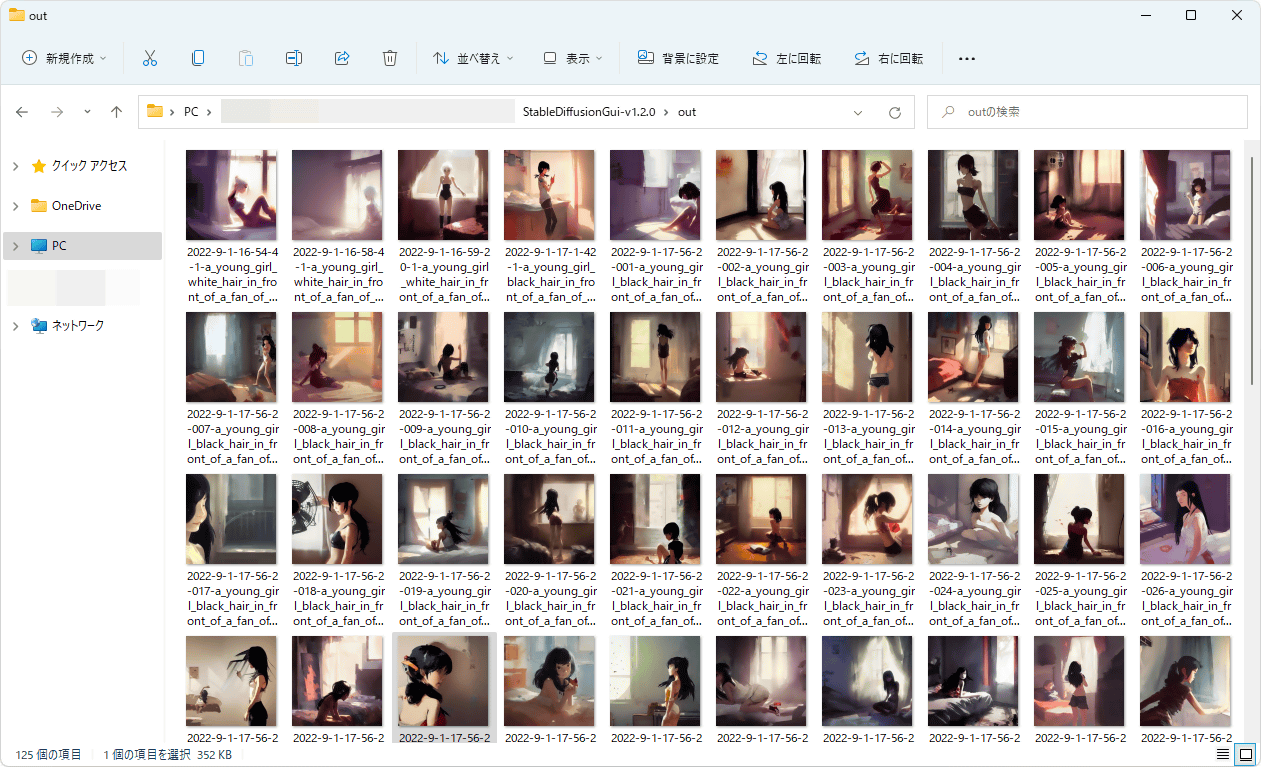
An image close to the image was generated, so I will generate a large number of images with this setting and select an image that is close to my taste. The log screen at the bottom right of the screen records the time taken to generate one image, so use this time to determine the number of prints. This time, I had 1 hour to generate the image, and it took 28.65 seconds to generate one image, so I decided to generate 120 images.

Set the Amount Of Image To Generate value to 120 and click Generate.
When I checked the save folder about an hour later, the generated images were saved in a row.
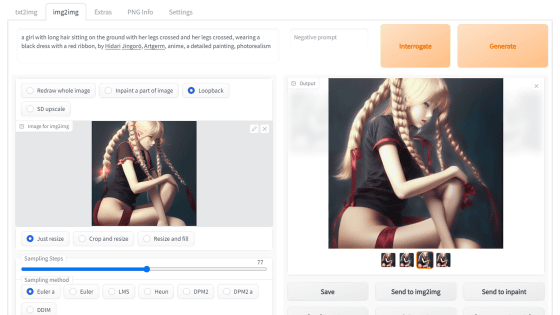
Step 5: Generate a derived image based on an image close to your taste
By selecting an image that is close to your preference from a large number of generated images, specifying that image as a reference image, and executing image generation again, you can make the generated image as close to your preference as possible.
Display the image on the NMKD Stable Diffusion GUI and select 'Use as Init Image' from the right-click menu, or select the image from 'Load Image'.
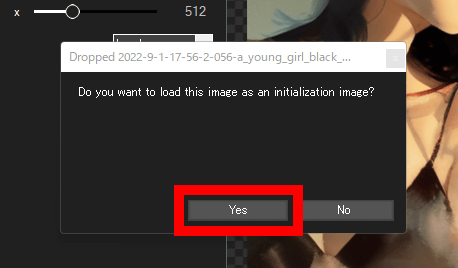
When a confirmation screen asking whether to specify it as a reference image is displayed, click 'Yes'.
Then, a new setting item 'Init Image Strength (Influence)' will be displayed on the screen. The larger the value of this item, the farther the image will be generated from the reference image. Generate images while fiddling with Init Image Strength (Influence) and various setting items.
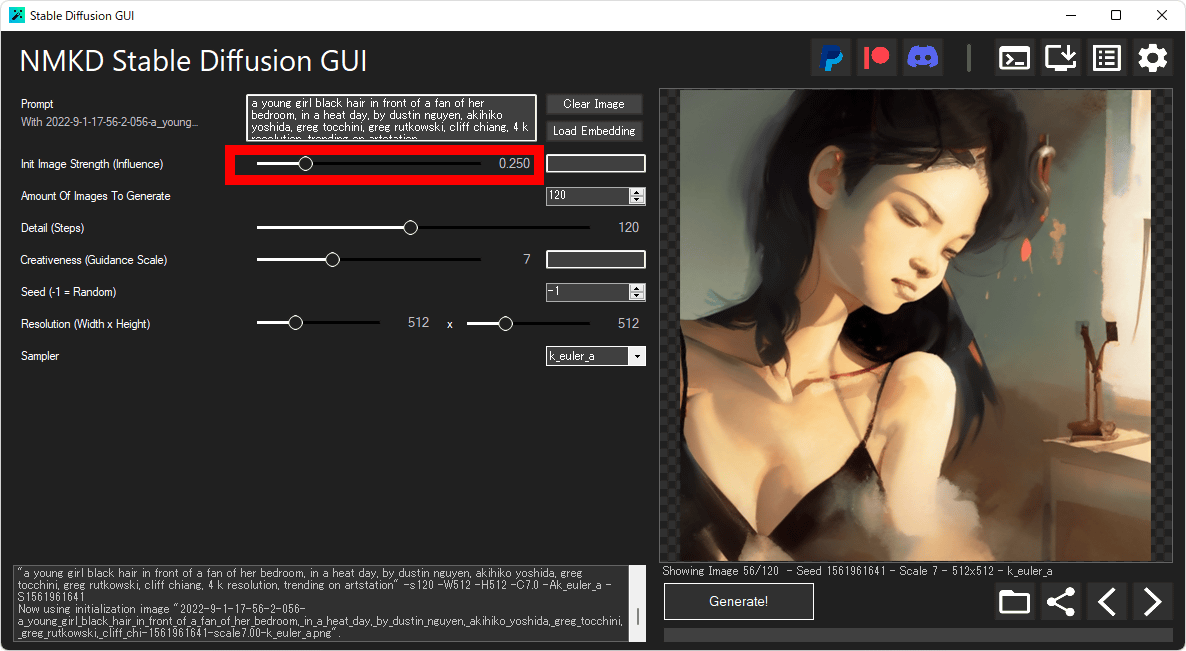
In this way, while changing the settings, generate more and more images based on the reference image, and make the generated image as close as possible to your taste.
I was able to generate the following image with a total of about 1 hour and a half work including waiting time.
Related Posts: