Summary of how to enlarge beautifully from 'Extras' according to the type of image generated by image generation AI 'Stable Diffusion (AUTOMATIC 1111 version)'
The web UI package '
Dependencies AUTOMATIC1111/stable-diffusion-webui Wiki GitHub
https://github.com/AUTOMATIC1111/stable-diffusion-webui/wiki/Dependencies#esrgan-upscaling
The following article summarizes how to introduce the AUTOMATIC1111 version of Stable Diffusion web UI to the local environment.
Image generation AI ``Stable Diffusion'' works even with 4 GB GPU & various functions such as learning your own pattern can be easily operated on Google Colabo or Windows Definitive edition ``Stable Diffusion web UI (AUTOMATIC 1111 version)'' installation method summary - GIGAZINE
Also, you can understand the basic usage of the AUTOMATIC 1111 version Stable Diffusion web UI by reading the following article.
Basic usage of ``Stable Diffusion web UI (AUTOMATIC 1111 version)'' that can easily use ``GFPGAN'' that can clean the face that tends to collapse with image generation AI ``Stable Diffusion''-GIGAZINE
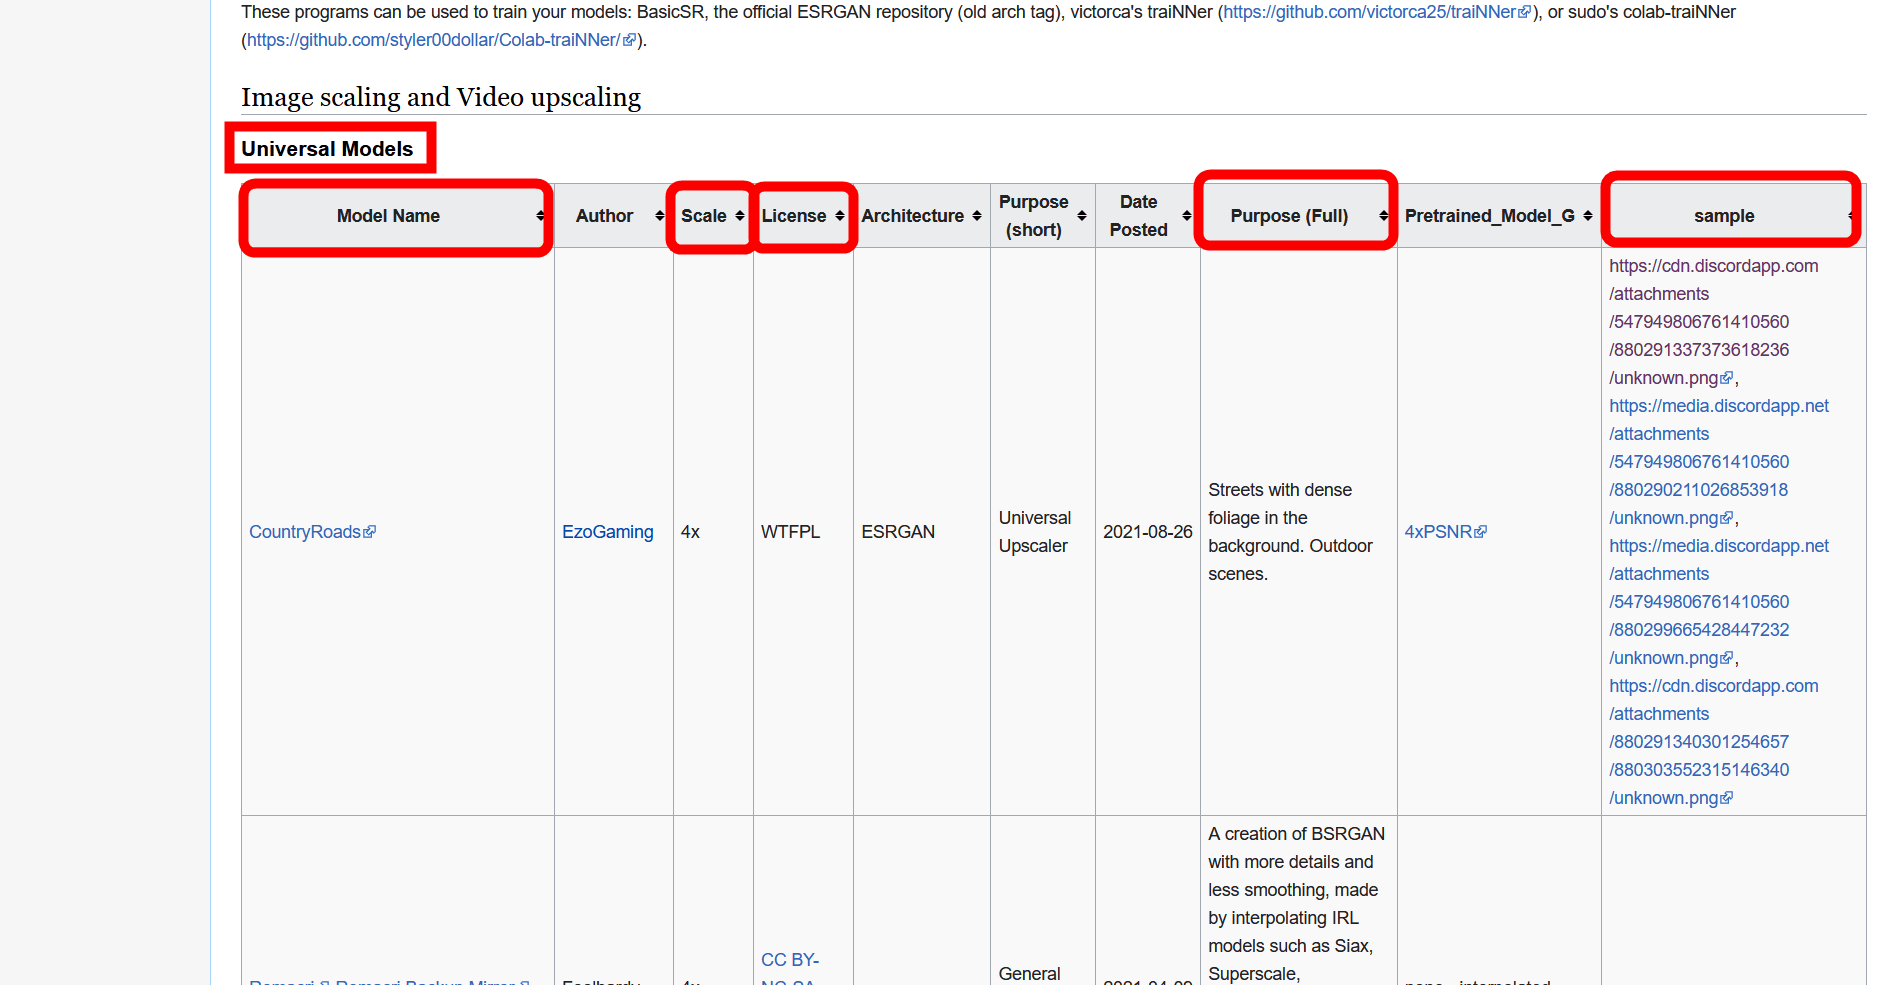
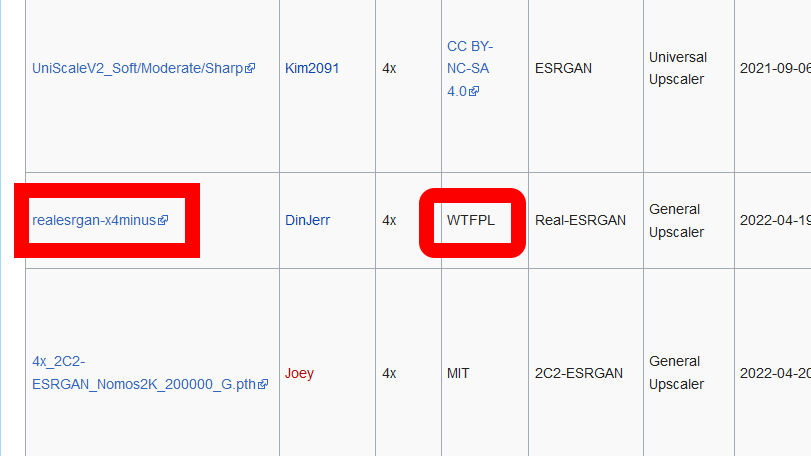
The ESRGAN model used for image upscaling is summarized in the following Wiki.
Model Database - Upscale Wiki
https://upscale.wiki/wiki/Model_Database
The appropriate ESNGAN model differs depending on the image to be enlarged, such as 'live-action image', 'painting', 'animation', 'manga', etc., but this time, the model is selected from 'Universal Models', which is the most versatile type. Download. Each model is organized in a table, but check 'Model Name', 'Scale', 'License', 'Purpose', and 'Sample'. OK. If you have a specific image you want to enlarge, see Purpose and Sample and select a model.
To download this 'realesrgan-x4minus' this time, click the model name 'realesrgan-x4minus'. In addition, the license '
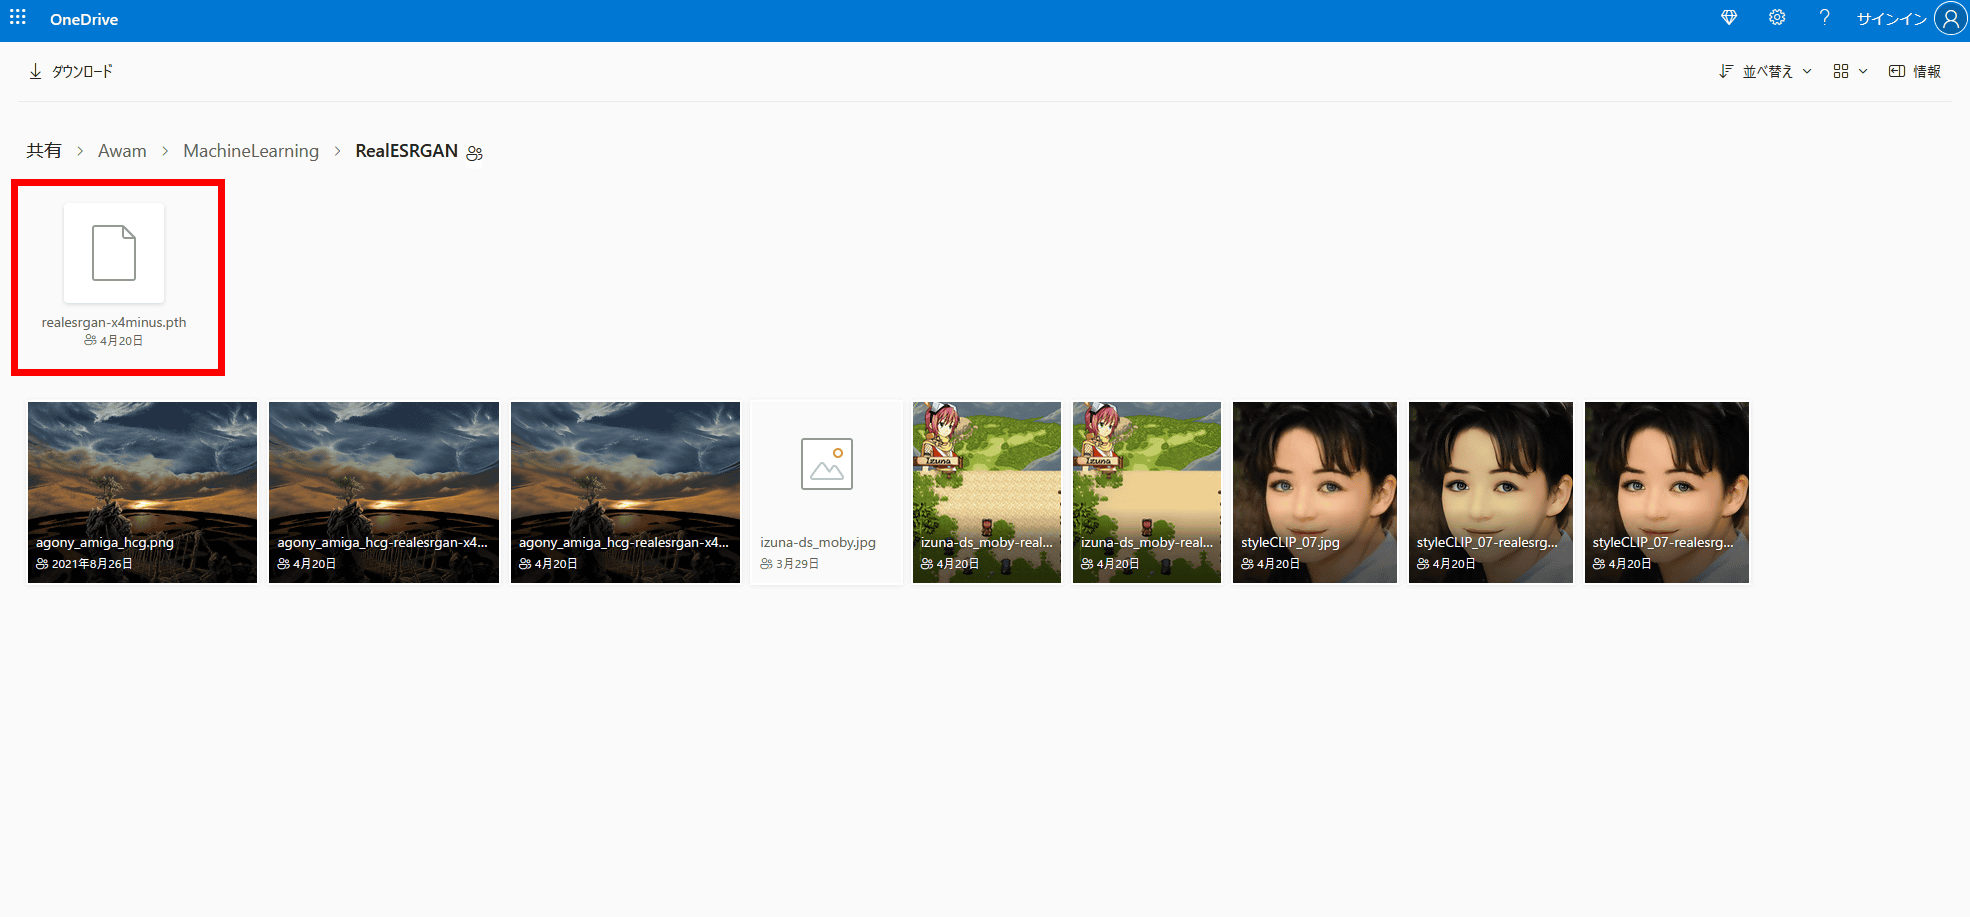
realesrgan-x4minus is distributed on OneDrive. ESRGAN model files have the extension '.pth'. Click 'realesrgan-x4minus.pth'.
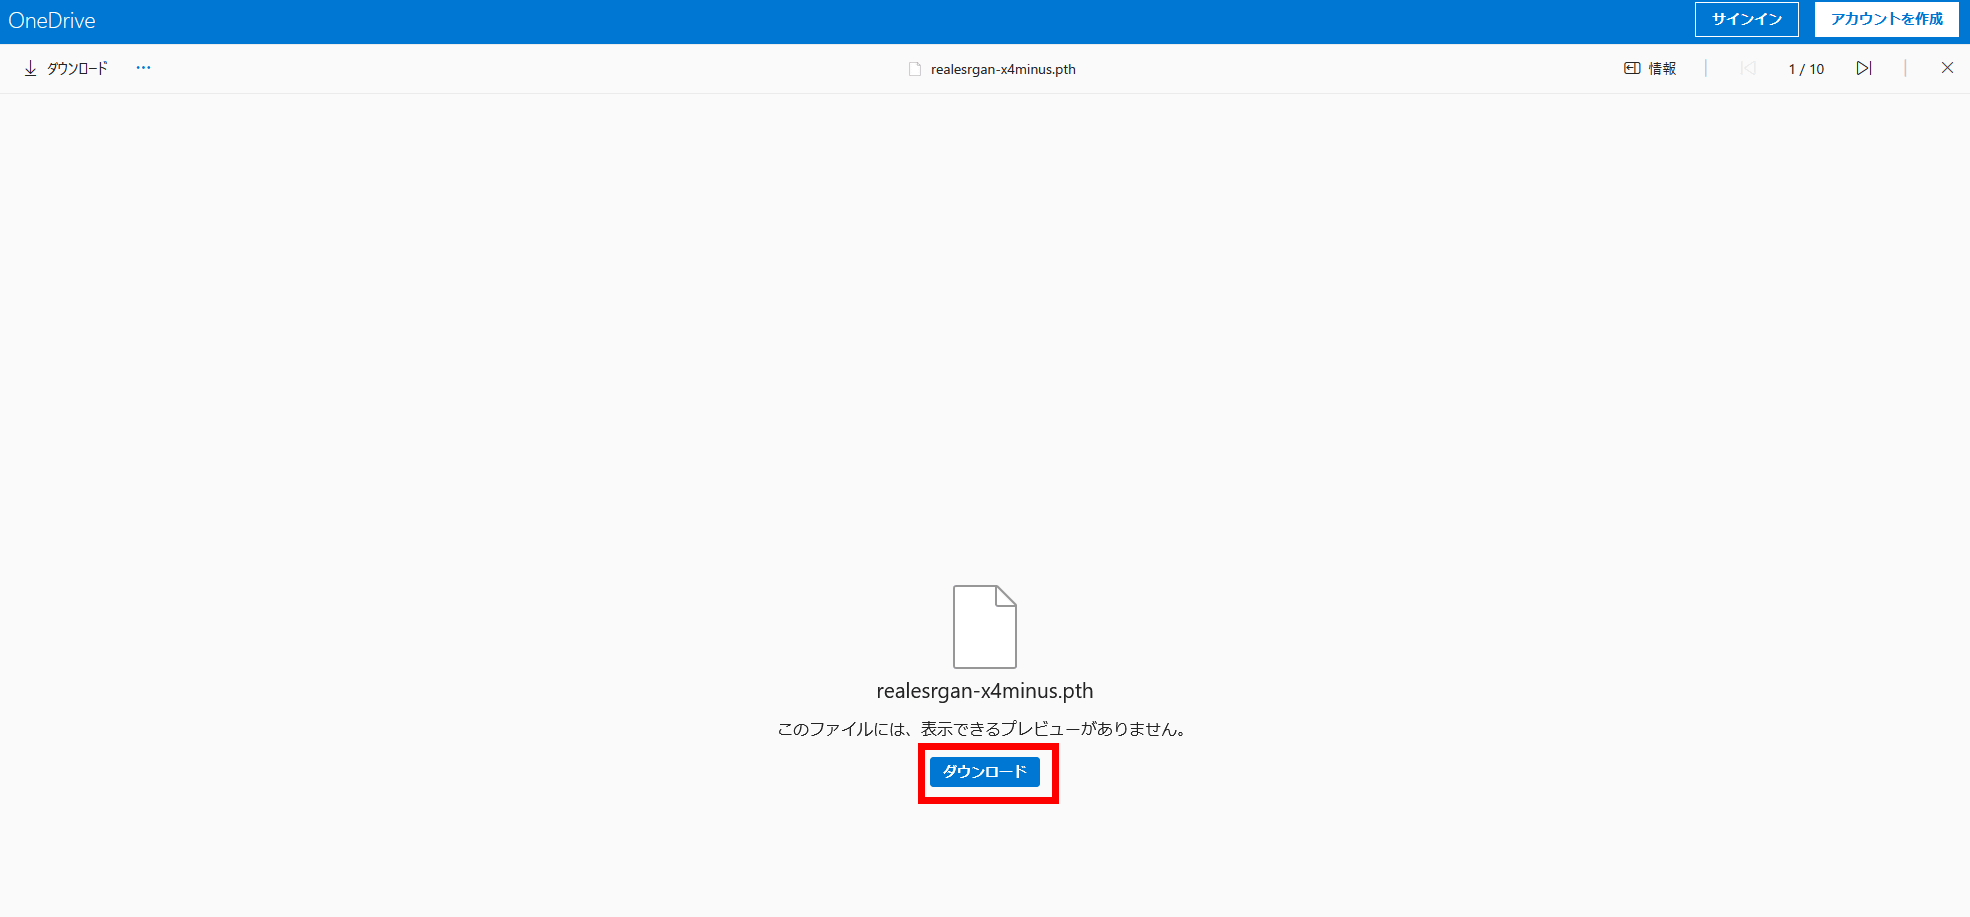
Click Download.
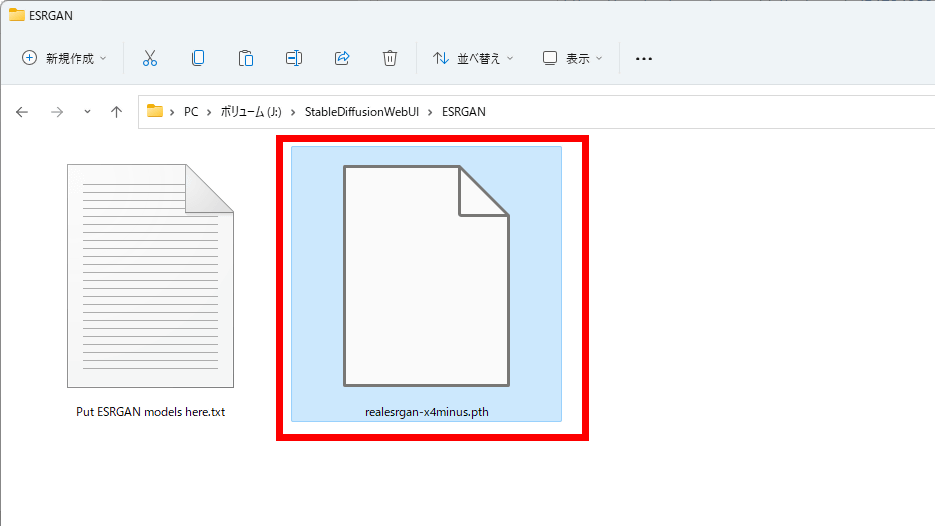
The destination to save the model file to be downloaded is the 'ESRGAN' folder in the directory of the AUTOMATIC 1111 version Stable Diffusion webUI.
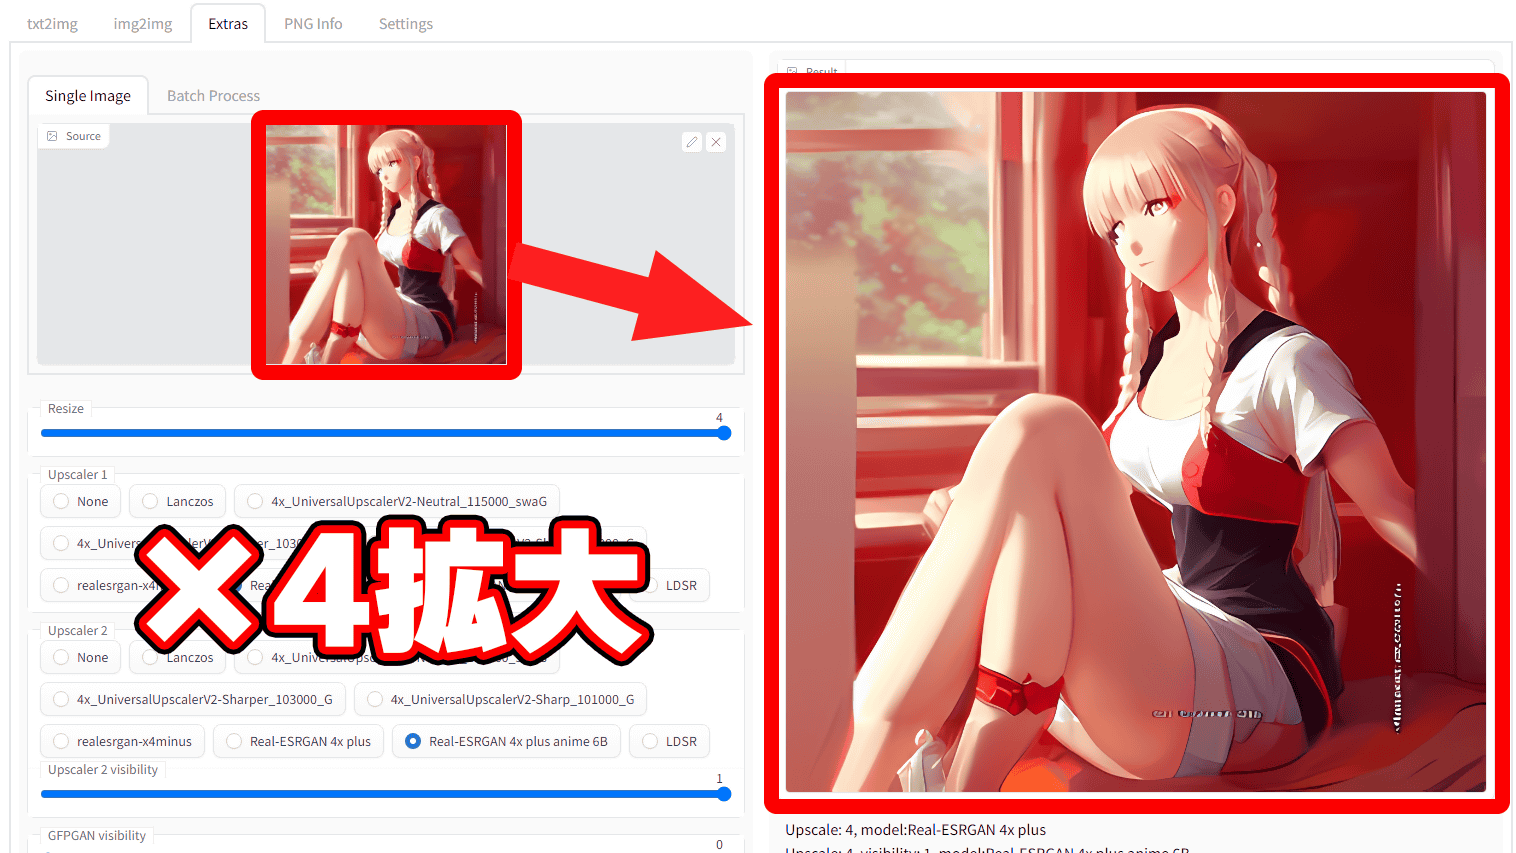
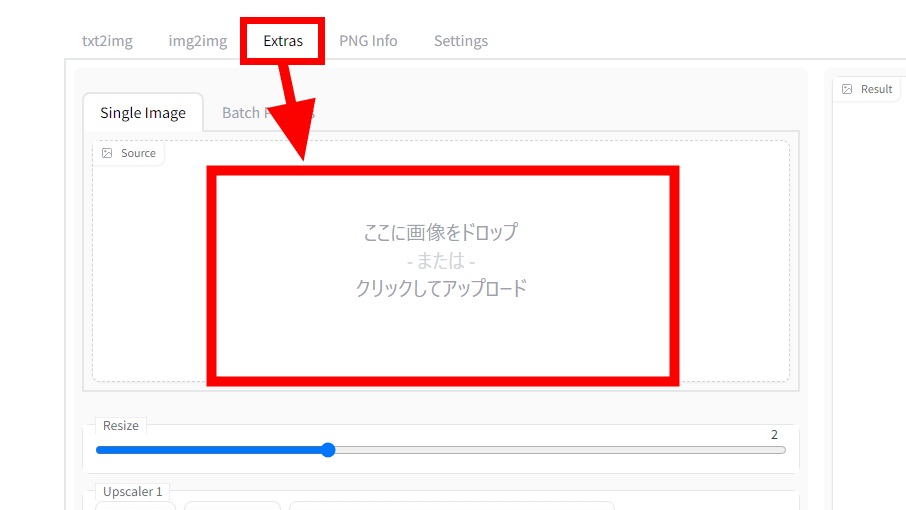
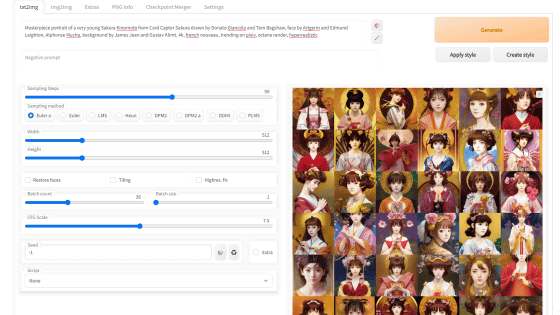
After downloading the ESRGAN model like this, start the AUTOMATIC 1111 version Stable Diffusion webUI and click 'Extras' at the top. Click 'Single Image' and select the image you want to enlarge, or drag and drop the image you want to enlarge.
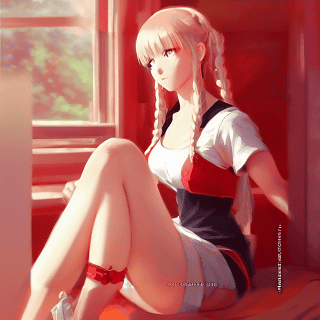
What I read this time is a picture created with Stable Diffusion reduced to 320 x 320 pixels.
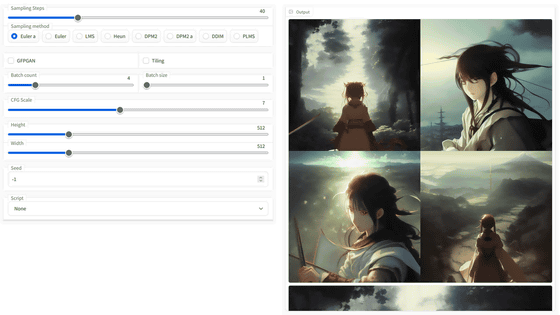
Once the image is loaded, just configure the settings and click 'Generate'. Various settings are as follows.
・Resize: Magnification rate
・Upscaler1: The first algorithm for upscaling
・Upscaler2: Second algorithm for upscaling
・Upscaler 2 visibility: Visibility of the second algorithm
・GFPGAN visibility: Visibility of GFPGAN, an algorithm for facial restoration
CodeFormer visibility: Visibility of CodeFormer, a Transformer-based facial inpainting algorithm
・CodeFormer weight: The weight of CodeFormer, the higher the value, the weaker the effect.
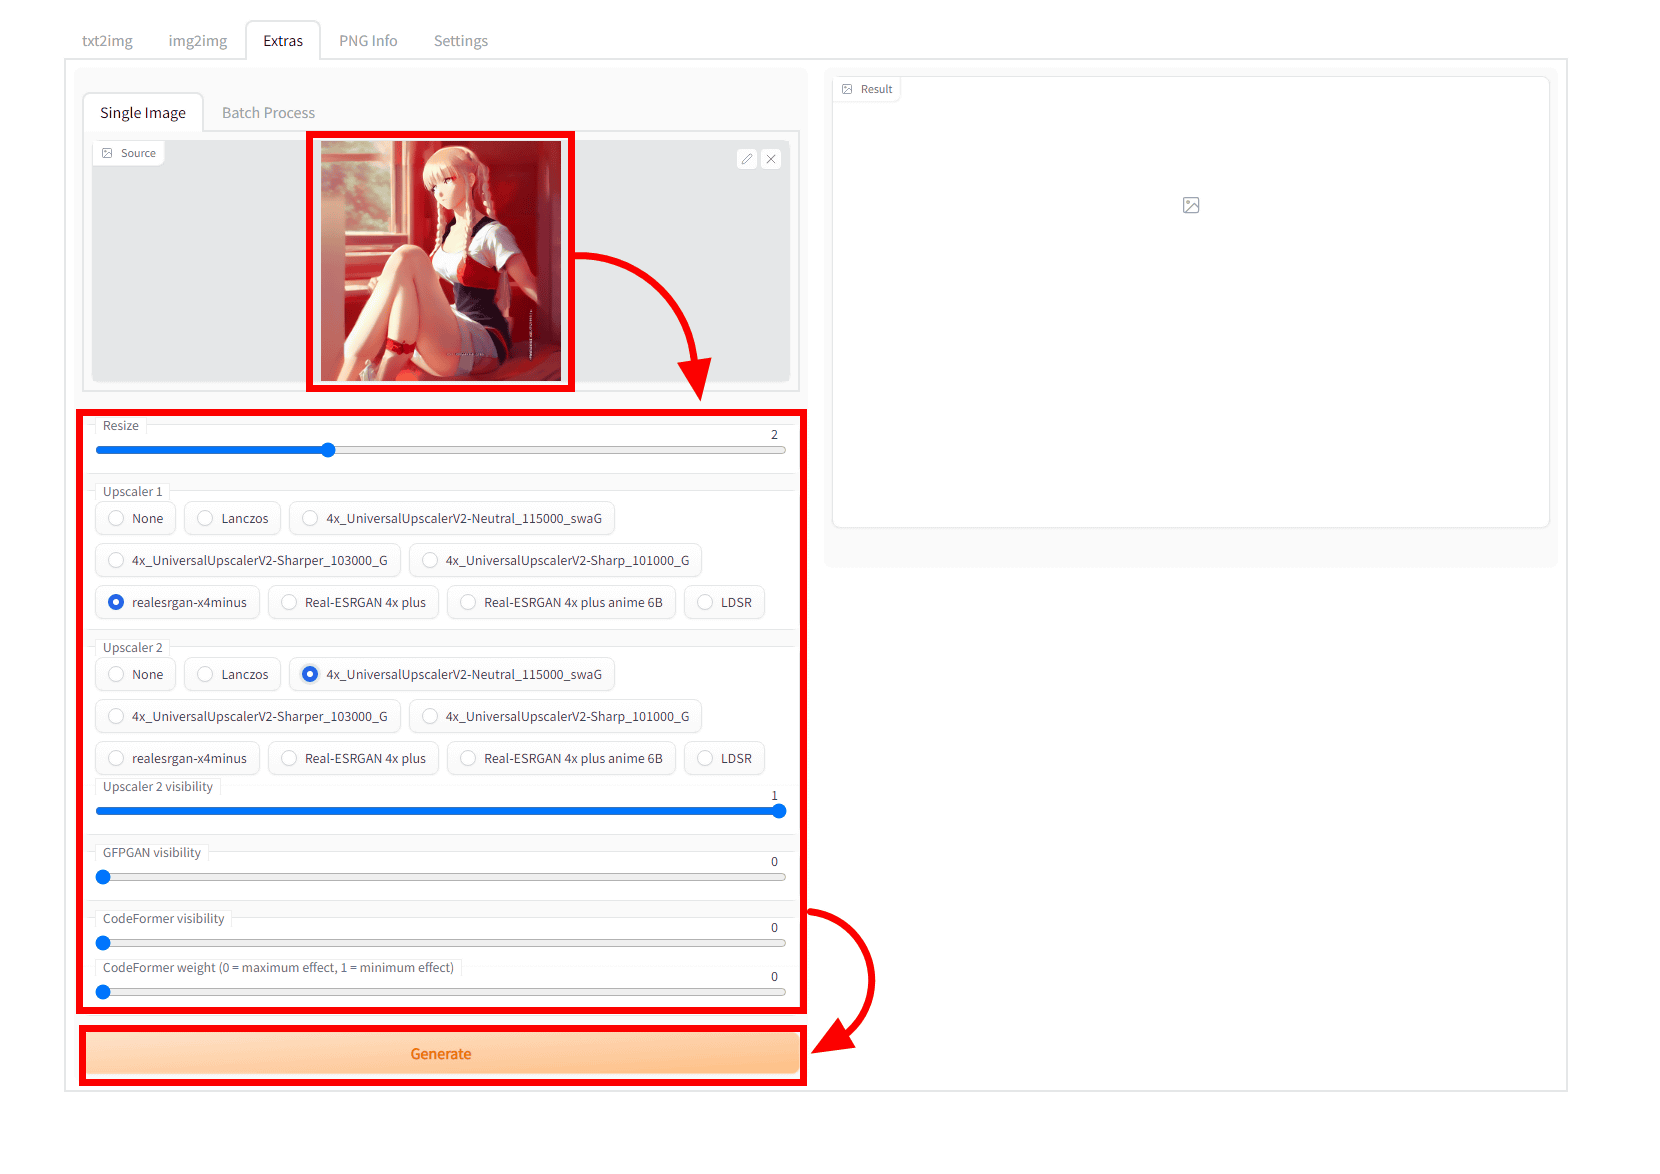
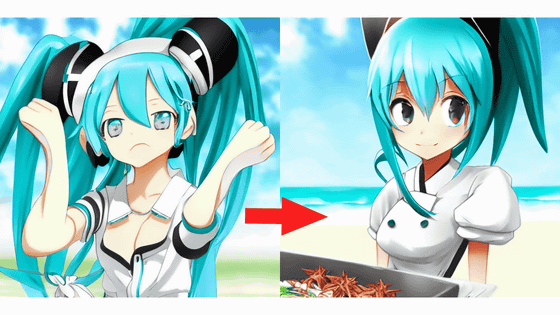
Then, the enlarged result was displayed like this.

I tried enlarging it with various settings, so I prepared a comparison image. The image on the left is a simple enlargement of the image before upscaling, and the image on the right is the image after upscaling using Extras in the AUTOMATIC1111 version of the Stable Diffusion web UI. You can easily compare by moving the slide bar displayed in the center left and right.
The following is upscaled using realesrgan 4xminus and realesrgan 4x anime 6B, which is installed by default. Compared to the simply enlarged image, the noise is clearly reduced, the lines are clear, and the painting is clear.
This time, I enlarged it by 4 times with Sharp_101000_G of
Neutral_115000_swaG and Sharper_130000_G enlarged case by 4 times. The noise is clearly reduced, but the main lines are not sharp, but the atmosphere is a little fuzzy.
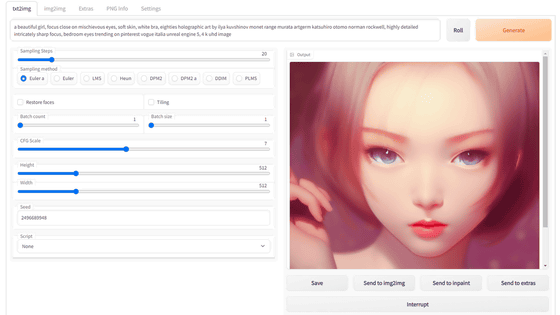
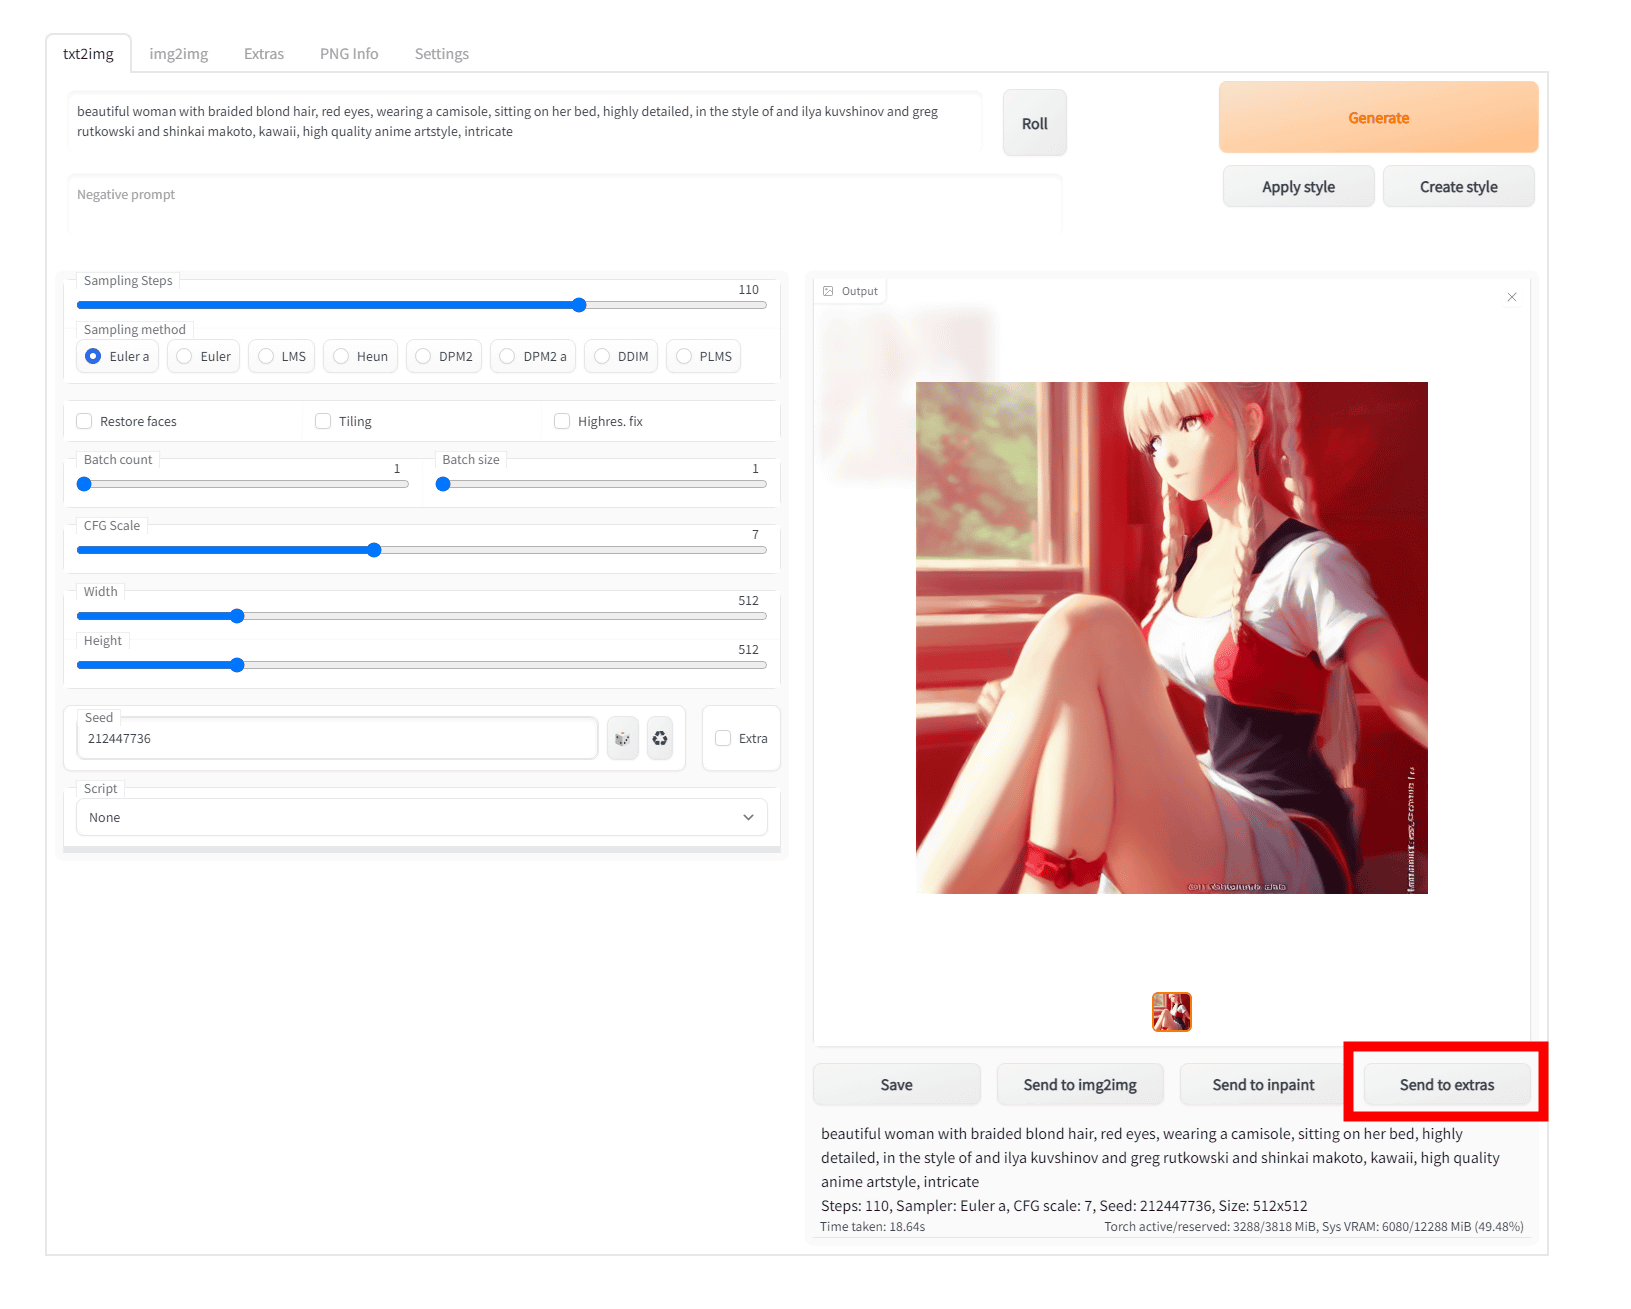
In addition to selecting and dragging and dropping arbitrary images to Extras, images generated by AUTOMATIC 1111 version Stable Diffusion web UI can be directly input to Extras by clicking 'Send to extras' under the output result. possible. For example, if you try to create a large image of 1920 x 1920 pixels with Stable Diffusion, it will take a huge amount of time, and depending on the performance of your PC, you may get an error. However, for example, if you first generate an image with 480x480 pixels and then scale it up 4x with Extras, you can easily generate a large size and high resolution image.
Related Posts:

in Software, Web Service, Review, Creation, Web Application, Posted by log1i_yk