Summary of how to use the free plug-in 'Auto-Photoshop-StableDiffusion-Plugin' that can use image generation AI in Photoshop
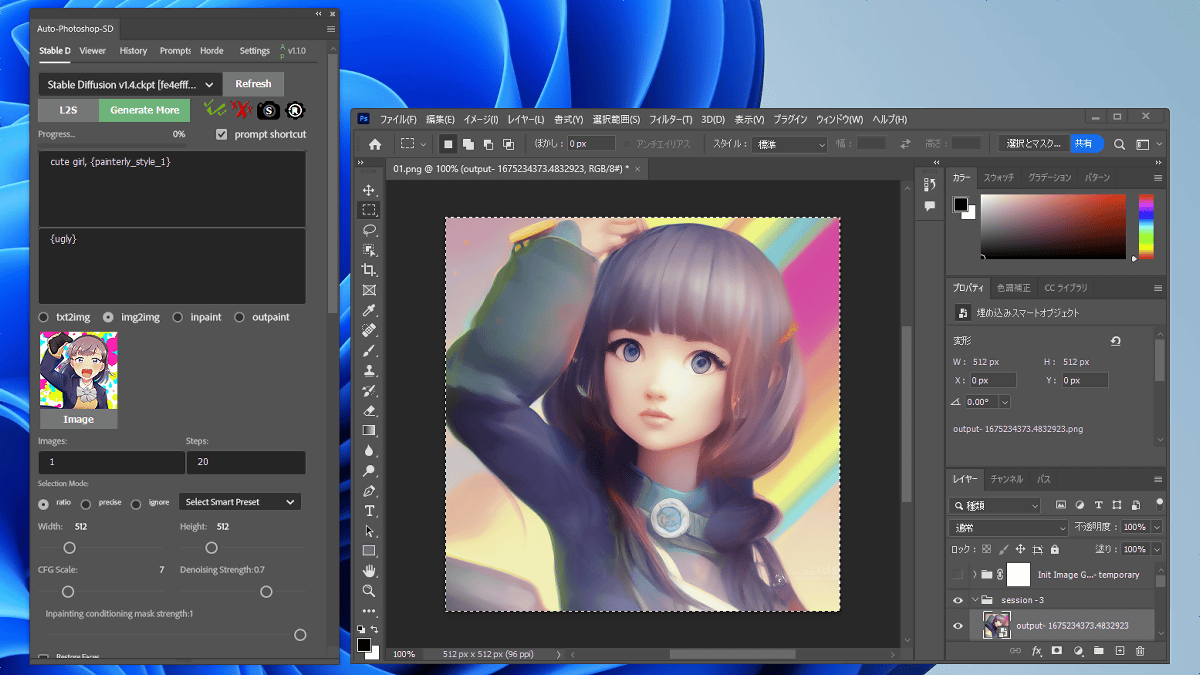
Image generation AI such as Stable Diffusion is very useful for creating ideas and outputting materials for work production. If you use the free Photoshop plug-in ' Auto-Photoshop-StableDiffusion-Plugin ', you can immediately edit the image generated by Stable Diffusion on Photoshop, so actually Auto-Photoshop-StableDiffusion-Plugin I checked how to install and how to use it.
GitHub - AbdullahAlfaraj/Auto-Photoshop-StableDiffusion-Plugin: A user-friendly plug-in that makes it easy to generate stable diffusion images inside Photoshop using Automatic1111-sd-webui as a backend.
·table of contents
◆1: Installation procedure for Auto-Photoshop-StableDiffusion-Plugin
◆2: How to generate an image with txt2img
◆3: How to generate an image with img2img
◆ 1: Installation procedure for Auto-Photoshop-StableDiffusion-Plugin
Auto-Photoshop-StableDiffusion-Plugin works in conjunction with Stable Diffusion web UI (AUTOMATIC1111 version), so first you need to install Stable Diffusion web UI (AUTOMATIC1111 version) according to the following article.
Image generation AI ``Stable Diffusion'' works even with 4 GB GPU & various functions such as learning your own pattern can be easily operated on Google Colabo or Windows Definitive edition ``Stable Diffusion web UI (AUTOMATIC 1111 version)'' installation method summary - GIGAZINE
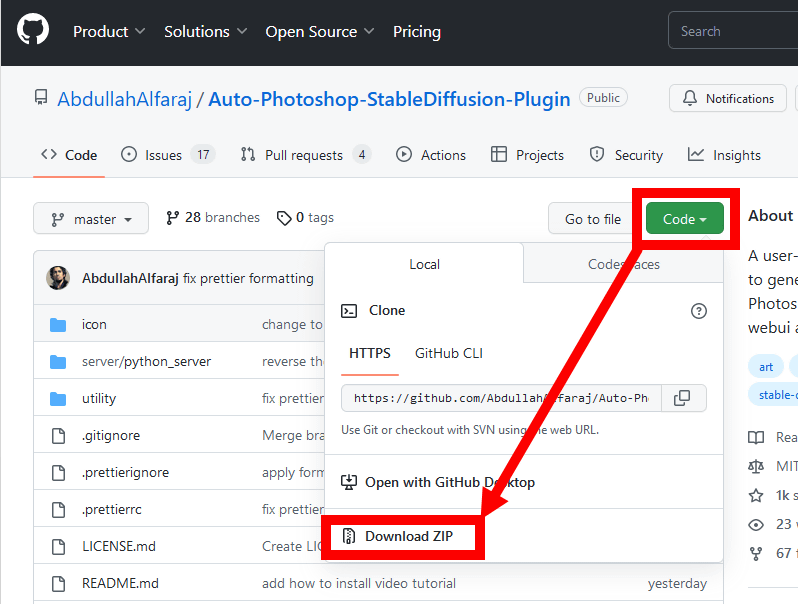
After installing the Stable Diffusion web UI (AUTOMATIC 1111 version), access the distribution page of Auto-Photoshop-StableDiffusion-Plugin, click the green 'Code' and then click 'Download ZIP'. The file size was 615.49KB.
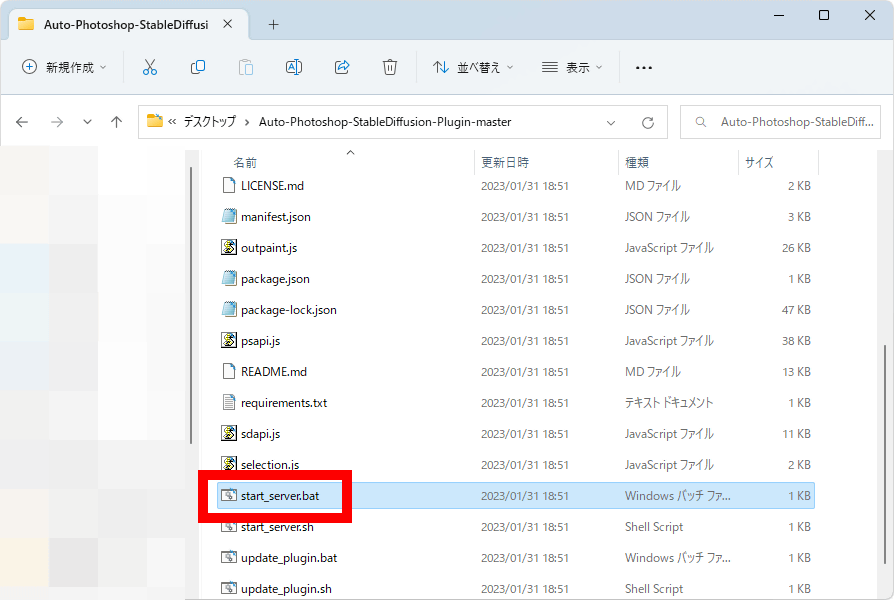
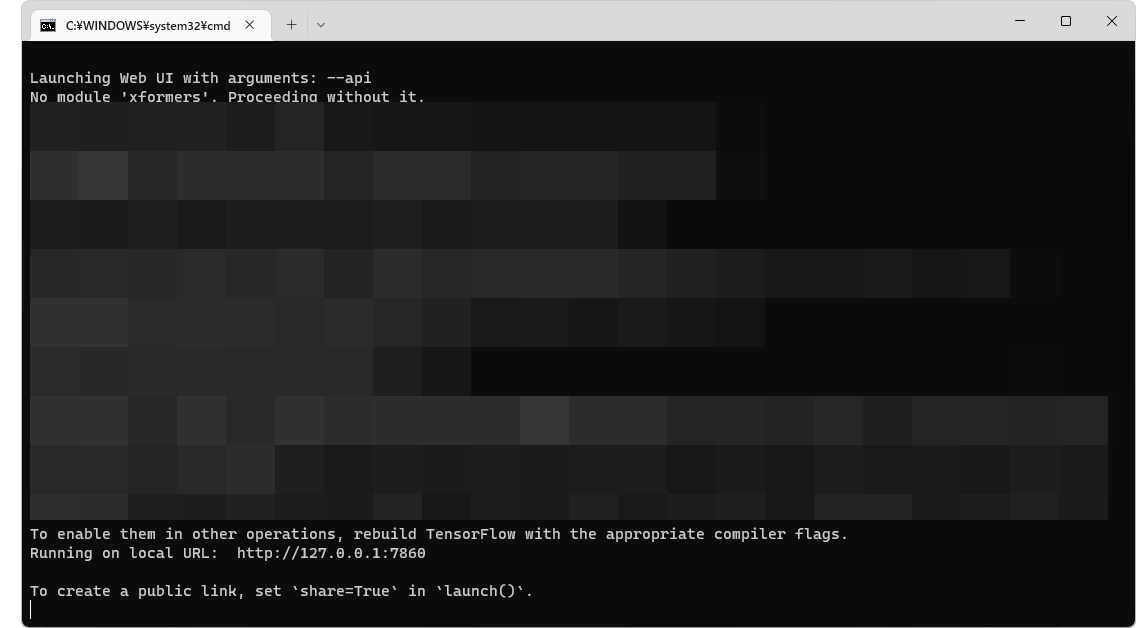
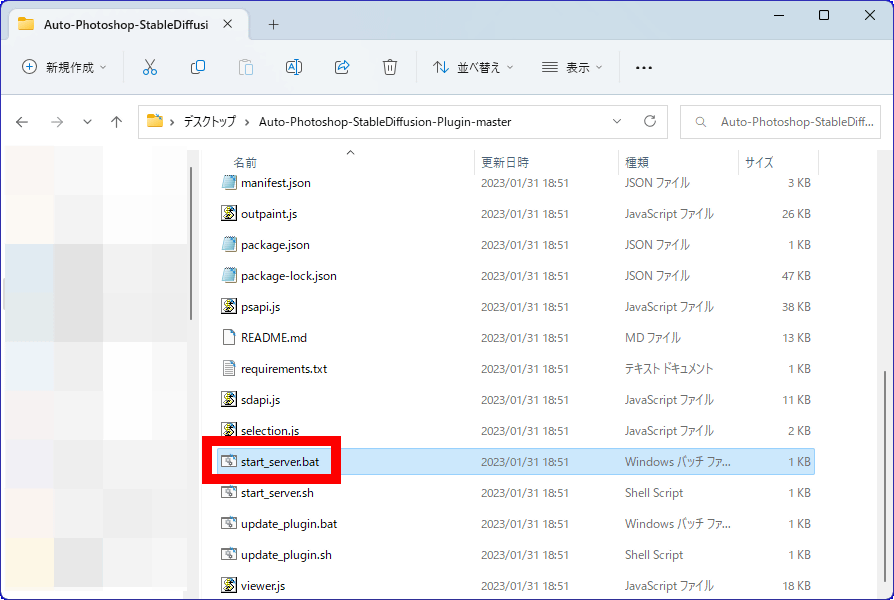
After unzipping the downloaded ZIP file, double-click 'start_server.bat' included in the folder to execute it.
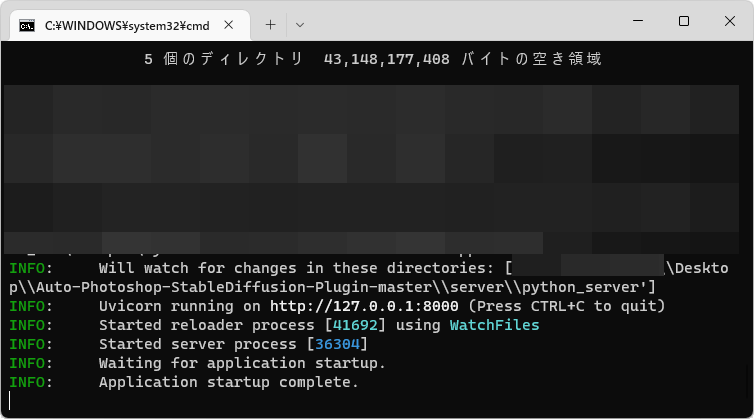
Wait for a while until a black screen appears.
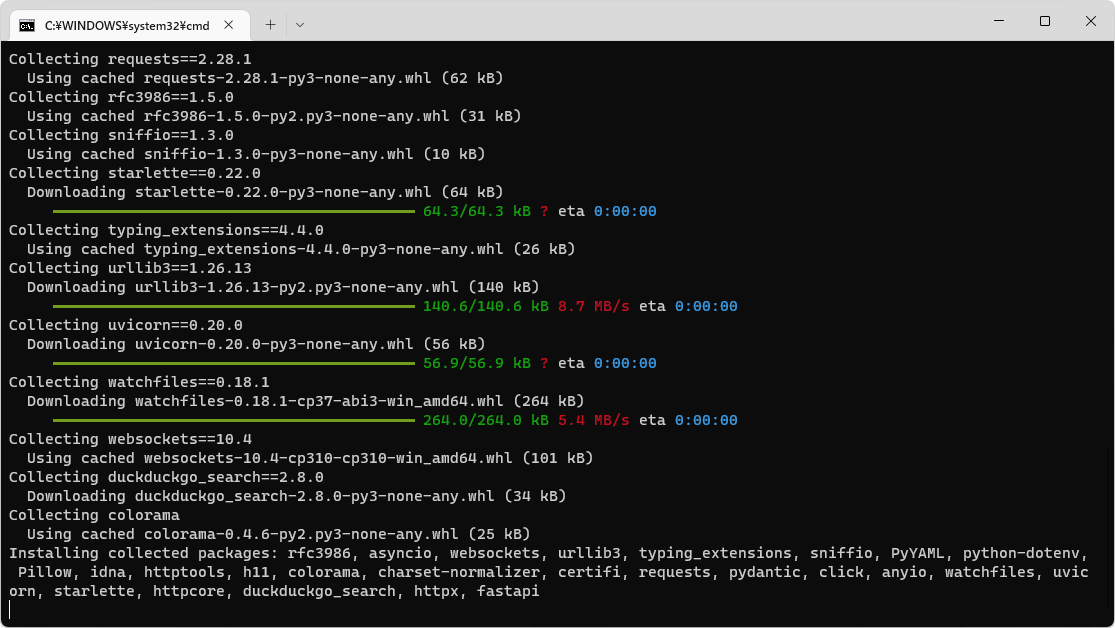
If 'Application startup complete' is displayed, preparation is completed. Leave the black screen unclosed.

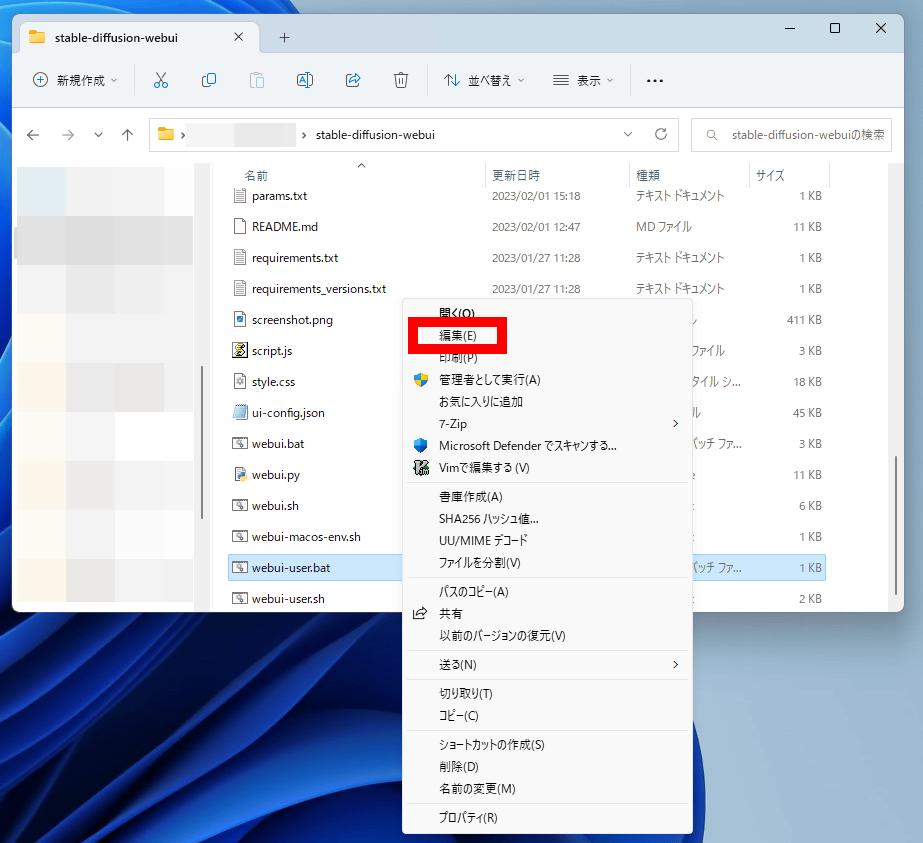
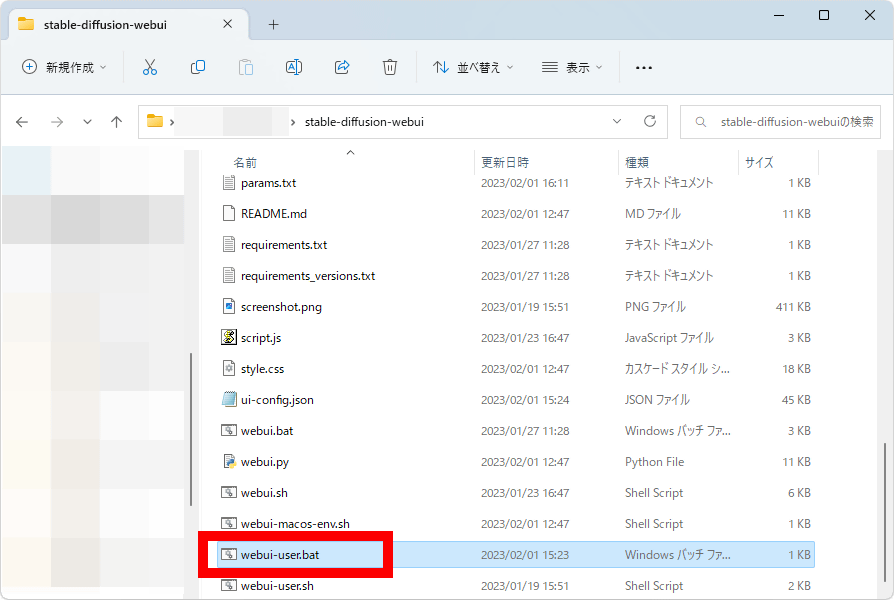
Next, go to the installation folder of Stable Diffusion web UI (AUTOMATIC 1111 version), right-click 'webui-user.bat' and click 'Show more options'.
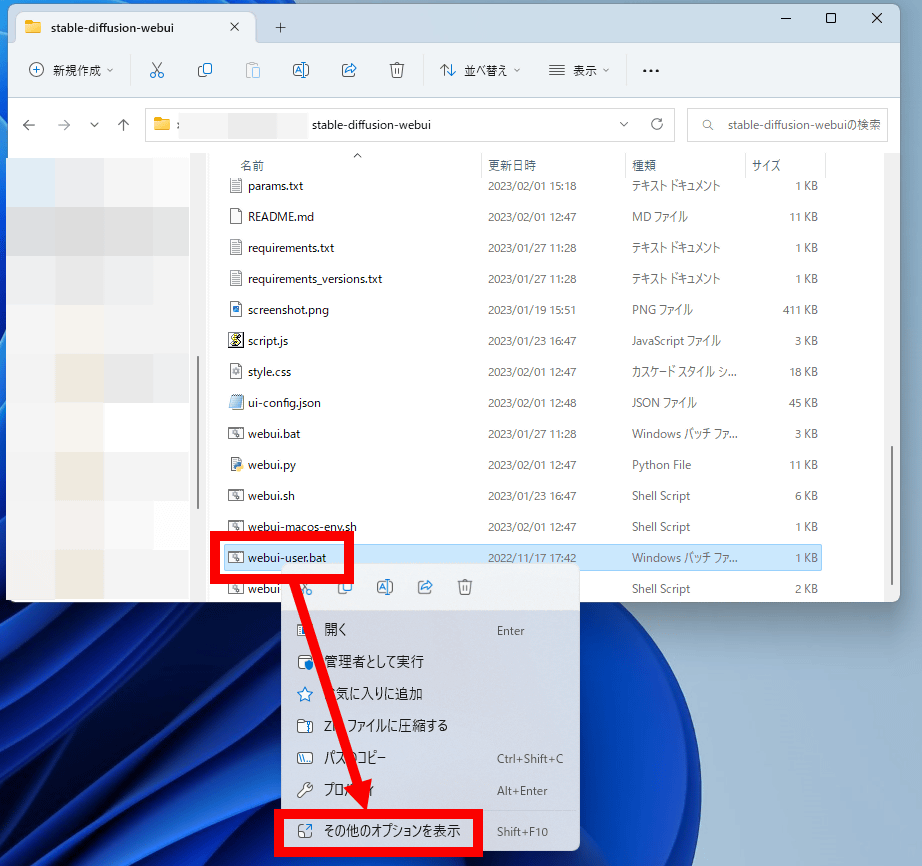
Click 'Edit'.
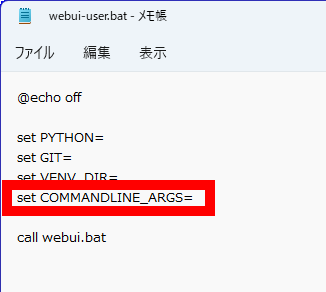
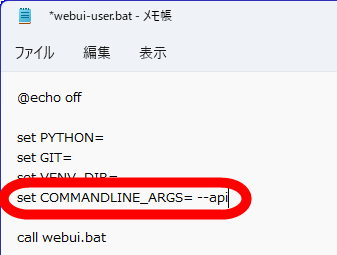
When Notepad opens, replace the part marked 'set COMMANDLINE_ARGS=' with 'set COMMANDLINE_ARGS= --api'.
After rewriting as follows, overwrite save and close the window.
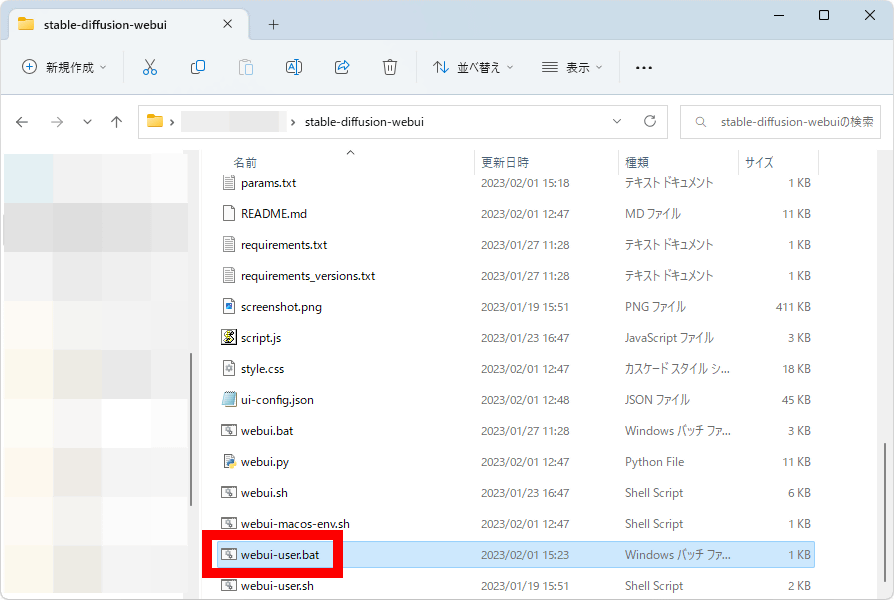
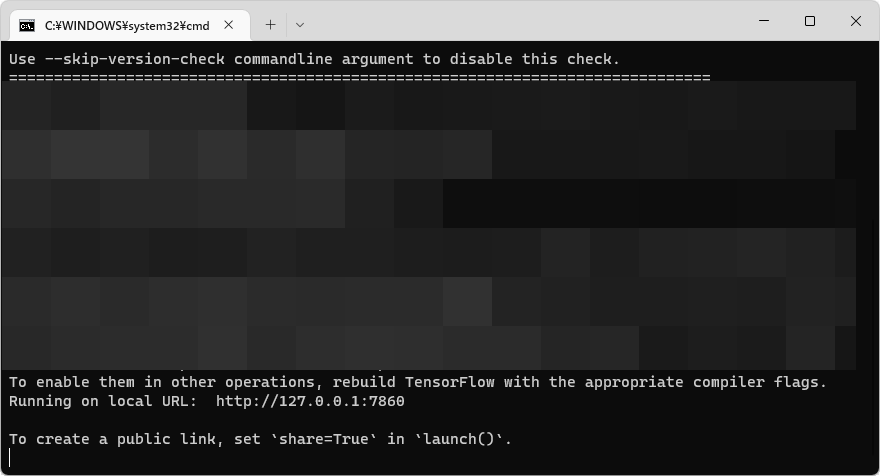
Then double click 'webui-user.bat' to run it.
OK when the startup process is complete. Leave the black screen unclosed.
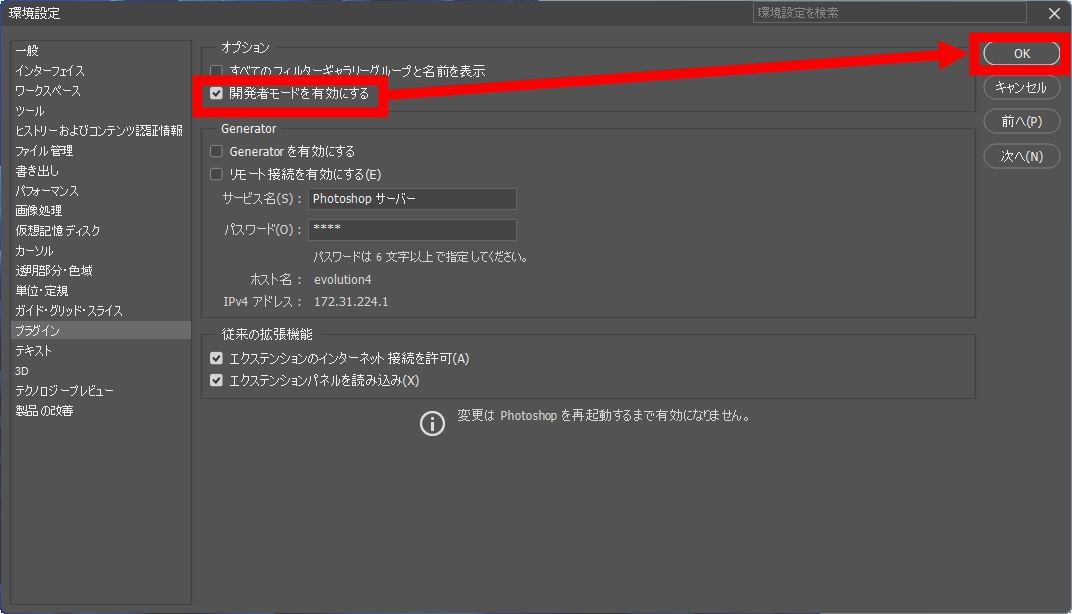
Next, start Photoshop and select 'Plugins' from 'Preferences' in the 'Edit' menu.

When the plug-in setting screen is displayed, check 'Enable developer mode' and click 'OK'. Additionally, restart Photoshop.
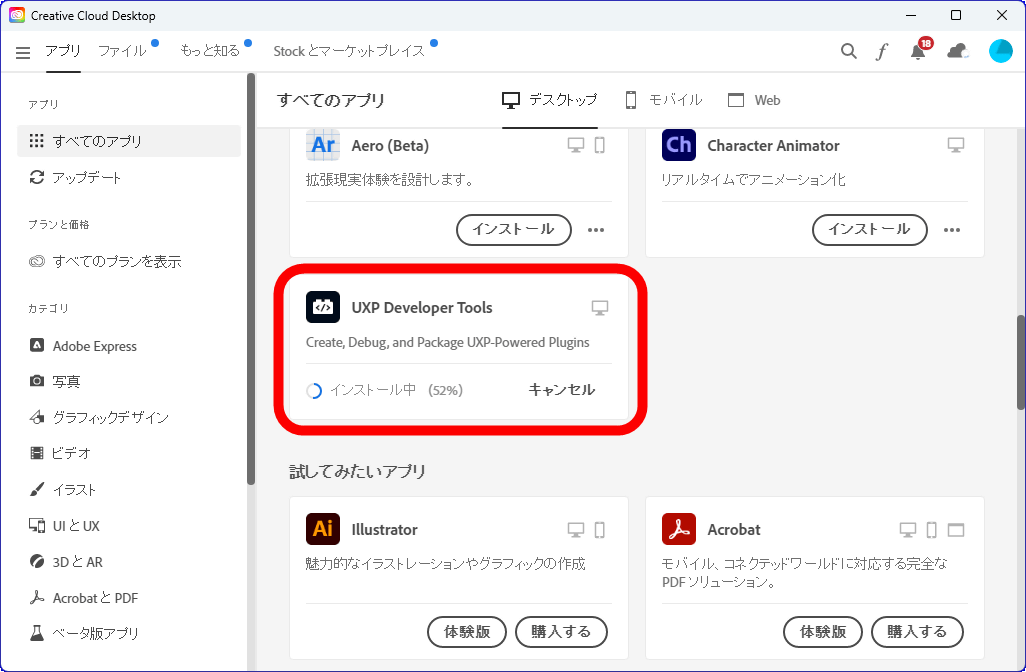
Next, go to Adobe's
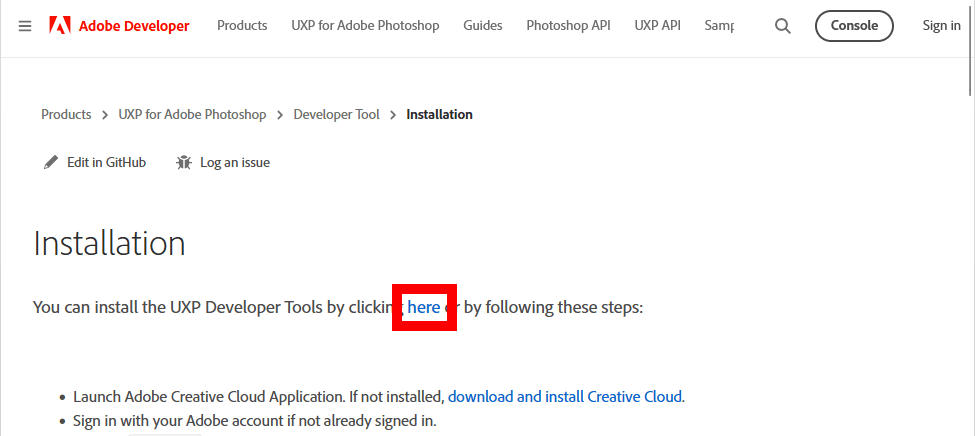
Click Open when the following popup appears.
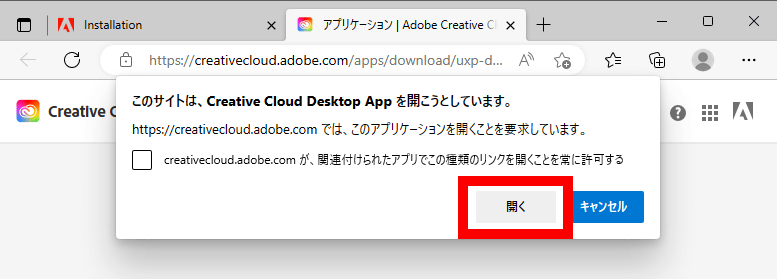
Then, the installation of 'UXP Developer Tools' will start, so wait for a while.
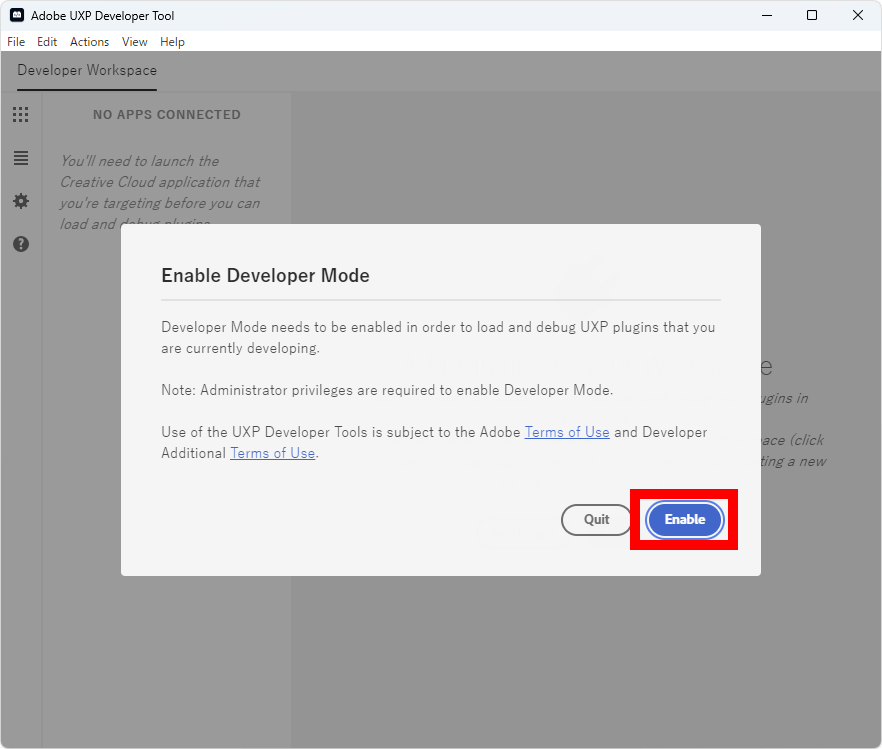
UXP Developer Tools will start automatically after the installation is complete. When UXP Developer Tools starts up, click 'Enable'.
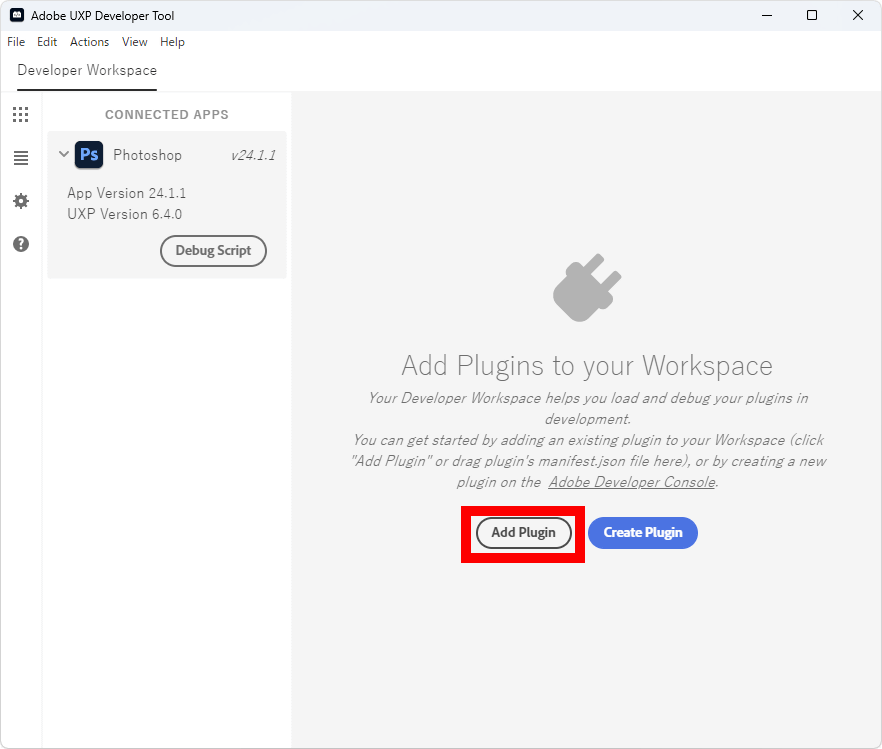
Then click 'Add Plugin'.
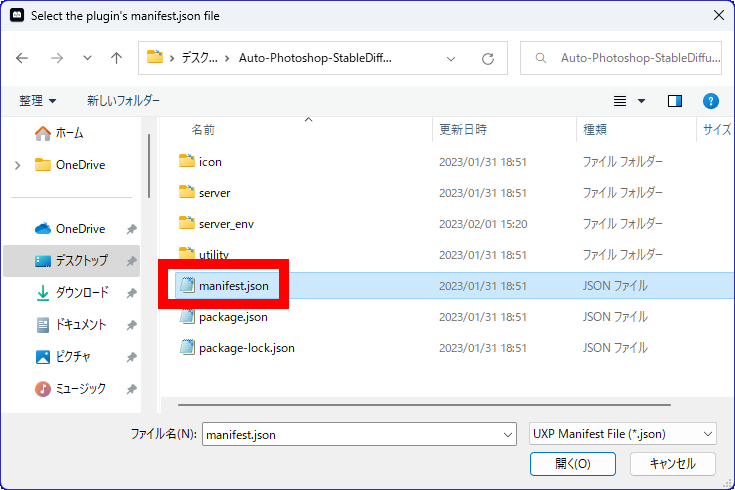
Select 'manifest.json' in the Auto-Photoshop-StableDiffusion-Plugin folder.
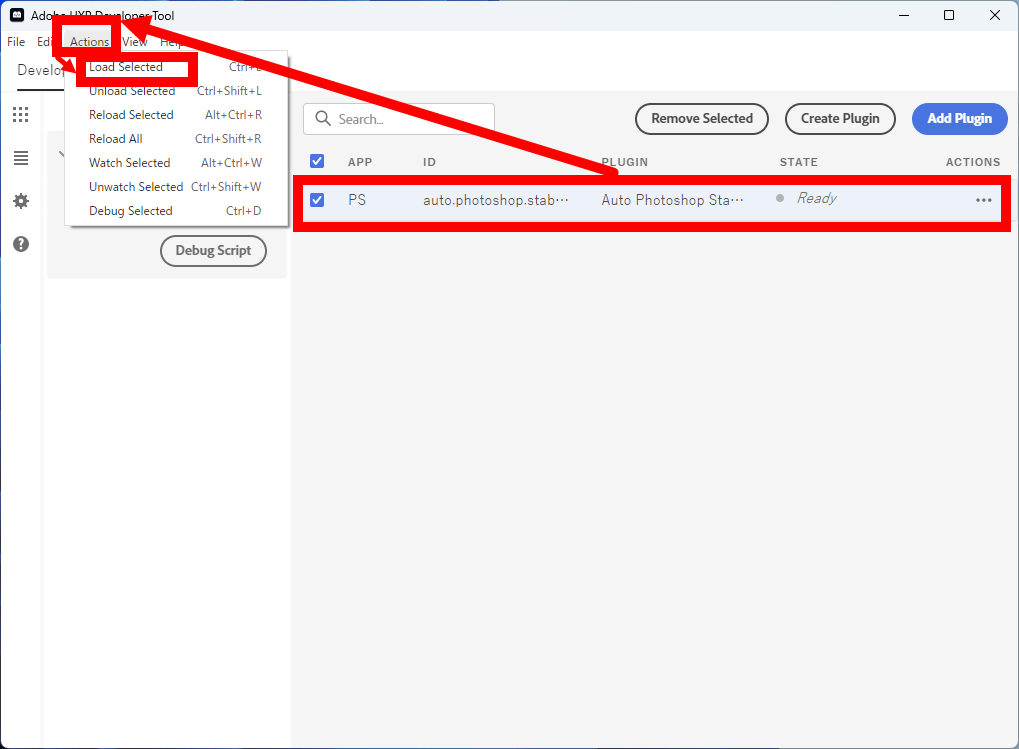
When Auto-Photoshop-StableDiffusion-Plugin is displayed on the screen of UXP Developer Tools, click to select it and click 'Load Selected' in the 'Action' menu.

Then, Auto-Photoshop-StableDiffusion-Plugin will start as follows.
・Startup procedure after the second time
The procedure for starting Auto-Photoshop-StableDiffusion-Plugin for the second and subsequent times is as follows. First, double-click 'webui-user.bat' in the installation folder of Stable Diffusion web UI (AUTOMATIC 1111 version).
When the Stable Diffusion web UI (AUTOMATIC1111 version) starts up, leave the screen without closing it.
Next, double-click 'start_server.bat' in the Auto-Photoshop-StableDiffusion-Plugin folder.
Leave this screen as is.
Next, start Photoshop.
When you are ready, start UXP Developer Tools, select Auto-Photoshop-StableDiffusion-Plugin, and click 'Load Selected' in the 'Action' menu.
Now you can use the Auto-Photoshop-StableDiffusion-Plugin.
◆ 2: How to generate an image with txt2img
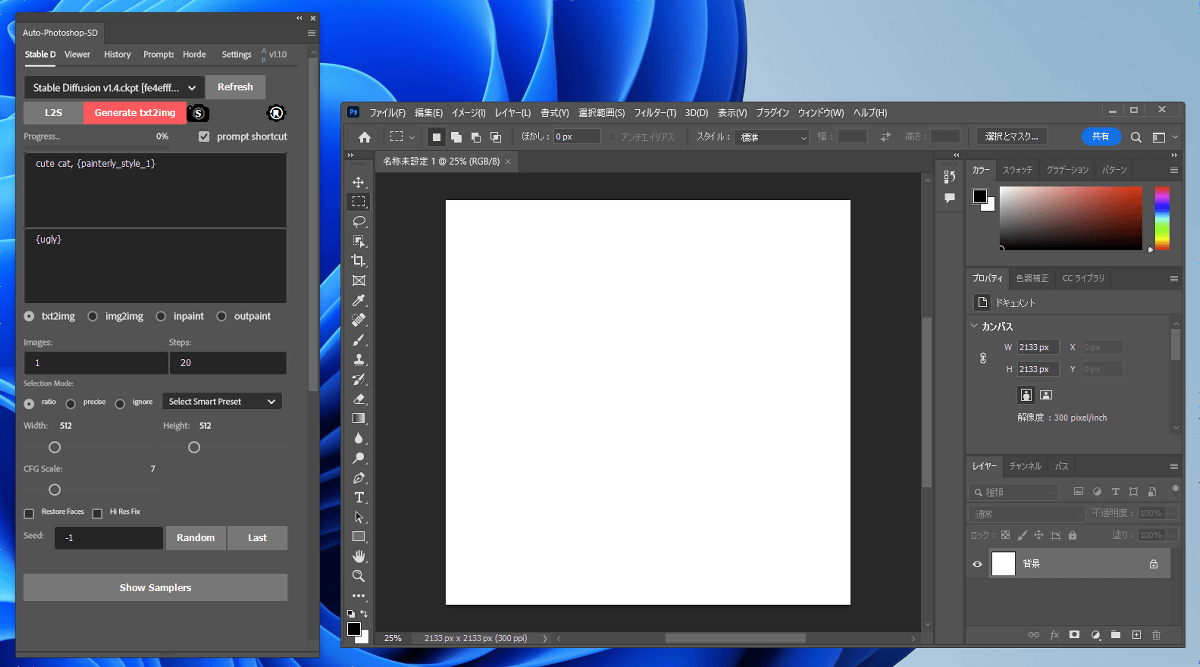
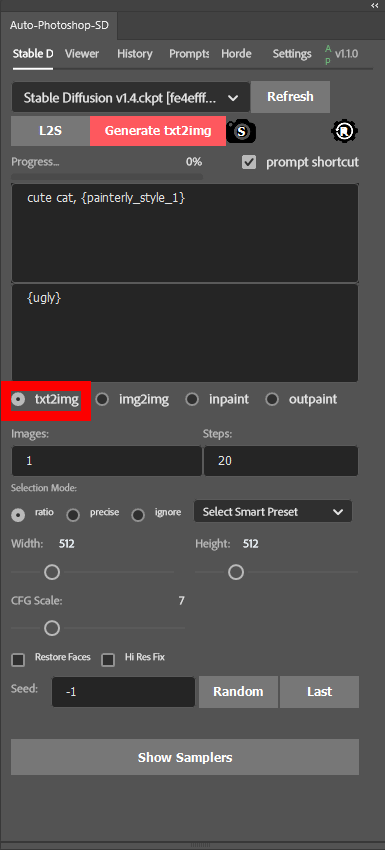
To run txt2img that generates an image along the sentence (prompt), first click 'txt2img' of Auto-Photoshop-StableDiffusion-Plugin.
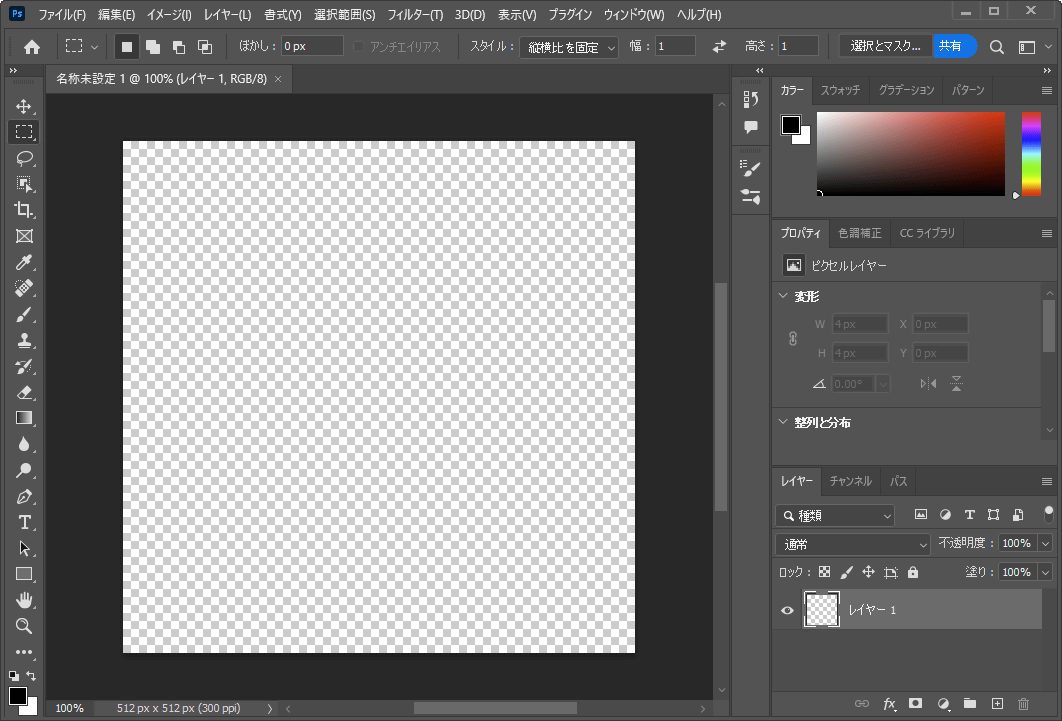
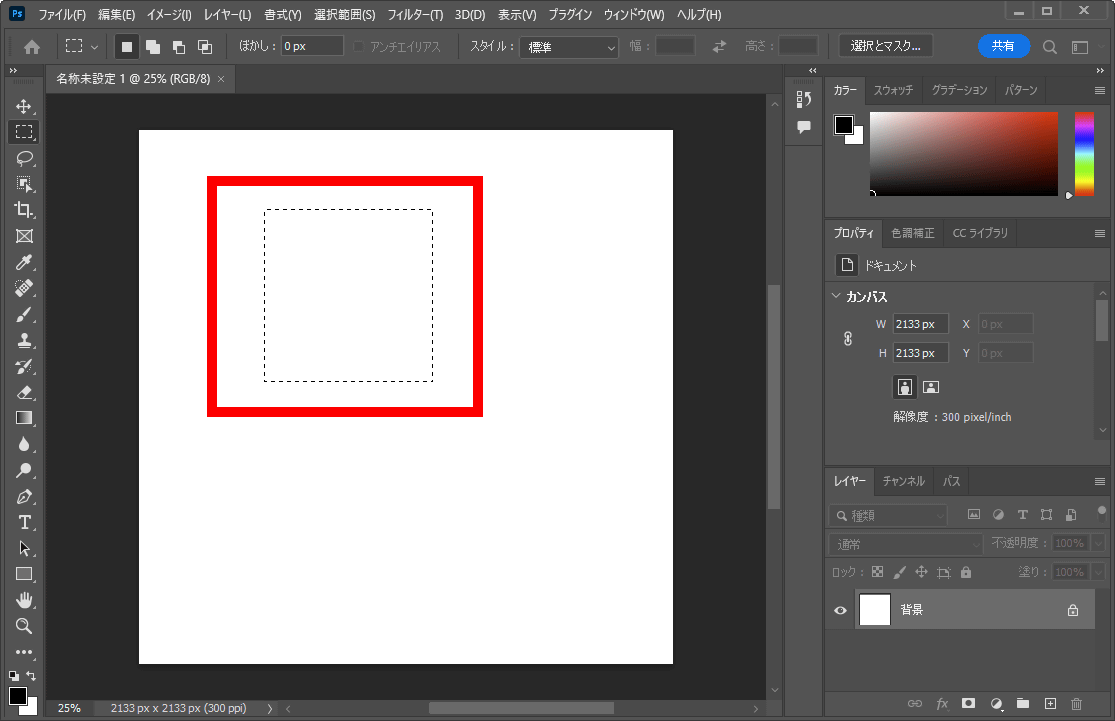
Next, select the area where you want to insert the image in Photoshop. At this time, the selection area should be square.
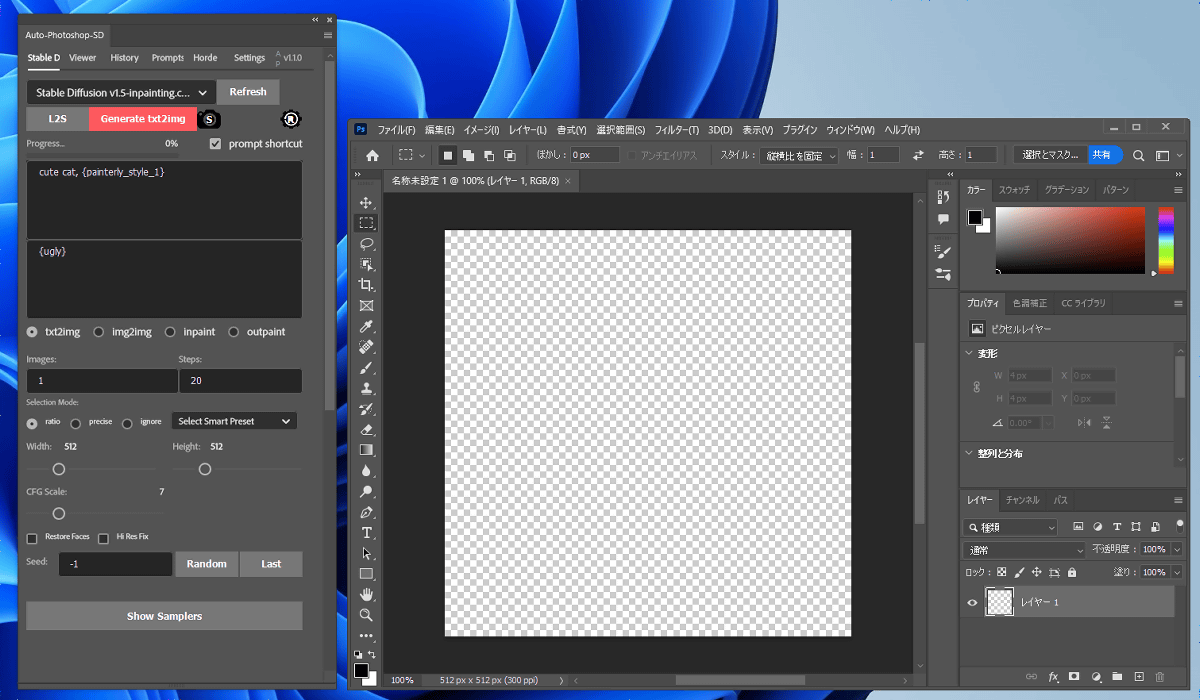
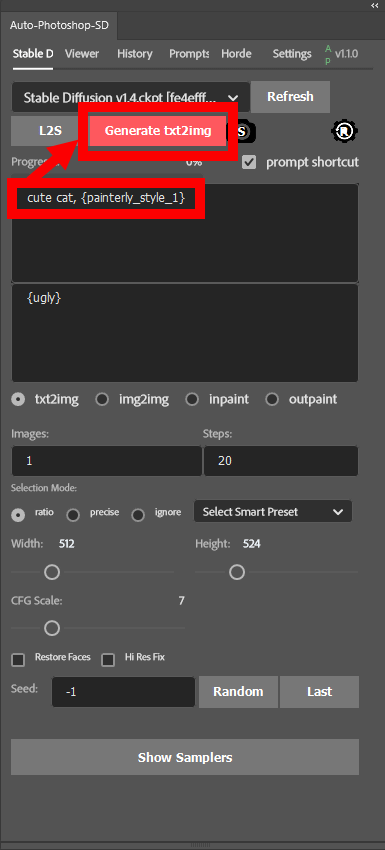
After selecting the area, enter the prompt in the red frame and click 'Generate txt2img'. This time, I tried using the prompt that was entered in the initial state.
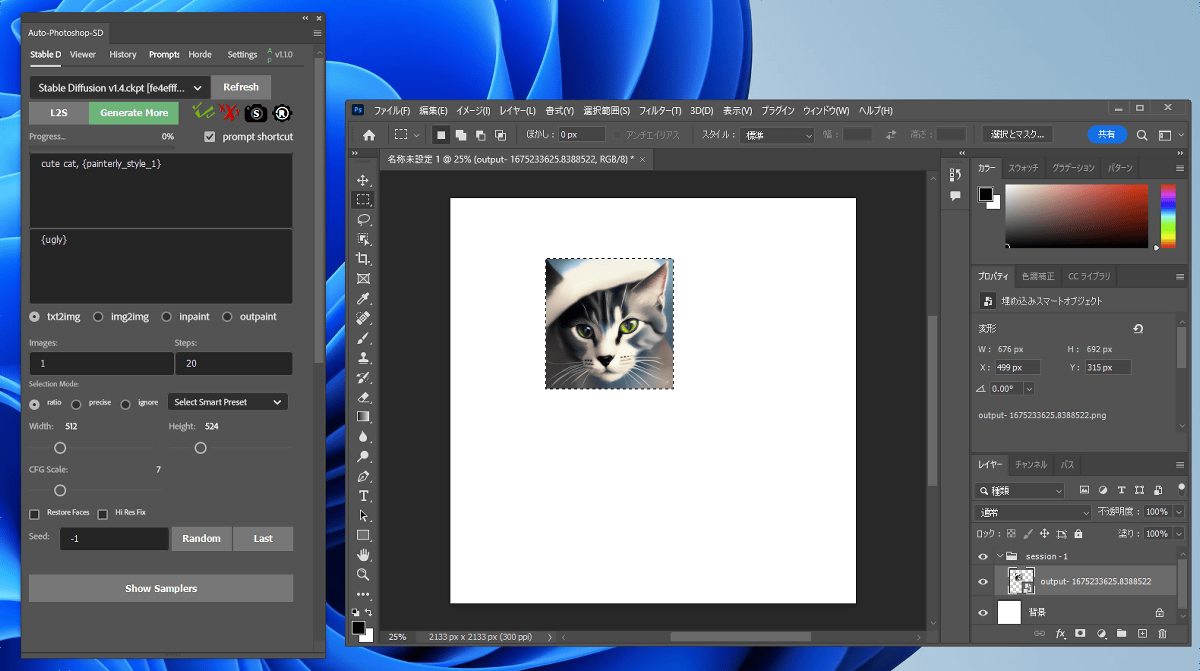
After waiting for a while, the generated image will be inserted in the selected area as shown below. At this time, the generated image is treated as a smart object, and Photoshop will perform the scaling process. Therefore, there is no need to worry about the resolution of the canvas or the size of the selection area.
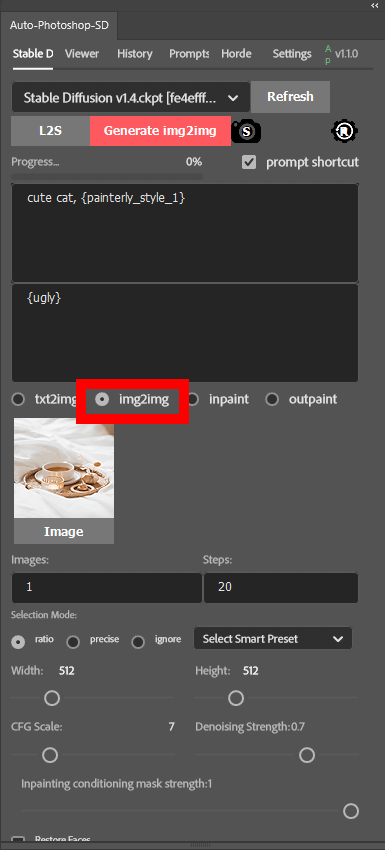
◆ 3: How to generate an image with img2img
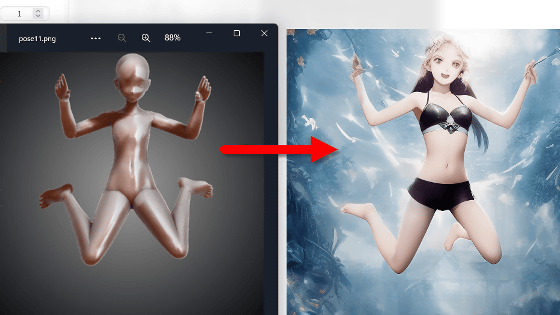
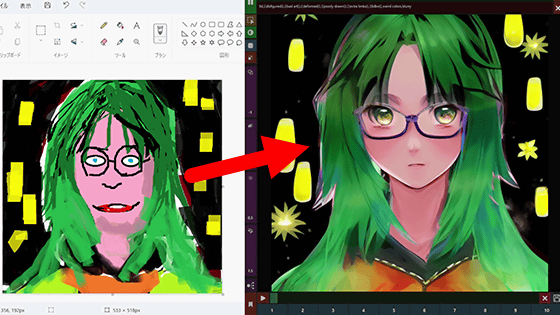
Then try img2img which allows you to enter a prompt and an image and generate an image of your choice. First, click 'img2img' in Auto-Photoshop-StableDiffusion-Plugin.
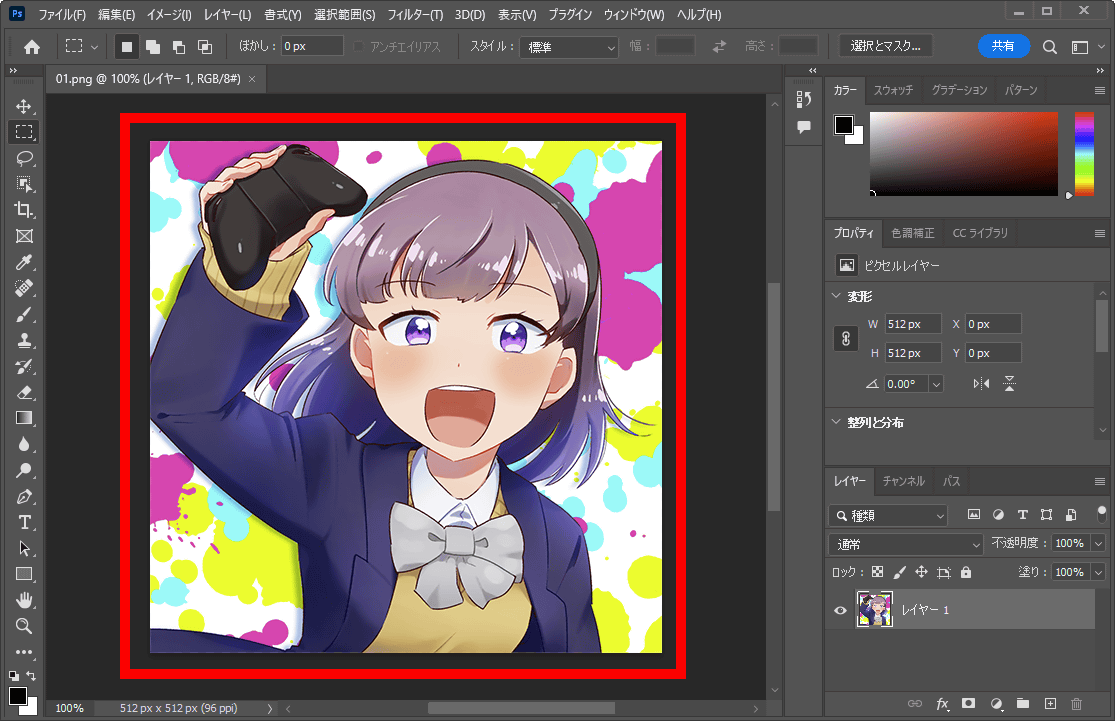
Next, open the image you want to input in Photoshop.
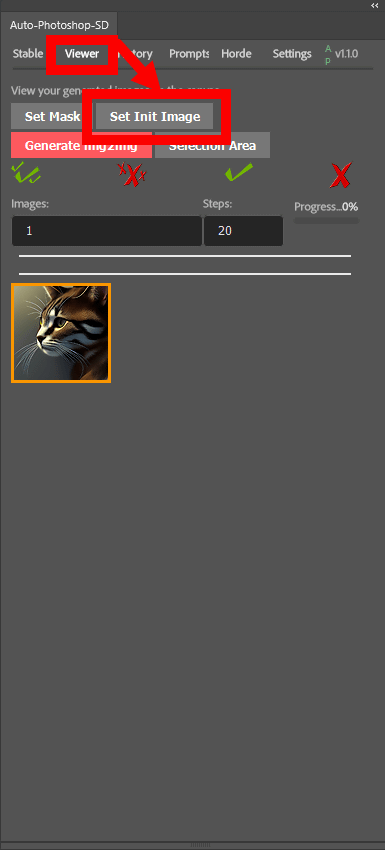
Return to Auto-Photoshop-StableDiffusion-Plugin, click 'Viewer' at the top, then click 'Set Init Image'.
Then click 'Stable D' at the top, then enter your preferred prompt. This time, I changed the 'cat' part of the initial prompt to 'girl'.
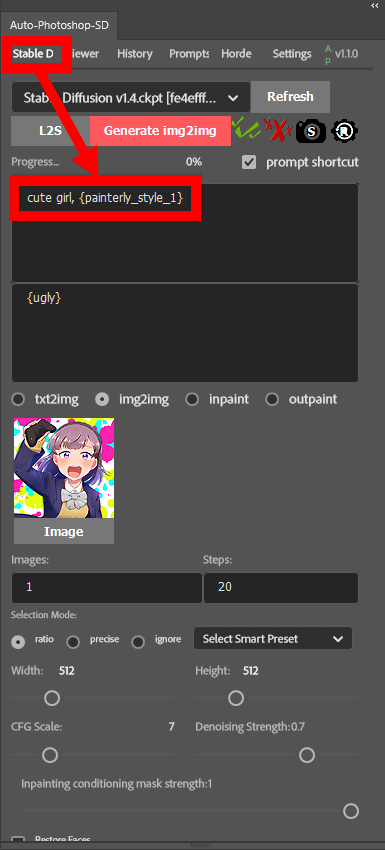
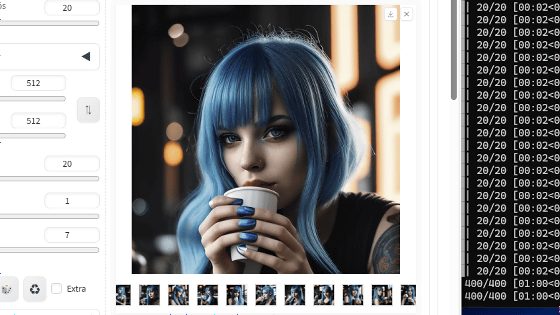
Finally, select all images in Photoshop and click 'Generate img2img'.
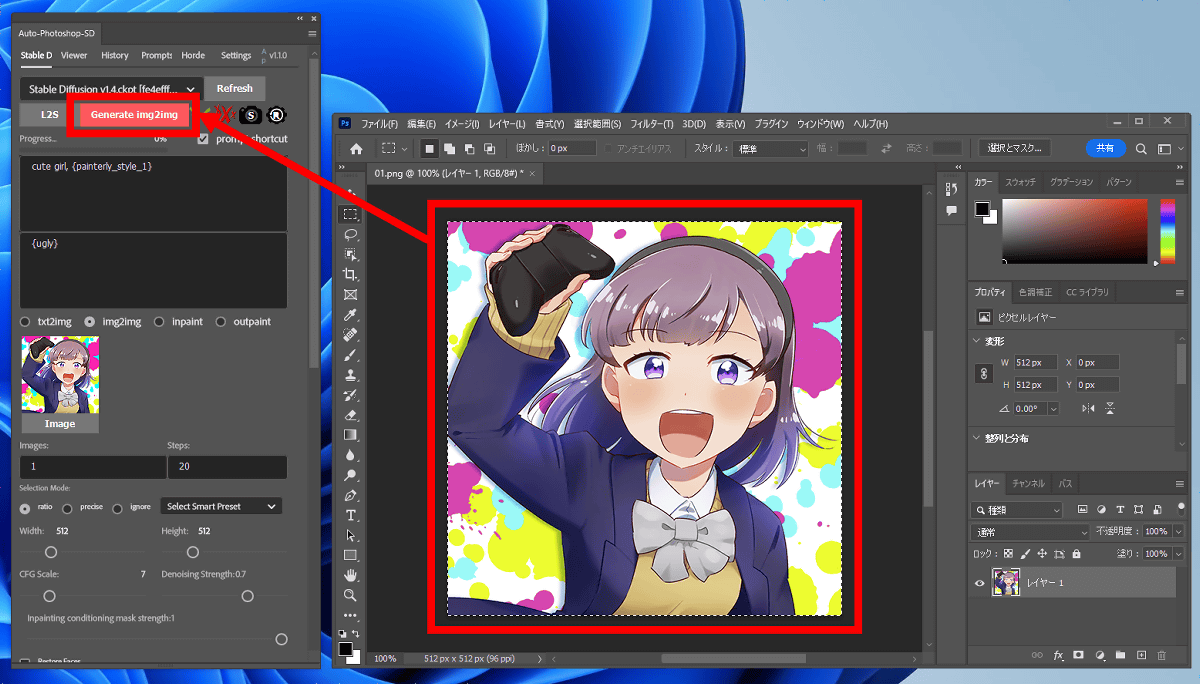
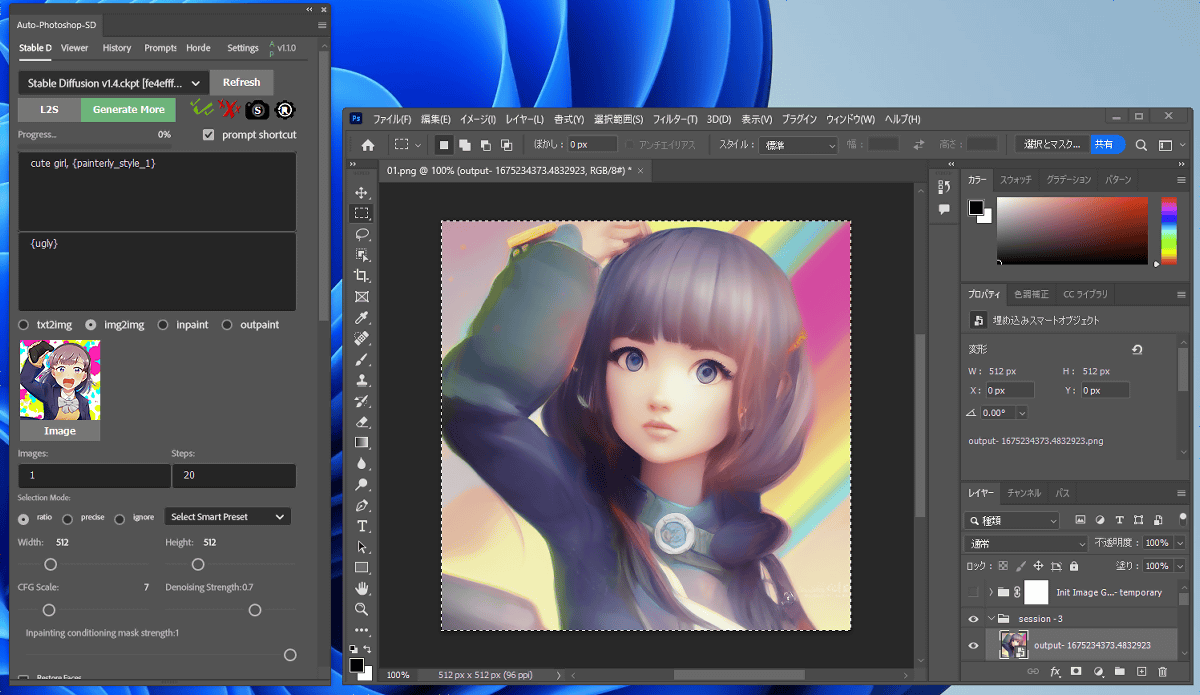
After waiting for a while, an image similar in composition to the input image was generated. If you want to generate other images, click 'Generate More' in Auto-Photoshop-StableDiffusion-Plugin.
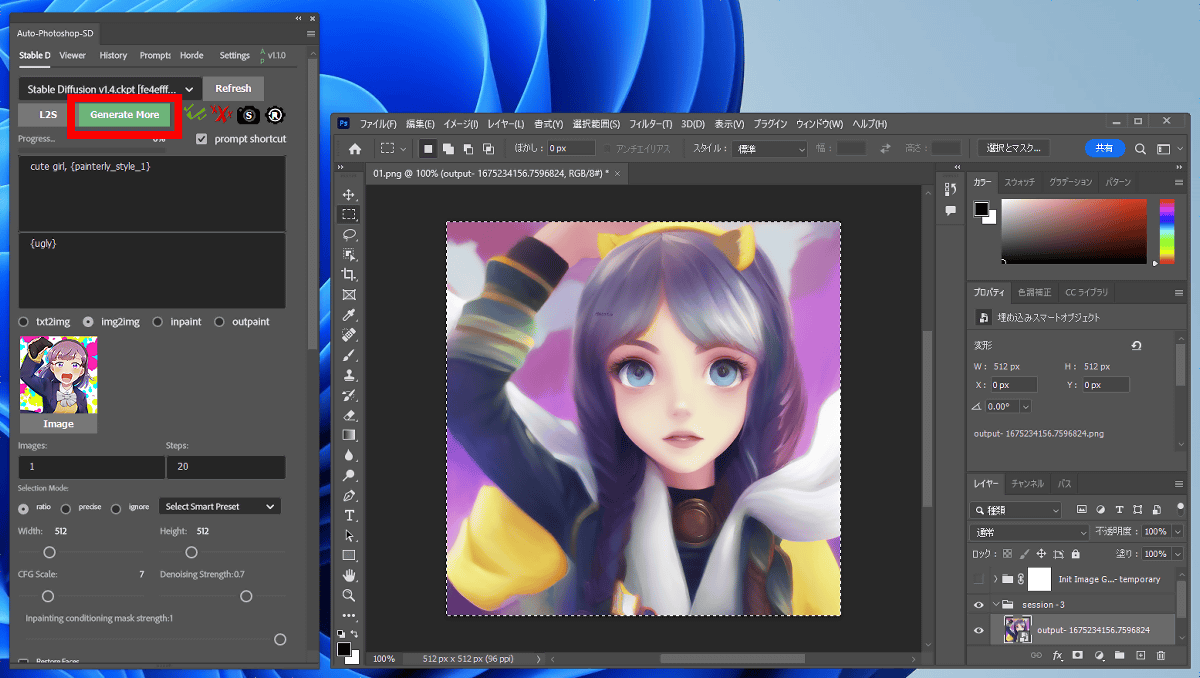
Then another image is generated. If you use Auto-Photoshop-StableDiffusion-Plugin, you can immediately edit the generated image in Photoshop, so it seems that the efficiency of work production will increase.
Related Posts: