How to realize ``environment where AI can rework drawn illustrations in real time'' by combining ``Stable Diffusion'' and ``Redream'' Summary, ControlNet can also be used to generate high-quality images

Since the appearance of the image generation AI 'Stable Diffusion', many AI tools have been developed by volunteers in the community. One of the community-made tools, `` Redream '', has the function of ``always capturing a part of the screen of the PC, pouring the captured image into img2img and continuing to generate the image''. When I tried using Redream, I was able to build a very convenient environment called `` an environment where AI can rework the illustrations I drew in real time '', so I summarized the installation procedure and how to use it.
GitHub - Fictiverse/Redream: Realtime Diffusion, using Automatic1111 Stable Diffusion API
The following is the operation movie of 'Environment where AI can rework drawn illustrations in real time' built with Redream. In order to build this environment, tools such as ' Stable Diffusion web UI (AUTOMATIC1111 version) ' are required in addition to Redream, so I will explain the environment construction procedure in detail, including the installation procedure for each tool.
[Stable Diffusion] I tried to build an environment where AI can rework illustrations in real time [Redream]-YouTube
·table of contents
◆1: Preparing to install Redream
◆2: Redream installation procedure
◆3: How to use Redream
◆ 4: Useful functions to remember
◆1: Preparing to install Redream
In order to use Redream, it is necessary to install 'Stable Diffusion web UI (AUTOMATIC 1111 version)', 'sd-webui-controlnet' and '.NET 6.0 Framework' on the PC. The installation procedure for each is as follows.
・Stable Diffusion web UI (AUTOMATIC1111 version)
The installation procedure of Stable Diffusion web UI (AUTOMATIC1111 version) is explained in detail in the following article. For those who have already installed it, please update to the latest version by referring to the update procedure in the article.
Image generation AI ``Stable Diffusion'' works even with 4 GB GPU & various functions such as learning your own pattern can be easily operated on Google Colabo or Windows Definitive edition ``Stable Diffusion web UI (AUTOMATIC 1111 version)'' installation method summary - GIGAZINE

・sd-webui-controlnet
Please install sd-webui-controlnet by referring to the following article.
I tried a combination technique of ``ControlNet'' & ``Stable Diffusion'' that allows you to specify poses and compositions and generate your favorite illustration images quickly Review-GIGAZINE

・.NET 6.0 Framework
To install .NET 6.0 Framework, first access the distribution page below.
Download .NET 6.0 (Linux, macOS, Windows)
https://dotnet.microsoft.com/en-us/download/dotnet/6.0
After accessing the distribution page, download the installer according to the environment of the PC to be installed. This time, I downloaded it by clicking 'x64' in 'Windows' in the SDK download area.

Then double-click the downloaded installer to run it.

When the following screen is displayed, click 'Install'.
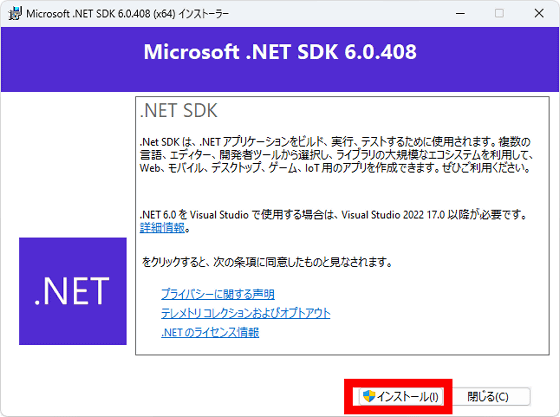
Click 'Close' when the installation is completed. This completes the preparations before installing Redream.

◆ 2: Redream installation procedure
To install Redream, first access the distribution page below.
Releases · Fictiverse/Redream · GitHub
After accessing the distribution page, download the latest 7z file. The latest version at the time of article creation was version 1.12, so I downloaded it by clicking 'Fictiverse_Redream_1.12.7z'.

Unzip the downloaded 7z file with compatible software such as '

Double-click 'Redream.exe' in the unzipped file to start Redream.
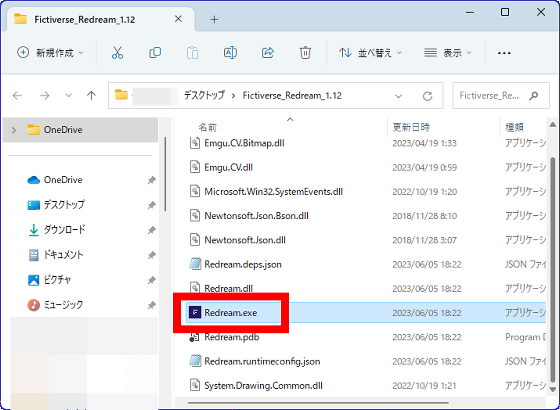
The screen of Redream looks like this.

◆3: How to use Redream
To use Redream, it is necessary to start Stable Diffusion web UI (AUTOMATIC1111 version) at the same time as Redream, so click 'webui-user.bat' in the installation folder of Stable Diffusion web UI (AUTOMATIC1111 version). and run it.

Next, click the button surrounded by a red frame at the top left of the screen to select the area to be captured with Redream.

A translucent rectangle will appear to indicate the capture area. The rectangle can be moved by right-clicking and dragging, so move it to the position you want to capture.

After specifying the capture position, click the play button at the top left of the Redream window. When the play button switches to green, image generation by Stable Diffusion is executed continuously and the generated images are displayed on the screen.

In order to build an environment where AI can rework drawn illustrations in real time, it is OK to overlay the capture area on the drawing area of illustration creation software such as paint. At this time, if the capture area is displayed, the illustration cannot be drawn, so click the button surrounded by the red frame to hide the capture area.
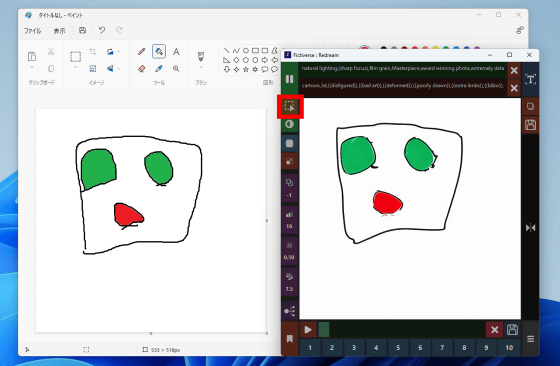
Finally, enter your favorite prompts in the professional input field (green) and negative prompt input field (red) at the top of the screen and you are ready to go.

After that, just by drawing an illustration in the capture area, the operation of ``pour the drawn illustration into img2img of Stable Diffusion and continuously generate and display images'' is executed. With this, we were able to build the 'environment where AI can rework illustrations in real time' mentioned at the beginning.
To save the image displayed on the Redream screen, click the save button at the top right of the screen.
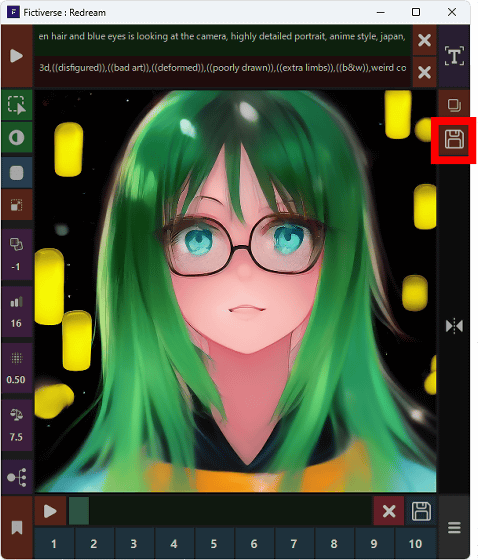
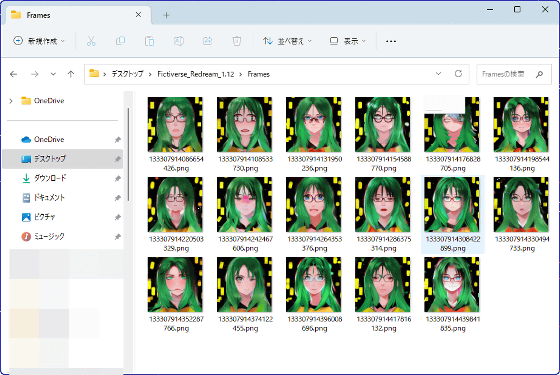
Once the save button turns green, every time a new image is generated it will be saved to the save folder.

The image is saved in the 'Frames' folder in the same hierarchy as 'Redream.exe'.
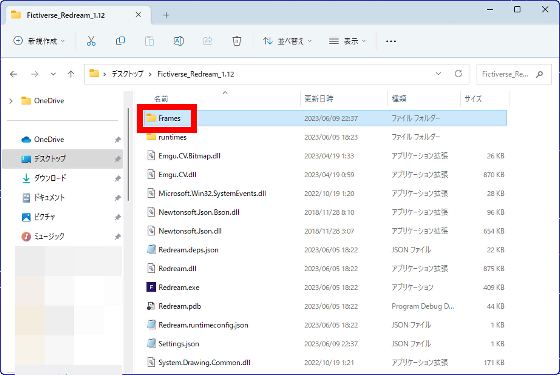
In the 'Frames' folder, images generated while the save button is green are saved more and more. To stop saving, click the save button again.
◆ 4: Useful functions to remember
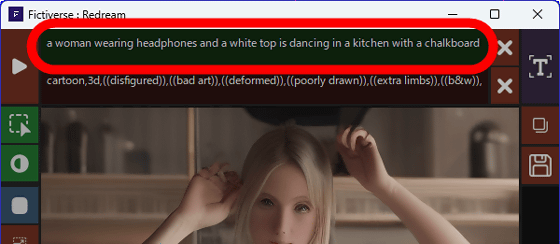
Redream has a function that automatically generates a prompt based on the image in the capture area. To automatically generate a prompt, click the button marked 'T' at the top right of the screen.
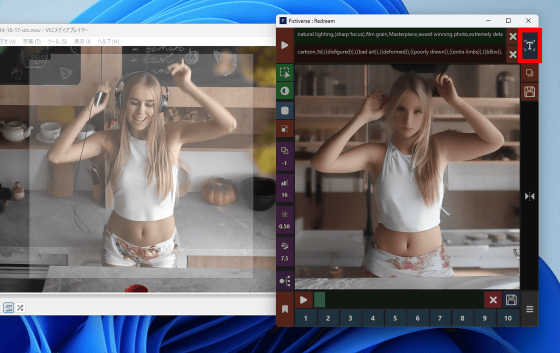
After waiting for a while, the prompt will be automatically entered in the prompt input field.
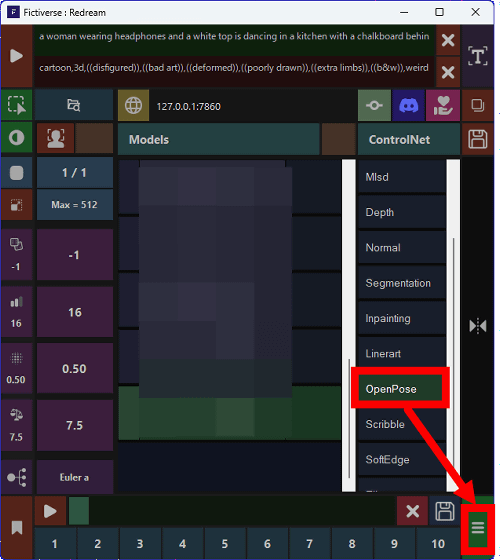
Redream can use ControlNet to perform functions such as 'depth extraction', 'pose extraction', and 'contour extraction' of the capture area. To use ControlNet, click the menu button at the bottom right of the screen.

The ControlNet function selection column will be displayed on the screen, so select the function you want to use. For example, if you want to use pose extraction, click 'OpenPose'. After selecting the function you want to use, click the menu button again to return to the original screen.
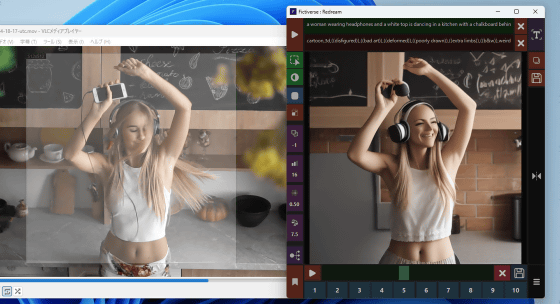
This makes it easier to reproduce the pose of the person in the capture area. Using the ControlNet function that suits your purpose can dramatically improve the quality of generated images, but the speed at which each image is generated slows down, so depending on the situation, it may be better not to use ControlNet.
Related Posts:


