A convenient tool `` layerdivider '' installation & usage summary that allows AI to automatically divide illustrations into layers by color for free and read them with Photoshop and Crysta
GitHub - mattyamonaca/layerdivider: A tool to divide a single illustration into a layered structure.
https://github.com/mattyamonaca/layerdivider
·table of contents
◆1: Installing Python
◆2: Installing Git
◆ 3: Introduction of Microsoft C ++ Build Tools
◆ 4: Installing Gradio
◆ 5: Switch PowerShell execution policy
◆ 6: Install layerdivider
◆ 7: Start layerdivider and try using it
◆1: Installing Python
layerdivider is recommended for Python 3.10.8 or later. The installer for Python 3.10.11, which is the latest version at the time of writing the article for Python 3.10, can be downloaded from the following.
Python Release Python 3.10.11 | Python.org
https://www.python.org/downloads/release/python-31011/
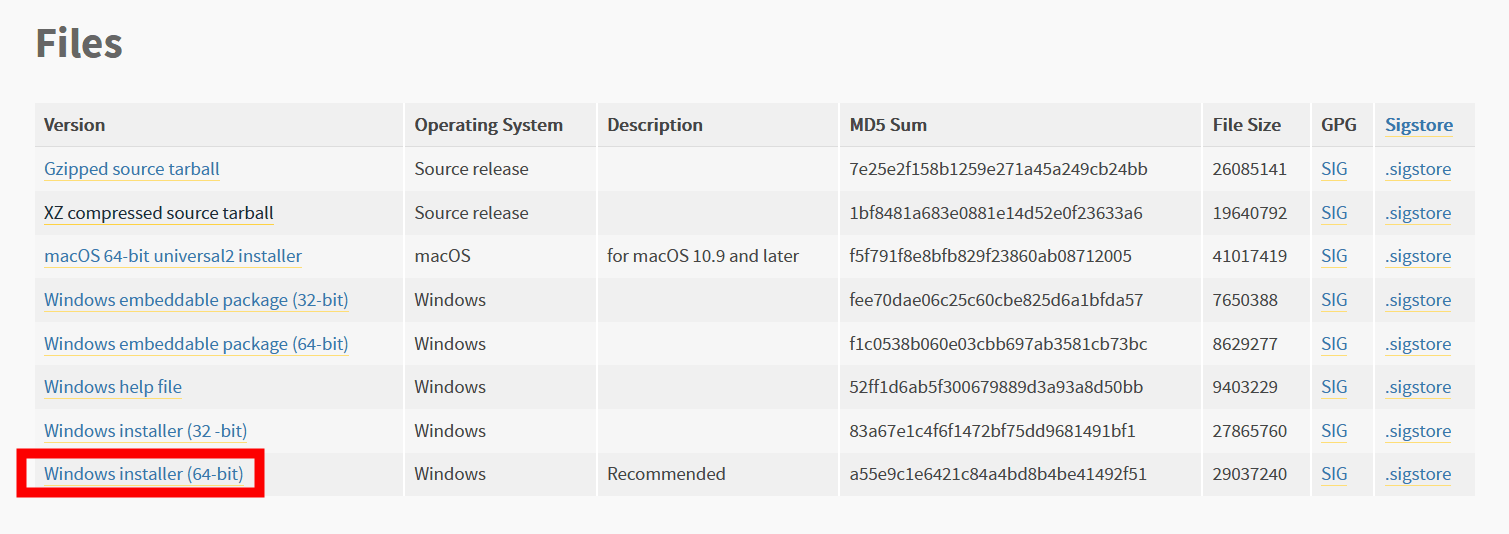
The installer download link is summarized in 'Files' on the above page. To install on Windows this time, click 'Windows installer (64-bit)'. The installer is in EXE format and the file size is 27.6MB.
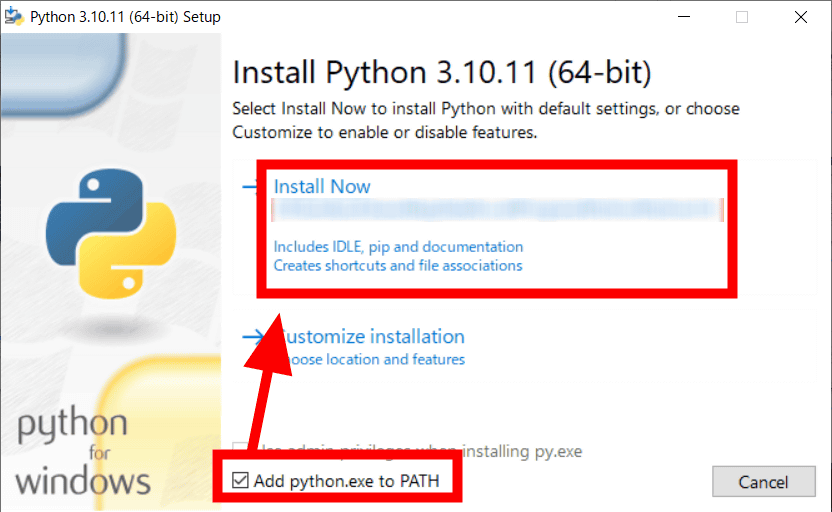
When you start the downloaded installer, it looks like this. Check 'Add python.exe to PATH' and click 'Install Now' to start the installation.
When the installation is finished, press 'Close' to close the installer.

◆2: Installing Git
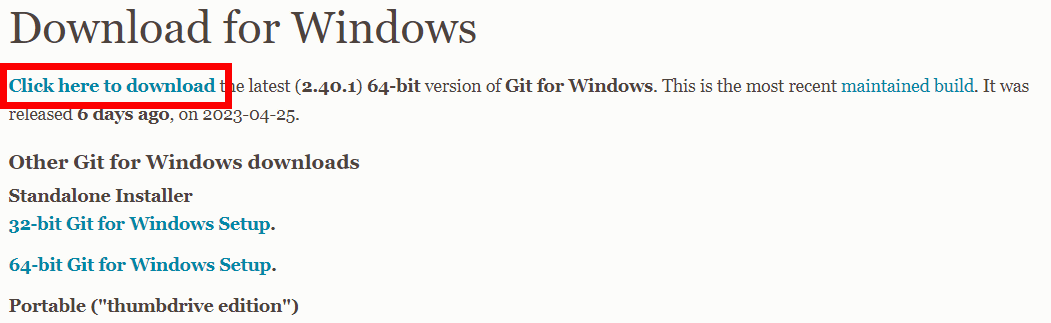
Then install Git. The Windows version installer is available on the following page.
Git - Downloading Package
Click 'Click here to download' to download the EXE format installer. File size is 51.4MB.
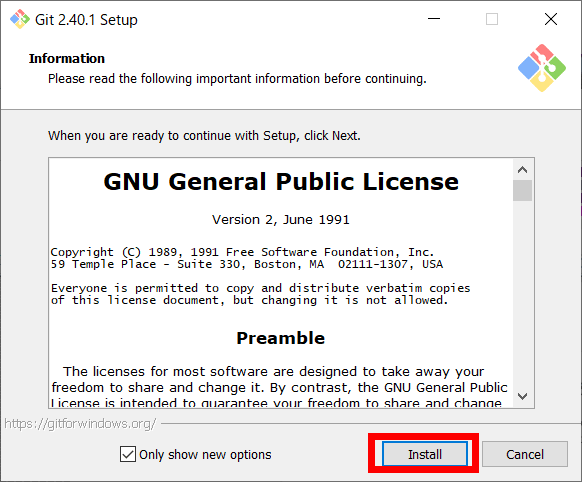
After launching the installer, click 'Install'.
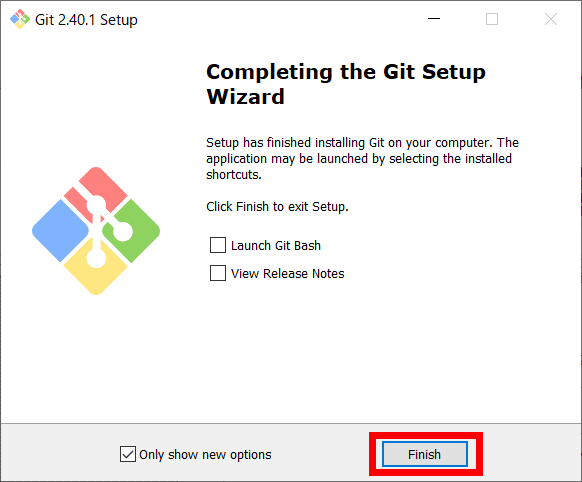
When the installation is completed, click 'Finish'.
◆ 3: Introduction of Microsoft C ++ Build Tools
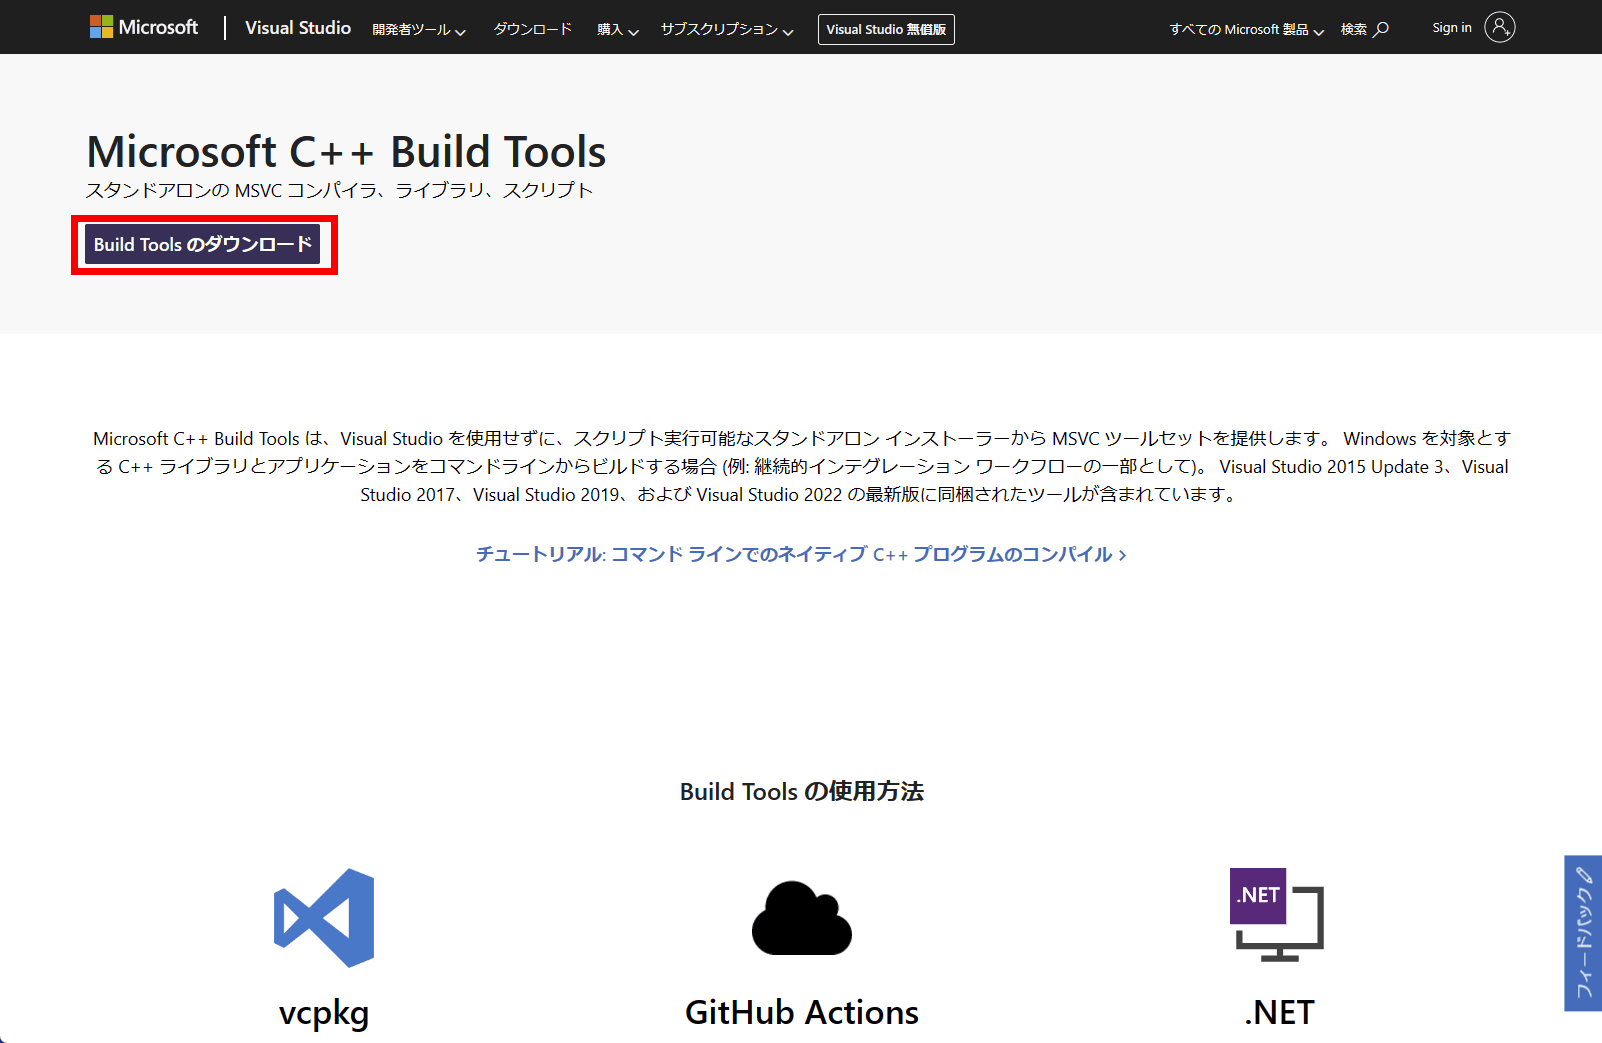
Next, introduce the Microsoft C++ Build Tools. Microsoft C++ Build Tools can be downloaded from the following page.
Microsoft C++ Build Tools-Visual Studio
Click 'Download Build Tools' to download the EXE format installer. File size is 3.53MB.
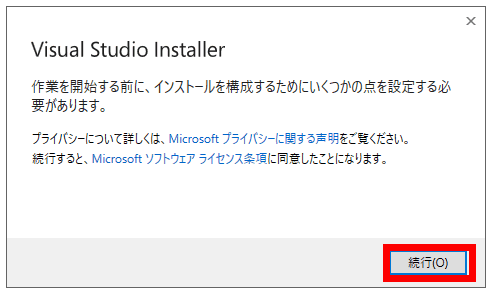
Launch the downloaded installer. Click 'Continue'.
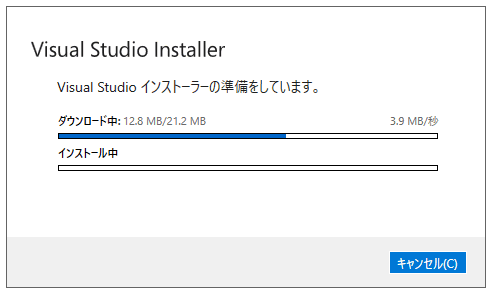
The installer will prepare.
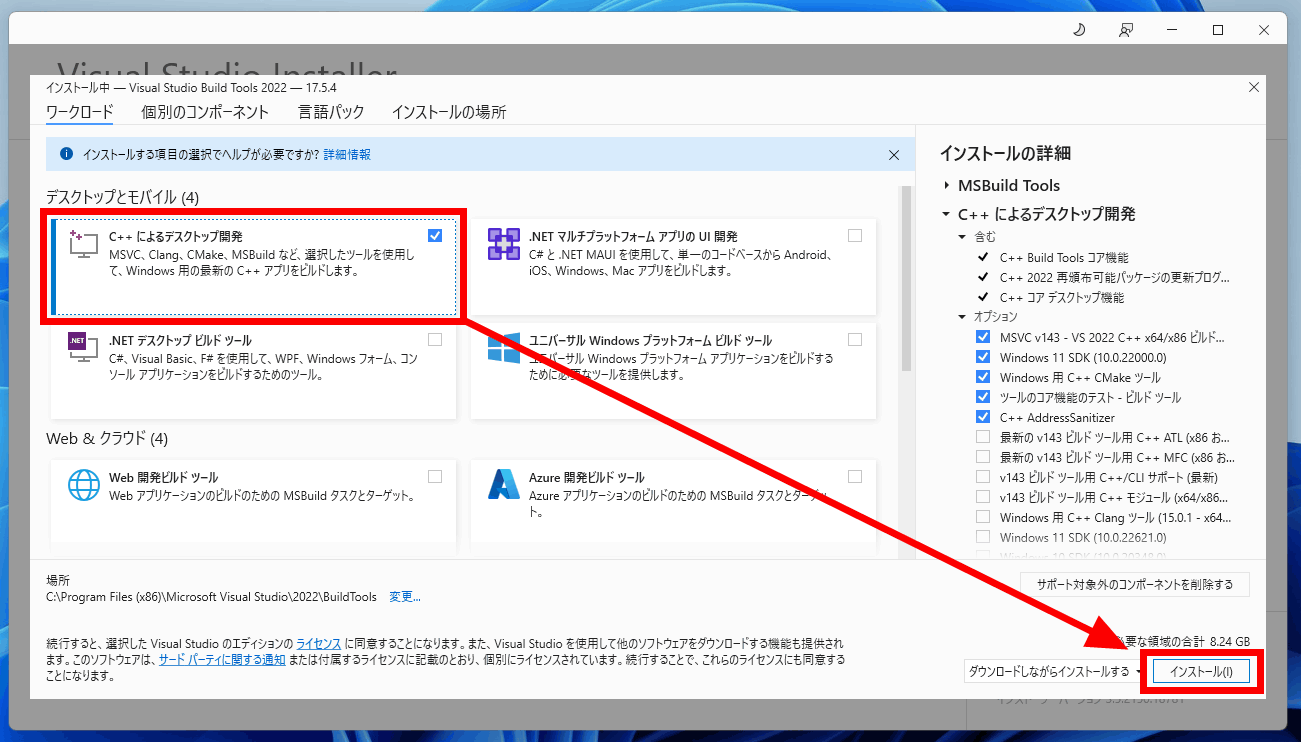
When the preparation of the installer is completed, it looks like this. Check 'Desktop development with C++' in the upper left and click 'Install' in the lower right. Now the introduction of Microsoft C ++ Build Tools is OK.
◆ 4: Installing Gradio
Gradio is a Python library for building machine learning model web apps. Enter ' pip install gradio ' from the command prompt OK.

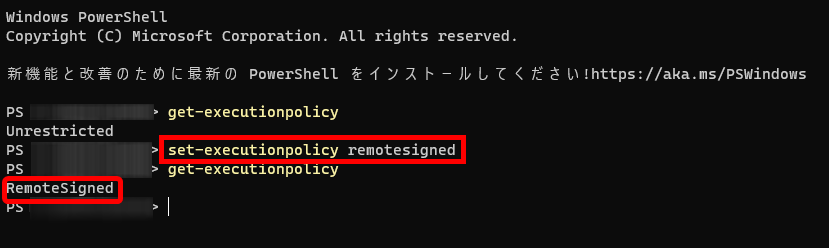
◆ 5: Switch PowerShell execution policy
For Windows clients,

Enter ' set-executionpolicy remotesigned ' to execute and switch the execution policy to 'RemoteSigned'.
◆ 6: Install layerdivider
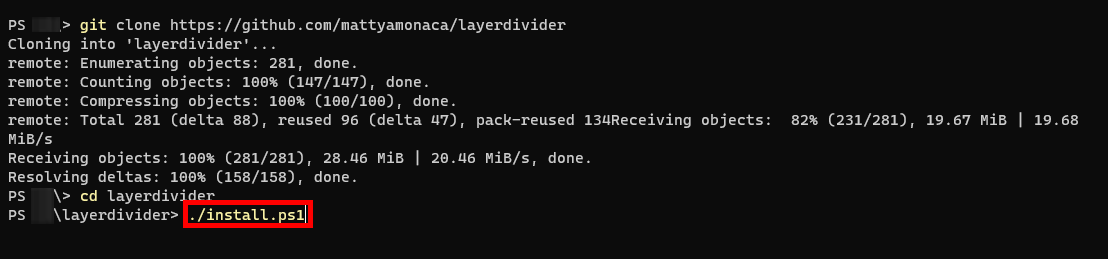
You can clone the repository locally by running git clone https://github.com/mattyamonaca/layerdivider in PowerShell.

Next, move to the layerdivider directory with PowerShell and execute ' ./install.ps1 ' to start the installation.
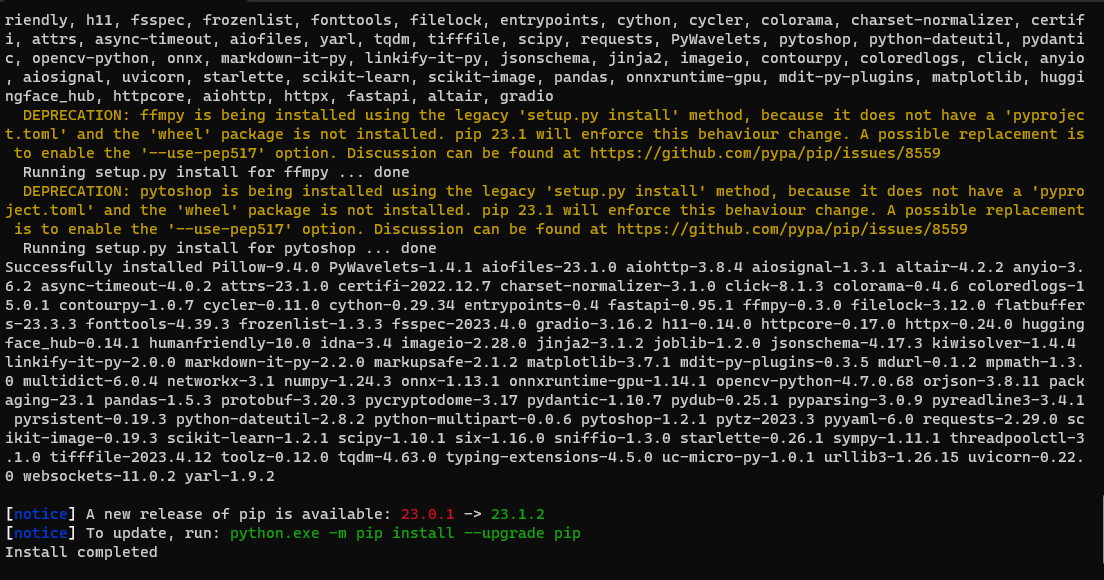
It looks like this when the installation is over.
◆ 7: Start layerdivider and try using it
In Powershell, if you execute './run_gui.ps1' in the layerdivider directory, the URL will be displayed after a while.

You can access the layerdivider by opening this URL in your web browser.
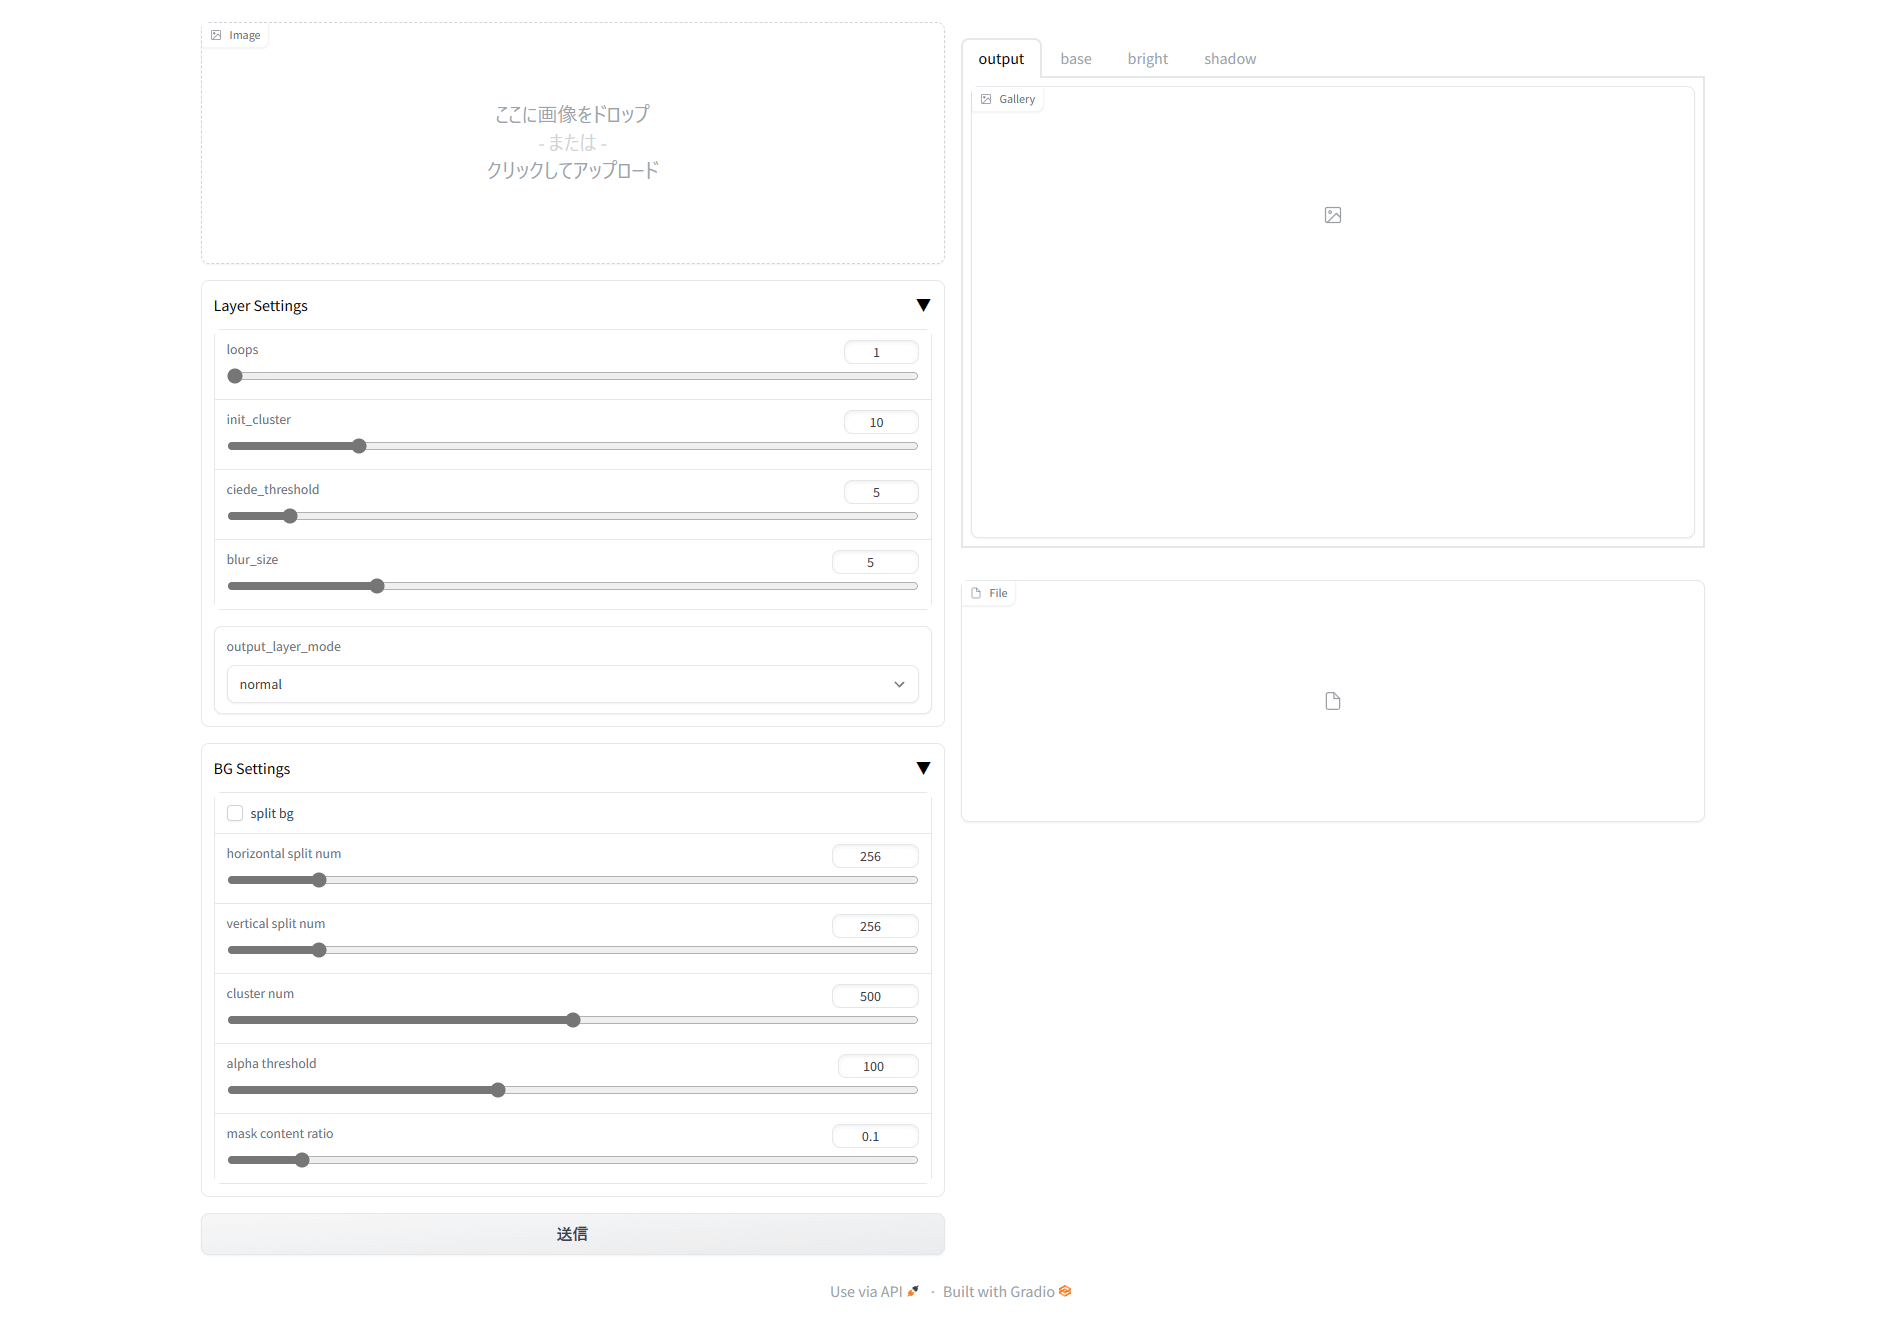
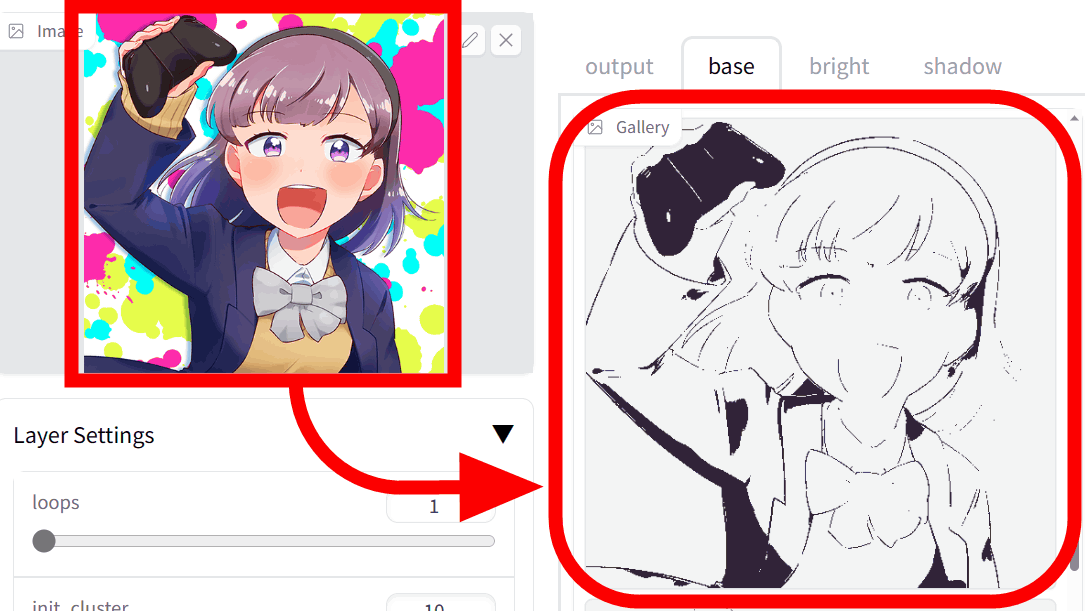
Drag and drop the illustration you want to divide into layers on the upper left. This time, I tried loading the illustration of '
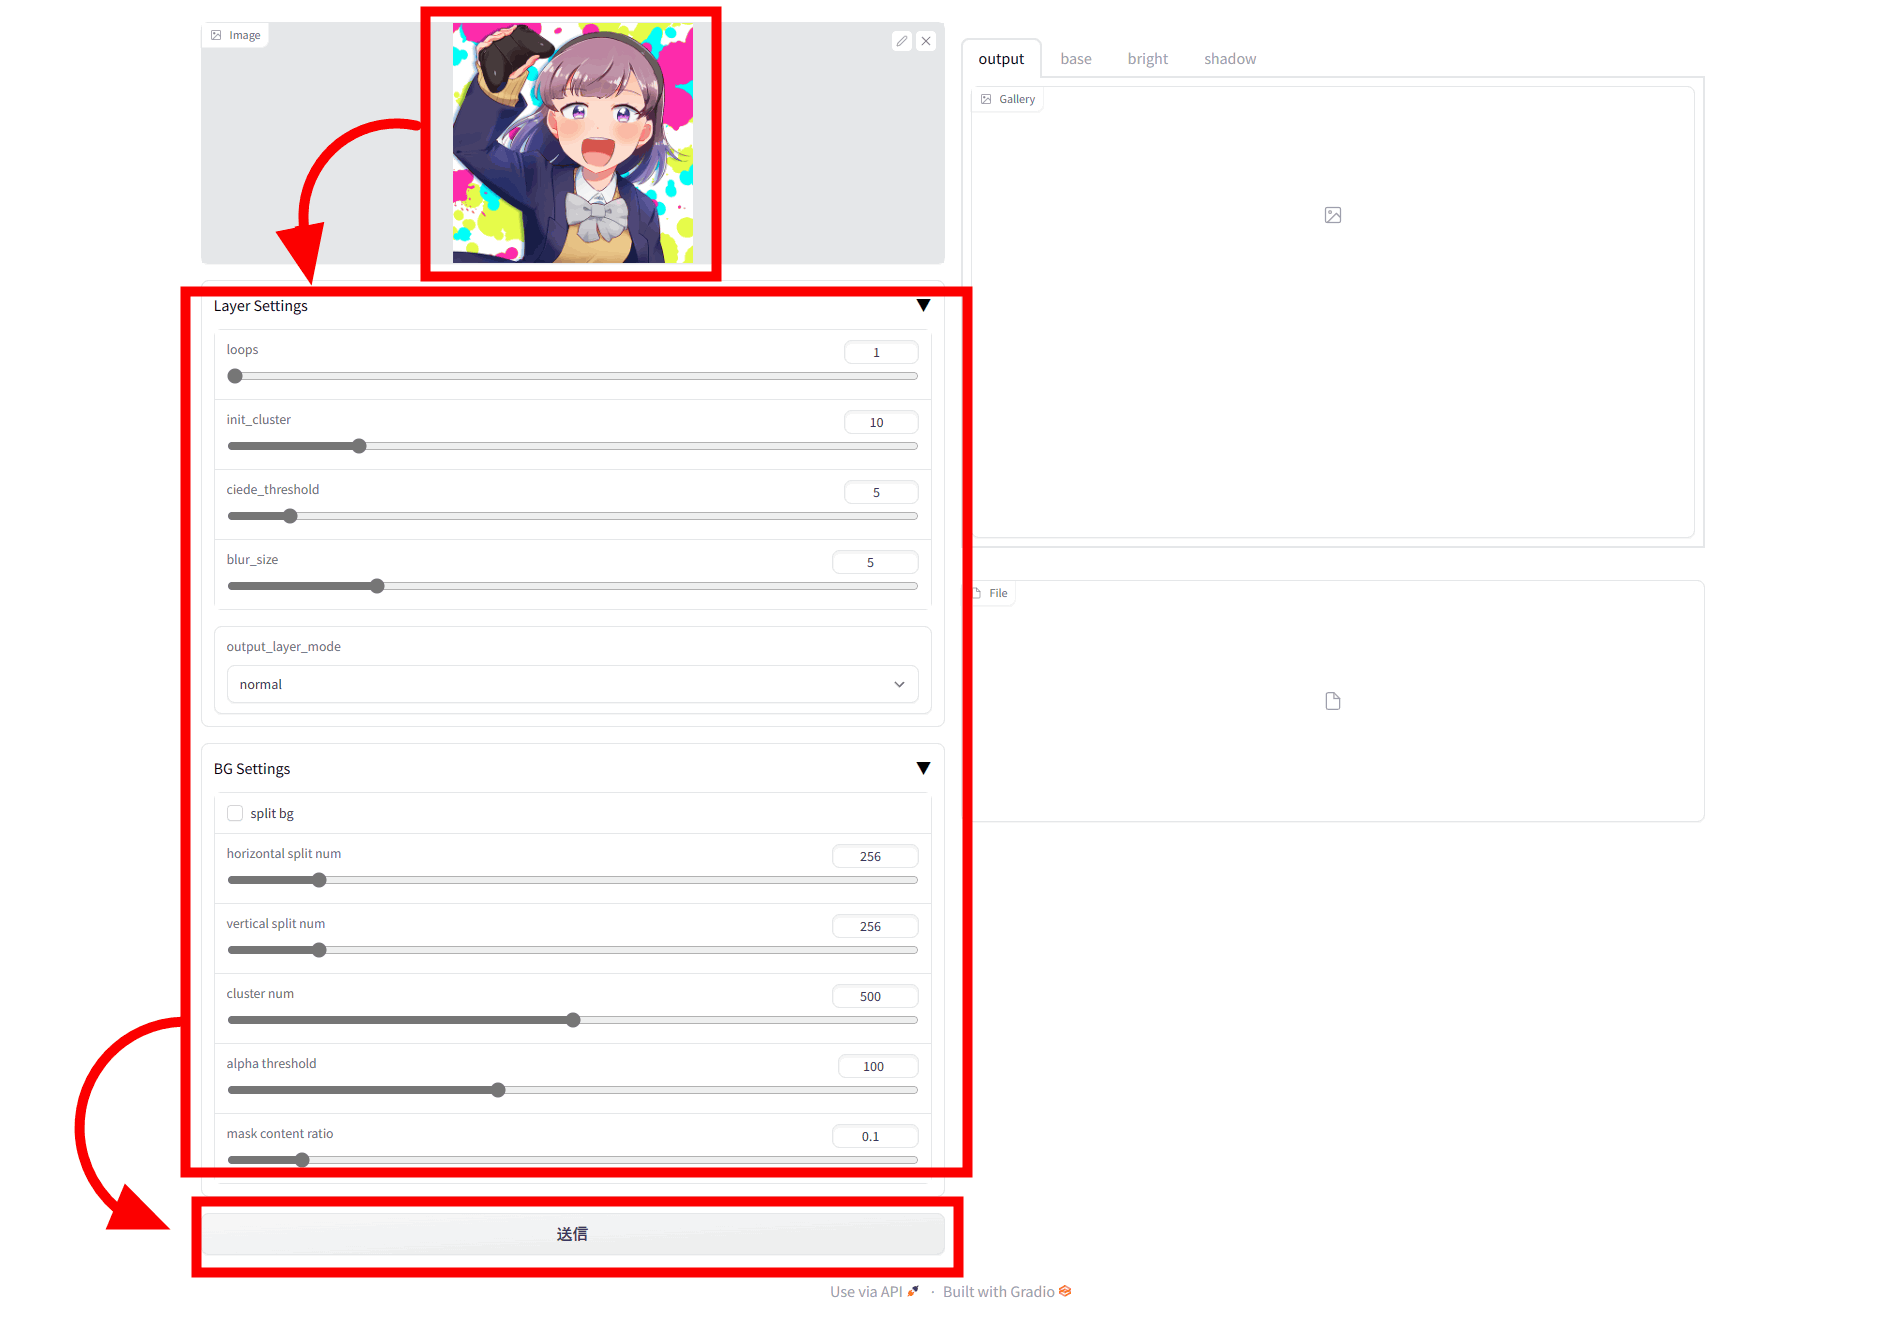
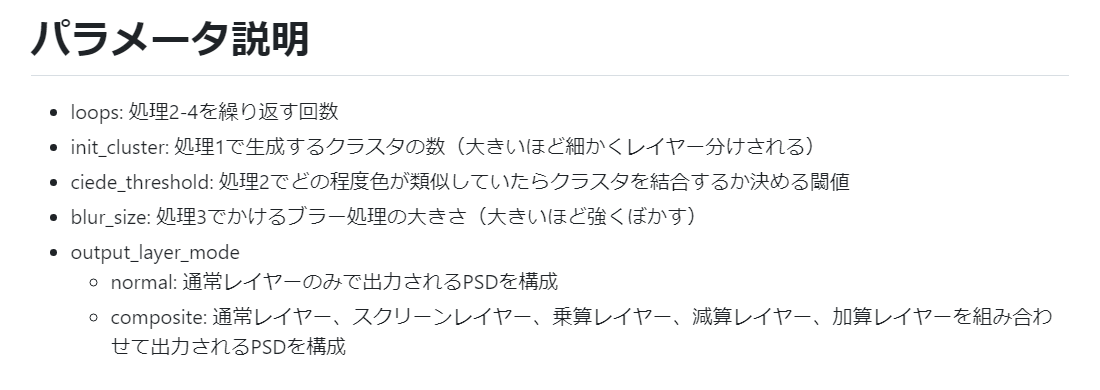
Each item of setting is summarized in GitHub, as follows.
You can confirm that the process is progressing on Powershell.

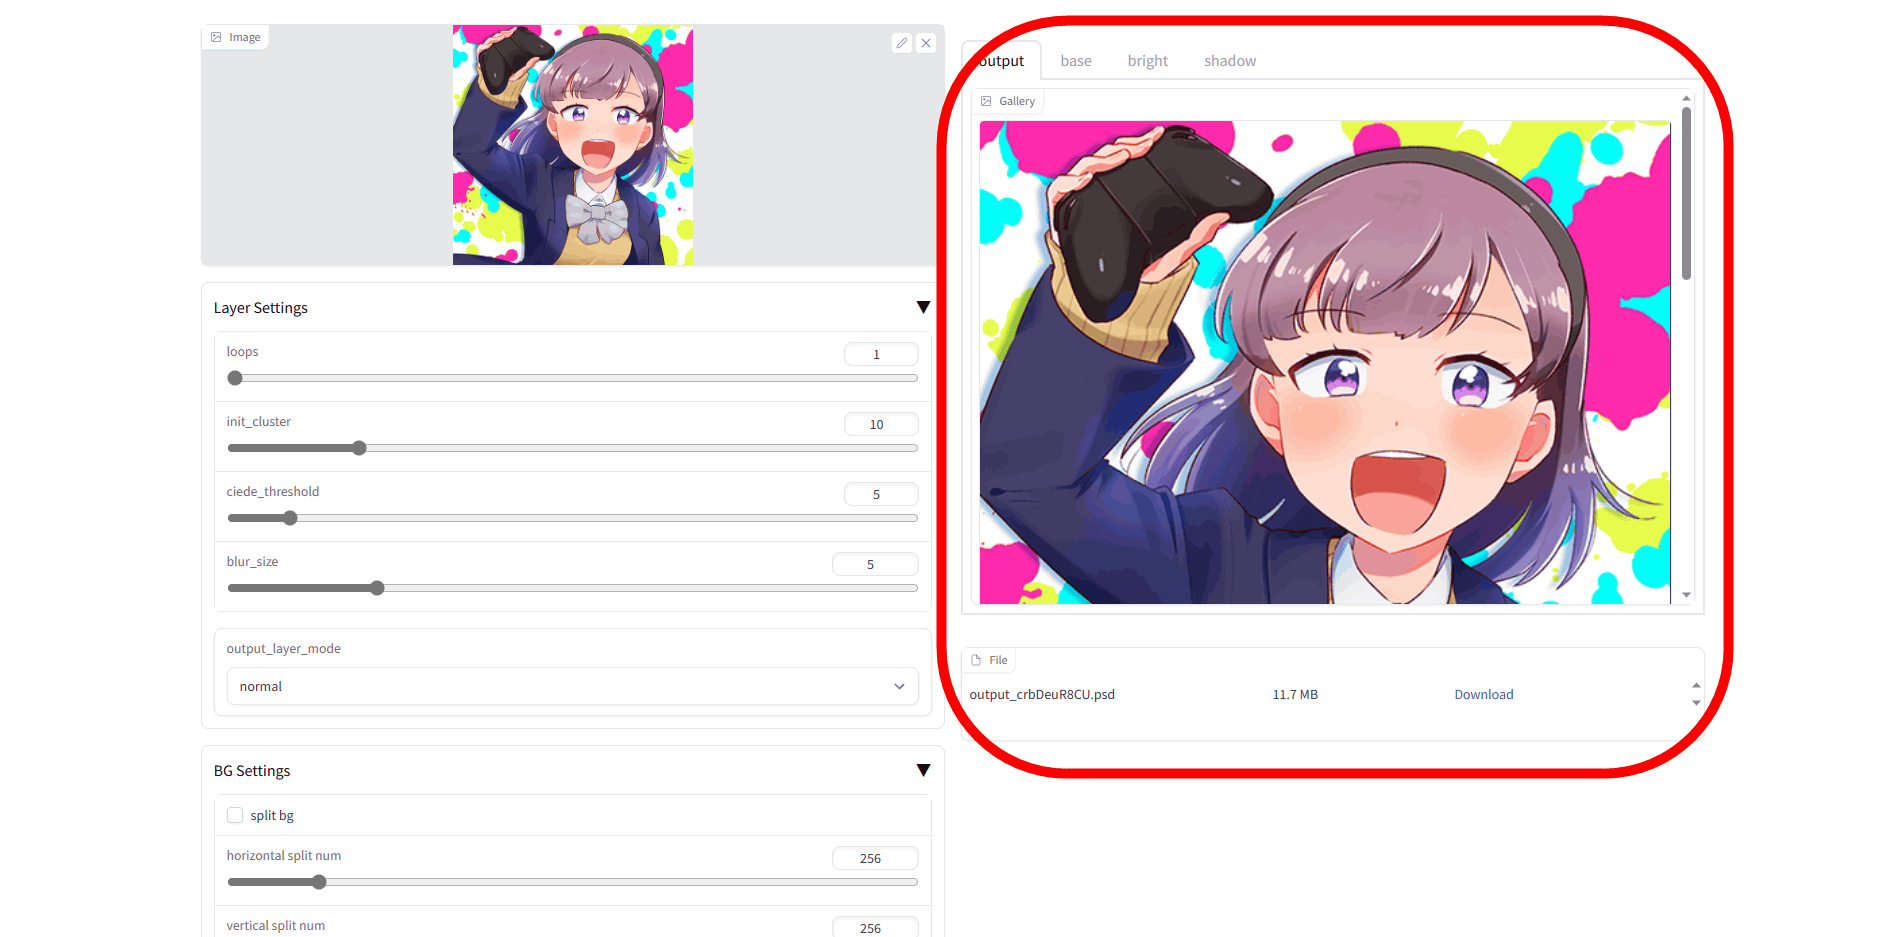
After dividing the layers, the illustration will be displayed on the right side.
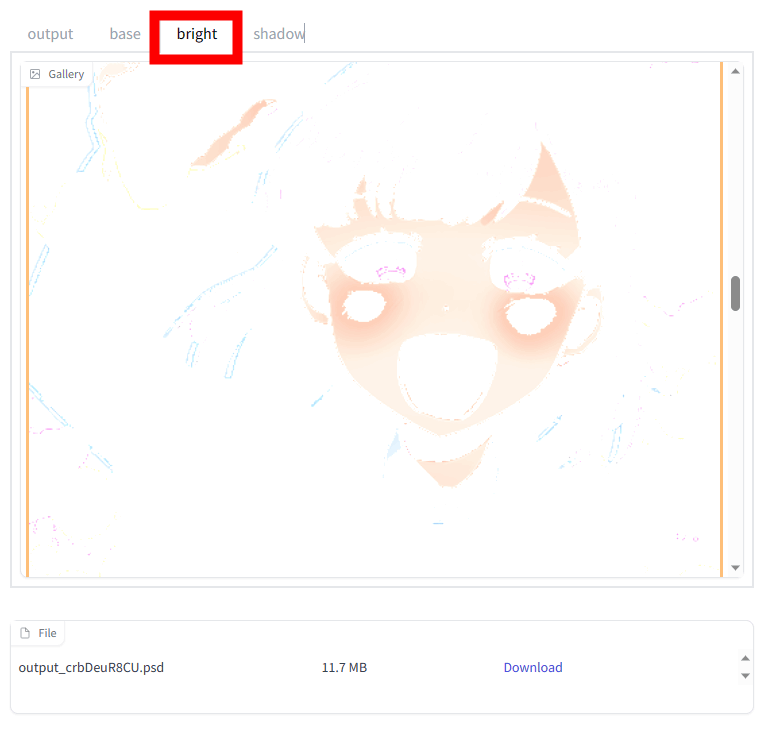
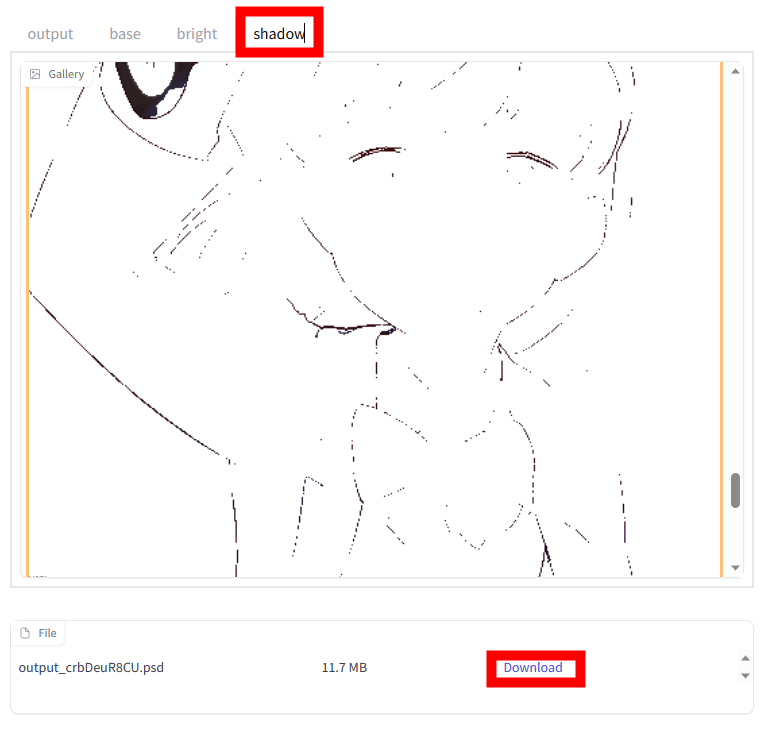
Layers are grouped into three types, 'base', 'bright' and 'shadow', and can be switched with the tab above the display part. Below is where 'base' is displayed. The base layer is also divided by color in more detail, and you can check it by scrolling.

'bright'
'shadow' looks like this. In addition, below the display part of the illustration is a download link for layer data in PSD format that can be read by Adobe Photoshop and CLIP STUDIO PAINT. You can save it by clicking 'Download'.
You can see the actually generated layer data in Adobe Photoshop and check it in the following movie. Layerdivider can easily divide illustrations into layers locally, so you can easily extract line drawings and colors from illustrations without layer data, so it seems to be applicable to various creative activities.
[Review] I tried switching the layer display by loading the illustration divided into layers by color with ``layerdivider'' into Photoshop-YouTube
It is also released as an extension of the AUTOMATIC1111 version of Stable Diffusion web UI , so if you have already installed the AUTOMATIC1111 version of Stable Diffusion web UI, you can install it more easily.
A tool (layerdivider) that divides a picture into layers based on color information and outputs it in PSD format is now available on SDWebUI!
— Matcha Monaka (@GianMattya) April 24, 2023
Paste the git URL from Extensions and install it! https://t.co/8U08TvSFIE
Also, from this version, you will be able to output the background and the person separately! #AUTOMATIC1111 pic.twitter.com/5f1Hi04iEq
Also, layerdivider has a Google Colaboratory note published, so it can be run on a PC with low specs.
layerdivider_launch.ipynb - Colaboratory
https://colab.research.google.com/github/mattyamonaca/layerdivider/blob/main/layerdivider_launch.ipynb
Related Posts: