Installation procedure & usage summary of free tool 'Lama Cleaner' that can completely delete unnecessary items contained in images without discomfort

There are many situations where you want to erase a part of an image, such as an unwanted subject in a photo or an annoying text contained in an image. I found a free tool ' Lama Cleaner ' that can cleanly delete unnecessary parts in images, so I summarized how to introduce it to a PC and how to use it.
GitHub - Sanster/lama-cleaner: Image inpainting tool powered by SOTA AI Model
Lama Cleaner can also be installed using the package management system 'pip' for Python, but this time 'Lama Cleaner One Click' can install 'Lama Cleaner' in one shot even on a PC that is not ready for Python etc. Installer' to install it on the PC. 'Lama Cleaner One Click Installer' can be downloaded from the following link.
lama-cleaner/README.md at main Sanster/lama-cleaner GitHub
https://github.com/Sanster/lama-cleaner/blob/main/scripts/README.md
The above page has an installer for Windows and an installer for macOS. Since I want to install it on Windows this time, click 'lama-cleaner-win.zip' to download it.

After downloading 'lama-cleaner-win.zip', unzip it using the Windows standard function or decompression software such as '

After unzipping, open the 'lama-cleaner-win' folder and open the 'lama-cleaner' folder inside it.
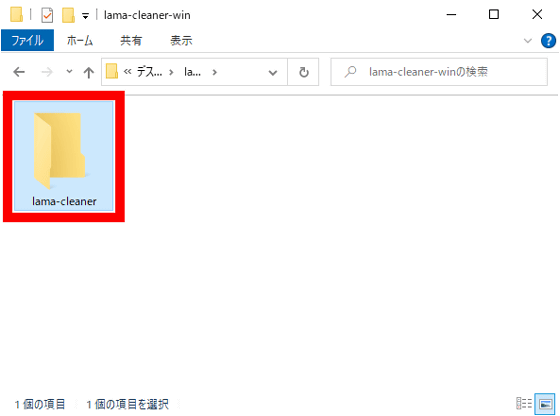
Next, double-click 'win_config.bat'.

Then, the command prompt will open and the characters will flow, so wait for a while.

After waiting for a while, you will be asked to select either 'sd1.5' or 'lama' as the model data to use for deleting unnecessary objects in the image. This time, I want to use 'lama' which does not require any special settings, so I typed 'lama' and pressed the Enter key.

Next, a screen to select whether to use 'cuda' or 'CPU' for image processing is displayed. If you have a PC equipped with NVIDIA GPU, select 'cuda' OK. Since I am using a PC that does not have an NVIDIA GPU this time, I entered 'cpu' and pressed the Enter key.

Finally, I was asked whether to use 'Lama Cleaner' as a desktop application, so I entered 'y' for Yes and pressed the Enter key. Installation and initial settings are now complete. The command prompt will automatically close.

After completing the settings, double-click 'win_start.bat'.

Then, the command prompt opens and the process starts, so wait for a while.

After waiting for a while, 'Lama Cleaner' will start. First, to specify the image you want to process, click 'Click here or drag an image file' in the center, or drag and drop the image onto the screen.

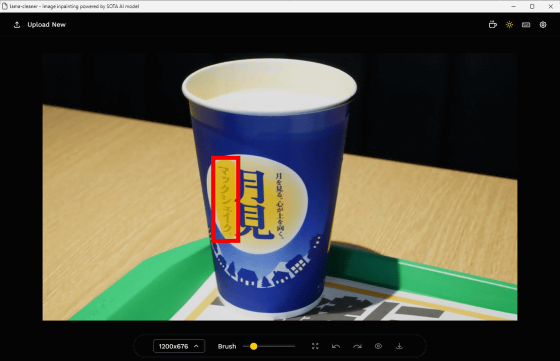
This time, I will process the photo of the McShake container below.

Image processing is easy. Just trace the part you want to erase with the mouse and fill it. This time, I tried to fill in the part marked 'Macshake'.
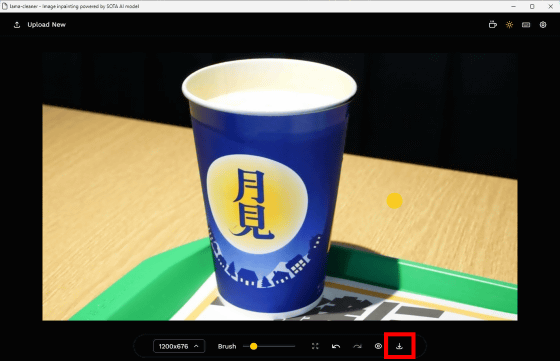
The processing result looks like this. The part marked 'Mack Shake' has been replaced with the background moon without any discomfort.
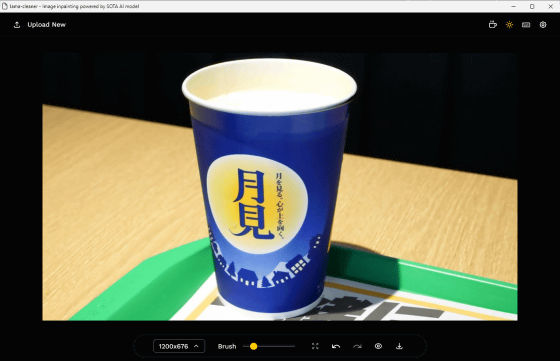
Furthermore, if you fill in the catchphrase written on the right side of 'Tsukimi' ... ...
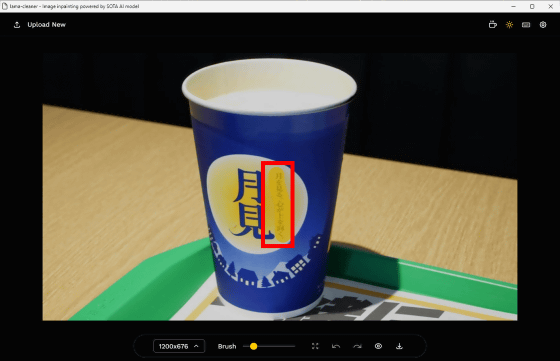
The image was completed without any discomfort, as if only 'Tsukimi' was written from the beginning. To save the completed image, click the red frame button at the bottom of the screen.
By moving the slider in the image below left and right, you can compare the image before processing (left) and the image after processing (right). It's an amazing performance with almost no discomfort.
Related Posts:


