I tried to transfer chats of 'Discord' and 'Slack' to each other with the paid function 'bridge connection' of the secure chat application 'Element'
Among software that focuses on exchanging messages, such as Discord and Slack, 'Element ' is a service that enables secure exchange using
Personal plans for Element | Free | Element Home
https://element.io/personal-plans
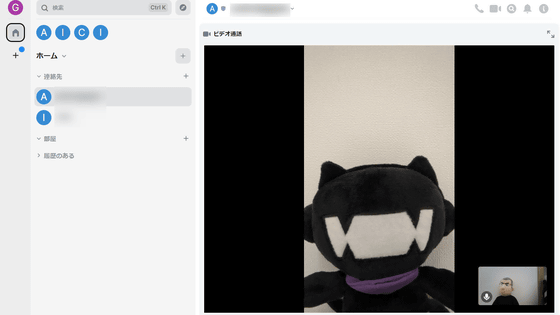
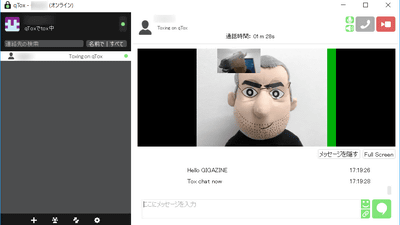
'Element' is a chat software that allows secure communication using the open standard and lightweight real-time communication protocol Matrix , as well as video calls with no ads and no time limit even in the free version. The basic settings and usage of Element are explained in detail in the following articles.
Free & no ads & no time limit video conference, voice call, file sharing secure chat application 'Element' --GIGAZINE
In the paid version, it is said that the 'bridge connection' that enables mirroring of messages in cooperation with Discord and Slack will be released, so I will actually try it.
·table of contents
◆ Initial setting
◆ I tried bridging with Slack
◆ I tried bridging with Discord
◆ Initial setting
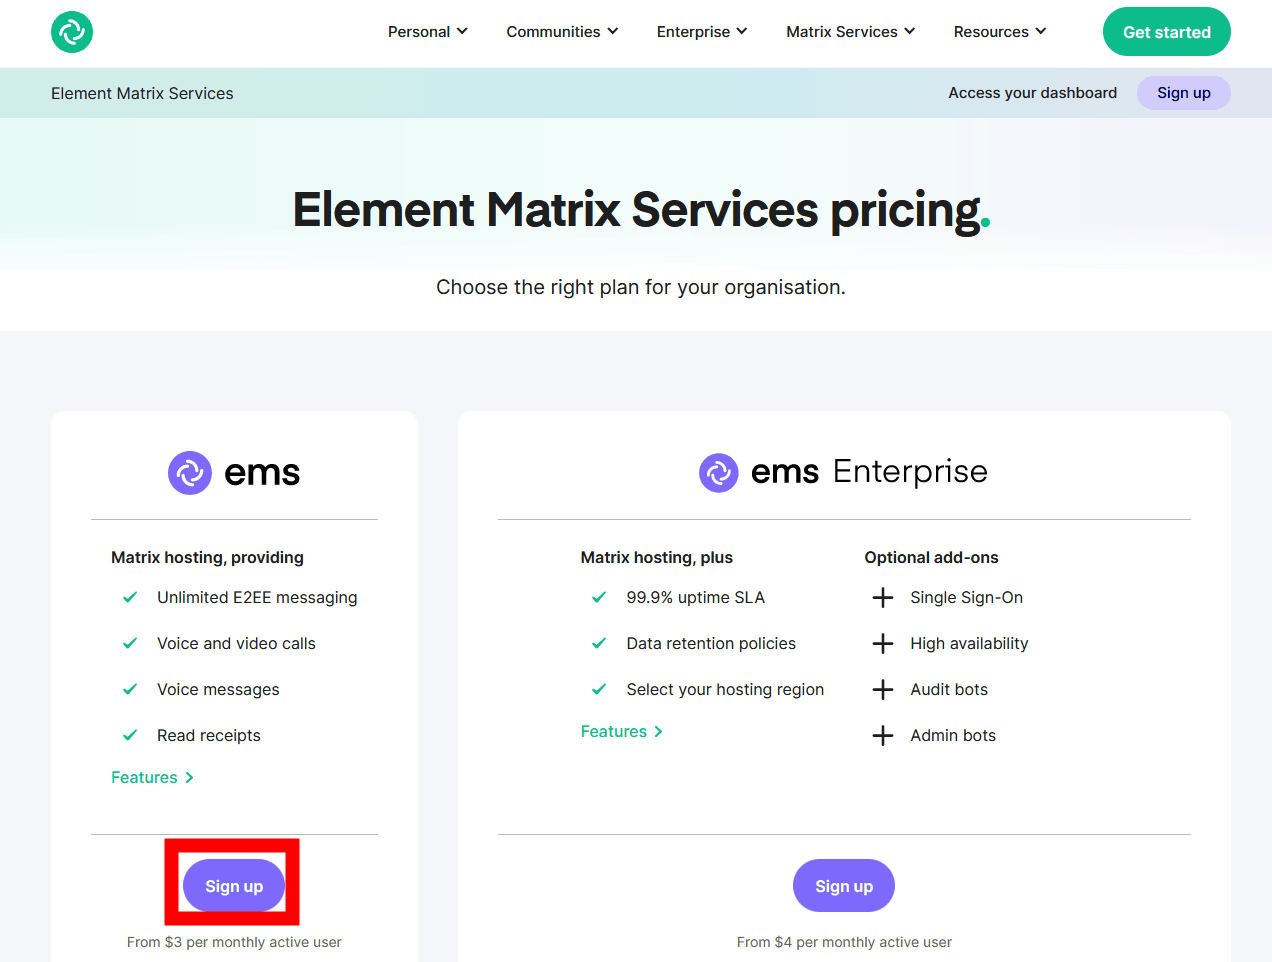
It seems that the bridge connection can also be used in 'Element Home ' for families, but this time we will use 'Element Matrix Services (EMS)' which enables the integration function of Matrix system. First , access the official page of EMS, and this time click 'Sign up' for the personal version (unmarked).
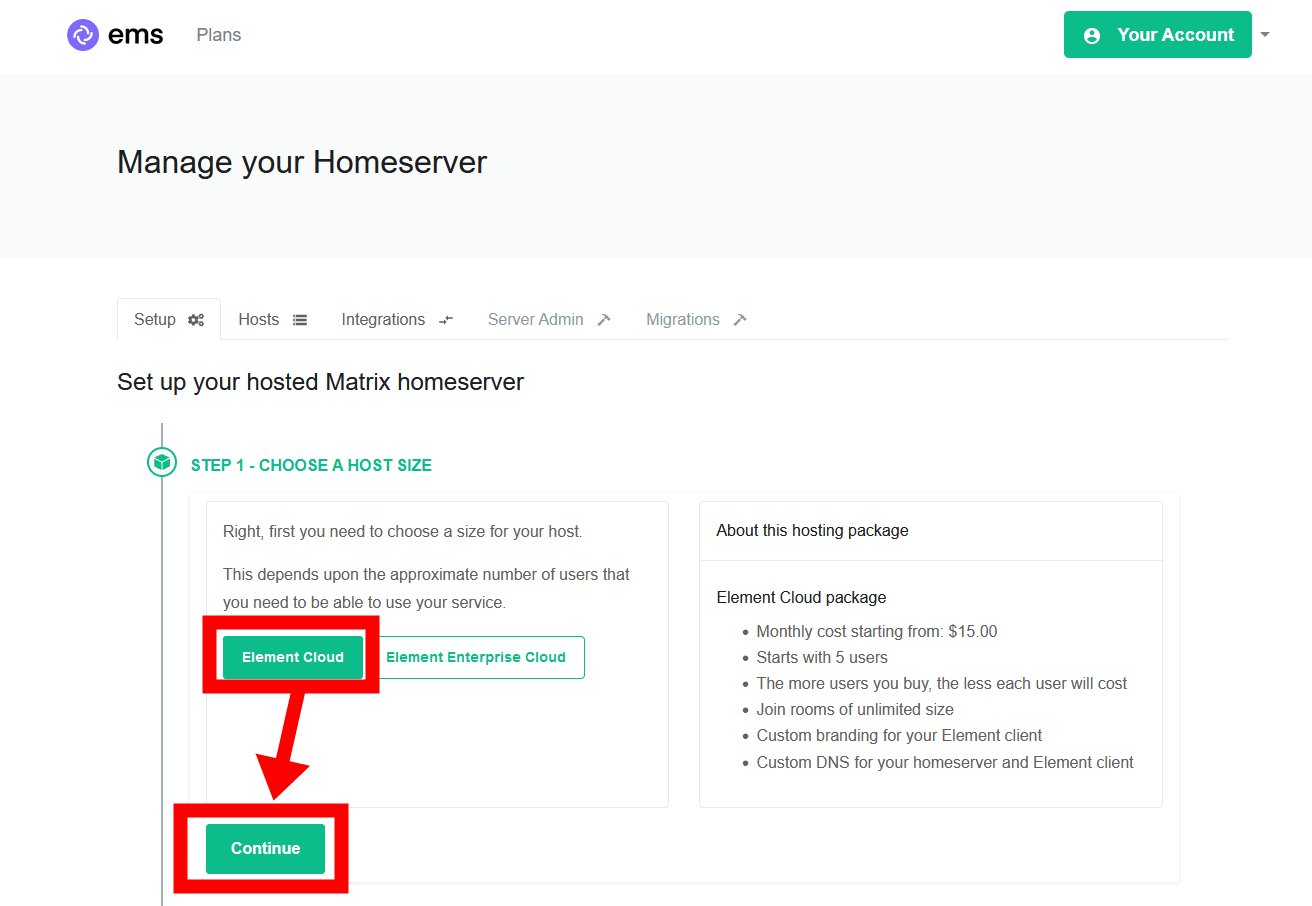
It is mandatory to subscribe to 'Element Cloud' for a minimum of $ 15 (about 1740 yen), so select this and click 'Continue'.
Enter the host name and click 'Check' to check if it is already in use. A home server called '(name entered) .ems.host' will be created, so be careful not to make any typos.
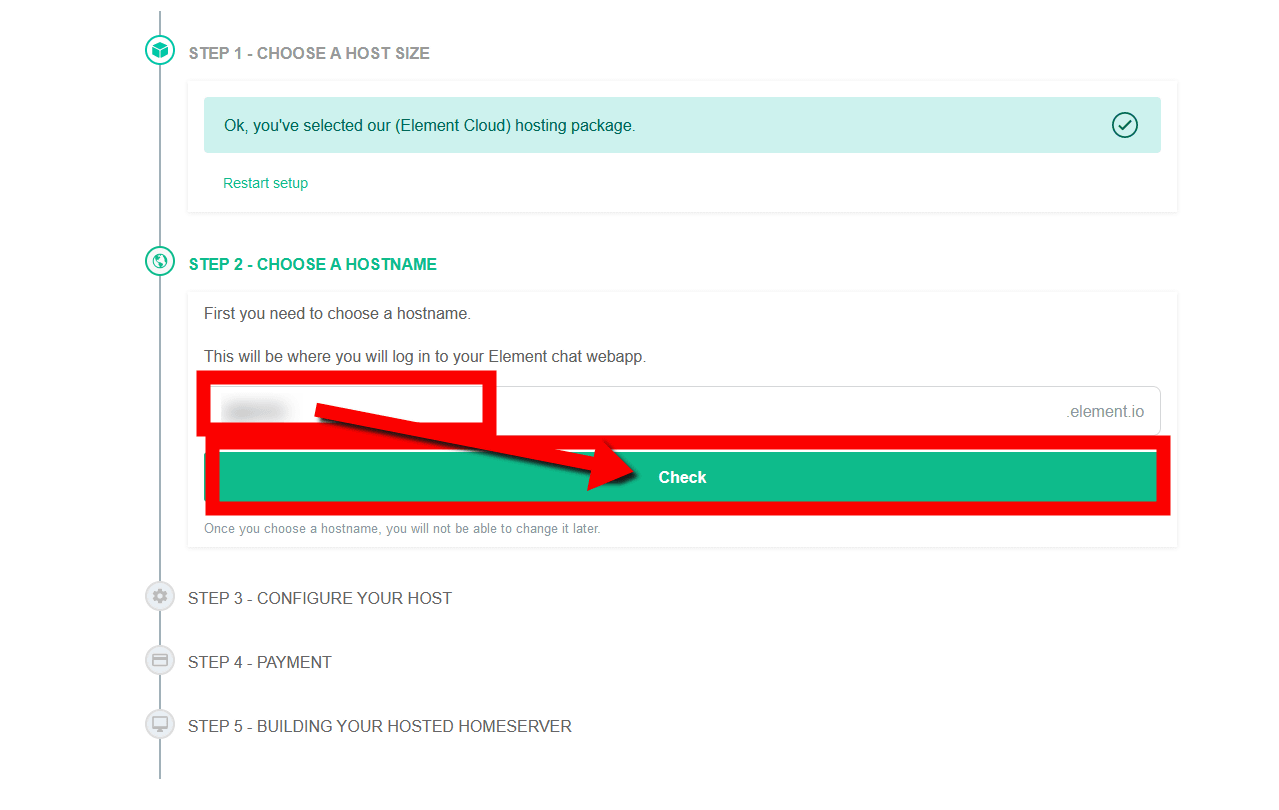
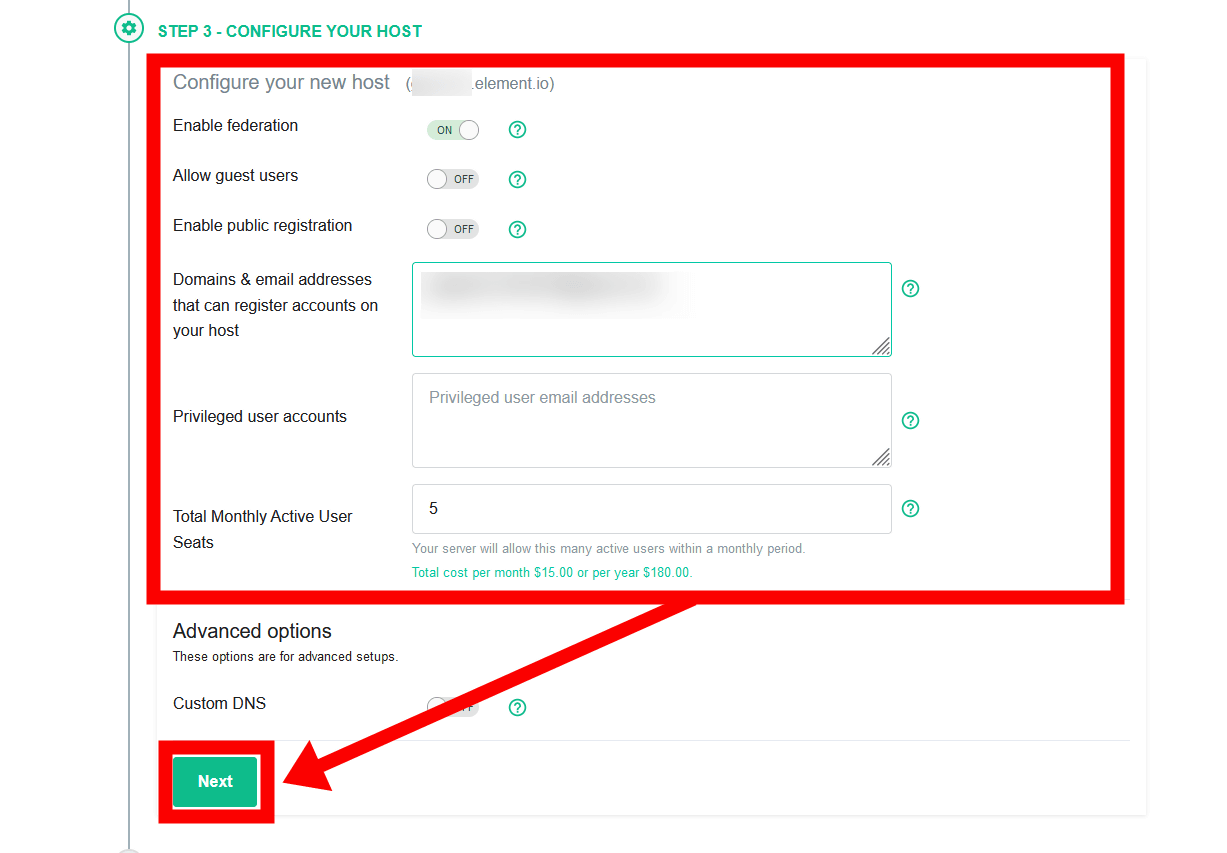
If there is no duplication, move on to the next. Set 'federation' to allow communication with other servers, set permission for guest users, specify the email address and domain to allow account creation in 'Domains & email addresses ~', and click 'Next'. In addition, 'Total Monthly Active User Seats' requires the number of people x $ 3 (about 350 yen), and the minimum number of people that can be set is 5.
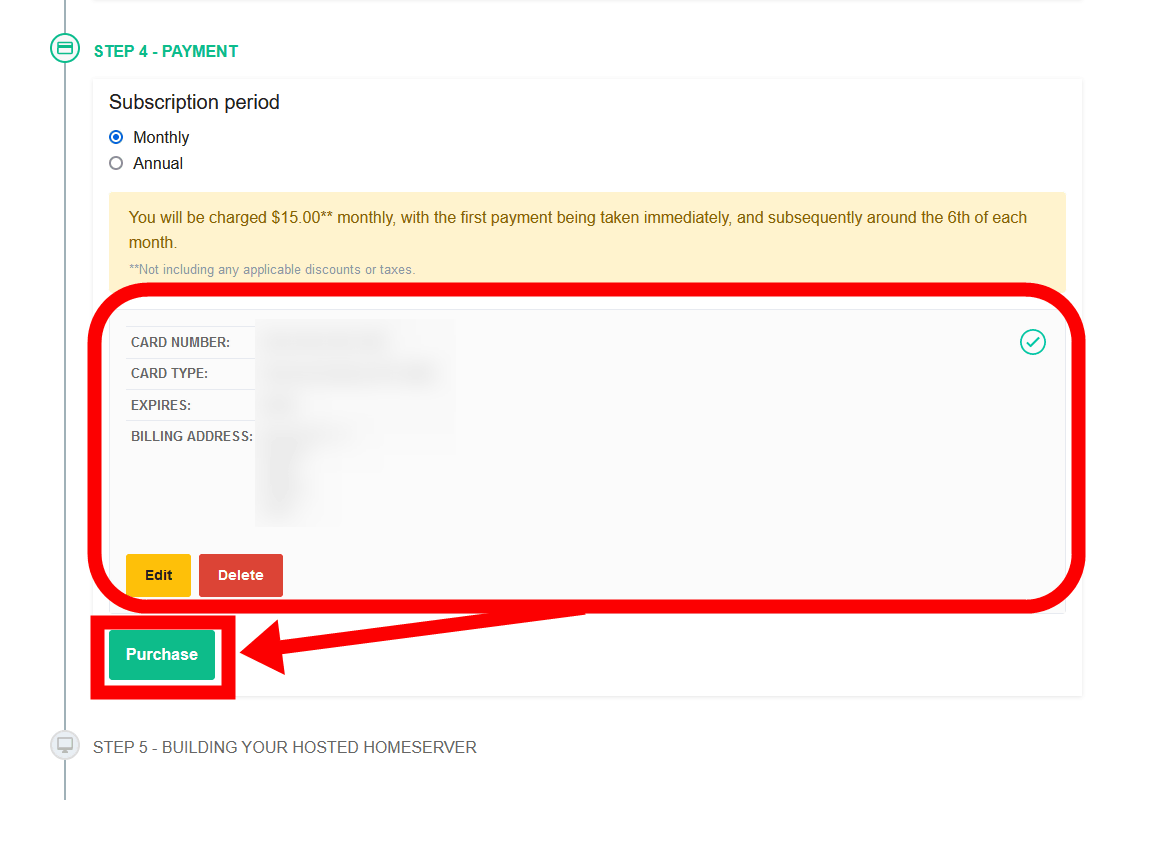
Select either Monthly or Annual plan, enter your credit card information and click 'Submit'

If the entered credit card information is correct, the following final confirmation will be displayed, so click 'Purchase'. Wait a few minutes and the hosting will be complete.
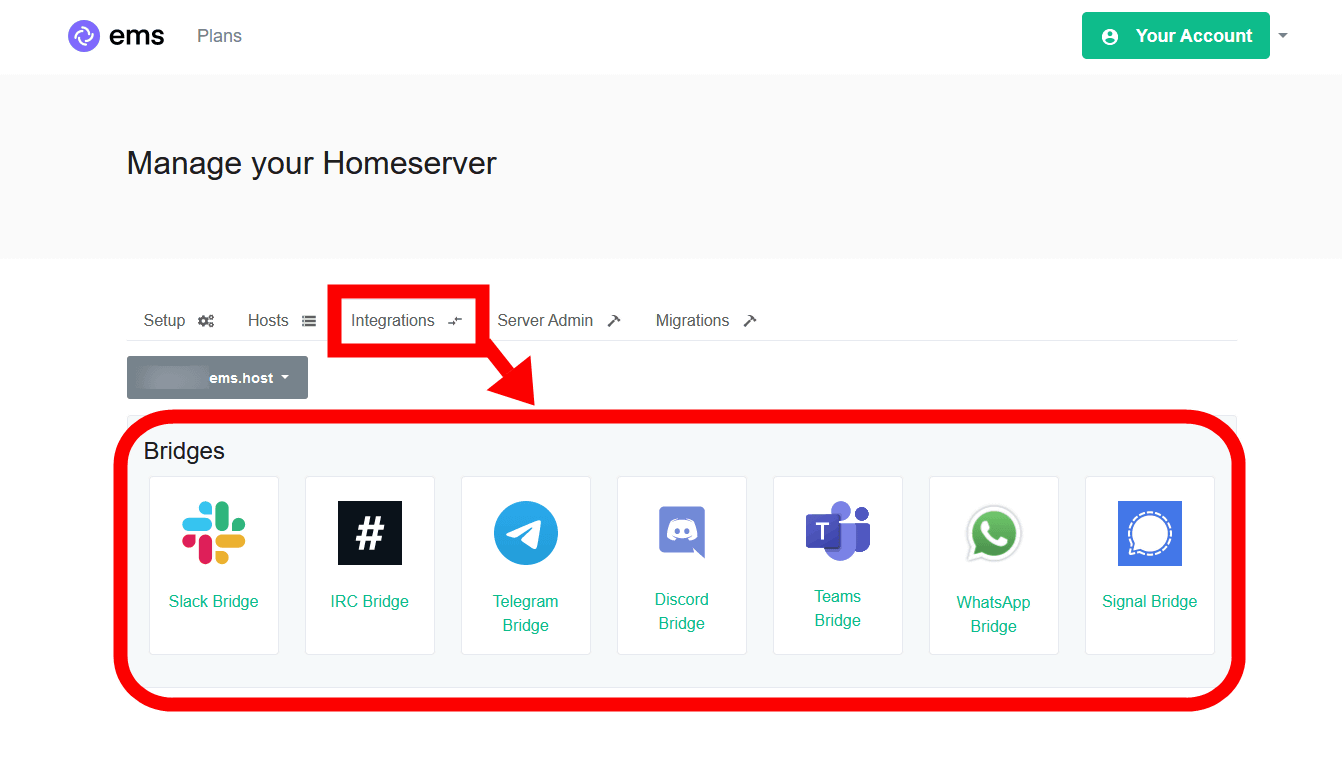
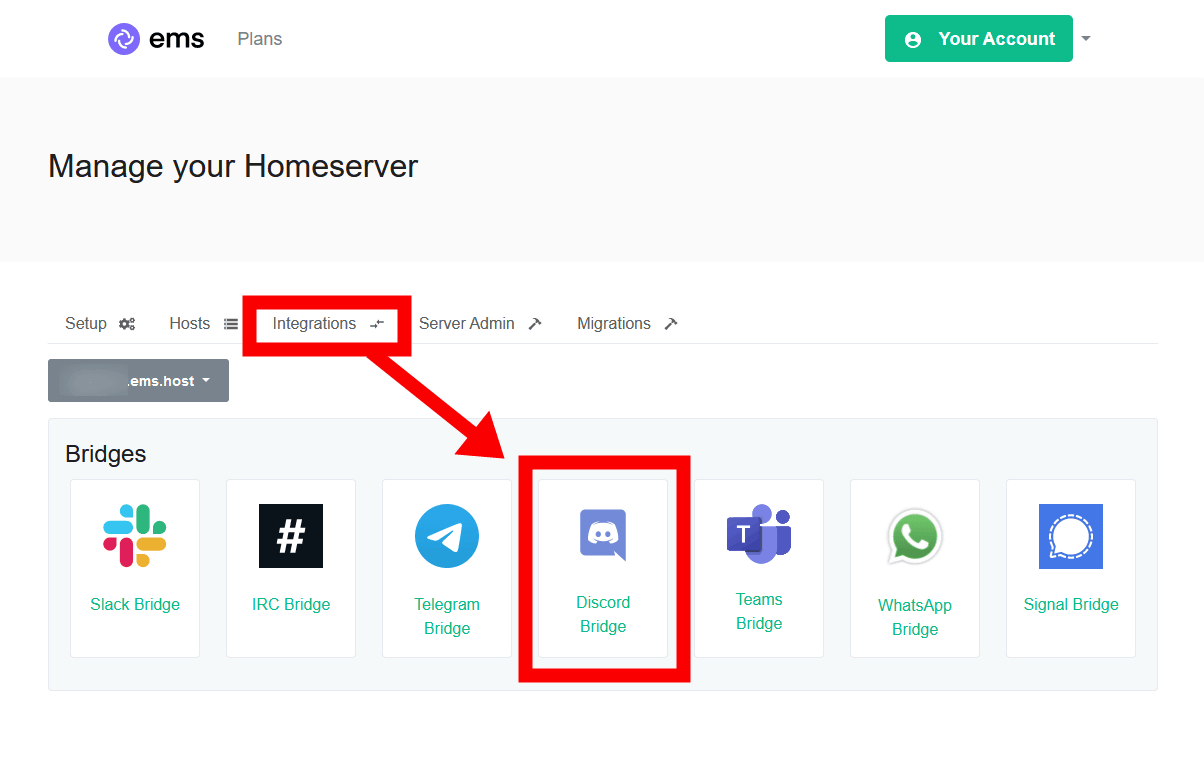
After hosting is complete, you will see a list of services that can be bridged in 'Bridge' on the 'Integrations' tab at the top of the page.
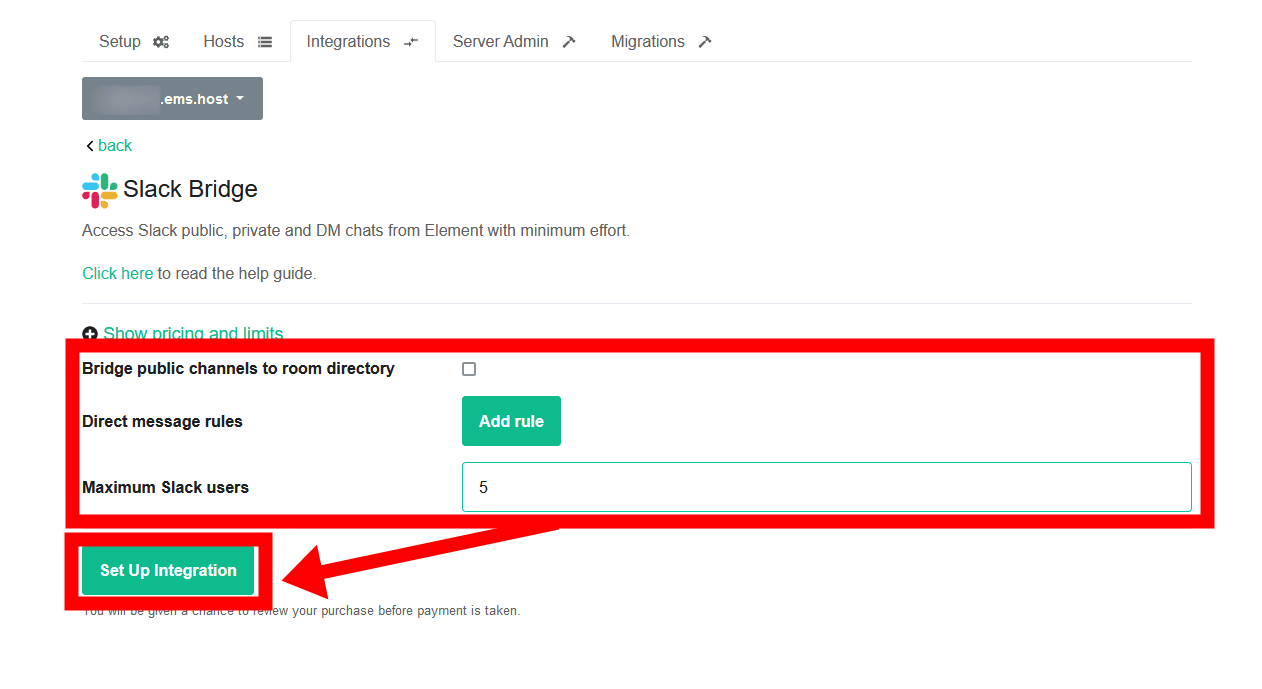
Slack's bridge connection is exceptionally free to use, but this time we will use the paid version of the bridge connection. Paid bridge connection settings are 'Bridge public channels to room directory', 'Direct Message rules', and 'Maximum Slack users'. 3 types. Since the bridge connection function costs a monthly usage fee of 0.5 dollars (about 58 yen) for the number of users, Maximum Slack users can limit the maximum number of people in advance. After completing the settings, click 'Set Up integration'.
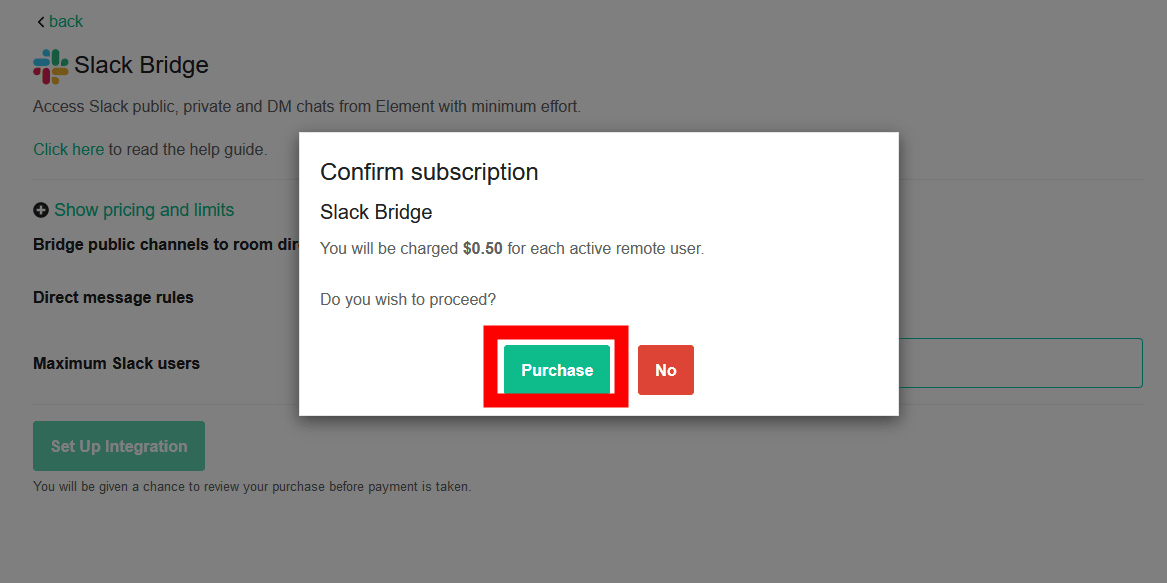
As mentioned above, the final confirmation that 'the number of users x $ 0.5 monthly usage fee will be charged' is displayed, so click 'Purchase'.
Then, the message 'Setting is in progress' will appear in various parts of the window, so wait for a while.
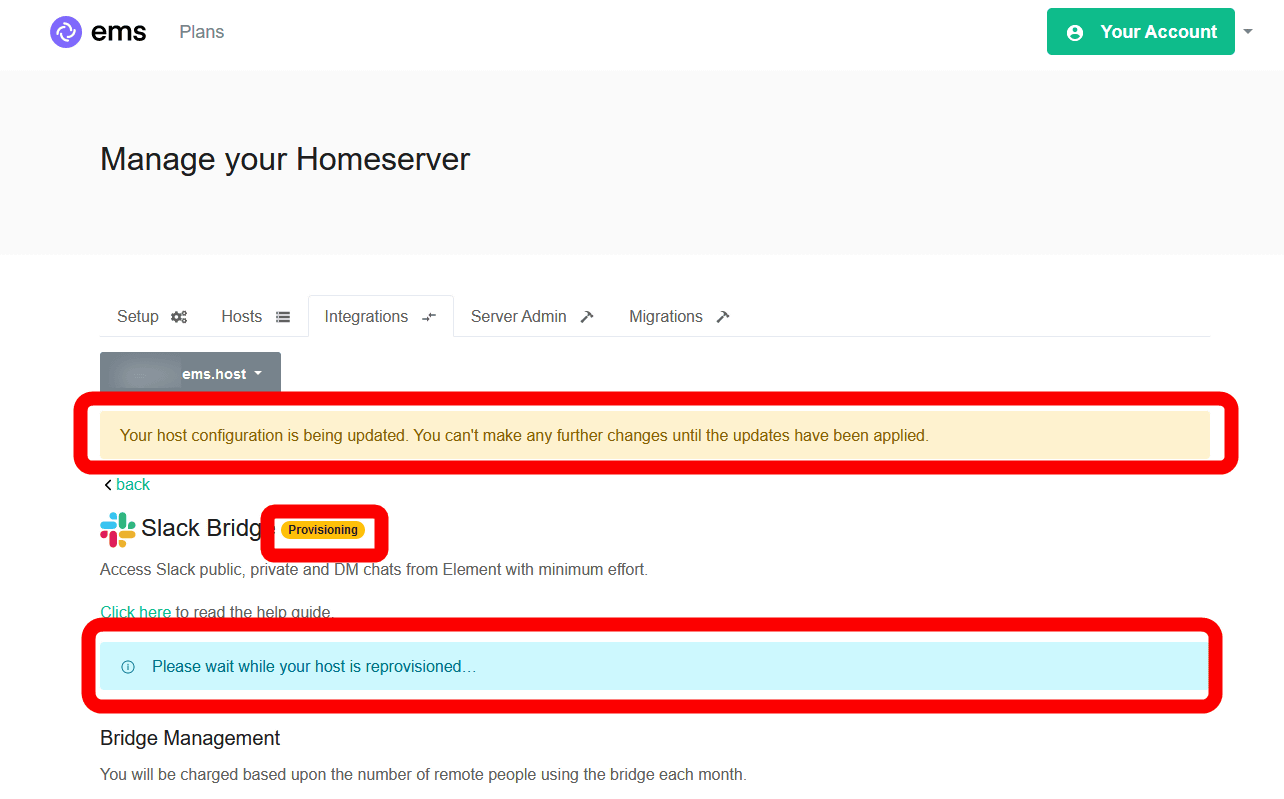
When 'Running' is displayed, the setting is completed. Move on to the settings on the Element side.

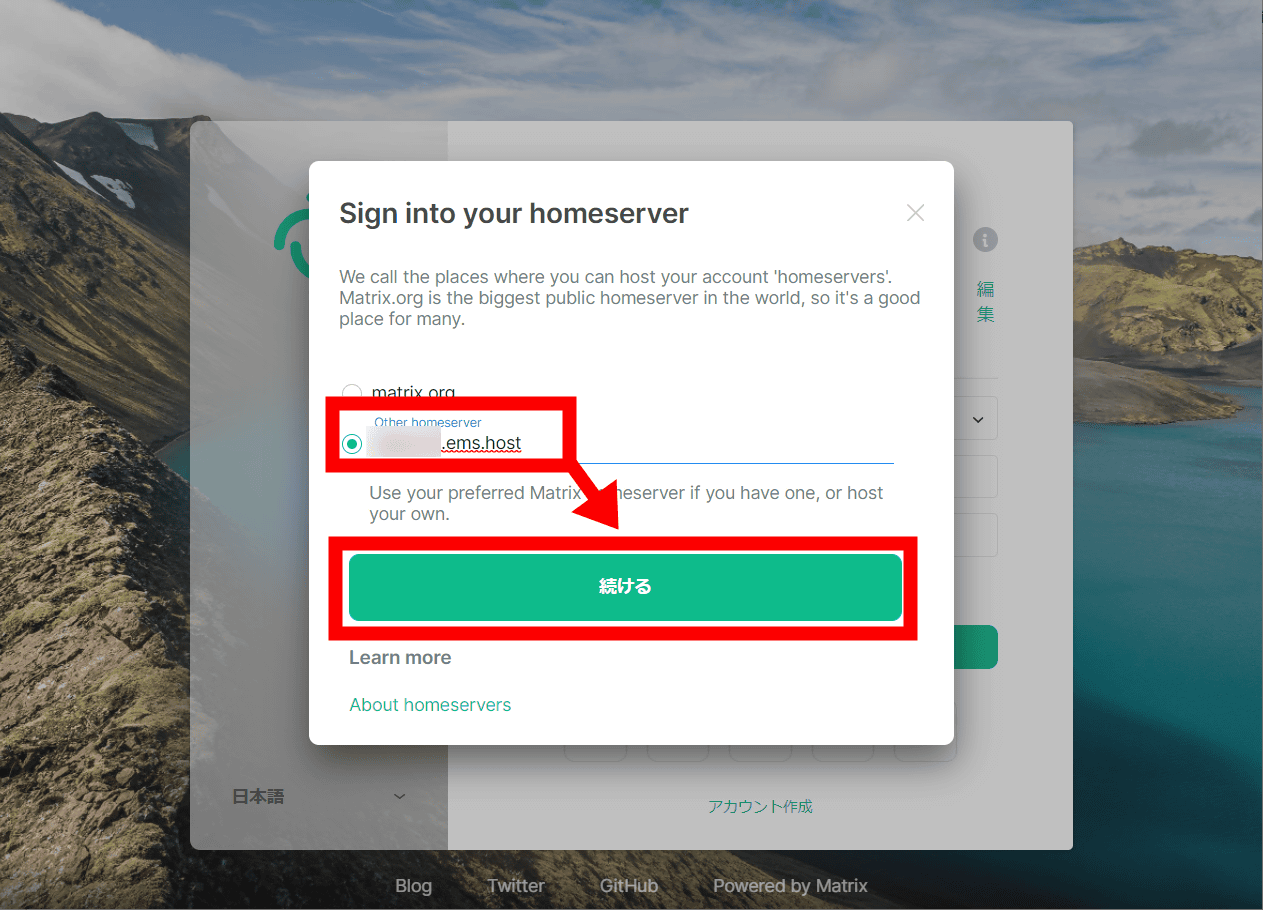
First, click 'Edit' on the home server on the Element login screen.
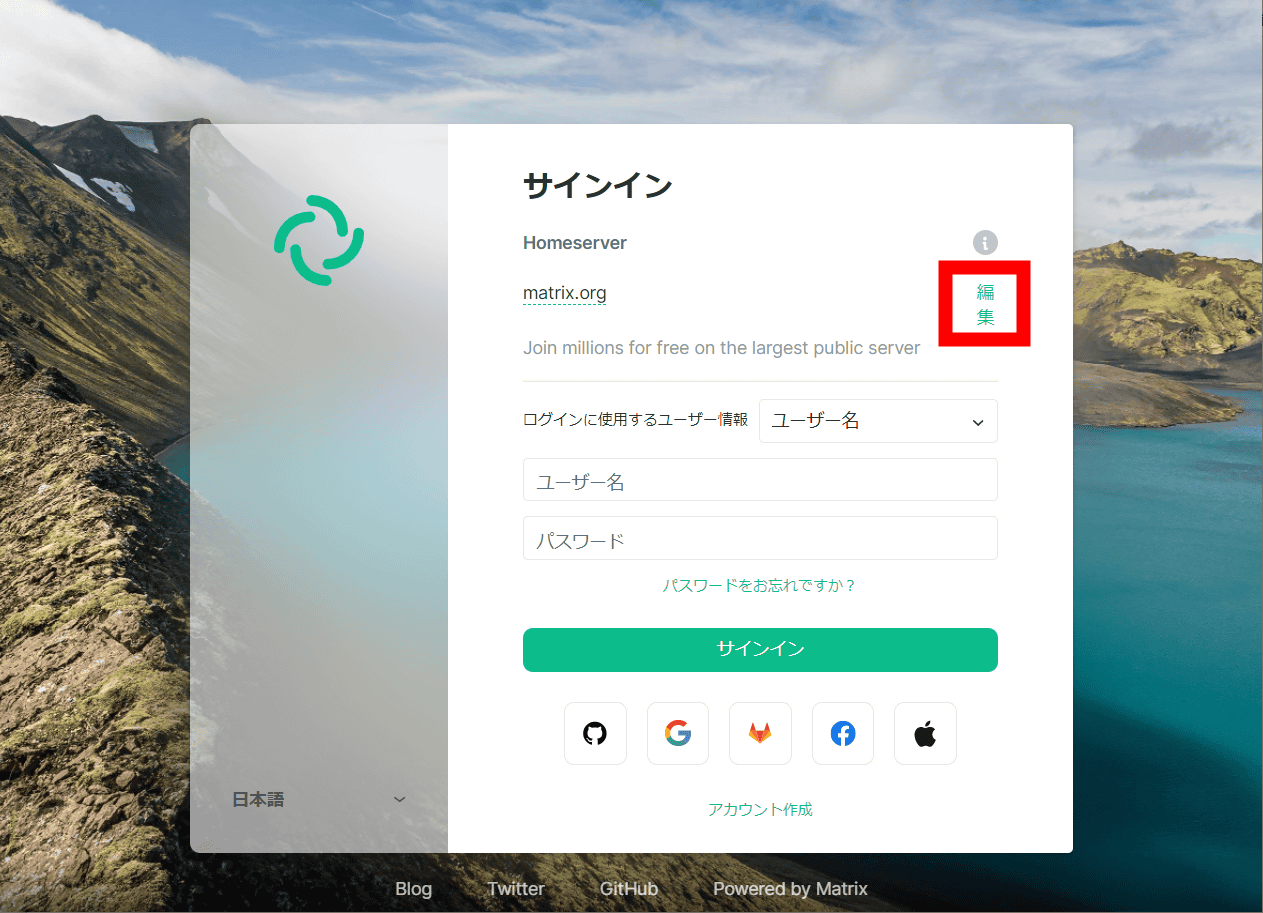
Enter the '(name you entered) .ems.host' that you set earlier.
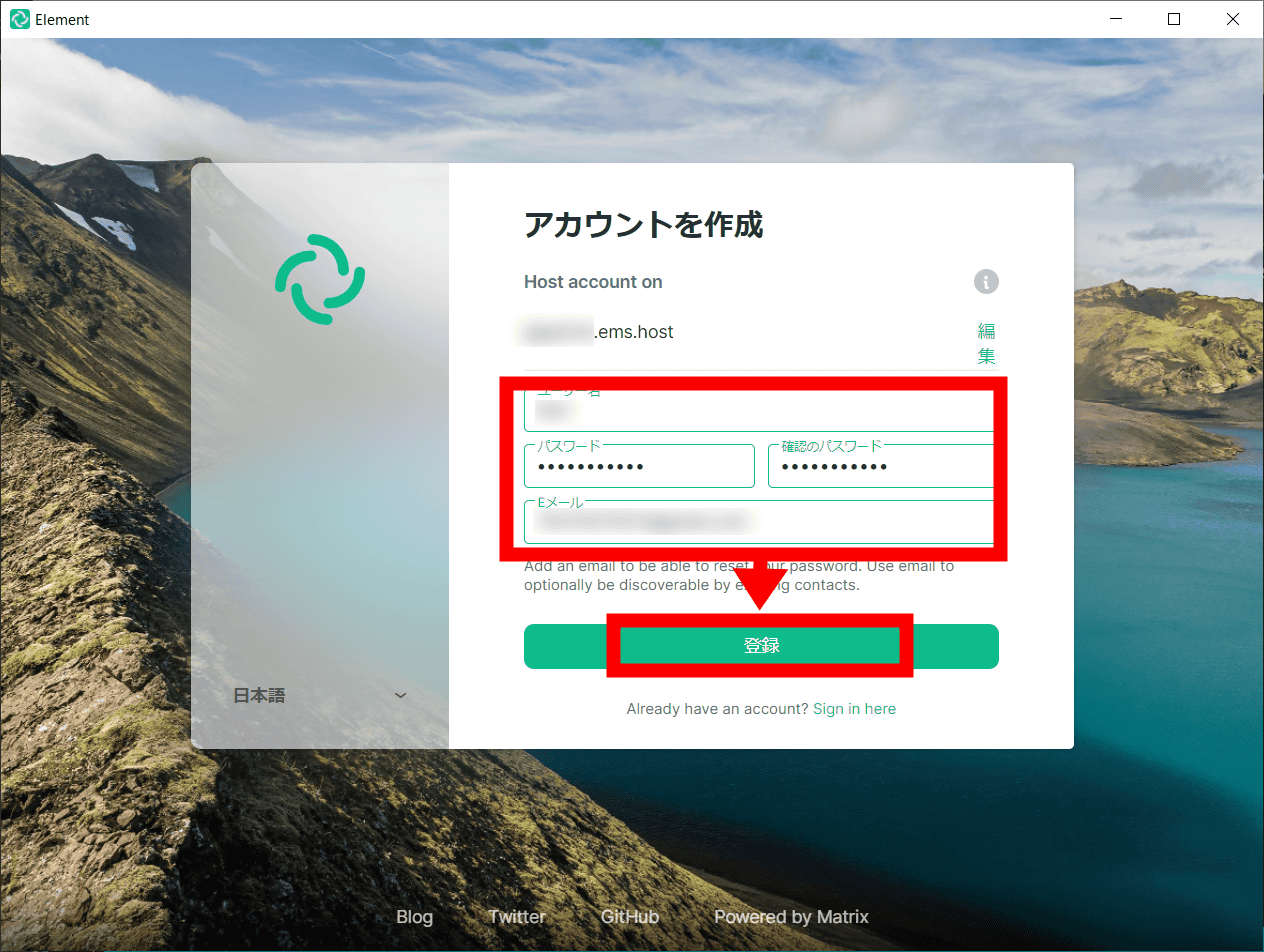
Next, create an account on your own server. Since you cannot log in using your Google account or Apple ID on your own server, enter your user name, password, and email address from the account creation screen and click 'Register'.
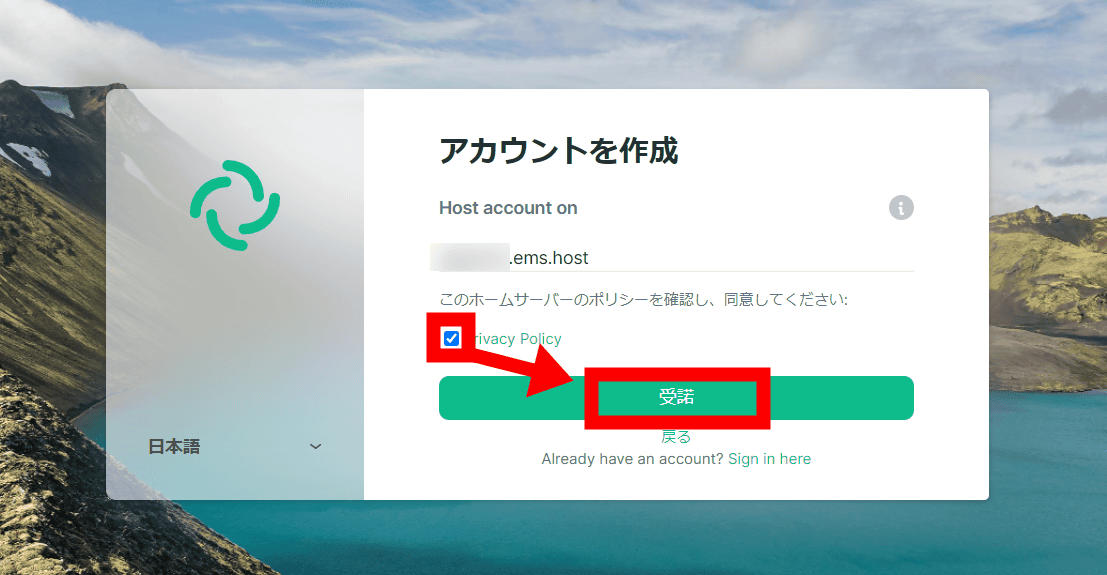
Check I accept the privacy policy and click 'Accept'.
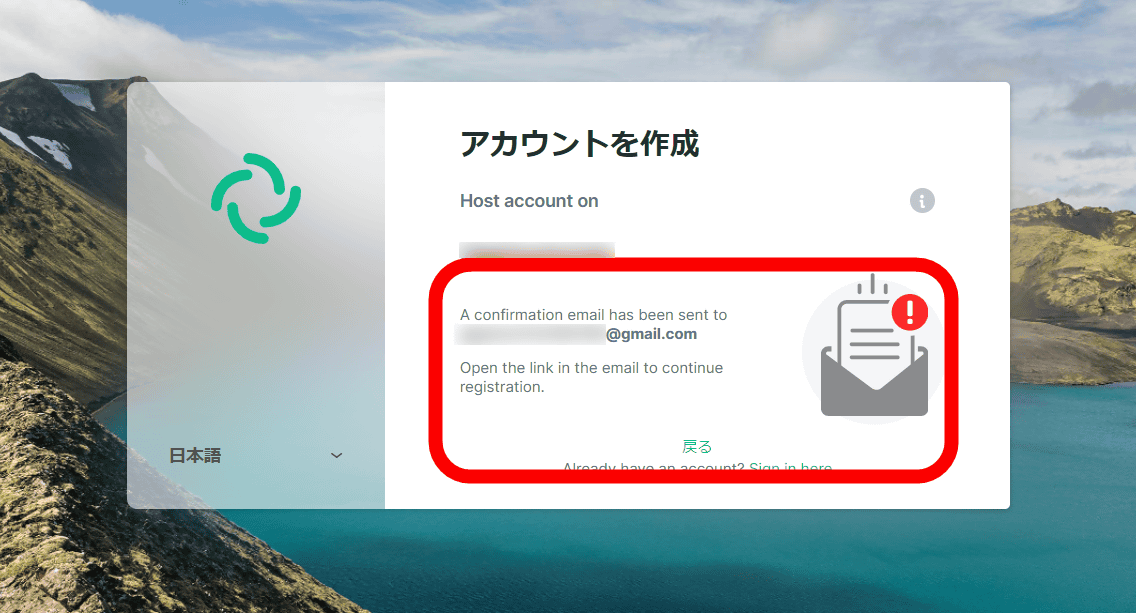
Then, it will be displayed that the email has been sent to the email address you entered.
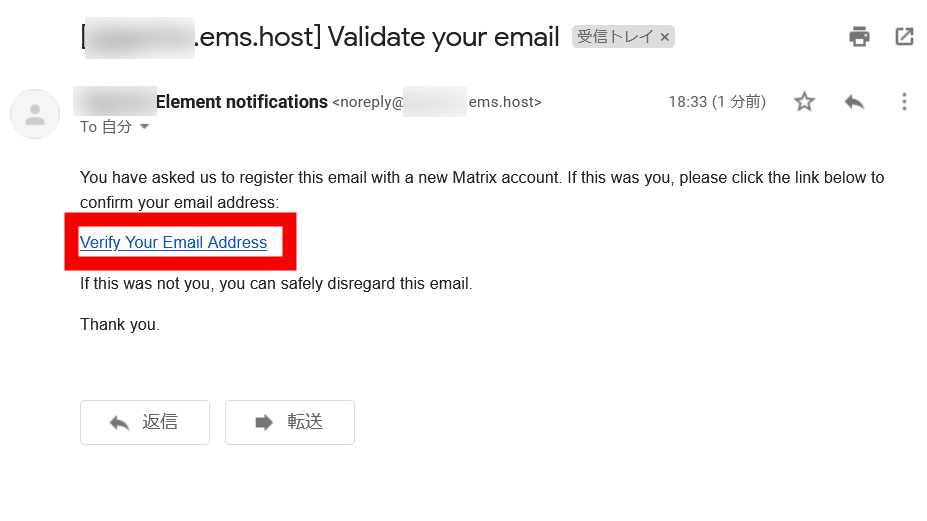
When I look at my mailbox, I received the following email, so click 'Verify Your Email Address' to complete the account creation.
◆ I tried bridging with Slack
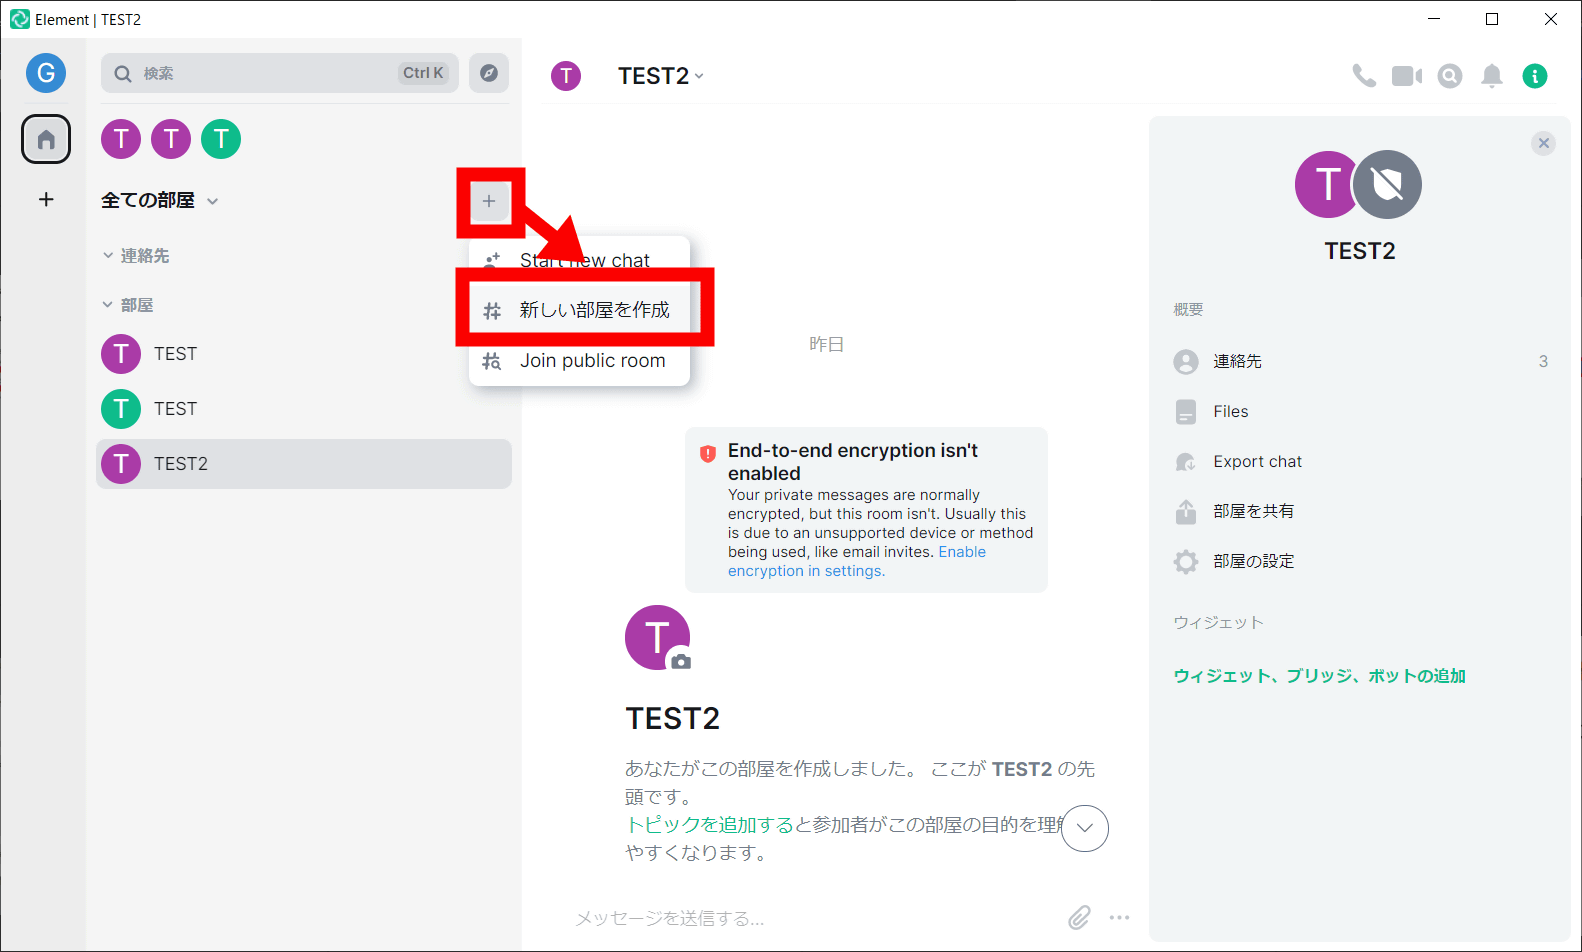
Let's create a chat room to log in and make a bridge connection. Click 'Create new room' from the add icon marked with '+'. In addition, although the following is a paid version of bridge connection, Slack's free version bridge connection can also be executed by the same procedure.
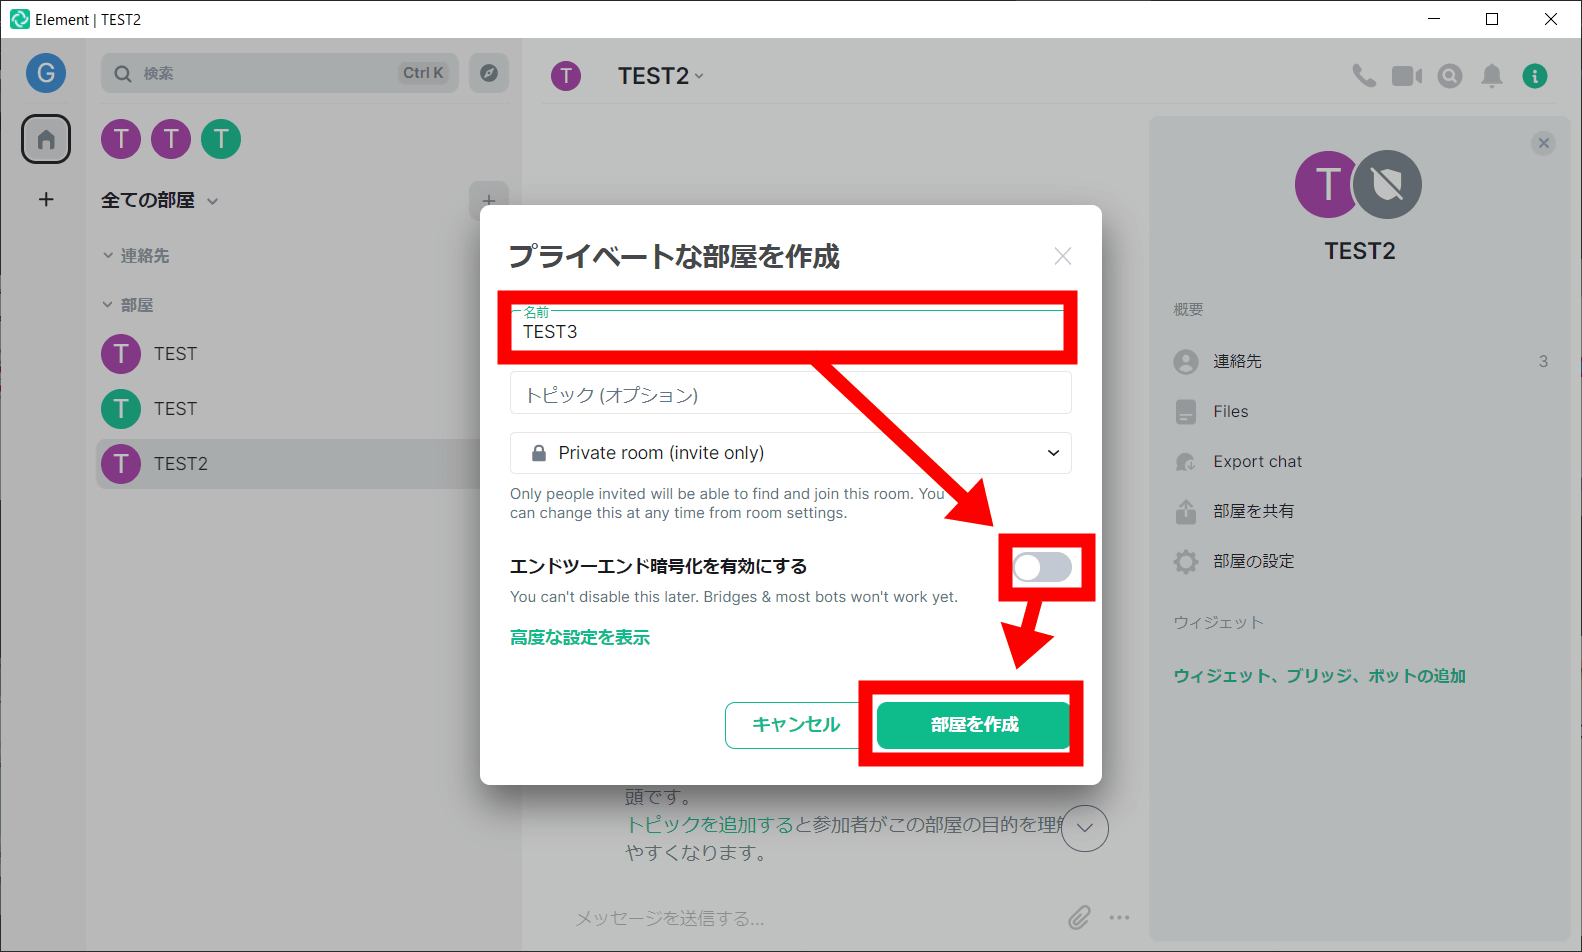
Then you will enter the chat room creation screen. Bridged connections are also available in private chat rooms, but they aren't available if end-to-end encryption is enabled, so set it to disabled. After entering the name etc., click 'Create Room'.
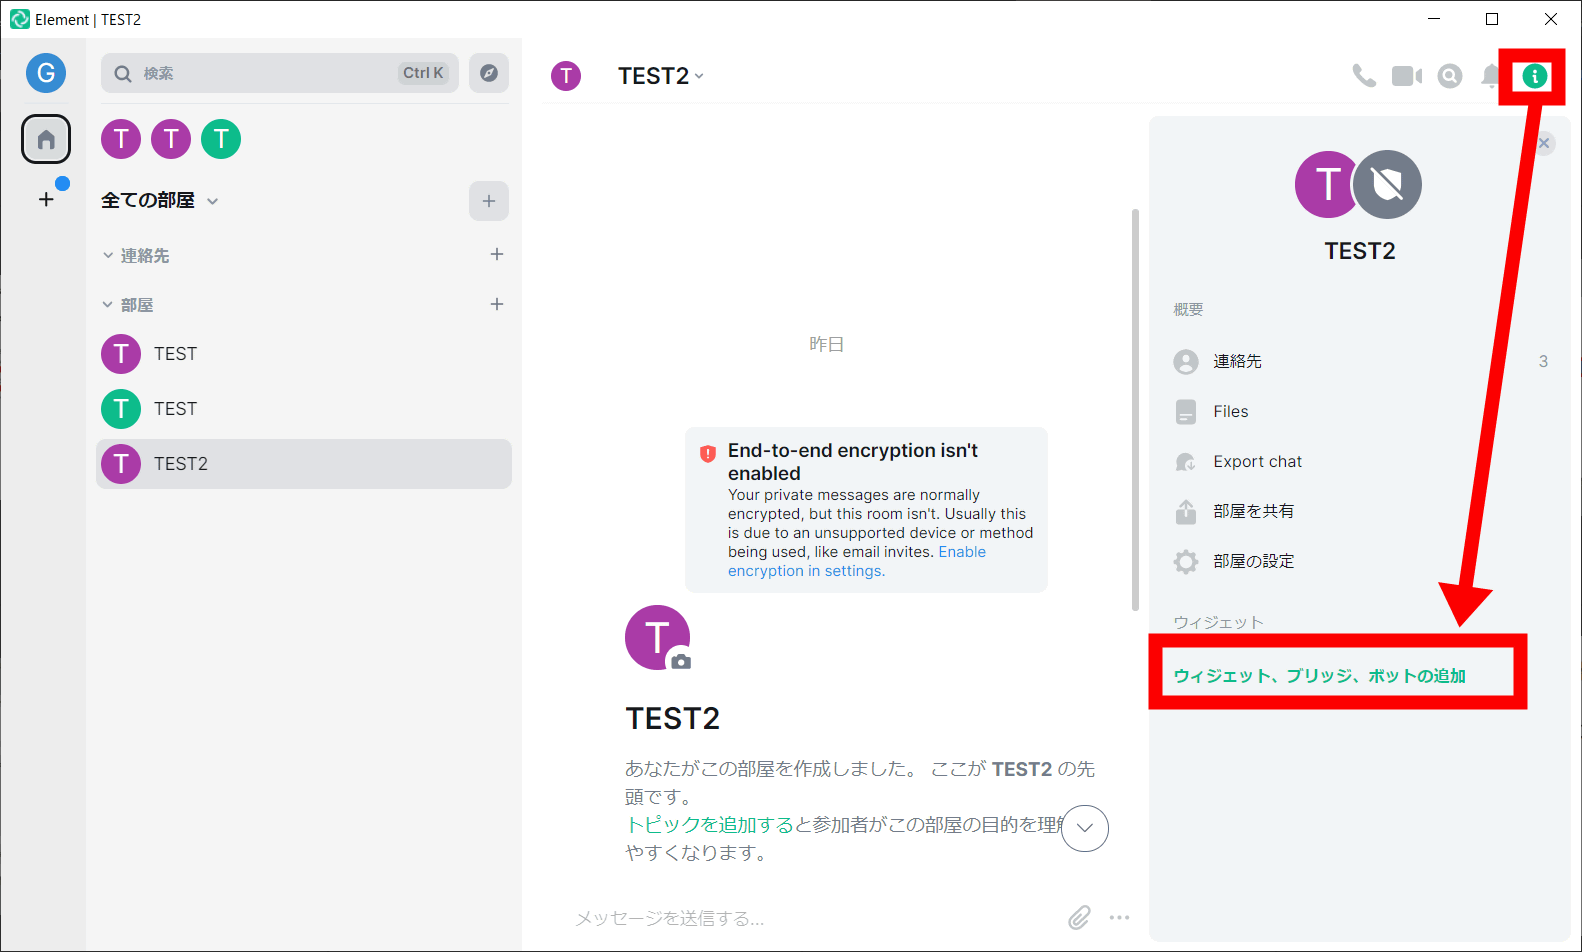
Select 'Add Widget, Bridge, Bot' from the 'i' icon in the upper right.
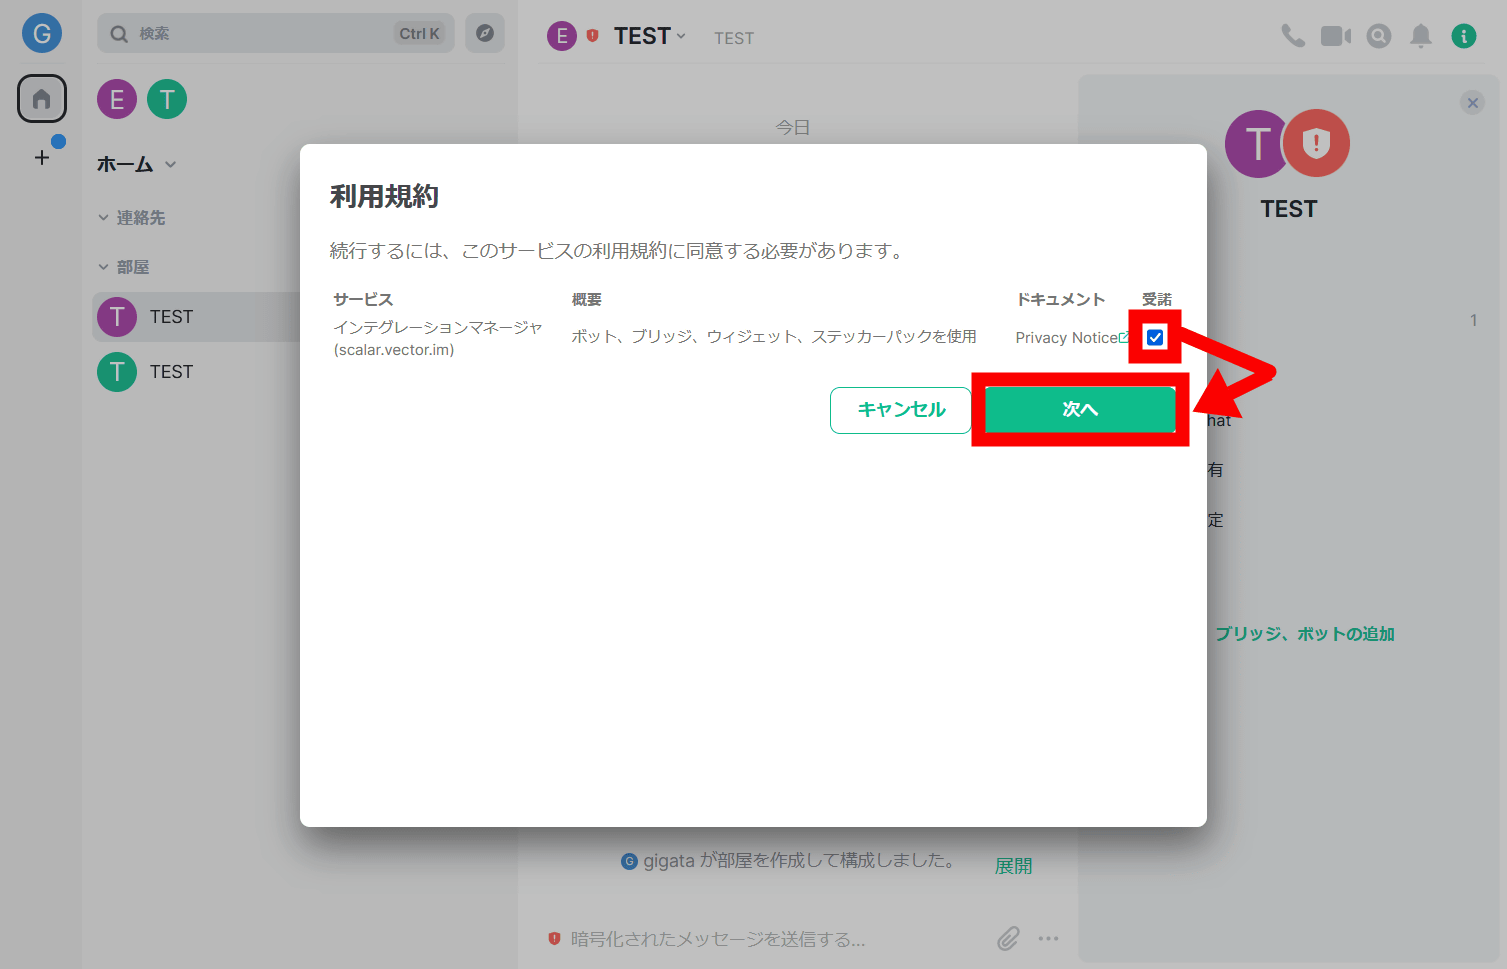
Agree to the terms of use and 'Next'
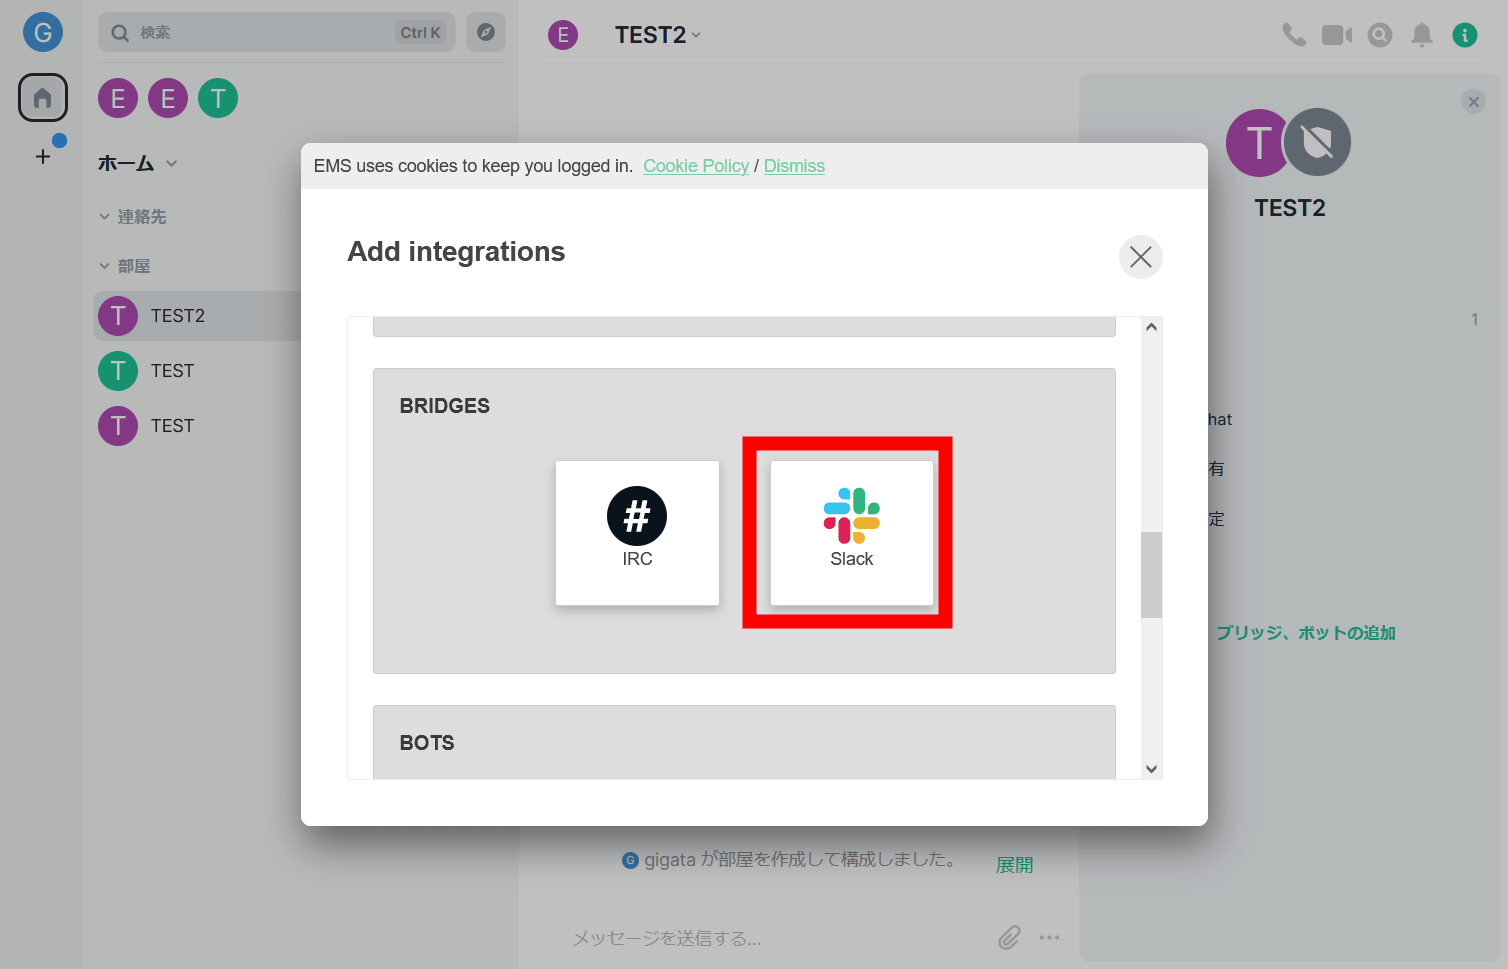
Select Slack in the 'BRIDGES' section.
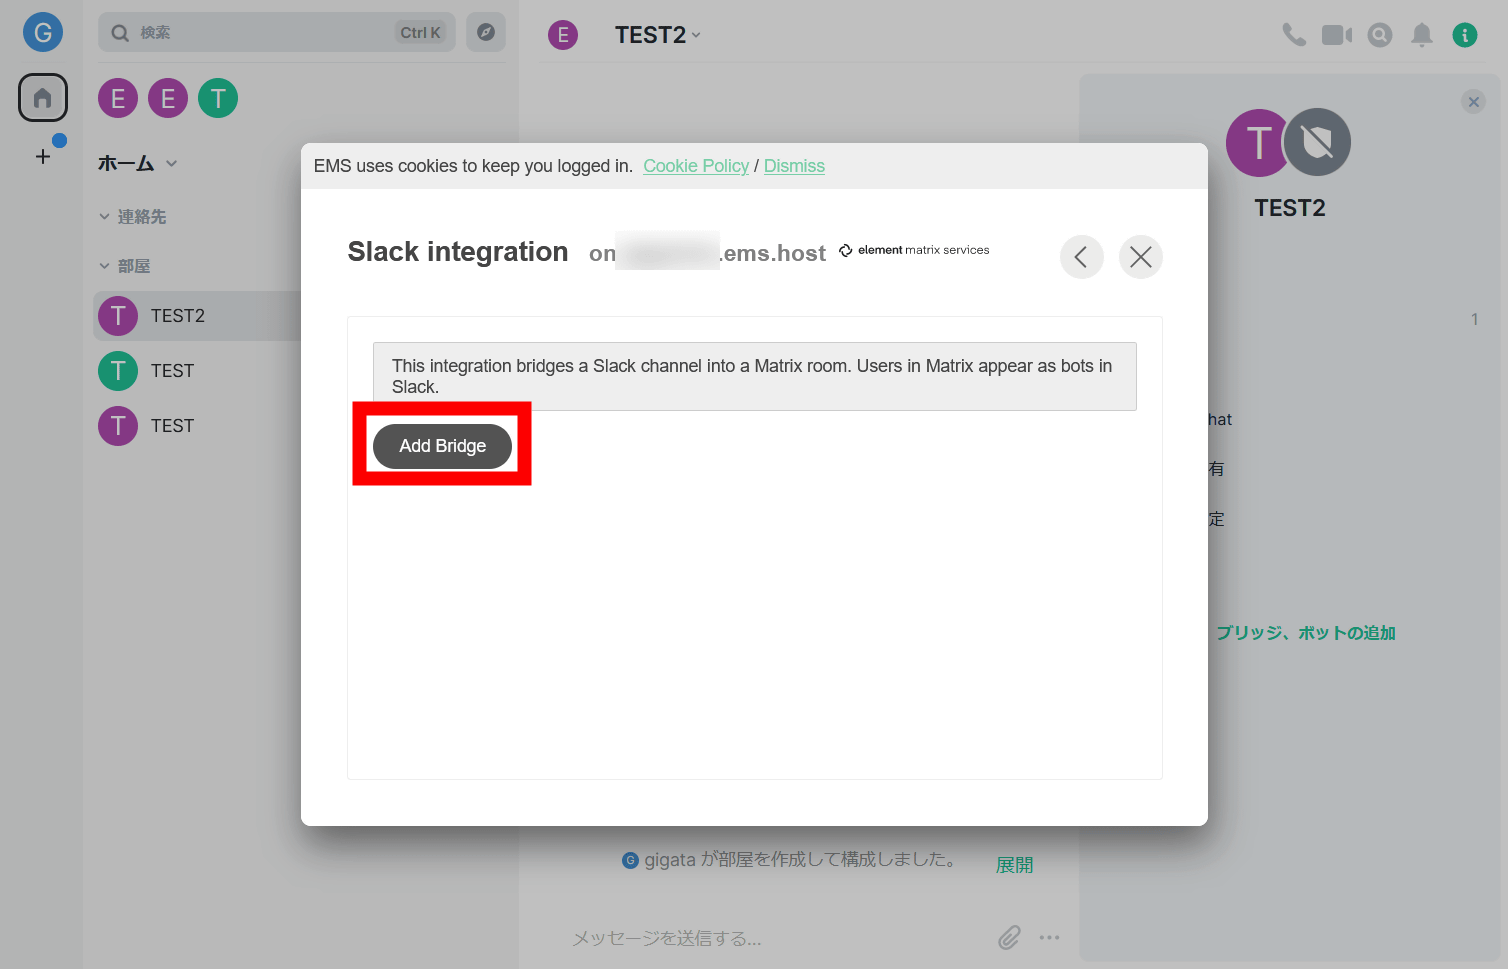
Click 'Add Bridges'.
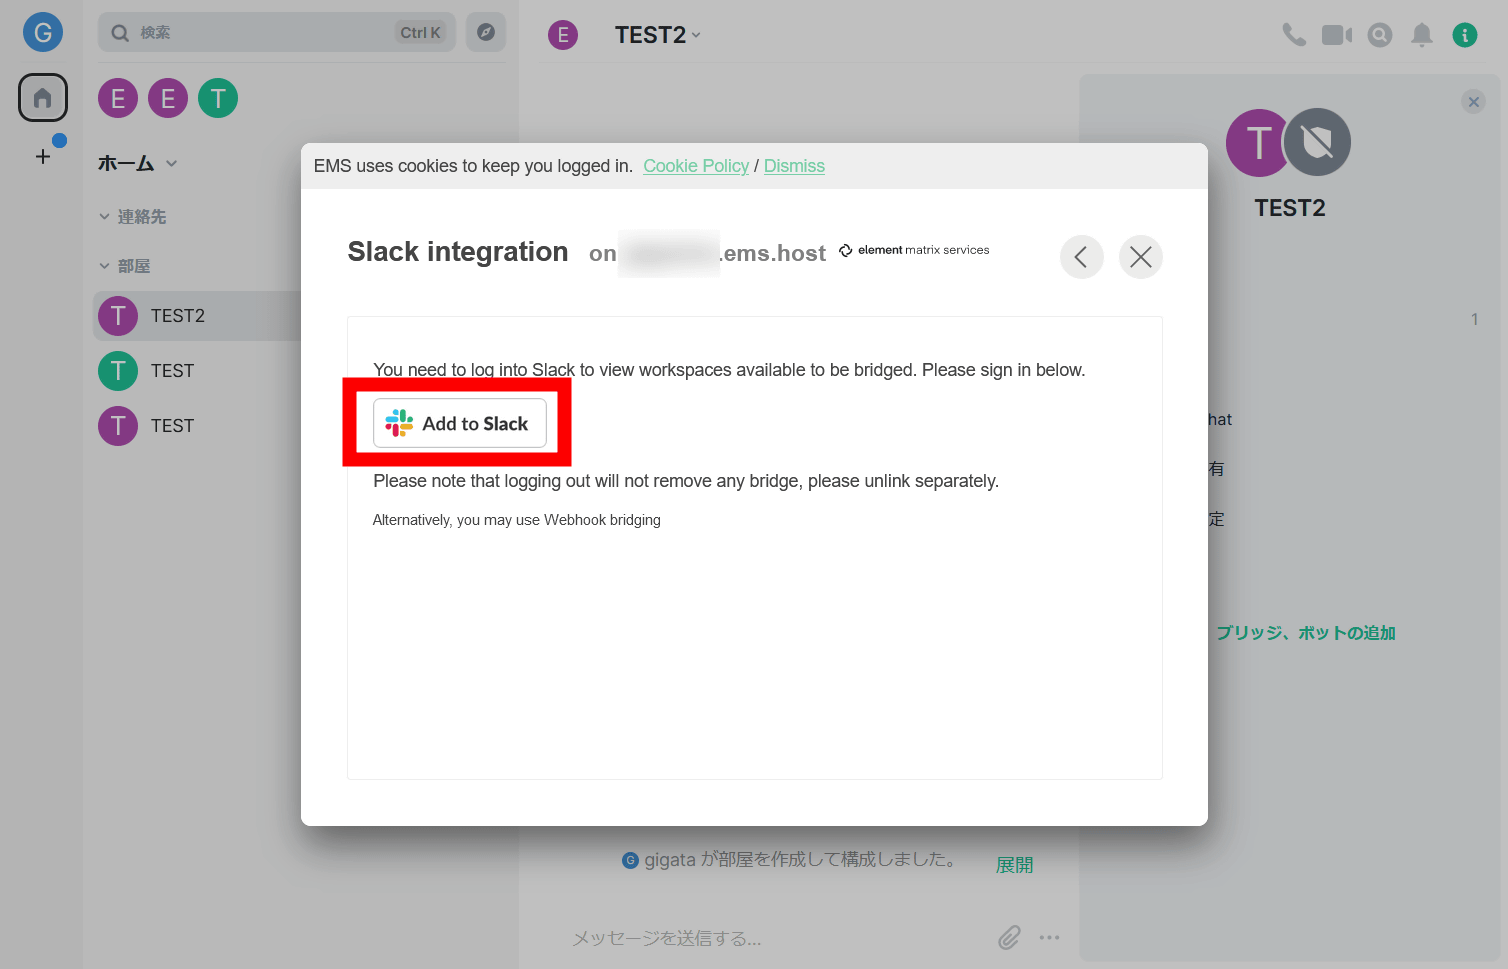
Click Add to Slack.
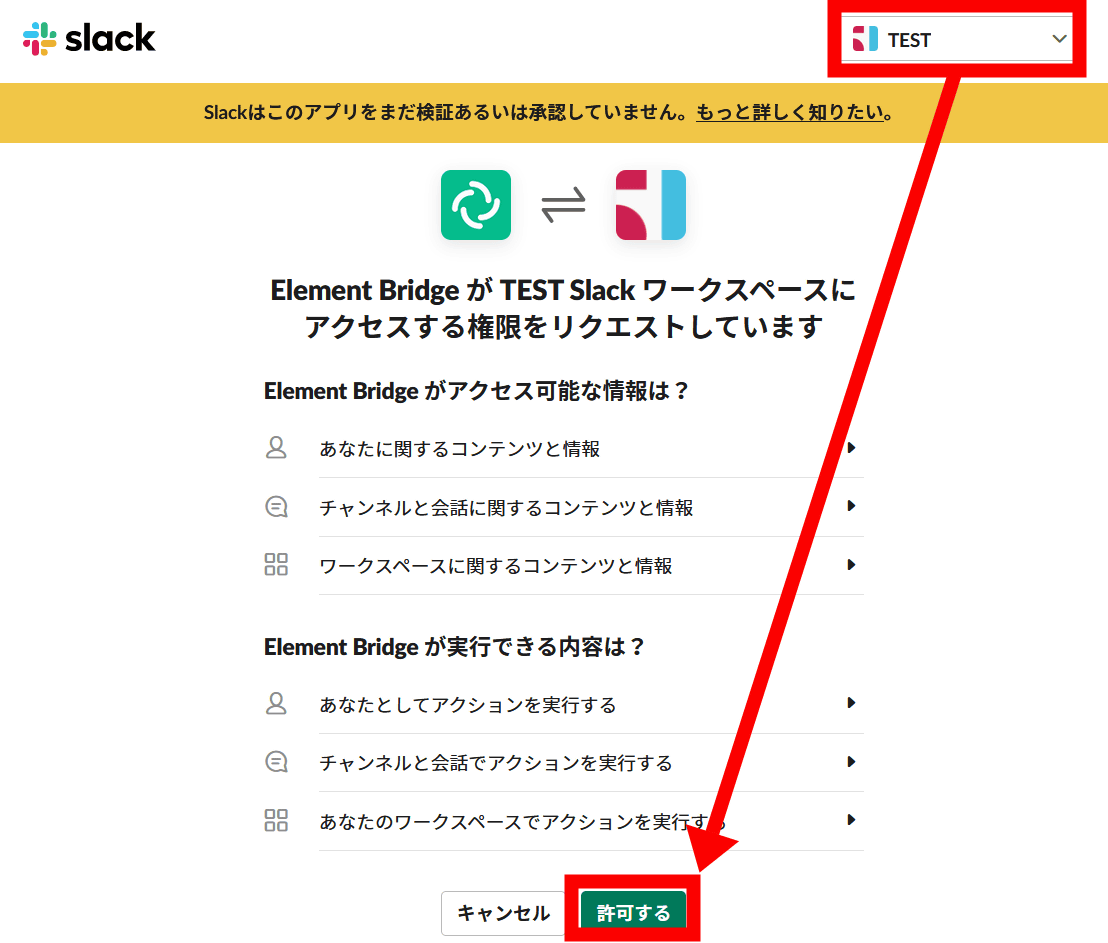
A window saying 'Element Bridge is requesting permission to access the Slack workspace' will appear in the browser as shown below. Select the Slack workspace you want to bridge and click 'Allow'.
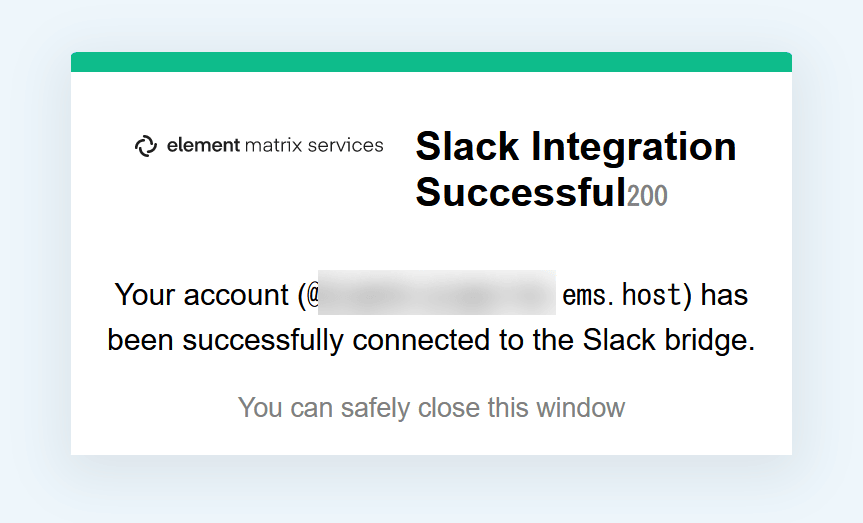
Then, the message 'Successful bridge connection with Slack' will appear, and this window will be closed.
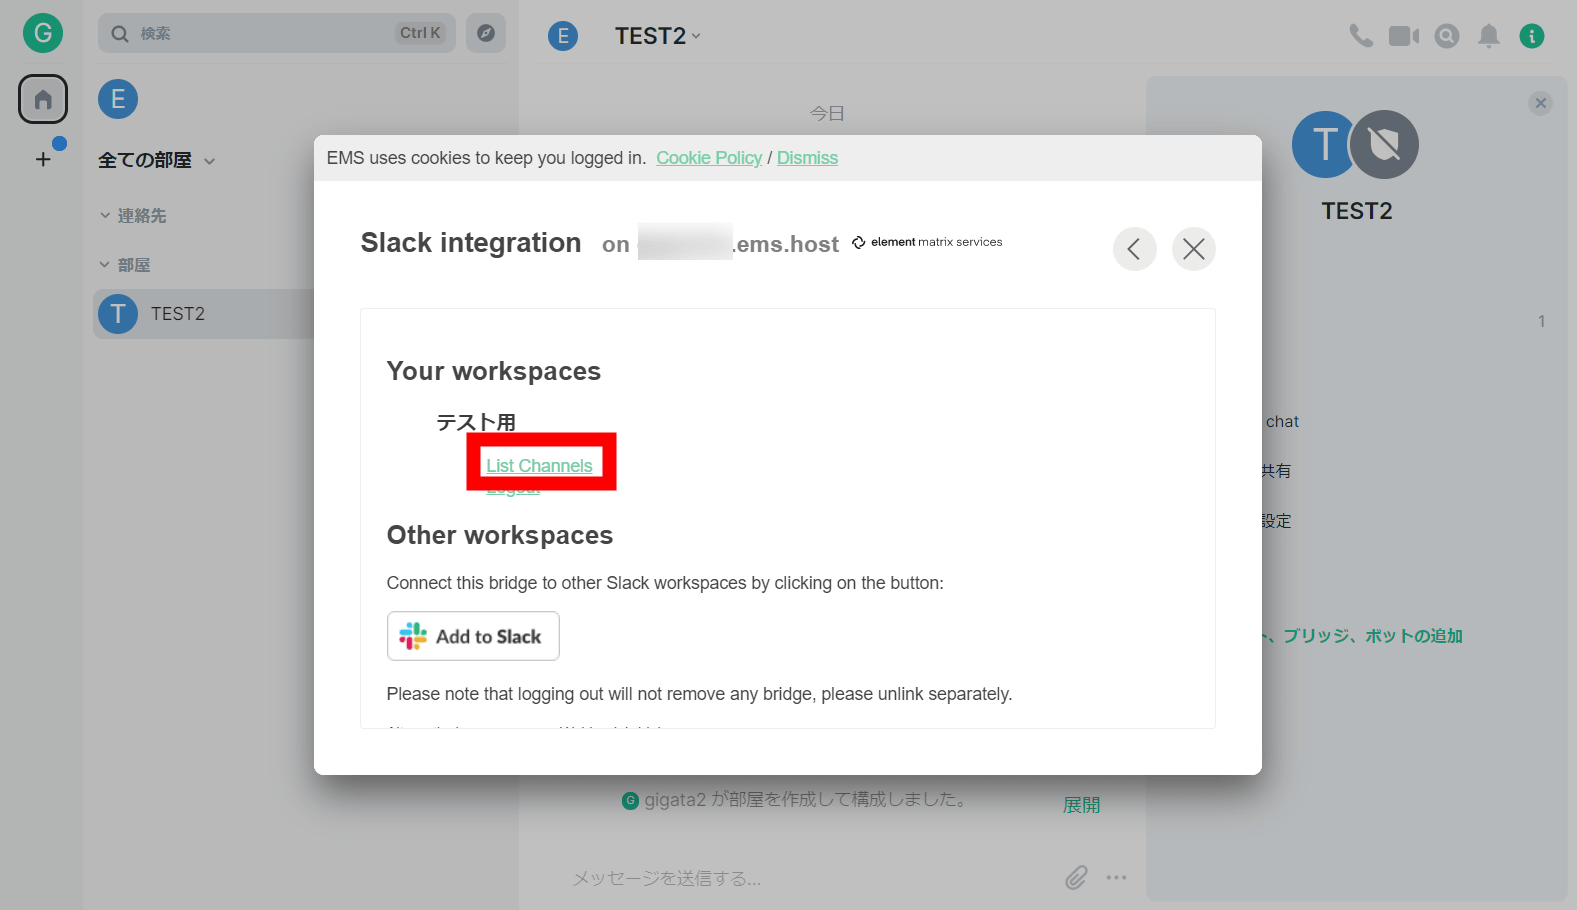
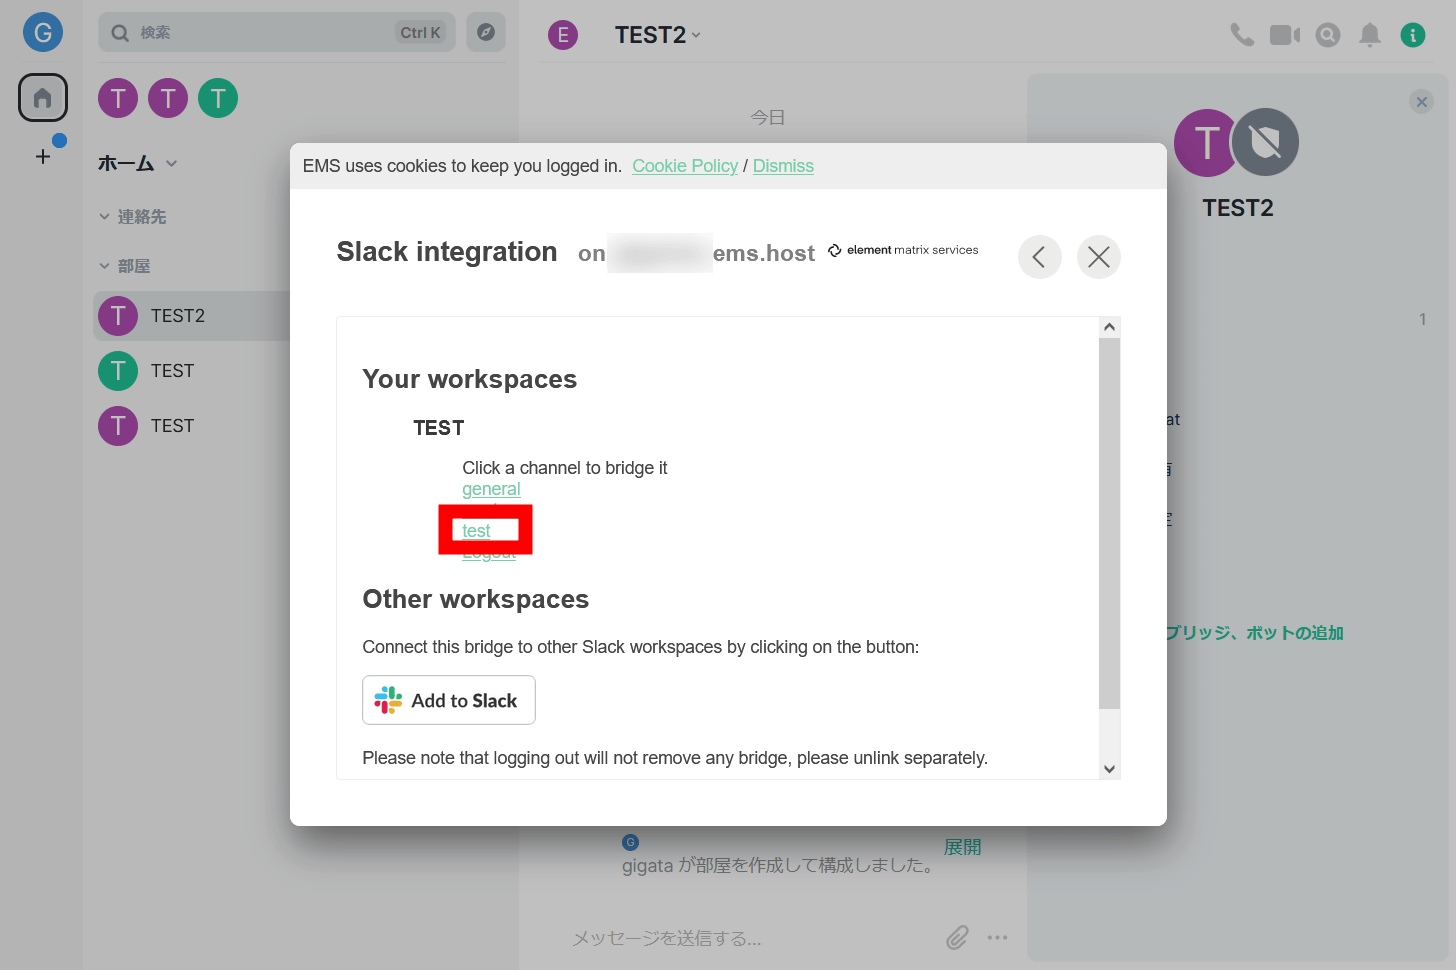
If you go back to Element and proceed with the same procedure from 'Add widgets, bridges, bots' again, this time the Slack workspace you selected earlier as 'Your workspaces' is displayed, so ' Click 'List Channels'.
Then a list of channels will be displayed, so select the channel you want to bridge.
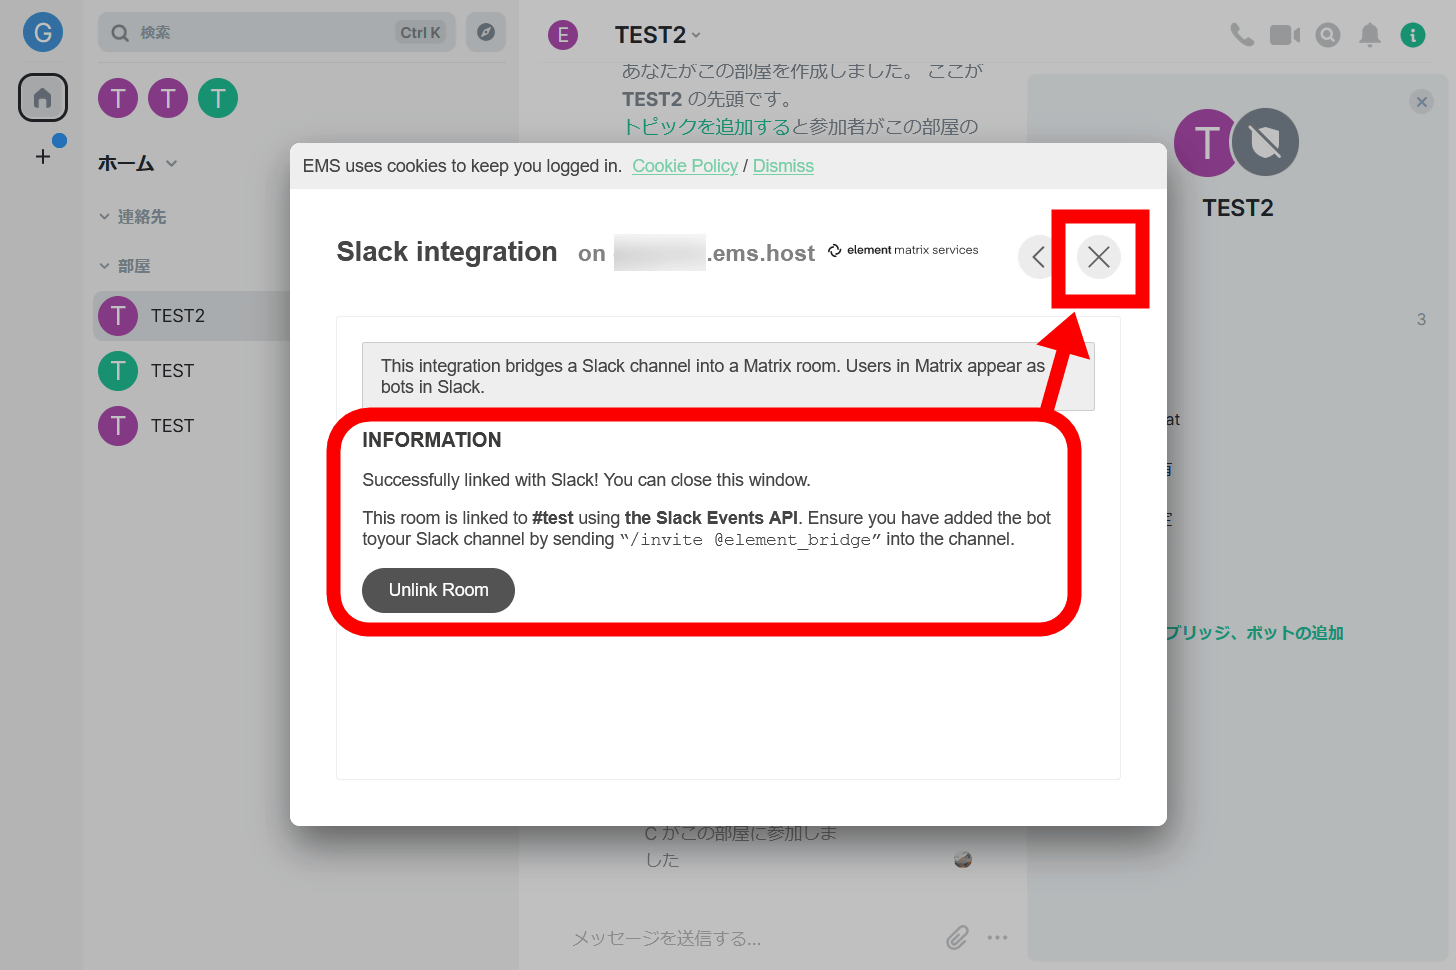
The message 'Bridge connection with Slack has been established!' Will appear, so the settings on the Element side are complete. Keep this pop-up closed.
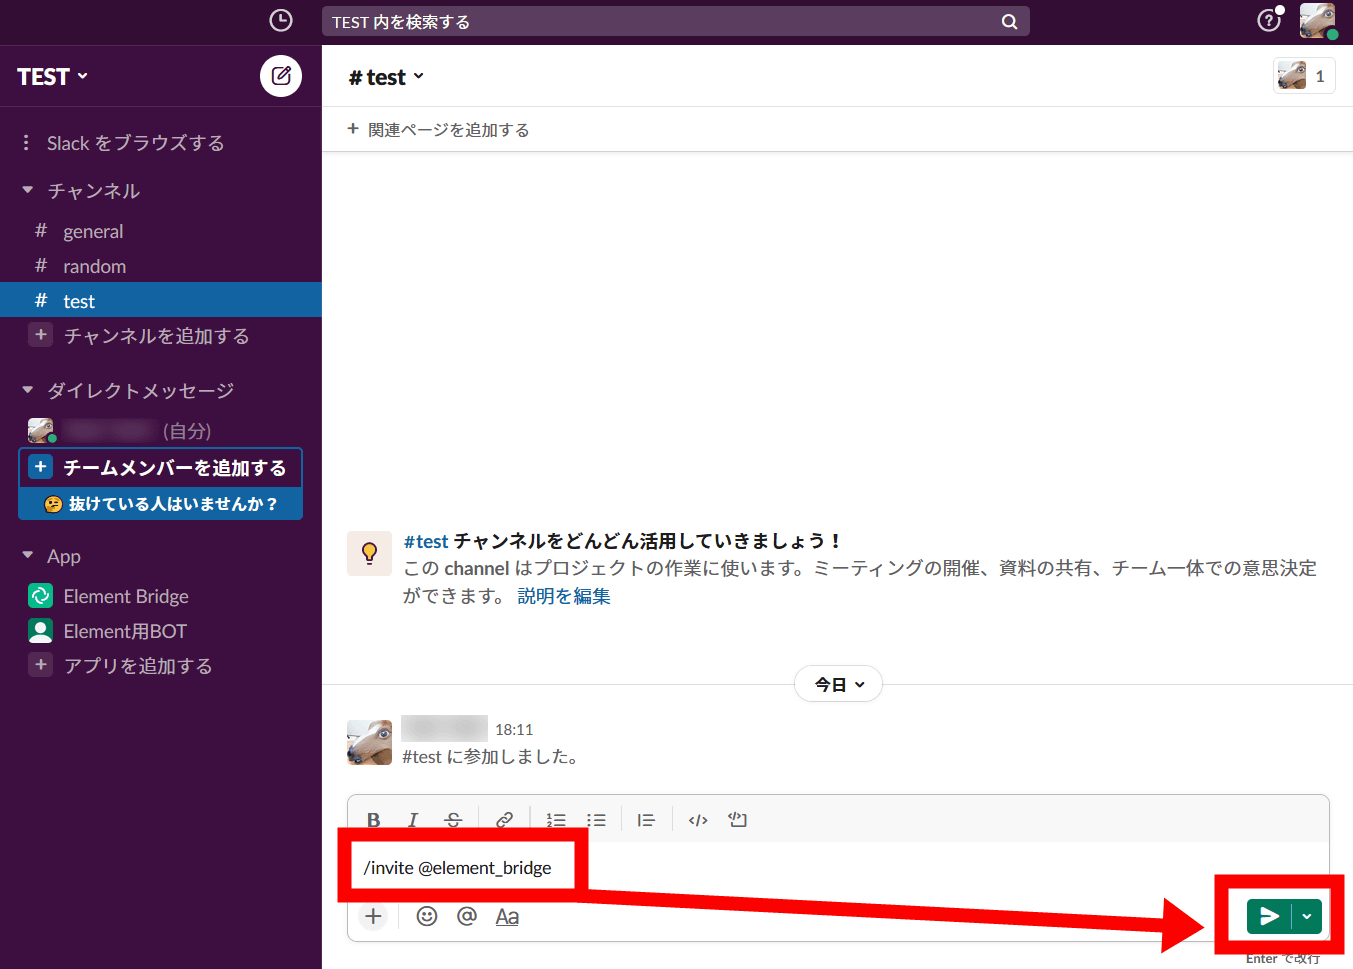
On the Slack side, the command '/ invite @element_bridge' is sent from the chat field on the specified channel to complete the setting.
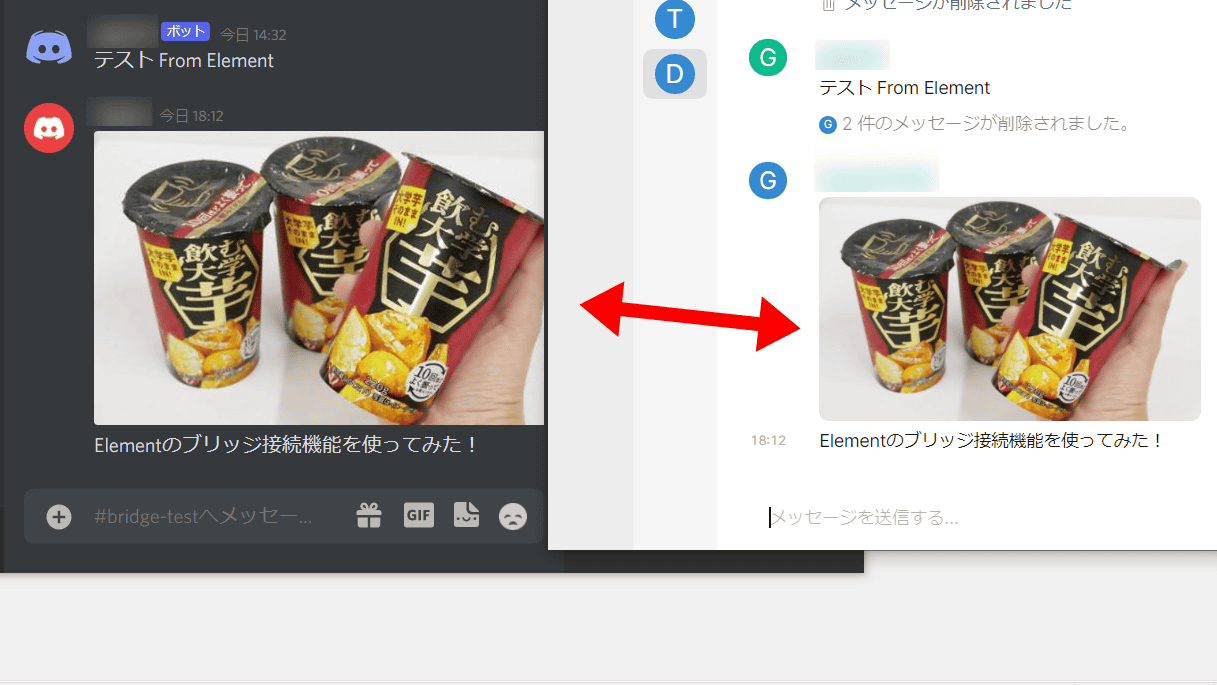
The Slack message and the Element message are now in sync.
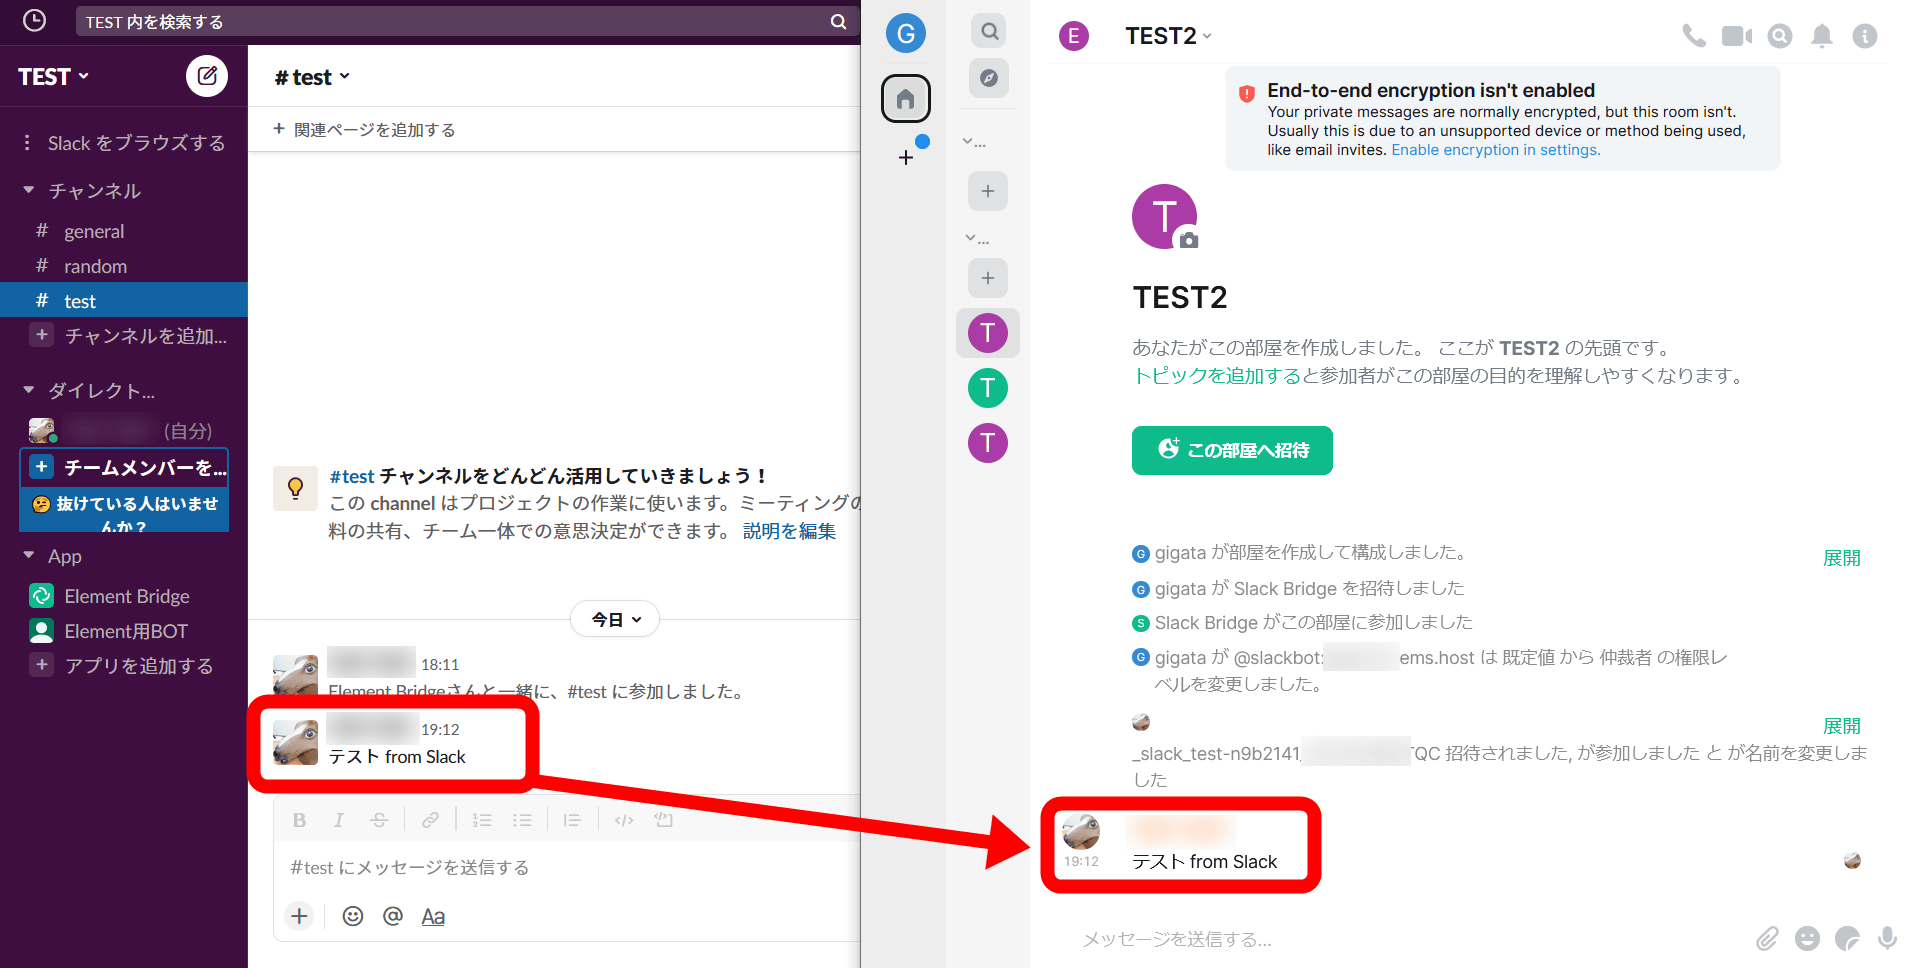
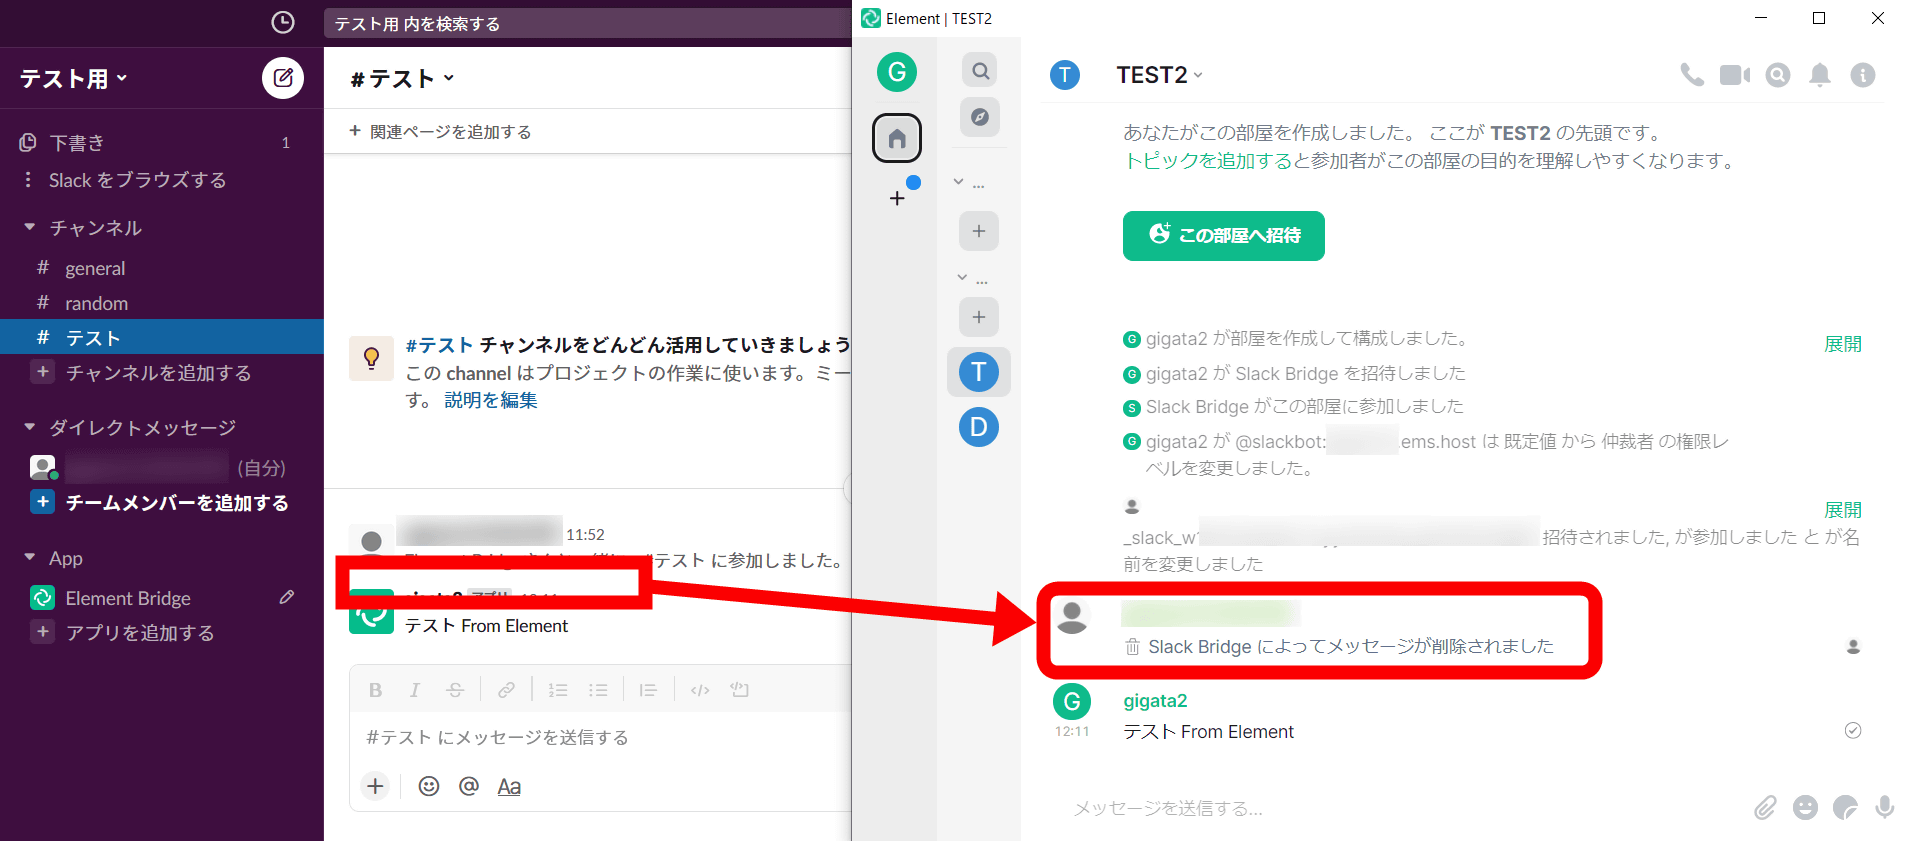
It is a message synchronization via BOT, but not only the message content but also the user name is transferred in a completely spoofed state. Also, if the message is deleted by one service, the message is also deleted by the other service, and it seems that the messages are completely synchronized. Since the message on the Element side is saved locally, it is also possible to save the Slack log on the Element side.
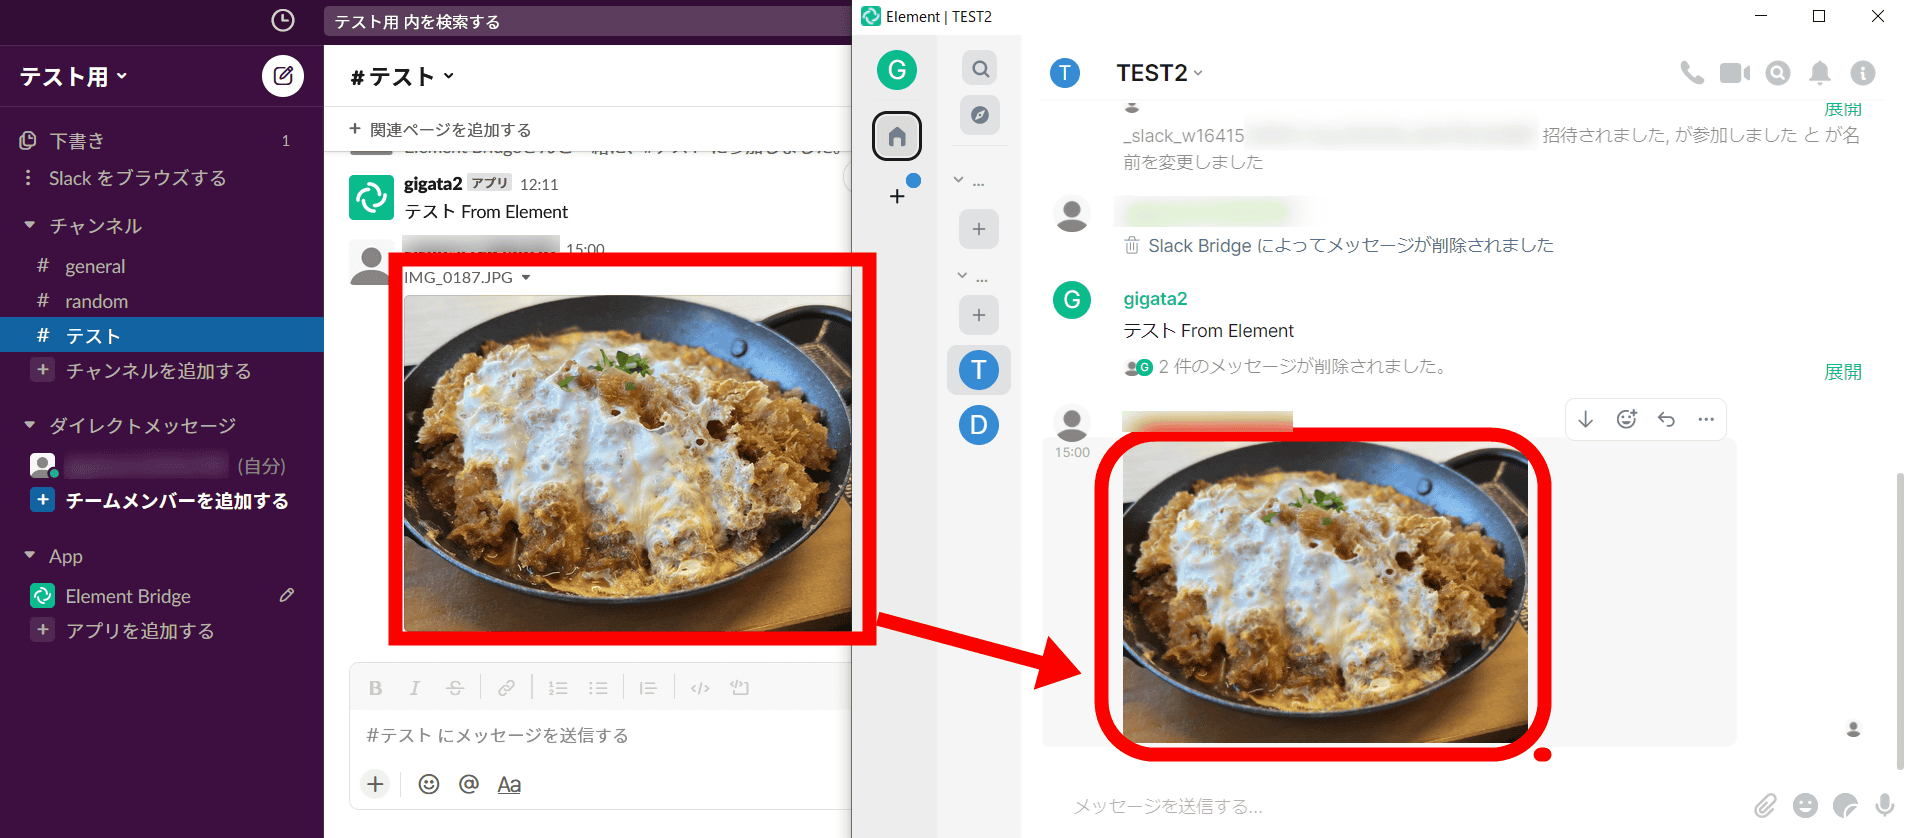
It syncs files as well as messages.
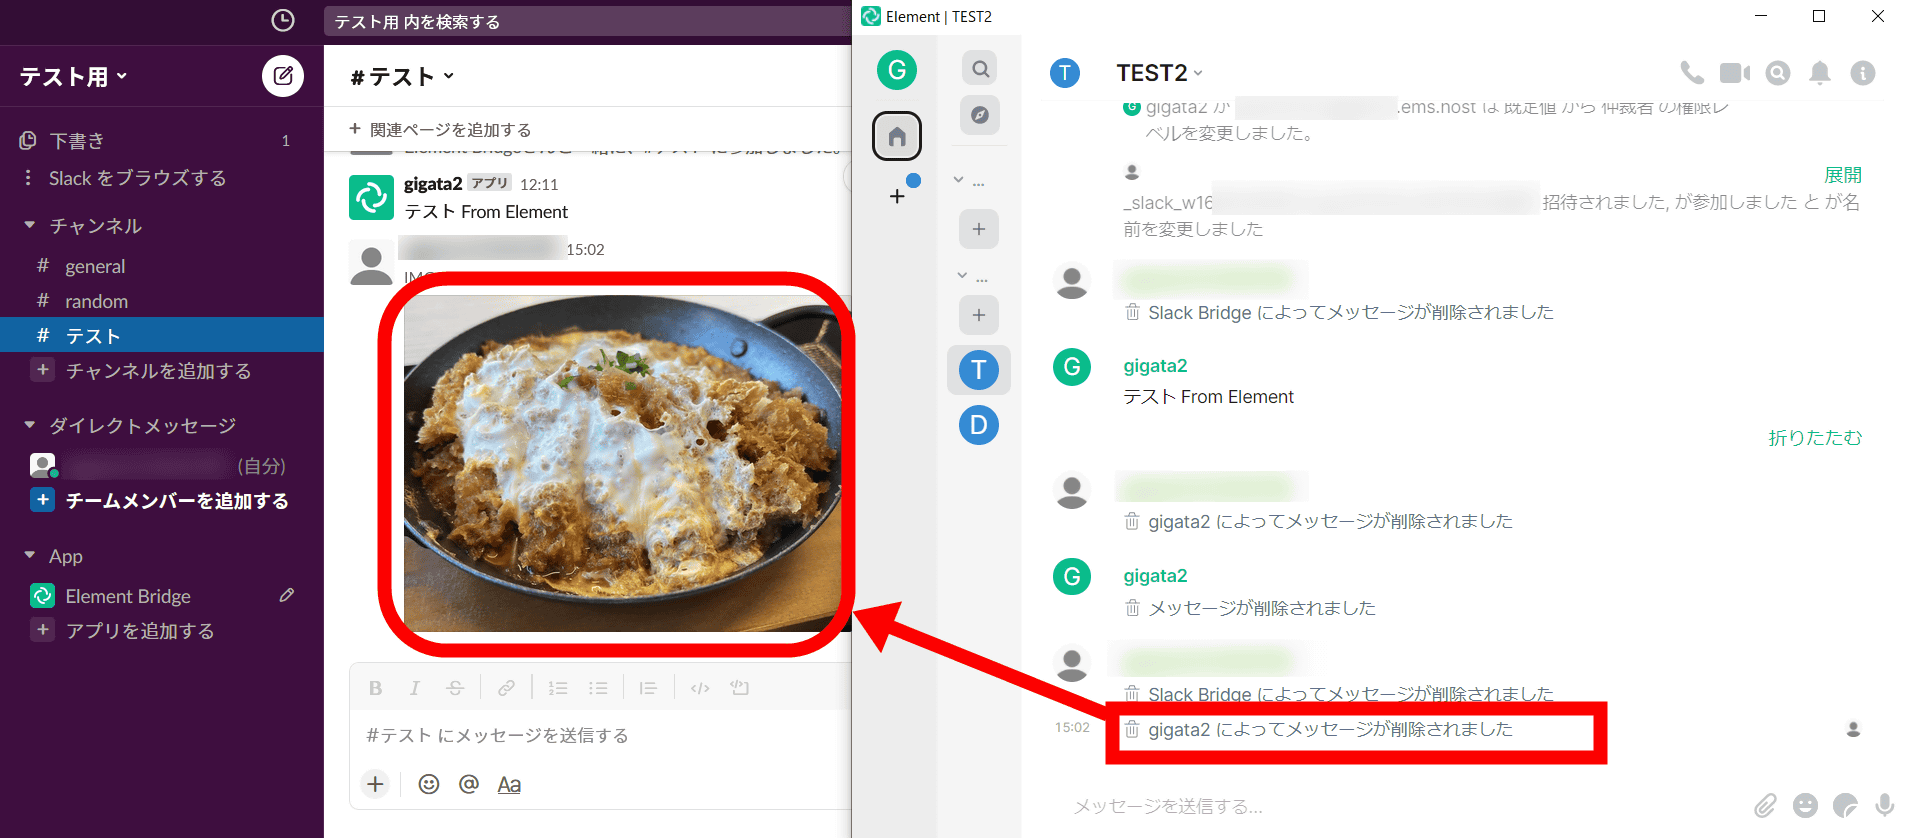
However, regarding the file, it seemed that 'the deletion on the Element side is not reflected on the Slack side'.
◆ I tried bridging with Discord
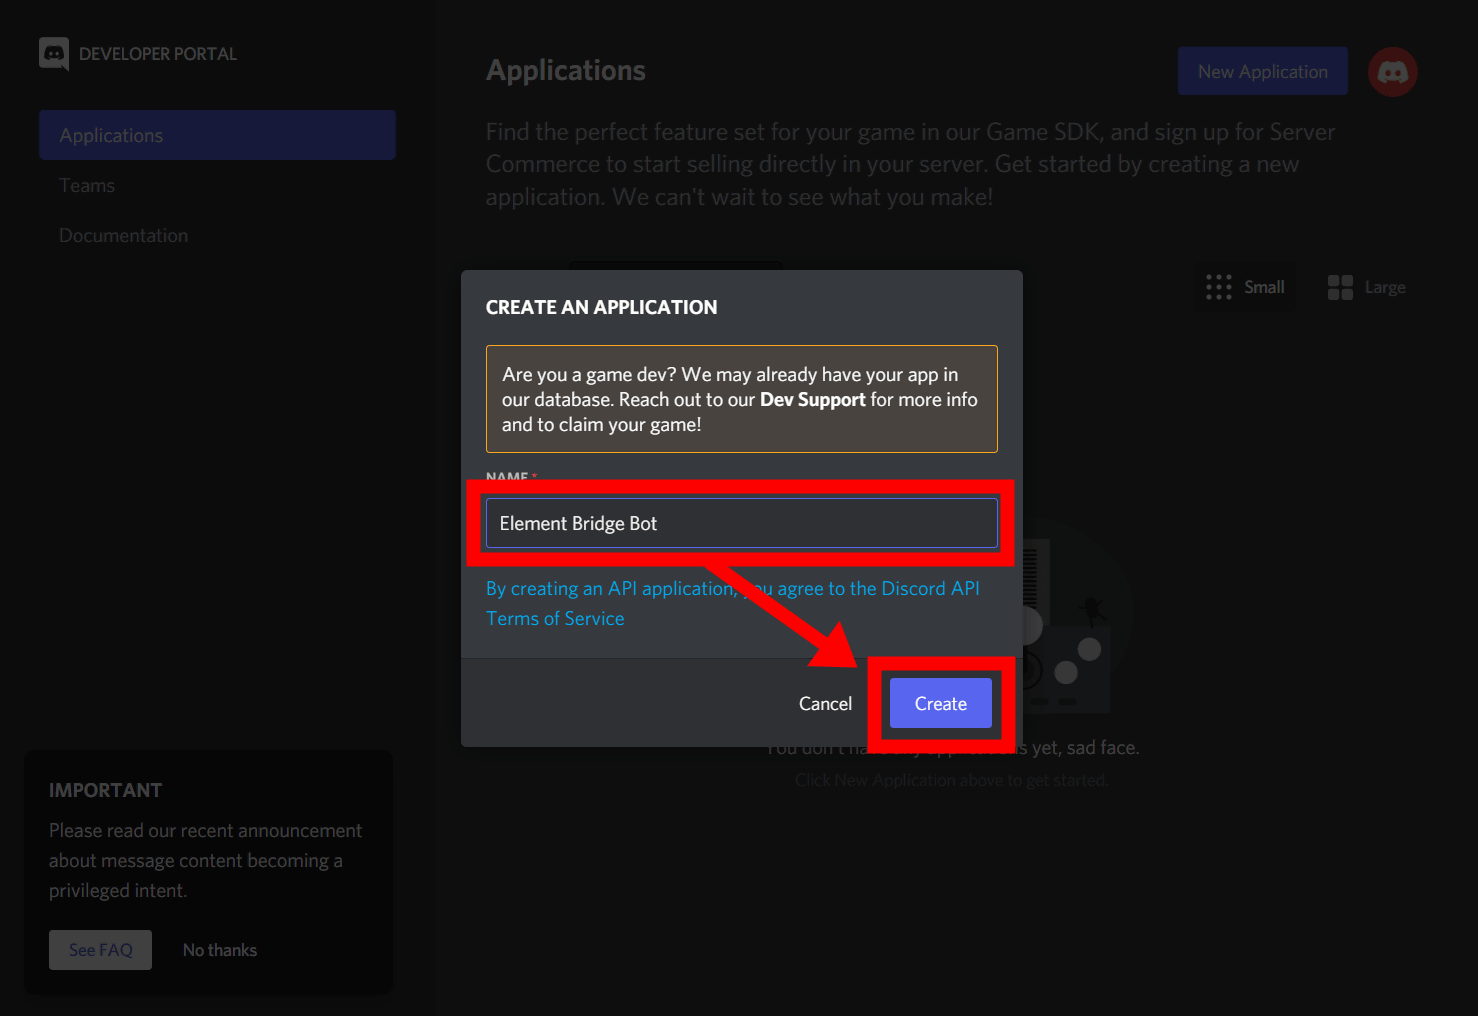
Now make a bridge connection with Discord. First, log in to Discord with a browser,
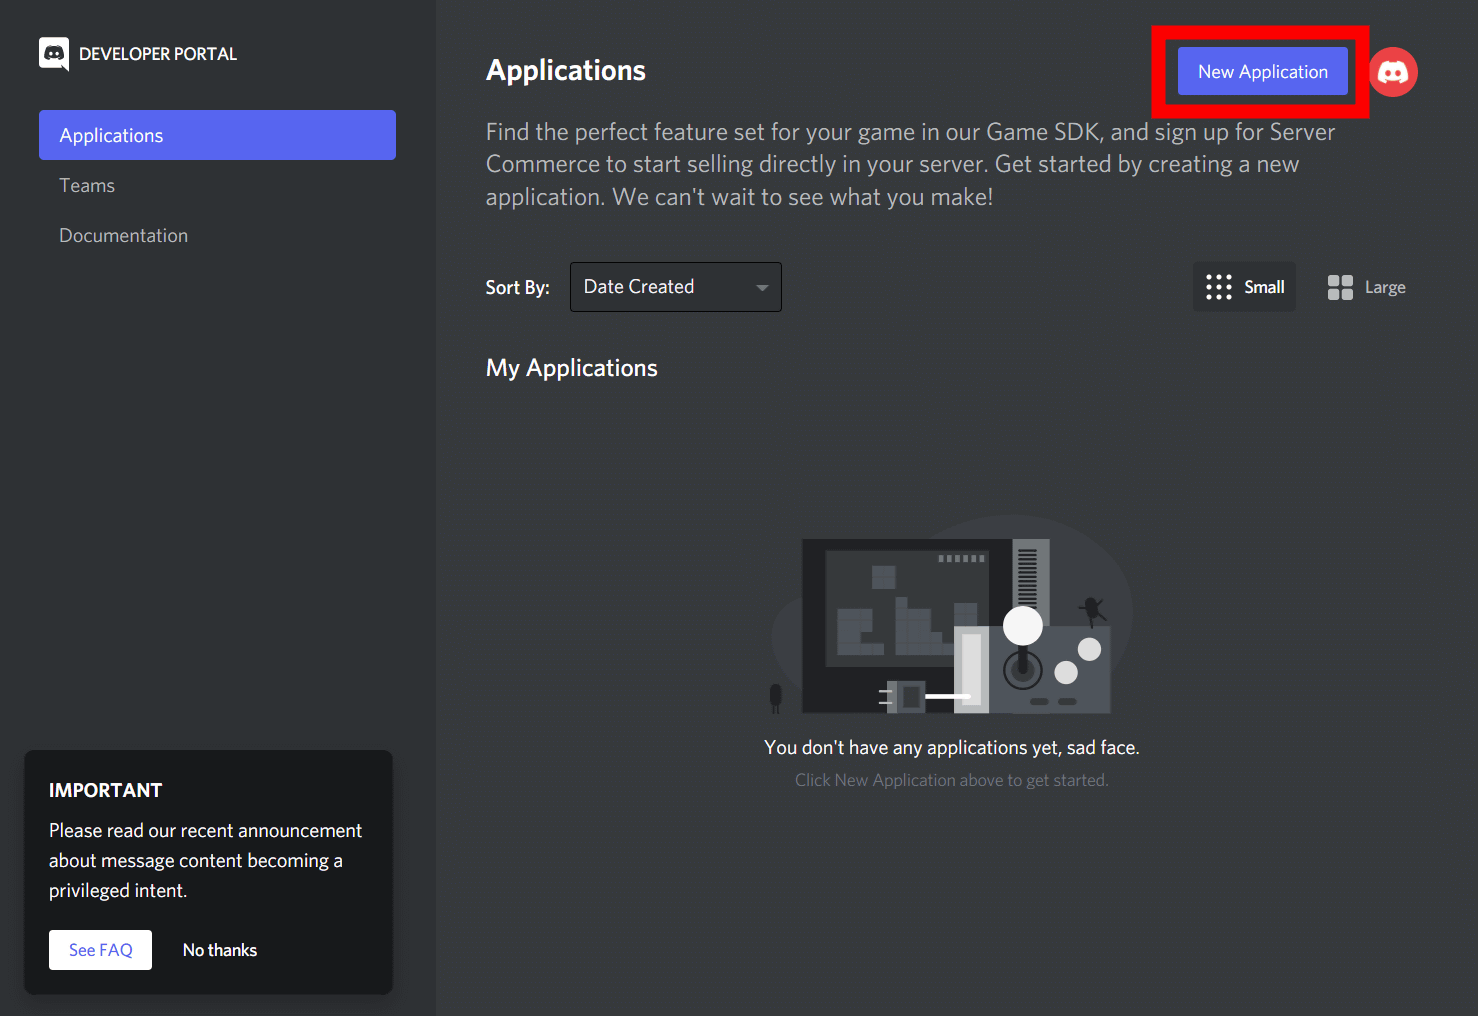
Set the application name and click 'Create'. The application name is for identification when you set multiple applications, so anything is OK.
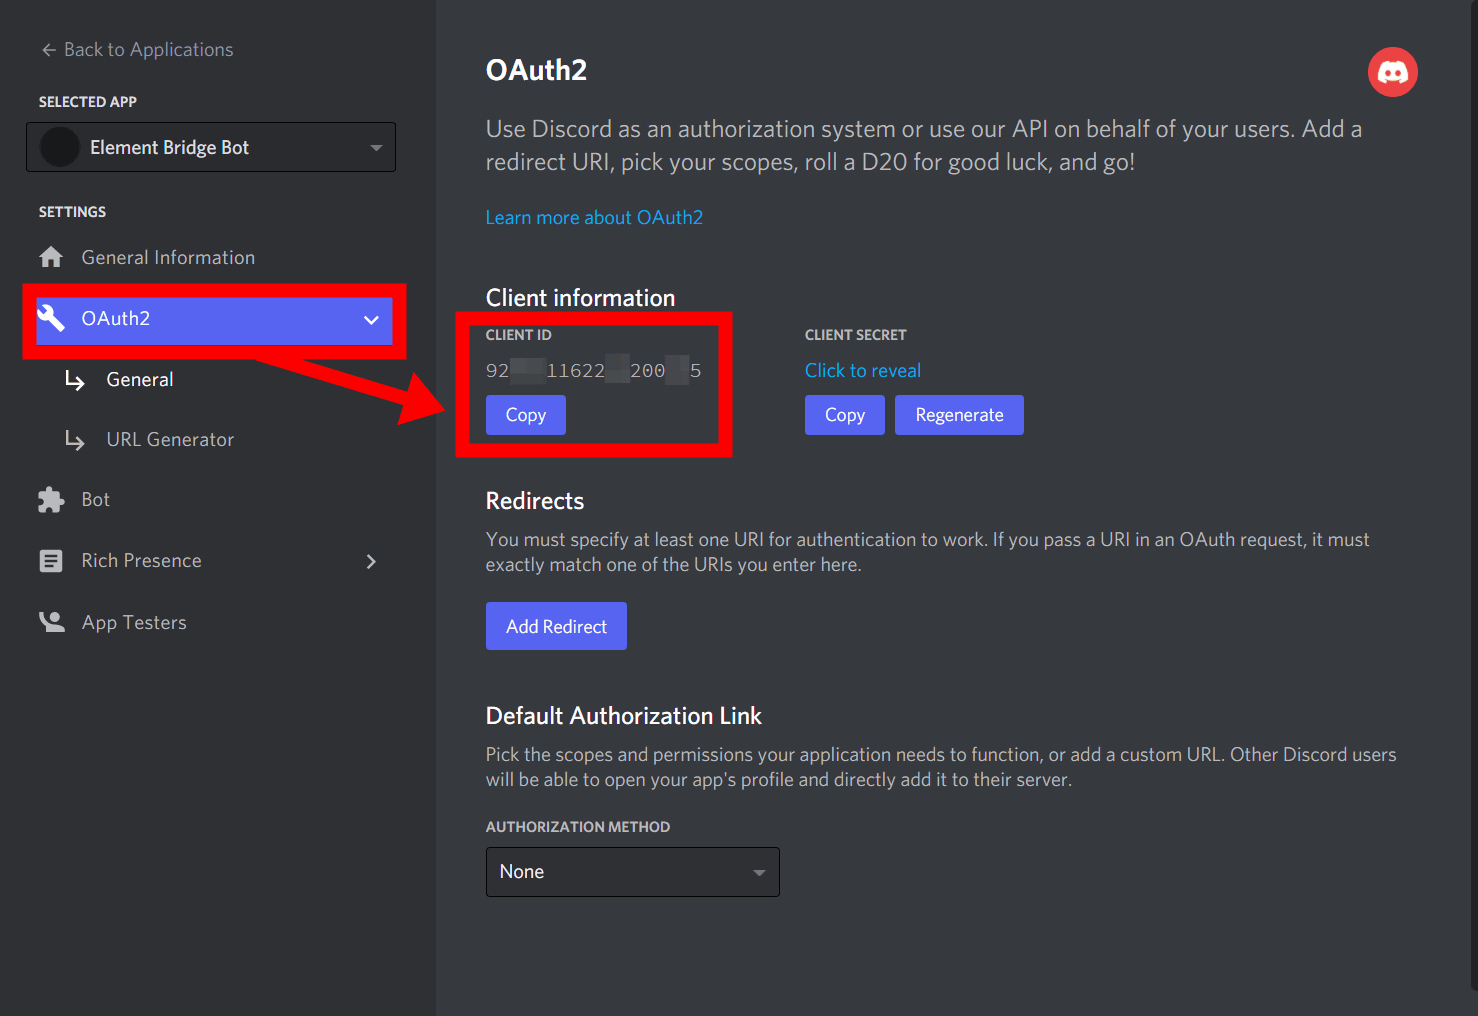
First, make a note of the 'CLIENT ID' in the tab called 'OAuth2'. This CLIENT ID is used when connecting to the bridge.
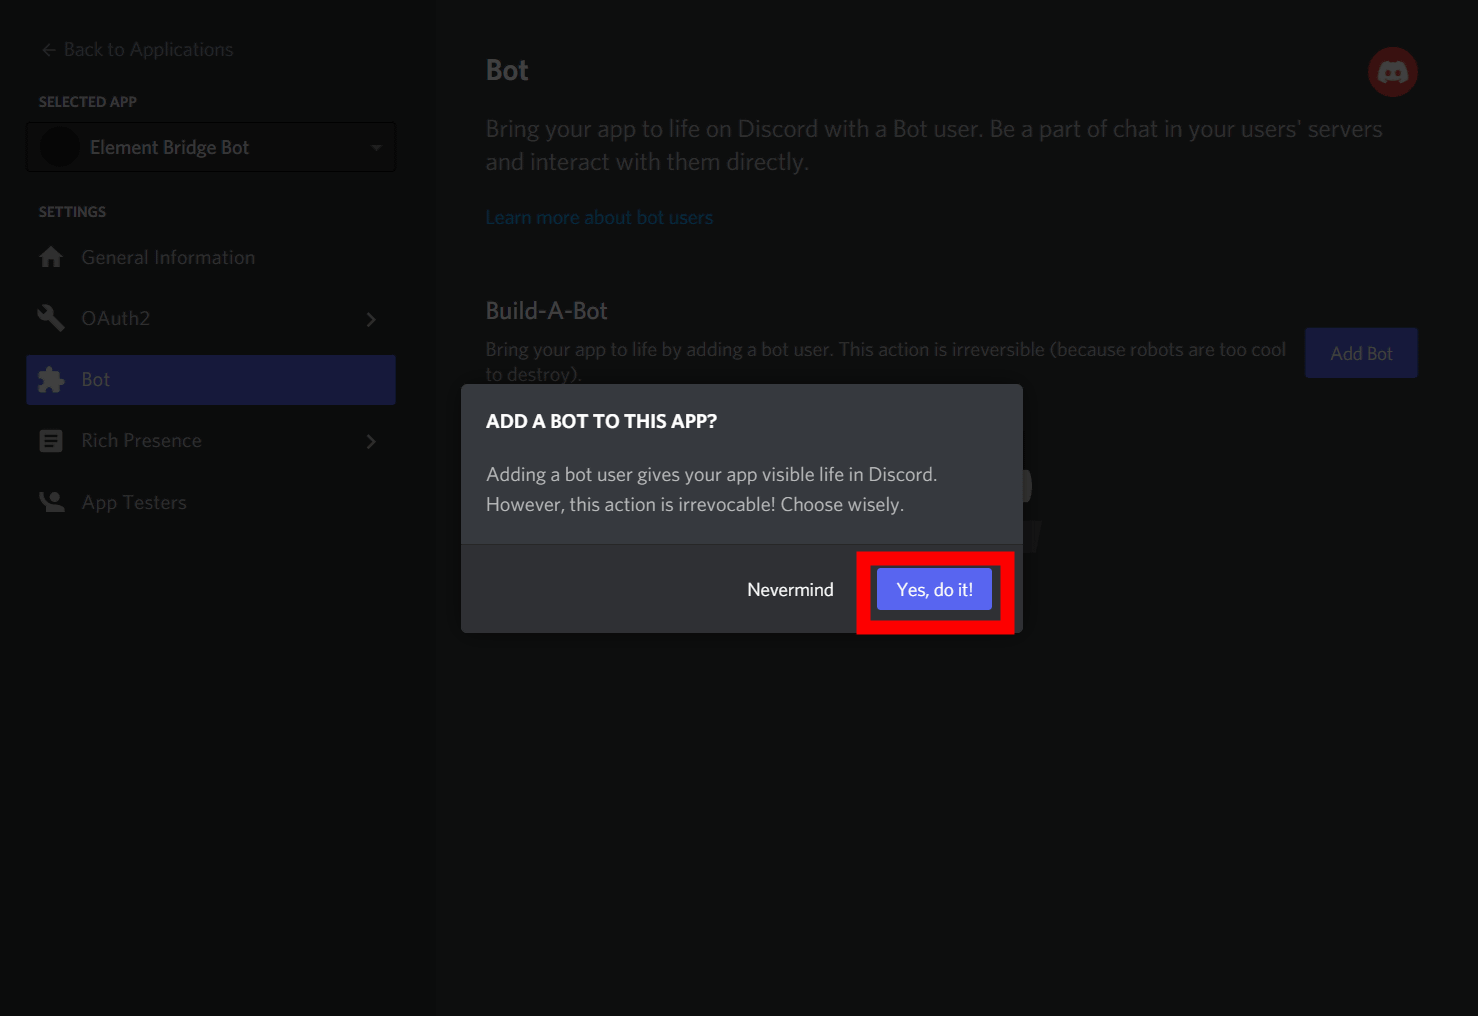
Then select 'Add Bot' from the 'Bot' tab.

A confirmation will be displayed, so click 'Yes, do it!'.
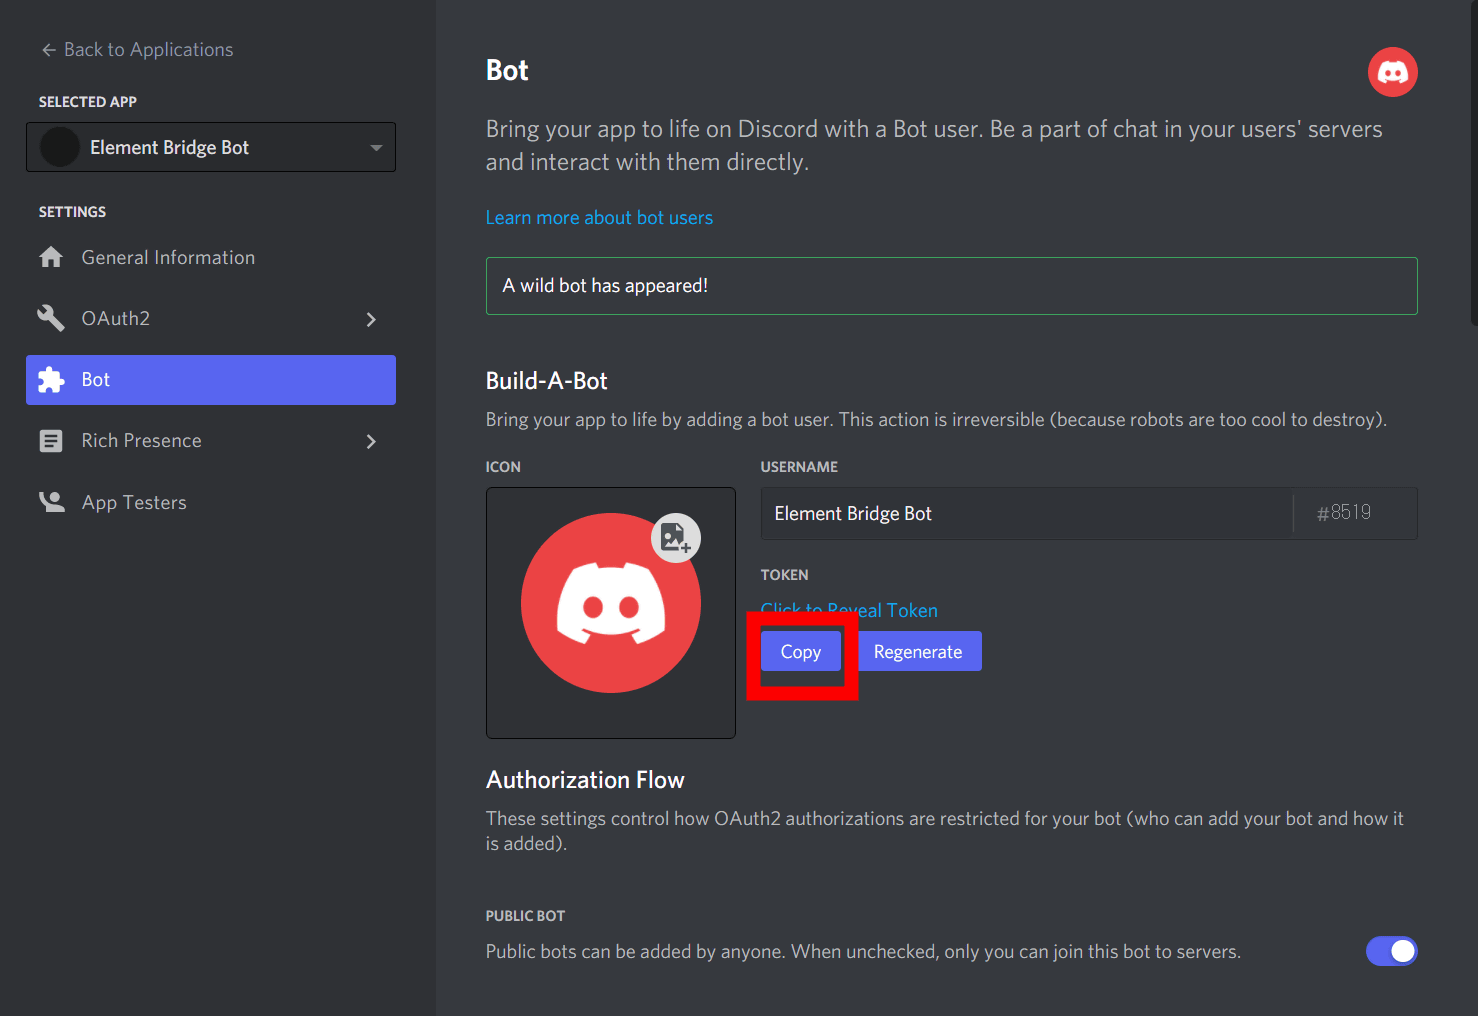
This is the birth of the bot. To use it for bridge connection, click 'Copy' in the item 'TOKEN' to get the Token required to operate the bot. Tokens in Discord are strings, so paste them as they are and store them in a text editor or something.
Next, in order to make settings on the EMS side,
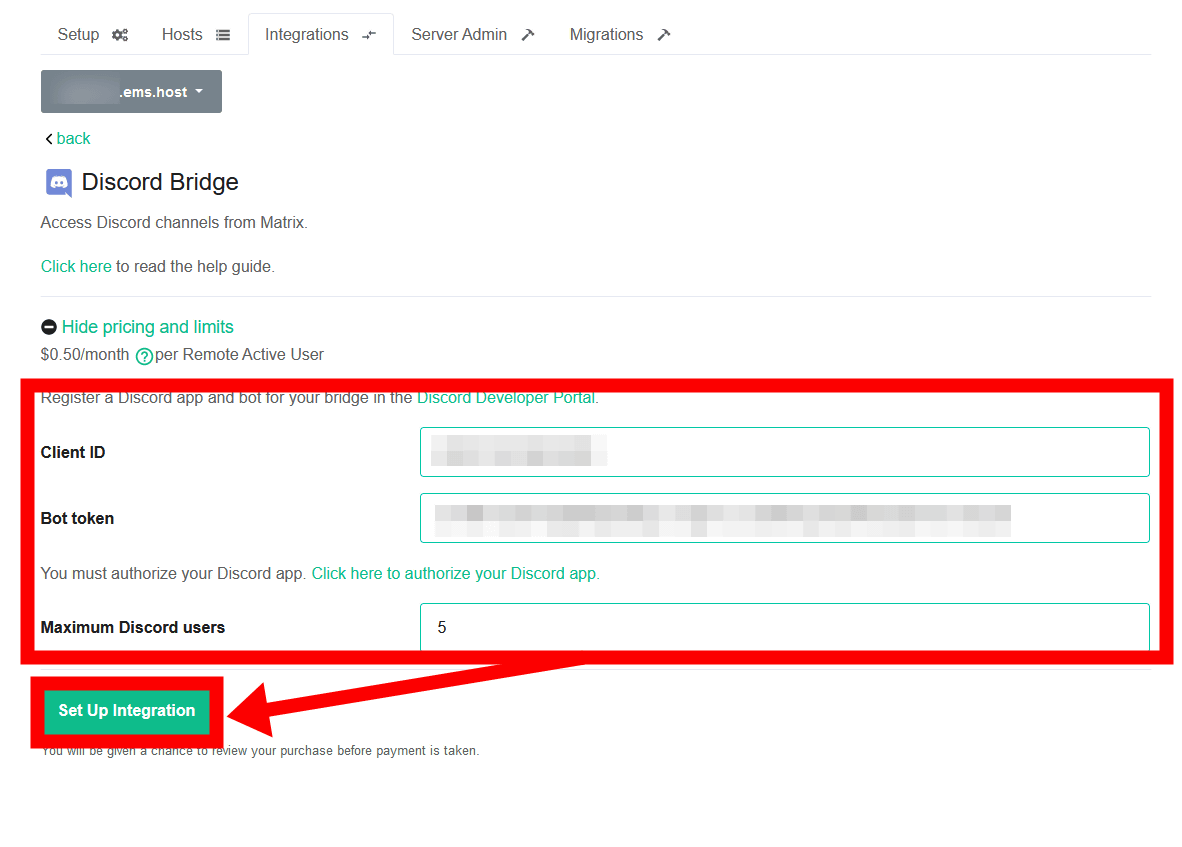
Enter the 'CLIENT ID' and 'TOKEN' that you wrote down above in 'Client ID' and 'Bot token', set the maximum number of users from Maximum Discord users, and click 'Set Up Integration'. In addition, since the bridge connection function costs a monthly usage fee of 0.5 dollars (about 58 yen), the maximum number of users can be limited in advance with Maximum Slack users.
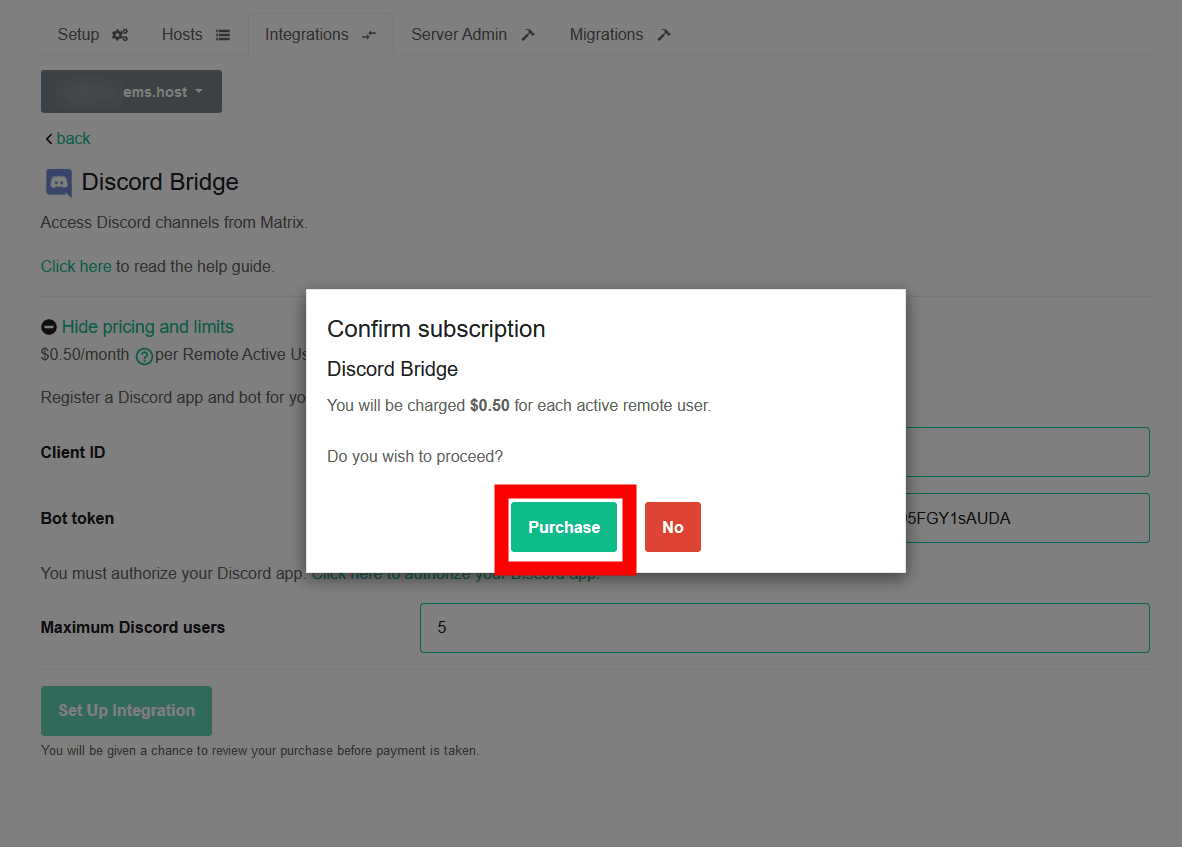
The final confirmation that 'the number of users x $ 0.5 per month will be charged' will be displayed, so click 'Purchase'.
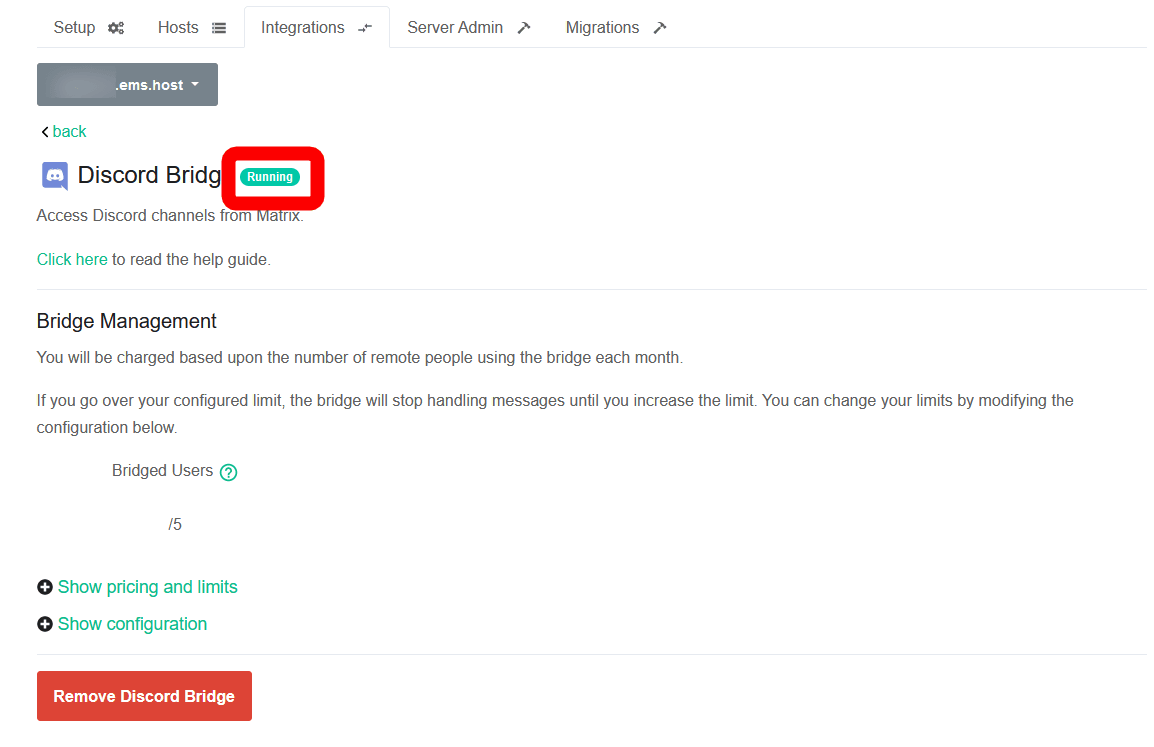
After waiting for a while, 'Running' will appear next to Discord Bridge, so the setting is complete.
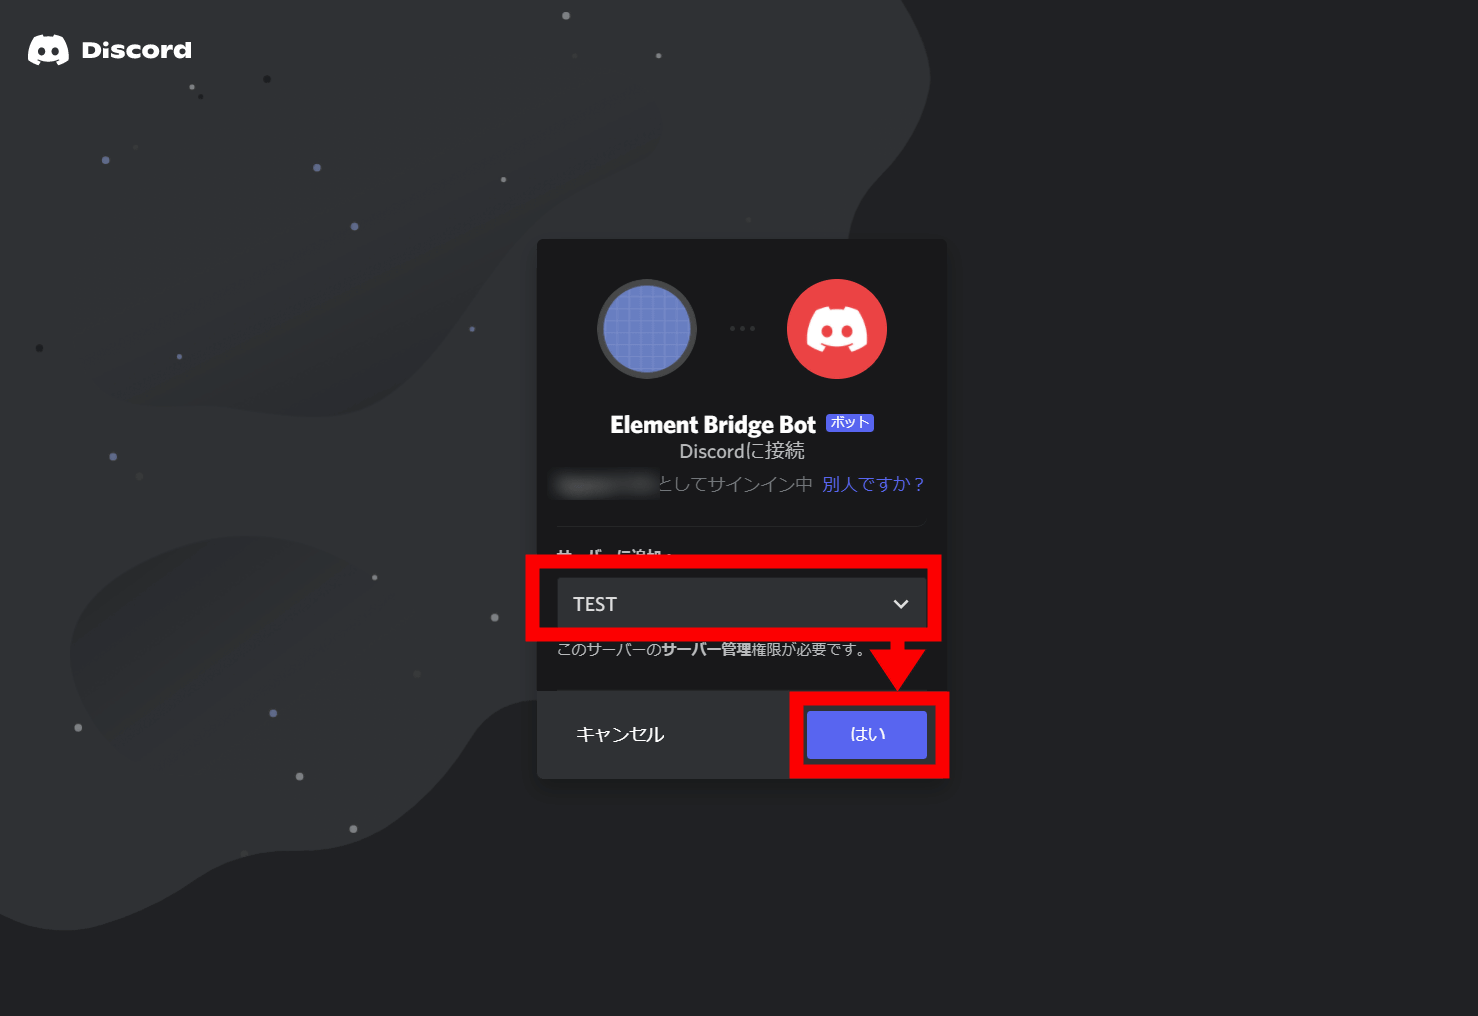
Next, in order to request permission from the Discord server for the application created earlier, the URL 'https://discordapp.com/api/oauth2/authorize?client_id=(CLIENT ID you wrote down earlier) & scope = bot & permissions = 607250432' To access. When you access it, it will be displayed that (the application name you created earlier) wants to connect to Discord, so select the server you want to add and click 'Yes'.
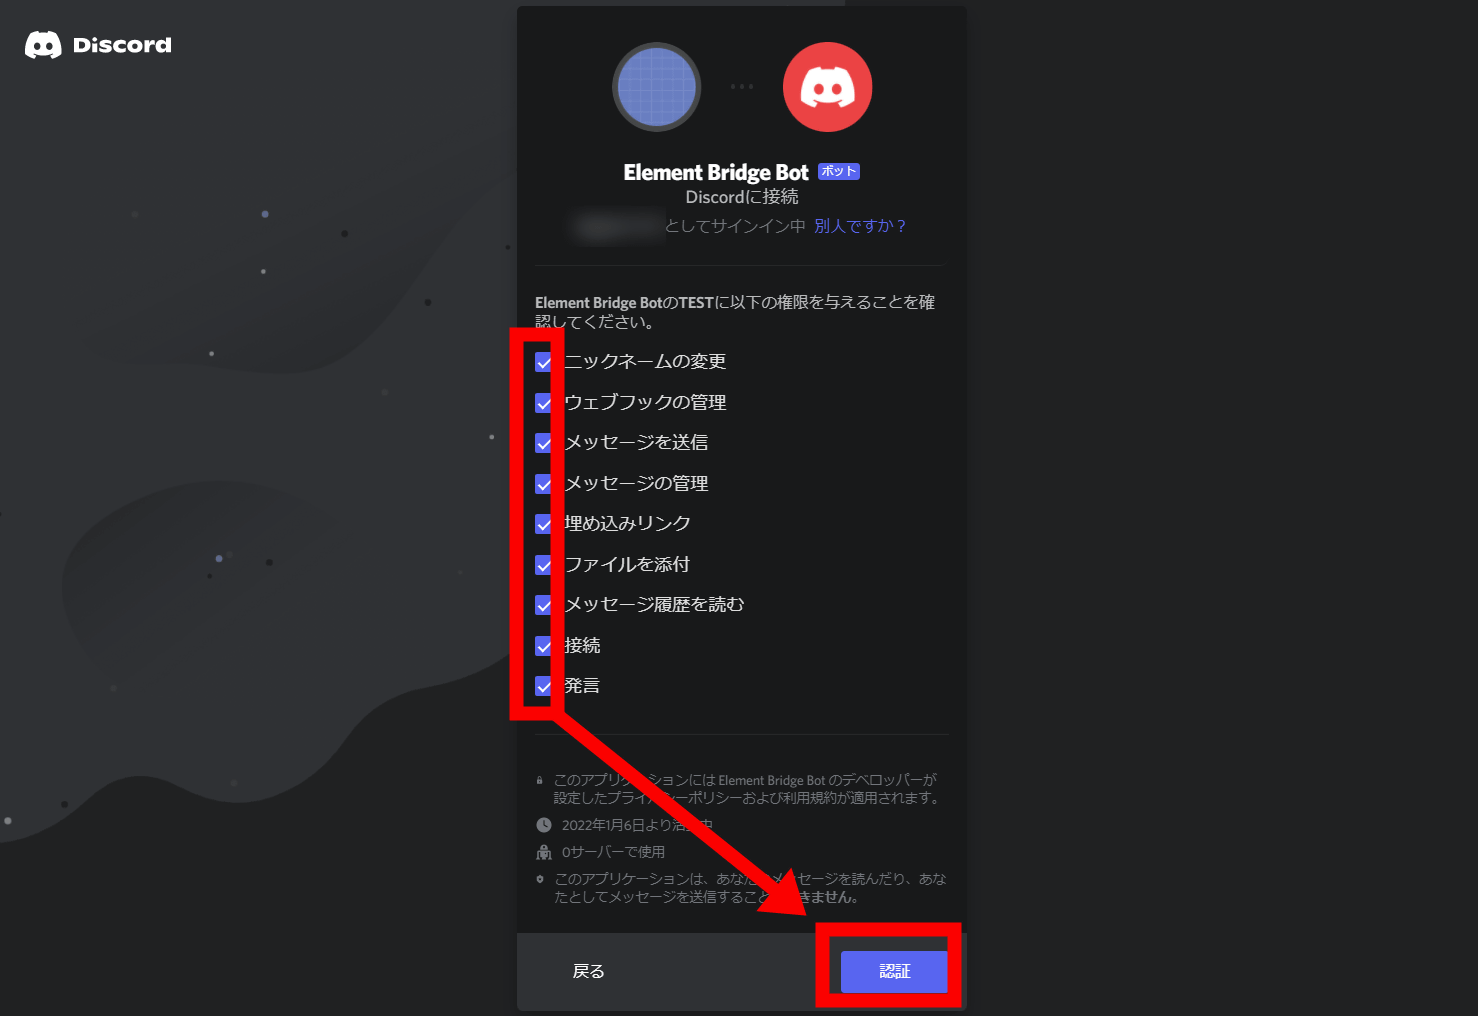
The application itself can be done even if you are not the administrator of the server, but the following is a task that requires management authority of the server, so proceed on the assumption that you have management authority. Set the permissions you want to give to the application you just created and click 'Authenticate'.
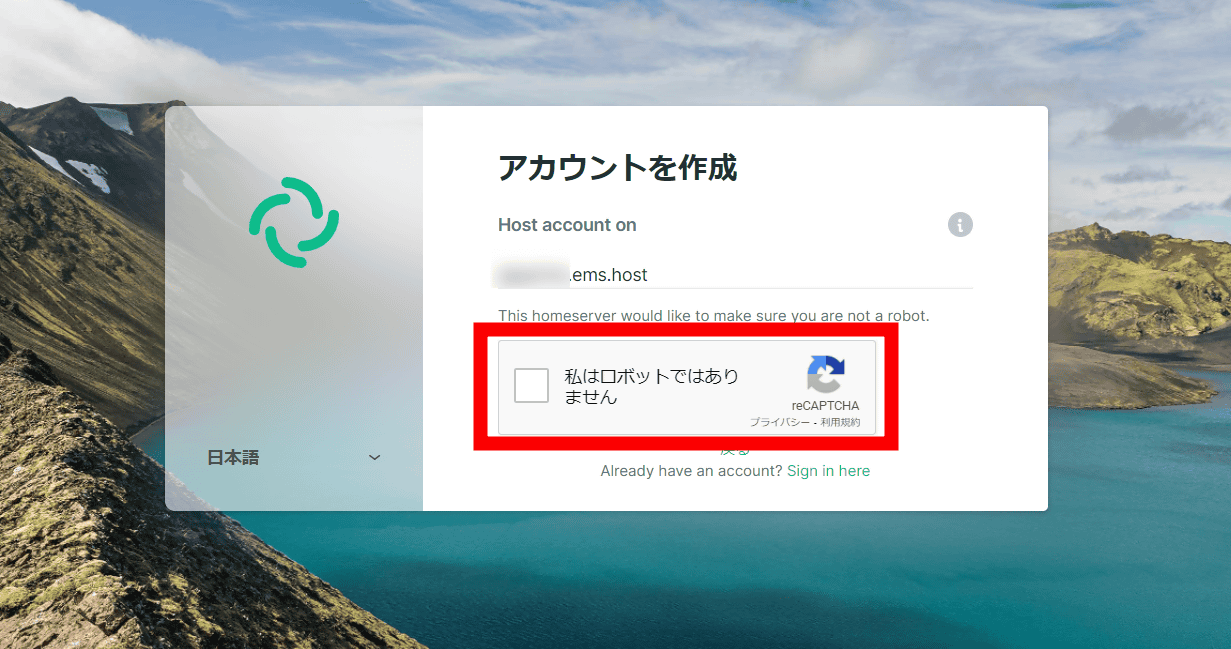
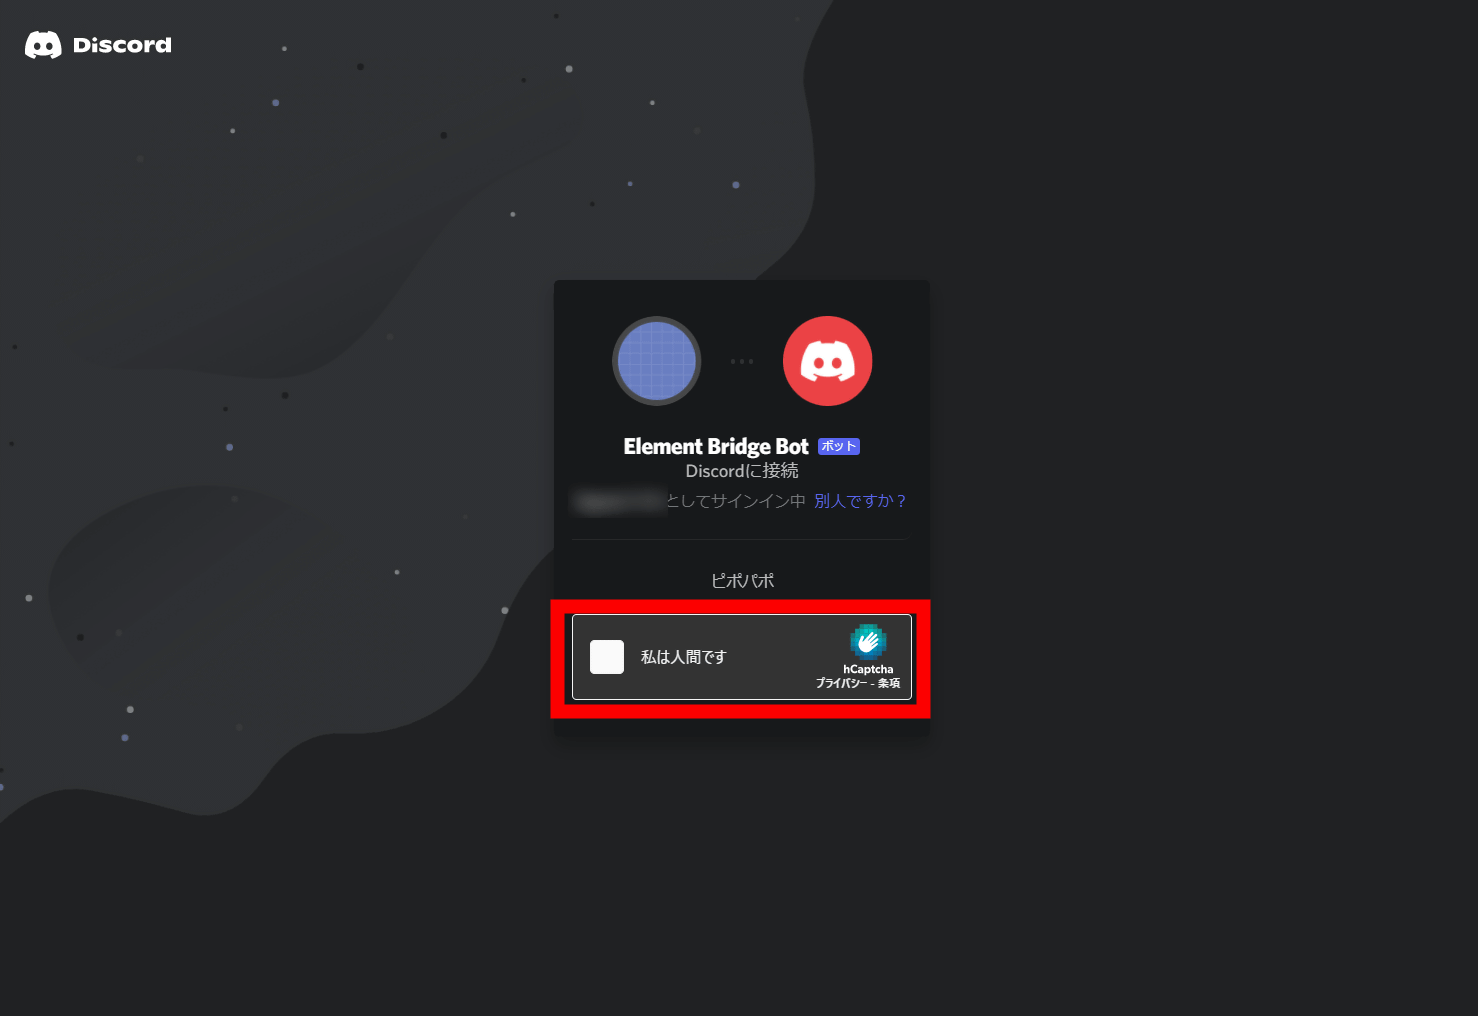
If you see a CAPTCHA, click 'I'm a human' to solve the puzzle.
Then, 'Authenticated' is displayed as shown below. Now this tab is closed and OK.

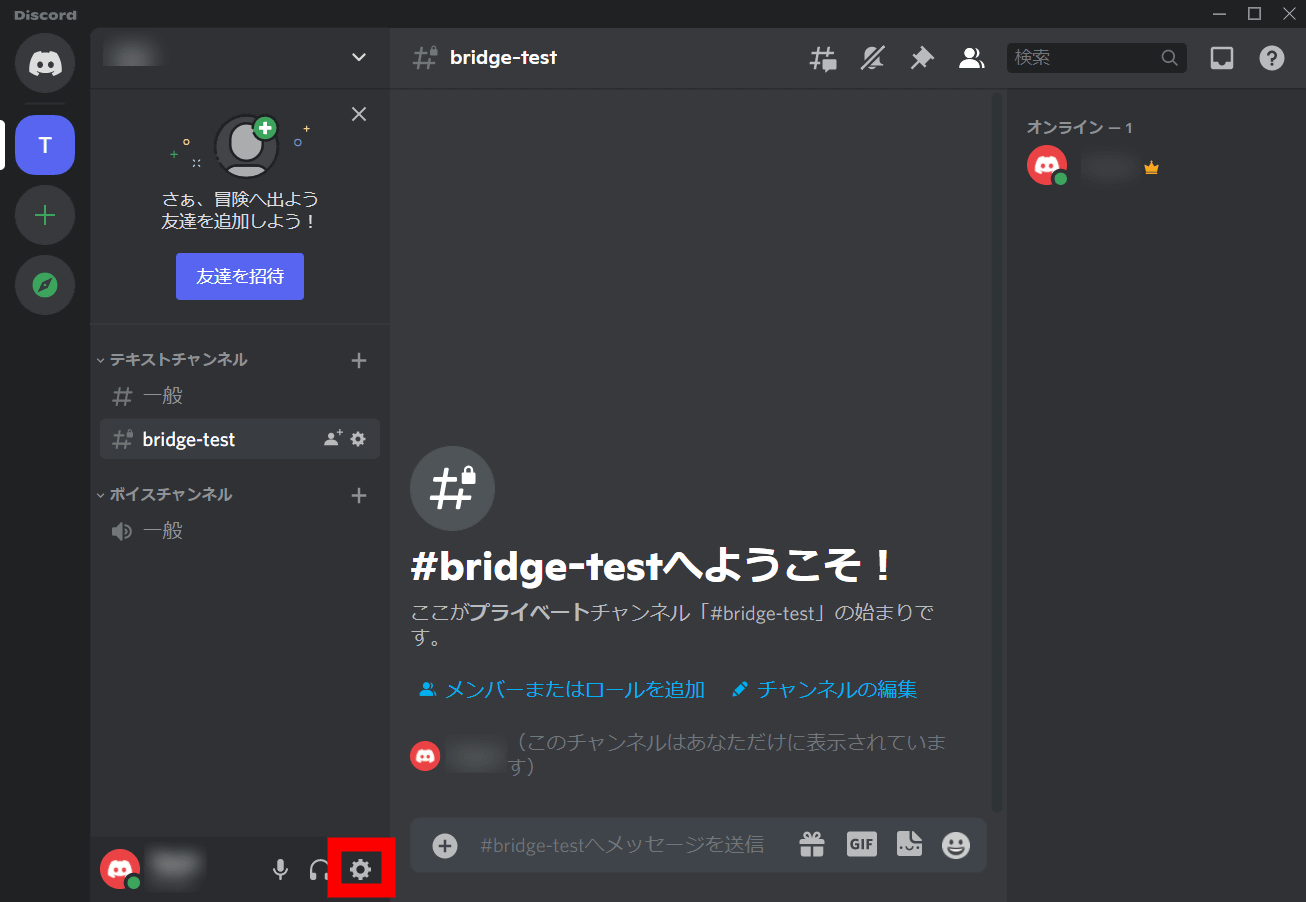
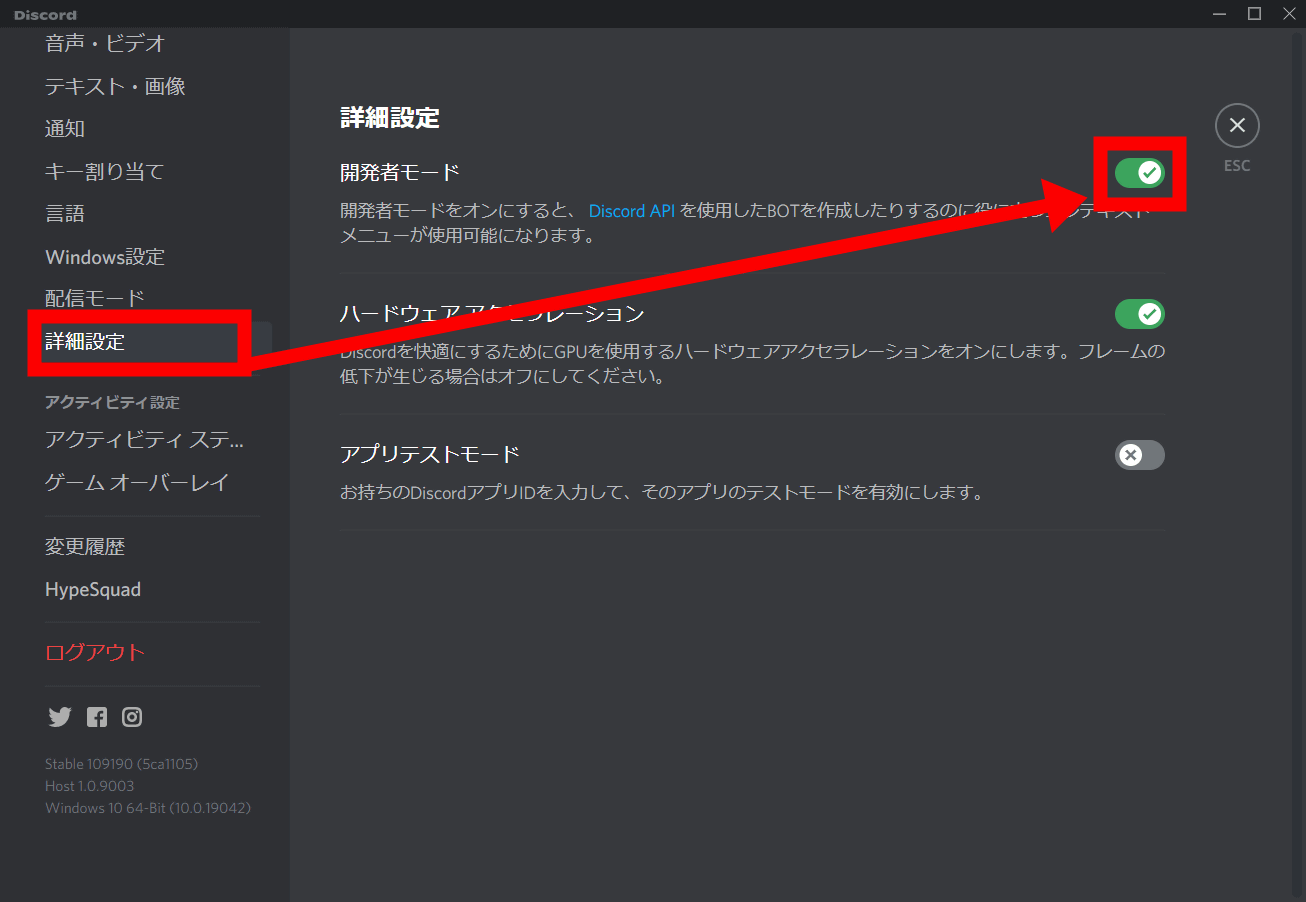
Next, we will actually bridge the Discord channel. First, you need to get two IDs, 'Server ID' and 'Channel ID', for the channel you want to bridge. If you are using Discord from your browser, the URL will display 'https://discord.com/channels/ (server ID) / (channel ID', so you can tell at a glance, but you are using the software version of Discord. In this case, special operation is required, so the following explains the procedure to display the server ID and channel ID in the software version of Discord. First, click the gear icon to move to the setting.
Turn on 'Developer Mode' from 'Advanced Settings'.
Then, when you right-click on the server name, the option 'Copy ID' will be displayed, and you can get the server ID from here.
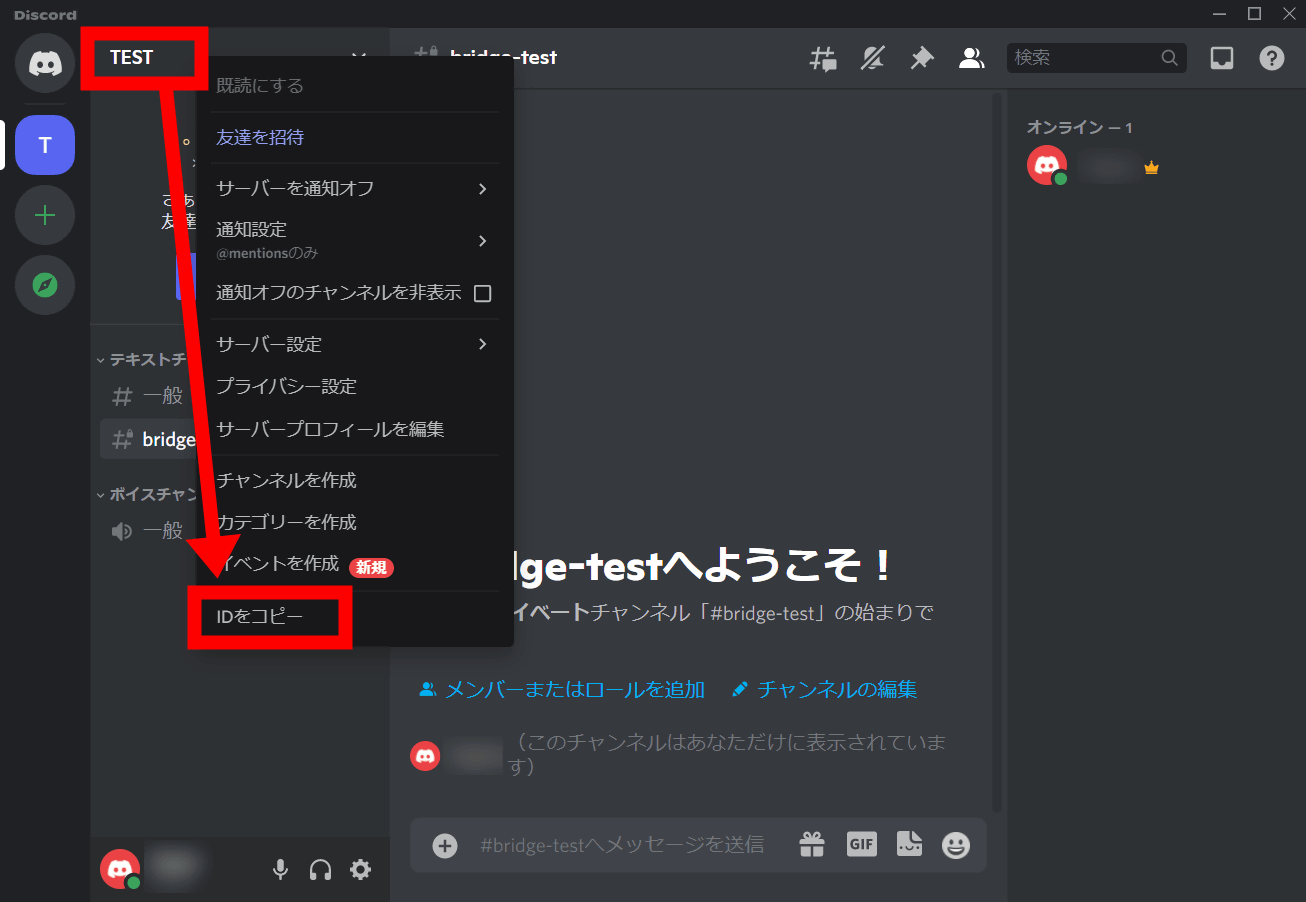
Similarly, right-click the channel name and get the channel ID from 'Copy ID'. Make a note of both IDs.

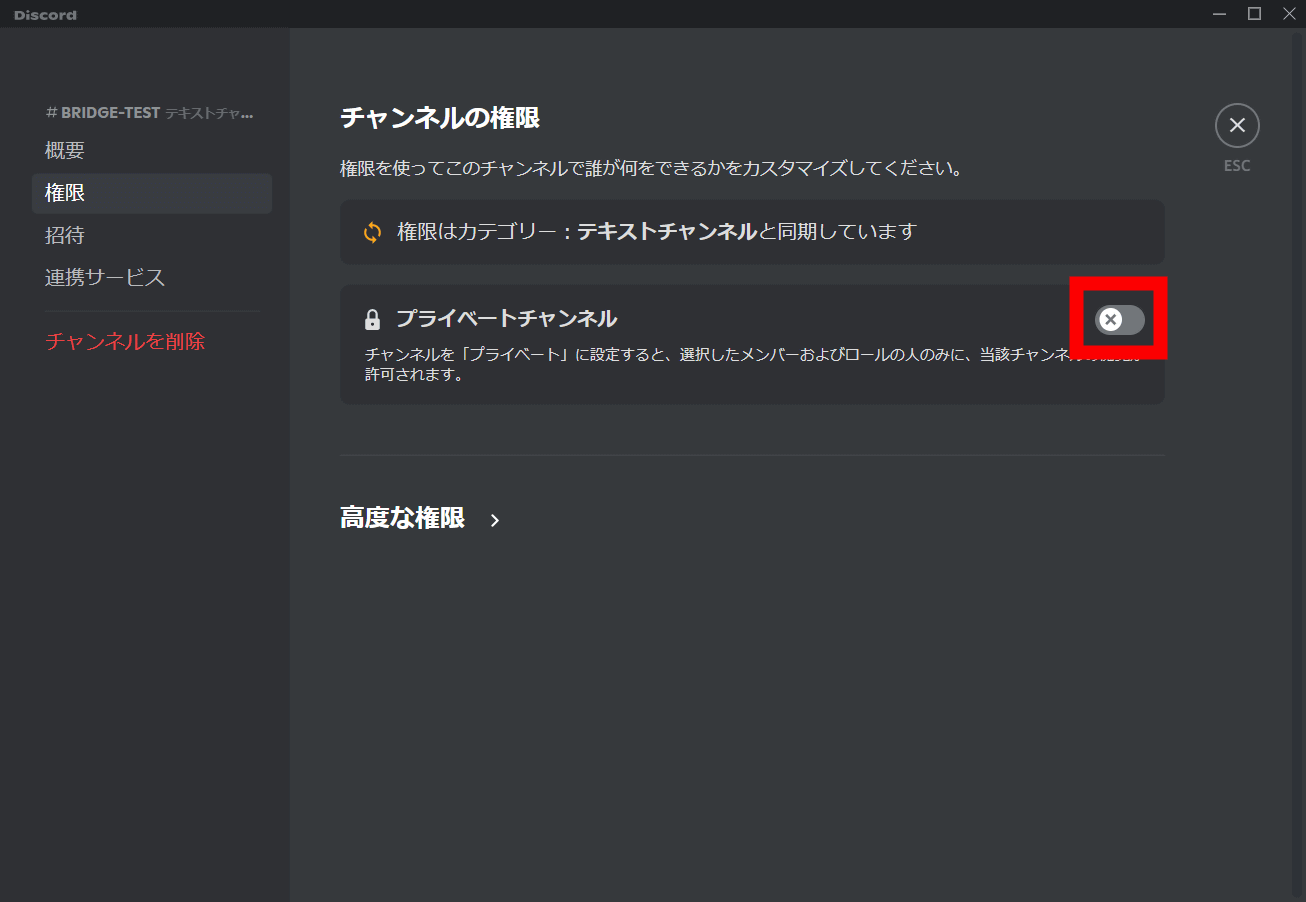
If the private channel is turned on in the channel settings, the BOT for bridge connection will not be included, so leave it off here.
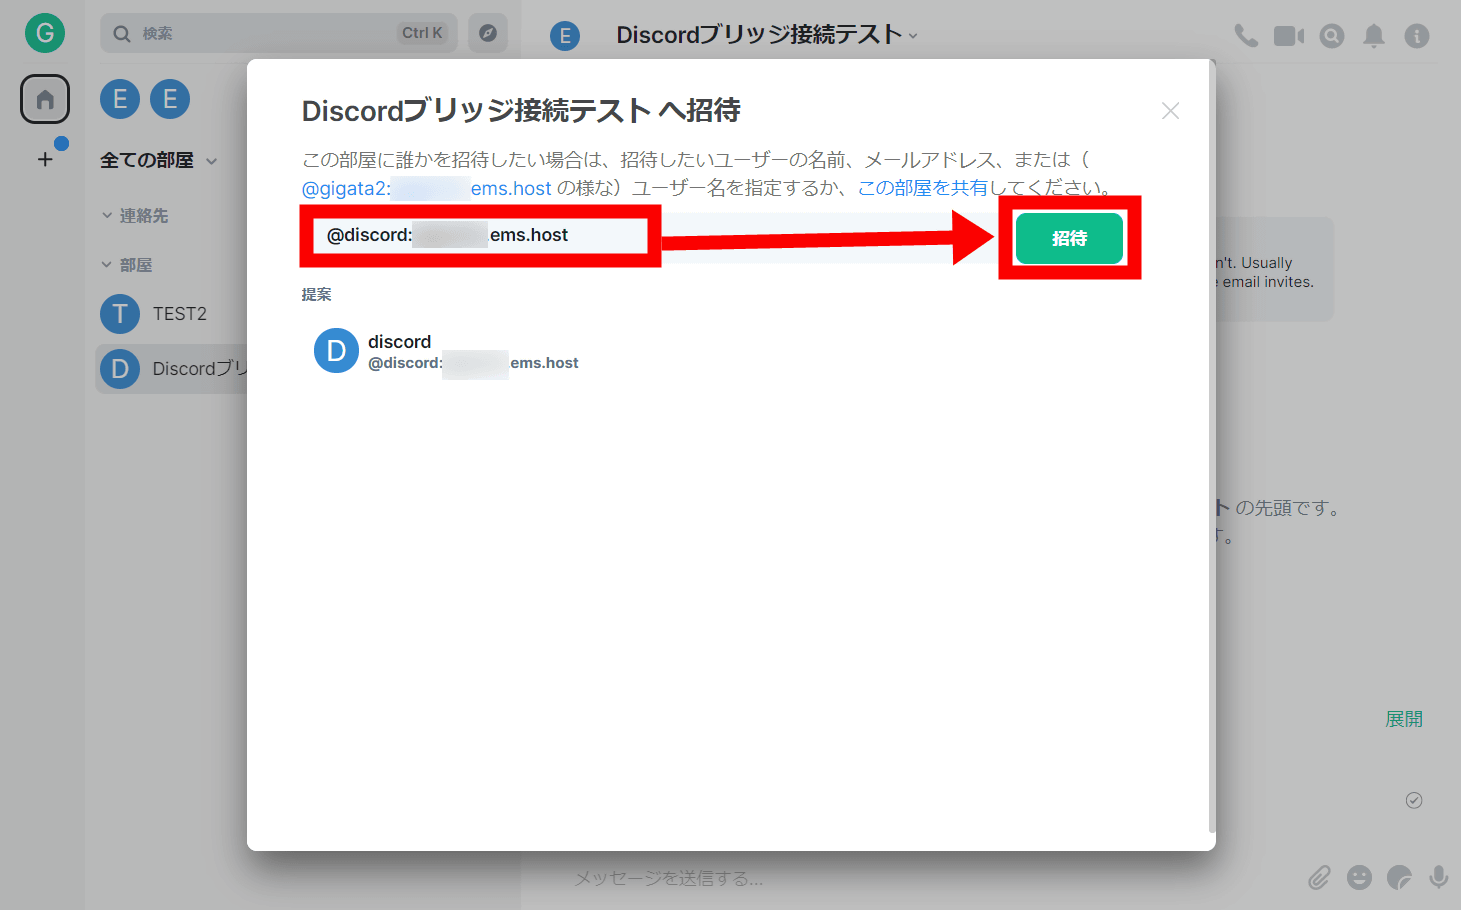
Next, click 'User Invitation' for the channel you want to bridge Element.
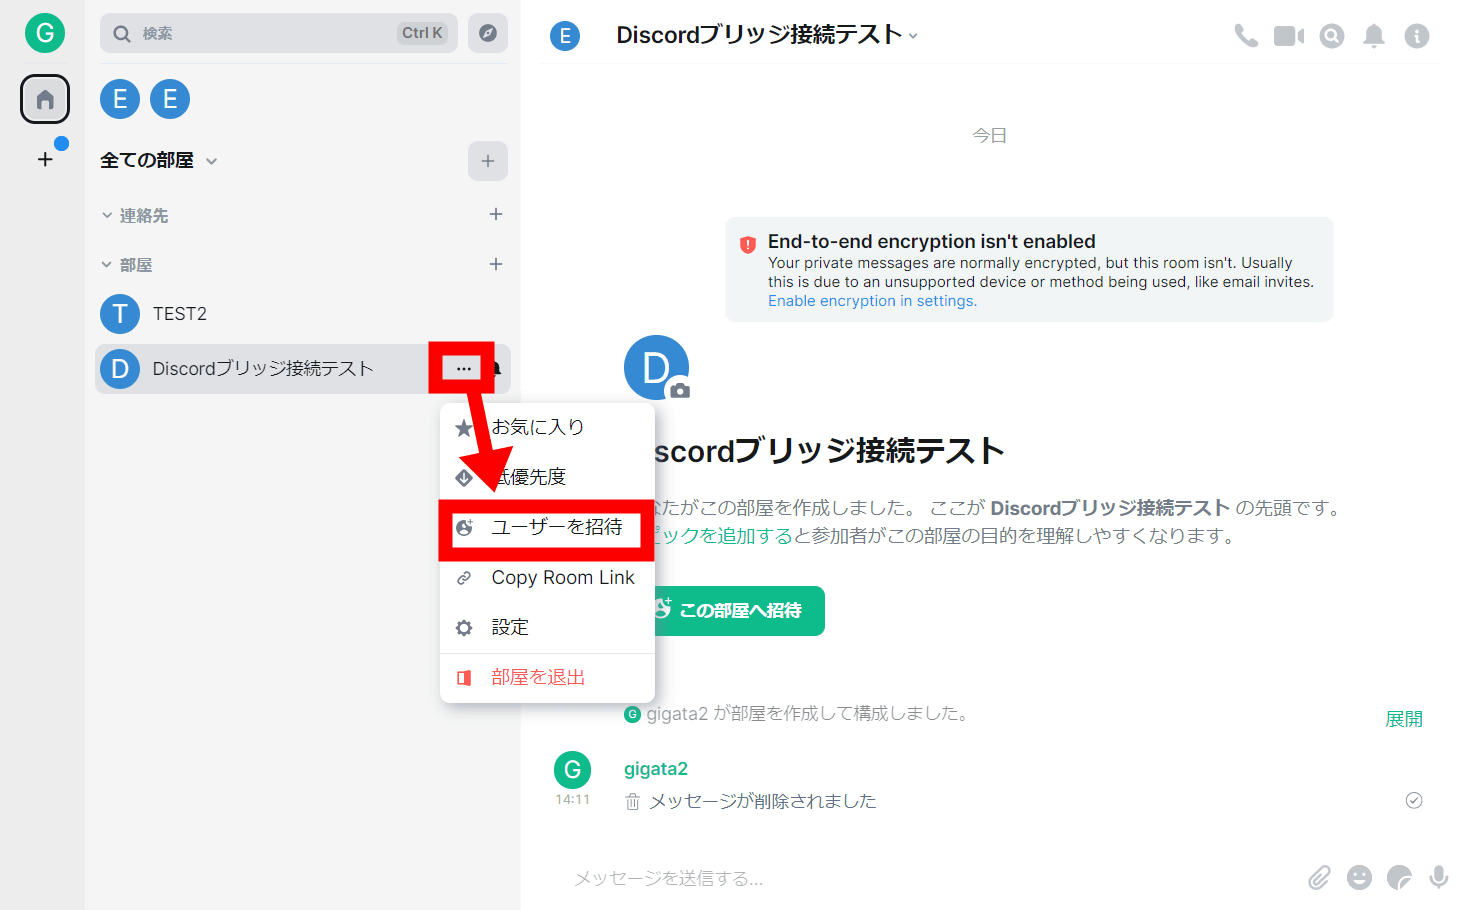
Enter '@discord: (server name) .ems.host' in the blank and click 'Invite'.
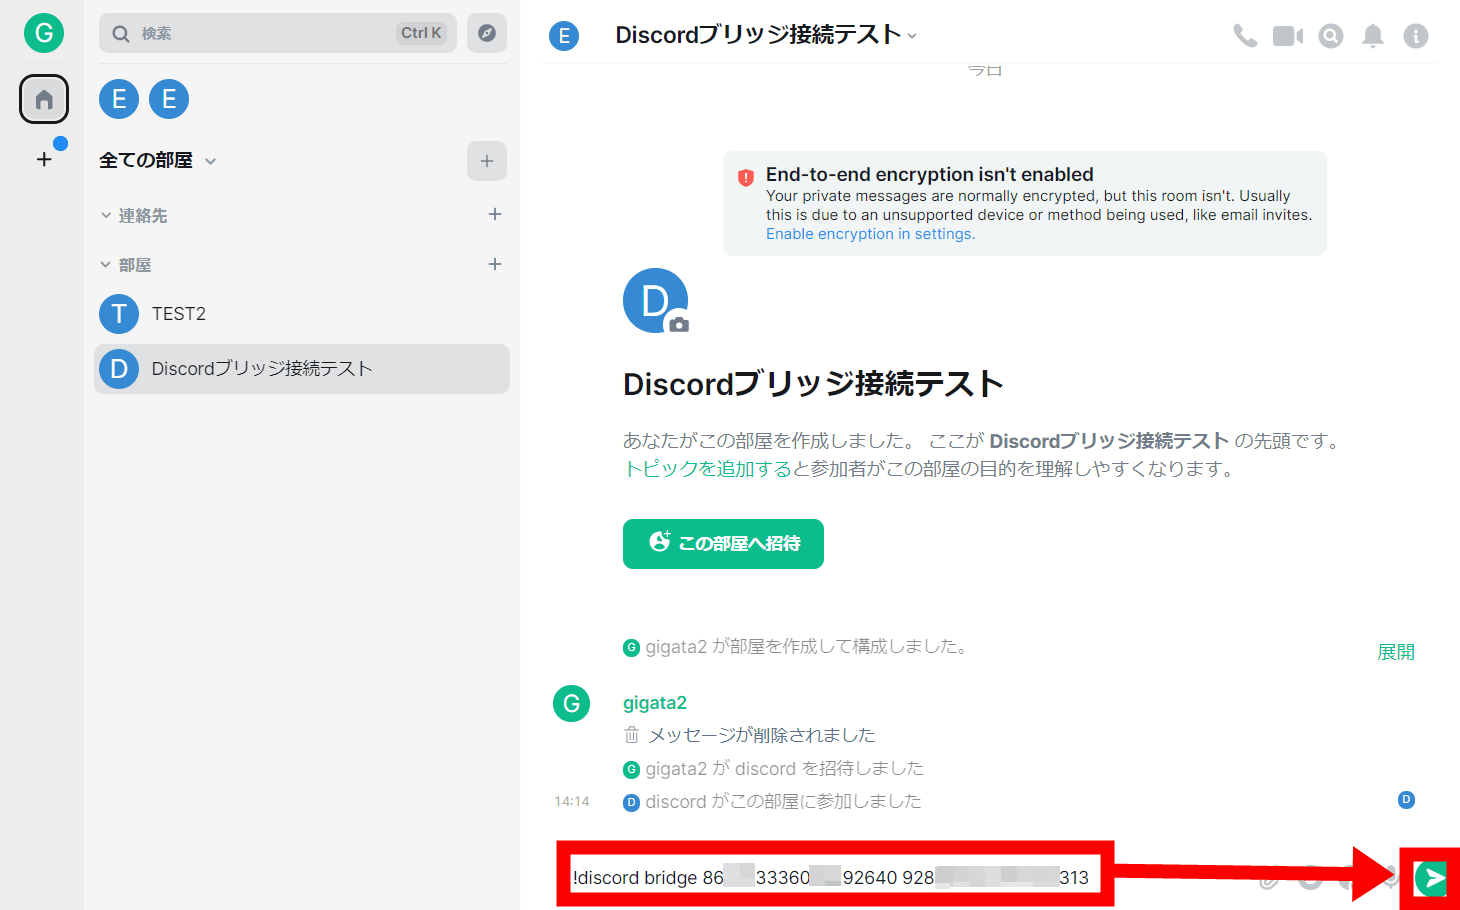
Then, a BOT for connecting the Discord bridge will come into that room, so say '! Discord bridge (server ID) (channel ID)' in the chat and request approval from the Discord side.
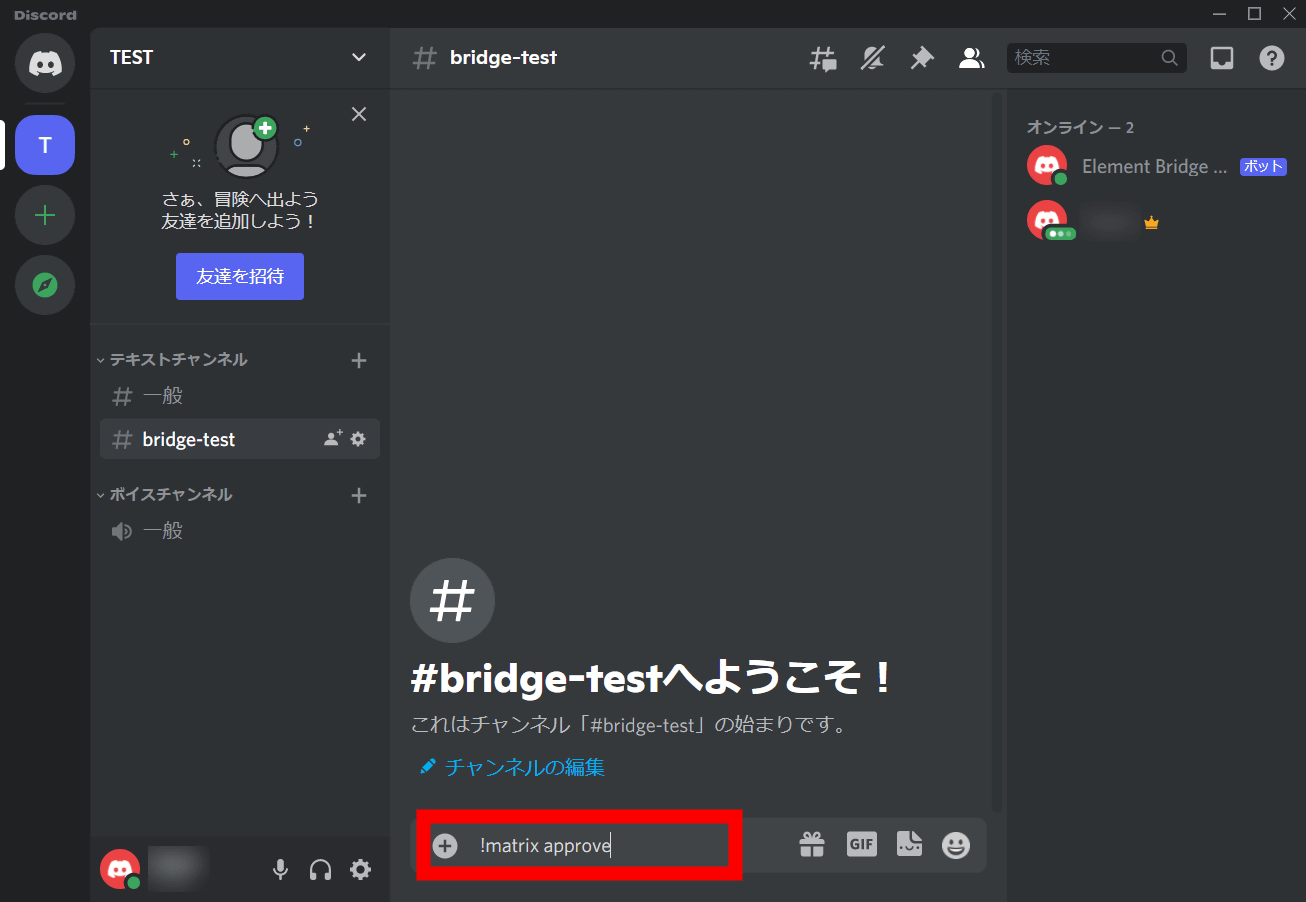
After that, just say '! Matrix approve' on the channel you want to bridge on the Discord side.
Now the messages will be transferred to each other between the relevant channels of Discord and Element.

Like Slack, it seems to delete messages and share files.
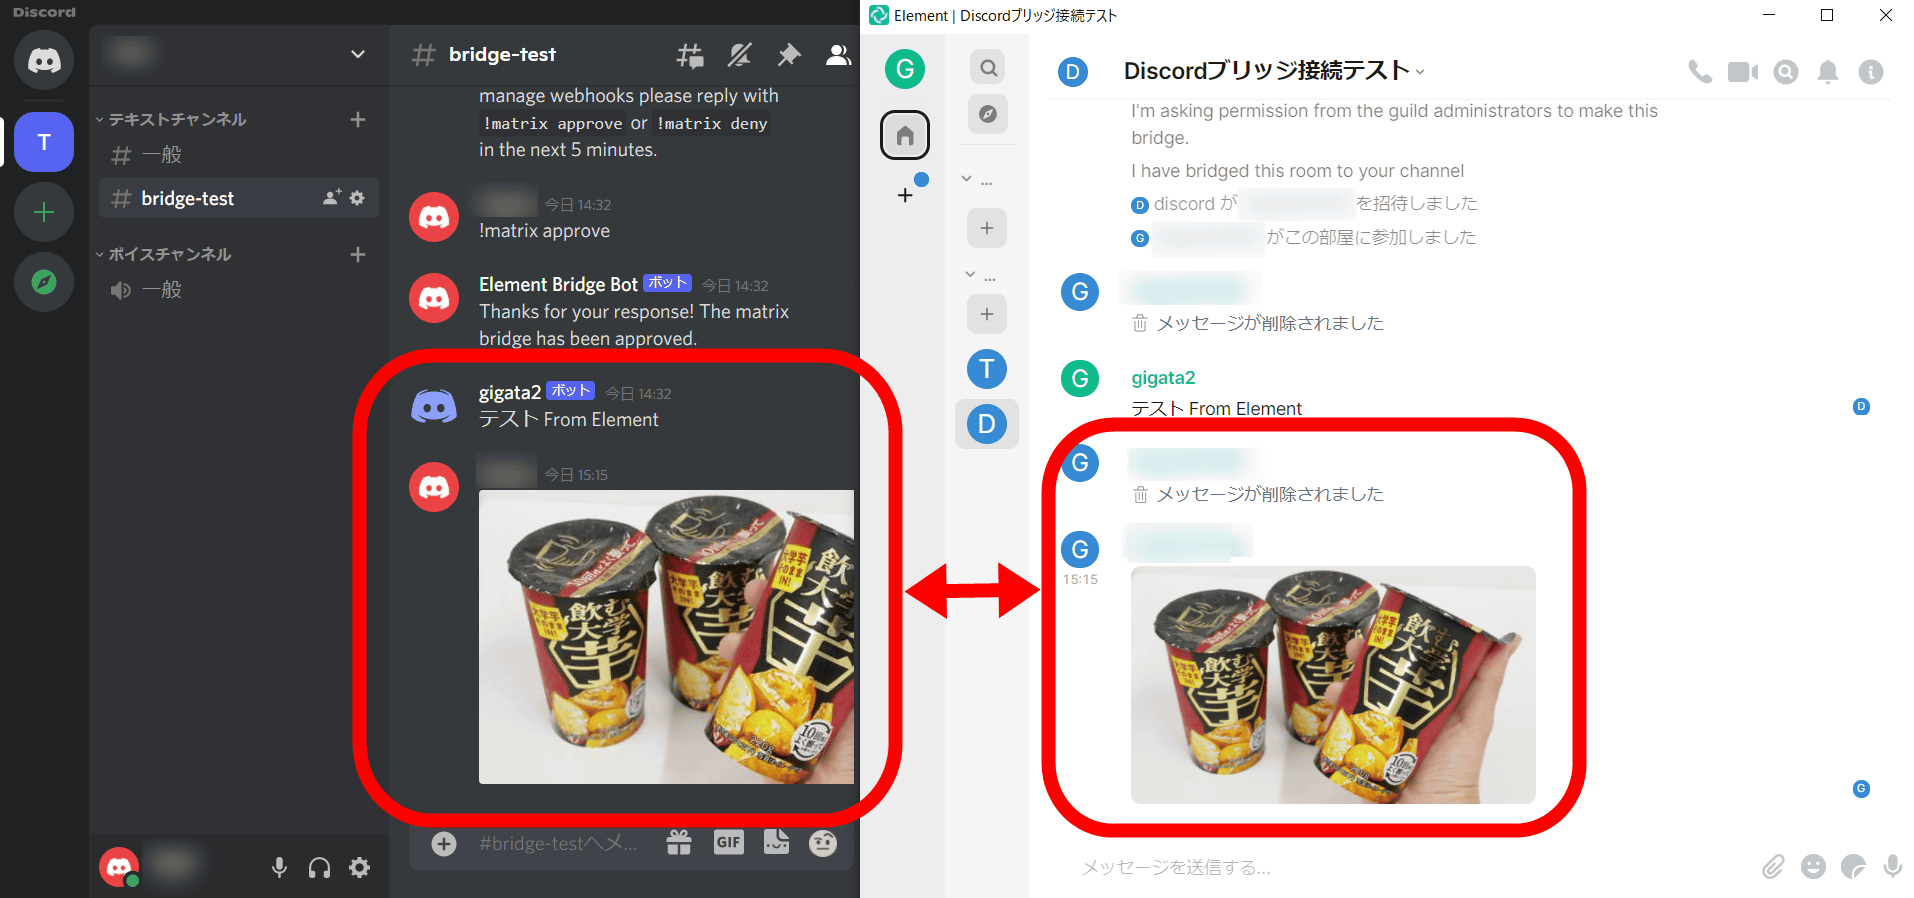
In addition, Discord cleared the point that 'file deletion on the Element side is not reflected' that existed in Slack.

Related Posts:
in Software, Web Service, Review, Posted by darkhorse_log