``Live Streamer NEXUS (AX310)'' review that can cover the most worrisome sound relationships in distribution such as game play, Vtuber, YouTuber, remote conference, etc. to a higher level compact & one unit
One of the points that the distributor (streamer) must be aware of when distributing games and video on YouTube etc. is 'distribution equipment'. In order to go beyond the bare minimum of 'distributing the game screen as it is', it is more convenient to have a device such as a stream deck, a mix amplifier, and an audio interface that can help with distribution.
AVerMedia's ' Live Streamer NEXUS (AX310) ' is exactly the one that covers the functions of the three devices of this 'stream deck', 'amplifier' and 'audio interface', so try to actually touch it I decided to. Since the name of the distribution equipment and the software for operating the equipment are both named 'NEXUS', the equipment is described as 'AX310' and the software as 'NEXUS' in the article.
Live Streamer NEXUS (AX310) | Compare | AVerMedia
◆ Contents
・
・Download and install operation software 'NEXUS'
・Connection between AX310 and device
・Set up AX310 and 'NEXUS' - Delivery on RECentral
・Live Streamer MIC 330 (AM330) Opening & Appearance
・'NEXUS' settings ・Hotkeys and widgets
・'NEXUS' setting ・Audio mixer
・Check sound settings ・Set software output audio
・'NEXUS' settings ・Save account information, change appearance, etc.
◆ Live Streamer NEXUS (AX310) Opening & Appearance
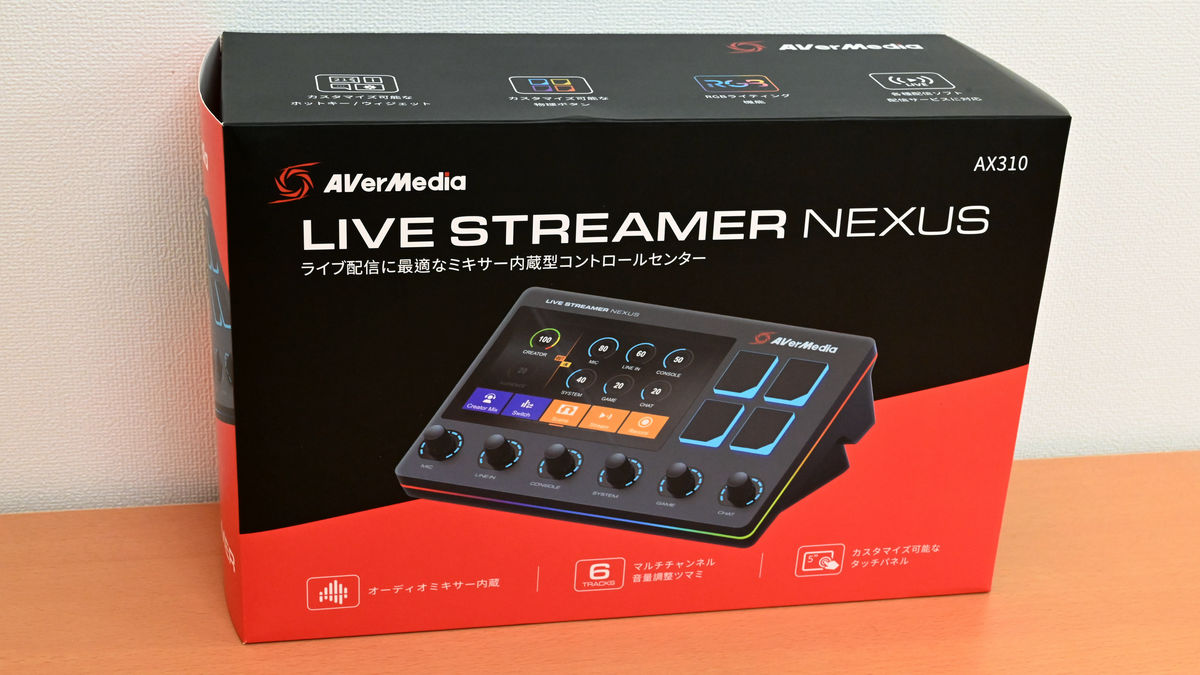
The outer box of AX310 looks like this.
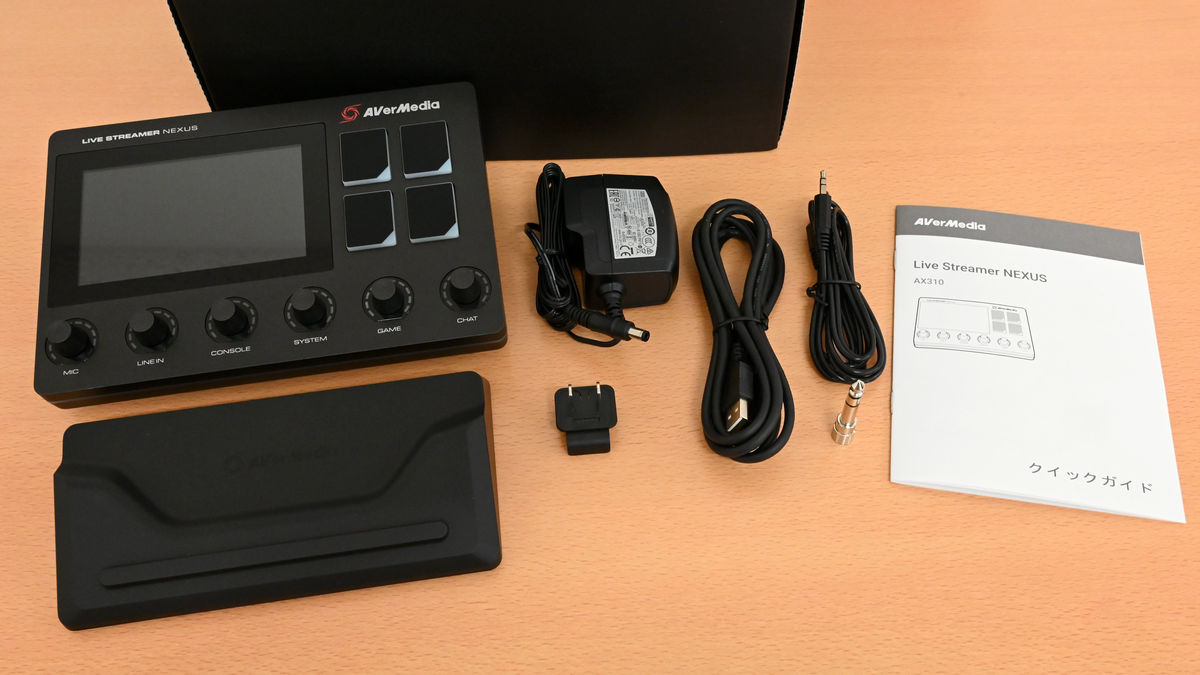
The contents are main body and magnet stand, power adapter (DC 12V / 1.5A) and Japanese outlet plug, USB 2.0 Type-B to Type-A cable, 3.5mm stereo audio cable, 3.5mm to 6.3mm audio conversion adapter, quick guide.
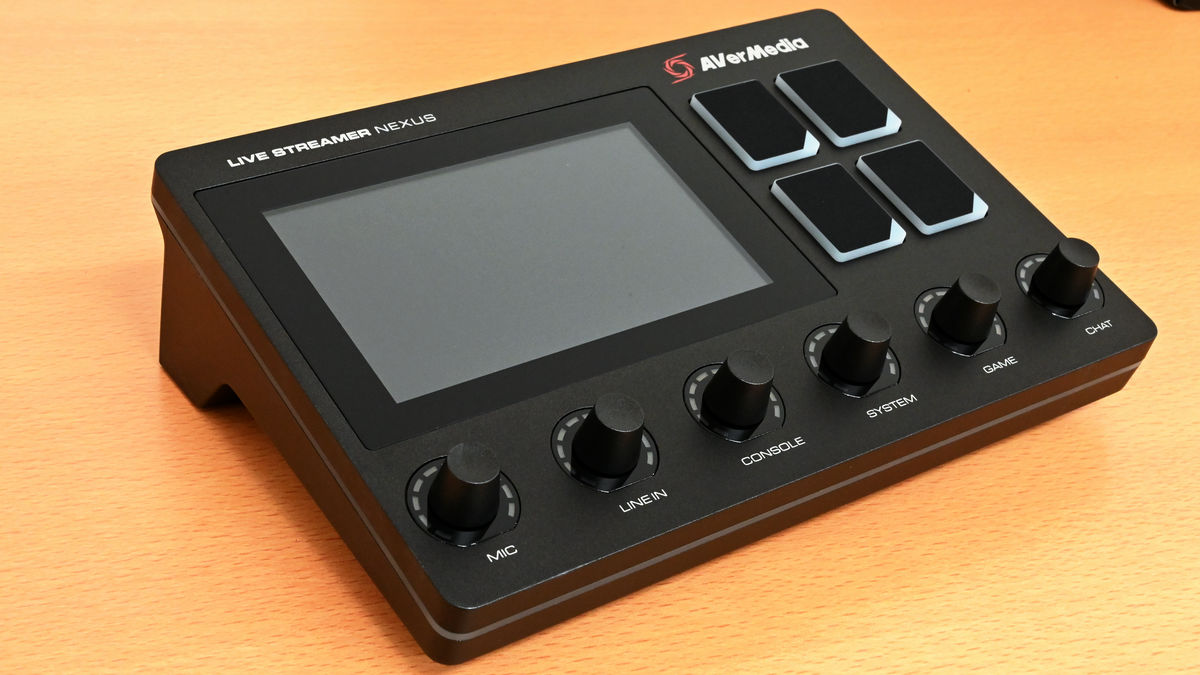
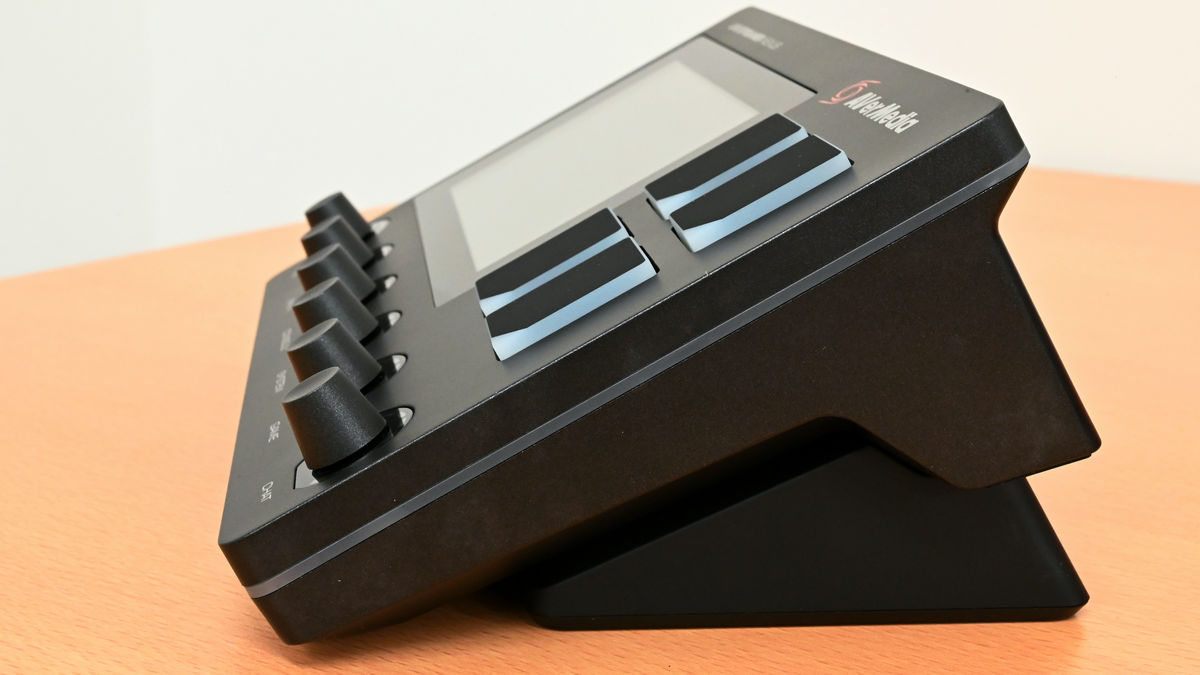
The main body size is about 214 mm × 146 mm × 61 mm (thickest part), and it has a touch panel, 4 physical buttons, and 6 knobs. The knobs are assigned the functions of 'MIC', 'LINE IN', 'CONSOLE', 'SYSTEM', 'GAME' and 'CHAT' from the beginning. There are no buttons on the sides.
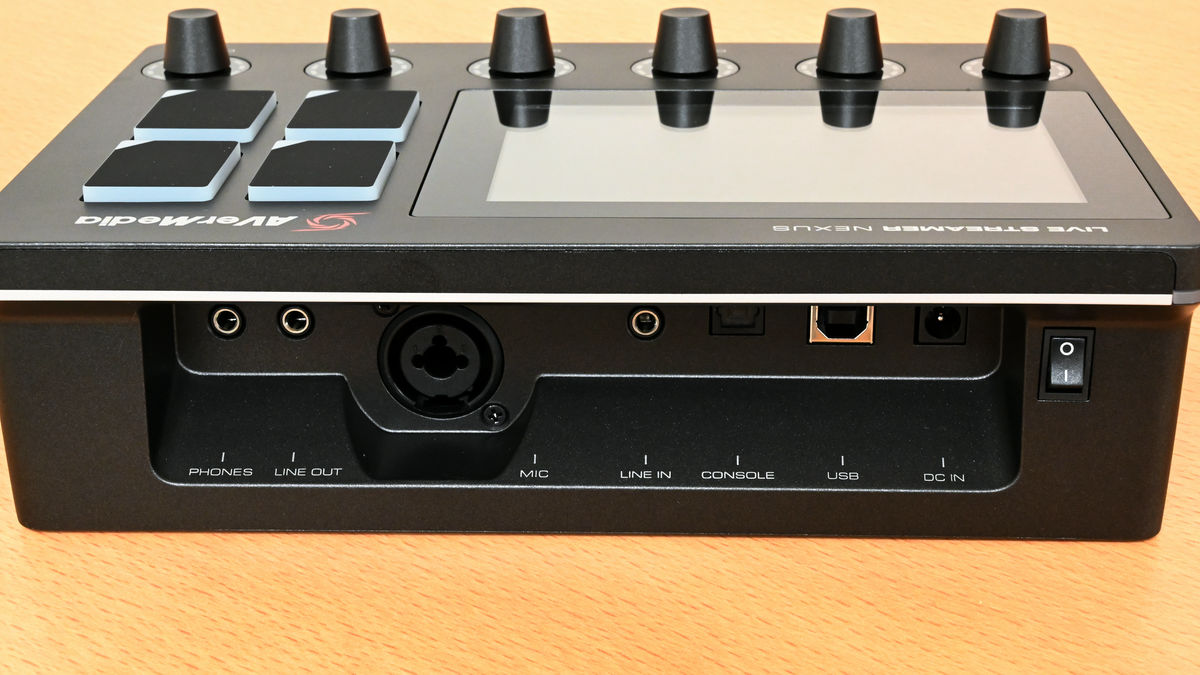
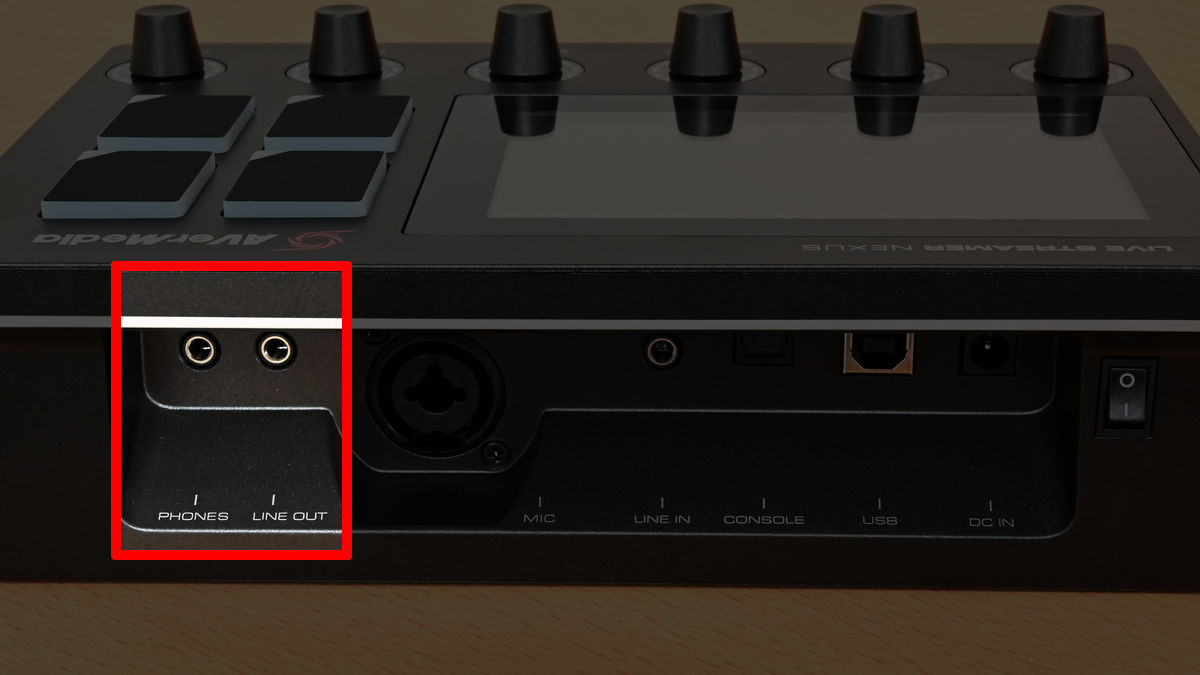
The back is the audio interface part. The terminals are 'PHONES (3.5 mm)', 'LINE OUT (3.5 mm)', 'MIC (XLR / 6.3 mm)', 'LINE IN (3.5 mm)', 'CONSOLE (optical digital)', 'USB (Type-B)' from the left ''DC IN (power supply)', the physical switch on the right is the power switch. How to connect will be explained later.
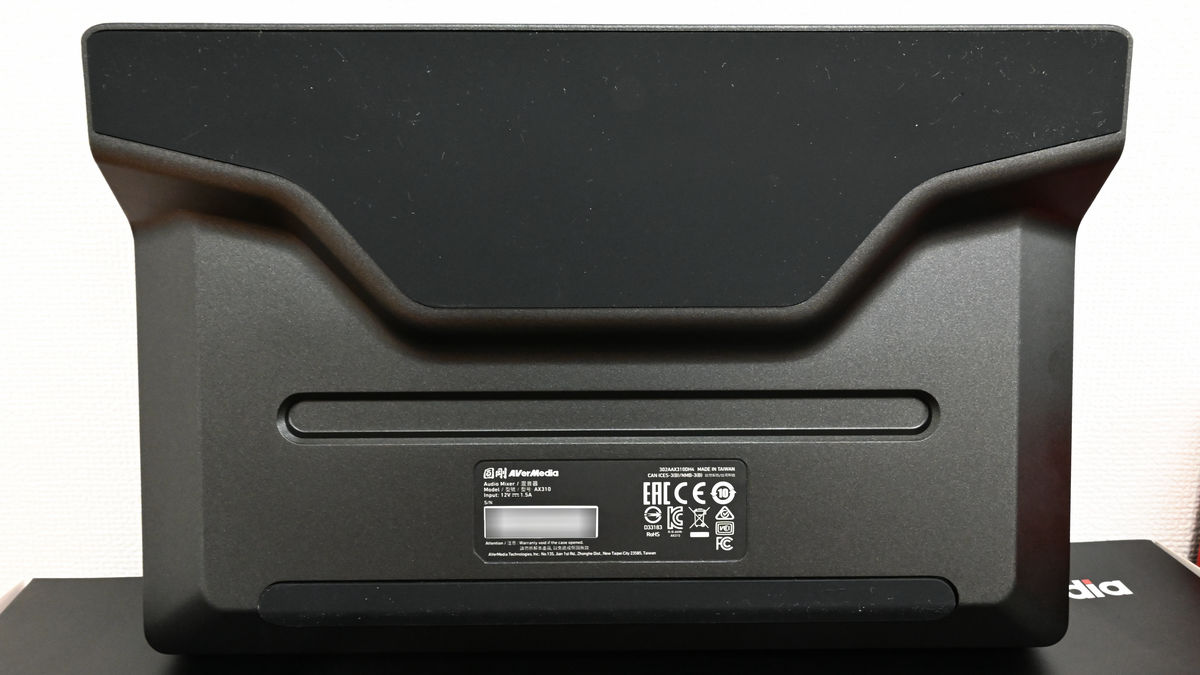
The bottom has a structure that is firmly grounded, and there is a long and narrow recess used for connection with the magnetic stand.
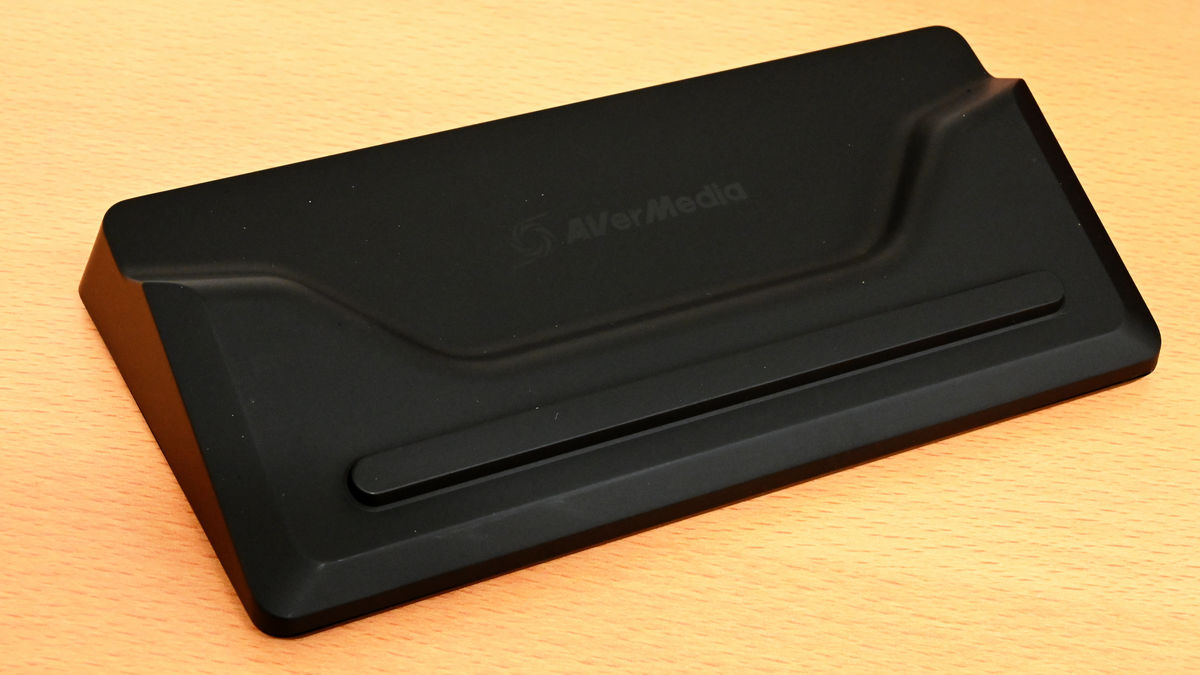
This is a magnet stand. The size is roughly 184 mm × 84 mm × 33 mm. Used for height adjustment.
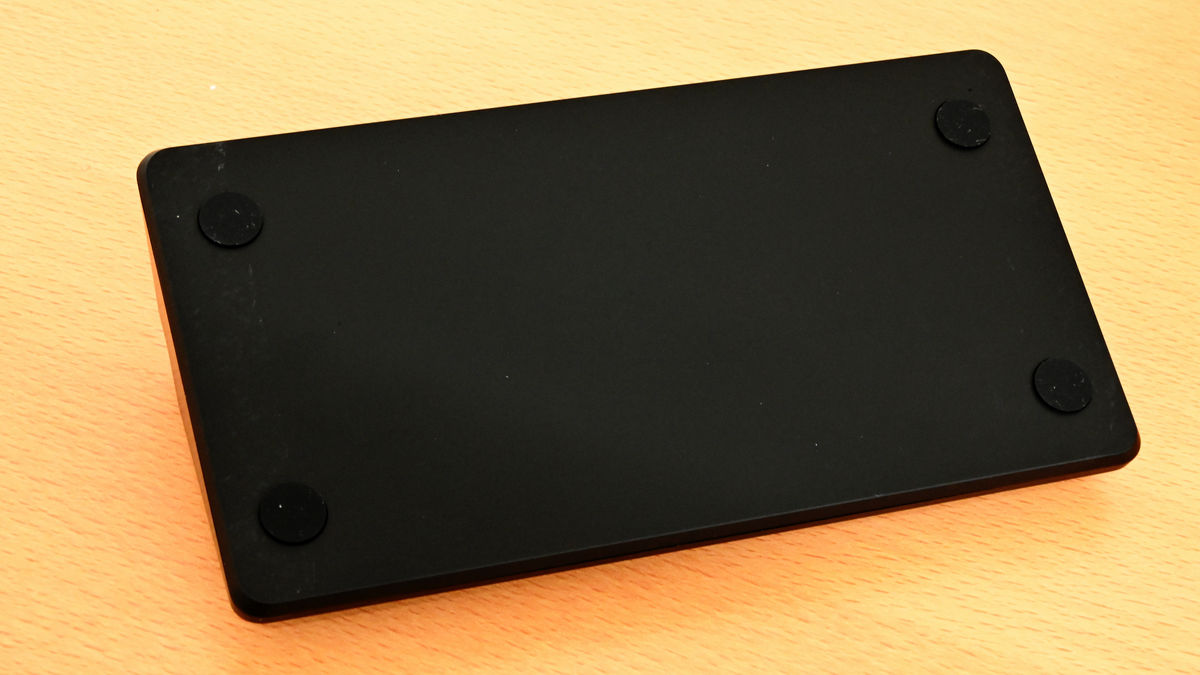
The bottom has non-slip corners.
Combining the main unit and the magnetic stand makes the height 93mm. Since the magnet is included, the stand will stick properly even if you lift the main unit.
The main body weighs 697g.
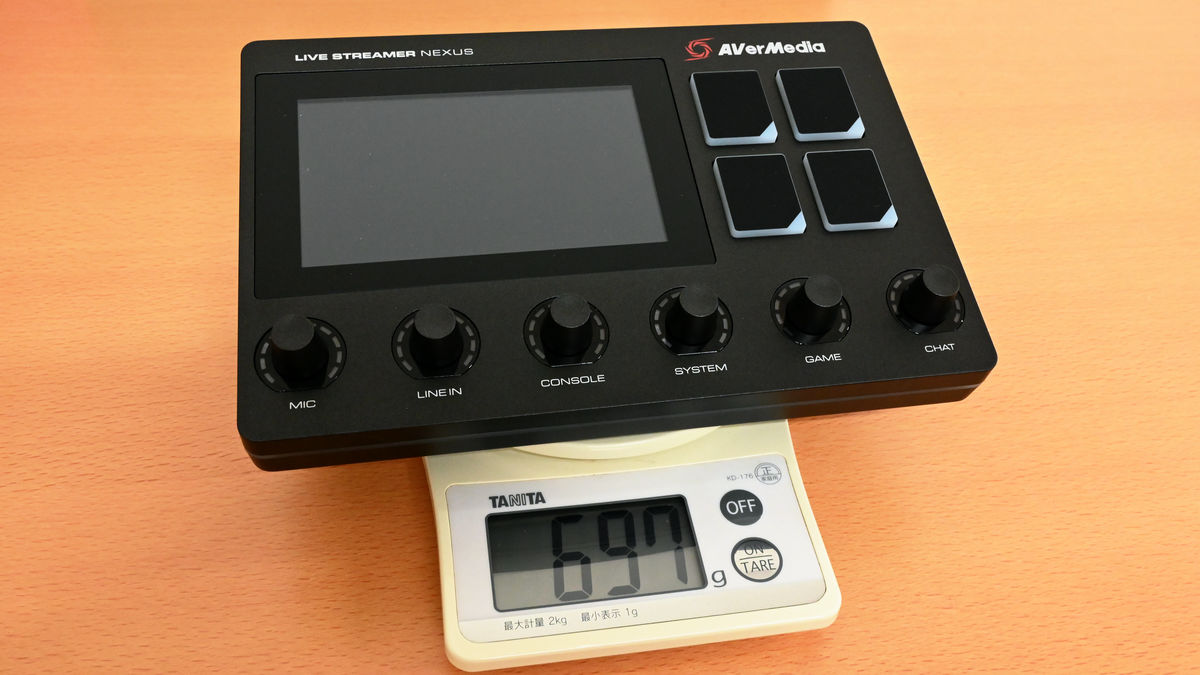
The stand is 151g. The total weight of the power adapter, cables, etc. is less than 1 kg, so it is possible to carry and move the equipment even when 'using a different delivery location than usual'.

◆ Operation software 'NEXUS' download & installation
To use 'Live Streamer NEXUS', the software 'NEXUS' for PC is required. First, open
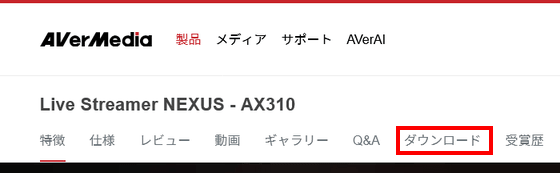
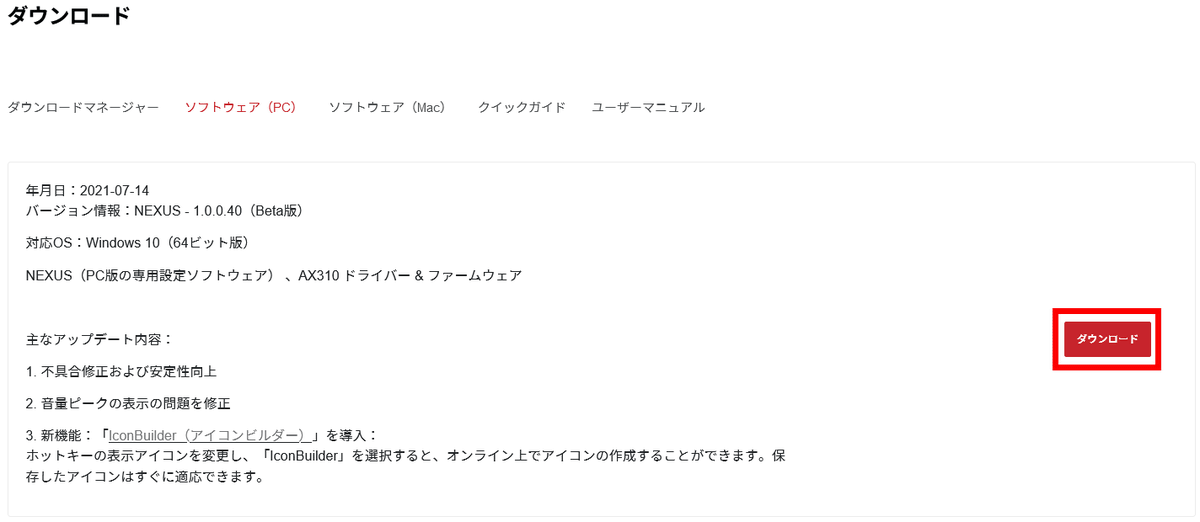
Go to the download item, so click 'Software (PC)'.
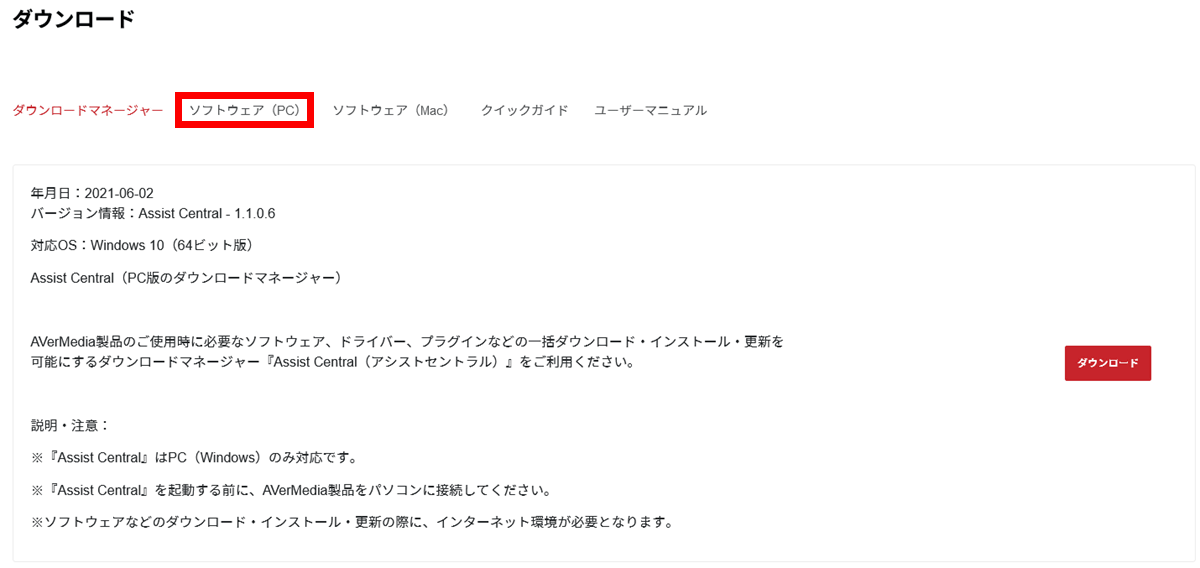
Click the 'Download' button on the right. The latest version at the time of article creation was '1.0.0.40 (Beta version)'.
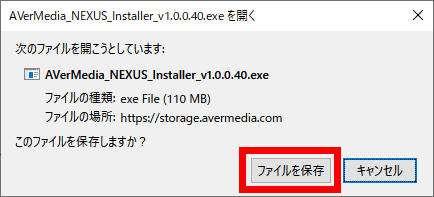
Click 'Save File' to save the file to your desktop or any other location.
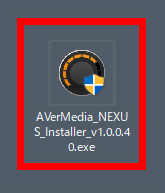
Launch the downloaded 'AverMedia_NEXUS_Installer_v1.0.0.40.exe'.
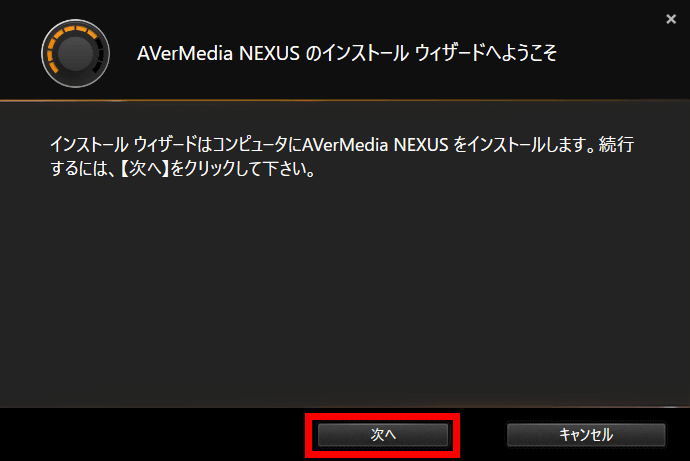
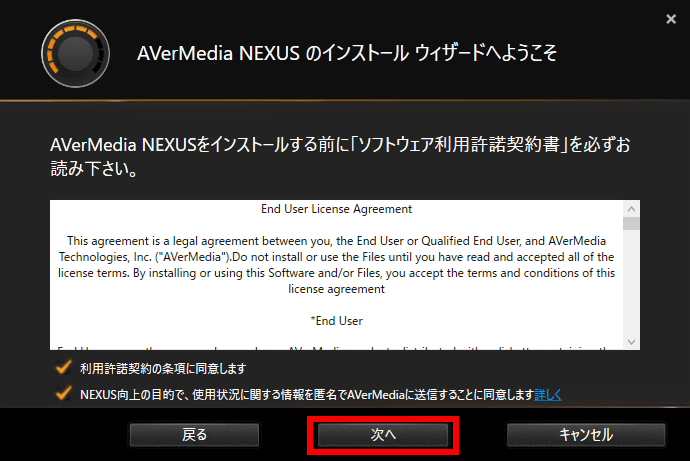
Click 'Next'.
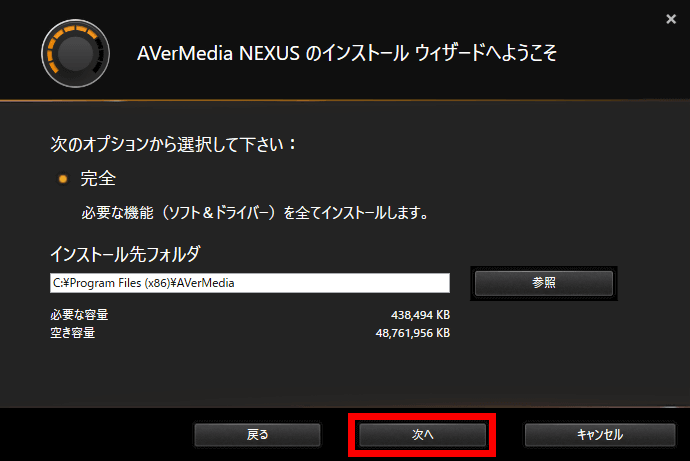
Click 'Next'.
Click 'Next'.
Click 'Finish'.

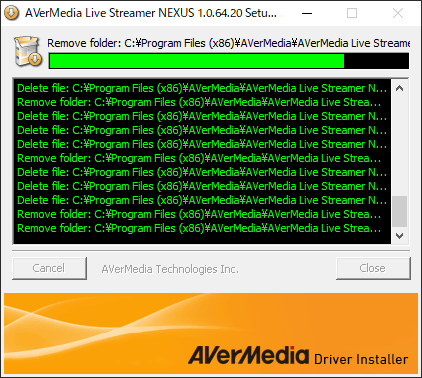
Another window will open and the driver will be installed. No action is required, it will finish automatically.
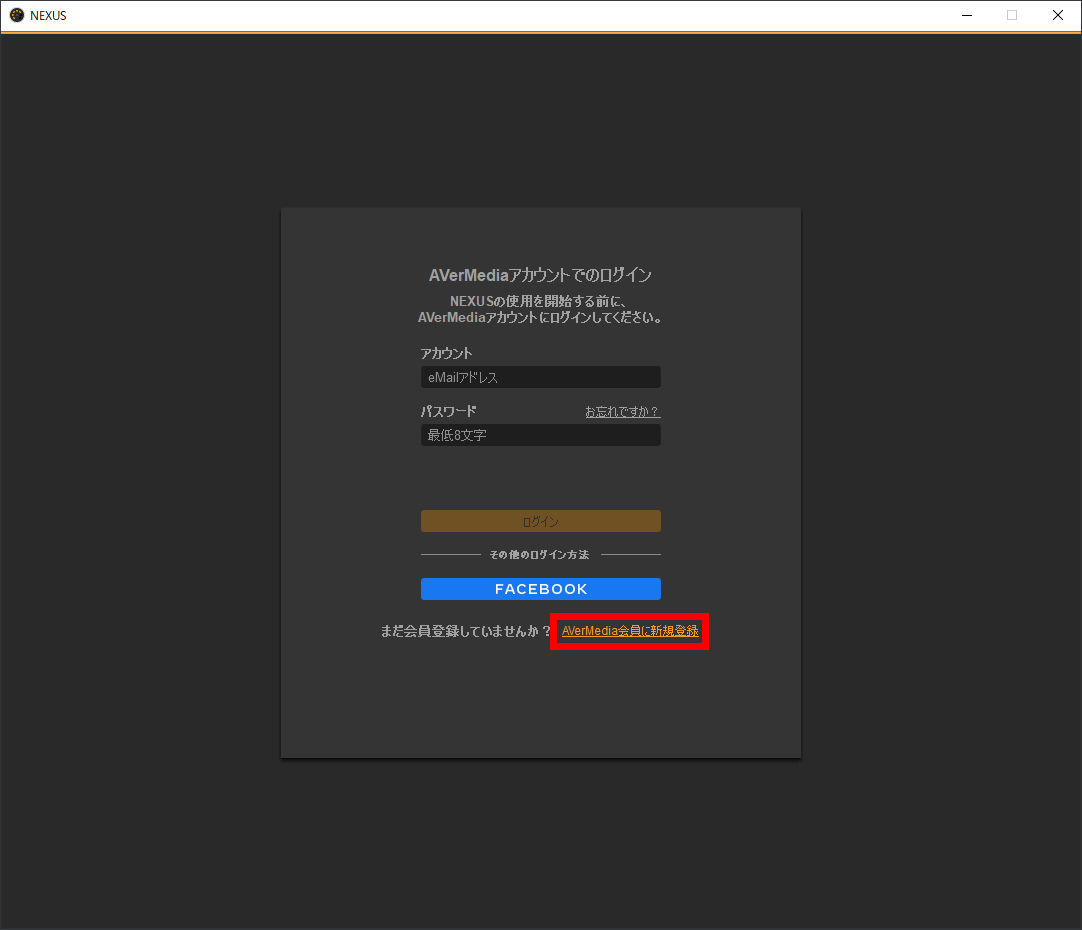
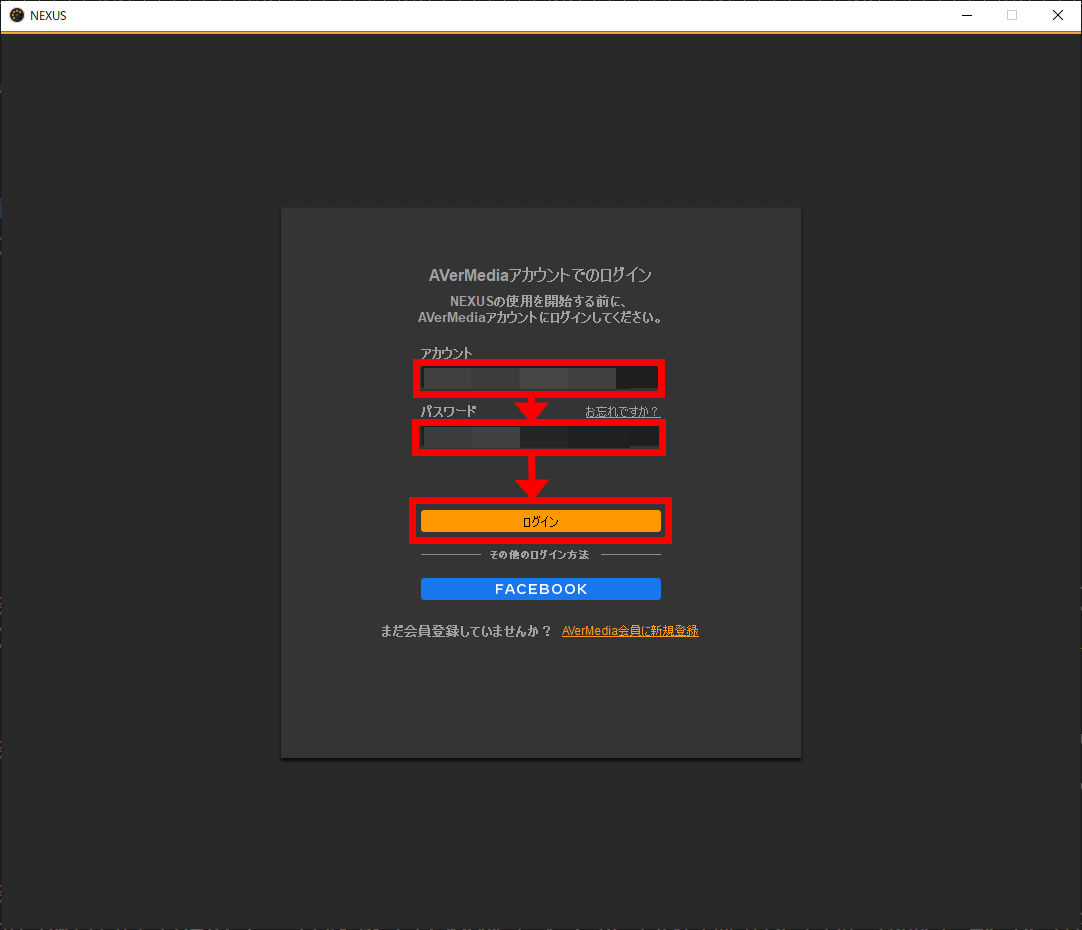
'NEXUS' will start and the login screen of the AVerMedia account will be displayed, so click 'New registration as an AVerMedia member' at the bottom.
Separate from 'NEXUS', a web browser will open a
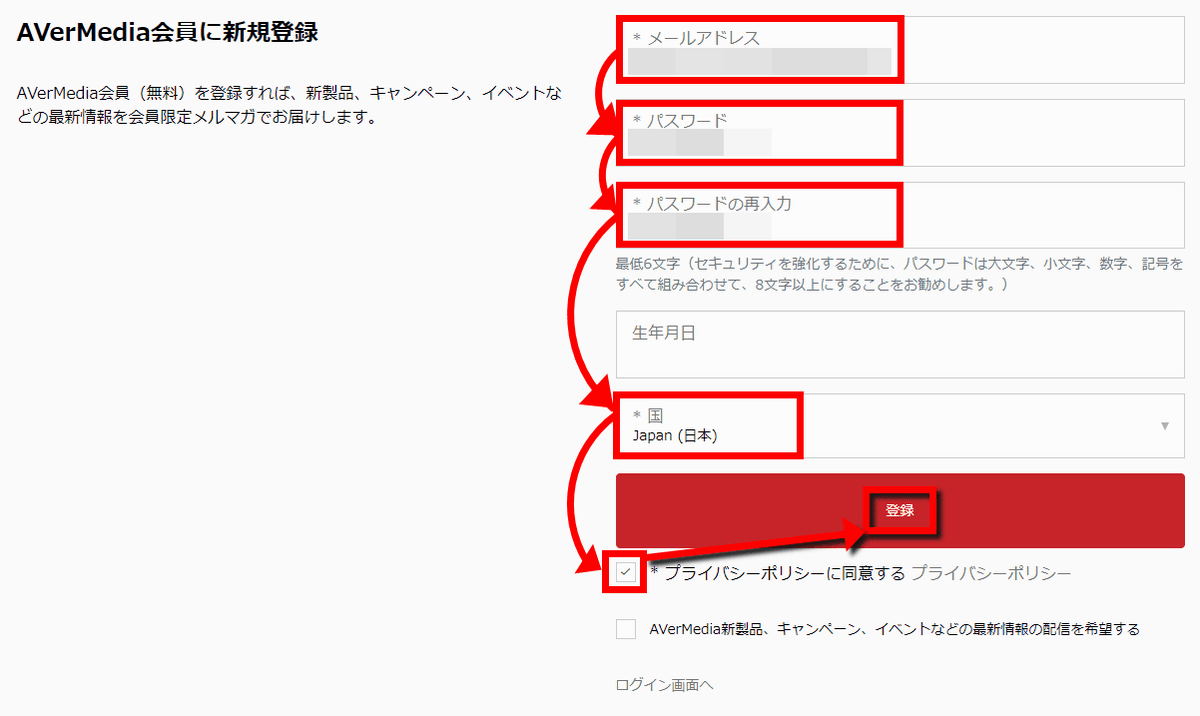
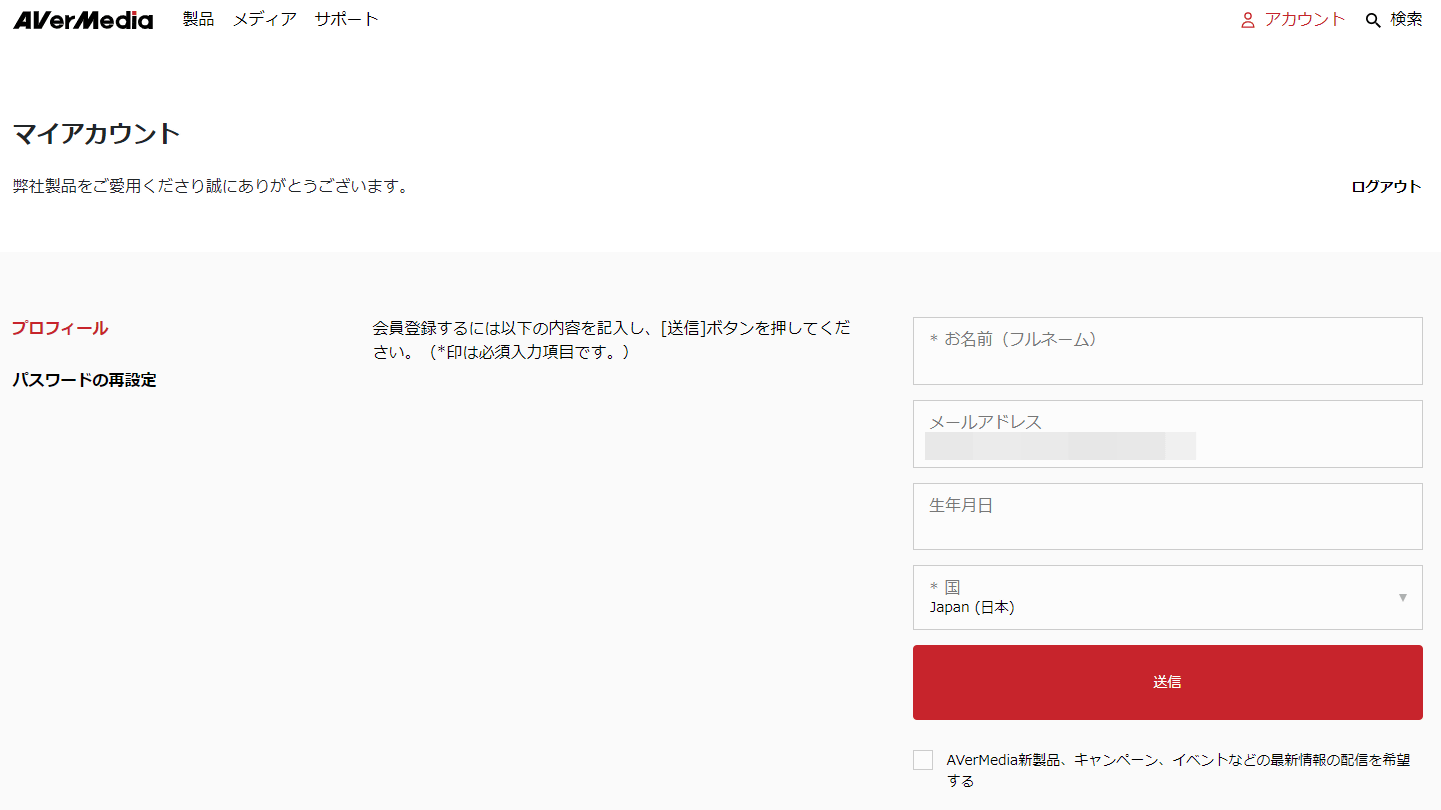
Once you have registered, you will automatically go to the My Account page, so close the browser and OK.
Return to 'NEXUS', enter the email address and password of the AVerMedia account you just registered and click 'Login'.
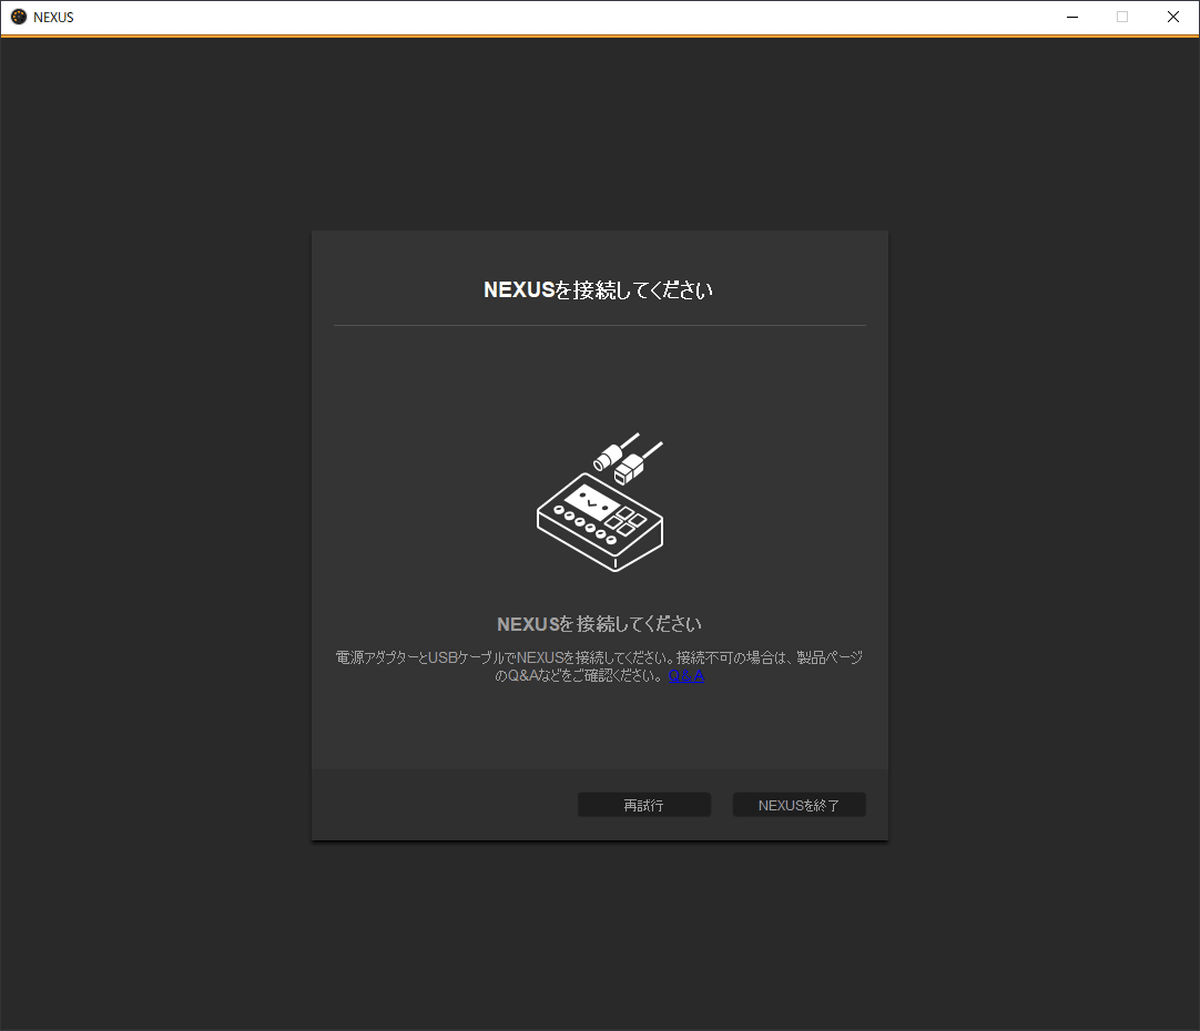
Now 'NEXUS' is waiting for connection with AX310. This is the end of what we can do on the software side, so next we will prepare the AX310.
◆ Connection of AX310 and equipment
We will connect AX310 and various devices. Whether you want to distribute PS5 games, Nintendo Switch games, or PC games or drawings, the connection method changes depending on the case.
First of all, the two terminals from the left side of the back are used to monitor the sound yourself. Basically, I think that there are many cases where headphones or earphones are connected to 'PHONES', but if you are using a highly directional microphone and the sound of the speaker does not become noise, connect the speaker to 'LINE OUT'. It is OK even if it makes a sound.
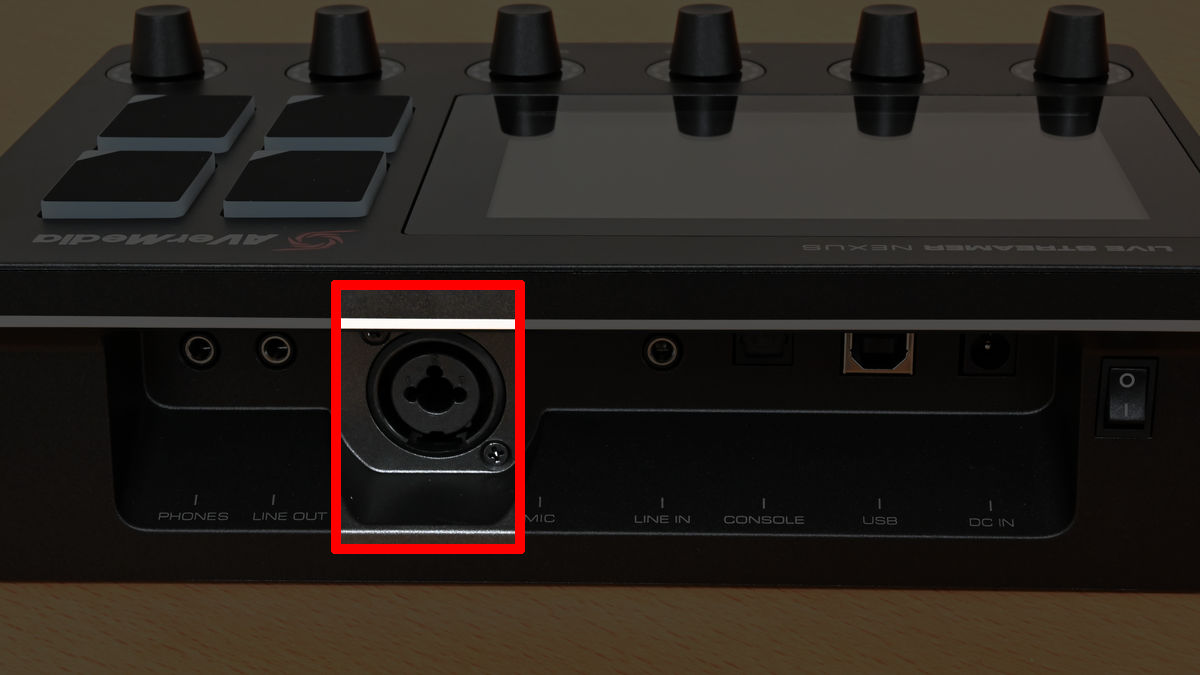
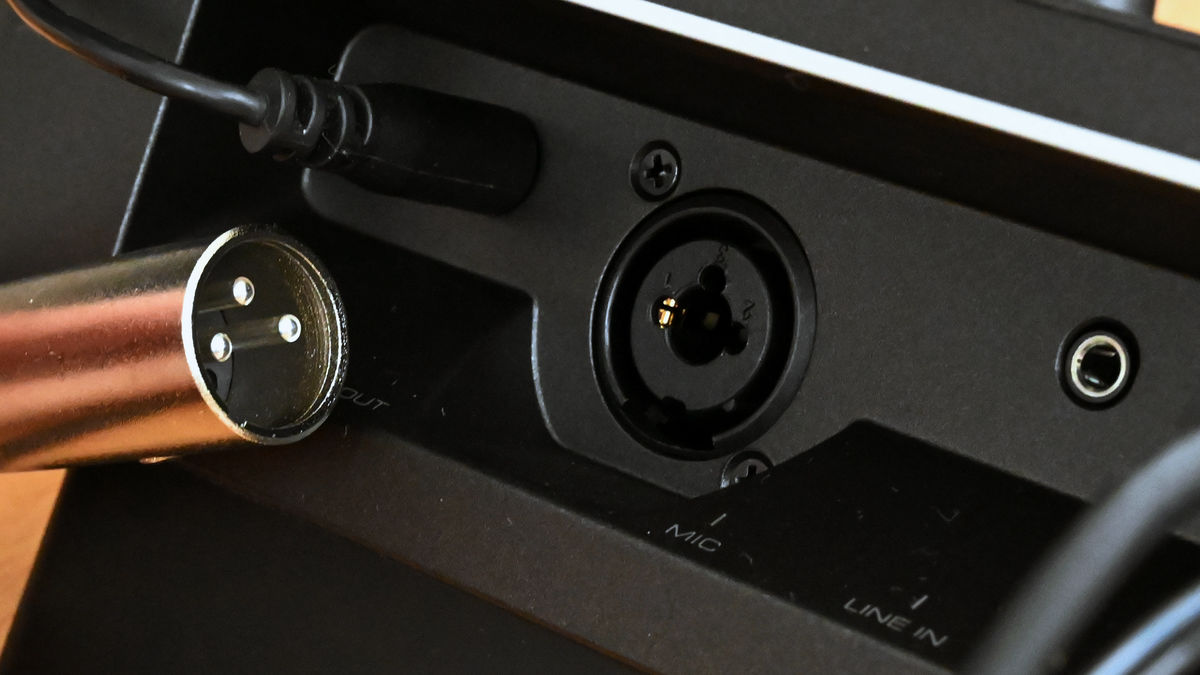
A large hole is a terminal for connecting a microphone. The microphone terminal is characterized by a 6.3mm standard size jack and an
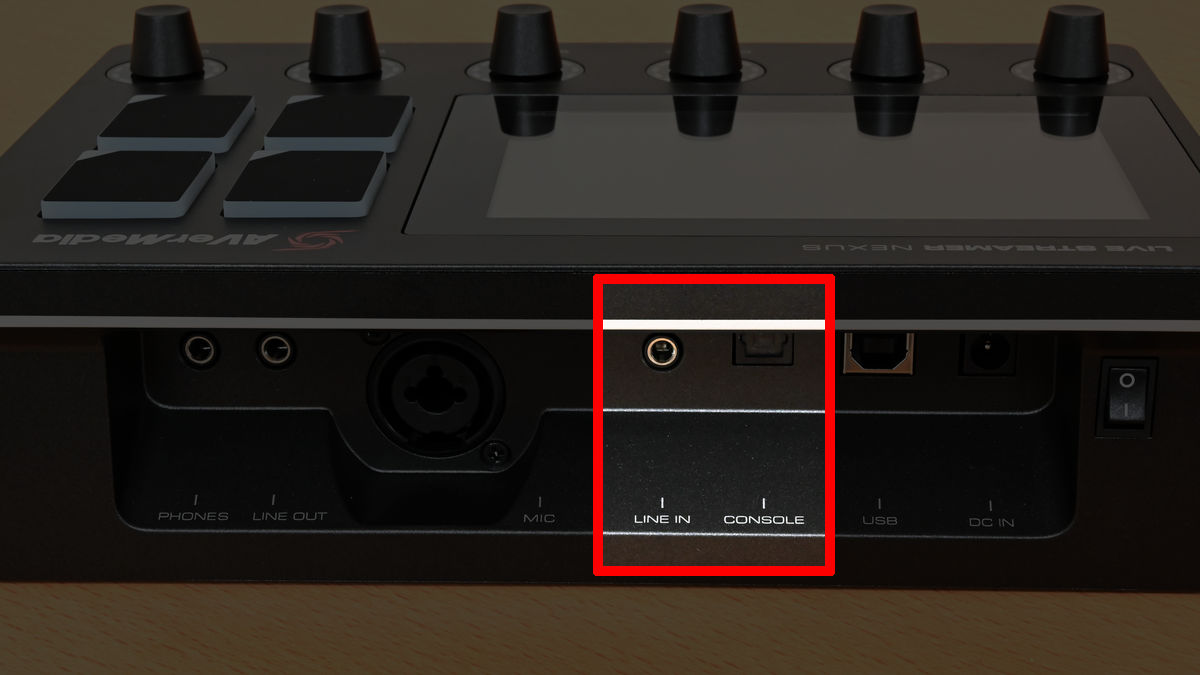
'LINE IN' and 'CONSOLE' connect game consoles and other devices that play the audio you want to distribute. Please output the video of the game machine to the distribution PC via the separately prepared capture device. For audio, for example, Nintendo Switch and audio equipment have a 3.5mm audio jack, so connect with 'LINE IN' with an audio cable. If the PlayStation 4 (excluding CUH-2000, 2100, 2200) and Xbox One can output optical digital audio, connect to 'CONSOLE' with an optical digital cable. In the case of outputting video and audio together with HDMI like PlayStation 5 and Xbox Series X / S, after separating the video and audio with the HDMI audio separator, use the optical digital cable to connect the HDMI audio separator and 'CONSOLE'. Connect.
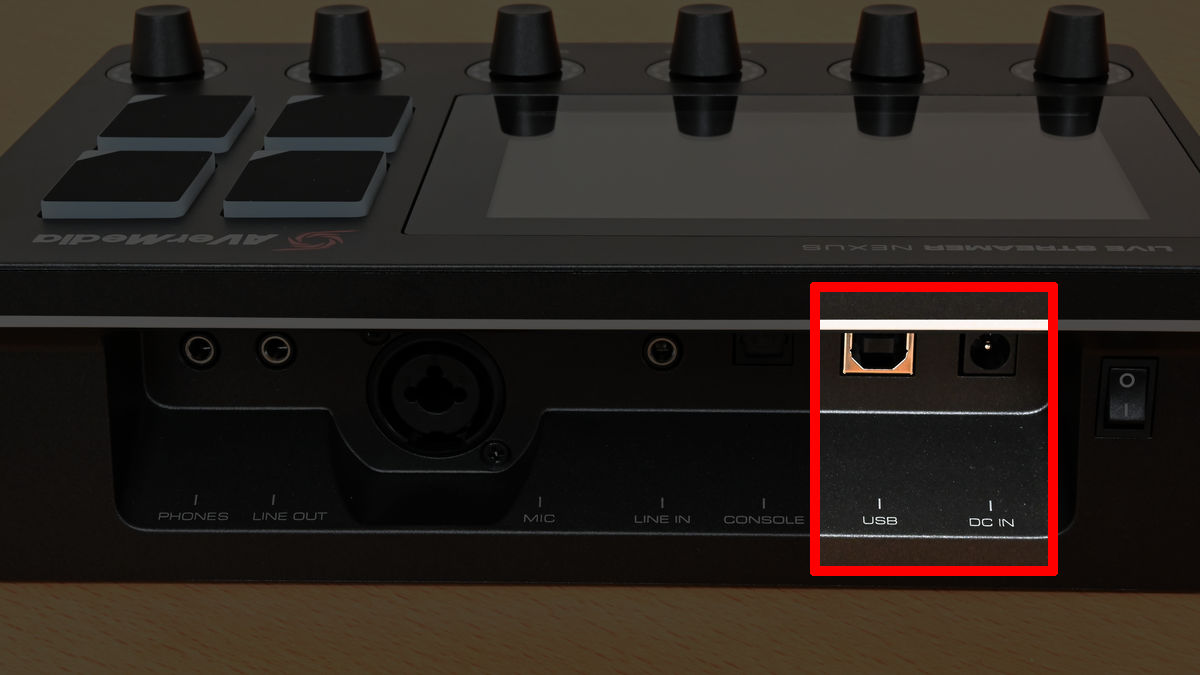
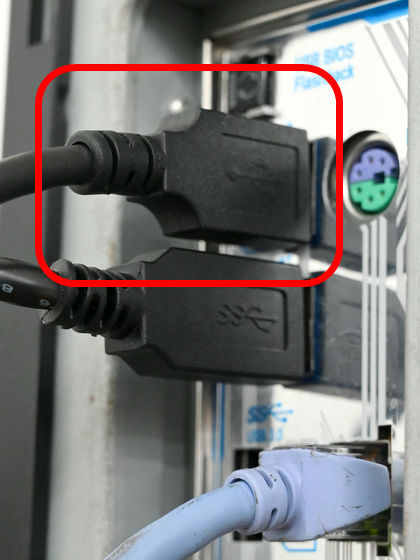
Insert the Type-B side of the included USB cable into 'USB' and connect it to the distribution PC. 'DC IN' connects the power adapter.
If you want to see it with a diagram, or if you want to know what to do when you have a dual PC system of a gaming PC and a distribution PC (PDF file), please refer to pages 8 to 12 of the
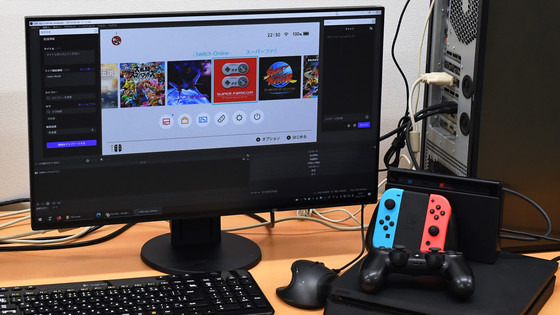
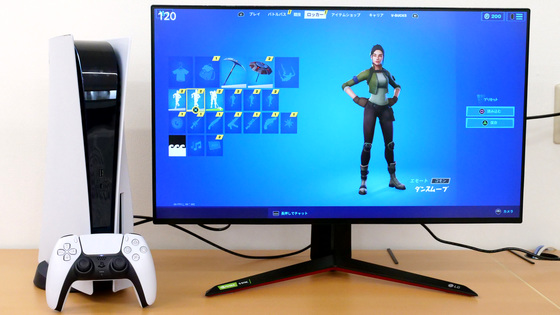
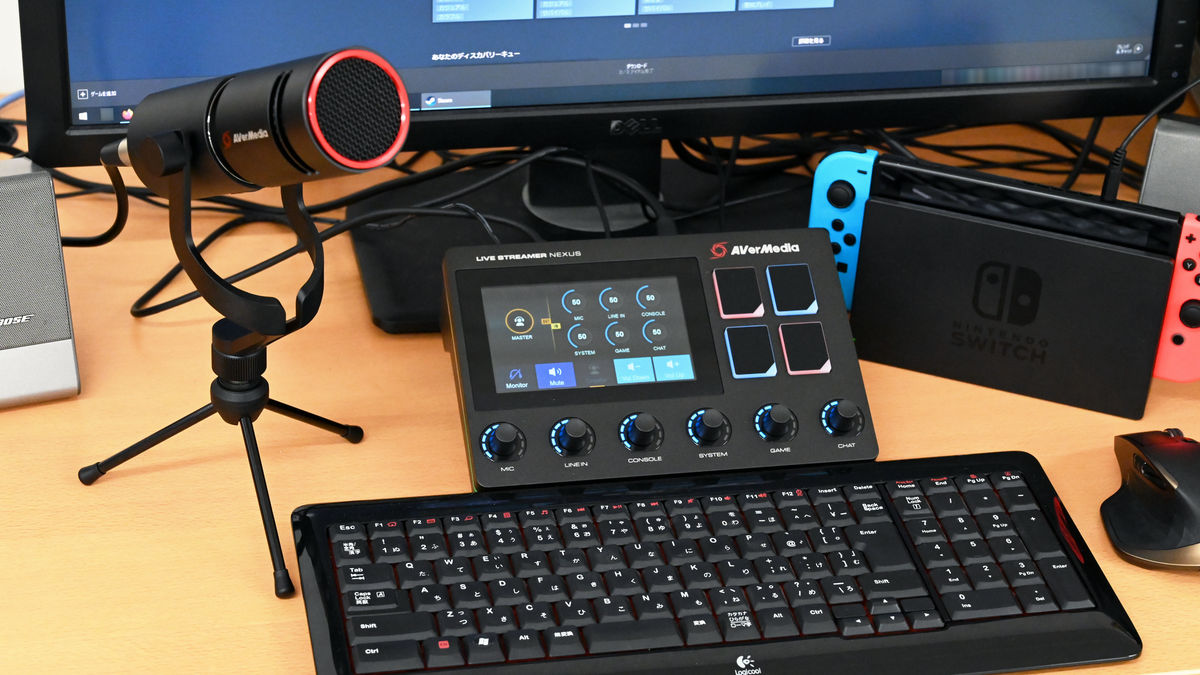
I actually tried to make a configuration assuming 'distribute live game on Nintendo Switch'.
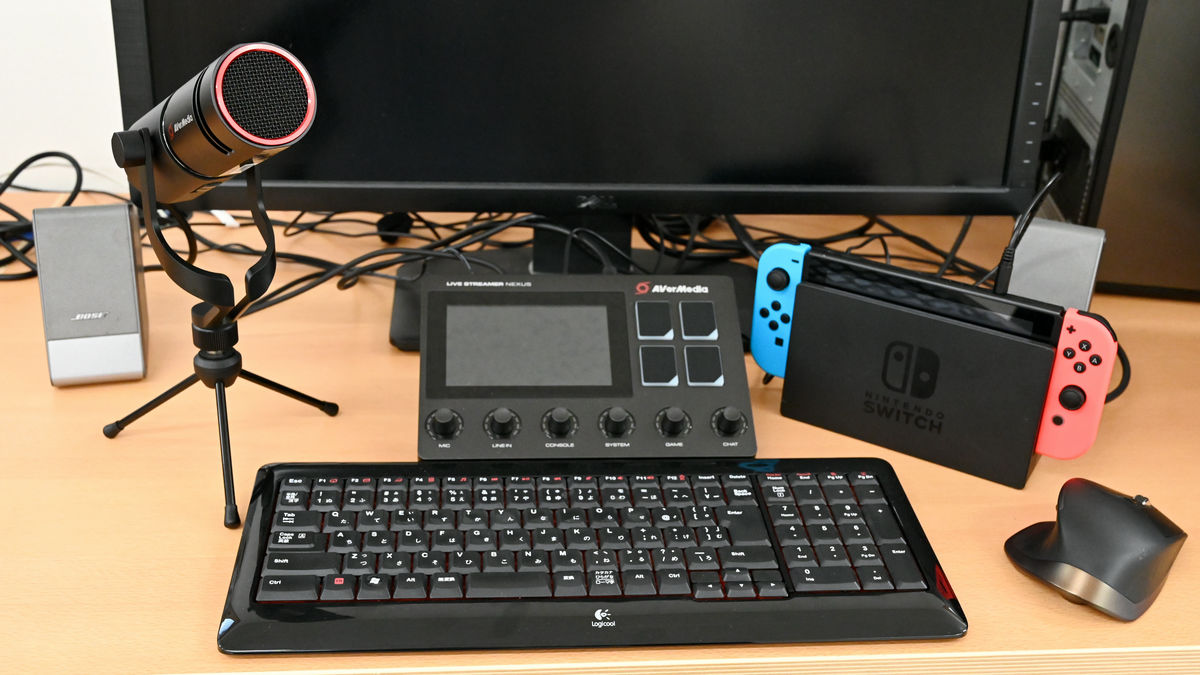
The connection destination of the cable looks like this. It is OK to connect headphones to the PHONES terminal instead of 'speakers', but these five types of connections are the minimum required.

◆ Setting up AX310 and 'NEXUS' - Distributed on RECentral
Insert the plug of the USB cable extended from AX310 into the PC where 'NEXUS' is installed.
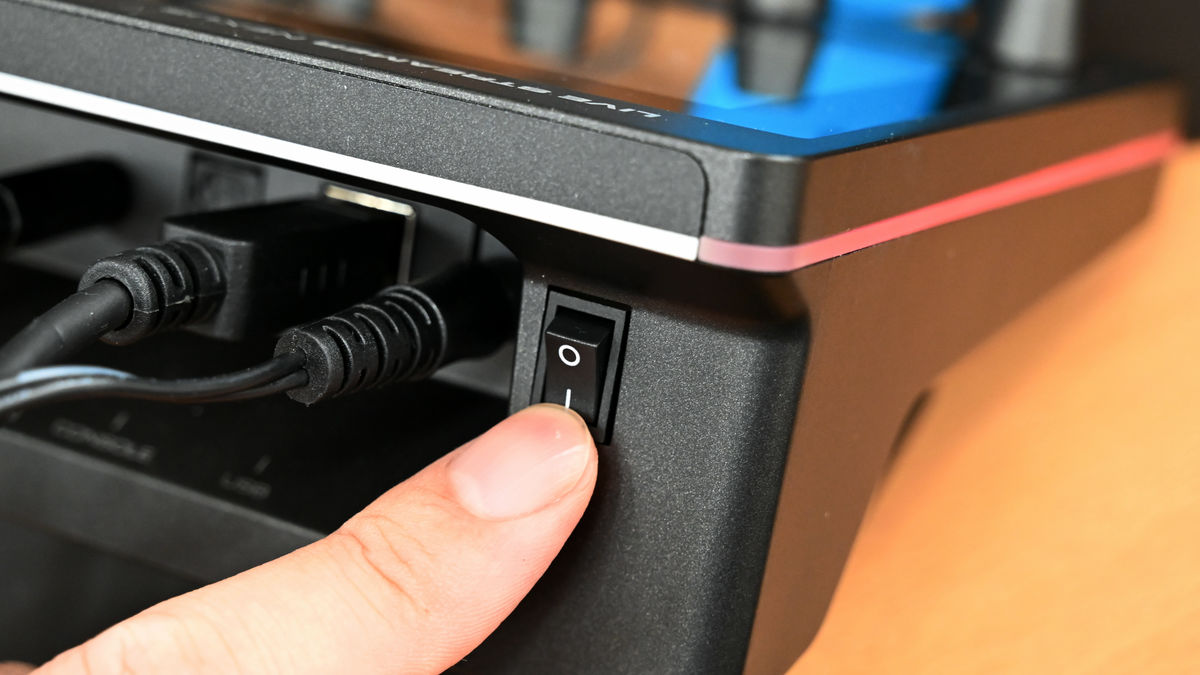
Turn on the AX310 power switch.
Then, the peripheral parts of the main unit, buttons, indicators, etc. will light up, and the AX310 will start up. It's like this when it's a movie shot in a room where the light is turned off so that it's easy to understand.
The PC side was in the state of 'Please connect NEXUS', but when you turn on the power of AX310 ......
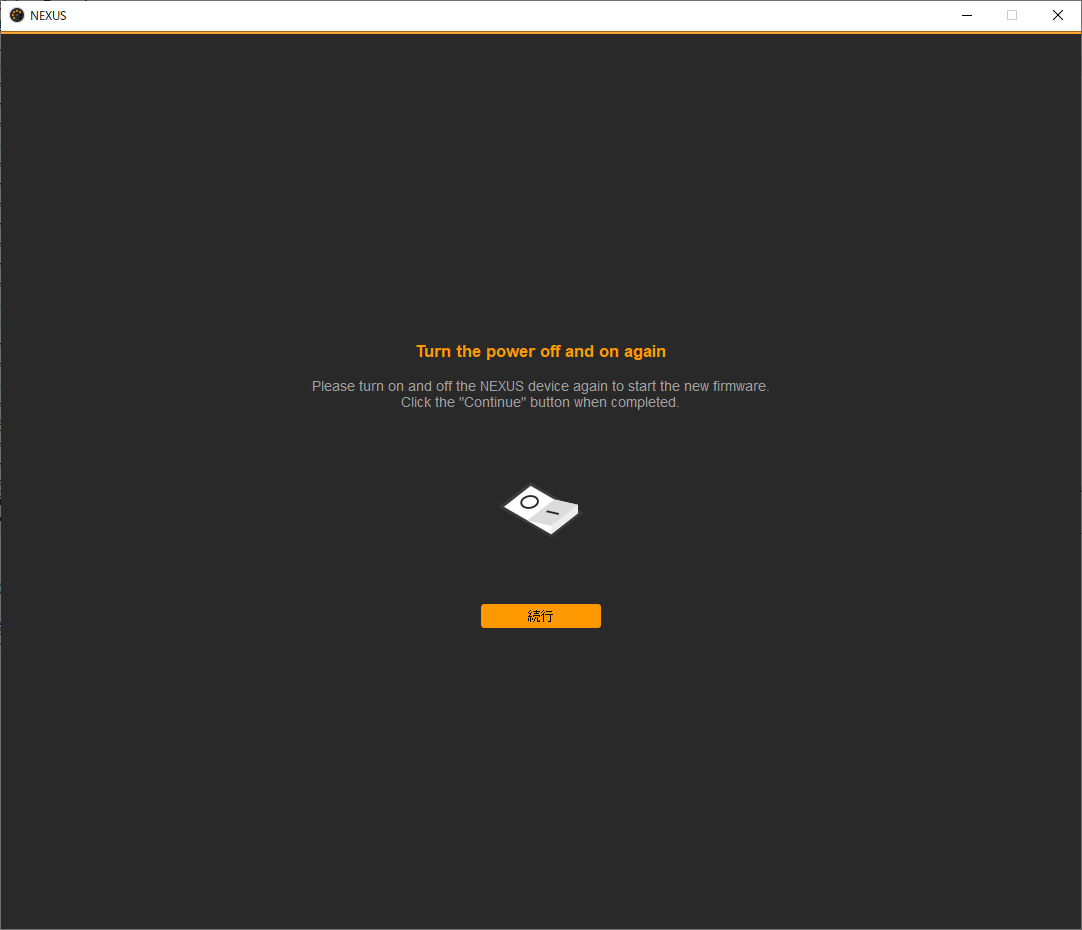
Firmware update has started.

You will be prompted to power cycle, so power off the AX310 and power it back on.
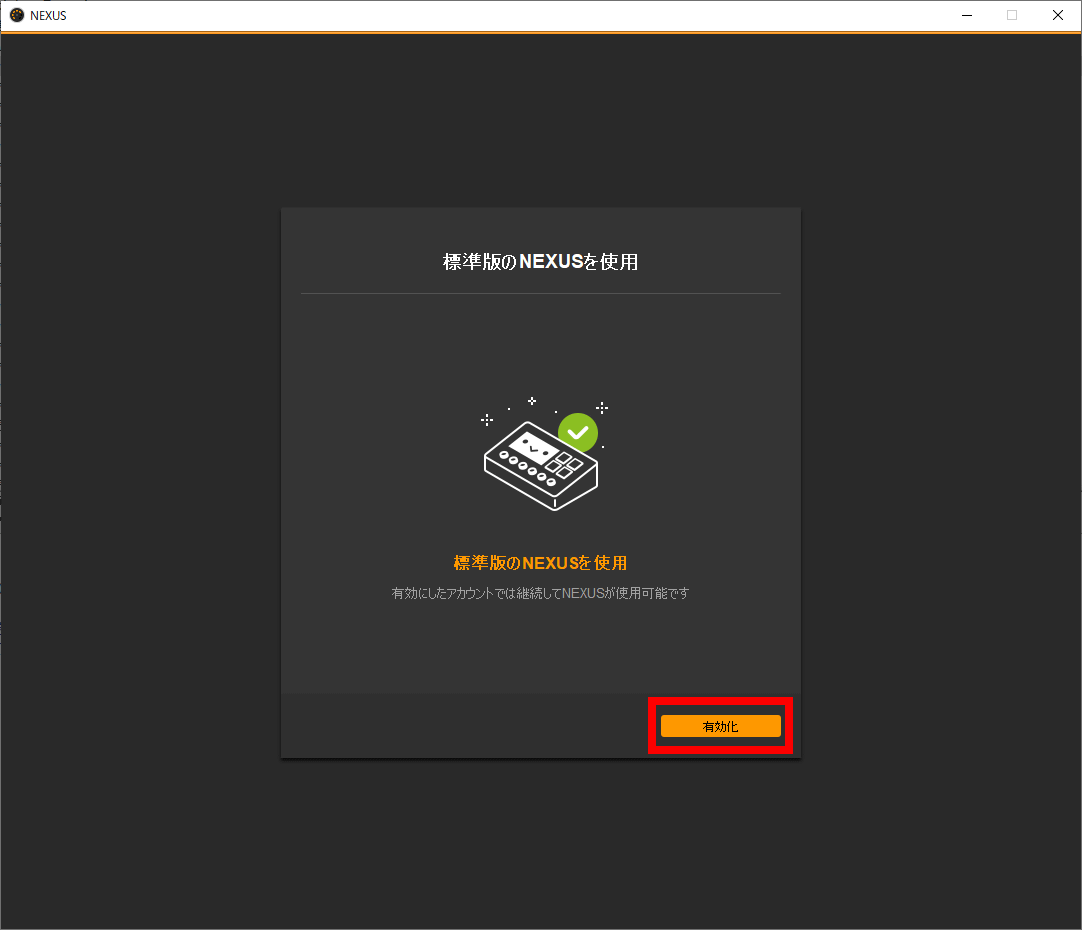
'NEXUS' will be on the screen 'Use standard version of NEXUS', so click 'Activate'.
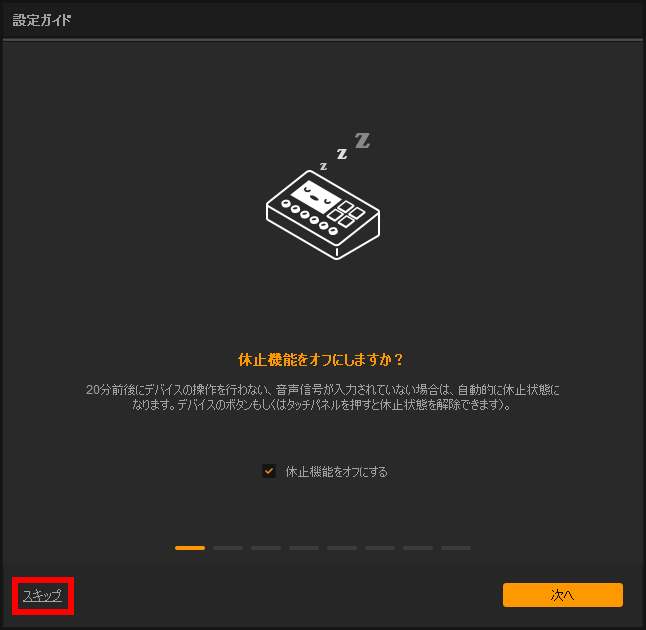
From here, it will be a tutorial-like Tips display, so click 'Skip' at the bottom left to proceed in a short procedure. Tips are not displayed again, but they simply tell you what you can do with the AX310.
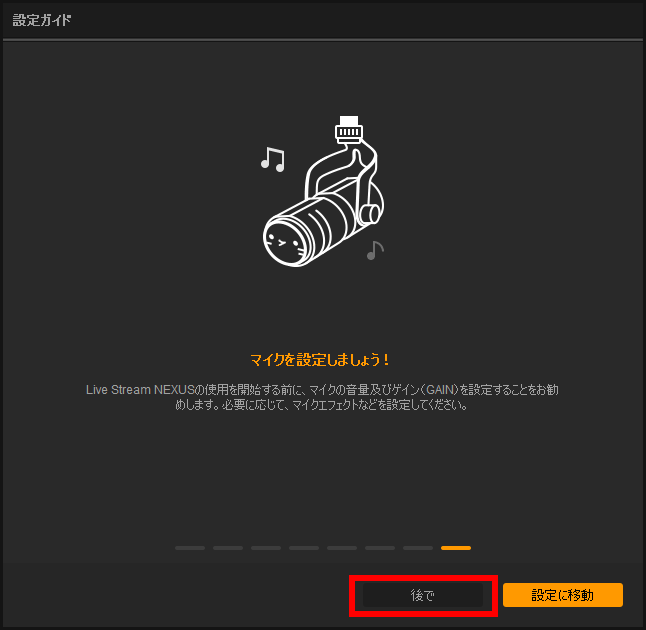
Jump to 'Let's set the microphone!' at the end of the Tips display, so click 'Later'. Volume and gain settings will be done later.
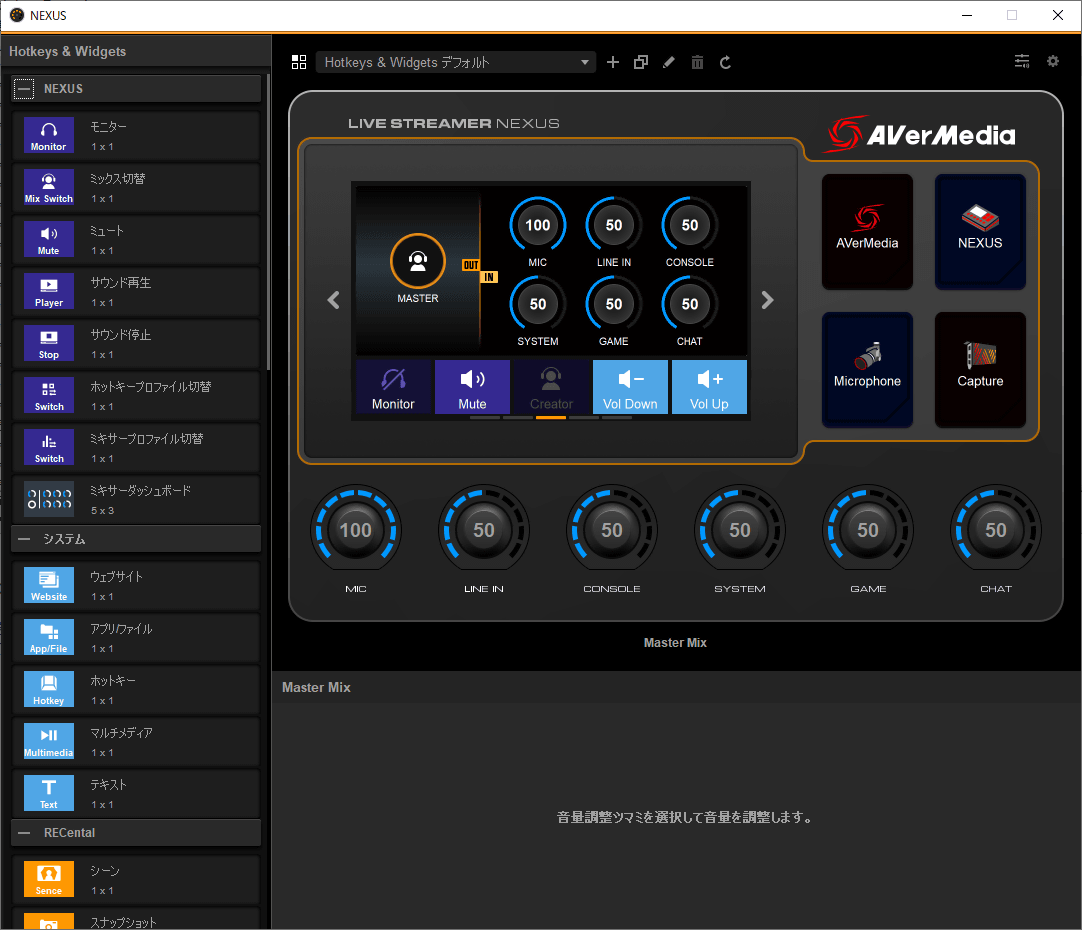
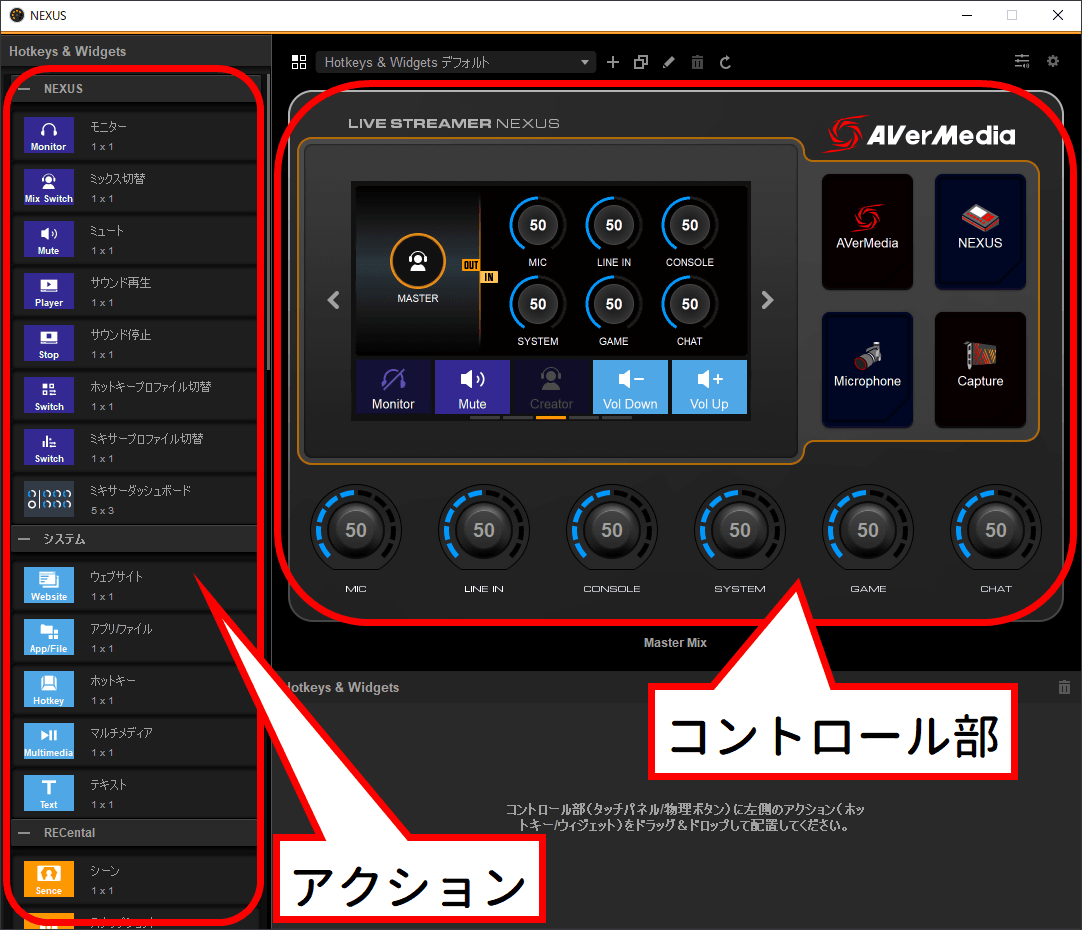
The basic screen of 'NEXUS' looks something like this, the left side is the action list, and the right side is the control part with the same content as the operation panel part of the main unit. Drag and drop icons from the action list on the left to the touch panel part or physical button part on the right to assign functions. The key to making full use of the AX310 is figuring out how to arrange the functions and where to place them so that they are easy to use. Details will be explained later, so we will proceed with the default settings for now.
The Nintendo Switch used for gameplay has already been connected for distribution. For distribution, use either '
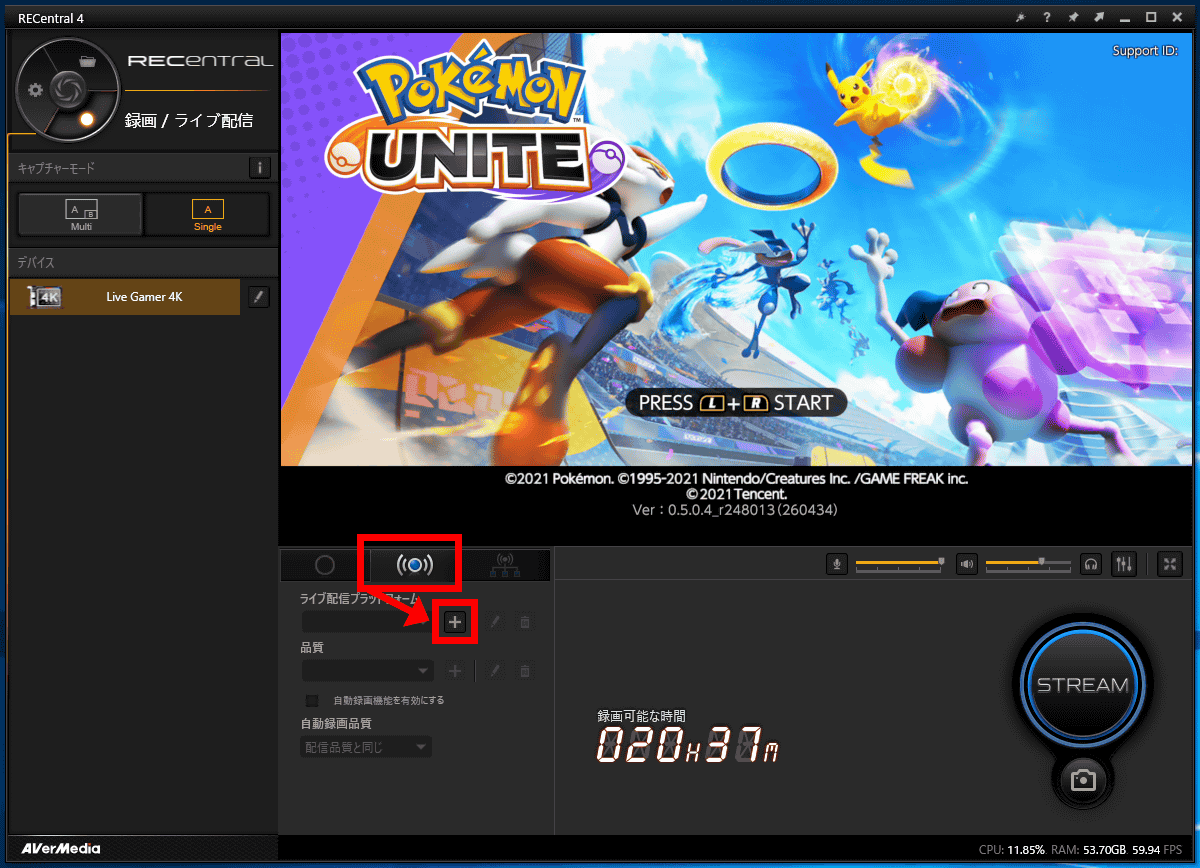
This time, let's set up the delivery with 'RECentral' made by AVerMedia as well as AX310. Start 'RECentral', click the 'Distribution' icon in the bottom menu, and click '+' next to the live distribution platform item.
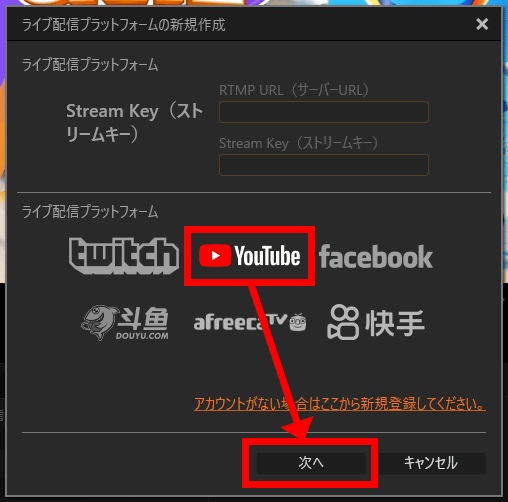
Since the platform setting screen opens, select 'YouTube' and click 'Next'.
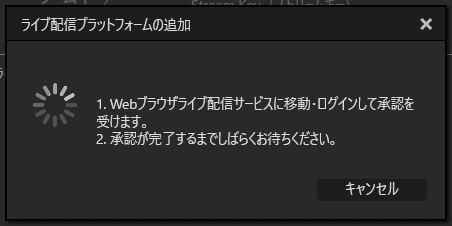
A dialog waiting for approval appears, and a web browser opens automatically.
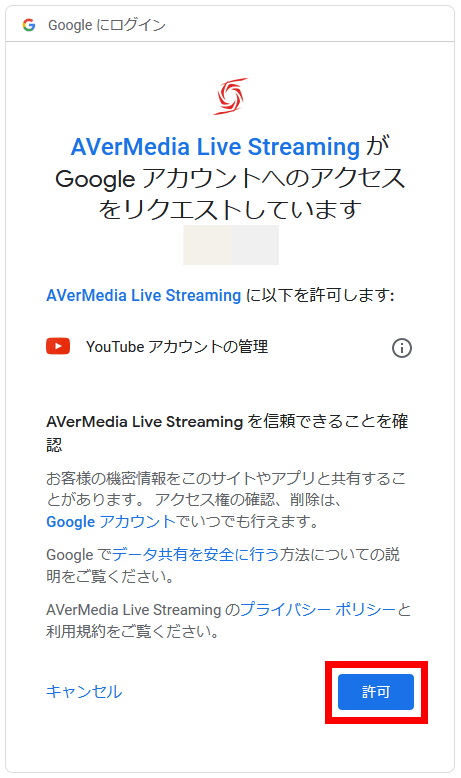
Since it is a YouTube setting, log in to the Google account for YouTube used for distribution and click 'Allow' for the access request.
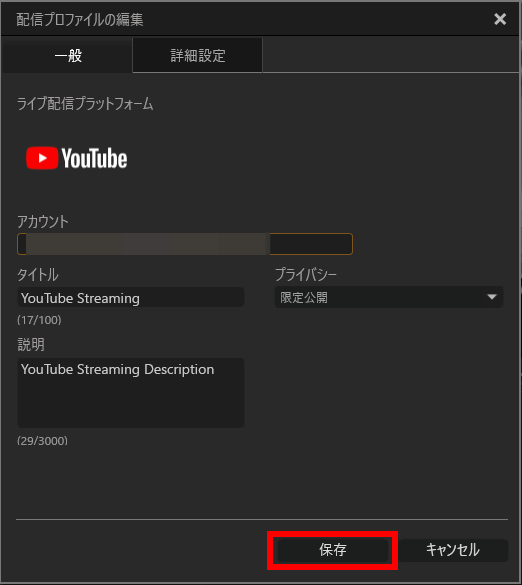
Confirm that the account information is entered in the profile and click 'Save'. In addition, when performing test distribution etc., set the 'Privacy' column to 'Limited' or 'Private'.
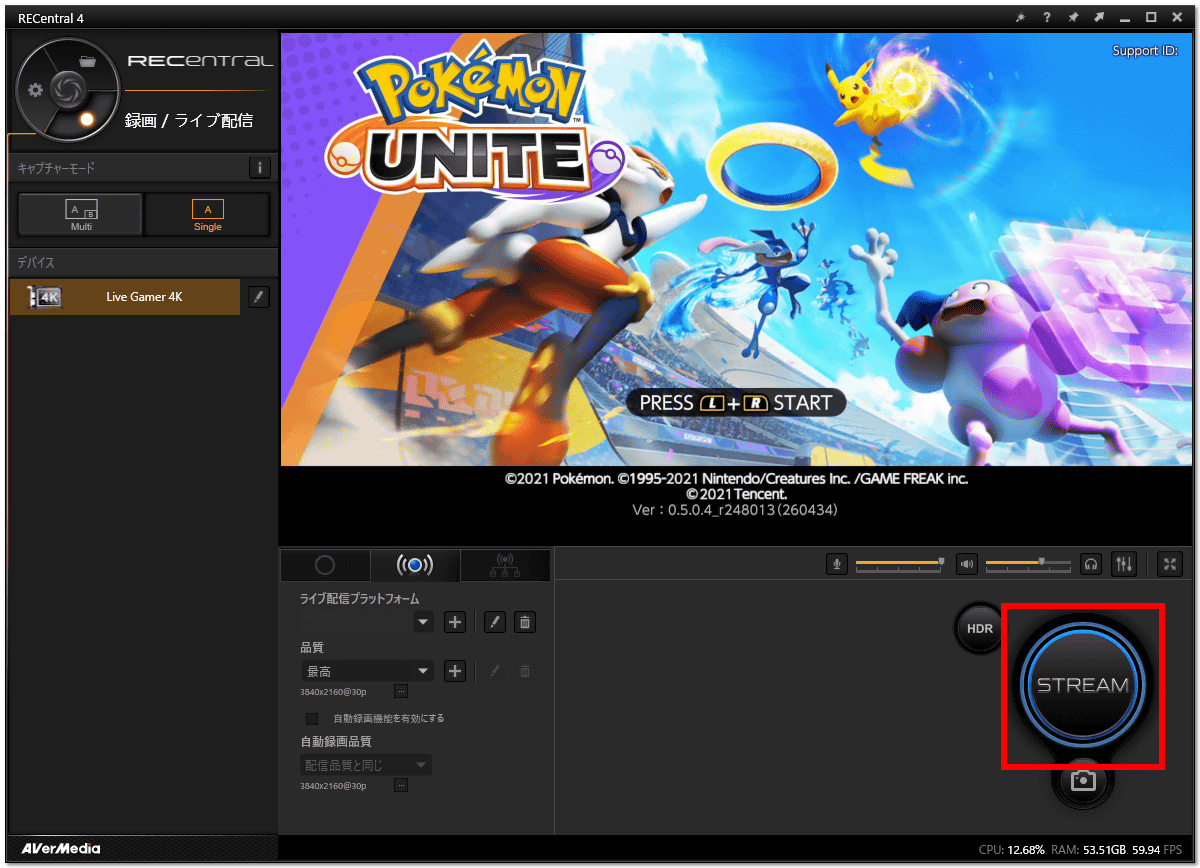
The settings are now complete. After that, if you press 'STREAM', the distribution will start.
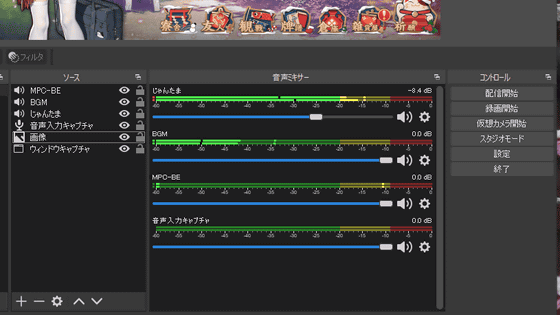
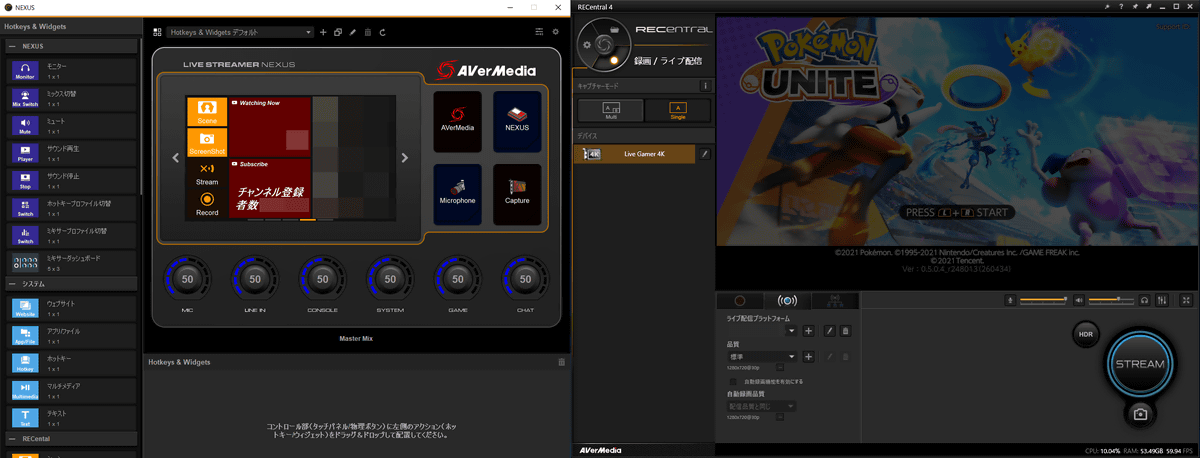
During the broadcast, only RECentral is displayed on the monitor, so there is no opportunity to see the 'NEXUS' screen, but the number of viewers, the number of registrants, and the comment column are reflected almost in real time on the software, just like the AX310. It was done.
With this, 'I can now distribute games using AX310', but various settings are not enabled or are left as default, so if you really distribute as it is, the precious AX310 will become a treasure. It will be spoiled. From here on, in order to make it possible to deliver comfortably, you will try out what kind of settings are suitable for you.
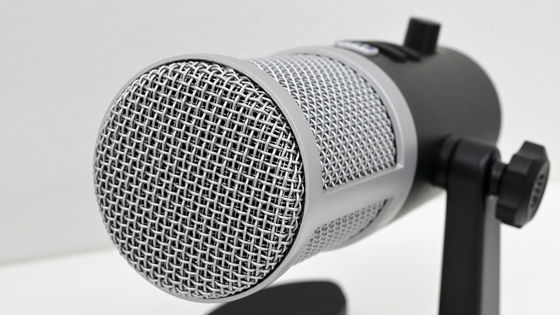
◆ Live Streamer MIC 330 (AM330) Opening & Appearance
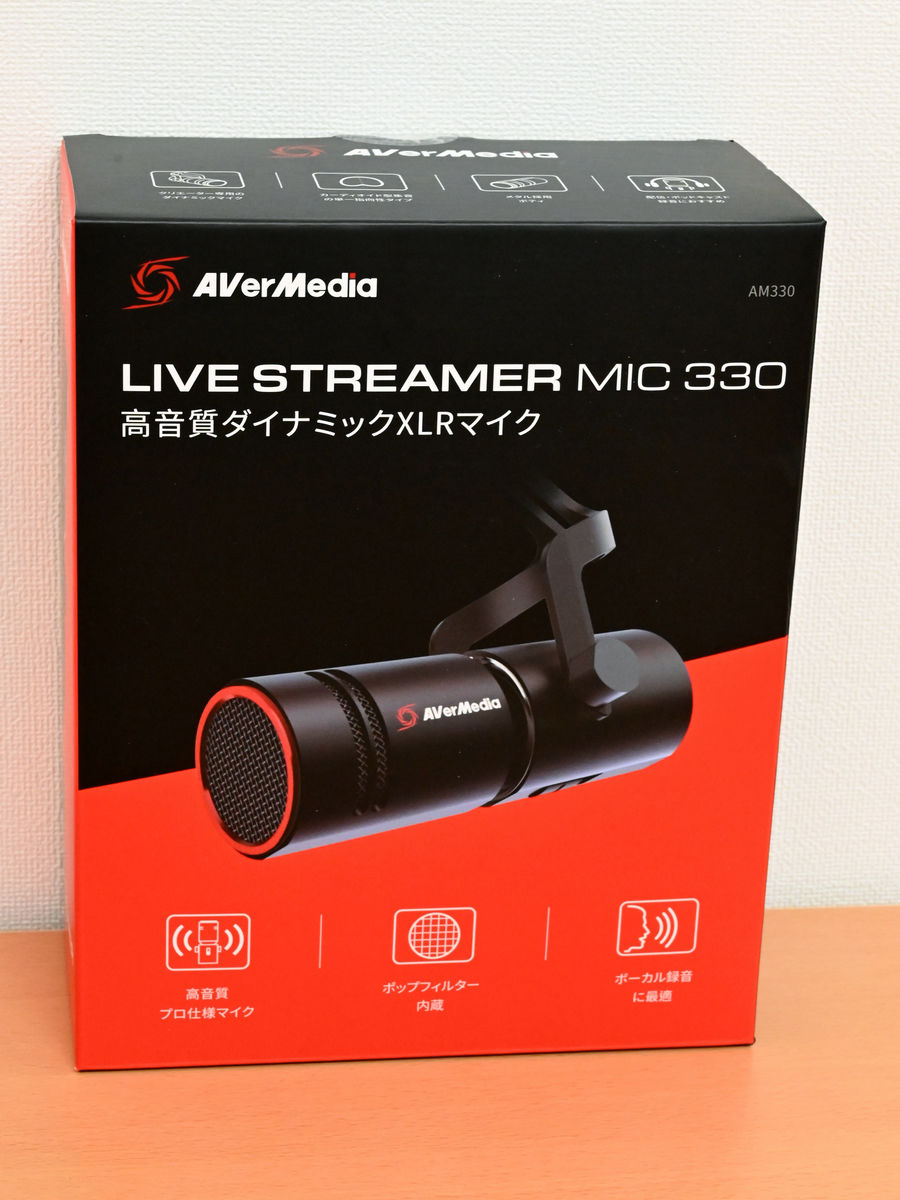
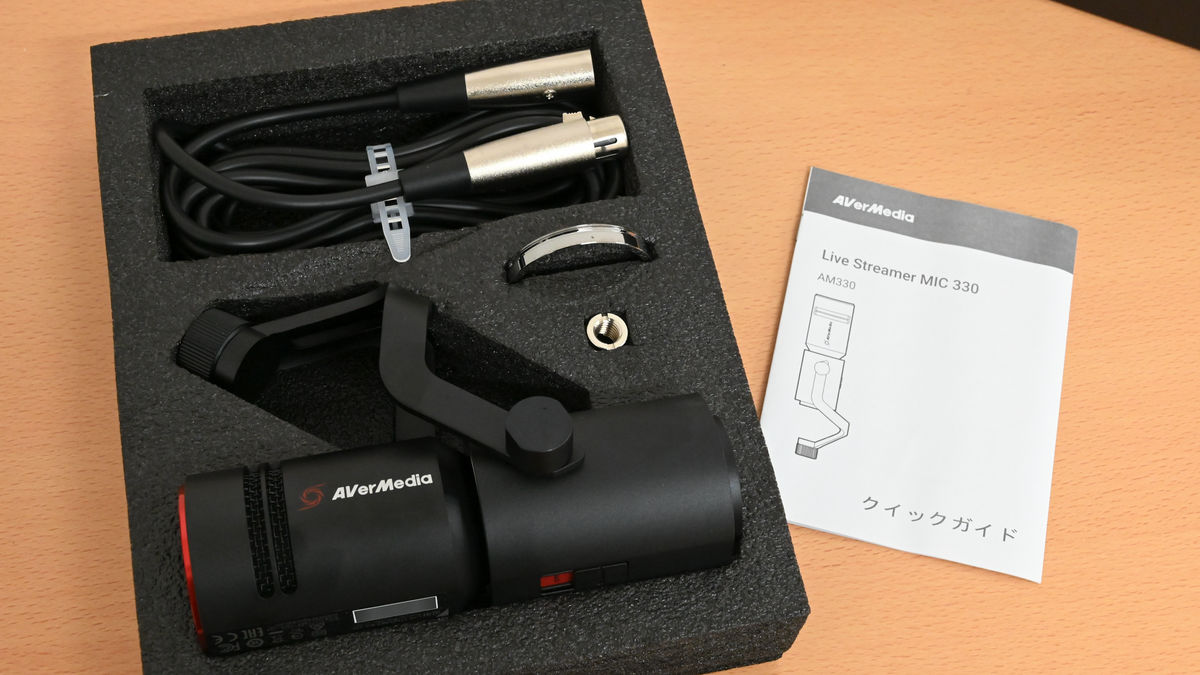
First of all, this AX310 allows Canon adapter (XLR) connection. It is possible to simply increase the sound quality with physical power. So I decided to use AVerMedia's unidirectional dynamic microphone 'Live Streamer MIC 330 (AM330)'. The outer box looks something like this, a design common to AX310.
The set of contents was firmly sandwiched with cushioning material. Microphone cable (XLR-F - XLR-M), replacement collar, conversion screw (5/8 inch to 3/8 inch), AM330 main unit, quick guide.
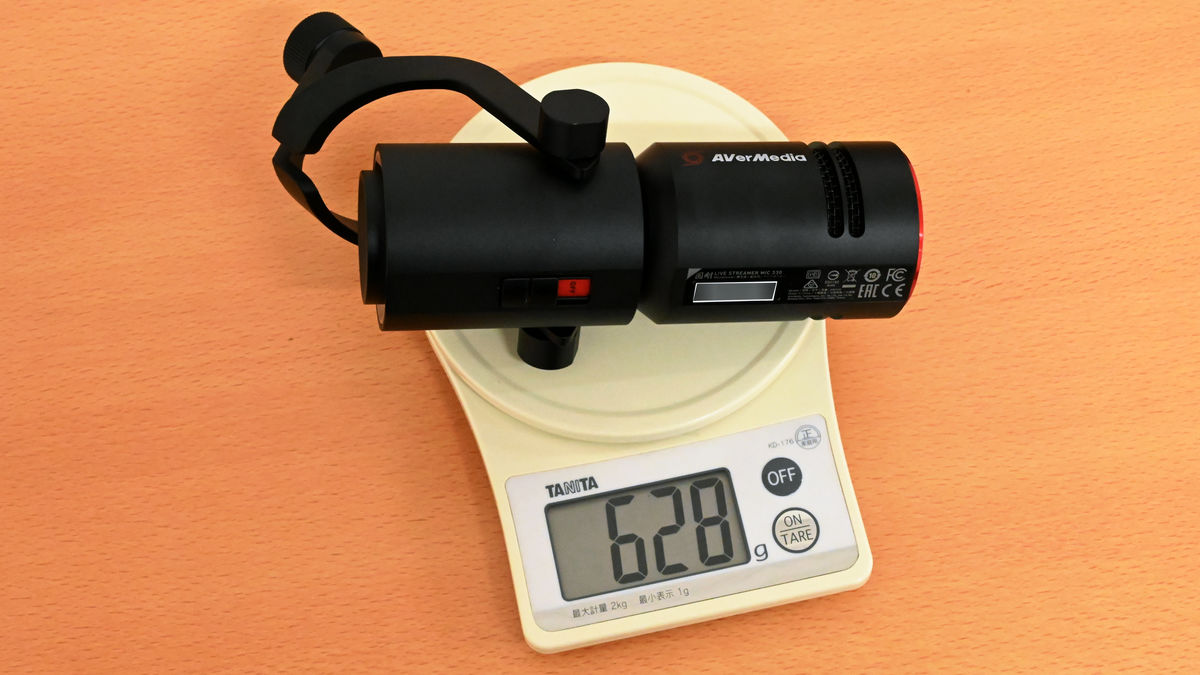
AM330 weighs 628g.
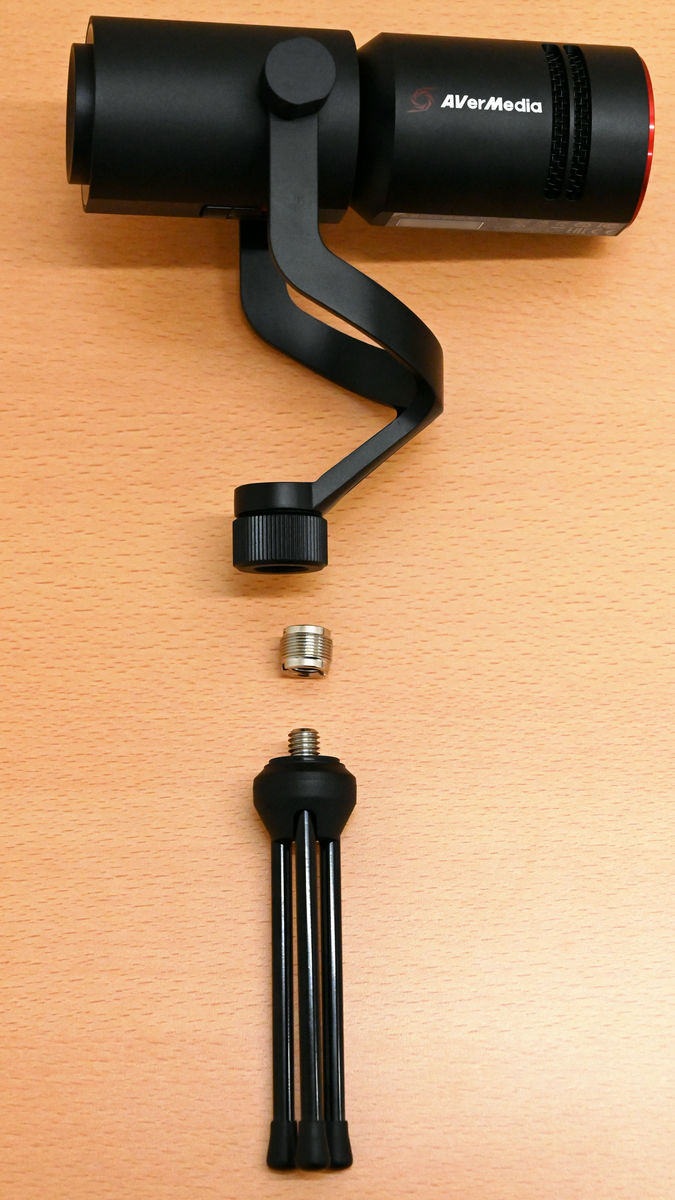
Since it is not a self-supporting microphone, a stand or holder must be prepared separately. This time, I decided to use the stand that came with other microphones. The stand was equipped with a 3.5 inch screw similar to a tripod, so I used the conversion screw included with the AM330.
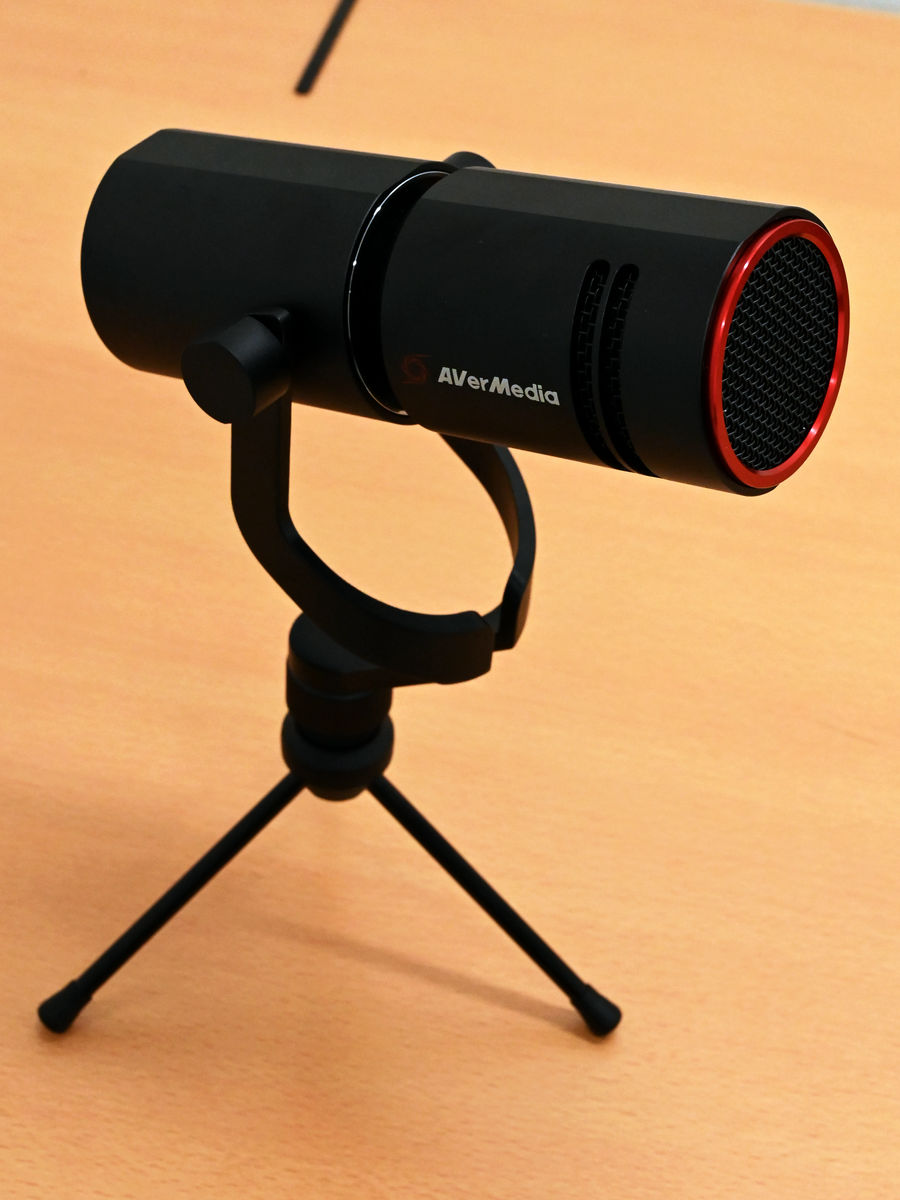
It was a rather thin mic stand, so it was a little uneasy to try, but it was stable and stood on its own. The bracket on the AM330 side may be working well.
So, connect the XLR-F side of the cable to the XLR terminal on the rear side of AM330.

Then connect the XLR-M side of the cable to the XLR terminal of the AX310. The microphone is now ready.
◆ 'NEXUS' Settings/Hotkeys & Widgets
In 'NEXUS', we will set the action when the AX310 operation panel (touch panel and physical button) is pressed. The default screen is like this, with a list of actions on the left and a control section on the right that mimics the AX310.
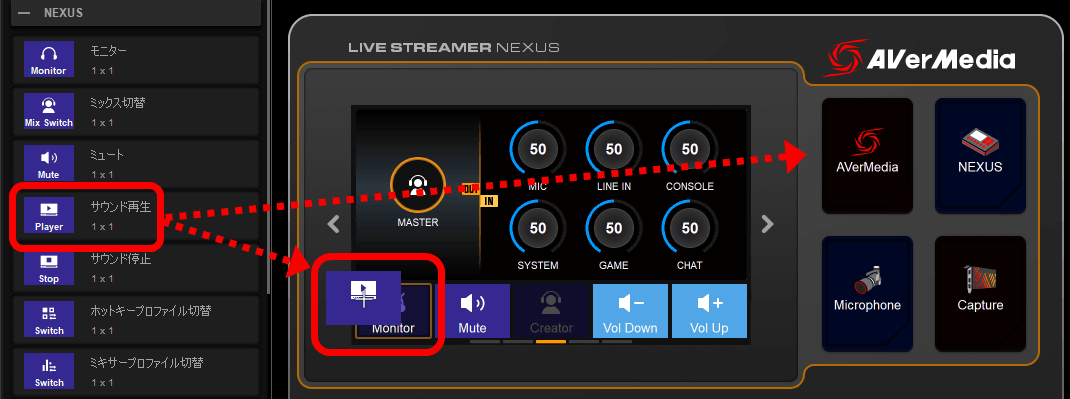
In this state, you can add or replace functions by dragging and dropping actions and widgets on the left onto the touch panel and physical buttons of the control section.
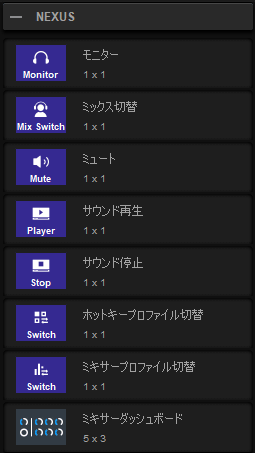
More than 40 types of actions and widgets are provided by default. First of all, there are eight related to 'NEXUS' operation. 'Monitor' turns the monitor sound ON/OFF. 'Switch Mix' switches between Creator Mix and Audience Mix when using the Dual Mix setting. 'Mute' turns ON/OFF the audio mute of the specified channel or all channels. 'Sound play' and 'Sound stop' play and stop the set sound respectively. 'Hotkey profile switching' switches the created hotkey/widget profile. 'Mixer profile switching' switches the profile of the created mixer (input device and PC channel audio configuration). The 'Mixer Dashboard' shows the current volume status of each channel.
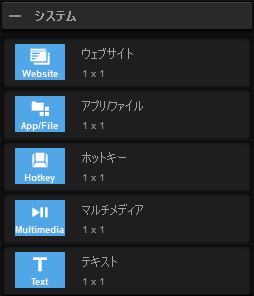
There are five 'system' related. 'Website' opens the specified URL in a web browser. 'App/File' opens or switches to the specified software or file. 'Hot key' executes (starts) the specified key combination. 'Multimedia' is used to control songs and videos that are being played by the system. The icon is ``play/pause'', but it can be changed to ``play/pause'', ``stop'', ``previous song/next song'', ``mute/unmute'', ``volume up'', and ``volume down''. And 'Text' pastes the specified text (fixed form).
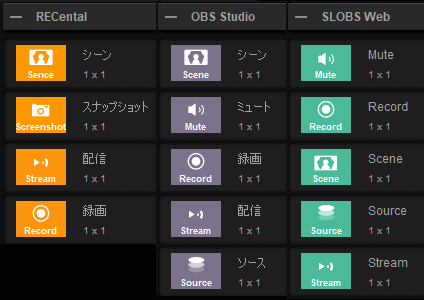
Hotkeys are also available for linking with distribution/recording software 'RECentral', 'OBS Studio', and 'SLOBS Web (Streamlabs OBS)'. 'Scene' is for switching scenes with the specified scene collection, 'Snapshot' is for screen shooting, 'Mute' is for mute ON/OFF of the specified audio device, and 'Record' is for recording. Start/stop, 'Stream' to start/stop delivery, 'Source' to switch the specified source.
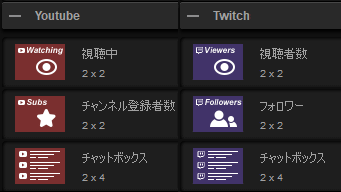
Widgets for the distribution services 'YouTube' and 'Twitch' can be used to display the number of people watching, the number of registrants/followers, and the comment field.
When I checked the actual appearance of the widget, it looks like this. What is displayed on the right side is the YouTube comment field, which could display about 15 lines vertically and about 20 full-width characters horizontally.

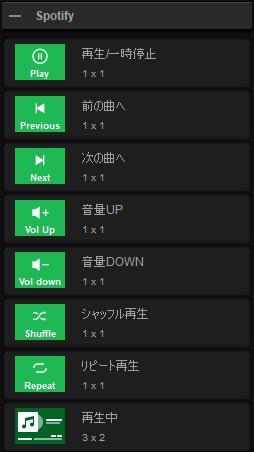
Furthermore, for 'Spotify', hotkeys that can perform various operations and widgets that display the name of the song being played, artist information, jacket image, and playback time are available.
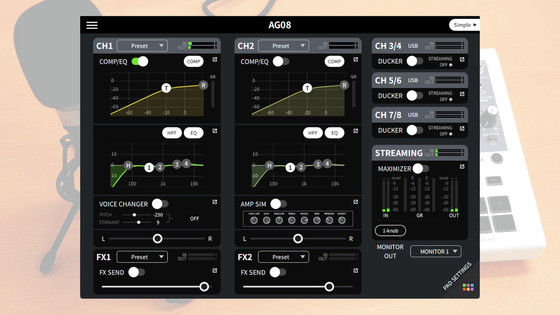
◆ 'NEXUS' Settings / Audio Mixer Edition
When you click around the mixer (the area where six knobs are arranged) in the 'NEXUS' control section, the setting screen for the audio mixer appears, and the hotkeys and widgets that were lined up on the left side are gone, from 'MIC' to 'CHAT' There are 6 types of channel display. Also, if you click the microphone knob, the microphone audio settings will appear at the bottom.

First, check if the type of microphone you are using is properly selected at the bottom 'Type of microphone'. In this case, AM330 is a dynamic type with XLR connection, so this is OK.

Adjust volume and gain here.
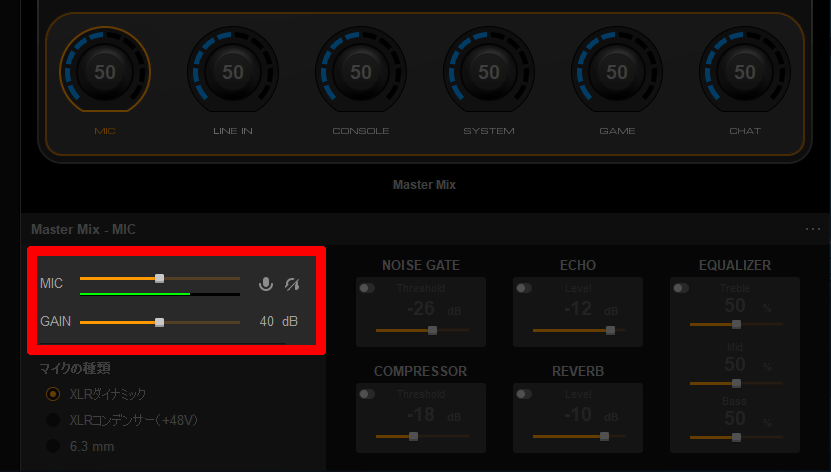
Click '...' at the right end ... ...
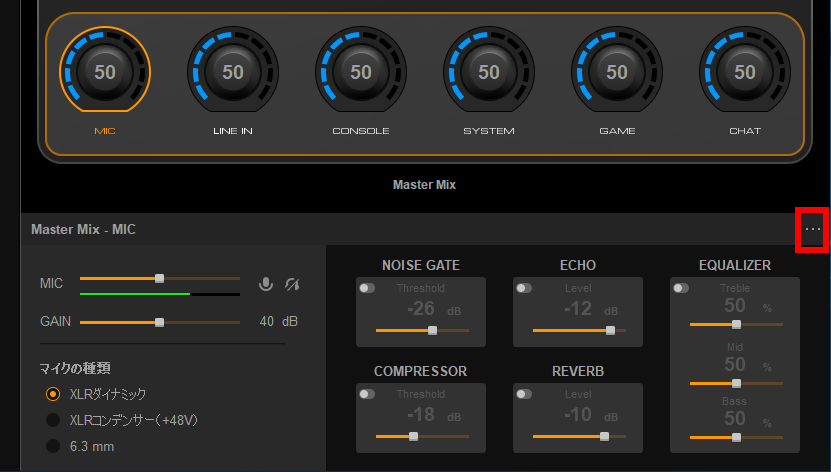
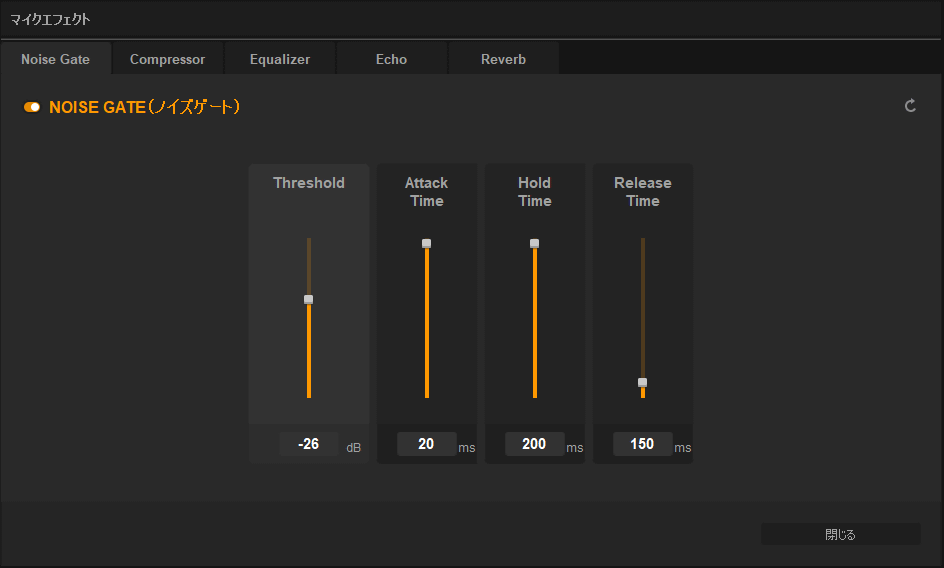
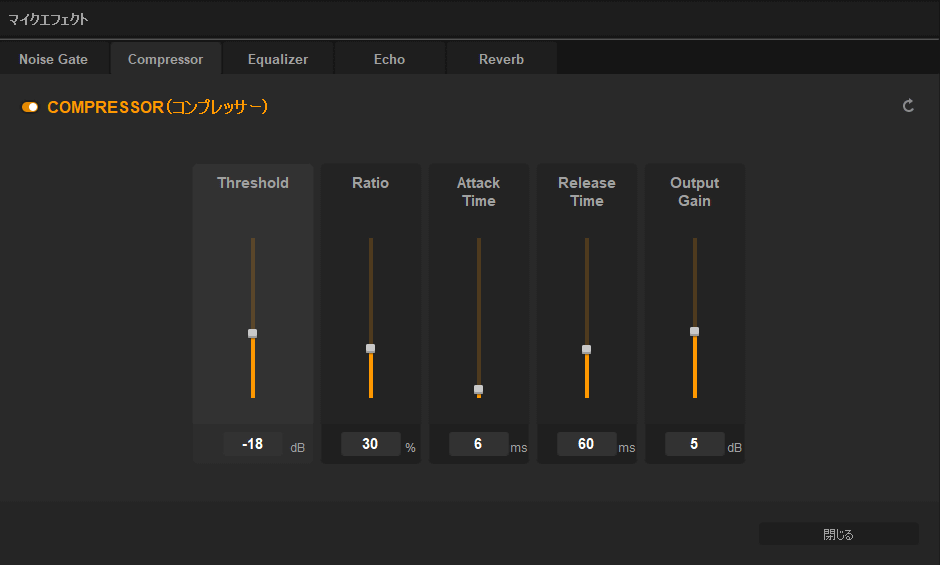
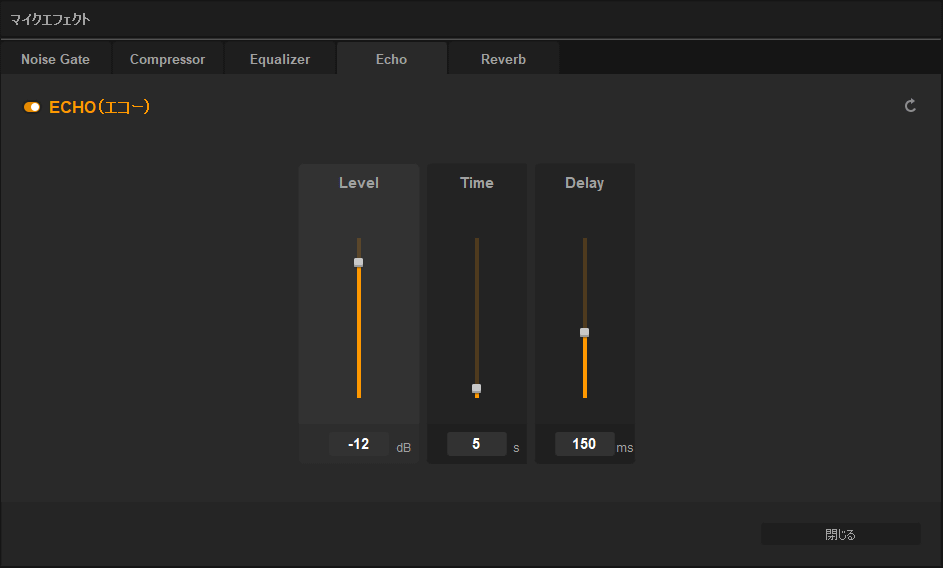
The microphone effect setting screen opens. Here you can set five items: 'Noise Gate', 'Compressor', 'Equalizer', 'Echo', and 'Reverb', each of which can be turned ON/OFF with an independent toggle switch.
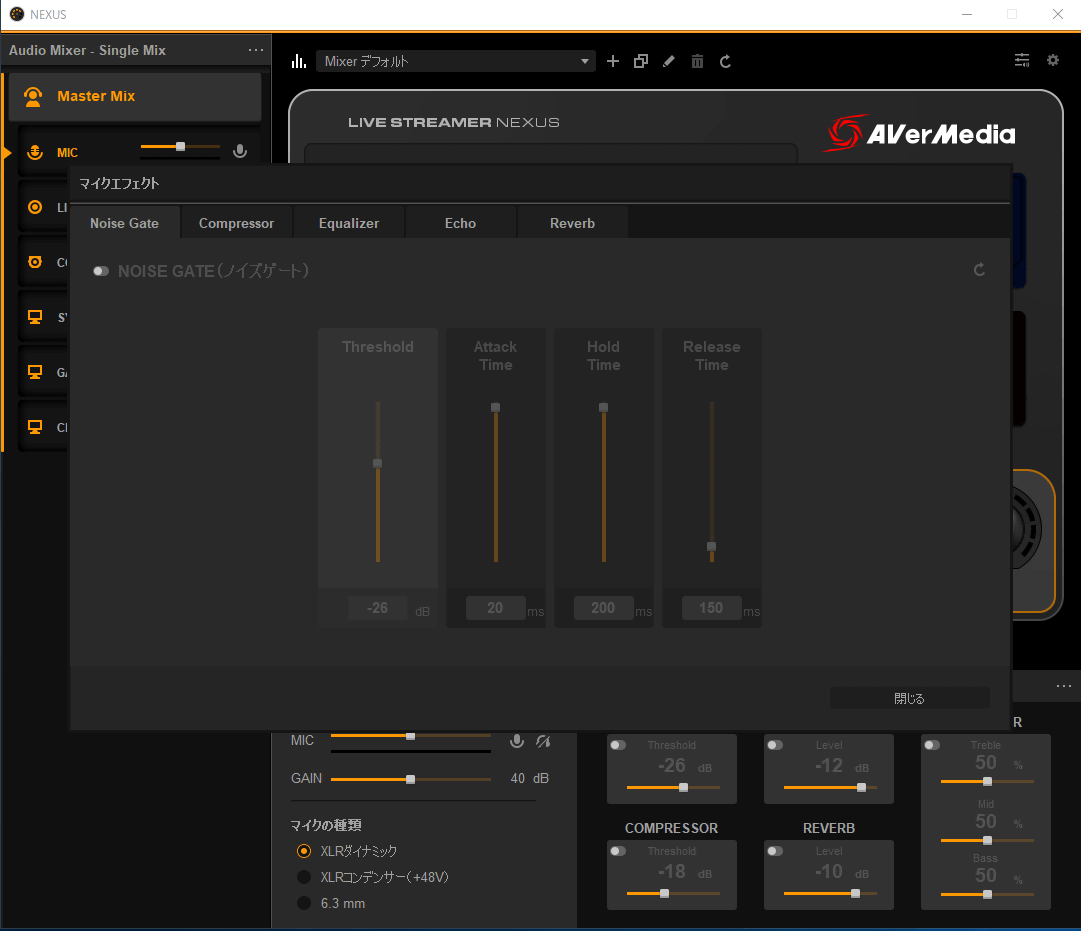
'Noise gate' is a function that cuts out unnecessary noise and sets the gate of the sound. 'Threshold' determines up to which volume level the sound is passed, and below which volume level to cut as noise. 'Attack Time' is the speed at which the gate opens, and determines how fast the fade-in will occur when the sound exceeds the level set by Threshold. 'Hold Time' is a setting for how long the gate is kept open when a sound that crosses the gate is heard. 'Release Time' is the opposite of Attack Time, setting the speed at which the gate closes. You can decide how fast to fade out when the sound falls below the level set by Threshold.
'Compressor' evens out the overall volume level. It should be useful for people who tend to shout when they are excited or surprised. 'Threshold' sets the reference volume level at which the compressor operates. 'Ratio' is a setting for how much to compress for volume level adjustment, and the amount exceeding the Threshold is compressed at the ratio with the original sound based on Ratio. 'Attack Time' is the time from when the input sound exceeds the standard to the start of compression, 'Release Time' is the length of time that the compression is applied, and 'Output Gain' is the amount of volume that will be reduced by compression. This is an adjustment setting for returning.
'Equalizer' cuts or boosts the sound by frequency to 'make sound'.
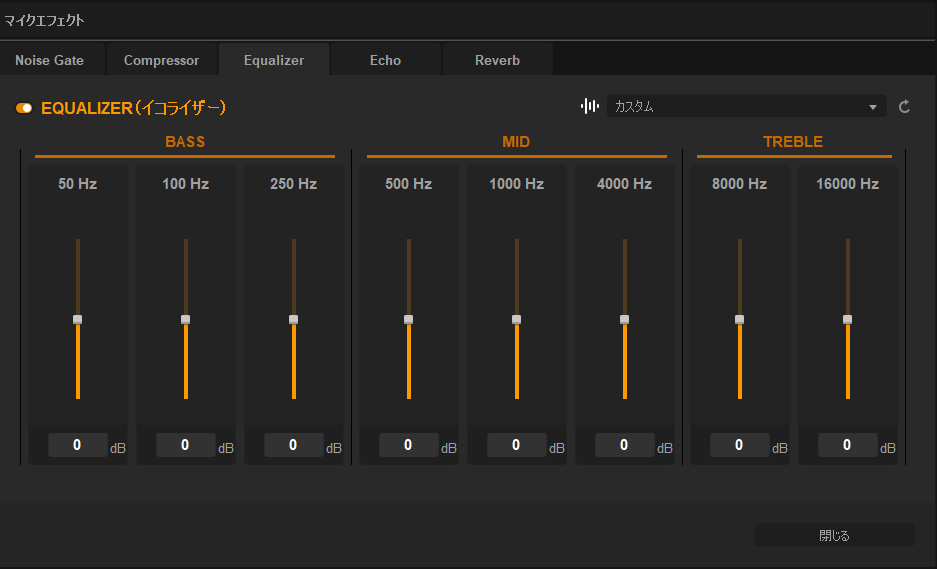
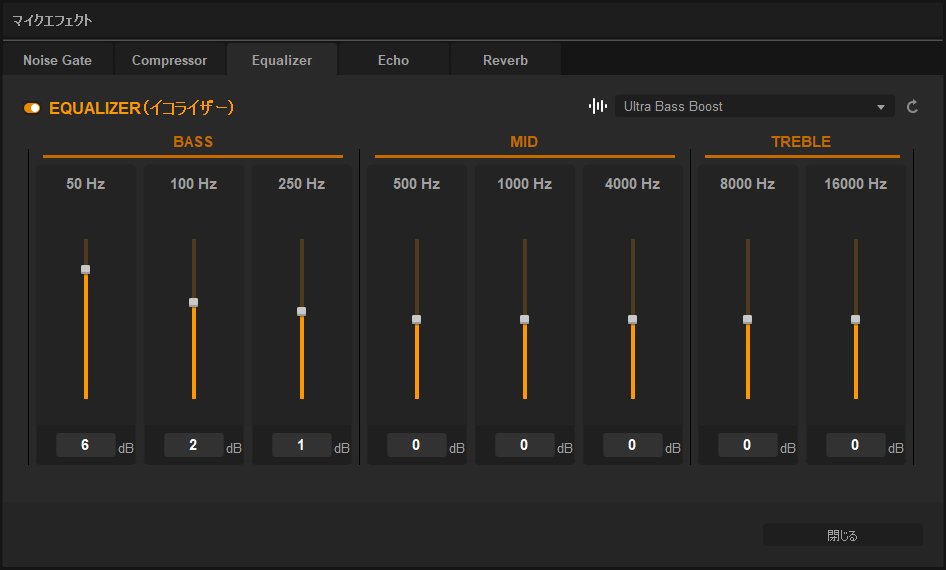
Since some presets are prepared from the beginning ......
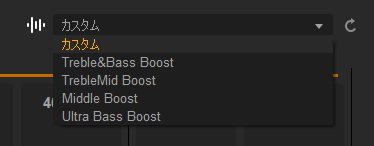
It is also ant to create a favorite sound with reference to this.
'Echo' is an effect that reverberates the sound and creates a spaciousness. We often hear cases where it is used in the title call of a radio-style program or in the decisive line. 'Level' is the volume of the echoes, 'Time' is the length of the echoes, and 'Delay' is the interval between echoes.
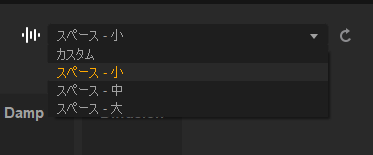
“Reverb” is similar to echo in that it also reverberates, but it is translated as “reverberation” and is the way sound is heard indoors as it bounces off floors, walls, ceilings, etc. 'Level' is the volume, 'Time' is the duration of the reverberation, 'Room Size' is the size of the room that produces the reverberation, 'Damp' is the quality of the reverberation, and 'Diffusion' is the spread of the reverberation.

Like the equalizer, it comes with multiple presets.
So far, all the sound settings have been done in Single Mix mode, where you set the volume of your own audio and the volume of the audio for distribution at the same time, but the AX310 has a Dual Mix mode that allows you to set separate settings for yourself and for distribution.
When in Dual Mix mode, the audio mixer will show “Creator Mix” and “Audience Mix” settings, so you can switch between them to set the appropriate sound. For example, if you are playing sound through a speaker in your environment, you can hear your voice with your own ears without having to listen through the speaker. By doing so, you won't have to hear your own voice coming back.
◆ Checking sound settings ・Software output audio settings
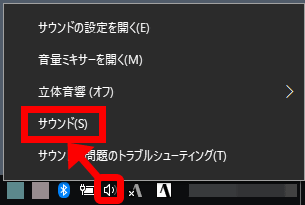
In addition, when setting the sound, it is also necessary to check the settings once away from 'NEXUS'. Right-click the speaker icon in the notification area of the PC and click 'Sound settings'.
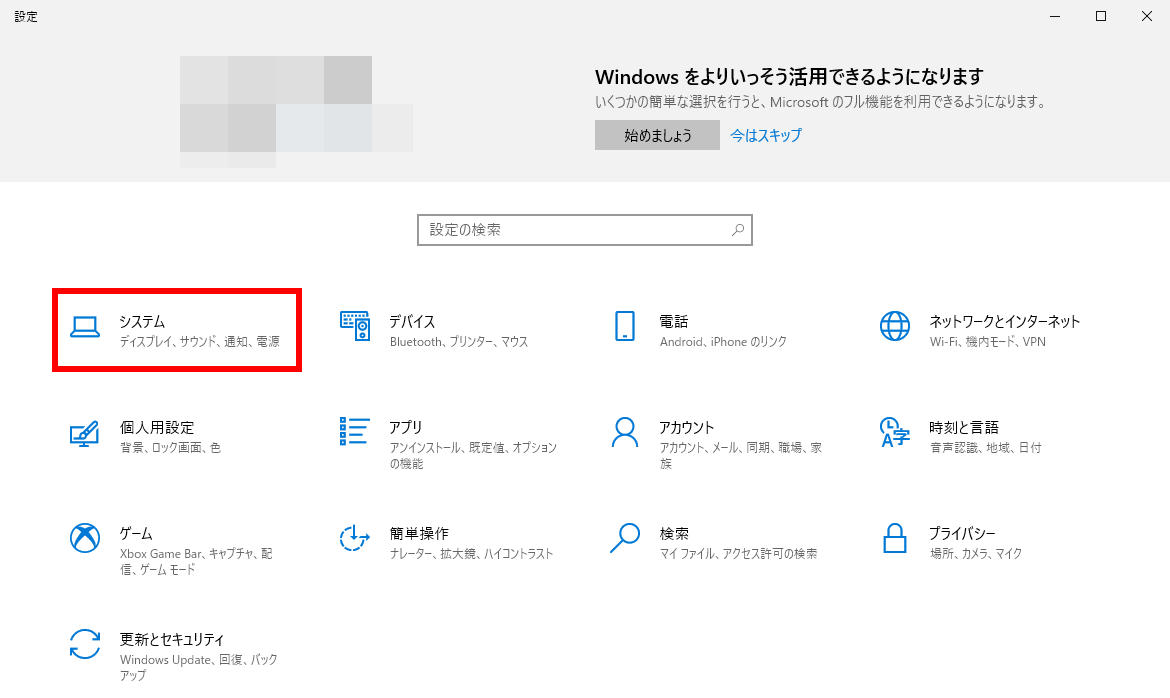
If you can't find the speaker icon or if there is no 'Sound settings' in the right-click menu, click 'Settings' in the start menu ...
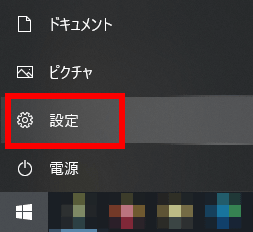
Click 'System'.
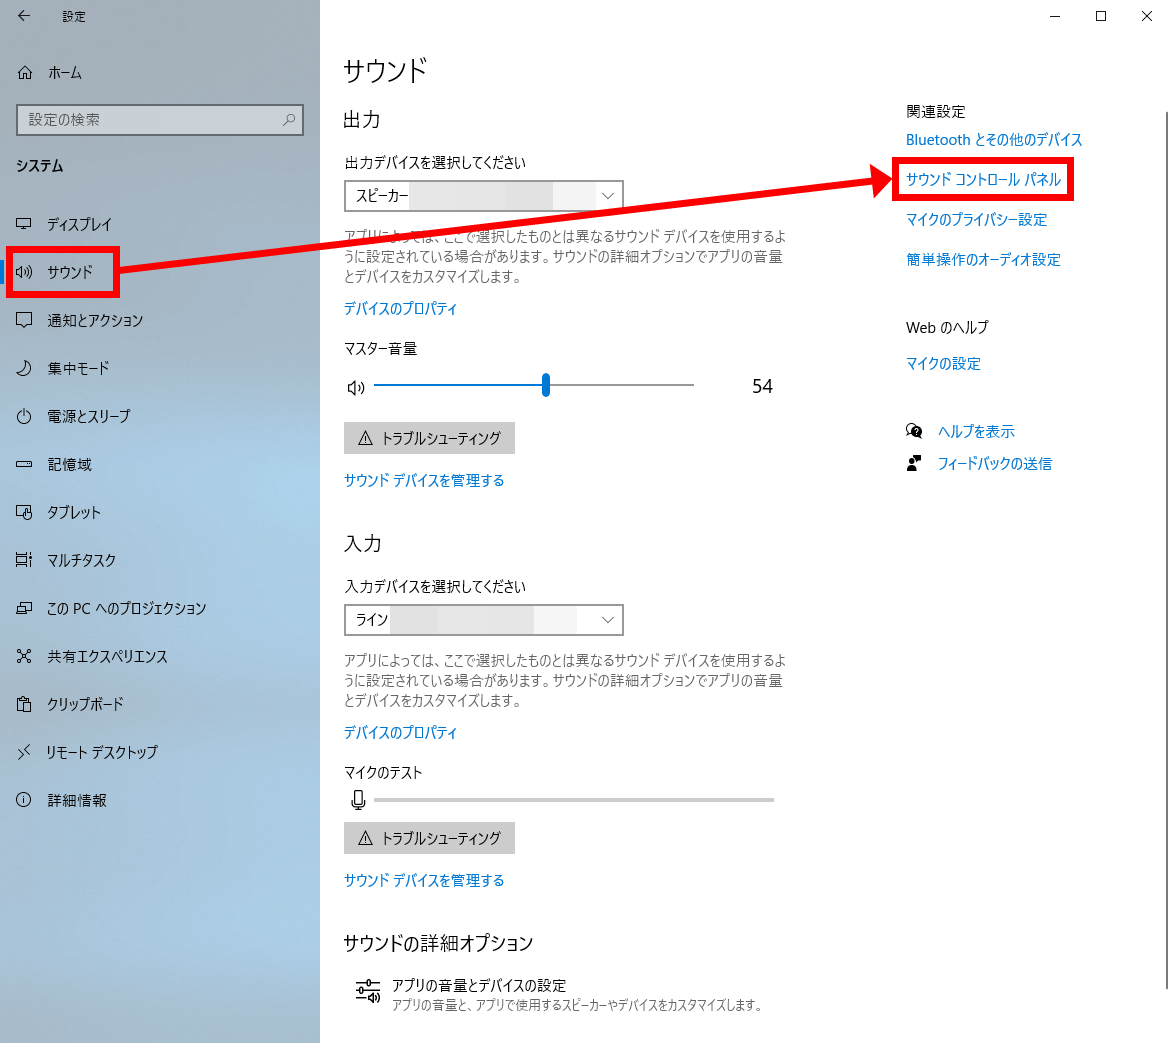
Click the 'Sound' tab to open the 'Sound Settings'. Now that the steps are merged, click 'Sound Control Panel' under 'Related Settings'.
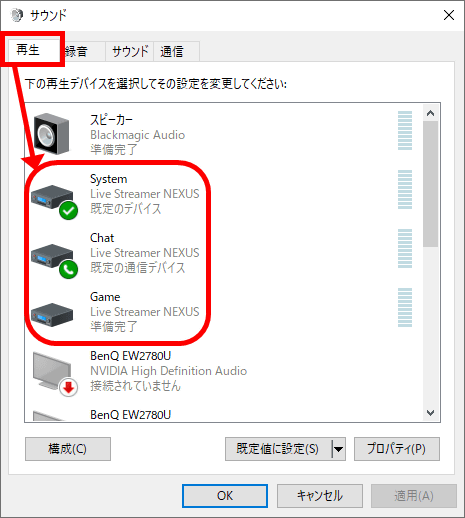
Since 'System Live Streamer NEXUS', 'Chat Live Streamer NEXUS' and 'Game Live Streamer NEXUS' have been added to the 'Playback' tab, 'System' is the 'default device' and 'Chat' is the 'default communication device'. ”.
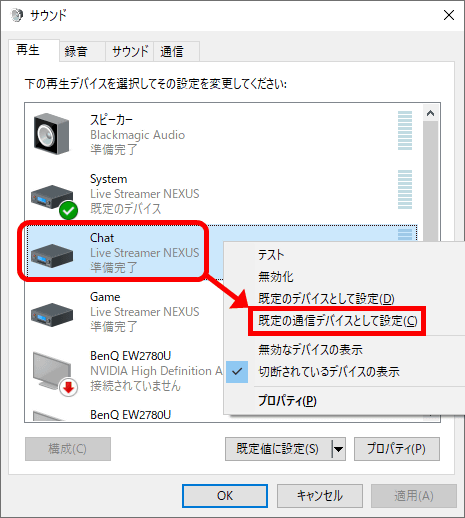
If not, right-click for example Chat and click 'Set as default communication device' to set it.
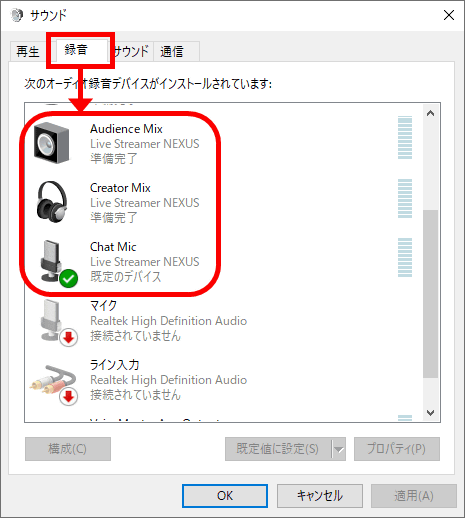
The 'Recording' tab now includes 'Audience Mix', 'Creatoe Mix' and 'Chat Mix'. Now close the 'Sound Control Panel'.
In the 'Sound Settings' that remains open, click 'App volume and device settings' at the bottom.
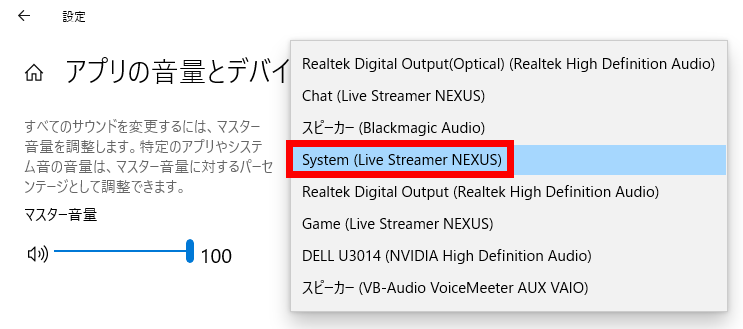
Check that 'Output' on the right side of the master volume column is 'System (Live Streamer NEXUS)' and input is 'Chat Mic (Live Streamer NEXUS)'.

If it is different, select it again from the pull-down menu.
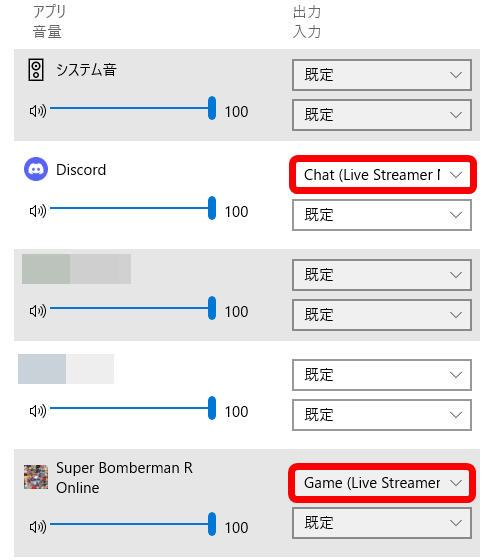
Under the master volume, the running applications are lined up. If it is a PC game, you can play the game you want to play. If the game console is connected via a capture device, set 'Output' in the recording/distribution software column to 'Game (Live Streamer NEXUS)', Discord, LINE, Skype, etc. If you are using a voice chat tool, set the 'output' of the software to 'Chat (Live Streamer NEXUS)'. With this setting, you can adjust the volume of the system sound of the distribution PC itself with 'System', the volume of the game specified with 'Game', and the voice chat volume with 'Chat' among the six knobs of AX310.
◆ 'NEXUS' general settings, appearance change, etc.
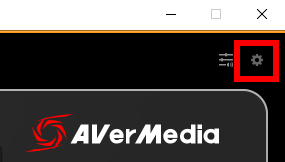
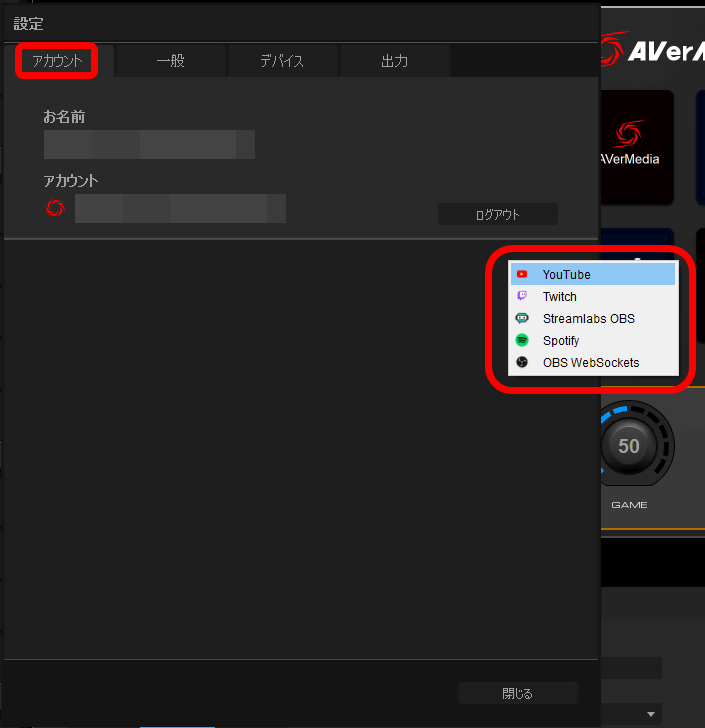
Click the gear icon in the upper right of 'NEXUS' to open the setting screen for 'NEXUS' itself.
In 'account', in addition to the AVerMedia account, you can save the account information of YouTube, Twitch, Streamblabs OBS, Spotify, OBS WebSockets used for recording and distribution. Actually, I will register a YouTube account.
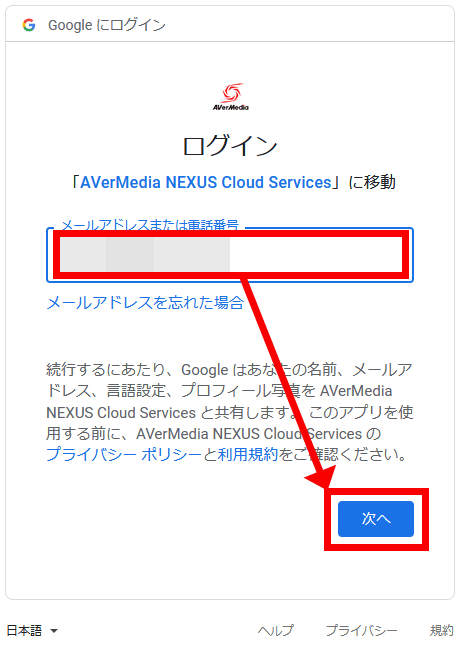
Since the web browser opens, enter the email address of the Google account used on YouTube and click 'Next'.
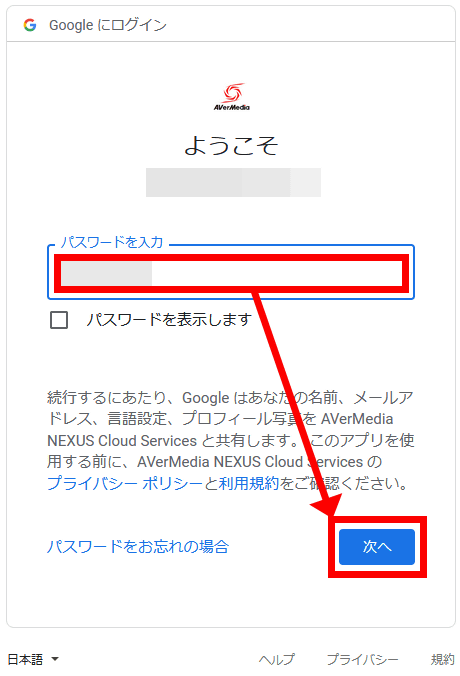
Enter the password and click 'Next'.
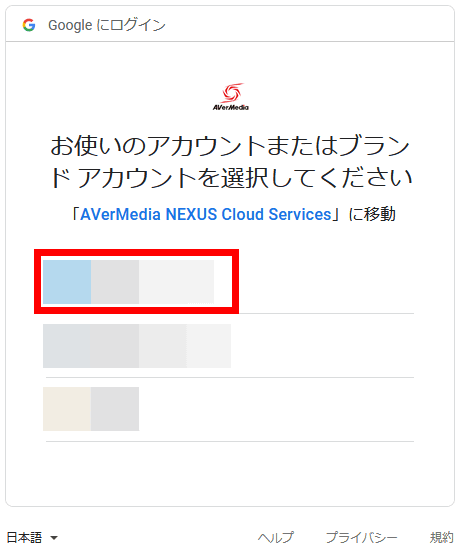
Click on the entered account.
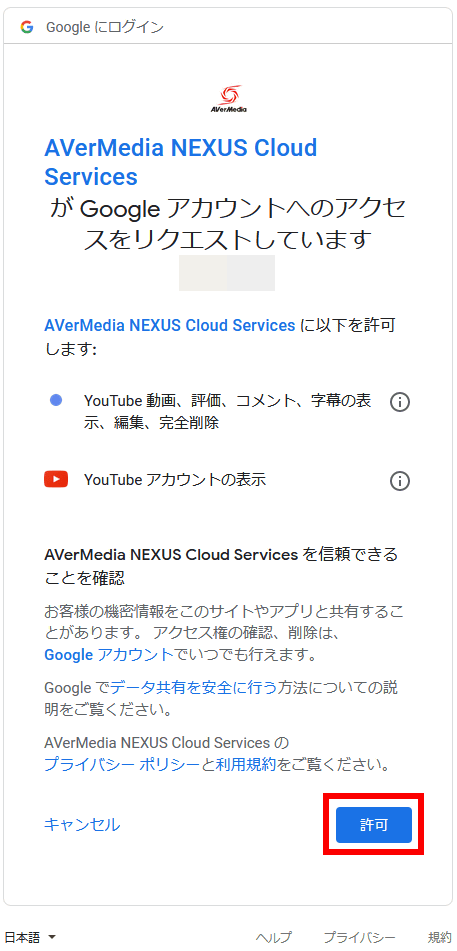
Since there is a permission request, click 'Allow'. A fairly strong authority is required, probably because the widget acquires the number of registrants and the contents of the comment field.
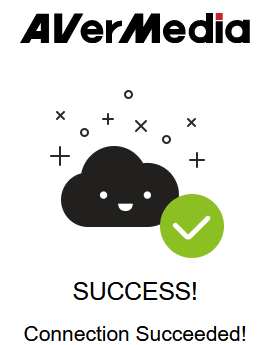
If 'SUCCESS! Connection Succeeded!' is displayed, the connection is complete.
YouTube account information has been added to 'NEXUS'.

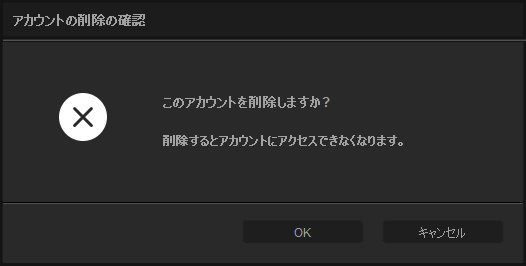
The confirmation screen when deleting registration information looks like this. Of course, the account itself is not affected, only the access rights are removed.
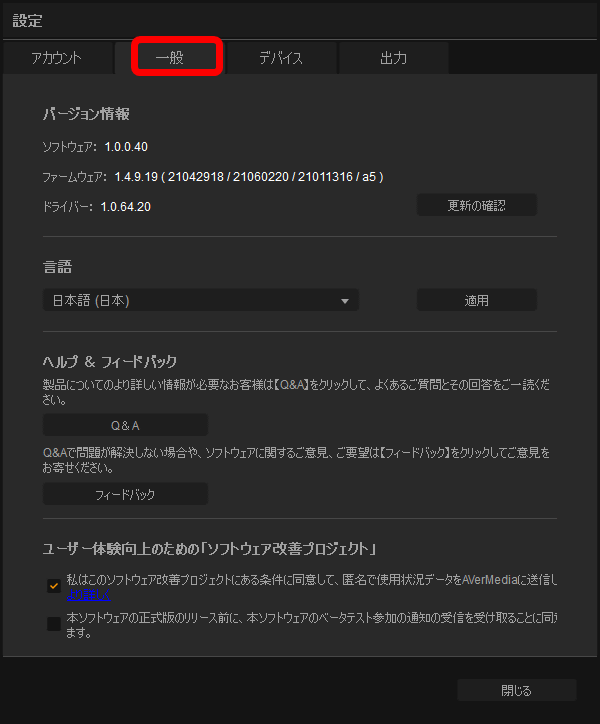
On the 'General' tab, you can check the version information and set the language.
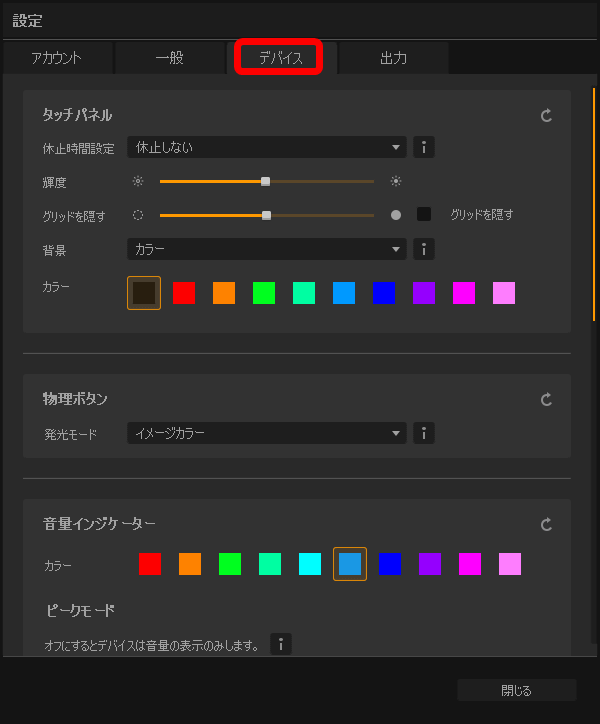
On the 'Device' tab, you can set the emission color and lighting method for touch panels, physical buttons, volume indicators, status lamps, etc.
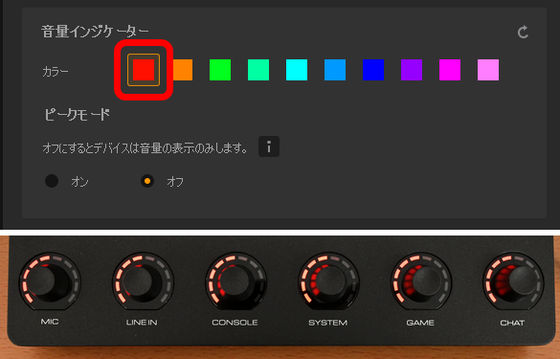
As an example, I changed the color of the volume indicator. It looks like this when it's red.
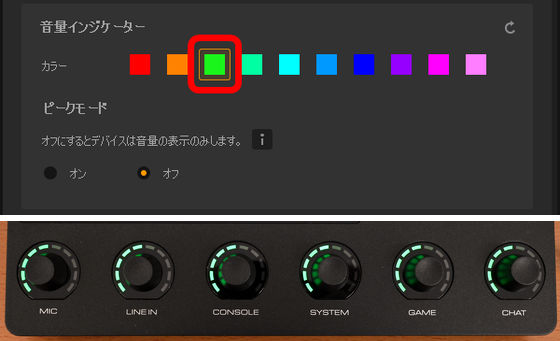
It looks like this when it's green. It's also fun to explore your favorite luminescent color and luminescent method.
On the 'Output' tab, you can set the sampling rate of the audio mixer, which mix to use as the LINE OUT output source, and whether to apply effects to Chat Mic.

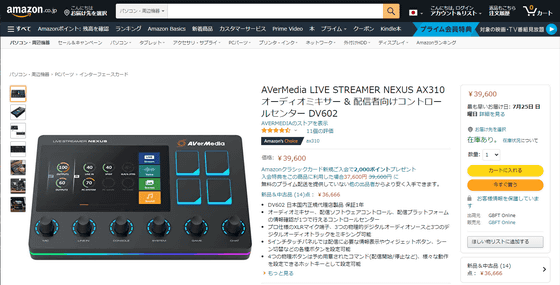
And, if you start worrying about the settings in this way, there seems to be no end, and there is no doubt that you can dramatically improve the distribution quality 'Live Streamer NEXUS (AX310)' is 39,600 yen including tax on Amazon.co.jp. It is sold in
In addition, 'Live Streamer MIC 330 (AM330)' suitable for distribution use is also sold at Amazon.co.jp for 11,000 yen including tax.
Related Posts: