Review of 'FLIR ONE Pro' that can be used as an external thermal camera for smartphones
I have been using
FLIR ONE Pro | Teledyne FLIR
https://www.flir.jp/products/flir-one-pro/
◆ Appearance of the main unit
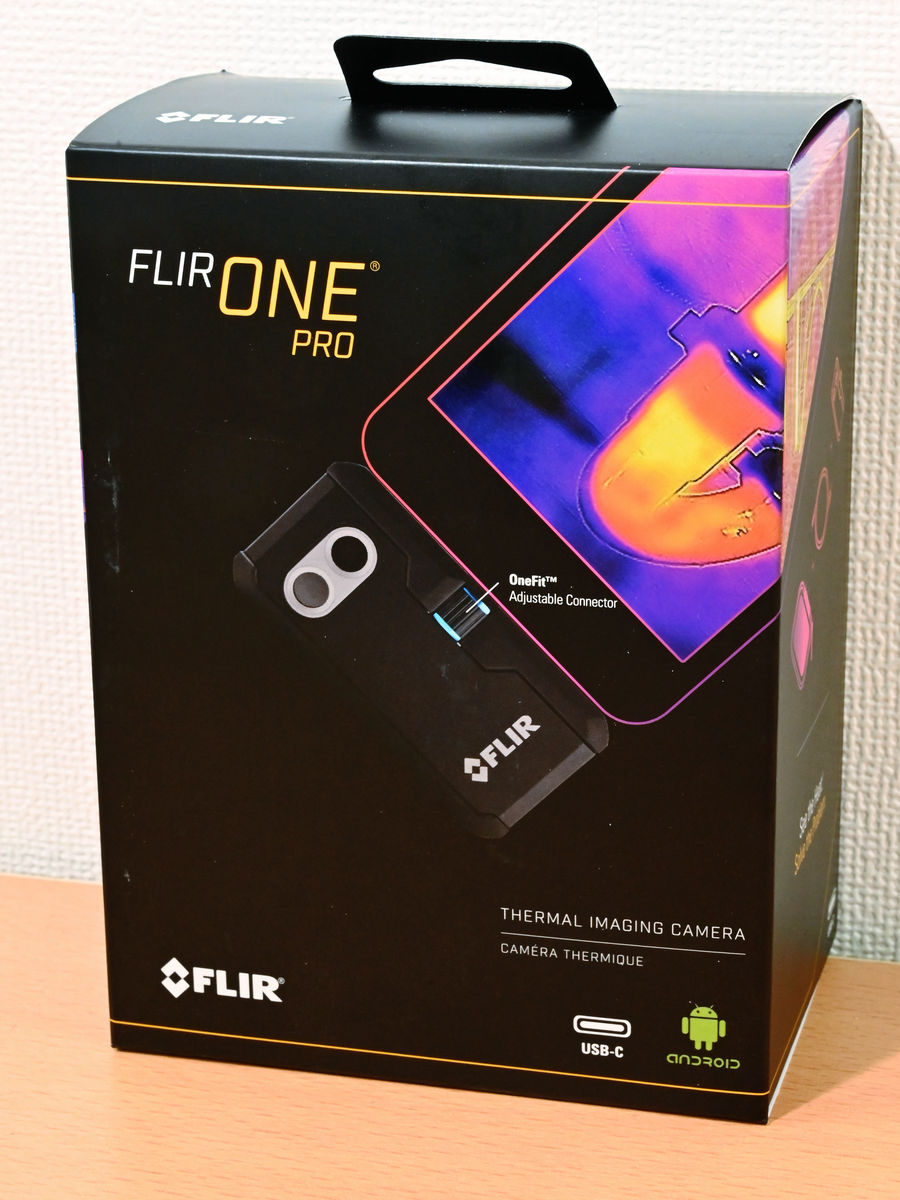
The outer box looks like this.
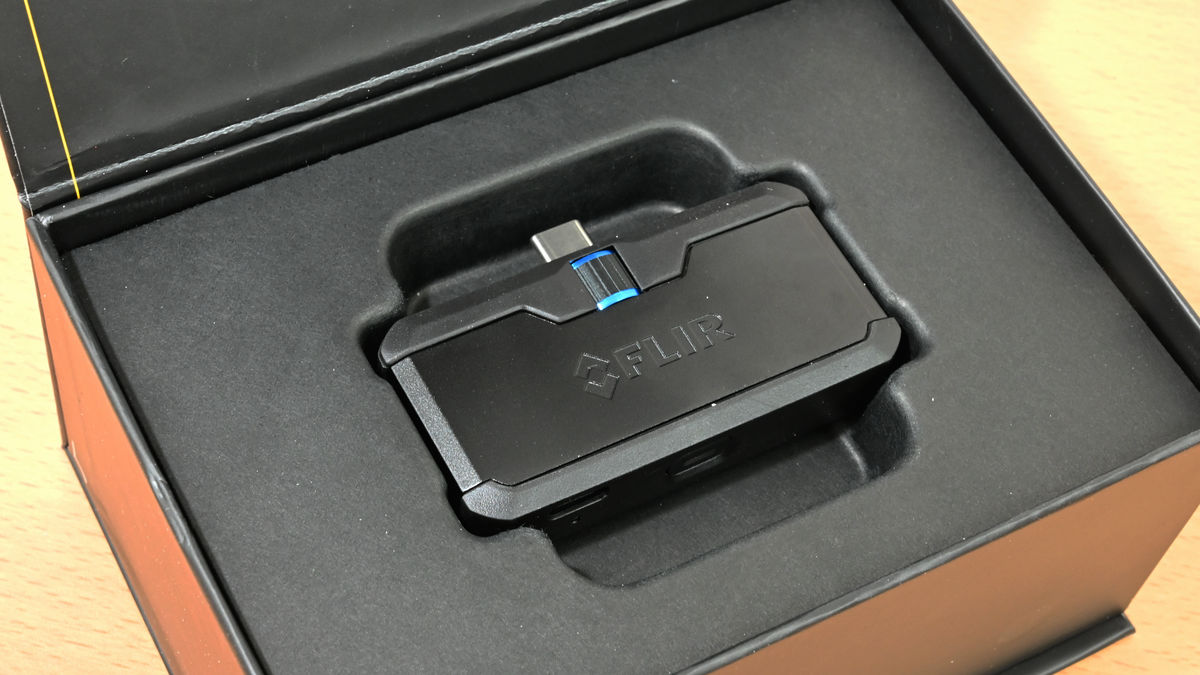
This is the FLIR ONE Pro. It has a different color design from the
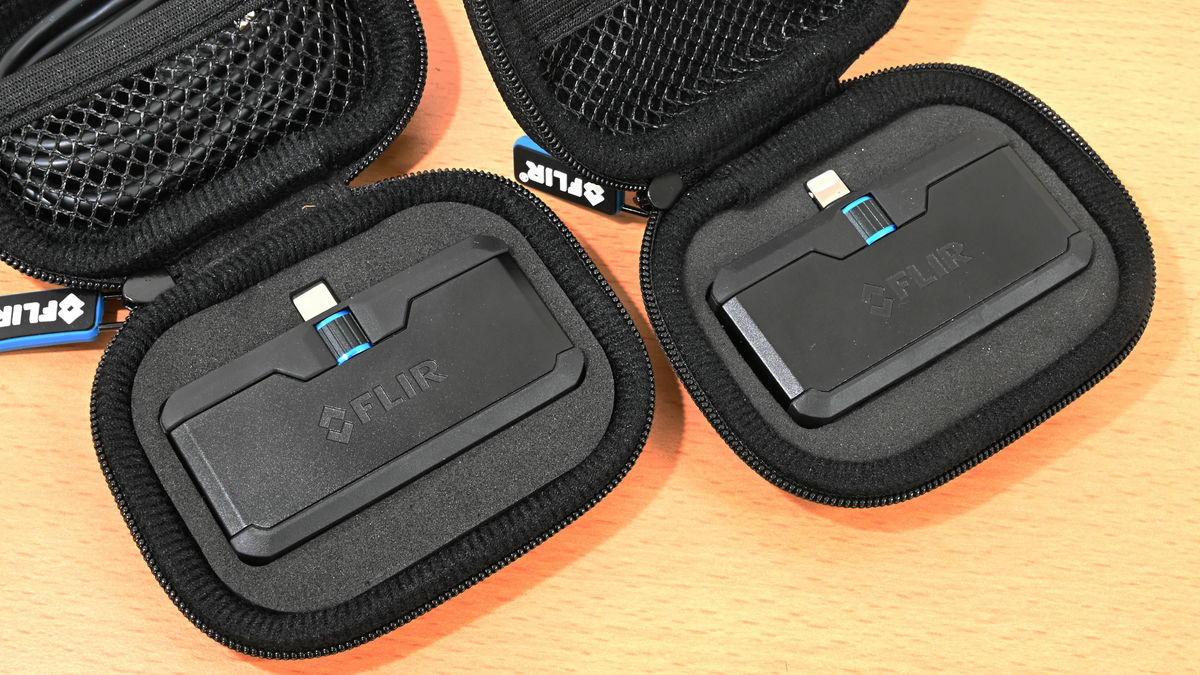
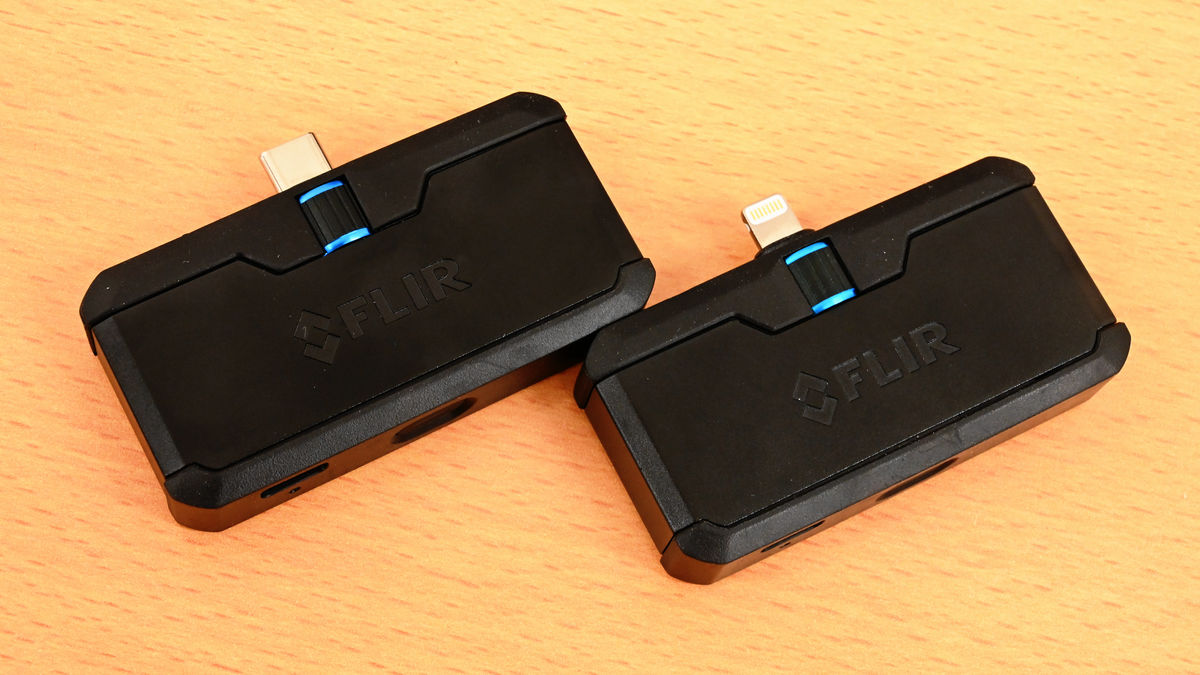
It comes with a cushioned case, making it easy to take it anywhere. On the left is the 'FLIR ONE Pro for USB-C' and on the right is the 'FLIR ONE Pro for iOS'.
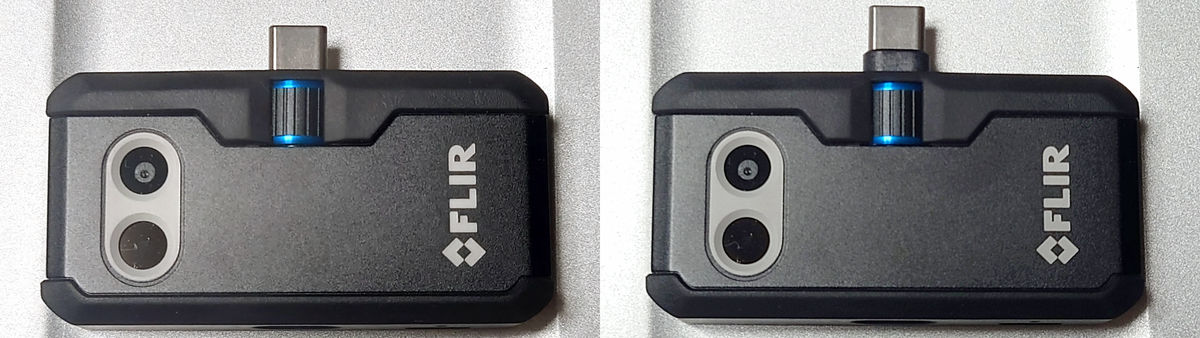
This is what it looks like when you take it out of the case. The only difference between the two is the connector. There are also some that can be connected via Micro USB.
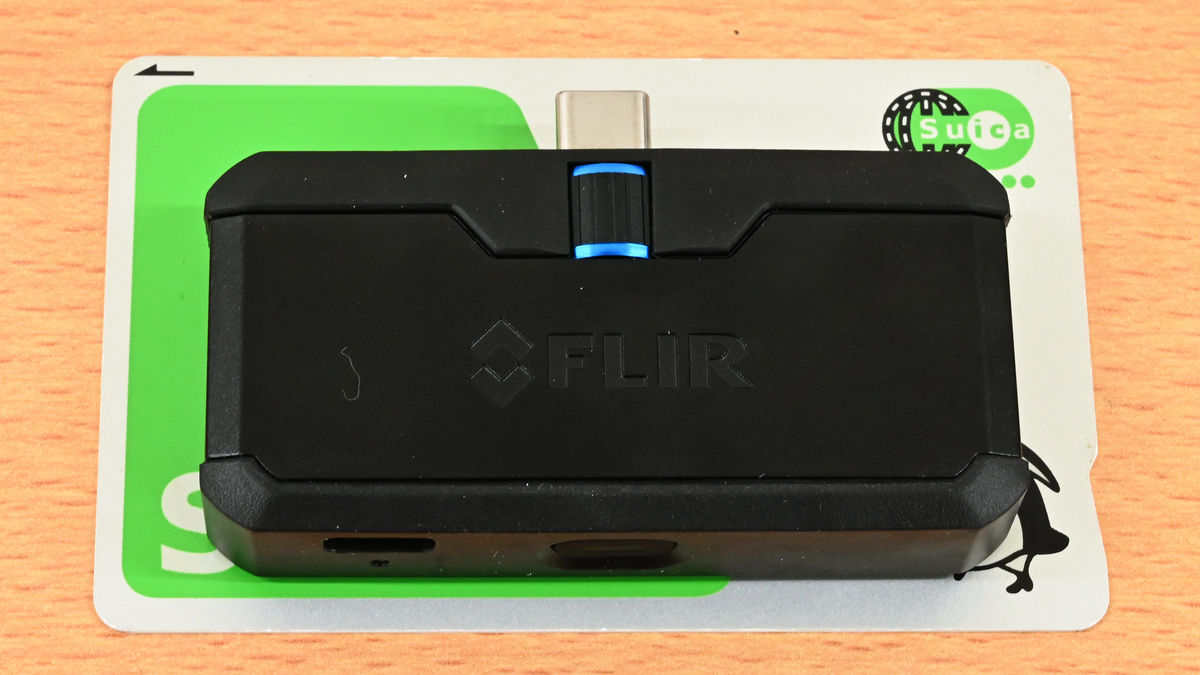
The size is about two times smaller than a transportation IC card.
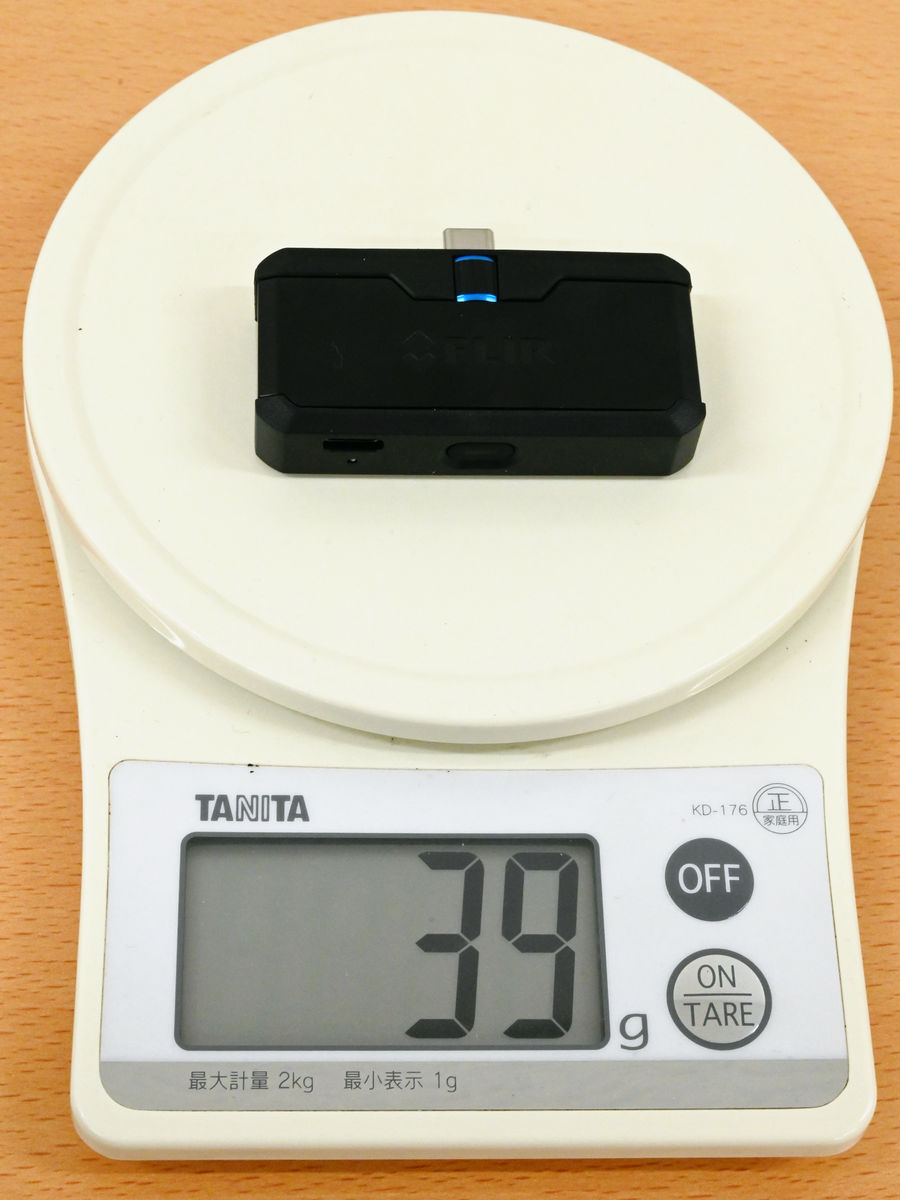
Actual weight: 39g.
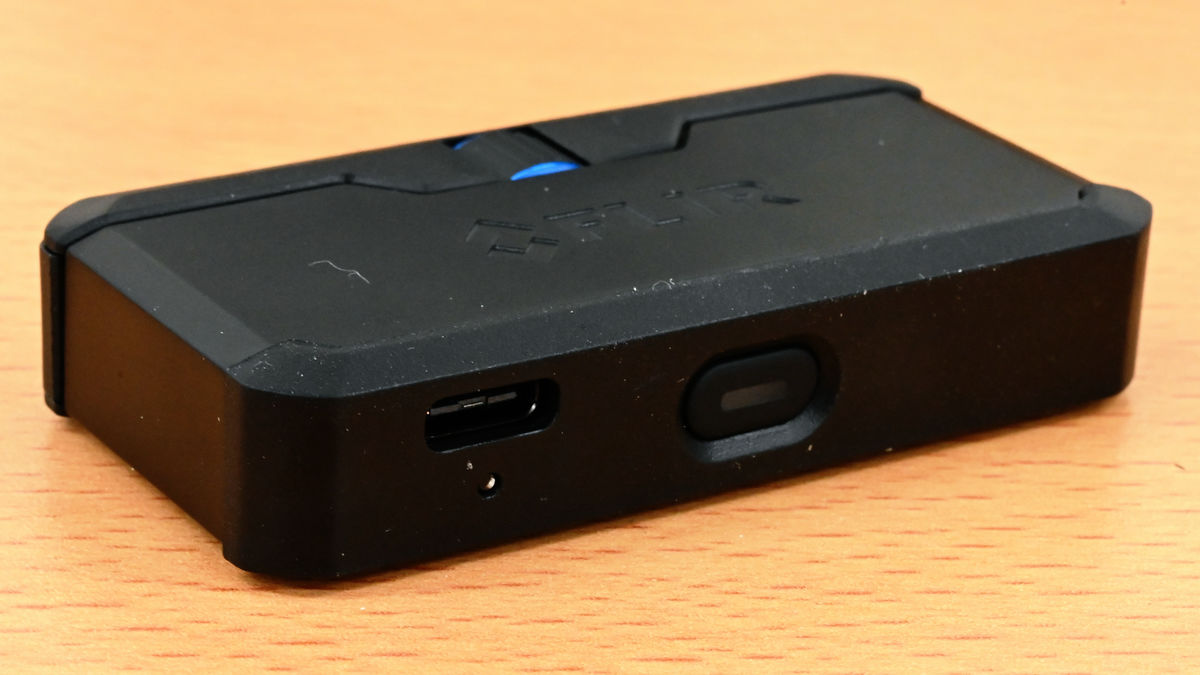
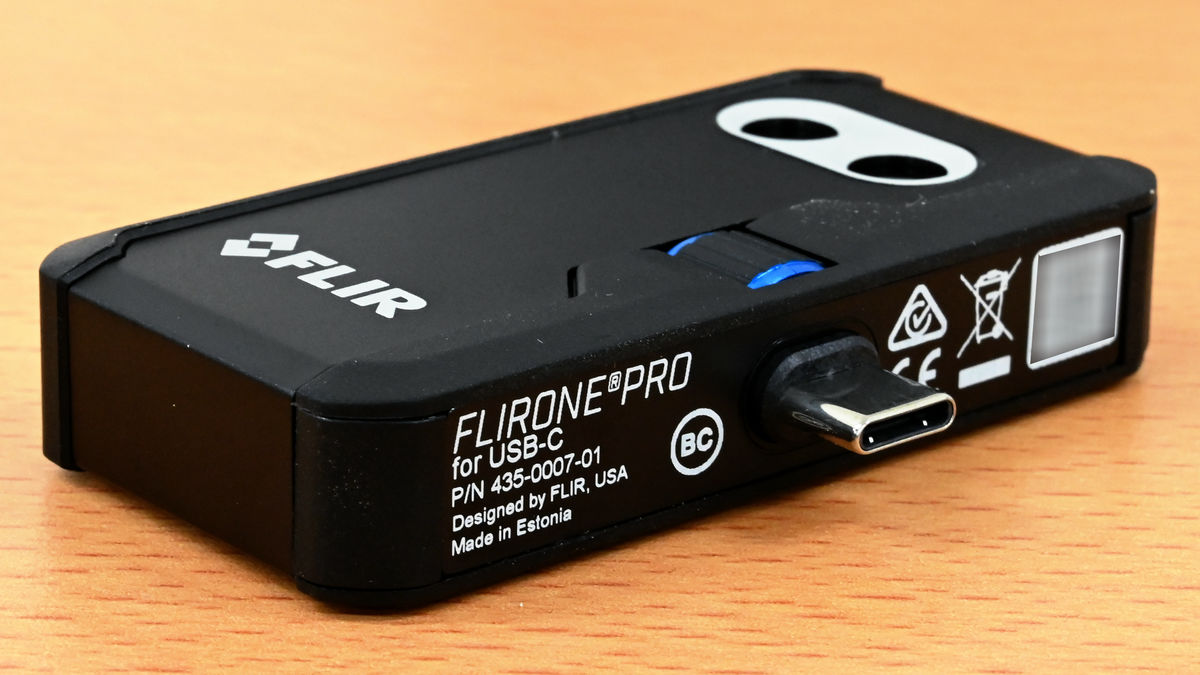
On the bottom there is a USB-C port for charging, a charging indicator LED, and a power button. It takes about an hour to fully charge at 1A.
The product number and other information are written on the top side.
When attached to a smartphone, the camera is located at the bottom right. The top (near the connection part) is the visible light camera, and the bottom is the thermal camera.

I attached it to a Pixel 5 and an iPhone 12 and lined them up.
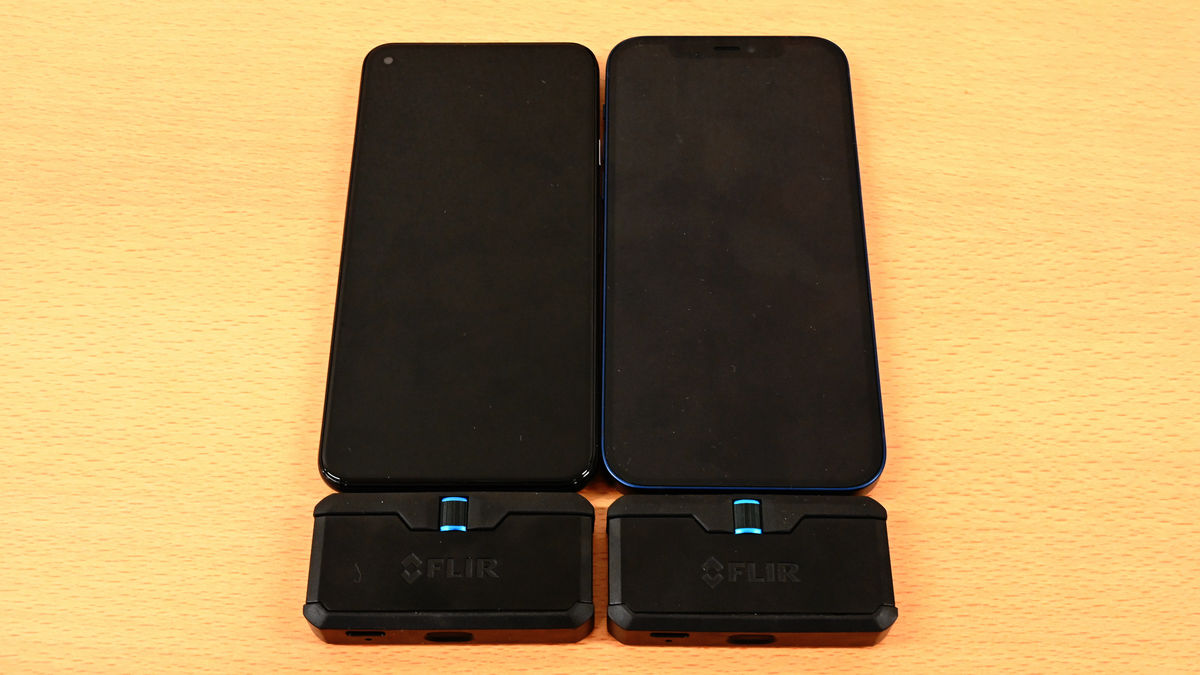
In addition, the height of the terminal can be adjusted with the blue dial, so you can attach the FLIR ONE Pro even with a case on.
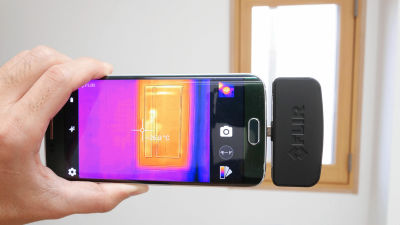
◆FLIR ONE App
The app is essential to using the FLIR ONE Pro.
'FLIR ONE' on the App Store
FLIR ONE - Apps on Google Play
https://play.google.com/store/apps/details?id=com.flir.flirone
This time I will be using 'FLIR ONE Pro for USB-C', so I installed the app on my Android device.
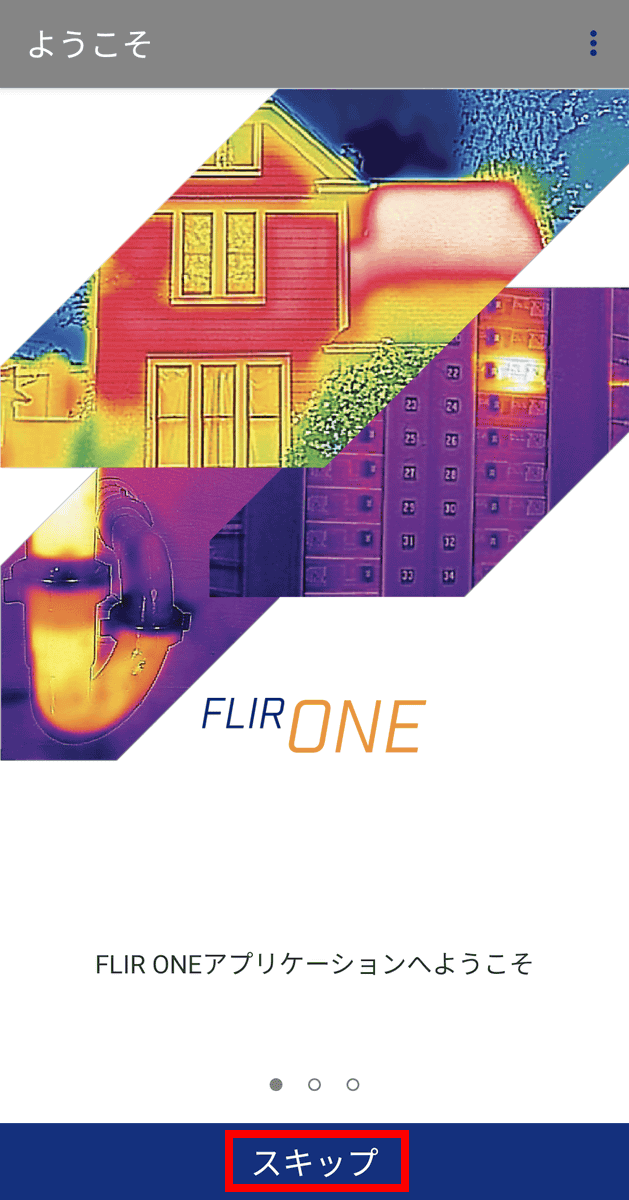
Launch the app and tap 'Skip.'
The end user license agreement will be displayed, so read it and tap 'OK'.

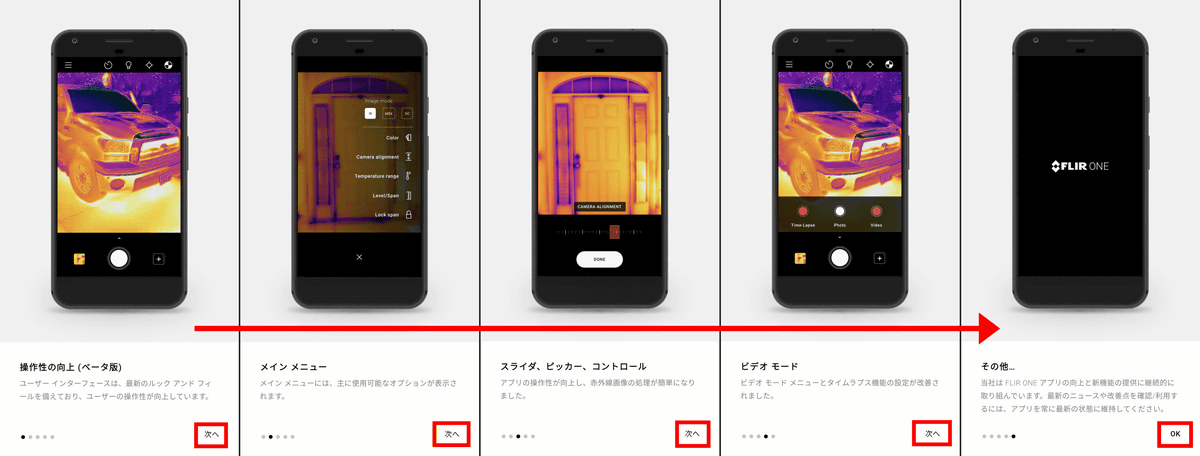
Swipe or click 'Next' to read the explanation, then tap 'OK.'
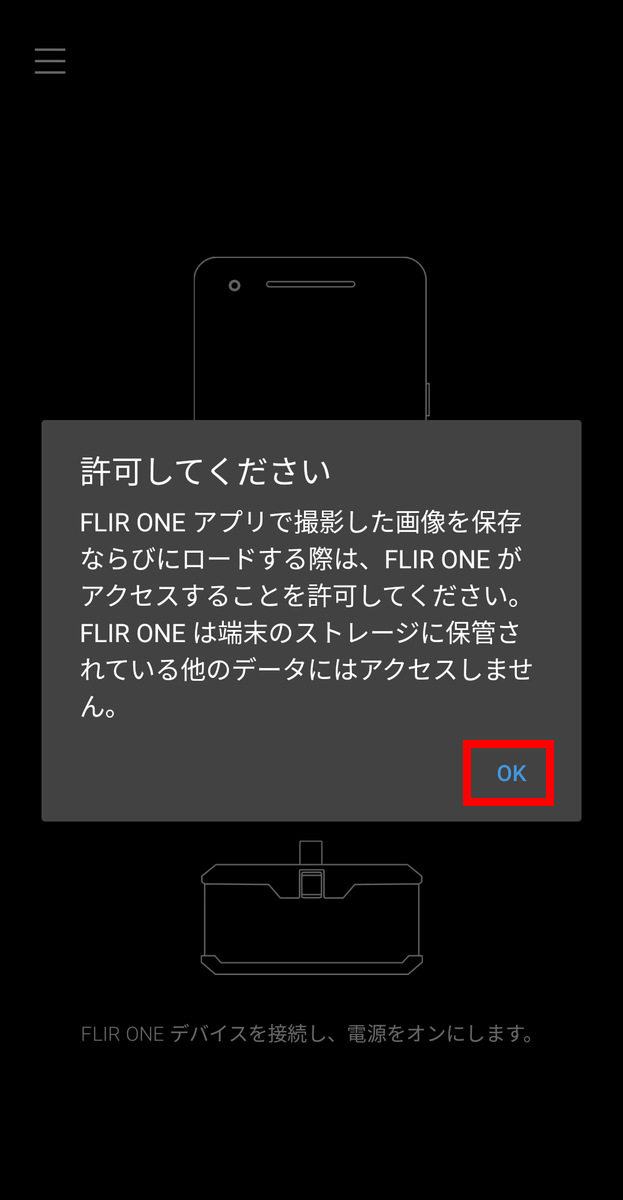
A dialog will appear, so tap 'OK'.
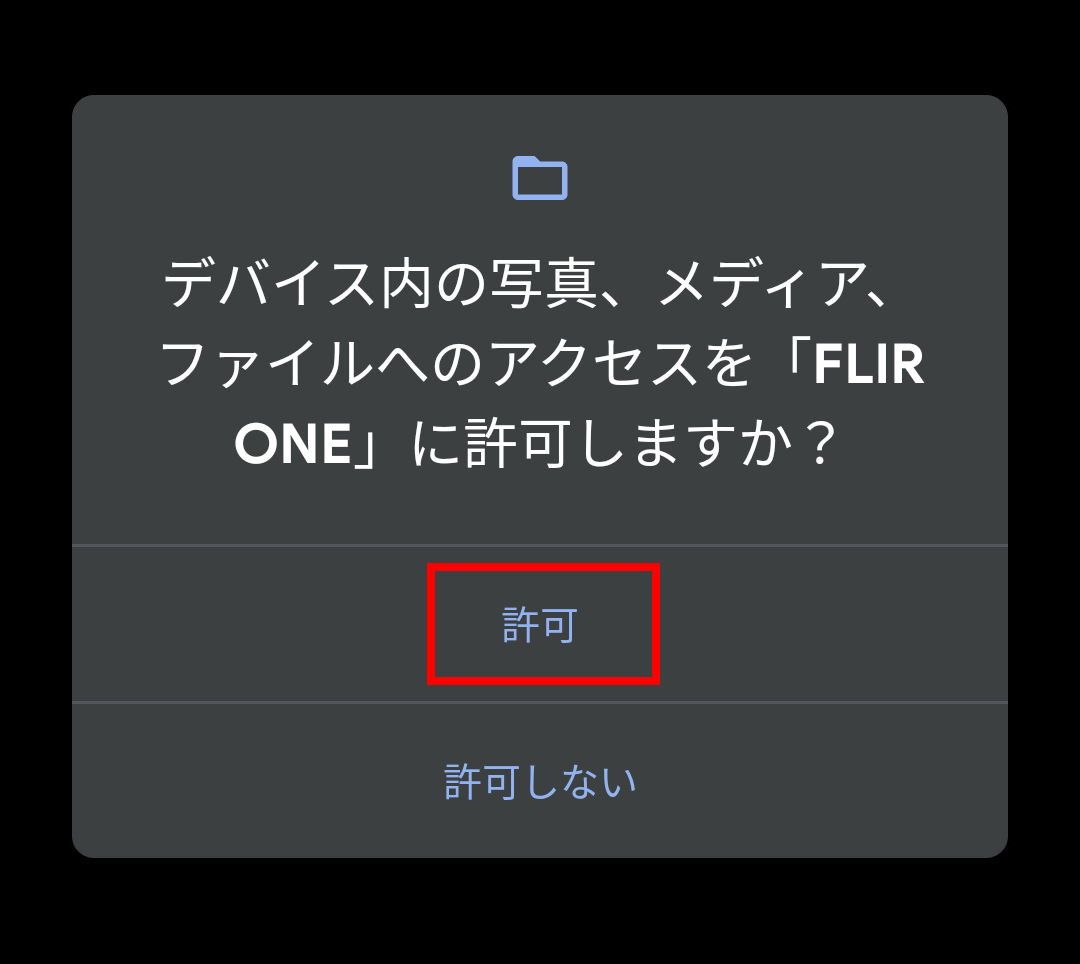
Tap 'Allow'.
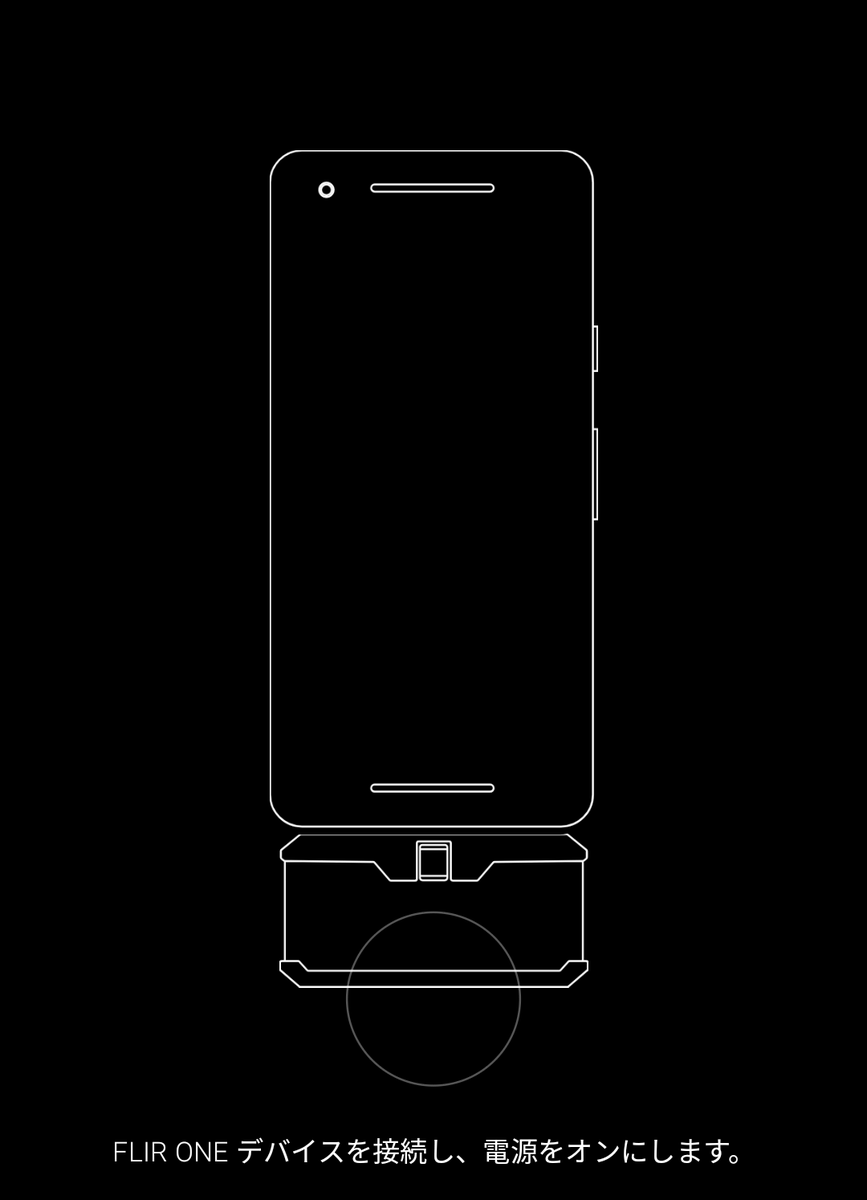
Follow the instructions on the screen to connect and power on the FLIR ONE Pro. It takes a few seconds for it to start up after you press the power button.
A dialog box will appear asking 'Do you want to start FLIR ONE and process FLIR ONE Camera?' Tap 'OK'.

You can now use the app.
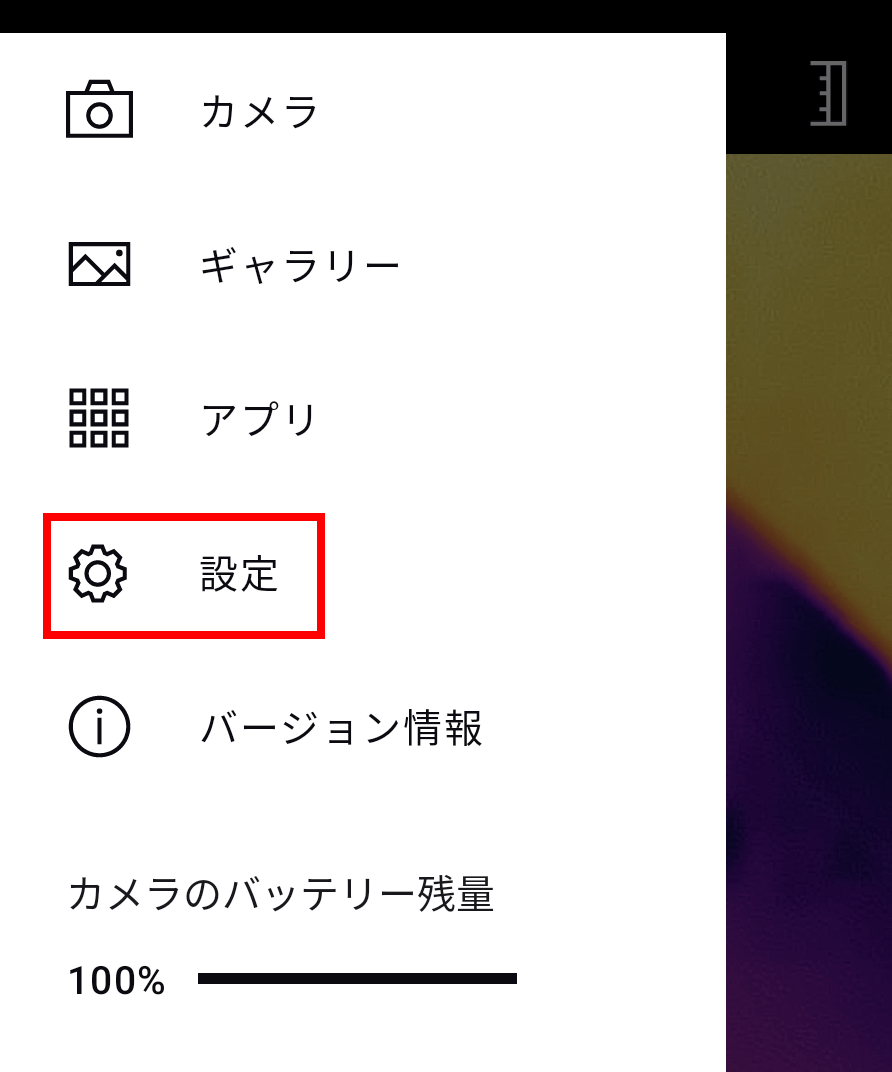
Press the hamburger icon to display the menu. 'Camera' returns you to the previous shooting screen, and 'Gallery' allows you to view the images and videos you have taken. 'Apps' displays other FLIR apps. 'Settings' allows you to configure various settings. 'About' displays the app version. The remaining battery level of the FLIR ONE Pro is displayed at the bottom. Tap 'Settings.'
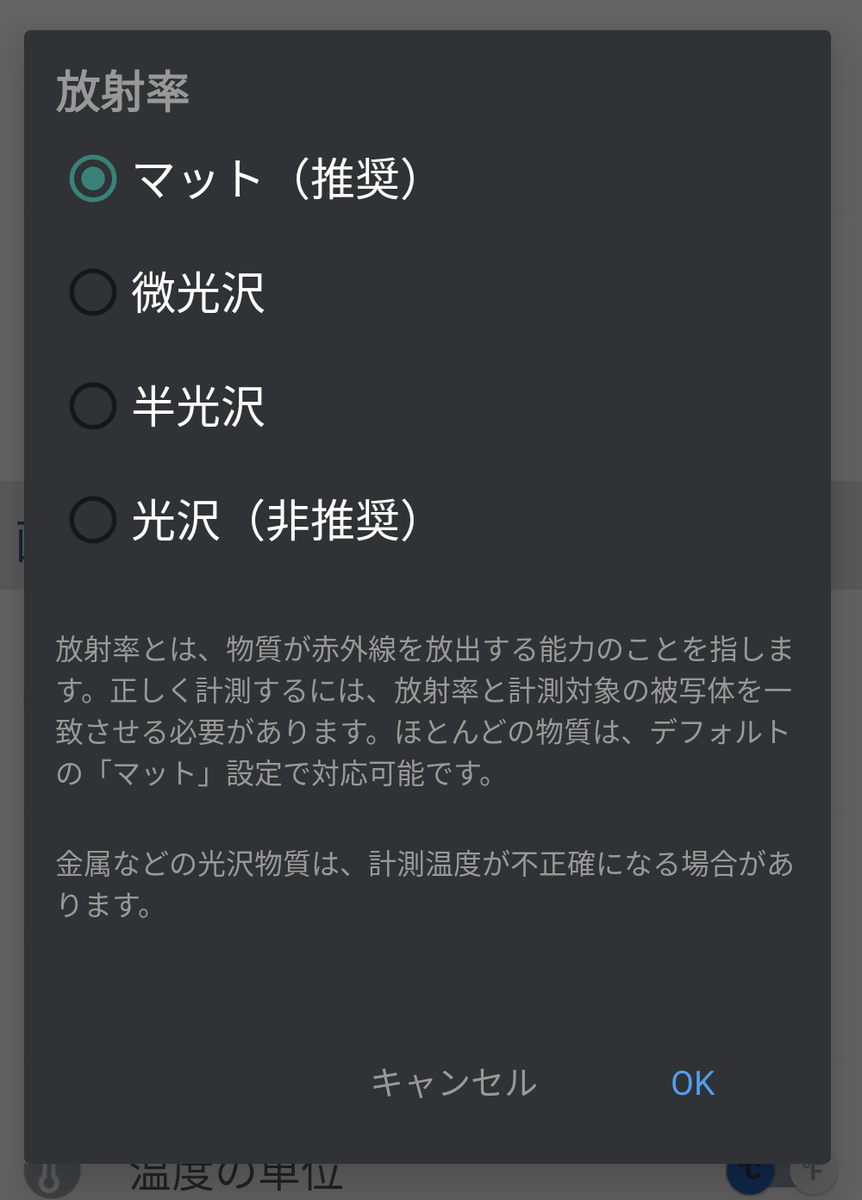
In the settings, you can configure settings for images and applications. If you don't know what 'Emissivity: Matte' is, tap it...

This refers to the ability of a material to emit infrared rays, and it turns out that the basic rule is to make it 'matte.' Shiny materials, such as metal, will make the temperature measurement inaccurate.
In addition, you can set the option to save the location information of the photo.

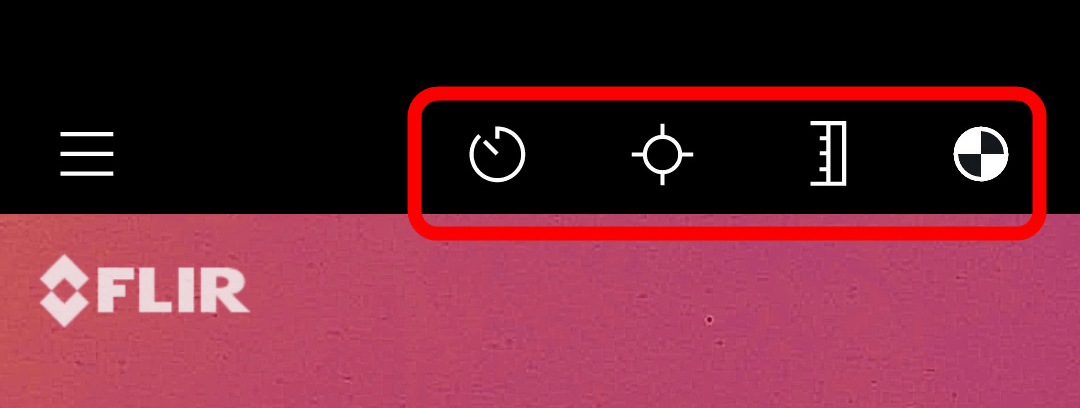
When in camera view, there are four icons lined up in the upper right. From left to right, the icons are 'Self-timer', 'Spot meter', 'Span', and 'Calibration'. Each time you tap the 'Self-timer', it switches between 3 seconds, 5 seconds, 10 seconds, and no timer. In addition, 'Calibration' allows you to perform manual correction in addition to automatic correction.
There are three types of spot meters: spot, box, and circle, and you can place as many as you like.
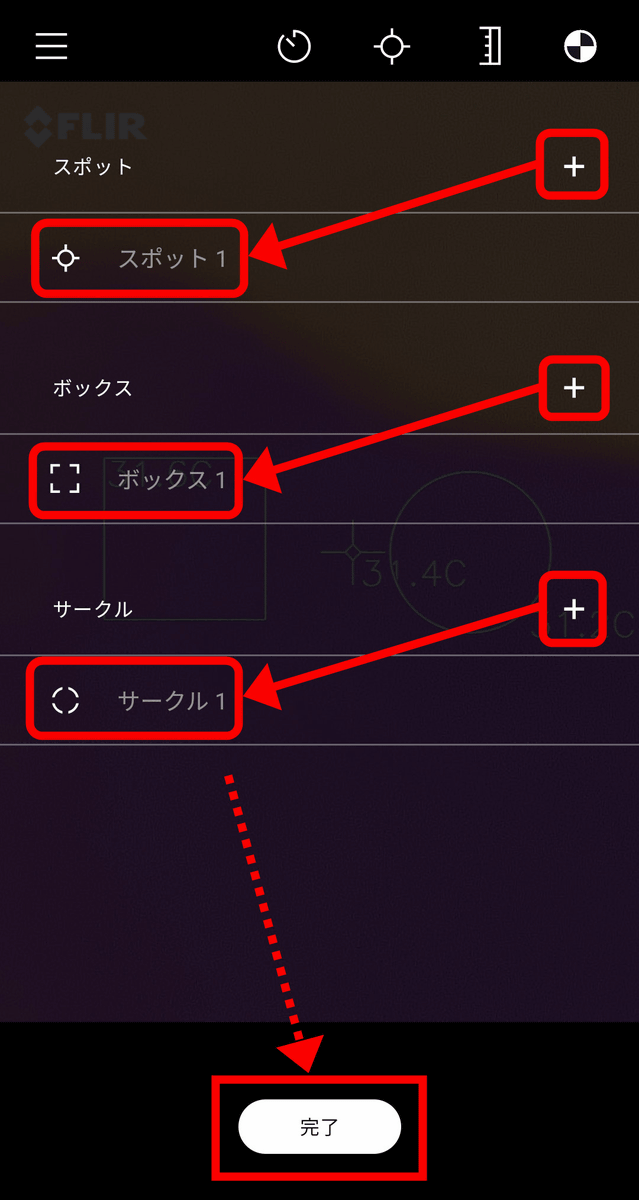
For example, if you place one 'Spot', 'Box', and 'Circle', it will look like this. You can move each one by tapping on the location.
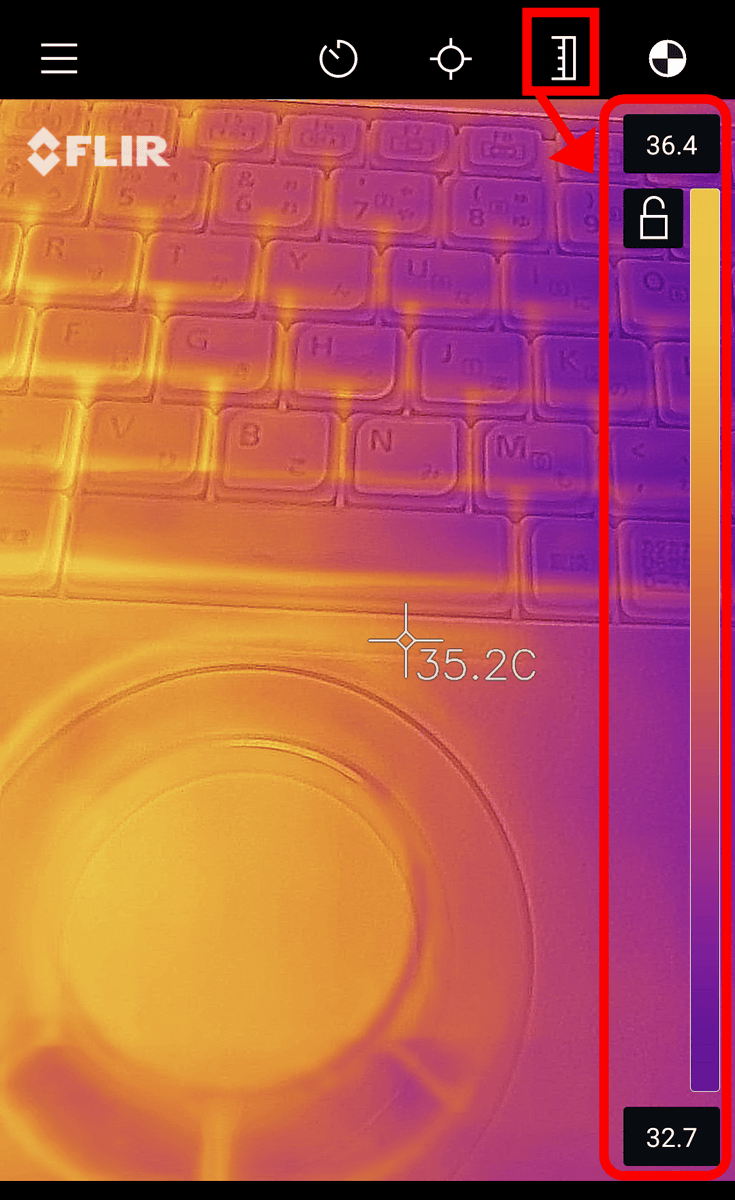
'Span' displays a temperature range on the right edge of the screen, and tapping the lock icon will maintain the range of the scene you are viewing.
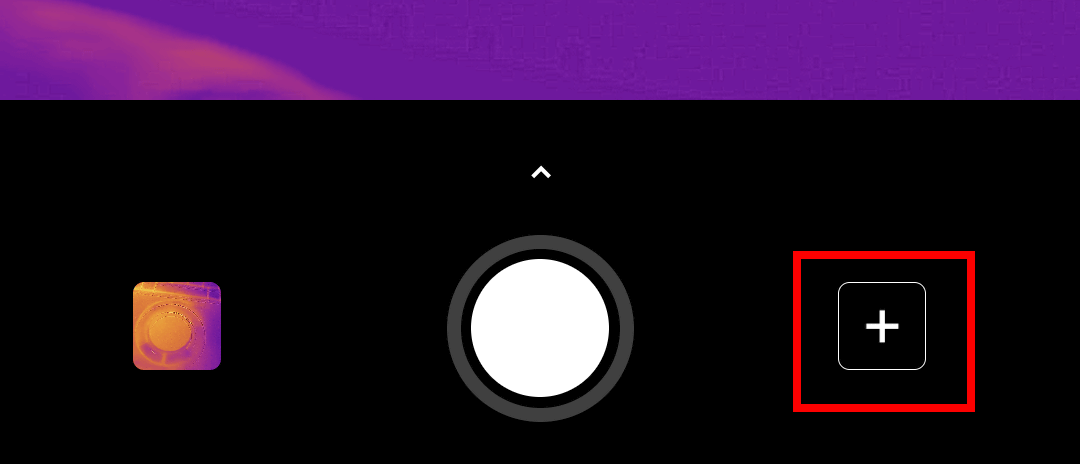
Click the '+' at the bottom of the camera view, next to the shutter button, to open the shooting settings.
The settings are as follows:
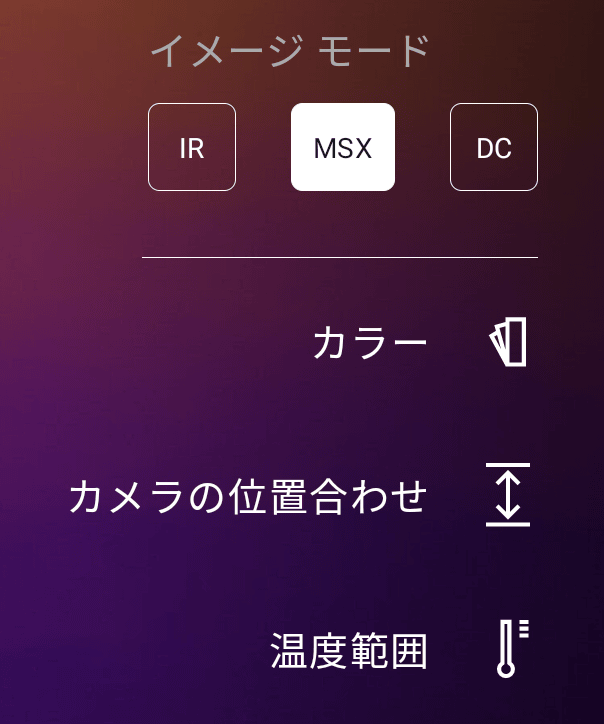
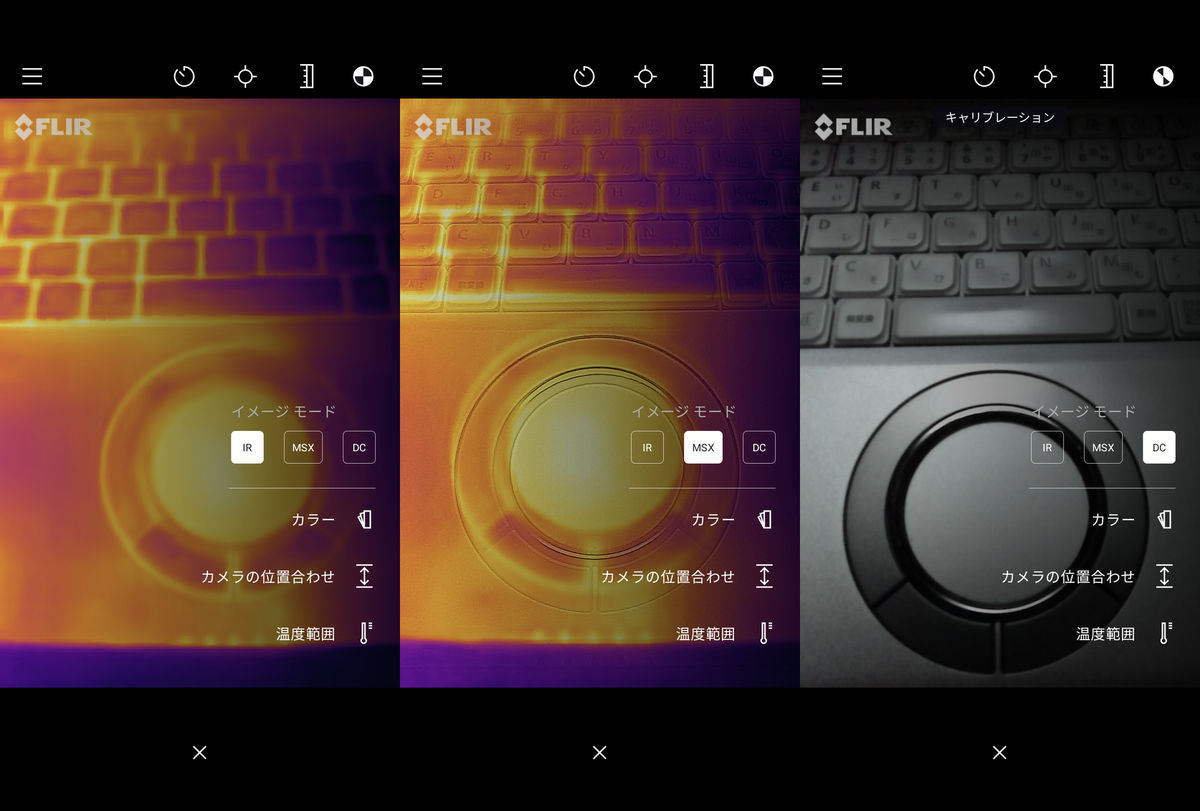
The image modes 'IR,' 'MSX,' and 'DC' differ in that they are thermal only, a combination of two cameras, and visible light only, respectively, with 'MSX' taking advantage of the strengths of having two cameras.
You can also change the display color. The default is 'iron,' but you can change it to 'gray' ...
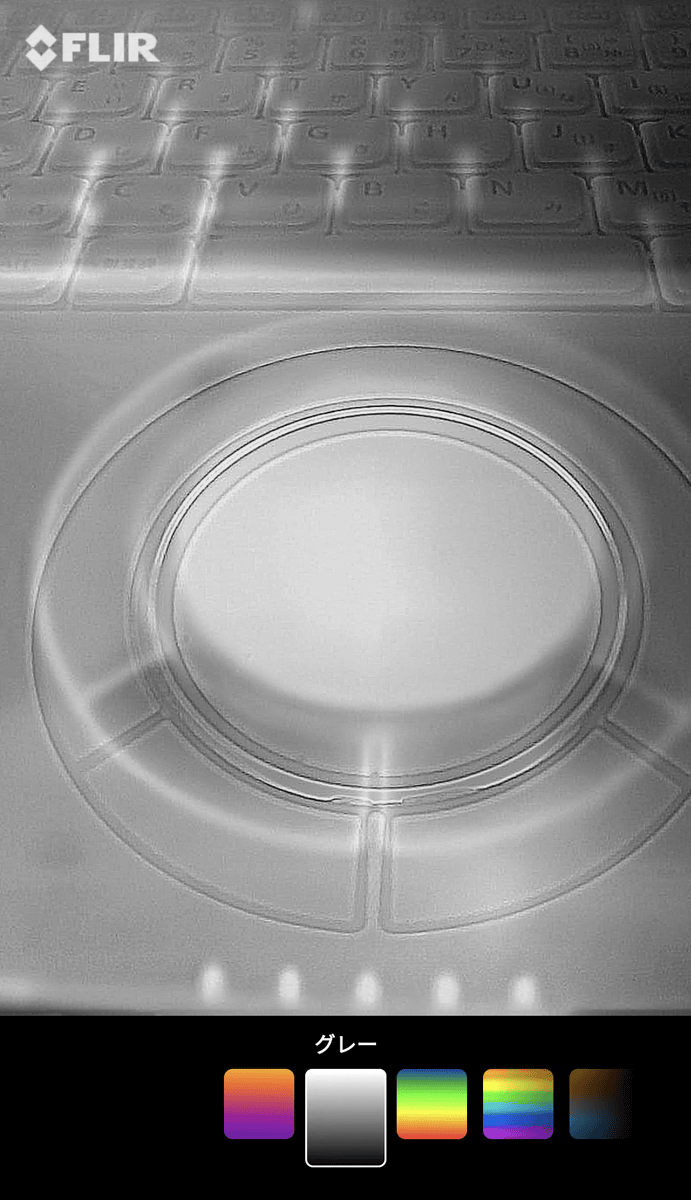
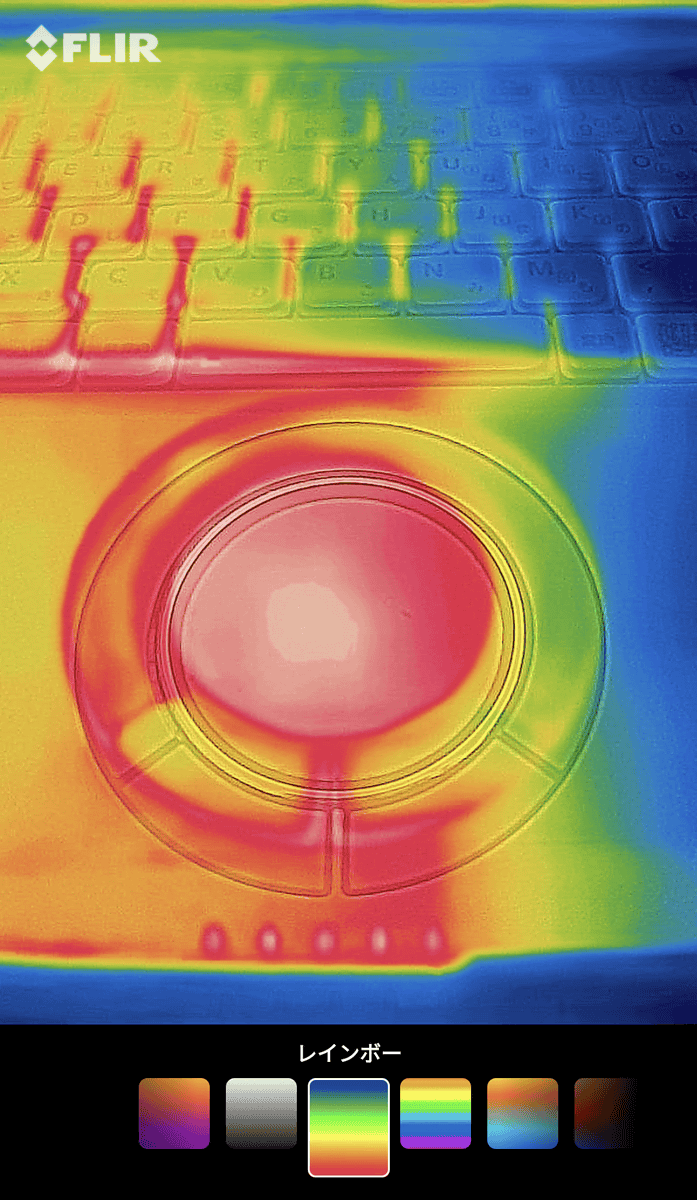
You can also choose 'Rainbow'.
To switch to video or time-lapse photography, tap the small arrow above the shutter button to display a menu.

◆Examples
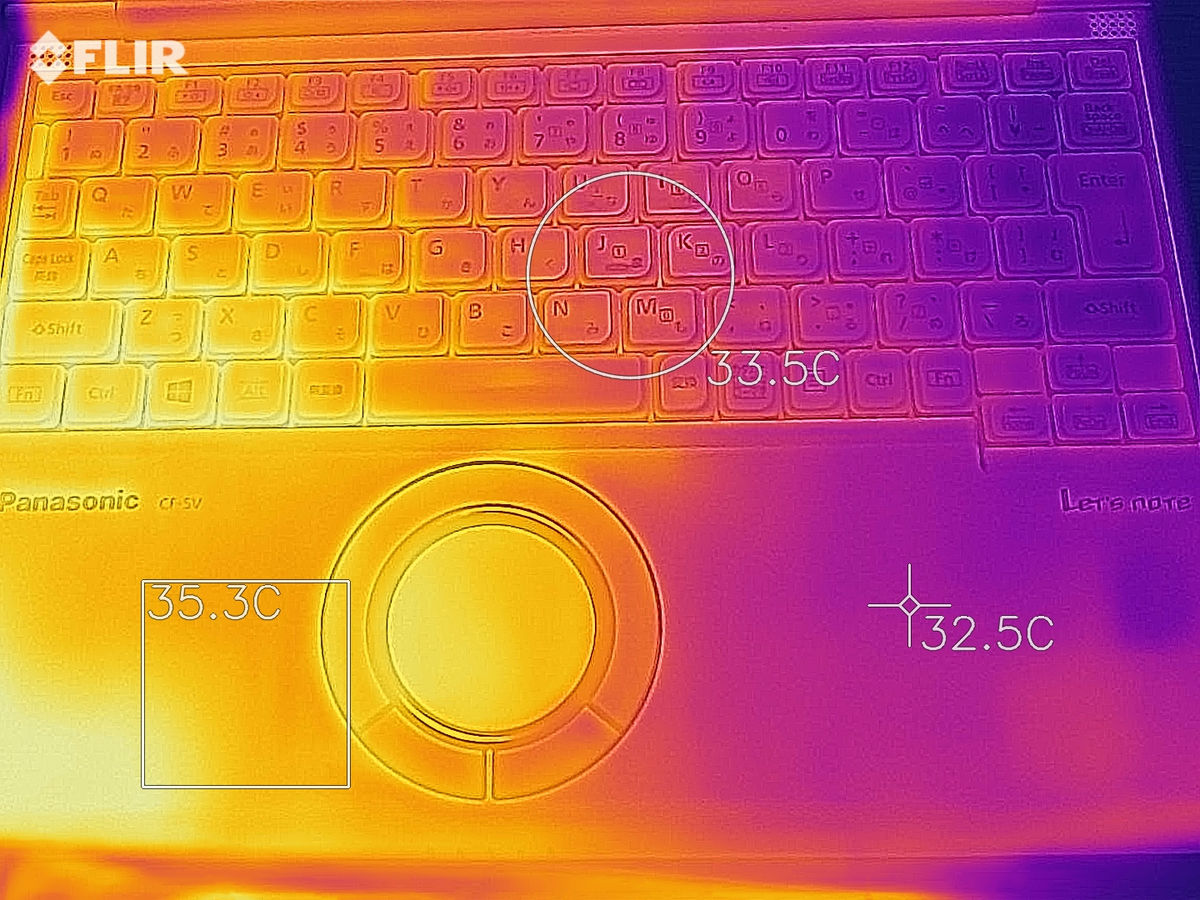
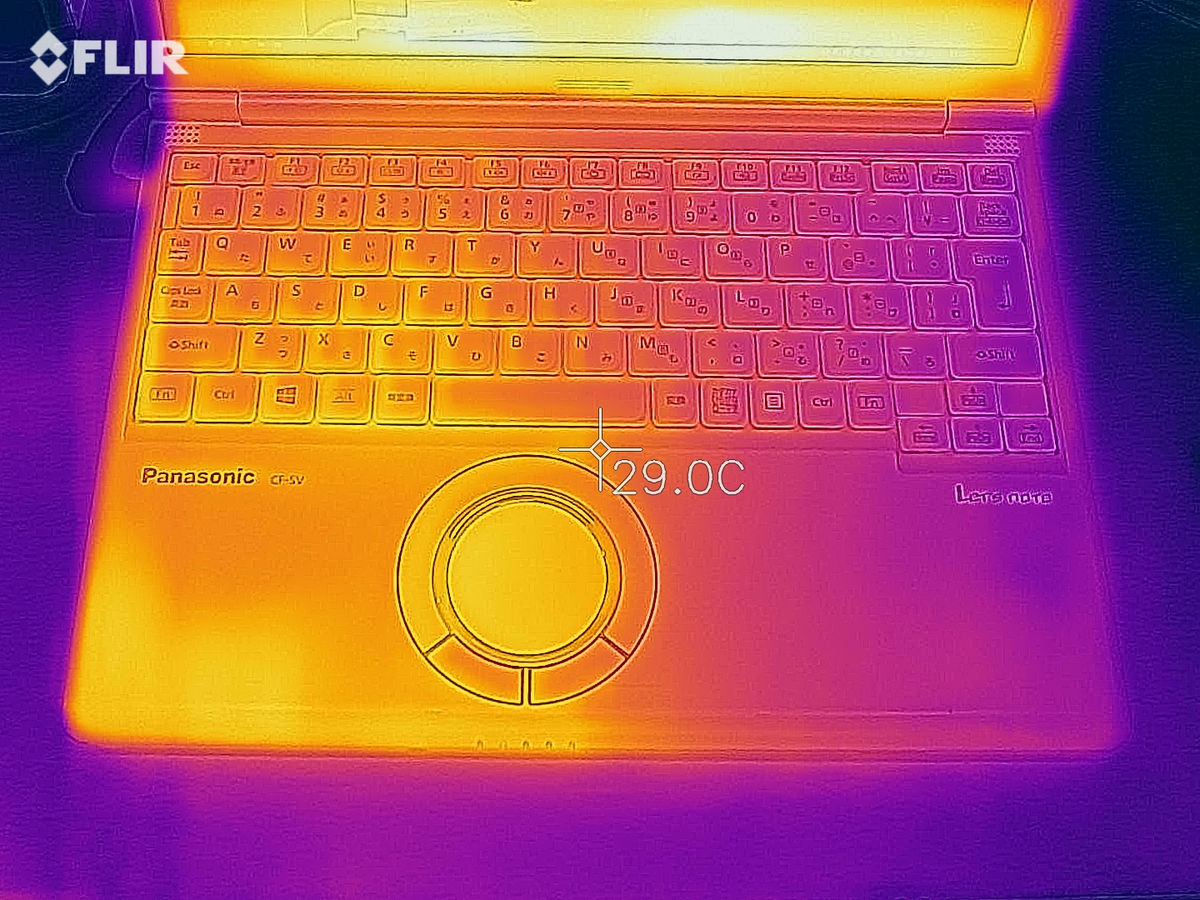
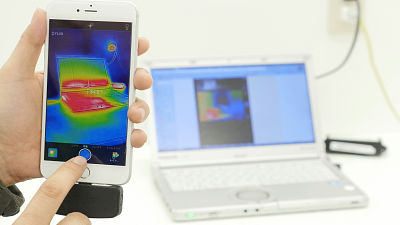
The PC I'm working on looks like this. The left side of the computer seems to be hotter than the right side.
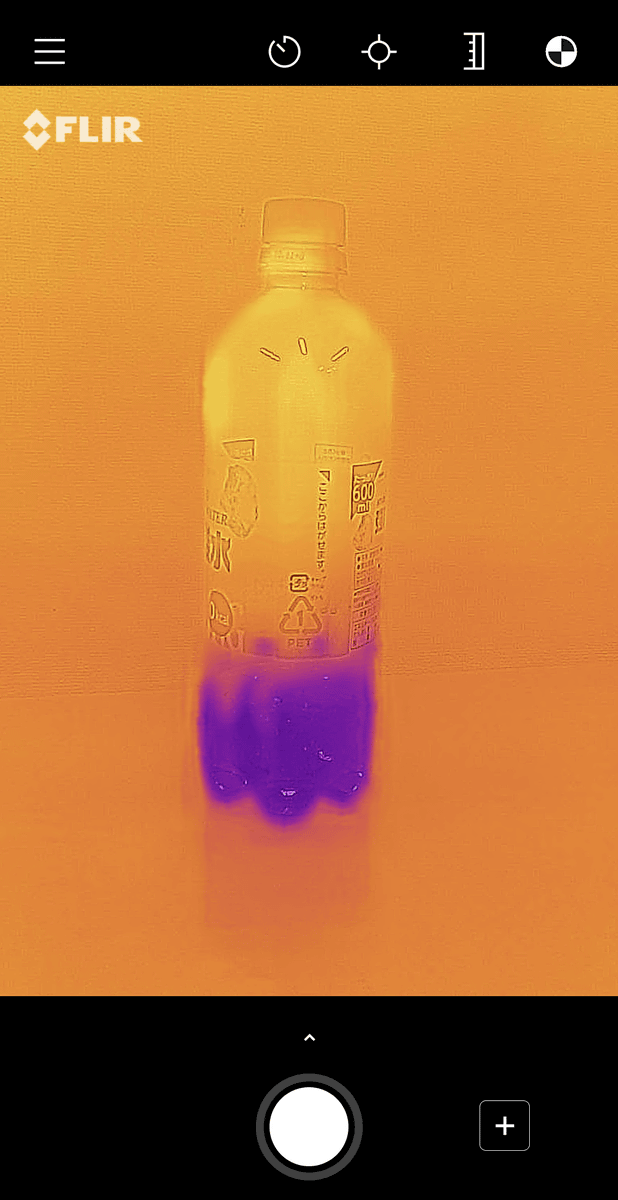
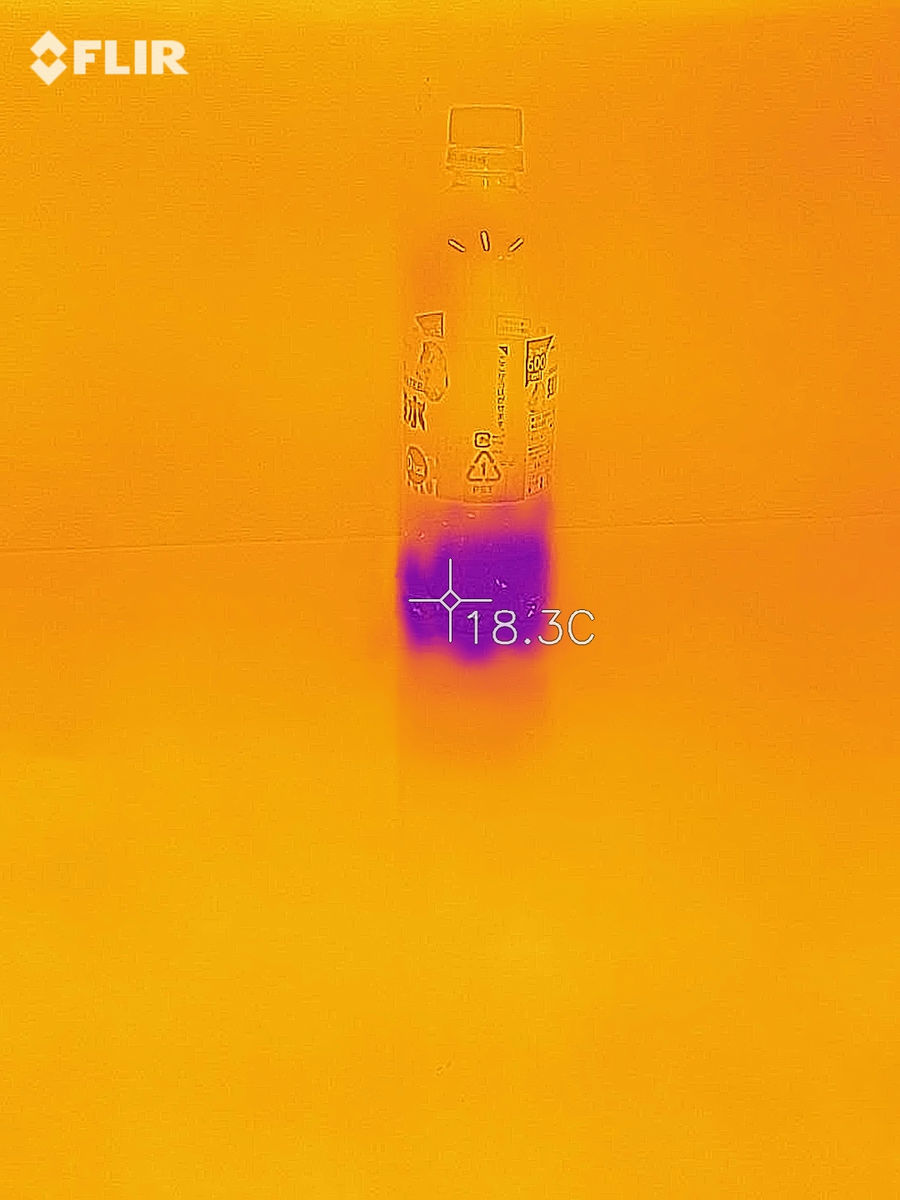
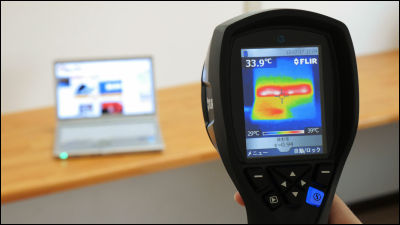
The drink in the plastic bottle on the edge of the table is about 18.3 degrees.
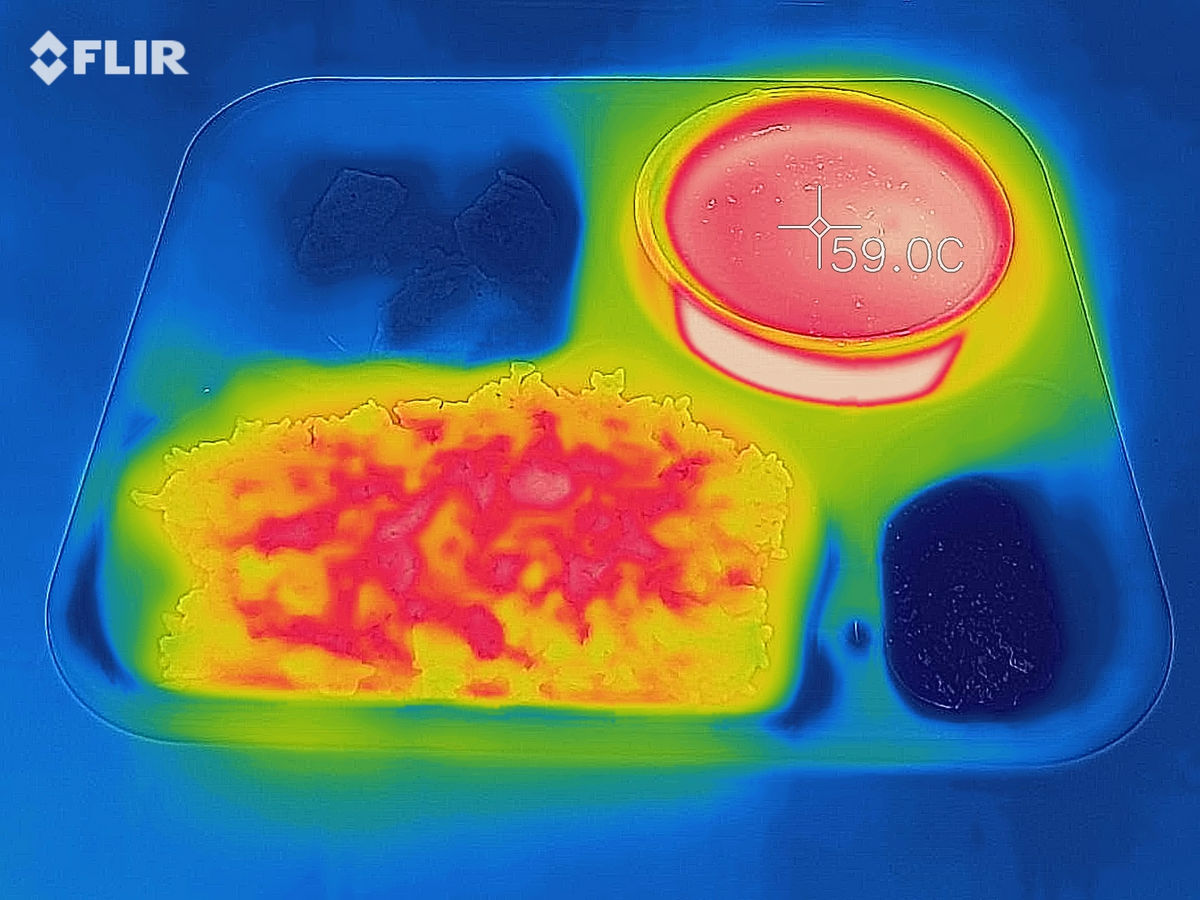
The bento I bought had a piping hot curry part that was about 59 degrees.
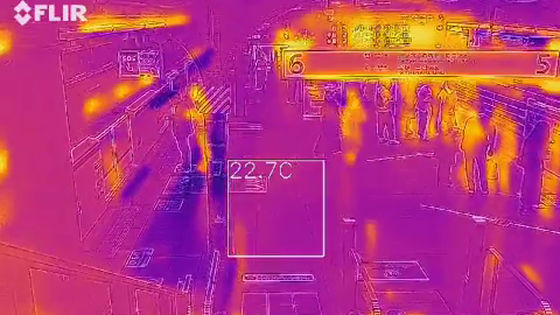
This is what it looks like when filmed. If you do it in a crowded place, you can feel like a predator.
Shooting infrared movies with FLIR ONE Pro - YouTube
The FLIR ONE Pro for Android (USB Type-C connection) is priced at 54,780 yen on Amazon, but at the time of writing, it is being sold for 45,485 yen.
Amazon | FLIR (FLIR) [Domestic genuine product] FLIR ONE Pro for Android (Type-C) 19200 pixels 1 year warranty Infrared thermography Manufacturer part number: 435-0007-03 | Thermometer | Industrial and research and development supplies mail order
Similarly, the iPhone/iPad version (Lightning connection) is also being sold for 45,485 yen including tax, down from the list price of 54,780 yen.
Amazon | FLIR (FLIR) [Domestic genuine product] FLIR ONE Pro for iPhone/iPad 19200 pixels 1 year warranty Infrared thermography Manufacturer part number: 435-0006-03 Black | Thermometer | Industrial and research and development supplies mail order


Related Posts:

in Free Member, Video, Hardware, Review, Posted by logc_nt