Review of using 'Halide', a camera app that is easy to use even for beginners even though it is full of professional functions

Some of the people who started working on a third-party camera app saying, 'Let's graduate from the genuine iPhone camera app,' should have been frustrated because they didn't know how to set the exposure. The iPhone camera app ' Halide ' is packed with the latest features and professional features that are comparable to the
Halide Mark II --Pro Camera on the App Store
https://apps.apple.com/us/app/halide/id885697368
Pro. Camera. Action. Introducing Halide Mark II. | Halide
https://blog.halide.cam/introducing-halide-mkii-30f9f2bceac3
·table of contents
◆ Installation and preparation for use
◆ UI usability & focus, shutter speed, ISO sensitivity, white balance change method and each function are like this
◆ I actually shot in portrait mode, AR function, and 'Instant RAW'
◆ Summary
◆ Installation and preparation for use
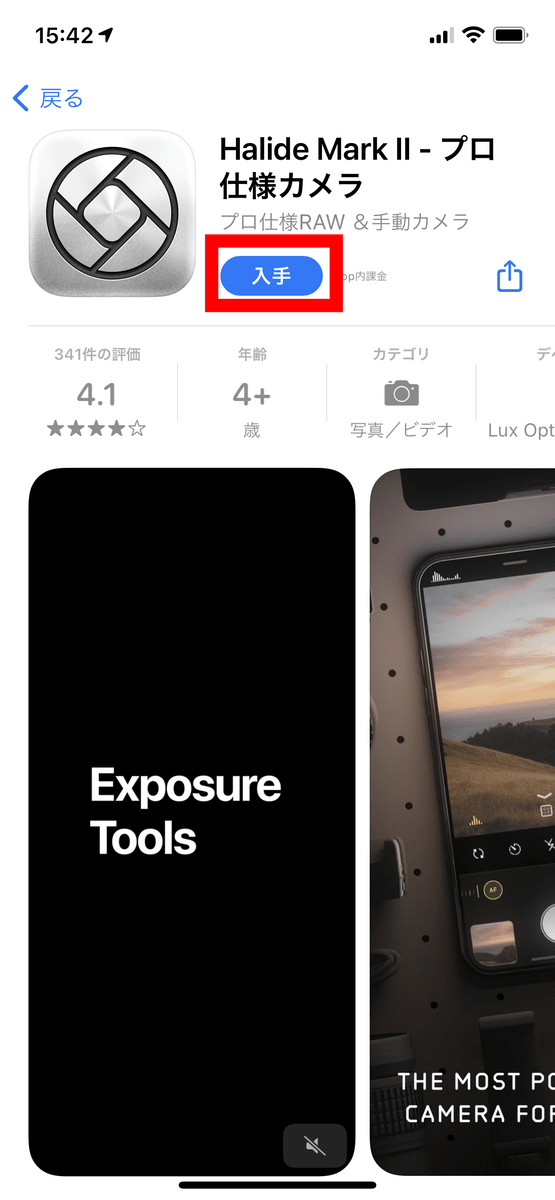
To install, first go to the Halide distribution page and tap Get.
After installation, tap 'Open'.

Tap anywhere on the screen to continue.

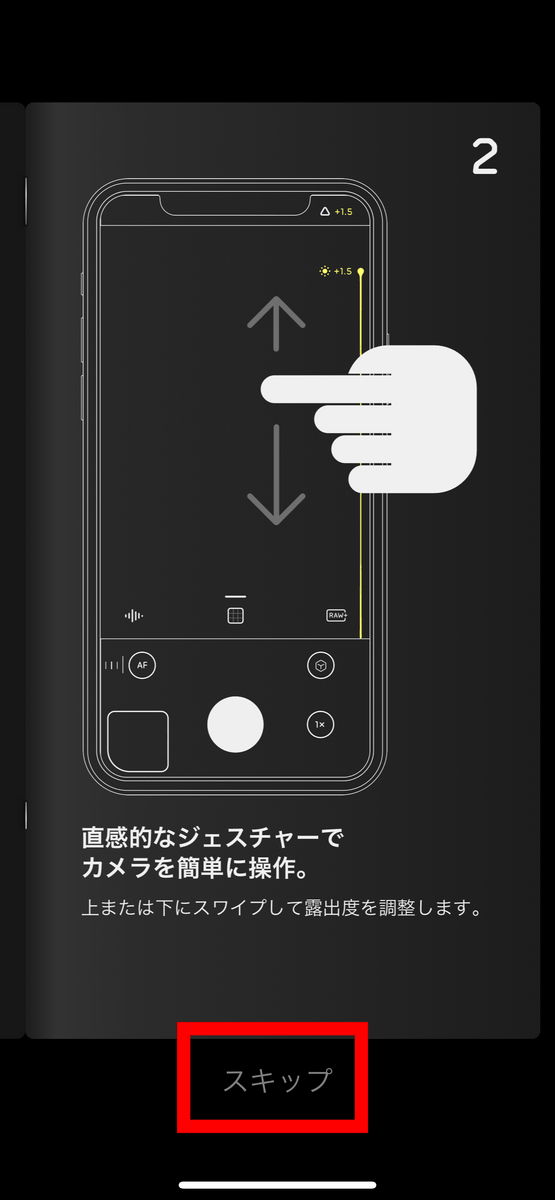
Tap 'Skip'.
Halide is a paid app, but it has a free trial period of up to a week. Tap Start free trial and subscribe to start the trial period.
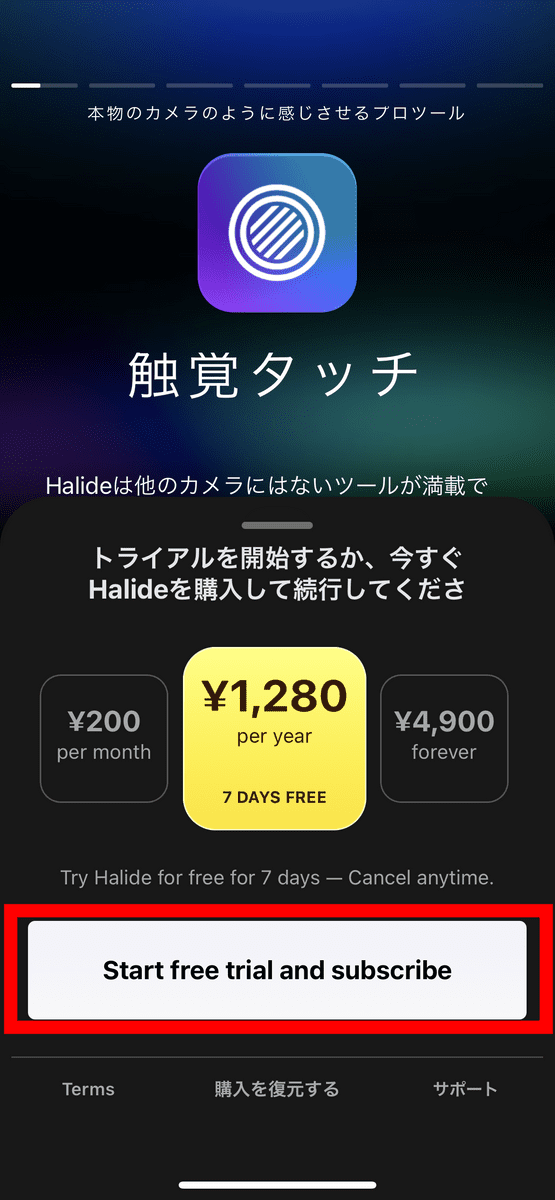
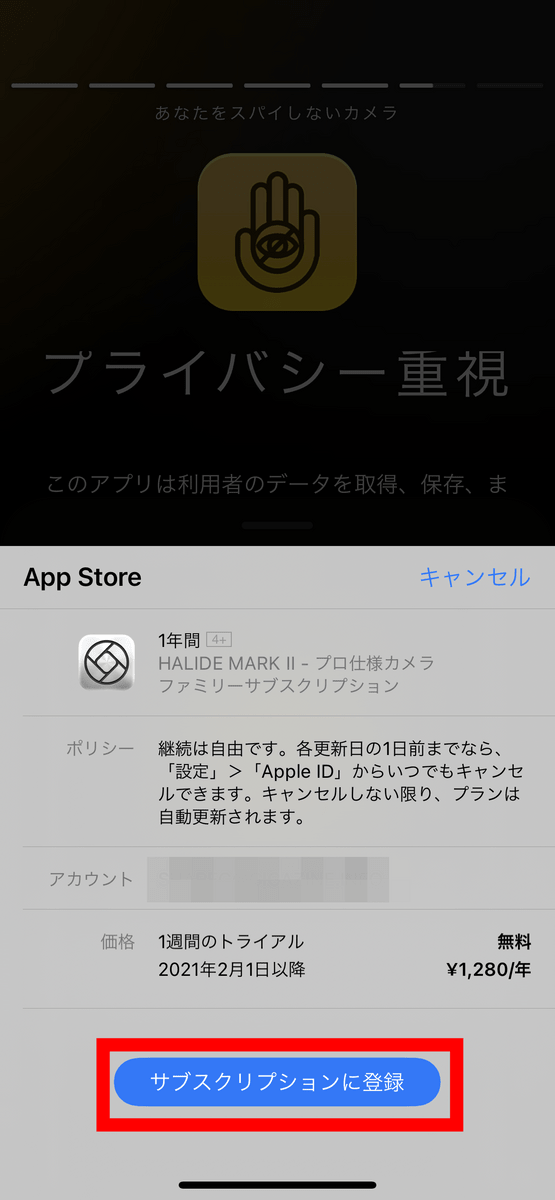
Tap 'Subscribe'. If you tap this button, you will be charged if you do not cancel the subscription by the end of the trial period, so be careful if you do not use it for more than a week.
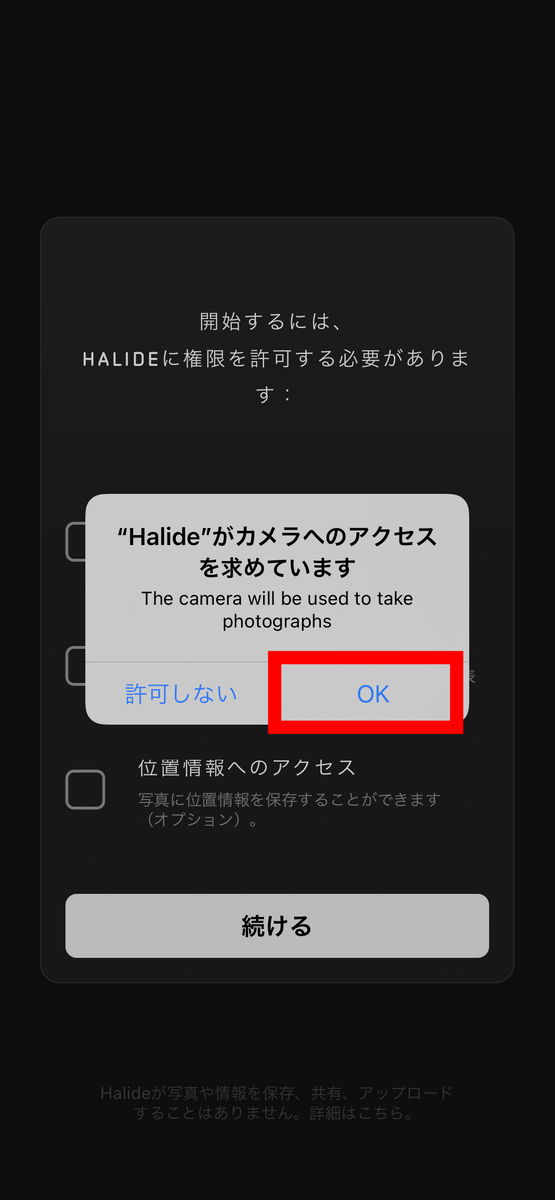
Tap 'OK'.

Tap the checkbox next to 'Camera Access'.
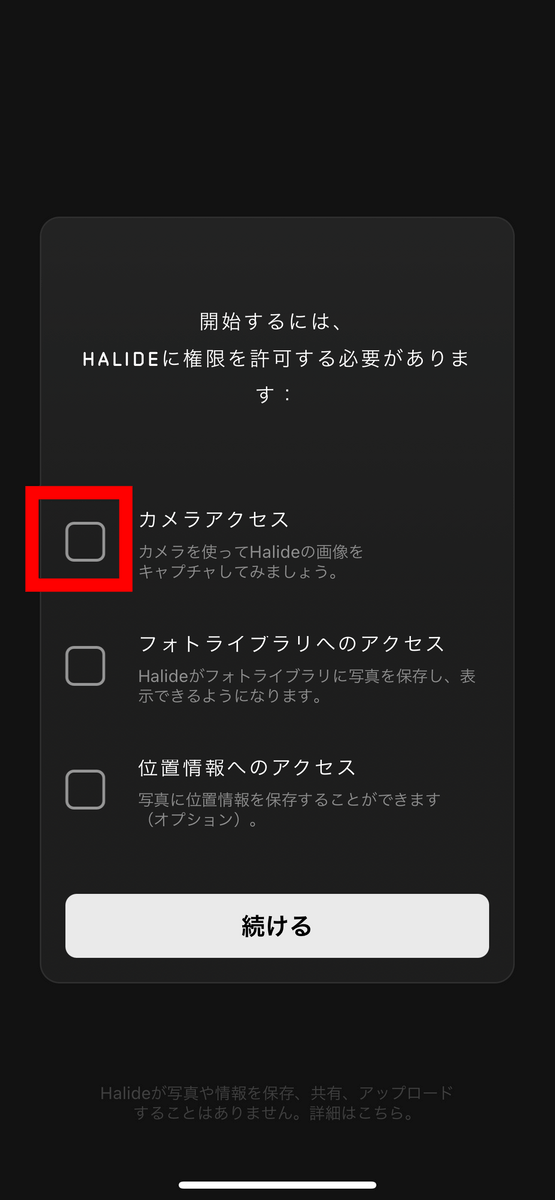
You will be asked for permission to use the camera, so tap 'OK'.
Once you've granted access to your photo library and location in the same way, tap Continue and you're ready to go.

◆ UI usability & focus, shutter speed, ISO sensitivity, white balance change method and each function are like this
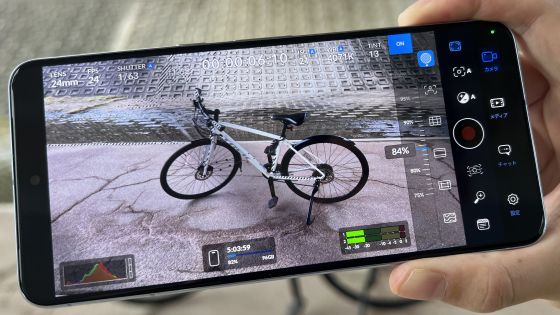
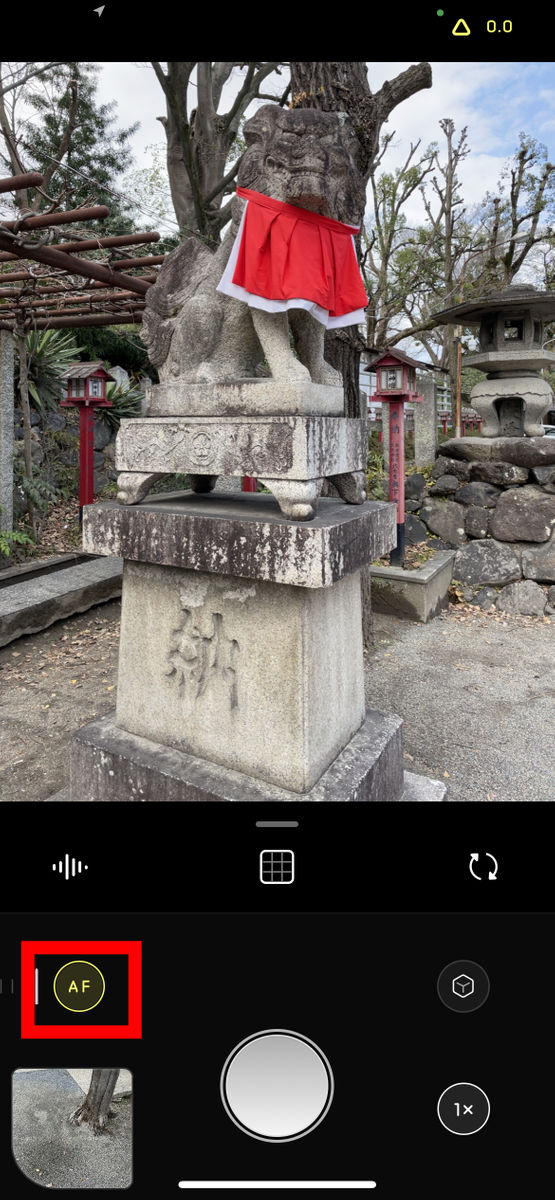
This is Halide's home screen. One of the elements that Halide puts the most effort into is the UI of the home screen, and the icons are concentrated at the bottom of the screen, so at first glance you can see that 'most icons can be operated with one thumb'. .. First, to check all the functions, tap 'AF' to cancel autofocus ...
A slide for manually setting the focus was automatically displayed.

If it's hard to tell if it's in focus, tap the button in the red frame ...
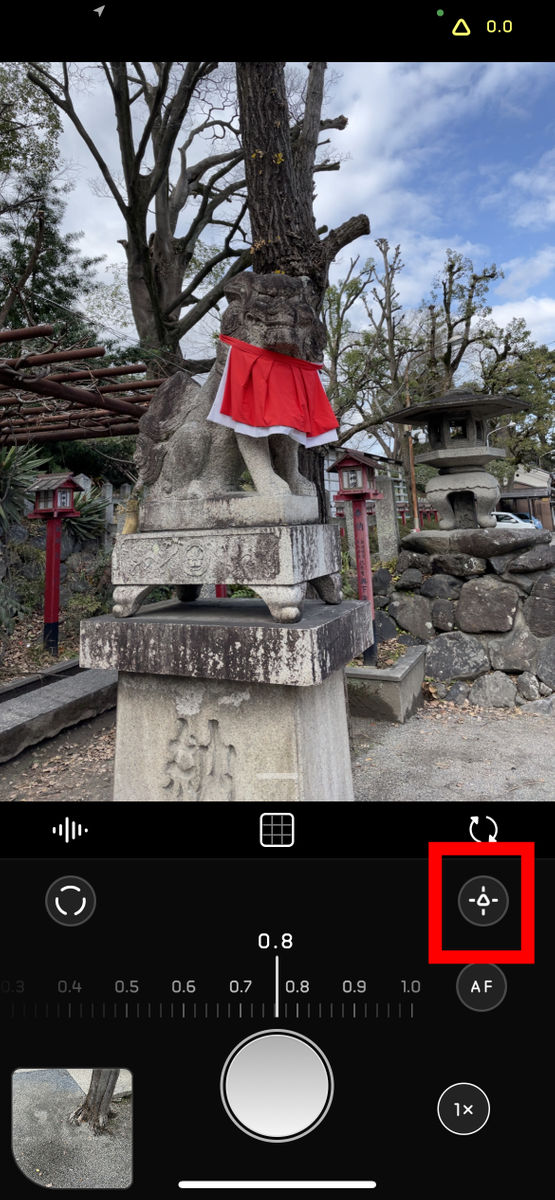
You can magnify it with the magnifying glass in the center of the screen.
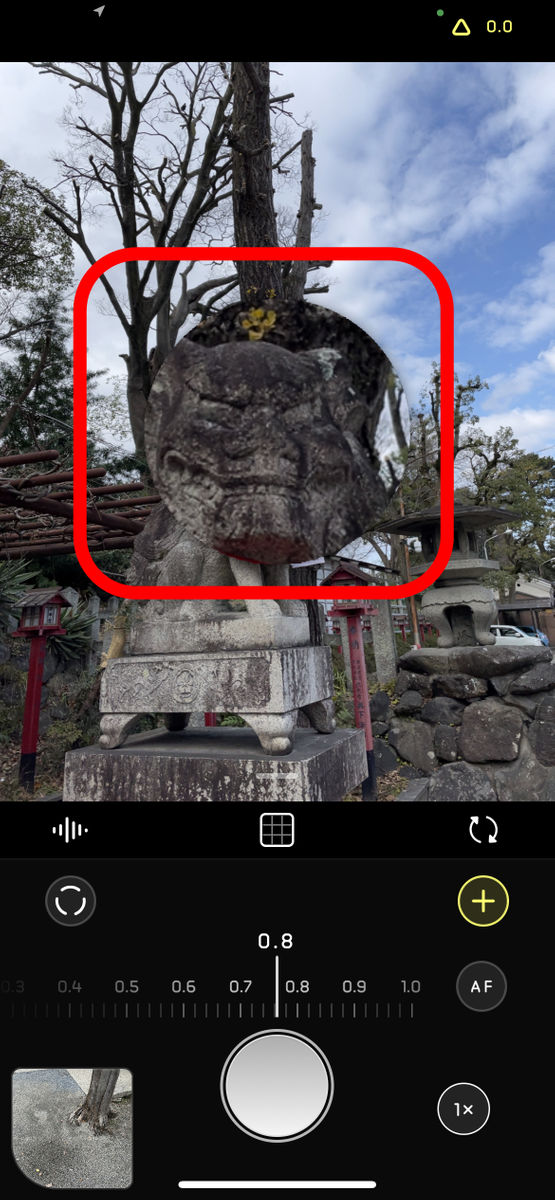
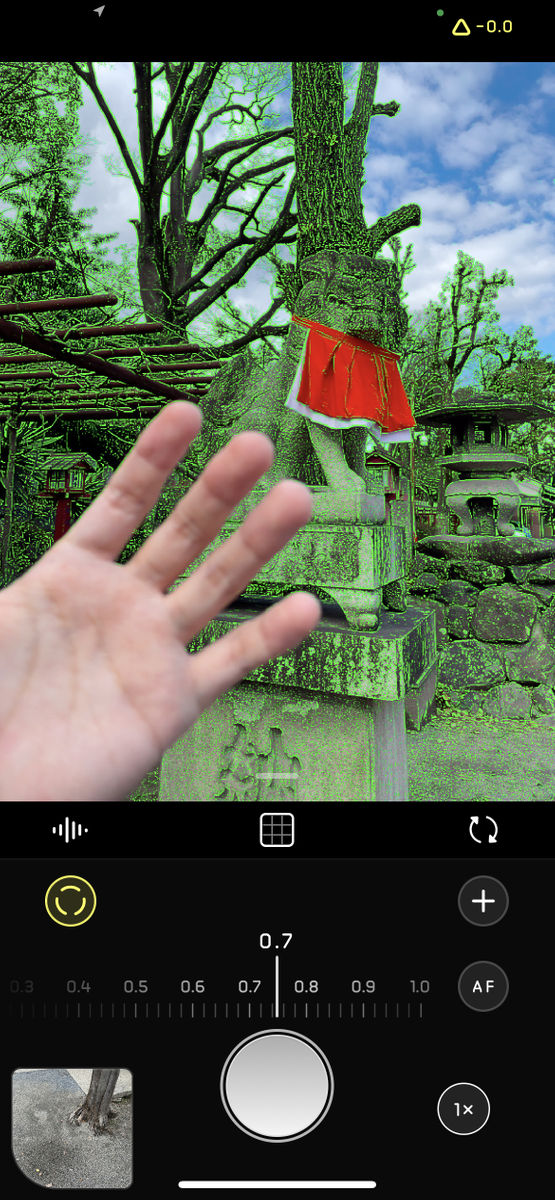
Also, by tapping the button surrounded by the red frame at the bottom left, you can use 'focus keeping' that emphasizes the focused part with a green outline.
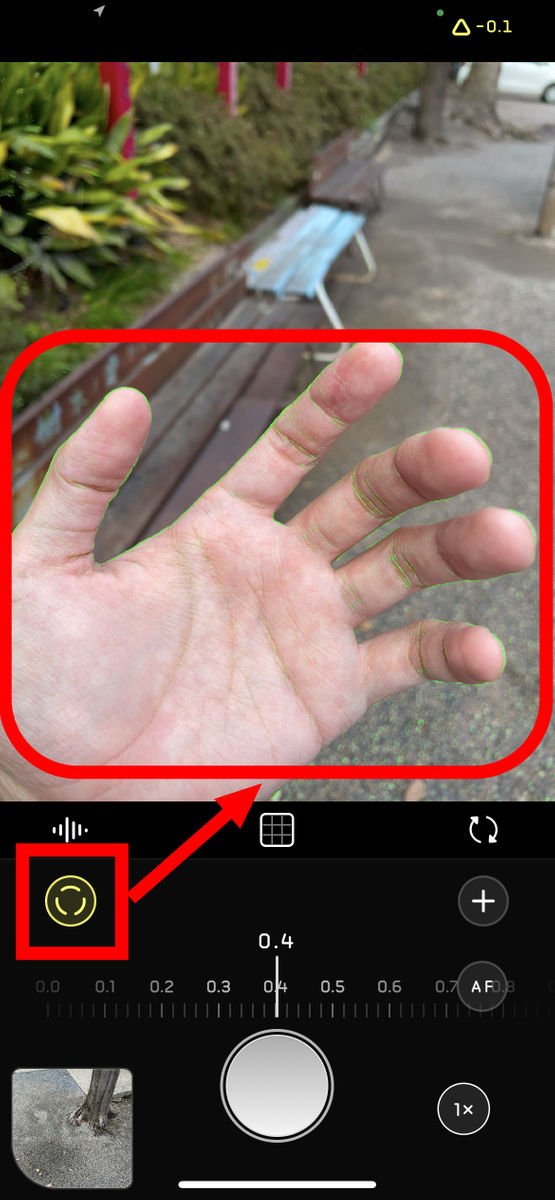
This allows you to see at a glance where the focus is.
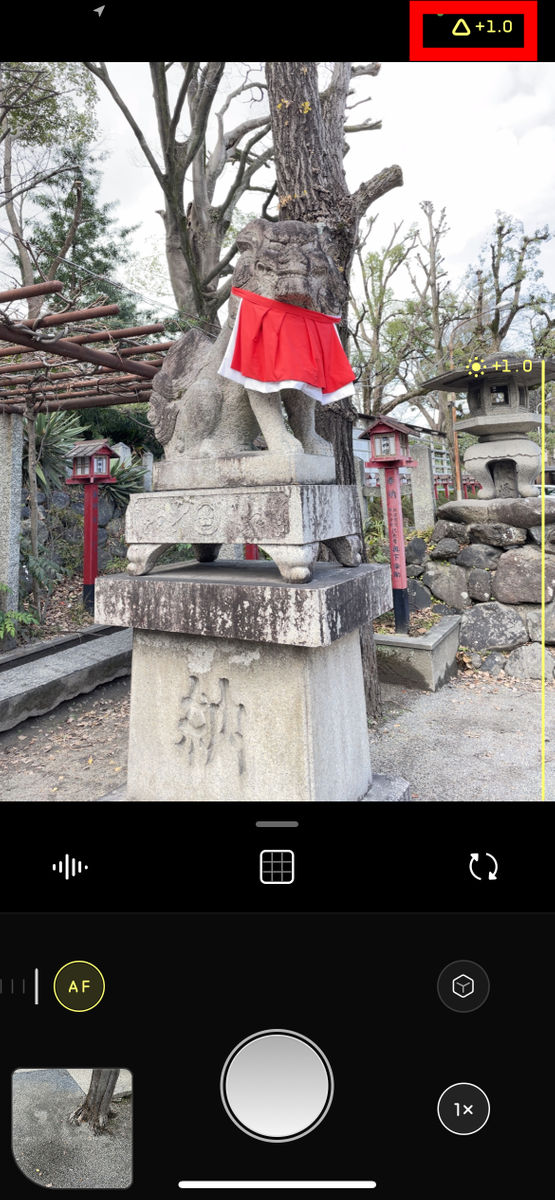
By default, Halide is in auto mode, which automatically adjusts the
Drag it up to make it brighter.
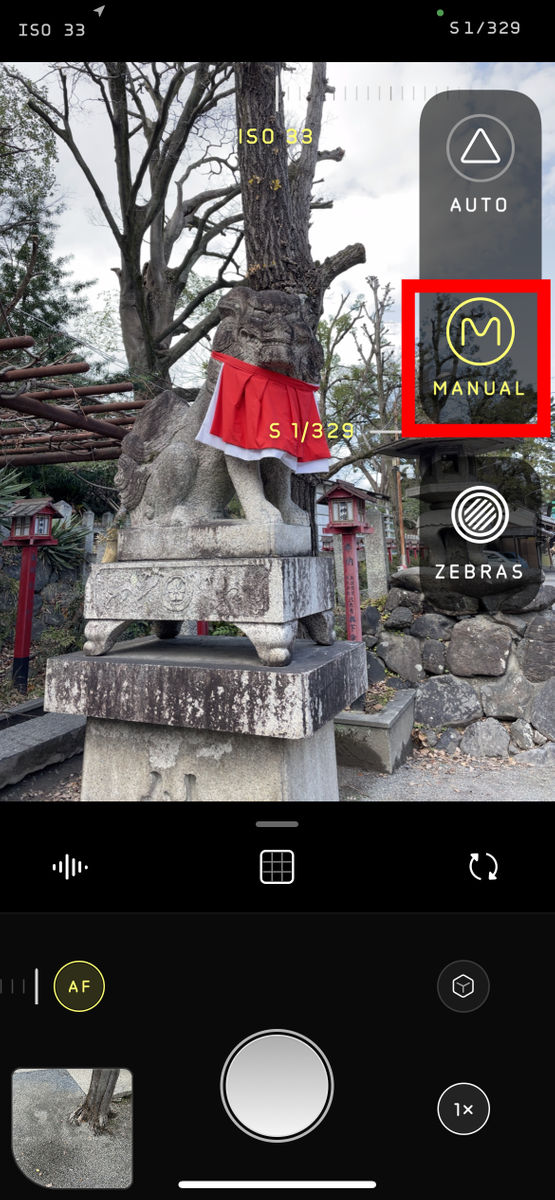
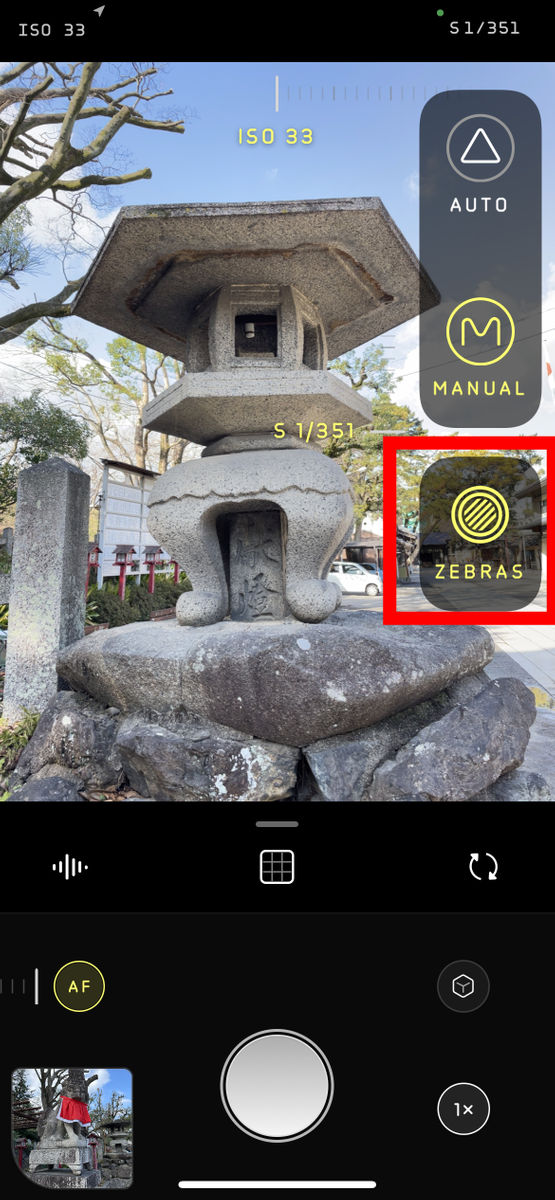
To switch to manual mode where you can freely change the exposure, tap the red frame at the top right of the screen, and then ...
Tap 'MANUAL'.
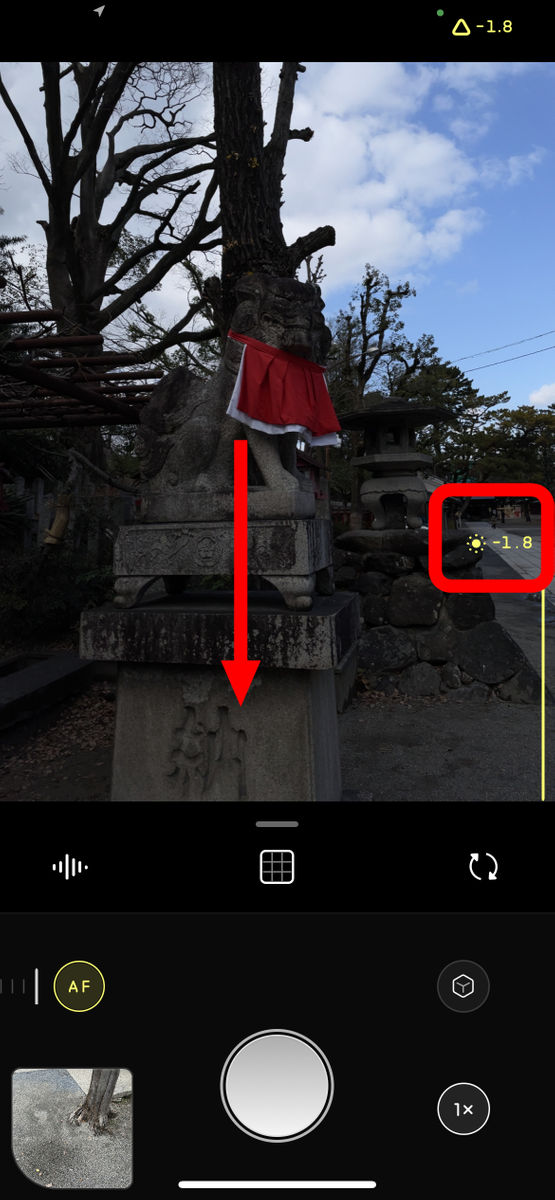
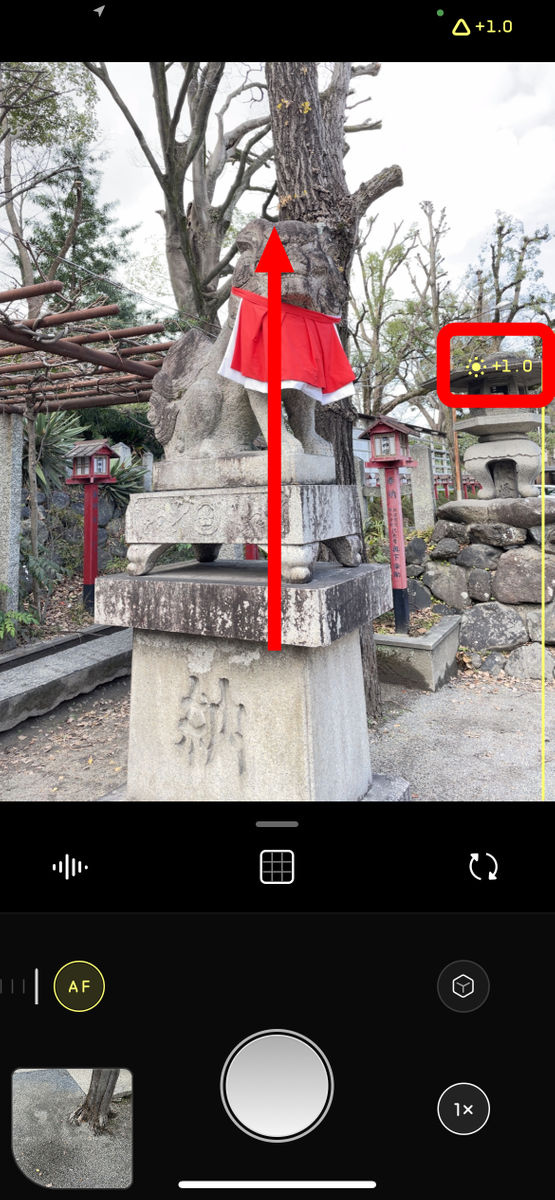
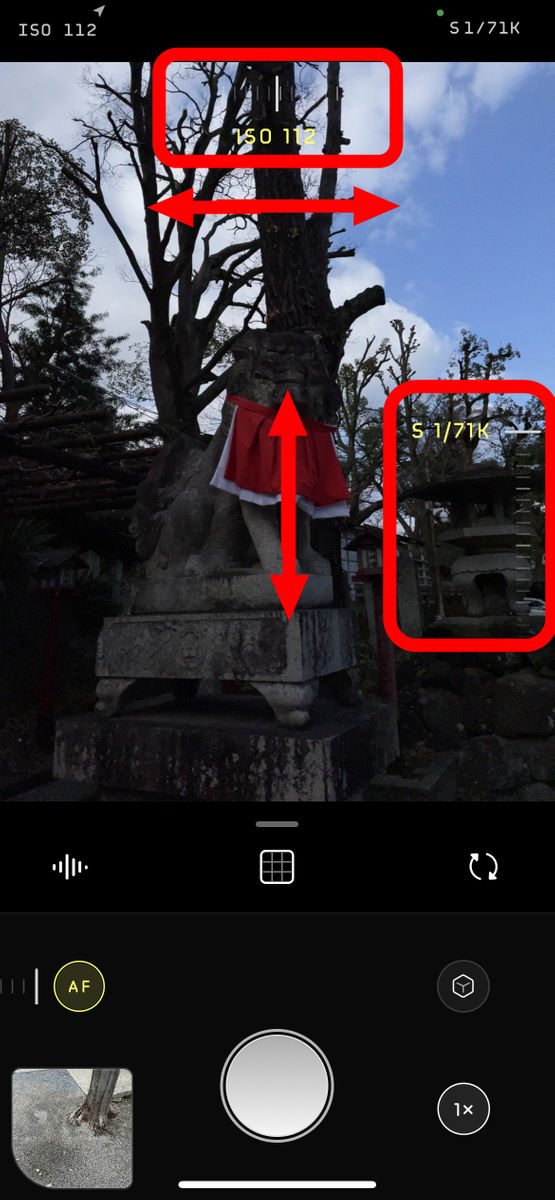
In manual mode, drag the screen up or down in the same way that you changed the brightness earlier to increase or decrease the shutter speed. You can also change the ISO sensitivity by dragging left or right.
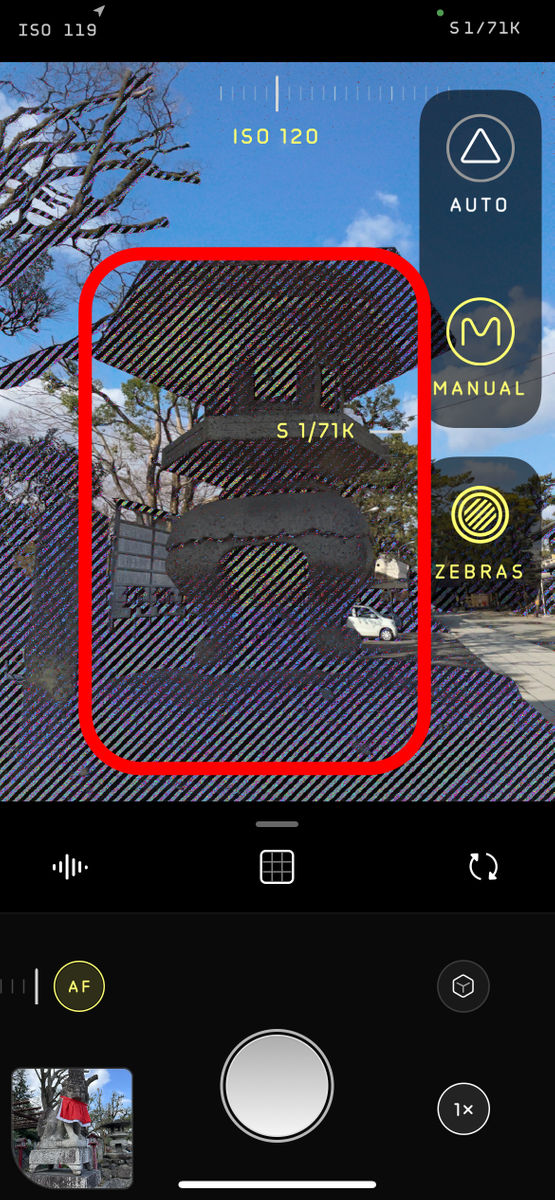
Many people who have tried the manual mode of the camera app have experienced that they accidentally set the extreme settings and the screen went blank or black.
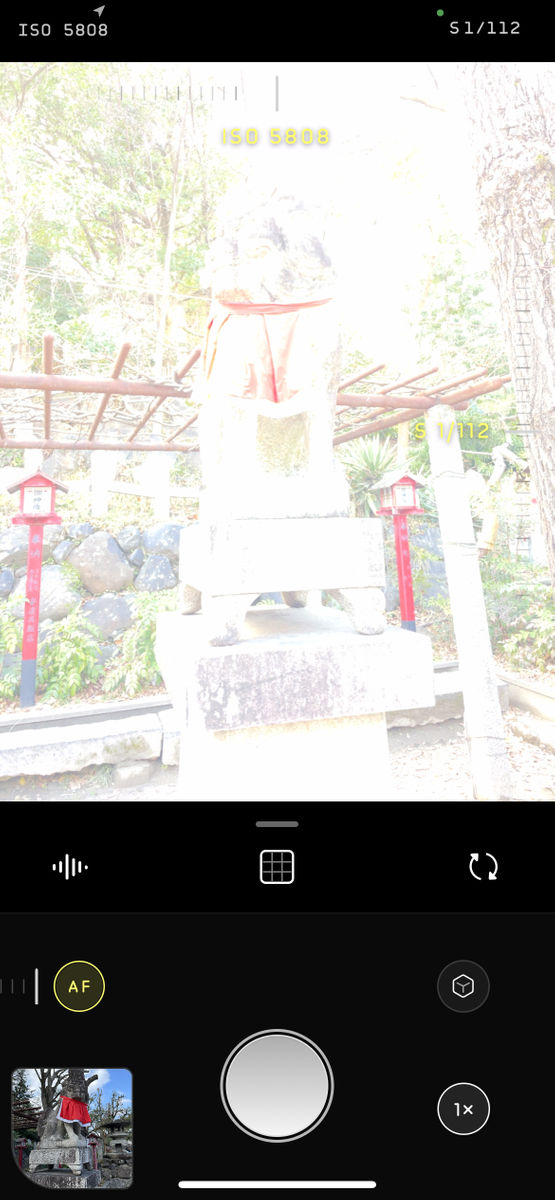
In such cases, the 'Zebra Stripe' function is useful.
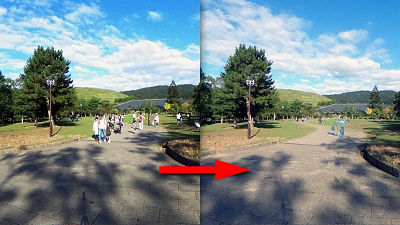
With this function, if the ISO sensitivity is too high and the sky is likely to be overexposed ...
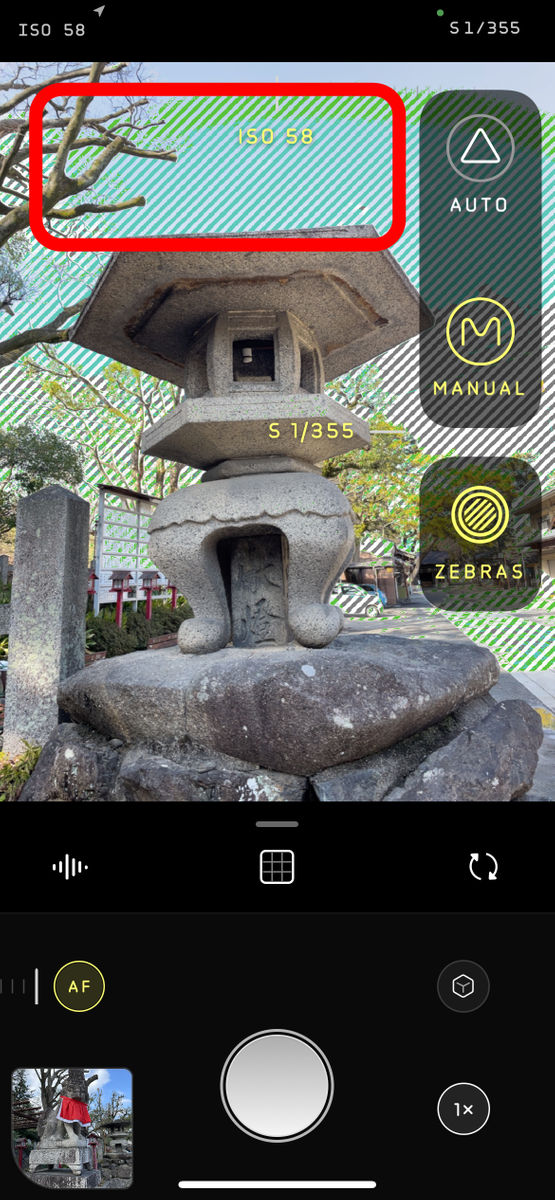
If the shutter speed is too fast and the subject appears dark, the problem area will be emphasized with a stripe pattern, making it easier to set the exposure within an appropriate range.
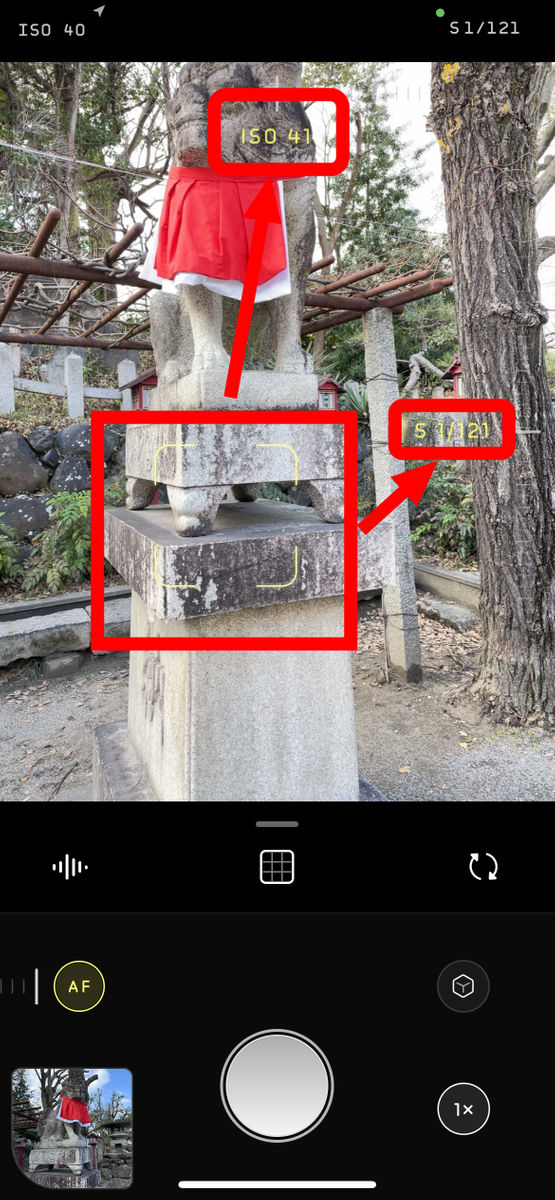
Also, if you're wondering what to set, tap the subject and it will automatically set the right ISO sensitivity and shutter speed.
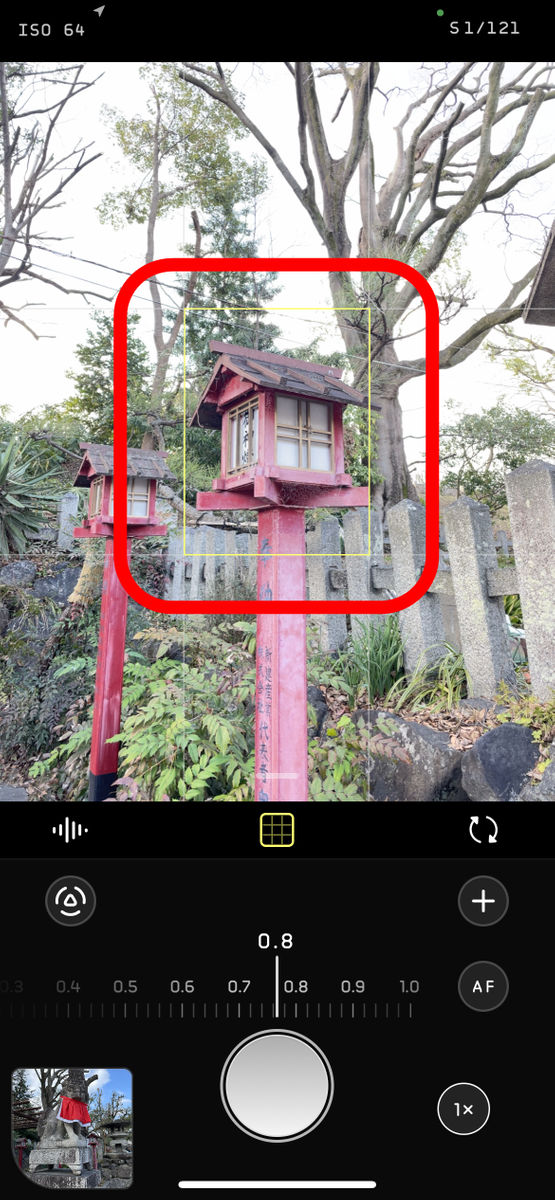
When you want to stick to the composition, it is convenient to tap the button in the red frame to display the grid.
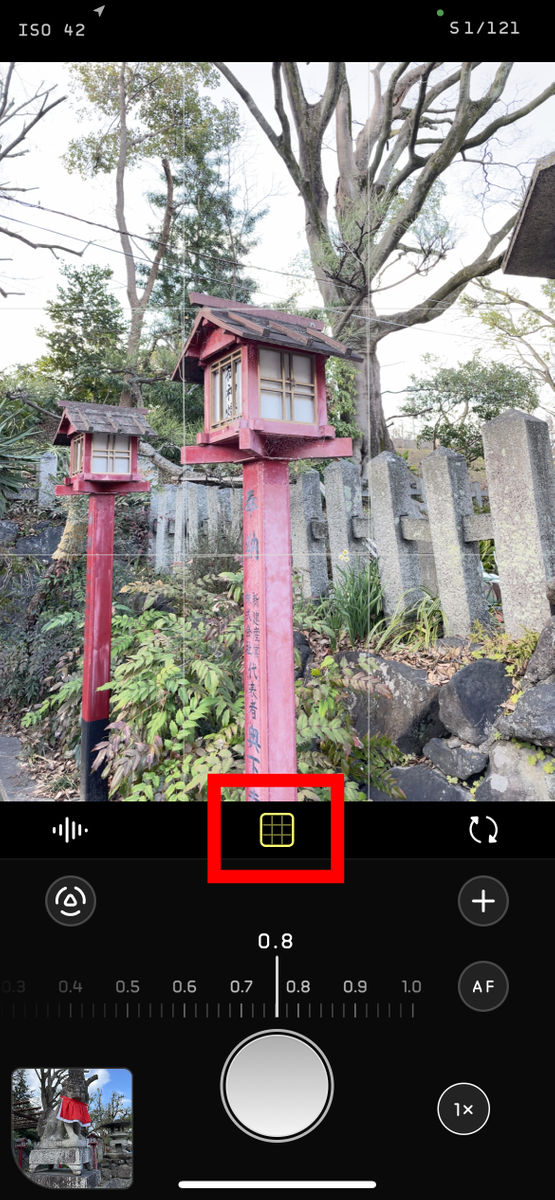
When the main body is straight, the grid in the center turns yellow and the main body trembles slightly, which is useful even if you are concerned about the inclination.
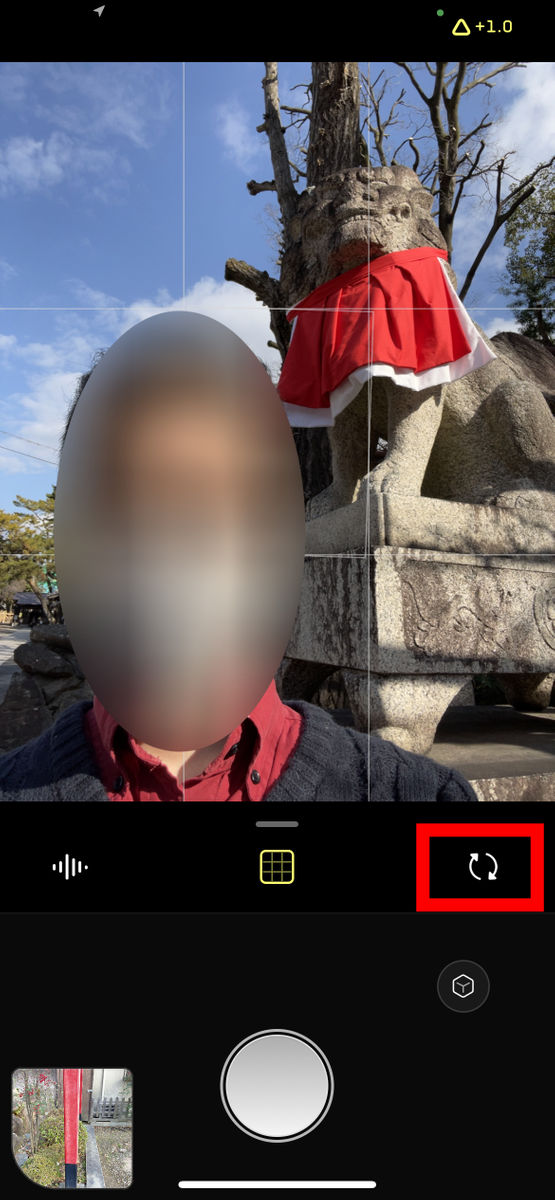
In addition, switching between the rear camera and in-camera, which is useful for taking selfies, etc ...
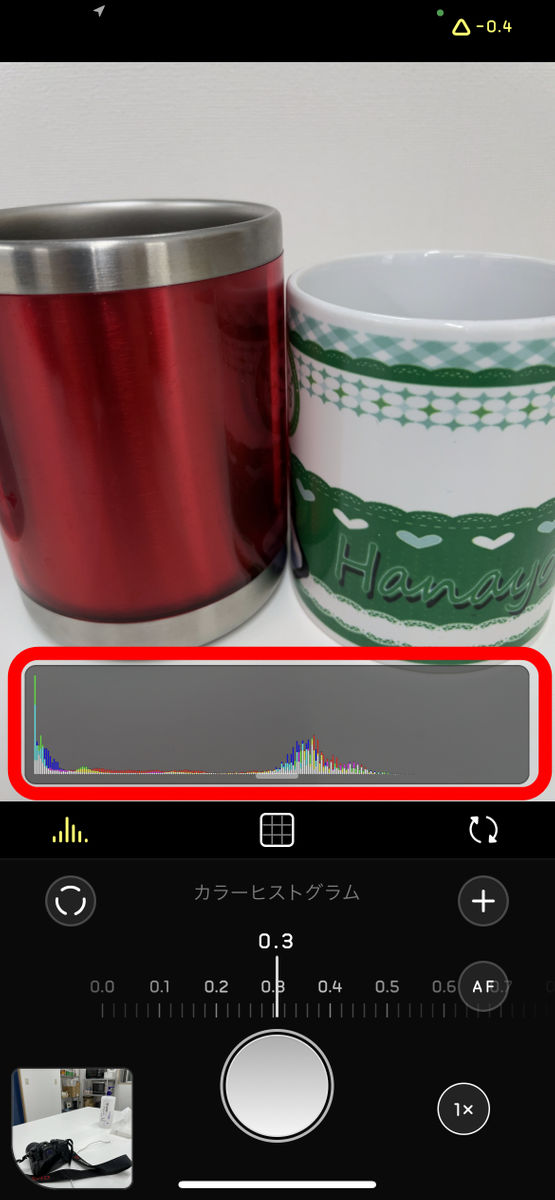
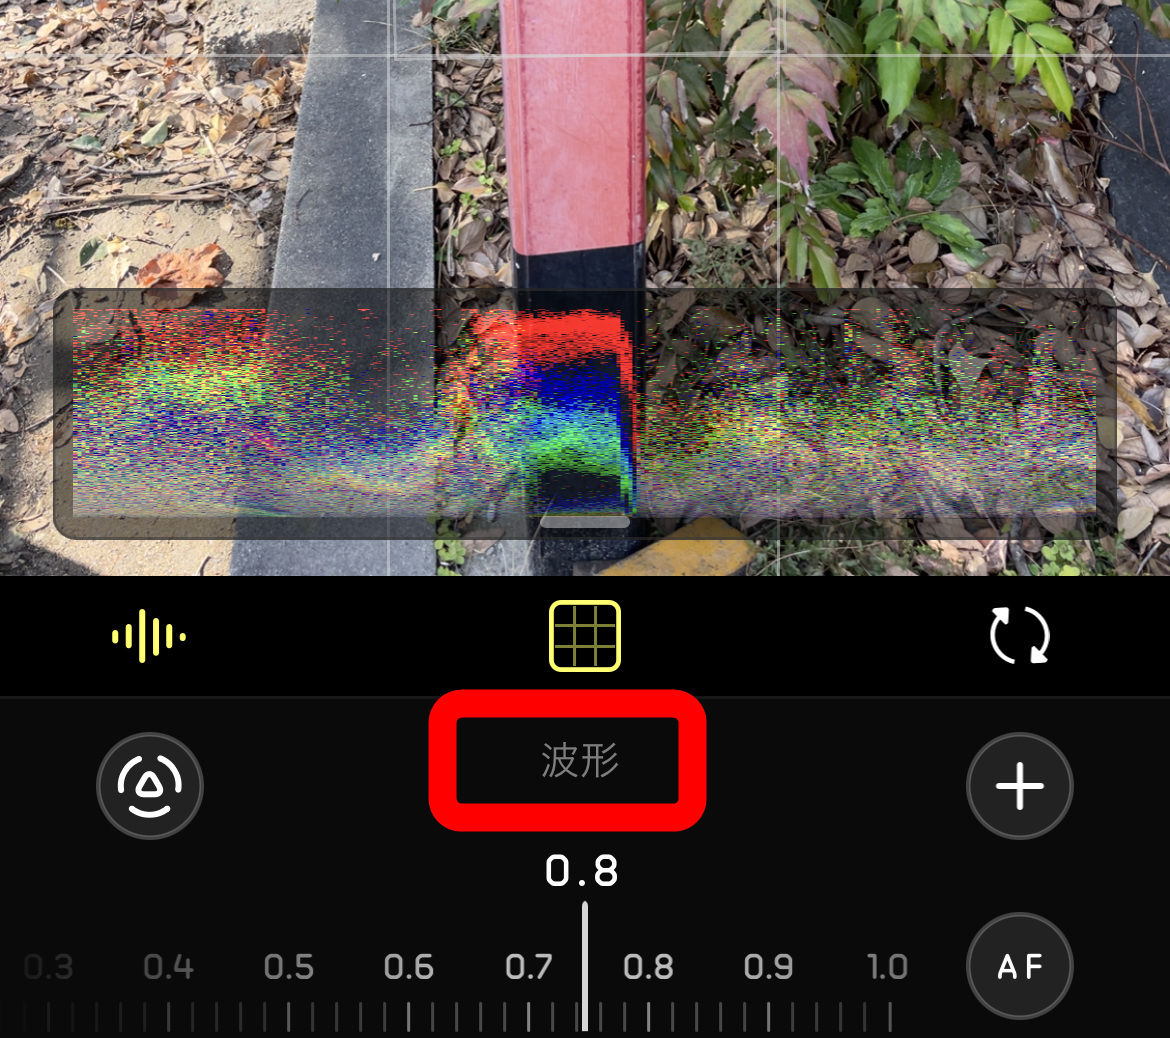
You can also display a histogram.
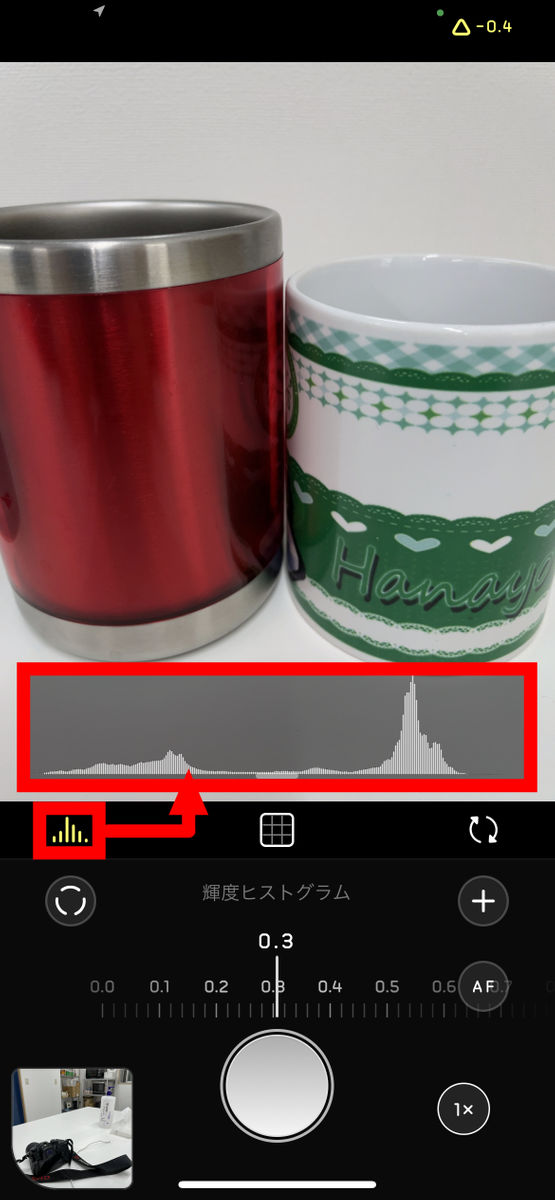
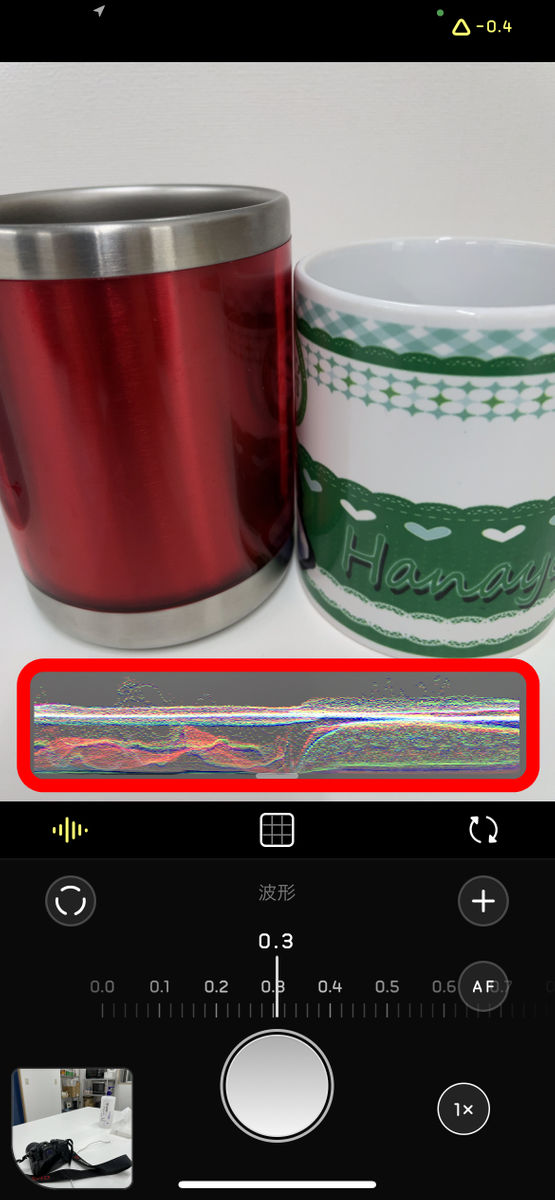
Tap the histogram part to change the brightness histogram to the color histogram
You can switch the waveform.
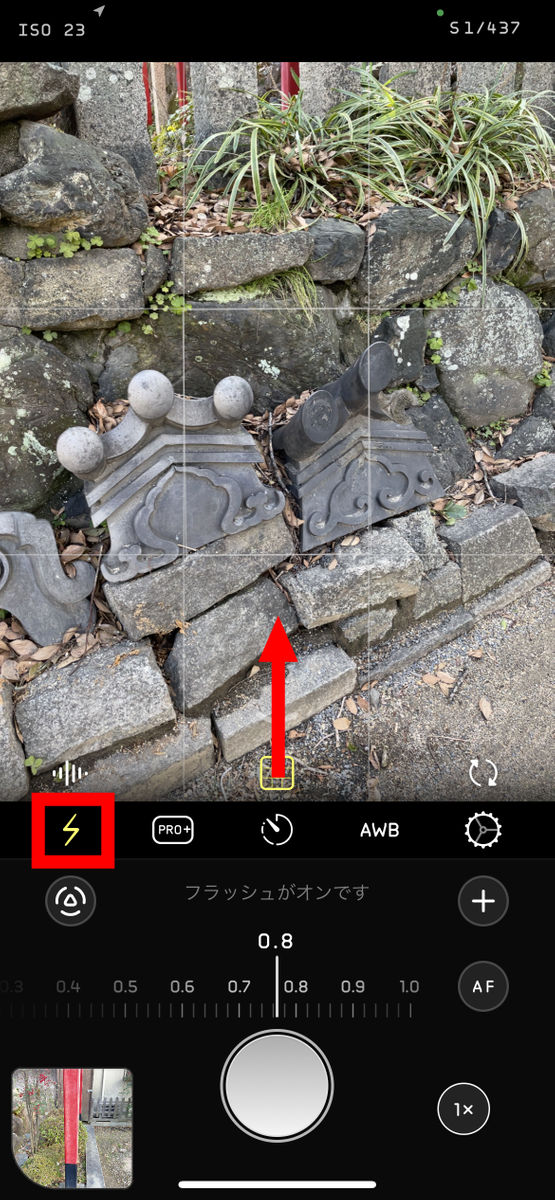
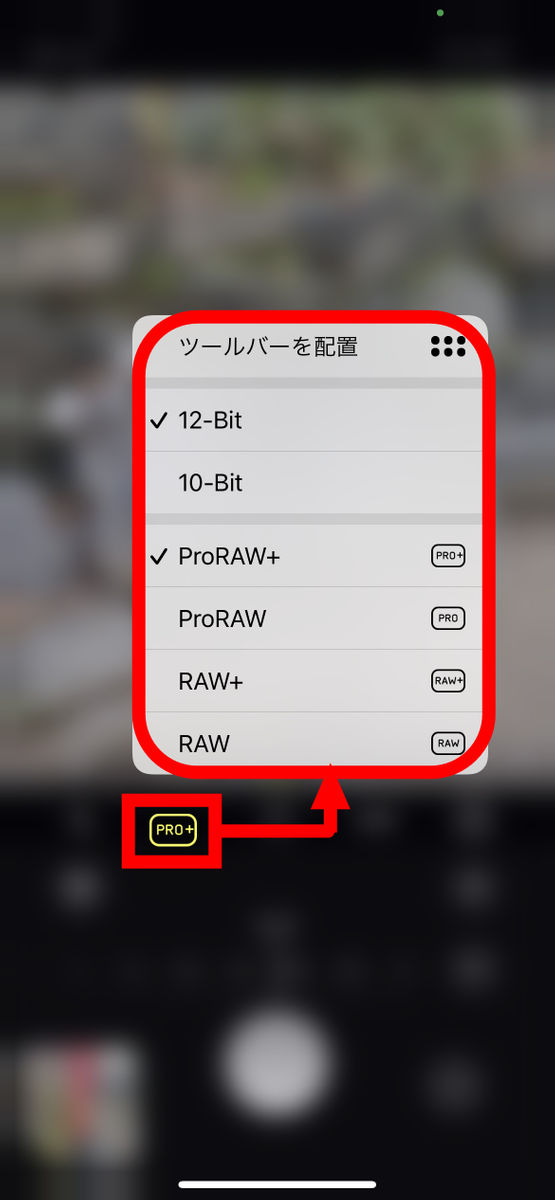
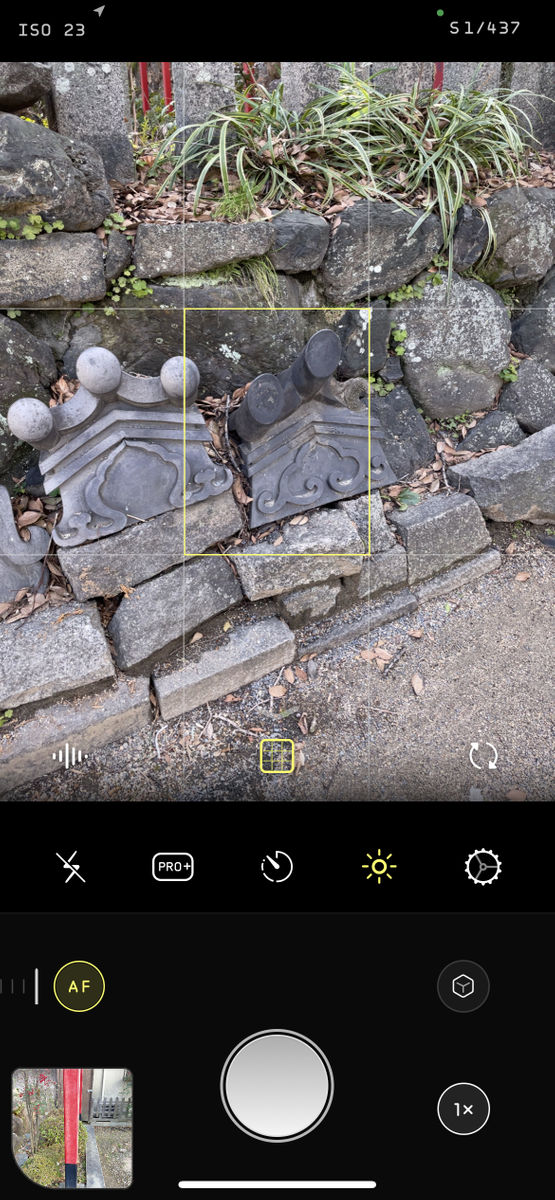
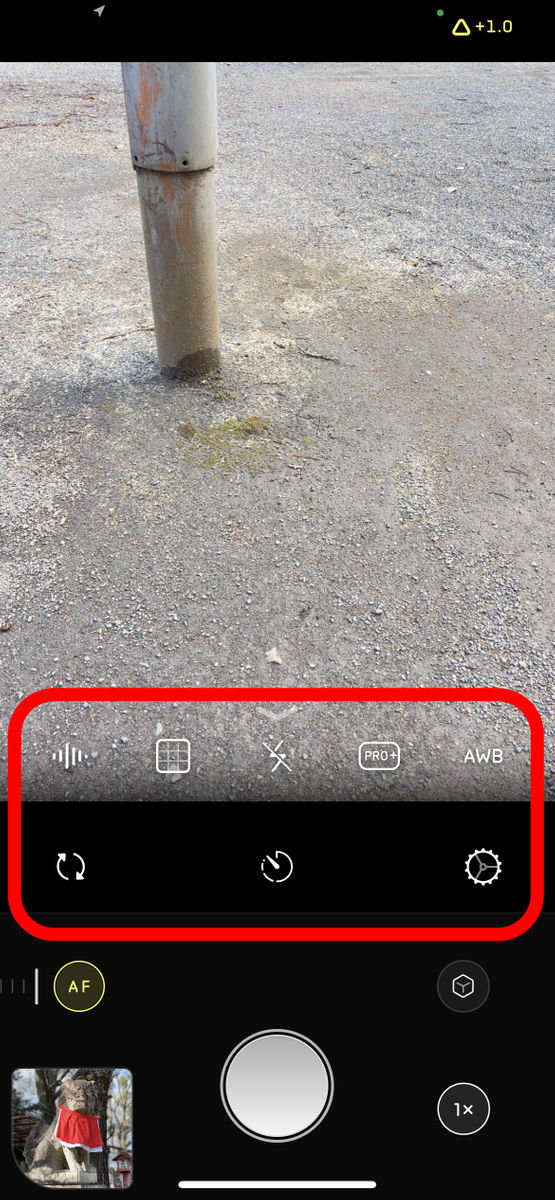
Drag the part where the three buttons are lined up to expand the drawer and access more functions. In addition to 'Switch Flash' on the far left of the second row, there are also 'Switch RAW Save Settings', 'Timer', 'White Balance', and 'Settings' buttons to the right.
Halide is compatible with
In addition, the timer function and ...

It has all the functions required for the camera app, such as switching the white balance.
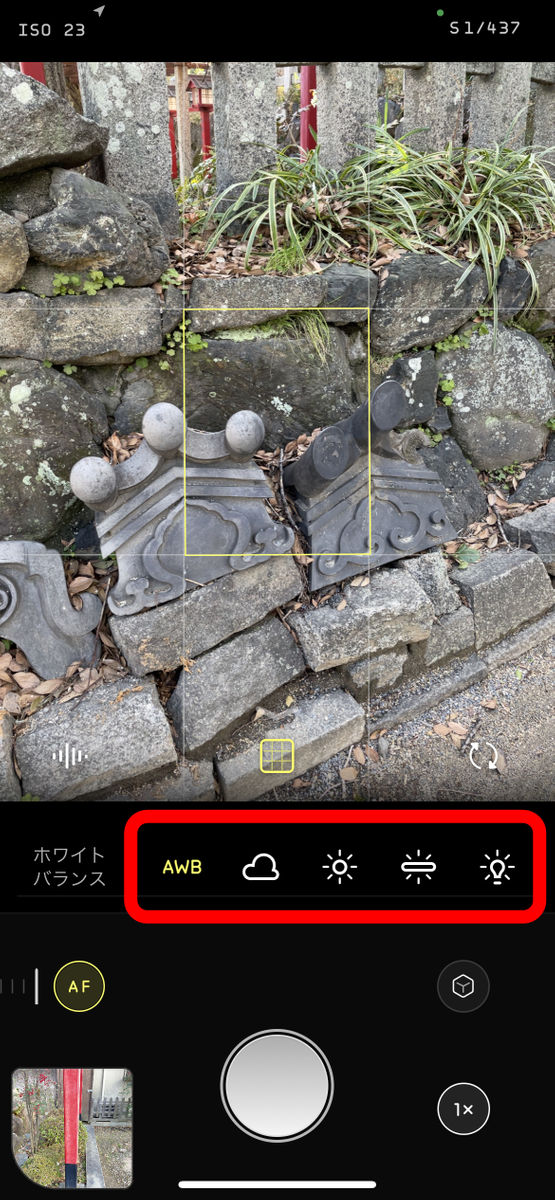
As expected, unlike digital SLR cameras, you cannot set custom white balance using a
The icons displayed in two columns on the drawer can be customized. To set, press and hold a specific icon, then tap 'Place Toolbar' that appears ...
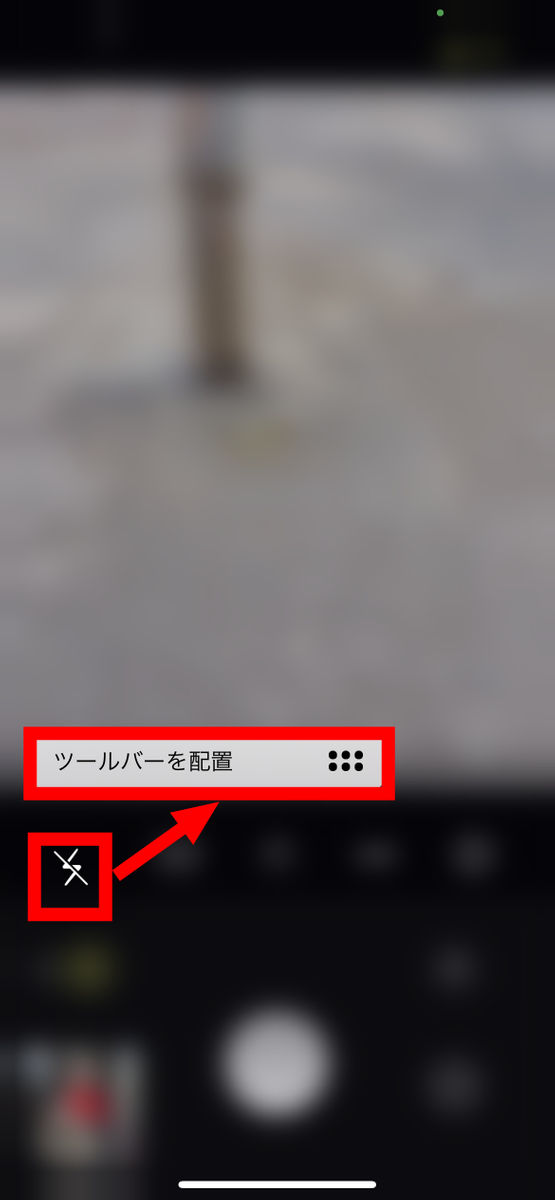
Drag the icons to reorder them, then tap Done.
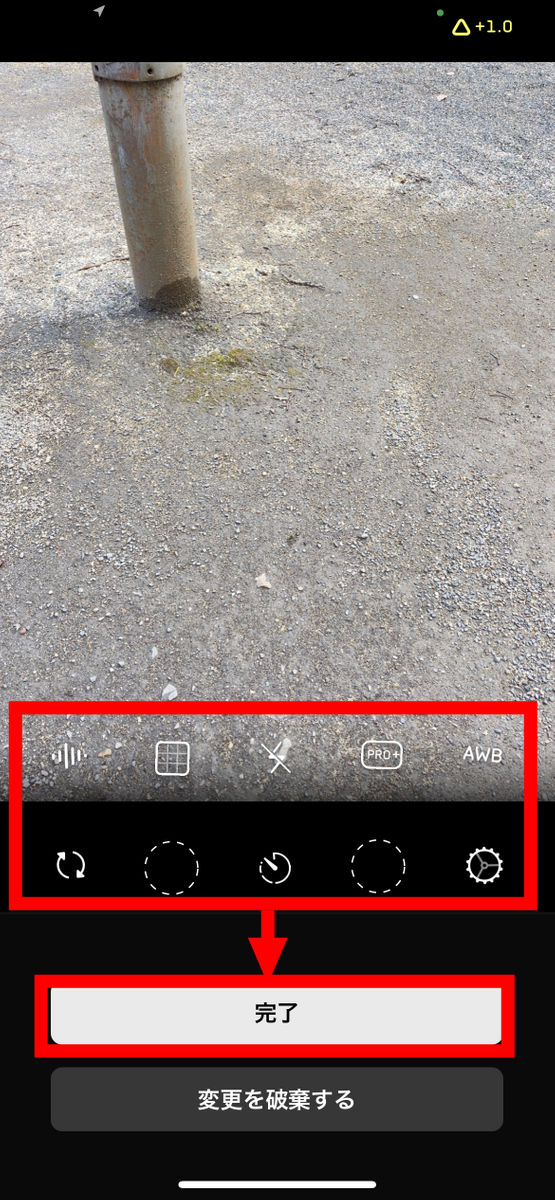
Then, I was able to freely arrange the icons including the margins in two places.
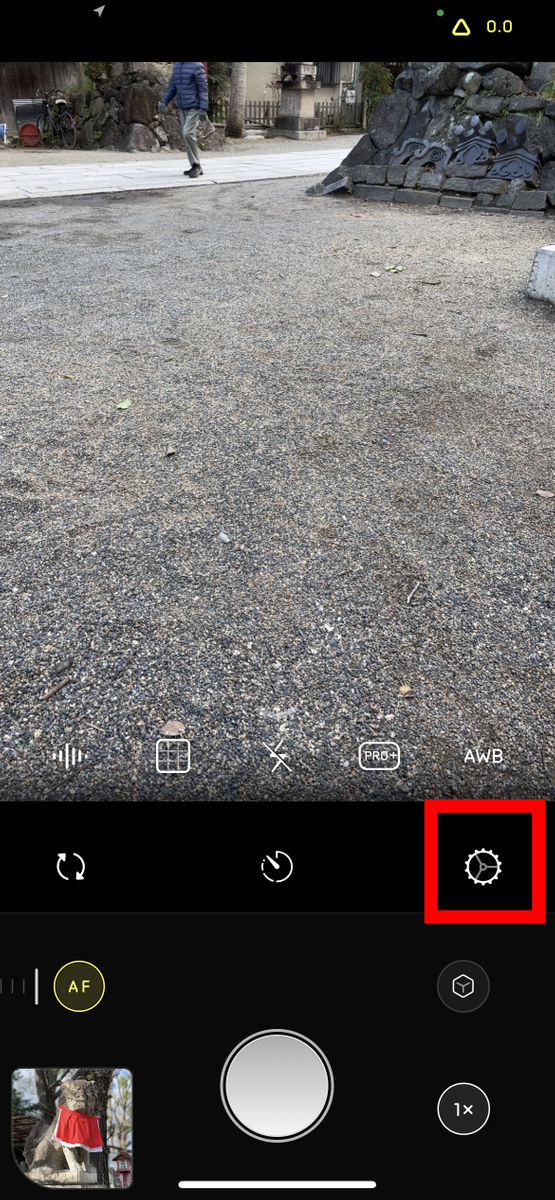
Tap the gear icon to open the settings.
This is Halide's settings menu. When you tap 'Capture' ...
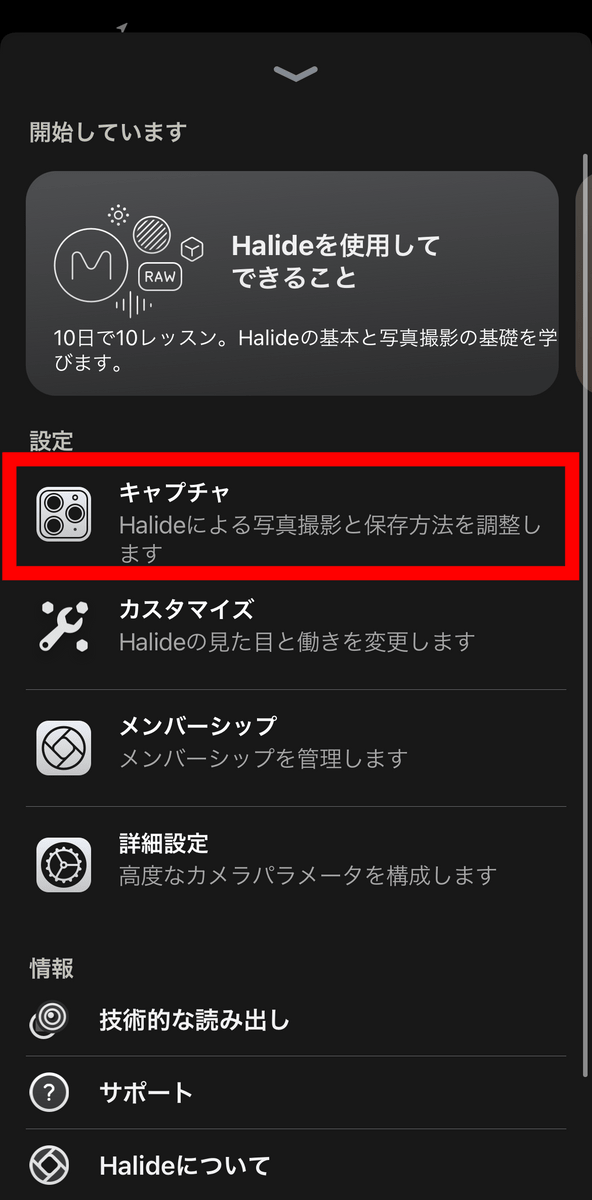
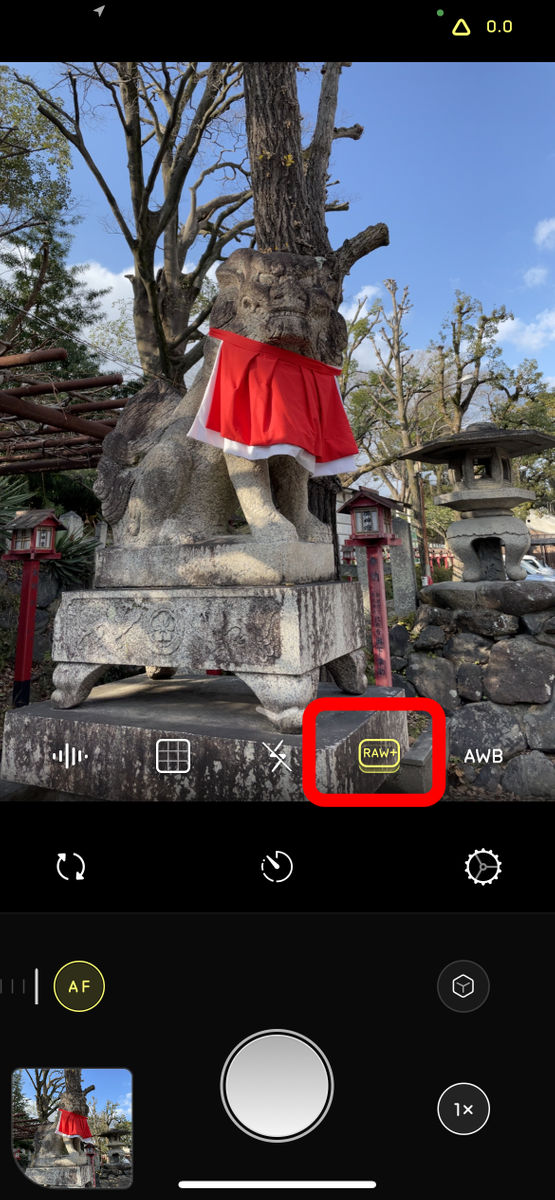
You can make settings related to shooting with Halide. Most notable is the 'coverage' feature, which is the most notable feature of Halide. After turning on this feature ...

When you return to the shooting screen, the RAW setting icon is doubled as shown below, and if you shoot in this state, the shutter will be released twice with 'Kashakasha'. This is because unlike the RAW function, which generates a compressed file (
According to Halide developer Ben Sandofsky, coverage features include '
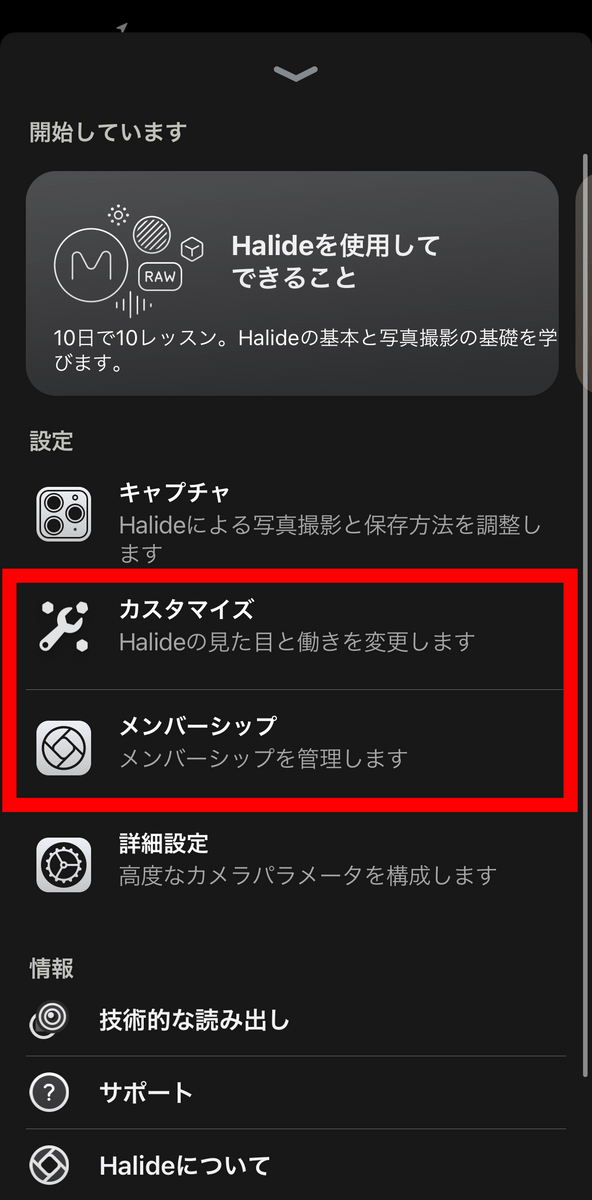
In 'Customize', you can customize the layout of the icons mentioned above, and in 'Membership', you can manage the membership status.
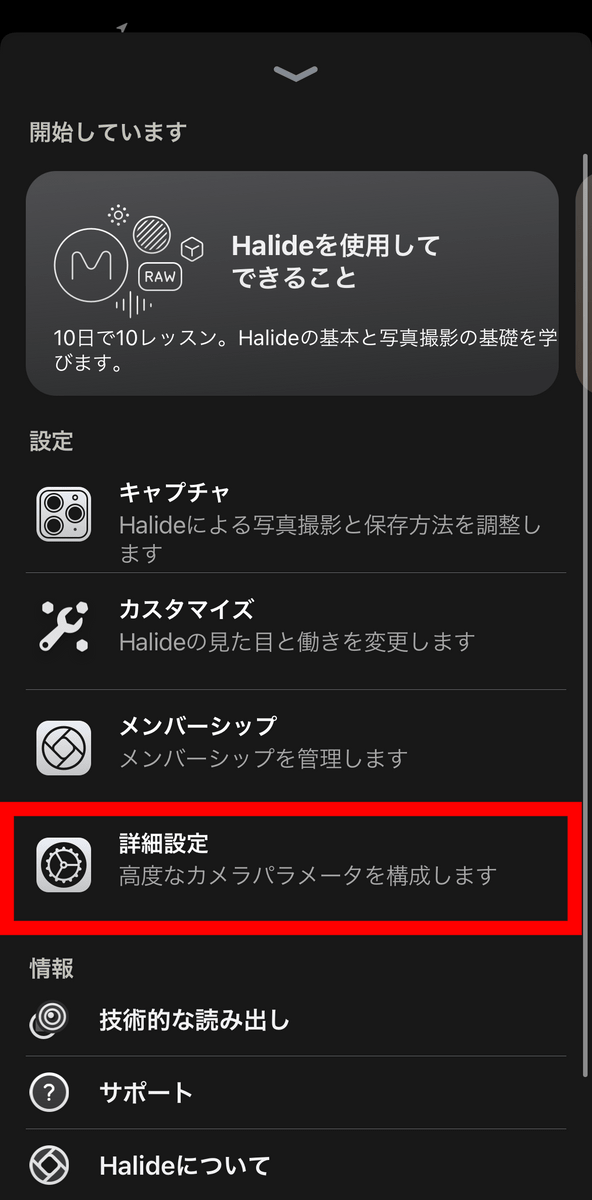
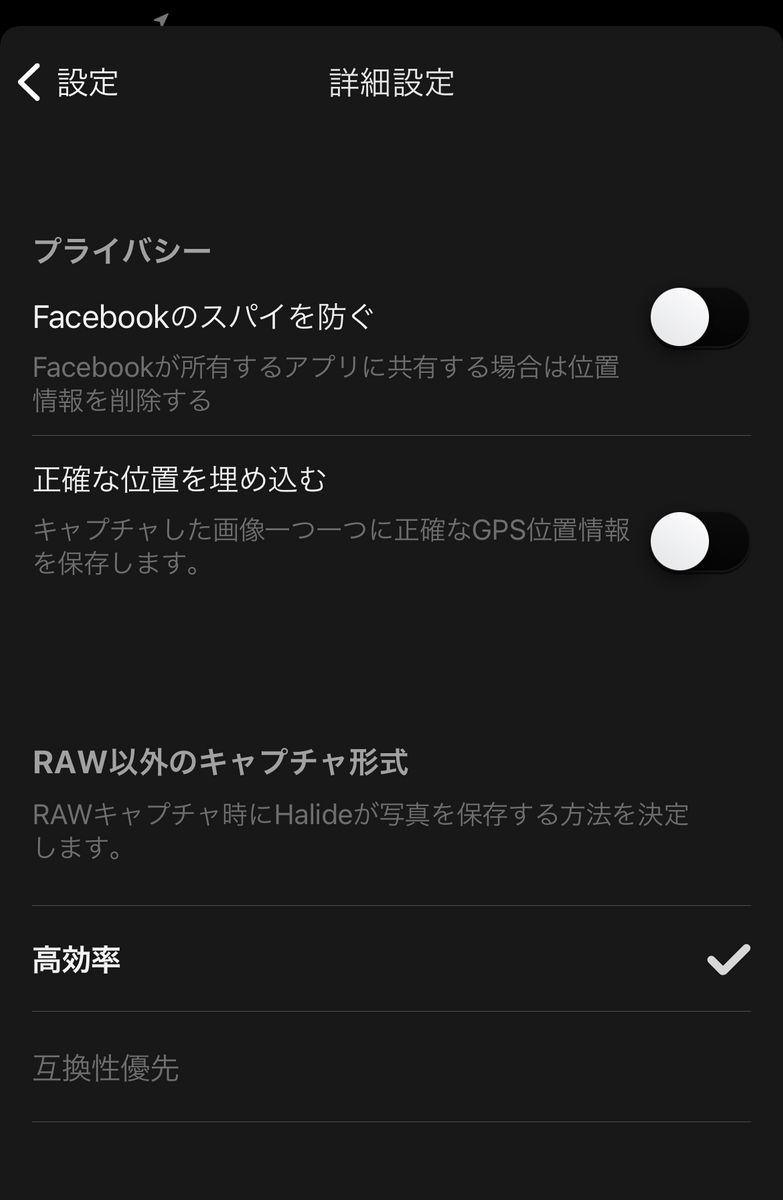
In 'Detailed settings' ...
You can make settings such as deleting location information when uploading to Facebook.
◆ I actually shot in portrait mode, AR function, and 'Instant RAW'
First, I selected the portrait mode from the bottom right of the screen and took a picture. If you tap the thumbnail at the bottom left after shooting ...
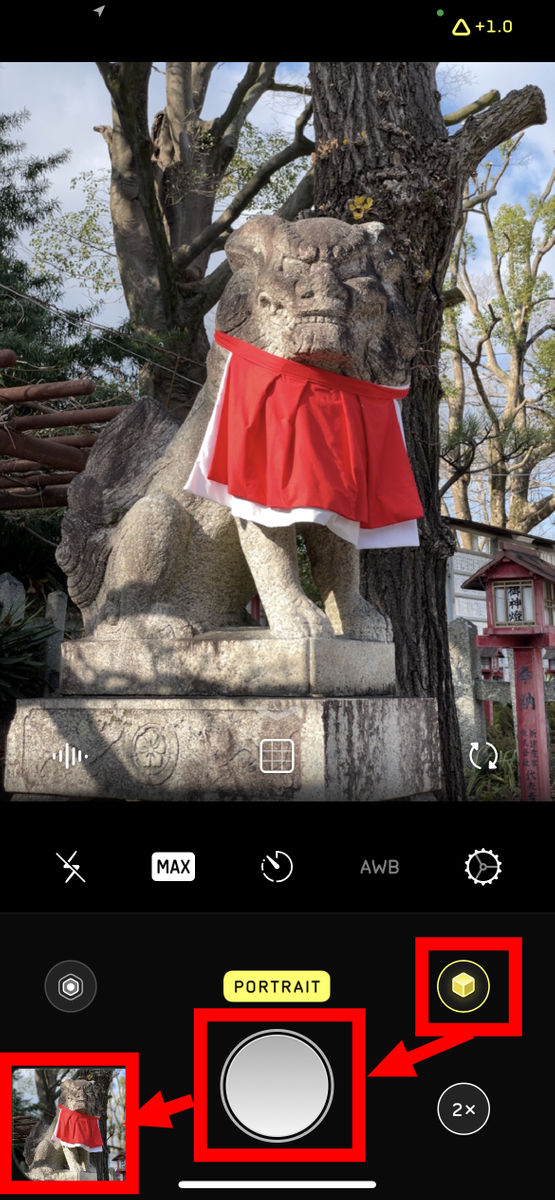
A preview is displayed.
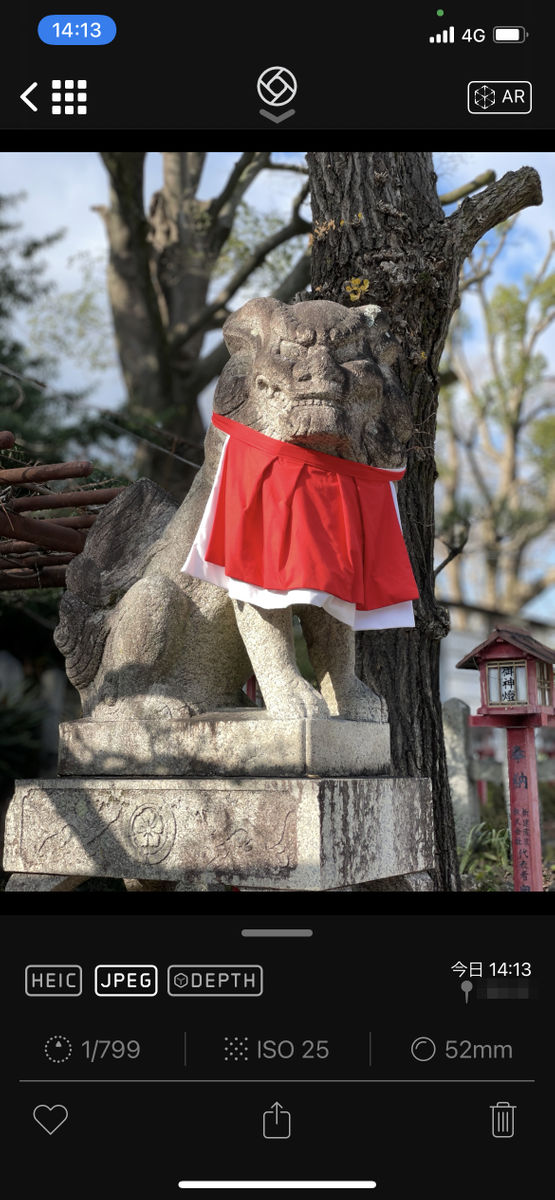
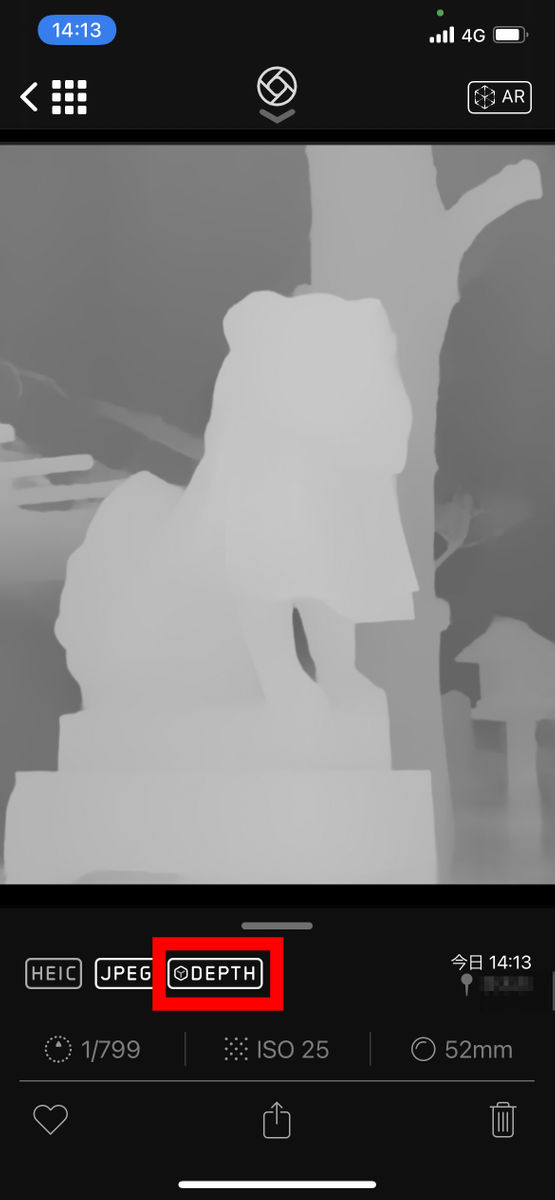
If you compare the
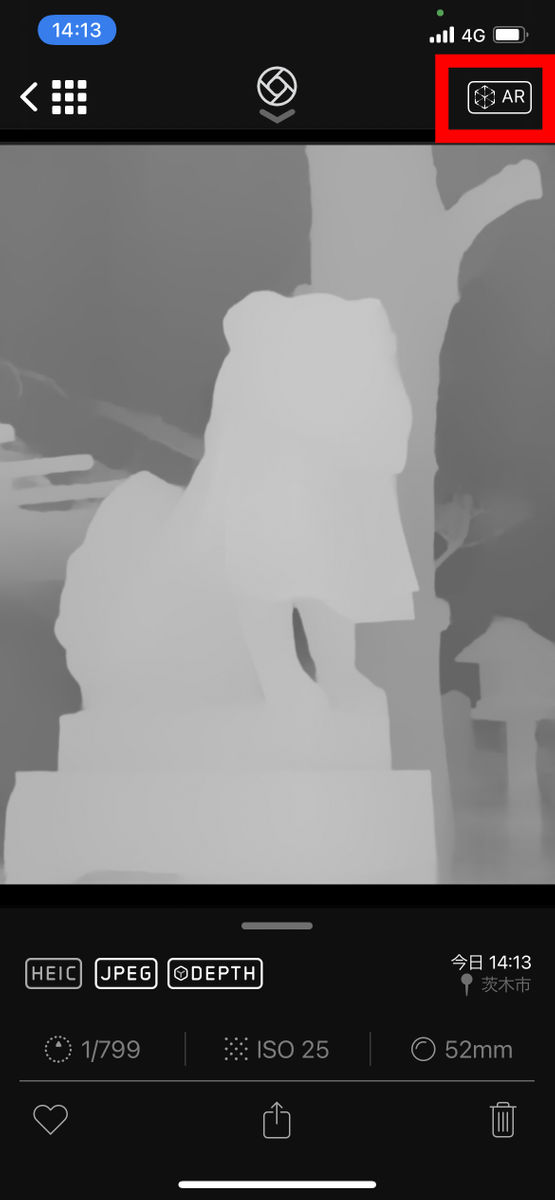
When you tap 'DEPTH' and look at the color coding of the depth of field, it looks like this.
In addition, there is an augmented reality (AR) function that is characteristic of Halide's portrait mode. To use it, tap 'AR' on the upper right and then ...
Calibrate by moving the main unit slightly left and right.
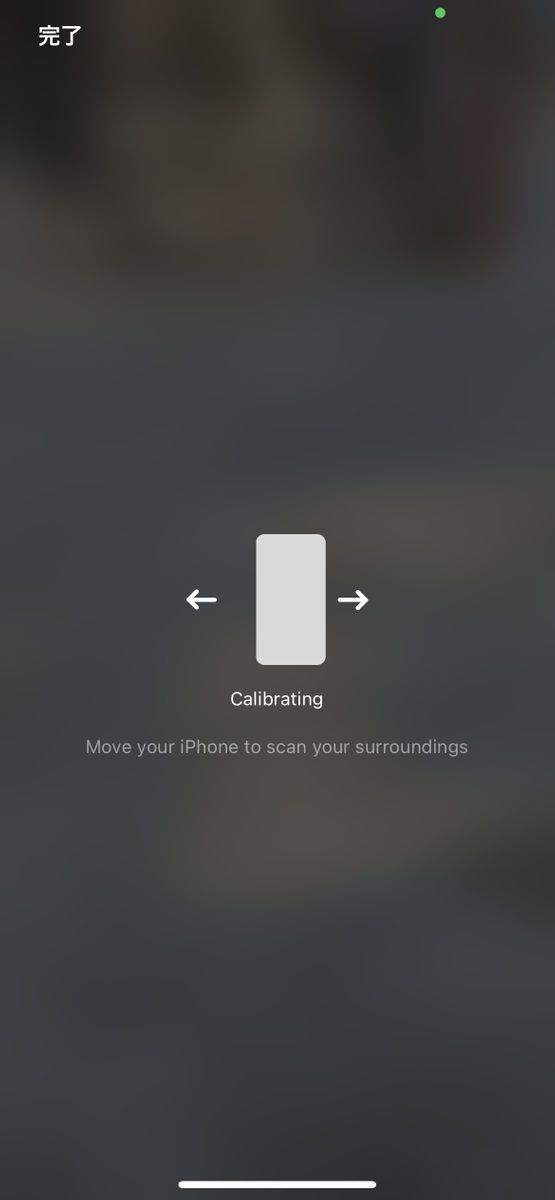
The captured subject is displayed on the screen, so adjust the position of the subject and tap the screen.
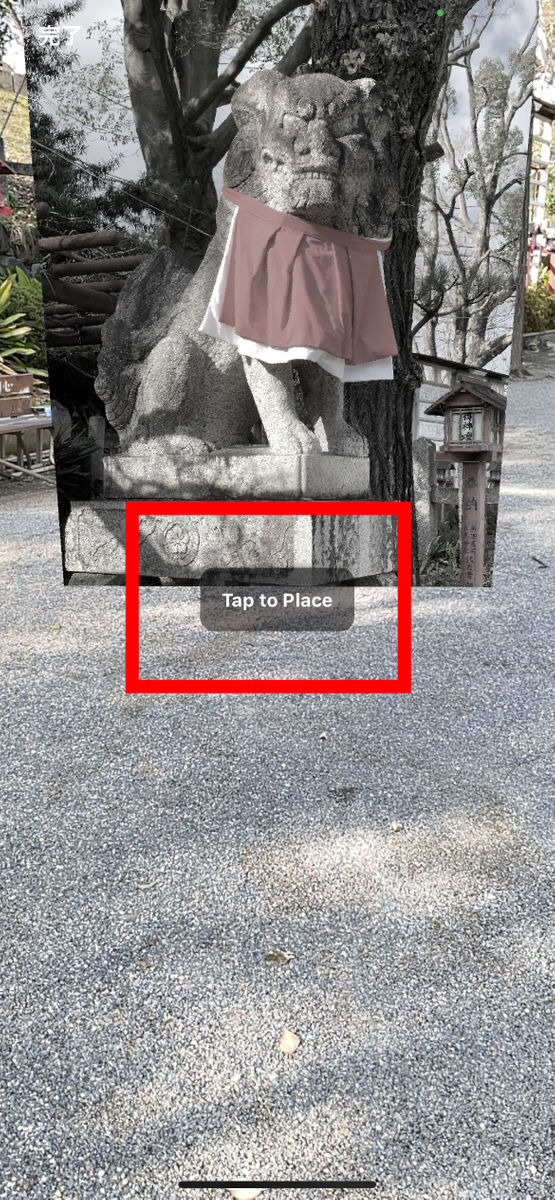
Then, an AR guardian dog appeared at the tapped place.
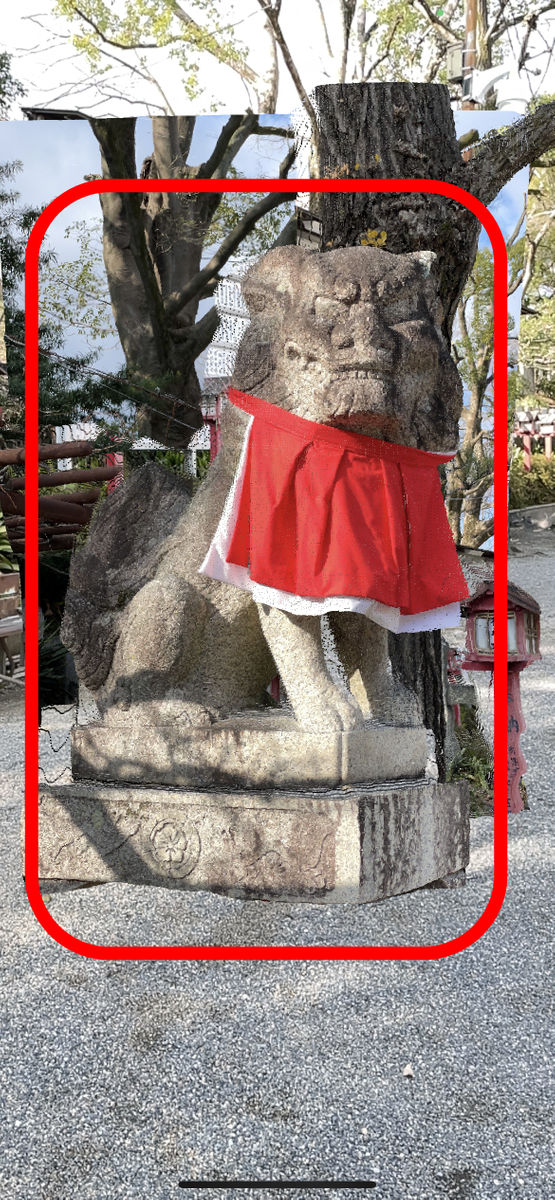
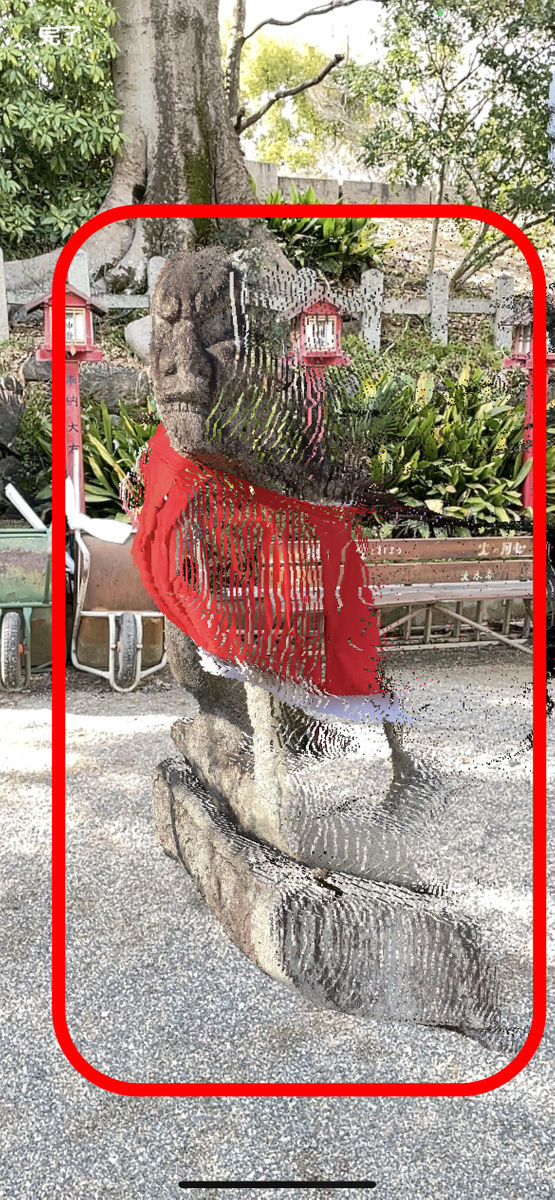
It looks like this when I wrap around sideways while holding the iPhone. Halide's portrait mode not only blurs the background to make the subject stand out, but also allows the subject to be displayed three-dimensionally with the AR function, so you can take pictures of big animals at the zoo or commemorate the pictures taken at your travel destination. It seems that you can also use it to reproduce the shooting at home.
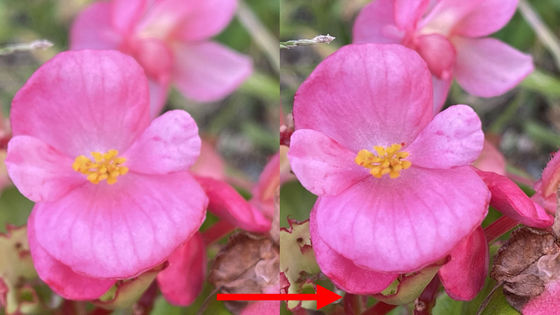
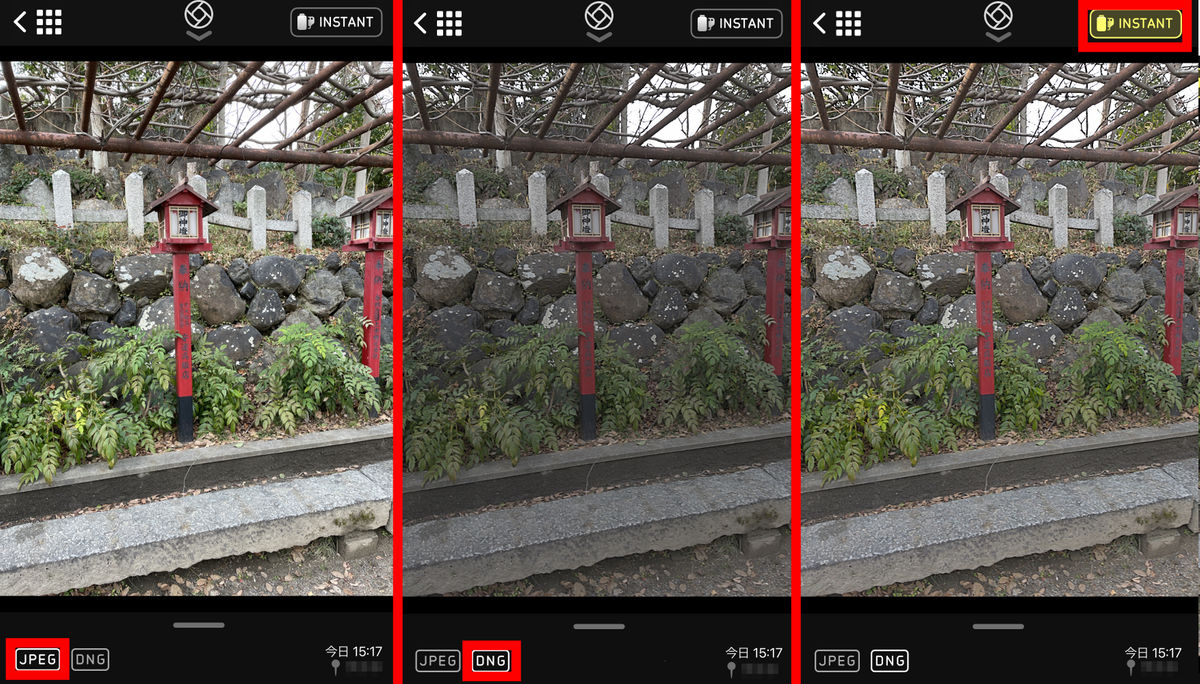
Another characteristic feature I felt when shooting Halide was the 'Instant RAW' feature. Compared to JPEG (left), which is processed by the iPhone at the same time as compression, the unprocessed DNG (middle) has a darker and less crisp impression, but with DNG (right) with the Instant RAW function enabled, Color development and color have been improved to some extent. According to Sandofsky, Instant RAW leaves room for editability as a RAW file, but with some processing to make it look good, 'the midpoint between completely unedited RAW and fully processed JPEG.' It is a realized function.
◆ Summary
The manual mode of many camera apps often simply eliminates the auto-adjustment feature, so it's easy to run into the problem of not knowing what to set unless you're an experienced user. On the other hand, Halide has been devised to follow the user even in manual mode and situations that require manual setting, making it a camera app that is easy for beginners to get along with while having the functions that advanced users need. It was finished.
However, editing software may be required to adjust the white balance, so it is not an app that says 'you can do anything from shooting to finishing with this one.' Also, when you enable a feature, the feature name may appear temporarily, which Sandofsky said, 'I wanted to make it a powerful tool not only for taking pictures, but also for learning about photography.' It states. From this point of view, I felt that Halide is particularly suitable for 'users who are aiming to step up after having a certain level of environment and knowledge.'
Halide can be used for free for up to 7 days, after which there is a charge. Membership can be selected from 200 yen per month, 1280 yen per year, and 4900 yen.

Related Posts: